45
Lesson 12 Getting Started with Word Essentials 1
| Date post: | 01-Jan-2016 |
| Category: |
Documents |
| Upload: | kerry-hunt |
| View: | 226 times |
| Download: | 1 times |
Lesson 12Getting Started with Word Essentials
1

2
22
OBJECTIVES
• Create a new document.• Change Word settings.• Enter text in a document.• Show nonprinting characters in a document.• Use the click-and-type setting.• Change views and magnification in the document window.• Navigate through a document.

3
33
Vocabulary
• Default: Preset options or variables automatically in effect when the document is created.
• Normal.dotm template: A file containing default styles and customizations that determine the structure and page layout of a document.
• Toggle: Alternating between the off and on states by repeating a procedure, such as clicking a button.
• Word wrap: A feature in Word that automatically wraps text that extends beyond the right margin to the next line.

4Word Essentials
• Word is the full-featured word processing application of the Microsoft Office suite.
• Used to create:• Letters• Reports• Tables• Memos• Faxes• Blogs• Etc

5Creating a New Document
• When you first start Word, a new blank document appears, titled Document1.
• Default settings are the preset options or variables automatically in effect when the document is created.
• Default settings for Word are stored in the Normal.dotm template.
• Using the Normal.dotm template increases the speed and efficiency of your work, because you do not need to spend time setting up the details of the document formats.

6
Creating a New Document (continued)
• You can open additional documents on top of Document 1. New blank documents will be numbered sequentially during the session that Word is opened.
• Filenames remain the same until you assign a new filename.
• When Word is closed and then reopened, the new blank document begins again with Document 1.
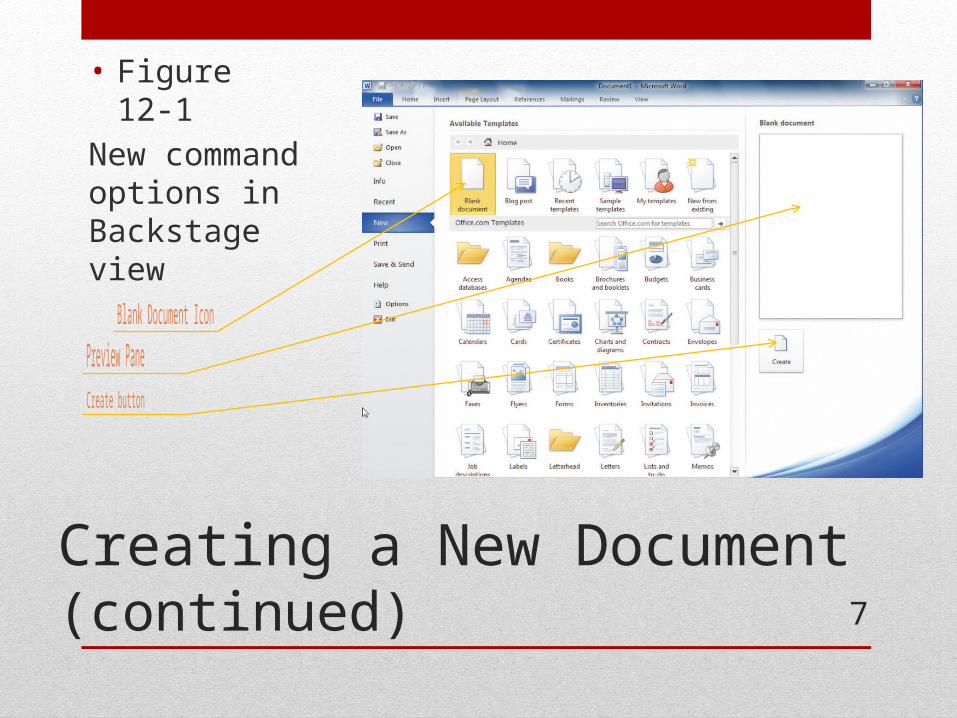
• Quick Tip: You can also create a new blank document by double-clicking the Blank document icon in Backstage view.
7
Creating a New Document (continued)
• Figure 12-1
New command options in Backstage view

8Changing Word Settings
• Word Options dialog box:• Allows you to
customize settings to fit your preferences and meet your needs• Such as the Save
feature:Save AutoRecover

9
Changing Word Settings (continued)
• “Behind the scenes” application settings in the Word Options dialog box are designed to protect your work and improve your efficiency.

10
Changing Word Settings (continued)
• Users of previous versions of Word are unable to open files saved in the new format, unless they have installed compatibility software. If you often share your documents with users working with previous versions of Word, you should consider changing the file format setting so all documents are saved in the Word 97-2003 (*.doc) format. The drawback to this is that some of the new Word 2010 features are inaccessible in such a document.

11
Inserting Text and Numbersinto a Document
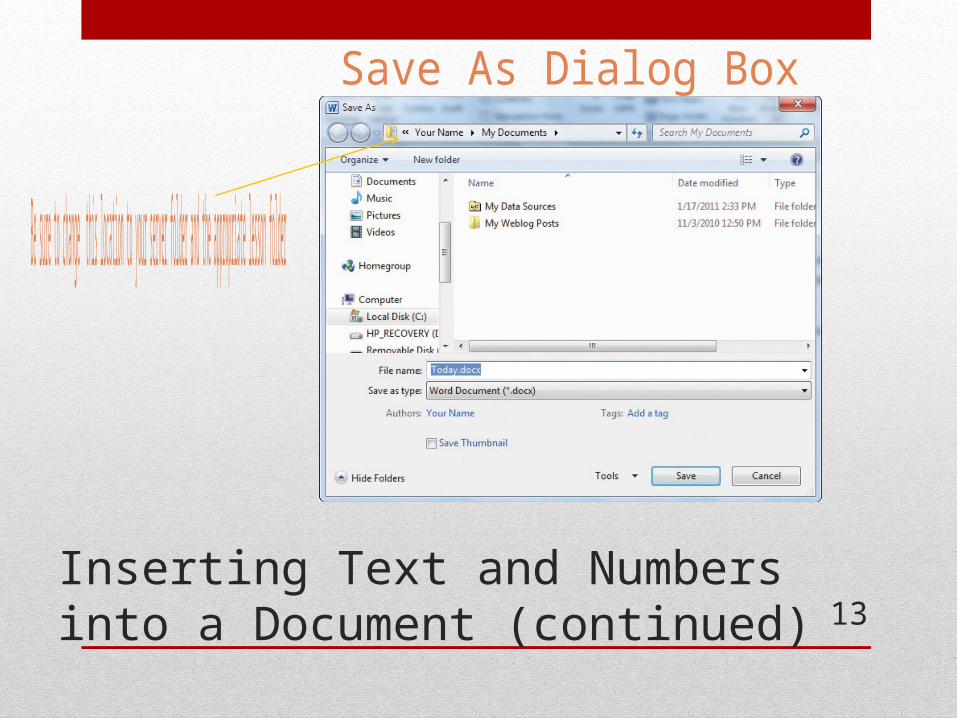
• As you enter text in a document, the insertion point moves to the right, and the information in the status bar at the lower-left corner of the document window changes to reflect the page number for the current position of the insertion point.
• Status bar continually changes to reflect total number of words in the document.
12
Inserting Text and Numbersinto a Document (continued)
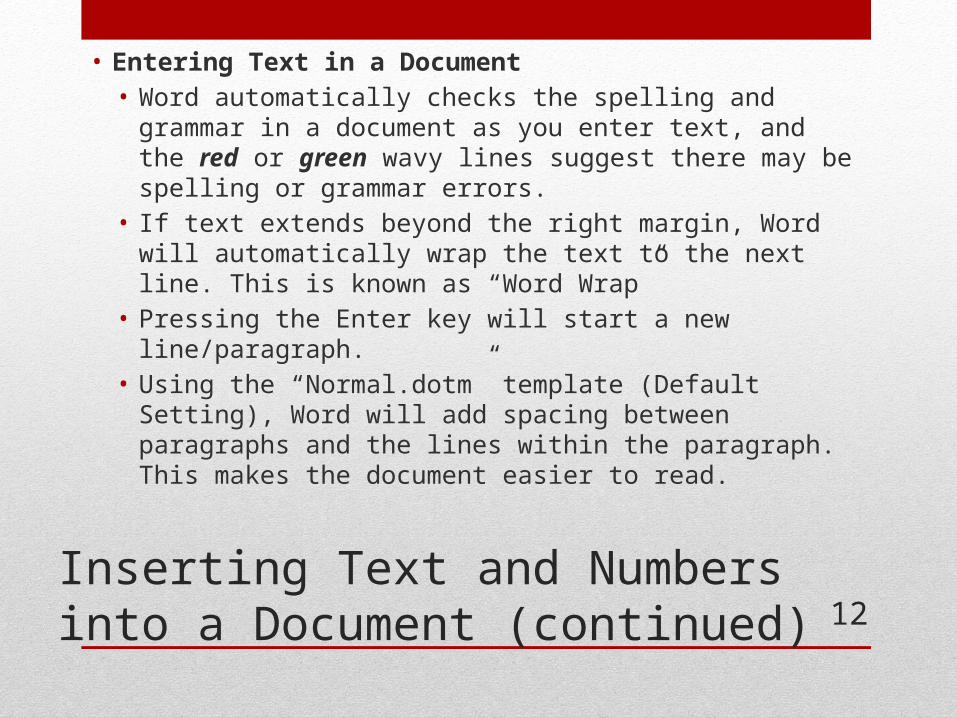
• Entering Text in a Document• Word automatically checks the spelling and grammar in a
document as you enter text, and the red or green wavy lines suggest there may be spelling or grammar errors.
• If text extends beyond the right margin, Word will automatically wrap the text to the next line. This is known as “Word Wrap”
• Pressing the Enter key will start a new line/paragraph.• Using the “Normal.dotm” template (Default Setting),
Word will add spacing between paragraphs and the lines within the paragraph. This makes the document easier to read.
13
Inserting Text and Numbersinto a Document (continued)

14
Inserting Text and Numbersinto a Document (continued)
• Showing Characters and Using Click and Type• The Show/Hide ¶ button enables you to toggle the
option to show these “nonprinting characters.” Using these special characters makes editing your document easier.
• Nonprinting characters include:• Paragraph Markers• Blank Spaces• Page or Section Breaks• Tab Markers

15
Inserting Text and Numbersinto a Document (continued)

16
Inserting Text and Numbersinto a Document (continued)
• Show/Hide button is located on the Home Tab under the Paragraph group.
• When you toggle an option, you alternate between the off and on states by repeating a procedure, such as clicking a button.
• Click and type is a Word setting that enables you to quickly position the insertion point within a blank area of a document.

17
Inserting Text and Numbersinto a Document (continued)

18
Inserting Text and Numbersinto a Document (continued)
• Mouse pointer changing to an I‑beam indicates text can be entered in that area of the document.
• If a graphic is visible next to the I-beam, it indicates the format for the text.The I-beam, shown at the right, indicates that the text will be aligned at the left, beginning where you positioned the insertion point.

19
Inserting Text and Numbersinto a Document (continued)
• When you reposition the insertion point, by double-clicking the mouse, within a blank space in the document, Word automatically adds blank paragraphs or tabs to the position of the new location of the insertion point. Therefore new nonprinting markers and tab markers indicate how many blank paragraphs and tabs were created to move the insertion point to the new location.
• Quick Tip: When entering numbers in a document, you can use the numbers in the top row on the keyboard or you can use the numbers on the number keypad. If the numbers are not displayed on the screen when you use the keypad, press the Num Lock key on the keypad.

20
Inserting Text and Numbersinto a Document (continued)

21
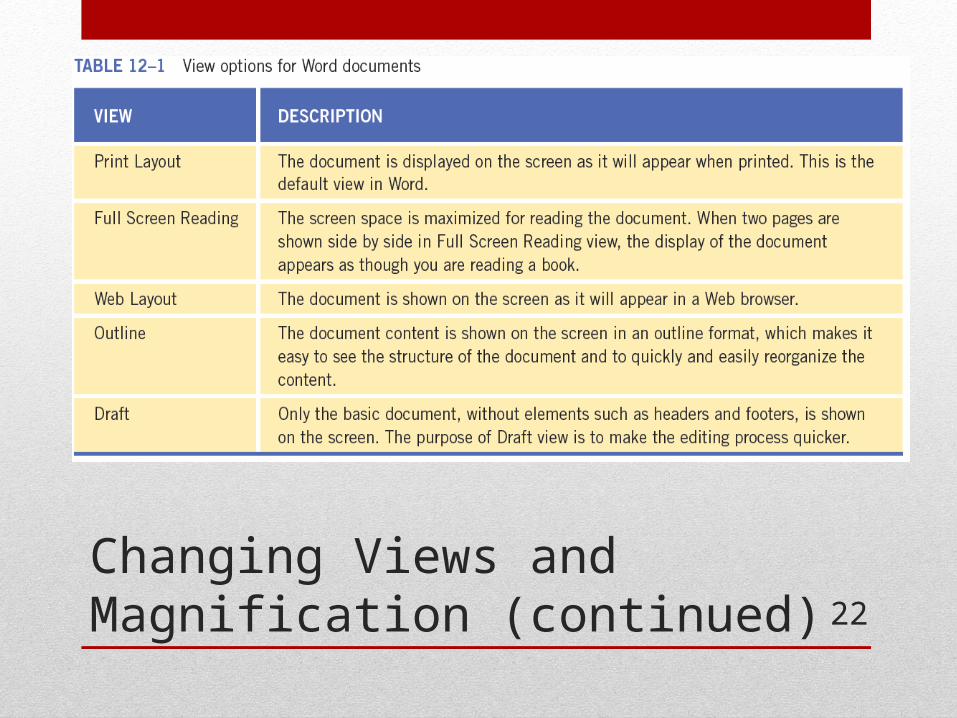
Changing Views and Magnification
You can change the way you view your document, and you can also change the magnification to control how much of the document is shown on the screen.• Changing the Document View• You can change the view by selecting options from the
Document Views group on the “View” tab. You can also change the view by clicking one of the view buttons in the status bar in the lower right corner of the application window.
22
Changing Views and Magnification (continued)

23
Changing Views and Magnification (continued)

24
Changing Views and Magnification (continued)
• View Options menu in Full Screen Reading view.
• The orange background indicates the option is enabled.
25
Changing Views and Magnification (continued)
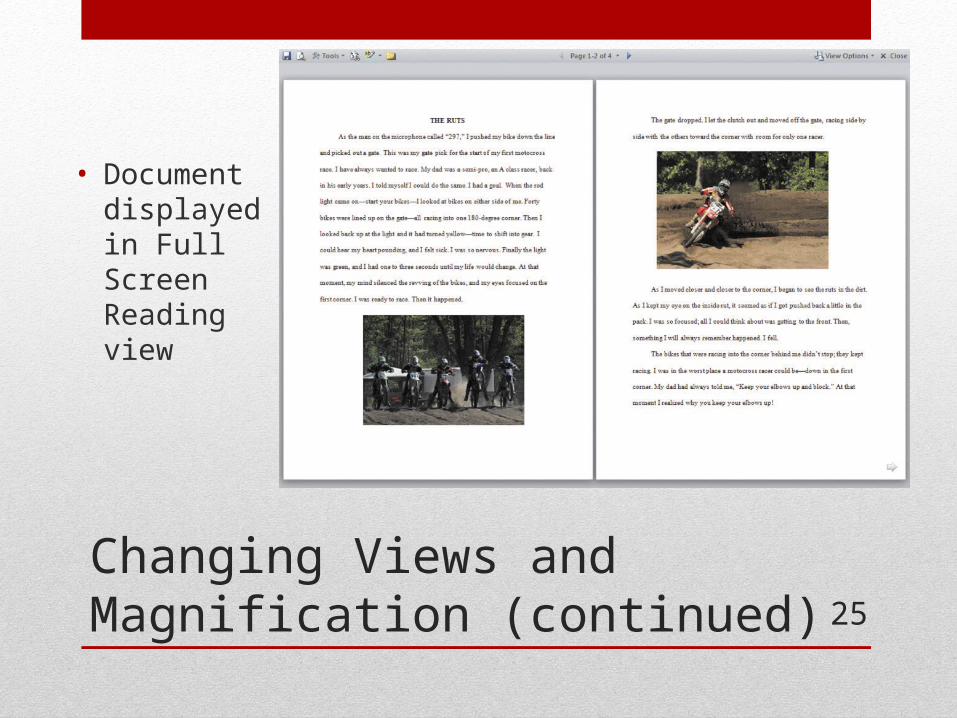
• Document displayed in Full Screen Reading view

26
Changing Views and Magnification (continued)
• Changing the Zoom Settings• Zoom options enable you to increase and
decrease the size of text and graphics on the screen.
• You can show an entire page or multiple pages at the same time.
• You can change the zoom settings using options in the Zoom groupon the View tab or controlson the status bar.

27
Changing Views and Magnification (continued)
• When opening a new or saved document, the document is displayed with the default zoom setting for the current document view.
• Default view settings vary because of:• Screen Size• Screen Resolution Settings• Number of Panes displayed on screen
• Additional option to Zoom:• Use Mouse Scroll Wheel plus the Control Key to zoom in or
out of document.

28
Changing Views and Magnification (continued)
• Additional option to Zoom:• Click on the View tab,
then select the Zoom group and click on the Zoom button to open the Zoom dialog box. Select from options listedin the dialog box.
29
Changing Views and Magnification (continued)
• View and Zoom settings are saved with the document. Usually when document is opened, it is displayed in the view and zoom setting in which it was saved.
• Two exceptions to above:• Open document and change zoom setting, and then
save the document without making any changes to the content of the document, the zoom settings will not be saved.• Save document displayed in either Full Screen
Reading or Draft view, the document will reopen in Print Layout view.

30
Navigating Through the Document
• Using the Navigation Pane• Allows you to move through
long documents easily. In the Navigation Pane, you can choose the option to view thumbnails for each page in the document. To go to a specific page, click the thumbnail for that page.

31
Navigating Through the Document (continued)
• Thumbnails identified by page numbers and current page identified in status bar
• Graphics or headings can help to identify the page you are looking for
• Clicking on Thumbnail will take you to that specific page.
32
Navigating Through the Document (continued)
• The Windows Control Panel provides options for changing the settings for your mouse or other pointing devices to fit your preferences. For example, you can change the appearance and size of the mouse pointer, or you can change how fast the mouse pointer moves around the screen. If your left hand is your dominant hand, you can change the settings so the right button is the primary button. Then you can more easily manipulate the mouse with your left hand.
33
Navigating Through the Document (continued)
• Scrolling and Browsing• If the part of the document you want to navigate to is on the
screen, simply position the mouse pointer there and click.• If the part of the document you want to navigate to is currently
not visible, you can use the scroll bars to navigate to that part of the document.
• Scroll bars allow for quick maneuvering throughout the document• As you drag the scroll box, a ScreenTip tells you what page you
are viewing.

34
Navigating Through the Document (continued)
• Zoom settings affect Scroll bars:• Zoom settings set to Page Width (Default) or smaller
percentage, the horizontal scroll bar will not appear because entire width of document is already visible
• Scrolling through document does not change the insertion point in the document.
• After scrolling to a new page of document, to reposition the insertion point on that page, simply click mouse where you want to place it.

35
Navigating Through the Document (continued)

36
Navigating Through the Document (continued)
• When navigating a multipage document, the Go To command can be very useful, because you can go directly to a specific page, a specific line, or a specifictype of content in the document.
• You can also quickly open the Go To tab in the Find dialog box by pressing Ctrl+G.

37
Navigating Through the Document (continued)
• Browsing is another option. When you browse, you focus on an object such as a specific page or a footnote.
38
Navigating Through the Document (continued)
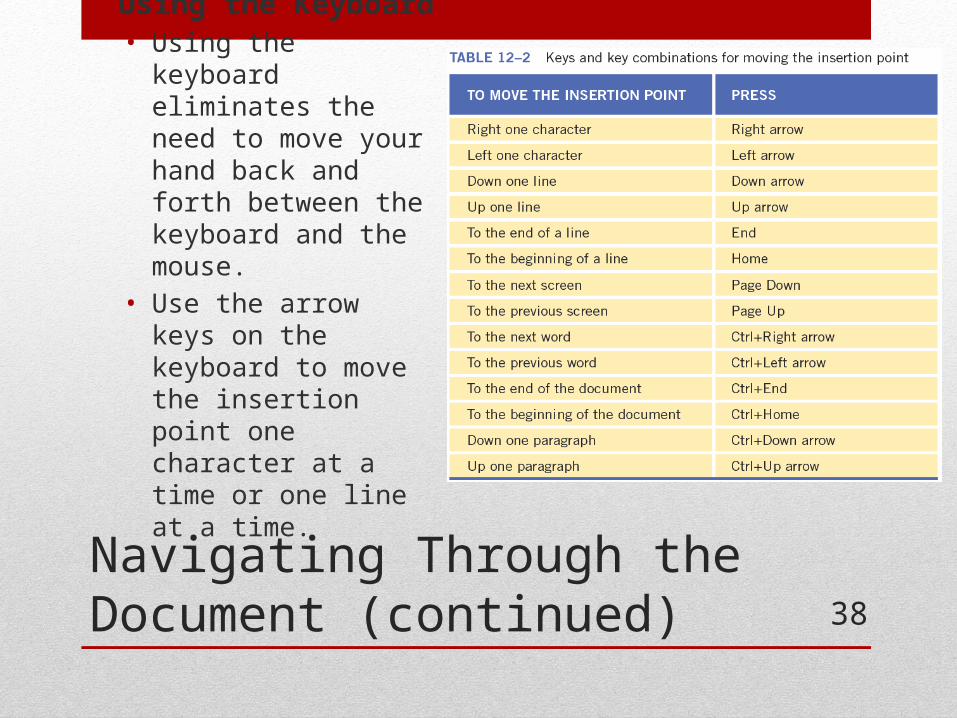
• Using the Keyboard• Using the keyboard
eliminates the need to move your hand back and forth between the keyboard and the mouse.
• Use the arrow keys on the keyboard to move the insertion point one character at a time or one line at a time.

39
Navigating Through the Document (continued)
• You can find a comprehensive list of links for information about keyboard shortcuts by searching for the keywords “keyboard shortcuts” in the Word Help dialog box.

40Summary
In this lesson, you learned:• New blank documents are created based on a template
with default settings.• There are many “behind the scenes” settings in Word that
can be changed to meet your preferences.• Word automatically wraps text to the next line when the
line of text extends beyond the right margin.• Showing the nonprinting characters, such as tab markers,
blank spaces, page breaks, and paragraph markers can be very useful as you create and edit a document.

41Summary (continued)
• The click and type setting enables you to position the insertion point in a blank area of a document.
• Word provides several options for viewing a document.• You can use zoom options to increase or decrease the size
of the text and graphics on the screen.• You can view thumbnails of the document pages in the
Navigation Pane to make it easier and faster to navigate through the document.
• You can also use the mouse, the Go To command, the Select Browse Object button, and keyboard shortcuts to navigate through a document.

42QUICK QUIZZES
1) __________ settings are preset options or variables automatically in effect when the document is created.
Answer: Default
2) True or False? You can open additional documents on top of Document1.
Answer: True
3) Where can you find the setting to schedule an automatic save of a document?
Answer: Word Options Dialog Box
4) To access the Word Options dialog box, click the __________ tab, then click Options.
Answer: File

43
QUICK QUIZZES (continued)
5) As you enter text in a Word document, the __________changes to reflect the page number for the current position of the insertion point and continually changes to show the current total number of words in the document.A. word wrap feature B. status bar
C. Zoom slider D. Click and Type feature
Answer: B. status bar
6) True or False? If the text you are entering extends beyond the right margin, Word will automatically wrap the text to the next line.
Answer: True

44
QUICK QUIZZES (continued)
7) True or False? Print Layout view shows the document how it will appear in a Web browser.
Answer: False
8) True or False? Full Screen Reading view maximizes the screen space for reading.
Answer: True
9) The __________setting in the Zoom dialog box allows you to view all the pages in the document at once.
A. Page width B. Whole page
C. Text width D. Many pages
Answer: D. Many pages

45
QUICK QUIZZES (continued)
10) To enable the Navigation Pane option, click the Navigation Pane checkbox in the Show group on the __________ tab.
Answer: View
11) In the Browse the pages in your document tab of the Navigation Pane, click the __________ to go directly to that page.
Answer: Thumbnail
12) True or False? As you drag the scroll box, a ScreenTip tells you what page you are viewing.
Answer: True
13) When navigating a multipage document, the __________ command can be very useful, because you can go directly to a specific page, a specific line, or a specific type of content in the document.
Answer: Go To


![Skaffold - storage.googleapis.com · [getting-started getting-started] Hello world! [getting-started getting-started] Hello world! [getting-started getting-started] Hello world! 5.](https://static.documents.pub/doc/80x56/5ec939f2a76a033f091c5ac7/skaffold-getting-started-getting-started-hello-world-getting-started-getting-started.jpg)


