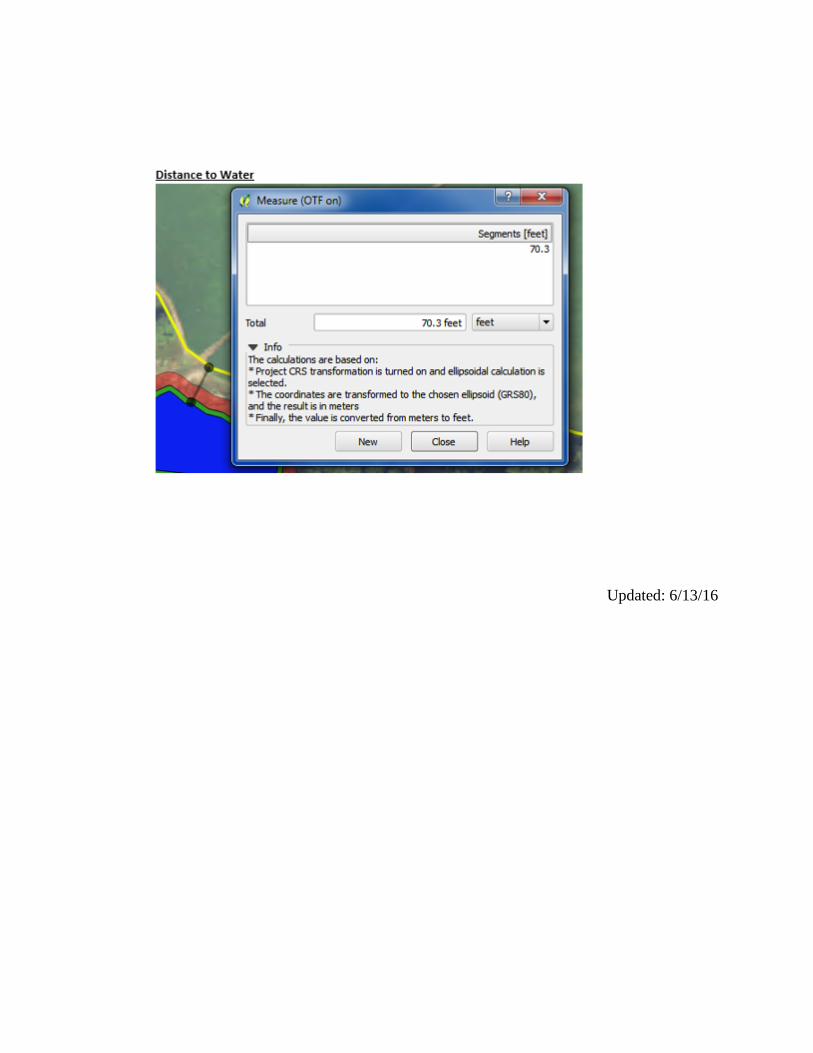
Lesson 5 Procedure to Determine Distance to Water, Calculate an Average Slope Length and Percent Slope and Document The producer wants to apply poultry manure to field 5 which has a P-FIV of 180 ppm. A PSI and PMT must be determined. It can be seen from the map that there is a pond at the edge of the field and a named stream (Bell Creek) close to the pond. Does the field slope towards that water or away from it? How far is it to that water from the edge of the field? Field 5
Transcript
Lesson 5 Procedure to Determine Distance to Water, Calculate an Average Slope Length and
Percent Slope and Document
The producer wants to apply poultry manure to field 5 which has a P-FIV of 180 ppm. A PSI and PMT must be determined. It can be seen from the map that there is a pond at the edge of the field and a named stream (Bell Creek) close to the pond. Does the field slope towards that water or away from it? How far is it to that water from the edge of the field?
Field 5
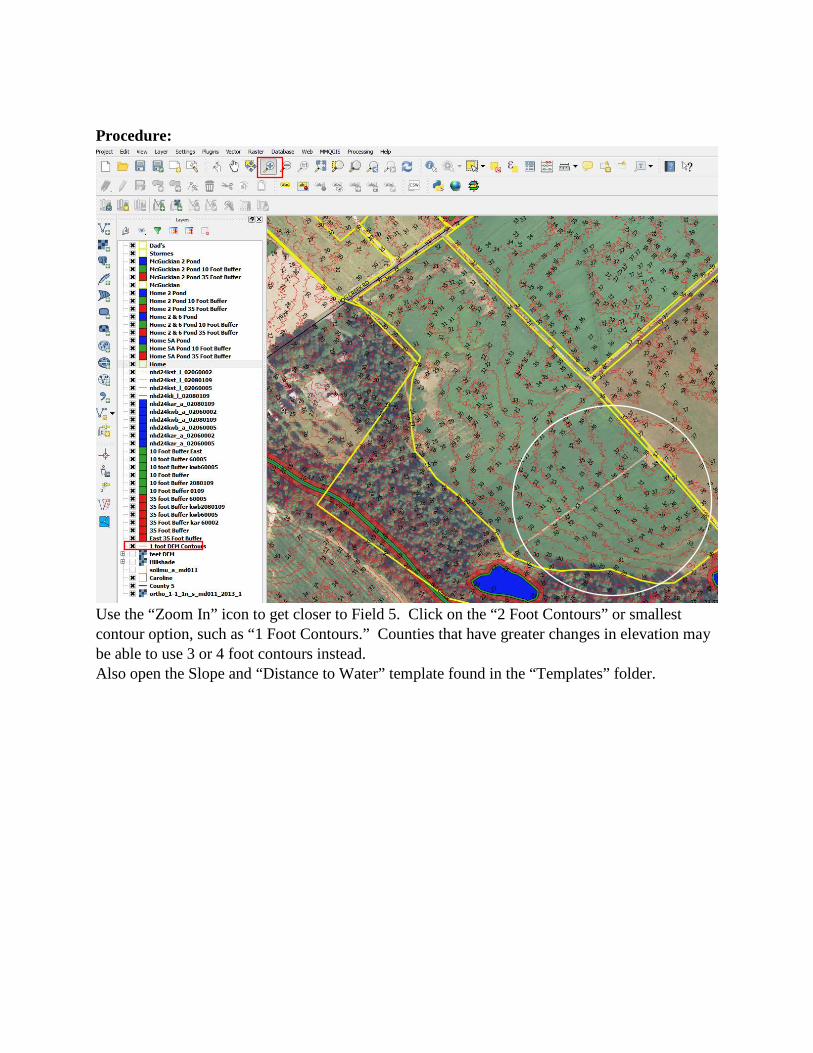
Procedure:
Use the “Zoom In” icon to get closer to Field 5. Click on the “2 Foot Contours” or smallest contour option, such as “1 Foot Contours.” Counties that have greater changes in elevation may be able to use 3 or 4 foot contours instead. Also open the Slope and “Distance to Water” template found in the “Templates” folder.
Using the Measuring Tool
1. Click on the measuring icon. 2. Select Measure Line. 3. Click on the Info button for documentation purposes. 4. Left Click on Starting Point. 5. Right Click on Ending Point. 6. Record on a note pad the high and low contours and the length of the line. 7. Use the snipping tool to capture the measuring window and line but make sure to adjust
the measuring tool window first to ensure the best picture documentation. 8. Delete the first image (Slope 1) in the template and copy the image from the snipping tool
into the template. 9. Click “New” to make another measurement. 10. Follow this procedure three times.
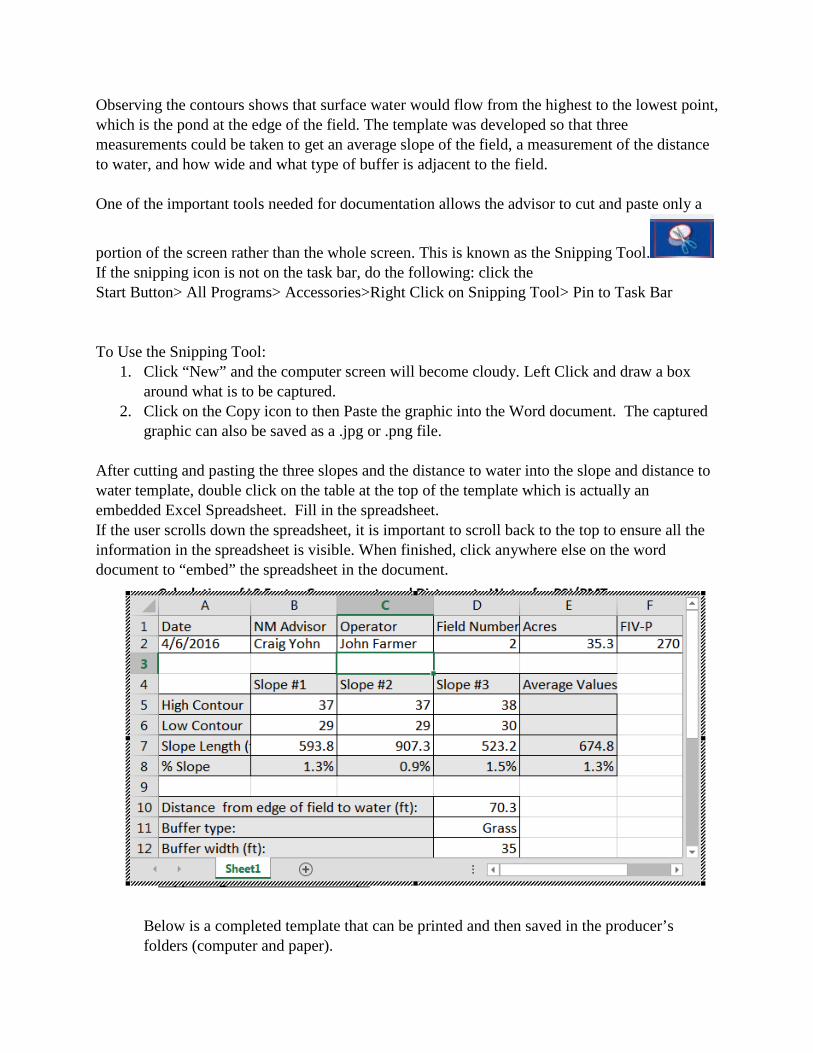
Observing the contours shows that surface water would flow from the highest to the lowest point, which is the pond at the edge of the field. The template was developed so that three measurements could be taken to get an average slope of the field, a measurement of the distance to water, and how wide and what type of buffer is adjacent to the field. One of the important tools needed for documentation allows the advisor to cut and paste only a
portion of the screen rather than the whole screen. This is known as the Snipping Tool. If the snipping icon is not on the task bar, do the following: click the Start Button> All Programs> Accessories>Right Click on Snipping Tool> Pin to Task Bar To Use the Snipping Tool:
1. Click “New” and the computer screen will become cloudy. Left Click and draw a box around what is to be captured.
2. Click on the Copy icon to then Paste the graphic into the Word document. The captured graphic can also be saved as a .jpg or .png file.
After cutting and pasting the three slopes and the distance to water into the slope and distance to water template, double click on the table at the top of the template which is actually an embedded Excel Spreadsheet. Fill in the spreadsheet. If the user scrolls down the spreadsheet, it is important to scroll back to the top to ensure all the information in the spreadsheet is visible. When finished, click anywhere else on the word document to “embed” the spreadsheet in the document.
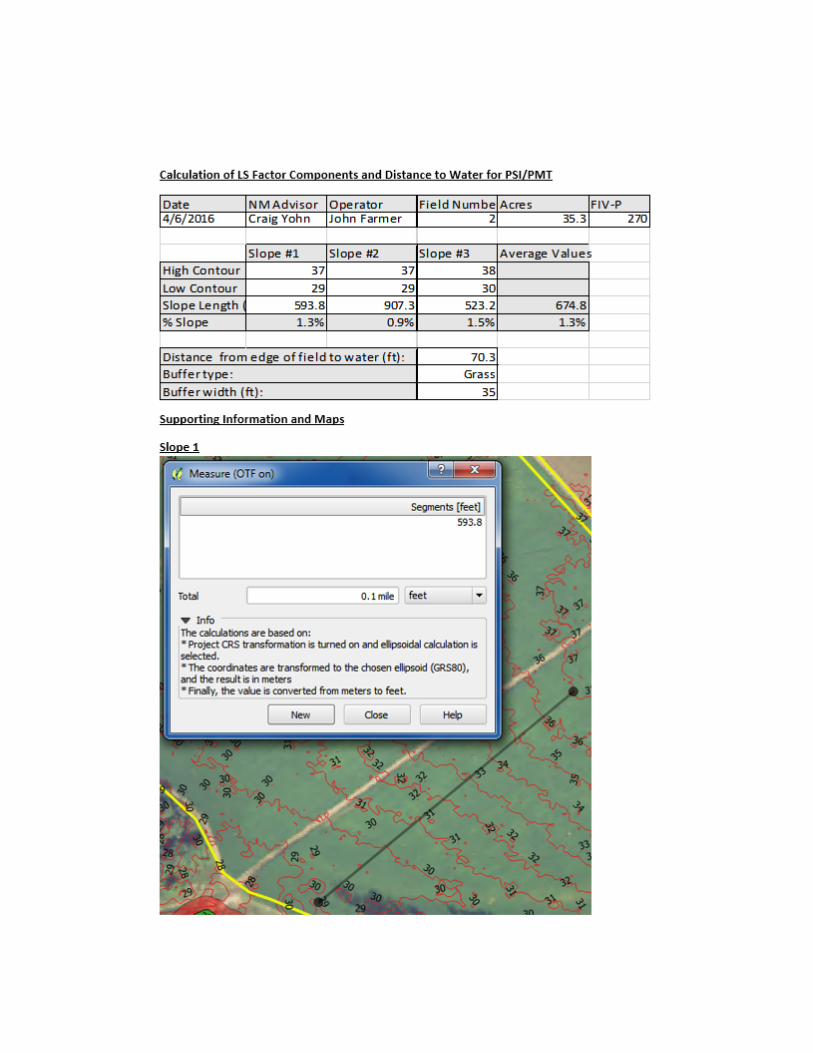
Below is a completed template that can be printed and then saved in the producer’s folders (computer and paper).