130
User Guide LG 440G P/N : MFL67641601 (1.0) www.lg.com ENGLISH ESPAÑOL Printed in China

User Guide
LG 440GP/N : MFL67641601 (1.0) www.lg.com
ENGLISHESPAÑOL
Printed in China

Some of the contents of this manual may
not apply to your phone depending on your
phone’s software or your service provider.
Copyright ©2012 LG Electronics, Inc. All
rights reserved. LG and the LG logo are
registered trademarks of LG Group and its
related entities. All other trademarks are
the property of their respective owners.
LG 440G User Guide

2
Contents . . . . . . . . . . . . . . . . . . . . . . . . . . 2
Your Phone . . . . . . . . . . . . . . . . . . . . . . . . 5
Phone Components . . . . . . . . . . . . . . . . . . . . . . . 5
Rear view . . . . . . . . . . . . . . . . . . . . . . . . . . . . . . 7
Getting Started . . . . . . . . . . . . . . . . . . . . . 8
Installing the SIM card and battery. . . . . . . . . . . 8
Charging your phone . . . . . . . . . . . . . . . . . . . . . 10
General Functions . . . . . . . . . . . . . . . . . 12
Before you begin . . . . . . . . . . . . . . . . . . . . . . . . 12
Making a Call. . . . . . . . . . . . . . . . . . . . . . . . . . . 12
Answering a Call . . . . . . . . . . . . . . . . . . . . . . . . 13
Adjusting the Volume . . . . . . . . . . . . . . . . . . . . 13
Entering Text . . . . . . . . . . . . . . . . . . . . . . . . . . . 14
In-Call Menu . . . . . . . . . . . . . . . . . . . . . . 16
During a Call . . . . . . . . . . . . . . . . . . . . . . . . . . . 16
Making a Second Call . . . . . . . . . . . . . . . . . . . 16
Swapping Between Two Calls . . . . . . . . . . . . . . 16
Answering an Incoming Call . . . . . . . . . . . . . . . 16
Rejecting an Incoming Call . . . . . . . . . . . . . . . . 17
Using the Speakerphone . . . . . . . . . . . . . . . . . 17
Phone Menus . . . . . . . . . . . . . . . . . . . . . 18
Contacts . . . . . . . . . . . . . . . . . . . . . . . . . 22
Contact List . . . . . . . . . . . . . . . . . . . . . . . . . . . . 22
New Contact . . . . . . . . . . . . . . . . . . . . . . . . . . . 22
Groups . . . . . . . . . . . . . . . . . . . . . . . . . . . . . . . . 22
Speed Dial . . . . . . . . . . . . . . . . . . . . . . . . . . . . . 22
SIM Management . . . . . . . . . . . . . . . . . . . . . . . 23
Own Number . . . . . . . . . . . . . . . . . . . . . . . . . . . 23
My Business Card . . . . . . . . . . . . . . . . . . . . . . . 23
Messages . . . . . . . . . . . . . . . . . . . . . . . . 24
Create Message . . . . . . . . . . . . . . . . . . . . . . . . 24
Inbox . . . . . . . . . . . . . . . . . . . . . . . . . . . . . . . . . 27
Drafts . . . . . . . . . . . . . . . . . . . . . . . . . . . . . . . . . 28
Outbox . . . . . . . . . . . . . . . . . . . . . . . . . . . . . . . . 28
Message Settings . . . . . . . . . . . . . . . . . . . . . . . 29
Message Alert . . . . . . . . . . . . . . . . . . . . . . . . . 29
Save To . . . . . . . . . . . . . . . . . . . . . . . . . . . . . . 29
Signature . . . . . . . . . . . . . . . . . . . . . . . . . . . . . 29
Text Message . . . . . . . . . . . . . . . . . . . . . . . . . 29
Multimedia Message . . . . . . . . . . . . . . . . . . . . 30
Voicemail . . . . . . . . . . . . . . . . . . . . . . . . . . . . . 30
Music. . . . . . . . . . . . . . . . . . . . . . . . . . . . 31
Music . . . . . . . . . . . . . . . . . . . . . . . . . . . . . . . . . 31
Playing Music . . . . . . . . . . . . . . . . . . . . . . . . . 31
Adding Music To Your Handset . . . . . . . . . . . . . 32
Additional Music Services . . . . . . . . . . . . . . . . . 32
Recent Calls . . . . . . . . . . . . . . . . . . . . . . 33
Games & Apps . . . . . . . . . . . . . . . . . . . . 33
Contents

3
Email . . . . . . . . . . . . . . . . . . . . . . . . . . . . 34Sending an email using your new account . . . . 34
Retrieving your email . . . . . . . . . . . . . . . . . . . . 34
Message folders . . . . . . . . . . . . . . . . . . . . . . . 34
Changing your email settings . . . . . . . . . . . . . . 35
Camera . . . . . . . . . . . . . . . . . . . . . . . . . . 36Take Photo . . . . . . . . . . . . . . . . . . . . . . . . . . . 36
Record Video . . . . . . . . . . . . . . . . . . . . . . . . . . 37
Camera Album . . . . . . . . . . . . . . . . . . . . . . . . . 38
My Folder . . . . . . . . . . . . . . . . . . . . . . . . 39Audio . . . . . . . . . . . . . . . . . . . . . . . . . . . . . . . 39
Pictures . . . . . . . . . . . . . . . . . . . . . . . . . . . . . . 39
Video . . . . . . . . . . . . . . . . . . . . . . . . . . . . . . . . 39
Other Files . . . . . . . . . . . . . . . . . . . . . . . . . . . . 39
File Manager . . . . . . . . . . . . . . . . . . . . . . . . . . 40
Tools . . . . . . . . . . . . . . . . . . . . . . . . . . . . 41Voice Command . . . . . . . . . . . . . . . . . . . . . . . 41
Alarm Clock . . . . . . . . . . . . . . . . . . . . . . . . . . . 43
Calendar . . . . . . . . . . . . . . . . . . . . . . . . . . . . . 43
Notepad . . . . . . . . . . . . . . . . . . . . . . . . . . . . . 44
Calculator . . . . . . . . . . . . . . . . . . . . . . . . . . . . 45
Tasks . . . . . . . . . . . . . . . . . . . . . . . . . . . . . . . 45
Stopwatch . . . . . . . . . . . . . . . . . . . . . . . . . . . . 46
Tip Calculator . . . . . . . . . . . . . . . . . . . . . . . . . 46
Unit Converter . . . . . . . . . . . . . . . . . . . . . . . . . 46
Voice Recorder . . . . . . . . . . . . . . . . . . . . . . . . 47
Browser . . . . . . . . . . . . . . . . . . . . . . . . . . 48
Settings . . . . . . . . . . . . . . . . . . . . . . . . . . 50
Audio & Ringtones . . . . . . . . . . . . . . . . . . . . . . . 50
Ringtone . . . . . . . . . . . . . . . . . . . . . . . . . . . . . 50
Message Tone . . . . . . . . . . . . . . . . . . . . . . . . . 50
Alert Tone . . . . . . . . . . . . . . . . . . . . . . . . . . . . 50
Keypad Tone . . . . . . . . . . . . . . . . . . . . . . . . . . 51
Multimedia . . . . . . . . . . . . . . . . . . . . . . . . . . . 51
Call . . . . . . . . . . . . . . . . . . . . . . . . . . . . . . . . . 51
Phone Settings . . . . . . . . . . . . . . . . . . . . . . . . . 51
Languages . . . . . . . . . . . . . . . . . . . . . . . . . . . 51
Set Hotkeys . . . . . . . . . . . . . . . . . . . . . . . . . . . 51
Flight Mode . . . . . . . . . . . . . . . . . . . . . . . . . . . 51
Security . . . . . . . . . . . . . . . . . . . . . . . . . . . . . . 52
Reset Settings . . . . . . . . . . . . . . . . . . . . . . . . . 52
Display . . . . . . . . . . . . . . . . . . . . . . . . . . . . . . . . 53
Wallpapers . . . . . . . . . . . . . . . . . . . . . . . . . . . 53
Fonts . . . . . . . . . . . . . . . . . . . . . . . . . . . . . . . . 53
Clocks & Calendar . . . . . . . . . . . . . . . . . . . . . . 53
Brightness . . . . . . . . . . . . . . . . . . . . . . . . . . . . 53
Backlight Timer . . . . . . . . . . . . . . . . . . . . . . . . 53
Menu Styles . . . . . . . . . . . . . . . . . . . . . . . . . . 53
Call . . . . . . . . . . . . . . . . . . . . . . . . . . . . . . . . . . . 53
Send My Number . . . . . . . . . . . . . . . . . . . . . . . 53
Answer Mode . . . . . . . . . . . . . . . . . . . . . . . . . 54
Senior Mode . . . . . . . . . . . . . . . . . . . . . . . . . . 54
Time & Cost . . . . . . . . . . . . . . . . . . . . . . . . . . 54
Accesibility . . . . . . . . . . . . . . . . . . . . . . . . . . . 54
Bluetooth . . . . . . . . . . . . . . . . . . . . . . . . . . . . . . 54
Turn On/Off . . . . . . . . . . . . . . . . . . . . . . . . . . . 55
Search New Device . . . . . . . . . . . . . . . . . . . . . 55

4
My Devices . . . . . . . . . . . . . . . . . . . . . . . . . . . 55
My Bluetooth Info . . . . . . . . . . . . . . . . . . . . . . . 55
Memory . . . . . . . . . . . . . . . . . . . . . . . . . . . . . . . 56
Used Space . . . . . . . . . . . . . . . . . . . . . . . . . . . 56
Applications . . . . . . . . . . . . . . . . . . . . . . . . . . . . 57
Messages . . . . . . . . . . . . . . . . . . . . . . . . . . . . 57
Browser . . . . . . . . . . . . . . . . . . . . . . . . . . . . . . 57
Voice Command . . . . . . . . . . . . . . . . . . . . . . . 58
TTS (Text-to Speech) . . . . . . . . . . . . . . . . . . . . 59
Phone Information . . . . . . . . . . . . . . . . . . . . . . . 59
Accessories . . . . . . . . . . . . . . . . . . . . . . 60
For Your Safety . . . . . . . . . . . . . . . . . . . . 61
Contents

5
Your Phone
Phone Components
1
2
3
56
4
7
Press and hold to
activate/deactivate
Vibrating Mode.
891011
13
12

6
1. Earpiece: Lets you hear the caller during
a call.
2. Main LCD: Displays phone status icons,
menu items, web items, web information,
pictures and more, in full color.
3. Left Soft Key/Right Soft Key: Each of
these keys perform the functions indicated
by the text on the display immediately
above them.
4. Camera Key: Lets you activate the
Camera and take pictures.
5. Message Hot Key: Trigger this key to
directly go to Create Message.
6. Navigation Keys
Home screen functions:
Games & Apps
Contacts
Alarm Clock
Music
- In a menu: Navigates between menus.
7. Send Key: Press this key in standby
mode to quickly access the most recent
missed, dialed, and received calls. Also
dials a call when you enter a number.
8. Clear/Back Key: Allows you to return
to the previous screen. Press and hold to
activate the Voice Command function.
9. TTS Mode Key: Lets you turn the TTS
mode on/off.
10. OK Key: Select options and menus.
11. End/Power Key: Allows you to power
the phone on or off, end calls, or return
to standby mode.
12. Volume Keys: Allows you to control the
Master Volume while in standby mode
and the earpiece volume during a call.
13. Charger/USB Port: Allows you to
connect a charger or other supported
accessories.
Your Phone

7
Rear view
Back Cover
SIM Card SlotBattery

8
Installing the SIM card and battery
1. Remove the back cover
Place your thumb at the top part of the
back cover and slide it downwards to
remove it.
2. Remove the battery
Hold the top edge of the phone and use
the fingernail cutout near the bottom of
the battery to lift the battery from the
phone.
Warning
Do not remove the battery when the
phone is turned on; this can damage the
phone.
Getting Started

9
3. Install the SIM card
Slide the SIM card into the SIM card slot
(as shown below). Make sure that the
gold contact area on the card is facing
downwards. To remove the SIM card, pull
it gently in the opposite direction.
4. Install the battery
Insert the top of the battery first into the
top edge of the battery compartment.
Ensure that the battery contacts align with
the terminals on the phone. Press the
bottom of the battery down until it snaps
into place.
5. Install the back cover
Align the back cover on the battery
compartment and slide it upwards until it
locks into place.

10
Battery Information and Care
Always unplug the charger from the wall
socket after the phone is fully charged to
save unnecessary power consumption of
the charger.
Charging your phone Locate the Charger/USB Port on the left side
of your phone. Insert the charger connector
to the phone (the ‘B’ side of the connector
has to be facing up when connecting to the
phone) and then plug into the wall socket.
Your LG 440G will need to be charged until
the Full Battery message appears on the
screen.
Important!
You must insert the battery before
charging.
Warning
Use of unauthorized accessories could
damage your phone and void your
warranty.
Getting Started

11
On-Screen Icons
The table below describes various display
indicators or icons that appear on the
phone’s display screen.
ICON/
INDICATORDESCRIPTION
Network signal strength (number
of bars will vary)
No network signal
Low Battery
New text message
New email
An alarm is set
Ring profile in use
Silent All profile in use
EDGE network available
Bluetooth is active
3G network available
The browser is active
ICON/
INDICATORDESCRIPTION
Vibrating Mode On
Speakerphone
Call in Progress
Voicemail
Battery Full
Battery Charging
Flight Mode On
Camera in use
Camcorder in use
Camcorder timer

12
Before you beginRemember that you can select the menu
icons from Menu screen using the number
keys if you set the Menu Style as List Style.
If you set the Menu Style as Icon Style, you
can only use the Navigation Keys to select
the menu icons.
Making a Call1 Make sure your phone is powered on.
2 Enter a phone number including the area
code. To edit a number on the display
screen, simply press the Clear/Back Key
to erase one digit at a time.
Press and hold the Clear/Back Key
to erase the entire number.
3 Press the Send Key to call the
number.
4 To end the call, press the End/Power Key
.
Making a Call with the Send
Key
1 Press the Send Key to display the
most recent missed, dialed and received
calls will be displayed.
2 Highlight the desired number by using the
Navigation Keys.
3 Press the Send Key .
Making International Calls
1 Press and hold the key and the
international access character ‘+’ will
appear.
2 Enter the country code, area code, and
the phone number.
3 Press the Send Key to call the
number.
Ending a Call
To end a call, press the End/Power Key
.
General Functions

13
Making a Call from the Contacts
You can store frequently called names and
phone numbers in the SIM card as well as in
your Contacts List.
You can dial a number by simply highlighting
a name in the Contacts List and pressing the
Send Key .
1 Press the down Navigation Key to
access the Contact List.
2 Highlight the Contact and press the Send
Key .
Answering a CallWhen you receive a call, the phone displays
a notification on the screen and rings and/
or vibrates. If the caller can be identified, the
caller’s phone number (or name, if stored in
your Contacts) is displayed.
1 Press the Send Key or the Left Soft
Key Accept to answer an incoming
call.
If the Answer Mode has been set as Any
Key ( Menu > Settings >
Call > Answer Mode), any key
press will answer a call, except for the
End/Power Key , the Right Soft Key
, or the Volume Keys.
2 End the call by pressing the End/Power
Key .
Note
You can answer a call while using other
functions or features.
Adjusting the VolumeUse the Volume Keys during a call to adjust
the earpiece volume.
While in standby mode, you can adjust the
Master Volume using the Volume Keys.

14
Vibrating Mode (Quick)
Vibrating Mode can be activated by pressing
and holding down the key.
Signal Strength
If you are inside a building, being near a
window may give you better reception. You
can see the strength of your signal by the
signal indicator on your phone’s display
screen.
Entering TextYou can enter alphanumeric characters by
using the phone’s keypad. For example,
storing names in the Contacts, writing
a message, or scheduling events in the
calendar all require text to be entered.
Changing the Text Input Mode
Change the text input mode by pressing
when in a text entry field.
You can check the current text input mode in
the upper right corner of the screen.
The following text input modes are available
on the phone.
ABC Mode
This mode allows you to enter letters by
pressing the key labeled with the required
letter.
123 Mode (Numbers Mode)
Type numbers using one keystroke per
number. To change to 123 mode in a text
entry field, press the key until 123
mode is displayed in the upper right corner.
Symbol Mode
The Symbol Mode enables you to enter
various symbols or special characters.
To enter a symbol, press the key. Use
the Navigation Keys to highlight the desired
symbol and press the OK Key .
General Functions

15
Using the ABC Mode
Use the alphanumeric keypad to enter your
text.
1 Press the key labeled with the required
letter.
2 To insert a space, press the key
once. To delete letters, press the Clear/
Back Key . Press and hold down the
Clear/Back Key to erase all of the
entered text.
Note
Refer to the table below for more
information on the characters available
using the keys.
KeyCharacters in the Order Displayed
Upper Case Lower Case
1 . , ’ @ ? ! - : / 1 . , ’ @ ? ! - : / 1
2 A B C 2 a b c 2
3 D E F 3 d e f 3
4 G H I 4 g h i 4
KeyCharacters in the Order Displayed
Upper Case Lower Case
5 J K L 5 j k l 5
6 M N O 6 m n o 6
7 P Q R S 7 p q r s 7
8 T U V 8 t u v 8
9 W X Y Z 9 w x y z 9
0Space Key,
0 (Long press)
Space Key,
0 (Long press)
Using the 123 (Numbers) Mode
The 123 Mode enables you to enter
numbers in a text message (a telephone
number, for example) more quickly. Press
the keys corresponding to the required
digits before manually switching back to the
appropriate text entry mode.

16
During a CallYour phone provides a number of control
functions that you can use during a call.
To access these functions during a call,
press the Left Soft Key Options.
Making a Second Call
You can select a number you wish to dial
from the Contacts to make a second call.
1 Press the Left Soft Key Options,
then select Contacts.
2 Highlight the contact, then press the Send
Key to make a second call.
Swapping Between Two Calls
Once the second call has been dialed (or
answered), you can switch between the calls
by using one of the following three methods:
Press the Send Key .
Press the Left Soft Key Options
and then select Swap Calls.
Press the up or down Navigation Keys.
Answering an Incoming Call
To answer an incoming call when the
handset is ringing, simply press the Send
Key . The handset is also able to warn
you of an incoming call while you are already
on a call. A tone sounds in the earpiece
and the display will show that a second
call is waiting. This feature, known as Call
Waiting, is only available if your network
supports it.
If Call Waiting is turned on, you can put the
first call on hold and answer the second call
by pressing the Send Key .
In-Call Menu

17
Rejecting an Incoming Call
You can reject an incoming call without
answering by simply pressing the End/Power
Key .
Muting the Microphone
You can mute the microphone during a call
by pressing the Right Soft Key Mute.
The handset can be unmuted by pressing
the Right Soft Key Unmute. When the
handset is muted, the caller cannot hear
you, but you can still hear the caller.
Using the Speakerphone
You can use the integrated Speakerphone
during a call by pressing the OK Key
Spk. On. The loudspeaker is automatically
deactivated when you end the call.
Warning
Due to increased volume levels, do not
place the phone near your ear while the
speakerphone is enabled.

18
1. Prepaid
[Single Tank -TF / Net 10]
1.1 Add Airtime
1.2 Buy Airtime
1.3 My Phone Number
1.4 My Airtime Info
1.5 Airtime Display
1.6 Serial Number
1.7 SIM Number
1.8 Code Entry Mode
[Straight Talk - Single Tank]
1.1 Add Airtime
1.2 My Phone Number
1.3 Service End Date
1.4 Serial Number
1.5 SIM Number
1.6 Code Entry Mode
[Straight Talk - Multi Tank]
1.1 Add Airtime
1.2 My Phone Number
1.3 My Balance Info
1.4 Serial Number
1.5 SIM Number
1.6 Code Entry Mode
2. Contacts
2.1 Contact List
2.2 New Contact
2.3 Groups
2.4 Speed Dial
2.5 SIM Management
2.6 Own Number
2.7 My Business Card
3. Messages
3.1 Create Message
3.2 Inbox
3.3 Drafts
3.4 Outbox
3.5 Message Settings
Phone Menus

19
4. Music
4.1 Now Playing
4.2 All Songs
4.3 Playlists
4.4 Artists
4.5 Albums
4.6 Genres
4.7 Shuffle Songs
5. Recent Calls
5.1 All Calls
5.2 Missed Calls
5.3 Dialed Calls
5.4 Received Calls
6. Games & Apps
6.1 Buy Games
6.2 [Preloaded applications]
7. Email
7.1 Write Email
7.2 [Accounts]
8. Camera
8.1 Take Photo
8.2 Record Video
8.3 Camera Album
9. My Folder
9.1 Audio
9.2 Pictures
9.3 Video
9.4 Other Files
9.5 File Manager
10. Tools
10.1 Voice Command
10.2 Alarm Clock
10.3 Calendar
10.4 Notepad
10.5 Calculator
10.6 Tasks
10.7 Stopwatch
10.8 Tip Calculator
10.9 Unit Converter
10.10 Voice Recorder
10.11 SIM App.

20
11. Browser
12. Settings
12.1 Audio & Ringtones
12.1.1 Ringtone
12.1.2 Message Tone
12.1.3 Alert Tone
12.1.4 Keypad Tone
12.1.5 Multimedia
12.1.6 Call
12.2 Phone Settings
12.2.1 Languages
12.2.2 Set Hotkeys
12.2.3 Flight Mode
12.2.4 Security
12.2.5 Reset Settings
12.3 Display
12.3.1 Wallpapers
12.3.2 Fonts
12.3.3 Clocks & Calendar
12.3.4 Brightness
12.3.5 Backlight Timer
12.3.6 Menu Styles
12.4 Call
12.4.1 Send My Number
12.4.2 Answer Mode
12.4.3 Senior Mode
12.4.4 Time & Cost
12.4.5 Accessibility
12.5 Bluetooth
12.5.1 Turn On(Turn Off)
12.5.2 Search New Device
12.5.3 My Devices
12.5.4 My Bluetooth Info
Phone Menus

21
12.6 Memory
12.6.1 Used Space
12.7 Applications
12.7.1 Messages
12.7.2 Browser
12.7.3 Voice Command
12.7.4 TTS
12.8 Phone Information

22
Contact ListThis menu allows you to save and manage
contact address information. The Contact
List allows you to add a new address or
search saved contact addresses by name.
To access Contact List, from the standby
screen, press the Left Soft Key Menu,
Contacts and Contact List.
New ContactThis menu allows you to add a new contact
to the Contact List. You can enter contact
address information including name,
phone numbers, email addresses, group
information items, memos, ring tones, and a
contact Picture ID.
To access New Contact, from the standby
screen, press the Left Soft Key Menu,
Contacts and New Contact.
GroupsThis menu allows you to manage group
information. You can also configure a ring
tone for a group so that the group ring tone
sounds when a call from a specific contact
address within that group is received and
there is no ring tone configured for the
specific contact address.
To access Groups, from the standby screen,
press the Left Soft Key Menu,
Contacts and Groups.
Speed DialThis menu allows you to assign a frequently-
called contact to the Speed Dial List. You can
select a number from 2 to 9 as a speed dial.
To access Speed Dial List, from the standby
screen, press the Left Soft Key Menu,
Contacts and Speed Dial.
Contacts

23
SIM ManagementThis menu allows you to copy information
from your SIM card to your handset and vice
versa. If a name is duplicated during the
copying operation, the information is also
duplicated. You can also delete information
from the SIM card.
To access SIM Management, from the
standby screen, press the Left Soft Key
Menu, Contacts and SIM
Management.
Own NumberThis displays your phone numbers stored in
the SIM card.
To access Own Number, from the standby
screen, press the Left Soft Key Menu,
Contacts and Own Number.
My Business CardThis displays your business card stored in
the handset. You can also delete or edit it.
To access My Business Card, from the
standby screen, press the Left Soft Key
Menu, Contacts and My
Business Card.

24
This menu includes functions related to SMS
(Short Message Service), MMS (Multimedia
Message Service), Voicemail as well as the
network’s service messages.
Create Message1 From the standby screen, press the Left
Soft Key Menu.
2 Select Messages.
3 Press Create Message.
OR
You can simply press the Message Hot Key
from the standby screen.
Note
If you insert a Picture, Audio, or Video
file while writing a multimedia message,
the file loading time will take about
5 seconds. You will not be able to activate
any key during the file loading time. When
the file loading is complete, you will be
able to write a multimedia message.
Editing a message
The following options are available when
editing a message.
Using Insert
While entering text, press the Right Soft
Key Insert. The following options are
available.
Symbol: You can insert various symbols
into your message. Pressing the Left Soft
Key and Right Soft Key scrolls
through the pages.
Picture: You can select a picture to insert
by using the Navigation Keys. You can
preview the selected picture by pressing
the Right Soft Key View.
Audio: You can insert an audio file from
your saved audio files.
Video: You can insert a video clip from
your saved video clips.
Take New Picture: You can take and
insert a picture in your message.
Messages

25
Record New Audio: You can record a
new audio clip by pressing the OK Key
Record. Press the Left Soft Key
Options before you begin recording
to set the options (below). After recording
a new audio clip, you can delete it by
pressing the Left Soft Key Discard.
Quality: Set the audio’s quality to Fine,
Normal, or Economy.
Record New Video: You can record a
new video by pressing the OK Key
Record. When finished recording, press
the OK Key Insert.
Slide: Allows you to insert another slide
before or after the current slide.
Template
Text: Allows you to easily insert
frequently used sentences in the text
message.
Multimedia: Preset multimedia
templates can be created (
Menu > Messages > Message
Settings > Multimedia
Message > Multimedia
Templates > New).
Signature: Allows you to insert your
own created signature.
More: Allows you to insert vCard,
vCalendar, vNote, vTask or Contact.
Note
vCard, vCalendar, vNote and vTask
are created by the Contacts, Calendar,
Notepad, and Tasks functions,
respectively. Go to the Tools and Contacts
sections in this Manual for more detailed
information.

26
Using Options
While entering text, press the Left Soft Key
Options.
Text Entry Mode: Sets the text input
mode. For more details, refer to Entering
Text(page 14).
Text Entry Settings
- Text Entry Language: Allows you to
set the text entry language to English or
Spanish.
- T9 Word Candidate List: Displays the
word candidates as you type.
- T9 Next Word Prediction: Allows the
phone to predict the next word when
typing in T9 mode.
- T9 Dictionary: Allows you to add,
delete, reset, and modify words.
Save to Drafts: Saves the message to
Drafts.
Cancel Message: Allows you to exit the text
input mode without saving your message.
Sending a Message
After completing a message, press the OK
Key Send To to select a recipient.
press the Left Soft Key Options.
In this menu, you can choose from the
following options:
- Enter Number: Allows you to enter the
phone number using the keypad.
- Enter Email: Allows you to enter an
email address instead of a phone
number.
- Insert Symbol: Allows you to enter
symbols.
- Caller Groups: Displays Contacts
Groups.
- Recent Messages: Choose a Contact
from Recent Messages.
- Recent Calls: Choose a Contact from
Recent Calls.
- Delivery Options: Allows you to set the
options for Add Cc and Add Bcc.
- Save to Drafts: Saves the selected
message to Drafts.
Messages

27
- Cancel Message: Allows you to cancel
the message.
InboxYou will be alerted when you receive a
message. New messages are stored in the
Inbox. In the Inbox, you can identify each
message by icons. If you are notified that
you have received a multimedia message,
you can download the whole multimedia
message by selecting it in the Inbox menu.
To reach the Inbox, from the standby screen,
press the Left Soft Key Menu >
Messages > Inbox.
When you press the Right Soft Key
Reply, you can reply to the sender of the
message.
While viewing the Inbox, press the Left Soft
Key Options for the following options:
Add to Contact: You can save the
sender’s phone number in the Contact
List.
Delete: You can delete the selected
message.
Forward: You can forward the selected
message to another person.
Copy to Phone/Copy to SIM: You can
copy to Phone or SIM depending on
where the text message is stored.
Move to Phone/Move to SIM: You
can move to Phone or SIM depending on
where the text message is stored.
Select Multiple: You can select multiple
messages.
Sort By: Allows you to sort the messages
by date, sender, read/unread, or subject.
Message Details: You can view the
following information about received
messages: message Type, Subject, From,
and message Time.
Delete All Read Msg: You can delete all
read messages.

28
DraftsAllows you to view and edit the messages
saved as drafts. To access drafts, from the
standby screen, press the Left Soft Key
Menu, Messages, and Drafts.
When you press the Right Soft Key
Delete, it allows you to delete the message.
While viewing the Drafts, press the Left Soft
Key Options for the following options:
Select Multiple: Allows you to select
multiple messages to delete.
Message Details: Allows you to view the
details of the message.
OutboxOutbox is the storage place for recently
sent messages. When you press the Send
Key , you can call the recipient of the
selected message.
If the message is not sent from the Outbox,
you will receive a sound alert along with
a Message Sending Failure notice on the
screen. Another attempt will be made to
send the failed message and after two
unsuccessful attempts, the message will no
longer be sent automatically.
To access the Outbox, from the standby
screen, press the Left Soft Key Menu,
Messages, and Outbox.
The following options are available for the
Outbox folder by pressing the Left Soft Key
Options:
Delete: Deletes the selected message.
Edit: Allows you to edit the selected
message.
Select Multiple: Allows you to select
multiple messages to delete.
Sort By: Allows you to sort the messages
by date and recipient.
Message Detail: Allows you to view the
details of the message.
Press the Right Soft Key Forward to
send the selected message to another.
Messages

29
Message SettingsTo access and configure your Message
Settings, from the standby screen, press the
Left Soft Key Menu, Messages, and
Message Settings.
Message Alert
Allows you to set the Sounds, Volume, Alert
Type, and Alert Interval.
Save To
Allows you to choose whether to save to the
SIM Card or the Phone.
Signature
Allows you to create, edit, and delete your
signature, which can be configured to be
sent out with your outgoing messages.
Text Message
Allows you to set preferences for text
messages.
The following options are available:
Text Templates: Predefined messages
that can quickly be sent. Press the Left
Soft Key Options to access the
following available options:
Send: Allows you to send the selected
template via Message.
Delete: Allows you to delete the
selected template message.
Edit: Allows you to edit the selected
template message.
Delete All: Deletes all messages in the
folder.
Cancel: Cancel the template you were
creating.

30
Msg Center No.: Allows you to view and
edit the phone number for the Message
Center. Do not edit unless instructed to do
so by your service provider.
Email Gateway: Allows you to view
and edit the Email Gateway. Do not edit
unless instructed to do so by your service
provider.
Insert Signature: Allows you to turn the
Signature feature on or off.
Multimedia Message
Allows you to set your preferences for
multimedia messages.
The following options are available:
Multimedia Templates: Allows you
to add, edit, and delete multimedia
templates. Press the Right Soft Key
New to create a new multimedia
template. Press the Left Soft Key
Options while creating a message to
access the following available options:
Text Entry Mode: Sets the text
input mode. For more details, refer to
Entering Text(page 14).
Text Entry Settings
- Text Entry Language: Allows you to
set the text entry language to English or
Spanish.
- T9 Word Candidate List: Displays the
word candidates as you type.
- T9 Next Word Prediction: Allows the
phone to predict the next word when
typing in T9 mode.
- T9 Dictionary: Allows you to add,
delete, reset, and modify words.
Cancel Message: Allows you to exit
the text input mode without saving your
message.
Voicemail
This menu allows you to set the Voicemail
Center Number if this feature is supported.
Please check with for details of their service
in order to configure the handset correctly.
Messages

31
MusicYou can access Music by pressing the Left
Soft Key Menu and selecting Music.
The following options are available:
All Songs: Allows you to view all the
songs in your music library.
Playlists: Allows you to create your own
playlists.
Artists: Shows the list of artists of all the
songs in your music library, and shows all
the songs by a chosen artist.
Albums: Shows the list of albums of
all the songs in your music library, and
shows all the songs on a chosen album.
Genres: Shows the list of genres of
all the songs in your music library, and
shows all songs of a specific genre.
Shuffle Songs: Allows you to play all
the songs in your music library in random
order.
Tip!
The music player plays formats such as
MP3, AAC, AAC+, and WMA.
Note
Music files may be protected by copyright
and intellectual property laws. Please
ensure that you adhere to the applicable
Terms of Use of materials laws prior to
downloading or copying files.
Playing Music
To listen to music that you have in your
phone, follow these quick easy steps:
1 Press the Left Soft Key Menu to
open the Main Menu.
2 Select Music and then choose from Now
Playing, All Songs, Playlists, Artists,
Albums and Genres or Shuffle Songs
to shuffle your collection.
Play/Pause to
play and pause a selected song. While
playing, press the up or down Navigation
Keys to change the volume and the left or
right Navigation Keys to go to the previous
or next song.
Music

32
Soft Key Options to access other
functions while music is playing.
Adding Music To Your Handset
Music files can be added to your handset by
using one or more of the following methods:
network directly to your device.
services.
Note
Some sites are data intensive (i.e.
previews via streaming) so the user
should be enrolled in an unlimited data
plan before using these services to avoid
per-use data charges.
Additional charges may apply when
downloading music, ringtones, etc.
Additional Music Services
There may be other music applications
preloaded or available for your phone that
allow you to:
song from a song sample.
anywhere you go.
favorite parts of your favorite songs, etc.
Music

33
This menu allows you to see the list of
recently received calls. To access Recent
Calls, from the standby screen, press the
Left Soft Key Menu and Recent
Calls.
You can access the following menus:
All Calls, Missed Calls, Dialed Calls, and
Received Calls.
This menu allows you to download or access
the various games.
To access the Games, from the standby
screen, press the Left Soft Key Menu
and Games & Apps.
Recent Calls Games & Apps

34
Sending an email using your new account
To send/receive an email, you should set up
an email account.
1 Press the Left Soft Key Menu,
select Email and choose the account you
want to use.
2 Press the Left Soft Key Options
and choose Write Email to write
an email.
3 Enter the recipient's address in the To
field. Then use the down Navigation Key
to access the Subject and Messages
fields.
4 Enter your message using the keypad and
press the OK Key Send to send
the email.
Retrieving your email
1 Press the Left Soft Key Menu, and
select Email.
2 Select the account you want to use.
3 Press the Left Soft Key Options and
select Refresh to connect to your email
account and retrieve your new messages.
Note
You can manually retrieve your email only
if you set to Push Off.
Message folders
Open Email, press the Left Soft Key
Options, and select Mailbox. The list
of folders will be displayed.
Write Email - Create your new message.
Inbox - All the e-mails you receive are
placed into your Inbox. From here you can
reply, forward and more.
Drafts - If you don’t have time to finish
writing a e-mail, you can save what you
have written so far in here.
Outbox - This is a temporary storage folder
while e-mail are being sent or stores the
messages that are failed to sent.
Sent - Copies of all the e-mail you send are
kept into your Sent folder.
Trash - All the e-mail you remove are
placed into your Trash.

35
Changing your email settings
1 Press the Left Soft Key Menu,
choose Email > Left Soft Key
Options > Mailbox >
Options > Settings.
2 Set any of the following options.
Accounts - You can edit e-mail account
settings.
Schedule - Allows you to configure the
email schedule.
Notification - Choose whether or not to be
alerted to new emails.
Default Account - Choose which account
to compose e-mail by default.
Signature - Create an email signature and
switch this feature on.

36
To access Camera from the standby screen,
press the Left Soft Key Menu and
select Camera.
Take Photo
Using the camera you can take pictures
of people or events while on the move.
Additionally, you can send photos to other
people in a picture message.
The following options will appear (as icons)
at the bottom of the screen.
Album: Allows you to see saved
image and video files.
Video: Allows you to switch to
Camcorder mode.
Capture: Allows you to capture the
image.
Zoom: Allows you to set the zoom
level.
Brightness: Allows you to set the
Brightness.
Press the Right Soft Key Settings for
the following options:
Preview Tab
Image Size: The resolution of the image
can be captured in 1280*960, 640*480,
320*240.
Color Effects: Allows you to choose from
Off, Mono, Sepia, or Negative.
White Balance: Set the White Balance
as Auto, Daylight, Cloudy, Illuminate, or
Indoors.
Night Mode: Set Night Mode to On or
Off.
Timer: Timer can be set to Off, 3
Seconds, 5 Seconds, or 10 Seconds.
Shot Mode
- Normal Mode: This set as normal
camera mode.
- Continuous Shot: This is great for
taking photos of moving objects or at
sporting events. The continuous shot is
only available in QVGA(320x240) mode
and can be set to 3, 6, or 9 shots per
event.
Camera

37
Image Quality: The quality of the
captured image can be set to Super Fine,
Fine, or Normal.
Others Tab
Shutter Tones: You can choose from
Tone 1, Tone 2, Tone 3, or Off.
Reset Settings: Allows you to set the
Camera to the default settings.
Using Zoom
In Camera mode, you can zoom in and out
by using the up and down Volume Keys.
The maximum zoom scale depends on the
resolution as follows.
Resolution Zoom scale
1280*960 Not Available
640*480 Level 1 ~ Level 10
320*240 Level 1 ~ Level 10
Record Video
Allows you to record a video clip with your
phone. Before starting to record, press the
Left Soft Key Settings to configure
your settings.
The following options will appear (as icons)
at the bottom of the screen.
Album: Allows you to see saved
image and video files.
Photo: Allows you to switch to the
Camera function so you to take a picture.
Record: Allows you to begin
recording the video.
Zoom: Allows you to set the zoom
level.
Brightness: Allows you to set the
Brightness.

38
Press the Left Soft Key Settings for
the following options:
Preview Tab
Color Effects: Allows you to choose from
Off, Mono, Sepia, or Negative.
White Balance: Set the White Balance
as Auto, Daylight, Cloudy, Illuminate, or
Indoors.
Video Quality: Allows you to set video
quality to Super Fine, Fine, or Normal.
Duration: Set the recording duration to
General Mode or MMS Video mode.
Others Tab
Recording Tones: Allows you set
Recording Tones to On or Off.
Reset settings: Allows you to set the
Camcorder to the default settings.
Note
In Video mode, you can adjust the zoom
scale by using the up and down Volume
Keys. The zoom scale ranges from Level
1 to Level 9.
Camera Album
Allows you to view the pictures and videos
that are captured with the camera. When a
file is highlighted, the following options are
available when you press the Left Soft Key
Options:
For image file:
Use As/Send Via/Print Via Bluetooth/
Delete/Rename/Select Multiple/File
Information.
For video file:
Send Via/Delete/Rename/Select
Multiple/File Information
Camera

39
My FolderAudio
To access Audio, from the standby screen,
press the Left Soft Key Menu, My
Folder, and Audio.
Buy Ringtones Allows you to buy ring
tones.
Record Voice: Allows you to record
voice notes.
Saved audio files are displayed in the list.
Pictures
To access Picture, from the standby screen,
press the Left Soft Key Menu, My
Folder, and Pictures.
Buy Graphics: Connects to Color
Graphics download site.
Take Photo: Allows you to take a picture.
The picture files saved on your phone are
displayed.
Video
To access Video, from the standby screen,
press the Left Soft Key Menu, My
Folder, and Video.
Record Video: Allows you to record a
video.
The video files saved on your phone are
displayed.
Note
Please note that DRM can restrict some
functions, such as sending and editing.
Other Files
When you receive files of an undefined
format (such as .vcs, .vcf, etc.) via email, the
files are saved in this folder.
To access Other Files, from the standby
screen, press the Left Soft Key Menu,
My Folder, and Other Files.

40
The following options are available by
pressing the Left Soft Key Options:
Send Via: Send the selected file via
Message, Email, or Bluetooth.
Delete: Allows you to delete the selected
file.
Move: Allows you to move the selected
file to another folder.
Copy: Allows you to copy the selected file
to another folder.
Rename: Allows you to edit the name of
the selected file.
Select Multiple: Allows you to select
multiple files at once to perform various
functions.
Sort By: Allows you to sort the files by
Name, Date, and Type.
File Information: Allows you to view
information about the selected file or
used memory space on your phone.
File Manager
This function allows you to view the content
in your internal phone memory.
To access File Manager, from the standby
screen, press the Left Soft Key Menu,
My Folder, and File Manager.
My Folder

41
Voice Command
Voice Command is the function whereby
your phone’s voice recognition engine
identifies the voice of the user and carries
out the requested commands. When the user
operates the Voice Command function, there
are four possible commands, Call <Name
or Number>, Listen Voicemail, Missed Calls,
and Time & Date. To activate the Voice
Command function, hold down the Clear/
Back Key while the phone is in standby
mode or press the Left Soft Key
Menu, Tools, and Voice Command.
1 Call <Name or Number>: This function
is activated only when the user says the
command “Call” followed by the name
stored in the address book or say the
phone number. Please note that interfering
noise might cause a problem displaying
candidates. Additionally, the user has the
option to select a number type at the end,
such as “mobile”, “home”, or “work”.
2 Listen Voicemail: This command is
activated when the user says “Listen
Voicemail”. The user will then be
automatically connected to voicemail.
3 Missed Calls: This command is activated
when the user says the words “Missed
Calls”. The mobile phone presents the
missed call list.
Follow-up Commands Available
- Yes: Make the phone call.
- No: Moves to the next result.
- Cancel: Go back to the main Voice
Command menu.
- Exit: Terminate Voice Command.
- Next: Moves to the next result.
4 Time & Date: This command is activated
when the user says “Time & Date”. The
phone displays the current local time
and date.
Tools

42
Voice Command Options
When the Voice Command option is
activated, you can press the Left Soft Key
Options for the following options:
Mode
- Speed: Voice Command is abbreviated.
- Normal: Voice Command is played
normally with prompts.
Best Match
- 1 Match: The most likely match will be
displayed when finding a number from
the address book.
- 4 Matches: The four most likely
matched names will be displayed when
finding a name from the address book.
Sensitivity
- High: Operation and performance of
the voice recognition engine is rarely
affected by the user’s voice command
and surrounding sound.
- Medium: Operation of the voice
recognition engine is normally affected
by user’s voice command and
surrounding sound.
- Low: Operation of the voice recognition
engine is strongly affected by user’s
voice command and surrounding sound.
Spk. On Mode
- Automatic On: When this option is
selected, the speakerphone is turned on
and the sound is loud enough so you
can hear the output when the phone is
away from the ear, at a distance
- Off: When this option is selected, the
speakerphone is turned off and the
sound is quieter and cannot be heard
when the phone is away from the ear, at
a distance
Tools

43
Alarm Clock
The alarm function allows you to set up
multiple separate alarms. You can also set
the time, repetition interval, and alarm tone.
If there is no alarm setting, press the Left
Soft Key New to add a new alarm.
To access Alarm Clock, from the standby
screen, press the Left Soft Key Menu,
Tools, and Alarm Clock.
Alarm Options
Time: Input your desired alarm time by
specifying the hour and minutes.
You can also choose a predefined amount
of time (15 Minutes Later, 30 Minutes
Later, 45 Minutes Later, 1 Hour Later, Off).
Repeat: Select the desired repeat mode
(Once, Daily, Mon ~ Fri, Sat ~ Sun, Select
Weekday).
Alarm Tone: Press the OK Key
List to access the list of available Alarm
Tones.
Volume: Set the volume of the alarm by
pressing the up and down Volume Keys.
Type: Select the Ring Alert Type between
Ring, Vibrate, Ring & Vibrate and Vibrate
after Ring.
Memo: Enter an alarm name.
Snooze interval: Select the snooze
interval between 5 Minutes, 15 Minutes,
30 Minutes, 45 Minutes, 1 Hour and Off.
Press the Left Soft Key Save to save
your new Alarm.
Calendar
When you enter this menu, a calendar will
be displayed. The red square cursor is used
to locate a particular day. The bottom bar
on the calendar indicates saved schedules
(if any) for that day. This function helps you
keep track of your schedule. The phone can
sound an alarm tone if it has been set for a
specific schedule item.

44
The chart below shows the keys that can be
used to navigate the Calendar:
Key Description
/ Weekly
/ Daily
/ Annually
/ Monthly
To access Calendar, from the standby
screen, press the Left Soft Key Menu,
Tools, and Calendar.
The following options are available when a
Calendar event is selected from the Calendar
menu.
Search: Allows you to search the saved
schedule(s).
Set Holiday: Allows you to set specific
dates to display as Holidays on your
calendar.
View All: Allows you to view all saved
schedules.
Week View: Allows you to view the
calendar by week.
Go to Date: Allows you to jump to a
specific date.
Selective Delete: Allows you to
delete Old Schedules or All Schedules
selectively.
Settings: Allows you to set various
calendar settings.
Notepad
You can create up to a maximum of 30
memos.
To access Notepad, from the standby screen,
press the Left Soft Key Menu, Tools,
and Notepad.
1 Press the Left Soft Key New to
create a new memo.
2 Input the memo and press the OK Key
Save to save.
Tools

45
Calculator
The Calculator function allows you to
calculate simple mathematical equations.
To access Calculator, from the standby
screen, press the Left Soft Key Menu,
Tools, and Calculator.
Tasks
This feature allows you to save and manage
a task.
To access Tasks, from the standby screen,
press the Left Soft Key Menu, Tools,
and Tasks.
1 To add a new task item, press the Left
Soft Key New.
2 Input the Due Date, Note, Priority, and
Status information for the new Task.
3 Press the Left Soft Key Save to
save the Task item.
The following options are available in the
Task list by pressing the Left Soft Key
Options:
Mark ‘Complete’: Allows you to change
the status of the selected task as
Completed.
Edit: Allows you to edit a saved task.
Delete: Deletes the selected task.
Selective Delete: Allows you to delete
All Completed/All Past Tasks selectively.
Send Task Via: Enables the selected
task to be sent via Text Message,
Multimedia Message, Email or Bluetooth.
Select Multiple: Allows you to select
multiple Tasks.
View Calendar: Allows you to view the
Calendar.

46
Stopwatch
This menu allows you to record the elapsed
time of an event. The duration of an
individual lap time (up to 20 laps) and the
total time can also be displayed.
To access Stopwatch, from the standby
screen, press the Left Soft Key Menu,
Tools, and Stopwatch.
1 To start timing, press the OK Key
Start. The running time is displayed as
HH.MM.SS.hh (hours, minutes, seconds,
hundredths of a second).
2 During the timing, you can record an
individual lap time by pressing the Right
Soft Key Lap. Up to 20 lap times
can be recorded.
3 You can stop or restart timing by pressing
the OK Key again.
4 To reset the stop watch, press the OK Key
Stop to stop the time, then press
the Right Soft Key Reset. If you've
recorded laps, press the Right Soft Key
Reset.
Tip Calculator
This feature allows you to quickly and easily
calculate the tip amount based on the total
bill as well as the split of the total bill based
on the number of people.
To access Tip Calculator, from the standby
screen, press the Left Soft Key Menu,
Tools, and Tip Calculator.
Unit Converter
This function allows you to convert units of
measurement.
There are 6 types of units that can
be converted: Area, Length, Weight,
Temperature, Volume, and Velocity.
To access Unit Converter, from the standby
screen, press the Left Soft Key Menu,
Tools, and Unit Converter.
Tools

47
Voice Recorder
Allows you to record an audio clip to your
phone. The recorded audio file is saved
automatically in the Audio menu.
To access Record Voice, from the standby
screen, press the Left Soft Key Menu,
Tools, and Voice Recorder.
The following options are available when you
press the Left Soft Key Options:
Record Mode: Sets the recording mode
to either MMS Mode or General Mode.
Quality: Allows you to set the quality
of an audio clip. You can set it to Fine,
Normal, or Economy.
When you press the Right Soft Key
Gallery, it will take you to the Audio gallery.

48
Browser is one of the services provided
by your network operator and it gives you
access to all the cool things you can do with
your wireless phone.
Note
Check the availability of services, pricing,
and tariffs with your network operator
and/or the service provider whose service
you wish to use. Service providers will
also give you instructions on how to use
their services.
Please contact your service provider to
open an Internet account.
Launch the Browser
To launch the browser from the standby
screen, press the Right Soft Key
Browser or press the Left Soft Key
Menu and select the Browser using the
Navigation Keys.
To exit the browser at any time, press the
End/Power Key .
Using the Browser
Once you are connected to the Internet, the
following menu options are available when
you press the Left Soft Key Options:
Zoom: Allows you to zoom in/out for
better look.
Note
You can also adjust the Browser text and
image size by pressing the up and down
Volume Keys to zoom in and out.
Home: Directs you to the homepage.
Enter URL: Allows you to enter URL you
desire to visit.
Send Link: Allows you to send link
Bookmarks: You can add or save the
current page to Bookmarks or view the
list saved under Bookmarks.
Navigation Mode: Allows you to select
Back, Forward, and Refresh.
Search Text: Allows you to search the
text.
Browser

49
Recent Pages: Allows you to view your
history of recently viewed web sites.
Settings: Allows you to set options for
web pages and appearance.
Menus for the Browser
You can surf the Internet using either the
phone keys or the Browser menu.
Using the Navigation Keys
When surfing the Internet, the Navigation
Keys function similarly from when the phone
is on standby mode.

50
Audio & RingtonesThis menu allows you to configure the audio
and ringtone settings for your phone.
To access Audio & Ringtones, from the
standby screen, press the Left Soft Key
Menu, Settings, and Audio &
Ringtones.
Ringtone
Sounds: Allows you to set a sound as the
ringtone for your phone.
Volume: Allows you to control your
Ringtone volume.
Alert Type: Supports 3 ring alert types:
Ring, Ring and Vibration, and Ring after
Vibration.
Increasing Ringtone: Allows you to
enable or disable the Increasing Ringtone
funcion, which is played when you receive
an incoming call.
Note
Full length music tracks cannot be set as
either ringtones or message tones.
Message Tone
Sounds: Allows you to set a sound as
your message tone.
Volume: Allows you to control your
Message Tone volume.
Alert Type: Supports 4 message alert
types: Silent, Vibrate, Ring Only, Ring &
Vibrate.
Alert Interval: Allows you to set the
Message Alert Interval.
Alert Tone
Sounds: Allows you to select a set of
alert tones. Supports 2 alert tone types:
Alert Tone 1 and Alert Tone 2.
Volume: This menu allows you to control
your Alert Tone volume.
Alert Type: You can select to turn Alert
Tones to Ring or Silent.
Settings

51
Keypad Tone
This menu option allows you to select a
tone that the phone sounds when a key is
pressed on the dialpad. You can select an
option from Beep and Voice and set the
volume.
Multimedia
This menu allows you to control your
Multimedia volume.
Call
This menu allows you to control your Call
volume.
Phone SettingsThis menu allows you to configure the Phone
Settings. To access Phone Settings, from
the standby screen, press the Left Soft Key
Menu, Settings, and Phone
Settings.
Languages
Allows you to change the language for the
display text on your phone. This change will
also affect the Language Input mode.
Set Hotkeys
Allows you to change the preferences on the
Hotkeys that are currently assigned for your
Navigation Keys (when in standby mode).
Flight Mode
This allows you to only use the phone’s
features that do not require the use of the
wireless network, excluding emergency calls,
when you are in an airplane or in places
where the wireless network is prohibited. If
you set the flight mode on, the flight mode
icon will be displayed on the screen instead
of the network signal icon.

52
On: You cannot make (or receive) calls,
excluding emergency calls, or use other
features that require network coverage.
Off: You can deactivate the flight mode to
access the network.
Security
Various codes and passwords are used to
protect the features and settings of your
phone.
Phone Lock: You can use a security
code to avoid unauthorized use of the
phone.
If you set the Phone Lock to When
Power On, the phone will request a
security code whenever you switch the
phone on. If you set the Phone Lock to
Lock Phone Now, your phone will lock
immediately.
Change Codes: The Change Codes
feature allows you to change your current
password to a new one. You must enter
the current password before you can
specify a new one.
Reset Settings
This function allows you to restore factory
settings. To do this, you need the security
code.
Master Reset: Restores the phone
settings (e.g.: Audio, Display, Language,
Bluetooth Settings) to default values.
Master Clear: Deletes downloaded/user
created contents (e.g.: images, videos)
from the phone.
Phone
- Deletes all downloaded/user created
images and audios from the phone
memory.
- Deletes personal information stored
in the phone memory (e.g.: Contacts,
Messages, Tasks, Alarm, Calendar
Schedules).
- Restores the settings stored in the
phone memory to the default values.
Settings

53
DisplayThis menu allows you to configure your
Display settings.
To access Display, from the standby screen,
press the Left Soft Key Menu,
Settings, and Display.
Wallpapers
This menu allows you to set a picture or
color as your background.
Fonts
You can configure the font size and color of
the font that your phone uses.
Clocks & Calendar
This feature allows you to select a Clock or
Calendar to display on the standby screen.
Brightness
You can set the brightness of the display
screen.
Backlight Timer
Use this to set the duration of the display
backlight.
Menu Styles
You can set the main menu style to Icon or
List view.
CallThis menu allows you to configure your Call
settings.
To access Call, from the standby screen,
press the Left Soft Key Menu,
Settings, and Call.
Send My Number
This network service allows you to set your
phone number to be displayed or hidden
from the person you are calling. You can
select Set by Network if you prefer to
have different settings for different service
providers.

54
Answer Mode
This allows you to determine how to answer
the phone.
Any Key: Allows you to answer an
incoming call by pressing any key, except
the End/Power Key , Volume Keys,
or the Right Soft Key Silent.
Send Key Only: Allows you to only
answer an incoming call by pressing the
Send Key or Left Soft Key
Accept.
Flip Open: Allows you to Flip open the
phone to answer an incoming call.
Senior Mode
Senior mode is a function that amplifies
a sound for seniors to hear the voice well
by emphasizing a low voice. It is used for
enhancing the speech quality while you are
on the phone.
You can set the Senior Mode to On or Off.
Time & Cost
Allows you to view information about Call
Duration and Data Counter.
Accesibility
TTY: Allows you to enable TTY Mode in
order to contact other TTY devices. Select
from TTY Full, TTY Talk, TTY Hear,
TTY Off.
Hearing Aid: Allows you to turn the
hearing aid functionality on or off.
BluetoothYour phone has built-in Bluetooth wireless
technology, which makes it possible for
you to connect your phone wirelessly to
other Bluetooth devices such as a hands-
free device, PC, laptop, or other phones.
The devices registered in your phone can
only be connected one at a time (To make
a connection to the same type of device or
change Bluetooth preferences, disconnect
the existing device first).
You can also exchange, for example,
business cards, calendar items, and pictures.
Settings

55
To access Bluetooth, from the standby
screen, press the Left Soft Key Menu,
Settings, and Bluetooth.
Hands-free profile
This appears when the hands-free
profile is used between the hands-free
device. This allows you to call using a
Bluetooth connection.
A2DP profile
This appears when the A2DP profile
is used between the stereo headset device
and the phone. This allows you to listen to
an audio clip. A2DP is the Advanced Audio
Distribution Profile, which provides support
for streaming either mono or stereo audio
using Bluetooth.
Hands-free + A2DP profile
This appears when both profiles of the
hands-free and the A2DP are used between
the compatible device and the phone. This
allows you to call and listen to an audio clip
using a Bluetooth connection.
When using each device, see the manual
that comes with the device.
Note
We recommend that your phone and the
Bluetooth device you are communicating
with should be no more than 10 meters
apart. The connection may be improved
if there are no solid objects between your
phone and the other Bluetooth device.
Turn On/Off
Allows you to turn your Bluetooth
functionality on or off.
Search New Device
This function allows you to search for and
add new devices.
My Devices
This function allows you to view the list of all
devices that are paired with your phone.
My Bluetooth Info
This menu allows you to configure the profile
for Bluetooth.
56
Device Visibility: Allows you to set your
device to be visible to other Bluetooth
devices.
Device Name: Allows you to change the
handset's name which can be seen by
other Bluetooth devices.
Supported Services: Shows you all
services that the handset supports.
My Bluetooth Address: Displays your
device's Bluetooth address.
To pair with another device
1 From the standby screen, press the Left
Soft Key Menu, Settings,
Bluetooth, and Search New
Device.
2 If you want to stop searching, press the
Right Soft Key Cancel.
3 All of the devices found are displayed.
4 Select the desired device by pressing
the OK Key Add and entering the
password.
MemoryThis menu allows you to configure your
Memory settings.
To access Memory, from the standby
screen, press the Left Soft Key Menu,
Settings, and Memory.
Used Space
This function shows the memory status of
the handset.
Phone Common
This function shows the Memory Status
of the phone and the memory being
used by Audio, Image, Video, Multimedia
Message, Email, Java, and Others types
of files.
Phone Reserved
This function shows the status of the
reserved memory used by Text Messages,
Contacts, Calendar items, Tasks, and the
Notepad.
SIM Card
This function shows the status of the SIM
Card memory.
Settings

57
ApplicationsThis menu allows you to configure
application settings
To access Applications, from the standby
screen, press the Left Soft Key Menu,
Settings, and Applications.
Messages
For more details, refer to Message Settings
on page 29.
Browser
This menu allows you to configure the
Browser settings.
Appearance
You can choose the settings of the browser
appearance (Text size, Character Encoding,
Show Image, JavaScript).
Cache
The web pages you have accessed are
stored in the phone memory. This menu
allows you to manage that function.
Clear Cache: Remove all cached data in
the memory.
Cache: Allows you to turn the memory
cache on or off.
Note
Cache is a type of buffer memory,
which is used to store data temporarily,
especially when it is online.
Cookies
The information of services you have
accessed are stored in what is called a
cookie.
From this menu, you can choose to allow
cookies or to delete cookies that are already
on your phone.

58
Clear Login Info.
You can delete the history of ID or Password
information that you have saved previously.
Screen Settings
You can change the settings of the browser
screen (Rendering Mode).
Security
A list of the available certificates is shown.
Certificates: You can see the list of
certificates and view them in detail.
Clear Session: Removes the secure
session.
Navigation Mode
You can change the methods of browser
navigation.
4 Way Navigation: The cursor of the
browser moves scroll amounts or follows
hyperlinks.
Mouse Pointer: You can move the cursor
like a mouse pointer.
Secure Popup
You can activate or deactivate the pop-up
which indicates a secure page.
Shortcuts
If set to On, you can use the Browser more
quickly and conveniently with the keypad in
the phone. If Shortcuts is on, the following
shortcuts are available:
1. Enter URL
3. View Bookmarks
5. Full Screen
7. Page Up
9. Zoom In
*. Page Down
2. This Page
4. Page Overview
6. Saved Pages
8. Recent Pages
0. Search Text
#. Zoom Out
You can adjust the Browser text and image
size by pressing the up and down Volume
Keys to zoom in and out.
Voice Command
This menu allows you to set various Voice
command options. Refer to page 42.
Settings

59
TTS (Text-to Speech)
When you set this on, text messages and
Notepad notes be read out.
Note
When the phone is in Vibration mode, TTS
does no work.
Phone InformationThis menu is used to view My Numbers,
Manufacturer, Model Name, Device ID,
Hardware Version, Software Version,
Language.
To access Phone Information, from the
standby screen, press the Left Soft Key
Menu, Settings, and Phone
Info.

60
AccessoriesThere are a variety of accessories available for your mobile phone, some of which may be
sold separately. You can select these options according to your personal communication
requirements. Consult your local dealer for availability.
Travel Adapter
This adapter allows you to charge the battery.
Battery
Standard battery is available.
Note
company or agent for further enquiries.
61
The highest SAR value for this model phone
when tested for use at the ear is 0.77 W/kg
and when worn on the body, as described
in this user guide, is 0.58 W/kg (body-worn
measurements differ among phone models,
depending upon available accessories and
FCC requirements).
While there may be differences between
SAR levels of various phones and at various
positions, they all meet the government
requirement for safe exposure.
The FCC has granted an Equipment
Authorization for this model phone with
all reported SAR levels evaluated as in
compliance with the FCC RF emission
guidelines. SAR information on this model
phone is on file with the FCC and can be
found under the Display Grant section
of http://www.fcc.gov/oet/ea/fccid/ after
searching on FCC ID ZNFLG440G.
For Your Safety


Es posible que parte del contenido de este
manual no sea aplicable a su teléfono, en
función del software o del proveedor de
servicios.
Copyright ©2012 LG Electronics, Inc.
Todos los derechos reservados. LG y el
logotipo de LG son marcas registradas de
LG Group y sus entidades relacionadas.
Todas las demás marcas son propiedad de
sus respectivos titulares.
LG 440G Guía del usuario

2
Contenido . . . . . . . . . . . . . . . . . . . . . . . . . 2
El teléfono . . . . . . . . . . . . . . . . . . . . . . . . . 5
Componentes del teléfono . . . . . . . . . . . . . . . . . 5
Vista posterior . . . . . . . . . . . . . . . . . . . . . . . . . . . 7
Introducción . . . . . . . . . . . . . . . . . . . . . . . 8
Instalación de la tarjeta SIM y la batería . . . . . . 8
Cargar el teléfono . . . . . . . . . . . . . . . . . . . . . . . 10
Funciones generales . . . . . . . . . . . . . . . 12
Antes de comenzar . . . . . . . . . . . . . . . . . . . . . . 12
Hacer una llamada . . . . . . . . . . . . . . . . . . . . . . 12
Responder una llamada . . . . . . . . . . . . . . . . . . 13
Ajuste del volumen . . . . . . . . . . . . . . . . . . . . . . 14
Introducir texto . . . . . . . . . . . . . . . . . . . . . . . . . 14
Menú En llamada . . . . . . . . . . . . . . . . . . 17
Durante una llamada . . . . . . . . . . . . . . . . . . . . . 17
Hacer una segunda llamada . . . . . . . . . . . . . . . 17
Alternar entre dos llamadas . . . . . . . . . . . . . . . 17
Responder una llamada entrante . . . . . . . . . . . 17
Rechazar una llamada entrante . . . . . . . . . . . . 18
Silenciar el micrófono. . . . . . . . . . . . . . . . . . . . 18
Usando el altavoz . . . . . . . . . . . . . . . . . . . . . . . 18
Menús del teléfono . . . . . . . . . . . . . . . . . 19
Contactos . . . . . . . . . . . . . . . . . . . . . . . . 23
Lista de contactos . . . . . . . . . . . . . . . . . . . . . . . 23
Nuevo Contacto . . . . . . . . . . . . . . . . . . . . . . . . . 23
Grupos . . . . . . . . . . . . . . . . . . . . . . . . . . . . . . . . 23
Lista de Marcación Rápida . . . . . . . . . . . . . . . . 23
Administración de la Tarjeta SIM . . . . . . . . . . . 24
Número Propio . . . . . . . . . . . . . . . . . . . . . . . . . 24
Mi tarjeta de visita . . . . . . . . . . . . . . . . . . . . . . 24
Mensajería . . . . . . . . . . . . . . . . . . . . . . . 25
Crear mensaje . . . . . . . . . . . . . . . . . . . . . . . . . . 25
Buzón de Entrada . . . . . . . . . . . . . . . . . . . . . . . 28
Borradores . . . . . . . . . . . . . . . . . . . . . . . . . . . . . 29
Buzón de Salida . . . . . . . . . . . . . . . . . . . . . . . . 29
Config. de Mensaje . . . . . . . . . . . . . . . . . . . . . . 30
Alerta de Mensajes . . . . . . . . . . . . . . . . . . . . . 30
Guardar en . . . . . . . . . . . . . . . . . . . . . . . . . . . 30
Firma . . . . . . . . . . . . . . . . . . . . . . . . . . . . . . . 30
Mensaje de Texto . . . . . . . . . . . . . . . . . . . . . . . 30
Mensaje Multimedia . . . . . . . . . . . . . . . . . . . . . 31
Correo de Voz . . . . . . . . . . . . . . . . . . . . . . . . . 32
Música . . . . . . . . . . . . . . . . . . . . . . . . . . 33
Música . . . . . . . . . . . . . . . . . . . . . . . . . . . . . . . . 33
Servicios adicionales de música . . . . . . . . . . . . 35
Llamadas Recientes . . . . . . . . . . . . . . . . 36
Juegos. . . . . . . . . . . . . . . . . . . . . . . . . . . 36
Contenido

3
E-mail . . . . . . . . . . . . . . . . . . . . . . . . . . . 37 Enviar un mensaje de correo electrónico a través de una cuenta nueva . . . . . . . . . . . . . . . . . . . . 37Recuperar sus mensajes de correo electrónico . 37Carpetas de mensajes . . . . . . . . . . . . . . . . . . . 37Cambiar la configuración del correo electrónico 38
Cámara . . . . . . . . . . . . . . . . . . . . . . . . . . 39Tomar Foto . . . . . . . . . . . . . . . . . . . . . . . . . . . 39Grabar Video . . . . . . . . . . . . . . . . . . . . . . . . . . 40Álbum de la Cámara . . . . . . . . . . . . . . . . . . . . 41
Mi Carpeta . . . . . . . . . . . . . . . . . . . . . . . 42Audio . . . . . . . . . . . . . . . . . . . . . . . . . . . . . . . . . 42
Imágenes . . . . . . . . . . . . . . . . . . . . . . . . . . . . . . 42
Video . . . . . . . . . . . . . . . . . . . . . . . . . . . . . . . . . 42
Otros Archivos . . . . . . . . . . . . . . . . . . . . . . . . . . 42
Admin . Archivos . . . . . . . . . . . . . . . . . . . . . . . . 43
Herramientas . . . . . . . . . . . . . . . . . . . . . 44Comando de voz . . . . . . . . . . . . . . . . . . . . . . . 44Alarma . . . . . . . . . . . . . . . . . . . . . . . . . . . . . . 46Calendario . . . . . . . . . . . . . . . . . . . . . . . . . . . . 47Bloc de Notas . . . . . . . . . . . . . . . . . . . . . . . . . 48Calculadora . . . . . . . . . . . . . . . . . . . . . . . . . . . 48Tareas . . . . . . . . . . . . . . . . . . . . . . . . . . . . . . . 48Cronómetro . . . . . . . . . . . . . . . . . . . . . . . . . . . 49Calc . de propinas . . . . . . . . . . . . . . . . . . . . . . . 50Conversor de Unidad . . . . . . . . . . . . . . . . . . . . 50Grabador de voz . . . . . . . . . . . . . . . . . . . . . . . 50
Acceso Web . . . . . . . . . . . . . . . . . . . . . . 51
Configuración . . . . . . . . . . . . . . . . . . . . . 53Audio y tonos de timbre . . . . . . . . . . . . . . . . . . 53
Timbre . . . . . . . . . . . . . . . . . . . . . . . . . . . . . . 53Tono de Mensaje . . . . . . . . . . . . . . . . . . . . . . . 53Tono de Alerta . . . . . . . . . . . . . . . . . . . . . . . . . 53Tono de Teclado . . . . . . . . . . . . . . . . . . . . . . . . 54Multimedia . . . . . . . . . . . . . . . . . . . . . . . . . . . 54Llamada . . . . . . . . . . . . . . . . . . . . . . . . . . . . . 54
Config . del teléfono . . . . . . . . . . . . . . . . . . . . . . 54Idiomas . . . . . . . . . . . . . . . . . . . . . . . . . . . . . . 54Fijar teclas de acceso directo . . . . . . . . . . . . . . 54Modo de Avión . . . . . . . . . . . . . . . . . . . . . . . . . 55Seguridad . . . . . . . . . . . . . . . . . . . . . . . . . . . . 55Restaurar Configuraciones . . . . . . . . . . . . . . . . 55
Pantalla . . . . . . . . . . . . . . . . . . . . . . . . . . . . . . . 56Fondos de Pantalla . . . . . . . . . . . . . . . . . . . . . 56Fuentes . . . . . . . . . . . . . . . . . . . . . . . . . . . . . . 56Relojes y calendario . . . . . . . . . . . . . . . . . . . . . 56Brillo . . . . . . . . . . . . . . . . . . . . . . . . . . . . . . . . 56Tiempo de Luz de Fondo . . . . . . . . . . . . . . . . . 56Estilos de menú . . . . . . . . . . . . . . . . . . . . . . . . 57
Llamada . . . . . . . . . . . . . . . . . . . . . . . . . . . . . . . 57Enviar Mi Número . . . . . . . . . . . . . . . . . . . . . . 57Modo de Respuesta . . . . . . . . . . . . . . . . . . . . . 57Modo Senior . . . . . . . . . . . . . . . . . . . . . . . . . . 58Duración Y Costo . . . . . . . . . . . . . . . . . . . . . . . 58Accesibilidad . . . . . . . . . . . . . . . . . . . . . . . . . . 58

4
Bluetooth . . . . . . . . . . . . . . . . . . . . . . . . . . . . . . 58Activar/Desactivar . . . . . . . . . . . . . . . . . . . . . . 59Buscar Nuevo Aparato . . . . . . . . . . . . . . . . . . . 59Mis Aparatos . . . . . . . . . . . . . . . . . . . . . . . . . . 59Mi Info de Bluetooth . . . . . . . . . . . . . . . . . . . . . 59
Memoria . . . . . . . . . . . . . . . . . . . . . . . . . . . . . . 60Espacio Utilizado . . . . . . . . . . . . . . . . . . . . . . . 60
Aplicaciones . . . . . . . . . . . . . . . . . . . . . . . . . . . 61Mensajes . . . . . . . . . . . . . . . . . . . . . . . . . . . . . 61Acceso Web . . . . . . . . . . . . . . . . . . . . . . . . . . 61Comando de Voz . . . . . . . . . . . . . . . . . . . . . . . 63TTS (texto a voz) . . . . . . . . . . . . . . . . . . . . . . . 63
Información del teléfono . . . . . . . . . . . . . . . . . . 63
Accesorios . . . . . . . . . . . . . . . . . . . . . . . 64
Por su seguridad . . . . . . . . . . . . . . . . . . 65
Contenido

5
El teléfono
Componentes del teléfono
1
2
3
56
4
7
Toque y mantenga presionada esta tecla para activar el Modo Vibración.
891011
13
12

6
1. Auricular: Permite escuchar a la persona
que llama.
2. Pantalla LCD principal: Muestra a todo
color los iconos de estado del teléfono, los
elementos de los menús, los elementos
web, la información web, las fotos y
mucho más.
3. Teclas Suave Derecha e Izquierda:
Cada una de estas teclas ejecuta las
funciones indicadas por el texto en
pantalla ubicado justo sobre ellas.
4. Tecla de Cámara: Permite activar la
cámara y tomar fotografías.
5. Tecla rápida Mensaje: pulse esta tecla
para ir directamente a Crear mensaje.
6. Teclas de Navegación
- Funciones de la pantalla principal:
Juegos
Lista de contactos
Alarma
Música
- En un menú: Permite desplazarse por los
menús.
7. Tecla Enviar: Oprima esta tecla
en el modo de espera para acceder
rápidamente a las llamadas entrantes,
salientes y perdidas más recientes.
También marca llamadas cuando introduce
un número.
8. Tecla Borrar/Atrás: Oprima esta tecla
para regresar a la pantalla anterior.
También puede mantener oprimida para
activar la función Comando de voz.
9. Tecla Modo TTS: Le permite activar o
desactivar el modo TTS.
10. Tecla OK: Seleccione opciones y menús.
11. Tecla Fin/Encender: Permite encender
o apagar el teléfono, finalizar llamadas o
volver al modo de espera.
12. Teclas de Volumen: Permiten controlar
el volumen de los tonos de timbre
cuando el teléfono está en modo de
espera y el volumen del auricular durante
una llamada.
13. Puerto para Cargador/USB: Permite
conectar un cargador u otros accesorios
admitidos.
El teléfono

7
Vista posterior
Tapa posterior
Ranura para
Tarjeta SIMBatería

8
Instalación de la tarjeta SIM y la batería
1. Extraiga la tapa posterior
Coloque su pulgar en la parte superior de
la tapa posterior y deslícela hacia abajo
para extraerla.
2. Extraiga la batería
Sostenga el borde superior del teléfono
y use la abertura de dedos cerca de la
parte inferior de la batería para levantar la
batería del teléfono.
Advertencia
No retire la batería cuando el teléfono
esté encendido porque puede dañarlo.
Introducción

9
3. Inserte la tarjeta SIM
Deslice la tarjeta SIM hasta colocarla
en su ranura. Asegúrese de que el área
de contactos dorados de la tarjeta esté
orientada hacia abajo. Para retirar la
tarjeta SIM, tire suavemente hacia la
dirección contraria.
4. Inserte la batería
Inserte primero la parte superior de
la batería en el borde superior del
compartimiento de la batería. Asegúrese
de que el área de contacto de la batería
esté alineada con los terminales del
teléfono. Oprima la parte inferior de la
batería hasta que encaje en su lugar.
5. Instale la tapa posterior
Alinee la tapa posterior sobre el
compartimiento de la batería y deslícela
hacia arriba hasta que se trabe en su
lugar.

10
Información y cuidado de la batería
Siempre desconecte el cargador de la
toma después de cargar completamente el
teléfono para evitar el consumo de energía
no necesario del cargador.
Cargar el teléfonoUbique el Puerto para Cargador/USB en
el lado izquierdo del teléfono LG 440G de
LG. Inserte el conector del cargador en
el teléfono (el lado “B” del conector debe
orientarse hacia arriba al conectarlo en el
teléfono) y luego enchufe el cargador en la
toma de la pared. El teléfono LG 440G de
LG deberá cargarse hasta que aparezca en
la pantalla un mensaje que indique que la
batería está totalmente cargada.
Importante
Debe insertar la batería antes de cargarla.
Advertencia
El uso de accesorios no autorizados
podría dañar el teléfono y anular la
garantía.
Introducción

11
Iconos en pantalla
La tabla debajo describe varios indicadores
o iconos que aparecen en la pantalla de
visualización del teléfono.
ICONO/
INDICADOR DESCRIPCIÓN
Potencia de la señal de red
(varía la cantidad de barras)
Sin señal de red
Batería baja
Nuevo mensaje de texto
Nuevo correo eletrónico
Hay una alarma establecida
Perfil de Timbre en uso
Perfil de Silencio en uso
Red EDGE disponible
Bluetooth activo
Red 3G disponible
El navegador está activo
ICONO/
INDICADOR DESCRIPCIÓN
Modo vibración activado
Altavoz
Llamada en curso
Correo de voz
Batería llena
Batería cargando
Modo de Avión activado
Cámara en uso
Videocámara grabando
Temporizador de la videocámara

12
Antes de comenzarRecuerde que puede seleccionar los iconos
de menú en la pantalla Menú utilizando las
teclas numéricas si establece Estilos de
menú como Lista. Si establece Estilos de
menú como Icono, sólo puede utilizar las
Teclas de Navegación para seleccionar los
iconos del menú.
Hacer una llamada1 Asegúrese de que el teléfono esté
encendido.
2 Ingrese un número de teléfono, incluido
el código de área. Para modificar un
número que aparece en la pantalla de
visualización, sólo tiene que oprimir la
Tecla Borrar/Atrás y borrar los dígitos,
de a uno por vez.
Mantenga oprimida la Tecla Borrar/
Atrás para borrar todo el número.
3 Oprima la Tecla Enviar para llamar
al número seleccionado.
4 Para finalizar la llamada, oprima la Tecla
Fin/Encender .
Hacer una llamada con la Tecla
Enviar
1 Oprima la Tecla Enviar y aparecerán
los historiales de las llamadas recibidas,
realizadas y perdidas más recientes.
2 Resalte el número que desea usar con las
Teclas de Navegación.
3 Oprima la Tecla Enviar .
Hacer llamadas internacionales
1 Mantenga oprimida la tecla y
aparecerá “+”, el carácter de larga
distancia internacional.
2 Introduzca el código de país, el código de
área y el número de teléfono.
3 Oprima la Tecla Enviar .
Finalizar una llamada
Para finalizar una llamada, oprima la Tecla
Fin/Encender .
Funciones generales

13
Hacer una llamada desde
contactos
Es posible guardar nombres de personas
y números de teléfono a los que llama con
frecuencia en la tarjeta SIM y también la
Lista de Contactos.
Se puede marcar un número con sólo
resaltar un nombre de la Lista de Contactos
y oprimir la Tecla Enviar .
1 Oprima la Tecla de Navegación inferior
para acceder a la Lista de
Contactos.
2 Resalte el Contacto y oprima la Tecla
Enviar .
Responder una llamadaAl recibir una llamada, el teléfono suena
y/o vibra y una notificación aparece en la
pantalla. Si la persona que llama puede
ser identificada, se mostrará el número de
teléfono (o el nombre, si almacenado en la
Contactos).
1 Oprima la Tecla Enviar o la Tecla
Suave Izquierda Aceptar para
contestar una llamada entrante.
Si el Modo de Respuesta se ha
establecido en Cualquier tecla (
Menú > Configuración >
Llamada > Modo de Respuesta),
puede oprimir cualquier tecla para
responder la llamada, excepto la Tecla
Fin/Encender , la Tecla Suave
Derecha o las Teclas de Volumen.
2 Para finalizar la llamada, oprima la Tecla
Fin/Encender .
Nota
Puede responder una llamada mientras
usa otras funciones del menú.

14
Ajuste del volumenSi desea ajustar el volumen de los
auriculares durante una llamada, use las
Teclas de Volumen del teléfono.
En el modo de inactividad, puede ajustar
el volumen del timbre con las Teclas de
Volumen.
Modo vibración (Rápido)
El Modo vibración se puede activar al
mantener oprimida la tecla .
Potencia de la señal
Si está dentro de un edificio, ubicándose
cerca de una ventana puede mejorar la
recepción. Se puede conocer la potencia de
la señal a través del indicador de señal que
aparece en la pantalla de visualización del
teléfono.
Introducir textoPuede introducir caracteres alfanuméricos
usando el teclado del teléfono. Por ejemplo,
ya sea para guardar nombres en la Lista de
Contactos, escribir un mensaje o planeando
actividades en el calendario, es necesario
introducir texto.
Cambio del modo de entrada
de texto
Para cambiar el modo de entrada de texto,
oprima al encontrarse en un campo de
entrada de texto.
Puede comprobar el modo de entrada de
texto actual en la parte superior derecha de
la pantalla.
El teléfono cuenta con los siguientes modos
de entrada de texto.
Modo ABC
Este modo le permite introducir letras
oprimiendo la tecla etiquetada con la letra
requerida.
Funciones generales

15
Modo 123 (Modo de números)
Introduzca los números oprimiendo la tecla
una vez por número. Para cambiar al modo
123 en un campo de entrada de texto,
oprima la tecla hasta que se muestre
el modo 123 en la esquina superior derecha.
Modo símbolo
El modo símbolo le permite introducir
varios símbolos o caracteres especiales.
Para introducir un símbolo, oprima la tecla
. Use las Teclas de Navegación para
resaltar el símbolo que desea y oprima la
Tecla OK .
Uso del modo ABC
Utilice las teclas alfanuméricas para
introducir el texto.
1 Oprima la tecla que tenga impresa la letra
deseada.
2 Para insertar un espacio, oprima la tecla
una vez. Para borrar letras, oprima
la Tecla Borrar/Atrás . Mantenga
oprimida la Tecla Borrar/Atrás para
borrar todo el texto introducido.
TeclaCaracteres en orden de aparición
Mayúsculas Minúsculas
1 . , ’ @ ? ! - : / 1 . , ’ @ ? ! - : / 1
2 A Á B C 2 a á b c 2
3 D E É F 3 d e é f 3
4 G H I Í 4 g h i í 4
5 J K L 5 j k l 5
6 M N Ñ O Ó 6 m n ñ o ó 6
7 P Q R S 7 p q r s 7
8 T U Ú Ü V 8 t u ú ü v 8
9 W X Y Z 9 w x y z 9
0
Tecla de espacio,
0 (mantener
presionado)
Tecla de espacio,
0 (mantener
presionado)

16
Uso del modo 123 (modo de
números)
El modo 123 le permite introducir números
en un mensaje de texto (un número de
teléfono, por ejemplo) con mayor rapidez.
Oprima las teclas correspondientes a los
dígitos que quiere marcar y luego regrese
manualmente al modo de entrada de texto
que corresponda.
Funciones generales

17
Durante una llamadaEl teléfono brinda una cantidad de funciones
de control que pueden utilizarse durante una
llamada. Para acceder a estas funciones
durante una llamada, oprima la Tecla Suave
Izquierda Opciones.
Hacer una segunda llamada
Es posible seleccionar un número de la
Contactos y hacer una segunda llamada.
1 Oprima la Tecla Suave Izquierda
Opcions y seleccione Contactos.
2 Resalte el contacto y oprima la Tecla
Enviar para hacer una segunda
llamada.
Alternar entre dos llamadas
Cuando existen dos llamadas activas, puede
alternar entre una y otra a través uno de los
siguientes tres métodos:
Oprima la Tecla Enviar .
Oprima la Tecla Suave Izquierda
Opcions y luego seleccione
Intercambiar llamadas.
Oprima la Tecla de Navegación hacia
arriba o abajo.
Responder una llamada
entrante
Para responder una llamada entrante
cuando el teléfono está sonando, oprima
la Tecla Enviar . El teléfono también
puede advertirle que tiene una llamada
entrante mientras está respondiendo otra
llamada. Suena un tono en el auricular y la
pantalla muestra que una segunda llamada
está en espera. Esta función, conocida como
Llamada en espera, sólo estará disponible
si su red la admite.
Si la llamada en espera está activada, es
posible poner en espera la primera llamada
y contestar la segunda oprimiendo la Tecla
Enviar .
Menú En llamada

18
Rechazar una llamada entrante
Es posible rechazar una llamada entrante
y no contestarla al oprimir la Tecla Fin/
Encender .
Silenciar el micrófono
Durante una llamada, puede silenciar el
micrófono si oprima la Tecla Suave Derecha
Silencio. Se puede anular el silencio
del teléfono al oprimir la Tecla Suave
Derecha No sil. Si silencia el teléfono,
la persona que lo llama no podrá oírlo, pero
usted sí la oirá.
Usando el altavoz
Durante una llamada puede usar el altavoz
integrado si oprima la Tecla OK Enc
Altvz.
El altavoz se desactiva automáticamente
cuando finaliza la llamada.
Advertencia
Debido al aumento en el nivel del
volumen, no coloque el teléfono cerca de
su oído mientras está activado el altavoz.
Menú En llamada

19
1. Prepago
[Single Tank -TF / Net 10]
1.1 Añadir Tiempo Celular
1.2 Comprar Tiempo Celular
1.3 Mi Número Telefónico
1.4 Mi Saldo de Tiempo Celular
1.5 Mostrar Tiempo Celular
1.6 Número de Serie
1.7 Número de SIM
1.8 Modo Ingreso de Código
[Straight Talk - Single Tank]
1.1 Añadir Tiempo Celular
1.2 Mi Número Telefónico
1.3 Fecha de Vencimiento del Servicio
1.4 Número de Serie
1.5 Número de SIM
1.6 Modo Ingreso de Código
[Straight Talk - Multi Tank]
1.1 Añadir Tiempo Celular
1.2 Mi Número Telefónico
1.3 Mi Balance
1.4 Número de Serie
1.5 Número de SIM
1.6 Modo Ingreso de Código
2. Contactos
2.1 Lista de contactos
2.2 Nuevo Contacto
2.3 Grupos
2.4 Lista de Marcación Rápida
2.5 Administración de la Tarjeta SIM
2.6 Número Propio
2.7 Mi tarjeta de visita
3. Mensajes
3.1 Nuevo mensaje
3.2 Buzón de Entrada
3.3 Borradores
3.4 Buzón de Salida
3.5 Config. de Mensaje
Menús del teléfono

20
4. Musica
4.1 Reproduciendo Ahora
4.2 Todas Las Canciones
4.3 Listas de Reproducción
4.4 Artistas
4.5 Álbumes
4.6 Géneros
4.7 Reproducción Aleatoria
5. Llamadas Recientes
5.1 Todas Llamadas
5.2 Llamadas Perdidas
5.3 Llamadas Realizadas
5.4 Llamadas Recibidas
6. Juegos
6.1 Comprar juegos
6.2 [Aplicaciones precargadas]
7. E-mail
7.1 Escribir e-mail
7.2 [Cuentas]
8. Cámara
8.1 Tomar Foto
8.2 Grabar Video
8.3 Álbum de la Cámara
9. Mi Carpeta
9.1 Audio
9.2 Imágenes
9.3 Video
9.4 Otros Archivos
9.5 Admin. Archivos
10. Herramientas
10.1 Correo de Voz
10.2 Alarma
10.3 Calendario
10.4 Bloc de Notas
10.5 Calculadora
10.6 Tareas
10.7 Cronómetro
10.8 Calc. de propinas
10.9 Conversor de Unidad
10.10 Grabador de Voz
10.11 SIM App.
Menús del teléfono
21
11. Acceso Web
12. Configuración
12.1 Audio y tonos de timbre
12.1.1 Timbre
12.1.2 Tono de Mensaje
12.1.3 Tono de Alerta
12.1.4 Tono de Teclado
12.1.5 Multimedia
12.1.6 Llamada
12.2 Config. del teléfono
12.2.1 Idiomas
12.2.2 Estabelcer teclas de acceso directo
12.2.3 Modo de Avión
12.2.4 Seguridad
12.2.5 Restaurar Configuraciones
12.3 Pantalla
12.3.1 Fondos de Pantalla
12.3.2 Fuentes
12.3.3 Relojes y calendario
12.3.4 Brillo
12.3.5 Tiempo de Luz de Fondo
12.3.6 Estilos de menú
12.4 Llamada
12.4.1 Enviar Mi Número
12.4.2 Modo de Respuesta
12.4.3 Modo Senior
12.4.4 Duración Y Costo
12.4.5 Accesibilidad
12.5 Bluetooth
12.5.1 Activar(Desactivar)
12.5.2 Buscar Nuevo Aparato
12.5.3 Mis Aparatos
12.5.4 Mi Info de Bluetooth

22
12.6 Memoria
12.6.1 Espacio Utilizado
12.7 Aplicaciones
12.7.1 Mensajes
12.7.2 Acceso Web
12.7.3 Comandos de Voz
12.7.4 TTS
12.8 Información del teléfono
Menús del teléfono

23
Lista de contactosEste menú permite guardar y administrar
información sobre las direcciones de los
contactos. La Lista de contactos le permite
agregar nuevas direcciones o buscar las
direcciones de contactos guardadas por
nombre.
Para acceder Lista de contactos, desde la
pantalla de espera, oprima la Tecla Suave
Izquierda Menú, Contactos y
Lista de contactos.
Nuevo ContactoEste menú permite agregar un nuevo
contacto a la Lista de contactos. También
puede introducir información sobre los
contactos, como nombres, números de
teléfono, direcciones de correo electrónico,
información sobre el grupo, notas, tonos de
timbre y una imagen de identificación del
contacto.
Para acceder Nuevo Contacto, desde la
pantalla de espera, oprima la Tecla Suave
Izquierda Menú, Contactos y
Nuevo Contacto.
GruposEste menú permite administrar información
sobre los grupos. También puede
configurar un tono de timbre para un grupo
determinado.
Cuando reciba una llamada de una dirección
de contacto perteneciente a ese grupo y no
haya un tono de timbre configurado para esa
dirección de contacto específica, escuchará
el tono de timbre elegido.
Para acceder Grupos, desde la pantalla de
espera, oprima la Tecla Suave Izquierda
Menú, Contactos y Grupos.
Lista de Marcación RápidaEste menú permite configurar los números
de marcación rápida. Se puede seleccionar
un número del 2 al 9 como marcación
rápida.
Para acceder Lista de Marcación Rápida,
desde la pantalla de espera, oprima la Tecla
Suave Izquierda Menú, Contactos y
Lista de Marcación Rápida.
Contactos

24
Administración de la Tarjeta SIMEste menú permite copiar información de
la tarjeta SIM al teléfono y viceversa. Si un
nombre es duplicado durante la función de
copiar, la información también se duplica.
También puede borrar información de la
tarjeta SIM.
Para acceder Administración de la Tarjeta
SIM, desde la pantalla de espera, oprima
la Tecla Suave Izquierda Menú,
Contactos y Administración de la
Tarjeta SIM.
Número PropioMuestra los números de teléfono
almacenados en la tarjeta SIM.
Para acceder Número Propio, desde la
pantalla de espera, oprima la Tecla Suave
Izquierda Menú, Contactos y
Número Propio.
Mi tarjeta de visitaEste menú muestra su tarjeta de visita
almacenada en su teléfono. También puede
borrarla o editarla.
Para acceder Mi tarjeta de visita, desde la
pantalla de espera, oprima la Tecla Suave
Izquierda Menú, Contactos y
Mi tarjeta de visita.
Contactos

25
Este menú incluye funciones relacionadas
con los servicios SMS (servicio de mensajes
cortos), MMS (servicio de mensajes
multimedia) y Correo de Voz, así como con
los mensajes de servicio de la red.
Crear mensaje1 Desde la pantalla de espera, oprima la
Tecla Suave Izquierda Menú.
2 Seleccione Mensajes.
3 Oprima Nuevo mensaje.
O
Simplemente oprima la Tecla Rápida
Mensaje desde la pantalla de espera.
Nota
Si inserta un archivo de imagen, audio o
video al escribir un mensaje multimedia,
el tiempo de carga del archivo será
de unos 5 segundos. No podrá activar
ninguna tecla durante el tiempo de carga.
Cuando se complete la carga del archivo,
podrá escribir un mensaje de multimedia.
Editar un mensaje
Las siguientes opciones están disponibles al
editar un mensaje.
Usando Insertar
Mientras introduzca texto, oprima la
Tecla Suave Derecha Insertar. Las
siguientes opciones están disponibles:
Símbolo: Permite insertar varios
símbolos en el mensaje. Desplácese por
las páginas con la Tecla Suave Izquierda
y la Tecla Suave Derecha .
Imagen: Permite seleccionar una
imagen e insertarla usando las Teclas
de Navegación. Se puede obtener una
vista previa de la imagen seleccionada al
oprimir la Tecla Suave Derecha Ver.
Audio: Permite insertar un archivo
de audio de los archivos de audio
guardados.
Video: Permite insertar un clip de video
de los archivos de video guardados.
Tomar otra foto: Puede tomar e insertar
una foto en su mensaje.
Mensajería
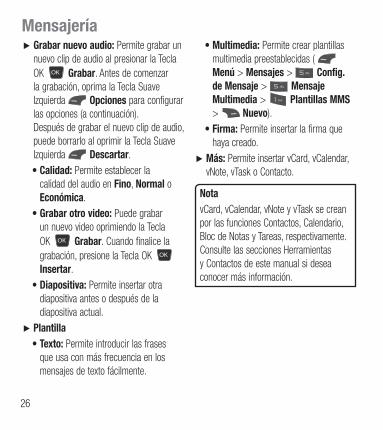
26
Grabar nuevo audio: Permite grabar un
nuevo clip de audio al presionar la Tecla
OK Grabar. Antes de comenzar
la grabación, oprima la Tecla Suave
Izquierda Opciones para configurar
las opciones (a continuación).
Después de grabar el nuevo clip de audio,
puede borrarlo al oprimir la Tecla Suave
Izquierda Descartar.
Calidad: Permite establecer la
calidad del audio en Fino, Normal o
Económica.
Grabar otro video: Puede grabar
un nuevo video oprimiendo la Tecla
OK Grabar. Cuando finalice la
grabación, presione la Tecla OK
Insertar.
Diapositiva: Permite insertar otra
diapositiva antes o después de la
diapositiva actual.
Plantilla
Texto: Permite introducir las frases
que usa con más frecuencia en los
mensajes de texto fácilmente.
Multimedia: Permite crear plantillas
multimedia preestablecidas (
Menú > Mensajes > Config.
de Mensaje > Mensaje
Multimedia > Plantillas MMS
> Nuevo).
Firma: Permite insertar la firma que
haya creado.
Más: Permite insertar vCard, vCalendar,
vNote, vTask o Contacto.
Nota
vCard, vCalendar, vNote y vTask se crean
por las funciones Contactos, Calendario,
Bloc de Notas y Tareas, respectivamente.
Consulte las secciones Herramientas
y Contactos de este manual si desea
conocer más información.
Mensajería

27
Usar opciones
Mientras introduce texto, oprima la Tecla
Suave Izquierda Opciones.
Modo de entrada de texto: Establece
el modo de entrada de texto. Si desea
conocer más detalles al respecto, consulte
la sección Introducir texto (página 14).
Ajustes de entrada de texto
- Idioma de entrada de texto: Permite
establecer el idioma de entrada de texto
en inglés o español.
- Lista de palabras T9 más probables:
Muestra las palabras más probables a
medida que escribe.
- Predicción de palabra T9: Permite
que el teléfono prediga la siguiente
palabra cuando escribe en modo T9.
- Diccionario T9: Permite agregar,
eliminar, restaurar y modificar las
palabras.
Guardar en Borradores: Guarda el
mensaje en Borradores.
Cancelar mensaje: Permite salir del modo
de entrada de texto sin guardar el mensaje.
Enviar un mensaje
Una vez completado el mensaje oprima la
Tecla OK Enviar para seleccionar un
destinatario.
más opciones, oprima la Tecla Suave
Izquierda Opciones. En este
menú, puede elegir una de las siguientes
opciones.
- Introducir el número: Permite
introducir el número telefónico con el
teclado.
- Introducir e-mail: Permite introducir la
dirección de correo electrónico en lugar
del número de teléfono.
- Insertar símbolo: Permite introducir
símbolos.
- Grupos: Muestra los contactos en los
grupos guardados.
- Mensajes recientes: Permite elegir un
contacto de los mensajes recientes.
- Llamadas Recientes: Permite elegir
un contacto de las llamadas recientes.

28
- Opciones de entrega: Permite elegir
entre las opciones Agregar a CC y
Agregar a CCO.
- Guardar en Borradores: Permite
guardar el mensaje seleccionado en
Borradores.
- Cancelar mensaje: Permite cancelar el
mensaje.
Buzón de EntradaSe le dará una alerta cuando reciba
un mensaje. Los mensajes nuevos se
almacenan en el Buzón de Entrada. En el
Buzón de Entrada, puede identificar cada
mensaje mediante iconos. Si se le notifica
que recibió un mensaje multimedia, puede
descargar todo el mensaje multimedia
seleccionándolo en el Buzón de Entrada.
Para acceder al Buzón de Entrada, desde la
pantalla de espera, oprima la Tecla Suave
Izquierda Menú > Mensajes >
Buzón de Entrada.
Al presionar la Tecla Suave Derecha
Resp., puede responder al remitente del
mensaje.
Mientras está viendo el Buzón de Entrada,
oprima la Tecla Suave Izquierda
Opciones para las siguientes opciones:
Agregar a contacto: Permite guardar
el número de teléfono del remitente en la
Lista de Contactos.
Borrar: Permite borrar el mensaje actual.
Reenviar: Permite reenviar el mensaje
seleccionado a otra persona.
Copiar a teléfono/Copiar en SIM:
Permite copiar en el teléfono o la tarjeta
SIM según la ubicación en la que esté
almacenado el mensaje de texto.
Mover al teléfono/Mover a la tarjeta
SIM: Se puede mover al teléfono o a
SIM dependiendo del lugar donde esté
almacenado el mensaje de texto.
Seleccionar varios: Permite seleccionar
varios mensajes.
Ordenar por: Permite ordenar los
mensajes por fecha, remitente, leído/no
leído o asunto.
Mensajería

29
Detalles del mensaje: Permite ver
información sobre los mensajes recibidos
como tipo de mensaje, asunto, dirección
del remitente y hora del mensaje.
Borrar todos los mensajes leídos:
Permite borrar todos los mensajes leídos.
BorradoresLe permite ver y editar los mensajes
guardados como borradores.
Para acceder Borradores, desde la
pantalla de espera, oprima la Tecla Suave
Izquierda Menú, Mensajes y
Borradores. Oprimiendo la Tecla Suave
Derecha Borrar, le permite eliminar el
mensaje. Mientras está viendo Borradores,
oprima la Tecla Suave Izquierda
Opciones para las siguientes opciones:
Seleccionar varios: Permite seleccionar
varios mensajes de la lista para borrar.
Detalles del mensaje: Permite ver los
detalles del mensaje.
Buzón de SalidaEl Buzón de Salida es la ubicación en la
que se almacenan los mensajes enviados
recientemente. Al oprimir la Tecla Enviar
, puede realizar una llamada al número
del destinatario del mensaje seleccionado.
Si el mensaje no envía del Buzón de Salida,
recibirá una alerta de sonido junto con un
aviso de falla de envío del mensaje en la
pantalla.
Se reintentará enviar el mensaje fallido y,
después de dos intentos sin éxito, ya no
volverá a enviarlo en forma automática.
Para acceder al Buzón de Salida, desde la
pantalla de espera, oprima la Tecla Suave
Izquierda Menú, Mensajes y
Buzón de Salida.

30
Las siguientes opciones son disponible para
el Buzón de Salida al oprimir la Tecla Suave
Izquierda Opciones:
Borrar: Borra el mensaje seleccionado.
Editar: Permite editar el mensaje
seleccionado.
Seleccionar varios: Permite seleccionar
varios mensajes de la lista para borrar.
Ordenar por: Permite ordenar los
mensajes Buzón de Salida por remitente
o fecha.
Detalles del mensaje: Permite ver los
detalles del mensaje.
Presione la tecla de función derecha
Desviar para enviar el mensaje
seleccionado a otra persona.
Config. de MensajePara acceder Config. de Mensaje, desde la
pantalla de espera, oprima la Tecla Suave
Izquierda Menú, Mensajes y
Config. de Mensaje.
Alerta de Mensajes
Permite establecer los Sonidos, Volumen,
Tipo de Alerta e Intervalo de la alerta.
Guardar en
Permite elegir si desea guardar en la Tarjeta
SIM o el Teléfono.
Firma
Permite crear, editar y borrar su firma, la
cual puede configurarse para enviar con sus
mensajes enviados.
Mensaje de Texto
Permite establecer sus preferencias para
mensajes de texto.
Las siguientes opciones son disponibles:
Plantillas de texto: Mensajes
predefinidos que se pueden enviar
rápidamente.
Oprima la Tecla Suave Izquierda
Opciones para acceder a las siguientes
opciones:
Mensajería

31
Enviar: Permite enviar la plantilla
seleccionada vía Mensaje.
Borrar: Permite borrar el mensaje de
plantilla seleccionado.
Editar: Permite editar el mensaje de la
plantilla seleccionada.
Borrar todo: Permite borrar todos los
mensajes de la carpeta.
Cancelar: Cancela la plantilla que
estaba creando.
Número de centro de mensajes: Permite
ver y editar el número de teléfono para el
centro de mensajes. No edite a menos que
sea indicado por su proveedor de servicio.
Puerta de Enlace de Email: Permite
ver y editar el número de teléfono de la
Puerta de enlace de correo electrónico.
No edite a menos que sea indicado por
su proveedor de servicio.
Insertar firma: Permite activar o
desactivar la función Firma.
Mensaje Multimedia
Permite establecer sus preferencias para
mensajes multimedia.
Las siguientes opciones son disponibles:
Plantillas MMS: Permite agregar, editar
y borrar plantillas multimedia. Presione
la Tecla Suave Derecha Nuevo
para crear una plantilla nueva. Oprima la
Tecla Suave Izquierda Opciones
para acceder a las siguientes opciones
disponibles:
Modo de entrada de texto: Establece
el modo de entrada de texto. Si desea
conocer más detalles al respecto,
consulte la sección Introducir texto
(página 14).
Ajustes de la entrada de texto
- Idioma de entrada de texto: Permite
establecer el idioma de entrada de texto
en inglés o español.
- Lista de palabras T9 más probables:
Muestra las palabras más probables a
medida que escribe.

32
- Predicción de palabra T9: Permite
que el teléfono prediga la siguiente
palabra cuando escribe en modo T9.
- Diccionario T9: Permite agregar,
eliminar, restaurar y modificar las
palabras.
Cancelar: Permite salir del modo de
entrada de texto sin guardar el mensaje.
Correo de Voz
Este menú le permite configurar el número
del centro de correo de voz si esta función
es admitida por. Verifique con los detalles de
su servicio para poder configurar el teléfono
correctamente.
Mensajería

33
MúsicaPuede acceder Música oprimiendo la Tecla
Suave Izquierda Menú y seleccione
Música.
Las siguientes opciones están disponibles:
Todas Las Canciones: Permite ver
todas las canciones de la biblioteca de
música.
Listas de Reproducción: Permite crear
listas de reproducción.
Artistas: Muestra la lista de artistas de
todas las canciones de la biblioteca de
música y todas las canciones del artista
que elija.
Álbumes: Muestra la lista de álbumes
de todas las canciones de la biblioteca de
música y todas las canciones del álbum
que elija.
Géneros: Muestra la lista de géneros
de todas las canciones de la biblioteca
de música y todas las canciones de un
género específico.
Reproducción Aleatoria: Permite
reproducir todas las canciones de la
biblioteca de música en orden aleatorio.
Sugerencia
El reproductor de música reproduce
formatos como MP3, AAC, AAC+ y WMA.
Nota
Es probable que los archivos de música
estén protegidos por las leyes de derecho
de autor y propiedad intelectual. Antes de
descargar o copiar archivos, asegúrese de
cumplir con las condiciones de uso de las
leyes de materiales.
Música

34
Reproducción de música
Para escuchar la música que tiene en
su teléfono, siga estos pasos sencillos y
rápidos:
1 Oprima la Tecla Suave Izquierda
Menú para abrir el menú principal.
2 Seleccione Música y elija entre
Reproduciendo Ahora, Todas Las
Canciones, Listas de Reproducción,
Artistas, Álbumes y Géneros para
seleccionar su música o simplemente
puede seleccionar Reproducción Aleatoria
para reproducir las canciones en orden
aleatorio.
Reprod./
Pausa la canción seleccionada. Durante
la reproducción, oprima la Tecla de
Navegación hacia arriba o abajo para
cambiar el volumen y hacia la izquierda
o derecha para ir a la canción siguiente
o anterior.
Tecla Suave Izquierda Opciones
para acceder a otras funciones del
teléfono mientras la música continúa.
Agregar música al teléfonoPueden agregarse archivos de música al
teléfono usando cualquiera de los siguientes
métodos:
red de directamente al teléfono.
de suscripción de música.
Nota
Algunos sitios manejan grandes
volúmenes de datos (por ejemplo,
vistas previas mediante transmisión por
secuencias). Por eso, sería conveniente
que el usuario contara con un plan
de datos ilimitado antes de usar estos
servicios, para evitar gastos basados en el
uso de datos.
Es posible que se apliquen cargos
adicionales al descargar música, timbres,
etc.
Música

35
Servicios adicionales de música
Es posible que haya otras aplicaciones de
música de precargadas o disponibles para el
teléfono, que le permitirán:
de una canción a partir de una canción de
muestra.
Escuchar el último tema clásico, jazz, pop
o rock donde quiera que vaya.
las partes preferidas de sus canciones
favoritas, etc.

36
Este menú le permite ver la lista de llamadas
recibidas recientemente.
Para acceder a Llamadas Recientes desde
la pantalla de espera, oprima la Tecla
Suave Izquierda Menú y Llamadas
Recientes.
Puede acceder a la lista de Todas Llamadas,
Llamadas Perdidas, Llamadas Realizadas y
Llamadas Recibidas.
Este menú permite descargar o acceder a
varios Juegos.
Para acceder a Juegos desde la pantalla
de espera, oprima la Tecla Suave Izquierda
Menú y Juegos.
Llamadas Recientes Juegos

37
Enviar un mensaje de correo electrónico a través de una cuenta nueva
Para enviar o recibir correo electrónico, debe
configurar una cuenta de correo electrónico.
1 Oprima la Tecla Suave Izquierda
Menú, seleccione E-mail y elija la cuenta
que desee usar.
2 Oprima la Tecla Suave Izquierda
Opcions y elija Escribir e-mail
para escribir un correo electrónico.
3 Introduzca la dirección del destinatario
en el campo Para. Luego use la Tecla
de Navegación inferior para acceder los
campos Asunto y Mensajes.
4 Ingrese el texto con su teclado y oprima
la Tecla OK Enviar para enviar el
correo electrónico.
Recuperar sus mensajes de correo electrónico
1 Presione la tecla de función izquierda
Menú y seleccione Correo
electrónico.
2 Seleccione la cuenta que desee utilizar.
3 Presione la tecla de función izquierda
Opcions y seleccione Actualizar
para conectarse con su cuenta de correo
electrónico y sus mensajes nuevos.
Nota
Puede recuperar sus mensajes de correo
electrónico manualmente si Direct Push
está desactivado.
Carpetas de mensajes
Abra E-mail, oprima la Tecla Suave
Izquierda Opcions y seleccione
Buzón de e-mail. La lista de las carpetas
se muestra
Escribir e-mail: Permite crear un mensaje
nuevo.
Buzón de Entrada: Todos los mensajes de
correo electrónico recibidos se guardarán
en el Buzón de Entrada. Desde aquí puede
responder, reenviar y realizar otras acciones.
Borradores: Si no tiene tiempo para
terminar de escribir un correo electrónico,
puede guardar aquí lo que escribió hasta
ese momento.
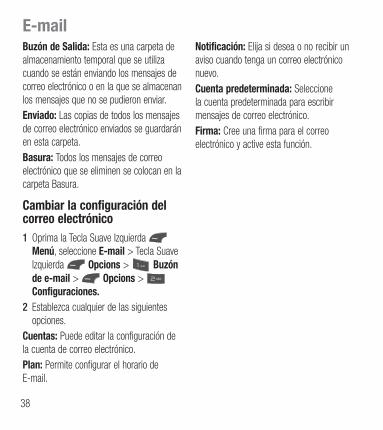
38
Buzón de Salida: Esta es una carpeta de
almacenamiento temporal que se utiliza
cuando se están enviando los mensajes de
correo electrónico o en la que se almacenan
los mensajes que no se pudieron enviar.
Enviado: Las copias de todos los mensajes
de correo electrónico enviados se guardarán
en esta carpeta.
Basura: Todos los mensajes de correo
electrónico que se eliminen se colocan en la
carpeta Basura.
Cambiar la configuración del correo electrónico
1 Oprima la Tecla Suave Izquierda
Menú, seleccione E-mail > Tecla Suave
Izquierda Opcions > Buzón
de e-mail > Opcions >
Configuraciones.
2 Establezca cualquier de las siguientes
opciones.
Cuentas: Puede editar la configuración de
la cuenta de correo electrónico.
Plan: Permite configurar el horario de
E-mail.
Notificación: Elija si desea o no recibir un
aviso cuando tenga un correo electrónico
nuevo.
Cuenta predeterminada: Seleccione
la cuenta predeterminada para escribir
mensajes de correo electrónico.
Firma: Cree una firma para el correo
electrónico y active esta función.

39
CámaraPara acceder Cámara desde la pantalla de
espera, oprima la Tecla Suave Izquierda
Menú y seleccione Cámara.
Tomar Foto
Con la cámara en su teléfono, puede tomar
fotografías de personas o acontecimientos
cuando esté en movimiento. Además, puede
enviar fotografías a otras personas en un
mensaje de imagen.
Las siguientes opciones aparecen (como
iconos) en la pantalla.
Álbum: Permite ver los archivos de
imagen y video guardados.
Video: Permite acceder a la
aplicación de video y grabar un clip de
video.
Capturar: Permite capturar la
imagen.
Zoom: Permite establecer el nivel
de zoom.
Brillo: Permite establecer el brillo.
Oprima la Tecla Suave Izquierda
Config. para las siguientes opciones:
Ficha Vista previa.
Tamaño de imagen: La imagen
se puede capturar con la resolución
1280*960, 640*480, 320*240.
Efectos de color: Incluye las opciones
Apagado, Bl. y negr, Sepia o Negativo.
Balance de blancos: Permite establecer
el balance de blancos en Auto, Luz de
día, Nublado, Iluminar e Interior.
Modo nocturno : Permite encender o
apagar el Modo nocturno.
Temporizador: Puede establecer el
temporizador en Apagado, 3 segundos,
5 segundos o 10 segundos.
Modo de disparo
- Normal: Este ajuste como modo normal
de la cámara.
- Toma continua: Esta función es
ideal para tomar fotos de objetos en
movimiento o de eventos deportivos.
El disparo continuo está disponible
solamente en el modo QVGA (320*240)
y permite establecer 3, 6 y 9 disparos
por evento.

40
Calidad de imagen: La calidad de la
imagen puede fijarse a Super fino, Fino
o Normal.
Ficha Otros
Tonos de obturador: Se pueden
establecer en Tono 1, Tono 2, Tono 3 o
Apagado.
Restaurar ajustes: Permite utilizar la
configuración predeterminada.
Uso del zoom
En el modo Cámara, puede acercar o alejar
la imagen con las Teclas de Volumen inferior
y superior. La escala máxima del zoom
depende de la resolución, de la siguiente
manera.
Resolución Escala del zoom
1280*960 No disponible
640*480 Nivel 1 a nivel 10
320*240 Nivel 1 a nivel 10
Grabar Video
El teléfono permite grabar un clip de video.
Antes de iniciar la grabación, oprima la
Tecla Suave Izquierda Config. para
establecer las opciones de configuración.
Las siguientes opciones aparecen (como
iconos) en la pantalla.
Álbum: Permite ver los archivos de
imagen y video guardados.
Foto: Permite pasar a la función
Cámara para tomar una foto.
Grabar: Inicia la grabación del video.
Zoom: Permite establecer el nivel
de zoom.
Brillo: Permite establecer el brillo.
Oprima la Tecla Suave Izquierda
Config. para las siguientes opciones:
Ficha Vista previa
Efectos de color: Incluye las opciones
Apagado, Bl. y negr, Sepia o Negativo.
Balance de blancos: Permite establecer
el balance de blancos en Auto, Luz de
día, Nublado, Iluminar e Interior.
Cámara
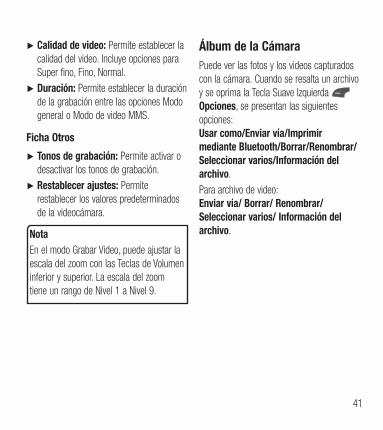
41
Calidad de video: Permite establecer la
calidad del video. Incluye opciones para
Super fino, Fino, Normal.
Duración: Permite establecer la duración
de la grabación entre las opciones Modo
general o Modo de video MMS.
Ficha Otros
Tonos de grabación: Permite activar o
desactivar los tonos de grabación.
Restablecer ajustes: Permite
restablecer los valores predeterminados
de la videocámara.
Nota
En el modo Grabar Video, puede ajustar la
escala del zoom con las Teclas de Volumen
inferior y superior. La escala del zoom
tiene un rango de Nivel 1 a Nivel 9.
Álbum de la Cámara
Puede ver las fotos y los videos capturados
con la cámara. Cuando se resalta un archivo
y se oprima la Tecla Suave Izquierda
Opciones, se presentan las siguientes
opciones:
Usar como/Enviar vía/Imprimir
mediante Bluetooth/Borrar/Renombrar/
Seleccionar varios/Información del
archivo.
Para archivo de video:
Enviar vía/ Borrar/ Renombrar/
Seleccionar varios/ Información del
archivo.

42
AudioPara acceder Audio, desde la pantalla de
espera, oprima la Tecla Suave Izquierda
Menú, Mi Carpeta y Audio.
Comprar tonos de timbre: Permite
comprar tonos de timbre.
Grabar Voz: Permite grabar notas de
voz.
Los archivos de audio guardados
aparecen en la lista.
ImágenesPara acceder Imágenes, desde la pantalla
de espera, oprima la Tecla Suave Izquierda
Menú, Mi Carpeta e
Imágenes.
Comprar gráficos: Lo conecta con el
sitio de descarga de gráficos de color de.
Tomar Foto: Permite tomar una foto.
Se muestran los archivos de imagen
guardados en el teléfono.
VideoPara acceder Video, desde la pantalla de
espera, oprima la Tecla Suave Izquierda
Menú, Mi Carpeta y Video.
Grabar Video : Permite grabar un video.
Se muestran los archivos de video
guardados en el teléfono.
Otros ArchivosLos archivos de formato indefinido (como
.vcs, .vcf, entre otros) que reciba por correo
electrónico se guardarán en esta carpeta.
Para acceder Otros Archivos, desde la
pantalla de espera, oprima la Tecla Suave
Izquierda Menú, Mi Carpeta y
Otros Archivos.
Están disponibles las siguientes opciones
al oprimir la Tecla Suave Izquierda
Opciones:
Enviar vía: Envía el archivo seleccionado
mediante Mensaje, E-mail o Bluetooth.
Mi Carpeta

43
Borrar: Permite borrar el archivo
seleccionado.
Mover: Permite mover el archivo
seleccionado.
Copiar: Permite copiar el archivo
seleccionado.
Renombrar: Permite editar el nombre
del archivo seleccionado.
Seleccionar varios: Permite seleccionar
múltiple archivos a la vez para realizar
varias funciones.
Ordenar por: Permite ordenar los
archivos por Nombre, Fecha y Tipo.
Información del archivo: Permite ver
información sobre el archivo seleccionado
o el espacio utilizado en su teléfono.
Admin. Archivos Esta función le permite ver el contenido en
la memoria interna de su teléfono.
Para acceder Admin. Archivos, desde la
pantalla de espera, oprima la Tecla Suave
Izquierda Menú, Mi Carpeta y
Admin. Archivos.

44
Comando de voz
El Comando de Voz es la función por la que
el mecanismo de reconocimiento de voz
del teléfono identifica la voz del usuario y
ejecuta los comandos solicitados. Cuando el
usuario opera la función Comando de Voz,
hay cuatro comandos posibles, Call <Name
or Number>, Listen Voicemail, Missed
Calls, y Time & Date. Para activar la función
Comando de Voz, mantenga oprimida
la Tecla Borrar/Atrás mientras el
teléfono está en modo de espera u oprima
la Tecla Suave Izquierda Menú,
Herramientas y Comando de Voz.
Nota
La función Comando de Voz sólo admite
comandos en inglés. Por favor diga los
comandos en inglés para utilizar esta
función.
1 Call <Name or Number>: Esta función
se activa sólo si el usuario dice el
comando “Call” (Llamar) seguido por el
nombre almacenado en la agenda o el
número de teléfono específico.
Tenga en cuenta que el ruido de
interferencia puede ocasionar problemas
para mostrar los resultados. Además, el
usuario tiene la opción de seleccionar un
tipo de número al final como “mobile”
(móvil), “home” (casa) o “work” (trabajo).
2 Listen Voicemail: Este comando se
activa cuando el usuario dice “Listen
Voicemail” (Escuchar correo de voz).
Se conectará con su Correo de Voz
automáticamente.
3 Missed Calls: Este comando se
activa cuando el usuario dice “Missed
Calls”(Llamadas perdidas). El teléfono
móvil presenta la lista de llamadas
perdidas.
Comandos de seguimiento
disponibles
- Yes (Sí): Permite marcar la llamada.
- No: Permite mover al siguiente
resultado.
- Cancel (Cancelar): Permite volver al
menú principal de Comandos de Voz.
- Exit (Salir): Permite finalizar la función
de Comandos de Voz.
Herramientas

45
- Next (Siguiente): Permite mover al
siguiente resultado.
4 Time & Date: Este comando se activa
cuando el usuario dice “Time & Date”
(Fecha y Hora). El teléfono muestra la
hora y la fecha actual.
Opciones de Comando de Voz
Cuando se activa la opción Comando de Voz,
puede oprimir la Tecla Suave Izquierda
Opciones para ver las siguientes opciones:
Modo
- Velocidad: El Comando de Voz es
abreviado.
- Normal: El Comando de Voz se
reproduce normalmente.
Mejor coincidencia
- 1 coincidencia: Se muestra la
coincidencia más probable para
encontrar un número en la agenda.
- 4 coincidencias: Se muestran los
cuatro nombres con mayor coincidencia
para encontrar un nombre en la agenda.
Sensibilidad
- Alto: El Comando de Voz del usuario y
el sonido del entorno raramente afectan
el funcionamiento y el rendimiento del
mecanismo de reconocimiento de voz.
- Medio: El Comando de Voz del usuario
y el sonido del entorno normalmente
afectan el funcionamiento del
mecanismo de reconocimiento de voz.
- Bajo: El Comando de Voz del usuario
y el sonido del entorno afectan
considerablemente el funcionamiento
del mecanismo de reconocimiento de
voz.
Modo de altavoz
- Activación automática: Cuando
selecciona esta opción, el altavoz se
enciende y el sonido es suficientemente
alto para ser escuchado cuando el
teléfono está lejos del oído, en un lugar
distante.
- Apagado: Cuando selecciona esta
opción, el altavoz se apaga y el sonido
es más bajo y no puede escucharse
cuando el teléfono está lejos del oído,
en un lugar distante.

46
Alarma
Esta función sirve para configurar múltiples
alarmas por separado. También sirve para
establecer el sonido de la alarma, la hora y
el intervalo de repetición. Si no hay alarmas
establecidas, oprima la Tecla Suave Izquierda
Nuevo para agregar una alarma
nueva.
Para acceder Alarma, desde la pantalla de
espera, oprima la Tecla Suave Izquierda
Menú, Herramientas y
Alarma.
Opciones de la alarma
Hora: Introduzca la hora de alarma
deseada especificando la hora y minutos.
También puede elegir una cantidad de
tiempo predefinido (15 minutos después,
30 minutos después, 45 minutos
después, 1 hora después, Apagado).
Repetir: Seleccione el modo de repetir
deseado (Una vez, Diariamente, Lun ~
Vie, Sáb ~ Dom, Seleccione el día de la
semana).
Tono de alarma: Oprima la Tecla OK
Lista para acceder a la lista de
tonos de alarma disponibles.
Volumen: Establezca el volumen de las
alarmas con la Tecla de Volumen.
Tipo: Seleccione el tipo de alerta de
llamada entre Timbrar, Vibrar, Timbrar y
vibrar, Vibrar después de timbrar.
Nota: Permite introducir el nombre de
la alarma.
Intervalo de alarma: Seleccione el
intervalo para posponer entre 5 minutos,
15 minutos, 30 minutos, 45 minutos,
1 hora y Apagado.
Oprima la Tecla Suave Izquierda
Guardar para guardar la alarma.
Herramientas

47
Calendario
Cuando acceda a este menú, se mostrará
un calendario. El cursor rojo cuadrado se
utiliza para ubicar un día en particular. La
barra inferior del calendario indica las citas
guardadas (si hay alguno) para ese día.
Esta función permite llevar un registro de
las citas. El teléfono puede emitir un tono
de alarma si ha sido configurado para un
elemento específico del calendario.
La siguiente tabla muestra las teclas que se
pueden usar para navegar el Calendario:
Tecla Descripción
/ Semanal
/ Diario
/ Anualmente
/ Mensual
Para acceder Calendario, desde la pantalla
de espera, oprima la Tecla Suave Izquierda
Menú, Herramientas y
Calendario.
Las siguientes opciones son disponibles
cuando un evento de Calendario se
selecciona del menú Calendario.
Buscar: Permite buscar las citas
guardadas.
Fijar feriado: Permite establecer fechas
específicas y mostrarlas como días
festivos en el calendario.
Ver todos: Permite ver todas las citas
guardadas.
Vista semanal: Permite ver el calendario
en vista de semana.
Ir a fecha: Permite ir directamente a una
fecha determinada.
Borrado selectivo: Permite borrar
las citas antiguas o todas las citas de
manera selectiva.
Configuraciones: Permite establecer
varias configuraciones del calendario.

48
Bloc de Notas
Es posible crear un máximo de 30 notas.
Para acceder Bloc de Notas, desde la
pantalla de espera, oprima la Tecla Suave
Izquierda Menú, Herramientas y
Bloc de Notas.
1 Oprima la Tecla Suave Izquierda
Nuevo para crear una nueva nota.
2 Escriba la nota y oprima la Tecla OK
Guardar para guardarla.
Calculadora
La funcion Calculadora permite realizar
cálculos matemáticos simples.
Para acceder Calculadora, desde la pantalla
de espera, oprima la Tecla Suave Izquierda
Menú, Herramientas y
Calculadora.
Tareas
Esta función le permite guardar y administrar
tareas.
Para acceder Tareas, desde la pantalla de
espera, oprima la Tecla Suave Izquierda
Menú, Herramientas y
Tareas.
1 Para agregar un nuevo elemento de tarea,
oprima la Tecla Suave Izquierda
Nuevo.
2 Introduzca información de la Fecha límite,
Nota, Prioridad y el Estado.
3 Oprima la Tecla Suave Izquierda
Guar. para guardar el elemento Tarea.
Las siguientes opciones son disponibles en
la lista de Tareas al oprimir la Tecla Suave
Izquierda Opcions:
Marcar “Finalizada”: Permite cambiar
el estado de la tarea seleccionada a
Finalizada.
Editar: Permite editar una tarea
guardada.
Borrar: Permite borrar la tarea
seleccionada.
Herramientas

49
Borrado selectivo: Permite borrar Todos
los completados/Todas las tareas pasadas
de manera selectiva.
Enviar tarea por: Permite enviar la
tarea seleccionada por Mensaje de Texto,
Mensaje Multimedia, E-mail o Bluetooth.
Seleccionar varios: Permite seleccionar
varias tareas.
Ver calendario: Permite ver el
Calendario.
Cronómetro
Este menú le permite registrar el tiempo
transcurrido de un evento. Puede mostrar la
duración de una vuelta individual (hasta 20
vueltas) y el tiempo total.
Para acceder Cronómetro, desde la pantalla
de espera, oprima la Tecla Suave Izquierda
Menú, Herramientas y
Cronómetro.
1 Para iniciar el cronometraje, oprima
la Tecla OK Inicio. El tiempo
continuo se muestra como HH.MM.
SS.hh (horas, minutos, segundos,
centésimas de segundo).
2 Durante el cronometraje, puede registrar
un tiempo de vuelta individual si oprima
la Tecla Suave Derecha Vuelta.
Pueden registrarse hasta 20 tiempos
de vuelta.
3 Para detener o reiniciar el cronometraje,
oprima la Tecla OK de nuevo.
4 Para restaurar el cronómetro, oprima la
la Tecla OK Parar y luego la Tecla
Suave Derecha Restaur. Si grabó
vueltas, oprima la Tecla Suave Derecha
Restaur.

50
Calc. de propinas
Esta función permite calcular la propina
según el total de la factura y también dividir
el total de la factura entre la cantidad de
personas.
Para acceder Calc. de propinas, desde la
pantalla de espera, oprima la Tecla Suave
Izquierda Menú, Herramientas y
Calc. de propinas.
Conversor de Unidad
Esta función permite convertir unidades de
medida.
Se pueden convertir seis tipos de unidades:
Área, Longitud, Peso, Temperatura, Volumen
y Velocidad.
Para acceder Conversor de Unidad, desde
la pantalla de espera, oprima la Tecla Suave
Izquierda Menú, Herramientas y
Conversor de Unidad.
Grabador de voz
Puede grabar un clip de audio en este menú.
El archivo de audio grabado se guarda
automáticamente en el menú Audio.
Para acceder a Grabador de voz desde la
pantalla de espera, oprima la Tecla Suave
Izquierda Menú, Herramientas y
Grabador de voz.
Las siguientes opciones están disponibles
al oprimir la Tecla Suave Izquierda
Opciones:
Modo de grabación: Establece el modo
de grabación en MMS o General.
Calidad: Determina la calidad de una
grabación de audio.
Al presionar la Tecla Suave Derecha
Galería, se abre la galería de audio.
Herramientas

51
Acceso Web es uno de los servicios
proporcionados por su proveedor de
servicios y brinda acceso a todas las cosas
interesantes que se pueden hacer con el
teléfono inalámbrico.
Nota
Compruebe la disponibilidad de servicios,
precios y tarifas con su operador de red
o con el proveedor de los servicios que
desee usar. Los proveedores de servicio
también le darán instrucciones sobre
cómo utilizar sus servicios.
Para abrir una cuenta de Internet,
comuníquese con su proveedor de
servicios.
Inicio del Acceso Web
Para iniciar el Acceso Web desde la pantalla
de espera, oprima la Tecla Suave Derecha
Acceso Web. También puede oprimir
la Tecla Suave Izquierda Menú y
seleccione Acceso Web con las Teclas de
Navegación.
Para salir del Acceso Web en cualquier
momento, oprima la Tecla Fin/Encender
.
Uso del Acceso Web
Una vez que se conecte a Internet, las
siguientes opciones de menú estarán
disponibles cuando oprima la Tecla Suave
Izquierda Opciones:
Zoom: Permite acercar y alejar la página
para ver mejor.
Nota
También puede ajustar el tamaño del
texto del navegador y de las imágenes,
modificando el zoom con las Teclas de
Volumen inferior y superior.
Casa: Lo dirige la la página de inicio.
Introduzca URL: Permite introducir una
URL que desee visitar.
Enviar enlace: Permite enviar enlaces.
Favoritos: Puede agregar o guardar la
página actual a Favoritos o ver la lista
guardada bajo Favoritos.
Acceso Web

52
Modo de navegación: Permite
seleccionar Volver, Reenviar y Actualizar.
Buscar texto: Permite buscar el texto.
Páginas Recientes: Permite ver el
historial de sitios de web visitados
recientemente.
Configuraciones: Permite establecer las
opciones para páginas de web, apariencia
y la red.
Menús del Acceso Web
Puede navegar por Internet usando las teclas
del teléfono o el menú del Acceso Web.
Uso de las Teclas de
Navegación
Al navegar por Internet, el funcionamiento de
las Teclas de Navegación es similar al que
presentan en el modo de espera.
Acceso Web

53
Audio y tonos de timbreEste menú permite configurar los ajustes de
Audio y tonos de timbre de su teléfono.
Para acceder Audio y tonos de timbre, desde
la pantalla de espera, oprima la Tecla Suave
Izquierda Menú, Configuración y
Audio y tonos de timbre.
Timbre
Sonidos: Permite fijar un sonido como
tono de timbre para su teléfono.
Volumen: Permite controlar el volumen
del tono de timbre.
Tipo de Alerta: Admite tres tipos de
alertas: Timbrar, Timbrar y vibrar, y
Timbrar después de vibrar.
Timbre Creciente: Permite encender
o apagar la función de timbre creciente,
la cual se reproduce cuando recibe una
llamada entrante.
Nota
No es posible configurar pistas de música
completas como tonos de timbre ni de
mensaje.
Tono de Mensaje
Sonidos: Permite fijar un sonido como
tono de mensaje para su teléfono.
Volumen: Permite controlar el volumen
de la alerta de mensaje nuevo.
Tipo de Alerta: Admite 4 tipos de
alertas de mensajes: Silencio, Vibrar, Sólo
timbrar, Timbrar y vibrar.
Intervalo de la alerta: Permite fijar un
Intervalo de la alerta.
Tono de Alerta
Sonidos: Permite seleccionar un
conjunto de tonos de alerta. Admite
2 tipos de tono de alerta: Tono de Alerta 1
y Tono de Alerta 2.
Volumen: Permite controlar el volumen
de las alertas.
Configuración

54
Tipo de Alerta: Permite establecer los
tonos de alerta en Timbrar o Silencio.
Tono de Teclado
Esta opción de menú permite seleccionar
un tono que suene en el teléfono cuando
se oprima una tecla en el teclado. Puede
seleccionar una opción de Pitido o Voz y fijar
el volumen.
Multimedia
Este menú permite controlar el volumen
multimedia.
Llamada
Este menú permite controlar el volumen de
las llamadas.
Config. del teléfonoEste menú permite configurar el teléfono.
Para acceder Config. del teléfono, desde la
pantalla de espera, oprima la Tecla Suave
Izquierda Menú, Configuración, y
Config. del teléfono.
Idiomas
Permite cambiar el idioma para el texto que
se visualiza en su teléfono. Este cambio
también afectará al Modo de entrada de
idioma.
Fijar teclas de acceso directo
Permite modificar las preferencias sobre las
teclas de atajos actualmente asignadas a las
Teclas de Navegación (cuando se encuentre
en el modo de espera).
Configuración

55
Modo de Avión
Permite usar sólo las funciones del
teléfono que no requieran el uso de la red
inalámbrica cuando esté en un avión o en
lugares en los que se prohíbe usar la red
inalámbrica. Si ajusta el Modo de Avión
como activado, el icono de Modo de Avión
se mostrará en la pantalla en lugar del icono
de señal de red.
Encendido: No se pueden realizar
(ni recibir) llamadas, incluidas las de
emergencia, ni usar otras funciones que
requieran cobertura de red.
Apagado: Permite el Modo de Avión para
acceder a la red.
Seguridad
Existen varios códigos y contraseñas para
proteger las funciones y la configuración del
teléfono.
Bloqueo del Teléfono: Usted puede
usar un código de seguridad para
prevenir el uso no autorizado del teléfono.
Si fija el Bloqueo del Teléfono a Al
encender, el teléfono solicitará un código
de seguridad cada vez que lo encienda.
Si fija el Bloqueo del Teléfono a Bloquear
teléfono ahora, el teléfono se bloquea
inmediatamente.
Cambiar Códigos: La función Cambiar
Códigos permite cambiar el código actual
a uno nuevo. Debe introducir el código
actual antes de especificar uno nuevo.
Restaurar Configuraciones
Esta función permite restaurar la
configuración de fábrica. Para hacerlo, se
necesita introducir el código de seguridad.
Reinicio Maestro: Restaura la
configuración del teléfono (por ejemplo,
las opciones de Audio, Pantalla, Idioma,
Bluetooth) a los valores predeterminados.
Borrado Maestro: Borra el contenido
descargado o creado por el usuario (por
ejemplo, imágenes o videos) del teléfono.

56
Teléfono
- Borra de la memoria del teléfono todas
las imágenes, el audio y los videos
descargados o creados por el usuario.
- Borra la información personal
almacenada en la memoria del teléfono
(por ejemplo, Address Book, Mensajes,
Tareas, Alarmas, y Citas de Calendario)
a los valores predeterminados.
- Restaura la configuración almacenada
en la memoria del teléfono a los valores
predeterminados.
PantallaEste menú permite configurar los ajustes
de Pantalla.
Para acceder a Pantalla, desde la pantalla
de espera, oprima la Tecla Suave Izquierda
Menú, Configuración y
Pantalla.
Fondos de Pantalla
Este menú permite fijar una imagen o un
color como fondo de pantalla.
Fuentes
Este menú permite configurar el tamaño y el
color de las fuentes que usa el teléfono.
Relojes y calendario
Esta función permite seleccionar un reloj o
calendario para que aparezca en la pantalla
de espera.
Brillo
Puede configurar el brillo de la pantalla y
el teclado.
Tiempo de Luz de Fondo
Permite establecer el tiempo que debe
permanecer encendida la luz de fondo de
la pantalla.
Configuración

57
Estilos de menú
Es posible establecer el estilo del menú
principal como vista de Iconos o Lista.
LlamadaEste menú permite configurar los ajustes de
Llamada.
Para acceder a Llamada, desde la pantalla
de espera, oprima la Tecla Suave Izquierda
Menú, Configuración y
Llamada.
Enviar Mi Número
Este servicio de red permite establecer
que se muestre o se oculte su número de
teléfono a la persona que está llamando.
Si prefiere usar distintos valores de
configuración para diferentes proveedores
de servicios, puede seleccionar Fijado por
la red.
Modo de Respuesta
Le permite determinar cómo contestar el
teléfono.
Cualquier tecla: Permite responder una
llamada entrante al oprimir cualquier tecla
excepto la Tecla Fin/Encender ,
las Teclas de Volumen o la Tecla Suave
Derecha Silencio.
Solamente tecla enviar: Permite
responder una llamada entrante
solamente al oprimir la Tecla Enviar
o la Tecla Suave Izquierda Aceptar.
Tapa abierta: Permite abrir la tapa del
teléfono para responder una llamada
entrante.

58
Modo Senior
Modo Senior es una función que amplifica el
sonido para gentes mayores de edad para
oir la voz mejor con el énfasis en la voz baja.
Se utiliza para mejorar la calidad de voz
mientras está en el teléfono.
Se puede activar o desactivar el Modo
Senior.
Duración Y Costo
Permite comprobar la Duración de Llamada
y el Contador de datos.
Accesibilidad
TTY: Permite habilitar el Modo TTY para
contactar otros aparatos TTY. Seleccione
entre TTY llena, Conversar TTY,
Escuchar TTY o TTY apagado.
Prótesis Auditiva: Permite encender
o apagar la funcionalidad de Prótesis
Auditiva
BluetoothEl teléfono dispone de tecnología inalámbrica
Bluetooth incorporada que posibilita la
conexión, sin necesidad de cables, entre el
teléfono y otros aparatos Bluetooth, como
aparatos de manos libres, computadoras,
portátiles u otros teléfonos. Los aparatos
registrados en el teléfono sólo pueden
conectarse de a uno por vez. (Para hacer
una conexión con el mismo tipo de aparato
o cambiar las preferencias de Bluetooth,
desconecte primero el aparato existente).
También pude intercambiar, por ejemplo,
tarjetas de visita, elementos de calendario
e imágenes.
Para acceder a Bluetooth, desde la pantalla
de espera, oprima la Tecla Suave Izquierda
Menú, Configuración y
Bluetooth.
Perfil manos libres
El icono aparece cuando se usa el perfil
de manos libres entre el aparato de manos
libres y el teléfono. Esto le permite llamar
con una conexión de Bluetooth.
Configuración

59
Perfil A2DP
El icono aparece cuando se usa el perfil
A2DP entre el aparato de auricular estéreo y
el teléfono. Esto le permite escuchar un clip
de audio. A2DP es el perfil de distribución de
audio avanzado, que ofrece compatibilidad
con audio de transmisión continua tanto
monoaural como estéreo con el uso de
Bluetooth.
Perfil de manos libres y A2DP
El icono aparece cuando los dos perfiles
de manos libres y el A2DP se usan entre
el aparato compatible y el teléfono. Esto le
permite llamar y escuchar un clip de audio
con una conexión Bluetooth.
Para usar los aparatos, consulte el manual
que viene con cada uno de ellos.
Nota
Recomendamos que su teléfono y el
aparato Bluetooth con el que se esté
comunicando estén a un máximo de 10
metros de distancia. La conexión puede
mejorarse si no hay objetos sólidos entre
su teléfono y el otro aparato Bluetooth.
Activar/Desactivar
Permite activar o desactivar la funcionalidad
de Bluetooth.
Buscar Nuevo Aparato
Esta función permite buscar y agregar
nuevos dispositivos.
Mis Aparatos
Esta función permite ver la lista de todos
los dispositivos que están vinculados con el
teléfono.
Mi Info de Bluetooth
Este menú permite configurar el perfil de
Bluetooth.
Mi visibilidad: Permite establecer la
visibilidad del teléfono para que se pueda
encontrar en otros dispositivos Bluetooth.
Mi nombre: Permite cambiar el nombre
del teléfono, que puede verse por otros
dispositivos Bluetooth.
Servicios admitidos: Muestra todos los
servicios compatibles con el teléfono.

60
Mi dirección Bluetooth: Muestra la
dirección Bluetooth de su teléfono.
Para emparejar con otro aparato
1 Desde la pantalla de espera, oprima
la Tecla Suave Izquierda Menú,
Configuración, Bluetooth y
Buscar Nuevo Aparato.
2 Si desea detener la búsqueda, oprima la
Tecla Suave Izquierda Cancelar.
3 Se mostrarán todos los aparatos
encontrados.
4 Para seleccionar el aparato deseado,
oprima la Tecla OK Agregar e
introduzca la contraseña.
MemoriaEste menú permite configurar los ajustes de
Memoria.
Para acceder a Memoria, desde la pantalla
de espera, oprima la Tecla Suave Izquierda
Menú, Configuración y
Memoria.
Espacio Utilizado
Esta función muestra el estado de la
memoria del teléfono.
Común (teléf.) Esta función muestra el estado de la memoria del teléfono y la memoria que utilizan los archivos de Música, Imágenes, Video, Mensaje multimedia, E-mail, Java y Otros tipos de archivos.
Reservada (teléf.) Esta función muestra el estado de la memoria reservada que se utiliza para Mensajes de texto, Contactos, Calendario, Tareas y Bloc de Notas.
Tarjeta SIM Esta función muestra el estado de la memoria de la tarjeta SIM.
Configuración

61
AplicacionesEste menú permite ajustar la configuración
de aplicaciones.
Para acceder Configuración de aplicacion,
desde la pantalla de espera, oprima
la Tecla Suave Izquierda Menú,
Configuración y Aplicaciones.
Mensajes
Para obtener más detalles, consulte Config.
de mensajes en la página 30.
Acceso Web
Este menú permite configurar los ajustes del
Acceso Web.
Aspecto
Puede elegir la configuración del aspecto del
Acceso Web (Tamaño del texto, Codificación
de caracteres, Mostrar imagen, Java script).
Caché
Las páginas web visitadas almacenan
información en la memoria del teléfono. Este
menú permite administrar esa función.
Borrar caché: Permite borrar todos los
datos almacenados en la memoria caché.
Permitir caché: Permite encender o
apagar la memoria caché.
Nota
La memoria caché es una memoria de
búfer que permite almacenar datos de
forma temporal, especialmente los que
provienen del Internet.
Cookies
La información de los servicios a los que
ha accedido está almacenada en lo que se
denomina Cookie.
Desde este menú, puede elegir Permitir
cookies o Borrar cookies que ya contiene
el teléfono.

62
Borrar información de inicio de
sesión
Borrar información de inicio de sesión.
Puede borrar el historial de información
de identificación o contraseña que haya
guardado anteriormente.
Configuración de pantalla
Puede cambiar la configuración de
la pantalla del Acceso Web (Modo de
procesamiento).
Seguridad
Se muestra una lista de certificados
disponibles.
Certificados: Permite ver la lista de
certificados y visualizarla en detalle.
Borrar sesión: Permite eliminar la
sesión segura.
Modo de navegación
Puede cambiar los métodos de navegación
del Acceso Web.
Navegación de 4 vías: El cursor del
Acceso Web se desplaza o sigue los
enlaces.
Puntero del mouse: Puede mover el
cursor como el puntero de un ratón.
Emergente seguro
Puede activar o desactivar los elementos
emergentes que indican si la página es
segura.
Teclas de acceso rápido
Si se activa, puede usar el Acceso Web de
manera más rápida y conveniente con el
teclado del teléfono. Si se activan las Teclas
de acceso rápido, se pueden utilizar los
siguientes atajos son disponibles:
Configuración

63
1. Introduzca URL
3. Ver marcadores
5. Pantalla completa
7. Retroceder página
9. Ampliar
*. Página abajo
2. Esta página
4. Descripción de la
página
6. Páginas Guardadas
8. Páginas Recientes
0. Buscar texto
#. Reducir
Comando de Voz
Este menú permite configurar varias
opciones del comando de voz. Consultar la
página 45.
TTS (texto a voz)
Cuando se activa esta opción, se pueden
leer en voz alta los mensajes de text y del
Bloc de notas.
Nota
El modo TTS no funciona cuando el
teléfono está en modo de vibración.
Información del teléfonoEste menú permite ver datos como Mi
número, Fabricante, Nombre del modelo, ID
del dispositivo, Versión de hardware, Versión
del software, Idioma.
Para acceder a Información del Teléfono,
desde la pantalla de espera, oprima
la Tecla Suave Izquierda Menú,
Configuración y Información del
teléfono.

64
AccesoriosHay varios accesorios disponibles para su teléfono celular, y es posible que algunos
se vendan por separado. Puede seleccionar esas opciones según sus requisitos de
comunicación en particular. Consulte con su distribuidor local para conocer la disponibilidad.
Adaptador de viaje
Este adaptador permite cargar la batería.
Batería
Baterías estándares disponibles.
Nota
empresa o el agente de servicio técnico de su región.

65
El valor más elevado de la SAR para este
modelo de teléfono cuando se lo probó para
usarse en el oído es de 0,77 W/kg y cuando
se lo usa sobre el cuerpo, según lo descrito
en esta guía del usuario, es de 0,58 W/kg.
(Las mediciones del uso en el cuerpo varían
en función de los modelos de los teléfonos y
dependen de los accesorios disponibles y los
requisitos de la FCC).
Aun cuando puede haber diferencias entre
los niveles de SAR de varios teléfonos y en
varias posiciones, todos ellos cumplen el
requisito gubernamental para una exposición
segura.
La FCC ha otorgado una Autorización
de equipo para este modelo de teléfono
con todos los niveles de SAR reportados
y evaluados en cumplimiento de los
lineamientos de emisión de RF de la FCC. La
información de la SAR sobre este modelo de
teléfono está archivada en la FCC y puede
encontrarse en la sección Display Grant de
http://www.fcc.gov/oet/ea/fccid/ después de
buscar FCC ID ZNFLG440G.
Por su seguridad


