15
Lifeguarding BLENDED LEARNING INSTRUCTOR’S MANUAL
| Date post: | 26-Mar-2018 |
| Category: |
Documents |
| Upload: | phunghuong |
| View: | 216 times |
| Download: | 2 times |

Lifeguarding
Lifeguarding BLENDED LEARNING INSTRUCTOR’S MANUAL
Lifeg
ua
rdin
g B
LEN
DE
D LE
AR
NIN
G IN
STR
UC
TOR
’S M
AN
UA
L
LG_IM_Blended_Cover-Rev9-24-12.indd 1 9/26/12 8:54 AM

Contents vii
CHAPTER 1 INTRODUCTION _____________________________________________________________ 1Course Purpose _____________________________________________________________ 1Course Objectives ___________________________________________________________ 1Course Participants __________________________________________________________ 1Instructor Responsibilities ____________________________________________________ 2
CHAPTER 2 COURSE DESIGN____________________________________________________________ 3
Course Content _____________________________________________________________ 3Recommended Lesson Plan ___________________________________________________ 3 Participant Resources ________________________________________________________ 4
Lifeguarding Manual ______________________________________________________ 4Lifeguarding Blended eLearning _____________________________________________ 4
Instructor Resources _________________________________________________________ 4Lifeguarding Blended Learning Instructor’s Manual _____________________________ 4Video Segments___________________________________________________________ 6Materials, Equipment and Supplies ___________________________________________ 6Course Presentation _______________________________________________________ 7Activity Worksheets ________________________________________________________ 7Instructor’s Corner ________________________________________________________ 7
Additional Resources for Instructors and Participants ___________________________ 8Training Equipment and Red Cross Retail Products _____________________________ 8Additional Red Cross Courses ______________________________________________ 8Refresher Program ________________________________________________________ 8
CHAPTER 3 SETTING UP AND RUNNING THIS COURSE ____________________________________ 9
Recommended Class Size ____________________________________________________ 9Course Length ______________________________________________________________ 9Managing Participants ________________________________________________________ 9Classroom Space ____________________________________________________________ 9Swimming Area _____________________________________________________________ 10Setting Up and Running Skill Sessions ________________________________________ 10
Land-Based Skill Practice _________________________________________________ 10In-Water Skill Practice _____________________________________________________ 10Training to the Standard, But Testing to the Objective __________________________ 10
Class Safety ________________________________________________________________ 11Health Precautions for Course Participants ____________________________________ 11Participants With Disabilities and Special Health Considerations _________________ 12
CHAPTER 4 REQUIREMENTS FOR SUCCESSFUL COURSE COMPLETION ____________________ 13
Criteria for Course Completion and Certifi cation _______________________________ 13
SECTION A | ADMINISTRATION
CONTENTS

viii Lifeguarding Blended Learning Instructor’s Manual
Continuing Education Units for Professionals __________________________________ 14Lifeguarding Course Outline _________________________________________________ 15Shallow Water Lifeguarding Course Outline ____________________________________ 20Precourse Session _________________________________________________________ 25Lesson Plans
Lesson 1: The Professional Lifeguard ________________________________________ 30Lesson 2: Facility Safety and Patron Surveillance ______________________________ 37Lesson 3: Injury Prevention _________________________________________________ 49Lesson 4: Water Rescue Skills _____________________________________________ 55Lesson 5: Before Providing Care and Victim Assessment _______________________ 68Lesson 6: Breathing Emergencies ___________________________________________ 78Lesson 7: Cardiac Emergencies and Using an Automated External Defi brillator _____ 88Lesson 8: First Aid _______________________________________________________102Lesson 9: Head, Neck and Spinal Injuries in the Water _________________________118Lesson 10: Final Written Exam and Final In-Water Skill Scenarios _______________126
Activity Worksheets ________________________________________________________130ACTIVITY WORKSHEET 2.1—Reasons for the Rules _________________________130ACTIVITY WORKSHEET 3.1—Guarding Special Attractions ___________________132ACTIVITY WORKSHEET 3.2—Strategies for a Safe Group Visit ________________133ACTIVITY WORKSHEET 7.1—Using an AED in Unique Situations— Fact or Fiction ________________________________134
SECTION B | THE LIFEGUARDING AND SHALLOW WATER
LIFEGUARDING COURSES
Lifeguarding _______________________________________________________________135SECTION 1—Lifeguarding Skills Exams A and B _____________________________________________136
Shallow Water Lifeguarding _________________________________________________149SECTION 1—Shallow Water Lifeguarding Skills Exams A and B _____________________________________________150
Final Written Exam Answer Sheets __________________________________________162Index _____________________________________________________________________165Final Written Exam Answer Keys
SECTION C | LIFEGUARDING FINAL WRITTEN EXAMS
Final Written Exams _________________________________________________________ 13Final In-Water Skills Scenarios _______________________________________________ 13Exam Security _____________________________________________________________ 14Reporting Procedures _______________________________________________________ 14Participant Course Evaluation ________________________________________________ 14Awarding Certifi cates _______________________________________________________ 14
LESSON 2 | Facility Safety and Patron Surveillance 37
Session Length: 2 hours
LESSON OBJECTIVESAfter completing this lesson, participants will be able to:
! Describe the role lifeguards play in ensuring facility safety. ! Identify how to ensure the safety of patrons when weather conditions create safety concerns. ! Explain the reasons for common rules and regulations at aquatic facilities. ! Describe the role that facility management plays in facility safety. ! Describe the drowning process. ! Identify the behaviors of a swimmer, a distressed swimmer, and an active and a passive victim. ! Identify and defi ne elements of effective surveillance. ! Explain proper scanning techniques and identify tactics to overcome scanning challenges. ! Explain and demonstrate lifeguard rotations. ! Demonstrate how to safely and effectively enter the water and approach a victim, and how to perform effective
surveillance including scanning, victim recognition and lifeguard rotations.
ADDITIONAL MATERIALS, EQUIPMENT AND SUPPLIES ! Activity Worksheet 2.1—Reasons for the Rules ! Diving brick(s) ! Stopwatch or pace clock
LESSON 2FACILITY SAFETY AND PATRON SURVEILLANCE
TOPIC: FACILITY SAFETY
Guided Discussion
! Aquatic facilities must have the appropriate rescue equipment available and in proper working order at all times for emergency response.
! As a lifeguard, you must always wear or carry certain equipment so that it is instantly available in an emergency, including a rescue tube, resuscitation mask and gloves. You also must have a whistle to signal an emergency.
Activity ! Ask a volunteer to come forward to demonstrate how to wear the rescue tube while in an elevated lifeguard station and a ground-level station.
The demonstration should include the following:
" Keep the strap of the rescue tube over the shoulder and neck.
" Hold or gather the excess line to keep it from getting caught in the chair or other equipment when you move or start a rescue.
" Hold the rescue tube across the thighs in an elevated station.
" Hold the rescue tube across the stomach when standing.
! Ask participants: Why should you wear the hip pack at all times, whether or not you are on surveillance duty?
Answer: To be prepared to respond to an emergency at all times, whether or not performing surveillance duty.
Time: 10 minutes
38 Lifeguarding Blended Learning Instructor’s Manual
! Explain to participants that the type of rescue equipment, such as backboards, can vary among facilities and they will need to be trained to use the specific pieces of equipment at the facility where they will be employed.
! Explain that rescue equipment can be expensive to purchase and maintain and should be treated respectfully.
Activity ! Explain to participants that one of their most important responsibilities as a lifeguard will be to help ensure that the aquatic facility is safe.
TOPIC: WEATHER CONDITIONS
Guided Discussion
! Weather affects the safety of swimmers both outdoors and indoors.
! You will need to know and follow facility procedures to clear patrons from the water and deck before an impending storm.
! Ask participants: If thunder or lightning occurs, what should you do?
Answers: Responses should include the following:
Clear everyone from the water at the first sound of thunder or first sight of lightning.
" If you are in an elevated station, get down immediately.
" Move everyone to a safe area, free from contact with water, plumbing or electrical circuits.
" For outdoor facilities, move everyone inside, if possible.
Keep patrons and staff out of showers and locker rooms during a thunderstorm, as water and metal can conduct electricity.
Do not use a telephone connected to a landline except in an emergency.
Keep everyone away from windows and metal objects.
Watch for more storms and monitor weather reports on a radio or TV broadcast, weather radio or website.
The National Lightning Safety Institute recommends waiting 30 minutes after the last lightning sighting or sound of thunder before resuming activities.
TOPIC: RULES AND REGULATIONS
Activity ! Explain that each aquatic facility establishes its own set of rules and regulations. Some are required by the state or local health department, whereas others are determined by the facility itself. Lifeguards must know and enforce all facility rules.
! Explain that rules are communicated to patrons by signage as well as verbally when lifeguards enforce the rules.
! Divide the class into small groups. Distribute Activity Worksheet 2.1—Reasons for the Rules. Assign each group different sections of the worksheet.
! Refer participants to Chapter 2, Facility Safety, in the Lifeguarding Manual for information to help them with this activity. Explain that there are five common rules for each category, or type of facility or attraction. These are not the “most important” rules, but rather common rules. The intent of this activity is to provide a wide range of rules so that participants gain an understanding of the rationale for different types of rules.
! Allow approximately 5 minutes for groups to discuss the reasoning behind the assigned rules.
! Reassemble the class and call on group leaders to share their answers.
Time: 5 minutes
Time: 10 minutes
LESSON 2 | Facility Safety and Patron Surveillance 39
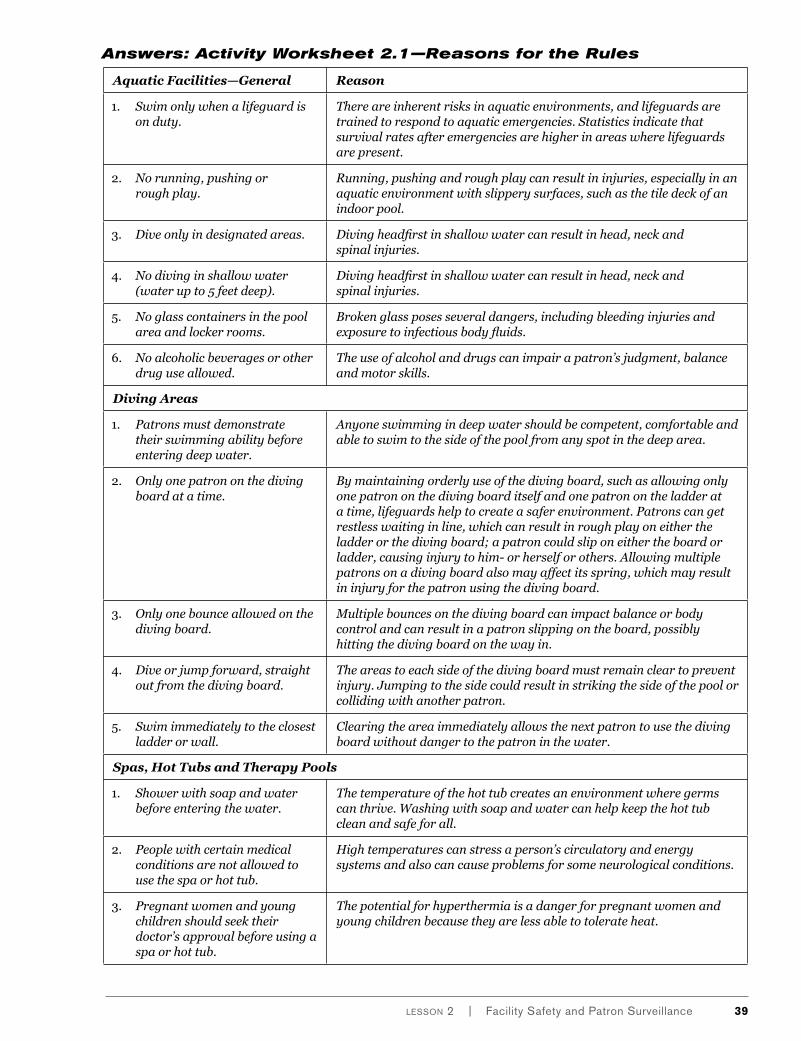
Answers: Activity Worksheet 2.1—Reasons for the Rules
Aquatic Facilities—General Reason
1. Swim only when a lifeguard is on duty.
There are inherent risks in aquatic environments, and lifeguards are trained to respond to aquatic emergencies. Statistics indicate that survival rates after emergencies are higher in areas where lifeguards are present.
2. No running, pushing or rough play.
Running, pushing and rough play can result in injuries, especially in an aquatic environment with slippery surfaces, such as the tile deck of an indoor pool.
3. Dive only in designated areas. Diving headfi rst in shallow water can result in head, neck and spinal injuries.
4. No diving in shallow water (water up to 5 feet deep).
Diving headfi rst in shallow water can result in head, neck and spinal injuries.
5. No glass containers in the pool area and locker rooms.
Broken glass poses several dangers, including bleeding injuries and exposure to infectious body fl uids.
6. No alcoholic beverages or other drug use allowed.
The use of alcohol and drugs can impair a patron’s judgment, balance and motor skills.
Diving Areas
1. Patrons must demonstrate their swimming ability before entering deep water.
Anyone swimming in deep water should be competent, comfortable and able to swim to the side of the pool from any spot in the deep area.
2. Only one patron on the diving board at a time.
By maintaining orderly use of the diving board, such as allowing only one patron on the diving board itself and one patron on the ladder at a time, lifeguards help to create a safer environment. Patrons can get restless waiting in line, which can result in rough play on either the ladder or the diving board; a patron could slip on either the board or ladder, causing injury to him- or herself or others. Allowing multiple patrons on a diving board also may affect its spring, which may result in injury for the patron using the diving board.
3. Only one bounce allowed on the diving board.
Multiple bounces on the diving board can impact balance or body control and can result in a patron slipping on the board, possibly hitting the diving board on the way in.
4. Dive or jump forward, straight out from the diving board.
The areas to each side of the diving board must remain clear to prevent injury. Jumping to the side could result in striking the side of the pool or colliding with another patron.
5. Swim immediately to the closest ladder or wall.
Clearing the area immediately allows the next patron to use the diving board without danger to the patron in the water.
Spas, Hot Tubs and Therapy Pools
1. Shower with soap and water before entering the water.
The temperature of the hot tub creates an environment where germs can thrive. Washing with soap and water can help keep the hot tub clean and safe for all.
2. People with certain medical conditions are not allowed to use the spa or hot tub.
High temperatures can stress a person’s circulatory and energy systems and also can cause problems for some neurological conditions.
3. Pregnant women and young children should seek their doctor’s approval before using a spa or hot tub.
The potential for hyperthermia is a danger for pregnant women and young children because they are less able to tolerate heat.
40 Lifeguarding Blended Learning Instructor’s Manual
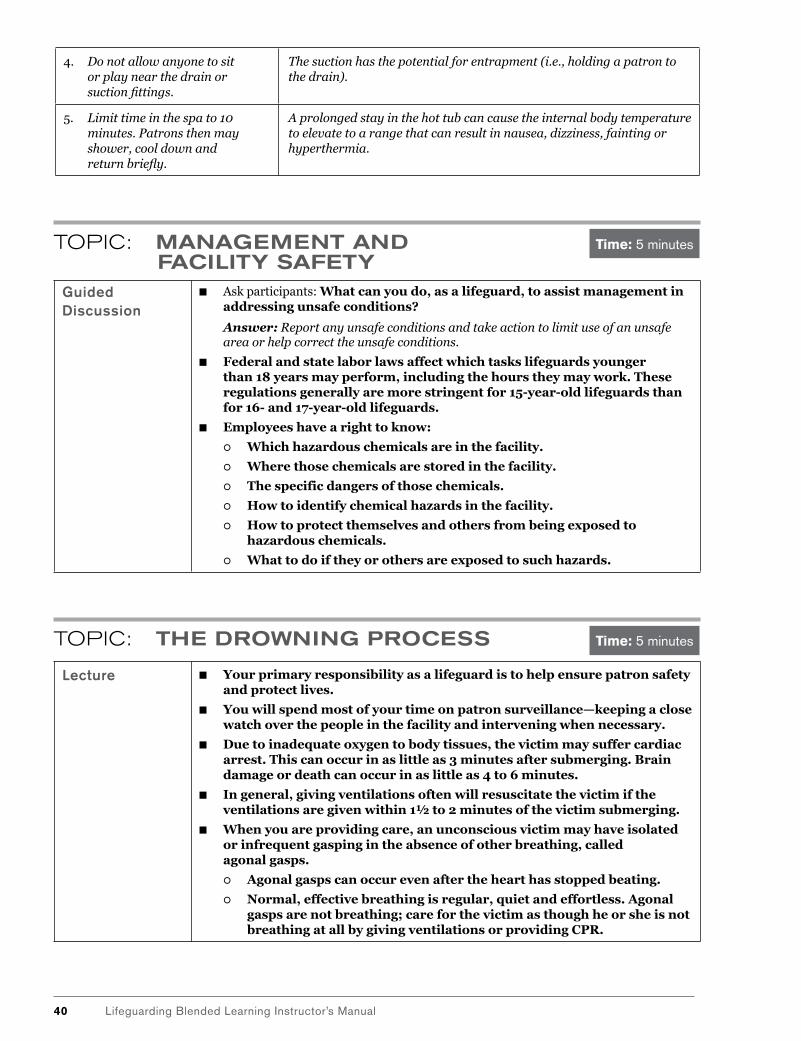
4. Do not allow anyone to sit or play near the drain or suction fi ttings.
The suction has the potential for entrapment (i.e., holding a patron to the drain).
5. Limit time in the spa to 10 minutes. Patrons then may shower, cool down and return briefl y.
A prolonged stay in the hot tub can cause the internal body temperature to elevate to a range that can result in nausea, dizziness, fainting or hyperthermia.
TOPIC: MANAGEMENT AND FACILITY SAFETY
Guided Discussion
! Ask participants: What can you do, as a lifeguard, to assist management in addressing unsafe conditions?
Answer: Report any unsafe conditions and take action to limit use of an unsafe area or help correct the unsafe conditions.
! Federal and state labor laws affect which tasks lifeguards younger than 18 years may perform, including the hours they may work. These regulations generally are more stringent for 15-year-old lifeguards than for 16- and 17-year-old lifeguards.
! Employees have a right to know:
Which hazardous chemicals are in the facility.
Where those chemicals are stored in the facility.
The specific dangers of those chemicals.
How to identify chemical hazards in the facility.
How to protect themselves and others from being exposed to hazardous chemicals.
What to do if they or others are exposed to such hazards.
TOPIC: THE DROWNING PROCESS
Lecture ! Your primary responsibility as a lifeguard is to help ensure patron safety and protect lives.
! You will spend most of your time on patron surveillance—keeping a close watch over the people in the facility and intervening when necessary.
! Due to inadequate oxygen to body tissues, the victim may suffer cardiac arrest. This can occur in as little as 3 minutes after submerging. Brain damage or death can occur in as little as 4 to 6 minutes.
! In general, giving ventilations often will resuscitate the victim if the ventilations are given within 1! to 2 minutes of the victim submerging.
! When you are providing care, an unconscious victim may have isolated or infrequent gasping in the absence of other breathing, called agonal gasps.
Agonal gasps can occur even after the heart has stopped beating.
Normal, effective breathing is regular, quiet and effortless. Agonal gasps are not breathing; care for the victim as though he or she is not breathing at all by giving ventilations or providing CPR.
Time: 5 minutes
Time: 5 minutes

LESSON 2 | Facility Safety and Patron Surveillance 41
! Ask participants: What does this understanding of the drowning process mean for you as a lifeguard?
Answers: Responses should include the following:
Practice preventive lifeguarding and enforce rules to keep patrons safe.
Stay alert to recognize when a patron is drowning.
Respond with urgency.
Get the victim’s airway out of the water and provide care for a breathing emergency as quickly as possible.
If a victim is in cardiac arrest, begin CPR as quickly as possible.
Practice emergency care skills frequently to be ready to respond quickly and with confi dence.
TOPIC: EFFECTIVE SURVEILLANCE—VICTIM RECOGNITION
Guided Discussion
! Ask participants: What are some situations that could lead to trouble for a weak or nonswimmer?
Answers: Responses should include the following:
Bobbing in or near water over his or her head
Hand-over-hand wall crawling
Being beyond arm’s reach of a supervising adult, even if wearing infl atable water wings or swim rings
Clinging to something or struggling to grab something to stay afl oat
Wearing a life jacket improperly
! Ask participants: What are some situations that could lead to trouble for a swimmer?
Answers: Responses should include the following:
Breath-holding or swimming under water for an extended period after hyperventilating
Participating in a high-risk/high-impact activity, such as diving
Experiencing a medical emergency, such as a sudden illness
! Refer participants to Table 3-1: Behaviors of Distressed Swimmers and Drowning Victims in the Lifeguarding Manual.
! Ask participants: What are the characteristics of a distressed swimmer?
Answers: Responses should include the following:
Able to keep his or her face out of the water
Able to call for help
Able to wave for help
Horizontal, vertical or diagonal body position, depending on what the person is using for support
Floating, sculling or treading water
Time: 5 minutes

42 Lifeguarding Blended Learning Instructor’s Manual
! Ask participants: What instinctive drowning response behaviors would you see in a drowning victim who is struggling at or near the surface?
Answers: Responses should include the following:
Cannot call out for help/his or her efforts are on getting a breath
Struggles to keep the face above water in an effort to breathe
Has arms extended to the side or in front, pressing down for support
Has a vertical body position in the water with no supporting kick
Might continue to struggle under water
Might eventually lose consciousness and stop moving
! Ask participants: In some cases, what might a very small child look like when in trouble in the water?
Answers: Responses should include the following:
Appears to be doing the “doggy paddle” but is not making forward progress
In a horizontal position at the surface, but not able to raise the face up out of the water
Under water, struggling to get to the surface
! Ask participants: What are some conditions that could lead to a patron becoming a drowning victim who appears to be unconscious?
Answers: Responses should include the following:
Lack of timely rescue of an active victim
Heart attack or stroke
Seizure
Head injury
Heat-related illness
Hypothermia (below-normal body temperature)
Hyperventilation and prolonged underwater breath-holding activities
Use of alcohol and other drugs
TOPIC: EFFECTIVE SURVEILLANCE—SCANNING
Guided Discussion
! Ask participants: Thinking back to the video segments you watched in the eLearning portion, what are some important factors for effective scanning?
Answers: Responses should include the following:
Know what to look for to determine if a victim is in trouble in the water.
Deliberately and actively observe swimmers’ behavior.
Scan the entire volume of water: bottom, middle and surface.
Move your eyes and head while scanning and look directly at the patron’s body movements.
Maintain an active, rescue-ready posture.
! Tell participants that you will present some challenges for scanning and they are to provide you with what tactics could help to overcome the challenge.
Time: 10 minutes
LESSON 2 | Facility Safety and Patron Surveillance 43
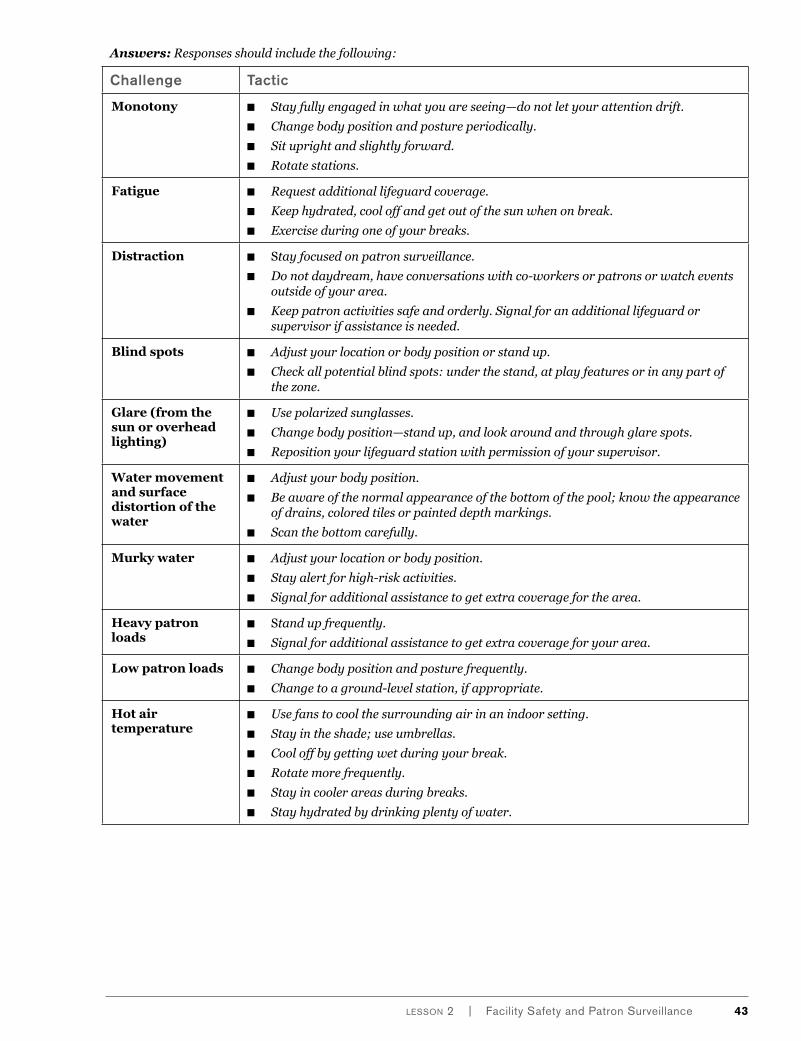
Answers: Responses should include the following:
Challenge Tactic
Monotony ! Stay fully engaged in what you are seeing—do not let your attention drift.
! Change body position and posture periodically.
! Sit upright and slightly forward.
! Rotate stations.
Fatigue ! Request additional lifeguard coverage.
! Keep hydrated, cool off and get out of the sun when on break.
! Exercise during one of your breaks.
Distraction ! Stay focused on patron surveillance.
! Do not daydream, have conversations with co-workers or patrons or watch events outside of your area.
! Keep patron activities safe and orderly. Signal for an additional lifeguard or supervisor if assistance is needed.
Blind spots ! Adjust your location or body position or stand up.
! Check all potential blind spots: under the stand, at play features or in any part of the zone.
Glare (from the sun or overhead lighting)
! Use polarized sunglasses.
! Change body position—stand up, and look around and through glare spots.
! Reposition your lifeguard station with permission of your supervisor.
Water movement and surface distortion of the water
! Adjust your body position.
! Be aware of the normal appearance of the bottom of the pool; know the appearance of drains, colored tiles or painted depth markings.
! Scan the bottom carefully.
Murky water ! Adjust your location or body position.
! Stay alert for high-risk activities.
! Signal for additional assistance to get extra coverage for the area.
Heavy patron loads
! Stand up frequently.
! Signal for additional assistance to get extra coverage for your area.
Low patron loads ! Change body position and posture frequently.
! Change to a ground-level station, if appropriate.
Hot air temperature
! Use fans to cool the surrounding air in an indoor setting.
! Stay in the shade; use umbrellas.
! Cool off by getting wet during your break.
! Rotate more frequently.
! Stay in cooler areas during breaks.
! Stay hydrated by drinking plenty of water.

44 Lifeguarding Blended Learning Instructor’s Manual
IN-WATER SKILL SESSION: ENTRIES AND APPROACHES, VICTIM RECOGNITION AND LIFEGUARD ROTATION
Entries and Approaches
Skill Practice ! Explain to participants that during the water rescue skill sessions, you will demonstrate skills and guide them through practice.
! For each skill, be sure to review key points from the text and video, including instructions on how to perform each skill and reminders about when each entry or approach is appropriate.
! Explain that every rescue should begin by activating the EAP. Participants should simulate this during each practice session.
! Explain that the signals used to activate the EAP may vary among facilities. Define the method that will be used in skill sessions, including the following:
Announce the activation of the EAP with either a loud signal mimicking a whistle or by making a verbal announcement.
Point to the victim that is in need of help.
! Lead them through the following skills using a rescue tube:
Slide-in entry and walking approach
" Especially useful in shallow water, crowded pools, or when a victim with a head, neck or spinal injury is close to the side of the pool
Slide-in entry and swimming approach
" Especially useful in shallow water, crowded pools, or when a victim with a head, neck or spinal injury is close to the side of the pool
Stride jump and swimming approach
" When you are less than 3 feet above the water and the water is at least 5 feet deep
Compact jump and swimming approach
" When you are more than 3 feet above the water and the water is at least 5 feet deep
" Jump from the deck into the water.
SHALLOW WATER LIFEGUARDING
! When conducting the Shallow Water Lifeguarding course, omit the stride jump and swimming approach. The compact jump should be performed when the lifeguard is 3 feet or less above the water.
! Remind participants that if the tube slips out or if they need to swim a longer distance, let the tube trail behind. They should reposition the tube as appropriate before making contact with the victim.
! Observe each participant’s performance of the skill several times and provide corrective feedback.
! Participants should practice the skills several times. Time permitting, participants should practice the skills until they are able to meet performance criteria. Participants who cannot meet the performance criteria should be counseled to practice outside of class times if possible.
! Observe each participant’s performance of the skill and provide corrective feedback.
Time: 45 minutes

LESSON 2 | Facility Safety and Patron Surveillance 45
Skill Drill—Entries and Approaches
! Explain to participants that they now are going to practice the entry and approach skills to make decisions as to when it is appropriate to use the different entries and approaches and build fitness.
! Keep participants moving throughout these activities to develop conditioning for speed and endurance:
Have participants simulate activating the EAP; perform a designated entry and then swim an approach stroke with a rescue tube as fast as they can for a significant distance, 25 yards if possible; climb out without using the ladder; and walk quickly back to the starting point. Repeat until participants have done this several times, sometimes swimming the approach stroke with the rescue tube under their armpits and sometimes with the rescue tube trailing behind.
Continue to follow the skill drill using the same pattern, but give participants a scenario and let them decide what entry to use, such as:
" The water is murky and they cannot see the bottom. Slide-in entry
" They are guarding on the deck and the water is 4-feet deep. Compact jump
" The pool is crowded and swimmers are directly in front of them. Slide-in entry
" They are in an elevated lifeguard station that is 4 feet above the level of the water and the water is 7-feet deep. Compact jump
" They are in an elevated guard chair that is not suitable for a jump, so they must climb down to enter the water. The chair could be situated in a shallow water area or not secured adequately to allow the lifeguard to jump from it. Simulate stepping down from the stand and perform a compact jump or slide-in entry
" They suspect a spinal injury close to the edge of the pool. Slide-in entry
" They are guarding a deep-water area on the deck and suspect a spinal injury at the far side of the pool. Compact jump, stride jump or slide-in entry
Effective Scanning and Lifeguard Rotations
Activity ! Explain to participants that they are going to participate in an activity to experience effective scanning and lifeguard rotations.
! Two participants will be positioned on deck as lifeguards, equipped with rescue tubes and hip packs. The remaining participants will be in the water as if it were a recreational swim time.
! Assign each participant a number and record it with their name to avoid calling the number of one of those playing the lifeguard role. When their number is called, they will know it is their turn to play the role of either a distressed swimmer, an active victim or a passive victim. The victim should not react immediately but should allow the lifeguards some time to scan the pool before presenting them with the challenge of victim recognition.
! Assign zones of coverage for the lifeguards. When a victim is recognized, the lifeguard should activate (or simulate) the EAP, point to the victim and state what type of victim they observe.
! Place an extra rescue tube and hip pack on the deck for the incoming lifeguard. Explain that the participant who was the victim will exit the water, put on a rescue tube and hip pack and rotate into the position of one of the lifeguards. The lifeguard who is being replaced will rotate to the position of the other lifeguard; afterward, he or she will place the rescue tube and hip pack on the deck and enter the water to join the recreational swim group. Follow the same pattern of rotation throughout the activity.
! Remind participants that they need to follow rotation procedures that maintain patron surveillance.
46 Lifeguarding Blended Learning Instructor’s Manual
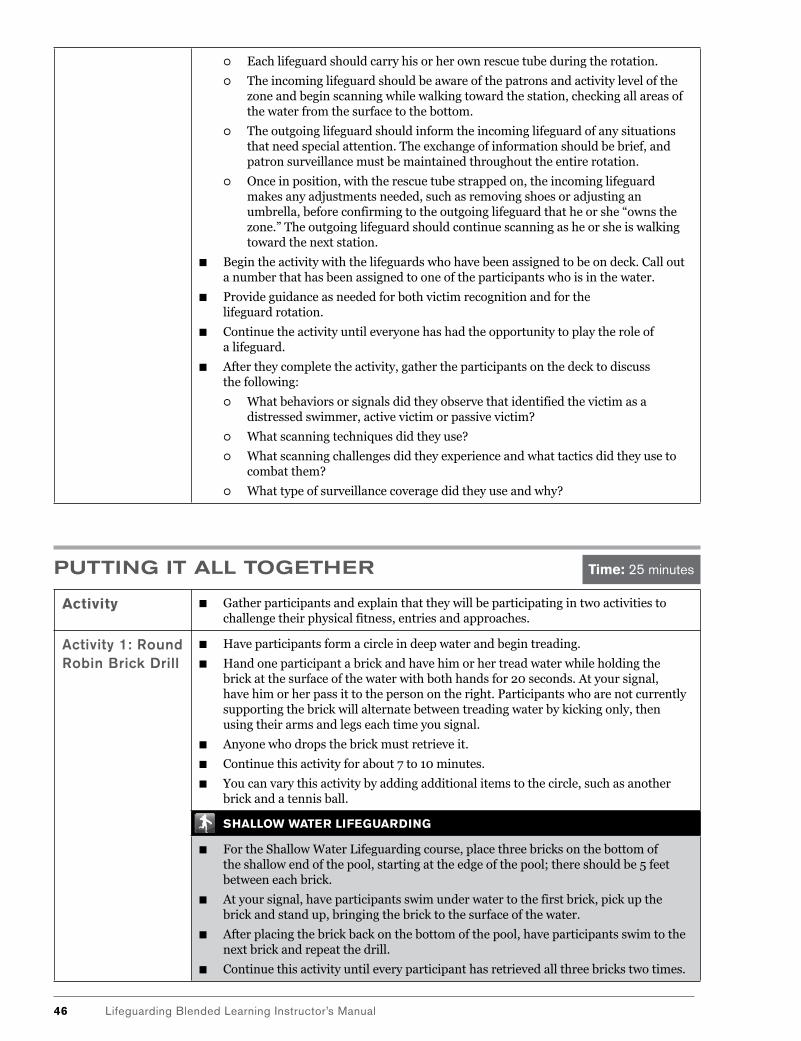
Each lifeguard should carry his or her own rescue tube during the rotation.
The incoming lifeguard should be aware of the patrons and activity level of the zone and begin scanning while walking toward the station, checking all areas of the water from the surface to the bottom.
The outgoing lifeguard should inform the incoming lifeguard of any situations that need special attention. The exchange of information should be brief, and patron surveillance must be maintained throughout the entire rotation.
Once in position, with the rescue tube strapped on, the incoming lifeguard makes any adjustments needed, such as removing shoes or adjusting an umbrella, before confirming to the outgoing lifeguard that he or she “owns the zone.” The outgoing lifeguard should continue scanning as he or she is walking toward the next station.
! Begin the activity with the lifeguards who have been assigned to be on deck. Call out a number that has been assigned to one of the participants who is in the water.
! Provide guidance as needed for both victim recognition and for the lifeguard rotation.
! Continue the activity until everyone has had the opportunity to play the role of a lifeguard.
! After they complete the activity, gather the participants on the deck to discuss the following:
What behaviors or signals did they observe that identified the victim as a distressed swimmer, active victim or passive victim?
What scanning techniques did they use?
What scanning challenges did they experience and what tactics did they use to combat them?
What type of surveillance coverage did they use and why?
PUTTING IT ALL TOGETHER
Activity ! Gather participants and explain that they will be participating in two activities to challenge their physical fitness, entries and approaches.
Activity 1: Round Robin Brick Drill
! Have participants form a circle in deep water and begin treading.
! Hand one participant a brick and have him or her tread water while holding the brick at the surface of the water with both hands for 20 seconds. At your signal, have him or her pass it to the person on the right. Participants who are not currently supporting the brick will alternate between treading water by kicking only, then using their arms and legs each time you signal.
! Anyone who drops the brick must retrieve it.
! Continue this activity for about 7 to 10 minutes.
! You can vary this activity by adding additional items to the circle, such as another brick and a tennis ball.
SHALLOW WATER LIFEGUARDING
! For the Shallow Water Lifeguarding course, place three bricks on the bottom of the shallow end of the pool, starting at the edge of the pool; there should be 5 feet between each brick.
! At your signal, have participants swim under water to the first brick, pick up the brick and stand up, bringing the brick to the surface of the water.
! After placing the brick back on the bottom of the pool, have participants swim to the next brick and repeat the drill.
! Continue this activity until every participant has retrieved all three bricks two times.
Time: 25 minutes

LESSON 2 | Facility Safety and Patron Surveillance 47
Activity 2: Rescue Tube Relay
! Explain to participants that this is a swimming relay activity to practice entries and approach strokes combined with speed.
! Divide the group into two or more teams with an equal number of participants.
! Each team member, wearing a hip pack, must either do a stride jump or compact jump into the water and swim to the other side using a modified front crawl or breaststroke while keeping the rescue tube under his or her armpits.
SHALLOW WATER LIFEGUARDING
! For the Shallow Water Lifeguarding course, participants should use the compact jump to enter the water.
! When each team member reaches the other end of the pool, he or she should hand off the rescue tube and hip pack to the next person in line. The next person in line performs a stride jump or compact jump into the water and swims with the rescue tube back to the starting point.
! Continue this process until each team member has participated for about 7 to 10 minutes.
! You can vary this activity by changing the type of entry or approach stroke or letting the tube trail behind.
SKILL CHARTS AND ASSESSMENT TOOLSIn addition to performing the steps listed in the skill chart in the correct order, participants must meet the criteria listed at the proficient level to be checked off for this skill.
ENTRIES
SKILL CHART: SLIDE-IN ENTRY
1. Sit down on the edge facing the water. Place the rescue tube next to you or in the water.
2. Lower your body into the water feetfirst.
3. Retrieve the rescue tube.
4. Place the rescue tube across your chest with the tube under your armpits, focus on the victim and begin the approach.
SKILL CHART: STRIDE JUMP (Lifeguarding Course only)
1. Squeeze the rescue tube high against your chest with the tube under your armpits.
2. Hold the excess line to keep the line from getting caught on something when jumping into the water.
3. Leap into the water with one leg forward and the other leg back.
4. Lean slightly forward, with your chest ahead of your hips, and focus on the victim when you enter the water.
5. Squeeze or scissor your legs together right after they make contact with the water for upward thrust.
6. Focus on the victim and begin the approach.
SKILL CHART: COMPACT JUMP
1. Squeeze the rescue tube high against your chest with the tube under your armpits.
2. Hold the excess line to keep it from getting caught on the lifeguard chair or other equipment when jumping into the water.
3. Jump out and away from the lifeguard chair, pool deck or pier. In a wave pool, time the jump to land on the crest (top) of a wave.
4. Bend your knees, and keep your feet together and flat to absorb the shock if you hit the bottom. Do not point your toes or keep your legs straight or stiff.
5. Let the buoyancy of the rescue tube bring you back to the surface.
6. Focus on the victim when surfacing and begin the approach.

48 Lifeguarding Blended Learning Instructor’s Manual
SKILL ASSESSMENT TOOL: ENTRIES
Criteria Proficient Not Proficient
Equipment properly positioned for the appropriate entry
! Control of the rescue tube maintained
! Tube held securely to the chest for the compact jump and stride jump
! Excess line held to keep it from getting caught on the lifeguard stand or other equipment
! Contact with the rescue tube not maintained
! Tube not held securely to the chest for the compact jump and stride jump
! Excess line not held
Appropriate entry selected for the situation
Entry is safe for the rescuer, victim and surrounding persons
Entry causes safety hazard
Focus on victim is maintained Upon entering (or resurfacing after a compact jump), focus on the victim or the site where the victim was last seen is maintained
Fails to look toward the victim or site where the victim was last seen
RESCUE APPROACHES
SKILL CHART: WALKING APPROACH
1. Walk to the victim.
2. Hold the rescue tube at your side and walk quickly toward the victim.
3. If necessary, position the tube in front of you before contacting the victim.
SKILL CHART: SWIMMING APPROACH
1. Swim to the victim using a modified front crawl or breaststroke.
2. Keep the rescue tube under your armpits or torso and swim toward the victim with your head up, keeping the rescue tube in control at all times.
3. For longer distances, or if the rescue tube slips out from under your arms or torso while you are swimming, let the tube trail behind.
4. If necessary, reposition the rescue tube in front of you before contacting the victim.
SKILL ASSESSMENT TOOL: APPROACHES
Criteria Proficient Not Proficient
Approaches victim safely and quickly
Effective propulsion used for safe approach
! No effective propulsion
! Approach causes a safety hazard
Focus on the victim is maintained Focus on the victim or the site where the victim was last seen is maintained
Fails to look toward the victim or site where the victim was last seen
Equipment properly positioned for the appropriate approach
! Control of rescue tube maintained during approach
! Tube strapped on during approach
! Tube remains in position or is repositioned as needed before contact with victim
! Fails to maintain contact with the rescue tube
! Does not strap on tube during approach
! Tube not in position for the selected rescue before contact with victim


