28
LWUIT 1.1 for Java ME Developers Biswajit Sarkar Chapter No. 10 "Using Themes"

LWUIT 1.1 for Java ME Developers
Biswajit Sarkar
Chapter No. 10 "Using Themes"
For More Information: www.packtpub.com/lwuit-1-1-for-java-me-developers/book
In this package, you will find: A Biography of the author of the book
A preview chapter from the book, Chapter NO.10 "Using Themes"
A synopsis of the book’s content
Information on where to buy this book
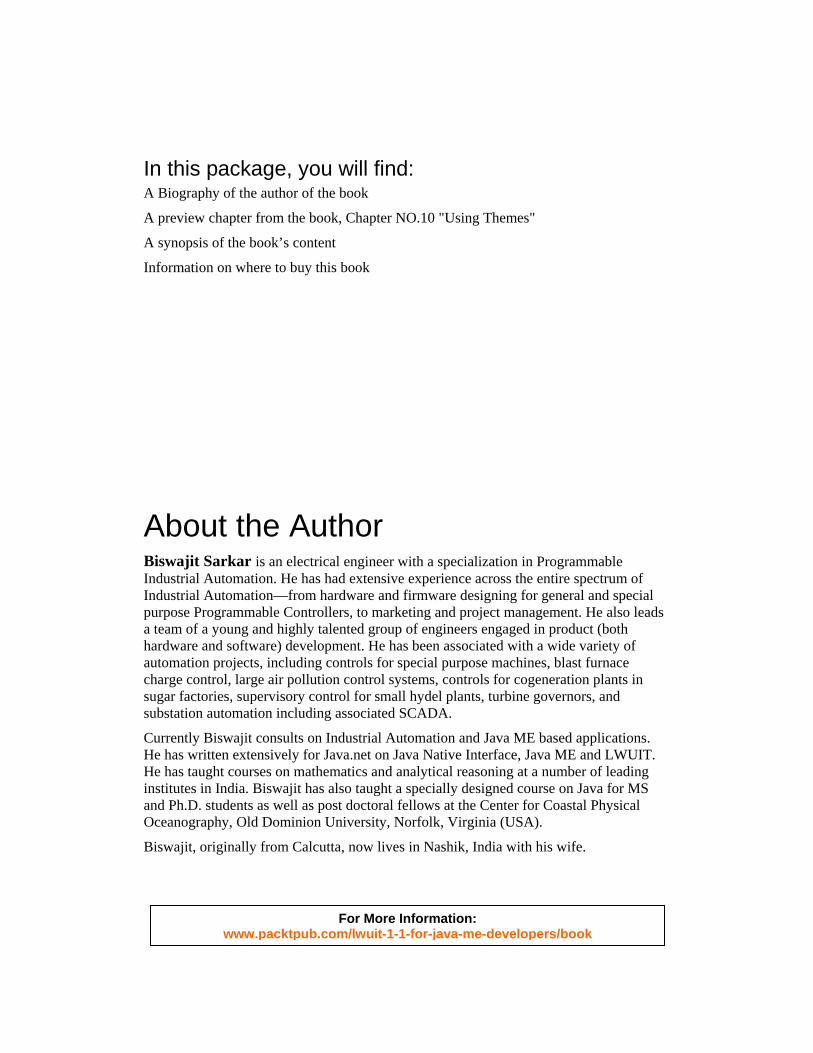
About the Author Biswajit Sarkar is an electrical engineer with a specialization in Programmable Industrial Automation. He has had extensive experience across the entire spectrum of Industrial Automation—from hardware and firmware designing for general and special purpose Programmable Controllers, to marketing and project management. He also leads a team of a young and highly talented group of engineers engaged in product (both hardware and software) development. He has been associated with a wide variety of automation projects, including controls for special purpose machines, blast furnace charge control, large air pollution control systems, controls for cogeneration plants in sugar factories, supervisory control for small hydel plants, turbine governors, and substation automation including associated SCADA.
Currently Biswajit consults on Industrial Automation and Java ME based applications. He has written extensively for Java.net on Java Native Interface, Java ME and LWUIT. He has taught courses on mathematics and analytical reasoning at a number of leading institutes in India. Biswajit has also taught a specially designed course on Java for MS and Ph.D. students as well as post doctoral fellows at the Center for Coastal Physical Oceanography, Old Dominion University, Norfolk, Virginia (USA).
Biswajit, originally from Calcutta, now lives in Nashik, India with his wife.

For More Information: www.packtpub.com/lwuit-1-1-for-java-me-developers/book
This book would never have seen daylight had it not been for the excellent support that I received from the editorial team at Packt Publishing. I must express my grateful appreciation of the roles played by Douglas Paterson at the critical formative stage of the book, and, later by Dhiraj Chandiramani. Lata Basantani and Zainab Bagasrawala made sure that the project remained on schedule, while Shadab Khan and his team deftly guided the completion process. I am grateful for the comments of the reviewers that helped me maintain clarity of thought, and ensured the technical integrity of the book.
On the personal front, first and foremost, I am indebted to Dada who equipped me with the ability to undertake such an activity. The encouragement and unstinting support I received from my wife Jyoti were a great source of strength and helped me survive those difficult times when I was nearly swamped by my various commitments and the temptation to give up was great. Isaac, my son-in-law, has always encouraged me to write and was a great confidence booster. Finally, I must acknowledge the sacrifices made by my grandchildren Anunita and Ian who spent many unhappy days and evenings without my participation in their games.

For More Information: www.packtpub.com/lwuit-1-1-for-java-me-developers/book
LWUIT 1.1 for Java ME Developers The Lightweight Toolkit (LWUIT) is designed to help developers to create highly attractive User Interfaces for MIDP 2.0 and CLDC 1.1 compliant small devices like mobile phones. This toolkit supports a number of interesting widgets and features like theming, animations, transitions, and logging. LWUIT also addresses the issue of fragmentation by making it possible to implement screens with a device independent look and feel.
This book covers the widgets and functionalities of the library in detail, demonstrating their use with a large number of examples and a profusion of screenshots. A number of structural and architectural issues are discussed to help you gain insight into the inner workings of the library.
LWUIT is an evolving library and we are bound to see modifications and additions to its current repertoire. The knowledge you gain from this book will help you significantly in understanding these changes and in remaining up-to-date. The Lightweight Toolkit Library is an external API that is not an integral part of the Java platform and has to be bundled with an application meant for a physical device. One implication of this is that any application you write based on a given version (like version 1.1) will not become obsolete and will work on future devices too.
This book will equip you with the knowledge and skills required to create applications that will impress users with visual sophistication.

For More Information: www.packtpub.com/lwuit-1-1-for-java-me-developers/book
What This Book Covers Chapter 1 tells you what LWUIT is all about and, broadly, how it operates. Starting with an overview of LWUIT which present the widgets and the functional features, this chapter goes on to discuss the basic architecture of LWUIT and ends with introductions to the two classes that are its foundations—LWUIT Implementation and Display.
Chapter 2 lists the items that you will need to download and tells you where to find them. It prepares you for trying out the examples in the book and for creating your own applications by building a demo project. Next, you get to know the Component class, the component rendering process, and the Graphics class. Finally, this chapter lays the foundation for using Style and Animation with components.
Chapter 3 deals with the Container class, which is designed to be the holder of components. There are a number of descendants of Container—the Form, the Dialog, the Calendar and the TabbedPane. These classes also are discussed in detail with examples to show how they can be used in applications.
Chapter 4 covers Labels and the three components that are its descendants. These are the Button, the CheckBox and the RadioButton. RadioButtons exhibit special properties when they work with the ButtonGroup class and this aspect is demonstrated through an example. This chapter also takes a look at the Border class, which is used in the examples.
Chapter 5 demonstrates how flexible a List, and its subclass ComboBox, can be. This flexibility is shown through the examples that use custom renderers to enhance the appearance and functionality of lists and combo boxes.
Chapter 6 explores TextArea and TextField—the two classes that enable users to enter, display and edit text. A text field has the interesting property of in-place editing and this is treated in detail in this chapter.
Chapter 7 takes you through the various layout managers that arrange components on containers. There are six layout managers and the examples show the different ways in which these classes place components. The root of these six classes is the Layout class, which too is studied here.

For More Information: www.packtpub.com/lwuit-1-1-for-java-me-developers/book
Chapter 8 shows how custom components can be built. Building such a component involves not only visual aspects but also issues like styling, event handling and event generation. All of these topics are dealt with in this chapter through the examples.
Chapter 9 demonstrates how LWUIT handles various non-code elements that may be required by an application. Images, Fonts, and Animation Resources are examples of such elements. Resource files are used to package these elements and the Resources class provides the methods for extracting them from a resource file. The LWUIT bundle contains LWUIT Designer, which is a very convenient utility for creating resource files. This chapter examines how resource files are built and used.
Chapter 10 is about Themes. Themes are used to establish visual coherence through all the screens of an application. The LWUIT Designer is the tool that displays, edits and builds the themes that define how your applications will look. In this chapter, you will learn about themes, their usage and how they can be created.
Chapter 11 shows off two fascinating functionalities of LWUIT—Animations and Transitions. Animations involve repeated rendering on a component while Transitions determine the way in which a form is moved out of or brought into display. In this chapter, you will study these two features and see how to use them in actual applications. You will also see how to develop a custom transition which demonstrates the process of such customization.
Chapter 12 shows you how the Painter interface can be used to customize the appearance of a component’s background. This chapter also explains how a transparent or translucent layer (like a glass pane) can be placed over a form to implement interesting visual effects.
Chapter 13 covers two useful utilities that come with the LWUIT library. These are the Effects and the Log classes. The Effects class simulates the reflection of an image and appends the reflection to the original image. The Log class enables you to monitor at runtime the inner workings of the classes that you write. This can be a very effective debugging tool. This chapter demonstrates the use of Effects and Log classes. It also examines the structure of Log class through an example that builds its subclass to provide additional capabilities.

For More Information: www.packtpub.com/lwuit-1-1-for-java-me-developers/book
Using ThemesIn the preceding chapters, we have seen how to set styles for components. In an application with a large number of UI components, setting attributes for each can be a tedious task and can also lead to errors. A Theme allows us to set the style attributes for an entire class of components in a single place. This not only simplifi es the task of setting attributes for all components of a particular type but also ensures that any newly added component will look just like all the others of the same type in the application. A theme thereby establishes a visual coherence through all the screens of an application.
In this chapter, we shall study themes and their usage in detail through the following steps:
View an existing theme using the LWUIT DesignerEdit a themeBuild a new themePreview the new theme on LWUIT demo MIDletUse the new theme in a demo MIDletUse your own component in a theme
Working with theme files A theme fi le is conceptually similar to CSS while its implementation is like that of a Java properties fi le. Essentially a theme is a list of key-value pairs with an attribute being a key and its value being the second part of the key-value pair An entry in the list may be Form.bgColor= 555555. This entry specifi es that the background color of all forms in the application will be (hex) 555555 in the RGB format. The list is implemented as a hashtable.
•
•
•
•
•
•

For More Information: www.packtpub.com/lwuit-1-1-for-java-me-developers/book
Using Themes
[ 238 ]
Viewing a theme file A theme is packaged into a resource fi le that can also hold, as we have already seen, other items like images, animations, bitmap fonts, and so on. The fact that a theme is an element in a resource bundle means it can be created, viewed, and edited using the LWUIT Designer. The following screenshot shows a theme fi le viewed through the LWUIT Designer:
The fi rst point to note is that there are fi ve entries at the bottom, which appear in bold letters. All such entries are the defaults. To take an example, the only component-specifi c font setting in the theme shown above is for the soft button. The font for the form title, as well as that for the strings in other components is not defi ned. These strings will be rendered with the default font.

For More Information: www.packtpub.com/lwuit-1-1-for-java-me-developers/book
Chapter 10
[ 239 ]
A theme fi le can contain images, animations, and fonts—both bitmap and system—as values. Depending on the type of key, values can be numbers, fi lenames or descriptions along with thumbnails where applicable.
Editing a theme file In order to modify an entry in the theme fi le, select the row, and click on the Edit button. The dialog for edit will open, as shown in the following screenshot:
Clicking on the browse button (the button with three dots and marked by the arrow) will open a color chooser from which the value of the selected color will be directly entered into the edit dialog. The edit dialog has fi elds corresponding to various keys, and depending on the one selected for editing, the relevant fi eld will be enabled. Once a value is edited, click on the OK button to enter the new value into the theme fi le. In order to abort editing, click on the Cancel button.

For More Information: www.packtpub.com/lwuit-1-1-for-java-me-developers/book
Using Themes
[ 240 ]
Populating a theme We shall now proceed to build a new theme fi le and see how it affects the appearance of a screen. The application used here is DemoTheme, and the code snippet below shows that we have set up a form with a label, a button, and a radio button.
//create a new form Form demoForm = new Form("Theme Demo");
//demoForm.setLayout(new BorderLayout()); demoForm.setLayout(new BoxLayout(BoxLayout.Y_AXIS));
//create and add 'Exit' command to the form //the command id is 0 demoForm.addCommand(new Command("Exit", 1));
//this MIDlet is the listener for the form's command demoForm.setCommandListener(this);
//label Label label = new Label("This is a Label");
//button Button button = new Button("An ordinary Button");
//radiobutton RadioButton rButton = new RadioButton("Just a RadioButton");
//timeteller -- a custom component //TimeTeller timeTeller = new TimeTeller();
//set style for timeLabel and titleLabel(in TimeViewer) //these parts of TimeTeller cannot be themed //because they belong to TimeViewer which does not //have any UIID /*Style tStyle = new Style(); tStyle.setBgColor(0x556b3f); tStyle.setFgColor(0xe8dd21); tStyle.setBorder(Border.createRoundBorder(5, 5)); timeTeller.setTitleStyle(tStyle);
Style tmStyle = timeTeller.getTimeStyle(); tmStyle.setBgColor(0xff0000); tmStyle.setFgColor(0xe8dd21); tmStyle.setBgTransparency(80); tmStyle.setBorder(Border.createRoundBorder(5, 5));*/
//add the widgets to demoForm demoForm.addComponent(label); demoForm.addComponent(button); demoForm.addComponent(rButton);
//demoForm.addComponent(timeTeller);
//show the form demoForm.show();

For More Information: www.packtpub.com/lwuit-1-1-for-java-me-developers/book
Chapter 10
[ 241 ]
The statements for TimeTeller have been commented out. They will have to be uncommented to produce the screenshots in the section dealing with setting a theme for a custom component.
The basic structure of the code is the same as that in the examples that we have come across so far, but with one difference—we do not have any statement for style setting this time around. That is because we intend to use theming to control the look of the form and the components on it. If we compile and run the code in its present form, then we get the following (expected) look.
All the components have now been rendered with default attributes. In order to change the way the form looks, we are going to build a theme fi le—SampleTheme—that will contain the attributes required. We start by opening the LWUIT Designer through the SWTK. Had a resource fi le been present in the res folder of the project, we could have opened it in the LWUIT Designer by double-clicking on that fi le in the SWTK screen. In this case, as there is no such fi le, we launch the LWUIT Designer through the SWTK menu.

For More Information: www.packtpub.com/lwuit-1-1-for-java-me-developers/book
Using Themes
[ 242 ]
The following screenshot shows the result of selecting Themes, and then clicking on the Add button:
The name of the theme is typed in, as shown in the previous screenshot. Clicking on the OK button now creates an empty theme fi le, which is shown under Themes.

For More Information: www.packtpub.com/lwuit-1-1-for-java-me-developers/book
Chapter 10
[ 243 ]
Our fi rst target for styling will be the form including the title and menu bars. If we click on the Add button in the right panel, the Add dialog will open. We can see this dialog below with the drop-down list for the Component fi eld.

For More Information: www.packtpub.com/lwuit-1-1-for-java-me-developers/book
Using Themes
[ 244 ]
Form is selected from this list. Similarly, the drop-down list for Attribute shows all the attributes that can be set. From this list we select bgImage, and we are prompted to enter the name for the image, which is bgImage in our case.
The next step is to close the Add Image dialog by clicking on the OK button. As we have not added any image to this resource fi le as yet, the Image fi eld above is blank. In order to select an image, we have to click on the browse button on the right of the Image fi eld to display the following dialog.
Again, the browse button has to be used to locate the desired image fi le. We confi rm our selection through the successive dialogs to add the image as the one to be shown on the background of the form.

For More Information: www.packtpub.com/lwuit-1-1-for-java-me-developers/book
Chapter 10
[ 245 ]
As we can see, the process of adding an attribute to a component is pretty intuitive. In a similar manner, we can set the various background and foreground colors for the components. When setting a color attribute, the dialog will have the familiar browse button to select the color from a color chooser dialog.
For setting a font, the dialog has two radio buttons to select Bitmap or System fonts. If Bitmap is selected, then the available bitmap fonts in the resource fi le will be shown in the corresponding fi eld. If there are no bitmap fonts in the resource fi le, then the required font will have to be selected by clicking on the browse button, which will initiate the same sequence of operations that we saw in Chapter 9 for adding a bitmap font. With the System button selected, on the other hand, the applicable parameter fi elds will become active.

For More Information: www.packtpub.com/lwuit-1-1-for-java-me-developers/book
Using Themes
[ 246 ]
Once we have set the attributes for the form, its title and its menu, the theme fi le looks like the following screenshot:
Now, it is time to see what we have done to our form. One way of doing this is to run the application. But the LWUIT Designer provides a very convenient way of checking the result of our actions on a theme fi le through the preview panel. If you maximize the LWUIT Designer window, then this panel will appear on the extreme right of the window whenever a theme fi le is selected.

For More Information: www.packtpub.com/lwuit-1-1-for-java-me-developers/book
Chapter 10
[ 247 ]
What we see on the preview panel is how the LWUITDemo application (it is a part of the LWUIT download bundle) would look with the attributes specifi ed in the theme fi le that we are dealing with. This preview keeps showing the effects of style attributes as we enter them into the theme. The style settings for the form, the title and the menu do appear to have produced the intended result. To cross-check, let us save the fi le and run our demo so that we can see how the screen looks now. However, for the theme fi le to take effect, it has to be installed, and that is quite easily done as we see in the code below:
Resources sampleThemeResource = Resources.open("/SampleTheme.res"); Hashtable sampleTheme = sampleThemeResource.getTheme("SampleTheme"); UIManager.getInstance().setThemeProps(sampleTheme);
With that done, we can compile and run the code, and as we see, the form together with the title and menu, does indeed look the way we would expect it to after the preview.

For More Information: www.packtpub.com/lwuit-1-1-for-java-me-developers/book
Using Themes
[ 248 ]
We now turn our attention to the label, the button, and the radio button. The following is the complete theme fi le to set attributes for all the components on the form. Note that there is no font setting for the label, the button, or the radio button. Instead, there is a default font, which is effective for all these three components.
Before we save this fi le, let us preview the theme. The LWUIT Demo on the preview panel is not merely an image. It works as well. So, to preview the look of the label, the button, and the radio button, we select Buttons on the demo, and the following screen opens on the preview panel:

For More Information: www.packtpub.com/lwuit-1-1-for-java-me-developers/book
Chapter 10
[ 249 ]
The styles appear to be acceptable. We have not set any attribute for the check boxes, and the defaults become applicable to them. However, we did set a default font, and this is effective for the check boxes too. The fi le can now be saved. The fi nal result as applied to our form is shown in the following screenshot:
Theming custom components So far our theme fi le has specifi ed attributes for the standard components supported by the library. It is possible to use theming for custom components too. To try this out, we shall use the TimeTeller component that we had created in Chapter 8. The two interfaces and the two classes that together make up that component have been put into a package named book.newcomp to make the code better organized. A timeteller is added to the form by uncommenting the relevant statements shown in the MIDlet code snippet listed earlier in this chapter. However, note that we have not set any style for the timeteller instance.

For More Information: www.packtpub.com/lwuit-1-1-for-java-me-developers/book
Using Themes
[ 250 ]
Without any entry for TimeTeller in the theme fi le, the screen looks similar to the following screenshot:
We can see that the two labels of the timeteller are properly styled, while the overall component background has the default color. This happens because the labels have been explicitly styled through code while creating the timeteller. If you experiment with the theme fi le, then you will see that it is not possible to affect the styles of the TimeViewer part of the component through the fi le. This can be explained when we consider how theming works. When the setThemeProps method is executed, the UIManager instance transfers values from the theme fi le into respective style objects by using the UIID of a component as the key. Obviously, if a component does not have its own UIID, its style cannot be set through the theme. The TimeViewer class has not been allocated a UIID and that is why it will not be affected by any entry in the theme fi le. TimeTeller, on the other hand, does have a UIID, and we can therefore set its attributes through the theme fi le. In order to do that, we click on the Add button to get the Add dialog. In the Component fi eld, we type in TimeTeller and set bgColor following the usual procedure.

For More Information: www.packtpub.com/lwuit-1-1-for-java-me-developers/book
Chapter 10
[ 251 ]
A click on the OK button enters the value in the theme. The following screenshot shows three entries for TimeTeller:

For More Information: www.packtpub.com/lwuit-1-1-for-java-me-developers/book
Using Themes
[ 252 ]
The result of setting these attributes can be seen in the following screenshot:
Manual styling versus theming We know that an attribute can be set for a specifi c widget by using a setter method of the Style class. Let's take a concrete example. In our demo MIDlet, we have manually set background colors for the two labels of the timeteller. We have also defi ned a different set of background colors for labels in general through the theme. We need to understand which setting takes precedence when confl icting attributes are set in this way.
The API documentation tells us that there are two types of methods for setting attributes. For setting background colors, the methods are setBgColor(int bgColor) and setBgColor(int bgColor, boolean override). If the fi rst method is used to manually set the background color of a widget, then a theme fi le entry will not be effective for that particular component instance. However, all other instances of the same component will be styled as per the theme fi le, provided manual styling using the same method has not been done. In this case, we have used the setBgColor(int bgColor) method to set background colors for the two labels within the timeteller. Therefore, the theme fi le has no effect on these two labels, although it does determine the corresponding color for the other label on the form. On the other hand, when the setBgColor(int bgColor, boolean override) method is used and the Boolean parameter is true, theme settings will override any manual styling.

For More Information: www.packtpub.com/lwuit-1-1-for-java-me-developers/book
Chapter 10
[ 253 ]
There is another way to allow a theme to override manually set style attributes. If we create a new style object and pass all the options in the constructor, then setting a theme fi le will change the attributes of such a style object.
Theming on the fly One feature of theming that we have not talked about so far is that it is possible to change themes at runtime by using the setThemeProps method of UIManager. But when a theme is set on the fl y there will be, in general, components that are not visible, and the effect of setting a theme on these components is not predictable. In order to make sure that even the components that are not visible have their styles properly updated, you should call the refreshTheme method using code like this:
Display.getInstance().getCurrent().refreshTheme();
When a theme is installed at runtime, there may be form instances that have been created earlier and are to be displayed later. In order that the newly installed theme may take effect on these forms too, it is necessary to call refreshTheme on all such forms before they are shown on screen. For forms that are created after the theme is set, no such action is required, as the respective style objects will be initialized to the theme settings. In the current example, demoForm was instantiated after the theme was installed, and accordingly, refreshTheme was not invoked.
New version of the LWUIT Designer The example in this chapter has been developed on the SWTK and the LWUIT Designer (Resource Editor) that comes with it. This is very convenient, as the resource bundle can be opened for viewing and editing from the SWTK console. The LWUIT download bundle also includes an LWUIT Designer, which offers some additional capabilities. In this section, we shall examine this version and see what is different about it.

For More Information: www.packtpub.com/lwuit-1-1-for-java-me-developers/book
Using Themes
[ 254 ]
The fi rst impression we get from the next screenshot is that of a totally different look. We then realize that it also has the new name on the title bar.
However, the really signifi cant difference is that this version of the LWUIT Designer supports a much wider variety of components and also an additional attribute. Some of the additions to the list of supported components are as follows:
ComboBoxPopup Command DialogBody ScrollThumb
The additional attribute that has been included is border. We shall use this edition of LWUIT Designer to add a border to the button in our demo. We will click on the Add button on the panel that shows the theme listing. We then select Button from the list of components and border from the drop-down attribute list on the Add dialog.
•
•
•
•

For More Information: www.packtpub.com/lwuit-1-1-for-java-me-developers/book
Chapter 10
[ 255 ]
The browse button next to the Border fi eld opens a dialog for specifying the kind of border we want.

For More Information: www.packtpub.com/lwuit-1-1-for-java-me-developers/book
Using Themes
[ 256 ]
Here we have selected a line border and have checked the box that will use the color scheme from the theme for the border. The resulting border for the button (An ordinary Button) is shown in the following screenshot:
Word of cautionWhen you create or modify a theme fi le using the new versions of LWUIT Designer, you may not be able to open the fi le through the version that comes with the SWTK. However, you will still be able to run the application on the SWTK, and the new or modifi ed theme will work properly.

For More Information: www.packtpub.com/lwuit-1-1-for-java-me-developers/book
Chapter 10
[ 257 ]
SummaryIn this chapter, we had a detailed discussion on themes—what they are, how to create them, and how to use them in applications. The steps we followed during our exploration of this topic are:
We saw how to use the LWUIT Designer for viewing and editing an existing themeWe built up a new theme from scratchAs we built the theme, we previewed its effectsThe new theme was installed in our MIDlet, and the proper way to ensure that a newly installed theme works on all existing forms was studiedA custom component was themedWe saw how to make theming and manual styling work together without contentionsA second version of LWUIT Designer was also tried out
Theming is one of the radically new functionalities available on the LWUIT as compared to the javax.microedition.lcdui package and allows the use of application-specifi c look and feel that is also independent of the native platform. So, complete familiarity with theming is very important for effective application development using LWUIT.
•
•
•
•
•
•
•

For More Information: www.packtpub.com/lwuit-1-1-for-java-me-developers/book
Where to buy this book You can buy LWUIT 1.1 for Java ME Developers from the Packt Publishing website: http://www.packtpub.com/lwuit-1-1-for-java-me-developers/book
Free shipping to the US, UK, Europe and selected Asian countries. For more information, please read our shipping policy.
Alternatively, you can buy the book from Amazon, BN.com, Computer Manuals and most internet book retailers.
www.PacktPub.com


