43
Migrating data from IBM InfoSphere Information Server 11.7.1.x to IBM Cloud Pak for Data 2.5.0

Migrating data from IBM InfoSphere
Information Server 11.7.1.x to IBM
Cloud Pak for Data 2.5.0
Contents Overview ...................................................................................................................................................... 3
Products versions supported for migration ....................................................................................... 3
Important: Deleting migrated content ............................................................................................... 3
Asset types that you can migrate ........................................................................................................ 3
Data that you can’t migrate .................................................................................................................. 8
Overall flow of migration procedure ................................................................................................... 9
Prerequisites ............................................................................................................................................... 9
Procedure .................................................................................................................................................. 21
Step 1: Export assets from the source system ............................................................................... 21
Step 2: Copy the exported files to the target system ..................................................................... 28
Step 3: Import the files to the target system .................................................................................. 29
Step 4: Synchronize glossary assets ................................................................................................. 39
Step 5: (Optional) Recreate the catalog for sharing information assets ..................................... 40
Step 6: (Optional) Re-enable automatic profiling of assets .......................................................... 40
Expected performance of migration ..................................................................................................... 41
Troubleshooting ....................................................................................................................................... 41

Overview
Products versions supported for migration
You can export data from IBM InfoSphere Information Server versions 11.7.1.x, and import
data to IBM Cloud Pak for Data version 2.5.0.
Migrating analysis database, automated discovery results, and data rule and rule set run
history is supported only from the Db2 databases.
Note: You must have Watson Knowledge Catalog service installed with IBM Cloud Pak for
Data.
Important: Deleting migrated content
Important: When you migrate glossary assets, and then remove any of them in Cloud Pak for
Data user interface, you cannot migrate them again. Glossary assets include terms, categories,
policies, rules, data classes, and labels.
Asset types that you can migrate
Asset types
The following table contains information about which asset types you can migrate and where
you can find them in Cloud Pak for Data.
Asset type in Information Server Location in Cloud Pak for Data
Terms Organize > Data and AI governance >
Business terms
Categories Organize > Data and AI governance >
Categories
Information governance rules Organize > Data and AI governance > Rules
Information governance policies Organize > Data and AI governance >
Policies
Data classes Organize > Data and AI governance > Data
classes
Labels Organize > Data and AI governance >
Classifications
Bundle assets (open IGC assets) Organize > Information assets
Common metadata assets:
- Implemented data resources
(databases, data files)
- Business intelligence (BI) assets
- Physical data model assets

- Logical data model assets
- Data connections
- Contract libraries
Extension mapping documents and extended
data sources
InfoSphere DataStage and QualityStage
assets
InfoSphere Streams assets
Workspaces Organize > Data quality
Data sets
Data rules
Data rule definitions
Rule sets
Rule set definitions
Quality rules
Analysis results: column analysis, data
quality analysis, data rule history, rule set
history, overlap analysis, relationship
analysis, cross-domain analysis, multiple
column primary key analysis
Metrics Organize > Information assets
Automation rules Organize > Metadata curation > Automation
rules
Import areas Organize > Metadata curation > Metadata
import Data connections
Staging area assets
Note: Only published versions of glossary assets are migrated (terms, categories, information
governance rules, and information governance policies). In the target catalog, they are also
imported as the published artifacts. If you want to migrate the content of the draft glossary,
you must publish these assets before migration.
Glossary asset properties
The following tables contain a comparison of properties between glossary assets in
Information Governance Catalog (IGC) and governance artifacts in Cloud Pak for Data.
Table 1. Term properties
Term in Information Governance Catalog Business term in Cloud Pak for Data
Name Name
Parent Category Primary category
Short Description Description
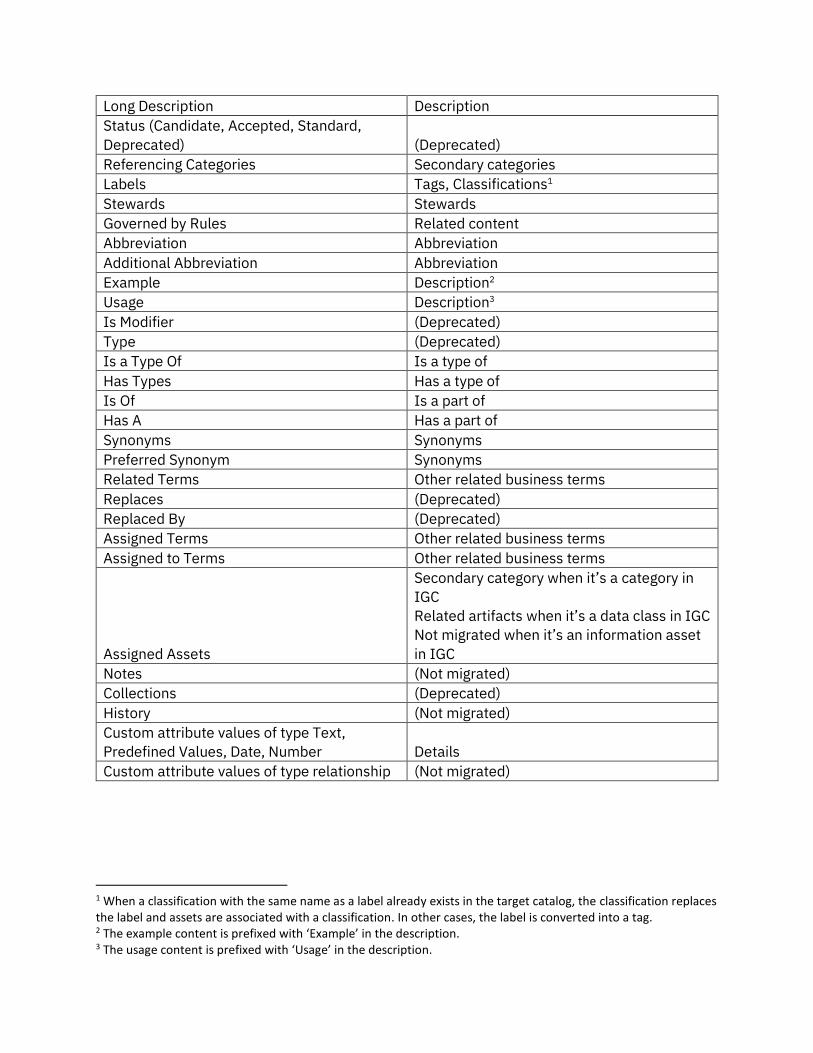
Long Description Description
Status (Candidate, Accepted, Standard,
Deprecated) (Deprecated)
Referencing Categories Secondary categories
Labels Tags, Classifications1
Stewards Stewards
Governed by Rules Related content
Abbreviation Abbreviation
Additional Abbreviation Abbreviation
Example Description2
Usage Description3
Is Modifier (Deprecated)
Type (Deprecated)
Is a Type Of Is a type of
Has Types Has a type of
Is Of Is a part of
Has A Has a part of
Synonyms Synonyms
Preferred Synonym Synonyms
Related Terms Other related business terms
Replaces (Deprecated)
Replaced By (Deprecated)
Assigned Terms Other related business terms
Assigned to Terms Other related business terms
Assigned Assets
Secondary category when it’s a category in
IGC
Related artifacts when it’s a data class in IGC
Not migrated when it’s an information asset
in IGC
Notes (Not migrated)
Collections (Deprecated)
History (Not migrated)
Custom attribute values of type Text,
Predefined Values, Date, Number Details
Custom attribute values of type relationship (Not migrated)
1 When a classification with the same name as a label already exists in the target catalog, the classification replaces the label and assets are associated with a classification. In other cases, the label is converted into a tag. 2 The example content is prefixed with ‘Example’ in the description. 3 The usage content is prefixed with ‘Usage’ in the description.
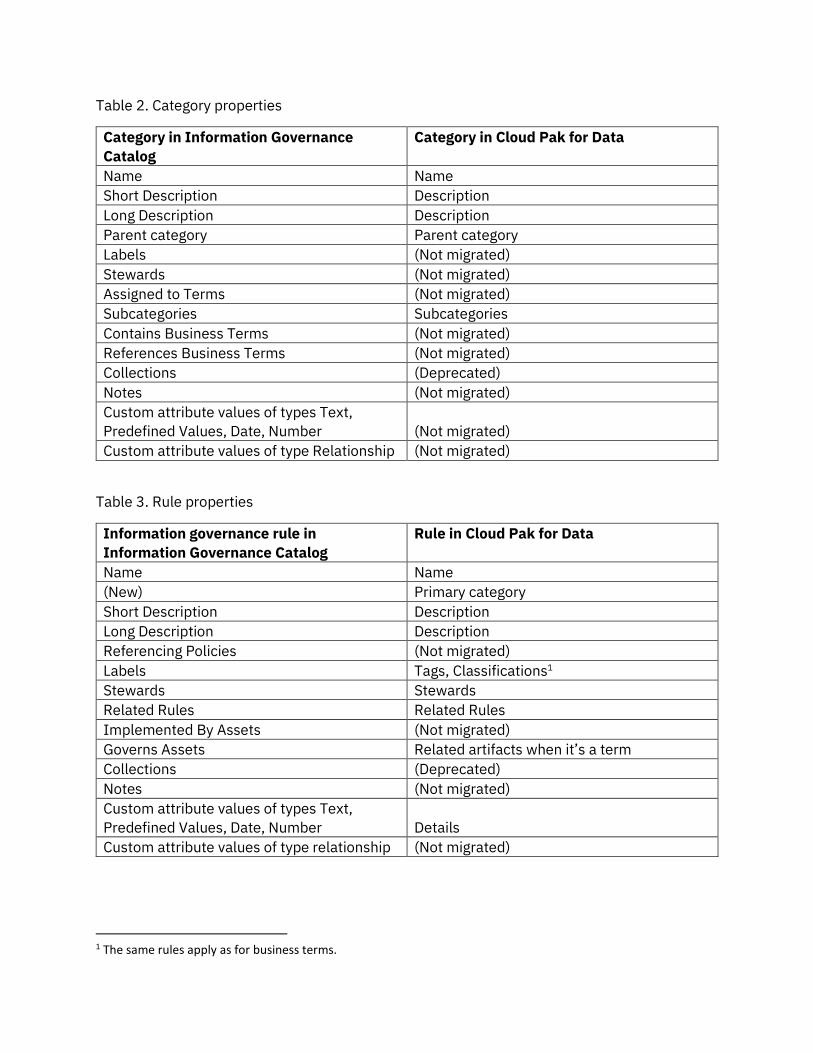
Table 2. Category properties
Category in Information Governance
Catalog
Category in Cloud Pak for Data
Name Name
Short Description Description
Long Description Description
Parent category Parent category
Labels (Not migrated)
Stewards (Not migrated)
Assigned to Terms (Not migrated)
Subcategories Subcategories
Contains Business Terms (Not migrated)
References Business Terms (Not migrated)
Collections (Deprecated)
Notes (Not migrated)
Custom attribute values of types Text,
Predefined Values, Date, Number (Not migrated)
Custom attribute values of type Relationship (Not migrated)
Table 3. Rule properties
Information governance rule in
Information Governance Catalog
Rule in Cloud Pak for Data
Name Name
(New) Primary category
Short Description Description
Long Description Description
Referencing Policies (Not migrated)
Labels Tags, Classifications1
Stewards Stewards
Related Rules Related Rules
Implemented By Assets (Not migrated)
Governs Assets Related artifacts when it’s a term
Collections (Deprecated)
Notes (Not migrated)
Custom attribute values of types Text,
Predefined Values, Date, Number Details
Custom attribute values of type relationship (Not migrated)
1 The same rules apply as for business terms.
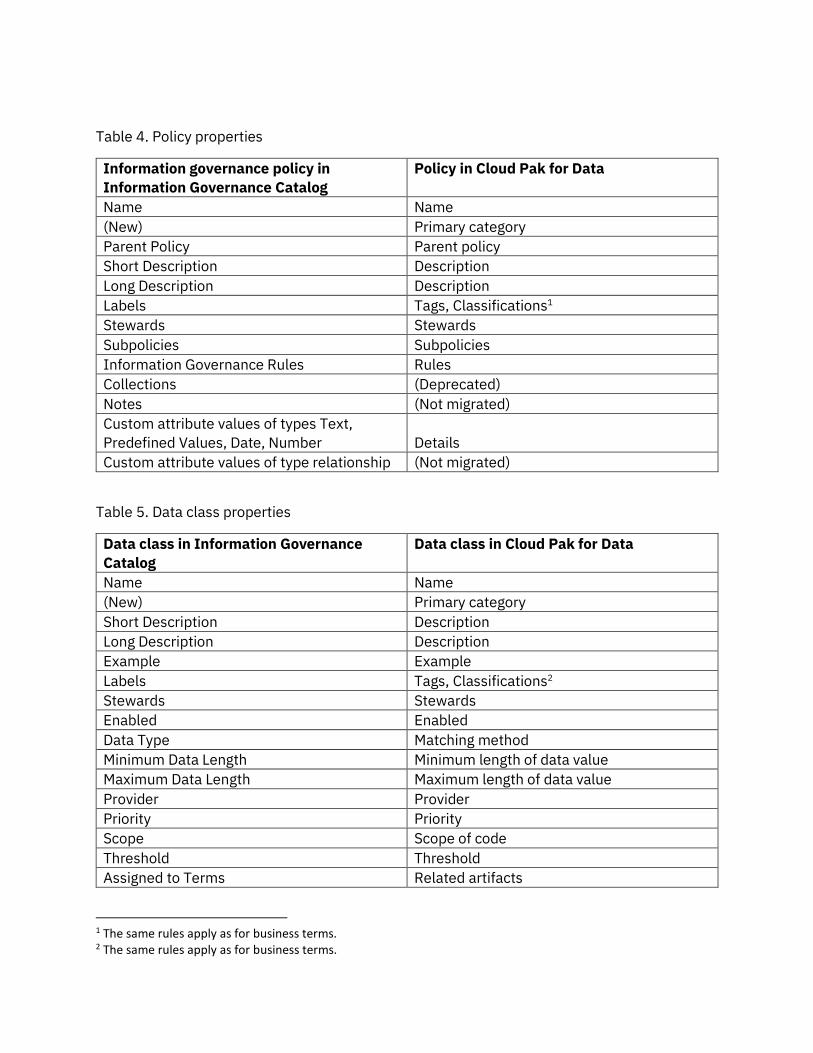
Table 4. Policy properties
Information governance policy in
Information Governance Catalog
Policy in Cloud Pak for Data
Name Name
(New) Primary category
Parent Policy Parent policy
Short Description Description
Long Description Description
Labels Tags, Classifications1
Stewards Stewards
Subpolicies Subpolicies
Information Governance Rules Rules
Collections (Deprecated)
Notes (Not migrated)
Custom attribute values of types Text,
Predefined Values, Date, Number Details
Custom attribute values of type relationship (Not migrated)
Table 5. Data class properties
Data class in Information Governance
Catalog
Data class in Cloud Pak for Data
Name Name
(New) Primary category
Short Description Description
Long Description Description
Example Example
Labels Tags, Classifications2
Stewards Stewards
Enabled Enabled
Data Type Matching method
Minimum Data Length Minimum length of data value
Maximum Data Length Maximum length of data value
Provider Provider
Priority Priority
Scope Scope of code
Threshold Threshold
Assigned to Terms Related artifacts
1 The same rules apply as for business terms. 2 The same rules apply as for business terms.
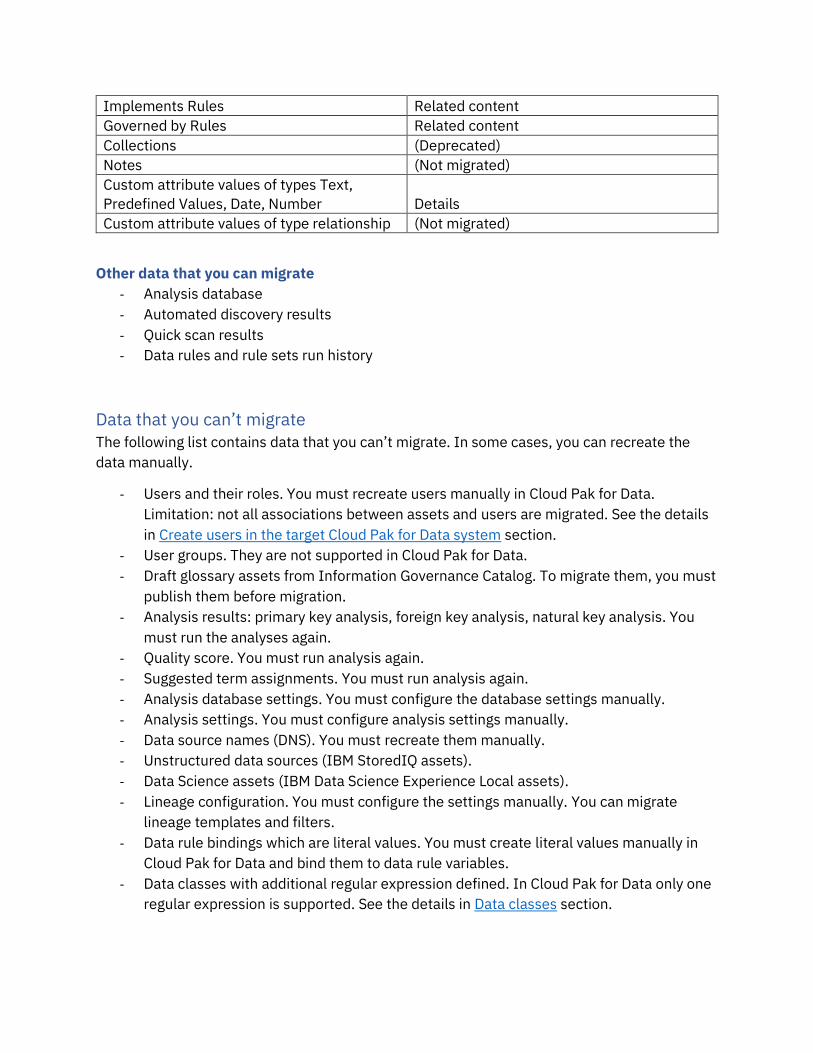
Implements Rules Related content
Governed by Rules Related content
Collections (Deprecated)
Notes (Not migrated)
Custom attribute values of types Text,
Predefined Values, Date, Number Details
Custom attribute values of type relationship (Not migrated)
Other data that you can migrate
- Analysis database
- Automated discovery results
- Quick scan results
- Data rules and rule sets run history
Data that you can’t migrate
The following list contains data that you can’t migrate. In some cases, you can recreate the
data manually.
- Users and their roles. You must recreate users manually in Cloud Pak for Data.
Limitation: not all associations between assets and users are migrated. See the details
in Create users in the target Cloud Pak for Data system section.
- User groups. They are not supported in Cloud Pak for Data.
- Draft glossary assets from Information Governance Catalog. To migrate them, you must
publish them before migration.
- Analysis results: primary key analysis, foreign key analysis, natural key analysis. You
must run the analyses again.
- Quality score. You must run analysis again.
- Suggested term assignments. You must run analysis again.
- Analysis database settings. You must configure the database settings manually.
- Analysis settings. You must configure analysis settings manually.
- Data source names (DNS). You must recreate them manually.
- Unstructured data sources (IBM StoredIQ assets).
- Data Science assets (IBM Data Science Experience Local assets).
- Lineage configuration. You must configure the settings manually. You can migrate
lineage templates and filters.
- Data rule bindings which are literal values. You must create literal values manually in
Cloud Pak for Data and bind them to data rule variables.
- Data classes with additional regular expression defined. In Cloud Pak for Data only one
regular expression is supported. See the details in Data classes section.
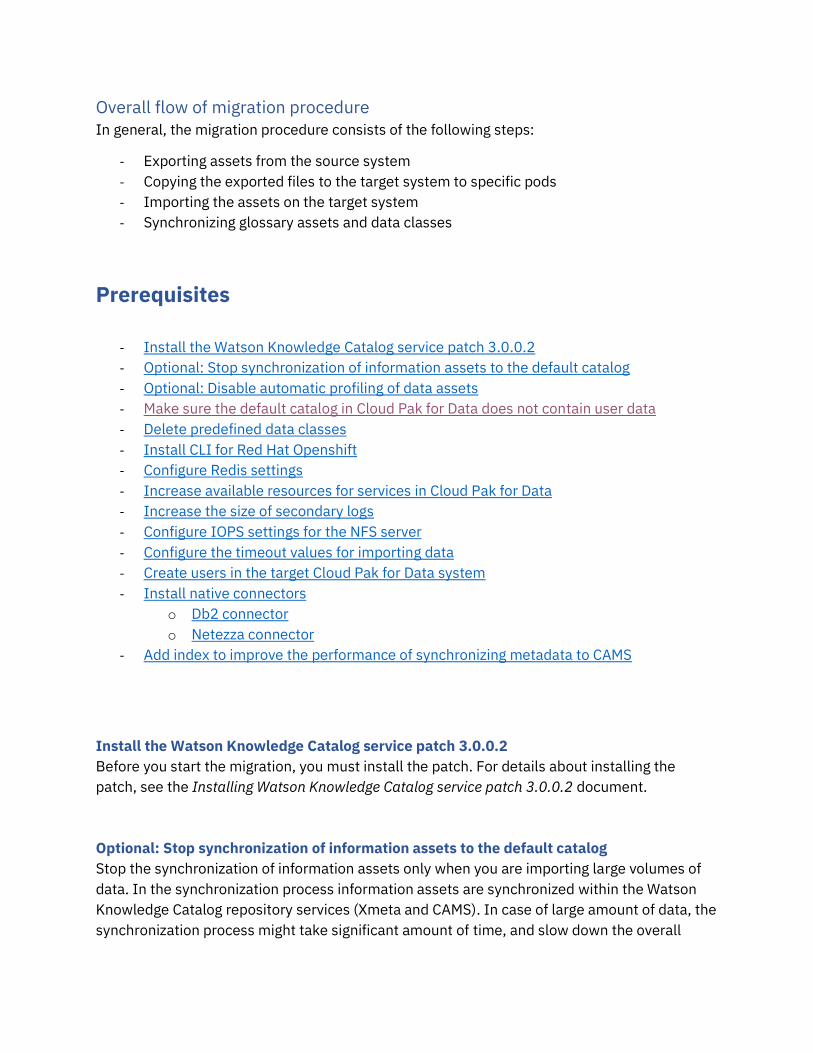
Overall flow of migration procedure In general, the migration procedure consists of the following steps:
- Exporting assets from the source system
- Copying the exported files to the target system to specific pods
- Importing the assets on the target system
- Synchronizing glossary assets and data classes
Prerequisites
- Install the Watson Knowledge Catalog service patch 3.0.0.2
- Optional: Stop synchronization of information assets to the default catalog
- Optional: Disable automatic profiling of data assets
- Make sure the default catalog in Cloud Pak for Data does not contain user data
- Delete predefined data classes
- Install CLI for Red Hat Openshift
- Configure Redis settings
- Increase available resources for services in Cloud Pak for Data
- Increase the size of secondary logs
- Configure IOPS settings for the NFS server
- Configure the timeout values for importing data
- Create users in the target Cloud Pak for Data system
- Install native connectors
o Db2 connector
o Netezza connector
- Add index to improve the performance of synchronizing metadata to CAMS
Install the Watson Knowledge Catalog service patch 3.0.0.2
Before you start the migration, you must install the patch. For details about installing the
patch, see the Installing Watson Knowledge Catalog service patch 3.0.0.2 document.
Optional: Stop synchronization of information assets to the default catalog
Stop the synchronization of information assets only when you are importing large volumes of
data. In the synchronization process information assets are synchronized within the Watson
Knowledge Catalog repository services (Xmeta and CAMS). In case of large amount of data, the
synchronization process might take significant amount of time, and slow down the overall
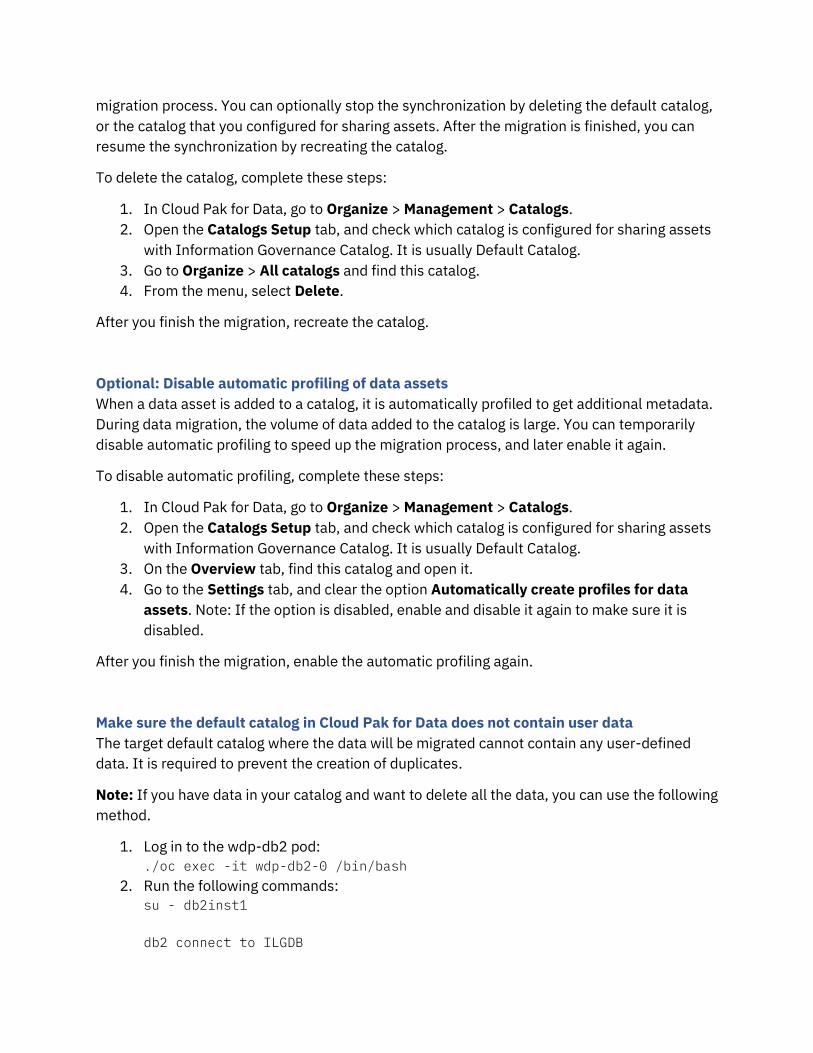
migration process. You can optionally stop the synchronization by deleting the default catalog,
or the catalog that you configured for sharing assets. After the migration is finished, you can
resume the synchronization by recreating the catalog.
To delete the catalog, complete these steps:
1. In Cloud Pak for Data, go to Organize > Management > Catalogs.
2. Open the Catalogs Setup tab, and check which catalog is configured for sharing assets
with Information Governance Catalog. It is usually Default Catalog.
3. Go to Organize > All catalogs and find this catalog.
4. From the menu, select Delete.
After you finish the migration, recreate the catalog.
Optional: Disable automatic profiling of data assets
When a data asset is added to a catalog, it is automatically profiled to get additional metadata.
During data migration, the volume of data added to the catalog is large. You can temporarily
disable automatic profiling to speed up the migration process, and later enable it again.
To disable automatic profiling, complete these steps:
1. In Cloud Pak for Data, go to Organize > Management > Catalogs.
2. Open the Catalogs Setup tab, and check which catalog is configured for sharing assets
with Information Governance Catalog. It is usually Default Catalog.
3. On the Overview tab, find this catalog and open it.
4. Go to the Settings tab, and clear the option Automatically create profiles for data
assets. Note: If the option is disabled, enable and disable it again to make sure it is
disabled.
After you finish the migration, enable the automatic profiling again.
Make sure the default catalog in Cloud Pak for Data does not contain user data
The target default catalog where the data will be migrated cannot contain any user-defined
data. It is required to prevent the creation of duplicates.
Note: If you have data in your catalog and want to delete all the data, you can use the following
method.
1. Log in to the wdp-db2 pod:
./oc exec -it wdp-db2-0 /bin/bash
2. Run the following commands:
su - db2inst1
db2 connect to ILGDB

db2 "set schema bg"
db2 "drop table \"flyway_schema_history\""
db2 "update GLOSSARY_STORAGE_VERSION set version = '0.0'"
db2 "delete from SCHEMAVERSION"
3. Restart the wkc-glossary-service pod. For example:
oc delete wkc-glossary-service-849fdd8cd7-6nq52
Delete predefined data classes
If you have any predefined data classes in your target Cloud Pak for Data environment, remove
them. When you import data classes from Information Server, these predefined data classes
are imported as well. It is especially important when you modified predefined data classes in
your source environment.
Install CLI for Red Hat Openshift
If you don’t have the OpenShift Container Platform CLI, you must install it to be able to run
various commands needed to complete the migration process. Refer to OpenShift Container
Platform documentation to install CLI.
You must have appropriate roles to run the following commands:
• oc login
• oc edit
• oc delete
• oc get pods
• oc cp
• oc exec
• oc set
Refer to OpenShift Container Platform documentation for more information about roles.
Configure Redis settings
Redis is used by many microservices to cache information. Before you start the migration, you
must configure its settings so that it doesn’t run out of memory. Complete these steps:
1. Edit the value of the maxmemory property in the redis.conf file. Run this command:
oc edit cm redis-ha-configmap
Change the value to "1573741824". It must be enclosed in double quotation marks.
2. Increase the Redis memory limit to 2 GB by running this command:
oc set resources sts redis-ha-server -c redis --limits=memory=2Gi
3. Update the CAMS OMRS cache TTL setting by running this command:
oc set env deploy catalog-api -c catalog-api omrs_cache_ttl_days=1
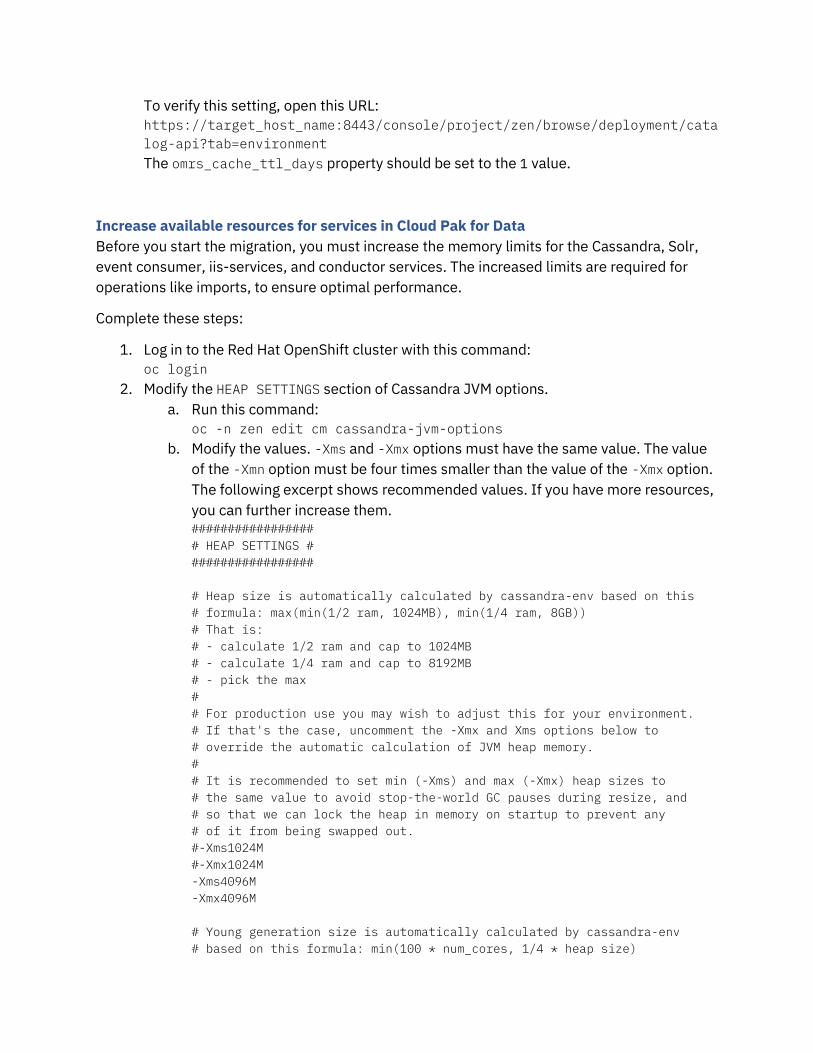
To verify this setting, open this URL:
https://target_host_name:8443/console/project/zen/browse/deployment/cata
log-api?tab=environment
The omrs_cache_ttl_days property should be set to the 1 value.
Increase available resources for services in Cloud Pak for Data
Before you start the migration, you must increase the memory limits for the Cassandra, Solr,
event consumer, iis-services, and conductor services. The increased limits are required for
operations like imports, to ensure optimal performance.
Complete these steps:
1. Log in to the Red Hat OpenShift cluster with this command:
oc login
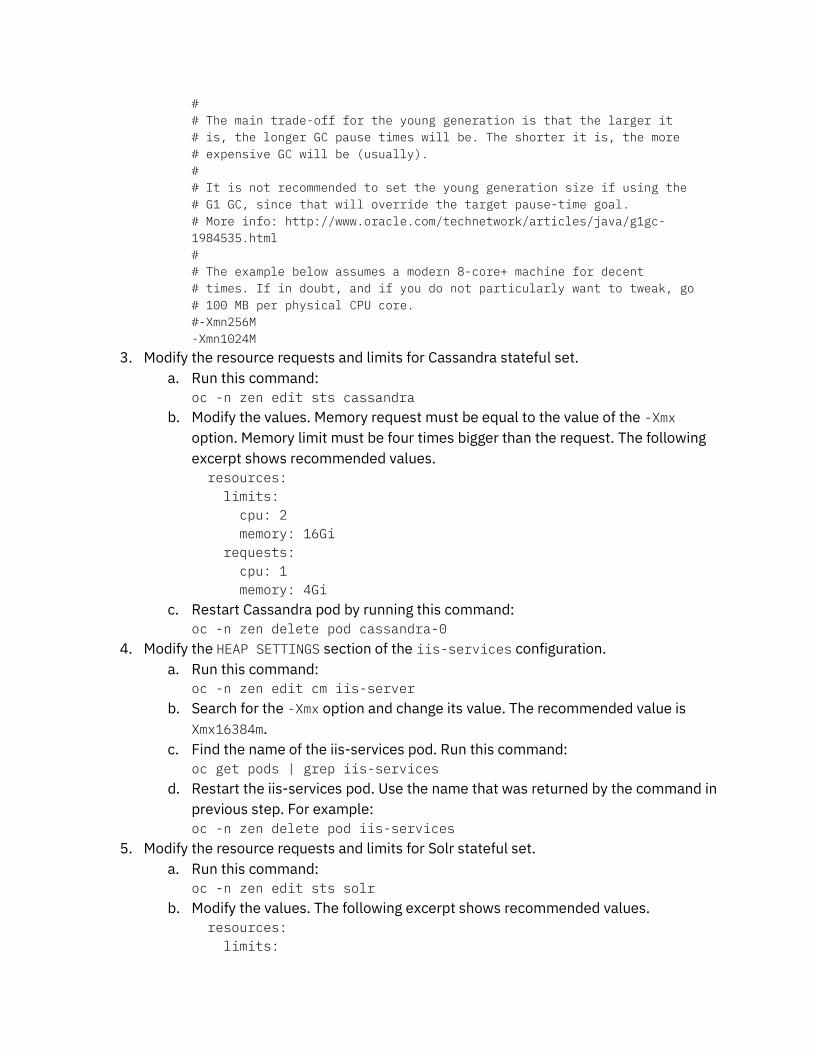
2. Modify the HEAP SETTINGS section of Cassandra JVM options.
a. Run this command:
oc -n zen edit cm cassandra-jvm-options
b. Modify the values. -Xms and -Xmx options must have the same value. The value
of the -Xmn option must be four times smaller than the value of the -Xmx option.
The following excerpt shows recommended values. If you have more resources,
you can further increase them. #################
# HEAP SETTINGS #
#################
# Heap size is automatically calculated by cassandra-env based on this
# formula: max(min(1/2 ram, 1024MB), min(1/4 ram, 8GB))
# That is:
# - calculate 1/2 ram and cap to 1024MB
# - calculate 1/4 ram and cap to 8192MB
# - pick the max
#
# For production use you may wish to adjust this for your environment.
# If that's the case, uncomment the -Xmx and Xms options below to
# override the automatic calculation of JVM heap memory.
#
# It is recommended to set min (-Xms) and max (-Xmx) heap sizes to
# the same value to avoid stop-the-world GC pauses during resize, and
# so that we can lock the heap in memory on startup to prevent any
# of it from being swapped out.
#-Xms1024M
#-Xmx1024M
-Xms4096M
-Xmx4096M
# Young generation size is automatically calculated by cassandra-env
# based on this formula: min(100 * num_cores, 1/4 * heap size)
#
# The main trade-off for the young generation is that the larger it
# is, the longer GC pause times will be. The shorter it is, the more
# expensive GC will be (usually).
#
# It is not recommended to set the young generation size if using the
# G1 GC, since that will override the target pause-time goal.
# More info: http://www.oracle.com/technetwork/articles/java/g1gc-
1984535.html
#
# The example below assumes a modern 8-core+ machine for decent
# times. If in doubt, and if you do not particularly want to tweak, go
# 100 MB per physical CPU core.
#-Xmn256M
-Xmn1024M
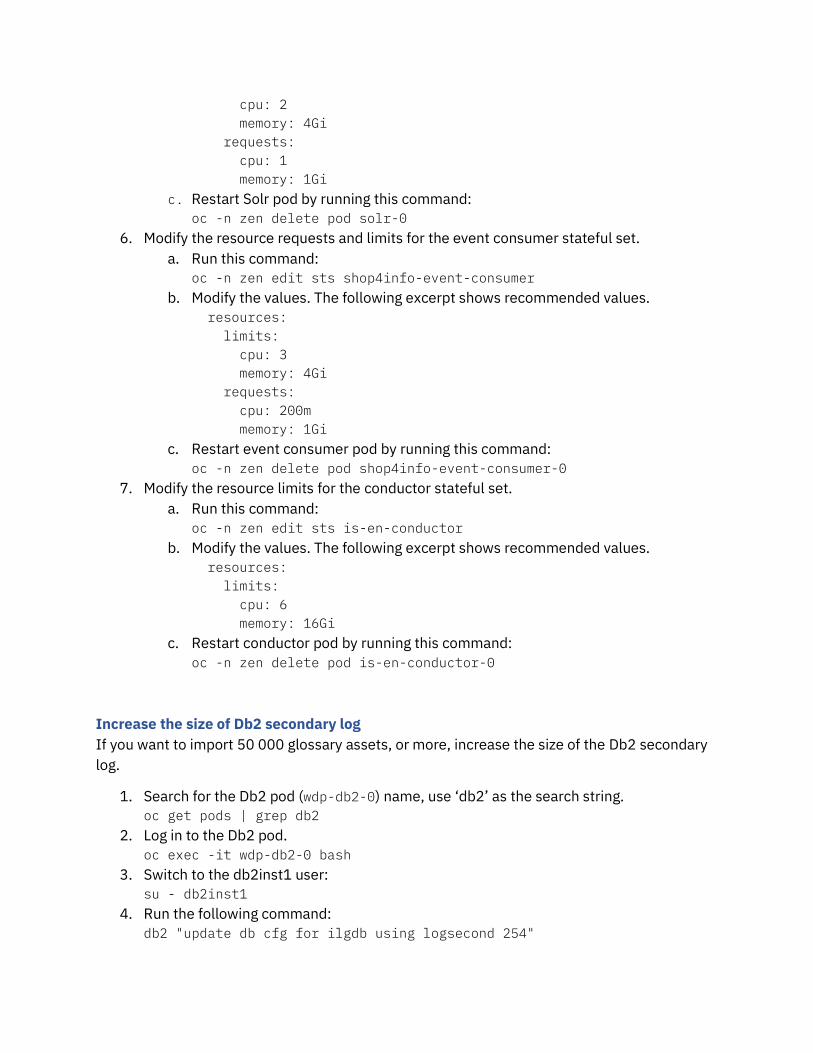
3. Modify the resource requests and limits for Cassandra stateful set.
a. Run this command:
oc -n zen edit sts cassandra
b. Modify the values. Memory request must be equal to the value of the -Xmx
option. Memory limit must be four times bigger than the request. The following
excerpt shows recommended values.
resources:
limits:
cpu: 2
memory: 16Gi
requests:
cpu: 1
memory: 4Gi
c. Restart Cassandra pod by running this command:
oc -n zen delete pod cassandra-0
4. Modify the HEAP SETTINGS section of the iis-services configuration.
a. Run this command:
oc -n zen edit cm iis-server
b. Search for the -Xmx option and change its value. The recommended value is
Xmx16384m.
c. Find the name of the iis-services pod. Run this command:
oc get pods | grep iis-services
d. Restart the iis-services pod. Use the name that was returned by the command in
previous step. For example:
oc -n zen delete pod iis-services
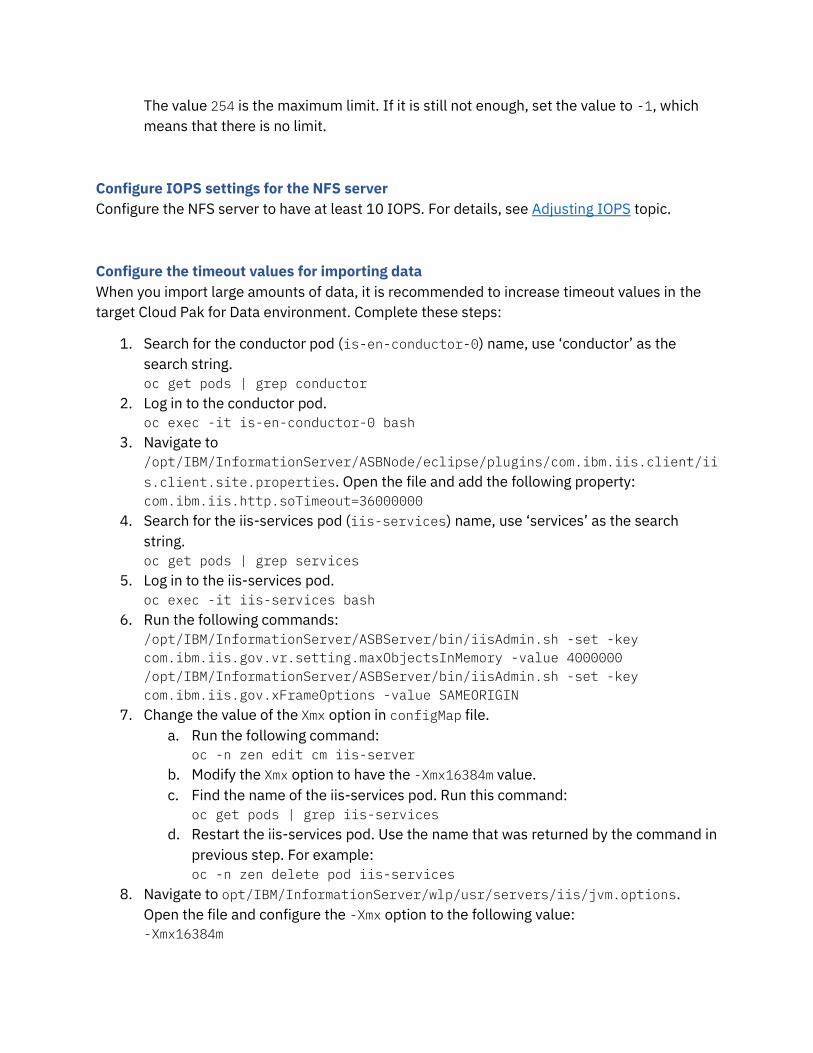
5. Modify the resource requests and limits for Solr stateful set.
a. Run this command:
oc -n zen edit sts solr
b. Modify the values. The following excerpt shows recommended values.
resources:
limits:
cpu: 2
memory: 4Gi
requests:
cpu: 1
memory: 1Gi
c. Restart Solr pod by running this command:
oc -n zen delete pod solr-0
6. Modify the resource requests and limits for the event consumer stateful set.
a. Run this command:
oc -n zen edit sts shop4info-event-consumer
b. Modify the values. The following excerpt shows recommended values.
resources:
limits:
cpu: 3
memory: 4Gi
requests:
cpu: 200m
memory: 1Gi
c. Restart event consumer pod by running this command:
oc -n zen delete pod shop4info-event-consumer-0
7. Modify the resource limits for the conductor stateful set.
a. Run this command:
oc -n zen edit sts is-en-conductor
b. Modify the values. The following excerpt shows recommended values.
resources:
limits:
cpu: 6
memory: 16Gi
c. Restart conductor pod by running this command:
oc -n zen delete pod is-en-conductor-0
Increase the size of Db2 secondary log
If you want to import 50 000 glossary assets, or more, increase the size of the Db2 secondary
log.
1. Search for the Db2 pod (wdp-db2-0) name, use ‘db2’ as the search string.
oc get pods | grep db2
2. Log in to the Db2 pod.
oc exec -it wdp-db2-0 bash
3. Switch to the db2inst1 user:
su - db2inst1
4. Run the following command:
db2 "update db cfg for ilgdb using logsecond 254"
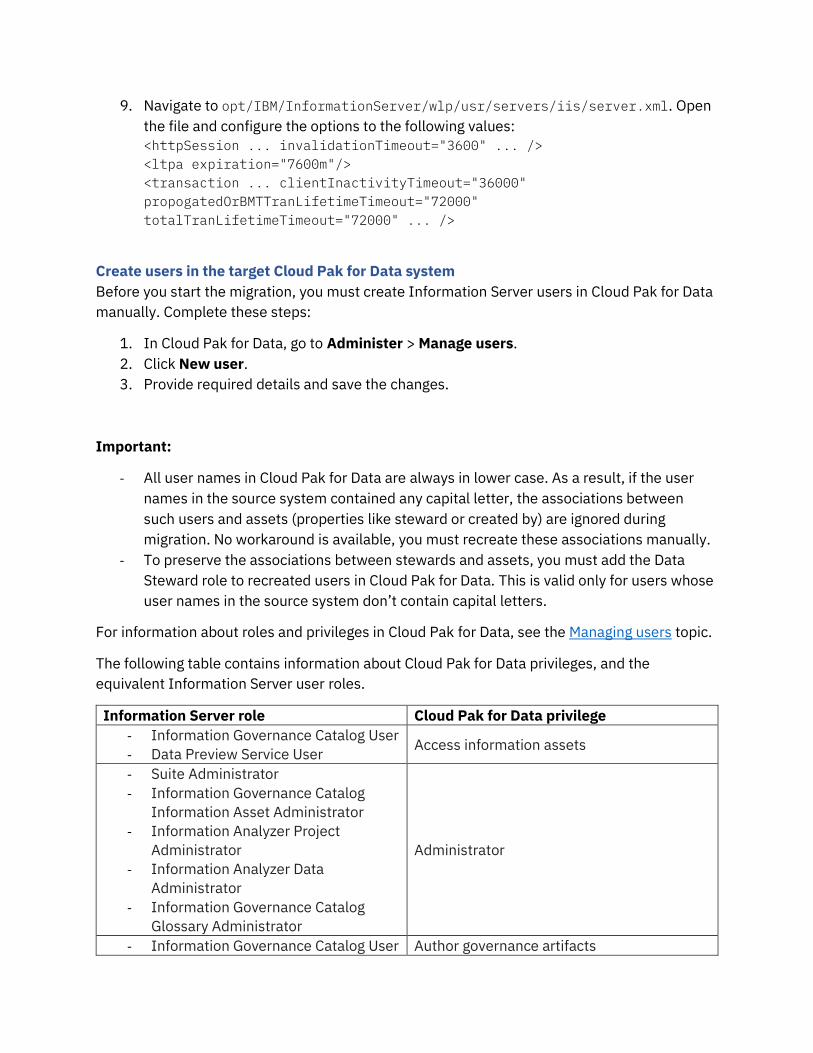
The value 254 is the maximum limit. If it is still not enough, set the value to -1, which
means that there is no limit.
Configure IOPS settings for the NFS server
Configure the NFS server to have at least 10 IOPS. For details, see Adjusting IOPS topic.
Configure the timeout values for importing data
When you import large amounts of data, it is recommended to increase timeout values in the
target Cloud Pak for Data environment. Complete these steps:
1. Search for the conductor pod (is-en-conductor-0) name, use ‘conductor’ as the
search string.
oc get pods | grep conductor
2. Log in to the conductor pod.
oc exec -it is-en-conductor-0 bash
3. Navigate to
/opt/IBM/InformationServer/ASBNode/eclipse/plugins/com.ibm.iis.client/ii
s.client.site.properties. Open the file and add the following property:
com.ibm.iis.http.soTimeout=36000000
4. Search for the iis-services pod (iis-services) name, use ‘services’ as the search
string.
oc get pods | grep services
5. Log in to the iis-services pod.
oc exec -it iis-services bash
6. Run the following commands:
/opt/IBM/InformationServer/ASBServer/bin/iisAdmin.sh -set -key
com.ibm.iis.gov.vr.setting.maxObjectsInMemory -value 4000000
/opt/IBM/InformationServer/ASBServer/bin/iisAdmin.sh -set -key
com.ibm.iis.gov.xFrameOptions -value SAMEORIGIN
7. Change the value of the Xmx option in configMap file.
a. Run the following command:
oc -n zen edit cm iis-server
b. Modify the Xmx option to have the -Xmx16384m value.
c. Find the name of the iis-services pod. Run this command:
oc get pods | grep iis-services
d. Restart the iis-services pod. Use the name that was returned by the command in
previous step. For example:
oc -n zen delete pod iis-services
8. Navigate to opt/IBM/InformationServer/wlp/usr/servers/iis/jvm.options.
Open the file and configure the -Xmx option to the following value:
-Xmx16384m
9. Navigate to opt/IBM/InformationServer/wlp/usr/servers/iis/server.xml. Open
the file and configure the options to the following values:
<httpSession ... invalidationTimeout="3600" ... />
<ltpa expiration="7600m"/>
<transaction ... clientInactivityTimeout="36000"
propogatedOrBMTTranLifetimeTimeout="72000"
totalTranLifetimeTimeout="72000" ... />
Create users in the target Cloud Pak for Data system
Before you start the migration, you must create Information Server users in Cloud Pak for Data
manually. Complete these steps:
1. In Cloud Pak for Data, go to Administer > Manage users.
2. Click New user.
3. Provide required details and save the changes.
Important:
- All user names in Cloud Pak for Data are always in lower case. As a result, if the user
names in the source system contained any capital letter, the associations between
such users and assets (properties like steward or created by) are ignored during
migration. No workaround is available, you must recreate these associations manually.
- To preserve the associations between stewards and assets, you must add the Data
Steward role to recreated users in Cloud Pak for Data. This is valid only for users whose
user names in the source system don’t contain capital letters.
For information about roles and privileges in Cloud Pak for Data, see the Managing users topic.
The following table contains information about Cloud Pak for Data privileges, and the
equivalent Information Server user roles.
Information Server role Cloud Pak for Data privilege
- Information Governance Catalog User
- Data Preview Service User Access information assets
- Suite Administrator
- Information Governance Catalog
Information Asset Administrator
- Information Analyzer Project
Administrator
- Information Analyzer Data
Administrator
- Information Governance Catalog
Glossary Administrator
Administrator
- Information Governance Catalog User Author governance artifacts

(No equivalent role) Manage categories
- Common Metadata Importer or
Common Metadata Administrator
- Information Analyzer Data
Administrator
- Data Operator role at the workspace
level
- Business Analyst at the workspace
level
Manage discovery
(No equivalent role) Manage governance workflow
- Information Governance Catalog
Information Asset Administrator
- Information Governance Catalog
Information Asset Author
- Data Preview Service User
Manage information assets
- Common Metadata Administrator Manage metadata import
- Rules Administrator
- Rules Author
- Rules Manager
- Information Analyzer Data
Administrator
- Information Analyzer Project
Administrator
Manage quality
- Information Governance Catalog User
View governance artifacts
- Rules User
- Information Analyzer User View quality
Install native connectors
You must install the following native connectors to be able to import metadata and run data
discovery:
- Db2 connector
- Netezza connector
Db2 connector
Complete the following steps:
1. Download the installation files install.sh and db2_client.tar.gz from Fix Central.
2. Copy the files to the /tmp directory on Cloud Pak for Data.
3. Get the name of the conductor pod by running this command. The pod name is in bold.
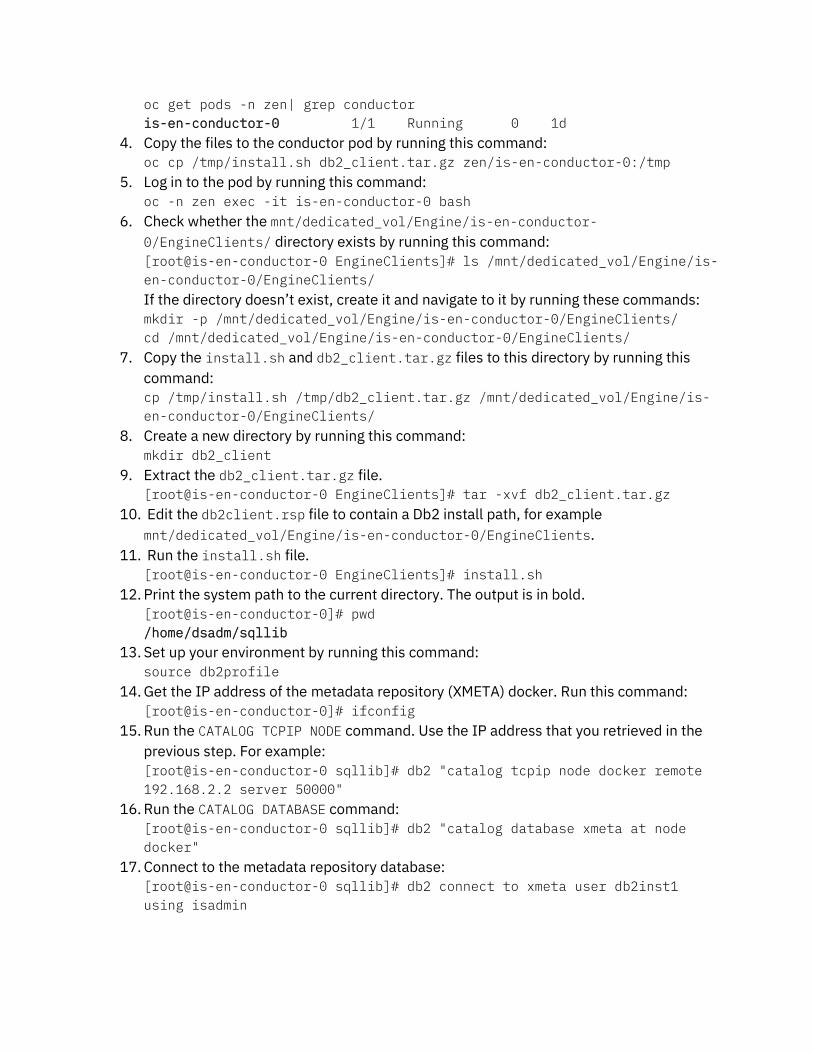
oc get pods -n zen| grep conductor
is-en-conductor-0 1/1 Running 0 1d
4. Copy the files to the conductor pod by running this command:
oc cp /tmp/install.sh db2_client.tar.gz zen/is-en-conductor-0:/tmp
5. Log in to the pod by running this command:
oc -n zen exec -it is-en-conductor-0 bash
6. Check whether the mnt/dedicated_vol/Engine/is-en-conductor-
0/EngineClients/ directory exists by running this command:
[root@is-en-conductor-0 EngineClients]# ls /mnt/dedicated_vol/Engine/is-
en-conductor-0/EngineClients/
If the directory doesn’t exist, create it and navigate to it by running these commands:
mkdir -p /mnt/dedicated_vol/Engine/is-en-conductor-0/EngineClients/
cd /mnt/dedicated_vol/Engine/is-en-conductor-0/EngineClients/
7. Copy the install.sh and db2_client.tar.gz files to this directory by running this
command:
cp /tmp/install.sh /tmp/db2_client.tar.gz /mnt/dedicated_vol/Engine/is-
en-conductor-0/EngineClients/
8. Create a new directory by running this command:
mkdir db2_client
9. Extract the db2_client.tar.gz file.
[root@is-en-conductor-0 EngineClients]# tar -xvf db2_client.tar.gz
10. Edit the db2client.rsp file to contain a Db2 install path, for example
mnt/dedicated_vol/Engine/is-en-conductor-0/EngineClients.
11. Run the install.sh file.
[root@is-en-conductor-0 EngineClients]# install.sh
12. Print the system path to the current directory. The output is in bold.
[root@is-en-conductor-0]# pwd
/home/dsadm/sqllib
13. Set up your environment by running this command:
source db2profile
14. Get the IP address of the metadata repository (XMETA) docker. Run this command:
[root@is-en-conductor-0]# ifconfig
15. Run the CATALOG TCPIP NODE command. Use the IP address that you retrieved in the
previous step. For example:
[root@is-en-conductor-0 sqllib]# db2 "catalog tcpip node docker remote
192.168.2.2 server 50000"
16. Run the CATALOG DATABASE command:
[root@is-en-conductor-0 sqllib]# db2 "catalog database xmeta at node
docker"
17. Connect to the metadata repository database:
[root@is-en-conductor-0 sqllib]# db2 connect to xmeta user db2inst1
using isadmin

Netezza connector
Complete the following steps:
1. Download the installation file nz-linuxclient-v7.0.3-P2.tar.gz from Fix Central.
2. Copy the file to the /tmp directory on Cloud Pak for Data.
3. Get the name of the conductor pod by running this command. The pod name is in bold.
oc get pods -n zen| grep conductor
is-en-conductor-0 1/1 Running 0 1d
4. Copy the file to the conductor pod by running this command:
oc cp /tmp/nz-linuxclient-v7.0.3-P2.tar.gz zen/is-en-conductor-0:/tmp
5. Log in to the pod by running this command:
oc -n zen exec -it is-en-conductor-0 bash
6. Check whether the mnt/dedicated_vol/Engine/is-en-conductor-
0/EngineClients/ directory exists by running this command:
[root@is-en-conductor-0 EngineClients]# ls /mnt/dedicated_vol/Engine/is-
en-conductor-0/EngineClients/
If the directory doesn’t exist, create it and navigate to it by running these commands:
mkdir -p /mnt/dedicated_vol/Engine/is-en-conductor-0/EngineClients/
cd /mnt/dedicated_vol/Engine/is-en-conductor-0/EngineClients/
7. Copy the nz-linuxclient-v7.0.3-P2.tar.gz file to this directory by running this
command:
cp /tmp/nz-linuxclient-v7.0.3-P2.tar.gz /mnt/dedicated_vol/Engine/is-en-
conductor-0/EngineClients/
8. Create a new directory by running this command:
mkdir oracle
9. Extract the file:
[root@is-en-conductor-0 EngineClients]# tar -xvf nz-linuxclient-v7.0.3-
P2.tar.gz
10. Go to the extracted directory linux64:
[root@is-en-conductor-0 EngineClients]# cd linux64
11. Unpack the NPS Linux Client:
[root@is-en-conductor-0 linux64]# unpack
Unpack the client to [/usr/local/nz] /mnt/IIS_zen/Engine/zen/is-en-conductor-
0/EngineClients/nz. If the directory doesn’t exist, specify y to create it.
12. Go back to the parent directory:
[root@is-en-conductor-0 linux64]# cd ..
13. Check the contents of the directory. The output is in bold.
[root@is-en-conductor-0 EngineClients]# ls
bin64 datadirect.package.tar.z db2_client lib lib64 licenses
linux linux64 nz nz-linuxclient-v7.0.3-P2.tar.gz sys webadmin
14. Navigate to the nz directory and list its contents:
[root@is-en-conductor-0 EngineClients]# cd nz
[root@is-en-conductor-0 nz]# ls
bin64 lib lib64 licenses sys

15. Access the odbc.ini file by running these commands:
$ODBCINI.
#vi $ODBCINI
And add the following data source information to the odbc.ini file.
[NZDSN]
Driver=/mnt/dedicated_vol/Engine/is-en-conductor-0/EngineClients
/nz/lib64/libnzodbc.so
Description=NetezzaSQL ODBC
Servername=203.0.113.17
Port=5480
Database=netezzadb
Username=user1
Password=password
ReadOnly=false
ShowSystemTables=false
LegacySQLTables=false
LoginTimeout=0
QueryTimeout=0
DateFormat=1
NumericAsChar=false
SQLBitOneZero=false
StripCRLF=false
securityLevel=preferredUnSecured
caCertFile=
16. Access the dsenv file in the /opt/IBM/InformationServer/Server/DSEngine/
directory and add the following commands to the file:
export PATH/mnt/dedicated_vol/Engine/is-en-conductor-
0/EngineClients/nz/bin64:$PATH
export LD_LIBRARY_PATH=/mnt/dedicated_vol/Engine/is-en-conductor-
0/EngineClients/nz/lib64:$LD_LIBRARY_PATH
export NZ_ODBC_INI_PATH=/opt/IBM/InformationServer/DSEngine
Add index to improve the performance of synchronizing metadata to CAMS
To improve the performance of synchronizing metadata to the CAMS server, you must add
index on the Information Server services pod. Complete these steps:
1. Get the name of the Information Server services pod by running this command. The
name of the pod is in bold.
oc get pods | grep services
iis-services-849bfbbbc6-qscx 1/1 Running 0 1d
2. Log in to the pod by running this command:
oc exec -it iis-services-849bfbbbc6-5qscx bash
3. Run these commands:
cd /opt/IBM/InformationServer/ASBServer/bin
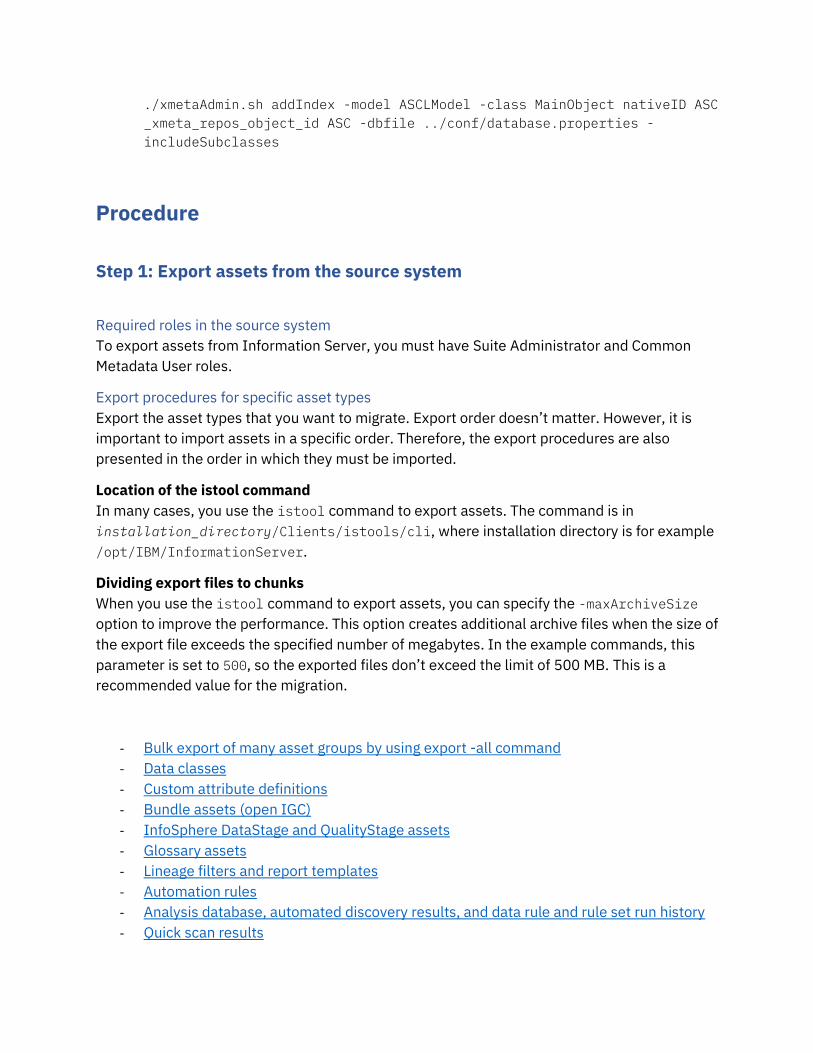
./xmetaAdmin.sh addIndex -model ASCLModel -class MainObject nativeID ASC
_xmeta_repos_object_id ASC -dbfile ../conf/database.properties -
includeSubclasses
Procedure
Step 1: Export assets from the source system
Required roles in the source system
To export assets from Information Server, you must have Suite Administrator and Common
Metadata User roles.
Export procedures for specific asset types
Export the asset types that you want to migrate. Export order doesn’t matter. However, it is
important to import assets in a specific order. Therefore, the export procedures are also
presented in the order in which they must be imported.
Location of the istool command
In many cases, you use the istool command to export assets. The command is in
installation_directory/Clients/istools/cli, where installation directory is for example
/opt/IBM/InformationServer.
Dividing export files to chunks
When you use the istool command to export assets, you can specify the -maxArchiveSize
option to improve the performance. This option creates additional archive files when the size of
the export file exceeds the specified number of megabytes. In the example commands, this
parameter is set to 500, so the exported files don’t exceed the limit of 500 MB. This is a
recommended value for the migration.
- Bulk export of many asset groups by using export -all command
- Data classes
- Custom attribute definitions
- Bundle assets (open IGC)
- InfoSphere DataStage and QualityStage assets
- Glossary assets
- Lineage filters and report templates
- Automation rules
- Analysis database, automated discovery results, and data rule and rule set run history
- Quick scan results
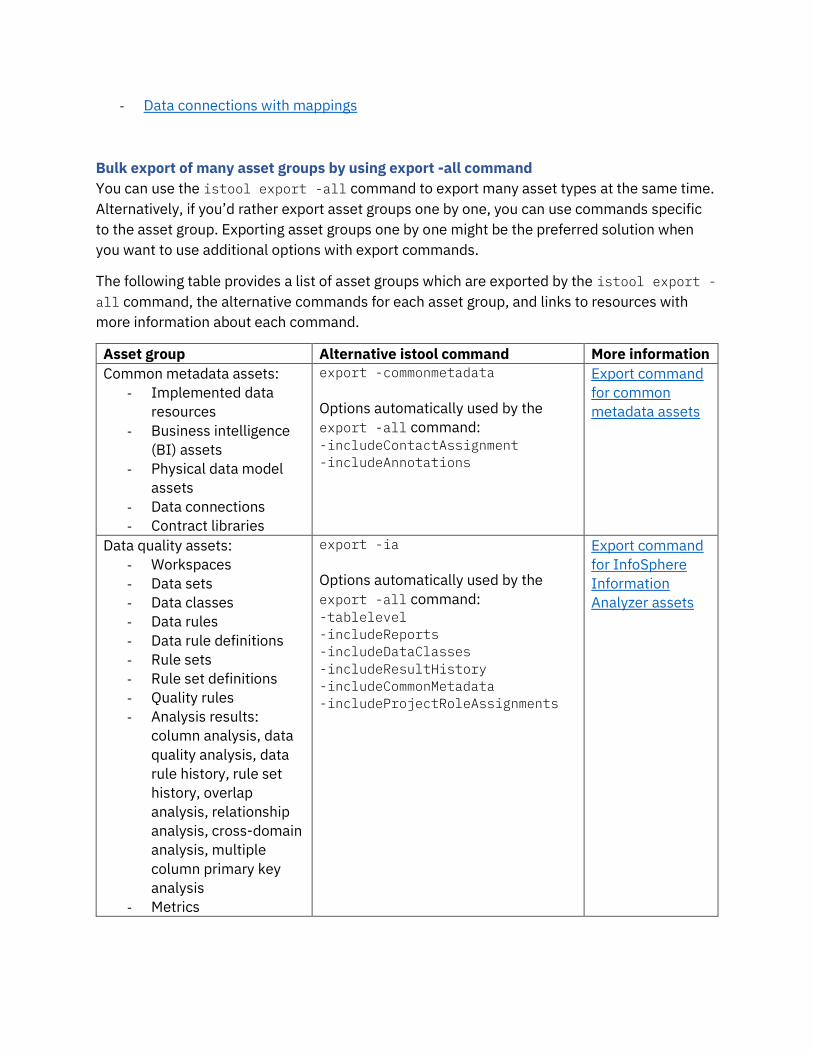
- Data connections with mappings
Bulk export of many asset groups by using export -all command
You can use the istool export -all command to export many asset types at the same time.
Alternatively, if you’d rather export asset groups one by one, you can use commands specific
to the asset group. Exporting asset groups one by one might be the preferred solution when
you want to use additional options with export commands.
The following table provides a list of asset groups which are exported by the istool export -
all command, the alternative commands for each asset group, and links to resources with
more information about each command.
Asset group Alternative istool command More information
Common metadata assets:
- Implemented data
resources
- Business intelligence
(BI) assets
- Physical data model
assets
- Data connections
- Contract libraries
export -commonmetadata
Options automatically used by the
export -all command: -includeContactAssignment
-includeAnnotations
Export command
for common
metadata assets
Data quality assets:
- Workspaces
- Data sets
- Data classes
- Data rules
- Data rule definitions
- Rule sets
- Rule set definitions
- Quality rules
- Analysis results:
column analysis, data
quality analysis, data
rule history, rule set
history, overlap
analysis, relationship
analysis, cross-domain
analysis, multiple
column primary key
analysis
- Metrics
export -ia
Options automatically used by the
export -all command: -tablelevel
-includeReports
-includeDataClasses
-includeResultHistory
-includeCommonMetadata
-includeProjectRoleAssignments
Export command
for InfoSphere
Information
Analyzer assets
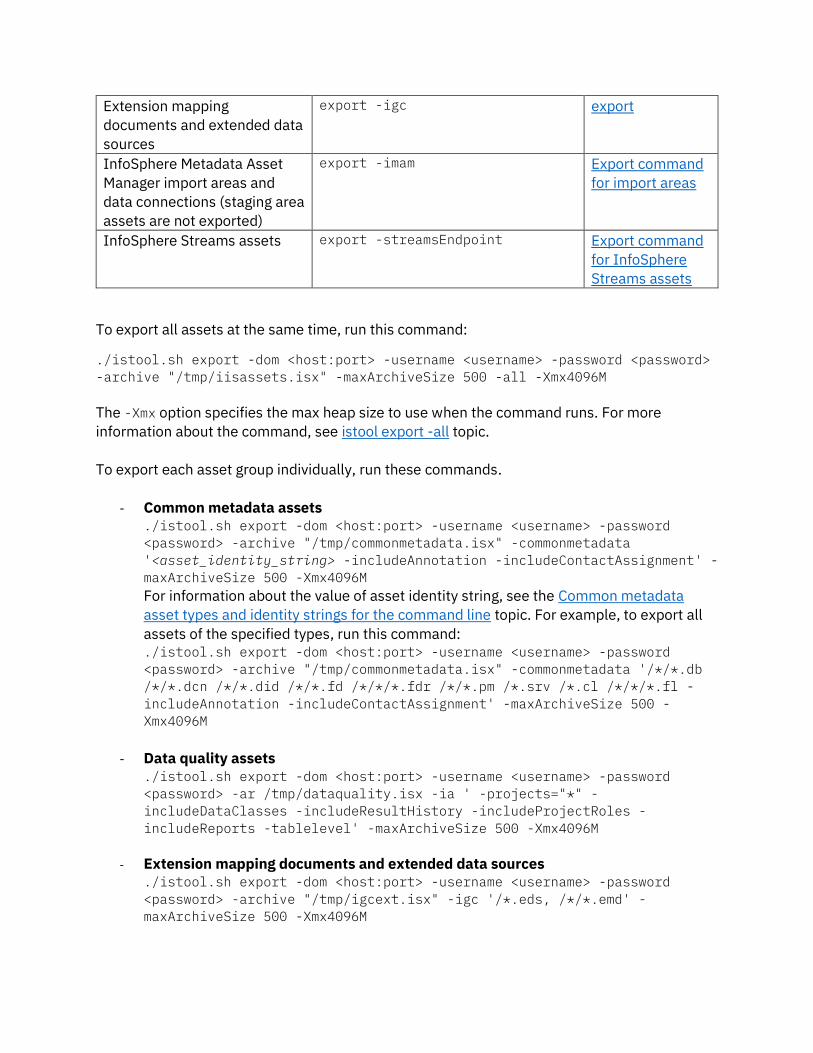
Extension mapping
documents and extended data
sources
export -igc export
InfoSphere Metadata Asset
Manager import areas and
data connections (staging area
assets are not exported)
export -imam Export command
for import areas
InfoSphere Streams assets export -streamsEndpoint Export command
for InfoSphere
Streams assets
To export all assets at the same time, run this command:
./istool.sh export -dom <host:port> -username <username> -password <password>
-archive "/tmp/iisassets.isx" -maxArchiveSize 500 -all -Xmx4096M
The -Xmx option specifies the max heap size to use when the command runs. For more
information about the command, see istool export -all topic.
To export each asset group individually, run these commands.
- Common metadata assets ./istool.sh export -dom <host:port> -username <username> -password
<password> -archive "/tmp/commonmetadata.isx" -commonmetadata
'<asset_identity_string> -includeAnnotation -includeContactAssignment' -
maxArchiveSize 500 -Xmx4096M
For information about the value of asset identity string, see the Common metadata
asset types and identity strings for the command line topic. For example, to export all
assets of the specified types, run this command: ./istool.sh export -dom <host:port> -username <username> -password
<password> -archive "/tmp/commonmetadata.isx" -commonmetadata '/*/*.db
/*/*.dcn /*/*.did /*/*.fd /*/*/*.fdr /*/*.pm /*.srv /*.cl /*/*/*.fl -
includeAnnotation -includeContactAssignment' -maxArchiveSize 500 -
Xmx4096M
- Data quality assets ./istool.sh export -dom <host:port> -username <username> -password
<password> -ar /tmp/dataquality.isx -ia ' -projects="*" -
includeDataClasses -includeResultHistory -includeProjectRoles -
includeReports -tablelevel' -maxArchiveSize 500 -Xmx4096M
- Extension mapping documents and extended data sources ./istool.sh export -dom <host:port> -username <username> -password
<password> -archive "/tmp/igcext.isx" -igc '/*.eds, /*/*.emd' -
maxArchiveSize 500 -Xmx4096M

- InfoSphere Metadata Asset Manager import areas ./istool.sh export -dom <host:port> -username <username> -password
<password> -archive "/tmp/importarea.isx" -imam '-importArea "*"' -
maxArchiveSize 500 -Xmx4096M
If you want to export staging area assets as well, use the -includeStagingAreaAssets
option, as in: ./istool.sh export -dom <host:port> -username <username> -password
<password> -archive "/tmp/importareastaging.isx" -imam '-importArea "*"'
-includeStagingAreaAssets -maxArchiveSize 500 -Xmx4096M
- InfoSphere Streams assets ./istool.sh export -dom <host:port> -username <username> -password
<password> -archive "/tmp/streams.isx" -streamsEndpoint '-ep *' -
maxArchiveSize 500 -Xmx4096M
Data classes
Note: Cloud Pak for Data supports only one regular expression for a data class. If you have
data classes with additional regular expression defined, you must split these data classes in
your source system so that they have only one regular expression. If you don’t split such data
classes, only the main regular expression is migrated.
To export data classes, run this command:
./istool.sh export -dom <host:port> -username <username> -password <password>
-archive "/tmp/dataclasses.isx" -dca '/*.dc /*.als -inccls -incca -incannot' -
maxArchiveSize 500 -Xmx4096M
The -Xmx option specifies the max heap size to use when the command runs. For more
information about the command, see the Export command for data class and data collection
analysis assets topic.
Custom attribute definitions
To export custom attribute definitions, use Information Governance Catalog user interface.
Complete these steps:
1. Log in to Information Governance Catalog classic. Access it by using this URL:
https://source-host-name/ibm/iis/igc/
2. Go to Administration > Catalog Management > Custom Attributes.
3. Select all custom attribute definitions, and from the menu, select Export.
4. Save the XML file.
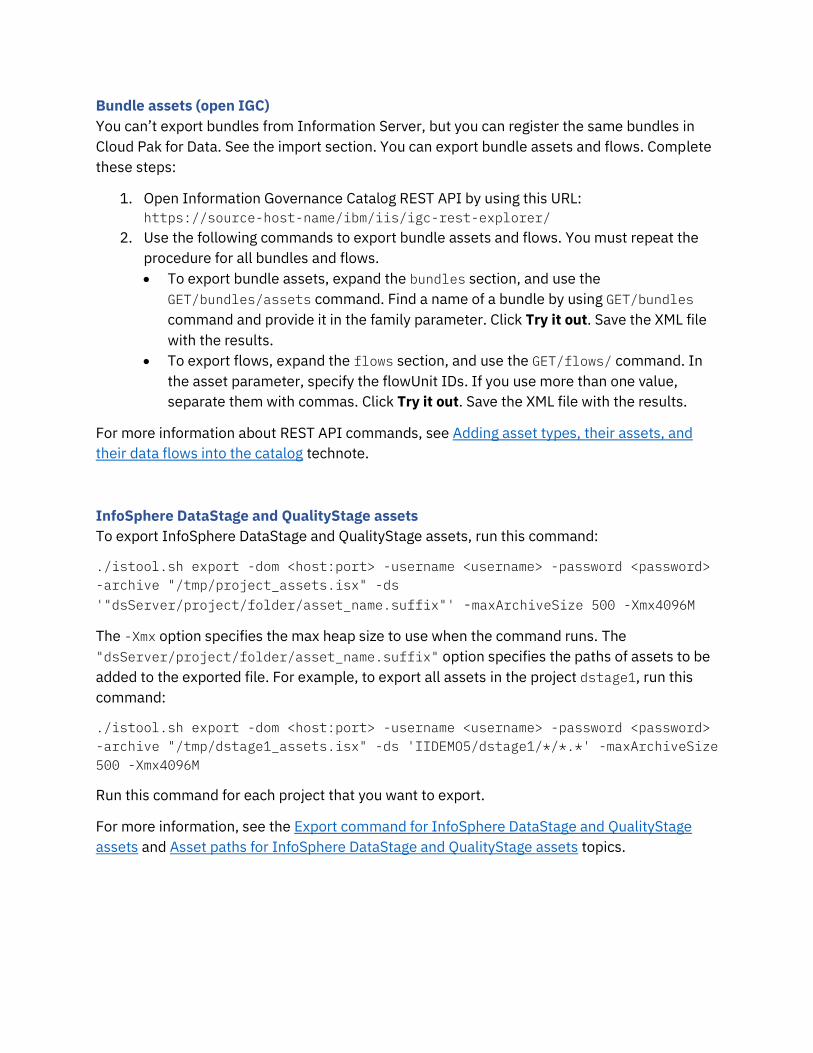
Bundle assets (open IGC)
You can’t export bundles from Information Server, but you can register the same bundles in
Cloud Pak for Data. See the import section. You can export bundle assets and flows. Complete
these steps:
1. Open Information Governance Catalog REST API by using this URL:
https://source-host-name/ibm/iis/igc-rest-explorer/
2. Use the following commands to export bundle assets and flows. You must repeat the
procedure for all bundles and flows.
• To export bundle assets, expand the bundles section, and use the
GET/bundles/assets command. Find a name of a bundle by using GET/bundles
command and provide it in the family parameter. Click Try it out. Save the XML file
with the results.
• To export flows, expand the flows section, and use the GET/flows/ command. In
the asset parameter, specify the flowUnit IDs. If you use more than one value,
separate them with commas. Click Try it out. Save the XML file with the results.
For more information about REST API commands, see Adding asset types, their assets, and
their data flows into the catalog technote.
InfoSphere DataStage and QualityStage assets
To export InfoSphere DataStage and QualityStage assets, run this command:
./istool.sh export -dom <host:port> -username <username> -password <password>
-archive "/tmp/project_assets.isx" -ds
'"dsServer/project/folder/asset_name.suffix"' -maxArchiveSize 500 -Xmx4096M
The -Xmx option specifies the max heap size to use when the command runs. The
"dsServer/project/folder/asset_name.suffix" option specifies the paths of assets to be
added to the exported file. For example, to export all assets in the project dstage1, run this
command:
./istool.sh export -dom <host:port> -username <username> -password <password>
-archive "/tmp/dstage1_assets.isx" -ds 'IIDEMO5/dstage1/*/*.*' -maxArchiveSize
500 -Xmx4096M
Run this command for each project that you want to export.
For more information, see the Export command for InfoSphere DataStage and QualityStage
assets and Asset paths for InfoSphere DataStage and QualityStage assets topics.

Glossary assets
Glossary assets include terms, categories, information governance rules, information
governance policies, and labels. You must export them to an XML file.
Export glossary assets by running this command:
./istool.sh glossary export -dom <host:port> -username <username> -password
<password> -filename "/tmp/glossaryassets.xml" -format XML -allcategories -
allpoliciesrules -includeassignedassets -includestewardship -
includelabeledassets -Xmx4096M
The -Xmx option specifies the max heap size to use when the command runs. For more
information about this command, see Glossary export command topic.
Lineage filters and report templates
To export lineage filters and report templates, complete these steps:
1. In Information Governance Catalog classic, go to Administration > Lineage
Management.
2. To export lineage filters:
a. Open Manage Lineage Filters.
b. Select the filters that you want to export.
c. From the menu, select Export.
d. Save the file.
3. To export lineage report templates:
a. Open Manage Lineage Report Templates.
b. Select the templates that you want to export.
c. From the menu, select Export.
d. Save the file.
Automation rules
Export automation rules by running this command:
/opt/IBM/InformationServer/ASBServer/bin/IAAdmin.sh -user <username> -password
<password> -url https://host:port -getDataQualityConfigurationRule
For more information about the command, see the Commands to import, export, and delete
automation rules topic.
Analysis database, automated discovery results, and data rule and rule set run history
Run this procedure for each data type separately, and replace <db_name> and <schema_name>
with the following values:

- Analysis database:
<db_name> = IADB
<schema_name> = IAUSER
- Automated discovery results:
<db_name> = XMETA
<schema_name> = AUDIT_TRAIL
- Data rule and rule set run history:
<db_name> = XMETA
<schema_name> = ASSET_RELATION
This procedure is specific to Db2 databases.
Complete these steps:
1. In the source system, log in to the database as the db2inst1 user and set up the
environment to run Db2 commands by running this command:
. ~/sqllib/db2profile
2. Create the database directory in the /tmp directory.
mkdir /tmp/<db_name>
chmod 777 /tmp/<db_name>
cd /tmp/<db_name>
3. Export database assets by running this command
db2move <db_name> export -aw -l lobs -sn <schema_name>
Quick scan results
To export quick scan results, complete these steps:
1. Log in to the solr pod on the source system:
kubectl exec -it solr-0 bash
2. Create a temporary directory:
mkdir /tmp/solr
3. Run the following backup command:
curl -k
'http://localhost:8983/solr/analysis/replication?command=backup&location
=/tmp/solr_bkp'
4. To display the status of the backup process, run this command:
curl -k
'http://localhost:8983/solr/analysis/replication?command=details&wt=xml'
5. Copy the solr directory from the solr pod to the tmp directory on the source system.
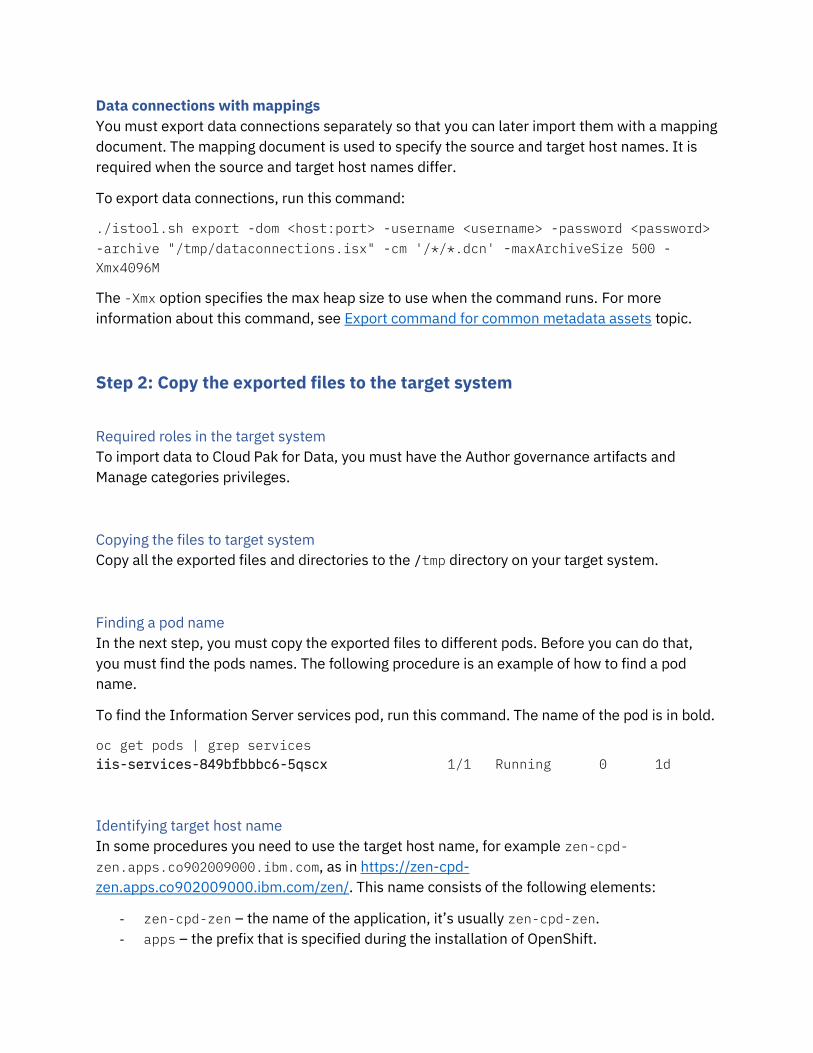
Data connections with mappings
You must export data connections separately so that you can later import them with a mapping
document. The mapping document is used to specify the source and target host names. It is
required when the source and target host names differ.
To export data connections, run this command:
./istool.sh export -dom <host:port> -username <username> -password <password>
-archive "/tmp/dataconnections.isx" -cm '/*/*.dcn' -maxArchiveSize 500 -
Xmx4096M
The -Xmx option specifies the max heap size to use when the command runs. For more
information about this command, see Export command for common metadata assets topic.
Step 2: Copy the exported files to the target system
Required roles in the target system
To import data to Cloud Pak for Data, you must have the Author governance artifacts and
Manage categories privileges.
Copying the files to target system
Copy all the exported files and directories to the /tmp directory on your target system.
Finding a pod name
In the next step, you must copy the exported files to different pods. Before you can do that,
you must find the pods names. The following procedure is an example of how to find a pod
name.
To find the Information Server services pod, run this command. The name of the pod is in bold.
oc get pods | grep services
iis-services-849bfbbbc6-5qscx 1/1 Running 0 1d
Identifying target host name
In some procedures you need to use the target host name, for example zen-cpd-
zen.apps.co902009000.ibm.com, as in https://zen-cpd-
zen.apps.co902009000.ibm.com/zen/. This name consists of the following elements:
- zen-cpd-zen – the name of the application, it’s usually zen-cpd-zen.
- apps – the prefix that is specified during the installation of OpenShift.
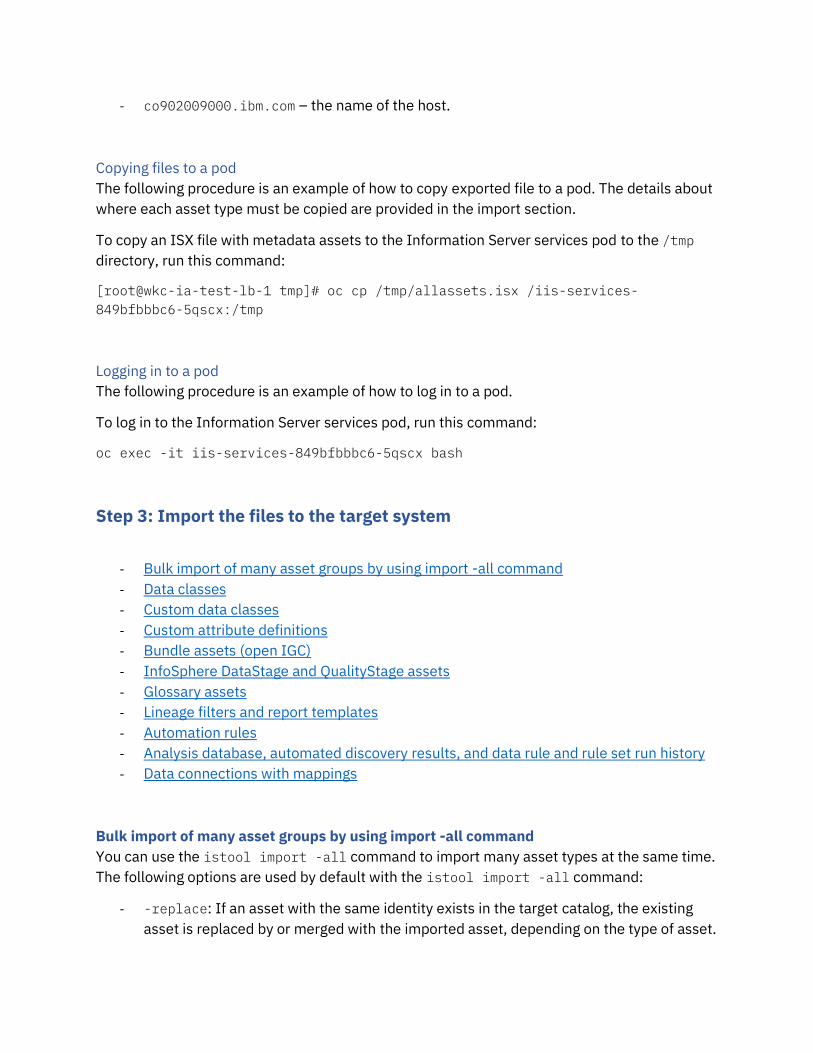
- co902009000.ibm.com – the name of the host.
Copying files to a pod
The following procedure is an example of how to copy exported file to a pod. The details about
where each asset type must be copied are provided in the import section.
To copy an ISX file with metadata assets to the Information Server services pod to the /tmp
directory, run this command:
[root@wkc-ia-test-lb-1 tmp]# oc cp /tmp/allassets.isx /iis-services-
849bfbbbc6-5qscx:/tmp
Logging in to a pod
The following procedure is an example of how to log in to a pod.
To log in to the Information Server services pod, run this command:
oc exec -it iis-services-849bfbbbc6-5qscx bash
Step 3: Import the files to the target system
- Bulk import of many asset groups by using import -all command
- Data classes
- Custom data classes
- Custom attribute definitions
- Bundle assets (open IGC)
- InfoSphere DataStage and QualityStage assets
- Glossary assets
- Lineage filters and report templates
- Automation rules
- Analysis database, automated discovery results, and data rule and rule set run history
- Data connections with mappings
Bulk import of many asset groups by using import -all command
You can use the istool import -all command to import many asset types at the same time.
The following options are used by default with the istool import -all command:
- -replace: If an asset with the same identity exists in the target catalog, the existing
asset is replaced by or merged with the imported asset, depending on the type of asset.
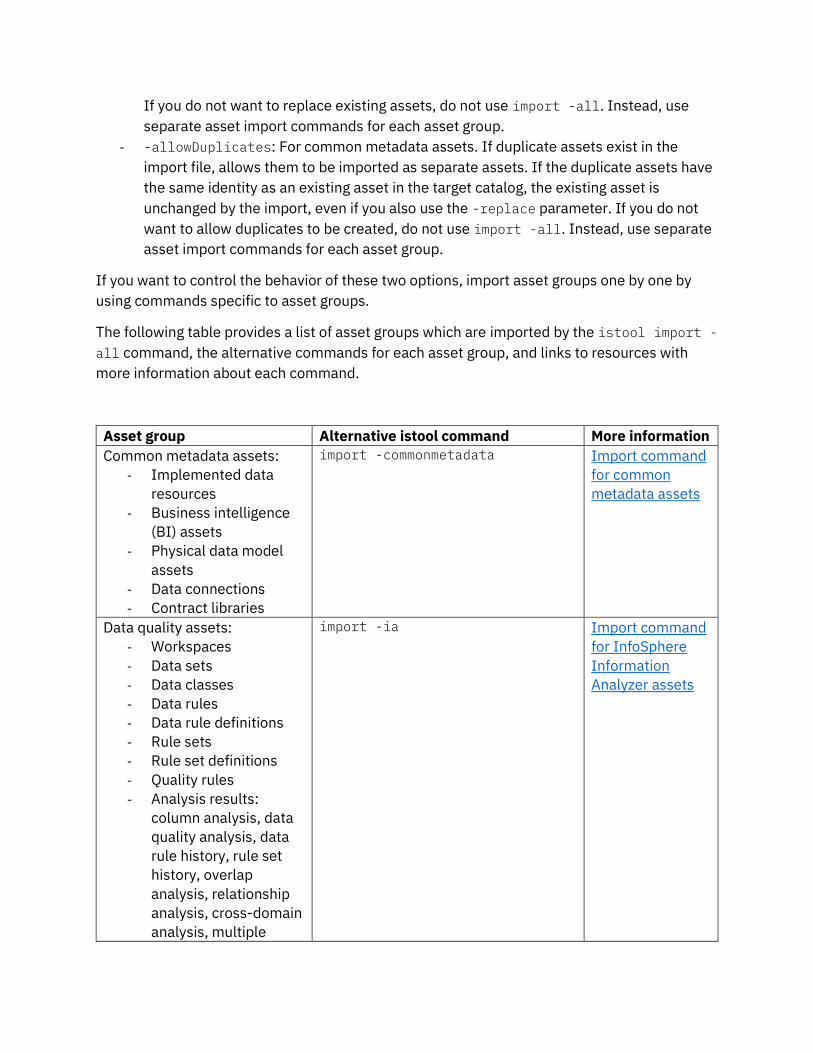
If you do not want to replace existing assets, do not use import -all. Instead, use
separate asset import commands for each asset group.
- -allowDuplicates: For common metadata assets. If duplicate assets exist in the
import file, allows them to be imported as separate assets. If the duplicate assets have
the same identity as an existing asset in the target catalog, the existing asset is
unchanged by the import, even if you also use the -replace parameter. If you do not
want to allow duplicates to be created, do not use import -all. Instead, use separate
asset import commands for each asset group.
If you want to control the behavior of these two options, import asset groups one by one by
using commands specific to asset groups.
The following table provides a list of asset groups which are imported by the istool import -
all command, the alternative commands for each asset group, and links to resources with
more information about each command.
Asset group Alternative istool command More information
Common metadata assets:
- Implemented data
resources
- Business intelligence
(BI) assets
- Physical data model
assets
- Data connections
- Contract libraries
import -commonmetadata
Import command
for common
metadata assets
Data quality assets:
- Workspaces
- Data sets
- Data classes
- Data rules
- Data rule definitions
- Rule sets
- Rule set definitions
- Quality rules
- Analysis results:
column analysis, data
quality analysis, data
rule history, rule set
history, overlap
analysis, relationship
analysis, cross-domain
analysis, multiple
import -ia
Import command
for InfoSphere
Information
Analyzer assets
column primary key
analysis
- Metrics
Extension mapping
documents and extended data
sources
import -igc import
InfoSphere Metadata Asset
Manager import areas and
data connections (staging area
assets are not imported)
import -imam Import command
for import areas
InfoSphere Streams assets import -streamsEndpoint Import command
for InfoSphere
Streams assets
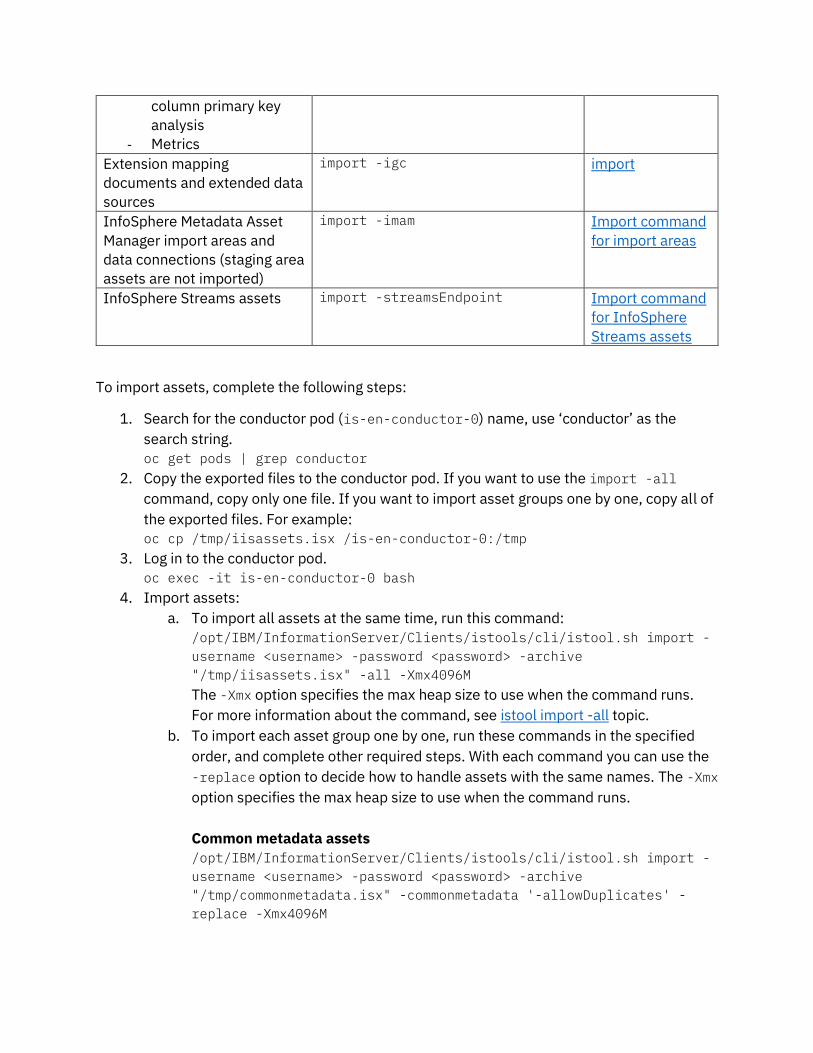
To import assets, complete the following steps:
1. Search for the conductor pod (is-en-conductor-0) name, use ‘conductor’ as the
search string.
oc get pods | grep conductor
2. Copy the exported files to the conductor pod. If you want to use the import -all
command, copy only one file. If you want to import asset groups one by one, copy all of
the exported files. For example:
oc cp /tmp/iisassets.isx /is-en-conductor-0:/tmp
3. Log in to the conductor pod.
oc exec -it is-en-conductor-0 bash
4. Import assets:
a. To import all assets at the same time, run this command:
/opt/IBM/InformationServer/Clients/istools/cli/istool.sh import -
username <username> -password <password> -archive
"/tmp/iisassets.isx" -all -Xmx4096M
The -Xmx option specifies the max heap size to use when the command runs.
For more information about the command, see istool import -all topic.
b. To import each asset group one by one, run these commands in the specified
order, and complete other required steps. With each command you can use the
-replace option to decide how to handle assets with the same names. The -Xmx
option specifies the max heap size to use when the command runs.
Common metadata assets
/opt/IBM/InformationServer/Clients/istools/cli/istool.sh import -
username <username> -password <password> -archive
"/tmp/commonmetadata.isx" -commonmetadata '-allowDuplicates' -
replace -Xmx4096M
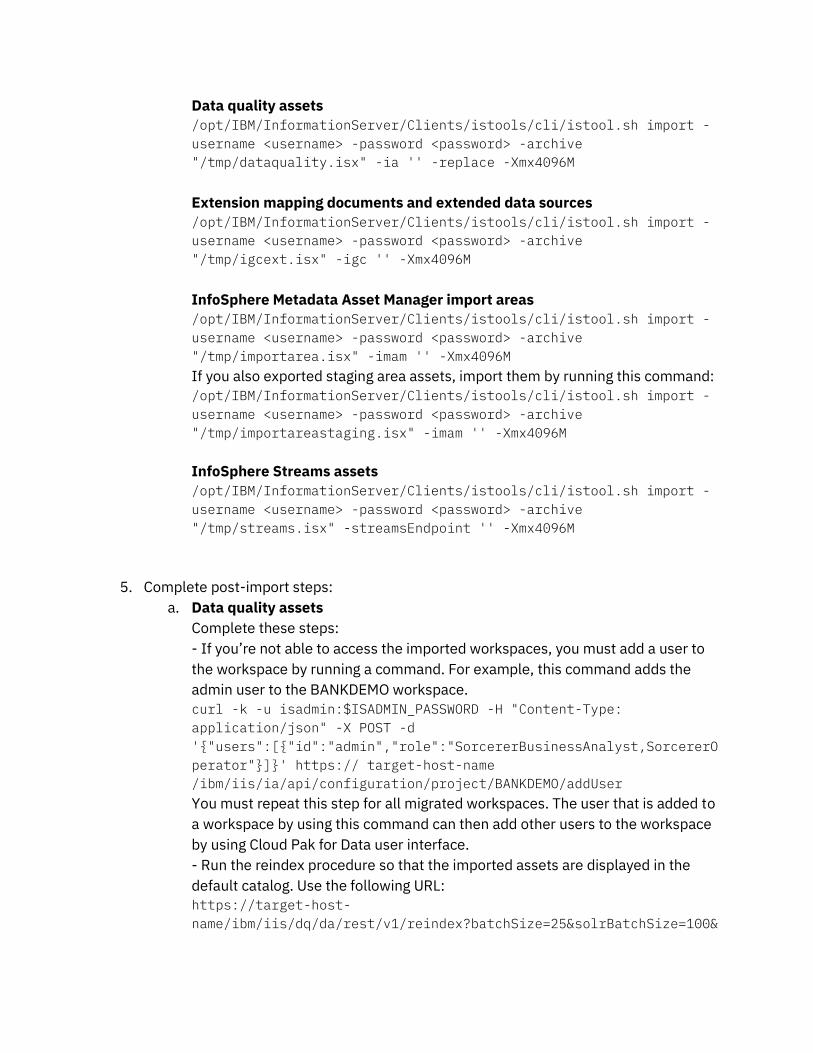
Data quality assets
/opt/IBM/InformationServer/Clients/istools/cli/istool.sh import -
username <username> -password <password> -archive
"/tmp/dataquality.isx" -ia '' -replace -Xmx4096M
Extension mapping documents and extended data sources
/opt/IBM/InformationServer/Clients/istools/cli/istool.sh import -
username <username> -password <password> -archive
"/tmp/igcext.isx" -igc '' -Xmx4096M
InfoSphere Metadata Asset Manager import areas
/opt/IBM/InformationServer/Clients/istools/cli/istool.sh import -
username <username> -password <password> -archive
"/tmp/importarea.isx" -imam '' -Xmx4096M
If you also exported staging area assets, import them by running this command:
/opt/IBM/InformationServer/Clients/istools/cli/istool.sh import -
username <username> -password <password> -archive
"/tmp/importareastaging.isx" -imam '' -Xmx4096M
InfoSphere Streams assets
/opt/IBM/InformationServer/Clients/istools/cli/istool.sh import -
username <username> -password <password> -archive
"/tmp/streams.isx" -streamsEndpoint '' -Xmx4096M
5. Complete post-import steps:
a. Data quality assets
Complete these steps:
- If you’re not able to access the imported workspaces, you must add a user to
the workspace by running a command. For example, this command adds the
admin user to the BANKDEMO workspace.
curl -k -u isadmin:$ISADMIN_PASSWORD -H "Content-Type:
application/json" -X POST -d
'{"users":[{"id":"admin","role":"SorcererBusinessAnalyst,SorcererO
perator"}]}' https:// target-host-name
/ibm/iis/ia/api/configuration/project/BANKDEMO/addUser
You must repeat this step for all migrated workspaces. The user that is added to
a workspace by using this command can then add other users to the workspace
by using Cloud Pak for Data user interface.
- Run the reindex procedure so that the imported assets are displayed in the
default catalog. Use the following URL:
https://target-host-
name/ibm/iis/dq/da/rest/v1/reindex?batchSize=25&solrBatchSize=100&
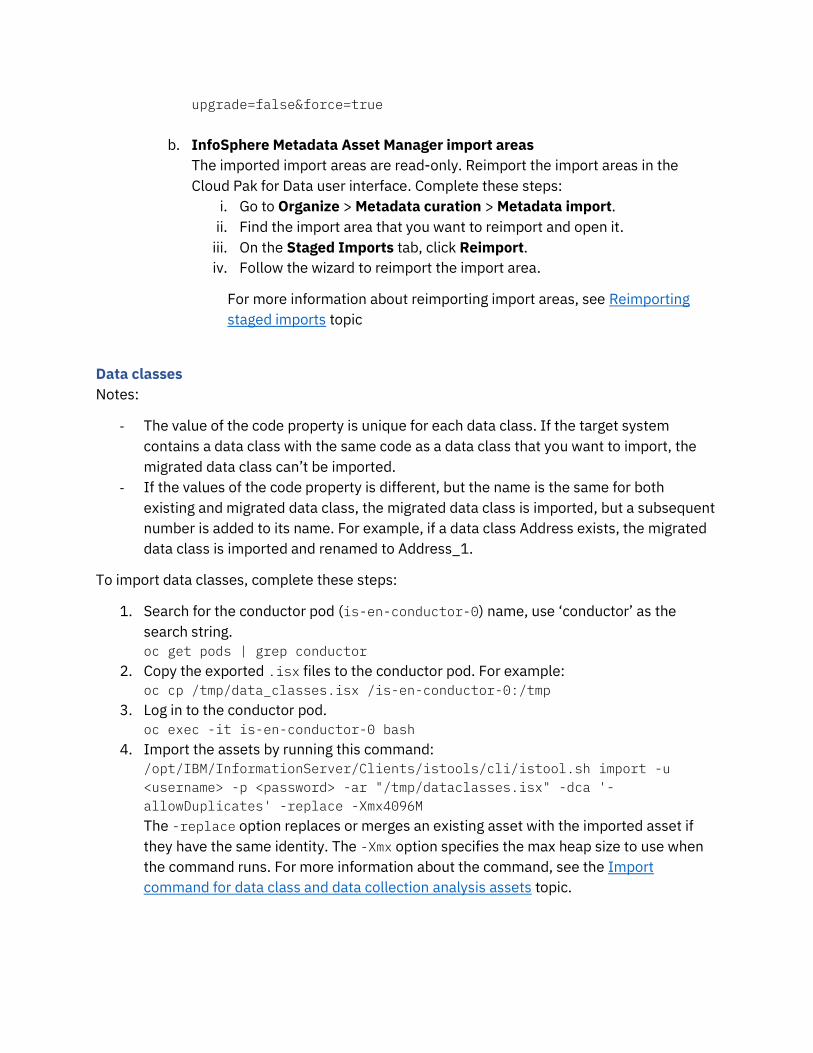
upgrade=false&force=true
b. InfoSphere Metadata Asset Manager import areas
The imported import areas are read-only. Reimport the import areas in the
Cloud Pak for Data user interface. Complete these steps:
i. Go to Organize > Metadata curation > Metadata import.
ii. Find the import area that you want to reimport and open it.
iii. On the Staged Imports tab, click Reimport.
iv. Follow the wizard to reimport the import area.
For more information about reimporting import areas, see Reimporting
staged imports topic
Data classes
Notes:
- The value of the code property is unique for each data class. If the target system
contains a data class with the same code as a data class that you want to import, the
migrated data class can’t be imported.
- If the values of the code property is different, but the name is the same for both
existing and migrated data class, the migrated data class is imported, but a subsequent
number is added to its name. For example, if a data class Address exists, the migrated
data class is imported and renamed to Address_1.
To import data classes, complete these steps:
1. Search for the conductor pod (is-en-conductor-0) name, use ‘conductor’ as the
search string.
oc get pods | grep conductor
2. Copy the exported .isx files to the conductor pod. For example:
oc cp /tmp/data_classes.isx /is-en-conductor-0:/tmp
3. Log in to the conductor pod.
oc exec -it is-en-conductor-0 bash
4. Import the assets by running this command:
/opt/IBM/InformationServer/Clients/istools/cli/istool.sh import -u
<username> -p <password> -ar "/tmp/dataclasses.isx" -dca '-
allowDuplicates' -replace -Xmx4096M
The -replace option replaces or merges an existing asset with the imported asset if
they have the same identity. The -Xmx option specifies the max heap size to use when
the command runs. For more information about the command, see the Import
command for data class and data collection analysis assets topic.
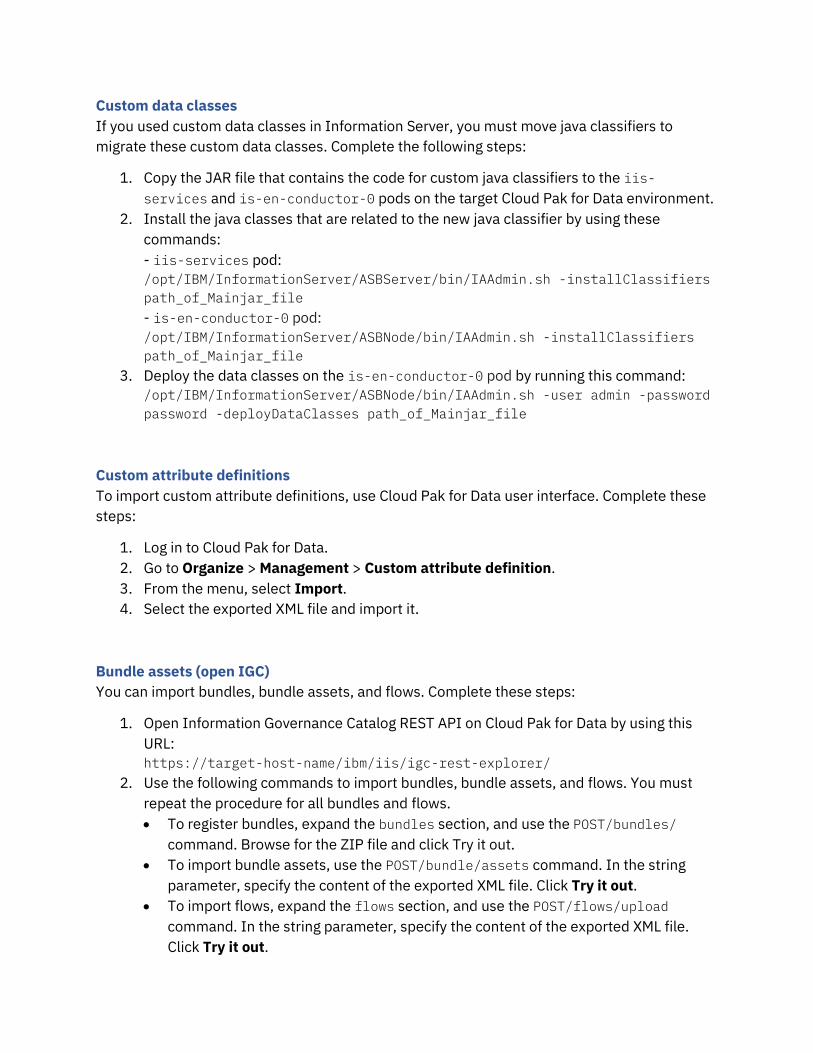
Custom data classes
If you used custom data classes in Information Server, you must move java classifiers to
migrate these custom data classes. Complete the following steps:
1. Copy the JAR file that contains the code for custom java classifiers to the iis-
services and is-en-conductor-0 pods on the target Cloud Pak for Data environment.
2. Install the java classes that are related to the new java classifier by using these
commands:
- iis-services pod:
/opt/IBM/InformationServer/ASBServer/bin/IAAdmin.sh -installClassifiers
path_of_Mainjar_file
- is-en-conductor-0 pod:
/opt/IBM/InformationServer/ASBNode/bin/IAAdmin.sh -installClassifiers
path_of_Mainjar_file
3. Deploy the data classes on the is-en-conductor-0 pod by running this command:
/opt/IBM/InformationServer/ASBNode/bin/IAAdmin.sh -user admin -password
password -deployDataClasses path_of_Mainjar_file
Custom attribute definitions
To import custom attribute definitions, use Cloud Pak for Data user interface. Complete these
steps:
1. Log in to Cloud Pak for Data.
2. Go to Organize > Management > Custom attribute definition.
3. From the menu, select Import.
4. Select the exported XML file and import it.
Bundle assets (open IGC)
You can import bundles, bundle assets, and flows. Complete these steps:
1. Open Information Governance Catalog REST API on Cloud Pak for Data by using this
URL:
https://target-host-name/ibm/iis/igc-rest-explorer/
2. Use the following commands to import bundles, bundle assets, and flows. You must
repeat the procedure for all bundles and flows.
• To register bundles, expand the bundles section, and use the POST/bundles/
command. Browse for the ZIP file and click Try it out.
• To import bundle assets, use the POST/bundle/assets command. In the string
parameter, specify the content of the exported XML file. Click Try it out.
• To import flows, expand the flows section, and use the POST/flows/upload
command. In the string parameter, specify the content of the exported XML file.
Click Try it out.

For more information about REST API commands, see Adding asset types, their assets, and
their data flows into the catalog technote.
InfoSphere DataStage and QualityStage assets
To import InfoSphere DataStage and QualityStage assets, complete these steps:
1. Search for the conductor pod (is-en-conductor-0) name, use ‘conductor’ as the
search string.
oc get pods | grep conductor
2. Copy the exported .isx files to the conductor pod. For example:
oc cp /tmp/dstage1_assets.isx /is-en-conductor-0:/tmp
3. Log in to the conductor pod.
oc exec -it is-en-conductor-0 bash
4. Create projects in the Cloud Pak for Data target environment. Create as many projects
as you want to migrate. Give them the same names as in your source environment. In
the command, use the services pod name as the domain: is-servicesdocker. This
command creates one project at a time. Each time you run it to create a project, specify
the project name in the -createproject option.
/opt/IBM/InformationServer/Server/DSEngine/bin/dsadmin -domain is-
servicesdocker:9446 -user <username> -password <password> -server IS-EN-
CONDUCTOR-0.EN-COND -createproject dstage1
This command might take several minutes to finish.
5. Import the assets by running this command:
/opt/IBM/InformationServer/Clients/istools/cli/istool.sh import -u
<username> -p <password> -ar "/tmp/dstage1_assets.isx" -ds 'IS-EN-
CONDUCTOR-0.EN-COND/dstage1' -Xmx4096M
The -Xmx option specifies the max heap size to use when the command runs. For more
information about the command, see the Import command for InfoSphere DataStage
and QualityStage assets topic.
6. Synchronize the assets by running the graph batchload command. Run the following
command:
/opt/IBM/InformationServer/Clients/istools/cli/istool.sh graph batchload
-u <username> -p <password> -c START -groups ETL
7. Run the reindex procedure so that the imported assets are displayed in the default
catalog. Use the following URL:
https://target-host-
name/ibm/iis/dq/da/rest/v1/reindex?batchSize=25&solrBatchSize=100&upgrad
e=false&force=true
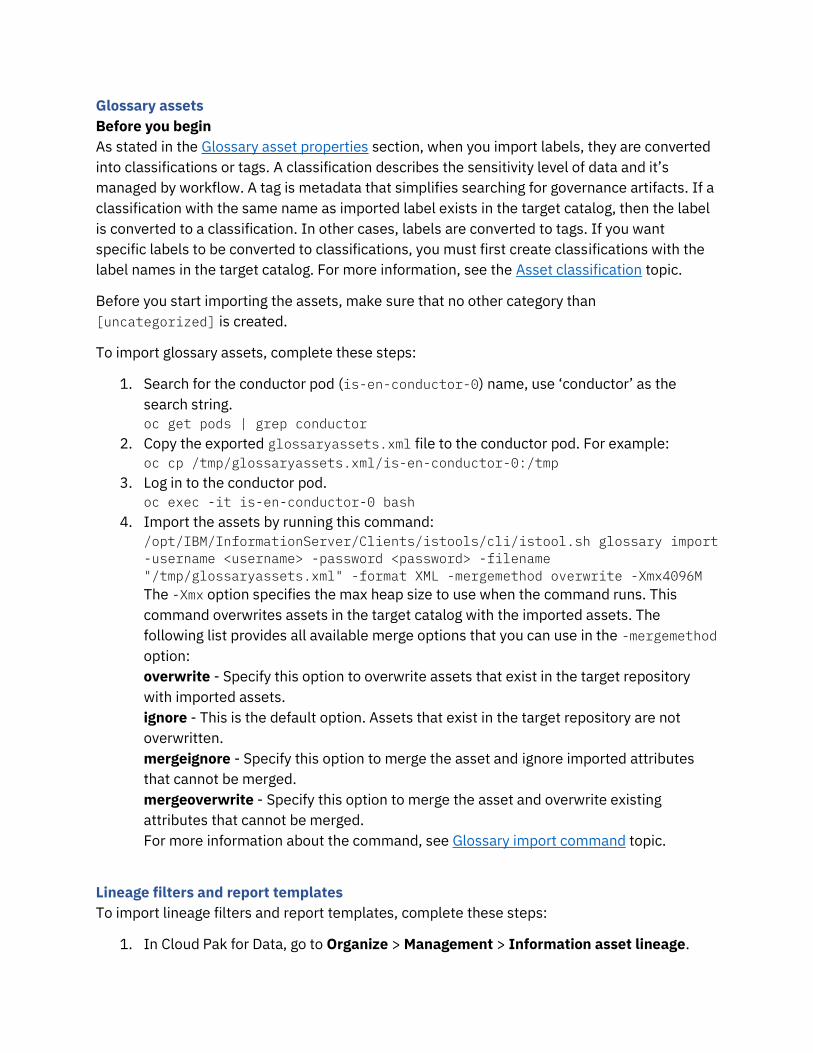
Glossary assets
Before you begin
As stated in the Glossary asset properties section, when you import labels, they are converted
into classifications or tags. A classification describes the sensitivity level of data and it’s
managed by workflow. A tag is metadata that simplifies searching for governance artifacts. If a
classification with the same name as imported label exists in the target catalog, then the label
is converted to a classification. In other cases, labels are converted to tags. If you want
specific labels to be converted to classifications, you must first create classifications with the
label names in the target catalog. For more information, see the Asset classification topic.
Before you start importing the assets, make sure that no other category than
[uncategorized] is created.
To import glossary assets, complete these steps:
1. Search for the conductor pod (is-en-conductor-0) name, use ‘conductor’ as the
search string.
oc get pods | grep conductor
2. Copy the exported glossaryassets.xml file to the conductor pod. For example:
oc cp /tmp/glossaryassets.xml/is-en-conductor-0:/tmp
3. Log in to the conductor pod.
oc exec -it is-en-conductor-0 bash
4. Import the assets by running this command:
/opt/IBM/InformationServer/Clients/istools/cli/istool.sh glossary import
-username <username> -password <password> -filename
"/tmp/glossaryassets.xml" -format XML -mergemethod overwrite -Xmx4096M
The -Xmx option specifies the max heap size to use when the command runs. This
command overwrites assets in the target catalog with the imported assets. The
following list provides all available merge options that you can use in the -mergemethod
option:
overwrite - Specify this option to overwrite assets that exist in the target repository
with imported assets.
ignore - This is the default option. Assets that exist in the target repository are not
overwritten.
mergeignore - Specify this option to merge the asset and ignore imported attributes
that cannot be merged.
mergeoverwrite - Specify this option to merge the asset and overwrite existing
attributes that cannot be merged.
For more information about the command, see Glossary import command topic.
Lineage filters and report templates
To import lineage filters and report templates, complete these steps:
1. In Cloud Pak for Data, go to Organize > Management > Information asset lineage.
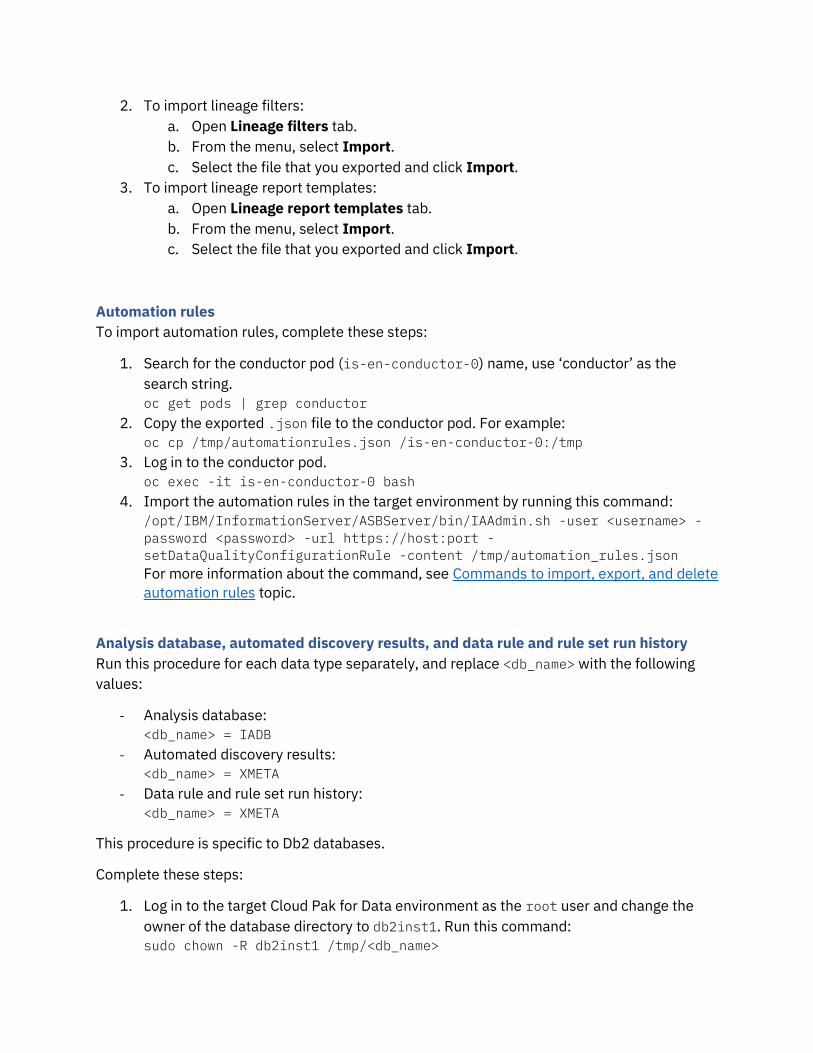
2. To import lineage filters:
a. Open Lineage filters tab.
b. From the menu, select Import.
c. Select the file that you exported and click Import.
3. To import lineage report templates:
a. Open Lineage report templates tab.
b. From the menu, select Import.
c. Select the file that you exported and click Import.
Automation rules
To import automation rules, complete these steps:
1. Search for the conductor pod (is-en-conductor-0) name, use ‘conductor’ as the
search string.
oc get pods | grep conductor
2. Copy the exported .json file to the conductor pod. For example:
oc cp /tmp/automationrules.json /is-en-conductor-0:/tmp
3. Log in to the conductor pod.
oc exec -it is-en-conductor-0 bash
4. Import the automation rules in the target environment by running this command:
/opt/IBM/InformationServer/ASBServer/bin/IAAdmin.sh -user <username> -
password <password> -url https://host:port -
setDataQualityConfigurationRule -content /tmp/automation_rules.json
For more information about the command, see Commands to import, export, and delete
automation rules topic.
Analysis database, automated discovery results, and data rule and rule set run history
Run this procedure for each data type separately, and replace <db_name> with the following
values:
- Analysis database:
<db_name> = IADB
- Automated discovery results:
<db_name> = XMETA
- Data rule and rule set run history:
<db_name> = XMETA
This procedure is specific to Db2 databases.
Complete these steps:
1. Log in to the target Cloud Pak for Data environment as the root user and change the
owner of the database directory to db2inst1. Run this command:
sudo chown -R db2inst1 /tmp/<db_name>

2. Search for the metadata repository pod (iis-xmetarepo) name, use ‘xmeta’ as the
search string.
oc get pods | grep xmeta
3. Copy the directory to the metadata repository pod. For example:
oc cp /tmp/IADB /iis-xmetarepo:/tmp
4. Log in to the metadata repository pod.
[root@co9020091232 tmp]# oc exec -it iis-xmetarepo sh -n zen
sh-4.2# bash
[root@is-xmetadocker /]#
5. Change the user to the db2inst1 user and set up the environment to run Db2
commands:
su - db2inst1
. ~/sqllib/db2profile
6. Go to /tmp/<db_name> directory in the xmeta pod, and import database assets by
running this command:
db2move <db_name> import -io replace_create -l lobs
Quick scan results
Before you begin
Before you start the quick scan results import from the source system, ensure that there are no
quick scan results already in the target system.
To import quick scan results, complete these steps:
1. Search for the solr pod (solr-0) name, use ‘solr’ as the search string.
oc get pods | grep solr
2. Copy the exported solr directory to the solr pod. For example:
oc cp /tmp/solr /solr-0:/tmp
3. Log in to the conductor pod.
oc exec -it solr-0 bash
4. Run the following restore command:
curl -k
'http://localhost:8983/solr/analysis/replication?command=restore&locatio
n=/tmp/solr_bkp/'
5. To check the status of the restore process, run this command:
curl -k
'http://localhost:8983/solr/analysis/replication?command=restorestatus&w
t=xml'
Data connections with mappings
To import data connections with mappings, complete these steps:

1. Create a mapping file. For information about the structure and content of the file, see
Using a mapping file topic. The example content of such file is:
<?xml version="1.0" encoding="UTF-8"?>
<!-- Sample Mapping File -->
<Mapping xsi:schemaLocation="SampleArchiveMappingFile.xsd"
xmlns:xsi="http://www.w3.org/2001/XMLSchema-instance">
<ObjectMappings>
<!-- Example to change Host name in the imported data from "old_host" to
"new_host" -->
<ObjectMapping> <Attribute packageNsUri="http:///5.2/ASCLModel.ecore"
classname="HostSystem" attrname="name"/>
<CurrentValue val="<host>" />
<NewValue val="<conductor pod name>" />
</ObjectMapping>
</ObjectMappings>
</Mapping>
In the CurrentValue val="<host>" property, specify the name of the source host. In
the NewValue val="<conductor pod name>" property, specify the name of the
conductor pod, for example is-en-conductor-0.
2. Search for the conductor pod (is-en-conductor-0) name, use ‘conductor’ as the
search string.
oc get pods | grep conductor
3. Copy the exported file and the mapping file to the conductor pod. For example:
oc cp /tmp/dataconnections.isx mappings.xml /is-en-conductor-0:/tmp
4. Log in to the conductor pod.
oc exec -it is-en-conductor-0 bash
5. Import the data connections by running this command:
/opt/IBM/InformationServer/ASBServer/bin/IAAdmin.sh -user <username> -
password <password> -archive "/tmp/dataconnections.isx" -commonmetadata
'-allowDuplicates -mapping "/tmp/mapping.xml"' -replace -Xmx4096M
6. After the assets are imported, run this command:
/opt/IBM/InformationServer/ASBServer/bin/imam.sh --action
reanalyzeSharedAreas --username <username> --password <password>
Step 4: Synchronize glossary assets
After you import glossary assets and data classes, you must synchronize them so that they are
displayed as governance artifacts in Cloud Pak for Data user interface. Complete these steps:
1. Run this command to get the authorization token:
curl -k -X GET https://target-host-name/v1/preauth/validateAuth -H
'Content-Type: application/json' -H 'cache-control: no-cache' -H
'password: password' -H 'username: user1

2. Run the following migrate command. Instead of <your-token> provide the token that
you retrieved in the previous step.
curl -d -k "https://target-host-name/v3/governance_artifact_types
/all/migrate" -H "accept: application/json" -H "Authorization: Bearer
<your-token>"
3. To check the status of the synchronization, run the following command:
curl -X GET "https://target-host-name/v3/governance_artifact_types
/all/migrate/status " -H "accept: application/json" -H "Authorization:
Bearer <your-token>" -k
When the synchronization is finished, the following status is displayed:
"Migration status": "Finished",
"Started": "<start date>"
"Ended": "<end date>"
When the synchronization is still in progress, the phase name is displayed. The
following phases are run during synchronization:
- "Migrate"
- "Reconcile"
- "Promote"
- "SendToGlobalSearch"
- "Cleanup"
4. If the synchronization failed, after you fix all issues, you can resume it from the point
when it failed. Run the following command:
curl -d -k "https://target-host-name/v3/governance_artifact_types
/all/migrate/resume " -H "accept: application/json" -H "Authorization:
Bearer <your-token>"
Step 5: (Optional) Recreate the catalog for sharing information assets
If you deleted the catalog that was configured to share assets with Information Governance
Catalog, you must recreate it. Complete these steps:
1. Go to Organize > Management > Catalogs and open the Catalog Setup tab.
2. Enter the catalog name and description and click Create.
The synchronization is started automatically.
Step 6: (Optional) Re-enable automatic profiling of assets If you disabled the automatic profiling of data assets, enable it again. Complete these steps:
1. In Cloud Pak for Data, go to Organize > Management > Catalogs.
2. Find the catalog where you disabled the profiling and open it.
3. Go to the Settings tab, and select the option Automatically create profiles for data
assets.

The automatic profiling is started.
Expected performance of migration The following summaries show rough estimations of the time the migration process might take.
The process is divided into the following steps:
- Importing of assets by using istool command
- Synchronization of assets between Xmeta and Shop4info services
Database assets
The following number of assets were migrated:
- Hosts: 60
- Databases: 470
- Database schemas: 11 050
- Database tables: 335 460
- Database columns: 6 225 530
The time it took to migrate these assets:
- Import: 2h 25min
- Synchronization: 5h 45min
Glossary assets
An industry model with the following number of assets was migrated:
- Terms: 50 830
- Categories: 445
The time it took to migrate these assets:
- Import: 1h 10min
- Synchronization: 1h
Troubleshooting
The migration logs are stored in glossary-service. Use this command to access the logs:
logs wkc-glossary-service-849fdd8cd7-6nq52 -n zen
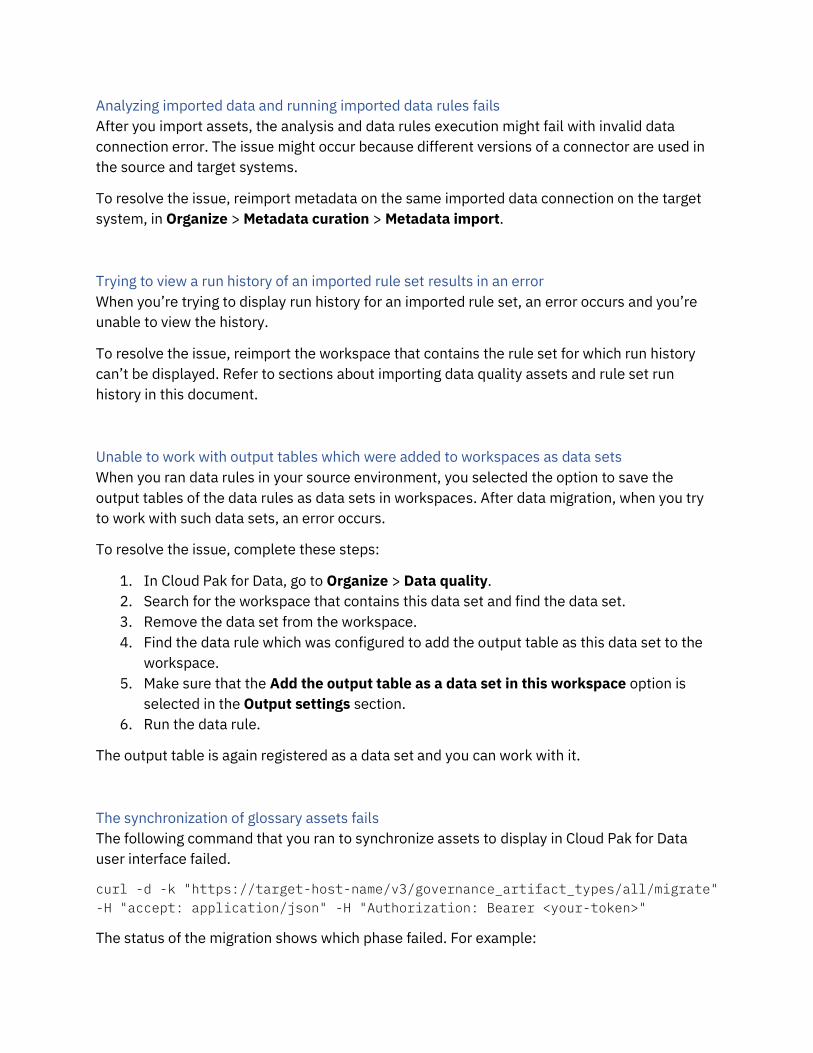
Analyzing imported data and running imported data rules fails
After you import assets, the analysis and data rules execution might fail with invalid data
connection error. The issue might occur because different versions of a connector are used in
the source and target systems.
To resolve the issue, reimport metadata on the same imported data connection on the target
system, in Organize > Metadata curation > Metadata import.
Trying to view a run history of an imported rule set results in an error
When you’re trying to display run history for an imported rule set, an error occurs and you’re
unable to view the history.
To resolve the issue, reimport the workspace that contains the rule set for which run history
can’t be displayed. Refer to sections about importing data quality assets and rule set run
history in this document.
Unable to work with output tables which were added to workspaces as data sets
When you ran data rules in your source environment, you selected the option to save the
output tables of the data rules as data sets in workspaces. After data migration, when you try
to work with such data sets, an error occurs.
To resolve the issue, complete these steps:
1. In Cloud Pak for Data, go to Organize > Data quality.
2. Search for the workspace that contains this data set and find the data set.
3. Remove the data set from the workspace.
4. Find the data rule which was configured to add the output table as this data set to the
workspace.
5. Make sure that the Add the output table as a data set in this workspace option is
selected in the Output settings section.
6. Run the data rule.
The output table is again registered as a data set and you can work with it.
The synchronization of glossary assets fails
The following command that you ran to synchronize assets to display in Cloud Pak for Data
user interface failed.
curl -d -k "https://target-host-name/v3/governance_artifact_types/all/migrate"
-H "accept: application/json" -H "Authorization: Bearer <your-token>"
The status of the migration shows which phase failed. For example:
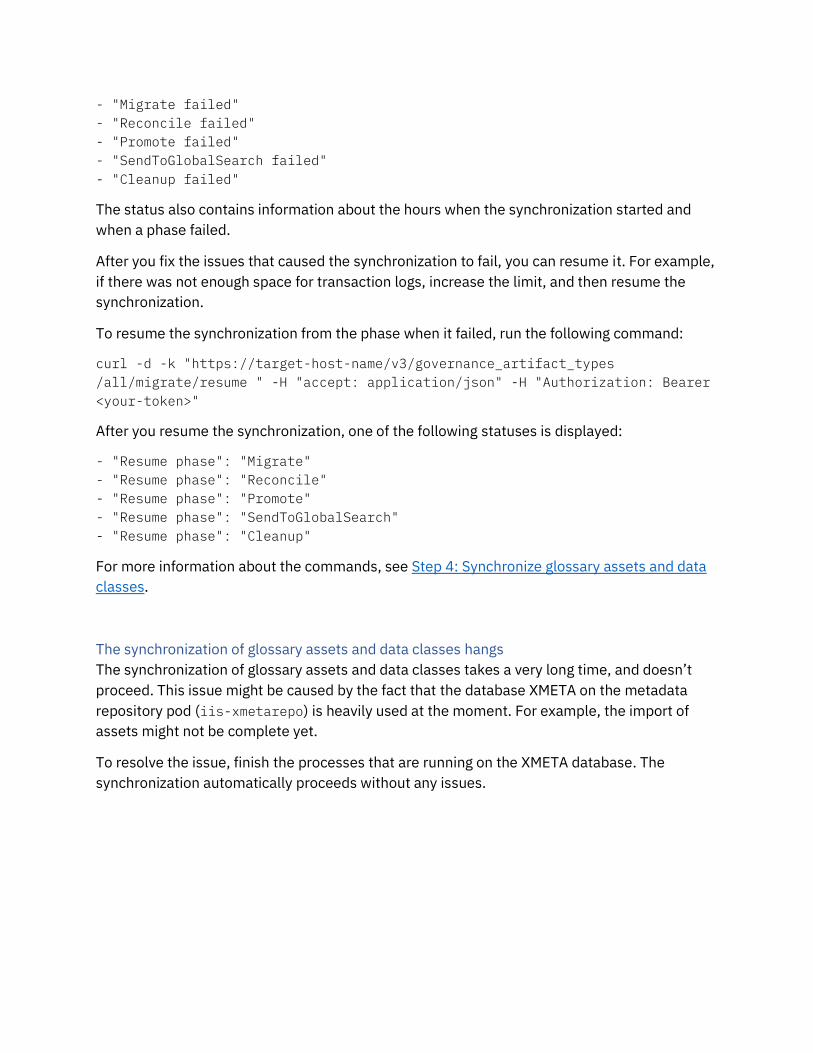
- "Migrate failed"
- "Reconcile failed"
- "Promote failed"
- "SendToGlobalSearch failed"
- "Cleanup failed"
The status also contains information about the hours when the synchronization started and
when a phase failed.
After you fix the issues that caused the synchronization to fail, you can resume it. For example,
if there was not enough space for transaction logs, increase the limit, and then resume the
synchronization.
To resume the synchronization from the phase when it failed, run the following command:
curl -d -k "https://target-host-name/v3/governance_artifact_types
/all/migrate/resume " -H "accept: application/json" -H "Authorization: Bearer
<your-token>"
After you resume the synchronization, one of the following statuses is displayed:
- "Resume phase": "Migrate"
- "Resume phase": "Reconcile"
- "Resume phase": "Promote"
- "Resume phase": "SendToGlobalSearch"
- "Resume phase": "Cleanup"
For more information about the commands, see Step 4: Synchronize glossary assets and data
classes.
The synchronization of glossary assets and data classes hangs
The synchronization of glossary assets and data classes takes a very long time, and doesn’t
proceed. This issue might be caused by the fact that the database XMETA on the metadata
repository pod (iis-xmetarepo) is heavily used at the moment. For example, the import of
assets might not be complete yet.
To resolve the issue, finish the processes that are running on the XMETA database. The
synchronization automatically proceeds without any issues.


