Macro Toolworks Perfect Keyboard
Version 8.x.x, Standard Edition or higher
Copyright © 2018
How to Combine Macros
This document shows how to combine multiple macros into one macro. We will use
macro file created as part of other tutorial “How to Create Clipboard Macro”. We will
extend the macro file so that the Gmail signature will have also a picture like this:
We will rename the macro file “HowTo_CreateClipboardMacro.4tw” to
“HowTo_CombineMultipleMacros.4tw”, open it in Macro Toolworks using
“File/Open” menu command, and start extending it.
Note: You may need to read “How to Create Text Insertion Macro” and “How to Create Clipboard Macro”
tutorials before moving to this one.
Steps:
1. Let’s create a new Clipboard Macro with the picture. Copy the picture to
the clipboard and then use “Add Clipboard Macro” button.
2. Let’s name the new Clipboard Macro “SignaturePicture”.
3. Now we create a new macro by clicking “Add Macro” button. In the “Macro
Steps” tab, click on Add Command icon to add “Run MACRO”
command:
4. We configure the “Run MACRO” command to run the “Mail Signature
(Gmail)” macro and click OK:
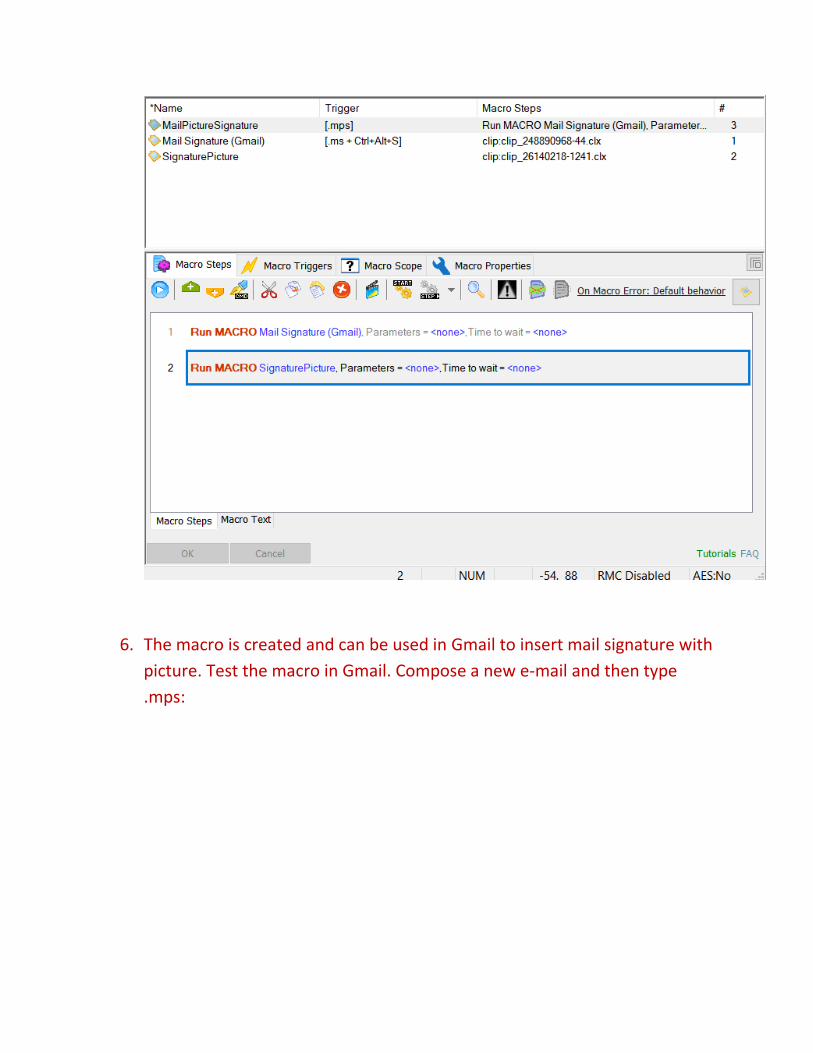
5. The same way we add one more “Run MACRO” command that we
configure to run “SignaturePicture”. Then we name the macro
“MailPictureSignature” and assign it “.mps” text shortcut. So what we get is
a macro that calls two other macros in order to generate the required
result – mail signature (the first Run MACRO command) and the picture
(the second Run MACRO command):
6. The macro is created and can be used in Gmail to insert mail signature with
picture. Test the macro in Gmail. Compose a new e-mail and then type
.mps: