Lureandmore.com Tutorial 1 Making 1-sided molds Pouring your own Soft Plastic fishing lures is cheap, easy and safe. It is also the perfect way to make truly custom lures for yourself and your friends (and even for sale). What you need (left to right) Back Row 1) Super glue – for attaching the bait to the mold box. 2) Room Temperature Vulcanising (RTV) Silicon – This will be the mold itself. Other options for the mold are Plaster of Paris (POP), household silicon sealant or aluminium. RTV is relatively cheap, safe to use at home, and produces molds that are ready in 3-5 hours without further steps, can be used thousands of times with a variety of products (resin, plastic, lead) without sticking, can be warmed in the microwave and don’t break if you drop them. POP is also easy, but requires sealing with epoxy and slow baking to finalise tempering. Household silicon can be used by squeezing it out and mixing it with a small amount of water and colouring (so you can see how well mixed the water is). Aluminium molds will be made to order by professionals. RTV is unique in that once cured, it ticks only to itself, meaning you can pull away lures, masters and mold boxes with minimal effort. RTV can be bought in hobby stores or on the Internet. 3) Mold box – I got mine at a hobby store. 4) Disposable cup – for mixing RTV.
Transcript
Lureandmore.com Tutorial 1
Making 1-sided molds
Pouring your own Soft Plastic fishing lures is cheap, easy and safe. It is also the
perfect way to make truly custom lures for yourself and your friends (and even for
sale).
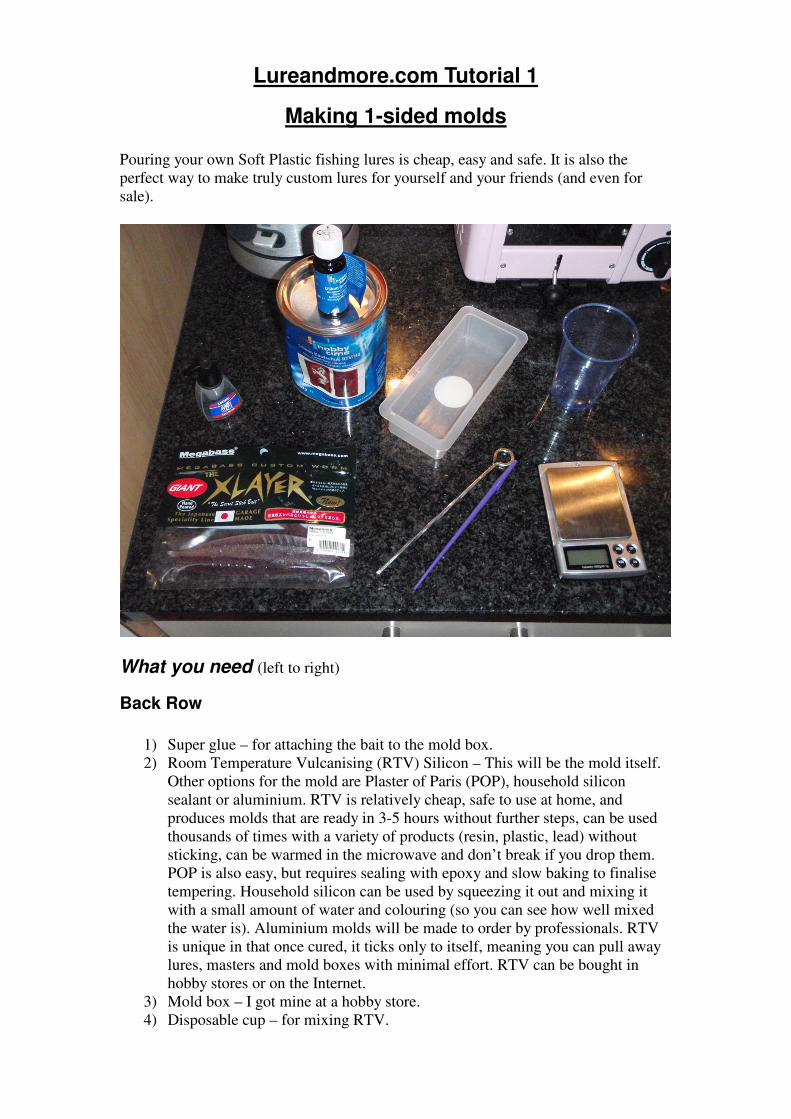
What you need (left to right)
Back Row
1) Super glue – for attaching the bait to the mold box.
2) Room Temperature Vulcanising (RTV) Silicon – This will be the mold itself.
Other options for the mold are Plaster of Paris (POP), household silicon
sealant or aluminium. RTV is relatively cheap, safe to use at home, and
produces molds that are ready in 3-5 hours without further steps, can be used
thousands of times with a variety of products (resin, plastic, lead) without
sticking, can be warmed in the microwave and don’t break if you drop them.
POP is also easy, but requires sealing with epoxy and slow baking to finalise
tempering. Household silicon can be used by squeezing it out and mixing it
with a small amount of water and colouring (so you can see how well mixed
the water is). Aluminium molds will be made to order by professionals. RTV
is unique in that once cured, it ticks only to itself, meaning you can pull away
lures, masters and mold boxes with minimal effort. RTV can be bought in
hobby stores or on the Internet.
3) Mold box – I got mine at a hobby store.
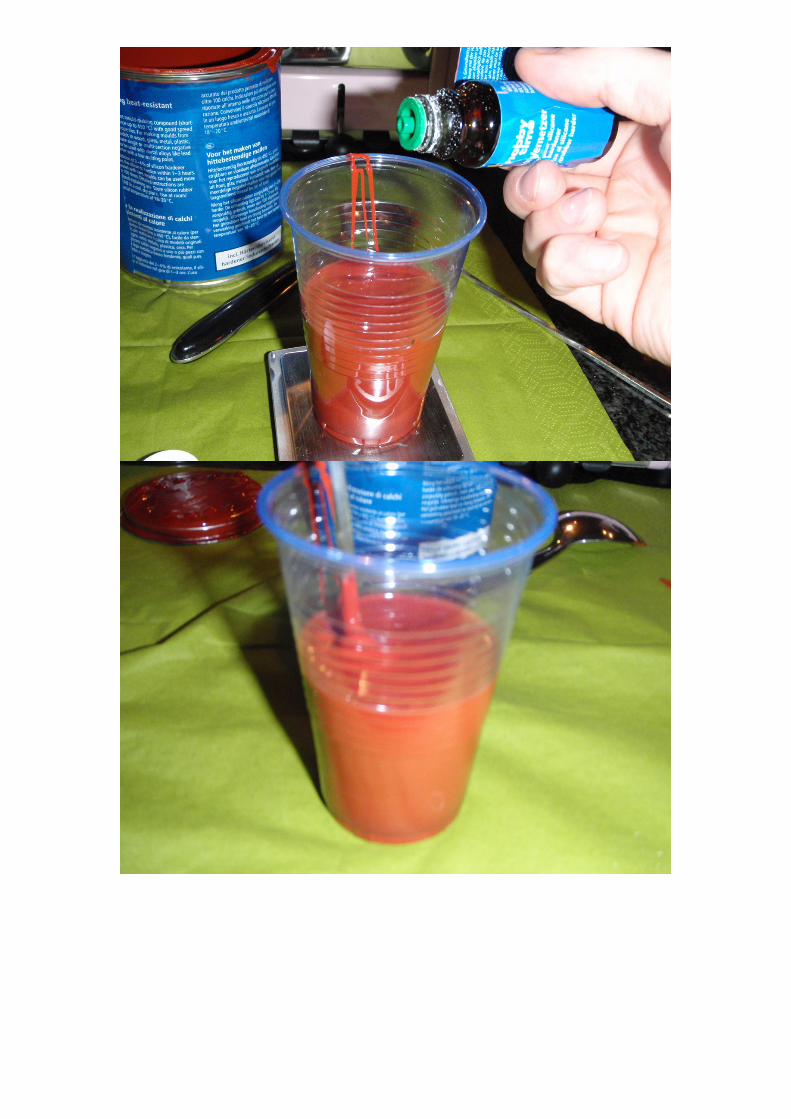
4) Disposable cup – for mixing RTV.
Front Row
1) Masters – baits to copy. Here I’m using a Megabass Giant (French) X-Layer,
but any bait with a flat side will work (slug-go etc). Remember if you’re going
to sell baits, copying someone else’s design for profit breaches copyright laws.
I neither advocate nor encourage this.
2) Metal skewer – for stirring the RTV.
3) Paintbrush – for initial layer of RTV on master.
4) Scales – for accurately measuring RTV by weight.
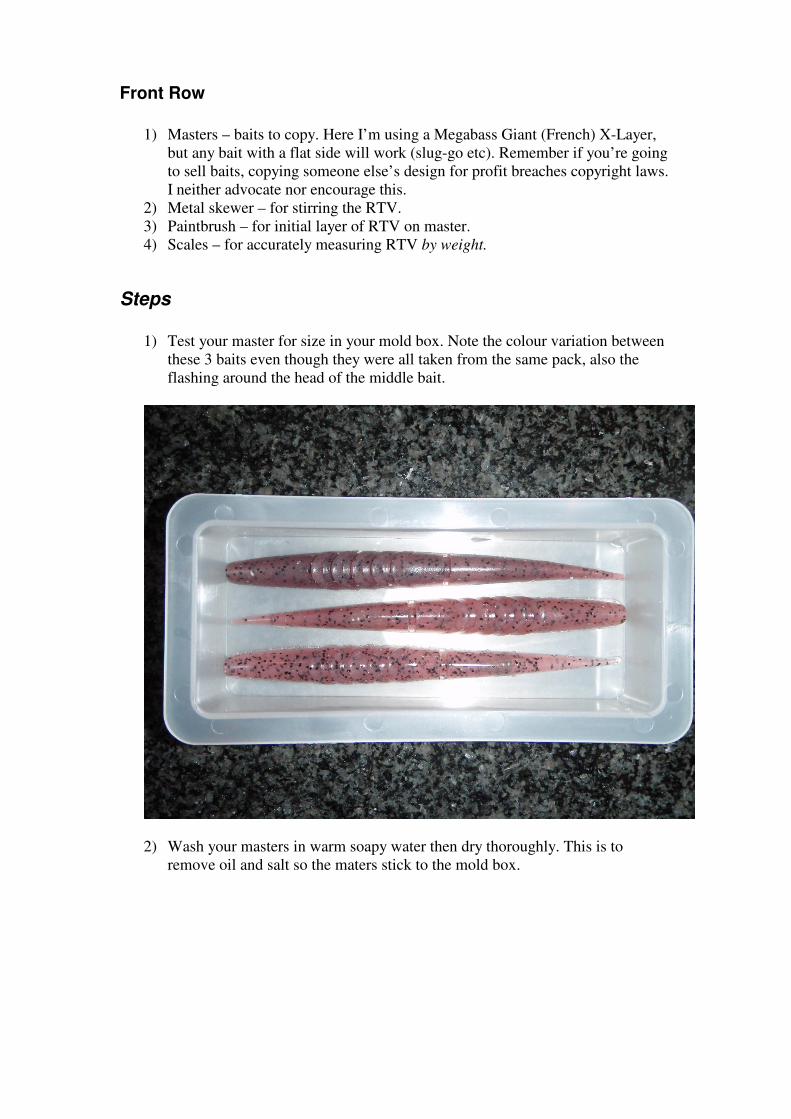
Steps
1) Test your master for size in your mold box. Note the colour variation between
these 3 baits even though they were all taken from the same pack, also the
flashing around the head of the middle bait.
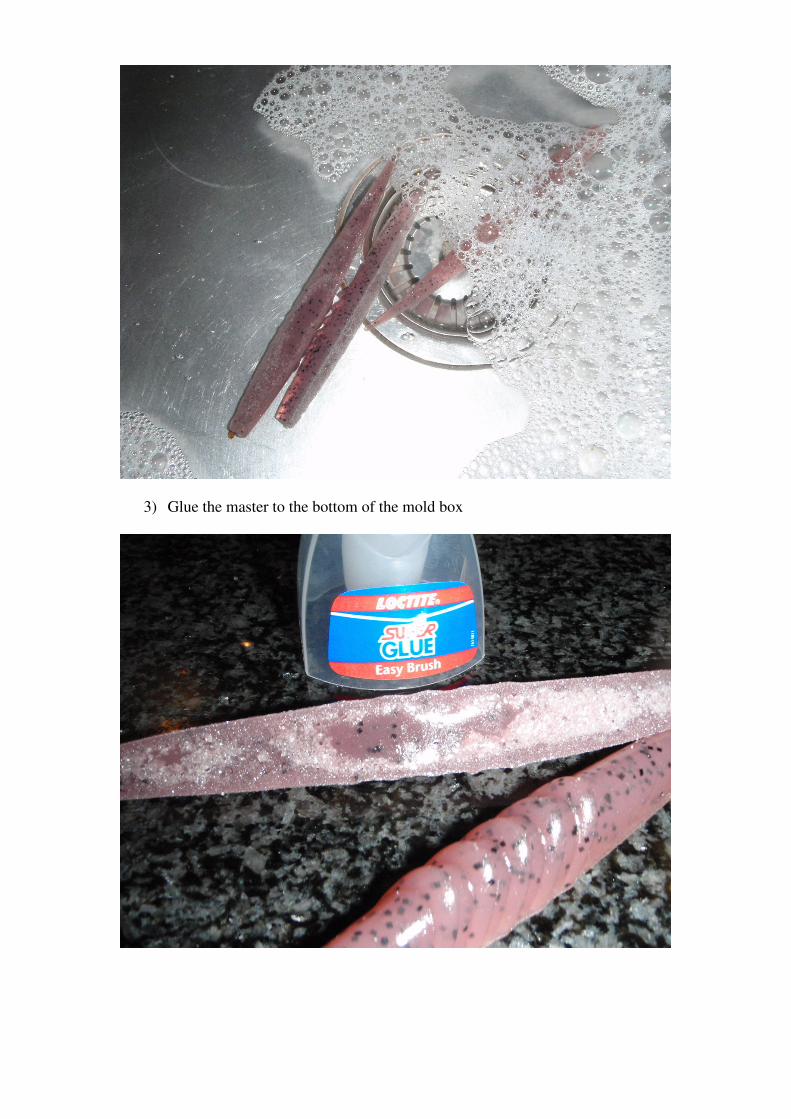
2) Wash your masters in warm soapy water then dry thoroughly. This is to
remove oil and salt so the maters stick to the mold box.
3) Glue the master to the bottom of the mold box
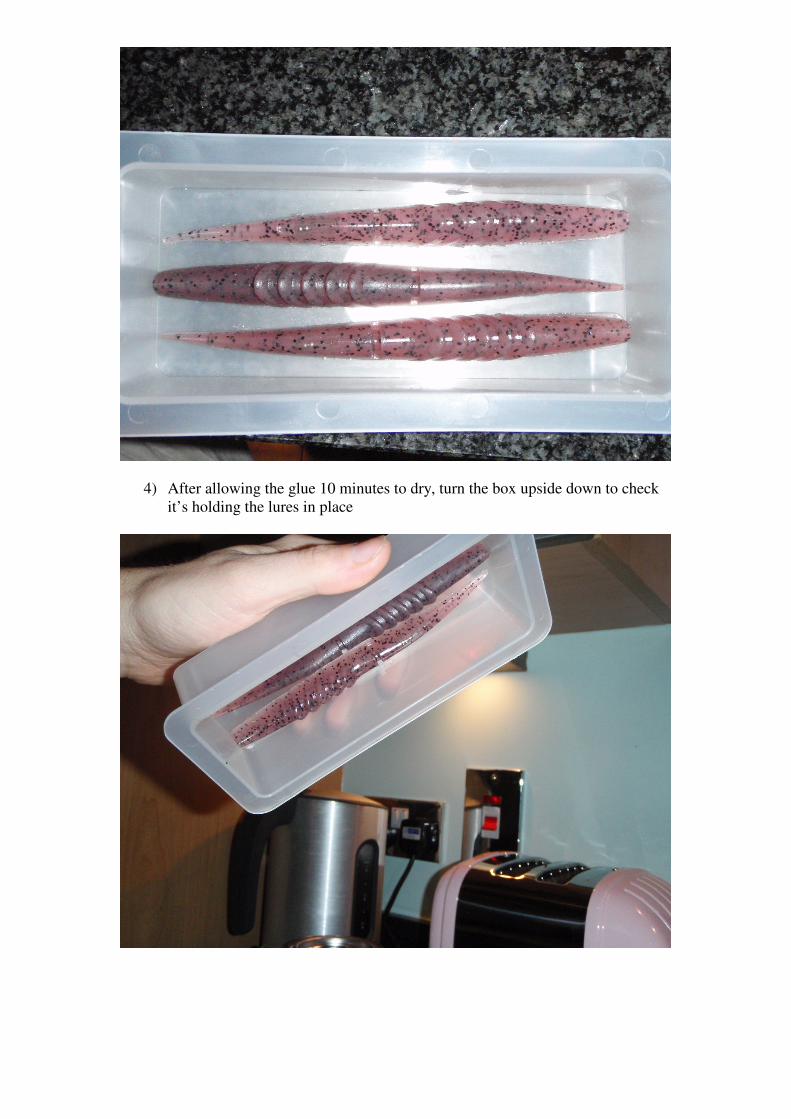
4) After allowing the glue 10 minutes to dry, turn the box upside down to check
it’s holding the lures in place
5) Weigh and mix the RTV according to the instructions. Ensure you pop any
bubbles that appear.
6) Paint a thin layer of RTV over the masters. This is to ensure full coverage
without any air bubbles.
7) Pour the rest of the RTV over the lures. I suggest pouring from one side to the
other – this ensures any air bubbles are pushed away from the lures, keeping
the integrity of the layer painted on.
8) Check underneath. Some creepage under the masters is to be expected. The
final mold will be trimmed with scissors anyway (another advantage of RTV).
9) Wait 24 hours. Although the RTV sets in 3-5 hours giving it a full 24 hours
minimises tearing when removing from the mold box.
10) Remove the mold from the mold box.
11) Remove the masters by gently bending the mold, and trim the small overhangs
with a pair of sharp scissors. You now have a mold ready to pour perfect
copies of your masters.
In Tutorial 2 I will show you how to pour a replica of your master using your new


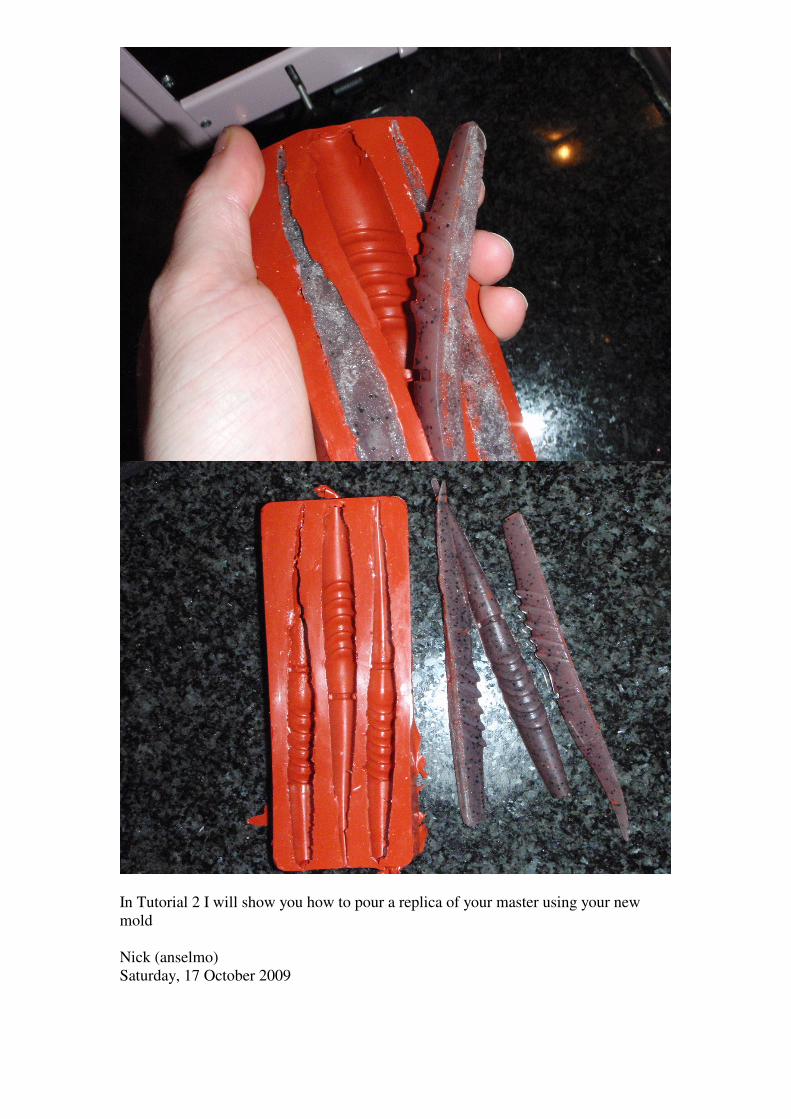


![SPRO. Catalogo Lures 2012 [UK]](https://static.documents.pub/doc/80x56/568c51f91a28ab4916b4d11a/spro-catalogo-lures-2012-uk.jpg)


