Managing Authentication and Identity Services You can create access policies based on user identity rather than IP addresses. To enable identity-based services, you configure policies and options to obtain user identity, and then use identity objects in your access policies. The following topics describe authentication and identity services and how to configure them. • Overview of Authentication and Identity Services, page 1 • Configuring Authentication and Identity Services, page 3 Overview of Authentication and Identity Services Authentication is the act of confirming the identity of a user. You can obtain user identities passively or actively. With passive authentication, user identity is obtained by checking a mapping of IP addresses to user identity collected by the CDA or AD agent application. Authentication is passive because the user is not prompted to provide credentials. With active authentication, when an HTTP or decrypted HTTPS traffic flow comes from an IP address for which ASA CX has no user-identity mapping, you can decide whether to authenticate the user who initiated the traffic flow against the directories configured for the network. If the user successfully authenticates, the IP address is considered to have the identity of the authenticated user. You can apply identity-based access policies to traffic that has either a passive or active user mapping, controlling network access based on who is trying to access the resource rather than controlling it by static IP address-based policies. There are many separate features involved in providing authentication and identity services: • Directory realms—You must define the directory realms that provide authentication services. A realm contains one or more directory servers, such as Active Directory or OpenLDAP, that define the user names and user group membership for the network. When you configure identity policies, you must select the directory realm that will provide authentication. • Identity policies—Use identity policies to enable policies based on user identity, including username and user group membership. Identity policies never result in dropped or blocked traffic, even if the user fails to authenticate. Instead, they collect user information, so that access policies can match traffic based on user identity, and so that dashboards and events include user identity information. User Guide for ASA CX and Cisco Prime Security Manager 9.2 OL-29763-02 1
Transcript
Managing Authentication and Identity Services
You can create access policies based on user identity rather than IP addresses. To enable identity-basedservices, you configure policies and options to obtain user identity, and then use identity objects in youraccess policies. The following topics describe authentication and identity services and how to configurethem.
• Overview of Authentication and Identity Services, page 1
• Configuring Authentication and Identity Services, page 3
Overview of Authentication and Identity ServicesAuthentication is the act of confirming the identity of a user. You can obtain user identities passively oractively.
With passive authentication, user identity is obtained by checking a mapping of IP addresses to user identitycollected by the CDA or AD agent application. Authentication is passive because the user is not prompted toprovide credentials.
With active authentication, when an HTTP or decrypted HTTPS traffic flow comes from an IP address forwhich ASA CX has no user-identity mapping, you can decide whether to authenticate the user who initiatedthe traffic flow against the directories configured for the network. If the user successfully authenticates, theIP address is considered to have the identity of the authenticated user.
You can apply identity-based access policies to traffic that has either a passive or active user mapping,controlling network access based on who is trying to access the resource rather than controlling it by staticIP address-based policies.
There are many separate features involved in providing authentication and identity services:
• Directory realms—You must define the directory realms that provide authentication services. A realmcontains one or more directory servers, such as Active Directory or OpenLDAP, that define the usernames and user group membership for the network. When you configure identity policies, you mustselect the directory realm that will provide authentication.
• Identity policies—Use identity policies to enable policies based on user identity, including usernameand user group membership. Identity policies never result in dropped or blocked traffic, even if the userfails to authenticate. Instead, they collect user information, so that access policies can match traffic basedon user identity, and so that dashboards and events include user identity information.
User Guide for ASA CX and Cisco Prime Security Manager 9.2 OL-29763-02 1
• Authentication settings—Authentication settings control how authentication mappings and prompts aremanaged. For example, you can define how long a username-to-IP address mapping remains valid beforeyou want to prompt the user to reauthenticate. These settings have system defaults, so you need to adjustthem only if you desire different settings.
• Identity policy objects—Identity policy objects define the specific user names or user group names forwhich you want to define access control. You can also selectively exclude names from an object. Forexample, you could define an object that includes the user group Eng, but exclude users Guest1 andGuest2, who are members of that group.
• Access policies—When you specify Identity policy objects as part of the source field in an access policy,you are controlling access to the destination resources based on user identity.
• CDA or Active Directory agent—(Optional.) You can install the CDA or AD agent in your network tocollect user identity information when users log into the network, before they try to pass traffic throughthe device. This type of identity is considered a passive identity mapping. By collecting this information,you can enable identity-based access control without forcing users to authenticate directly.
• Identity-based dashboards—Many dashboards include identity information if it is available, so you cananalyze the traffic on your network based on user identity. The Users dashboard is specifically designedto provide user-based network usage information. You can use these dashboards to identify cases wherenetwork acceptable use criteria are not being met.
Supported AAA Servers and Authentication MethodsYou can use AAA servers running LDAP (Lightweight Directory Access Protocol) to implement authenticationand identity services. Following are the supported servers and the authentication methods you can use witheach.
•Microsoft Active Directory—You can use the following AD servers:
•Windows Server 2008 R2
•Windows Server 2003 R2
You can use the following authentication methods in identity policies when using AD; you can alsoallow negotiation to select the strongest supported method:
• NTLM (All Windows platforms.)
• Kerberos (Windows XP only.)
• Basic (No restrictions.)
• OpenLDAP—Version 2.4.21 or later. The Basic authentication method is the only available method.
Types of User IdentityTo enable identity services, so that traffic flows can be conditionally handled based on the user who initiatesthe flow, the CX device maps the user name to the IP address of the user’s device.Based on how the user-to-IP address mapping is obtained, users are considered to have one of the followingidentity types:
User Guide for ASA CX and Cisco Prime Security Manager 9.22 OL-29763-02
Managing Authentication and Identity ServicesSupported AAA Servers and Authentication Methods
• Active—The user was directly authenticated by the CX device. Active authentication is applied to HTTPor decrypted HTTPS traffic only. If any other type of traffic matches an identity policy that requires orallows active authentication, then active authentication will not be attempted.
• Passive—A user-to-IP address mapping was received from the Context Directory Agent (CDA) or ActiveDirectory (AD) agent. This type of identity can be available regardless of the types of traffic sent by theuser.
• Unknown—There is no user-to-IP mapping. For example, the user tried to actively authenticate to theCX device, but authentication failed. Users who fail active authentication are represented in userdashboards under the username Realm\ANONYMOUS. Users who simply do not have a mappingbecause they were not required to authenticate are shown as their IP address.
What to Tell Users About AuthenticationIf you configure identity policies to require or allow for active authentication, users might be prompted toauthenticate when they make HTTP requests, or HTTPS requests that are decrypted by decryption policies.To help users authenticate correctly, ensure that they know the following:
• Authentication prompts will include the name of the directory realm and the ASA CX management IPaddress. Ensure that users understand that authentication requests that include this information are validrequests and that they should respond to them.
•When using NTLM or Kerberos authentication with Active Directory, users can enter their name in anyof these formats: username, username@domain, DOMAIN\username. For example, user1,[email protected], ENG\user1.
•When using basic authentication, users should supply their name in username@domain format, forexample, [email protected].
Configuring Authentication and Identity ServicesThe following procedure provides an overview of the process for configuring authentication and identityservices. Use this procedure to understand the general configuration process and see the referenced topics fordetailed steps.
Procedure
Step 1 Configure directory realms as described in Configuring Directory Realms, on page 5.The directory realms define the directory servers that contain user and user group information. Users authenticateagainst these servers to provide user identity, which can then be used to provide identity-based access controland reporting.
Step 2 (Optional) Configure the Active Directory (AD) agent as described in Identifying the Active Directory Agent.If you are using Active Directory in your directory realm, you can install the Context Directory Agent (CDA)or Active Directory agent to provide passive user-to-IP address mappings based on Windows loginauthentications.
Step 3 (Optional) Change the authentication settings if necessary as described in Configuring Authentication Settings,on page 22.
User Guide for ASA CX and Cisco Prime Security Manager 9.2 OL-29763-02 3
Managing Authentication and Identity ServicesWhat to Tell Users About Authentication
Authentication settings have default values appropriate for most networks, so you might not need to changethem.
Step 4 Create at least one identity policy for each directory realm as described in Configuring Identity Policies, onpage 11.Identity policies determine the type of identity users must supply, either through active authentication, passivemapping, or none at all if you elect to not require authentication. You must have at least one policy per realm,or you will not get user identity mappings for users defined within the realm.
If you intend to use active authentication, you must also ensure that the policy redirecting traffic fromthe ASA to the ASACX SSP enables the authentication proxy. If you do not enable the authenticationproxy, you are limited to passive authentication. For more information, see Enabling ActiveAuthentication, on page 16.
Note
Step 5 If you are using active authentication, and you want to enforce authentication for HTTPS requests, configuredecryption policies to decrypt secure traffic from the sources you want to authenticate.The decryption policy should apply the Decrypt Everything action.
Step 6 (Optional) When using Active Directory, you can configure client browsers to provide transparentauthentication for NTLM or Kerberos as described in Enabling Transparent User Authentication, on page17.When configured to provide transparent authentication, browsers can respond to authentication requests fromtrusted sources by providingWindows login information without prompting users. Thus, active authenticationoccurs but users are not aware that authentication happened and they are not inconvenienced or confused byan unexpected authentication prompt.
Step 7 (Optional) Create identity-based access policies as described in Configuring Context-Aware Access Policies.You can control access to a destination by using identity policy objects in the source definition of an accesspolicy. The identity object defines the user or user group names that are allowed, or denied, access to adestination. For information on identity policy objects, see CX Identity Objects.
Step 8 Analyze network traffic using identity information in dashboards and events.Many dashboards, such as the Users dashboard, includes identity-based traffic analysis. You can also accessdashboards related to identity-based access policies by looking at the policy hits dashboard for the policy.Use this information to determine the efficacy of your policy and to identify users who are violating acceptableuse policies. For information on dashboards, see Viewing Dashboards and Reports .
In addition to dashboards, the Event Viewer includes user name information on events when available. Forinformation on Event Viewer, see Viewing Events.
Overview of Directory RealmsA directory realm is a named list of directory servers. For Active Directory (AD), a realm is equivalent to anAD domain. For LDAP, the realm is any LDAP server and its redundant servers, that is, all servers with thesame top level distinguished name (DN).
You use directory realms:
• In identity policies, to identify the directories with which the user must authenticate. There must be anidentity policy for each realm in order to use identities defined in the realm in access policies.
• On the Users page, to identify the directory that contains remote users you are granting access to theweb interface.
User Guide for ASA CX and Cisco Prime Security Manager 9.24 OL-29763-02
Managing Authentication and Identity ServicesOverview of Directory Realms
To open the directory realms page, where you can add, edit, or delete realms and the directory servers containedin them, or reorder the directory servers within a realm, select Components > Directory Realm.
The Directory Realm page includes the following items:
I want to
Contains the following commands:
• Add Realm—To add a new directory realm. You are prompted for a name, description, anddirectory type. The realm name will appear in dashboards along with the username in the formatRealm\username. Thus, you might want to use NetBIOS domain names for your realm names sothat username strings include the expected NetBIOS domain name.
List of directory realms and their directory servers
The list shows all directory realms and within each realm is an ordered list of directory servers containedin the realm. The first server in the list is always used unless it becomes unavailable, in which case thenext server in the list is tried until a response is received.
There can be a single Active Directory realm. When binding to Active Directory, the first AD serverin the realm is used. There can by any number of Standard LDAP realms.
To see the commands related to a directory realm or server, mouse over the directory realm header orthe directory server row. The following are the available commands:
Directory realm commands:
• Add New Directory—To add a new directory server to the realm. The server is added to the topof the realm as the first entry. After adding the directory, move it to the desired position beforecommitting your changes.
• Delete Realm—To delete the realm. You cannot delete a realm if it is being used in a policy orpolicy object, or as the global realm for system users.
• Edit Realm—To edit the realm properties.
Directory server commands:
• Delete Directory—To delete the directory server.
• Edit Directory—To edit the directory server properties.
•Move Up,Move Down—To move the directory server until it is in the desired position. The upand down commands move the directory a single row. You can also click and drag a directory tothe desired location.
Configuring Directory Realms
Obtain the values for these settings from your AD or OpenLDAP administrator.Tip
User Guide for ASA CX and Cisco Prime Security Manager 9.2 OL-29763-02 5
Managing Authentication and Identity ServicesOverview of Directory Realms
A directory realm is a named list of directory servers. For Active Directory (AD), a realm is equivalent to anAD domain. For LDAP, the realm is any LDAP server and its redundant servers, that is, all servers with thesame top level distinguished name (DN).
To configure a directory realm, you must create the realm and then add directory servers to the realm. Thefollowing procedure explains both aspects.
(Single Device mode.)When you create your first directory realm, a default identity policy is automaticallycreated for that realm. You can edit the policy to change any characteristic of the policy to suit your needs.In Multiple Device mode, no default policy is created.
Tip
Procedure
Step 1 Select Components > Directory Realm.The directory realms are organized in a list, and each directory realm contains a priority list of directoryservers. The first directory is always used unless it becomes unavailable, in which case subsequent directoriesare used. To see the commands related to a realm, youmust mouse-over the name of the realm; to see commandsrelated to a directory server, you must mouse-over the row for the directory. You can then select the desiredcommand.
If you need to work with an existing directory realm or server, use the filter controls to help you locate theitem.
Step 2 Configure the directory realm.a) To open the form for creating or editing a directory realm, do one of the following:
• To create a new realm, select I want to > Add Realm.
• To edit an existing realm, mouse over the realm name and click Edit Realm.
b) Fill in the directory realm properties:
• Name—The name of the realm. This name will appear in dashboards along with the username inthe format Realm\username. Thus, you might want to use NetBIOS domain names for your realmnames so that username strings include the expected NetBIOS domain name.
The name is also visible to end users if you create an identity policy for the realm that results in usersoccasionally being prompted to authenticate.
• Description—A description for the realm.
• Directory Type—The type of directory server, either Microsoft Active Directory or StandardLDAP. You can create a single Active Directory realm, but you can create more than one standardLDAP realm.
Select SSO if you are creating a single-sign-on (SSO) directory for integration with other managementproducts. For detailed information on creating an SSO realm, see Configuring SSO Directories andUsers.
• Primary Domain—(AD only.) The fully qualified Active Directory domain name that the deviceshould join. For example, example.com. Domains in a trust relationship with this domain are alsosupported.
User Guide for ASA CX and Cisco Prime Security Manager 9.26 OL-29763-02
Managing Authentication and Identity ServicesOverview of Directory Realms
• Join Username, Join Password—(AD only.) The Active Directory sAMAccountName or UserPrincipal Name to use when joining the device to the AD domain or to leave the domain. Thesecredentials must have the authority within AD to join devices to the domain or to leave the domain.
c) (AD only.) Click the Test Domain Join link to verify that you can join the device to the AD realm.If the test fails, you need to resolve the issues. Log into the CLI and use the show dns command to verifythat you have configured the right DNS domain for the device, and included the domain in the searchdomains list. Another potential problem might be that intervening firewalls do not have all required portsopen to enable domain join; see the Microsoft support site for details on how to configure a firewall fordomains and trusts for specific port requirements for your setup.
d) Click Save to save your changes.
Step 3 Configure the directory servers within a realm:a) To open the form for adding or editing a directory server, do one of the following:
• To add a directory server, mouse over the realm name and click Add New Directory.
• To edit an existing directory server, mouse over the server name and click Edit Directory.
b) Fill in the directory server properties. For detailed information, see Directory Properties, on page 7.Be sure to click the Test Connection link when filling in the properties. This will test whether thedirectory can be contacted using those properties. If the connection fails and you are certain theproperties are correct, ensure there is a network path between the device and the directory server.If necessary, log into the CLI to use commands such as ping and traceroute.
Tip
c) Click Save to save your changes.You can repeat the process of adding directories to identify all servers used in the realm.
Step 4 If necessary, move the server entries so that they are in priority order within the directory realm, with theprimary server at the top of the list.You can drag and drop server entries, or use theMove Up orMove Down links that appear when you mouseover a server entry.
Directory Properties
Obtain the values for these settings from your AD or OpenLDAP administrator.Tip
The following table describes properties for directories that you include in directory realms. Where indicated,some properties apply to certain directory types only. For more information about LDAP properties and theirsyntax, refer to RFC 2253.
Table 1: Directory Properties
DescriptionProperty
The DNS name or IP address of the directory server.Directory Hostname
User Guide for ASA CX and Cisco Prime Security Manager 9.2 OL-29763-02 7
Managing Authentication and Identity ServicesOverview of Directory Realms
DescriptionProperty
The port number used for communications with the server. The default is 389.
Port 389 is the only supported port, which supplies standard LDAP(plain text) connections. You cannot use secure LDAP (LDAP overSSL) on port 636, nor can you specify the Active Directory GlobalCatalog Server on port 3268.
Note
Port
The distinguished name of the directory object in the LDAP hierarchy used forauthenticated binding. The LDAP login name represents a user record in theLDAP server that the administrator uses for binding (administrator privilegesare not required for the user). For example,cn=Administrator,dc=example,dc=com. This string is case-sensitive andalphanumeric. Special characters are allowed.
LDAP Login Name
(LDAP only.)
The user name used for authenticated binding with the AD server, for example,[email protected].
For Active Directory, the user privilege requirements differ based on the type ofauthentication you will allow in your identity policies. Ensure you specify a userwith the required privileges:
• NTLM, Basic—Any valid user account should work.
• Kerberos—The user account must have the “Validated Write to ServicePrinciple Name” permission. See the Active Directory documentation fordetails on delegating authority to modify SPNs.
AD Login Name
(AD only.)
The password for the user specified in AD/LDAP Login Name.AD/LDAP Password
The LDAP search base distinguished name used to fully-qualify usernames beingauthenticated against LDAP directories. The field also defines the location inthe LDAP hierarchy for searching or querying user information in both LDAPand AD. For example, cn=users,dc=example,dc=com. The maximum length is128 characters. The string is case-sensitive. Spaces are not permitted, but otherspecial characters are allowed.
If you do not specify a user search base, the system will create a generic oneconsisting of the entire domain components of the directory name. For example,if the directory name is ad.example.com, the constructed qualifier would bedc=example,dc=com. The generic namemight or might not work in your network,so it is best to explicitly enter a qualifier. For standard LDAP, you probably willalways need to explicitly enter a qualifier. If you use an IP address instead of aDNS name, you will always need to enter a qualifier.
For more information, see Determining the Directory Search Base, on page 9.
User Search Base
User Guide for ASA CX and Cisco Prime Security Manager 9.28 OL-29763-02
Managing Authentication and Identity ServicesOverview of Directory Realms
DescriptionProperty
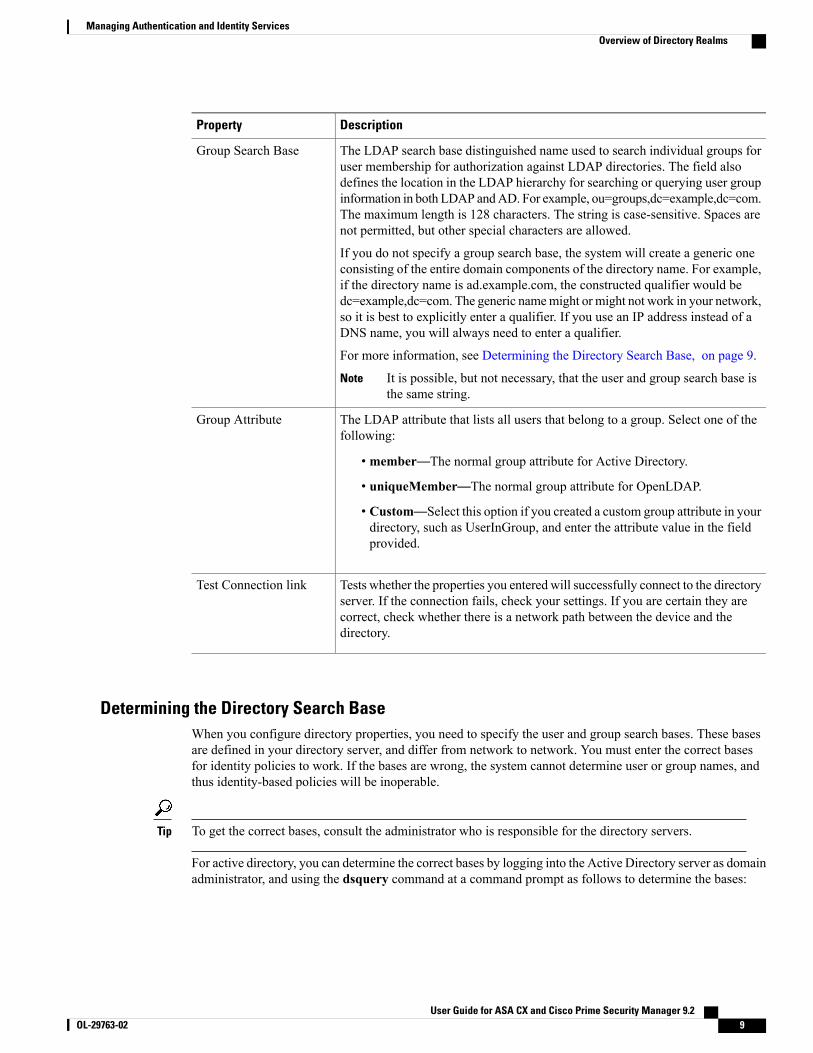
The LDAP search base distinguished name used to search individual groups foruser membership for authorization against LDAP directories. The field alsodefines the location in the LDAP hierarchy for searching or querying user groupinformation in both LDAP andAD. For example, ou=groups,dc=example,dc=com.The maximum length is 128 characters. The string is case-sensitive. Spaces arenot permitted, but other special characters are allowed.
If you do not specify a group search base, the system will create a generic oneconsisting of the entire domain components of the directory name. For example,if the directory name is ad.example.com, the constructed qualifier would bedc=example,dc=com. The generic namemight or might not work in your network,so it is best to explicitly enter a qualifier. If you use an IP address instead of aDNS name, you will always need to enter a qualifier.
For more information, see Determining the Directory Search Base, on page 9.
It is possible, but not necessary, that the user and group search base isthe same string.
Note
Group Search Base
The LDAP attribute that lists all users that belong to a group. Select one of thefollowing:
• member—The normal group attribute for Active Directory.
• uniqueMember—The normal group attribute for OpenLDAP.
• Custom—Select this option if you created a custom group attribute in yourdirectory, such as UserInGroup, and enter the attribute value in the fieldprovided.
Group Attribute
Tests whether the properties you entered will successfully connect to the directoryserver. If the connection fails, check your settings. If you are certain they arecorrect, check whether there is a network path between the device and thedirectory.
Test Connection link
Determining the Directory Search BaseWhen you configure directory properties, you need to specify the user and group search bases. These basesare defined in your directory server, and differ from network to network. You must enter the correct basesfor identity policies to work. If the bases are wrong, the system cannot determine user or group names, andthus identity-based policies will be inoperable.
To get the correct bases, consult the administrator who is responsible for the directory servers.Tip
For active directory, you can determine the correct bases by logging into the Active Directory server as domainadministrator, and using the dsquery command at a command prompt as follows to determine the bases:
User Guide for ASA CX and Cisco Prime Security Manager 9.2 OL-29763-02 9
Managing Authentication and Identity ServicesOverview of Directory Realms
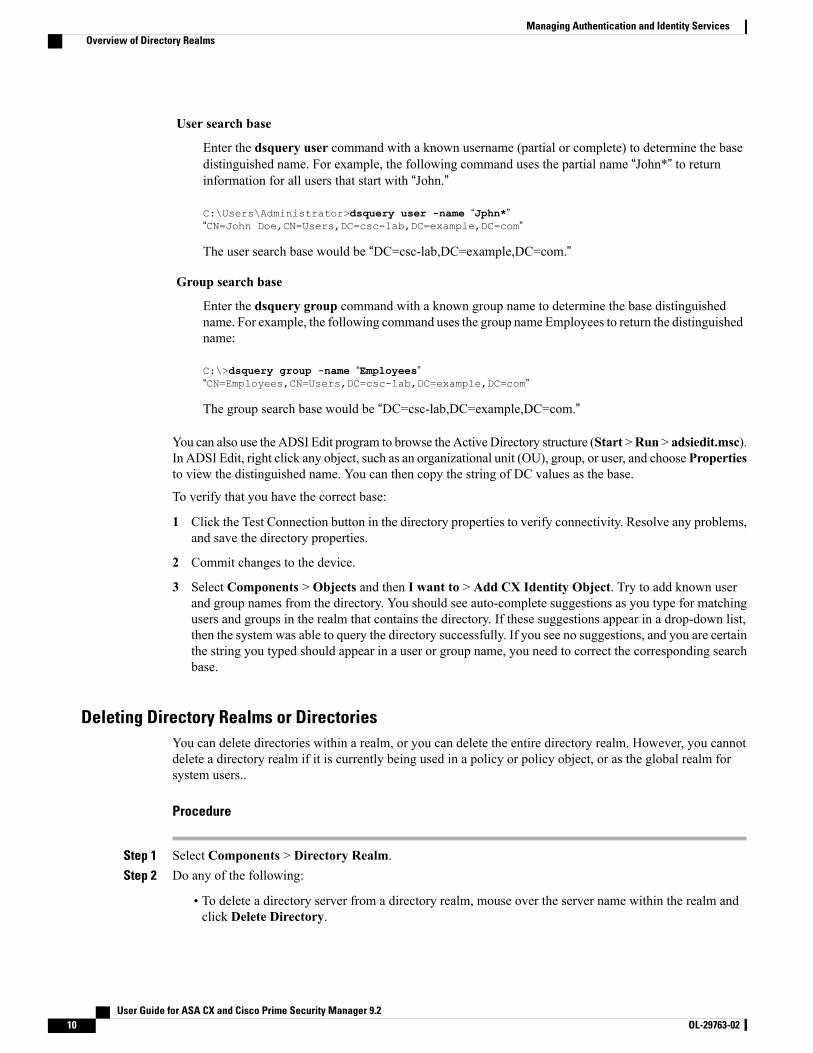
User search base
Enter the dsquery user command with a known username (partial or complete) to determine the basedistinguished name. For example, the following command uses the partial name “John*” to returninformation for all users that start with “John.”
C:\Users\Administrator>dsquery user -name “Jphn*”“CN=John Doe,CN=Users,DC=csc-lab,DC=example,DC=com”
The user search base would be “DC=csc-lab,DC=example,DC=com.”
Group search base
Enter the dsquery group command with a known group name to determine the base distinguishedname. For example, the following command uses the group name Employees to return the distinguishedname:
C:\>dsquery group -name “Employees”“CN=Employees,CN=Users,DC=csc-lab,DC=example,DC=com”
The group search base would be “DC=csc-lab,DC=example,DC=com.”
You can also use the ADSI Edit program to browse the Active Directory structure (Start >Run > adsiedit.msc).In ADSI Edit, right click any object, such as an organizational unit (OU), group, or user, and choose Propertiesto view the distinguished name. You can then copy the string of DC values as the base.
To verify that you have the correct base:
1 Click the Test Connection button in the directory properties to verify connectivity. Resolve any problems,and save the directory properties.
2 Commit changes to the device.
3 Select Components > Objects and then I want to > Add CX Identity Object. Try to add known userand group names from the directory. You should see auto-complete suggestions as you type for matchingusers and groups in the realm that contains the directory. If these suggestions appear in a drop-down list,then the system was able to query the directory successfully. If you see no suggestions, and you are certainthe string you typed should appear in a user or group name, you need to correct the corresponding searchbase.
Deleting Directory Realms or DirectoriesYou can delete directories within a realm, or you can delete the entire directory realm. However, you cannotdelete a directory realm if it is currently being used in a policy or policy object, or as the global realm forsystem users..
Procedure
Step 1 Select Components > Directory Realm.Step 2 Do any of the following:
• To delete a directory server from a directory realm, mouse over the server name within the realm andclick Delete Directory.
User Guide for ASA CX and Cisco Prime Security Manager 9.210 OL-29763-02
Managing Authentication and Identity ServicesOverview of Directory Realms
• To delete a directory realm, mouse over the name of the realm and click Delete Realm.
Configuring Identity PoliciesUse identity policies to enable policies based on user identity, including username and user group membership.Identity policies never result in dropped or blocked traffic, even if the user fails to authenticate.
Instead, identity policies can prompt users to provide username/password when attempting to connect to adestination according to your matching criteria and authentication action. If the user fails authentication, theuser’s traffic is evaluated against your access rules and is permitted or denied based on those rules. If nopassive authentication mapping is available for the IP address of the workstation the user is using, only theuser’s IP address is used for matching purposes, so any identity-based rules you create will not apply.Thus, youmight have an identity-based access rule that would allow traffic for UserA to ServerA, and disallowsall other access to ServerA. If UserA successfully authenticates, the access rule will apply and UserA will beallowed to access ServerA. If UserA fails authentication, and there is no passive mapping, the access rule willnot apply and UserA will not be allowed access to ServerA.
Tips
• By active or passive authentication, you can ensure that the user associated with a traffic flow is known,allowing identity-based access rules to function correctly, and providing user information in dashboardsand events.
• Active authentication is applied to HTTP or decrypted HTTPS traffic only. If any other type of trafficmatches an identity policy that requires or allows active authentication, then active authentication willnot be attempted. Thus, it is not necessary to create Do Not Require Authentication policies fornon-HTTP/HTTPS traffic. Likewise, it is not meaningful to create a policy that applies the Get Identityvia Active Authentication action for traffic matching criteria that excludes HTTP traffic, for example,by selecting a service group that specifies ICMP as the only service type.
• Identity policies are applied based on first match for traffic matching criteria. Ensure that you define thematching criteria precisely so that the desired action, including the directory realm to use, is applied toeach traffic class.
Before You Begin
You must create the directory realm before you can configure identity policies for the realm.
(Single Device mode only.) When you create the first directory realm, a default identity policy is automaticallycreated for the realm. You can edit or delete the default policy to suit your needs.
Procedure
Step 1 Select Configurations > Policies/Settings and open the Identity Policies tab.(Multiple Device mode only). You can open the tab for a specific device you select in Device view, or youcan open the policy independently of the device in Repository view.
Step 2 Do any of the following:
User Guide for ASA CX and Cisco Prime Security Manager 9.2 OL-29763-02 11
Managing Authentication and Identity ServicesConfiguring Identity Policies
• To add a new policy, use one of theAdd Policy buttons. If you select a policy set, you can add the policyat the top or bottom of the set. If you select a policy, you can add the new one above or below it.
• To edit an existing policy, select the policy and click the Edit Policy button.
• To base a new policy on a similar existing policy, select the policy and click theDuplicate Policy button.
A form opens with the policy properties.
Step 3 Define the traffic matching criteria using the Source, Destination, and Service fields.You can leave any field blank to not restrict traffic based on that criteria.
Step 4 Select the directory realm in the Realm field.Step 5 Define the action to apply to matching traffic, including authentication type and user agents if necessary.
For detailed information about the action-related settings, read Identity Policy Properties, on page 12. Considerthe following tips:
• The available options differ based on directory type and whether you configured a CDA or AD agent.
• If you select an option that allows for active authentication, eitherGet Identity via Active Authenticationor Get Identity Using AD Agent with Yes selected for the active authentication question, you canexclude user agents from active authentication. Exclude agents that cannot respond to active authenticationprompts, for example, software update applications.
• For AD realms with active authentication, you can select the authentication method: basic, NTLM,Kerberos, or Advanced. Select the method supported by your server and clients; select Advanced if yousupport more than one method.
Step 6 If you want to limit the policy to traffic on specific interfaces on the parent device, select the Source InterfaceRole or the Destination Interface Role, or both, that identify the interfaces.The default is to apply the policy to traffic between any interfaces on the device. If you select interfaces thatdo not exist on the device, the policy is never applied to traffic.
Step 7 Click Save Policy.Step 8 If necessary, move the policy so that it is in priority order.
Policies are applied on a first-match basis, so youmust ensure that policies with highly specific traffic matchingcriteria appear above policies that have more general criteria that would otherwise apply to the matchingtraffic.
To move a policy set or rule, you click and hold the Move icon (the vertical double-headed arrow on the leftmargin) and drag it to the policy after which you want to insert it. You can also simply edit the sequencenumber and change it to the desired value.
Identity Policy PropertiesUse identity policies on CX devices to define the user authentication requirements for matching traffic. Identitypolicies never result in blocked traffic. Instead, they determine whether user identity is obtained for the sourceIP address of a traffic flow.
Requiring authentication makes it possible to configure access policies based on user identity, and providesuser-based usage information in dashboards.
Identity policies have the following properties:
User Guide for ASA CX and Cisco Prime Security Manager 9.212 OL-29763-02
Managing Authentication and Identity ServicesConfiguring Identity Policies
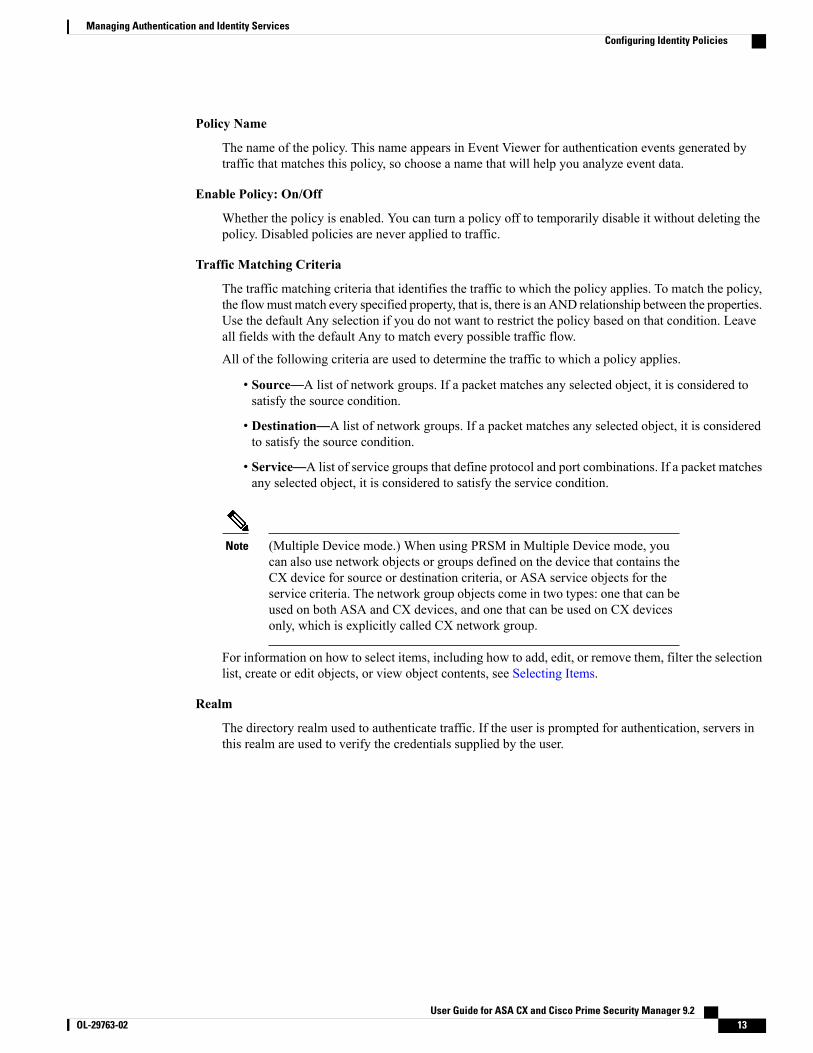
Policy Name
The name of the policy. This name appears in Event Viewer for authentication events generated bytraffic that matches this policy, so choose a name that will help you analyze event data.
Enable Policy: On/Off
Whether the policy is enabled. You can turn a policy off to temporarily disable it without deleting thepolicy. Disabled policies are never applied to traffic.
Traffic Matching Criteria
The traffic matching criteria that identifies the traffic to which the policy applies. To match the policy,the flowmust match every specified property, that is, there is an AND relationship between the properties.Use the default Any selection if you do not want to restrict the policy based on that condition. Leaveall fields with the default Any to match every possible traffic flow.
All of the following criteria are used to determine the traffic to which a policy applies.
• Source—A list of network groups. If a packet matches any selected object, it is considered tosatisfy the source condition.
• Destination—A list of network groups. If a packet matches any selected object, it is consideredto satisfy the source condition.
• Service—A list of service groups that define protocol and port combinations. If a packet matchesany selected object, it is considered to satisfy the service condition.
(Multiple Device mode.) When using PRSM in Multiple Device mode, youcan also use network objects or groups defined on the device that contains theCX device for source or destination criteria, or ASA service objects for theservice criteria. The network group objects come in two types: one that can beused on both ASA and CX devices, and one that can be used on CX devicesonly, which is explicitly called CX network group.
Note
For information on how to select items, including how to add, edit, or remove them, filter the selectionlist, create or edit objects, or view object contents, see Selecting Items.
Realm
The directory realm used to authenticate traffic. If the user is prompted for authentication, servers inthis realm are used to verify the credentials supplied by the user.
User Guide for ASA CX and Cisco Prime Security Manager 9.2 OL-29763-02 13
Managing Authentication and Identity ServicesConfiguring Identity Policies
The type of authentication required for matching traffic flows. The options differ based on the directorytype and whether you configured a CDA or AD agent. Select one of these options based on availability:
Get Identity Using AD Agent
(AD with configured CDA or AD agent only.) If a passive user-to-IP address mapping wasobtained from the CDA or AD agent, use it.
Select Yes or No for Do you want to use active authentication if AD agent cannot identifythe user? If you select Yes (the default), and a passive mapping for the user’s IP address wasnot obtained from the CDA or AD agent, the system tries to get identity through the client, eithertransparently (NTLM, Kerberos only) or by prompting the user to authenticate.
If you selectNo, and a passivemapping is not available, the user’s IP address will not be associatedwith a user name, and identity-based access rules will not be applied to the user’s traffic.
Get Identity via Active Authentication
(All directory types.) Obtain identity information even if a passive mapping exists for the user.Identity is obtained transparently if you use NTLM or Kerberos and the clients have the correctconfiguration; otherwise, users are prompted to authenticate.
Once authenticated, the user’s IP address is considered a surrogate for the user, and the user isnot required to reauthenticate for every subsequent connection. Reauthentication is required afterthe authenticated session duration setting is exceeded.
Do Not Require Authentication
(All directory types except ADwith a CDA or AD agent configured.) Do not obtain user identity.Identity-based access rules will not be applied to the user’s traffic.
Active authentication is applied to HTTP or decrypted HTTPS traffic only. Ifany other type of traffic matches an identity policy that requires or allows activeauthentication, then active authentication will not be attempted.
Note
User Guide for ASA CX and Cisco Prime Security Manager 9.214 OL-29763-02
Managing Authentication and Identity ServicesConfiguring Identity Policies
Authentication Type
(AD only.) If you select an option that requires or allows for active authentication, select theauthentication method to use during active authentication. This setting applies for AD realms only;LDAP realms always use basic authentication. You can use the following authenticationmethods; selectone for which your AD servers are configured:
• NTLM (NT LAN Manager). Supported by all Windows platforms.
• Kerberos. Supported for Windows XP only.
• Basic. This is the default. Supported on all platforms.
• Advanced. Select this option to allow the device to negotiate the method between the user agent(the application the user is using to initiate the traffic flow) and the Active Directory server.Negotiation results in the strongest commonly supported method being used, in order, Kerberos,NTLM, then basic.
If you allow for NTLM or Kerberos, clients can configure their browsers to allow for transparentauthentication as described in Enabling Transparent User Authentication, on page 17. Otherwise, usersare prompted for their directory username and password.
Exclude User Agent
If you select an option that requires or allows for active authentication, you can exclude user agents(applications) that cannot respond to authentication requests, such as software update applications orremote access VPN clients that send authentication traffic through the VPN tunnel (such as Android2.3 with AnyConnect 2.5). Select the user agent policy objects that identity the user agents (in theInclude list in the object) that you do not want to prompt for authentication.
Interface Roles
The criteria that identifies the parent device’s interfaces to which the policy applies. To match the policy,the traffic must enter the device on one of the source interfaces and leave the device on one of thedestination interfaces. The default is any interface for both source and destination, meaning the policyis not restricted to specific interfaces.
To limit the policy to specific interfaces, select the appropriate interface role objects in either the SourceInterface Role or Destination Interface Role fields, or both. The interface role objects define theinterface names or naming patterns for the interfaces.
If you specify interface roles, and no interfaces on the devicematch the interfacenames defined in the role, the policy will never apply to any traffic on thedevice.
Tip
Tags
Words or phrases that help you identify this item. For example, you can assign the same tag to multipleitems to make it easy to view them through a search. Tags could identify use case, purpose, or any othercharacteristic you choose. These tags are for your purposes only, and do not affect how the system orpolicies function. You can enter (or select) more than one tag.
User Guide for ASA CX and Cisco Prime Security Manager 9.2 OL-29763-02 15
Managing Authentication and Identity ServicesConfiguring Identity Policies
Ticket ID
A case or ticket identifier from your support system (for example, Remedy). If you are making a changethat is related to a network support case, you can enter the ticket ID here for tracking purposes. Youcan enter new IDs or select from existing IDs that are used in pending changes; specify as many separateIDs as needed. (The list does not show IDs used in already-committed changes.)
Enabling Active AuthenticationIf you want to use active authentication, you need to address the following requirements:
• The class map for the traffic redirection policy on the ASA must include the auth-proxy keyword, forexample cxsc fail-open auth-proxy.
If you configure redirection using PRSM, the keyword is automatically included.
• The default port used by the ASA for active authentication is tcp/885. You can configure a different portusing the cxsc auth-proxy port number command using the ASA CLI. A non-default port must behigher than 1024. You can see the currently configured port using the show run all cxsc command.
• If there are firewalls between the ASA and the user, you must open the authentication port on thosefirewalls.
• Ensure that time settings are consistent among the directory servers, ASA CX, and clients. A time shiftamong these devices can prevent successful user authentication. “Consistent” means that you can usedifferent time zones, but the time should be the same relative to those zones; for example, 10 AM PST= 1 PM EST.
•When using Active Directory with Kerberos authentication, the domain controller, ASA CX, and clientmust all be in the same domain, or authentication will fail. For NTLM and basic authentication, thedevices should be in the domain, but authentication might work even if they are not in the same domain.Although NTLM is supported with allWindows clients, Kerberos is supported withWindows XP clientsonly.
To increase the likelihood of successful authentication, consider selectingAdvanced as the authenticationmethod. This will allow the system to negotiate the strongest method supported by both the client andserver, and to try different methods if one fails.
• If you use Kerberos or NTLM with Active Directory, you can configure browsers to transparentlyrespond to active authentication requests. For detailed information, see Enabling Transparent UserAuthentication, on page 17.
• Not all user agents can successfully respond to active authentication requests. For example, if a useragent in a remote access VPN connection sends the authentication traffic through the VPN tunnel, activeauthentication will not succeed. Android 2.3 using AnyConnect 2.5 is an example of this type of agent.Software updaters might also not successfully respond to active authentication.
To account for these types of user agent, you can use an existing user agent object, or you can create auser agent policy object that lists these agents in the Include list. Then, in the active authenticationidentity policy, select the objects in the Exclude User Agent field.
• Users are prompted only if the traffic is HTTP or decrypted HTTPS. To prompt for HTTPS flows, youmust create decryption policies that apply the Decrypt Everything action to the appropriate traffic sources.
User Guide for ASA CX and Cisco Prime Security Manager 9.216 OL-29763-02
Managing Authentication and Identity ServicesEnabling Active Authentication
Special Configuration Requirements for Remote Access VPN
If the ASA hosts remote access AnyConnect VPN connections, the active authentication prompt might notbe displayed for certain clients. For example, Windows 7 Enterprise and Professional Editions, and Mac OSX 10.6.8, clients have this problem.
To enable active authentication prompting in these cases, you need to configure a split tunnel policy on theVPN access group to exclude the ASA's Internet IP address from the VPN. The following example showswhat such a configuration would look like.
ASA-5525-3# show running-config interface!interface GigabitEthernet0/4nameif internetsecurity-level 100ip address 10.194.204.37 255.255.255.0!
ASA-5525-3# show running-config access-listaccess-list Split_Tunnel_List standard permit host 10.194.204.37
ASA-5525-3# show running-config group-policygroup-policy test internalgroup-policy test attributesvpn-tunnel-protocol ikev1 ikev2 l2tp-ipsec ssl-client ssl-clientlesssplit-tunnel-policy excludespecifiedsplit-tunnel-network-list value Split_Tunnel_ListASA-5525-3#
Enabling Transparent User AuthenticationIf you configure the identity policy for a realm to allow for active authentication, either Get Identity viaActive Authentication or Get Identity Using AD Agent with Yes selected for the active authenticationquestion, you can use the following authentication methods to acquire user identity:
Basic Authentication (Active Directory and LDAP)
With basic authentication, users are always prompted to authenticate with their directory username andpassword. The password is transmitted in clear text. For that reason, basic authentication is not considereda secure form of authentication.
Basic is the default authentication mechanism.
User Guide for ASA CX and Cisco Prime Security Manager 9.2 OL-29763-02 17
Managing Authentication and Identity ServicesEnabling Transparent User Authentication
Integrated Windows Authentication (Active Directory only)
With integrated Windows authentication, you take advantage of the fact that users log into a domainto use their workstation. The browser tries to use this domain login when accessing a server, or in thecase of ASA CX, the network protected by the ASA CX. The password is not transmitted. Ifauthentication is successful, the user is transparently authenticated; the user is unaware that anyauthentication challenge was made or satisfied.
If the browser cannot satisfy an authentication request using the domain login credentials, the user isprompted for username and password, which is the same user experience as basic authentication. Thus,if you configure integratedWindows authentication, it can reduce the need for users to supply credentialswhen accessing the network or servers in the same domain.
You must configure client browsers to support integratedWindows authentication to enable transparentauthentication. The configuration is explained below.
When you configure an authentication policy, you select the specific type of authentication methodused in your network. The options are:
• NTLM. Supported by all Windows platforms.
• Kerberos. Supported by Windows XP only.
• Advanced, where the strongest method allowed by both the Active Directory server and the useragent is used. (The user agent is typically a web browser through which the user is initiating atraffic flow.) The order of strength is Kerberos, NTLM, then basic.
The following sections explain the general requirements and basic configuration of integrated Windowsauthentication for some commonly used browsers that support it; users should consult the help for their browser(or other user agent) for more detailed information, because the techniques can change between softwarereleases.
Not all browsers support integrated Windows authentication, such as Chrome and Safari (based on theversions available when this was written). Users will be prompted for username and password. Consultthe browser’s documentation to determine if support is available in the version you use.
Tip
Requirements for Transparent AuthenticationUsers must configure their browser or user agent to implement transparent authentication. They can do thisindividually, or you can configure it for them and push the configuration to client workstations using yoursoftware distribution tools. If you decide to have users do it themselves, ensure that you provide the specificconfiguration parameters that work for your network.
Regardless of browser or user agent, you must implement the following general configuration:
• Add the ASA interface through which users connect to the network to the Trusted Sites list. You canuse the IP address or if available, the fully-qualified domain name (for example, asa_inside.example.com).You can also use wildcards or partial addresses to create a generalized trusted site. For example, youcan typically cover all internal sites using *.example.com or simply example.com, trusting all serversin your network. If you add the specific address of the ASA interface, you might need to add severaladdresses to the trusted sites to account for all user access points to the network.
• Integrated Windows authentication does not work through a proxy server. Therefore, you must eithernot use a proxy, or you must add the ASA interface to the addresses excluded from going through the
User Guide for ASA CX and Cisco Prime Security Manager 9.218 OL-29763-02
Managing Authentication and Identity ServicesEnabling Transparent User Authentication
proxy. If you decide that you must use a proxy, users will be prompted for authentication even if youuse the NTLM or Kerberos methods.
Configuring transparent authentication is not a requirement, but a convenience to end users. If you do notconfigure transparent authentication, users are presented with a login challenge for all authenticationmethods.
Tip
Configuring Internet Explorer for Transparent AuthenticationTo configure Internet Explorer for both NTLM and Kerberos transparent authentication:
Procedure
Step 1 Select Tools > Internet Options.Step 2 Select the Security tab, select the Local Intranet zone, then do the following:
a) Click the Sites button to open the list of trusted sites.b) Ensure that at least one of the following options is selected:
• Automatically detect intranet network. If you select this option, all other options are disabled.
• Include all sites that bypass the proxy.
c) Click Advanced to open the Local Intranet Sites dialog box, then paste the URL you want to trust intothe Add Site box and click Add.Repeat the process if you have more than one URL. Use wildcards to specify a partial URL, such ashttp://*.example.com or simply *.example.com.
Close the dialog boxes to return to the Internet Options dialog box.
d) With Local Intranet still selected, click Custom Level to open the Security Settings dialog box. Find theUser Authentication > Logon setting and select Automatic logon only in Intranet zone. Click OK.
Step 3 In the Internet Options dialog box, click the Connections tab, then click LAN Settings.If Use a proxy server for your LAN is selected, you need to ensure that the ASA interface bypasses theproxy. Do any of the following as appropriate:
• Select Bypass proxy server for local addresses.
• ClickAdvanced and enter the address into the Do not use proxy server for addresses beginning withbox. You can use wildcards, for example, *.example.com.
Configuring Firefox for Transparent AuthenticationFirefox has different properties for NTLM and Kerberos authentication. The following steps explain theconfiguration for both methods. If you do not support both methods, skip the steps for the unsupported method.
User Guide for ASA CX and Cisco Prime Security Manager 9.2 OL-29763-02 19
Managing Authentication and Identity ServicesEnabling Transparent User Authentication
Procedure
Step 1 Open about:config. Use the filter bar to help you locate the preferences that you need to modify.Step 2 To support NTLM, modify the following preferences (filter on network.automatic):
• network.automatic-ntlm-auth.trusted-uris—Double-click the preference, enter the URL, and clickOK. You can enter multiple URLs by separating them with commas; including the protocol is optional.For example:
You can also use partial URLs. Firefox matches the end of the string, not a random substring. Thus, youcould include your entire internal network by specifying just your domain name. For example:
example.com
• network.automatic-ntlm-auth.allow-proxies—Ensure that the value is true, which is the default.Double-click to change the value if it is currently false.
Step 3 To support Kerberos, modify the following preferences (filter on network.negotiate):
• network.negotiate-auth.allow-proxies—Ensure that the value is true, which is the default. Double-clickto change the value if it is currently false.
• network.negotiate-auth.delegation-uris—Double-click and enter http://,https://.
• network.negotiate-auth.gsslib—Ensure that the value is blank, which is the default. If this preferencehas a value, right-click it and select Reset, or double-click it and erase the value.
• network.negotiate-auth.trusted-uris—Double-click and enter http://,https://.
• network.negotiate-auth.using-native-gsslib—Ensure that the value is true, which is the default.Double-click to change the value if it is currently false.
Step 4 Check the HTTP proxy settings. You can find these by selecting Tools > Options, then click the Networktab in the Options dialog box. Click the Settings button in the Connection group.
• If No Proxy is selected, there is nothing to configure.
• If Use System Proxy Settings is selected, you need to modify the network.proxy.no_proxies_onproperty in about:config to add the trusted URIs you included innetwork.automatic-ntlm-auth.trusted-uris (or would have included, if you configured Kerberos only).
• IfManual Proxy Configuration is selected, update theNo Proxy For list to include these trusted URIs.
• If one of the other options is selected, ensure that the properties used for those configurations excludethe same trusted URIs.
User Guide for ASA CX and Cisco Prime Security Manager 9.220 OL-29763-02
Managing Authentication and Identity ServicesEnabling Transparent User Authentication
Identifying the Active Directory AgentThe Cisco Context Directory Agent (CDA) or Cisco Active Directory (AD) Agent provides user-to-IP addressmappings to all devices that are configured to use it. For users who log into the network domain on yourstandard (non-VPN) network, the agent, in communication with the AD server, obtains the login informationand creates a user-to-IP address mapping table. This information can be augmented by other devices in thenetwork, such as the ASA, which can provide mappings obtained from VPN and direct sources. Identitymappings obtained from the AD agent are considered passive mappings.
Both the ASA and CX devices use the same CDA or AD agent setup to enable identity-aware firewall services.CDA replaces the older AD agent software, but the web interface uses “AD agent” to refer to either application.
Configuring a CDA or AD agent is optional. Configure it only if you want to support passive mappings.Note that if you do not support passive mappings, you must use active authentication in your identitypolicies or you will not have user names available for access control, and events and dashboards will notinclude user information.
Tip
Before You Begin
CDA and AD agent are separate software that you must install in your network. You must configure one ofthem to work with the Active Directory servers and with the network devices that are its consumer devicesor clients. Before completing this task, install and configure the agent software.
Obtain the CDA or AD agent software from http://www.cisco.com/go/asa.
For information on setting up and configuring the software, see the following documents:
• CDA—Installing and Configuring Context Directory Agent, http://www.cisco.com/en/US/docs/security/ibf/cda_10/Install_Config_guide/cda10.html.
• ADAgent—Installation and Setup Guide for the Active Directory Agent , http://www.cisco.com/en/US/docs/security/ibf/setup_guide/ibf10_install.html
You must add the CX device as a consumer device (CDA) or client (AD agent), which you can do before orafter you complete this procedure. Keep in mind that the RADIUS shared secret configured for the CX deviceon the CDA or AD agent and the one configured here must be the same.
Procedure
Step 1 Select Configurations > Policies/Settings and open the AD Agent tab.(Multiple Device mode only). You can open the tab for a specific device you select in Device view, or youcan open the policy independently of the device in Repository view.
Step 2 Enter the following information:
• Hostname or IP—The DNS name or IP address of the CDA or AD agent server.
• Password—The RADIUS shared secret that is configured on the CDA or AD agent for use with thisclient device.
Step 3 Click Test to check whether the agent can be contacted using the supplied information.
User Guide for ASA CX and Cisco Prime Security Manager 9.2 OL-29763-02 21
Managing Authentication and Identity ServicesIdentifying the Active Directory Agent
If the connection fails, check your settings. If you are certain they are correct, check whether there is a networkpath between the device and the agent.
Step 4 Click Save to save your changes.
What to Do Next
CDA or AD agent mappings are used only if you allow for passive mappings in the identity policies for therealm that contains the AD servers that are also clients of the agent. Thus, you should check your identitypolicies to ensure they specify Get Identity Using AD Agent. If your policies use Get Identity via ActiveAuthentication, then the passive mappings are not used.
Configuring Authentication SettingsYou can configure authentication settings related to how your identity policies function.
Procedure
Step 1 Select Configurations > Policies/Settings and open the Auth Settings tab.(Multiple Device mode only). You can open the tab for a specific device you select in Device view, or youcan open the policy independently of the device in Repository view.
Step 2 Change the following options as needed:
• Authenticated session duration—The number of hours for which a user-to-IP address mapping willbe maintained. When a mapping reaches this age, it is deleted and a new mapping is obtained based onyour identity policy settings. For example, if you use active authentication for the realm that matchesthe user’s IP address, the user will be authenticated during the user’s next connection attempt. However,if your policy uses passive mappings and does not allow for active authentication, the user will not beauthenticated.
• Failed authentication timeout—If a user fails to correctly authenticate during active authentication,and exceeds the maximum authentication attempts, the IP address for the user is considered to havefailed authentication. This timeout value determines the length of time, in minutes, before the user atthat IP address is again prompted to authenticate. During this time, all traffic from the IP address isevaluated based on the IP address alone, and no user or user group based rules are applied to the traffic.Thus, during this failed timeout period, a user might be prevented from accessing resources for whichthe user would be allowed if the user had successfully authenticated.
•Maximum authentication attempts—The number of times a user can retry authentication whenprompted to authenticate by ASA CX. The number of attempts is reset when the user successfullyauthenticates. If the user fails to authenticate, the user is not again prompted for authentication until thefailed authentication timeout is exceeded.
• Group refresh interval— How often user group membership is updated from the directory servers, inhours. The default is every 24 hours (once a day). If you add a user to a group, the user is not recognizedas being a member of the group until the next update. Membership for a group is obtained only if youuse the group in a policy.
Step 3 Click Save to save your changes.
User Guide for ASA CX and Cisco Prime Security Manager 9.222 OL-29763-02
Managing Authentication and Identity ServicesConfiguring Authentication Settings
User Guide for ASA CX and Cisco Prime Security Manager 9.2 OL-29763-02 23
Managing Authentication and Identity ServicesConfiguring Authentication Settings
User Guide for ASA CX and Cisco Prime Security Manager 9.224 OL-29763-02
Managing Authentication and Identity ServicesConfiguring Authentication Settings