16
2019.05 MANIFOLD 2 SERIES v1.0 User Guide
2019.05
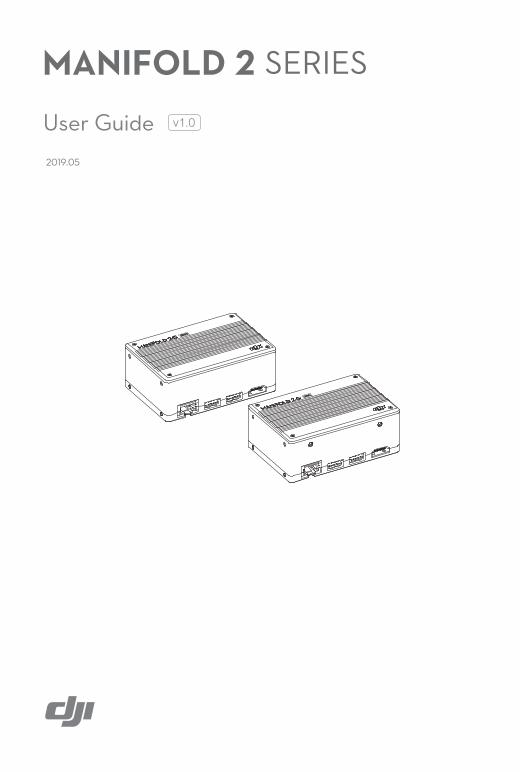
MANIFOLD 2 SERIES
v1.0User Guide

2 © 2019 DJI All Rights Reserved.
Contents
Disclaimer 3
Warning 3
Introduction 3
In the Box 4
Overview 5
Manifold 2 5Power Distribution Unit 7USB 3.0 Hub 8Button I/O Extension Unit 8
System Configuration 9
Basic Configuration 9Network Configuration 9Software Installation 9BIOS Settings 10
System Image 10
Preparation 10Entering Recovery Mode 10Image Backup 10System Recovery 11
Installation and Connection 12
Specifications 14

© 2019 DJI All Rights Reserved. 3
DisclaimerCongratulations on purchasing your new DJITM product. The information in this document affects your safety and your legal rights and responsibilities. Read this entire document carefully to ensure proper configuration before use. Failure to read and follow instructions and warnings in this document may result in serious injury to yourself or others, damage to your DJI product, or damage to other objects in the vicinity. This document and all other collateral documents are subject to change at the sole discretion of DJI. By using this product, you hereby signify that you have read this disclaimer and warning carefully and that you understand and agree to abide by the terms and conditions herein. You agree that you are solely responsible for your own conduct while using this product, and for any consequences thereof. You agree to use this product only for purposes that are proper and in accordance with all applicable laws, rules, and regulations, and all terms, precautions, practices, policies and guidelines DJI has made and may make available. DJI accepts no liability for damage, injury or any legal responsibility incurred directly or indirectly from the use of this product. The user shall observe safe and lawful practices including, but not limited to, those set forth in this document. Notwithstanding above, your statutory rights under applicable national legislation are not affected by this disclaimer. DJI is a trademark of SZ DJI TECHNOLOGY CO., LTD. (abbreviated as “DJI”) and its affiliated companies. Names of products, brands, etc., appearing in this document are trademarks or registered trademarks of their respective owner companies. This product and document are copyrighted by DJI with all rights reserved. No part of this product or document shall be reproduced in any form without prior written consent of or authorization from DJI.
Warning1. Make sure to use DJI designated cables and connect external devices to the ports in strict
accordance with specifications of these ports.2. DO NOT disassemble the MANIFOLDTM 2 and its accessories.3. Ensure that the Manifold 2 and its components are free from contamination such as water, oil, soil,
and sand.4. Mount the Manifold 2 to an appropriate position for heat dissipation.5. DO NOT touch or let your hands or body come in contact with any components as they may be hot
during operation.6. Avoid vibrations and impacts when using the Manifold 2 or during storage or transportation.7. The USB 3.0 devices connected to the Manifold 2 may cause interference to the GNSS or Wi-Fi
signals. Take electromagnetic shielding measures to reduce the interference if necessary.
IntroductionThe Manifold 2 is DJI’s second-generation microcomputer for DJI SDK developers. There are two versions: Manifold 2-G (128GB), Manifold 2-C (256GB). The Manifold 2-G is equipped with the Wi-Fi-ready NVIDIA® JetsonTM TX2 module, capable of rapid complex graphics processing. The Manifold 2-C has an Intel® CoreTM i7-8550U processor, boasting excellent processing power and responsiveness. With a variety of ports to connect different external devices, the Manifold 2 is compatible with many DJI drone platforms, flight control systems and additional devices*. The Manifold 2 is flexible and expandable, making it the go-to tool for developers.
* Support for additional DJI products will be added as testing and development continues. Visit the Manifold 2 product page on dji.com for the most current list. http://www.dji.com/manifold-2

4 © 2019 DJI All Rights Reserved.
Manifold 2
AC Power Adapter*
Power Distribution Unit
Button I/O Extension Unit
USB 3.0 Hub
In the Box
×1
×1 ×1 ×1 ×2
×1 ×1
Assembly Bracket Set
Wi-Fi Antenna**
* The illustrationmaybedifferent fromtheactualadapter inthebox,astheManifold2-GandManifold2-Chavedifferent
adapters.
**OnlyincludedintheManifold2-Gpackage.
Cables
AC Power Cable (varies by region)
OTG Cable XT60 to XT30 Power Cable CAN/UART Cable Micro USB Cable
UART Cable for A3/N3 Flight Controller
I/O Cable XT30 Power Cable UART Cable for M210 Series
×1
×2 ×1
×1 ×1 ×1×2
×3 ×1

© 2019 DJI All Rights Reserved. 5
OverviewManifold 2
The illustrations below use the Manifold 2-G as an example. Unless otherwise specified, the descriptions apply to the both models in the Manifold 2 series.
1. Ethernet Port (RJ-45) Connect a network cable to the port to access the Internet.
2. USB 3.0 Ports (Type A) Connect external USB 3.0 devices.
3. HDMI Output Port Connect a display device.
4. Antenna Ports (for the Manifold 2-G only) Mount the Wi-Fi antennas to the ports to access the Internet via Wi-Fi. Make sure that the two
antennas are vertical to each other or towards to the signal source. DO NOT block the antennas with metal objects.
5. Power Ports Connect an external power source to supply power for the Manifold 2. The ports are standard XT30
ports with an input voltage of 13.2 - 27 V for the Manifold 2-G and 15.2 - 27 V for the Manifold 2-C and are independent from each other. When connecting power sources to both ports, the Manifold 2 will automatically choose the power source with a higher voltage.
6. Power Indicator The indicator is on when the Manifold 2 is connected to a power source, and off when
disconnected.
7. USB 3.0 Port (Micro-B) This port on the Manifold 2-G allows it to be used as both a host and a device. Use it as a host by
connecting a USB device using the OTG cable. Use it as a device for image backup and system recovery or as a regular USB 3.0 device by connecting it to a host using a Micro USB cable.
This port on the Manifold 2-C allows the Manifold 2-C to be used as a host only. Connect the OTG cable to the Manifold 2-C and then connect a USB device to the other end of the OTG cable.
1 3
4
2 5 56 7 8 9 10

MANIFOLD 2 SERIES User Guide
6 © 2019 DJI All Rights Reserved.
The UART0 port is for the debug terminal with a baud rate of 115200. DO NOT connect it to the DJI SDK API Port or any other non-string stream input port.
Access UART0 from ttyS0 in the kernel of the operating system, while access UART1 (for the Manifold 2-G only) from ttTHS2 in the kernel of the operating system.
The UART ports of the Manifold 2-G support a baud rate up to 3M. The nominal baud rate 921600 has an actual baud rate of 910000. As a result, when connecting other devices that have a baud rate error against the nominal value, such as some OSDK devices, the UART ports may not be able to communicate properly with these devices. In these cases, it is recommended to use other baud rates.
The UART port of the Manifold 2-C supports a baud rate up to 115200.
9. CAN Ports (for the Manifold 2-G only) Only the Manifold 2-G has CAN ports. The ports on the Manifold 2-C are marked with N/A. The
operating level of the CAN ports is 3.3 V TTL. The maximum transmission speed is 2 Mbps. These ports cannot supply power to the external devices.
Pin map:
1 2 3 41GND CANH CANL N/A
10. I/O Port Connects to the Button I/O Extension Unit using the I/O cable to control some functions of the
Manifold 2. DO NOT hot swap the devices connected to the I/O port to avoid damage to the devices.
Pin map:
1 2 3 4 5
1SPI:MOSI SPI:MISO RST SPI:CS PWR6 7 8 9 10
SPI:CLK RCV I2C:CLK GND I2C:SDA
Pins 3, 5, and 7 are mapped to the RST, PWR, and RCV buttons on the Button I/O Extension Unit respectively.
8. UART Ports The operating level is 3.3 V TTL. For the Manifold 2-C, there is only one UART port available, and
the other port is marked with N/A. These ports cannot supply power.
Pin map:
1 2 3 41GND RXD TXD N/A

MANIFOLD 2 SERIES User Guide
© 2019 DJI All Rights Reserved. 7
Power Distribution Unit
Connect the Power Distribution Unit to a power source to power the Manifold 2 and other external devices for debugging. Make sure to connect corresponding devices according to the specifications of the ports.
1. Low Power Output Port (XT30) The maximum continuous current is 15 A and the maximum peak current is 30A. The power input
of this port is from Port 7 (Power Adapter Input Port).
2-6. High Power Output Port (XT30) The maximum continuous current is 15 A and the maximum peak current is 30A. The five ports are
parallel with power input from Port 8 (High Power Input Port).
7. Power Adapter Input Port Connect the power adapter to the AC power source (100 - 240 V, 50/60 Hz), and then Port 1 can
supply power to the Manifold 2 continuously. Many of DJI’s power adapters are compatible with this port. Refer to the Specifications for details.
The following situation is an example to use this port. Connect this port to a power source, and connect Port 1 to the power port of the Manifold 2. The Manifold 2 will stay powered on even when replacing the input battery connected to Port 8 on the Power Distribution Unit.
8. High Power Input Port (XT60) Connect a 4S - 6S LiPo battery to supply power to the Manifold 2 and other devices through Ports
2 - 6 on this unit. The maximum continuous current is 30 A and the maximum peak current is 60 A.
Port 1 and one of Ports 2 - 6 can be connected to the two power ports on the Manifold 2 simultaneously by independent power sources to the Manifold 2.
It is recommended to use the Power Distribution Unit for power management since its electromagnetic compatibility can reduce interference to the GNSS or Wi-Fi signal from the power supply.
Connect high-power devices to Ports 2 - 6 in increasing order of power consumption to help reduce heat generation.
17
8
2 3 4 5 6

MANIFOLD 2 SERIES User Guide
8 © 2019 DJI All Rights Reserved.
USB 3.0 Hub
The USB 3.0 Hub includes four USB 3.0 ports and one XT30 port. Connect a 4S - 6S LiPo battery to supply up to 1 A of output current to each USB port.
Button I/O Extension Unit
Connect the Button I/O Extension Unit to the I/O port on the Manifold 2 to control some specific functions of the Manifold 2.
1. Extension Port (for the Manifold 2-G only)
Pin map: 1 3 5 7
12
N/A GND I2C:SDA I2C:SCL2 4 6 8
SPI:CLK SPI:CS SPI:MISO SPI:MOSI
2. RCV Button This recovery button is only available for the Manifold 2-G. Press it and the RST button to enter
Recovery mode. Refer to System Image for details.
3. PWR Button Power button. Press once to power on/off the Manifold 2. Press and hold for 10 seconds to force
the Manifold 2 to power off.
4. RST Button Reset button. Press once to reset the Manifold 2.
5. I/O Port Connects to the I/O port on the Manifold 2 using the I/O cable.
5
2 3 41

© 2019 DJI All Rights Reserved. 9
System ConfigurationUsers can perform basic setup in the terminal interface.
Basic Configuration
The Manifold 2 comes with the Ubuntu 16.04 operating system pre-installed. After powering on the Manifold 2, then connect a monitor with a HDMI port, mouse and keyboard to log in with the information below.
User name: dji Password: dji
Network Configuration
Access the Internet using a network cable or Wi-Fi (for the Manifold 2-G only). If DHCP service is available on the connected network, an IP address will be assigned to the Manifold 2 automatically. Otherwise, run the following commands to obtain an IP address:
Wired Network$ sudo ifconfig eth0 xxx.xxx.xxx.xxx$ ifconfig
Wireless Network$ sudo ifconfig wlan0 xxx.xxx.xxx.xxx$ ifconfig
“xxx.xxx.xxx.xxx” is the IP address that you wish to use. The commands above can also be used to check if the configuration is correct.
Software Installation
The Manifold 2-G and Manifold 2-C come with the following software pre-installed. Users can install other software according to different applications.
Manifold 2-G Manifold 2-CJetpack 3.3 √ ×
Ubuntu 16.04 √ √CUDA 9 √ ×
OpenCV 3.0 √ √ROS √ √
CMake √ √Git √ √
htop √ √Terminator √ √
Eigen √ √Ceres √ √GCC 7 √ √

MANIFOLD 2 SERIES User Guide
10 © 2019 DJI All Rights Reserved.
BIOS Settings
The Manifold 2-C’s built-in CMOS battery could run out if unused for a long time, which could result in a loss of BIOS settings. Follow the instructions below to re-load the BIOS settings.1. Power on the Manifold 2-C. If the CMOS battery has run out, the information on the terminal screen
will prompt for user configuration.2. Press the Esc or Del key on the keyboard to enter BIOS.3. Press F3 to load the default BIOS settings, and then press F4 to save and exit.
Make sure to operate the above BIOS settings after the CMOS battery runs out. Otherwise, a hardware error may occur on the Manifold 2-C.
To avoid damage from a dead CMOS battery, it is recommended to keep the Manifold 2-C powered on for at least 30 minutes to charge the CMOS battery when using for the first time or after long-term storage without power supply.
System ImageOnly the Manifold 2-G supports Recovery mode, System Recovery, and Image Backup. Connect the Manifold 2-G to a host and enter Recovery mode to recover the system and create an image backup. The method of system recovery for the Manifold 2-C is similar to a regular X86 computer.
Preparation
1. Prepare a computer with the Ubuntu operating system as a host, for example a Manifold 2-C. Make sure there is at least 32 GB on the hard disk.
2. Download the latest image from the following link. The image file includes the official DJI image and tools for image backup and system recovery.
https://www.dji.com/manifold-2/info#downloads
Entering Recovery Mode
1. Connect the Button I/O Extension Unit to the Manifold 2-G.2. Connect the USB 3.0 port (Micro-B) on the Manifold 2-G to the host.3. Connect the Manifold 2-G to a power source.4. Press and hold the RCV button on the Button I/O Extension Unit, then press and hold the RST
button. Release both buttons after two seconds.5. Type in $ lsusb in the terminal of the host. An NVIDIA device will be listed to indicate that the
Manifold 2-G has entered Recovery mode. If not, check if the connection and operation for entering Recovery mode are correct, and try again.
Image Backup
Users can create an image backup to recover the system. There is no need to create an image backup if users recover the system using the official DJI image.

MANIFOLD 2 SERIES User Guide
© 2019 DJI All Rights Reserved. 11
Only data in the eMMC will be backed up when creating an image backup, not the data in the SSD.
1. Make sure there is at least 32 GB of space available on the hard disk of the host to store the image.
2. Enter Recovery mode.3. In the terminal of the host, enter the directory for the official image file, and use the following
command to extract the compressed file of the official image. $ sudo tar -zxvf manifold2G_image_Vx.x.x.x.tar.gz “manifold2G_image_Vx.x.x.x.tar.gz” is the name of the compressed file.
Make sure to extract the file using the sudo command. Otherwise, image backup will fail.
4. Enter the directory named Linux_for_Tegra in the extracted folder, and use the following command to back up the image to the host.
$ sudo ./flash.sh -r -k APP -G xxxx.img jetson-tx2 mmcblk0p1 “xxxx.img” is the image name given by the users.
System Recovery
Only data in the eMMC will be recovered when recovering the system. Data in the SSD will not be recovered. Use the official DJI image or your own image backup.
DO NOT use the TX2 Jetpack from NVIDIA to recover the system. Otherwise, most of the hardware ports cannot work properly due to the driver compatibility.
Using the Official DJI Image1. Enter Recovery mode.2. In the terminal of the host, enter the directory for the image file, and use the following command to
extract the compressed file of the official image. $ sudo tar -zxvf manifold2G_image_Vx.x.x.x.tar.gz “manifold2G_image_Vx.x.x.x.tar.gz” is the name of the compressed file.
Make sure to extract the file using the sudo command. Otherwise, system recovery will fail.
3. Enter the directory named Linux_for_Tegra in the extracted folder, and use the following command to recover the system.
$ sudo ./flash.sh jetson-tx2 mmcblk0p1
Using Your Image1. Enter Recovery mode.2. In the terminal of the host, enter the directory for the official image file, and use the following
command to extract the compressed file of the official image. $ sudo tar -zxvf manifold2G_image_Vx.x.x.x.tar.gz “manifold2G_image_Vx.x.x.x.tar.gz” is the name of the compressed file.
Make sure to extract the file using the sudo command. Otherwise, system recovery will fail.

MANIFOLD 2 SERIES User Guide
12 © 2019 DJI All Rights Reserved.
3. Enter the directory named Linux_for_Tegra in the extracted folder for the compressed file of the official image, and use the following command to overwrite the system image with your own image.
$ sudo cp xxxx.img.raw bootloader/system.img “xxxx.img.raw” is the name of the image in use.4. Enter the directory named Linux_for_Tegra in the extracted folder and use the following command
to recover the system. $ sudo ./flash.sh -r -k APP jetson-tx2 mmcblk0p1
Installation and Connection1. It is recommended to use the included Power Distribution Unit, USB 3.0 Hub and an optional
Manifold 2 Mini Network Switch with the Manifold 2, and assemble them as shown using the Assembly Bracket Set.
The size of the screw holes on the Manifold 2 is M2.5 with a thread depth of 5 mm. The size of the screw holes on the accessories is M2.5 with a thread depth of 3.5 mm. DO NOT use screws that are too long to avoid damage to the components.
2. When using with DJI flying platforms, mount the Manifold 2 and other external devices to the flight platform using a compatible mounting bracket.
3. Connection:
When using with DJI flight controllers or flying platforms, it is recommended not to connect to the UART0 port on the Manifold 2 if the port is not configured. Instead, connect to the UART1 port (for the Manifold 2-G only) or to the USB 3.0 port using a third-party adapter.
The following descriptions use connecting to the UART1 port on the Manifold 2-G as an example.

MANIFOLD 2 SERIES User Guide
© 2019 DJI All Rights Reserved. 13
When using on the M210/M210 RTK or M210 V2/M210 RTK V2 flying platforms, connect the OSDK port on the aircraft as shown in the figure below to the UART1 port on the Manifold 2-G. Make sure to use the included UART Cable for the M210 Series.
M210/M20 RTK
M210 V2/M210 RTK V2
Visit the DJI Developer website for more information about the DJI Onboard SDK. https://developer.dji.com/onboard-sdk
When using with the A3 or N3 flight controller or the M600 series flight platform, connect the API port on the flight controller to the UART1 port on the Manifold 2-G. Make sure to use the included UART Cable for A3/N3 Flight Controller.

14 © 2019 DJI All Rights Reserved.
SpecificationsManifold 2
Name Manifold 2-G (128GB) Manifold 2-C (256GB)Model MF2G MF2CWeight Approx. 230 g Approx. 205 g
Dimensions 91×61×35 mmProcessor NVIDIA Jetson TX2 Intel Core i7-8550UMemory 8 GB 128 bit, DDR4 1333 MHz 8 GB 64 bit, DDR4 2400 MHzeMMC 32 GB (approx. 28 GB available) N/A
SATA-SSD 128 GB 256 GB
Network
1000Mbps Ethernet RJ-45 Port
Wi-FiTransmission Standard: IEEE 802.11a/b/g/n/acMaximum Transmission Speed: 866.7 MbpsOperating Frequency: 2.4000 - 2.4835 GHz; 5.150 - 5.250 GHz*; 5.250 - 5.350 GHz*EIRP: < 20 dBm (2.4000 - 2.4835 GHz)< 20 dBm (5.150 - 5.250 GHz)< 23 dBm (5.250 - 5.350 GHz)
1000Mbps Ethernet RJ-45 Port
USB USB 3.0 Port (Type A) × 2, USB 3.0 Port (Micro-B) × 1
I/OCAN Port × 2, UART Port × 2,
I2C Port × 1, SPI Port × 1UART Port × 1
Power 3 - 25 W 5 - 60 WPower Supply
13.2 - 27.0 V Power Port × 2 Independent Power Supply
15.2 - 27.0 V Power Port × 2 Independent Power Supply
Operating Temperature
-13º to 113º F (-25º to 45º C)
* 5.150 - 5.250 GHz, 5.250 - 5.350 GHz: limited to indoor use.

MANIFOLD 2 SERIES User Guide
© 2019 DJI All Rights Reserved. 15
91.00
35.0
0
61.0
0
28.0
0
M2.5×5.5
45.00
25.0
03.
00
M2.5×5.5
Unit: mm
AC Power Adapter
Model A14-057N1A A14-100P1ACompatible Product Manifold 2-G Manifold 2-CVoltage 17.4 V 26.3 VRated Power 57 W 100 W
Manifold 2 includes a power adapter. Users can also use other DJI power adapters that are compatible with the power adapter input port on the Power Distribution Unit and has a rated power no less than the value listed above, such as the power adapter of the Phantom 3 series, Phantom 4 series, Inspire series, Matrice series, and Lightbridge 2.
DJI incorporates HDMITM technology.The terms HDMI and HDMI High-Definition Multimedia Interface, and the HDMI Logo are trademarks or registered trademarks of HDMI Licensing LLC in the United States and other countries.

MANIFOLD is a trademark of DJI.NVIDIA is a trademark of NVIDIA Corporation in the U.S. and/or other countries.Intel and Core are trademarks of Intel Corporation or its subsidiaries in the U.S. and/or other countries.Copyright © 2019 DJI All Rights Reserved.
This content is subject to change without prior notice.
Download the latest version from the official DJI websitehttps://www.dji.com/manifold-2
If you have any questions about this document, please contact DJI by sending a message to [email protected].
DJI Supporthttps://www.dji.com/support
DJI Developer [email protected]


