15
Opencockpits B737 Shell dimensions & assembly manual. 15/02/2017
| Date post: | 06-Mar-2018 |
| Category: |
Documents |
| Upload: | hoangkhanh |
| View: | 214 times |
| Download: | 1 times |

Opencockpits
B737 Shelldimensions
&assembly manual.
15/02/2017

B737 Shell dimensions and views.
Opencockpits

2182mm
280m
m w
ith w
heels
2739mm
Platform dimensions and views.
Opencockpits

Floor: Galvanized steel thin sheets
Reinforcement brackets instructure joints.12 Units.
Wheel attachments.4 Units.
Platform components: floor and reinforcement plates.
Opencockpits
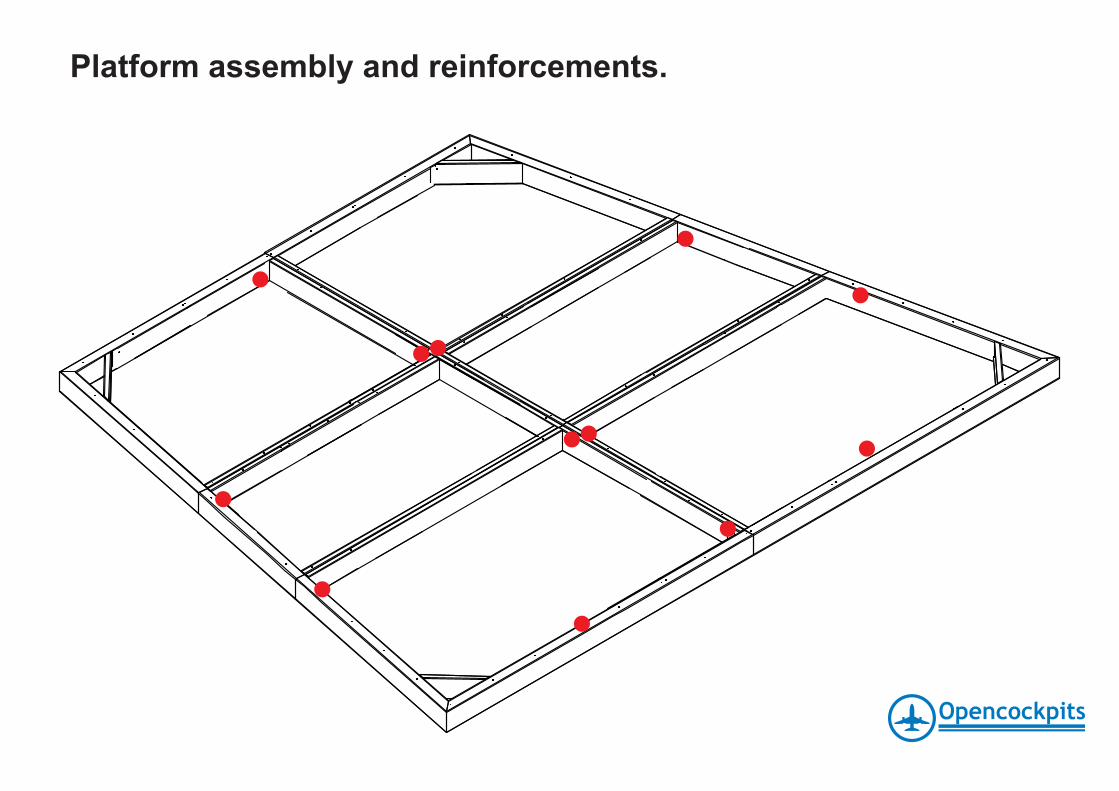
Platform assembly and reinforcements.
Opencockpits

Structure with panels.

Assembly procedure 1/9.
1º. Assembly the platform with wheels and reinforcements.
3º. Start assembling the side walls and archs.Now the walls and floor perimeter can be fixed to the platform.
2º. Set the floor sheets on the platform but fix only a few screws inside,let the perimeter without fixing screws.
Opencockpits

Assembly procedure 2/9.
4º. Continues assembling walls from down to up. 8º. Main ribs.
5º. Is very important to not tight the screws for future adjustments.
6º. Close the structure with all black panels, adjust the joints andthen you can tight the screws.
7º. Now proceed with internal ribs.
Opencockpits

Assembly procedure 3/9.
9º. Install the main rib into the structure.
10º. Proceed with drilled ribs for overhead fixing.
Opencockpits

Assembly procedure 4/9.
11º. Continue with overhead ribs.
Opencockpits

Assembly procedure 5/9.
12º. Proceed with MIP ribs and inside walls. 13º. Install inside white walls and main grey spar. White walls are fixed withsmall plates coloured in red in previous image.
Opencockpits

Assembly procedure 6/9.
14º. Both inside walls and window frames can be fixed.Upper closures can be fixed too, but is not recommen-dable because the overheads are not fixed yet.
15º. Is recommended to install the steering tiller before installing MIPstructure.
Opencockpits
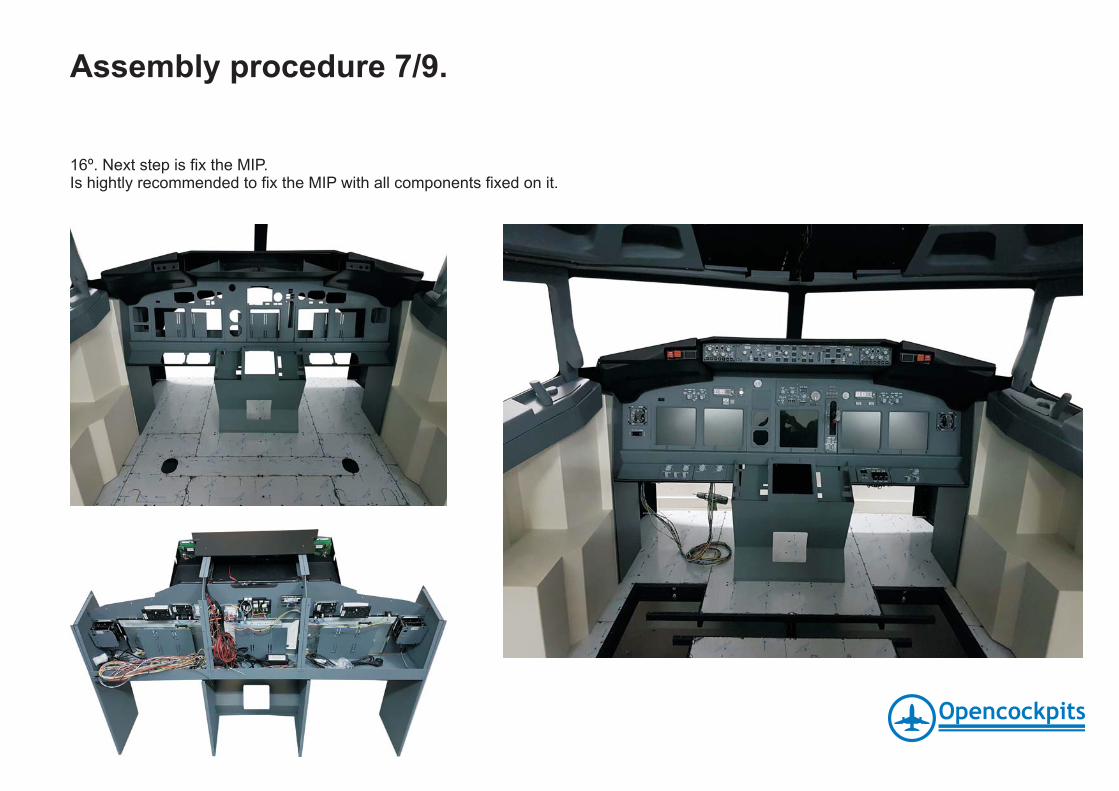
Assembly procedure 7/9.
16º. Next step is fix the MIP.Is hightly recommended to fix the MIP with all components fixed on it.
Opencockpits

Assembly procedure 8/9.
17º. Now is time for fixing pedals and after them,the linked Yokes.
18º. After fixing pedals and yokes proceed with wiring for overheads andfix both.a) Fix wiring first and after that, fix FWD overhead.b) Fix AFT overhead the last.
Caution!: Use washers to avoid overhead drop.
Opencockpits

Assembly procedure 9/9.
19º. After fixing both overheads, upper closures can be fixed.
20º. Next step is fix the J-Rails, holes are pre-drilled. ThrottleQuadrant and Pedestal can be fixed too (these not predilled).
Opencockpits
21º. See if paint corrections are needed, remove soil protection and fix theseats on place.


