MChem in Chemistry Degrees CHE3040 Professional and Industrial Skills for Career Development Level 6 (HE3) STUDENT HANDBOOK Contents: Page 1. Syllabus 2 2. Professional and Industrial Skills for Career Development – Introduction 3 3. ULearn Introduction 4 4. Organising the Professional and Industrial Skills Activities Over Your Industrial Year 4 5. Period 1: Activity I: World of Work or Activity II: Health and Safety 5 6. Period 2: Activity III: Chemical Publication or Activity IV: Organising a Meeting 26 1
Transcript
MChem in Chemistry Degrees
CHE3040
Professional and Industrial Skills for Career DevelopmentLevel 6 (HE3)
STUDENT HANDBOOK
Contents: Page
1. Syllabus 2
2. Professional and Industrial Skills for Career Development – Introduction 3
3. ULearn Introduction 4
4. Organising the Professional and Industrial Skills Activities Over Your Industrial Year 4
5. Period 1: Activity I: World of Work or Activity II: Health and Safety 5
6. Period 2: Activity III: Chemical Publication or Activity IV: Organising a Meeting 26
7. Period 3: Activity V: Curriculum Vitae and Interview 34
Prof. Neil I. Ward (revised June 2011)1.0 Syllabus
Module Number CHE3040Module Title Professional and Industrial Skills for Career DevelopmentLevel 6 (HE3)Number of Credits 15Module Co-ordinator
Professor N.I. Ward
Semester 5Staff contributors Professor N.I. Ward Unit(s) of Assessment
Coursework (100%)
Pre-requisites Satisfactory completion of level 5 (HE2) chemistry, with a programme mark average of 60% at each level.
Aims The aims of this module are to: develop skills and/or competencies for a career; develop a better understanding of the world of work enhance the learning experience in a real world
environment from both a personal and professional perspective;
gain confidence on your decision making; provide an individualistic viewpoint to your workplace
experience; and
improve your self-reflective practice. Learning Outcomes
On completion of these activities, you should be able to:
organise meetings and other activities the company might require from you;
engage in reflective thinking about what you do and how to improve it;
develop initiative and be creative so as to provide new perspectives within the place of employment;
understand the world of work to improve future employability;
demonstrate a level of initiative; be creative and reflective so as to solve problems in the
workplace;
develop further specific skills so as to become more proficient in the use of IT.
Content This module is undertaken by MChem degree students throughout their Industrial Research Year (IRY). Access to the material for this module is via ULearn or through the module handbook (a hard copy of which is provided to every
2
student and academic supervisor.
Each student is expected to complete: a SWOT analysis before the placement begins; then three activities that will be assessed during industrial visits. There are five activities distributed in three periods over the twelve months of the Industrial Research Year. The student will have to choose one activity for periods 1 and 2. Only one activity is available for period 3 as this has been designed for all students to complete being a key skill in PPD in terms of future employability. A final SWOT analysis is completed at the end of the IRY Year.The five activities are:
I. World of Work; II. Health and Safety; III. Chemical Publication; IV. Organising a Meeting; and V. Future Employability - CV and Interview.
Methods of Teaching/Learning
This module will be delivered using the University’s virtual learning site:
Access can also be made via the Chem PT website (http://sbms.surrey.ac.uk/pty/) under the index list item “Current Students/PDP”.
Students need to have available your university URN code number and password to enter the ULearn site.
Selected Texts None required – all material in University’s virtual learning site above.
Methods of Assessment
Coursework (100%) Depends on the nature of the individual activity.
The submission deadline is 1 week before the date of your Academic Tutor’s visit for the corresponding activity (the student must do three for this module).
All submissions will be done via ULearn using the Assignment folder for each activity and a supplementary submission by email to the module coordinator (Professor Neil I. Ward – email address [email protected]), PTY administrator and visiting Academic Tutor.
2.0 Professional and Industrial Skills for Career Development – Introduction
Definition of Personal Development Planning Professional and Industrial Skills for Career Development (PISCD) relates to Personal Development Planning (PDP) which is 'a structured and supported process undertaken by individuals to reflect on their own learning, performance and/or achievement and to plan for personal, educational and career development.'
PISCD embraces a range of approaches to learning that connect the planning of your actions to achieve your goals, the recording of your experiences in order to better understand the process, results and the reflection that allows you to evaluate the experiences you have gone through.It not only helps you to develop knowledge about yourself and through this build a stronger sense of identity, but also improves your ability to relate your learning and achievements to the employers' interests and needs.
There is scientific evidence that the learning processes that underlie PDP, when conducted well, result in good learning outcomes.
Extracted from the Higher Education Academy site (http://www.heacademy.ac.uk/PDP.htm)
3.0 ULearn Introduction: Professional and Industrial Skills for Career Development
Welcome to the PDP site for the Chemistry Industrial Year! You should have completed a SWOT analysis before the beginning of your Industrial Year using the guidelines provided in the "SWOT Analysis" assignment icon. Please read "An Introduction to PDP in the Industrial Year" file before you proceed to the Period 1 folder.
In PDP it is essential that you maintain a record of all your actions. A log-book enables you to record through the period of undertaking your selected Activity the Objectives, Planning, Actions, Outcomes, Future Requirements and Records. An example of the log-book format is provided. (An example can be found in the ULearn folder associated with the Introduction section).
Choose and complete one of the two activities in the Period 1 folder. The deadline for submitting your selected activity is the week before your first industrial visit by your academic tutor. Please submit using ULearn and prepare a hard copy version that should be available for assessment during the industrial visit. During this visit you should also make available your log-book for assessment. Failure to send by the submission date will invoke the penalty as stated in your Level 6 Handbook. If a particular activity is not undertaken another activity must be done as a retrieval according to the standard regulations.Proceed to the Period 2 and 3 folders and complete as above. The deadlines for submitting the activities in both cases is a week prior to the second and third industrial visits (ULearn) and a hard copy of your assignments and your log-book should be available for assessment during the industrial visits. The lateness penalty and retrieval requirements are as described in your Level 6 Handbook.
4.0 Organising the Activities Over Your Industrial Year
The activities have been designed to help you develop a more sophisticated understanding of the world of work and your position as an employee within it. You are encouraged to interact with different members of your company.
This PDP module provides you with the opportunity to communicate with other employees of the company, in itself a key skill, giving you also an insight into their knowledge gained through many years of industrial experience. You will be provided with suggestions as to where to gather extra information that might be of help, but the activities are to be carried out independently and require different levels of initiative. You are expected to complete:
a SWOT analysis before the placement begins three activities that will be assessed during industrial visits. There are five
activities distributed in three periods over the twelve months of the Industrial Research Year. You will have to choose one activity for periods 1 and 2. Only one activity is available for period 3 as this has been designed for you all to complete being a key skill in PDP in terms of future employability. All five activities can be accessed through ULearn
a final SWOT analysis at the end of your Industrial Year
The five activities are:
I. World of Work
II. Health and Safety
III. Chemical Publication
IV. Organising a Meeting
5
V. Future Employability: CV and Interview
The following time-line illustrates the distribution of activities over the 12 months of your placement year.
The following section provides details for each activity. There is an introduction to the three periods covering the 12 month time period (as shown in the schematic above), and then separate folders for Instructions, Tutorials and Assignments. This handbook will focus mainly on the details provided in these folders although further details and examples are available in the Ulearn site.
5.0 Period 1: Activity I: World of Work or Activity II: Health and Safety
During the first few weeks of the industrial placement you should have completed an induction or training programme in your company. It is important that the process of getting to know about your company does not finish at the end of the induction period. The two activities provided in Period 1 (between 0.5 to 2 months after the start of the placement) are designed to further your understanding of the industrial workplace environment.
You have a choice of two activities. For each of them you will find a learning module folder (an icon representing a few pages) with the activity number and name (i.e. "Activity I. World of Work - Instructions") and a tutorial folder (i.e. "Activity I. World of Work - Tutorials") with additional material needed to complete the activity. There is also a separate folder relating to the submission of your assignments (i.e. “Activity I. World of Work - Assignments”).
It is important that you keep a record of all the stages undertaken in completing the final assessment goals of the activity. Complete a log-book or record of your module work which records your objectives, actions and outcomes throughout all stages. This log-book will be assessed as part of the activity mark. An example of the log-book structure is provided in ULearn and in the notes below this section, although you can develop your
6
own management record that records the dates, description of your work, action points, a summary of all literature used, interview details, etc.In summary the first Activity (for the first Industrial visit) must be one of the two below:
Activity I. World of Work
This activity will provide you with the opportunity to learn about the business world. The activity concentrates on helping you become more familiar with the organisational structure and operation of your company.
Activity II. Health and Safety
Health and Safety (H&S) is a very important area in all companies. You should have been fully trained during the induction period in the H&S regulations as they relate to your company. This activity will enable you to focus on the application of those regulations in a specific area of the company, using a particular presentation format (video, brochure, PowerPoint, etc.). A goal of this activity is that the format you produce should be implemented by the company.
7
Activity I. World of WorkThis activity should be done between 0.5 to 2 months after the start of your placement (before the first Industrial visit by your Academic Tutor). It will require you to research your company, organise and edit information and produce 2 professional charts, and a report. You should also produce a log-book (or record of your module work) recording all the stages of your undertaking the activity. An example of the log-book (record book or diary) layout is provided below. You may want to modify it to suit the situation of your work.
Step 1: Research your Company
As an initial phase of conducting your research find out about the general information on your company. Attempt to organise the information as you gather it into topics or sections. Do not rely on just copying, but read the text from reports, websites, company publicity documents, etc and edit the details. Always record in your log-book the source of your information so you can reference the information. The intention is that you start to build a better understanding of your company beyond the information you have been given during your induction or training period. It is important that you attempt to gather details so as to have a better understanding of how the business world functions.
Start with the management structure, the number of departments or company divisions, their structure and function in the company, the number of employees, etc. Then try to go further and find out about the central business activity of your company from raw materials, origin of the materials, suppliers, processes, quality assurance and control activities, products, clients, where are the products sold, what source of energy do they use to run the processing plant (if there is a plant), etc.
It is important that you include the ‘chemistry’ of your company, especially in terms of the main processes, products and special features that are unique for your company. Your research should also include the laboratory and analysis methods used throughout the company.
Here are some suggestions as to possible sources of information:
details from your induction or training period (but only to be used as a brief introduction)
the website of your company, marketing material, annual reports, brochures on products
the intranet of your company (if available)
details from staff of the company including Public Relations, Reception, Marketing and Sales, etc.
8
Be proactive. Ask!!!Chemical Sciences: Professional and Industrial Skills for Career Development
Log-Book (or record of your module work/diary) RecordName: University Code:
Activity:
Date:
Objective/s:
Actions:
Outcomes:
Future Requirements:
Records of Information (references, links to websites, etc.):
9
Step 2: Produce two Charts
1. Read the "Getting to Know Your Company" guide that is part of this package
2. Following the ideas and examples presented in the guide, produce two charts or diagrams in an A4 page format:
Chart 1: on how the company is organised with your workplace included in it.
Chart 2: on how your company operates: what comes in (supplies), what goes out (product or main products), who are the customers, who are the suppliers, where are the product/s produced, how is quality ensured, labs, research and development facilities, health and safety, is the company environmentally friendly, how are industrial processing effluents treated, what do the different departments add and what outside sources influence the overall operation of the company structure.
You will have to submit these two charts through ULearn as part of Activity I. Assignment (one week before your first visit) and also have them available to show to your academic tutor during the first visit for assessment. Please ensure that you also have your detailed log-book (or record/diary) available for assessment. See section 3 above regarding the lateness penalty and retrieval requirements.
Step 3: Chemistry of your Company
Research the ‘chemistry’ of your company, especially in terms of the main processes, products and special features that are unique for your company. This should also include laboratory QA/QC and analysis methods or computational facilities used throughout the company. In preparing material for inclusion in your report (see Step 4) make sure you reference all sources of information (including company documents or reports, intranet websites, etc). It is essential that you include chemical equations, reaction mechanisms, figures or tables of instrumentation and data in your report.
Step 4: Report on the World of Work
Write a report on your company. The report should include:
a general overview (based on the material used in your charts)
a detailed insight into the 'chemistry of your work'
a bibliography.
10
Some guidelines for your report:
Your report should be a professional presentation with a
Title page A 120-word (maximum) Summary List of Contents Sections of information Figures and Tables to be inserted in the text with captions and references cited Bibliography
Font: Times New Roman, 1.5 line space, size 12, 2.5 cm margins Maximum Length: 5 pages
Step 5: Submit Assignments
A special ULearn page will enable you to submit your assignments for this Activity I – World of Work. You are also provided with a list of comments/questions which are intended to encourage you to reflect on the activity and then submit a response in the special submission box.
You will have to submit your Activity I report along with the two charts produced in Step 2 through ULearn as "Activity I. World of Work - Assignment". The deadline is one week before the first Academic Tutor’s visit. Also email the reports to your academic tutor and the PTY Administrator and cc to [email protected].
In addition, have the report (properly bound), the two charts and your log-book (or record of your module work) available in hard copy to show to your Academic Tutor during the first visit for assessment. See section 3 above regarding the lateness penalty and retrieval requirements.
The flowing guidelines or tutorials are included to help you in Activity I.
Getting to Know Your Companya Short Guide to Creating a Flowchart
Creating a Chart
A chart is a selection of information on a given topic. The purpose of a chart is to offer a visual representation of that information so as to have an overview in one format. Generally, it is presented as boxes linked by arrows, expressing connections between the pieces of information. There is a theme to the chart, the criteria of selection, usually made evident in the title that helps the reader decode the chart.
The more complex the amount of information to be reported, the more difficult it will be to place it all on the same chart. Font size, width of lines, colours, boxes inside boxes are different ways of further classifying the information in a chart. There is a limit however, to how much information you can place before the chart becomes too cluttered. If you find the information to be too much, you may want to eliminate detail, or may choose to produce more than one chart.
For instance, in your company you may find information on the different departments and who is in charge of each one. You may also find information on the different branches of the company (maybe even all over the world). There could also be information on the different plants or research facilities and what is done or produced in each of them. You may find ingenious ways of fitting all of these in one chart or may choose to produce more than one chart.
Make a Chart of your Company's Structure
You are asked, as part of Activity I, to produce a chart with the structure of your company. We are interested in a representation of the company that would show your position within its overall structure. You will have to decide the criteria under which you will represent the company (it may be the different departments, the different branches, production units vs. research units, etc.).
The final result should be accurate and clear but there is a great deal of creativity in how you select and organize the information to achieve this end. Remember that the purpose of the exercise is that you become more familiar with your company so try to keep this in mind as you work through the activity.
An example: The University of Surrey
We offer you a chart with the structure of the University of Surrey so that you have an idea of how the content is presented by the viewpoint or criteria selected.
12
The chart you will create is a "picture" of the company. A static vision of how it is organized. You may also concentrate on the function of the company: namely, the processes that take place within it.
Your company as a system
You may want to think of the company as a system. A system that transforms something into something else (raw materials into final products) making use of resources (installations, human resources, technical know how, machines, etc.), with the purpose of selling these products to some costumer in order to produce revenue. Simple concepts that can be described in a line, but that require at times a complex structure in order to help the system fulfil its goal.
An example:
The example we have chosen should be familiar to all of you: a bakery.
We can consider that there is:
the main raw materials or supplies (flour, eggs, sugar, yeast) that are used in large quantities.
other supplies that are used in smaller quantities: reactants to speed up the rising of the dough, colours, etc. Some of these are not necessary for the product itself, but have some comparative advantage to make it more competitive in the market (longer shelf life, better appearance, etc.).
facilities (storage spaces, kitchen, packaging plant, etc.), energy: electricity, water, gas - as these are all necessary to produce the goods
and keep the system running. The kitchen of the bakery is the plant: where the raw materials are transformed
into the product according to a series of procedures called recipes. There is a set of instructions (or operating procedures) per each product -
different breads, buns, pastries, etc. Each of these products requires quality control methods to make sure
ingredients, procedures and final products are up to standards. Maybe the master cook will "taste" them or some other, more sophisticated procedure, will be in place.
Each of the products also requires to be packed differently so as to be delivered to the customer (maybe the bread can be transported in bags, while pastries require trays). So, there should be some packaging processes in place that in turn require supplies.
Finally we have to deliver the goods to the customer. The bakery may have a direct outlet (sell the products over the counter) or may supply a supermarket. If the products need to be moved great distances a distribution system should be in place. Distribution requires a structure of its own (vehicles, petrol to keep them in motion, drivers, may be people to actually move the goods).
Running behind every step of the system there is money (money pays for the supplies and the other resources, pays salaries to keep people at work, covers the
13
costs of packaging and delivery and money is the final price when the products are delivered). It is not surprising then that the bakery needs somebody in charge of finances.
It also needs somebody to overlook the employees (human resources). Somebody to keep the equipment (ovens, mixers, cars, etc.) in good condition
(maintenance), and Somebody to overlook that all happens in a safe manner for workers and for
customers (health and safety).
We have attempted to put all this information in the chart provided.
A bakery flowchart is available only in the ULearn Activity I – Tutorials folder.
Your company's flowchart
So the idea is that you research what your company does to establish how the system works in order to design a chart or flowchart. Once more, the purpose of the exercise is to help you familiarize yourself with your company so please search the internet, ask people in the company, or do anything necessary to understand your company better. You may choose to accompany the chart with a verbal account as the one presented for the bakery. Since we are all quite familiar with what a bakery does there is some information that has been omitted here (for instance the chemistry of bread making). Keep in mind that you will be describing your company to people who may not be familiar with what is done there so try to give enough information to present your company fully. Avoid any confidential information. Always check with your industrial supervisor with regards to the content of your report and charts so as to avoid any problems relating to confidential company information. Also quote the source of all information. Avoid plagiarism.
14
Postgraduate Medical School
(PGMS)
- Research in the School of Management
School of Management
Arts, Communication & Humanities
School of Human Sciences
European Institute of Health & Medical Sciences (EIHMS)
School of Engineering
School of Electronics and Physical Sciences
School of Biomedical and Molecular
Sciences
-Department of Dance Studies- Department of Music & Sound Recording- Department of Culture, Media & Communication
- Centre for Language Studies-Department of Law-Department of Political, International & Policy Studies
-Chemical and Analytical Sciences- Integrative Physiological Sciences- Microbiological Sciences- Nutrition and Food Sciences
- Advanced Technology Institute (ATI)- Computing- Centre for
Communication Systems Research (CCSR)
- Centre for Solid and Signal Processing (CVSSP)- Electronic Engineering- Mathematics and Statistics- Microwave and Systems Research Group (MSRG)
- Optoelectronic Devices and Materials Group (ODMG)
- Physics- Surrey Centre for Research in Ion Beam Applications (SCRIBA)- Surrey Space Centre (SSC)
- Chemical and Process Engineering- Civil Engineering- Centre for Biomedical Engineering- Centre for
Environmental Health Engineering (CEHE)
- Centre for Environmental Strategy- Fluids Research Centre- Materials Science and Engineering- Materials, Surfaces & Structural Systems-Mechanical and Aerospace Engineering- Mechatronics - Process & Information Systems Engineering- University of Surrey Environmental Body (USEB)- UniS Materials Institute- UniS Material Network- Structural Ceramics Network (SCERN)
- Centre for Research in Nursing and Midwifery Education- Healthcare Workforce Research Centre- International Centre for Nursing Ethics - Robens Centre
- Economics - Psychology- Sociology-Digital World Research Centre
15
Activity II. Health and Safety
Time Period: this activity should be done 0.5 to 2 months after the start of the placement (before the first Industrial visit by the Academic Tutor). Please make sure that you have not completed Activity I as you may only select one activity from Period 1.
During this activity you will produce various forms of reports on Health and Safety details with the intention of providing materials for disseminating H&S information in your company. The activity is designed as an opportunity to gain an insight in how the company is organised in terms of H&S and how that information is brought to the attention of staff and visitors. You will also be able to develop new skills in areas other than ‘theoretical’ chemistry (namely how to communicate with others, especially professionals in the field of H&S, and how to produce an important format for H&S information - poster, brochure, etc - through using different forms of software and presentation material).
There are many different ways of producing a final report for this activity. A measure of your professionalism will be your commitment when working through the activity. It depends on you if the final result is valuable for the company (and hence for you) or is nothing more than an ´empty´ exercise done for academic study. A successful outcome of the activity will be shown by the fact that your company will use your reports in the future!!
Please ensure that you complete a log-book or Record of Work/Diary (using the basic format provided in the Tutorials section) which records all the stages you undertake in researching and completing this activity. Also, make sure that your completed log-book is made available for assessment along with the other ‘reports’.
Step 1: Research the Health and Safety Regulations of Your Company
1. Start by making a detailed investigation of the Health & Safety Regulations of your company. Do not just rely on the material provided during your induction or training period. The intention is that you start to build a better understanding of your company through asking questions of your supervisor/s, H&S staff, and by reviewing all of the available information on the website, intranet, laboratory manuals, posters and company booklets.
2. Check what H&S information is already provided for visitors and in what format. You will be asked to produce a Health & Safety communication format/document. Do not just copy what is already available. Use your judgement, initiative and comments from other professionals in the company to develop your own strategy for producing a new and innovative format. Go beyond a basic description: find out new information like what is the company policy for visitors or contractors, the format of promoting the policy and what methods of
16
annual training or review are used to ensure that staff are aware of changes in H&S policy, etc. Think about what specific area you might want to develop your format for, i.e. a document for visitors to your laboratory or the processing plant, etc. How can you ensure that there will be a positive response to what you produce, i.e. the individual does read it, etc. Make sure the format is not just another piece of paper but something that will be effective in informing the reader, and how can you measure that?
Here are some suggestions as to possible sources of information:
the website or intranet of your company
marketing or H&S material the company has produced
laboratory manuals or reports handed out at the Reception
posters, visitors passes,
your supervisor, processing plant staff.
Be proactive. Ask!!!
Step 2: Evaluate the Health and Safety Regulations
1. Evaluate the company's Health and Safety Regulations and documentation for visitors; i.e. handouts at the Security Office or Reception area, documents or wall displays in the laboratory environment. Do not attempt to evaluate all the Health & Safety Regulations but rather focus on a specific area that you want as the subject area of your activity.
2. Find out what the guidelines are for the part of the company you work in (your laboratory, office, computing facility, processing plant, etc).
3. In evaluating the material record all sources of information in your log-book so that they will be reported as part of your final assessment for the activity (Step 5).
4. Organise your material into folders or computer files, edit and think about key words and phrases you can use in your assignment submission, record material in terms of being used, including certain design features, i.e. colours, logos, images, photos, etc.
Step 3: Interview Health and Safety Personnel
1. Organise a meeting with your supervisor and then the H&S Personnel. Try to organise a "tour" of the company with them (or at least a visit to the main areas relating to your selected subject area for the activity). They may be very busy, but
17
there should be somebody in the group that could help you for an hour or so. Establish a day and time for the meeting. Explain to them that you are interested in producing something to help the company report H&S information in that area of the company.
2. With your supervisor and then the H&S staff member helping you, walk the company site and your workplace (laboratory, office, processing site, etc). It is important to get a varied overview of how H&S is interpreted and applied within the company. Use this opportunity to ask any questions that have emerged out of Steps 1 and 2. Try to identify with the help of the H&S staff areas of difficulty in getting through the H&S information or any missing points of communicating existing material (i.e. information that simply is not available). Build on your material in Step 2, but do not take for granted your evaluation, check your conclusions. Because you are not an expert in the area you may have misinterpreted things. Record all information in your log-book.
3. Negotiate with H&S staff how you could be of help to them: writing a brochure for visitors (if there is not one in place, or the one in place could be improved), making a video to be shown at the entrance while visitors wait, making a brochure or poster for your workspace or for some other part of the company, a PP presentation to show visitors or to show at the beginning of presentations. Of course these are just suggestions. You and the H&S people can think of other options.
4. TAKE NOTES ALL THE TIME and record in your log-book or record of work/diary!!! This is essential as you will have to report this material in Step 5.
Step 4: Produce Your Presentation Format
1. Once you have established in collaboration with the personnel of your company (H&S or your supervisor) what is the site of the company to be used (entrance for visitors, your lab, etc.) and what format to use (video, brochure, poster or PowerPoint presentation), explore the tutorials offered for obtaining ideas about the "format-style and content framework" you may wish to use. You should find all the options in the folder "Activity II. Health and Safety - Tutorials".
2. Each tutorial will give you specific guidelines on how to use the material you have gathered for the activity. However, in all cases you will have to have:
the information you want to present: not only the specific information but also the objective and the audience you intend the information to reach. All three elements will determine how you present the information.
the logo of the company probably some pictures of the company specific icons and symbols in use for the H&S instructions you want to
present.
18
3. Register all your considerations in your log-book, that is, a detailed registry of your process.
4. Follow the tutorials, registering success and difficulties at each stage in the log-book or record of work/diary.
5. Produce the material in its final format. Consider where it will be used, by whom, how and consider how to put it to work. All of these steps should also be in your log-book.
6. The material will be assessed not only by the format but the contents and the quality/impact. Is the final format of such a standard that the company would be willing to use it? That should be your goal for being successful with this activity!!!
The "format" you have produced, the log-book with indications of the path followed to produce it as well as the report you will produce in the next step should be submitted through ULearn in "Activity II. Assignment" at least a week before the programmed first visit.
You should have all assignment material available for assessment by your Academic and Industrial Tutors at the time of the first industrial visit. See section 3 above regarding the lateness penalty and retrieval requirements.
Step 5: Produce a Health and Safety Report
Write a report describing the Health and Safety policy in your company. The report should include:
a general overview (based on your research, your evaluation and the interview with the H&S personnel)
a specific description of what the H&S situation in the company work area you have selected (reception, your own lab, any other area), how is the existing H&S policy reported and reviewed, what may be inappropriate and why. Again it is not just your view but the conclusions you have arrived together with your supervisor and H&S personnel. Are these conclusions different from your evaluation in Step 2?
two pages should report concisely the information given to you through the H&S interview
what type of communication format have you decided to use and what were the considerations for doing so (what would be handed in more easily, what would be displayed more permanently, what would be the easy/cheaper to produce?)
H&S is not about complying with a formality (going through the motions, so to speak) but about protecting the members of the company and/or visitors. How does your report try to make sure the information in it reaches the audience it is intended for? What mechanisms have you considered to ensure that it works?
a bibliography of the sources of material used.
19
Your report should be a professional presentation with a:
Title page A 120-word (maximum) Summary List of Contents Sections of information 2 pages on the interviews with your supervisor and H&S staff Figures and Tables to be inserted in the text with captions and references cited Bibliography
Font: Times New Roman, 1.5 line space, size 12, 2.5 cm margins
Maximum Length: 10 pages
The "format" you have produced (poster, brochure, etc. and the final H&S report should be submitted through ULearn as "Activity II. Assignment" at least a week prior to the programmed first visit. Also email copies to your academic tutor, the PTY Administrator and cc to [email protected]. See section 3 above regarding the lateness penalty and retrieval requirements.
You should have the final "format", your log-book (or record of work/diary) and the report (properly bound) available for assessment by your Academic and Industrial Tutors at the time of the first industrial visit.
The following are examples of tutorials provided to give you some ideas about the format you may wish to use in this activity.
A brochure is a pamphlet usually consisting of one sheet of paper printed on both sides and folded two or three times. It is a means of promoting information. It could be on a product, company or activity. The main drive is that it should catch people's attention and it should deliver the information very quickly as people tend to spend a very short time on printed promotional material.
We suggest you use the conventional tri-folded brochure to do your assignment. We offer you here an example (more are available in ULearn. In a brochure the content matters, but the looks do as well!The example offered here through a link are also available at the end of the instructions for the activity.
The brochure is a story that should unfold from the cover panel to the last section. It is a very quick story and it has a clear goal in mind.
Establish the central message of the brochure. What is its goal? Think of the audience the brochure is designed to address. What do you want the
audience to learn? Write out ideas of what you want in the brochure in relation to the chosen topic.
Try to write phrases or short paragraphs that could become the "pieces" you will use in the final version. Remember this is material that is read very quickly.
Gear the language to the customer. Try to be direct. Attempt to keep the information flowing smoothly throughout the document. Look at the brochure as a road map taking your customer from the front cover through your product offerings to the final sale. Select every word with care. Avoid jargon. Eliminate all grammatical errors and misspellings (have someone review the manuscript).
If the message could be better conveyed or completed with images, as it is usually the case, find the necessary artwork (logos, pictures, graphs, maps, etc.).
Once you have the pieces you will have to see how to put them into a defined layout. We suggest that you discuss at this stage your plans with appropriate administrators. In many cases you will need the support of the senior management to complete your task. Show the selected text and the general direction you have chosen to your industry supervisor or a senior member of staff as is appropriate (may be a head of division or the section leader).
We suggest you work on a three-folded brochure (A4 page folded in three as the figure indicates).
The tri-fold (or standard) brochure uses both sides of the paper with three panels on each side. Fold a plain sheet of paper in the manner indicated by the figure. Once folded, the paper will provide space for the completion of 6 sections of information. Use the figure below to understand which part of the folded paper is should be completed so as to complete the organised story line.
The number indicates the order in which the sides are more likely to be viewed by the reader.
Outside first cover (1):The most important part of the brochure. Must have a high attention impact factor and should help people focus on the material. Make it visually appealing by using simple designs and well chosen fonts. Include the company logo and business name and a limited amount of information that can be scanned at a glance.
Outside back flap (2):Use this panel for catchy information. You are still trying to persuade the reader to open the next flap and see the main piece of information.
Inside panels (3, 4 and 5):In terms of these three panels, the inside left panel is the one seen first. We read from left to right so our eyes have the "habit" of scanning in that order. You can work on each panel separately or decide to design the inside of your brochure as one piece (covering all three - 3, 4 and 5 panels). If you work on them separately, there should still be coherence in the design as they are all seen at the same time. You may want to place some text in panel 3 and a figure, map or chart in panels 4 and 5 for instance, but they all relating to each other.
Outside middle panel (6):Should stand on its own for it is usually seen when the brochure is folded. Could serve for providing the company's details (address, phone number and the like), a map on how to reach the company, mission statement, the company's appreciation
22
for the environment or safety, or any other piece of information that can stand on its own.
Work on a Draft
You have to place now the material you have gathered as your content inside the layout. Use a folded page to develop a sketch/pilot example, trying to play with the length of texts, size of fonts, images and their size and where to place material. It is usually a lot easier to do this with paper and pencil than in the computer.
Once you have a better idea of where the pieces fit - very much as if it was a puzzle - you can move to the computer.
Produce a Printable Copy
What has made this stage so different is that everybody has access to publishing tools. You may find that Word™ is enough for what you need, but it would make your life easier if you could work in a software package with a little more flexibility. Microsoft Office Publisher is not only suitable but available in most computers with Microsoft Office. If you go to New Publications in this program, the first option is publications for print. "Brochures" is one of the options there.
Having access to publishing tools and producing something worth publishing are two very different things. You know from your draft where the pieces go, but now you need to decide what they will look like.
Place the "pieces" in the screen. Define fonts and sizes. As you see them on the screen you will probably want to make adjustments as you will find it too bare or too busy. Try different fonts and font sizes to see whether that changes the overall aspect of the page. Try also changing the size of images and the location or position of them.
Printing
Print a copy now and then as you work. Your brochure in paper might look different from the one on the screen and you might need to make adjustments.
It is important to define where the brochure will be printed. The best would be a colour laser printer that gives you colour and quality. But if that is not available and you will print in black and white, work on the screen in grey colours so that you have a better idea of what it will really look like. You may want to use coloured paper to make a more appealing brochure even if working only with grey colour.
If the brochure will be read quickly and discarded a standard weight paper would be enough. However, if it is a piece that will be available for many to use and not to be removed from the company, it would be better to use a higher weight paper and maybe even considering sealing it with plastic.
23
Some Tips on Graphic Design
Graphic design is a lot about taste, sensitivity and eye. We cannot help you develop any of them through these lines, but we can offer some guidelines that might help you avoid traps common for beginners.
A professional looking piece will not be clattered. Too many fonts, images, Word Art, Clip Art, etc. usually gives a final product that is busy and unclear. Manage your resources!
Fonts play an important role in reinforcing or countering the brochure's message. San serif fonts tend to express efficiency and simplicity while serif fonts are better used to convey elegance, leisure, etc.
It is good practice to use no more than three different fonts in any one brochure. One font carries the message while the other fonts serve as design accents. Bolding or italicizing a font does not necessarily count as a separate font. However, only use bold and italics as an emphasis to impart clarity to the message.
Try to use fonts of the same family unless you are trying to contrast a piece of text for some reason, but it should be a valid reason!
Images help the reader and make your brochure more appealing. Use common sense to get the most out of them. For instance, if part of the message is the image itself, it should be big enough to see what you want the reader to see. Size is important for conveying the message. An image that does not have a specific purpose could be there just to enhance the looks. You may, for instance, choose a semi transparent image as the background of your brochure, giving texture to an otherwise blunt page. Yet, do not feel obliged to include images. Sometimes less is better.
Some examples of brochures follow:
24
25
26
6.0 Period 2: Activity III: Chemical Publication or Activity IV: Organising a Meeting
You are now in the middle period of your industrial placement. You should have had your first industrial visit and completed the period of training such that you are now undertaking research projects. The two activities provided in Period 2 (approximately between months 3.5 and 6 of your placement) are designed to advance your personal skills for the workplace and future employability.
You have a choice of two activities. For each of them you will find a learning module with the name of the activity and a tutorial folder with additional material needed to complete the activity. There is also a further folder which enables you to submit your assignments using ULearn and to record your personal reflections of the selected activity.
It is important that you keep a record of all the stages undertaken in completing the final assessment goals of the activity. Complete a log-book (or record of work/diary) which records your objectives, actions and outcomes through all stages. This log-book (record/diary) will be assessed as part of the activity mark.
Activity III. Chemical Publication
This activity is designed for you to use the knowledge gained in Scientific Communication/World of Work modules relating to chemical publications. Firstly you will revise your knowledge about the importance and structure of a chemical publication. Then you will use a scientific report produced as part of a member of staff’s research work or an MSc or Final Year research project (or on request from the Module Coordinator – practical data from a level 2 practical) and prepare for submission to an Editor of a journal a completed copy of a chemistry publication (say for The Analyst, Chemical Communications, Journal of Power Sources, The Science of the Total Environment).
Activity IV. Organising (Planning and Facilitating) a Meeting
This activity will enable you organise and implement a business meeting in your company.
27
Activity III. Chemical Publication
Time Period: 3.5 to 6 months after start of placement (before second Industrial visit by Academic Tutor). You can only select one activity for Period 2, namely this one (Chemical Publication) or Activity IV: Organising (Planning and Facilitating) a Meeting.
Chemical publications are an important educational and research tool for being able to report, in a logical manner, the end product of scientific work. Chemical research is about reviewing what is already known, supported by evidence ‘taken’ from existing literature, setting out a logical sequence or strategy of experimental work that is carried out and reported using tables, figures and text so as to provide evidence of either a review or new innovative data/results.
The language used in chemical journals should be concise, grammatically correct, relevant to the specific area of chemistry (chemical symbols, units, equations, etc) and expressed in a clear style such that a reader may be able to follow the scientific detail, and whenever necessary should be able to replicate the experimental design presented. Moreover, a chemical publication becomes a permanent record in time of the scientists research output, showing how a particular subject area, say mass spectrometry, is advancing and how the data and interpretation provide a framework for new research ideas and possible funding. In principle all chemistry-related research should result in a publication. New scientific results should be presented as a paper in a journal for the development of scientific ideas and the advancement of the subject.
In Scientific Communication (level HE1) you were introduced to the different types of Chemical Publications (especially journals) in the University of Surrey library and how the abstracting service and internet (Web of Knowledge and ScienceDirect) can be used to locate specific chemical journals. Moreover, through several coursework exercises you were introduced to the basic structure of a scientific article, especially the use of a summary or abstract, keywords and the basic format of tables, figures and the methods used to cite references and report published work in a bibliography. In module World of Work (HE2) you completed activities relating to report writing and poster presentations which enabled you to evaluate scientific material and present it in a concise and structured manner.
This activity is designed to instruct you on the reviewing process of scientific information and how to produce a chemical publication which will be fit for the purpose of submission to the Editor of that journal. In carrying out this activity you will learn about the different types of chemical publications, their design/layout and the process of producing a journal submission by:
the reviewing of scientific information (data, reports, published material), the construction of tables and figures (from basic experimental data and
statistical calculations), how to describe concisely and accurately the experimental design, calibration
(quantitative or qualitative determination) and possible validation of experimental research measurements,
28
the presentation of a chemical strategy, mode of action, or chemical structure/reaction mechanism, and finally
the presentation of results, interpretation and discussion of the findings relative to what may already be known.
The final submission for this activity will involve three pieces of work, including a review of the structure of a specific chemical paper published in a Royal Society of Chemistry (RSC) journal, and the production and final submission of a paper that you will produce from a particular subject area of chemistry. This paper will be submitted to the “Editor” of the selected journal. Furthermore you will make available for assessment your detailed log-book (or record of work/diary) which should provide a record of your activity development stages (objectives, actions, outcomes, future requirements and records of information). An example of the log-book framework is available in the activity folder (‘Tutorials’) and above in section 5 of Period 1.
Follow the suggested steps and remember that you might want to modify some of the points in undertaking this activity. However, remember that the final objective is after reviewing the research material provided you will prepare and submit a chemical publication to the “Editor” of the selected journal so that it will be fit for publication.
Step 1: Research the Structure of a Chemical Publication
The structure of a chemical publication or paper varies from one journal to another. This not only relates to the sections (Abstract, Keywords, Introduction….. References), but also the layout of tables/figures, the referencing of published contributions cited in the text and the bibliography/references section, the type of units to be used (e.g. SI), etc.
The Editor or publishers for each chemical journal provide, either by their website or within the volume of published papers, a “Information/Instructions/Full Guide to Authors” with instructions on the scope, types of contributions, guide for submission of papers, manuscript style, and detailed instructions relevant for submitting a paper to that particular chemical journal.
In Step 1 you will research the structure of a major RSC journal, namely, JAAS, the Journal of Analytical Atomic Spectrometry. The website for this journal is:
JAAS is widely considered to be the number-one journal publishing innovative research on the fundamental theory, practice and analytical application of spectrophotometric techniques to elemental research.
In a recent volume of this journal, J. Anal. At. Spectrom., 2007, 22, 351 - 360, the following paper is cited:
Determination of lead isotope ratios in crude oils with Q-ICP/MSS. Dreyfus, C. Pécheyran, C. P. Lienemann, C. Magnier, A. Prinzhofer and O. F. X. Donard
A method was developed to directly measure lead isotope ratios in crude oils by ICP-MS. Sample introduction strategy was based on the mixing of a USN produced dry aerosol together with an organic aerosol. Two introduction systems, a USN and a Scott-type spray chamber, were fitted to a specifically designed dual inlet torch. This specific configuration allowed simultaneous introduction of organic solutions and aqueous solutions in the plasma, and permitted mass bias correction of lead isotope ratios using the certified Pb isotope standard NIST SRM 981. Crude oils diluted to total Pb concentrations ranging from 0.6 to 10 ng g–1 were analysed for their Pb isotope ratios. A careful optimisation of instrumental settings was performed for the measurement of lead isotope ratios. In order to determine the best operating conditions, isotope ratio precision, different dwell times, number of sweeps/replicate, and settle times were investigated while keeping the same total acquisition time/run of 43.2 seconds distributed between 202Hg, 204Pb, 206Pb, 207Pb, and 208Pb isotopes. The use of 1.5 ms as a settle time and 1000 sweeps for 43.2 s of total acquisition time/run and 7.5 s of stabilisation time/run appeared to be a good compromise between high precision and fair time management. Routine measurements of 10 replicate (i.e. run) organic samples containing 10 ng g–1 of lead provided precision better than 0.2% for 208Pb/207Pb, 208Pb/206Pb, 206Pb/207Pb ratios, and better than 0.5% for 206Pb/204Pb, 207Pb/204Pb, and 208Pb/204Pb ratios. The isotopic measurements of crude oils of specific geochemical interest exhibited good accuracy and reproducibility, making highly convenient the use of this technique, at least for petroleum geochemistry. This study brings new isotopic information for the reconstruction of petroleum system history.
A full copy of the PDF of this paper is available in “Activity III – Tutorials” (with the permission of the RSC Publishers - S. Dreyfus, C. Pécheyran, C. P. Lienemann, C. Magnier, A. Prinzhofer and O. F. X. Donard, J. Anal. At. Spectrom., 2007, 22, 351 - 360, DOI: 10.1039/b610803b – Reproduced by permission of The Royal Society of Chemistry).
You should read the paper in full and in your log-book provide a response to the following comments in bold:
Abstract: you should be able to observe the style used in this section. As a summary it starts with a sentence that reports the overall topic of the paper. It then provides short statements about the analytical methodology, the specific analytical figures of merit that the method has produced, the important operating conditions that have been optimised, the validation (accuracy and precision) results and finally how this new methodology has been applied. Compare how this Abstract would differ from a summary that you have produced in your coursework. What are the main differences in terms of
the content, the use of English (sentence structure, grammar/tense, etc), and use of chemical symbols and units? Are there any references cited?
Keywords: This is an important method of linking the subject area of the paper to the abstracting system used to report papers (ScienceDirect, Chemical Abstracts, etc). How many words are used in the title or the Abstract? Are they similar? How many keywords can you see in the Abstract?
Introduction or opening paragraphs: This section reports what is known from the published literature. Is the term Introduction used? What is the style of the opening paragraphs? In reporting a review of the literature (that is publications relevant to the subject material of the paper) how do the authors cite other papers? What different methods of citing the authors of published work, or reference method (numbering or name/date) is used in the text? What is the sentence structure used? In terms of the paragraphs of this section can you determine a particular style, say does each paragraph contain different topics relevant to the keywords or the Abstract? How do the opening paragraphs end? You use in your reports the terms Aim and Objectives, are they reported in the paper?
Experimental: remember that JAAS is a major analytical chemistry journal so this section will be very concise and detailed as it will hold some of the key instrumental and methodological information of the research. It will also contain Tables of instrumental conditions, the specific details of the experiments including all the chemicals, their purity (and the commercial source must be provided). Many JAAS papers are about method development and validation (accuracy and precision measurements) so the experimental section may outline the procedures but the Results and Discussion section will have all of the signal responses, optimisation data, etc. How are the Tables organised, especially the title (Table 1.) and the legend? How is the data set out in the table? What significant figures are reported and how is this established? Where are the units reported? Are they SI units and are they reported as ng/g or ng g-1? Each journal may use a different method of reporting units. Are references made in the text to cite the Table and where is the Table positioned in the text relative to where it is reported? How are the instruments and their conditions reported? Note there is not much reference to analytical instrument theory and the statements are fairly concise and factual. The length of the text costs money to publish so concise details are reported.
Results and Discussion: reports the findings and all of the results are reported concisely in Tables or Figures. Both illustrations have specific design structures set down by the “Guide to Authors” details. You should have an in-depth inspection of this section. What method is used to report the results and how the discussion is written? How are the Tables and Figures designed and reported in the text? How does the author/s report specific findings? Have a look at the use of paragraphs and the order of reporting information. How many references are reported in this section? Is there any pattern to the selection of references when compared with those reported in the Introduction? What is the length of this section when compared with the others? How are chemicals reported, in words or as symbols? For isotopes, temperature units, percentages, etc are the details reported using “font/super or subscript”? How are footnotes reported for Tables and what information is presented?
31
Conclusions: report the main findings of the study. This is normally not a direct copy of the Abstract! Inspect how the authors report the conclusions and how the interpretation of the results reported in the previous section (Results and Discussion) are summarised in this section. Is there an obvious link between the information reported in the Abstract and the Conclusions? What is the length? How many paragraphs or are there any Tables and Figures in this section?
References: this section is the vital link between the citing of papers in the text (including Tables and Figures) and the full details so that you can use ScienceDirect, Chemical Abstracts or any other abstracting system to read the publications listed. Since this section is about “traceability” of information, each reference should be correctly cited. Each journal has a specific method for reporting the reference. Inspect the actual design of how each reference is presented. Is there a different style for books, papers and conference presentations? How are the authors, journal, volume and pages reported? What further information do you think JAAS should report which would make it easier to find papers using say Chemical Abstracts?
Record all of your responses to the above questions in your log-book. This is important as it will help you complete Steps 2 to 5 below. Your log-book must be made available at the time of the second visit to the company by your Academic Tutor who will assess your work.
Step 2: Produce a Report on a Specific Subject Area of a Chemical Publication
In Step 1 you have gained an insight of the structure of reporting analytical research in a major RSC journal, namely, JAAS. You will now be requested to review and produce a report for submission on the structure of specific chemical papers published in a Royal Society of Chemistry (RSC).
You may select any subject area of chemistry that you are interested in, especially in terms of your degree or your future career aspirations. You will now have to select a couple of RSC journals that relate to your subject selection (say for example The Analyst and JAAS). The Royal Society of Chemistry Publishing website is:
Inspect a selected paper from each journal using the section questions above in Step 1. Record in your log-book your responses. Then prepare a final report on “The Structure of Chemical Publications”. You may wish to consider the following outline, but it is not essential to follow this as you will also be assessed in terms of the originality of your interpretation and reporting style. Your report could contain:
A summary of your observations about the structures The titles/authors/journal/volume/year/page numbers A critical analysis of the structure of both journals – use Table/s to list the
separate sections of the papers and how do they compare in style A critical viewpoint of how you as a chemist (wanting to read these journals in
an attempt to gain information for reporting material in a new publication or as
a review or as a need to find new ideas) have found that journal as an effective format for transferring information
Give specific examples of the text or data or information in Tables/Figures to support your argument in the report.
The length of the report is up to you. The layout, use of headings/sub-headings, tables etc is important. A few hints to help you:
1. It might be useful if the two papers are from inorganic/organic/materials journals (say Chemical Communications and Dalton Transactions OR Journal of Materials Chemistry and Journal of Chemical Research),
2. This will enable you to evaluate chemical formulae or reaction mechanisms and the different way of presenting chemistry when compared with analytical chemistry information,
3. Use tables/bullet points and summarise your comments. You will have to submit your Activity III report “The Structure of Chemical Publications” along with the paper produced in Steps 3-5 through ULearn as "Activity III. Chemical Publication- Assignment".
The deadline is one week before the second Academic Tutor’s visit. Also email copies to your academic tutor, PTY Administrator and cc to [email protected].
In addition, have the reports (properly bound) and your log-book available in hard copy to show to your Academic Tutor during the second visit for assessment. See section 3 or your Level 6 Handbook regarding the lateness penalty and retrieval requirements.
Step 3: Review the Scientific Material for a Selected Chemical Journal
You have now explored the structure of chemical papers published in scientific journals. It is important to stress that this is the main method used by research chemists to present their results for peer review and professional inspection (via the internet, abstracting services, journals in the library, etc).
Now the main part of this activity is to use the knowledge gained in Steps 1 and 2 and produce a chemical publication for submission to the “Editor” of a particular chemical journal. This activity is very important in terms of your career development, especially if you are considering a career in research or as a professional chemist. Moreover, in your final year of your degree you will be expected to write a research dissertation on your final year project. So learning how to take scientific research material (say your final year report) and produce a chemical paper for publication is a very important skill.
In the “Activity III – Tutorials” folder you will find various documents that contain research data relating to analytical – environmental, materials or inorganic chemistry reports. Inspect each document and select ONE that you will use to prepare your chemical publication. You may also on request to the Module Coordinator ask for
practical data from a level 2 practical you completed last year, and use that to prepare your paper. You must also select a specific chemical journal in which to present your finished paper. In order to do this you should have a look at the internet and possible details about chemical journals (chemistry, environmental, forensic, biomedical, materials), for example:
Having selected the journal, review the structure of that journal (in the manner of Steps 1 and 2). Now you are ready to start preparing the material from your selected document. Record all stages in your log-book (or record of work/diary).
The following suggestions might be useful:
Select the material for the Introduction and Experimental (Materials and Methods) sections first as this enables you to review the subject material and provide a selection of publications to reference in the text.
Leave the Abstract and Keywords to last (and maybe the title of the paper). Once you start on the Results and Discussion section make sure you do a
preliminary inspection of the data and decide what are the important results to include (not all results need to be published) and in what format (Tables/Figures). If you are reporting reaction mechanisms or equations decide on what material and how you are going to produce them in the paper. You will not be able to photocopy existing Figures as you have done before in coursework exercises in levels 1 and 2.
Remember to be concise and factually correct, so plan the order of presentation so it fits the aim/‘hypothesis’ of the research.
Check all calculations and statistical evaluations such that you can judge from previous papers or the “Guide to Authors” for that journal how the data should be presented in Tables and Figures (including what units, the style for reporting them, the number of significant figures).
Remember length is money as journals sometimes charge per page to publish work.
Now you are ready to ‘build’ your chemical publication. It is suggested that before you start you should do the following:
1. Obtain from the internet and read the ‘Instructions/Information/Guide for Authors’ and Copyright documentation for your selected journal.
2. Obtain a copy of a previous published paper from your selected journal (using ScienceDirect or the Web of Knowledge – instructions available in the “Activity III – Tutorials” folder).
3. Select one that is similar in subject to that of the documentation you are using to prepare your paper. This paper will provide you with information about the style of presentation you should use. Please do not just copy your example!
4. Now prepare your chemical publication!
Step 5: Submit to the Editor of the Selected Journal
“The Structure of Chemical Publications” along with the paper produced in Steps 3-5 should be submitted using "Activity III. Assignment" in ULearn. The visiting Academic Tutor in collaboration with the Industrial Tutor will assess the activity during the second industrial visit according to established criteria. See section 3 above regarding the lateness penalty and retrieval requirements.
All parts should be available in hard copy for assessment during the visit, including the log-book.
35
Activity IV. Planning and Facilitating Meetings
Time Period: this activity should be done 3.5 to 6 months after the start of the placement (before the first Industrial visit by the Academic Tutor). Please make sure that you have not completed Activity III as you may only select one activity from Period 2.
During your placement you should have participated in group meetings. As you progress in your professional career you will probably have to organise a meeting for your group or others in the company. After organising a few dinners at your house, you will surely have a basic idea of what is necessary to plan and carry-out a successful evening, but a company will require a little bit more formality in the preparation and delivery of a business meeting.
Like in other activities proposed in this module, you are asked to take the initiative and approach your supervisor and others in the company. Be proactive and ask questions and record details so you are able to prepare a log-book (example: find it at the end of the activity) that records all the steps in completing the activity.
Follow the steps suggested and remember that you might want to modify some of the points in undertaking the activity but the final objective is to have you in charge of organising the meeting.
Step 1: Establish Your Role
1. Organise an interview with your supervisor or group leader and arrange to organise a group meeting.
2. Think about the meeting before you see this person. Think through how you will present this to your supervisor or group leader. "I have been asked by the university . . . ." might be an easy solution, but not one that will help you to complete the activity. Be professional in approaching the staff of your company about the need to plan and facilitate a professional business meeting.
3. Discuss with your supervisor or group leader the type of meeting you will organise and your role in it. Find out: will you be the facilitator, the minute taker or maybe both?
Who in the section/group are to attend the meeting and how do get in touch with them? What is the reason for the meeting? What is the date and time of the meeting?
Is there an agenda already established? If not should you put it together? How? Is the agenda defined by the group leader or is it an open meetings? Some companies will have one person establishing the agenda, others will have an open agenda (everybody can contribute to it)
Establish if there are minutes of a previous meeting and if they have already been distributed or you should do so.
36
4. Also interview the person that regularly organises the group or section meetings to explain what has been arranged with the group leader and get instructions on how to proceed:
Is there a need for any specific equipment (computers, wide screen, audio, video, etc.)?
Is it customary to serve some refreshments? How are the minutes taken, what are the main points to consider? (is
the person who is regularly in charge of taking the minutes still going to do it, or will it just be you who will take them as an exercise).
It is important that you keep a record of all the stages undertaken in completing the final assessment goals of the activity. Complete a log-book which records your objectives, actions and outcomes through all stages. This log-book will be assessed as part of the activity mark.
Step 2: Have the meeting
Read the guide "Planning and Facilitating a Meeting" in the folder titled "Activity IV. Planning a Meeting - Tutorials". You should have an idea now not only of what is necessary, but also where and when you can book the room for the meeting, find the equipment to be placed in the room, etc. It is YOUR responsibility that all the components are in place at the time of the meeting.
Check the guide to make sure you:
1. have everything in place prior to the meeting: Organise the agenda according to what you arranged with your group
leader Invite the members of the audience and make sure they have any
documents relating to the meeting Book the room Book the equipment needed and have it in the room Organise refreshments if it applies On the day of the meeting, visit the room and make sure everything is
in place before the starting time Organise additional papers, copies of the agenda, pens, etc. that you
will take to the meeting. 2. know what to do during the meeting.
As soon as the meeting is over, write up the minutes highlighting the action points.
Compare your minutes with those taken by the "regular" person in charge. If the company is interested, send your minutes to all of those who were present at the meeting. Obtain and record their comments and when necessary what course of action you will take to improve any problem areas.
Make sure that you complete your log-book for all stages of the activity.
Step 3: Get feedback
37
1. Organise a review meeting with the group leader or the person in charge of organising group meetings.
2. Get feedback on your participation. How did you perform? Positive and negative comments.
3. Take notes and record all of the information in your log-book.
Step 4: Guide of Good Practice, Report and Log-book
1. Write a "Guide of Good Practice for Planning and Facilitating a Meeting". You may wish to share your experiences with other placement colleagues via ULearn before preparing the guide. For that purpose we have included a Discussion Module, called "Activity IV. Organising a Meeting - Discussion".
The guide could contain the following suggestions: a list of contents, specific details on how to plan and facilitate a business meeting in a chemical company, special features on how the meeting varies between annual review meetings or section research report meetings, etc, and a checklist for the organiser. The length of the guide is not critical but it should be concise, easy to follow and informative in terms of real practice. The Guide should be sent using the "Activity IV. Planning and Facilitating a Meeting - Assignment " folder.
2. Write a report "Planning and Facilitating Meetings" on the experience using not only your views but also building on the feedback you have received. The report may include: A short reference to the interview with the group leader that lead to the
activity A general description of how the interview went How did you negotiated with the group leader? - in terms of deciding
what was to be your role in the meeting Anything additional that emerged in the interview. A detailed description of the steps you went through to have all the pieces
in place (keep all the notes you produced while working through it in your log-book)
How did the meeting go? (what where the good and bad points) The comments you have received as feedback after the meeting. How did you feel about being in the position you had during the meeting?
(whether facilitator, note taker, time keeper). Did it offer the opportunity to rehearse and undertake a new role at a business meeting?
Could you have been more proactive during the meeting? How did your minutes compare with the "professional" ones? What should you do differently next time you may be faced with a similar
task.
The Guide of Good Practice on Planning and Facilitating a Meeting and your report should be submitted using "Activity IV. Assignment" in ULearn.
38
Also email copies to your academic tutor, PTY Administrator and cc to [email protected].
The visiting Academic Tutor in collaboration with the Industrial Tutor will assess the activity during the second industrial visit according to established criteria. See section 3 or your Level 6 Handbook regarding the lateness penalty and retrieval requirements.
All parts should be available in hard copy for assessment during the visit, including the log-book.
You will also find the various tutorials on “Planning and Facilitating Meetings”.
Planning and Facilitating MeetingsThings to consider when organising a meeting
Here are some general ideas on how to conduct a meeting. You may need to discuss these issues with your industrial supervisor, group leader or whoever acts as the chairman of a group meeting:
How do you organise the activities you will be performing? (minute taking, time keeping, etc.)
How do you take the minutes? (each company, even each Chair will have a different idea of how to structure the minutes)
What documentation do you need to have available? How do you plan and produce an Agenda, etc.?
DO NOT take the suggestions presented here as instructions. You need to adapt the material to suite your company's style.
We have intentionally left the suggestions very broad so that you can be prepared to cover any type of meeting; namely a small laboratory group to a section meeting; weekly report or technical meeting. Most probably, you will conduct and take the minutes of a standard work-group meeting (maybe an hour in length at most), but in case you are given a bigger responsibility, we hope the ideas included here should help you to organise any size of business meeting (you can also use some of the details to plan a company social event or party!).
Remember to record everything in your log-book.
Meetings
Meetings are a forum for people to come together, share ideas and plan for change. Since they are by far the most effective medium for planning and delegation, it's worth trying to get them right!
Characteristics of good meetings:
Open: accessible to everyone, no matter what his or her experience, background, or beliefs might be. Open meeting agendas are set in advance, by asking through e-mail for topics to discuss. The minutes of the meeting are sent out to the main e-mail list, so people who didn't attend can contribute.
Effective: a meeting needs to produce a result. Informed: intelligent debate and discussion makes sure that the most effective
and relevant method or solution is agreed upon. Inclusive: minorities should be welcome and diversity of ideas and opinions
encouraged. Democratic: avoid alienating anyone with the discussion and decision-making
structure of your group. Organised: meetings need to be structured in order. Enjoyable: meetings can (and should) be fun and dynamic.
40
Empowering: we want people to walk away from meetings feeling better for having been there - believing they can make change happen, and looking forward to taking action.
Typical roles in meetings include:
Facilitator/Chairperson. This person sees that the meeting moves forward and follows the agenda, unless the agenda is changed by a vote of the group. She/he helps the meeting accomplish its goals.
Note taker. This person takes the minutes of the meeting. Timekeeper - reminds the Chairperson about the time constraints. Presenters. A variety of people can present various programmes, ideas, and
reports, as appropriate to the group. These people, if possible, should be different from the facilitator/Chairperson.
Greeter. In large organisational meetings, ask at least one person to welcome new people and get their names and addresses.
Organising your meeting
In order to have a successful meeting some steps need to be taken before, during and after the meeting. A few suggestions are provided. Remember to adapt to the standard practice used in your company for conducting a business meeting.
Before the meeting:
Estimate your budget. Establish the focus of the meeting, date to be held and reason for having it. Number of attendees and who they are: clients, staff only, public, focus group.
According to whom they are and the size of the group, decide the style of event: boardroom, classroom, or meeting room and check that the chosen room can house all the people that will be attending the meeting.
Produce a delegate list and approximate numbers. With the information of date, duration and people attending, decide on the
facilities and book it. Check if the facilities provide audio/video equipment for presentation (other
needs could be, laptop, special screens, etc.). There is some equipment that is standard but you may want to contact any presenters at the planned meeting to make sure you have the equipment they will require.
Make sure you share all information with the Chairperson and that you are instructed on the style required for taking the minutes (particularly if you are the one taking the minutes). See the end of the document for a description of the minutes.
If the meeting will be more than a couple of hours you may want to include food and drinks.
Once you have established the place, time, and the general topics, circulate this information along with the agenda (see the end of the document for a description) to those that will participate, inviting them to add to it (verify if this is the common procedure in your company). Whatever method is used to
41
prepare the agenda in your company, it is a good practice to get agreement on the agenda at the start of the meeting.
The day of the meeting:
Make sure people are directed to the meeting place. Inform the reception or group secretary that the meeting is being held (where and when). If it is a large meeting, you may need to place signs in the building or consider any other means to direct people to the meeting place.
Check the chosen location to see that all necessary equipment and furniture is there and works (Check A/V equipment --laptop, projector etc-- to ensure all cables, laptop, screen, microphone, mouse are present and in working condition)
Prepare miscellaneous items to bring: pens, pads, documents, presentation laser pointers, badges, business cards, name badges for the desk, printed handouts of material that will be covered, drinks or food, extra copies of the agenda and attachments of the agenda (as it is not uncommon that some of those present forget to bring their copy).
Read the agenda and organise your thoughts about it. If any particular issues are of concern, highlight them to help you focus.
Arrange chairs in circles or around tables to encourage discussion and cohesiveness. Podium and theatre arrangements encourage formality. Decide which arrangements are best. Set up fewer chairs rather than having chairs sitting empty in the meeting place. Arrange the chairs so that the view to the screen is clear.
For large group meetings: plan to start within 10 to 15 minutes of the official start time. For smaller meetings, particularly regular organisational meetings, start exactly on time.
During the meeting:
Make sure someone from your group has prepared to facilitate the meeting (Chairperson).
The Chairperson should introduce and welcome the speaker (if there is a person opening the meeting).
Somebody, possibly you, should be prepared to take the minutes of the meeting according to the style agreed.
Check if there is anyone present that you ought to introduce. Refreshments before the meeting will help create a sociable atmosphere and
also creates time to talk to the speaker about the group or presentation. Display some publicity materials on a table and have a mailing list ready (if
applicable). Ask those attending for the first time to leave their contact details.
After the meeting:
Thank the speaker and the audience for coming; announce the date and topic of the next activity/ event, and the next meeting.
Review the meeting.
42
Make sure that your note taker prepares the meeting minutes soon after the meeting. In what style should the minutes be reported and how do you indicate Action Points.
Call members who missed the meeting. Update them on the meeting's outcomes.
Once the minutes are prepared, write relevant reminder notes in your calendar. Before the next meeting, the officers and staff should be assured that tasks that
were agreed to at the last meeting are accomplished. Place a copy of the meeting notes in an organisational notebook or file so that
everyone knows where the institutional memory is kept if this is done in your company.
AGENDA
Using an agenda means:
1. You'll get through everything you want in the time allocated for the meeting.
2. The meeting is organised and set times are made so as to maintain a sense of order throughout the meeting.
3. It is important that you do not spend too long on unimportant topics: if this starts to happen, you can move on and agree to come back after the other agenda items have been covered.
4. There are a number of ways of setting an agenda:
You can e-mail it round and ask people to add items on to it.
One person can simply invite contributions and compile them.
Some groups simply pass a sheet of paper round at the start of the meeting. This is good, but it is more common to set the agenda in advance and circulate among those that will be present so that they know what to expect and organise their thoughts and any material to be circulated for discussion.
Adjust to whatever is the common practice in your company.
MINUTES AND ACTION POINTS
Minutes are the registry of the meeting. They need to summarise what has happened during it. Do not try to reproduce the meeting verbatim. On the contrary, unless otherwise indicated by the Chairman, follow the phrase "less is more"; refer to what has been agreed upon (decisions) and who is doing what (action points). Phrases should be grammatically complete. They should include a verb that is usually in past tense (as it is a report of what has happened). Each topic of the agenda should be addressed and a conclusion of the discussion recorded.
43
Key decisions: the group decisions should be recorded. If in doubt on anything that was said, check during the meeting as you write it. If you are in doubt about the accuracy of your information when preparing the final copy from your draft, send an e-mail to whoever made the comment so that the person helps you to clarify the details.
Action points: When a decision has been made about an action that should be undertaken, record the action, who is doing it, and the deadline. Highlight all action points. Read them out to all present at the end of the meeting to remind everyone what was agreed. Go over them at the start of the next meeting to check they've been done.
44
Activity V. Future Employability: CV and Interview
Time Period: 8.5 to 10.5 months after start of placement (before the third Industrial visit by Academic Tutor)
You are almost at the point of leaving the company. You will have another year at University and then you will probably be searching for a job. It is a great opportunity to have the view of professionals from the company on what they want when hiring new employees. You can contact the Human Resources personnel of your company. They are very busy people and it is in your best interest to get the most out of the time they will give you.
Not all companies have the same procedures, interests or methods. That is why an important part of this activity is to share what you have gathered in your company with others. You will be much better prepared when searching for a job if you have a spectrum of what the chemical industry expects from future employees.
The activity has various components:
Rewriting your Curriculum Vitae (CV) based on HR or your Industrial Supervisor input
Prepare a "Manual of Good Practice for CV Writing" based on the information gathered from your interaction with HR staff, other professionals or your supervisor
Having an interview rehearsal and then after discussion with other colleagues via Ulearn prepare a "Manual of Good Practice for Interviews"
A log-book in which you have recorded all the stages of undertaking the activity.
Step 1: Rewriting your Curriculum Vitae (CV)
1. Reorganise your CV as if you were applying to your company. Write the application letter as well. There could be some guidelines in the company’s website. You can find the in the folder "Activity V. CV and Interview - Tutorials".
2. Identify the person in Human Resources (HR) in your company that could help you with your CV. This may be the person that reads the CVs of prospective employees, that interviews them, or whoever has the time and is willing to help you, it could be your supervisor if they are available. Contact this person and arrange two meetings: the first meeting to go over your CV and application letter to improve them and the second one to have an interview rehearsal.
3. For the meeting, organise your mind. You want to present yourself as a possible candidate for employment and want to find out if you are a person they would employ, and if you are not, why not! Ask the person to consider your CV and letter: what do they like, what needs to be changed, what is
45
missing, what skills do employers want, what do you have that can become your selling point. TAKE NOTES!!! Record all the information in your log-book. You never know what piece of information might become clearer later on in undertaking this activity. Be dynamic and to the point, the person does not have time!
The point list offered above is just a guide to help you complete the activity. You can drop some and add others. It is your opportunity to understand the operation of the Human Resources staff. Try to make the most of this activity as a means of preparing yourself for job hunting in the near future.
Furthermore, ask other professionals in your company for their own personal viewpoint. How did they prepare their CV? How did they prepare for an interview? Obtain a clear overview of this important area in terms of your future employability potential.
Step 2: Manual of Good Practice for CV Writing
Based on the experience in Step 1:
1. Re-write your CV and application letter according to the suggestions received. Is it significantly different from the original one?
2. Post in the discussion facility of ULearn "Recommendations When Applying to a Company".
3. Write a "Manual of Good Practice for CV Writing" based on ALL the information posted in the discussion group (ULearn)
Remember that each company has their own "style" of recruiting; so do not take one person's opinion as the only possible code of good practice. Interact with your placement colleagues in other companies through ULearn to get a feel for common trends and particulars. DO NOT USE ANY INFORMATION THAT IS CONFIDENTIAL TO YOUR COMPANY.
Your new CV and application letter and the "Manual of Good Practice for CV Writing" should be submitted using "Activity V. Assignment" in ULearn.
Also email copies to your academic tutor, PTY Administrator and cc to [email protected].
A hard copy of each of them and your log-book should be available for assessment by your Academic Tutor at the time of the third visit. See section 3 or your Level 6 Handbook regarding the lateness penalty and retrieval requirements.
Step 3: Interview Rehearsal
1. Organise the second meeting for an interview rehearsal once you have the new version of your CV and application letter. Contact the person who helped you with your CV. If this person is not available, find somebody else who has
participated in interviews in the company to help you. Establish the purpose of the meeting (to have an interview rehearsal) and determine the place and time of the meeting.
2. Organise your thoughts for the interview. By asking for the interview you are telling them you are interested in working for them. Why? Make sure you have information on the company and anything else that provides an answer as to why you want to work for their company.
3. If possible, once the interview is finished ask for an evaluation of how you did, what was right and what could be improved.
These are just suggestions to help you. You can drop some and add others. You have to become responsible for your own improvement and therefore your initiative is what is needed at this stage. Remember to record all of the information in your log-book.
Step 4: Manual of Good Practice for Interviews
Based on how you felt and the evaluation of the person interviewing you:
1. Post in the discussion facility of Ulearn in bullet-point form "Recommendations for Participating in an Interview".
2. Write a "Manual of Good Practice for Interviews" using all the contributions posted in ULearn.
3. Write a couple of paragraphs on how the activity (the meetings, rewriting your CV and the interview rehearsal) has helped you develop your personal level of professionalism when you send your assignment (Assignment).
The "Manual of Good Practice for Interviews" should be submitted using "Activity V. Assignment " in ULearn.
Also email copies to your academic tutor, PTY Administrator and cc to [email protected].
A hard copy and your log-book should be available for assessment by your Academic Tutor at the time of the third visit. See section 3 or your Level 6 Handbook regarding the lateness penalty and retrieval requirements.
Tel: 01111 123123 or 07000 123123Nationality: British
I am a highly motivated and competent BSc Psychology student seeking a graduate position to develop my quantitative research skills. I have achieved consistently high grades with an overall average of 70%. I am also organised able to manage my time responsibly between academic commitments and other interests including volunteering at a local youth group.
Higher Education
University of Bath BSc Psychology (Hons) Degree average: 70% First ClassBath, B&NES (currently in Year 2) Cognitive (65%), Clinical (71%) Sept 2004 - present Research Methods (74%),
Developmental (68%), Social (72%)
Education
St. James School A Levels Psychology (A), English Lit (B),Bath, B&NES Biology (C)Sept-1997 - July 2004 A/S Levels Politics (B), Music (C)
GCSEs 5 As, 3 Bs and 2Cs including Mathematics, English Lit. and Double Science.
Employment History
Psychology Department Research Assistant Responsibilities: University of Bath Recruiting and liaising with Bath, B&NES participating organisations; coding, June 2005- Sept 2005 entering and analysing data on SPSS; assisting report write-up. Blogdins Dept. Store Sales Assistant Responsibilities:Kitchenware Dept. Advising customers on specialistBath, B&NES and domestic catering products;Oct 2002 – April 2004 responsible for orders of own section; some staff training.
Skills and InterestsI have a full, clean driving license.I am a volunteer for a local youth group for which I have been fully trained. I lead craft activities and talk to the young people about the issues in their lives, which demands strong communication skills, sensitivity and understanding of good practice.I enjoy musical activities and play the trumpet in the University Wind Band.
RefereesDr John Johnny Mr Greg GregoryUniversity of Bath Blogger StreetSt John’s Road Bath BA76 753Bath BA53 980 Tel: 08927 8288288


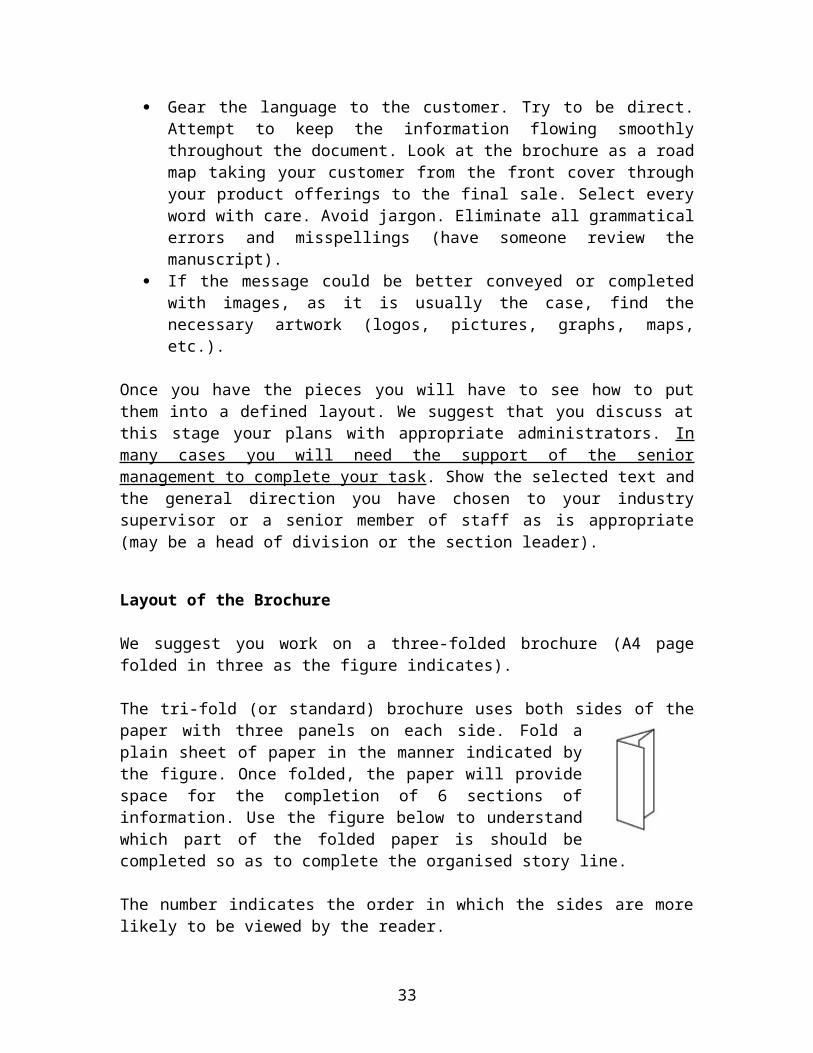


![MChem Computing and Chemistry [B14SC3]](https://static.documents.pub/doc/80x56/568144ab550346895db17595/mchem-computing-and-chemistry-b14sc3.jpg)
![Inquiry for Juniors (uLearn 11)[1]](https://static.documents.pub/doc/80x56/559386b21a28aba6058b4798/inquiry-for-juniors-ulearn-111.jpg)


