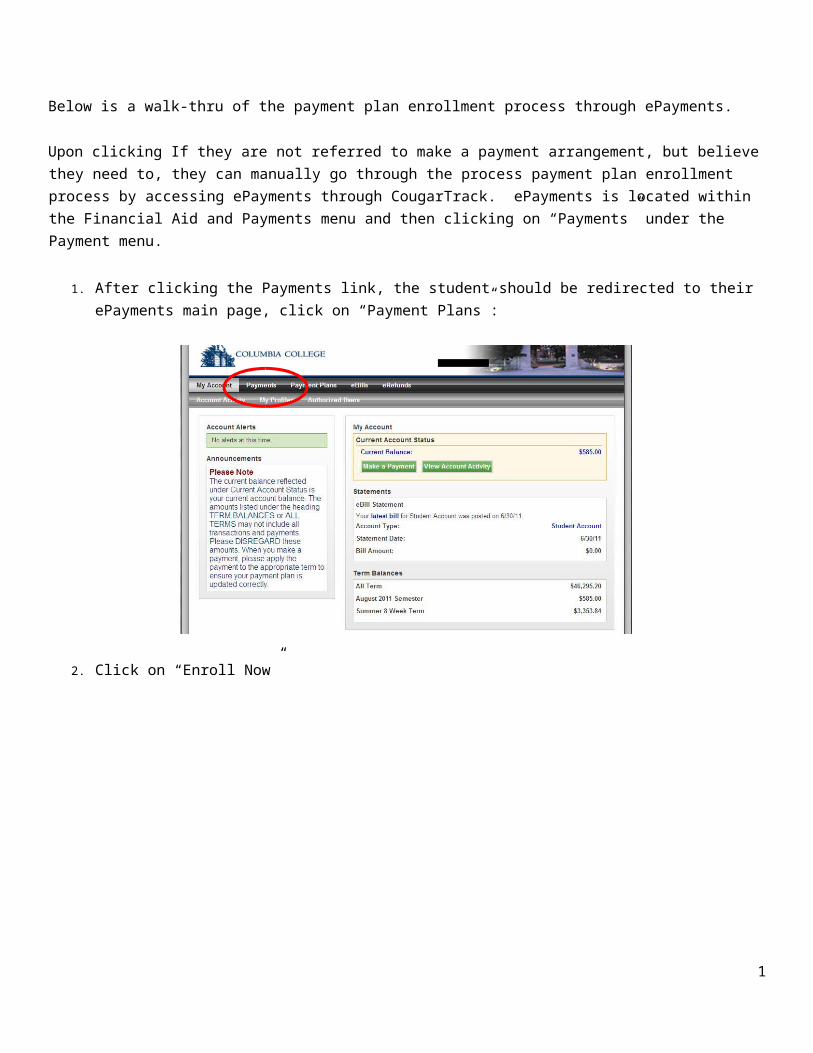
Below is a walk-thru of the payment plan enrollment process through ePayments. Upon clicking If they are not referred to make a payment arrangement, but believe they need to, they can manually go through the process payment plan enrollment process by accessing ePayments through CougarTrack. ePayments is located within the Financial Aid and Payments menu and then clicking on “Payments” under the Payment menu. 1. After clicking the Payments link, the student should be redirected to their ePayments main page, click on “Payment Plans”: 2. Click on “Enroll Now” 1
Transcript
Below is a walk-thru of the payment plan enrollment process through ePayments. Upon clicking If they are not referred to make a payment arrangement, but believe they need to, they can manually go through the process payment plan enrollment process by accessing ePayments through CougarTrack. ePayments is located within the Financial Aid and Payments menu and then clicking on “Payments” under the Payment menu.
1. After clicking the Payments link, the student should be redirected to their ePayments main page, click on “Payment Plans”:
2. Click on “Enroll Now”
3. The student will need to choose the appropriate term for their payment plan from the drop-down box.
1
4. It is not uncommon for there to be multiple terms for payment plans. Also, classes that begin in August and January will have their payment plans found under the “August 20XX Semester” or “January 20XX” semester, even if they are 8-week session classes. Once they have chosen the appropriate session for their payment plan, they will click the “GO” button:
2
3
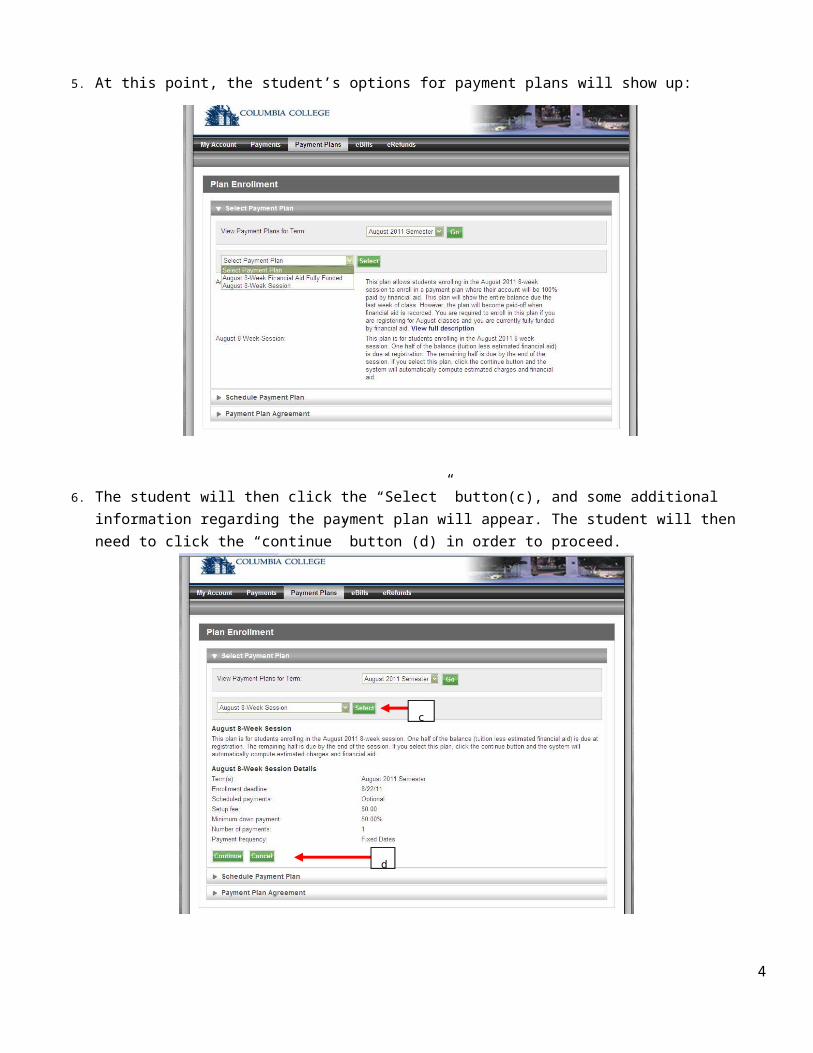
5. At this point, the student’s options for payment plans will show up:
6. The student will then click the “Select” button(c), and some additional information regarding the payment plan will appear. The student will then need to click the “continue” button (d) in order to proceed.
4
d
c
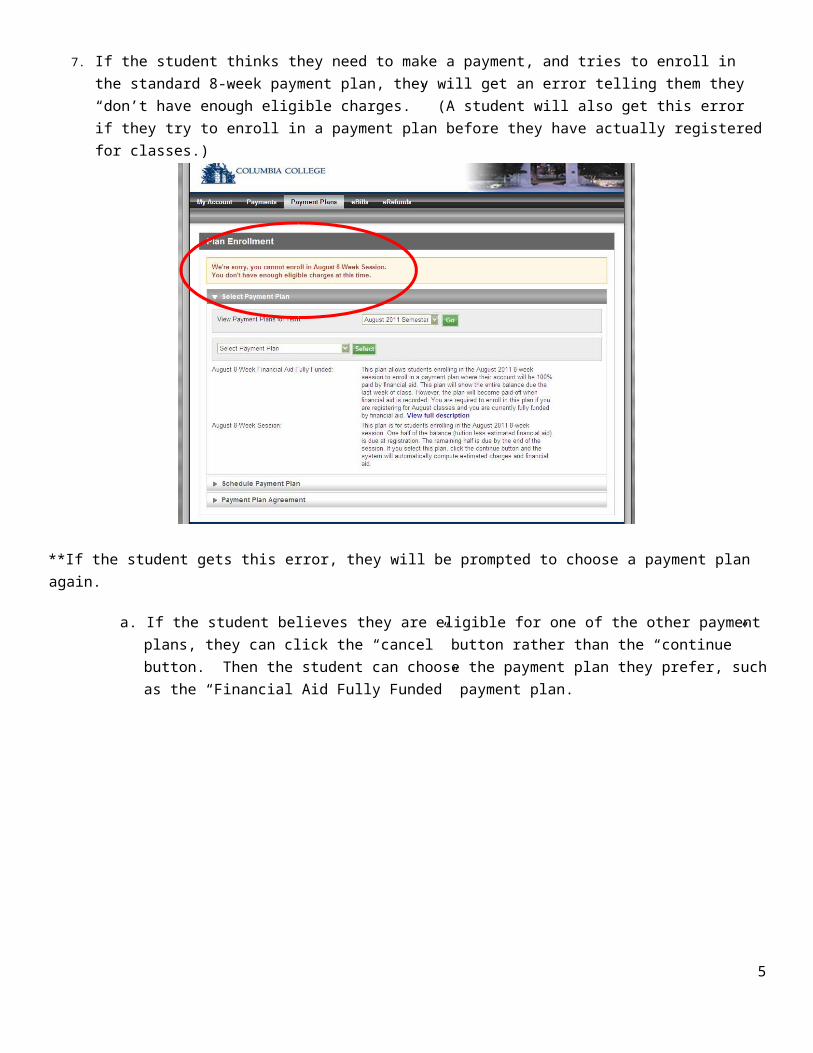
7. If the student thinks they need to make a payment, and tries to enroll in the standard 8-week payment plan, they will get an error telling them they “don’t have enough eligible charges.” (A student will also get this error if they try to enroll in a payment plan before they have actually registered for classes.)
**If the student gets this error, they will be prompted to choose a payment plan again.
a. If the student believes they are eligible for one of the other payment plans, they can click the “cancel” button rather than the “continue” button. Then the student can choose the payment plan they prefer, such as the “Financial Aid Fully Funded” payment plan.
5
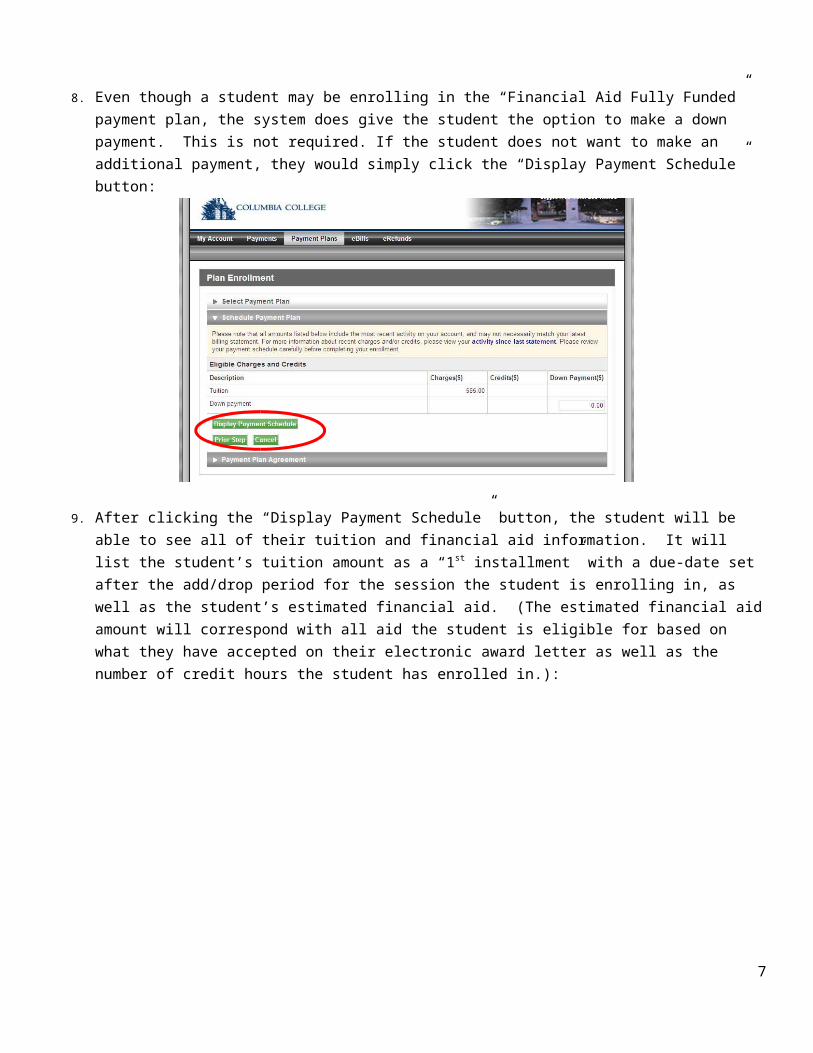
8. Even though a student may be enrolling in the “Financial Aid Fully Funded” payment plan, the system does give the student the option to make a down payment. This is not required. If the student does not want to make an additional payment, they would simply click the “Display Payment Schedule” button:
9. After clicking the “Display Payment Schedule” button, the student will be able to see all of their tuition and financial aid information. It will list the student’s tuition amount as a “1st installment” with a due-date set after the add/drop period for the session the student is enrolling in, as well as the student’s estimated financial aid. (The estimated financial aid amount will correspond with all aid the student is eligible for based on what they have accepted on their electronic award letter as well as the number of credit hours the student has enrolled in.):
6
10. The student will need to choose whether they would like to set up an automatic payment. This is a personal payment on top of their awarded financial aid for the session, not to make their financial aid pay for their bill. In cases where a student is fully funded by their financial aid, they should always choose the “No” button before clicking “continue”.
11. At this point the student will see their payment plan agreement. The student will need to click the “I Agree” checkbox, and has the option to print a copy of the agreement before clicking “continue”.
12. When the student has successfully completed enrollment in their payment plan, they will get an announcement indicating they have completed the process.