+ All Categories
Home > Documents > Mission-critical database performance: Intel Xeon ... Principled Technologies test report 2 family...

Mission-critical database performance: Intel Xeon ... Principled Technologies test report 2 family...

Date post: 17-May-2018
Category:
Upload: vanduong
View: 216 times
Download: 3 times
Share this document with a friend
39
FEBRUARY 2014 A PRINCIPLED TECHNOLOGIES TEST REPORT Commissioned by Intel Corp. MISSION-CRITICAL DATABASE PERFORMANCE: INTEL XEON PROCESSOR E7 V2 FAMILY VS. IBM POWER7+ Your large databases are not just part of your business; they are vital to operation day in and day out. For these mission-critical workloads, not just any hardware will do. You need reliable, high-performing systems to power these database applications and ensure employees and customers can complete the tasks that they need to. High-performance processors can ensure the performance you need, but which performs the best, saves on acquisition costs, reduces power consumption, and leaves headroom for future growth? In our labs at Principled Technologies, we compared two systems based on high-performance processors: a new four-socket Intel Xeon processor E7-4890 v2-based server versus an IBM POWER7+ processor-based system. Running bare-metal Oracle® Database 12c workloads, the Intel Xeon processor-based system outperformed the IBM POWER7+ system by 15.9 percent in our tests. What’s more, the better-performing Intel Xeon processor-based system costs 69.4 percent less, used up to 42.0 percent less idle power, and used 33.5 percent less active power, while leaving twice the headroom for future growth. All these factors lead to a 5.7x performance per system watt per dollar advantage. These results show that servers harnessing the new Intel Xeon processor E7 v2 family can deliver the high performance per system watt per dollar you demand for your large, mission-critical databases while helping your bottom line. * Reflects price estimates Intel provided.
Transcript

FEBRUARY 2014

A PRINCIPLED TECHNOLOGIES TEST REPORT Commissioned by Intel Corp.

MISSION-CRITICAL DATABASE PERFORMANCE: INTEL XEON PROCESSOR E7 V2 FAMILY VS. IBM POWER7+

Your large databases are not just part of your business; they are vital to

operation day in and day out. For these mission-critical workloads, not just any

hardware will do. You need reliable, high-performing systems to power these database

applications and ensure employees and customers can complete the tasks that they

need to.

High-performance processors can ensure the performance you need, but which

performs the best, saves on acquisition costs, reduces power consumption, and leaves

headroom for future growth? In our labs at Principled Technologies, we compared two

systems based on high-performance processors: a new four-socket Intel Xeon processor

E7-4890 v2-based server versus an IBM POWER7+ processor-based system. Running

bare-metal Oracle® Database 12c workloads, the Intel Xeon processor-based system

outperformed the IBM POWER7+ system by 15.9 percent in our tests. What’s more, the

better-performing Intel Xeon processor-based system costs 69.4 percent less, used up to

42.0 percent less idle power, and used 33.5 percent less active power, while leaving

twice the headroom for future growth. All these factors lead to a 5.7x performance per

system watt per dollar advantage.

These results show that servers harnessing the new Intel Xeon processor E7 v2

family can deliver the high performance per system watt per dollar you demand for your

large, mission-critical databases while helping your bottom line.

* Reflects price estimates Intel provided.

A Principled Technologies test report 2

Mission-critical database performance: Intel Xeon processor E7 v2 family vs. IBM POWER7+

(Revised 2/28/14 to include full methodology)

MORE PERFORMANCE MEANS BETTER BUSINESS Customers and employees alike need to access your critical databases without

waiting. By maximizing the performance of your infrastructure, you ensure that business

keeps moving as quickly as possible. This has the potential to lead to such benefits as

increased user satisfaction, larger profits, and even decreased infrastructure costs as

you eliminate underperforming hardware.

These critical databases need specialized, reliable processing hardware that can

deliver the highest performance possible. To help determine the performance, power

consumption, and processor headroom that certain processor architecture might bring

to your Oracle Database environment, we compared the Intel Xeon processor E7-4890

v2 against the IBM POWER7+ using a supply chain warehouse OLTP database workload

on Oracle Database 12c. We used the open-source HammerDB utility as our test tool.

For system configuration information, see Appendix A. To learn how we tested,

see our step-by-step details in Appendix B.

And the winner is… In our lab tests, the Intel Xeon processor E7-4890 v2-powered server

outperformed the IBM POWER7+ processor-based system. The Intel Xeon processor

system was able to handle 1.16 times the number of Oracle transactions per minute

that the IBM POWER7+ system could handle (see Figure 1). This means that the Intel

Xeon processor E7 v2 family-based server delivered 15.9 percent more performance

than the IBM POWER7+ system for the Oracle database in our tests.

Figure 1: The Intel Xeon processor E7-4890 v2-powered server delivered 15.9 percent more database performance than the IBM POWER7+-based server delivered.

1.00

1.16

0.00

0.20

0.40

0.60

0.80

1.00

1.20

1.40

IBM POWER7+ processor-basedserver

Intel Xeon processor E7-4890 v2-based server

Re

lati

ve p

erf

orm

ance

Database performance

A Principled Technologies test report 3

Mission-critical database performance: Intel Xeon processor E7 v2 family vs. IBM POWER7+

(Revised 2/28/14 to include full methodology)

Factoring in system cost Increased performance for critical database workloads is important, but at what

cost does that large increase come? In this case, the high-performing Intel Xeon

processor E7-4890 v2-based server would cost significantly less—69.4 percent less—

than its lower-performing competitor. Figure 2 compares the estimated price for the

configured four-socket Intel Xeon processor E7-4890 v2-powered server compared to

the IBM Power 750 Express server with IBM POWER7+ 4.0 GHz processors.1 These prices

give Intel Xeon processor E7-4890 v2-powered server a 3.2x advantage in reducing

acquisition cost, which frees up money for other efforts.

Figure 2: The Intel Xeon processor E7-4890 v2-powered server would cost an estimated 69.4 percent less to purchase than the IBM POWER7+-based server.

$189,970

$58,053(estimate)

$0

$50,000

$100,000

$150,000

$200,000

IBM POWER7+ processor-basedserver

Intel Xeon processor E7-4890 v2-based server

US

do

llar

s

Hardware purchase cost(lower is better)

Don’t forget to look at power consumption The cost of powering high-performance hardware day in and day out has a great

effect on your ongoing operating expenses. The lower the power consumption, the

better for your budget. While we ran our tests on the systems, we recorded the power

they consumed both while idle and while running our Oracle Database 12c workload.

As Figure 3 shows, the Intel Xeon processor E7-4890 v2-based server consumed

42.0 percent less power while idle than the IBM POWER7+ processor-based system

during a two-minute sampling period.

1 Intel provided the estimated price for the Intel Xeon processor E7-4890 v2-based server. Price of the IBM POWER7+ processor-based server is list price from Avnet, February 2014. Prices do not include tax or shipping.

A Principled Technologies test report 4

Mission-critical database performance: Intel Xeon processor E7 v2 family vs. IBM POWER7+

(Revised 2/28/14 to include full methodology)

Figure 3: The Intel Xeon processor E7-4890 v2-powered server consumed 42.0 percent less power than the IBM POWER7+-based server while idle.

655

380

0

100

200

300

400

500

600

700

IBM POWER7+ processor-basedserver

Intel Xeon processor E7-4890 v2-based server

Wat

ts

Power consumption while idle(lower is better)

The Intel Xeon processor E7-4890 v2-based server also consumed 33.5 percent

less power while running the test workload (see Figure 4).

Figure 4: The Intel Xeon processor E7-4890 v2-powered server consumed 33.5 percent less power than the IBM POWER7+-based server while under load.

1,339

891

0

200

400

600

800

1,000

1,200

1,400

1,600

IBM POWER7+ processor-basedserver

Intel Xeon processor E7-4890 v2-based server

Wat

ts

Power consumption under load(lower is better)

These results show that you don’t have to sacrifice power efficiency to get the

best performance out of your critical database workloads. The Intel Xeon processor E7-

4890 v2-based server was able to provide both higher performance and lower power

consumption in our tests, which can save you on operating costs.

Looking to the future The Intel Xeon processor E7-4890 v2-based server delivered 15.9 percent more

database performance, but how taxed was the system compared to its competitor?

A Principled Technologies test report 5

Mission-critical database performance: Intel Xeon processor E7 v2 family vs. IBM POWER7+

(Revised 2/28/14 to include full methodology)

As Figure 5 shows, The Intel Xeon processor E7-4890 v2-based system ran the

workload with an average CPU utilization of 61.5 percent, compared to the IBM

POWER7+-based system’s 81.0 percent. This means that the Intel Xeon processor-based

server had nearly twice the remaining headroom to handle more workloads than the

IBM POWER7+-based server. The remaining headroom would allow you to add more

workloads as your business grows in the future, without the cost of adding servers to

your infrastructure.

Figure 5: The Intel Xeon processor E7-4890 v2-powered server handled the workload with nearly twice the headroom of the IBM POWER7+-based server.

81.0%

61.5%

0%

10%

20%

30%

40%

50%

60%

70%

80%

90%

IBM POWER7+ processor-basedserver

Intel Xeon processor E7-4890 v2-based server

Pe

rce

nta

ge p

roce

sso

r uti

liza

tio

nCPU utilization

In addition to increased processor headroom for future growth, the Intel Xeon

processor E7-4890 v2-based system supports six times more memory than the IBM

Power 750 Express (6 TB vs. 1 TB), which can lead to performance advantages with

memory-intensive applications. This increased memory footprint can be particularly

beneficial to in-memory applications such as newer analytics and business intelligence

programs.

WHAT WE TESTED About the new Intel Xeon processor E7 v2 family

Intel designed the new Intel Xeon processor E7 v2 family to support mission-

critical, high-performance workloads by adding up to 50 percent more cores/threads

and 25 percent more cache to provide significant jumps in performance from previous

releases. The Intel Xeon processor E7 v2 family provides up to 6TB DDR3 memory,

supports up to 24 DDR3 DIMMs per socket, and supports up to 1,600MHz DDR3 speeds

to improve performance and increase scalability.

The Intel Xeon processor E7 v2 family supports all the previous reliability,

availability, and serviceability features of previous processor releases to support critical

workloads. With Intel Run Sure technology, these processors add new RAS features,

A Principled Technologies test report 6

Mission-critical database performance: Intel Xeon processor E7 v2 family vs. IBM POWER7+

(Revised 2/28/14 to include full methodology)

including eMCA Gen 1, MCA Recovery – Execution Path, MCA IO, and PCIe Live Error

Recovery.

For more information about the Intel Xeon processor E7 v2 product family, visit

www.intel.com/content/www/us/en/processors/xeon/xeon-e7-v2-family-details.html.

About our test tool, HammerDB HammerDB is an open-source benchmark tool that tests the database

performance of many leading databases, including Oracle Database, Microsoft® SQL

Server®, PostgreSQL, MySQL™, and more. The benchmark includes two built-in

workloads derived from industry-standard benchmarks: a transactional (TPC-C-like)

workload and a data warehouse (TPCH-like) workload. For this study, we used the

transactional workload. Our tests were not official TPC results and are not comparable

in any manner.

For more information about HammerDB, visit hammerora.sourceforge.net.

IN CONCLUSION Choosing the right processor hardware to power your most important database

applications can make or break how your business operates. For large, mission-critical

databases, high-performance, reliable processors are key to keeping your databases up

and running and performing well.

In our hands-on lab tests with large Oracle 12c databases, we found that a four-

socket server powered by the Intel Xeon processor E7-4890 v2 delivered dramatically

better database performance than an IBM POWER7+ processor-based system,

increasing transactions per minute by 15.9 percent. Fewer servers or higher capacity at

a 69.4 percent lower acquisition cost enables IT use the savings and innovate in other

areas. Plus, in our tests the Intel Xeon processor E7-4890 v2-based server used up to

42.0 percent less power while idle and up to 33.5 percent less power while running our

database workload, which in a real-world environment would reduce ongoing

operational expense for energy. If you put these numbers all together, that equates to a

5.7x performance per steady-state system watt per acquisition dollar advantage – a key

metric to ensure your datacenter space is efficient. The Intel Xeon processor E7 v2

family-based system also left twice the processor headroom to allow for future growth.

Selecting systems that can deliver such top-of-the-line performance can ready

your business to meet customer needs better, increasing satisfaction to improve your

bottom line. Higher performing systems can also reduce the number of servers you

need to house, power, and run, which makes your infrastructure more efficient and

reliable.

A Principled Technologies test report 7

Mission-critical database performance: Intel Xeon processor E7 v2 family vs. IBM POWER7+

(Revised 2/28/14 to include full methodology)

APPENDIX A – SYSTEM CONFIGURATION INFORMATION Figure 6 provides detailed configuration information for the test systems.

System Intel Xeon processor E7-4890 v2-

based server IBM POWER 7+processor-based

server

Power supplies

Total number 2 2

Vendor and model number Intel DPS-1200TB A Emerson 7001599-J000

Wattage of each (W) 1,200 1,925

Cooling fans

Total number 8 5

Vendor and model number PSD1209PMBX-A IBM PN 00E7691

Dimensions (h × w) of each 3.8″ × 3.8″ 3.25″ × 3.25″

Volts 12 12

Amps 2.2 4.1

General

Number of processor sockets 4 4 (2 x 4-core) dual-chip modules

Number of cores per processor 15 8

Number of hardware threads per core

2 4

System power management policy Ondemand governor Dynamic Power Savings (Favor Performance)

CPU

Vendor Intel IBM

Name Xeon POWER7+

Model number E7-4890 v2 POWER7+ 4.0 GHz

Socket type LGA2011 POWER7

Core frequency (GHz) 2.80 4.00

Bus frequency 8.00 GT/s 100 GB/s (sustained)

L1 cache 64 KB Instruction (8-way Set-associative)

32 KB + 32 KB

L2 cache 256 KB Unified (8-way Set-associative)

256 KB (per core)

L3 cache 37.5 MB Unified (Fully Associative)

10 MB (per core)

Platform

Vendor and model number Intel C606J Chipset-based server Power 750 Express

System model number Reference platform (BRICKLAND) 8408-E8D

BIOS name and version BIVTSDP1.86B.0046.R04.1312041636 (12/04/2013)

AM770_052

A Principled Technologies test report 8

Mission-critical database performance: Intel Xeon processor E7 v2 family vs. IBM POWER7+

(Revised 2/28/14 to include full methodology)

System Intel Xeon processor E7-4890 v2-

based server IBM POWER 7+processor-based

server

BIOS settings

Turbo Enabled HT Enabled HW Prefetch Enabled ACL Prefetch Enabled NUMA Enabled EIST Enabled C State Enabled

Default

Memory module(s)

Total RAM in system (GB) 1,024 1,024

Maximum memory configuration possible (TB)

6 1

Type #1

Vendor and model number Samsung® M393B2G70BH0-CK0 Micron® MT36KSF2G72PZ-1G4

Type DDR3 DDR3

Speed (MHz) 1,600 1,066

Speed running in the system (MHz) 1,600 1,333

Timing/Latency (tCL-tRCD-tRP-tRASmin)

11-11-11 9-9-9

Size (GB) 16 16

Number of RAM module(s) 32 64

Chip organization Double-sided Double-sided

Rank Dual-rank Dual-rank

Type #2

Vendor and model number Micron 36JSF2G72PZ-1G6E1 N/A

Type DDR3 N/A

Speed (MHz) 1,600 N/A

Speed running in the system (MHz) 1,600 N/A

Timing/Latency (tCL-tRCD-tRP-tRASmin)

11-11-11 N/A

Size (GB) 16 N/A

Number of RAM module(s) 32 N/A

Chip organization Dual-sided N/A

Rank Dual-rank N/A

Operating system

Name Red Hat Enterprise Linux 6.5 AIX 7.1 TL3 SP1

File system ext4 JFS2

Kernel 2.6.32-431.3.1.el6.x86_64 64-bit

Language English English

RAID controller

Vendor and model number LSI SAS9217-8i IBM PCIe 3Gb SAS Controller

Firmware version 07.22.01.00 0422003f

Hard drives

Vendor and model number Seagate ST9300653SS IBM 9FU066-039

A Principled Technologies test report 9

Mission-critical database performance: Intel Xeon processor E7 v2 family vs. IBM POWER7+

(Revised 2/28/14 to include full methodology)

System Intel Xeon processor E7-4890 v2-

based server IBM POWER 7+processor-based

server

Number of drives 2 2

Size (GB) 300 146.8

RPM 15,000 15,000

Type SAS SAS

Ethernet adapters

First network adapter

Vendor and model number Intel Corporation 82599ES 10-Gigabit SFI/SFP+ Network Connection

IBM Integrated Multifunction Card with Copper SFP+ 10GbE

Type Dual-port Onboard dual-port

Second network adapter

Vendor and model number Intel Corporation 82576 Gigabit Network Connection

Broadcom® BCM95719A1904G

Type Quad-port Quad-port

Fibre adapter

Vendor and model number HP PN AJ63A (Emulex LPE12002) IBM PN 10N9824 (Emulex LPE12002)

Type PCI Express PCI Express

Firmware 2.01A12 2.02x7

Optical drive(s)

Vendor and model number TEAC DV-W28 - ATAPI IBM PN 74Y7341

Type DVD-RW DVD-RW

USB ports

Number 4 3

Type 2.0 2.0

Figure 6: System configuration information for the test systems.

A Principled Technologies test report 10

Mission-critical database performance: Intel Xeon processor E7 v2 family vs. IBM POWER7+

(Revised 2/28/14 to include full methodology)

APPENDIX B – HOW WE TESTED

Configuring Red Hat Enterprise Linux and Oracle Database 12c We installed Red Hat Enterprise Linux on the Intel server, then configured settings as we specify below. Screen

outputs are in grey boxes.

1. Disable SELINUX. vi /etc/selinux/config

SELINUX=disabled

2. Disable the firewall for IPv4 and IPv6. chkconfig iptables off

chkconfig ip6tables off

3. To update the operating system packages, type the following: yum update -y

Installed:

kernel.x86_64 0:2.6.32-431.3.1.el6

Updated:

ca-certificates.noarch 0:2013.1.95-65.1.el6_5

dmidecode.x86_64 1:2.11-2.el6_1

dracut.noarch 0:004-336.el6_5.2

dracut-kernel.noarch 0:004-336.el6_5.2

ethtool.x86_64 2:3.5-1.2.el6_5

kernel-firmware.noarch 0:2.6.32-431.3.1.el6

nspr.x86_64 0:4.10.2-1.el6_5

nss.x86_64 0:3.15.3-3.el6_5

nss-sysinit.x86_64 0:3.15.3-3.el6_5

nss-tools.x86_64 0:3.15.3-3.el6_5

nss-util.x86_64 0:3.15.3-1.el6_5

openldap.x86_64 0:2.4.23-34.el6_5.1

openssl.x86_64 0:1.0.1e-16.el6_5.4

p11-kit.x86_64 0:0.18.5-2.el6_5.2

p11-kit-trust.x86_64 0:0.18.5-2.el6_5.2

python.x86_64 0:2.6.6-52.el6

python-libs.x86_64 0:2.6.6-52.el6

tzdata.noarch 0:2013i-2.el6

yum.noarch 0:3.2.29-43.el6_5

yum-rhn-plugin.noarch 0:0.9.1-49.el6

4. To install additional packages, type the following commands:

yum install -y acpid cpuspeed wget vim nfs-utils openssh-clients man

lsscsi unzip smartmontools numactl ipmitool OpenIPMI

5. Reboot the server. reboot

6. Install additional packages with the following commands: yum install -y \

A Principled Technologies test report 11

Mission-critical database performance: Intel Xeon processor E7 v2 family vs. IBM POWER7+

(Revised 2/28/14 to include full methodology)

binutils \

compat-libcap1 \

compat-libstdc++-33 \

compat-libstdc++-33.i686 \

gcc \

gcc-c++ \

glibc \

glibc.i686 \

glibc-devel \

glibc-devel.i686 \

ksh \

libgcc \

libgcc.i686 \

libstdc++ \

libstdc++.i686 \

libstdc++-devel \

libstdc++-devel.i686 \

libaio \

libaio.i686 \

libaio-devel \

libaio-devel.i686 \

libXext \

libXext.i686 \

libXtst \

libXtst.i686 \

libX11 \

libX11.i686 \

libXau \

libXau.i686 \

libxcb \

libxcb.i686 \

libXi \

libXi.i686 \

make \

sysstat \

unixODBC \

unixODBC-devel \

xorg-x11-xauth \

xorg-x11-utils

7. Edit the sysctl file. vim /etc/sysctl.conf

A Principled Technologies test report 12

Mission-critical database performance: Intel Xeon processor E7 v2 family vs. IBM POWER7+

(Revised 2/28/14 to include full methodology)

fs.file-max = 6815744

kernel.sem = 250 32000 100 128

kernel.shmmni = 4096

kernel.shmall = 1073741824

kernel.shmmax = 4398046511104

net.core.rmem_default = 262144

net.core.rmem_max = 4194304

net.core.wmem_default = 262144

net.core.wmem_max = 1048576

fs.aio-max-nr = 1048576

net.ipv4.ip_local_port_range = 9000 65500

vm.nr_hugepages = 262144

vm.hugetlb_shm_group = 54321

8. Apply the changes with the following command: sysctl -p

9. Edit the security limits configuration. vim /etc/security/limits.conf

oracle soft nofile 1024

oracle hard nofile 65536

oracle soft nproc 2047

oracle hard nproc 16384

oracle soft stack 10240

oracle hard stack 32768

oracle soft memlock 536870912

oracle hard memlock 536870912

10. Add the necessary groups and users. groupadd -g 54321 oinstall

groupadd -g 54322 dba

groupadd -g 54323 oper

useradd -u 54321 -g oinstall -G dba,oper oracle

11. Modify the password for the Oracle user. passwd oracle

Changing password for user oracle.

New password:

Retype new password:

passwd: all authentication tokens updated successfully.

12. Edit the hosts file. vim /etc/hosts

127.0.0.1 localhost localhost.localdomain localhost4 localhost4.localdomain4

::1 localhost localhost.localdomain localhost6 localhost6.localdomain6

192.168.137.1 controller1.test.lan controller1 controller.test.lan controller

192.168.10.1 controller1g1

192.168.20.1 controller1g2

192.168.137.5 storage1.test.lan storage1 storage.test.lan storage

A Principled Technologies test report 13

Mission-critical database performance: Intel Xeon processor E7 v2 family vs. IBM POWER7+

(Revised 2/28/14 to include full methodology)

192.168.10.5 storage10g1.test.lan storage10g1

192.168.20.5 storage10g2.test.lan storage10g2

192.168.137.11 intel1.test.lan intel1

192.168.10.11 intel10g1.test.lan intel10g1 intel.test.lan intel tpcc1.test.lan tpcc1

192.168.20.11 intel10g2.test.lan intel10g2

192.168.137.21 ibm1.test.lan ibm1

192.168.10.21 ibm10g1.test.lan ibm10g1 ibm.test.lan ibm

192.168.20.21 ibm10g2.test.lan ibm10g1

192.168.137.100 hammerdb1.test.lan hammerdb1

192.168.10.100 hammerdb10g1.test.lan hammerdb10g1 hammerdb.test.lan hammerdb

192.168.20.100 hammerdb10g2.test.lan hammerdb10g2

13. Edit the 90-nproc.conf file. vim /etc/security/limits.d/90-nproc.conf

Modifying this line:

* soft nproc 1024

To reflect this change:

* - nproc 16384

14. Create a logical volume. lvcreate -L 30G -n lv_u01 vg_intel

Logical volume "lv_u01" created

15. Make the file system and modify /etc/fstab. mkfs.ext4 -L /u01 /dev/vg_intel/lv_u01

vim /etc/fstab

/dev/mapper/vg_intel-lv_u01 /u01 ext4 defaults 1 2

storage10g2:/intel/fra /u01/app/oracle/fast_recovery_area nfs

rw,bg,hard,nointr,rsize=65536,wsize=65536,tcp,actimeo=0,vers=3,timeo=600 0 0

storage10g2:/share /mnt/share nfs

rw,bg,hard,nointr,rsize=65536,wsize=65536,tcp,actimeo=0,vers=3,timeo=600 0 0

16. Create folders and set permissions for Oracle installation. mkdir /u01

mount /u01

mkdir -p /u01/app/oracle/flash_recovery_area

mount /u01/app/oracle/flash_recovery_area

chown -R oracle:oinstall /u01

chmod -R 775 /u01/

17. Edit the profile file to set environment variables. vim /home/oracle/.bash_profile

# Oracle Settings

export TMP=/tmp

export TMPDIR=$TMP

A Principled Technologies test report 14

Mission-critical database performance: Intel Xeon processor E7 v2 family vs. IBM POWER7+

(Revised 2/28/14 to include full methodology)

export ORACLE_HOSTNAME=intel.test.lan

export ORACLE_BASE=/u01/app/oracle

export GRID_HOME=$ORACLE_BASE/product/12.1.0/grid

export DB_HOME=$ORACLE_BASE/product/12.1.0/dbhome_1

export ORACLE_HOME=$DB_HOME

export ORACLE_SID=tpcc1

export ORACLE_TERM=xterm

export BASE_PATH=/usr/sbin:$PATH

export PATH=$ORACLE_HOME/bin:$BASE_PATH

export LD_LIBRARY_PATH=$ORACLE_HOME/lib:/lib:/usr/lib

export CLASSPATH=$ORACLE_HOME/JRE:$ORACLE_HOME/jlib:$ORACLE_HOME/rdbms/jlib

alias grid_env='. /home/oracle/grid_env'

alias db_env='. /home/oracle/db_env'

18. Edit the grid_env file, and adjust additional variables:

vim /home/oracle/grid_env

export ORACLE_SID=+ASM

export ORACLE_HOME=$GRID_HOME

export PATH=$ORACLE_HOME/bin:$BASE_PATH

export LD_LIBRARY_PATH=$ORACLE_HOME/lib:/lib:/usr/lib

export CLASSPATH=$ORACLE_HOME/JRE:$ORACLE_HOME/jlib:$ORACLE_HOME/rdbms/jlib

19. Edit the db_env file, and adjust additional variables:

vim /home/oracle/db_env

export ORACLE_SID=tpcc1

export ORACLE_HOME=$DB_HOME

export PATH=$ORACLE_HOME/bin:$BASE_PATH

export LD_LIBRARY_PATH=$ORACLE_HOME/lib:/lib:/usr/lib

export CLASSPATH=$ORACLE_HOME/JRE:$ORACLE_HOME/jlib:$ORACLE_HOME/rdbms/jlib

20. Edit the scsi_id file. echo "options=-g" > /etc/scsi_id.config

21. Edit the 99-oracle-asmdevices rules file. vim /etc/udev/rules.d/99-oracle-asmdevices.rules

KERNEL=="sd*[a-z]", SUBSYSTEM=="block", ENV{DEVTYPE}=="disk",

ENV{ID_SERIAL}=="3600144f07c620b00000052f362ba021e", NAME+="oracleasm/intel_redo_0_10",

OWNER="oracle", GROUP="dba", MODE="0660"

KERNEL=="sd*[a-z]", SUBSYSTEM=="block", ENV{DEVTYPE}=="disk",

ENV{ID_SERIAL}=="3600144f07c620b00000052f362bb0220", NAME+="oracleasm/intel_redo_1_10",

OWNER="oracle", GROUP="dba", MODE="0660"

KERNEL=="sd*[a-z]", SUBSYSTEM=="block", ENV{DEVTYPE}=="disk",

ENV{ID_SERIAL}=="3600144f07c620b00000052f362bb0222", NAME+="oracleasm/intel_redo_0_11",

OWNER="oracle", GROUP="dba", MODE="0660"

KERNEL=="sd*[a-z]", SUBSYSTEM=="block", ENV{DEVTYPE}=="disk",

ENV{ID_SERIAL}=="3600144f07c620b00000052f362bc0224", NAME+="oracleasm/intel_redo_1_11",

OWNER="oracle", GROUP="dba", MODE="0660"

KERNEL=="sd*[a-z]", SUBSYSTEM=="block", ENV{DEVTYPE}=="disk",

A Principled Technologies test report 15

Mission-critical database performance: Intel Xeon processor E7 v2 family vs. IBM POWER7+

(Revised 2/28/14 to include full methodology)

ENV{ID_SERIAL}=="3600144f07c620b00000052f362bc0226", NAME+="oracleasm/intel_redo_0_12",

OWNER="oracle", GROUP="dba", MODE="0660"

KERNEL=="sd*[a-z]", SUBSYSTEM=="block", ENV{DEVTYPE}=="disk",

ENV{ID_SERIAL}=="3600144f07c620b00000052f362bc0228", NAME+="oracleasm/intel_redo_1_12",

OWNER="oracle", GROUP="dba", MODE="0660"

KERNEL=="sd*[a-z]", SUBSYSTEM=="block", ENV{DEVTYPE}=="disk",

ENV{ID_SERIAL}=="3600144f07c620b00000052f362bd022a", NAME+="oracleasm/intel_redo_0_13",

OWNER="oracle", GROUP="dba", MODE="0660"

KERNEL=="sd*[a-z]", SUBSYSTEM=="block", ENV{DEVTYPE}=="disk",

ENV{ID_SERIAL}=="3600144f07c620b00000052f362bd022c", NAME+="oracleasm/intel_redo_1_13",

OWNER="oracle", GROUP="dba", MODE="0660"

KERNEL=="sd*[a-z]", SUBSYSTEM=="block", ENV{DEVTYPE}=="disk",

ENV{ID_SERIAL}=="3600144f07c620b00000052f362be022e", NAME+="oracleasm/intel_redo_0_14",

OWNER="oracle", GROUP="dba", MODE="0660"

KERNEL=="sd*[a-z]", SUBSYSTEM=="block", ENV{DEVTYPE}=="disk",

ENV{ID_SERIAL}=="3600144f07c620b00000052f362be0230", NAME+="oracleasm/intel_redo_1_14",

OWNER="oracle", GROUP="dba", MODE="0660"

KERNEL=="sd*[a-z]", SUBSYSTEM=="block", ENV{DEVTYPE}=="disk",

ENV{ID_SERIAL}=="3600144f07c620b00000052f362bf0232", NAME+="oracleasm/intel_redo_0_15",

OWNER="oracle", GROUP="dba", MODE="0660"

KERNEL=="sd*[a-z]", SUBSYSTEM=="block", ENV{DEVTYPE}=="disk",

ENV{ID_SERIAL}=="3600144f07c620b00000052f362bf0234", NAME+="oracleasm/intel_redo_1_15",

OWNER="oracle", GROUP="dba", MODE="0660"

KERNEL=="sd*[a-z]", SUBSYSTEM=="block", ENV{DEVTYPE}=="disk",

ENV{ID_SERIAL}=="3600144f07c620b00000052f4773c0236", NAME+="oracleasm/intel_data_0_0",

OWNER="oracle", GROUP="dba", MODE="0660"

KERNEL=="sd*[a-z]", SUBSYSTEM=="block", ENV{DEVTYPE}=="disk",

ENV{ID_SERIAL}=="3600144f07c620b00000052f4773c0238", NAME+="oracleasm/intel_data_1_0",

OWNER="oracle", GROUP="dba", MODE="0660"

KERNEL=="sd*[a-z]", SUBSYSTEM=="block", ENV{DEVTYPE}=="disk",

ENV{ID_SERIAL}=="3600144f07c620b00000052f4773d023a", NAME+="oracleasm/intel_data_0_1",

OWNER="oracle", GROUP="dba", MODE="0660"

KERNEL=="sd*[a-z]", SUBSYSTEM=="block", ENV{DEVTYPE}=="disk",

ENV{ID_SERIAL}=="3600144f07c620b00000052f4773d023c", NAME+="oracleasm/intel_data_1_1",

OWNER="oracle", GROUP="dba", MODE="0660"

KERNEL=="sd*[a-z]", SUBSYSTEM=="block", ENV{DEVTYPE}=="disk",

ENV{ID_SERIAL}=="3600144f07c620b00000052f4773e023e", NAME+="oracleasm/intel_data_0_2",

OWNER="oracle", GROUP="dba", MODE="0660"

KERNEL=="sd*[a-z]", SUBSYSTEM=="block", ENV{DEVTYPE}=="disk",

ENV{ID_SERIAL}=="3600144f07c620b00000052f4773f0240", NAME+="oracleasm/intel_data_1_2",

OWNER="oracle", GROUP="dba", MODE="0660"

KERNEL=="sd*[a-z]", SUBSYSTEM=="block", ENV{DEVTYPE}=="disk",

ENV{ID_SERIAL}=="3600144f07c620b00000052f4773f0242", NAME+="oracleasm/intel_data_0_3",

OWNER="oracle", GROUP="dba", MODE="0660"

KERNEL=="sd*[a-z]", SUBSYSTEM=="block", ENV{DEVTYPE}=="disk",

ENV{ID_SERIAL}=="3600144f07c620b00000052f477400244", NAME+="oracleasm/intel_data_1_3",

OWNER="oracle", GROUP="dba", MODE="0660"

KERNEL=="sd*[a-z]", SUBSYSTEM=="block", ENV{DEVTYPE}=="disk",

ENV{ID_SERIAL}=="3600144f07c620b00000052f477410246", NAME+="oracleasm/intel_data_0_4",

OWNER="oracle", GROUP="dba", MODE="0660"

KERNEL=="sd*[a-z]", SUBSYSTEM=="block", ENV{DEVTYPE}=="disk",

ENV{ID_SERIAL}=="3600144f07c620b00000052f477410248", NAME+="oracleasm/intel_data_1_4",

OWNER="oracle", GROUP="dba", MODE="0660"

KERNEL=="sd*[a-z]", SUBSYSTEM=="block", ENV{DEVTYPE}=="disk",

ENV{ID_SERIAL}=="3600144f07c620b00000052f47742024a", NAME+="oracleasm/intel_data_0_5",

OWNER="oracle", GROUP="dba", MODE="0660"

KERNEL=="sd*[a-z]", SUBSYSTEM=="block", ENV{DEVTYPE}=="disk",

A Principled Technologies test report 16

Mission-critical database performance: Intel Xeon processor E7 v2 family vs. IBM POWER7+

(Revised 2/28/14 to include full methodology)

ENV{ID_SERIAL}=="3600144f07c620b00000052f47742024c", NAME+="oracleasm/intel_data_1_5",

OWNER="oracle", GROUP="dba", MODE="0660"

KERNEL=="sd*[a-z]", SUBSYSTEM=="block", ENV{DEVTYPE}=="disk",

ENV{ID_SERIAL}=="3600144f07c620b00000052f47743024e", NAME+="oracleasm/intel_data_0_6",

OWNER="oracle", GROUP="dba", MODE="0660"

KERNEL=="sd*[a-z]", SUBSYSTEM=="block", ENV{DEVTYPE}=="disk",

ENV{ID_SERIAL}=="3600144f07c620b00000052f477440250", NAME+="oracleasm/intel_data_1_6",

OWNER="oracle", GROUP="dba", MODE="0660"

KERNEL=="sd*[a-z]", SUBSYSTEM=="block", ENV{DEVTYPE}=="disk",

ENV{ID_SERIAL}=="3600144f07c620b00000052f477440252", NAME+="oracleasm/intel_data_0_7",

OWNER="oracle", GROUP="dba", MODE="0660"

KERNEL=="sd*[a-z]", SUBSYSTEM=="block", ENV{DEVTYPE}=="disk",

ENV{ID_SERIAL}=="3600144f07c620b00000052f477450254", NAME+="oracleasm/intel_data_1_7",

OWNER="oracle", GROUP="dba", MODE="0660"

KERNEL=="sd*[a-z]", SUBSYSTEM=="block", ENV{DEVTYPE}=="disk",

ENV{ID_SERIAL}=="3600144f07c620b00000052f477450256", NAME+="oracleasm/intel_data_0_8",

OWNER="oracle", GROUP="dba", MODE="0660"

KERNEL=="sd*[a-z]", SUBSYSTEM=="block", ENV{DEVTYPE}=="disk",

ENV{ID_SERIAL}=="3600144f07c620b00000052f477460258", NAME+="oracleasm/intel_data_1_8",

OWNER="oracle", GROUP="dba", MODE="0660"

KERNEL=="sd*[a-z]", SUBSYSTEM=="block", ENV{DEVTYPE}=="disk",

ENV{ID_SERIAL}=="3600144f07c620b00000052f47747025a", NAME+="oracleasm/intel_data_0_9",

OWNER="oracle", GROUP="dba", MODE="0660"

KERNEL=="sd*[a-z]", SUBSYSTEM=="block", ENV{DEVTYPE}=="disk",

ENV{ID_SERIAL}=="3600144f07c620b00000052f47747025c", NAME+="oracleasm/intel_data_1_9",

OWNER="oracle", GROUP="dba", MODE="0660"

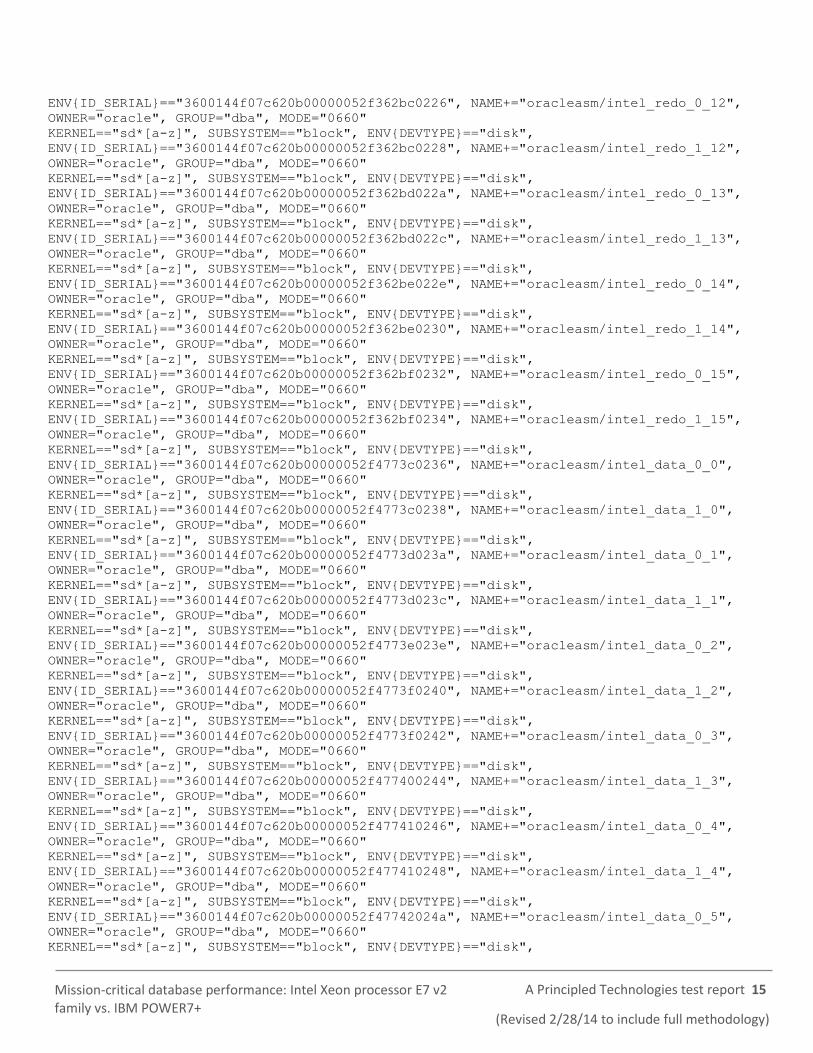
22. Execute udevadm and start udev. udevadm control --reload-rules

start_udev

23. List the ASM devices. ls -l /dev/oracleasm/intel_* | awk '{print $10}'

/dev/oracleasm/intel_data_0_0

/dev/oracleasm/intel_data_0_1

/dev/oracleasm/intel_data_0_2

/dev/oracleasm/intel_data_0_3

/dev/oracleasm/intel_data_0_4

/dev/oracleasm/intel_data_0_5

/dev/oracleasm/intel_data_0_6

/dev/oracleasm/intel_data_0_7

/dev/oracleasm/intel_data_0_8

/dev/oracleasm/intel_data_0_9

/dev/oracleasm/intel_data_1_0

/dev/oracleasm/intel_data_1_1

/dev/oracleasm/intel_data_1_2

/dev/oracleasm/intel_data_1_3

/dev/oracleasm/intel_data_1_4

/dev/oracleasm/intel_data_1_5

/dev/oracleasm/intel_data_1_6

/dev/oracleasm/intel_data_1_7

/dev/oracleasm/intel_data_1_8

/dev/oracleasm/intel_data_1_9

/dev/oracleasm/intel_redo_0_10

A Principled Technologies test report 17

Mission-critical database performance: Intel Xeon processor E7 v2 family vs. IBM POWER7+

(Revised 2/28/14 to include full methodology)

/dev/oracleasm/intel_redo_0_11

/dev/oracleasm/intel_redo_0_12

/dev/oracleasm/intel_redo_0_13

/dev/oracleasm/intel_redo_0_14

/dev/oracleasm/intel_redo_0_15

/dev/oracleasm/intel_redo_1_10

/dev/oracleasm/intel_redo_1_11

/dev/oracleasm/intel_redo_1_12

/dev/oracleasm/intel_redo_1_13

/dev/oracleasm/intel_redo_1_14

/dev/oracleasm/intel_redo_1_15

Installing Oracle Grid Infrastructure for a Standalone Server (Intel)

1. Run the GUI installer for Oracle Grid using the following commands: ssh –Y oracle@intel

grid_env

cd /mnt/share/linux/grid

./runInstaller

2. Perform ASM and diskgroup post-installation configuration. grid_env

sqlplus / as sysasm

SQL*Plus: Release 12.1.0.1.0 Production on Fri Feb 7 16:20:48 2014

Copyright (c) 1982, 2013, Oracle. All rights reserved.

Connected to:

Oracle Database 12c Enterprise Edition Release 12.1.0.1.0 - 64bit Production

With the Automatic Storage Management option

SQL> shutdown

ASM diskgroups dismounted

ASM instance shutdown

SQL> startup nomount

ASM instance started

Total System Global Area 1135747072 bytes

Fixed Size 2297344 bytes

Variable Size 1108283904 bytes

ASM Cache 25165824 bytes

A Principled Technologies test report 18

Mission-critical database performance: Intel Xeon processor E7 v2 family vs. IBM POWER7+

(Revised 2/28/14 to include full methodology)

SQL> ALTER DISKGROUP data MOUNT RESTRICTED;

Diskgroup altered.

SQL> ALTER DISKGROUP data RENAME DISK 'DATA_0000' TO

'data_0_0','DATA_0001' TO 'data_1_0';

Diskgroup altered.

SQL> shutdown

ASM diskgroups volume disabled

ASM diskgroups dismounted

ASM instance shutdown

SQL> startup

ASM instance started

Total System Global Area 1135747072 bytes

Fixed Size 2297344 bytes

Variable Size 1108283904 bytes

ASM Cache 25165824 bytes

ASM diskgroups mounted

ASM diskgroups volume enabled

SQL> ALTER DISKGROUP data SET ATTRIBUTE 'compatible.asm' = '12.1';

Diskgroup altered.

SQL> ALTER DISKGROUP data SET ATTRIBUTE 'compatible.rdbms = '12.1';

Diskgroup altered.

SQL> ALTER DISKGROUP data ADD

FAILGROUP DATA_0000 DISK

'/dev/oracleasm/intel_data_0_1' NAME data_0_1,

'/dev/oracleasm/intel_data_0_2' NAME data_0_2,

'/dev/oracleasm/intel_data_0_3' NAME data_0_3,

'/dev/oracleasm/intel_data_0_4' NAME data_0_4,

'/dev/oracleasm/intel_data_0_5' NAME data_0_5,

A Principled Technologies test report 19

Mission-critical database performance: Intel Xeon processor E7 v2 family vs. IBM POWER7+

(Revised 2/28/14 to include full methodology)

'/dev/oracleasm/intel_data_0_6' NAME data_0_6,

'/dev/oracleasm/intel_data_0_7' NAME data_0_7,

'/dev/oracleasm/intel_data_0_8' NAME data_0_8,

'/dev/oracleasm/intel_data_0_9' NAME data_0_9

FAILGROUP DATA_0001 DISK

'/dev/oracleasm/intel_data_1_1' NAME data_1_1,

'/dev/oracleasm/intel_data_1_2' NAME data_1_2,

'/dev/oracleasm/intel_data_1_3' NAME data_1_3,

'/dev/oracleasm/intel_data_1_4' NAME data_1_4,

'/dev/oracleasm/intel_data_1_5' NAME data_1_5,

'/dev/oracleasm/intel_data_1_6' NAME data_1_6,

'/dev/oracleasm/intel_data_1_7' NAME data_1_7,

'/dev/oracleasm/intel_data_1_8' NAME data_1_8,

'/dev/oracleasm/intel_data_1_9' NAME data_1_9;

Diskgroup altered.

SQL> CREATE DISKGROUP REDO0 EXTERNAL REDUNDANCY DISK

'/dev/oracleasm/intel_redo_0_10' NAME redo_0_10,

'/dev/oracleasm/intel_redo_0_11' NAME redo_0_11,

'/dev/oracleasm/intel_redo_0_12' NAME redo_0_12,

'/dev/oracleasm/intel_redo_0_13' NAME redo_0_13,

'/dev/oracleasm/intel_redo_0_14' NAME redo_0_14,

'/dev/oracleasm/intel_redo_0_15' NAME redo_0_15

ATTRIBUTE

'compatible.asm' = '12.1',

'compatible.rdbms' = '12.1',

'sector_size' = '512';

Diskgroup created.

SQL> CREATE DISKGROUP REDO1 EXTERNAL REDUNDANCY DISK

'/dev/oracleasm/intel_redo_1_10' NAME redo_1_10,

'/dev/oracleasm/intel_redo_1_11' NAME redo_1_11,

'/dev/oracleasm/intel_redo_1_12' NAME redo_1_12,

'/dev/oracleasm/intel_redo_1_13' NAME redo_1_13,

'/dev/oracleasm/intel_redo_1_14' NAME redo_1_14,

'/dev/oracleasm/intel_redo_1_15' NAME redo_1_15

ATTRIBUTE

'compatible.asm' = '12.1',

A Principled Technologies test report 20

Mission-critical database performance: Intel Xeon processor E7 v2 family vs. IBM POWER7+

(Revised 2/28/14 to include full methodology)

'compatible.rdbms' = '12.1',

'sector_size' = '512';

Diskgroup created.

SQL> quit

Disconnected from Oracle Database 12c Enterprise Edition Release 12.1.0.1.0 -

64bit Production

With the Automatic Storage Management option

Installing Oracle Grid Infrastructure for Standalone Server 12c on the Intel server 1. Run the GUI installer for Oracle Database using the following commands:

ssh –Y oracle@intel

db_env

cd /mnt/share/linux/grid

./runInstaller

2. Launch the Oracle Grid Infrastructure installation wizard.

3. In Software Updates, select Skip software updates, and click Next.

4. In Installation Options, select Install and Configure Oracle Grid Infrastructure for a Standalone Server, and click Next.

5. In Product Languages, select English and click the right-pointing arrow between the two selection panels to add

English to the Selected languages panel. Click Next.

6. In Create ASM Disk Group, click Change Discovery Path.

7. Enter /dev/ribm_* for the Disk Discovery Path, and click OK.

8. Check the boxes for /dev/ribm_data_0_0 and /dev/ribm_data_1_0. Click Next.

9. In ASM Password, select Use same passwords for these accounts. Enter and confirm the password, and click Next.

10. In Operating System Groups, set the Oracle ASM Operator (OSOPER for ASM) Group to dba. Click Next.

11. Click Yes to confirm the notifications and continue.

12. In Installation Location, accept the default locations provided, and click Next.

13. In Create Inventory, accept the defaults, and click Next.

14. In Root Script Execution, check the box for Automatically run configuration scripts.

15. Select Use “root” user credential, and provide the root password. Click Next.

16. In Summary, review the information, and click Install to begin installation.

17. Click Yes to confirm using the privileged user for the installer.

18. In Finish, click Close to exit the installer.

Installing Oracle Database 12c on the Intel server 1. Run the GUI installer for Oracle Database using the following commands:

ssh –Y oracle@intel

db_env

cd /mnt/share/linux/database

A Principled Technologies test report 21

Mission-critical database performance: Intel Xeon processor E7 v2 family vs. IBM POWER7+

(Revised 2/28/14 to include full methodology)

./runInstaller

2. Launch the Oracle Database 12c Release 1 Installer.

3. In Configure Security Updates, check the I wish to receive security updates via My Oracle Support checkbox. Click

Next.

4. Click Yes to confirm no email provided, and continue.

5. In Software Updates, select Skip software updates, and click Next.

6. In Installation Options, select Install database software only, and click Next.

7. In Grid Installation Options, select Single instance database installation, and click Next.

8. In Product Languages, select English and click the right-pointing arrow located between the two selection panels to

add English to the Selected languages panel. Click Next.

9. In Database Edition, select Enterprise Edition, and click Next.

10. In Installation Location, accept the default locations provided, and click Next.

11. In Operating System Groups, accept the defaults, and click Next.

12. In Summary, review the information, and click Install to begin installation.

13. When prompted, follow the instructions to execute the scripts. Click OK when the scripts have completed.

14. In Finish, click Close to exit the installer.

15. When prompted in the GUI installer, run the root shell script to finish the Oracle Database installation. /u01/app/oracle/product/12.1.0/dbhome_1/root.sh

Creating the Oracle Database (using DBCA) 1. Launch the Database Configuration Assistant (DBCA).

2. In Database Operations, select Create Database, and click Next.

3. In Creation Mode, select Advanced Mode, and click Next.

4. In Database Template, select the Template for General Purpose or Transaction Processing, and click Next.

5. In Database Identification, type tpcc1.test.lan for the Global Database Name.

6. Type tpcc1 for the SID. Click Next.

7. In Management Options, select Configure Enterprise Manager (EM) Database Express. Click Next.

8. In Database Credentials, select Use the Same Administrative Password for All Accounts.

9. Enter and confirm the administrative password, and click Next.

10. In Network Configuration, check the boxes for all listeners, and click Next.

11. In Storage Locations, select User Common Location for All Database Files. Type +DATA into the Database Files

Location field.

12. Select Specify Fast Recovery Area. Type (ORACLE_BASE)/fast_recovery_area in the Fast Recovery Area

field.

13. Set the Fast Recovery Area size to 2,048 GB, and click Next.

14. In Database Options, accept the defaults, and click Next.

15. In Initialization Parameters and under typical settings, set the Memory Size to 413,520 MB, and click next.

16. In Creation Options, select Create Database. Click Customize Storage Locations.

17. In the Customize Storage panel and under Redo Log Groups, select 1.

18. Set the file size to 98,304 MB. Click Apply.

19. Under Redo Log Groups, Select 2.

20. Set the file size to 98,304 MB. Click Apply.

21. Under Redo Log Groups, Select 3.

22. Click Remove and when prompted, click Yes.

A Principled Technologies test report 22

Mission-critical database performance: Intel Xeon processor E7 v2 family vs. IBM POWER7+

(Revised 2/28/14 to include full methodology)

23. To exit the Customize Storage panel, click Ok.

24. Click Next.

25. Review the Summary. To complete the database creation, click Finish.

26. Review the information on the screen, and click Exit.

27. To exit the DBCA, click Close.

Configuring AIX 7.1 and Oracle Database 12c for the POWER7+ server In this section, we detail configurations on the POWER7+ server. Screen outputs are in grey boxes.

1. Configure networking. mktcpip -i'en4' -a'192.168.137.21' -m'255.255.255.0' -h'ibm.test.lan' -

n'192.168.137.1' -d'test.lan' -g'192.168.137.1'

chdev -l 'en0' -a netaddr='192.168.10.21' -a netmask='255.255.255.0' -a

state='up'

chdev -l 'en1' -a netaddr='192.168.20.21' -a netmask='255.255.255.0' -a

state='up'

2. Log in remotely using rsh. rsh [email protected]

*******************************************************************************

* *

* *

* Welcome to AIX Version 7.1! *

* *

* *

* Please see the README file in /usr/lpp/bos for information pertinent to *

* this release of the AIX Operating System. *

* *

* *

******************************************************************************* #

3. Change the root user password. passwd

Changing password for "root"

root's New password: Password1

Enter the new password again: Password1

4. Install OpenSSL and OpenSSH packages:

cd /usr/sys/inst.images

installp -ac -Y -d . openssh.base openssl.base openssl.man.en_US

openssh.man.en_US

5. Log in using SSH. ssh [email protected]

6. Install the AIX Toolbox for Linux base environment packages. cd ~

mkdir -p ezinstall/ppc || :

cd ezinstall/ppc

A Principled Technologies test report 23

Mission-critical database performance: Intel Xeon processor E7 v2 family vs. IBM POWER7+

(Revised 2/28/14 to include full methodology)

ftp ftp.software.ibm.com

Name> ftp

Password> your e-mail address

ftp> cd aix/freeSoftware/aixtoolbox/RPMS/ppc/wget

ftp> binary

ftp> get wget-1.9.1-1.aix5.1.ppc.rpm

ftp> quit

rpm -hUv wget-1.9.1-1.aix5.1.ppc.rpm

wget -r -nd -g on

ftp://ftp.software.ibm.com/aix/freeSoftware/aixtoolbox/ezinstall/ppc/*.sh

chmod +x get*.sh

./getbase.sh

cd ~

rpm -Uhv ezinstall/ppc/base/*

7. You can now use the bash shell whenever you log in. bash

bash-4.2#

8. Expand the swap logical volume. lsps -a

lslv hd6

chps -s 126 hd6

9. Expand the root, /tmp, /usr, /var, and /opt volumes. chfs -a size=1G /

Filesystem size changed to 2097152

chfs -a size=5G /tmp

Filesystem size changed to 10485760

chfs -a size=20G /usr

Filesystem size changed to 41943040

chfs -a size=1G /var

Filesystem size changed to 2097152

chfs -a size=1G /opt

Filesystem size changed to 2097152

10. Install AIX update TL3 (Technology Update 3) and SP1 (Service Pack 1). cd /usr/sys/inst.images

wget -c --retr-symlinks ftp://<updates url>/* .

11. Add the necessary groups and users. mkgroup -A oinstall

mkgroup -A dba

A Principled Technologies test report 24

Mission-critical database performance: Intel Xeon processor E7 v2 family vs. IBM POWER7+

(Revised 2/28/14 to include full methodology)

mkgroup -A oper

useradd -m -g oinstall -G dba,oper oracle

12. Modify the password for the Oracle user. passwd oracle

Changing password for user oracle.

New password:

Retype new password:

passwd: all authentication tokens updated successfully.

13. Edit the security limits configuration. chuser fsize=-1 cpu=-1 data=-1 stack=-1 rss=-1 nofiles=-1 oracle

chuser fsize=-1 cpu=-1 data=-1 stack=-1 rss=-1 nofiles=-1 root

14. Configure the Oracle user to use the bash shell. chsh oracle /usr/bin/bash

15. Set the maximum number of processes to 16384. chdev -l sys0 -a maxuproc='16384'

16. Increase Asynchronous IO (AIO) maximum requests to 65536. ioo -o aio_maxreqs=65536

17. Configure system network settings. no -p -o tcp_ephemeral_low=9000 -o tcp_ephemeral_high=65500

no -p -o udp_ephemeral_low=9000 -o udp_ephemeral_high=65500

no -p -o tcp_sendspace=262144

no -p -o tcp_recvspace=262144

no -p -o rfc1323=1

18. Edit the hosts file. vi /etc/hosts

127.0.0.1 loopback localhost # loopback (lo0) name/address

::1 loopback localhost # IPv6 loopback (lo0) name/address

192.168.137.1 controller controller1

192.168.10.1 controller1g1

192.168.20.1 controller1g2

192.168.137.5 storage1.test.lan storage1 storage.test.lan storage

192.168.10.5 storage10g1.test.lan storage10g1

192.168.20.5 storage10g2.test.lan storage10g2

192.168.137.11 intel1.test.lan intel1

192.168.10.11 intel10g1.test.lan intel10g1 intel.test.lan intel

192.168.20.11 intel10g2.test.lan intel10g2

A Principled Technologies test report 25

Mission-critical database performance: Intel Xeon processor E7 v2 family vs. IBM POWER7+

(Revised 2/28/14 to include full methodology)

192.168.137.21 ibm1.test.lan ibm1

192.168.10.21 ibm10g1.test.lan ibm10g1 ibm.test.lan ibm tpcc1.test.lan tpcc1

192.168.20.21 ibm10g2.test.lan ibm10g1

192.168.137.100 hammerdb1.test.lan hammerdb1

192.168.10.100 hammerdb10g1.test.lan hammerdb10g1 hammerdb.test.lan hammerdb

192.168.20.100 hammerdb10g2.test.lan hammerdb10g2

19. Create a new 30GB mirrored logical volume for Oracle program files formatted and mounted at "/u01". mkdir /u01

mklv -c 2 -s y -t jfs2 -y hd12u01 rootvg 30g

crfs -v jfs2 -d'hd12u01' -m'/u01' -A'yes' -p'rw' -a agblksize='4096' -a

isnapshot='no'

mount /u01

20. Modify /etc/ filesystems. vi /etc/filesystems

/u01/app/oracle/fast_recovery_area:

dev = /ibm/fra

vfs = nfs

nodename = storage10g2

mount = true

options =

rw,bg,hard,proto=tcp,vers=3,rsize=65536,wsize=65536,cio,timeo=600,intr

account = false

/mnt/share:

dev = /share

vfs = nfs

nodename = storage10g2

mount = true

options =

rw,bg,hard,proto=tcp,vers=3,rsize=65536,wsize=65536,cio,timeo=600,intr

account = false

21. Create folders and set permissions for Oracle installation. mkdir -p /u01/app/oracle/flash_recovery_area

mount /u01/app/oracle/flash_recovery_area

chown -R oracle:oinstall /u01

chmod -R 775 /u01/

22. Edit the profile file to set environment variables. vi /home/oracle/.bash_profile

# Oracle Settings

export TMP=/tmp

export TMPDIR=$TMP

export ORACLE_HOSTNAME=ibm.test.lan

A Principled Technologies test report 26

Mission-critical database performance: Intel Xeon processor E7 v2 family vs. IBM POWER7+

(Revised 2/28/14 to include full methodology)

export ORACLE_BASE=/u01/app/oracle

export GRID_HOME=$ORACLE_BASE/product/12.1.0/grid

export DB_HOME=$ORACLE_BASE/product/12.1.0/dbhome_1

export ORACLE_HOME=$DB_HOME

export ORACLE_SID=tpcc1

export ORACLE_TERM=xterm

export BASE_PATH=/usr/sbin:$PATH

export PATH=$ORACLE_HOME/bin:$BASE_PATH

export LD_LIBRARY_PATH=$ORACLE_HOME/lib:/lib:/usr/lib

export CLASSPATH=$ORACLE_HOME/JRE:$ORACLE_HOME/jlib:$ORACLE_HOME/rdbms/jlib

alias grid_env='. /home/oracle/grid_env'

alias db_env='. /home/oracle/db_env'

23. Edit the grid_env file, and adjust additional variables: vi /home/oracle/grid_env

export ORACLE_SID=+ASM

export ORACLE_HOME=$GRID_HOME

export PATH=$ORACLE_HOME/bin:$BASE_PATH

export LD_LIBRARY_PATH=$ORACLE_HOME/lib:/lib:/usr/lib

export CLASSPATH=$ORACLE_HOME/JRE:$ORACLE_HOME/jlib:$ORACLE_HOME/rdbms/jlib

24. Edit the db_env file, and adjust additional variables: vi /home/oracle/db_env

export ORACLE_SID=tpcc1

export ORACLE_HOME=$DB_HOME

export PATH=$ORACLE_HOME/bin:$BASE_PATH

export LD_LIBRARY_PATH=$ORACLE_HOME/lib:/lib:/usr/lib

export CLASSPATH=$ORACLE_HOME/JRE:$ORACLE_HOME/jlib:$ORACLE_HOME/rdbms/jlib

25. Run cfgmgr to detect any new LUNs, and list disk drives using lsdev. cfgmgr

lsdev -Cc disk

hdisk0 Available 06-00-00 SAS Disk Drive

hdisk1 Available 06-00-00 SAS Disk Drive

hdisk2 Available 0B-00-01 Other FC SCSI Disk Drive

hdisk3 Available 0B-00-01 Other FC SCSI Disk Drive

hdisk4 Available 0B-00-01 Other FC SCSI Disk Drive

hdisk5 Available 0B-00-01 Other FC SCSI Disk Drive

hdisk6 Available 0B-00-01 Other FC SCSI Disk Drive

hdisk7 Available 0B-00-01 Other FC SCSI Disk Drive

hdisk8 Available 0B-00-01 Other FC SCSI Disk Drive

hdisk9 Available 0B-00-01 Other FC SCSI Disk Drive

hdisk10 Available 0B-00-01 Other FC SCSI Disk Drive

hdisk11 Available 0B-00-01 Other FC SCSI Disk Drive

hdisk12 Available 0B-00-01 Other FC SCSI Disk Drive

A Principled Technologies test report 27

Mission-critical database performance: Intel Xeon processor E7 v2 family vs. IBM POWER7+

(Revised 2/28/14 to include full methodology)

hdisk13 Available 0B-00-01 Other FC SCSI Disk Drive

hdisk14 Available 0B-00-01 Other FC SCSI Disk Drive

hdisk15 Available 0B-00-01 Other FC SCSI Disk Drive

hdisk16 Available 0B-00-01 Other FC SCSI Disk Drive

hdisk17 Available 0B-00-01 Other FC SCSI Disk Drive

hdisk18 Available 0B-01-01 Other FC SCSI Disk Drive

hdisk19 Available 0B-01-01 Other FC SCSI Disk Drive

hdisk20 Available 0B-01-01 Other FC SCSI Disk Drive

hdisk21 Available 0B-01-01 Other FC SCSI Disk Drive

hdisk22 Available 0B-01-01 Other FC SCSI Disk Drive

hdisk23 Available 0B-01-01 Other FC SCSI Disk Drive

hdisk24 Available 0B-01-01 Other FC SCSI Disk Drive

hdisk25 Available 0B-01-01 Other FC SCSI Disk Drive

hdisk26 Available 0B-01-01 Other FC SCSI Disk Drive

hdisk27 Available 0B-01-01 Other FC SCSI Disk Drive

hdisk28 Available 0B-01-01 Other FC SCSI Disk Drive

hdisk29 Available 0B-01-01 Other FC SCSI Disk Drive

hdisk30 Available 0B-01-01 Other FC SCSI Disk Drive

hdisk31 Available 0B-01-01 Other FC SCSI Disk Drive

hdisk32 Available 0B-01-01 Other FC SCSI Disk Drive

hdisk33 Available 0B-01-01 Other FC SCSI Disk Drive

26. Rename the LUNs. rendev -l 'hdisk2' -n 'ibm_data_0_0'

rendev -l 'hdisk3' -n 'ibm_data_0_1'

rendev -l 'hdisk4' -n 'ibm_data_0_2'

rendev -l 'hdisk5' -n 'ibm_data_0_3'

rendev -l 'hdisk6' -n 'ibm_data_0_4'

rendev -l 'hdisk7' -n 'ibm_data_0_5'

rendev -l 'hdisk8' -n 'ibm_data_0_6'

rendev -l 'hdisk9' -n 'ibm_data_0_7'

rendev -l 'hdisk10' -n 'ibm_data_0_8'

rendev -l 'hdisk11' -n 'ibm_data_0_9'

rendev -l 'hdisk12' -n 'ibm_redo_0_10'

rendev -l 'hdisk13' -n 'ibm_redo_0_11'

rendev -l 'hdisk14' -n 'ibm_redo_0_12'

rendev -l 'hdisk15' -n 'ibm_redo_0_13'

rendev -l 'hdisk16' -n 'ibm_redo_0_14'

rendev -l 'hdisk17' -n 'ibm_redo_0_15'

rendev -l 'hdisk18' -n 'ibm_data_1_0'

rendev -l 'hdisk19' -n 'ibm_data_1_1'

rendev -l 'hdisk20' -n 'ibm_data_1_2'

rendev -l 'hdisk21' -n 'ibm_data_1_3'

rendev -l 'hdisk22' -n 'ibm_data_1_4'

rendev -l 'hdisk23' -n 'ibm_data_1_5'

A Principled Technologies test report 28

Mission-critical database performance: Intel Xeon processor E7 v2 family vs. IBM POWER7+

(Revised 2/28/14 to include full methodology)

rendev -l 'hdisk24' -n 'ibm_data_1_6'

rendev -l 'hdisk25' -n 'ibm_data_1_7'

rendev -l 'hdisk26' -n 'ibm_data_1_8'

rendev -l 'hdisk27' -n 'ibm_data_1_9'

rendev -l 'hdisk28' -n 'ibm_redo_1_10'

rendev -l 'hdisk29' -n 'ibm_redo_1_11'

rendev -l 'hdisk30' -n 'ibm_redo_1_12'

rendev -l 'hdisk31' -n 'ibm_redo_1_13'

rendev -l 'hdisk32' -n 'ibm_redo_1_14'

rendev -l 'hdisk33' -n 'ibm_redo_1_15'

27. Adjust LUN queue depth and maximum transfer size. chdev -l 'ibm_data_0_0' -a queue_depth='30' -a max_transfer='0x100000'

chdev -l 'ibm_data_0_1' -a queue_depth='30' -a max_transfer='0x100000'

chdev -l 'ibm_data_0_2' -a queue_depth='30' -a max_transfer='0x100000'

chdev -l 'ibm_data_0_3' -a queue_depth='30' -a max_transfer='0x100000'

chdev -l 'ibm_data_0_4' -a queue_depth='30' -a max_transfer='0x100000'

chdev -l 'ibm_data_0_5' -a queue_depth='30' -a max_transfer='0x100000'

chdev -l 'ibm_data_0_6' -a queue_depth='30' -a max_transfer='0x100000'

chdev -l 'ibm_data_0_7' -a queue_depth='30' -a max_transfer='0x100000'

chdev -l 'ibm_data_0_8' -a queue_depth='30' -a max_transfer='0x100000'

chdev -l 'ibm_data_0_9' -a queue_depth='30' -a max_transfer='0x100000'

chdev -l 'ibm_redo_0_10' -a queue_depth='30' -a max_transfer='0x100000'

chdev -l 'ibm_redo_0_11' -a queue_depth='30' -a max_transfer='0x100000'

chdev -l 'ibm_redo_0_12' -a queue_depth='30' -a max_transfer='0x100000'

chdev -l 'ibm_redo_0_13' -a queue_depth='30' -a max_transfer='0x100000'

chdev -l 'ibm_redo_0_14' -a queue_depth='30' -a max_transfer='0x100000'

chdev -l 'ibm_redo_0_15' -a queue_depth='30' -a max_transfer='0x100000'

chdev -l 'ibm_data_1_0' -a queue_depth='30' -a max_transfer='0x100000'

chdev -l 'ibm_data_1_1' -a queue_depth='30' -a max_transfer='0x100000'

chdev -l 'ibm_data_1_2' -a queue_depth='30' -a max_transfer='0x100000'

chdev -l 'ibm_data_1_3' -a queue_depth='30' -a max_transfer='0x100000'

chdev -l 'ibm_data_1_4' -a queue_depth='30' -a max_transfer='0x100000'

chdev -l 'ibm_data_1_5' -a queue_depth='30' -a max_transfer='0x100000'

chdev -l 'ibm_data_1_6' -a queue_depth='30' -a max_transfer='0x100000'

chdev -l 'ibm_data_1_7' -a queue_depth='30' -a max_transfer='0x100000'

chdev -l 'ibm_data_1_8' -a queue_depth='30' -a max_transfer='0x100000'

chdev -l 'ibm_data_1_9' -a queue_depth='30' -a max_transfer='0x100000'

chdev -l 'ibm_redo_1_10' -a queue_depth='30' -a max_transfer='0x100000'

chdev -l 'ibm_redo_1_11' -a queue_depth='30' -a max_transfer='0x100000'

A Principled Technologies test report 29

Mission-critical database performance: Intel Xeon processor E7 v2 family vs. IBM POWER7+

(Revised 2/28/14 to include full methodology)

chdev -l 'ibm_redo_1_12' -a queue_depth='30' -a max_transfer='0x100000'

chdev -l 'ibm_redo_1_13' -a queue_depth='30' -a max_transfer='0x100000'

chdev -l 'ibm_redo_1_14' -a queue_depth='30' -a max_transfer='0x100000'

chdev -l 'ibm_redo_1_15' -a queue_depth='30' -a max_transfer='0x100000'

28. Set permissions on new LUN devices for Oracle ASM use. chown oracle:dba /dev/ribm_*

chmod 660 /dev/ribm_*

29. List the ASM devices. ls -l /dev/ribm_* | awk '{print($1"\t"$3"\t"$4"\t"$10)}'

crw-rw---- oracle dba /dev/ribm_data_0_0

crw-rw---- oracle dba /dev/ribm_data_0_1

crw-rw---- oracle dba /dev/ribm_data_0_2

crw-rw---- oracle dba /dev/ribm_data_0_3

crw-rw---- oracle dba /dev/ribm_data_0_4

crw-rw---- oracle dba /dev/ribm_data_0_5

crw-rw---- oracle dba /dev/ribm_data_0_6

crw-rw---- oracle dba /dev/ribm_data_0_7

crw-rw---- oracle dba /dev/ribm_data_0_8

crw-rw---- oracle dba /dev/ribm_data_0_9

crw-rw---- oracle dba /dev/ribm_data_1_0

crw-rw---- oracle dba /dev/ribm_data_1_1

crw-rw---- oracle dba /dev/ribm_data_1_2

crw-rw---- oracle dba /dev/ribm_data_1_3

crw-rw---- oracle dba /dev/ribm_data_1_4

crw-rw---- oracle dba /dev/ribm_data_1_5

crw-rw---- oracle dba /dev/ribm_data_1_6

crw-rw---- oracle dba /dev/ribm_data_1_7

crw-rw---- oracle dba /dev/ribm_data_1_8

crw-rw---- oracle dba /dev/ribm_data_1_9

crw-rw---- oracle dba /dev/ribm_redo_0_10

crw-rw---- oracle dba /dev/ribm_redo_0_11

crw-rw---- oracle dba /dev/ribm_redo_0_12

crw-rw---- oracle dba /dev/ribm_redo_0_13

crw-rw---- oracle dba /dev/ribm_redo_0_14

crw-rw---- oracle dba /dev/ribm_redo_0_15

crw-rw---- oracle dba /dev/ribm_redo_1_10

crw-rw---- oracle dba /dev/ribm_redo_1_11

crw-rw---- oracle dba /dev/ribm_redo_1_12

crw-rw---- oracle dba /dev/ribm_redo_1_13

crw-rw---- oracle dba /dev/ribm_redo_1_14

crw-rw---- oracle dba /dev/ribm_redo_1_15

Installing Oracle Grid Infrastructure for a Standalone Server on AIX 1. Run the GUI installer for Oracle Grid using the following commands:

ssh –Y root@ibm

A Principled Technologies test report 30

Mission-critical database performance: Intel Xeon processor E7 v2 family vs. IBM POWER7+

(Revised 2/28/14 to include full methodology)

cd /mnt/share/aix/grid

./rootpre.sh

Copying new kernel extension to /etc....

Loading the kernel extension from /etc

Oracle Kernel Extension Loader for AIX

Copyright (c) 1998,1999 Oracle Corporation

Successfully loaded /etc/pw-syscall.64bit_kernel with kmid: 0x50c9e000

Successfully configured /etc/pw-syscall.64bit_kernel with kmid: 0x50c9e000

The kernel extension was successfuly loaded.

Checking if group services should be configured....

Nothing to configure

2. Run the GUI installer for Oracle Grid using the following commands.

ssh –Y oracle@ibm

grid_env

cd /mnt/share/aix/grid

./runInstaller

********************************************************************************

Your platform requires the root user to perform certain pre-installation

OS preparation. The root user should run the shell script 'rootpre.sh' before

you proceed with Oracle installation. rootpre.sh can be found at the top level

of the CD or the stage area.

Answer 'y' if root has run 'rootpre.sh' so you can proceed with Oracle

installation.

Answer 'n' to abort installation and then ask root to run 'rootpre.sh'.

********************************************************************************

Has 'rootpre.sh' been run by root on all nodes? [y/n] (n)

y

Starting Oracle Universal Installer...

3. Launch the Oracle Grid Infrastructure installation wizard.

4. In Software Updates, select Skip software updates, and click Next.

5. In Installation Type, select install and Configure Oracle Grid Infrastructure for a Standalone Server, and click Next.

6. In Product Languages, select English, and click the right-pointing arrow located between the two selection panels to

add English to the Selected languages panel. Click Next.

A Principled Technologies test report 31

Mission-critical database performance: Intel Xeon processor E7 v2 family vs. IBM POWER7+

(Revised 2/28/14 to include full methodology)

7. In Create ASM Disk Group, click Change Discovery Path.

8. Enter /dev/ribm_* for the Disk Discovery Path, and click OK.

9. Check the boxes for /dev/ribm_data_0_0 and /dev/ribm_data_1_0. Click Next.

10. In ASM Password, select Use same passwords for these accounts.

11. Enter and confirm the password, and click Next.

12. In Operating System Groups, set the Oracle ASM Operator (OSOPER for ASM) Group to dba. Click Next.

13. Click Yes to confirm the notifications and continue.

14. In Installation Location, accept the default locations provided, and click Next.

15. Click Yes to confirm the notification and continue.

16. In Create Inventory, accept the defaults, and click Next.

17. In Root Script Execution, check the Automatically run configuration scripts checkbox.

18. Select Use “root” user credential, and provide the root password. Click Next.

19. In Prerequisite Checks, check the Ignore All checkbox to bypass the findings of the prerequisite checks. Click Next.

20. Click Yes to confirm information notification and continue.

21. In Summary, review the information, and click Install to begin installation.

22. Click Yes to confirm using the privileged user for the installer.

23. In Finish, click Close to exit the installer.

24. Perform ASM and diskgroup post-installation configuration.

grid_env

sqlplus / as sysasm

SQL*Plus: Release 12.1.0.1.0 Production on Tue Feb 11 00:07:10 2014

Copyright (c) 1982, 2013, Oracle. All rights reserved.

Connected to:

Oracle Database 12c Enterprise Edition Release 12.1.0.1.0 - 64bit Production

With the Automatic Storage Management option

SQL> shutdown

ASM diskgroups volume disabled

ASM diskgroups dismounted

ASM instance shutdown

SQL> startup nomount

ASM instance started

Total System Global Area 1135747072 bytes

Fixed Size 2297344 bytes

Variable Size 1108283904 bytes

ASM Cache 25165824 bytes

SQL> ALTER DISKGROUP data MOUNT RESTRICTED;

A Principled Technologies test report 32

Mission-critical database performance: Intel Xeon processor E7 v2 family vs. IBM POWER7+

(Revised 2/28/14 to include full methodology)

Diskgroup altered.

SQL> ALTER DISKGROUP data RENAME DISK 'DATA_0000' TO

'data_0_0','DATA_0001' TO 'data_1_0';

Diskgroup altered.

SQL> shutdown

ASM diskgroups volume disabled

ASM diskgroups dismounted

ASM instance shutdown

SQL> startup

ASM instance started

Total System Global Area 1135747072 bytes

Fixed Size 2297344 bytes

Variable Size 1108283904 bytes

ASM Cache 25165824 bytes

ASM diskgroups mounted

ASM diskgroups volume enabled

SQL> ALTER DISKGROUP data SET ATTRIBUTE 'compatible.asm' = '12.1';

Diskgroup altered.

SQL> ALTER DISKGROUP data SET ATTRIBUTE 'compatible.rdbms = '12.1';

Diskgroup altered.

SQL> ALTER DISKGROUP data ADD

FAILGROUP DATA_0000 DISK

'/dev/ribm_data_0_1' NAME data_0_1,

'/dev/ribm_data_0_2' NAME data_0_2,

'/dev/ ribm_data_0_3' NAME data_0_3,

'/dev/ ribm_data_0_4' NAME data_0_4,

'/dev/ ribm_data_0_5' NAME data_0_5,

'/dev/ ribm_data_0_6' NAME data_0_6,

A Principled Technologies test report 33

Mission-critical database performance: Intel Xeon processor E7 v2 family vs. IBM POWER7+

(Revised 2/28/14 to include full methodology)

'/dev/ ribm_data_0_7' NAME data_0_7,

'/dev/ ribm_data_0_8' NAME data_0_8,

'/dev/ ribm_data_0_9' NAME data_0_9

FAILGROUP DATA_0001 DISK

'/dev/ ribm_data_1_1' NAME data_1_1,

'/dev/ ribm_data_1_2' NAME data_1_2,

'/dev/ ribm_data_1_3' NAME data_1_3,

'/dev/ ribm_data_1_4' NAME data_1_4,

'/dev/ ribm_data_1_5' NAME data_1_5,

'/dev/ ribm_data_1_6' NAME data_1_6,

'/dev/ ribm_data_1_7' NAME data_1_7,

'/dev/ ribm_data_1_8' NAME data_1_8,

'/dev/ ribm_data_1_9' NAME data_1_9;

Diskgroup altered.

SQL> CREATE DISKGROUP REDO0 EXTERNAL REDUNDANCY DISK

'/dev/ ribm_redo_0_10' NAME redo_0_10,

'/dev/ ribm_redo_0_11' NAME redo_0_11,

'/dev/ ribm_redo_0_12' NAME redo_0_12,

'/dev/ ribm_redo_0_13' NAME redo_0_13,

'/dev/ ribm_redo_0_14' NAME redo_0_14,

'/dev/ ribm_redo_0_15' NAME redo_0_15

ATTRIBUTE

'compatible.asm' = '12.1',

'compatible.rdbms' = '12.1',

'sector_size' = '512';

Diskgroup created.

SQL> CREATE DISKGROUP REDO1 EXTERNAL REDUNDANCY DISK

'/dev/ ribm_redo_1_10' NAME redo_1_10,

'/dev/ribm_redo_1_11' NAME redo_1_11,

'/dev/ribm_redo_1_12' NAME redo_1_12,

'/dev/ribm_redo_1_13' NAME redo_1_13,

'/dev/ribm_redo_1_14' NAME redo_1_14,

'/dev/ribm_redo_1_15' NAME redo_1_15

ATTRIBUTE

'compatible.asm' = '12.1',

'compatible.rdbms' = '12.1',

A Principled Technologies test report 34

Mission-critical database performance: Intel Xeon processor E7 v2 family vs. IBM POWER7+

(Revised 2/28/14 to include full methodology)

'sector_size' = '512';

Diskgroup created.

SQL> quit

Disconnected from Oracle Database 12c Enterprise Edition Release 12.1.0.1.0 -

64bit Production

With the Automatic Storage Management option

Installing Oracle Database 12c on the POWER7+ server 1. Run the GUI installer for Oracle Database using the following commands:

ssh –Y oracle@ibm

db_env

cd /mnt/share/aix/database

./runInstaller

********************************************************************************

Your platform requires the root user to perform certain pre-installation

OS preparation. The root user should run the shell script 'rootpre.sh' before

you proceed with Oracle installation. rootpre.sh can be found at the top level

of the CD or the stage area.

Answer 'y' if root has run 'rootpre.sh' so you can proceed with Oracle

installation.

Answer 'n' to abort installation and then ask root to run 'rootpre.sh'.

********************************************************************************

Has 'rootpre.sh' been run by root? [y/n] (n)

y

Starting Oracle Universal Installer...

2. Launch the Oracle Database 12c Release 1 Installer.

3. In Configure Security Updates, check the I wish to receive security updates via My Oracle Support checkbox. Click

Next.

4. Click Yes to confirm no email provided, and continue.

5. In Software Updates, select Skip software updates, and click Next.

6. In Installation Option, select Install database software only, and click Next.

7. In Grid Installation Options, select Single instance database installation, and click Next.

8. In Product Languages, select English and click the right-pointing arrow located between the two selection panels to

add English to the Selected languages panel. Click Next.

9. In Database Edition, select Enterprise Edition, and click Next.

A Principled Technologies test report 35

Mission-critical database performance: Intel Xeon processor E7 v2 family vs. IBM POWER7+

(Revised 2/28/14 to include full methodology)

10. In Installation Location, accept the default locations provided, and click Next.

11. In Operating System Group, accept the defaults, and click Next.

12. In Prerequisite checks, check the Ignore All checkbox to bypass the findings of the prerequisite checks, and click

Next.

13. Click Yes to confirm the notification and continue.

14. In Summary, review the information, and click Install to begin installation.

15. In Install Product, follow the instructions to execute the scripts. Click OK when the scripts have completed.

16. In Finish, click Close to exit the installer.

17. When prompted in the GUI installer, run the root shell script to finish the Oracle Database installation. /u01/app/oracle/product/12.1.0/dbhome_1/root.sh

Creating the Oracle Database (using DBCA) 1. Launch the Database Configuration Assistant (DBCA).

2. In Database Operations, select Create Database, and click Next.

3. In Creation Mode, select Advanced Mode, and click Next.

4. In Database Template, select the Template for General Purpose or Transaction Processing, and click Next.

5. In Database Identification, type tpcc1.test.lan for the Global Database Name.

6. Type tpcc1 for the SID. Click Next.

7. In Management Options, select Configure Enterprise Manager (EM) Database Express. Click Next.

8. In Database Credentials, select Use the Same Administrative Password for All Accounts.

9. Enter and confirm the administrative password, and click Next.

10. In Network Configuration, check the boxes for all listeners, and click Next.

11. In Storage Locations, select User Common Location for All Database Files. Type +DATA into the Database Files

Location field.

12. Select Specify Fast Recovery Area. Type (ORACLE_BASE)/fast_recovery_area in the Fast Recovery Area

field.

13. Set the Fast Recovery Area Size to 2,048 GB, and click Next.

14. In Database Options, accept the defaults, and click Next.

15. In Initialization Parameters and under typical settings, set the Memory Size to 411,320 MB, and click next.

16. In Creation Options, select Create Database. Click Customize Storage Locations.

17. In the Customize Storage panel and under Redo Log Groups, select 1.

18. Set the file size to 98,304 MB. Click Apply.

19. Under Redo Log Groups, select 2.

20. Set the file size to 98,304 MB. Click Apply.

21. Under Redo Log Groups, select 3.

22. Click Remove and when prompted, click Yes.

23. To exit the Customize Storage panel, click Ok.

24. Click Next.

25. Review the Summary. To complete the database creation, click Finish.

26. Review the information on the screen, and click Exit.

27. To exit the DBCA, click Close.

Configuring Oracle Tablespaces and redo log Alter the tablespaces on both systems as shown below.

A Principled Technologies test report 36

Mission-critical database performance: Intel Xeon processor E7 v2 family vs. IBM POWER7+

(Revised 2/28/14 to include full methodology)

ALTER DATABASE ADD LOGFILE GROUP 1 ( '+REDO0/tpcc1/redo01_0.log', '+REDO1/tpcc1/redo01_1.log' ) SIZE 96G; ALTER DATABASE ADD LOGFILE GROUP 2 ( '+REDO0/tpcc1/redo02_0.log', '+REDO1/tpcc1/redo02_1.log' ) SIZE 96G;

CREATE BIGFILE TABLESPACE "TPCC"

DATAFILE '+DATA/tpcc1/tpcc.dbf’

SIZE 100G AUTOEXTEND ON NEXT 1G

BLOCKSIZE 8K

EXTENT MANAGEMENT LOCAL AUTOALLOCATE

SEGMENT SPACE MANAGEMENT AUTO;

CREATE BIGFILE TABLESPACE “TPCC_OL"

DATAFILE '+DATA/tpcc1/tpcc_ol.dbf’

SIZE 50G AUTOEXTEND ON NEXT 1G

BLOCKSIZE 16K

EXTENT MANAGEMENT LOCAL AUTOALLOCATE

SEGMENT SPACE MANAGEMENT AUTO;

CREATE UNDO TABLESPACE undotbs2

DATAFILE '+DATA/tpcc1/undotbs02.dbf’

SIZE 100M AUTOEXTEND ON NEXT 100M;

ALTER SYSTEM SET UNDO_TABLESPACE=undotbs2;

DROP TABLESPACE undotbs1 INCLUDING CONTENTS AND DATAFILES;

CREATE UNDO TABLESPACE undotbs1

DATAFILE '+DATA/tpcc1/undotbs01.dbf’

SIZE 8G BLOCKSIZE 8K;

ALTER SYSTEM SET UNDO_TABLESPACE=undotbs1;

DROP TABLESPACE undotbs2 INCLUDING CONTENTS AND DATAFILES;

Configuring the Oracle pfile Alter the Oracle pfile on both systems as shown below.

_disable_logging=FALSE

_disable_selftune_checkpointing=TRUE

_enable_NUMA_support=TRUE

_in_memory_undo=TRUE

_kgl_hot_object_copies=4

A Principled Technologies test report 37

Mission-critical database performance: Intel Xeon processor E7 v2 family vs. IBM POWER7+

(Revised 2/28/14 to include full methodology)

aq_tm_processes=0

audit_file_dest='/u01/app/oracle/admin/tpcc1/adump'

audit_trail='NONE'

commit_logging='BATCH'

commit_wait='NOWAIT'

compatible='12.1.0.0.0'

control_files='+DATA/tpcc1/control01.ctl','+DATA/tpcc1/control02.ctl'

db_16k_cache_size=32749125632

db_block_checking='FALSE'

db_block_checksum='FALSE'

db_block_size=8192

db_cache_size=128849018880

db_create_file_dest='+DATA'

db_domain='test.lan'

db_file_multiblock_read_count=32

db_name='tpcc1'

db_recovery_file_dest_size=2048g

db_recovery_file_dest='/u01/app/oracle/fast_recovery_area'

db_writer_processes=4

diagnostic_dest='/u01/app/oracle'

disk_asynch_io=TRUE

dispatchers='(PROTOCOL=TCP) (SERVICE=tpcc1XDB)'

dml_locks=500

fast_start_mttr_target=0

filesystemio_options='setall'

large_pool_size=1g

local_listener='LISTENER_TPCC1'

lock_sga=TRUE

log_checkpoint_interval=0

log_checkpoint_timeout=0

log_checkpoints_to_alert=TRUE

open_cursors=2000

parallel_max_servers=0

parallel_min_servers=0

pga_aggregate_target=5g

plsql_code_type='NATIVE'

plsql_optimize_level=3

processes=1000

query_rewrite_enabled='TRUE'

remote_login_passwordfile='EXCLUSIVE'

replication_dependency_tracking=FALSE

result_cache_max_size=0

shared_pool_size=5905580032

statistics_level='BASIC'

timed_statistics=FALSE

trace_enabled=FALSE

transactions_per_rollback_segment=1

undo_management='AUTO'

undo_retention=0

undo_tablespace='UNDOTBS1'

Installing HammerDB Client Complete the following steps on both systems.

1. Launch the Oracle Client Installer.

2. In Select Installation Type, select Administrator (1.8 GB) as the installation type, and click Next.

A Principled Technologies test report 38

Mission-critical database performance: Intel Xeon processor E7 v2 family vs. IBM POWER7+

(Revised 2/28/14 to include full methodology)

3. In Software Updates, select Skip software updates, and click Next.

4. In Select Product Languages, select English and click the right-pointing arrow located between the two selection

panels to add English to the Selected languages panel. Click Next.

5. In Specify Installation Location, accept the default locations provided, and click Next.

6. In Create Inventory, accept the defaults, and click Next.

7. In Summary, review the information, and click Install to begin installation.

8. In Install Product, follow the instructions to execute the scripts. Click OK when the scripts have completed.

9. In Finish, click Close to exit the installer.

A Principled Technologies test report 39

Mission-critical database performance: Intel Xeon processor E7 v2 family vs. IBM POWER7+

(Revised 2/28/14 to include full methodology)

ABOUT PRINCIPLED TECHNOLOGIES

Principled Technologies, Inc. 1007 Slater Road, Suite 300 Durham, NC, 27703 www.principledtechnologies.com

We provide industry-leading technology assessment and fact-based marketing services. We bring to every assignment extensive experience with and expertise in all aspects of technology testing and analysis, from researching new technologies, to developing new methodologies, to testing with existing and new tools. When the assessment is complete, we know how to present the results to a broad range of target audiences. We provide our clients with the materials they need, from market-focused data to use in their own collateral to custom sales aids, such as test reports, performance assessments, and white papers. Every document reflects the results of our trusted independent analysis. We provide customized services that focus on our clients’ individual requirements. Whether the technology involves hardware, software, Web sites, or services, we offer the experience, expertise, and tools to help our clients assess how it will fare against its competition, its performance, its market readiness, and its quality and reliability. Our founders, Mark L. Van Name and Bill Catchings, have worked together in technology assessment for over 20 years. As journalists, they published over a thousand articles on a wide array of technology subjects. They created and led the Ziff-Davis Benchmark Operation, which developed such industry-standard benchmarks as Ziff Davis Media’s Winstone and WebBench. They founded and led eTesting Labs, and after the acquisition of that company by Lionbridge Technologies were the head and CTO of VeriTest.

Principled Technologies is a registered trademark of Principled Technologies, Inc. All other product names are the trademarks of their respective owners.

Disclaimer of Warranties; Limitation of Liability: PRINCIPLED TECHNOLOGIES, INC. HAS MADE REASONABLE EFFORTS TO ENSURE THE ACCURACY AND VALIDITY OF ITS TESTING, HOWEVER, PRINCIPLED TECHNOLOGIES, INC. SPECIFICALLY DISCLAIMS ANY WARRANTY, EXPRESSED OR IMPLIED, RELATING TO THE TEST RESULTS AND ANALYSIS, THEIR ACCURACY, COMPLETENESS OR QUALITY, INCLUDING ANY IMPLIED WARRANTY OF FITNESS FOR ANY PARTICULAR PURPOSE. ALL PERSONS OR ENTITIES RELYING ON THE RESULTS OF ANY TESTING DO SO AT THEIR OWN RISK, AND AGREE THAT PRINCIPLED TECHNOLOGIES, INC., ITS EMPLOYEES AND ITS SUBCONTRACTORS SHALL HAVE NO LIABILITY WHATSOEVER FROM ANY CLAIM OF LOSS OR DAMAGE ON ACCOUNT OF ANY ALLEGED ERROR OR DEFECT IN ANY TESTING PROCEDURE OR RESULT. IN NO EVENT SHALL PRINCIPLED TECHNOLOGIES, INC. BE LIABLE FOR INDIRECT, SPECIAL, INCIDENTAL, OR CONSEQUENTIAL DAMAGES IN CONNECTION WITH ITS TESTING, EVEN IF ADVISED OF THE POSSIBILITY OF SUCH DAMAGES. IN NO EVENT SHALL PRINCIPLED TECHNOLOGIES, INC.’S LIABILITY, INCLUDING FOR DIRECT DAMAGES, EXCEED THE AMOUNTS PAID IN CONNECTION WITH PRINCIPLED TECHNOLOGIES, INC.’S TESTING. CUSTOMER’S SOLE AND EXCLUSIVE REMEDIES ARE AS SET FORTH HEREIN.


Recommended