99
Mobile Phone T62u
Mobile Phone T62u

l Use
Pvs
Ra
Ityi
at
“
o
T9U
anadian Pat. No. 1,331,057; United 38414B; Hong Kong Standard Pat. No. ublic of Singapore Pat. No. 51383; 2 463 (96927260.8) DE/DK, FI, FR, B; and additional patents are pending
worldwide.indows” and the design plus words ws” are each either registered and/or arks owned by Microsoft Corporation ond, Washington, U.S.A.
rademarks are owned by Bluetooth SIG, Inc., U.S.A.
of the services in this manual are not tworks. This also applies to the GSM ency Number 112 or 911. Contact your ervice provider if you are in doubt about a particular service or not. Please read safe and efficient use and the Limited s before you use your mobile phone.n Mobile Communications (USA) Inc.
All rights reservednumber: AE/LZT 123 7007 R12 PBM Printed in USA
Not f
or Com
merc
ia
ara obtener una copia en español de esta Guía del Usuario, isite nuestra página Web en www.SonyEricsson.com o,
i se encuentra en Estados Unidos, también puede llamar al 1-800-374-2776.
egister your new phone, purchase Sony Ericsson original ccessories, and see the latest in products by visiting us at
www.SonyEricsson.com.This manual is published by Sony Ericsson Mobile Communications (USA) Inc., without any warranty.
mprovements and changes to this manual necessitated by pographical errors, inaccuracies of current information, or
mprovements to programs and/or equipment may be made by Sony Ericsson Mobile Communications (USA) Inc., any time and without notice. Such changes will, however,
be incorporated into new editions of this manual.Trademarks referred to herein are trademarks of their
respective companies.Ericsson”, “Ericssonzzzz” and “ERICSSON ORIGINAL ACCESSORIES” are each registered U.S. Trademarks
wned by Telefonaktiebolaget L M Ericsson of Sweden and are used with permission by Sony Ericsson Mobile
Communications (USA) Inc. Text Input is licensed under one or more of the following: .S. Pat. Nos. 5,818,437, 5,953,541, 5,187,480, 5,945,928,
and 6,011,554; CKingdom Pat. No.22
HK0940329; RepEuro.Pat. No. 0 84IT,NL,PT.ES,SE,G
“Microsoft”, “W“Microsoft Windo
pending U.S. Trademof Redm
The BLUETOOTH t
Please note: Somesupported by all ne
International Emergnetwork operator or swhether you can use
the Guidelines for warranty chapter
©2002, Sony Ericsso
Publication 08/0

l Use
Not f
or Com
merc
ia
l Use
3
T cessories, and ............................................87............................................88............................................91
Not f
or Com
merc
ia
able of ContentsGuidelines for Safe and Efficient Use........5Limited Warranty .....................................10Getting Started..........................................13Getting To Know Your Phone..................17Changing Front Covers ............................20Calling ......................................................23Personalizing Your Phone ........................33Voice Control ...........................................41Voicemail .................................................46Sending and Receiving Items...................55Setting Up Mobile Internet.......................56Messaging.................................................61WAP .........................................................69Information Transfer and Exchange.........76More Features...........................................77Synchronization........................................79Security.....................................................83Troubleshooting........................................84
Assistance, AcAccessibility.Icons .............Index.............

l Use
Not f
or Com
merc
ia
4
l Use
for Safe and Efficient Use 5
GEPlph
R•
•
•
•
•••
•
roduct in an area where a potentially here exists.r product or install wireless area above your car’s air bag. disassemble your product. Only Sony ed personnel should perform service.one is equipped with infrared, never ray at anyone's eye and make sure sturb any other infrared units.
that has been specifically designed r your mobile phone. Use of ified antennas could damage your ay violate regulations, causing loss SAR levels above the recommended
phone as you would any other ver the top of the phone when in use, l quality and may cause the phone to r power level than needed, thus d standby times.
Not f
or Com
merc
ia
Guidelines
uidelines for Safe and fficient Useease read this information before using your mobile one.
ecommendationsAlways treat your product with care and keep it in a clean and dust-free place.Do not expose your product to liquid or moisture or humidity.Do not expose your product to extreme high or low temperatures.Do not expose your product to open flames or lit tobacco products.Do not drop, throw, or try to bend your product. Do not paint your product.Do not use your product near medical equipment without requesting permission.Do not use your product when in, or around aircraft, or areas posted “turn off two-way radio”.
• Do not use your pexplosive atmosp
• Do not place youequipment in the
• Do not attempt toEricsson authoriz
• If your mobile phdirect the infraredthat it does not di
Antenna Only use an antennaby Sony Ericsson founauthorized or modmobile phone and mof performance and limits (see below).
Efficient Use• Hold your mobile
phone. Do not coas this affects caloperate at a higheshortening talk an

l Use
um power required to reach the network. loser you are to a base station, the more he actual SAR level will decrease.
R below the radio frequency exposure ot mean that there are variations in safety. y be differences in SAR levels among all Sony Ericsson mobile phone models meet radio frequency exposure
significantly affect a mobile phone’s h the radio frequency exposure guidelines. e Federal Communication Commission ires that some manufacturers’ accessories and Sony Ericsson has done so with oducts. To avoid causing loss of radio frequency exposure levels above limits it is recommended that you only on or Ericsson original accessories with the mobile phone. If you wear the n your body while it is transmitting, and Sony Ericsson or Ericsson original body
, please ensure that the mobile phone is nimum of 1.5 cm from your body and that g an accessory that contains any metal.
Not f
or Com
merc
ia
6 Guidelines for Safe and Efficient Use
Radio Frequency (RF) Exposure and SARYour mobile phone is a low-power radio transmitter and receiver. When it is turned on, it emits low levels of radio frequency energy (also known as radio waves or radio frequency fields). Governments around the world have adopted comprehensive international safety guidelines, developed by scientific organizations, e.g. ICNIRP (International Commission on Non-Ionizing Radiation Protection) and IEEE (The Institute of Electrical and Electronics Engineers Inc.), through periodic and thorough evaluation of scientific studies. These guidelines establish permitted levels of radio wave exposure for the general population. The levels include a safety margin designed to assure the safety of all persons, regardless of age and health, and to account for any variations in measurements.
Specific Absorption Rate (SAR) is the unit of measurement for the amount of radio frequency energy absorbed by the body when using a mobile phone. The SAR value is determined at the highest certified power level in laboratory conditions, but the actual SAR level of the mobile phone while operating can be well below this value. This is because the mobile phone is designed
to use the minimTherefore, the clikely it is that t
Variations in SAguidelines do nWhile there mamobile phones,are designed to guidelines.Accessories cancompliance witFor example, thin the U.S. requshall be tested, respect to its prperformance orthe permissibleuse Sony Ericssintended for usemobile phone oyou do not use aworn accessorypositioned a miyou are not usin
l Use
for Safe and Efficient Use 7
Aphwfoex
DPlofhaErfopoveinanAanco
PMpapl
using the mobile phone, place it at pacemaker. If a minimum distance is kept between the mobile phone the risk of interference is limited. on to suspect that interference is iately turn off your mobile phone. logist for more information.
evices, please consult the device.
HILDREN TO PLAY WITH YOUR R ITS ACCESSORIES. THEY
EMSELVES OR OTHERS, OR TALLY DAMAGE THE MOBILE SSORY. YOUR MOBILE PHONE RY MAY CONTAIN SMALL LD BE DETACHED AND CREATE ARD.
the Product should not be placed in municipal local regulations for disposal of
Not f
or Com
merc
ia
Guidelines
separate leaflet with SAR information for this mobile one model is included with the material that comes
ith this mobile phone. This information can also be und, together with more information on radio frequency posure and SAR, on www.SonyEricsson.com.
rivingease check if local laws and regulations restrict the use mobile phones while driving or require drivers to use ndsfree solutions. We recommend that you use icsson or Sony Ericsson handsfree solutions intended r use with your product. Please note that because of ssible interference to electronic equipment, some hicle manufacturers forbid the use of mobile phones their vehicles unless a handsfree kit with an external tenna supports the installation. lways give full attention to driving and pull off the road d park before making or answering a call if driving nditions so require.
ersonal Medical Devicesobile phones may affect the operation of cardiac cemakers and other implanted equipment. Please avoid acing the mobile phone over the pacemaker, e.g. in your
breast pocket. Whenthe ear opposite the of 15 cm (6 inches) and the pacemaker, If you have any reastaking place, immedContact your cardio
For other medical dmanufacturer of the
ChildrenDO NOT ALLOW CMOBILE PHONE OCOULD HURT THCOULD ACCIDENPHONE OR ACCEOR ITS ACCESSOPARTS THAT COUA CHOKING HAZ
Disposing of Your mobile phone waste. Please checkelectronic products.
l Use
on or Sony Ericsson branded original argers intended for use with your mobile argers may not charge sufficiently or may
ive heat. Using other batteries and be dangerous.
e the battery to extreme temperatures, +60°C (+140°F). For maximum battery the battery at room temperature. ay explode if disposed of in fire.e the battery to liquid.hildren’s reach. mobile phone before removing the battery.ry for the intended purpose only.emble or modify the battery. e phone battery has metal contacts, do not contacts touch another metal object. This ircuit and damage the battery. the battery to be put into the mouth. rolytes may be toxic if swallowed.
Not for C
omm
ercia
8 Guidelines for Safe and Efficient Use
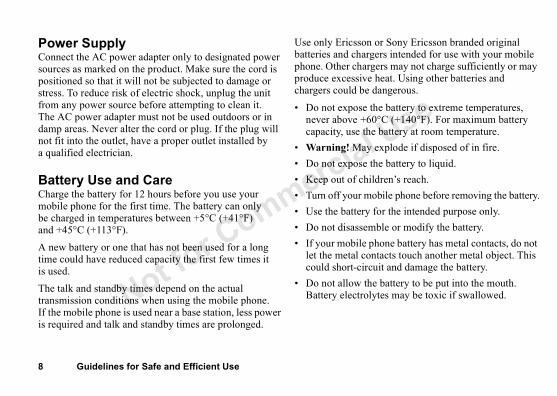
Power SupplyConnect the AC power adapter only to designated power sources as marked on the product. Make sure the cord is positioned so that it will not be subjected to damage or stress. To reduce risk of electric shock, unplug the unit from any power source before attempting to clean it. The AC power adapter must not be used outdoors or in damp areas. Never alter the cord or plug. If the plug will not fit into the outlet, have a proper outlet installed by a qualified electrician.
Battery Use and CareCharge the battery for 12 hours before you use your mobile phone for the first time. The battery can only be charged in temperatures between +5°C (+41°F) and +45°C (+113°F).A new battery or one that has not been used for a long time could have reduced capacity the first few times it is used.The talk and standby times depend on the actual transmission conditions when using the mobile phone. If the mobile phone is used near a base station, less power is required and talk and standby times are prolonged.
Use only Ericssbatteries and chphone. Other chproduce excesschargers could
• Do not exposnever above capacity, use
• Warning! M• Do not expos• Keep out of c• Turn off your• Use the batte• Do not disass• If your mobil
let the metal could short-c
• Do not allowBattery elect
l Use
for Safe and Efficient Use 9
DThPlcain
FThO(1
(2in
E
IMThrausconeco
to make or receive calls, the mobile hed on and in a service area with nal strength. Emergency calls may
ll cellular phone networks or when ices and/or mobile phone features are our local service provider.
ology to help provide location of an emergency is a goal shared by dustry, local phone companies and nse centers. Your phone includes presents the first step towards that echnique in its current state, ed implementation technologies od may not always work, even if you th an emergency response center. an emergency response center all ve, including intersecting streets, arks, to assist in locating you.
mmitted to continuing to work with ations industry to improve location cy response.
Not for C
omm
ercia
Guidelines
isposing Of The Batterye battery should never be placed in municipal waste.
ease check local regulations for disposal of batteries or ll your local Sony Ericsson Customer Care Center for formation.
CC Statementis device complies with Part 15 of the FCC rules.
peration is subject to the following two conditions: ) This device may not cause harmful interference, and
) This device must accept any interference received, cluding interference that may cause undesired operation.
mergency Calls
PORTANT!is mobile phone, like any mobile phone, operates using
dio signals, cellular and landline networks as well as er-programmed functions, which cannot guarantee nnection under all conditions. Therefore you should ver rely solely upon any mobile phone for essential mmunications (e.g. medical emergencies).
Remember, in orderphone must be switcadequate cellular signot be possible on acertain network servin use. Check with y
Using wireless techninformation in case the entire wireless inthe emergency respotechnology which regoal. However, the tcombined with relatmeans that the methare able to speak wiAlways review withlocation data you haas well as any landmSony Ericsson is cothe entire communicfeatures for emergen

l Use
arrantyobile Communications (USA) Inc.
, provides this Limited Warranty for your nd original accessories delivered with one (hereinafter referred to as “Product”).
duct need warranty service, please return rom whom it was purchased, or contact Ericsson Customer Care Center (national ) or visit www.SonyEricsson.com to get tion.
tyonditions of this Limited Warranty, Sony ts this Product to be free from defects
rial, and workmanship at the time of its se by a consumer, and for a subsequent ) year.
ill Doarranty period, this Product fails to ormal use and service, due to defects rials, or workmanship, Sony Ericsson ibutors or service partners, in the country
Not f
or Com
merc
ia
10 Limited Warranty
Sony Ericsson is not liable for any service(s) including operation, coverage, or range of the network services provided by network carriers independent of Sony Ericsson.
Limited WSony Ericsson M(Sony Ericsson)mobile phone ayour mobile ph
Should your Proit to the dealer fyour local Sonyrates may applyfurther informa
Our WarranSubject to the cEricsson warranin design, mateoriginal purchaperiod of one (1
What We WIf, during the woperate under nin design, mateauthorized distr
l Use
Limited Warranty 11
weite
Sototo
C1
2
s not cover any failure of the Product ar and tear, or due to misuse, limited to use in other than the mary manner, in accordance with the tructions for use and maintenance of
does this warranty cover any failure e to accident, modification or f God, or damage resulting from
system on which the Product is ided by a carrier independent from ony Ericsson will not be responsible availability, coverage, services, ystem.es not cover Product failures caused
odifications, or repair or opening of rmed by a non-Sony Ericsson . s not cover Product failures which by use of accessories or other s which are not Ericsson or Sony original accessories intended for uct. ny of the seals on the Product will .
Not f
or Com
merc
ia
here you purchased the Product, will, at their option, ther repair or replace the Product in accordance with the rms and conditions stipulated herein.
ny Ericsson and/or its service partners reserve the right charge a handling fee if a returned Product is found not be under warranty according to the conditions below.
onditionsThe warranty is valid only if the original proof of purchase issued to the original purchaser by the dealer, specifying the date of purchase and serial number*, is presented with the Product to be repaired or replaced. Sony Ericsson reserves the right to refuse warranty service if this information has been removed or changed after the original purchase of the Product from the dealer. If Sony Ericsson repairs or replaces the Product, the repaired or replaced Product shall be warranted for the remaining time of the original warranty period or for ninety (90) days from the date of repair, whichever is longer. Repair or replacement may involve the use of functionally equivalent reconditioned units. Replaced parts or components will become the property of Sony Ericsson.
3 This warranty doedue to normal weincluding but notnormal and custoSony Ericsson insthe Product. Nor of the Product duadjustment, acts oliquid.
4 Since the cellularto operate is provSony Ericsson, Sfor the operation,or range of that s
5 This warranty doby installations, mthe Product perfoauthorized person
6 The warranty doehave been causedperipheral deviceEricsson brandeduse with the Prod
7 Tampering with avoid the warranty

l Use
tries/regions additional information is , this is clearly shown on the valid proof
Not f
or Com
merc
ia
12 Limited Warranty
8 THERE ARE NO EXPRESS WARRANTIES, WHETHER WRITTEN OR ORAL, OTHER THAN THIS PRINTED LIMITED WARRANTY. ALL IMPLIED WARRANTIES, INCLUDING WITHOUT LIMITATION THE IMPLIED WARRANTIES OF MERCHANTABILITY OR FITNESS FOR A PARTICULAR PURPOSE, ARE LIMITED TO THE DURATION OF THIS LIMITED WARRANTY. IN NO EVENT SHALL SONY ERICSSON OR ITS LICENSORS BE LIABLE FOR INCIDENTAL OR CONSEQUENTIAL DAMAGES OF ANY NATURE WHATSOEVER, INCLUDING BUT NOT LIMITED TO LOST PROFITS OR COMMERCIAL LOSS, TO THE FULL EXTENT THOSE DAMAGES CAN BE DISCLAIMED BY LAW.
Some countries/states do not allow the exclusion or limitation of incidental or consequential damages, or limitation of the duration of implied warranties, so the preceding limitations or exclusions may not apply to you. The warranty provided does not affect the consumer’s statutory rights under applicable legislation in force, nor the consumer’s rights against the dealer arising from their sales/ purchase contract.
* In some counrequested. If soof purchase.
l Use
Getting Started 13
G
ABea
•
•
•
•
•
•
nstructs you to press a key, press and
nstructs you to press and hold a key, e key for one to two seconds.
icesunctions described in this user’s r subscription-dependent. Because of not be available in your phone.es that a service or function ription-dependent.
service provider for more our subscription.
s a subscriber with a service provider, criber Identity Module) card. The SIM puter chip that keeps track of your ervices included in your subscription, information, among other things.
Not for C
omm
ercia
etting Started
bout this user’s guidefore you start reading your User’s Guide, there are
few things you should know:
For ease of reference, see “Getting To Know Your Phone” on page 17 for a quick overview of the main functions of the phone, shortcuts and general information.A Menu Diagram is located on the inside front cover of this User’s Guide. This is a quick overview of the menus in your Sony Ericsson mobile phone.Your Quick Reference Card on the side back cover of this manual gives you information about your Sony Ericsson mobile phone that you can take with you.Text that is seen in the phone’s display is shown in the following typeface: Add To Phonebook.Softkey names are shown in the following typeface: Softkey.Key names are shown in the following typeface: C.
• When this guide irelease the key.
• When this guide ipress and hold th
Available servSome services and fguide are network- othis, all menus may This symbol indicatis network- or subsc
Please consult your information about y
The SIM cardWhen you register ayou get a SIM (Subscard contains a comphone number, the sand your phonebook

l Use
r SIM Card
ard by doing the following:IM card slot by sliding r up toward the top of
ne upside down and slot will unhinge access to the SIM
card into the slot e plastic holders. at the notch is in the er of the SIM card
the SIM holder down the phone. card in place by
astic bar toward f the phone until you
use your phone with the front or back removed.
Not f
or Com
merc
ia
14 Getting Started
AssemblyBefore you can use your phone, you need to:1 Install your SIM card and lock it in place.2 Attach and charge your battery.
3 Put your back cover on.
Installing You
Insert the SIM c1 Unlock the S
the plastic bathe phone.
2 Turn the phothe SIM cardallowing youcard holder.
3 Slide the SIMformed by thMake sure thtop right cornholder. Fold flush against
4 Lock the SIMsliding the plthe bottom ohear a click.
Note! Be sure to use only a Sony Ericsson lithium polymer battery that is listed as compatible with your mobile phone. Using batteries that are not compatible with your specific mobile phone will void your warranty.
Note! Always turn off the phone and detach the charger before you insert or remove a SIM card.
Note! Insert the SIM card and charge the battery before using the phone.
Note! Nevercover
l Use
Getting Started 15
A1
2
3
45
k Cover One notches along of the back of e.
e notches as slide the back ward. If the wires ositioned properly, cover may not easily.
Th
is side u
p
Not f
or Com
merc
ia
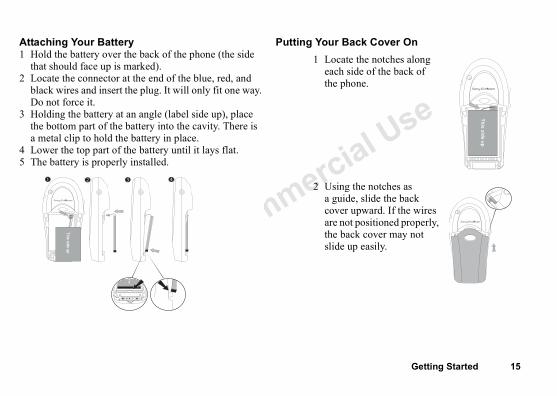
ttaching Your BatteryHold the battery over the back of the phone (the side that should face up is marked). Locate the connector at the end of the blue, red, and black wires and insert the plug. It will only fit one way. Do not force it.Holding the battery at an angle (label side up), place the bottom part of the battery into the cavity. There is a metal clip to hold the battery in place.Lower the top part of the battery until it lays flat.The battery is properly installed.
Putting Your Bac
This side up
de up
1 Locate theach sidethe phon
2 Using tha guide, cover upare not pthe backslide up

l Use
our Batterybattery for the first time, attach the to the back of your phone under the back lace the back cover (see “Putting Your
” on page 15). Once you have installed u should not need to remove it.charger to the phone at the flash symbol.
bol on the charger plug must match with bol on the system connector.p to 30 minutes before the battery appears in the display.
mately 12 hours or until the icon indicates ry is fully charged.charger by tilting the plug upward.
30 min.
fully charged
Not for Com
merc
ia
16 Getting Started
Charging YTo charge your phone’s batterycover. Then, repBack Cover Onyour battery, yo1 Connect the
The flash symthe flash sym
2 It may take ucharging icon
3 Wait approxithat the batte
4 Remove the
3 Click the back cover into place.

l Use
tting To Know Your Phone 17
G
PThbo
11 External antenna connector12 Headset jack (2.5mm plug/audio jack)13 Back cover latch
14 Accessory Connector (Handsfree, Charger, FM radio, MP3, Chatboard, etc.)15 Microphone16 Charging connector
Not f
or Com
merc
ia
Ge
etting To Know Your Phone
hone Viewse following diagrams illustrate the front, back, and ttom views of your phone.
1 Earpiece2 Side volume keys3 Display4 Left softkey5 Joystick (4-way navigation with center push key)6 Options key7 Keypad8 Power On/Off key9 Clear key10 Right softkey
2
3
5
6
7
8
9
104
1 13
11
12
14 1615
l Use
s , Lock Keypad then Select to lock To unlock your keypad press C then Yes.le indicates the currently-selected profile. profiles are Normal (no icon), Meeting
), Outdoors, ( ) Portable ( ), and Work ( ).g ( ) allows you to reject certain
ls. ( ) indicator indicates that the Magic is enabled.
) icon shows the number of unanswered e received. The icon appears when you calls.e ( ) indicates that you have received ) message. The number next to the icon t number of SMS messages you have
ge ( ) indicates that you have received age. The number next to the icon indicates of voice messages you have received.
service providers send an SMS message icate you have received a voice message.
Not f
or Com
merc
ia
18 Getting To Know Your Phone
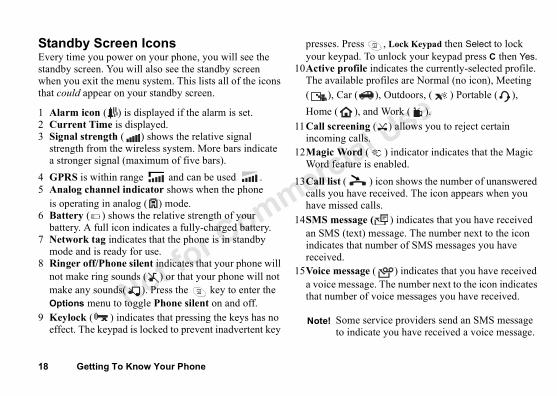
Standby Screen IconsEvery time you power on your phone, you will see the standby screen. You will also see the standby screen when you exit the menu system. This lists all of the icons that could appear on your standby screen.
1 Alarm icon ( ) is displayed if the alarm is set.2 Current Time is displayed.3 Signal strength ( ) shows the relative signal
strength from the wireless system. More bars indicate a stronger signal (maximum of five bars).
4 GPRS is within range and can be used .5 Analog channel indicator shows when the phone
is operating in analog ( ) mode.6 Battery ( ) shows the relative strength of your
battery. A full icon indicates a fully-charged battery.7 Network tag indicates that the phone is in standby
mode and is ready for use.8 Ringer off/Phone silent indicates that your phone will
not make ring sounds ( ) or that your phone will not make any sounds( ). Press the key to enter the Options menu to toggle Phone silent on and off.
9 Keylock ( ) indicates that pressing the keys has no effect. The keypad is locked to prevent inadvertent key
presses. Presyour keypad.
10Active profiThe available( ), Car (Home ( ),
11Call screeninincoming cal
12Magic WordWord feature
13Call list (calls you havhave missed
14SMS messagan SMS (textindicates thareceived.
15Voice messaa voice messthat number
Note! Someto ind

l Use
tting To Know Your Phone 19
K
SoYolathunFoprsoseorrigse
PoPr
JoPraTimse
you to quickly access options for ions vary based on the function you nce, when you are reading a new can press the for choices such as eply. You can also press for help.
Not f
or Com
merc
ia
Ge
ey Functions
ftkeysur phone is equipped with softkeys. The softkey text
bels are displayed on the bottom of your display. To use e softkey functions, press the left or right key that is der the text label on the screen.r example, ess the left ftkey to lect Call List press the ht softkey to
lect the Menu from the standby screen.
wer Keyess and briefly hold to turn on your phone.
ystickess the joystick/center select key to select highlighted item.lt the joystick up, down, left, or right to access the main enu tabs, scroll through menus, and view scrolling lections.
Options KeyThe key allowssome functions (optare using). For instaSMS message, you delete, forward, or r
Select Cancel
right softkeyleft softkey
left softkeylabel
right softkeylabel
l Use
n the latches.
m of the front phone. Remove rom the cover ).
Not f
or Com
merc
ia
20 Changing Front Covers
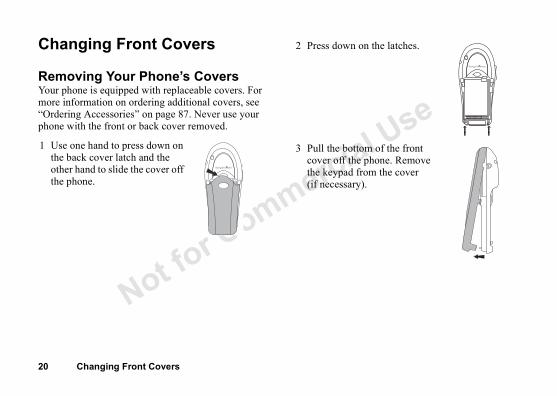
Changing Front Covers
Removing Your Phone’s CoversYour phone is equipped with replaceable covers. For more information on ordering additional covers, see “Ordering Accessories” on page 87. Never use your phone with the front or back cover removed.
1 Use one hand to press down on the back cover latch and the other hand to slide the cover off the phone.
2 Press down o
3 Pull the bottocover off thethe keypad f(if necessary

l Use
Changing Front Covers 21
R1
2
3
45
part of the front cover to the phone place.ck cover, see “Putting On” on page 15.
unctioning properly, over and adjust your
ceiving callshold to turn on your phone.ersonal Identity Number), if you SIM card. Your PIN is provided rovider.
e a mistake while entering your PIN, wrong number by pressing C.
Not f
or Com
merc
ia
eplacing Your Phone’s CoversLocate the four notches on the front cover (as indicated here).Holding the front cover horizontally (flat) place the keypad in the cover.Push down on each of the notches to secure the keypad in the cover.
Locate the tab on the top of the cover.Holding the front cover at an angle, as shown in the illustration, insert the tab into the notch on the phone.
6 Press the bottom until it clicks into
7 To replace the baYour Back Cover
If any keys are not fremove your front ckeypad.
Making and re1 Press and briefly 2 Enter your PIN (P
have one for yourby your service p
Note! If you makdelete the
l Use
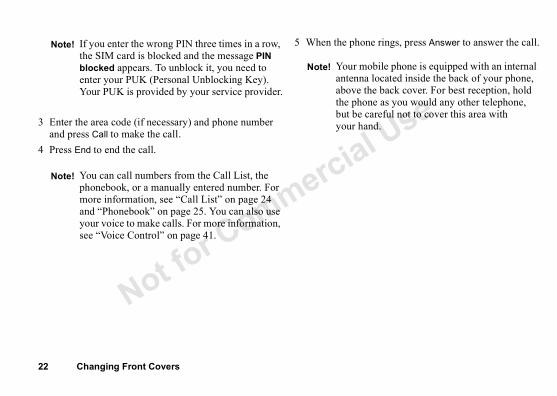
one rings, press Answer to answer the call.
obile phone is equipped with an internal a located inside the back of your phone,
the back cover. For best reception, hold one as you would any other telephone, careful not to cover this area with and.
Not f
or Com
merc
ia
22 Changing Front Covers
3 Enter the area code (if necessary) and phone number and press Call to make the call.
4 Press End to end the call.
5 When the phNote! If you enter the wrong PIN three times in a row, the SIM card is blocked and the message PIN blocked appears. To unblock it, you need to enter your PUK (Personal Unblocking Key). Your PUK is provided by your service provider.
Note! You can call numbers from the Call List, the phonebook, or a manually entered number. For more information, see “Call List” on page 24 and “Phonebook” on page 25. You can also use your voice to make calls. For more information, see “Voice Control” on page 41.
Note! Your mantennabovethe phbut beyour h
l Use
Calling 23
CBeon“M
ToPror
ToPrM
AIf Re10
ational calls until a + sign appears in the
laces the international access code m which you are calling. code, area code (without the leading umber, press Call.
ency callscy call, enter your local emergency
all.supports the international emergency or 08. This means that these numbers d to make an emergency call in any out a SIM card inserted, if a network
eling outside the country, you may ange your international access code g to Phonebook, Special Numbers, Code.
ice providers may require that a SIM erted, and in some cases that the PIN ntered as well.
Not f
or Com
merc
ia
allingfore you can make or receive any calls, you must turn the phone and be within range of a network. See aking and receiving calls” on page 21.
change earpiece volume during a calless the upper or lower side volume key to increase decrease the earpiece volume.
mute the microphone during a calless and hold C until the display shows Microphone uted. Press and hold C again to resume the conversation.
utomatic redialingthe connection of the call failed and the display shows try?, press Yes. The phone redials the number (up to times):• until the call is connected.• until you press a key or receive a call.
Making intern1 Press and hold
display. The + repof the country fro
2 Enter the countryzero) and phone n
Making emergTo make an emergennumber and press CYour mobile phone numbers, 112, 911, can normally be usecountry, with or withis within range.
Note! Do not hold the phone to your ear while waiting. When the call is connected, the phone gives a loud signal. Automatic redialing is not available for fax and data calls.
Note! When travneed to chby scrollinIntlAccess
Note! Some servcard is inshas been e

l Use
sed a call, Missed Calls: 1 appears in indicating the number of missed calls.
r missed callst to display the missed calls ( ).ber from the list, scroll to the number and
names of the last 50 calls made, received, saved in your Call List. If you have entification (CLI) service, the caller’s er will also be identified.
ber from the call listall list, press Call List from standby.
number you want to call, press Call.
all Listfo, Clear Call Lists.
Not f
or Com
merc
ia
24 Calling
In some countries, other emergency numbers may also be promoted. Your service provider may therefore have saved additional local emergency numbers on the SIM card.
Viewing your local emergency numbersScroll to Phonebook, Special Numbers, Emergency Nos.
Receiving callsWhen you receive a call, the phone rings and indicates who is calling you (if your subscription includes Caller ID service and the caller’s number is identified). If you have saved the number in your phonebook, the name associated with that number is displayed. If the number is a restricted number, the display shows Caller ID withheld.
Answering a call• Press Answer.
Rejecting a call• Press Busy, or• Press the upper or lower side volume key twice.
Missed callsIf you have misstandby mode,
Checking you1 Press Call Lis2 To call a num
press Call.
Call ListThe numbers orand missed are Calling Line Idname and numb
Calling a num1 To enter the c2 Scroll to the
Clearing the CScroll to Call In
Note! You can also use your voice to answer or reject calls. See “Voice Control” on page 41.
l Use
Calling 25
P
A123456
CYoansaToSI
If yo
you want to edit a contact saved on the eed to copy the contact to the phone.
the phone, scroll to Phonebook, m SIM.
acts stored on your SIM card ook, SIM Card, Copy from SIM.
ay take a few minutes. Copy now? isplay.
) number efault phone number. The first phone a contact automatically becomes the ou scroll to a certain contact in the then press and hold Call, the default
lt numberook, Edit Contact.er of the contact and press OK. is highlighted, press Edit.mber and press Select.
ber you want to be the default number
Not f
or Com
merc
ia
honebook
dding a contactScroll to Phonebook, Add Contact.Scroll to the field you want to fill in, press Edit.Enter the information.Press OK.Select the next field and so on.When you have entered the information, scroll to Save and Exit? and press Proceed.
opy contactsu can copy the contacts between your phone’s memory d the SIM card. The number of contacts that can be ved depends on the type of SIM card. copy contacts to the SIM card, scroll to Phonebook, M Card, Copy to SIM.
you insert a SIM card with saved contacts in your phone, u can call a contact by selecting SIM Card from the
Phonebook menu. IfSIM card, you first n
To copy contacts to SIM Card, Copy fro
Copying the cont1 Scroll to Phoneb2 Press Select.3 Copy from SIM m
appears on your d4 Press Yes.
Default (standardEach contact has a dnumber you link to default number. If yCall Contact list andnumber is dialed.
Setting the defau1 Scroll to Phoneb2 Enter the first lett3 When the contact4 Select Default Nu5 Scroll to the num
and press Select.
Note! The total number of contacts varies according to the amount of stored information for each contact. You can check the number of available contacts under Phonebook, Memory Status.
l Use
from your phonebook on your
ation number then press Call to dial the sponding to the phonebook position on d.
ition number.
sition numbers nebook, Contact Mngr., Position List.one number you want to move.sition to which you want to move the r.ve finished press Back.l apply when phb. is copied. Copy to s in the display. Press Yes to copy your ur SIM.
Not f
or Com
merc
ia
26 Calling
Speed dialingYou can store numbers in your phone’s phonebook or in the phonebook on your SIM card.
Speed dialing from your phonebook on your phone• From standby, press and hold one of the number keys
2-9 to find a contact beginning with the first letter on that key (or closest following). For example, press and hold 5 to go to the first contact beginning with “J”. To go to a contact beginning with “L” press 5 three times after you have entered the list of contacts.
• Scroll to the contact you want to call.• When the contact you want to call is highlighted, press
Call. Scroll to the number you want to call (if more than one number is stored for that contact). Press Call again.
Speed dialingSIM card• Enter the loc
number correyour SIM caror
• Enter the pos
• Press .• Press Select.
Changing po1 Scroll to Pho2 Select the ph3 Select the po
phone numbe4 When you ha5 Changes wil
SIM? appearchanges to yoNote! You can also use the Call Contact option in the
Phonebook menu to call a contact.

l Use
Calling 27
CWcamToM
AYo••
••
•
nebookan easily update or delete any contact
ook, Edit contact.er of the contact, press OK.act you want to edit. is highlighted, press Edit. you want to edit, Select.tion, press Edit, OK.ld and so on.ntered the information, scroll down and press Proceed.
took, Edit Contact.er of the contact, press OK. is highlighted, press C.pted to confirm your deletion.
Not f
or Com
merc
ia
hecking the memoryith the Memory status function in your phonebook, you n check how many positions you have left in your emory. check the phonebook memory, scroll to Phonebook,
emory Status.
dding voice commands to contactsu can add a voice command to a contact.Select Edit Contact from the Phonebook menu.Find the contact you want to edit by entering the first few letters of the contact name.Press OK.Select Edit Voice Tag to add a voice command for the selected contact.Press Yes when prompted to Add voice command?
Updating the phoWhen needed, you cinformation.
Editing a contact1 Scroll to Phoneb2 Enter the first lett3 Scroll to the cont4 When the contact5 Scroll to the field6 Enter the informa7 Select the next fie8 When you have e
to Save and exit?
Deleting a contac1 Scroll to Phoneb2 Enter the first lett3 When the contact4 You will be prom
Note! The total number of contacts varies according to the amount of stored information for each contact.
Note! If Edit Voice Tag is not selectable, turn Name Dialing on.

l Use
ee “T9™ Text Input” on page 31 for more
tween input methods during text entry to toggle between
. To turn T9 on initially, scroll to age, T9 Predictive, On.
est entering letters, you need to select ges that you want to use when writing.
ut languagesings, Language, Input Language.h the list of languages by tilting the r down.elect a language by pressing , , Uncheck.exit the menu.
sure a languages other than abc... is ed in order to T9 to work.
Not for C
omm
ercia
28 Calling
Deleting all contactsScroll to Phonebook, Contact Mngr., Delete All.
GroupsYou can create a group of contacts. By doing so you can send SMS messages to several recipients at the same time. See “SMS messages” on page 61.
Creating a group of contacts1 Scroll to Phonebook, Groups, Add Group.2 Enter a name for the group, press OK.3 Select Add Member.4 Enter the first letters of the contact you want to add,
press OK.5 Select the contact by pressing Select.6 Select a phone number.7 Repeat steps 3-6 to add more members.
Entering lettersThere are two ways to enter text, the Multitap method (default) or by using T9™ Text Input. T9™ Text Input is a predictive input method and can be a quicker way
to write texts. Sinformation.
Switching bePress and hold Multitap and T9Settings, Langu
Input languagBefore you starthe input langua
Selecting inp1 Scroll to Sett2 Scroll throug
joystick up o3 Select or des
or by Check/4 Press Exit to
Note! Contacts that are saved on the SIM card are not deleted.
Note! Makeselect

l Use
Calling 29
MWWinto
EnPrthbrsa
ultitap text input during multitap text input, you can owing list of things to do:ols and punctuation marks such as ?
ove between the symbols by tilting own left, or right. Select a symbol. ou can attach a picture, sound, tion (available when composing
P1
2
3
4
5
6
7
8
¤ % $ € £ ¥ \ § ¿ ¡ 0 Θ Ξ Ψ Ω
letters and numbers
etween capital and lowercase
d hold to enter numbers
Not f
or Com
merc
ia
ultitap text inputhen saving names in the phonebook or when writing AP addresses, you enter letters using multitap text put. You press each key as many times as needed show the letter you want.
tering letters using multitap text inputess the appropriate key, 1 – 9, 0 or repeatedly until e character you want appears in the display. Be sure to iefly pause between each letter if they are both on the me key. See the table of the Latin alphabet below:
Options during mWhen you press choose from the foll• Symbols – Symb
and , are shown. Mthe joystick up, d
• Insert Object – Ymelody, or animaSMS messages).
ress… to get…
Space - ? ! ‚ . : ; " ’ < = > ( ) _ 1a b c â ä æ à Ç 2 Γd e f è é 3 ∆ Φ
g h i ì 4j k l 5 Λm n o ñ ö ø ò 6
p q r s ß 7 Π Σ
t u v ü ù 8
9 w x y z 90 + & @ /
# * ↵ ¶
to delete
to shift bletters
0 - 9 press an
Press… to get…
C
l Use
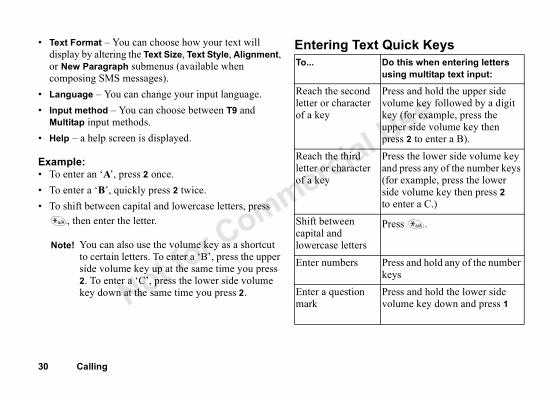
ext Quick KeysDo this when entering letters using multitap text input:
nd ter
Press and hold the upper side volume key followed by a digit key (for example, press the upper side volume key then press 2 to enter a B).
ter
Press the lower side volume key and press any of the number keys (for example, press the lower side volume key then press 2 to enter a C.)
s
Press .
Press and hold any of the number keys
n Press and hold the lower side volume key down and press 1
Not for C
omm
ercia
30 Calling
• Text Format – You can choose how your text will display by altering the Text Size, Text Style, Alignment, or New Paragraph submenus (available when composing SMS messages).
• Language – You can change your input language.• Input method – You can choose between T9 and
Multitap input methods.• Help – a help screen is displayed.
Example:• To enter an ‘A’, press 2 once.• To enter a ‘B’, quickly press 2 twice.• To shift between capital and lowercase letters, press
, then enter the letter.
Entering T
Note! You can also use the volume key as a shortcut to certain letters. To enter a ‘B’, press the upper side volume key up at the same time you press 2. To enter a ‘C’, press the lower side volume key down at the same time you press 2.
To...
Reach the secoletter or characof a key
Reach the thirdletter or characof a key
Shift between capital and lowercase letter
Enter numbers
Enter a questiomark
l Use
Calling 31
you normally enter letters in your p text input, you can use T9™ Text
S messages and email. The T9 Text built-in dictionary to recognize the d word for each sequence of key ou press each key only once, even if s not the first letter on the key.
sing T9 Text Inputes, SMS, Send New.ou want to write the word “phone”,
n is the one you want:pt and add a space. not the one you want:
up or down repeatedly to view ds (candidates). Accept a word and pressing 1.croll through the available words.
E
EDnuShm
Shla
Ewaofa
To
Input does not work for phonebook WAP addresses.
Not f
or Com
merc
ia
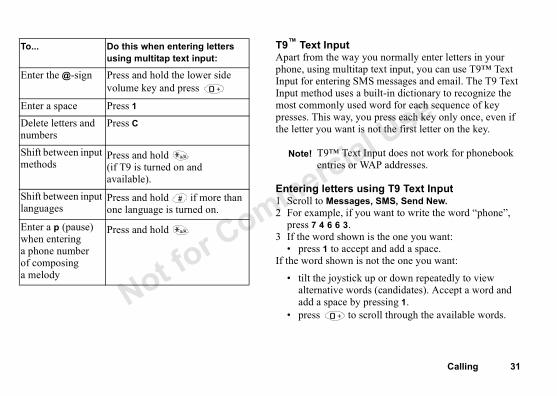
T9™ Text InputApart from the wayphone, using multitaInput for entering SMInput method uses amost commonly usepresses. This way, ythe letter you want i
Entering letters u1 Scroll to Messag2 For example, if y
press 7 4 6 6 3.3 If the word show
• press 1 to acceIf the word shown is
• tilt the joystickalternative woradd a space by
• press to s
nter the @-sign Press and hold the lower side volume key and press
nter a space Press 1elete letters and mbers
Press C
ift between input ethods
Press and hold (if T9 is turned on and available).
ift between input nguages
Press and hold if more than one language is turned on.
nter a p (pause) hen entering phone number composing
melody
Press and hold
... Do this when entering letters using multitap text input:
Note! T9™ Textentries or

l Use
Edit the suggested word by using multitap
– You can choose how your text will tering the Text Size, Text Style, r New Paragraph (available when MS messages).You can change your input language. – A list of input methods is shown. A list of alternative words is shown.
p screen is displayed.
9 Text Input Method T9 Text Input. This setting is valid for all not only for the text you are currently f T9 Text Input by doing one of the
ettings, Language, T9 Predictive, Off.
Not f
or Com
merc
ia
32 Calling
If you do not find the word you want by pressing :
• Press and hold to go to a list of options.• Select Edit Word. • Delete the entire word by pressing C. • Write the new word using multitap text input.
The word is added to the dictionary. The next time you enter the same characters, the word you just added to the dictionary will appear as one of the alternative words.
4 Continue writing your message. See also “Sending SMS messages” on page 61.
Options during predictive text inputIf you press when writing, you enter a list of options. You can scroll through these options by pressing the upper or lower side volume key or by tilting the joystick up or down:
• Symbols – Symbols and punctuation marks such as ? and , are shown. Move between the symbols by tilting the joystick up, down, left, or right. Select a symbol.
• Insert Object – You can attach a picture, sound, melody, or animation (available when composing SMS messages).
• Edit Word – text input.
• Text Format display by alAlignment, ocomposing S
• Language – • Input Method• Candidates –• Help – A hel
Turning off TYou can turn offinput of texts – writing. Turn offollowing:• Scrolling to S
l Use
Personalizing Your Phone 33
PYore
MYodedepu
ne, Master Reset.ings or Reset All. Reset settings tomizable settings (under the the default values. Reset All
ur phone’s settings to the factory selected when you purchased your
everything that you have saved in ory (for example, contacts, SMS
tures).ck code (0000 or the new code if you
Not f
or Com
merc
ia
ersonalizing Your Phoneu can adjust the phone settings to suit your own
quirements.
aster resetu can reset all the settings in the phone to the factory faults by choosing Settings, Master Reset. Factory faults are not necessarily the same settings as when you rchased your phone.
Resetting the pho1 Scroll to Settings2 Select Reset Sett
changes your cusSettings menu) tochanges all of yodefaults that werephone and erasesyour phone’s memmessages, and pic
3 Enter the phonelohave changed it).
Note! If you change a setting which is included in a profile, the active profile is also changed. See “Profiles” on page 39.
Note! Before performing a Master Reset, you may want to copy your phonebook to your SIM card.

l Use
aving a pictureas, Pictures.re group.
ick up or down to scroll through the ct a picture and press Edit to view the You can now start to edit the picture. below. view your options.The picture is saved in My Pictures.keys when editing a picture:
e the cursor up and left.e the cursor up.e the cursor up and right.
e the cursor left.p or put down the pen.s and hold to switch between zoom ull size view.e the cursor right.
e the cursor down and left.
Not f
or Com
merc
ia
34 Personalizing Your Phone
PicturesYour phone contains several pictures which you can send in an SMS message.
Editing and s1 Scroll to Extr2 Select a pictu3 Tilt the joyst
pictures. Seleediting tools.See the table
4 Press to5 Select Save. How to use the
Note! Your mobile phone has the capability to load, store and forward additional ringtone melodies, pictures, and other graphic images. The use of such melodies, pictures or images may be restricted or prohibited by rights of third parties, including but not limited to restriction under applicable privacy, copyright or trademark laws. You, and not Sony Ericsson, are entirely responsible for additional melodies, pictures or images that you download to or forward from your mobile phone. Prior to use of any additional melodies, pictures or images, please verify that your intended use is properly licensed or is otherwise authorized. Sony Ericsson does not guarantee the accuracy, integrity or quality of any additional ringtones, pictures, images or any other third party content. Under no circumstances will Sony Ericsson be liable in any way for your improper use of additional ringtones, pictures, images or other third party content.
Press… to…1 mov2 mov3 mov4 mov5 lift u
Presand f
6 mov7 mov

l Use
Personalizing Your Phone 35
AM
1234
dited pictures from My Pictures and ou cannot delete the original pictures ne when you bought it.
from My FavoritesPictures, My Favorites. and press C.
from My PicturesPictures, My Pictures. and press C.
and melodiesith a number of ring sounds and
dit your ring sounds and melodies, riend, in an SMS message. It is also d melodies via WAP. from the Settings, Sounds & Alerts,
nu and select a ring sound.
ound volume, Sounds & Alerts, Ring Volume.
r lower side volume key or tilt r right to increase or decrease
8
9
C
P
Not f
or Com
merc
ia
dding a picture to My Favoritesy Favorites is a collection of your favorite pictures.Scroll to Extras, Pictures.Select a picture group.Scroll to a picture and press .Press Yes to add the picture.
You can delete the eMy Favorites, but ythat were in the pho
Deleting a picture1 Scroll to Extras, 2 Scroll to a picture
Deleting a picture1 Scroll to Extras, 2 Scroll to a picture
Ring sounds Your phone comes wmelodies. You can eand send them to a fpossible to downloa• Select Voice Calls
Ring Sounds me
Setting the ring s1 Scroll to Settings2 Press the upper o
the joystick left othe volume.
move the cursor down.move the cursor down and right.move the cursor 1, 5, or 10 spaces.
SAVE and exit the picture.
CANCEL and exit the picture editor.
press and hold to clear the picture.
switch line thickness.
switch between black and white pen color.
ress… to…
l Use
lodiesve a sound or melody, you will be e the sound after selecting the melody.
g a ring sound that rises in steps from me to the highest.ng ring On or Off, scroll to Settings, s, Increasing Ring.
sounds for personal calls to the Two Line Service, you
t ring sounds for the two voice d Line 2 are displayed instead of Voice M subscription supports fax and data et different ring sounds for voice, fax spectively.
gal information about downloading ies and pictures, see “Pictures” on 4.
loaded melodies will be saved to lodies.
Not f
or Com
merc
ia
36 Personalizing Your Phone
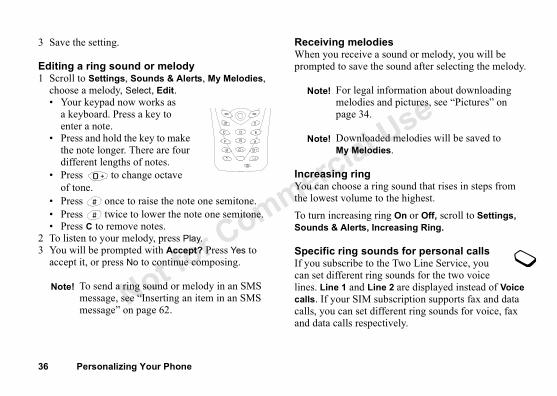
3 Save the setting.
Editing a ring sound or melody1 Scroll to Settings, Sounds & Alerts, My Melodies,
choose a melody, Select, Edit.• Your keypad now works as
a keyboard. Press a key to enter a note.
• Press and hold the key to make the note longer. There are four different lengths of notes.
• Press to change octave of tone.
• Press once to raise the note one semitone.• Press twice to lower the note one semitone.• Press C to remove notes.
2 To listen to your melody, press Play.3 You will be prompted with Accept? Press Yes to
accept it, or press No to continue composing.
Receiving meWhen you receiprompted to sav
Increasing rinYou can choosethe lowest voluTo turn increasiSounds & Alert
Specific ring If you subscribecan set differenlines. Line 1 ancalls. If your SIcalls, you can sand data calls re
Note! To send a ring sound or melody in an SMS message, see “Inserting an item in an SMS message” on page 62.
Note! For lemelodpage 3
Note! DownMy Me
l Use
Personalizing Your Phone 37
If Idrin
Se1
23
SYobuvi••
•
alert
, Sounds & Alerts, Vibrating Alert. you want.
all Timers menu, you can also turn r.
inute minder, you hear a beep once a call.
isplayed in standby mode.
ll to Settings, Time and Date,
at, scroll to Settings, Time and Date, an choose a 12-hour clock or
our clock, you can alternate between ing .
Not for C
omm
ercia
your subscription includes the Calling Line entification (CLI) service, you can assign a Personal g sound to up to 10 callers.
tting a specific ring sound for a callerScroll to Settings, Sounds & Alerts, Ring Sounds Personal Rings, Add New, Add.Enter the contact name, OK.Select a ring sound.
ounds & Alertsu can choose to be notified of an incoming call by the zzing of the vibrating alert. You can set the phone’s brating alert to one of the following:On – all the time.On if silent – on when the ring volume is turned off or when you have set the phone to silent.Off – all the time.
Vibrating alertTo set the vibrating
1 Scroll to Settings2 Select the setting
Minute MinderFrom the Call Info, Con the Minute Minde
If you turn on the mevery minute during
Time settingsThe time is always d
To set the time, scroSet Time.
To set the time formTime Format. You ca 24-hour clock.If you select the 12-ham and pm by press
Note! Not all service providers support Two Line Service.
l Use
ylockck means the keypad is locked 25 seconds
ess a key.
atic keylock On or Off, scroll to ks, Auto Keylock.
eypad manually, press and hold C ck Keypad or press and select .ains locked until you answer an incoming unlock the keypad manually.
e keypad, press and hold C. When th Unlock keypad?, press Yes to confirm.
tsour favorite functions that you want to
nd easily in the My Shortcuts menu.
ction to My Shortcutsmenu item that you want to add to s.m is selected, press , then select t.
Not f
or Com
merc
ia
38 Personalizing Your Phone
DateWhen the phone is in standby mode, you can press the upper or lower side volume key to see today’s date in the Status menu. You can set the date and date format in the Settings, Time and Date menu.
Time zone settingsUnder Settings, Time and Date, Advanced menu, you can set time zone and daylight saving time. Changing these, changes the time accordingly and thus also the appointments and tasks in your calendar.
Keypad lockYou can lock the keypad to avoid dialing a number by accident.
Automatic keAutomatic keyloafter you last pr
• To turn automSettings, Loc
• To lock the kand select LoLock Keypad
The keypad remcall or until you• To unlock th
prompted wi
My ShortcuYou can place yreach quickly a
Adding a fun1 Scroll to the
My Shortcut2 When the ite
Add Shortcu
Note! The time is also displayed when your phone is in “sleep” mode.
Note! Calls to the international emergency numbers 112, 911, or 08 can still be made when the keypad is locked. Some service providers may require that a SIM card is inserted, and in some cases that the PIN has been entered as well.
l Use
Personalizing Your Phone 39
Ed12
PYotothyoofToSe
C123
ToEd
file settings to the way they were set ur phone by scrolling to Settings, iles.
eomatically set the menu language to country where you bought your SIM e case, the preset language is English.
nu language, Language, Menu Language.e.
an be set to automatic, off, or on. the display light is turned off a few ess the last key.
sily select English by tilting the the left, pressing 0 0 0 0, then tilting k to the right. To easily change the o the language on your SIM card, stick to the left, press 8 8 8 8, then stick to the right.
Not f
or Com
merc
ia
iting a shortcut in My ShortcutsTo edit a shortcut, scroll to My Shortcuts.Scroll to the menu item that you would like to edit and press . You can choose Delete to remove the shortcut from the list or you can choose Change Position to edit the order of the selected shortcut in the list.
rofilesur phone has a number of pre-set profiles which are set
suit a certain environment. You can rename or change ese profiles. For example, when you go to a meeting, u can simply choose the Meeting profile and a number settings such as the ring sound is turned off. select a profile, scroll to Settings, Profiles, lect Profile.
hanging a profile settingScroll to Settings, Profiles, Edit Profile.Choose a setting.Change the profile settings and press SELECT to confirm. rename a profile, scroll to Settings, Profiles, it Profile, Profile Name.
You can reset all prowhen you bought yoProfiles, Reset Prof
Menu languagMost SIM cards autthe language of the card. If this is not th
Changing the me1 Scroll to Settings2 Choose a languag
Display lightThe Display Light cIn automatic mode, seconds after you pr
Note! You can eajoystick tothe joysticlanguage ttilt the joytilt the joy
l Use
reetingings, Display, User Greeting.ting.
dd to select a picture that will appear in reen.ground, scroll to Settings, Display,
sone comes with several background select. You can also create or download round pictures and animations for use in You can download pictures to your PC em onto your phone using a data cable.
an purchase a data cable from SonyEricsson.com/us if you are in the d States. For more information on asing Sony Ericsson branded or Ericsson ed accessories, see “Ordering sories” on page 87.
Not f
or Com
merc
ia
40 Personalizing Your Phone
• To set the Display Light, scroll to Settings, Display, Light.
ContrastUse Contrast to adjust the difference in brightness between the light and dark areas of your display.• To set the Contrast, scroll to Settings, Display,
Contrast.
Answering modeWhen you select Any Key, you can answer a call by pressing any key (except Busy). When using a portable handsfree kit, you can set the phone to answer the call automatically. To select an answering mode, scroll to Settings, Call Manager, Answering Mode.
You can also answer calls using your voice (see “Voice Control” on page 41).
User greetingWhen you turn your phone on or off, the Sony Ericsson greeting appears in the display. Your service provider’s own greeting may be shown instead.
Selecting a g1 Scroll to Sett2 Select a gree
BackgrounUse Backgrounyour standby scTo set the BackBackground.
My PictureYour mobile phpictures you canyour own backgtext messaging.and then load th
Note! You cwww.UnitepurchbrandAcces
l Use
Voice Control 41
YodoyotopiSecubuar
PThnu1
2
olone, you can use your voice to:
saying the name and number type e, work, etc.).
t calls.o voice memos.e control by saying a “Magic Word”. tion on this feature, see “The Magic .0 voice commands. When recording
ake sure you are in a quiet
ingn the voice dialing function and mmands.
nt of memory you use varies to the length of your recorded words. rds use up more memory.
Not f
or Com
merc
ia
u can also go to www.SonyEricsson.com and wnload the freeware background picture program to ur PC. Once you choose or create a picture, upload it your area at www.SonyEricsson.com and access your ctures via WAP. Go to Settings, Display, Background, lect Picture, My Picture. You can only store one stomized background picture in your phone at a time, t you can store additional pictures in your personalized ea at www.SonyEricsson.com.
hone number displayere are two ways that you can check your own phone mber(s):To check your phone number, scroll to Phonebook, Special Numbers, My Number, choose number type. If your number is not saved on your SIM card, you can enter it yourself.Press the upper or lower side volume key from the standby screen.
Voice ContrWith your mobile ph
• Call someone by (for example, hom
• Answer and rejec• Record or listen t• Activate the voic
For more informaWord” on page 45
You can save up to 5voice commands, menvironment.
Before voice dialYou must first turn orecord your voice co
Note! The amouaccording Longer wo
l Use
next to a contact name which has a voice
whether or not you want to hear the t name when you receive an incoming
ontact.
aller name On or Offings, Voice Control, Caller Name.Off.
ial by saying the name of the contact.
y, press and hold the upper or lower side
ey, lift the phone to your ear, and listen
e, say a name, for example “John”. played back to you.everal numbers for that contact, after , say the number type, for example,
Not f
or Com
merc
ia
42 Voice Control
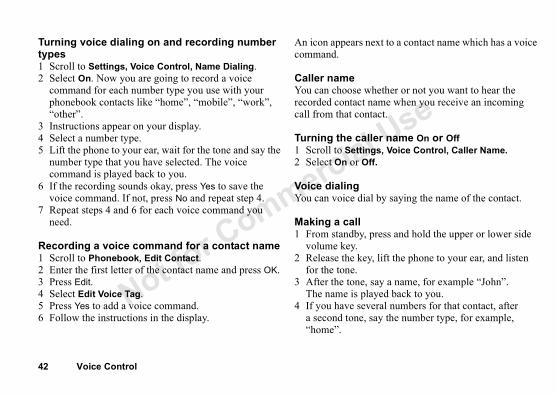
Turning voice dialing on and recording number types1 Scroll to Settings, Voice Control, Name Dialing.2 Select On. Now you are going to record a voice
command for each number type you use with your phonebook contacts like “home”, “mobile”, “work”, “other”.
3 Instructions appear on your display.4 Select a number type.5 Lift the phone to your ear, wait for the tone and say the
number type that you have selected. The voice command is played back to you.
6 If the recording sounds okay, press Yes to save the voice command. If not, press No and repeat step 4.
7 Repeat steps 4 and 6 for each voice command you need.
Recording a voice command for a contact name1 Scroll to Phonebook, Edit Contact.2 Enter the first letter of the contact name and press OK.3 Press Edit.4 Select Edit Voice Tag.5 Press Yes to add a voice command.6 Follow the instructions in the display.
An icon appearscommand.
Caller nameYou can chooserecorded contaccall from that c
Turning the c1 Scroll to Sett2 Select On or
Voice dialingYou can voice d
Making a call1 From standb
volume key.2 Release the k
for the tone.3 After the ton
The name is 4 If you have s
a second tone“home”.

l Use
Voice Control 43
Thco
VoYovoki
Tuan123
4
ar.your ear, wait for the tone and say ther word. If the recording sounds not, press No and repeat step 5.other word.
using voice commandsgs, say “Answer” or the alternative
d.
sing voice commandss, say “Busy” or the alternative word
The caller hears a busy tone or the voicemail.
ecording profile commands, Voice Control, Voice Profiles
ar.ed.
and say the profile name.
Not for C
omm
ercia
e number type is played back to you and the call is nnected.
From standby, you can also initiate voice dialing, voice profiles and voice memos by:• Pressing and holding the upper or lower side volume
key.• Pressing the handsfree button (when using a portable
handsfree device).• Saying the Magic Word. See “The Magic Word” on
page 45.
ice answeringu can answer or reject incoming calls by using your ice, when using a portable handsfree or a car handsfree t.
rning on voice answering and recording voice swer commandsScroll to Settings, Voice Control, Voice Answer. Select On.Select or deselect the accessories you want to be able to use with voice answering by pressing Check or Uncheck.Press Exit.
5 Instructions appe6 Lift the phone to
“Answer”, or anoOK, press Yes. If
7 Say “Busy”, or an
Answering a callWhen the phone rinword you recorded.The call is connecte
Rejecting a call uWhen the phone ringyou recorded.The call is rejected. call is forwarded to
Turning on and r1 Scroll to Settings2 Select On.3 Instructions appe4 Press OK to proce5 Select a profile.6 Wait for the tone
l Use
proceed.e to your ear, wait for the tone and say en press Yes if it sounds okay. If not,
one and say “Play”. Press Yes to accept or press No to re-record.
ording using a voice commandy, press and hold the upper or lower side ntil you hear a tone.ey, lift the phone to your ear and say e voice command is played back to you dicates that the recording has begun.cording, press Done.
ecordings using a voice commandy, press and hold the upper or lower side ntil you hear a tone.ey, lift the phone to your ear and say oice command is played back to you.r last recording.
an only play your most recent recording voice commands.
Not f
or Com
merc
ia
44 Voice Control
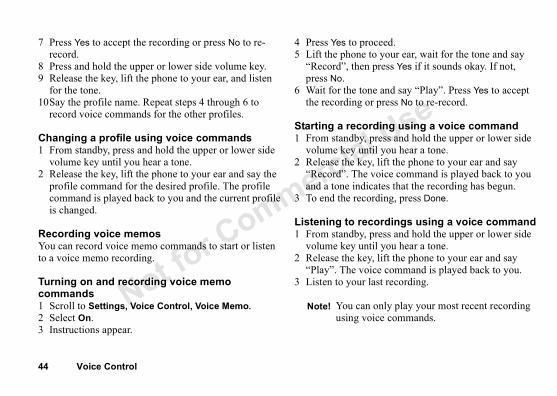
7 Press Yes to accept the recording or press No to re-record.
8 Press and hold the upper or lower side volume key.9 Release the key, lift the phone to your ear, and listen
for the tone.10Say the profile name. Repeat steps 4 through 6 to
record voice commands for the other profiles.
Changing a profile using voice commands1 From standby, press and hold the upper or lower side
volume key until you hear a tone.2 Release the key, lift the phone to your ear and say the
profile command for the desired profile. The profile command is played back to you and the current profile is changed.
Recording voice memosYou can record voice memo commands to start or listen to a voice memo recording.
Turning on and recording voice memo commands1 Scroll to Settings, Voice Control, Voice Memo.2 Select On.3 Instructions appear.
4 Press Yes to 5 Lift the phon
“Record”, thpress No.
6 Wait for the tthe recording
Starting a rec1 From standb
volume key u2 Release the k
“Record”. Thand a tone in
3 To end the re
Listening to r1 From standb
volume key u2 Release the k
“Play”. The v3 Listen to you
Note! You cusing

l Use
Voice Control 45
TYocoresu
Tu123
45
eed.and say the Magic Word.
e commandsur voice commands up to date by r deleting the ones you do not use.
oice command, Voice Control, Voice Memo, Edit
mand.rded voice command, select Play ord a new voice command, select
and say the command. the voice command for a contact tact in the Phonebook menu.
e Magic Word when you no longer y handsfree access, in order to save wer.
Not f
or Com
merc
ia
he Magic Wordu can record a Magic Word and use it as a voice mmand. Say the Magic Word and then one of your corded voice commands. The Magic Word is especially itable when using a car handsfree kit.
rning on and recording the Magic WordScroll to Settings, Voice Control, Magic Word.Select On.Select or deselect the accessories you want to be able to use with the Magic Word by pressing Check or Uncheck.Press Exit.Instructions appear.
6 Press Yes to proc7 Wait for the tone
Editing your voicYou can keep all yore-recording them o
Re-recording a v1 Scroll to Settings
Commands.2 Select a voice com3 To listen to a reco
Voice Tag. To recReplace Voice.
4 Wait for the tone 5 You can also edit
name in Edit Con
Note! Choose a long, unusual word which can easily be distinguished from ordinary background speech.
Note! Due to the nature of individual speech patterns and how your phone generates a matching Magic Word, false matches may occur through other sources of speech, like your car radio. If this happens, record a different Magic Word.
Note! Turn off thneed totallbattery po
l Use
ltion includes an answering can leave a voicemail message t answer a call.
oicemail messageour service provider, you are informed s left you a voicemail message by a text or by a voicemail indication.
oicemail servicecall your voicemail service by pressing you have saved your voicemail number in get the number from your service provider.
ber, scroll to Phonebook, Special mail.
e duration of the call is shown he Call Info menu allows you
al time of your calls.
call time of the last callfo, Call Timers, Last Call.
Not f
or Com
merc
ia
46 Voicemail
Tips when recordingIf your phone cannot detect speech, one of the following might have happened:
• You spoke too softly – try speaking more loudly.• You held the phone too far away – hold it as you do
during a call.• The voice command was too short – it should be
around one second long and more than one syllable.• You spoke too late or too soon – speak immediately
after the tone.• You did not record the voice command when the
handsfree was attached – for voice control with a handsfree kit, record when the handsfree is attached.
• You used another intonation – speak in the same tone as you did when you recorded the voice command.
• If you have entries with similar names, record the first and last name to further distinguish the voice tags.
VoicemaiIf your subscripservice, callers when you canno
Receiving a vDepending on ythat someone hamessage (SMS)
Calling your vYou can easily and holding 1, ifthe phone. You To enter the numNumbers, Voice
Call timeDuring a call, thin the display. Tto check the tot
Checking theScroll to Call In
l Use
Voicemail 47
CSc
CSc
R12
FIf ornuFofo
rward, Call Manager, Forward Calls.ory and then a forward alternative.
umber to which you want your calls r retrieve it from the phonebook by
ward, select a forward option and
tus, Call Manager, Forward Calls.
.ard that you want to check.
.
Bar Calls function is on, some alls options cannot be activated.
Not f
or Com
merc
ia
hecking the total call timeroll to Call Info, Call Timers, Total Calls.
hecking the call time of your outgoing callsroll to Call Info, Call Timers, Outgoing Time.
esetting the total call timeScroll to Call Info, Call Timers, Clear Timers.Select Total Calls or Outgoing Time.
orwarding callsyou cannot answer incoming voice, fax, data calls, you can forward them to another mber, for example your answering service.r voice calls, you can choose between the following rward alternatives:
• AlwaysForward – forward all voice calls.• When Busy – forward calls if you are already on
the phone.• Not Reachable – forward calls if your phone is
turned off.• No Reply – forward calls that you do not answer
within a specified time limit (dependent upon your service provider).
Turning on call fo1 Scroll to Settings2 Select a call categ3 Select Activate.4 Enter the phone n
to be forwarded opressing .
To turn off a call forselect Cancel.
Checking the sta• Scroll to Settings• Select a call type• Scroll to the forw• Select Get Status
Note! When the Forward C
l Use
econd calle second call and put the ongoing call on nswer.second call and continue the ongoing call, .e second call and end the ongoing call, e & Answer.
calls one ongoing call and one call on hold, following:
switch between the two calls.end both calls.
e calls call, you can have a joint ith an additional five people. t a conference on hold and make
an only put one call on hold.
Not f
or Com
merc
ia
48 Voicemail
More than one callYou can handle more than one call simultaneously. For example, you can put an ongoing call on hold, while you make or answer a second call, and then switch between the two calls.
Call waiting serviceIf the call waiting service is activated, you hear a beep in the earpiece if you receive a second call during an ongoing call.
To activate or deactivate the call waiting service, scroll to Settings, Call Manager, Call Waiting.
Making a second call1 Press Hold to put the ongoing call on hold.2 Enter the number you want to call, or retrieve
a number from the phonebook.
Receiving a s• To answer th
hold, press A• To reject the
select Ignore• To answer th
select Releas
Handling twoWhen you haveyou can do the
• Press Hold to• Press End to
ConferencIn a conferenceconversation wYou can also puanother call.
Note! During a call the Ongoing Call menu replaces the Call Info menu (which you can access by pressing ).
Note! You can only put one call on hold.
Note! You c

l Use
Voicemail 49
CToon
JoSc
A12
34
Cgr1Thav2
HYopa
icipant Call, Extract party:.ant.e a private conversation with the
ticipant to the conference
all, Join Calls.
pantsicipants from the conference group once.
cipant Call, Release Part.ant.
ticipantsall, Release All.
ring a Conference Callference group on hold and make n then switch between the new call all.
Not f
or Com
merc
ia
reating a conference call create a conference call, you must first have one going call and one call on hold.
ining the two calls into a conference callroll to Ongoing Call, Join Calls.
dding a new participantPress Hold to put the conference call on hold.Call the next person you wish to include in the conference call.Scroll to Ongoing Call, Join Calls.Repeat steps 1 to 3 to include more participants.
hecking the participants in the conference oupScroll to Ongoing Call, Parties in Conf.e first participant’s phone number is displayed, if ailable. Otherwise the display shows part 1, 2, etc.Tilt the joystick up or down to check the other participants.
aving a private conversationu can have a private conversation with one of the rticipants and put the other participants on hold.
Extracting a part1 Scroll to Ongoing2 Select the particip
You may now havparticipant.
Rejoining the pargroupScroll to Ongoing C
Releasing ParticiYou can release partone by one or all at
Releasing a parti• Scroll to Ongoing• Select the particip
Releasing all parScroll to Ongoing C
Making a Call duYou can put the conanother call. You caand the conference c

l Use
Serviceake calling card calls, you need to turn on
lling Card Numberso calling card numbers in your phone.
numbernebook, Calling Cards.onelock code. etup.ew.ess number of the calling card server. that you want to associate with your erver.ification code of the calling card server. you want to send first – the number that all or the verification code.
rd numbernebook, Calling Cards.onelock code.etup.
card number that you want to delete.
Not for C
omm
ercia
50 Voicemail
Putting the conference group on hold to make a new call1 Press Hold.2 Enter the number you wish to call and press Call.
Switching between the new call and the conference groupPress Hold.
Ending the new call and return to the conference groupPress Hold.
Ending the conference callPress End.
Calling card callsWhen making international or long distance calls, you may want to use the calling card service to redirect the charges to a credit card account, instead of your normal account.
Calling Card To be able to mthe service.
Setting Up CaYou can save tw
Saving a card1 Scroll to Pho2 Enter your ph3 Select Card S4 Select Add N5 Enter the acc6 Enter a name
calling card s7 Enter the ver8 Select which
you want to c
Deleting a ca1 Scroll to Pho2 Enter your ph3 Select Card S4 Scroll to the 5 Press Select.
Note! You cannot use the calling card service when making a fax or a data call.
l Use
Voicemail 51
6
7
Ed1234567
CYom
Se1234
Card Callumber you wish to call or retrieve it ok.ll.
er of the calling card server is called. cting phase, you are asked to send the t you want to call and the verification chosen earlier (see above). a few seconds and the number and matically.
calls service to restrict s from being made and a password, which comes with your e service provider, to turn a call bar
can be barred:
, All Outgoing.national calls, Outgoing Intl.national calls except to your home l Roam.
Not f
or Com
merc
ia
Select Delete when the card you want to delete is selected.Press Yes to confirm deletion of the selected calling card.
iting a card numberScroll to Phonebook, Calling Cards.Enter your phonelock code. Select Card Setup.Scroll to the card number that you want to edit.Press Select.Select Edit and edit the card number.Confirm the new number by pressing YES.
hoosing a Cardu must choose which card you want to use before
aking a calling card call.
lecting a cardScroll to Phonebook, Calling Cards.Enter your phonelock code. Select Card Selection.Select the card that you want to use.
Making a Calling1 Enter the phone n
from the phonebo2 Press and hold Ca
The access numbDuring the connephone number thacode, in the order
3 Press Call or waitcode are sent auto
Bar CallsYou can use the Barcertain types of callreceived. You need subscription from thon or off.The following calls
• all outgoing calls• all outgoing inter• all outgoing inter
country, Outg. Int

l Use
onPhonebook entries, RestrictCallsTo, ok.
e with calling cards, RestrictCallsTo, s.ecific phone number prefixes, To, My Choice (My Choice allows you to t prefixes for restriction).
ngng function allows calls to be rtain numbers saved on the SIM pt is made to call other numbers, the
er not permitted appears in the display. quires a SIM card that allows fixed aved. The fixed numbers are protected
dialing on or offnebook, Fixed dialing.
IN2.Off.
ency calls can still be made, even when dialing is on.
Not f
or Com
merc
ia
52 Voicemail
• all incoming calls, All Incoming.• all incoming calls when you are not in your home area,
When Roaming.
Turning Bar Calls On or Off1 Scroll to Settings, Call Manager, Bar Calls.2 Scroll to an option.3 Select Activate or Cancel. 4 Enter your password.• To cancel all call bars, select Cancel All.• To check the status of a call bar, select the call bar
option and then Get Status.• To change the password, select Change Passwd.
Restrict Calls ToRestrict Calls To allows you to restrict certain types of calls from being made, regardless of your service provider. You will need your phonelock code to set Restrict Calls To options.• all calls to Phonebook entries, RestrictCallsTo,
Phonebook.
• all calls to NNonPhonebo
• all calls madCalling Card
• all calls to spRestrictCallsset 3 differen
Fixed dialiThe Fixed dialimade only to cecard. If an attemmessage NumbFixed dialing renumbers to be sby your PIN2.
Turning Fixed1 Scroll to Pho2 Enter your P3 Select On or
Note! If you forward incoming calls, you cannot turn on some Bar calls options.
Note! EmergFixed

l Use
Voicemail 53
Sa1
234
CThcow
A1
234Yo
A1
23
ade within the selected group.
closed user group, Call Manager, Closed Groups,
s service, you can choose to receive in numbers. Other calls are
ed by a busy tone. The phone u have rejected are saved in the Call
to the accepted callers list, Call Manager, Accept Calls,
dd to List.k (you can add a contact’s number) an add a group).er of the contact or group.ber or group you want to add.
Not f
or Com
merc
ia
ving fixed numbersScroll to Phonebook, Special Numbers, Fixed Numbers, Add New.Enter your PIN2.Enter the fixed number.Enter the name you want to associate with the number.
losed user groupse Closed User Group function is a way of lowering call sts. On some networks it is cheaper to make calls ithin a call group. You can save 10 groups.
dding a closed user groupScroll to Settings, Call Manager, Closed Groups, Edit List.Scroll to Add New.Enter the name of the user group.Enter the index number.u get the index number from your service provider.
ctivating a groupScroll to Settings, Call Manager, Closed Groups, Edit List.Select a group.Select Activate.
Calls can only be m
Calling outside a1 Scroll to Settings
Open Calls.2 Select On.
Accept callsWith the accept callcalls only from certaautomatically rejectnumbers of calls yoList.
Adding numbers1 Scroll to Settings
Accepted List, A2 Select Phoneboo
or Groups (you c3 Enter the first lett4 Scroll to the num

l Use
lected during an automatic search. For all roll to Settings, Networks.
calling functions
ephone banking services or ng machines by sending tone or touch tones) during a call.
ones, press 0-9, and .isplay after the call is finished,
.
ake a note of a phone number during se your phone display as a notepad. Use to enter the number. When you end the
r remains in the display. You can call ressing CALL.
ct your service provider for the default s that will work with your specific
e.
Not f
or Com
merc
ia
54 Voicemail
Selecting an accept option1 Scroll to Settings, Call Manager, Accept Calls,
Accept From.2 Select one of the following:• From All – You receive all calls as normal.• From List – you only receive calls from callers in the
Accepted list. All other incoming calls will be rejected. The caller hears a busy tone and you get no indication of incoming calls.
• From No One – All incoming calls are rejected.
NetworksWhen you turn on the phone, it automatically selects your home network if this is within range. If it is not within range, you may use another network, provided your service provider has an agreement that allows you to do so. This is called roaming.You can select the network you want to use, or you may be able to add a network to your list of preferred networks. You can also change the order in which
networks are sesuch options, sc
Additional
Tone signalsYou can use telcontrol answerisignals (DTMF
• To send the t• To clear the d
press Cancel
NotepadIf you want to ma call, you can uthe number keyscall, the numbethe number by p
Note! Contasettingservic
l Use
nding and Receiving Items 55
TuIf ar
12
ShIf Idyo
123
d Receiving Items such as a business card, a calendar
lody using SMS or WAP.
sn business card to the phonebook.
siness card, scroll to Phonebook, nage My Own, Add My Own.
ness cardsusiness cards between your phone ia SMS.
siness cardk, Business Cards, Send My Own.
business card via SMS, you accept Yes. Press Yes again to save the card
Not f
or Com
merc
ia
Se
rning Off Tonesyou use the phone display as a notepad, the person you e talking to hears the tone signals when you press keys.
Press .Press Select to choose Turn Off Tones.
owing or hiding your numberyour subscription supports the Calling Line entification Restriction (CLIR), you can hide ur phone number when making a call.
Enter the number that you want to call and press .Scroll to Hide My Number or Show My Number.Press Select to choose the highlighted option.
Sending anYou can send an itemappointment or a me
Business cardYou can add your owTo add your own buBusiness Cards, Ma
Exchanging busiYou can exchange band another phone v
Sending your buScroll to Phoneboo
When you receive athe card by pressingin the phonebook.
Note! You can choose to always hide or always show your number by scrolling to Phonebook, Special Numbers, My Number.
l Use
setting information, including WAP and email, requires ttings:unts – settings for access to a server for saging.ile – settings for WAP browsing.ount – settings for email messaging.
settingsveral data accounts saved in h different settings for different ain setting for a data account is the
connection method). You can choose ialUp Conn. account types.
l Packet Radio Service) allows t access to web content.
ct your service provider for details on any sage charges.
eed a subscription that supports GPRS. ct your service provider for settings and information.
Not f
or Com
merc
ia
56 Setting Up Mobile Internet
Setting Up Mobile InternetIn order to use the Internet, browse via WAP services, or send and receive email messages, you must have a phone subscription that supports data transmission and you must have settings entered.
Receiving settings in an SMS messageYour Internet service provider may be able to send the required data account, WAP, and email settings directly to your phone in a text message (SMS).
Advanced Mobile Internetthe following se
• Data Accoemail mes
• WAP Prof• Email Acc
Data accountYou can have seyour phone, witpurposes. The mAccount Type (from GPRS or D
GPRS (Generafast and efficien
Note! Contact your service provider for the default settings that will work with your specific service.
Note! Your service provider may have programmed your WAP settings. If so, you will not need to configure your phone.
Note! Contadata u
Note! You nContauseful
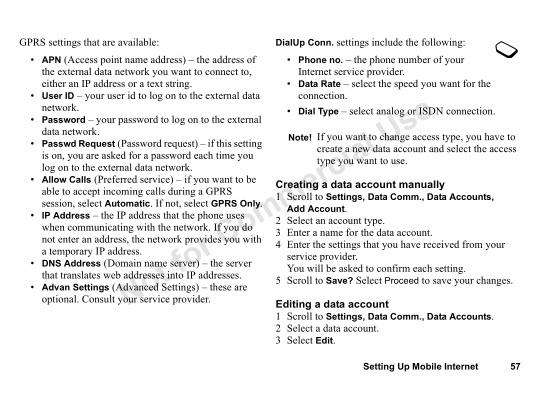
l Use
Setting Up Mobile Internet 57
G gs include the following:
e phone number of your e provider.lect the speed you want for the
ect analog or ISDN connection.
ccount manually, Data Comm., Data Accounts,
type.the data account. that you have received from your
to confirm each setting.elect Proceed to save your changes.
count, Data Comm., Data Accounts.unt.
t to change access type, you have to w data account and select the access ant to use.
Not f
or Com
merc
ia
PRS settings that are available:
• APN (Access point name address) – the address of the external data network you want to connect to, either an IP address or a text string.
• User ID – your user id to log on to the external data network.
• Password – your password to log on to the external data network.
• Passwd Request (Password request) – if this setting is on, you are asked for a password each time you log on to the external data network.
• Allow Calls (Preferred service) – if you want to be able to accept incoming calls during a GPRS session, select Automatic. If not, select GPRS Only.
• IP Address – the IP address that the phone uses when communicating with the network. If you do not enter an address, the network provides you with a temporary IP address.
• DNS Address (Domain name server) – the server that translates web addresses into IP addresses.
• Advan Settings (Advanced Settings) – these are optional. Consult your service provider.
DialUp Conn. settin
• Phone no. – thInternet servic
• Data Rate – seconnection.
• Dial Type – sel
Creating a data a1 Scroll to Settings
Add Account.2 Select an account3 Enter a name for 4 Enter the settings
service provider.You will be asked
5 Scroll to Save? S
Editing a data ac1 Scroll to Settings2 Select a data acco3 Select Edit.
Note! If you wancreate a netype you w

l Use
profile settings manuallyu have a data account set up between nd the Internet server, as described in t settings” on page 56.
wser, WAP Settings.on or a Profile to add a new profile xisting profile that you want to edit.
do the following: Edit the profile namepage – Enter the address of the WAP site s the homepage.
WAP Profiles may be set up by your e provider and you may not be able to y them. Contact your service provider ecific WAP Profiles information.
WAP Profiles may be set by your service er and you may not be able modify them. ct your service provider for specific Profiles information.
Not f
or Com
merc
ia
58 Setting Up Mobile Internet
4 Select the setting you want to edit. Edit the setting.5 Repeat step 4 for other settings you want to edit.
Preferred serviceYou can set GPRS on or off. To select preferred mode, scroll to Settings, Data comm., Preferred Srvc.
WAP profile settingsThe WAP settings are stored in a WAP profile. In most cases you only need to use one profile to access the Internet. You set up and use additional WAP profiles, for example, when accessing secure Internet sites, such as a banking site or a corporate intranet. You then simply switch between profiles when you need to change the network connection.
Entering WAP1 Make sure yo
your phone a“Data accoun
2 Scroll to Bro3 Select Comm
or select an e
4 You can now• Rename –• Chg Home
you want a
Note! Some data accounts may be set up by your service provider and may not be editable.
Note! To see the status of GPRS coverage and connection, press the upper or lower side volume key from standby to enter the Status menu and then scroll to GPRS.
Note! Someservicmodiffor sp
Note! SomeprovidContaWAP
l Use
Setting Up Mobile Internet 59
WToseYobuW
C12
)our subscription from unauthorized certain WAP sites, and to authorize IN code acts as a signature when you n.
y appear in the Security
enu, scroll to Browser, mon, Security, Locks.
ractsansactions you have made with your g. A contract, which contains details , can be saved in your phone.
acts, scroll to Browser, WAP Security, Contracts.
es are supplied by your service supported.
Not f
or Com
merc
ia
• Save to – You can choose all profiles or just the current profile.
• Gateway – You can choose IP settings, SMS settings, or Change type.An IP address consists of four groups of digits, with a maximum of three in each group. If one of your digit groups consists of only one or two digits, you have to enter a leading zero (0) for each digit that is missing. Example: If the IP address is 123.4.67.901, write 123.004.067.901.
AP security settings establish secure connections when using certain WAP rvices, you must have certificates saved in your phone. ur phone may already contain certificates when you y it. You can also download certificates from certain AP sites, or receive them from a service provider.
hecking the certificates in your phoneScroll to Browser, WAP Settings, Common, Security. Select Trusted Certif. or Client Certif.
Locks (PIN codesPIN codes protect yuse, when accessingtransactions. Your Pconfirm a transactio
A Locks setting masubmenu:
To go to the Locks mWAP Settings, Com
Transaction contYou can check on trphone when browsinabout the transactionTo check your contrSettings, Common,
Note! These codprovider if

l Use
ng – Select Copy Outgoing if you want es sent from your phone also to be sent to
ress of your choice. This way, your sent copied and can be saved for future
al – Select how often you want the phone your email server and check for incoming es.
h an office and a home email account, of them as default by selecting Select he Messages, Email, Options menu and count. page 67 for information about how to
Not f
or Com
merc
ia
60 Setting Up Mobile Internet
Email account settingsAn email account specifies, for example, the server that is used for your email messages.
Creating an email account1 Scroll to Messages, Email. 2 Select Edit Account.3 Select Add New4 Enter a name for the account, for example Home
or Office.5 Select Connect using. 6 A list appears with the data accounts that you have
saved in your phone.7 Select the data account you want to use with this email
account.8 Enter the rest of the settings in the list. You use the
same email settings in your phone as in your PC email program. If you do not have an email service, contact your service provider to get all the necessary settings.
• Copy Outgoiemail messagan email addmessages arereference.
• Check Intervto connect toemail messag
If you have botyou can set oneAccount from tselecting the acSee “Email” onuse email.
Note! Contact your service provider for the default settings that will work with your specific service.
l Use
Messaging 61
MYo– pimon
SShmof(sco
BFiseis
Se1
ber in the list, select Add New., including the international “+” sign .
gatewayses, SMS, EmailGatewaySMS.ay is saved on the SIM card it
play.il gateway in the list, select Add New.ateway.
messagesut entering letters, see “Entering
ing an SMS messagees, SMS, Send New.ge.
gateways is used to send SMS to email addresses.
Not f
or Com
merc
ia
essagingur phone supports various messaging services
SMS messages, enhanced text messages with ctures and/or melodies (EMS), and email essages. Please contact your service provider for details which services you can use.
MS messagesort Message Service (SMS) messages are text
essages can be sent to one person, or to a group recipients that you have saved in the phonebook
ee “Groups” on page 28). EMS messages can also ntain pictures, animations, melodies, and sounds.
efore you startrst make sure that the number of your service center is t. The number is supplied by your service provider and usually saved on the SIM card.
tting the service center numberScroll to Messages, SMS, Service Centers.If the service center number is saved on the SIM card it appears in the display.
2 If there is no num3 Enter the number
and country code
Setting the email1 Scroll to Messag
If the email gatewappears in the dis
2 If there is no ema3 Enter the email g
Sending SMSFor information aboletters” on page 28.
Writing and send1 Scroll to Messag2 Write your messa
Note! The emailmessages
l Use
e, Sound, Melody, or Animation. and confirm your selection.
agesessage can contain up to 160 characters, e language. You can send a longer s automatically divided into several s (up to six messages) and you are
h message.
messages on or off sages, SMS, Long Messages.Off.
g messagesages, SMS, Send New.essage. The display shows how many sage is divided into.ipient’s number or tilt the joystick to rieve the number from the phonebook t.sage by pressing OK.nt’s phone does not support long e messages are received one at a time.
Not f
or Com
merc
ia
62 Messaging
3 Enter the recipient’s phone number or retrieve a number or a group from the phonebook by tilting the joystick to the left. To send to an email address, set your Message Type to Email. See “Sending a message to an email address or phone number found in a message” on page 66.
4 Press Select to choose a highlighted contact and automatically send the message.
Sending a message later1 Scroll to Messages, SMS, Unsent Box.2 Select the message you want to send.
You may now edit your message.3 Press Send to send the message as described above.
Inserting an item in an SMS message1 Scroll to Messages, SMS, Send New. To send a long
SMS message, you may need to turn on Long Messages (see below).
2 While writing your message press and hold or .3 Select Insert Object.
4 Select Pictur5 Select an item
Long messA short SMS mdepending on thmessage, but it ishorter messagecharged for eac
Turning long 1 Scroll to Mes2 Select On or
Sending a lon1 Scroll to Mes2 Enter your m
parts the mes3 Enter the rec
the left to retor the call lis
4 Send the mes5 If the recipie
messages, th
Note! If you send an SMS message to a group, you are charged for each SMS number that the message is sent to.

l Use
Messaging 63
TeIf yom
C123456
7
8
If MwToTeprto
onst value for the message u can turn on the Set on eans that you choose the
ou send a message.he phone supports different types of
ervice provider may offer the facility SMS message into a format (email or that suits the equipment that is going ssage. To send an SMS message to an t the Message Type to Email.If your message cannot be delivered, e recipient has turned off the phone, r can save the message to send it later.
Include a reply request if you want our message to reply.Check if a message has been
value for the options abovees, SMS.you want.
ures are operator dependent.
Not for C
omm
ercia
mplatesyou have one or more messages that you send often, u can save these as templates. Your service provider ay also have saved some templates in your phone.
reating a templateScroll to Messages, SMS, Templates, Add NewCreate template by entering text.Write the message, OK.Use template for this msg.? appears in the display.Press Yes to use the template to create an SMS message.Press OK to send the SMS message. Press Cancel to save the template without sending the message.Enter the number that you want to send an SMS message.Press OK to send the message or Cancel to save the template without sending the message.
you want to use a template as a message, scroll to essages, SMS, Templates, select the template you ant from the list and then select Create Message.
delete a template, scroll to Messages, SMS, mplates. Select the template you want to delete and ess C. Press Yes to confirm the deletion or press No cancel the deletion.
Message optiYou can set a defauloptions below, or yosend option which msettings each time y• Message type – T
messages. Your sof converting an fax, for example)to receive the meemail address, se
• Validity Period – for example, if thyour service cente
• Request Reply –the recipient of y
• Status request – delivered.
Setting a default 1 Scroll to Messag2 Select the option
Note! Some feat
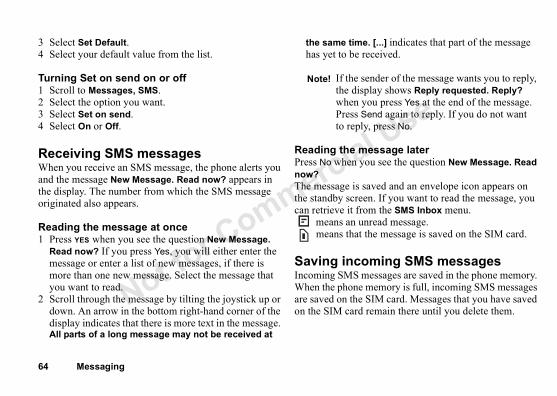
l Use
e. [...] indicates that part of the message received.
essage lateryou see the question New Message. Read
saved and an envelope icon appears on en. If you want to read the message, you
rom the SMS Inbox menu.nread message. the message is saved on the SIM card.
oming SMS messagesmessages are saved in the phone memory. memory is full, incoming SMS messages SIM card. Messages that you have saved remain there until you delete them.
sender of the message wants you to reply, splay shows Reply requested. Reply? you press Yes at the end of the message. Send again to reply. If you do not want ly, press No.
Not f
or Com
merc
ia
64 Messaging
3 Select Set Default.4 Select your default value from the list.
Turning Set on send on or off1 Scroll to Messages, SMS.2 Select the option you want.3 Select Set on send.4 Select On or Off.
Receiving SMS messagesWhen you receive an SMS message, the phone alerts you and the message New Message. Read now? appears in the display. The number from which the SMS message originated also appears.
Reading the message at once1 Press YES when you see the question New Message.
Read now? If you press Yes, you will either enter the message or enter a list of new messages, if there is more than one new message. Select the message that you want to read.
2 Scroll through the message by tilting the joystick up or down. An arrow in the bottom right-hand corner of the display indicates that there is more text in the message. All parts of a long message may not be received at
the same timhas yet to be
Reading the mPress No when now? The message isthe standby screcan retrieve it f
means an u means that
Saving incIncoming SMS When the phoneare saved on theon the SIM card
Note! If the the diwhen Press to rep
l Use
Messaging 65
SaWhi
LWSeprRe
ge to delete a message:
s. in the list of options. You can ssages, all unsaved messages, or all
menu, scroll to a message and press essage.
ssagee list of options.u want to reply to the message:ssagessage you want to reply to and enter
and enter a reply.and press OK to send the message.
ssage the list of options. the message.t’s phone number or tilt the joystick ve the number from the phonebook
ess OK to send.
Not for C
omm
ercia
ving from an SMS messagehen the phone number, picture, animation, or melody is ghlighted, press Select to save the item.
• A picture or animation is saved in My Pictures.• A melody is saved in My Melodies.• A phone number is saved in the Unsaved Numbers
list. When you are adding a new contact, you can access this list by pressing .
• A WAP address is saved in Bookmarks.
ist of Optionshen you select a message in the SMS Inbox by pressing lect, you can see the following list of options by essing : Delete, Reply, Chat, Forward, Save, Call, ad Next.
Deleting a messaThere are two ways
1 Select Delete Msgdelete all read memessages.
2 In the SMS InboxC to delete the m
Replying to a me1 Select Reply in th2 Select the way yo
• enter a new me• include the me
a reply• use a template
3 Enter your reply
Forwarding a me1 Select Forward in2 You can now edit3 Enter the recipien
to the left to retrieor the call list. Pr
Note! You can also reach a list of options in the Unsent or Sent items menus, by pressing after selecting a message. Options vary according to the type of item highlighted.

l Use
ure found in a messagehlighted picture.icture. You can select where you would
he picture, with in My Pictures or in n.
ody found in a messagehlighted melody icon.elody. The melody is saved in the
list. When the melody is highlighted, atically play. To set the melody as your ee “Ring sounds and melodies” on
t the signal you want to hear when you ge. You can choose between clicks, tones,
essage alertings, Sounds & Alerts, Message Alert.
rt.
Not for Com
merc
ia
66 Messaging
Saving a received messageSelect Save in the list of options. The message is saved on the SIM card. Messages that are saved on the SIM card remain there until you delete them.
Calling the sender of a messageSelect Call in the list of options.
Sending a message to an email address or phone number found in a message1 Select Mail to in the list of options.2 Enter a message.3 Press OK again to send the message.
Saving a phone number found in a messageSelect Save from Msg. in the list of options. The number is saved on the SIM card. Phone numbers that are saved on the SIM card remain there until you delete them.
Saving a pict1 Select the hig2 Select Save P
like to save tMy Animatio
Saving a mel1 Select the hig2 Select Save M
My Melodiesit will automring sound, spage 35.
Message AlerYou can choosereceive a messaor silent.
Setting the m1 Scroll to Sett2 Select an ale
Note! To call a phone number found in a message, press the left softkey twice when the number is highlighted.

l Use
Messaging 67
CChYoto
St12
34
RWbeap
••••
•
essage, press No. The rejected Chat in the SMS Inbox in the Messages
ew Chat message while another Chat g, you can end the ongoing session one.to your Chat messages (and SMS to Messages, Chat, Nickname, store ill appear with every Chat message
il function in your phone to ail messages. Before using ake sure you have created
mail account and specified which . You must also have a subscription
ansmission.
ur network operator provider for the default at will work with your rvice.
Not f
or Com
merc
ia
hatat works in the same way as Chat on the Internet. u can initiate a Chat session or you may be invited participate in a Chat session.
arting a Chat SessionScroll to Messages, Chat, Start Chat.Enter the recipient’s phone number or tilt the joystick to the left to select a contact from your phonebook.Write your message.Press OK.
eceiving a Chat Session Invitationhen you receive a Chat session invitation, the phone eps and the message Chat Message, Chat Now? pears.
To read the Chat message, press Yes.Write your chat message reply, press OK.To suspend a Chat session, press Cancel.To resume a Chat session, scroll to Messages, Chat, Resume.To end a Chat session, press End.
• To reject a Chat mmessage is savedmenu.
• If you receive a nsession in ongoinand start the new
• Add a nickname message). Scroll a nickname that wthat you send.
EmailYou can use the emasend and receive e-mthe email program, ma data account, an eemail account to usethat supports data tr
Note! Contact yoor service settings thspecific se
l Use
ent ” on page 34.ox is saved in the Outbox. All email the Outbox are sent when you select the ive option in the Email menu. an email message and do not send it, it is fts folder. You can open these messages,
end them, at any time.
d Readingd & Receive. Your email messages are from the server.il Inbox. ail message you want to read.
able to see all your new email messages e memory capacity of the Inbox is w in the top or bottom right corner,
ere are more email messages on the server. e email messages, scroll to the arrow.
hone can save up to six complete email ges. All your email messages are saved ur email server.
Not f
or Com
merc
ia
68 Messaging
Sending and ReceivingThe Send & Receive option in the Email menu offers the fastest way for you to check for new email messages and send email messages saved in your Outbox.
Writing and Sending
To write and send new email messages1 Scroll to Messages, Email, Compose.2 Select To:. You can:• select Add name:. Enter a name and e-mail address.• tilt the joystick to the left to enter the phonebook and
retrieve a saved e-mail address.3 If you want to send a copy of the message to someone,
select Cc: and select the address as above.4 If you want to set a priority other than Normal to the
message, scroll to Priority. Select High or Low.5 Select Subject:. Enter a title.
This is mandatory.6 Select Text:. Enter your message.7 Select one of the following:• Send Now
The message is sent at once.
• WithAttachmSee “Pictures
• Save to outbThe messagemessages in Send & Rece
If you composesaved in the Draedit them and s
Receiving an1 Scroll to Sen
downloaded 2 Scroll to Ema3 Select the em
You may not beat once, since thlimited. An arroindicates that thTo retrieve mor
Note! The pmessaon yo
l Use
WAP 69
R12
34
D1
2
AYooron
A1
2
3
4
lication Protocol) is a global d mobile services, for ernet communication, and telephony services. WAP allows services on the Internet such as ws, and reservation services from
ng the WAP browser, make sure you account, entered the WAP profile a WAP profile. For fast and efficient neral Packet Radio Service (GPRS)
access WAP services, you need tion that supports data transmission browsing.
wer an incoming voice call while sion is active, your WAP session ou can initiate a new WAP session
oice call ends.
Not for C
omm
ercia
eplyingOpen the email message you want to reply to.Place the cursor in the text and press to view a list of options. Select Reply or Reply all.Write a message.
eletingGo to the Inbox and select the email message you want to delete.Press C.
rchivingu can archive an email message in order to read it later
if you want to save important information. You can ly archive as much text as the display shows.
rchiving an email messageOpen the email message with the text you want to archive.Make sure the text that you want to archive is visible in the display.Place the cursor in the text and press to view a list of options. Select Copy to arch. The text can now be found in Archive under the Email menu.
WAPWAP (Wireless Appstandard for advanceexample, mobile Intmobile e-commerce,you to access certainbanking services, neyour mobile phone.
Before you start usihave created a data settings and selectedbrowsing, try the Geas the access type.
Note! In order toa subscripand WAP
Note! If you ansa WAP seswill end. Yonce the v

l Use
ount you want to use when sending and messages.
nt Settingsg for a data account is the access type thod). You can choose between two
ral Packet Radio Service) data you to be always online, yet pay mount of data transmitted and e you are connected. You need
n that supports GPRS. Please contact your ator for charging and subscription details.ection datau pay for the time you are connected.
ettings may already be entered when you e phone, or you can receive the settings
your network operator or your Internet e provider. You can also receive settings
ww.SonyEricsson.com.
ervice provider may provision your WAP s so they are not viewable on your phone.
Not f
or Com
merc
ia
70 WAP
Before you startFirst make sure that you have:• A phone subscription that supports data transmission. • Set your phone for mobile Internet, WAP, or email
messaging, see “Setting Up Mobile Internet” on page 56.
In order to browse via WAP or use the email program in your phone, you must enter settings for a data account in your phone. The settings specify all the information your phone needs to communicate with a certain server on the Internet, for example, the address of that server. You can have several data accounts saved in your phone, with different settings for different purposes. For fast and efficient access, try the General Packet Radio Service (GPRS) as the access type. In order to browse via WAP, you also need to enter settings for a WAP profile and select which WAP profile you want to use when browsing.In order to use the email program in your phone, you also need to enter settings for an email account and select
which email accreceiving email
Data AccouThe main settin(connection meaccess types:• GPRS (Gene
GPRS allowsonly for the anot for the tima subscriptionetwork oper
• DialUp connNormally, yo
Note! See “Email” on page 67 for more information about email set-up and messaging.
Note! The sbuy thfrom servicfrom w
Note! Your ssetting
l Use
WAP 71
C1
234
5
En12345
SeAPto
id to log on to the external data
ssword to log on to the external data
assword request) – if this setting is r a password each time you log on to work. want to allow incoming session, select ON. If not,
address that the phone uses when the network. If you do not enter a rovides you with a temporary IP
ain name server) – the name that the a number.
ic settings) – these are optional. rk operator.
ce provider may provision your WAP they are not viewable on your phone.
Not f
or Com
merc
ia
reating a data accountScroll to Settings, Data comm., Data accounts, Add account.Enter a name for the data account.Select an access type.Enter the settings that you have received from your operator.For GPRS: access point name (APN), user id, and password.For DialUp Connection: phone number, user id, and password.Confirm each setting.Scroll to Save?.
tering additional settings for a data accountScroll to Settings, Data comm., Data accounts.Select a data account.Press Edit.Select the setting you want to edit. Edit the setting.Repeat step 4 for all the settings you want to edit.
ttings for GPRSN – the address of the external data network you want
connect to, either an IP address or a text string.
User id – your user network.
Password – your panetwork.Passwd. request (Pon, you are asked fothe external data netAllow calls – if youcalls during a GPRSselect OFF.
IP address – the IP communicating withvalue, the network paddress.DNS Address (Domserver translates into
Basic settings (BasConsult your netwo
Note! Your servisettings so
l Use
referred serviceings, Data comm., Preferred Srvc.lection.
such data you have sent and received,
roll to Call Info, Data Counters, Last l Data.
AP browser
owsee WAP profile you want to use. wser. the following (dependent upon your der): mepage.
the status of GPRS coverage and ction, press the upper or lower side e key from standby to enter the Status
and then scroll to GPRS.
Not f
or Com
merc
ia
72 WAP
Settings for DialUp ConnectionPhone Number – the phone number of your Internet service provider.
User id, Password, Passwd. request. Same as for GPRS above.Data rate – select the speed you want for the connection.Dial type – select analog or ISDN connection.
If you want to change access type, you have to create a new data account and select the access type you want to use.
Data SettingsIf you have selected GPRS as the access type, the Preferred service should be set to GPRS&DialUp. An icon may then appear in the display telling you that GPRS is within range. See “Icons” on page 88. If you have selected DialUp Conn. as the access type, you should select DialUp Only as the preferred service. This setting is valid for all data accounts.
Selecting a p1 Scroll to Sett2 Make your se
Data CounterTo check how musing GPRS, scSession or Tota
Using the W
Starting to br1 First select th2 Scroll to Bro3 Select one of
service provi• Open your ho
Note! To seeconnevolummenu
l Use
WAP 73
••
Ex•
•
OWbr
Thde
lways contains the following:
Go to the homepage set for the ile.d the site you are currently browsing kmarks, or see the list of bookmarks
ofile.Enter the WAP address of a site you
nd a link to the current site to another
the contents of the WAP page. back to the WAP services menu other phone menus. The connection ot interrupted. When you want
again, scroll to Browser, Resume.by or disconnect.the current status, for example, e been browsing. Set the current site as the WAP profile you are using.
Not for C
omm
ercia
Go to one of your bookmarks. Select Bookmarks. Enter the address of a WAP site. Select Enter Address, New Address. Enter the WAP address or select one of the 10 latest entered addresses.
iting WAPPress and hold the right softkey to exit and disconnect. Remain connected? appears. Confirm your selection.If you want to leave the browser temporarily but stay online, press and hold YES and select Go to menu.
ptions when browsinghen you have started browsing, you can reach different owsing options by pressing .
e Options menu is dynamic. Its content may vary pending on which WAP site you are visiting.
The options menu a
• Mobile Internet –current WAP prof
• Bookmarks – Adto your list of boofor the current pr
• Enter address – want to visit.
• Send as link – Sephone.
• Reload – Refresh• Go To Menu – go
in order to accessto the Internet is nto start browsing
• Exit – Go to stand• Status – Display
how long you hav• New homepage –
homepage of the
Note! When you enter a WAP address, the normal http:// prefix is not needed. You do however need to enter a prefix to use protocols, such as ftp:// or https://.

l Use
messages push messages via WAP Services. This vice provider sends WAP content to your ou having to do anything. You can, for dated news or new WAP settings from vider.inds of push messages:
es that inform you about WAP services, link. To go to the WAP service, click the
rmation from a WAP service is sent to WAP browser.
ush messager phone to either accept or reject push is valid for all your WAP profiles.
message acceptancewser, WAP Settings, Common, Push
the following settings:allow push messages to be automatically
do not allow push messages.
Not f
or Com
merc
ia
74 WAP
Using bookmarksYou use bookmarks in your mobile phone just as you do with a PC Internet browser.
Working with bookmarks 1 Scroll to Browser.2 Select the bookmark you want.3 Select one of the following options:
• Go to – Go to the marked WAP site.• Edit Bookmark – Edit the name and/or
the WAP address of the bookmark. See “Options when browsing” on page 73 for more information.
• Delete – Remove the bookmark.• Send as link – Send as link to the current site.
Clearing CacheYou can clear the cache memory which contains previously visited WAP pages. You may, for example, want to clear the information on your transactions.1 Scroll to Browser, Clear Cache.2 Empty Cache? appears.
WAP pushYou can receivemeans that a serphone without yexample, get upyour service proThere are two k
• SMS messagby sending alink.
• Updated infoappear in the
Receiving a pYou can set youmessages. This
Setting push 1 Scroll to Bro
Access.2 Select one of
• On – You loaded.
• Off – You
l Use
WAP 75
RWIn
•
STh
•
•
•
•
ternet information in your
r, WAP Settings, Common.ation to save.
ar any sensitive information about AP services. This is to avoid r phone is misplaced, lost, or stolen.
h your service provider for more n regarding security certificates.
Not f
or Com
merc
ia
esponding to a push messagehen you receive a push message, it comes to the Push box.
Scroll to Browser, Push Inbox, and select one of the following:• Postpone – Save the message, to be loaded later.• Load – The browser starts and loads the WAP site
so that you can see the push content.• Delete – Deletes the push message.
tored informatione following information can be saved in your phone:
Cache – Information which is regularly used to improve frequent memory access.Passwords – Information for certain Internet server access.Cookies – Information deposited from Internet servers to improve frequent access.Push – Information received from services.
Saving mobile Inphone1 Scroll to Browse2 Select the inform
It is advisable to clepreviously visited Wa security risk if you
Note! Check witinformatio
l Use
M card that does not support separate fax rs, the phone does not recognize the type l.
eceive a fax or data call, you have to set e of these options. Once you have set your cific incoming call, it stays like this until
call type you want your next incoming oll to Settings, Call Manager, Next Call.
ll type you want (Voice, Data, or Fax) and choice.r phone to the computer.all from within the program.
you have set your phone for a specific ing call, it remains set until you change it.
Not f
or Com
merc
ia
76 Information Transfer and Exchange
Information Transfer and Exchange
Fax and data calls
Sending fax and data callsTo send fax and data calls you need to connect your phone to a computer, and then start the appropriate software program.
Receiving fax and data callsThe procedure of receiving fax and data calls depends on your network and subscription. If you have separate numbers for voice, fax and data calls, your phone will recognize the type of call.
Receiving a fax or data call (separate numbers)1 Connect your phone to a computer.2 Answer the call from within the software program
(if it does not answer automatically).
One numberIf you have a SIand data numbeof incoming cal
If you want to rthe phone to onphone for a speyou change it.1 To select the
call to be, scr2 Select the ca
confirm your3 Connect you4 Answer the c
Note! You cannot answer a fax or data call manually.
Note! Once incom
l Use
More Features 77
M
AThhoYoEvis
Se1
2
C1
2
TuPrIf w
functionorarily turn the alarm off so it will oximately nine minutes, press No Turn off alarm?
rmrm and Timer, Alarm Clock, Cancel.
nt alarmrm and Timer, Alarm Clock, hen enter the time and select when to recur by scrolling and pressing
m signalounds & Alerts, Alarm Sound. Select
Not f
or Com
merc
ia
ore Features
larm clocke alarm can be set to ring at a specific time within 24 urs, or recurrently at a specific time on several days. u can have both these alarms set at the same time. en if you have set your phone to silent or if your phone turned off, the alarm and timer signals ring.
tting an alarmScroll to Extras, Alarm and Timer, Alarm Clock, One-Time Alarm.Enter the time.
hanging the alarm timeScroll to Extras, Alarm and Timer, Alarm Clock, One-Time Alarm, New Time:.Enter the time.
rning the alarm offess any key to turn the alarm signal off when it rings.you do not want the alarm to be repeated, press YES hen prompted with Turn off alarm?
Using the snoozeIf you want to tempsound again in apprwhen prompted with
Canceling the alaScroll to Extras, Ala
Setting a recurreScroll to Extras, AlaRecurrent Alarm. Tyou want the alarm
.
Selecting an alarScroll to Settings, Sa signal.

l Use
a built-in calculator, which can add, , and multiply. You can access your rolling to Extras, Calculator.lete the figure.ll through the selection bar at the bottom by tilting the joystick to the left or right. re +, -, X, /, %, ., and =. Select an option
center push key or by pressing Select ion is highlighted.
ess , you have options including etrieving numbers from memory, π, ct.
Not f
or Com
merc
ia
78 More Features
StopwatchScroll to Extras, Stopwatch.• To start, stop or restart the stopwatch, press the left
softkey.• To save up to nine lap times, press Lap.
• To reset the stopwatch, press Reset.
TimerThe phone has a built-in 24-hour countdown timer which replaces the clock when it is set.
• To set the timer, scroll to Extras, Alarm and Timer, Timer. Enter the hours, minutes, and seconds. When the signal rings, press any key to turn it off.
• To enter a new time, scroll to Extras, Alarm and Timer, Timer, New Time:. Enter the hours, minutes, and seconds.
CalculatorThe phone has subtract, dividecalculator by sc• Press C to de• You can scro
of the displayThe options aby using the when the opt
• When you prstoring and ror add/subtra
Note! The stopwatch is turned off when you answer an incoming call or when you exit the stopwatch menu.
l Use
Synchronization 79
SYophthsyMIfalco
STosy1
using WAP: want to synchronize your phone t calendar or phonebook you must r this, see “Internet Calendar on page 82.
hronizationSynchronization, Synchronizing.onization method you wish to use.
Soundher you want the phone to make nchronization is finished.
hronization sound on or offSynchronization, Sound.
ndar to keep track of important eed to attend, phone calls that you ks that you need to do.
Not for C
omm
ercia
ynchronizationu can synchronize the calendar and contacts in your one with the calendar and contacts in your PC. To do is, you first need to install on your PC the nchronization program found on the Sony Ericsson obile Internet website (www.SonyEricsson.com). you have an Internet calendar or phonebook, you can so synchronize that with your phone calendar and ntacts, using WAP.
tarting the Synchronization synchronize using a data cable, you start the nchronization from your PC.Synchronization using your data cable:The process for starting synchronization differs according to how your computer is configured.
2 SynchronizationThe first time youwith your Internechoose settings foSynchronization”
Starting the sync1 Scroll to Extras, 2 Select the synchr
Synchronization You can select wheta sound when the sy
Turning the sync1 Scroll to Extras, 2 Select On or Off.
CalendarYou can use the calemeetings that you nneed to make, or tas
Note! You can purchase a data cable from www.SonyEricsson.com/us if you are in the United States. For more information on purchasing Sony Ericsson branded or Ericsson branded accessories, see “Ordering Accessories” on page 87.
l Use
zone for a meeting:
e zone.e zone in which the meeting is to be
meeting time will be adjusted lly according to the time zone you are in. Save and close.
taskas, Calendar, Add Task.ory,. (If the category is a phone call, enter
mber.)ct.o set a reminder for your appointment, nder.
calendarlendar content, scroll to Extras, Calendar one of the following:y – All appointments for today as well as e tasks are shown.asks – This shows all your entered tasks. e task you want to view. Press to see
r the task.
Not f
or Com
merc
ia
80 Synchronization
Appointments and tasksYou can save up to 200 appointments and tasks in your calendars, depending on the size of each item. You can choose to add a new appointment or task, or to use an old appointment or task as a template by copying and editing it.
• Appointments: meetings, vacation, phone call.• Tasks: make a phone call, send a message, pay bills.
Adding a new appointment1 Scroll to Extras, Calendar, Add apptmt.2 Enter the appropriate information, for example, class,
location, icon, and times. Confirm each entry.3 If you want to set a reminder for your appointment,
select a reminder.4 A list of options appears. If the appointment is recurring:
• Select Recurrent app.• Select the recurrence you want.
To change the class for your appointment:
• Select Class.• Select the Class you want.
To set the time
• Select Tim• Select a tim
held. Yourautomatica
5 Confirm with
Adding a new1 Scroll to Extr2 Select a categ
the phone nu3 Enter a subje4 If you want t
select a remi
Viewing yourTo view your caand then select
• View Todaincomplet
• View All TScroll to thoptions fo
l Use
Synchronization 81
C•
elect Always if you want the und even though the phone is
– If you want the phone to remind rofile when a meeting is about to . If you want the profile to be atically, select Auto, then select
letes all appointments and tasks .
tus you last synchronized your calendar
is left for new appointments and tasks scroll to Extras, Calendar, Options,
ll appointments and tasks in your elect Delete All in the Options menu.
Not f
or Com
merc
ia
• View Week – Move within and among the days by moving the joystick. Press Select to view a certain day.
• View Month – Move within and among the weeks by moving the joystick. Press Select to view a certain day. Days on which you have appointments are marked in bold.
alendar settingsSelect Options from the Extras, Calendar menu and then select one of the options:• Status – Use this to check when you last
synchronized your calendar, how much space is left for new appointments and tasks.
• Class View – you can choose whether to see only the private calendar entries, only the public ones or both.
• Reminders – Sreminder to soturned off.
• Profile Switchyou to switch pstart, select Onswitched automa profile.
• Delete All – Dein the calendar
Checking the staYou can check whenor how much space To check the status,Memory Status.
Note! In the monthly and weekly views, you can go to next week by pressing 3, to next month by pressing 6 and to next year by pressing 9. You can go back a week, a month or a year by pressing 1, 4, and 7 respectively. To reach the current day, press C.
Note! To delete acalendar, s
l Use
URL. rnet address of the Internet calendar and
dar path.rnet address, user id, and password for
r on the Internet.book path.rnet address, user id, and password for
ook on the Internet.
several games that you can access by ras, Games. You can control the games tick and the keys on your keypad. The h game will provide you with key
Not f
or Com
merc
ia
82 Synchronization
Internet Calendar SynchronizationVia WAP you can synchronize your mobile phone calendar or contacts with a calendar or phonebook on the Internet. To do this you must have:• an Internet calendar and phonebook program.
Contact your operator for more information about the program. You need a user id, password, and Internet address for the calendar and phonebook.
• a WAP profile set in your mobile phone. For information on how to set a WAP profile, see “WAP profile settings” on page 58.
Making the WAP synchronization settings1 Scroll to Extras, Synchronization, SyncServerSett.2 Select WAP Profile.
In the list of WAP profiles, select the one you want to use for synchronization.
3 Select Server User ID. Enter your user id for the Internet calendar and phonebook.
4 Select Server Pwd. Enter your password for the Internet calendar and phonebook.
5 Select SynchEnter the Intephonebook.
6 Select CalenEnter the Inteyour calenda
7 Select PhoneEnter the Inteyour phoneb
GamesYour phone hasscrolling to Extusing your joyshelp text for eacfunctions.
l Use
Security 83
S
SThyoSI
MSIIdIf SIbl(Psu
U1234
roll to Settings, Locks, SIM Lock,
croll to Settings, Locks, SIM Lock,
ard lock on or off, Locks, SIM Lock,
cts the phone against unauthorized the SIM card is exchanged. It is not
e phone. You can change the 0) to any four- to eight-digit personal
k can be set to on, automatic or off.
sage Codes do not match appears, d the new PIN incorrectly. If the rong PIN appears, followed by ou entered your old PIN incorrectly.
Not f
or Com
merc
ia
ecurity
IM card locke SIM card lock protects your subscription, but not ur phone itself, from unauthorized use. If you change M cards, the phone still works with the new SIM card.
ost SIM cards are locked at the time of purchase. If the M card lock is on, you have to enter a “PIN” (Personal entity Number) every time you turn on your phone.you enter your PIN incorrectly three times in a row, the M card is blocked. This is indicated by the message PIN ocked. To unblock it you need to enter your “PUK” ersonal Unblocking Key). Your PIN and PUK are pplied by your operator.
nblocking your SIM card PIN Blocked appears in the display.Enter your PUK.Enter a new four- to eight-digit PIN.Re-enter the new PIN to confirm.
To edit your PIN, scChange PIN.
To edit your PIN2, sChange PIN2.
Turning the SIM c1 Scroll to Settings
Protection.2 Select On or Off.3 Enter your PIN.
PhonelockThe phonelock proteuse if it is stolen andon when you buy thphonelock code (000code. The phoneloc
Note! If the mesyou enteremessage WOld PIN:, y
l Use
hootingts some problems that you might using your phone. Some problems call your service provider, but most of u can easily correct yourself.
nnot be switched onlace the battery. See “Installing Your SIM 4.
ss a Certain Function service may be dependent on r the network. Contact your r.
ive Any Calls e forwarded your incoming calls to e number. To cancel the Forward calls, ing calls” on page 47.e set the Accept Calls option to From no list. Select From all. See “Accept calls”
Not for C
omm
ercia
84 Troubleshooting
Phonelock onIf the phonelock is on, the message Locked appears each time you turn on the phone. You have to enter your code to use your phone.
AutomaticIf the phonelock is set to automatic, you do not need to enter your phonelock code until a different SIM card is inserted in the phone.
To edit your phonelock code, scroll to Settings, Locks, Phonelock, Change Code.
Setting the phonelock1 Scroll to Settings, Locks, Phonelock, Protection.2 Select an alternative.3 Enter the phonelock code.
TroublesThis chapter lisencounter whilerequire that youthe problems yo
The phone caRecharge or repCard” on page 1
Cannot AcceThe function oryour SIM card onetwork operato
Cannot Rece• You may hav
another phonsee “Forward
• You may havone or Fromon page 53.
Note! It is important that you remember your new code. If you forget it, contact your local Sony Ericsson retailer.
l Use
Troubleshooting 85
•
•
NWth30
MIf un(dEnthlatiljo
ns function that is temporarily mple due to your o a certain setting which has not been atures is not supported by the local
ot respond to any key presses, ess and hold the key for about ff your phone. Press and hold o turn your phone on again.
es
d in the phone or you may have y. Insert a SIM card. See “Installing page 14.
Cardork only with certain SIM cards.
M card and replace the back cover.
Not for C
omm
ercia
You may have selected Fax or Data as the next incoming call. Select Voice. See “Receiving calls” on page 24.You may have set Allow calls to Off for a data account. Select On instead. See “Data Account Settings” on page 70. If you still cannot receive incoming calls, it could be due to network limitations.
o indication of charginghen you start charging a battery that is empty or a battery at has not been used for a long time, it may take up to minutes before the battery icon appears in the display.
enu languagethe display shows a language that you do not derstand, you can always choose Automatic etermined by your SIM card). You can easily select glish by tilting the joystick to the left, pressing 0 0 0 0,
en tilting the joystick to the right. To easily change the nguage to the language determined by your SIM card, t the joystick to the left, press 8 8 8 8, then tilt the ystick to the right.
Gray menu optioGray text indicates aunavailable, for exasubscription or due tturned on or if the fenetwork.
Display FrozenIf your phone does nit may be frozen. Pr10 seconds to turn othe key briefly t
Error messag
Insert SIMThere is no SIM carinserted it incorrectlYour SIM Card” on
Insert correct SIMThe phone is set to wInsert the correct SI

l Use
- contact operatorr personal unblocking key code (PUK)
imes in a row. Contact your network ice provider.
cked. To unlock the phone, see page 83.
de:es with the phonelock code, 0000.
it to any four- to eight-digit code. ” on page 83.
ermittedng function is on and the number you ot on your fixed numbers list. See dialing on or off” on page 52.
g. Non-approved battery are using is not a Sony Ericsson-y and is charging slowly for safety
Not for C
omm
ercia
86 Troubleshooting
Emergency calls onlyYou are within range of a network, but you are not allowed to use it. However, in an emergency, some operators allow you to call the international emergency number 112 or 911. See “Making emergency calls” on page 23.
No NetworkThere is no network within range or the received signal is too weak. You have to move to get a signal that is strong enough.
Wrong PIN/Wrong PIN2You have entered your PIN or PIN2 incorrectly. Enter the correct PIN or PIN2. See “SIM card lock” on page 83.
Codes do not matchWhen you want to change a security code (for example your PIN) you have to confirm the new code by entering it again. The two codes that you have entered do not match. See “SIM card lock” on page 83.
PIN blocked/PIN2 blockedYou have entered your PIN or PIN2 incorrectly three times in a row. To unblock, see “SIM card lock” on page 83.
PUK blockedYou entered youincorrectly 10 toperator or serv
Phone lockedThe phone is lo“Phonelock” on
Phonelock coYour phone comYou can changeSee “Phonelock
Number not pThe Fixed Dialihave dialed is n“Turning Fixed
Slow charginThe battery youapproved batterreasons.
l Use
essories, and Accessibility 87
AA
TeS••••
OYobr
••••
lutions/Special NeedsAccessible Solutions for individuals all the Sony Ericsson Special Needs 996 (TTY) or 877-207-2056 (voice), Special Needs Center at:snc.com
on the internet at: com.
tson Mobile Internet at: com for online access to tware, customer services, ther useful information.
Not f
or Com
merc
ia
Assistance, Acc
ssistance, Accessories, and ccessibility
chnical Assistance/Customer erviceUnited States - 1-800-374-2776Latin America - +1-305-755-6789Canada - 1-800-668-2101Other countries - +1-919-472-7908
rdering Accessoriesu can purchase Sony Ericsson branded or Ericsson
anded accessories intended for use with this product by:
Visiting www.SonyEricsson.com/us (US only)Calling 1-800-374-2776 (US only)Calling 1-800-755-6789 (Puerto Rico)Visiting your local Sony Ericsson or Ericsson retailer.
Accessible SoFor information on with special needs cCenter at 877-878-1or visit the Ericssonwww.SonyEricsson-
InternetVisit Sony Ericssonwww.SonyEricsson.
Mobile InterneVisit the Sony Ericswww.SonyEricsson.synchronization sofuser’s guides, and o
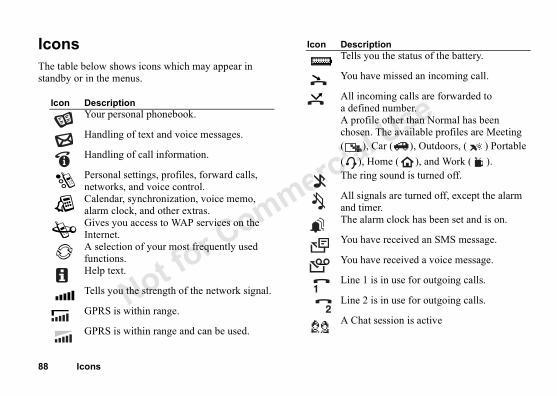
l Use
you the status of the battery.
have missed an incoming call.
ncoming calls are forwarded to ined number.ofile other than Normal has been en. The available profiles are Meeting ), Car ( ), Outdoors, ( ) Portable , Home ( ), and Work ( ).ring sound is turned off.
ignals are turned off, except the alarm imer.alarm clock has been set and is on.
have received an SMS message.
have received a voice message.
1 is in use for outgoing calls.
2 is in use for outgoing calls.
at session is active
ription
Not f
or Com
merc
ia
88 Icons
IconsThe table below shows icons which may appear in standby or in the menus.
Icon DescriptionYour personal phonebook.
Handling of text and voice messages.
Handling of call information.
Personal settings, profiles, forward calls, networks, and voice control.Calendar, synchronization, voice memo, alarm clock, and other extras.Gives you access to WAP services on the Internet.A selection of your most frequently used functions.Help text.
Tells you the strength of the network signal.
GPRS is within range.
GPRS is within range and can be used.
Tells
You
All ia defA prchos(( )The
All sand tThe
You
You
Line
Line
A Ch
Icon Desc
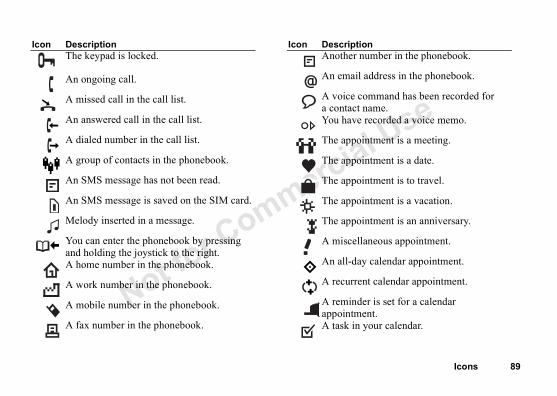
l Use
Icons 89
number in the phonebook.
address in the phonebook.
ommand has been recorded for name. recorded a voice memo.
intment is a meeting.
intment is a date.
intment is to travel.
intment is a vacation.
intment is an anniversary.
laneous appointment.
y calendar appointment.
nt calendar appointment.
er is set for a calendar ent. your calendar.
on
Not f
or Com
merc
ia
The keypad is locked.
An ongoing call.
A missed call in the call list.
An answered call in the call list.
A dialed number in the call list.
A group of contacts in the phonebook.
An SMS message has not been read.
An SMS message is saved on the SIM card.
Melody inserted in a message.
You can enter the phonebook by pressing and holding the joystick to the right.A home number in the phonebook.
A work number in the phonebook.
A mobile number in the phonebook.
A fax number in the phonebook.
Icon DescriptionAnother
An email
A voice ca contactYou have
The appo
The appo
The appo
The appo
The appo
A miscel
An all-da
A recurre
A remindappointmA task in
Icon Descripti

l Use
Not f
or Com
merc
ia
90 Icons
A task of high priority.
A task of low priority.
The task is to make a phone call.
The task is to write a message.
Icon Description

l Use
Index 91
In missed 24put on hold 48reject 24
Chat 64Conference calls 48
end 50extracting a participant 49putting conference on hold
50releasing a participant 49reviewing participants 49
Contactsadd 25copy 41edit 27
Contrast 40
DData account 70Data calls 76Data counter 72
Not f
or Com
merc
ia
dexAAccessibility 87Accessories 87Alarm clock 77Analog Indicator 18Answering mode 40Assistance 87
BBusiness cards 55
exchanging 55
CCalculator 78Calendar 79
add a task 80add an appointment 80settings 81
status 81view 80
Call 46Call time 46Calling 23, 50
automatic redialing 23call list 24fixed dialing 52groups 28speed dialing 26
Calling cardschoosing card 51making a call 51saving card number 50saving number 50
Callsaccept 53answer 24emergency 23forward 47international 23

l Use
automatic 38manual 38
LLanguage in display 39Light 39Locks
keypad 38phone 83SIM card 83
MMagic word 45Making calls 21Melodies
saving from a message 66Melodies, see Ring sounds 35Menu language 39Menu overview 95Message options 63Messaging 61
Not f
or Com
merc
ia
92 Index
Displayanimation 40greeting 40icons 88light 39
EEmergency calls 23Emergency numbers 23EMS 61Enhanced Messaging 61Entering letters
multitap text input 29T9 text input 31
Error messages 85
FFax, sending and receiving 76Fixed dialing 52Forwarding calls 47From 37
GGames 82GPRS 70, 71, 72Greeting 40Groups 28
closed user groups 53conference calls 48
HHandsfree 40
IIcons 18Icons in display 88International calls 23Internet 87Items 55
KKey sound 37Keypad lock 38
l Use
Index 93
PINchanging 83
PIN2changing 83
Profiles 39selecting 39
PUK 83
RReset 33Ring sounds 35
increasing 36increasing ring 36key sound 37personal 36
SSafety Guidelines 5Settings
profiles 39
Not f
or Com
merc
ia
Missed calls 24Mobile Internet 69, 87
bookmarks 74browsing 72options 73push messages 74
Mobile Internet settings 56DialUp Connection 57email account 60GPRS data 56locks 59manual set up 56preferred mode 58receiving in an SMS mes-
sage 56security 59WAP profile 58wizard 56
My shortcuts 38
NNetworks 54
OOptions Key 19
PPause 31Personal ring sound 36Personal ring sounds 36Phone views 17Phonebook 25
memory 27Phonelock 83
activating/canceling 84changing the security code
84Pictures 34
exchanging 35saving from a message 66
l Use
before voice dialing 41dialing 42editing voice commands 45magic word 45recording voice memos 44reject 43tips 43, 46
Voice dialing 42Voicemail 46
WWAP, see Mobile Internet 69
Not f
or Com
merc
ia
94 Index
Shortcuts 38SIM card
copy contacts 41unblocking 83
SIM card lock 83activating/canceling 83
SMSdeleting messages 65forwarding messages 65
SMS messagesinsert object 62save 65send 61templates 65write 61
Softkeys 19Special Needs 87Speed dialing 26Stopwatch 78
TT9 Text Input 31Technical Assistance 87Time settings 37
advanced settings 38set date 38set time 37
Timer 78TTY Phone Number 87Turn the phone on/off
animation 21greeting 21networks 21PIN 21
Two voice lines 50
VVibrating alert 37Voice answering 43Voice control 41
answering 43
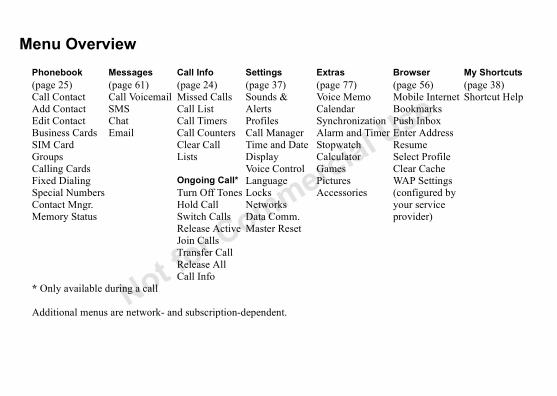
Not f
or Com
merc
ial U
se
Menu OverviewPhonebook(page 25)Call ContactAdd ContactEdit ContactBusiness CardsSIM CardGroupsCalling CardsFixed DialingSpecial NumbersContact Mngr.Memory Status
Messages(page 61)Call VoicemailSMSChatEmail
Call Info(page 24)Missed CallsCall ListCall TimersCall CountersClear Call Lists
Ongoing Call*Turn Off TonesHold CallSwitch CallsRelease ActiveJoin CallsTransfer CallRelease AllCall Info
Settings(page 37)Sounds & AlertsProfilesCall ManagerTime and DateDisplayVoice ControlLanguageLocksNetworksData Comm.Master Reset
Extras(page 77)Voice MemoCalendarSynchronizationAlarm and TimerStopwatchCalculatorGamesPicturesAccessories
Browser(page 56)Mobile InternetBookmarksPush InboxEnter AddressResumeSelect ProfileClear CacheWAP Settings(configured by your service provider)
My Shortcuts(page 38)Shortcut Help
* Only available during a call
Additional menus are network- and subscription-dependent.

se
k CardM
Sc
Q
E
W
Te
key.
ss Call.
ay
n.
lists.
Not for Com
merc
ial U
T62u Quicy Shortcuts Menu
The My Shortcuts menu allows you to customize the settings you use most often.
roll Through MenusTilt the joystick to the left or right.
uick Access to MenusEnter the number of the menu you want to reach.
mergency CallsEnter your local emergency number and press Call.
ebsitewww.SonyEricsson.com
chnical SupportUnited States - 1-800-374-2776Latin America - +1-305-755-6789Canada - 1-800-668-2101Other countries - +1-919-472-7908
Turn Phone On/OffPress and hold the power
Make a CallEnter the number and pre
Answer CallPress Answer.
End CallPress End.
Call Number Shown in DisplPress Call.
Enter the Call ListPress Call List.
Redial Last Dialed NumberPress Call List then Call.
Move through listsTilt the joystick up or dow
Delete an itemPress and hold C when in
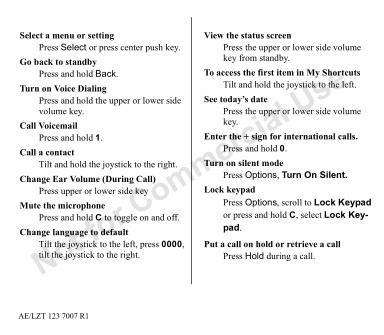
se
side volume
y Shortcuts to the left.
side volume
ional calls.
Silent.
ock Keypad t Lock Key-
a call
Not f
or Com
merc
ial U
AE/LZT 123 7007 R1
Select a menu or settingPress Select or press center push key.
Go back to standbyPress and hold Back.
Turn on Voice DialingPress and hold the upper or lower side volume key.
Call VoicemailPress and hold 1.
Call a contactTilt and hold the joystick to the right.
Change Ear Volume (During Call)Press upper or lower side key
Mute the microphonePress and hold C to toggle on and off.
Change language to defaultTilt the joystick to the left, press 0000, tilt the joystick to the right.
View the status screenPress the upper or lower key from standby.
To access the first item in MTilt and hold the joystick
See today’s datePress the upper or lower key.
Enter the + sign for internatPress and hold 0.
Turn on silent modePress Options, Turn On
Lock keypadPress Options, scroll to Lor press and hold C, selecpad.
Put a call on hold or retrievePress Hold during a call.

www.SonyEricsson.com
AE/LZT 123 7007 R1


![T-Mobile SGH-T159 User Manualimages.comparecellular.com/.../1800/Samsung_T159_UG_Eng-[T-Mobile].pdfSGH-T159 Series PORTABLE QUAD-BAND MOBILE PHONE User Manual Please read this manual](https://static.documents.pub/doc/80x56/5ae320127f8b9a5d648d7c98/t-mobile-sgh-t159-user-t-mobilepdfsgh-t159-series-portable-quad-band-mobile-phone.jpg)


