13
MyPBX with SugarCRM Integration Configuration Guide Version 1.0 Date: 2015.05.26 Yeastar Information Technology Co. Ltd.
MyPBX with SugarCRM Integration
Configuration Guide
Version 1.0
Date: 2015.05.26
Yeastar Information Technology Co. Ltd.
Integrate MyPBX and SugarCRM
2/13
Table of Contents
1. Introduction......................................................................................................... 3
2. Connection with SugarCRM and MyPBX .......................................................... 4
2.1 Install and Activate Asterisk Module ................................................................ 4 2.1.1 How to Install Asterisk Module Using Module Loader ................................ 4 2.2.2 How to Activate SugarCRM Asterisk Module............................................. 6
2.3. MyPBX Configuration ..................................................................................... 6 3.3 SugarCRM Configuration ................................................................................ 9
4. Handling Calls on Sugar CRM ......................................................................... 11
4.1 Click to call .................................................................................................... 11 4.2 Incoming Call Popup ..................................................................................... 11 4.3 Transfer a call ............................................................................................... 12 4.4 Take Notes during a Call ............................................................................... 13
Integrate MyPBX and SugarCRM
3/13
1. Introduction SugarCRM enables businesses to create extraordinary customer relationships with the most innovative, flexible and affordable CRM solution in the market. MyPBX could work perfectly with SugarCRM and help you to achieve the following features: Click to call. Incoming call popup. Take a note during a call, transfer a call and hung up the call with SugarCRM. Check call log in SugarCRM. This document provides a step-by-step guide for integration with MyPBX and SugarCRM. In this guide, we tested with MyPBX U100 and SugarCRM 6.5.20.
Note: Before installing SugarCRM, you should set up AMP (Apache+MySQL+Php) on your PC (Windows or Linux). Click the following link to get a detailed SugarCRM Installation Guide: http://support.sugarcrm.com/02_Documentation/01_Sugar_Editions/05_Sugar_Community_Edition/Sugar_Community_Edition_6.5/Sugar_Community_Edition_Installation_Guide_6.5.0/ For any problem occurred during the SugarCRM installation, please contact Sugar support.
Integrate MyPBX and SugarCRM
4/13
2. Connection with SugarCRM and MyPBX An Asterisk module is required to be installed in SugarCRM for connecting the CRM and MyPBX. Many 3rd party companies provide the add-on, such as: • Tech Exten: http://www.techextension.com • Callinize: http://www.callinize.com • Github: http://github.com
2.1 Install and Activate Asterisk Module
Usually, the engineer from 3rd party company will help you to install and activate the Asterisk module. We take Asterisk module from Tech Exten company as an example and introduce the details below.
2.1.1 How to Install Asterisk Module Using Module Loader
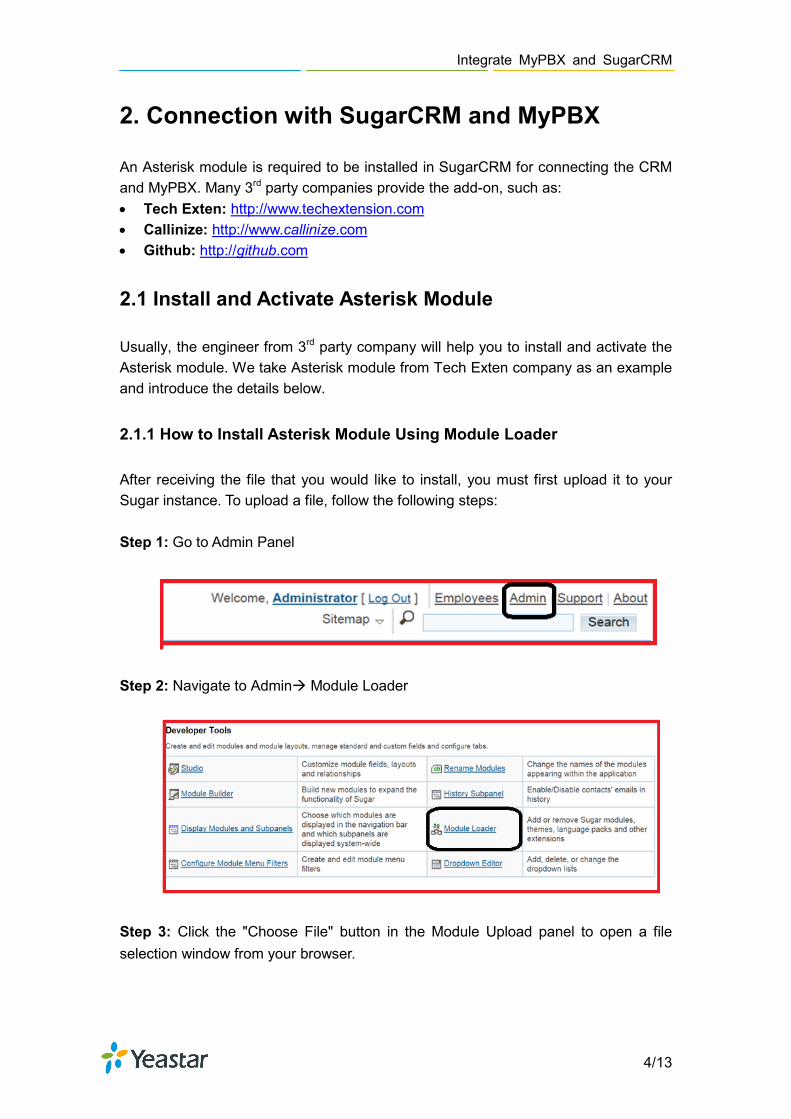
After receiving the file that you would like to install, you must first upload it to your Sugar instance. To upload a file, follow the following steps: Step 1: Go to Admin Panel
Step 2: Navigate to Admin Module Loader
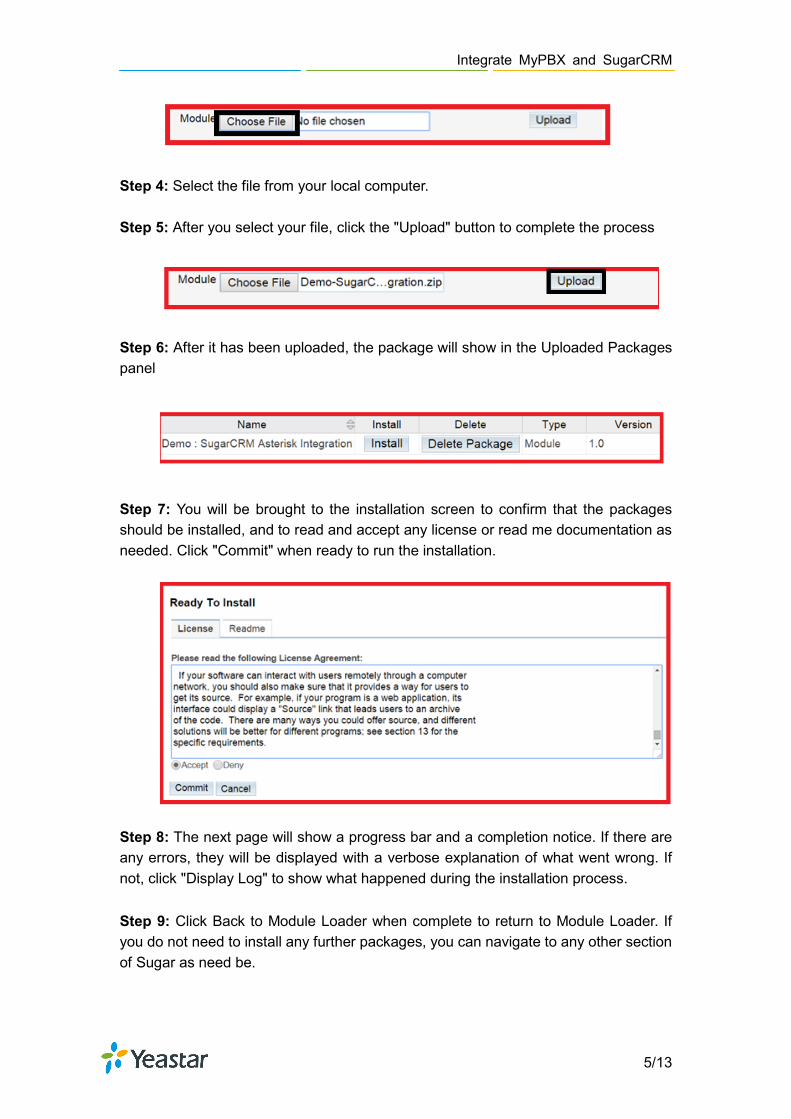
Step 3: Click the "Choose File" button in the Module Upload panel to open a file selection window from your browser.
Integrate MyPBX and SugarCRM
5/13
Step 4: Select the file from your local computer. Step 5: After you select your file, click the "Upload" button to complete the process
Step 6: After it has been uploaded, the package will show in the Uploaded Packages panel
Step 7: You will be brought to the installation screen to confirm that the packages should be installed, and to read and accept any license or read me documentation as needed. Click "Commit" when ready to run the installation.
Step 8: The next page will show a progress bar and a completion notice. If there are any errors, they will be displayed with a verbose explanation of what went wrong. If not, click "Display Log" to show what happened during the installation process. Step 9: Click Back to Module Loader when complete to return to Module Loader. If you do not need to install any further packages, you can navigate to any other section of Sugar as need be.
Integrate MyPBX and SugarCRM
6/13
2.2.2 How to Activate SugarCRM Asterisk Module
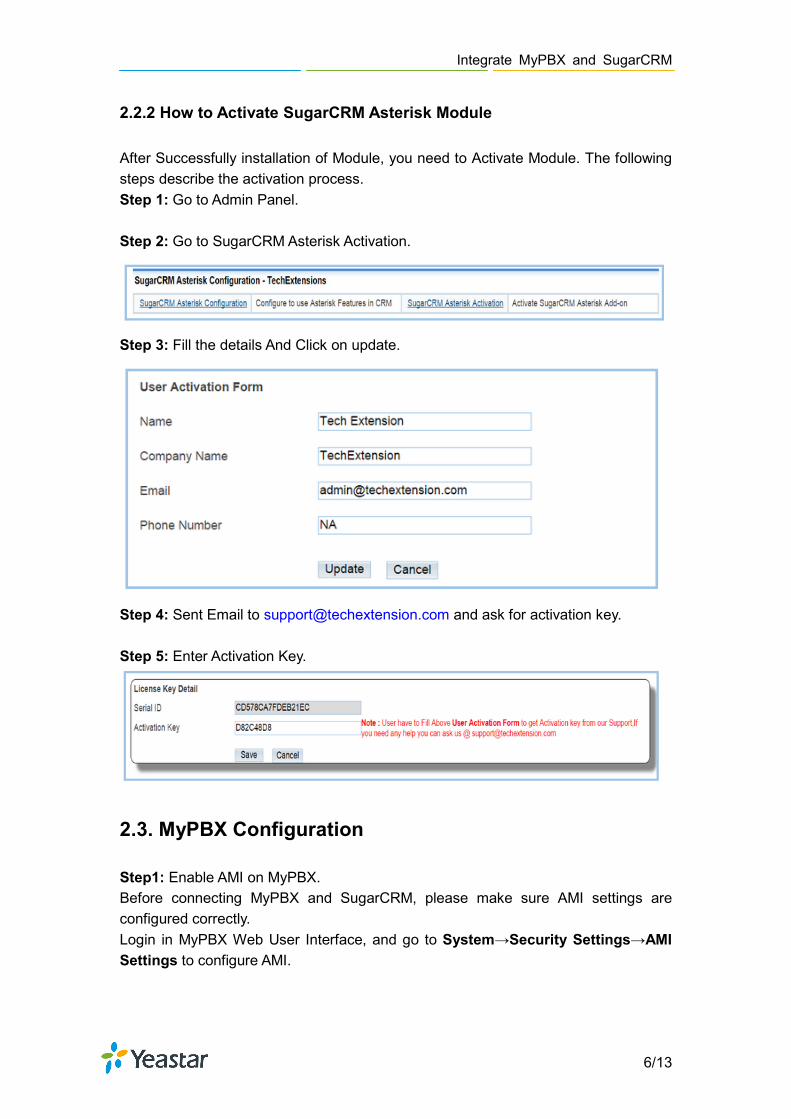
After Successfully installation of Module, you need to Activate Module. The following steps describe the activation process. Step 1: Go to Admin Panel. Step 2: Go to SugarCRM Asterisk Activation.
Step 3: Fill the details And Click on update.
Step 4: Sent Email to [email protected] and ask for activation key. Step 5: Enter Activation Key.
2.3. MyPBX Configuration
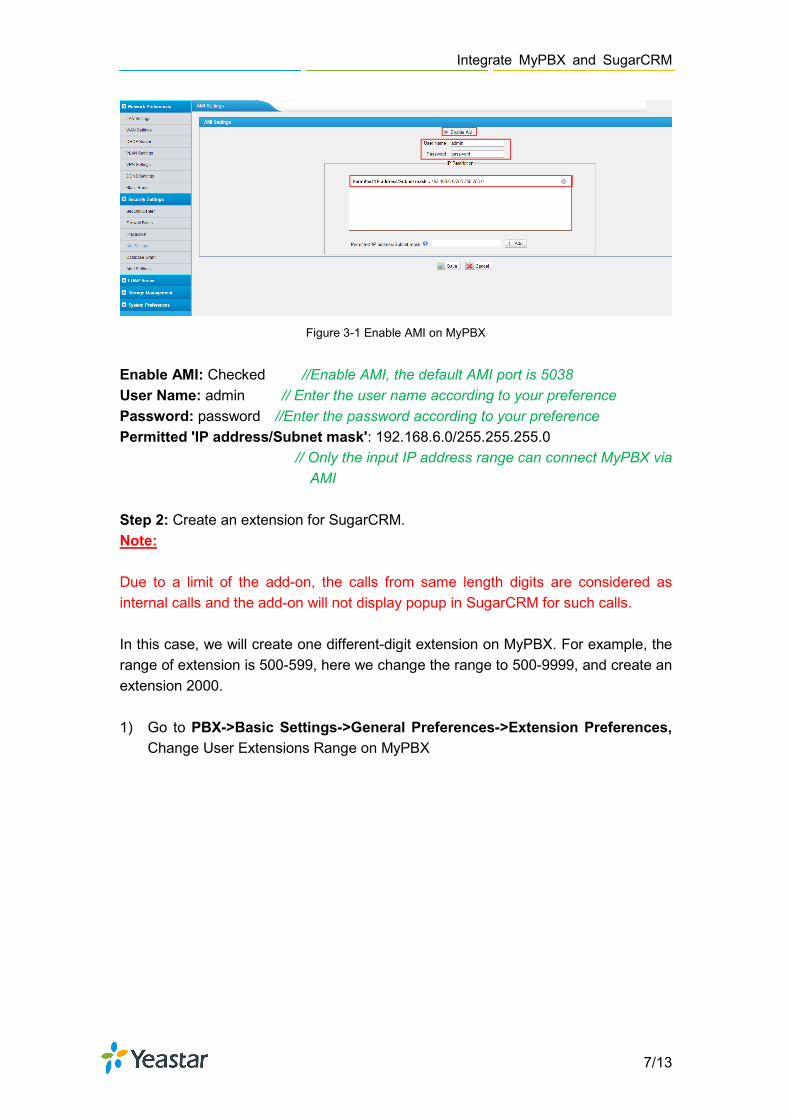
Step1: Enable AMI on MyPBX. Before connecting MyPBX and SugarCRM, please make sure AMI settings are configured correctly. Login in MyPBX Web User Interface, and go to System→Security Settings→AMI Settings to configure AMI.
Integrate MyPBX and SugarCRM
7/13
Figure 3-1 Enable AMI on MyPBX
Enable AMI: Checked //Enable AMI, the default AMI port is 5038 User Name: admin // Enter the user name according to your preference Password: password //Enter the password according to your preference Permitted 'IP address/Subnet mask': 192.168.6.0/255.255.255.0
// Only the input IP address range can connect MyPBX via AMI
Step 2: Create an extension for SugarCRM. Note: Due to a limit of the add-on, the calls from same length digits are considered as internal calls and the add-on will not display popup in SugarCRM for such calls. In this case, we will create one different-digit extension on MyPBX. For example, the range of extension is 500-599, here we change the range to 500-9999, and create an extension 2000. 1) Go to PBX->Basic Settings->General Preferences->Extension Preferences,
Change User Extensions Range on MyPBX
Integrate MyPBX and SugarCRM
8/13
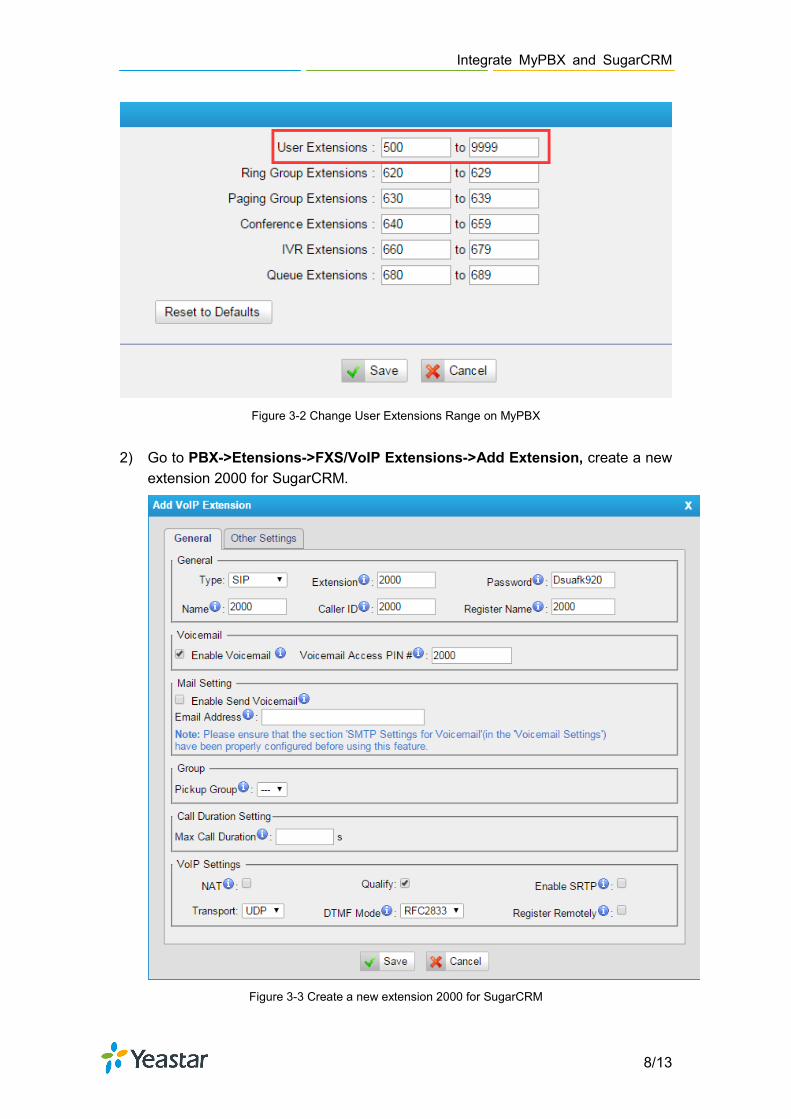
Figure 3-2 Change User Extensions Range on MyPBX
2) Go to PBX->Etensions->FXS/VoIP Extensions->Add Extension, create a new extension 2000 for SugarCRM.
Figure 3-3 Create a new extension 2000 for SugarCRM
Integrate MyPBX and SugarCRM
9/13
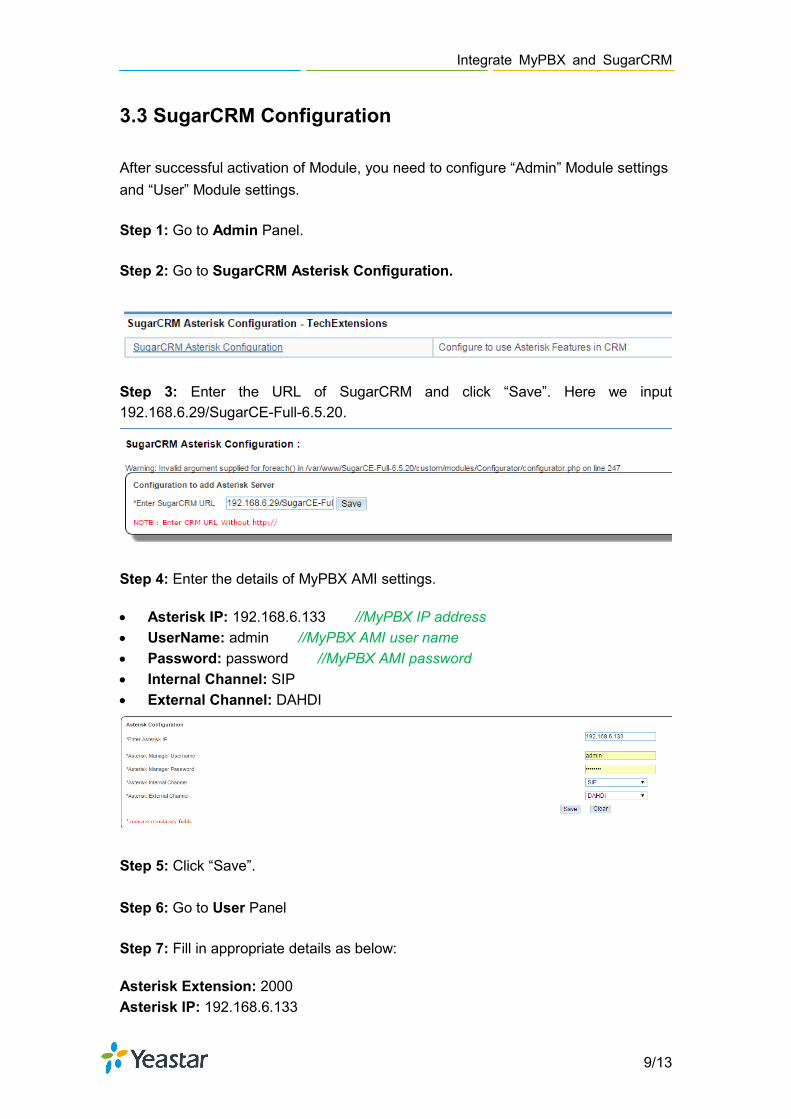
3.3 SugarCRM Configuration
After successful activation of Module, you need to configure “Admin” Module settings and “User” Module settings.
Step 1: Go to Admin Panel.
Step 2: Go to SugarCRM Asterisk Configuration.
Step 3: Enter the URL of SugarCRM and click “Save”. Here we input 192.168.6.29/SugarCE-Full-6.5.20.
Step 4: Enter the details of MyPBX AMI settings.
• Asterisk IP: 192.168.6.133 //MyPBX IP address • UserName: admin //MyPBX AMI user name • Password: password //MyPBX AMI password • Internal Channel: SIP • External Channel: DAHDI
Step 5: Click “Save”.
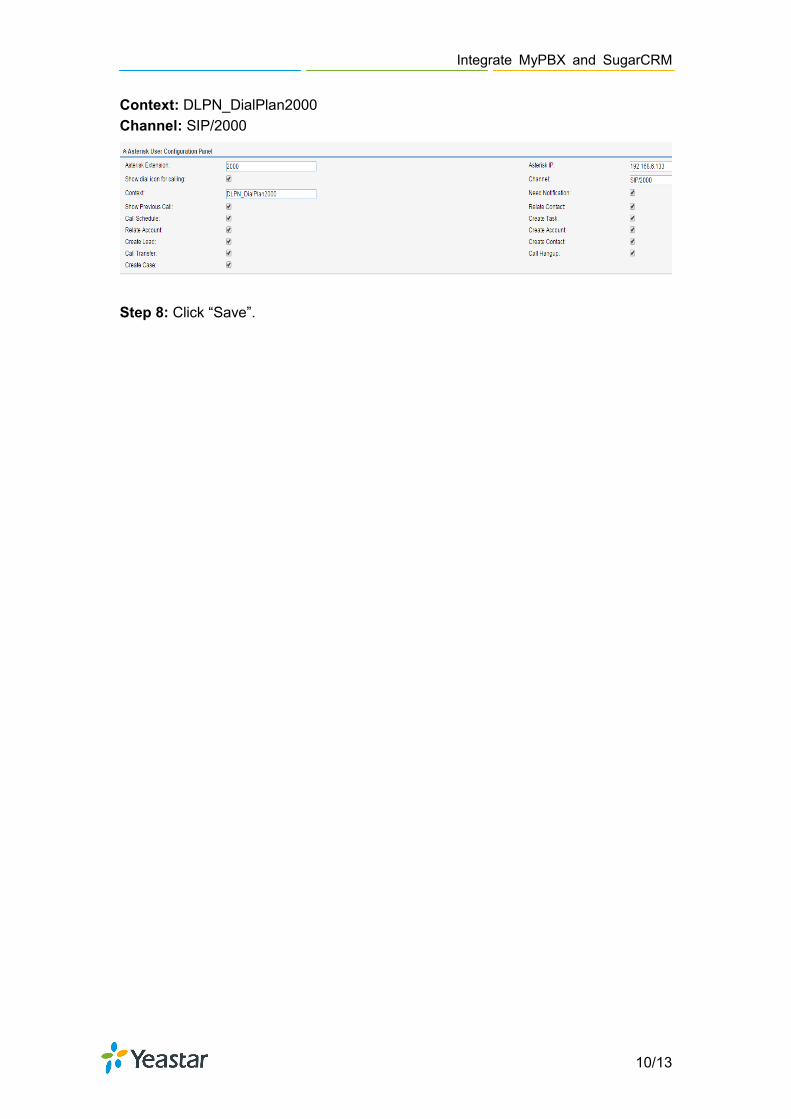
Step 6: Go to User Panel
Step 7: Fill in appropriate details as below:
Asterisk Extension: 2000 Asterisk IP: 192.168.6.133
Integrate MyPBX and SugarCRM
10/13
Context: DLPN_DialPlan2000 Channel: SIP/2000
Step 8: Click “Save”.
Integrate MyPBX and SugarCRM
11/13
4. Handling Calls on Sugar CRM
4.1 Click to call
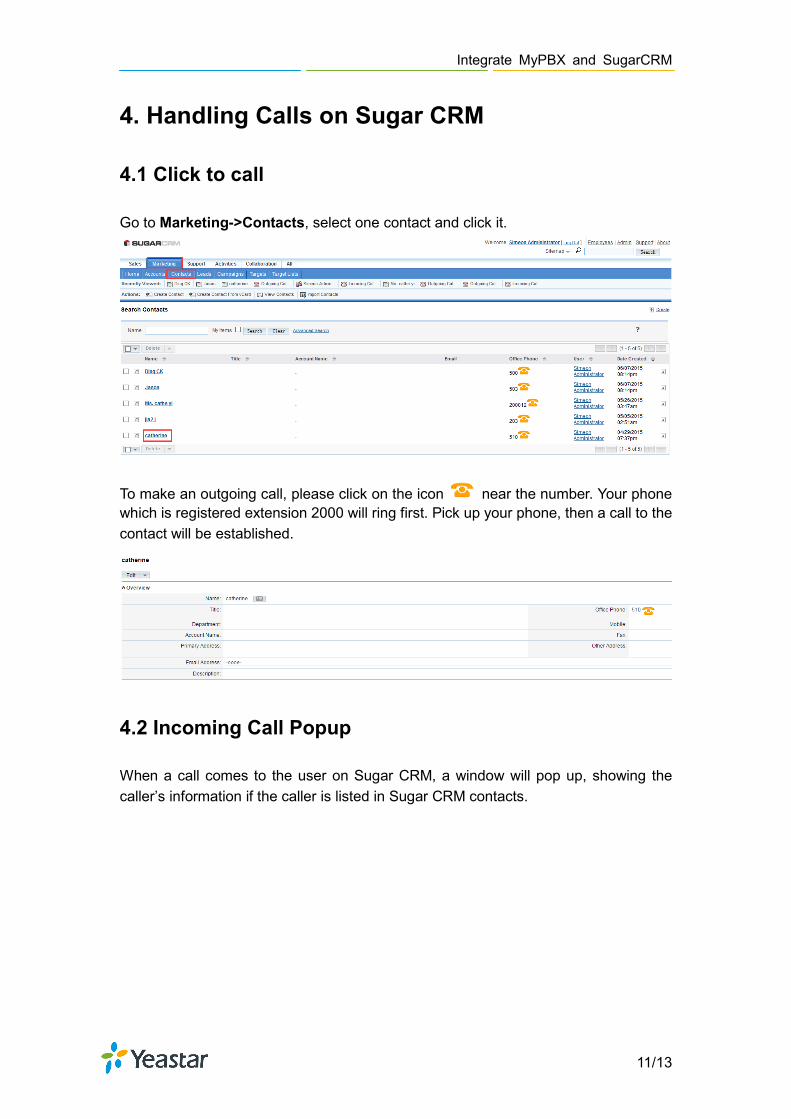
Go to Marketing->Contacts, select one contact and click it.
To make an outgoing call, please click on the icon near the number. Your phone which is registered extension 2000 will ring first. Pick up your phone, then a call to the contact will be established.
4.2 Incoming Call Popup
When a call comes to the user on Sugar CRM, a window will pop up, showing the caller’s information if the caller is listed in Sugar CRM contacts.
Integrate MyPBX and SugarCRM
12/13
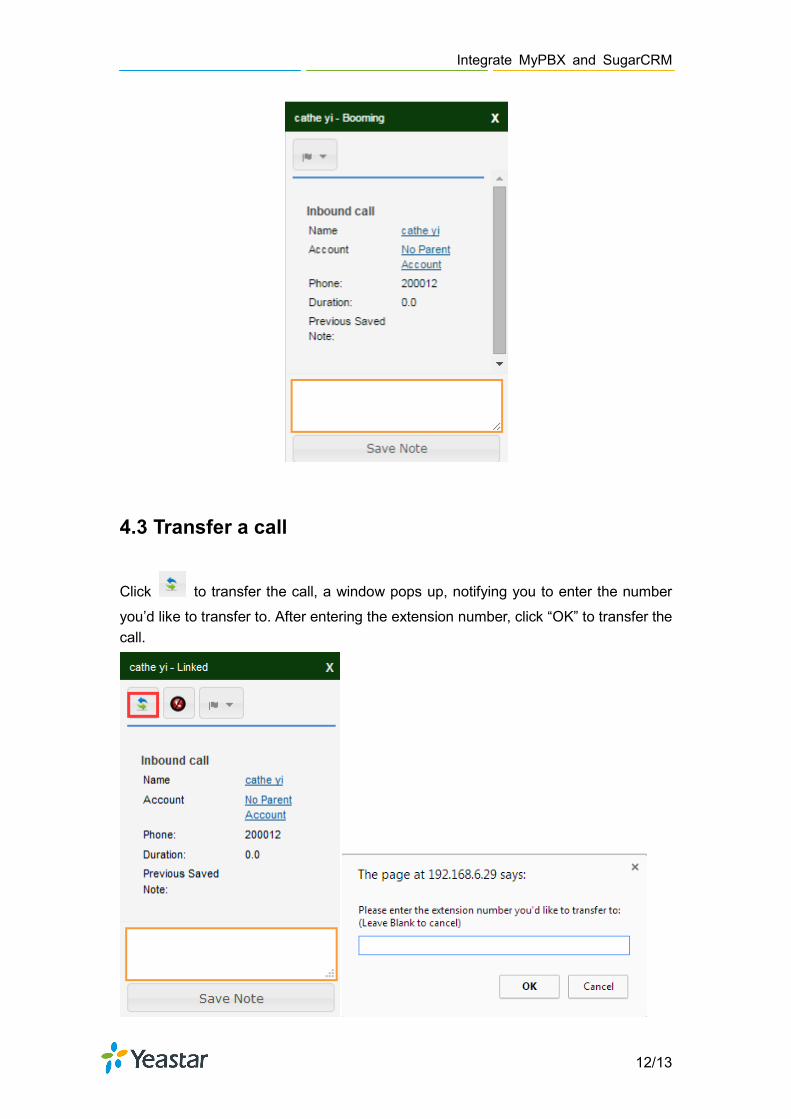
4.3 Transfer a call
Click to transfer the call, a window pops up, notifying you to enter the number
you’d like to transfer to. After entering the extension number, click “OK” to transfer the call.
Integrate MyPBX and SugarCRM
13/13
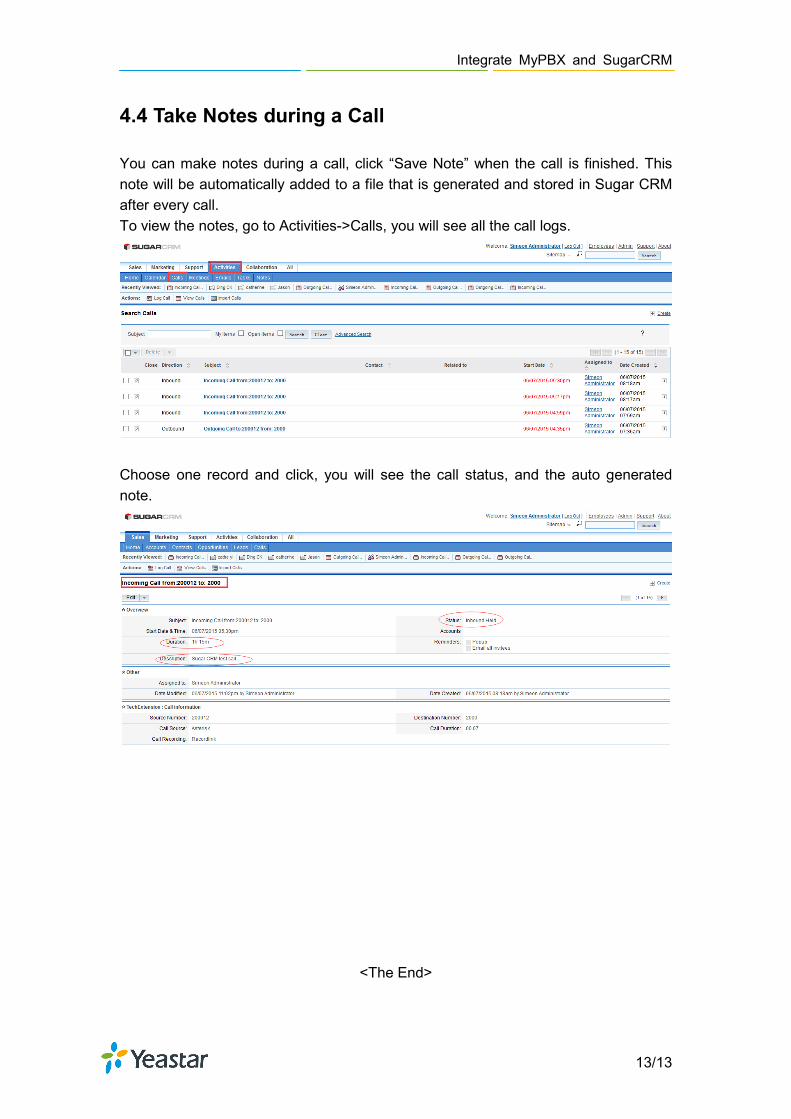
4.4 Take Notes during a Call
You can make notes during a call, click “Save Note” when the call is finished. This note will be automatically added to a file that is generated and stored in Sugar CRM after every call. To view the notes, go to Activities->Calls, you will see all the call logs.
Choose one record and click, you will see the call status, and the auto generated note.
<The End>


