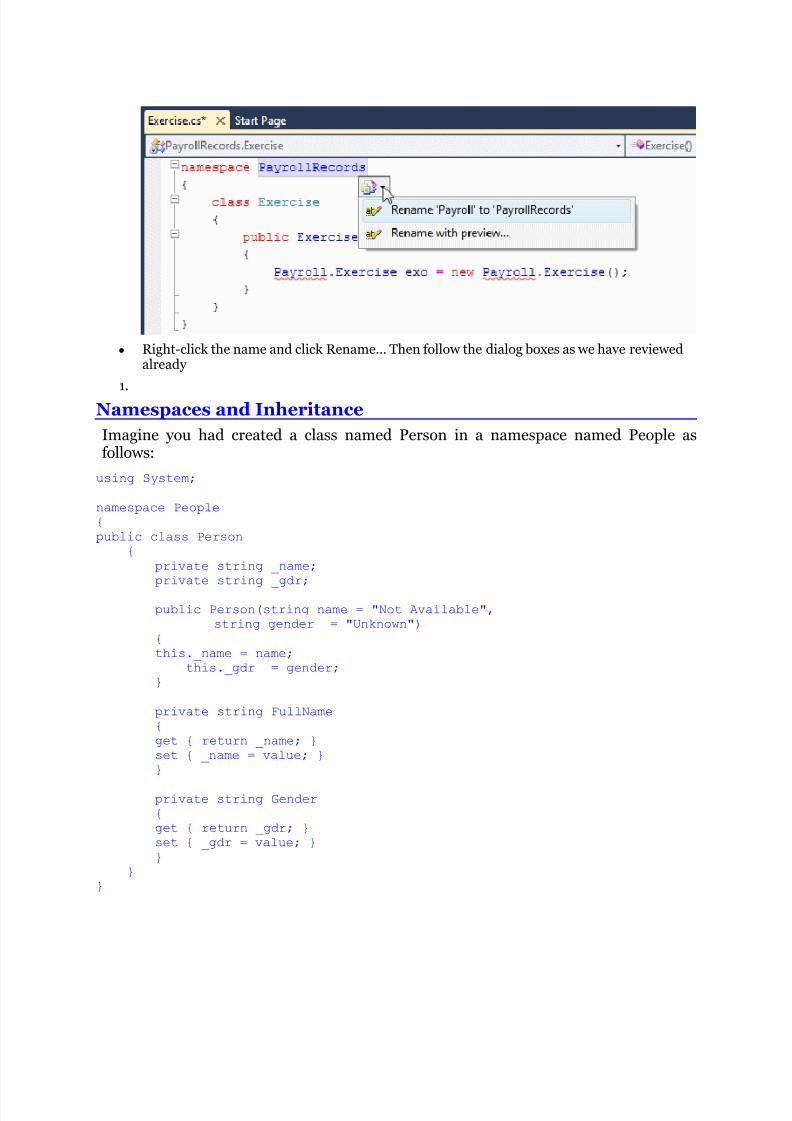
21
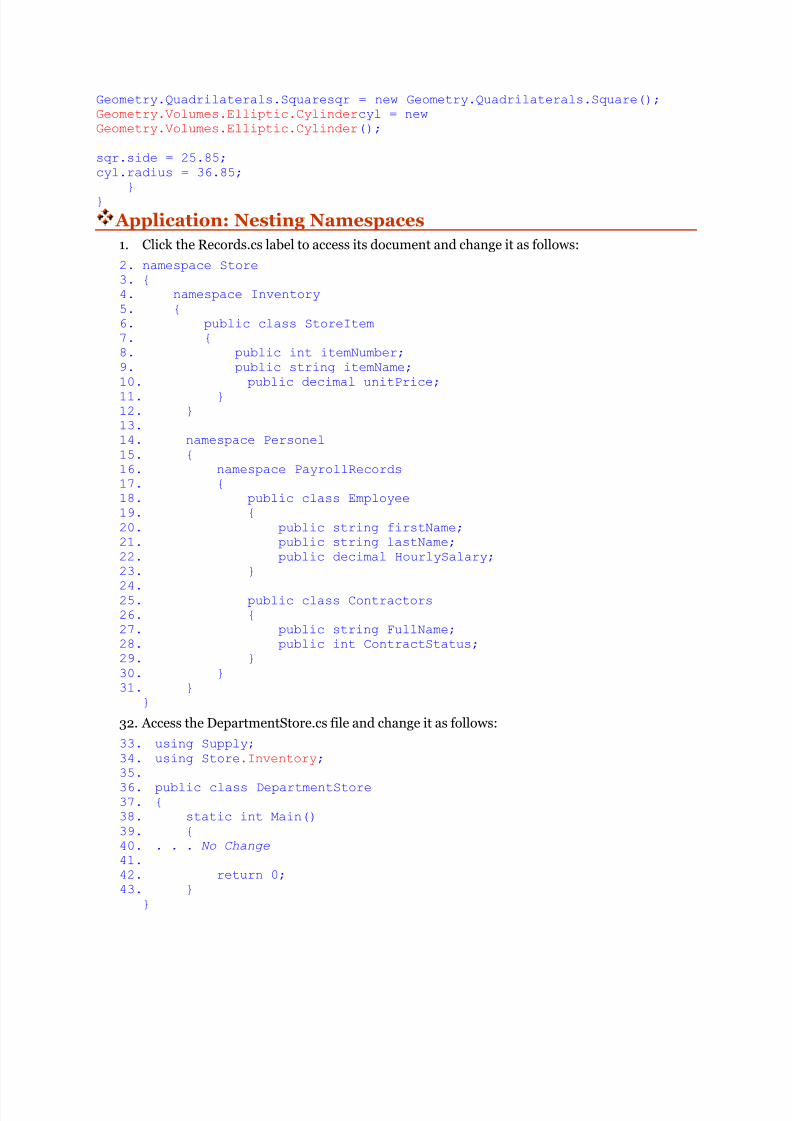
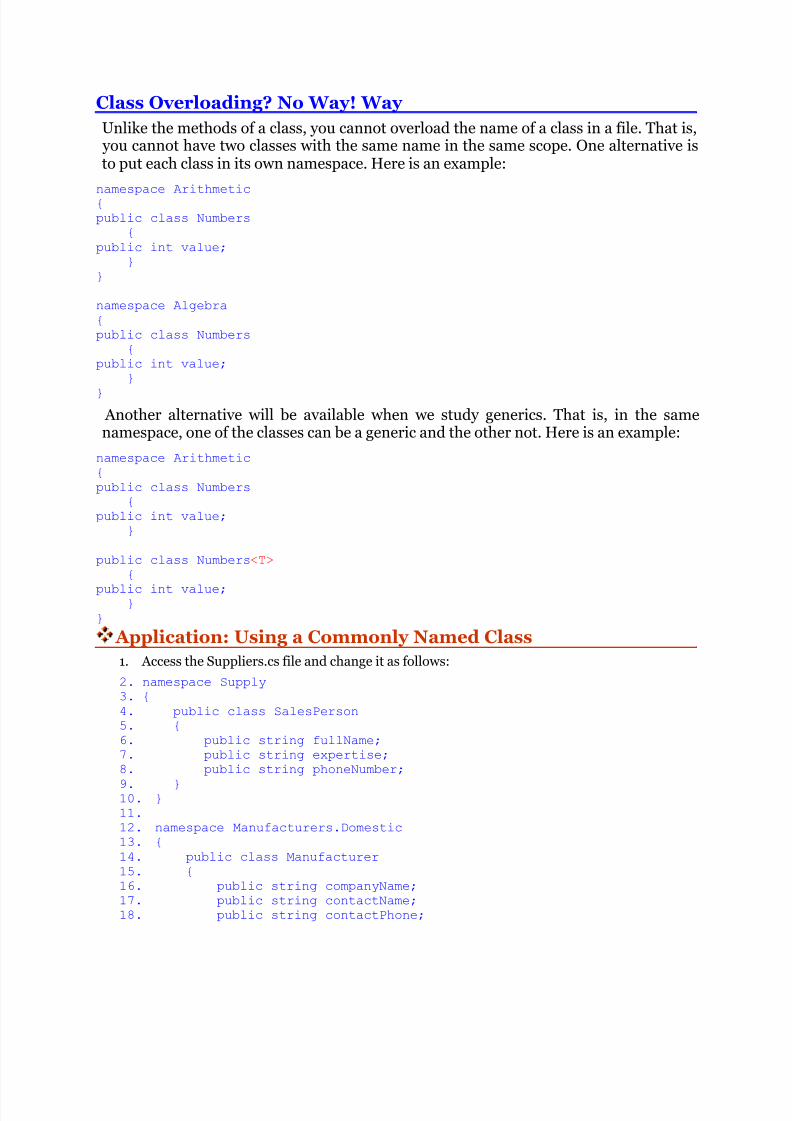
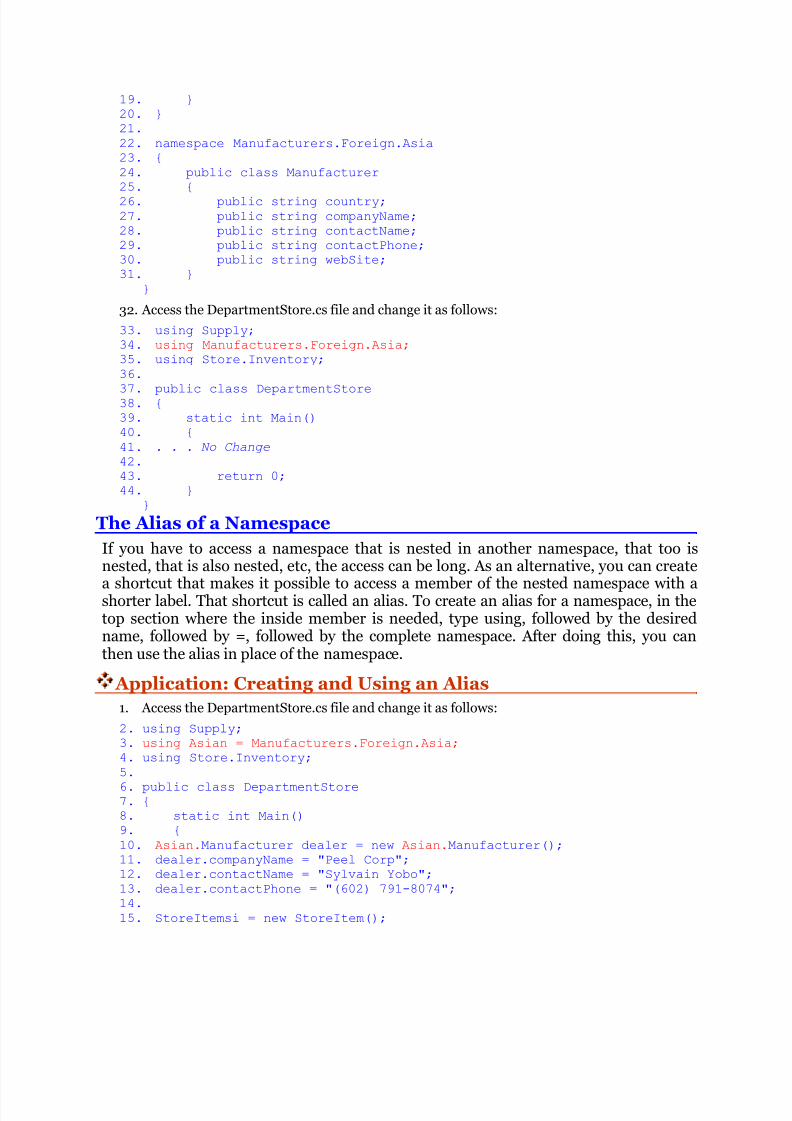
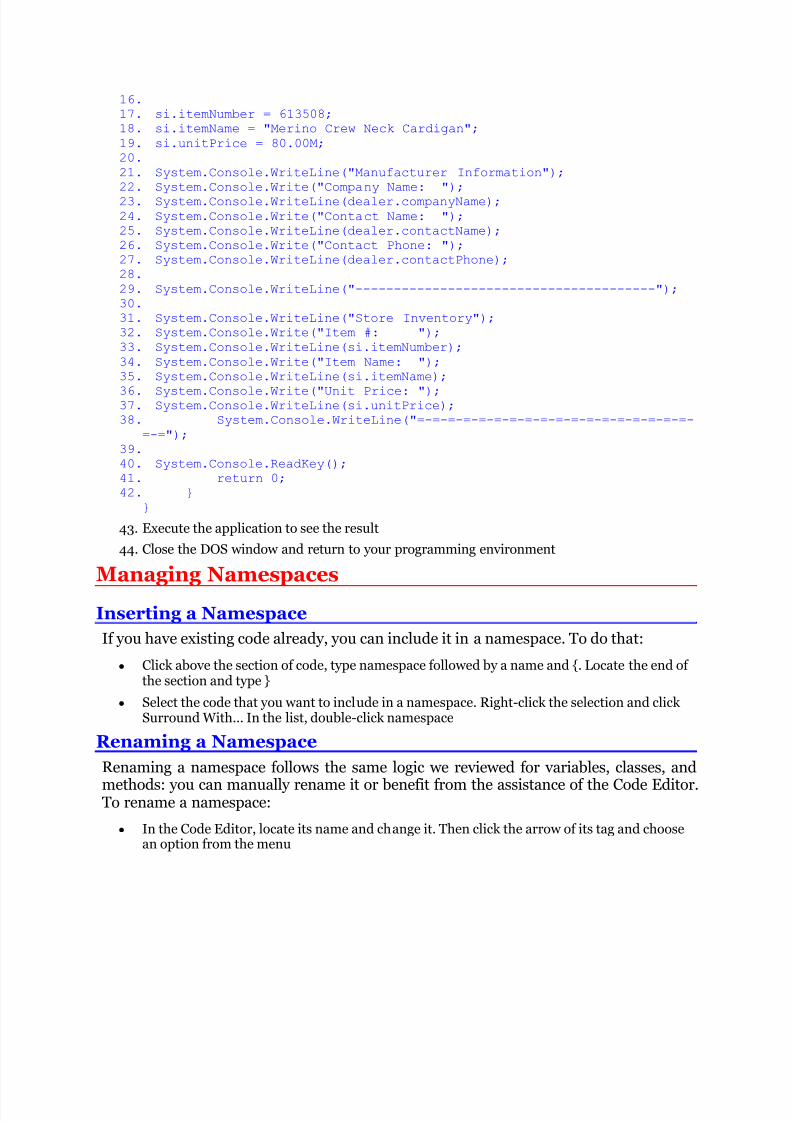
pplication: Introducing Namespaces 1. Start Microsoft Visual Studio 2. To create a new project, on the main menu, click File -> New Project 3. In the left l ist, click Windows 4. In the right list, click Empty Project 5. Change the name to DepartmentStore4 6. Click OK 7. To create a new file, on the main menu, click Project -> Add New Item... 8. In the left list, click Code 9. In the right list, click Code File 10. Change the Name to DepartmentStore and press Add 11. In the empty document, type the following: 12. public class DepartmentStore 13. { 14. static int Main() 15. { 16. return 0; 17. } } Manually Creating a Namespace To create a namespace: y Type code that starts with the namespace keyword followed by the name of the section y R ight-click the section where you want to create the namespace and double-click Insert Snippet... Double-click Visual C#. In the list, double-click namespace Like a class, the section that is part of a namespace starts with an opening curly bracket "{" and ends with a closing curly bracket "}". Here is an example: namespace Business { } Between the curly brackets, you can type anything that is part of the namespace. For example, you can create a class inside of a namespace. Here is an example: namespace Business { class House { } } Application: Creating a Namespace y To create a namespace, change the document as follows: y public class DepartmentStore y { y static int Main() y {


![XSL Transformations (XSLT) Version 1 · belonging to a specific XML namespace (see [2.1 XSLT Namespace]), which is referred to in this specification as the XSLT namespace. Thus this](https://static.documents.pub/doc/80x56/5e6be3fc3160165d82646b66/xsl-transformations-xslt-version-1-belonging-to-a-specific-xml-namespace-see.jpg)


