StarCommunity 3 A Programmer’s Guide StarCommunity - A Programmer’s Guide, v. 3.0 | Copyright 2005-2007 Netstar AB Netstar AB | Box 3415 | 103 68 Stockholm | Sweden Phone: +46 (0)8 5000 98 70 | Fax. +46 (0)8 5000 98 71 | E-mail: [email protected] | Web site: www.netstar.se StarCommunity - Building Relationships
Transcript
StarCommunity 3
A Programmer’s Guide
StarCommunity - A Programmer’s Guide, v. 3.0 | Copyright 2005-2007 Netstar AB
Netstar AB | Box 3415 | 103 68 Stockholm | Sweden Phone: +46 (0)8 5000 98 70 | Fax. +46 (0)8 5000 98 71 | E-mail: [email protected] | Web site: www.netstar.se
StarCommunity -
Building Relationships
2 (133)
Table of Contents
Table of Contents .................................................................................................................................... 2 1. Basic Understanding ........................................................................................................................ 6
1.1. Getting Started .......................................................................................................................... 6 1.1.1. Setting up Visual Studio ...................................................................................................... 6 1.1.2. What is the role of StarCommunity in an ASP.NET page? ................................................. 6
2. Tutorials.......................................................................................................................................... 22 2.1. User Management ................................................................................................................... 22
1.2.40. Adding a User ................................................................................................................. 22 1.2.41. Authenticating a User ..................................................................................................... 23 1.2.42. Getting the Currently Logged in User ............................................................................. 24 1.2.43. Removing a User ............................................................................................................ 24 1.2.44. Restoring a User ............................................................................................................. 25
3 (133)
1.2.45. Adding a User for Activation ........................................................................................... 26 1.2.46. Adding a User to a Group ............................................................................................... 27
2.2. Tags ......................................................................................................................................... 29 2.2.1. Tagging an entity .............................................................................................................. 29 2.2.2. Retrieving the tags of an entity ......................................................................................... 29 2.2.3. Removing a tag from an entity .......................................................................................... 30 2.2.4. Retrieving a tag cloud ....................................................................................................... 30 2.2.5. Implementing tag functionality on other classes ............................................................... 30
2.3. Rating ...................................................................................................................................... 31 2.3.1. Rating an entity ................................................................................................................. 31 2.3.2. Examine if a entity is already rated by an user ................................................................. 31 2.3.3. Retrieving ratings for an entity .......................................................................................... 31 2.3.4. Retrieving entities based on average rating ..................................................................... 32
2.4. Categories ............................................................................................................................... 32 2.4.1. Add a category .................................................................................................................. 32 2.4.2. Removea category ............................................................................................................ 32 2.4.3. Categorize an entity .......................................................................................................... 33 2.4.4. Retrieving categories for an entity .................................................................................... 33 2.4.5. Retrieving entities based on categories ............................................................................ 33
2.6. Queries .................................................................................................................................... 35 2.6.1. Filter and and sort StarCommunity objects....................................................................... 35 2.6.2. Filter on custom attributes ................................................................................................ 36 2.6.3. Using And / Or conditions ................................................................................................. 36
2.7. Blog .......................................................................................................................................... 38 2.7.1. Adding a Blog .................................................................................................................... 38 2.7.2. Removing a Blog ............................................................................................................... 38 2.7.3. Changing blog properties .................................................................................................. 39 2.7.4. Adding a Blog Entry .......................................................................................................... 39 2.7.5. Adding a Blog Entry with Future Publication Date ............................................................ 40 2.7.6. Getting Blog Entries .......................................................................................................... 41 2.7.7. Commenting on a Blog Entry ............................................................................................ 42
2.8. Calendar .................................................................................................................................. 44 2.8.1. Adding a Calendar ............................................................................................................ 44 2.8.2. Removing a Calendar ....................................................................................................... 44 2.8.3. Remove a Calendar .......................................................................................................... 45 2.8.4. Adding an Event ................................................................................................................ 45 2.8.5. Adding a Recurring Event ................................................................................................. 46 2.8.6. Inviting Users to an Event ................................................................................................. 48 2.8.7. Registering upon an Event Invitation ................................................................................ 49
2.9. Chat ......................................................................................................................................... 51 2.9.1. Implementing the Chat Applets on an ASP.NET page ..................................................... 51 2.9.2. Base .................................................................................................................................. 53 2.9.3. ChatWindow ...................................................................................................................... 53 2.9.4. UserList ............................................................................................................................. 54 2.9.5. MessageBox ..................................................................................................................... 54
2.10. Club ....................................................................................................................................... 56 2.10.1. Adding a Club ................................................................................................................. 56 2.10.2. Removing a Club ............................................................................................................ 57 2.10.3. Adding Club Members .................................................................................................... 57 2.10.4. Adding Club Ads ............................................................................................................. 58 2.10.5. Setting Club Keywords ................................................................................................... 59
2.12.2. Removing a Contact Relation ......................................................................................... 63 2.12.3. Approving a Contact Relation ......................................................................................... 64 2.12.4. ContactRelationCollections and Perspectives. ............................................................... 66 2.12.5. Configuration File ............................................................................................................ 68
2.13. Contest .................................................................................................................................. 69 2.13.1. Get Contests ................................................................................................................... 69 2.13.2. Get Contest Questions ................................................................................................... 69 2.13.3. Add Contest Submission ................................................................................................ 70 2.13.4. Get winners ..................................................................................................................... 71
2.14. DirectMessage ....................................................................................................................... 72 2.14.1. Send a Message ............................................................................................................. 72 2.14.2. Removing Messages ...................................................................................................... 73 2.14.3. Listing Messages in Folders ........................................................................................... 74 2.14.4. Flag a Message as read ................................................................................................ 75
2.15. Document Archive ................................................................................................................. 77 2.15.1. Add a Document Archive ................................................................................................ 77 2.15.2. Remove a Document Archive ......................................................................................... 77 2.15.3. Add a Document ............................................................................................................. 78 2.15.4. Update a Document ........................................................................................................ 79 2.15.5. Remove a Document ...................................................................................................... 80 2.15.6. Configuration File ............................................................................................................ 80
2.16. Expert .................................................................................................................................... 81 2.16.1. Add an Expert ................................................................................................................. 81 2.16.2. Add a Member Expert ..................................................................................................... 81 2.16.3. Remove an Expert .......................................................................................................... 82 2.16.4. See if a User is an Expert ............................................................................................... 83 2.16.5. Add a Question ............................................................................................................... 84 2.16.6. Assign a Question ........................................................................................................... 85 2.16.7. Answer a Question.......................................................................................................... 85 2.16.8. Approve an Answer......................................................................................................... 86 2.16.9. Get Questions Assigned to an Expert ............................................................................ 87 2.16.10. Get Question Answers .................................................................................................. 87
2.17. Forum .................................................................................................................................... 89 2.17.1. Adding a Forum .............................................................................................................. 89 2.17.2. Adding a Topic ................................................................................................................ 89 2.17.3. Locking a Topic ............................................................................................................... 90 2.17.4. Removing a Topic ........................................................................................................... 91 2.17.5. Moving a Topic ................................................................................................................ 91 2.17.6. Adding a Reply ................................................................................................................ 92 2.17.7. Removing a Reply........................................................................................................... 92
2.18. Image Gallery ........................................................................................................................ 94 2.18.1. Adding an Image Gallery ................................................................................................ 94 2.18.2. Removing an Image Gallery ........................................................................................... 94 2.18.3. Adding an Image ............................................................................................................. 95 2.18.4. Removing an Image ........................................................................................................ 96 2.18.5. Crop and Rotate an Image ............................................................................................. 96 2.18.6. Getting a Thumbnail of an Image ................................................................................... 98 2.18.7. Getting Images in an Image Gallery ............................................................................... 98
2.19. Moblog ................................................................................................................................. 100 2.19.1. Redirecting an Unwire MMS to a Specific Destination ................................................. 100
2.20. MyPage ............................................................................................................................... 102 2.20.1. Blocking a User ............................................................................................................. 102 2.20.2. Seeing if a User is Blocked ........................................................................................... 102 2.20.3. Getting Blocked Users .................................................................................................. 103 2.20.4. Setting a Portrait Image ................................................................................................ 104
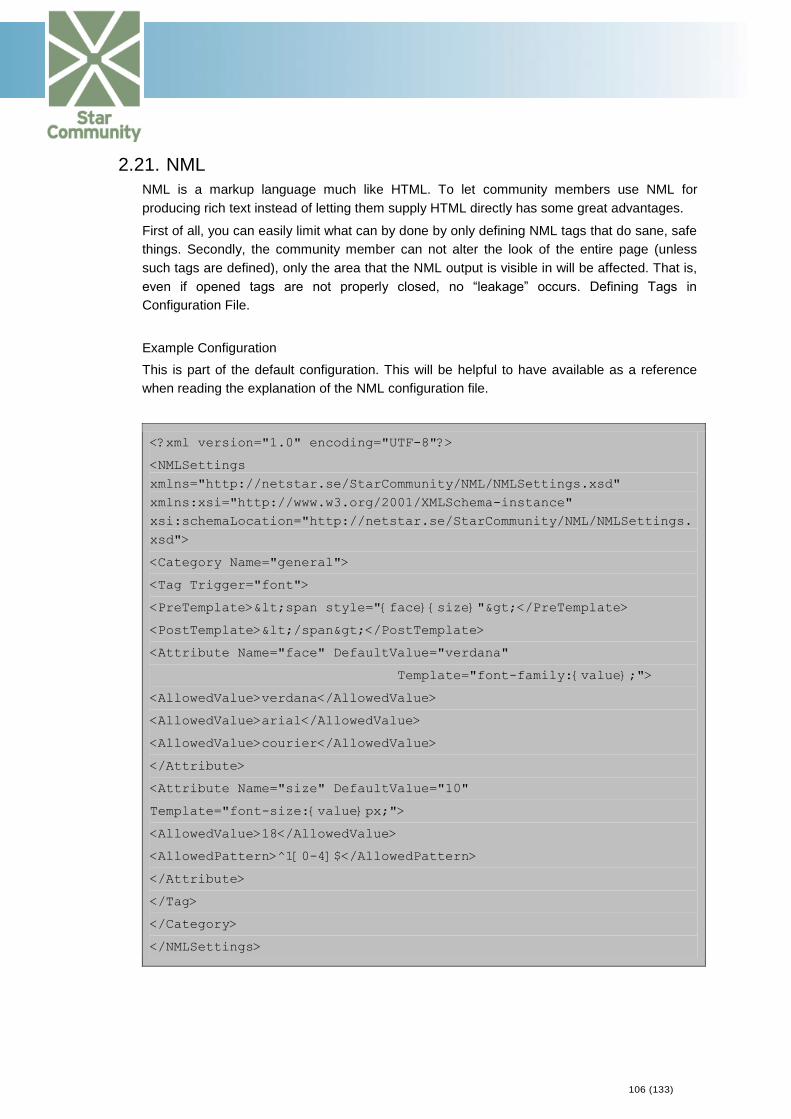
2.21. NML ..................................................................................................................................... 106 2.21.1. Rendering NML Content ............................................................................................... 107 2.21.2. Limiting Maximum Word Lengths ................................................................................. 108
5 (133)
2.22. OnlineStatus ........................................................................................................................ 109 2.22.1. Seeing if a User is Online ............................................................................................. 109 2.22.2. Getting a User’s Last Login Date .................................................................................. 109 2.22.3. Getting Currently Logged in Users ............................................................................... 110
2.23. Poll ....................................................................................................................................... 111 2.23.1. Adding a Poll ................................................................................................................. 111 2.23.2. Removing a Poll ............................................................................................................ 112 2.23.3. Voting in a Poll .............................................................................................................. 112 2.23.4. Display the Current State of a Poll................................................................................ 113 2.23.5. Adding Choices after Creation ...................................................................................... 114 2.23.6. Add Choices to Existing Poll ......................................................................................... 115
2.24. StarViral ............................................................................................................................... 116 2.24.1. Adding a Referral .......................................................................................................... 116 2.24.2. Display the State of Referrals ....................................................................................... 116
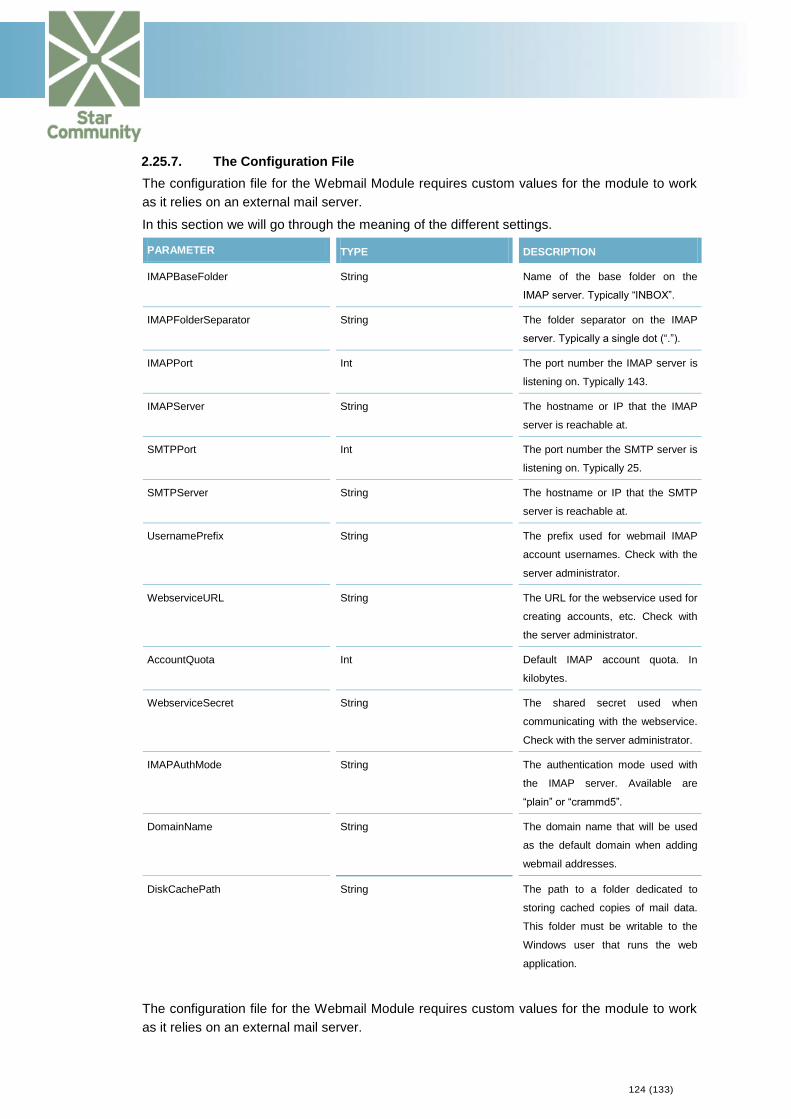
2.25. Webmail ............................................................................................................................... 118 2.25.1. Getting the status of an account ................................................................................... 118 2.25.2. Creating an account ...................................................................................................... 118 2.25.3. Disabling, Reactivating and Permanently Removing Accounts .................................... 119 2.25.4. Managing the Mailbox Tree for an Account .................................................................. 120 2.25.5. Getting Messages ......................................................................................................... 121 2.25.6. Sending a Message ...................................................................................................... 122 2.25.7. The Configuration File .................................................................................................. 124
3. Extending StarCommunity ........................................................................................................... 125 3.1. Extending StarCommunity classes ........................................................................................ 125 3.2. Benefit from StarCommunity functionality in third party classes ........................................... 128
3.2.1. Categorize MyClass entities ........................................................................................... 129 3.2.2. Retrieving categories for MyClass .................................................................................. 131 3.2.3. Retrieving MyClass entities based on categories ........................................................... 131
3.3. Use Netstar Cache system for third party implementations .................................................. 132
6 (133)
1. Basic Understanding
1.1. Getting Started
1.1.1. Setting up Visual Studio
After the installation of StarCommunity onto a Visual Studio Web Project the following steps
needs to be taken.
Add the necessary entries in the Global.asax.cs file mentioned in the
Installation Manual under “EPiServer specific instructions”. This also applies to
regular Web Projects not running EPiServer.
Add all assemblies as a reference to the project. Especially in Visual Studio 2005
this is of great importance, since on a rebuild, Visual Studio will delete all unused
assemblies from the bin directory.
1.1.2. What is the role of StarCommunity in an ASP.NET page?
StarCommunity is the backbone of a community. It is the API that retrieves and stores data
using an object oriented structure and with high performance. The ASP.NET webpage comes
into the picture when you want a way to display and input this data, which means,
StarCommunity does not give you the set of web pages that makes up a community but it
allows you to create them with full customizability in quicker and more stable way than you
could do by coding a community from scratch.
7 (133)
1.2. Netstar Design Concept and Similarities
The Netstar framework design is written in such a way that developers will recognize the structure
and immediately start development in new areas based on previous experience of StarCommunity
development.
Classes that commit and retrieve data all end with “Handler”, e.g. SiteHandler.
Committing data consists of methods starting with “Add”, “Update” and “Remove”.
Entity classes that hold data never contains methods for commiting data.
Handler classes contain events for most common methods, like adding, removing and
updating data.
1.2.1. Required Framework Componenta
StarCommunity depends on a set of common classes, called “Required Framework
Components” that reside in the StarSuite-namespace. These classes handle what is
common between Netstar products, like site partitioning and security and access rights. The
later is described in the figure below.
8 (133)
A Netstar product like StarCommunity is actually a module of Required Framework
Components and when a web site is started it is these components that set up the necessary
environment, loads the environment modules and provides a module context.
9 (133)
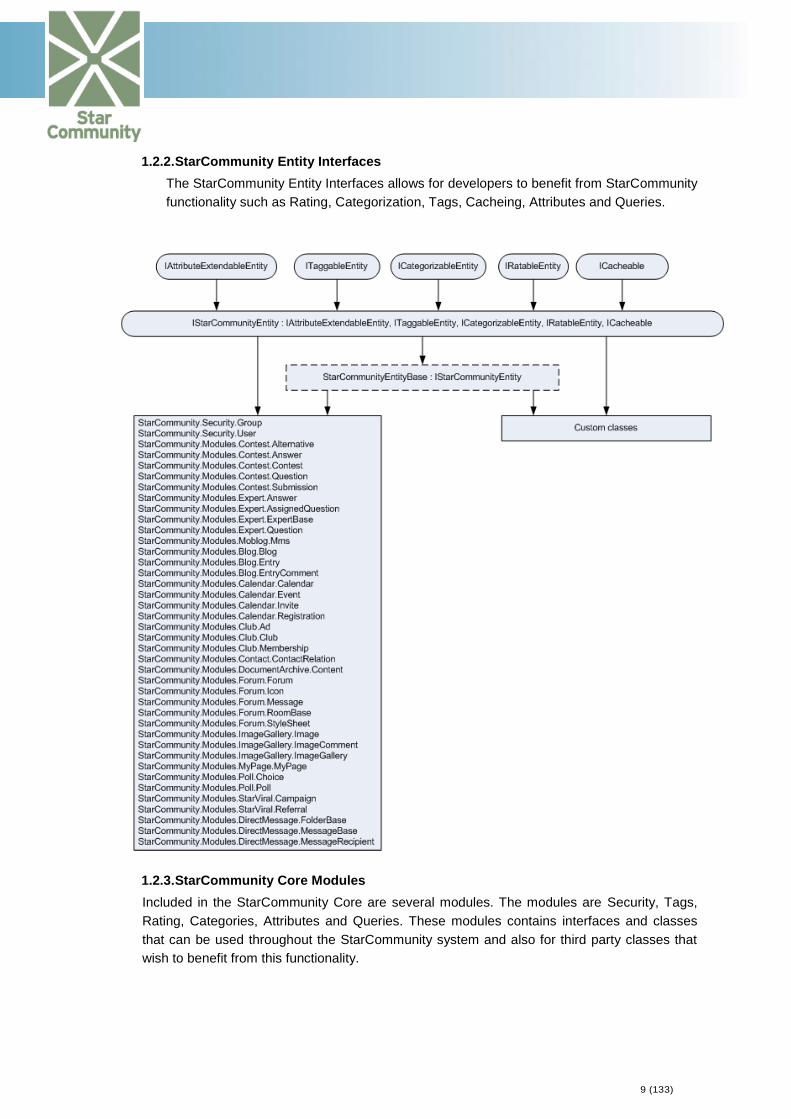
1.2.2. StarCommunity Entity Interfaces
The StarCommunity Entity Interfaces allows for developers to benefit from StarCommunity
functionality such as Rating, Categorization, Tags, Cacheing, Attributes and Queries.
1.2.3. StarCommunity Core Modules
Included in the StarCommunity Core are several modules. The modules are Security, Tags,
Rating, Categories, Attributes and Queries. These modules contains interfaces and classes
that can be used throughout the StarCommunity system and also for third party classes that
wish to benefit from this functionality.
10 (133)
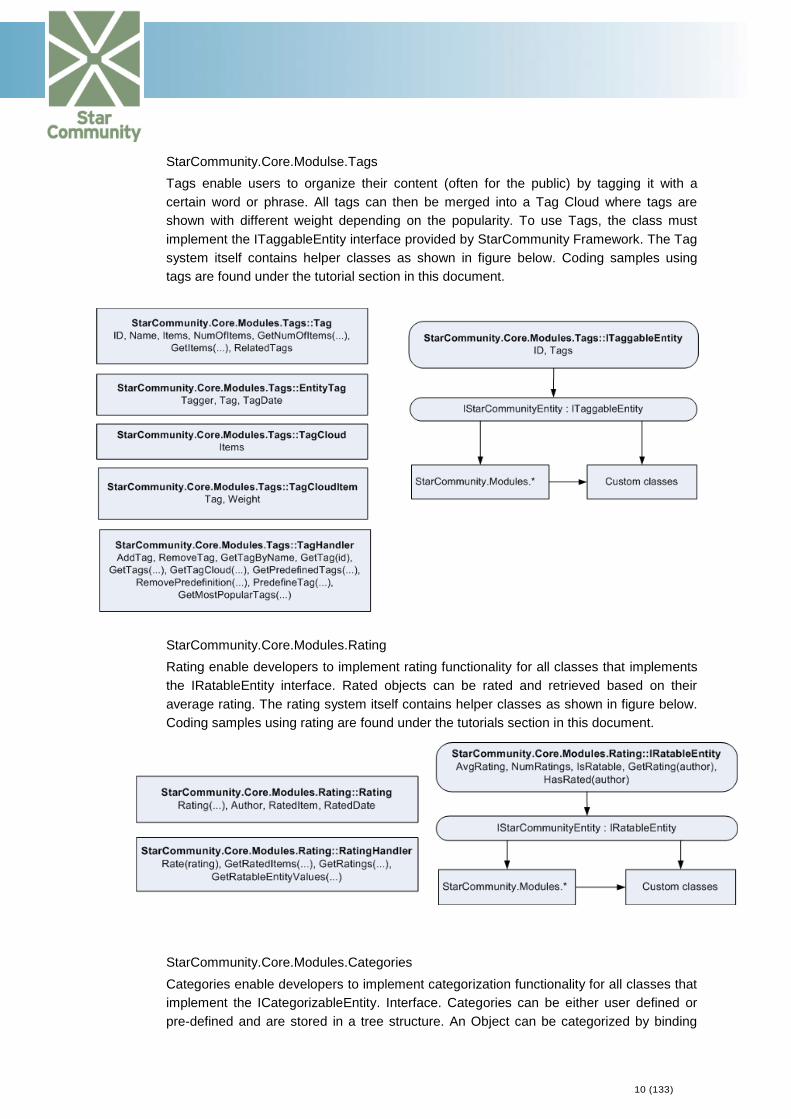
StarCommunity.Core.Modulse.Tags
Tags enable users to organize their content (often for the public) by tagging it with a
certain word or phrase. All tags can then be merged into a Tag Cloud where tags are
shown with different weight depending on the popularity. To use Tags, the class must
implement the ITaggableEntity interface provided by StarCommunity Framework. The Tag
system itself contains helper classes as shown in figure below. Coding samples using
tags are found under the tutorial section in this document.
StarCommunity.Core.Modules.Rating
Rating enable developers to implement rating functionality for all classes that implements
the IRatableEntity interface. Rated objects can be rated and retrieved based on their
average rating. The rating system itself contains helper classes as shown in figure below.
Coding samples using rating are found under the tutorials section in this document.
StarCommunity.Core.Modules.Categories
Categories enable developers to implement categorization functionality for all classes that
implement the ICategorizableEntity. Interface. Categories can be either user defined or
pre-defined and are stored in a tree structure. An Object can be categorized by binding
11 (133)
one or many categories to it and objects may then be retrieved based on their categories.
Examples of content commonly categorized are Images, Blogs and Messages. The
category system itself contains helper classes as shown in the figure below. Coding
samples using Categories are found under the tutorial section in this document.
StarCommunity.Core.Modules.Attributes
Attributes enable developers to add custom attributes and attribute values of both
primitive and complex types for all classes that implements
IAttributeExtendableEntityinterface. Attributes together with Queries makes
StarCommunity a very flexible development platform, which allows system architects and
developers to extend the core community functionality to meet highly specialized
requirements.
In its simplest form, attributes are used directly on existing StarCommunity objects in an
ASP.NET page by using the Set/GetAttributeValue methods. The following code sets and
gets an attribute named “forum_attribute” to the value of a forum instance for a
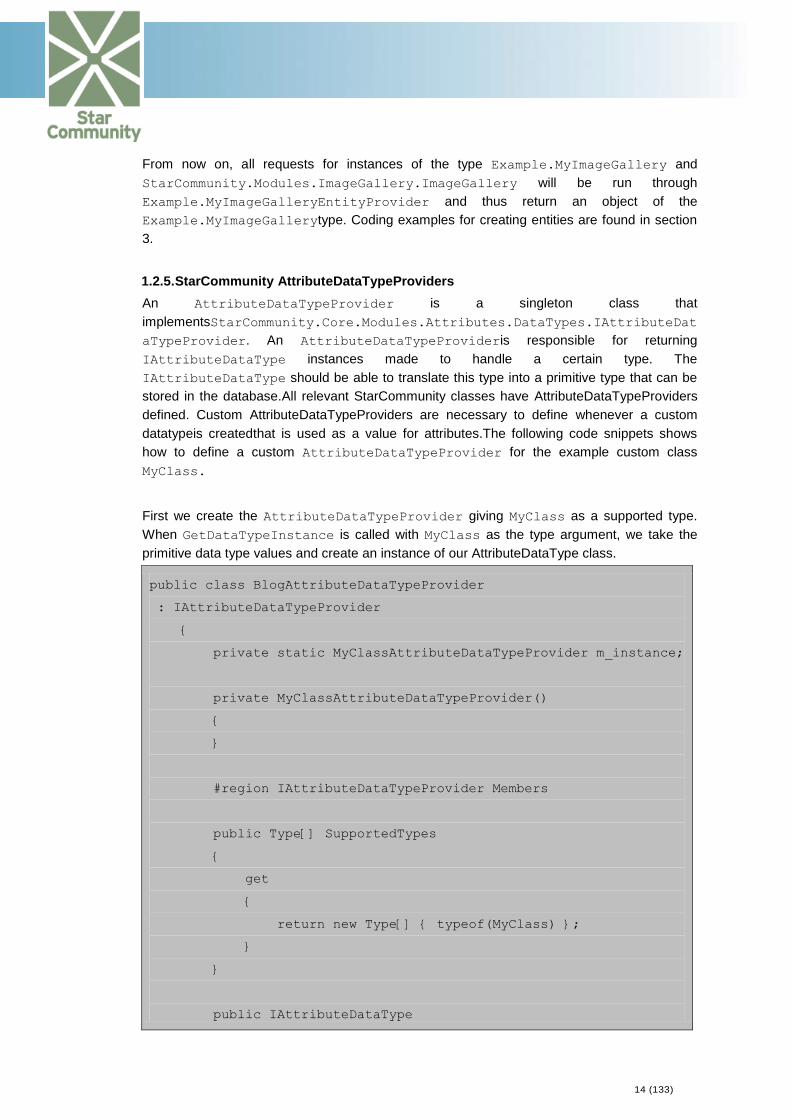
Now, when we update an IAttributeExtendableEntity with an attribute of type
MyClass, the MyClassAttributeDataType class will do the conversion.
1.1. Namespaces
1.2.6. StarSuite.Core
The StarSuite.Core namespace contains important startup classes like Settings, Site and
SiteHandler and takes care of loading modules in the correct order based on dependencies.
1.2.7. StarSuite.Core.Cache
The StarSuite.Core.Cache namespace contains the Netstar Cache system. The cache is
based on a tree-structure with the ability to have dependencies between branches. Every cached object in products like StarCommunity implements the ICacheable interface, allowing an object to have a primary cache key. The cache then keeps track of changes to this cache key and released other caches that also contain this object. All these features in conjunction make the Netstar cache a lot more precise than in previous versions. The new cache system also implements the policy of read-only objects in cache. This is a big change since previous versions, since now objects retrieved from methods needs to be cloned before any properties are updated. All StarCommunity entities have a Clone() method that will return a writable copy of the object.
1.2.8. StarSuite.Core.Data
The StarSuite.Core.Data namespace contains the database communication layer. It is called by all Factory classes to open connections and transactions and makes it possible to run several method calls within one transaction.
// we are only responsible for commiting the transaction
// if we were the ones to start it
if(!alreadyInTransaction)
DatabaseHandler.Commit();
} catch
{
if(!alreadyInTransaction)
DatabaseHandler.Rollback();
throw;
}
18 (133)
1.2.9. StarSuite.Core.Modules
The StarSuite.Core.Modules namespace contains the classes and interfaces necessary
for creating modules. To give an example of a module StarCommunity is actually one of them. And further down the module tree StarCommunity has its own modules.
1.2.10. StarSuite.Core.Globalization
The StarSuite.Core.Globalization namespace contains logic for retrieving and
storing globalized and localized text strings that can be used on a web site of different languages.
// Get the translated text for the currently set culture
string t = GlobalizationHandler.GetTranslation("translation_key");
1.2.11. StarSuite.Core.Modules.Security
The StarSuite.Core.Modules.Security namespace contains the interfaces for users, groups and access rights. The logic is then implemented in different assemblies depending on data
source. The StarSuite.Security.Internal.dll assembly (shipped with the
installation) is an implementation of StarSuite.Core.Modules.Security that uses the
SQL Server database as a source. By creating your own SecurityHandler the choosen
data source would be without limits.
1.2.12. StarCommunity.Core
The StarCommunity.Core namespace contains the important StarCommunitySystem
and StarCommunityContext classes that gives developers access to the StarCommunity
SecurityHandler.
// Get the sql connection string from the starcommunity context
the blueprint for tagging, attributes, rating and categorization. Also the Author classes and interfaces are located here, allowing for guests and users to identify themselves when making posts.
1.2.14. StarCommunity.Core.Modules.Security
The StarCommunity.Core.Modules.Security namespace contains extended interfaces
based on theStarSuite.Core.Modules.Securitynamespace. Extensions include
imlementation of IStarCommunityEntity on users and groups and the ability to store
users for later activation by e-mail etc. The assembly
StarCommunity.Security.Internal.dll is an implementation of this that uses the SQL
Server database as a data source.
// Get the currently logged in user. DefaultSecurity should be
// StarComunity.Security.Internal.SecurityHandler since no other
// handler is installed.
19 (133)
IUser u = (IUser)StarCommunitySystem.
CurrentContext.DefaultSecurity.CurrentUser;
1.2.15. StarCommunity.Core.Modules.Tags
This namespace contains the Tags core module whose functionality spans over all the StarCommunity modules, and optionally it may extend to third party modules as well. It allows
for tagging an entity of any type (implementing the ITaggableEntity interface) with a tag. A
tag cloud may then be generated for the tags globally or by site and/or type See the section 0 for implementation details.
1.2.16. StarCommunity.Core.Modules.Rating
This namespace contains the Rating core module whose functionality spans over all the StarCommunity modules, and optionally it may extend to third party modules as well. It allows
for rating an entity of any type (implementing the IRatableEntity interface) providing a
rating value. Entities may then be retrieved based on their average rating. See section 2.3 for implementation details.
1.2.17. StarCommunity.Core.Modules.Categories
This namespace contains the Categories core module whose functionality spans over all the StarCommunity modules, and optionally it may extend to third party modules as well. It allows
for categorizing an entity of any type (implementing the ICategorizableEntity interface)
providing one or many categories. Entities may then be retrieved based on their categorization.See section 2.4 for implementation details.
1.2.18. StarCommunity.Core.Modules.Attributes
This namespace contains the Attributes core module whose functionality spans over all the StarCommunity modules, and optionally it may extend to third party modules as well. It allows for binding attribute values of primitive or complex types to an entity of any type (implementing
the IAttributeExtendableEntity interface). See section 2.5 for implementation details.
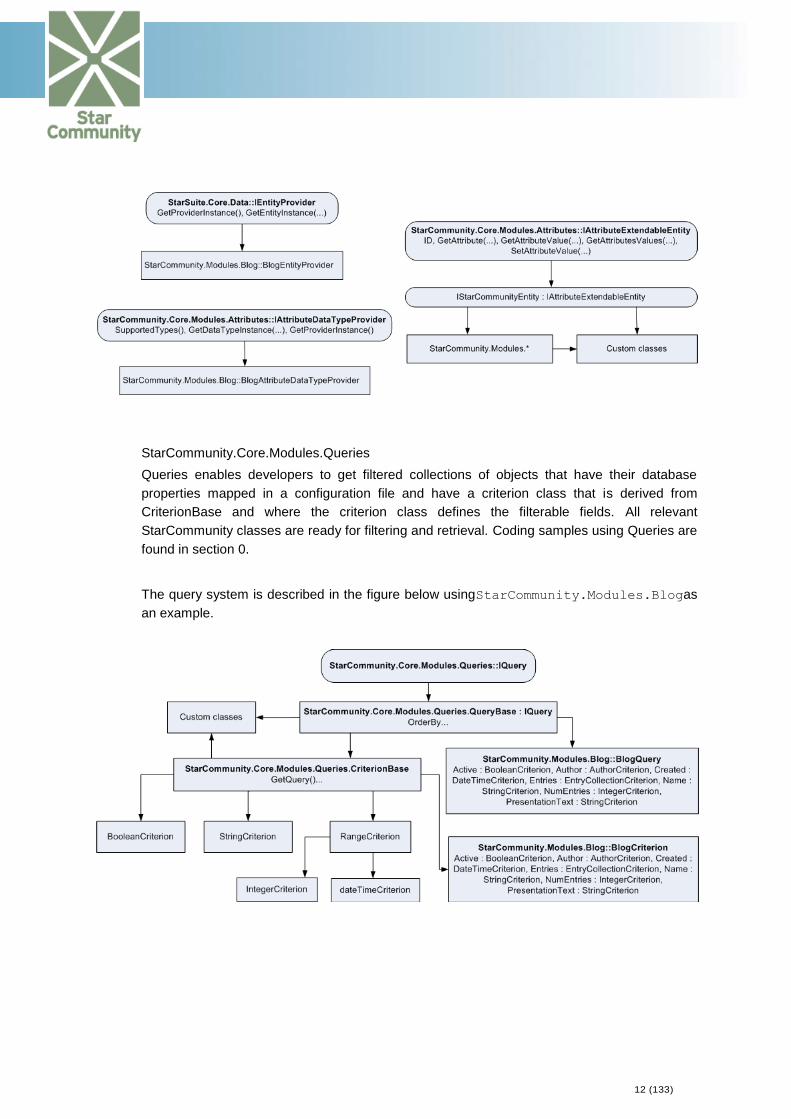
1.2.19. StarCommunity.Core.Modules.Queries
This namespace contains the Queries core module whose functionality spans over all the StarCommunity modules, and optionally it may extend to third party modules as well. It exposes the base functionality of queries and criteria and is not used directly, but instead through implementations of these base classes. Queries allows for retrieving dynamically filtered results.
1.2.20. StarCommunity.Modules.Blog
The StarCommunity.Modules.Blog namespace contains classes for creating and
managing blogs.
1.2.21. StarCommunity.Modules.Calendar
The StarCommunity.Modules.Calendar namespace contains classes for creating and
managing calendars, events, event invites and event registrations.
1.2.22. StarCommunity.Modules.Chat
The StarCommunity.Modules.Chat namespace contains classes for creating and
managing chat rooms, chat users and chat moderators.
20 (133)
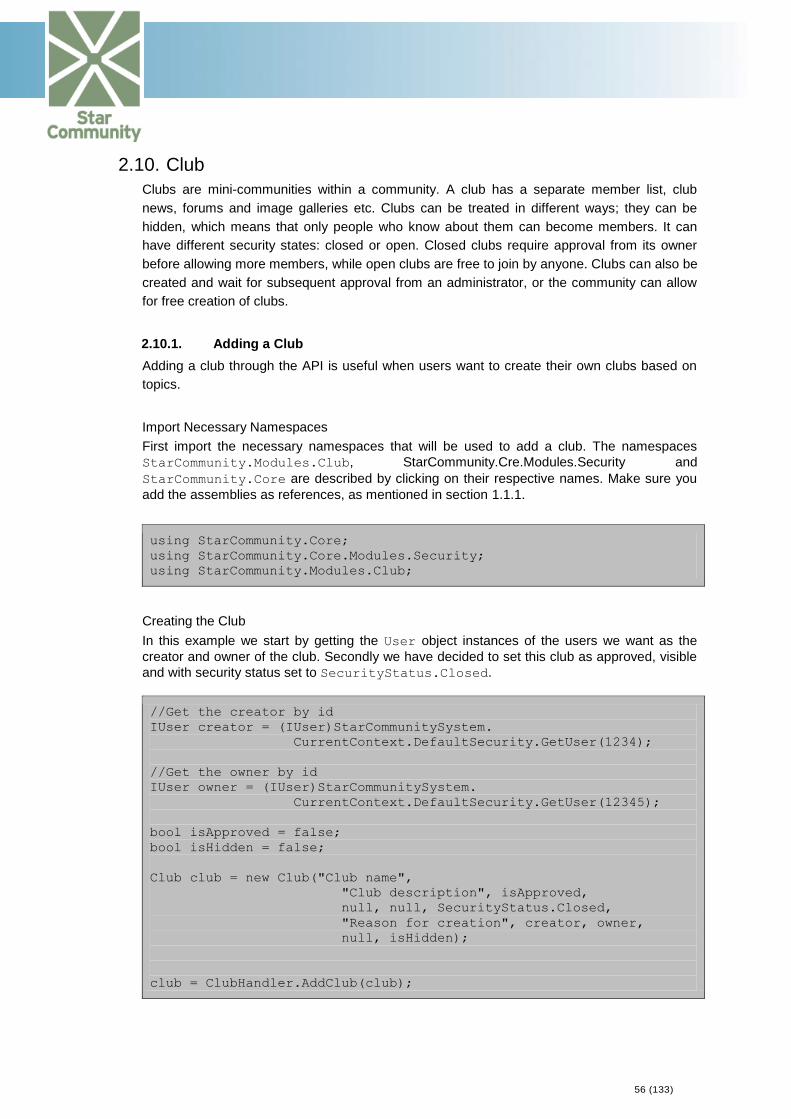
1.2.23. StarCommunity.Modules.Club
The StarCommunity.Modules.Club namespace contains classes for creating and
managing clubs, club members, club ads and club keywords.
1.2.24. StarCommunity.Modules.ConnectionLink
The StarCommunity.Modules.ConnectionLink namespace contains classes for
retrieving the shortest path between two users with the use of a breadth-first algorithm.
1.2.25. StarCommunity.Modules.Contact
The StarCommunity.Modules.Contact namespace contains classes for managing one-
way or two-way relations between users. Create relations immediately or let users approve them by the use of relations of the type “Request”.
1.2.26. StarCommunity.Modules.Contest
The StarCommunity.Modules.Contest namespace contains classes for managing
contests with alternative and free-text questions.
1.2.27. StarCommunity.Modules.DirectMessage
The StarCommunity.Modules.DirectMessage namespace contains classes for sending
and receiving direct-messages. Messages can be sent to multiple recipients at once and also be used in “System” mode, which allows you to send messages to a large number of users without performance drop.
1.2.28. StarCommunity.Modules.DocumentArchive
The StarCommunity.Modules.DocumentArchive namespace contains classes for
storing documents and creating folder structures.
1.2.29. StarCommunity.Modules.Expert
The StarCommunity.Modules.Expert namespace contains classes for creating and
managing experts, assign questions, approve answers and synchronize with forum rooms.
1.2.30. StarCommunity.Modules.Forum
The StarCommunity.Modules.Forum namespace contains classes for creating forums
and moderate topics.
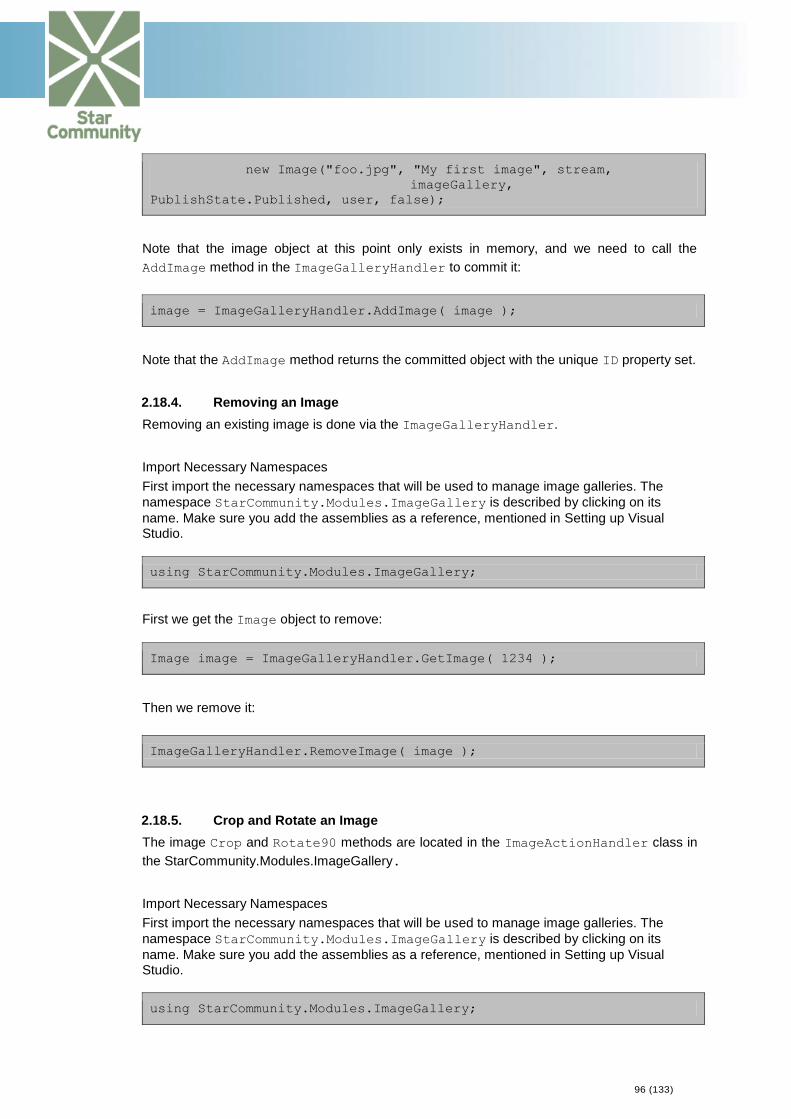
1.2.31. StarCommunity.Modules.ImageGallery
The StarCommunity.Modules.ImageGallery namespace contains classes for creating
image galleries, generating thumbnails, cropping, resizing, promoting and voting for images.
1.2.32. StarCommunity.Modules.Moblog
The StarCommunity.Modules.Moblog namespace contains classes for receiving MMS
messages sent from mobile phones. Moblog comes integrated with the mobile enabler Unwire but can easily be integrated with any other enabler.
Among the first things you build into a community is the possibility to register a membership
and get a User object instance representing this community member.
This article shows you, the developer, how to typically proceed to create this functionality with
the help of the StarCommunity Framework.
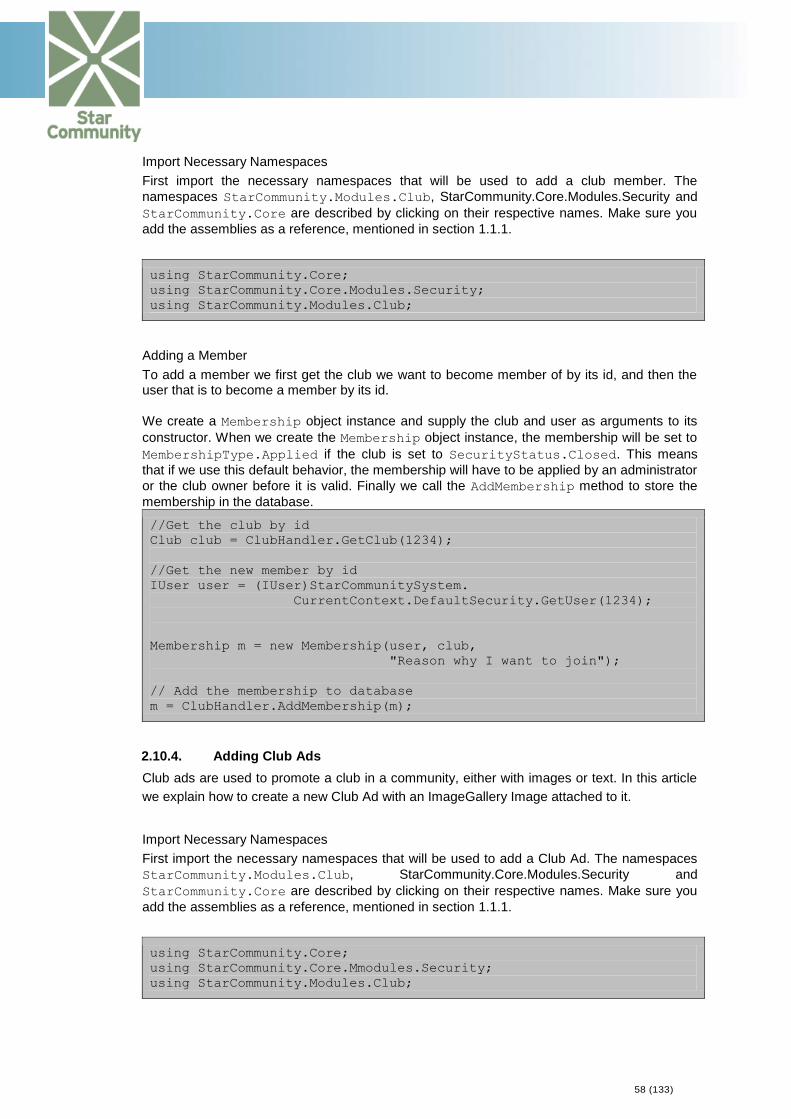
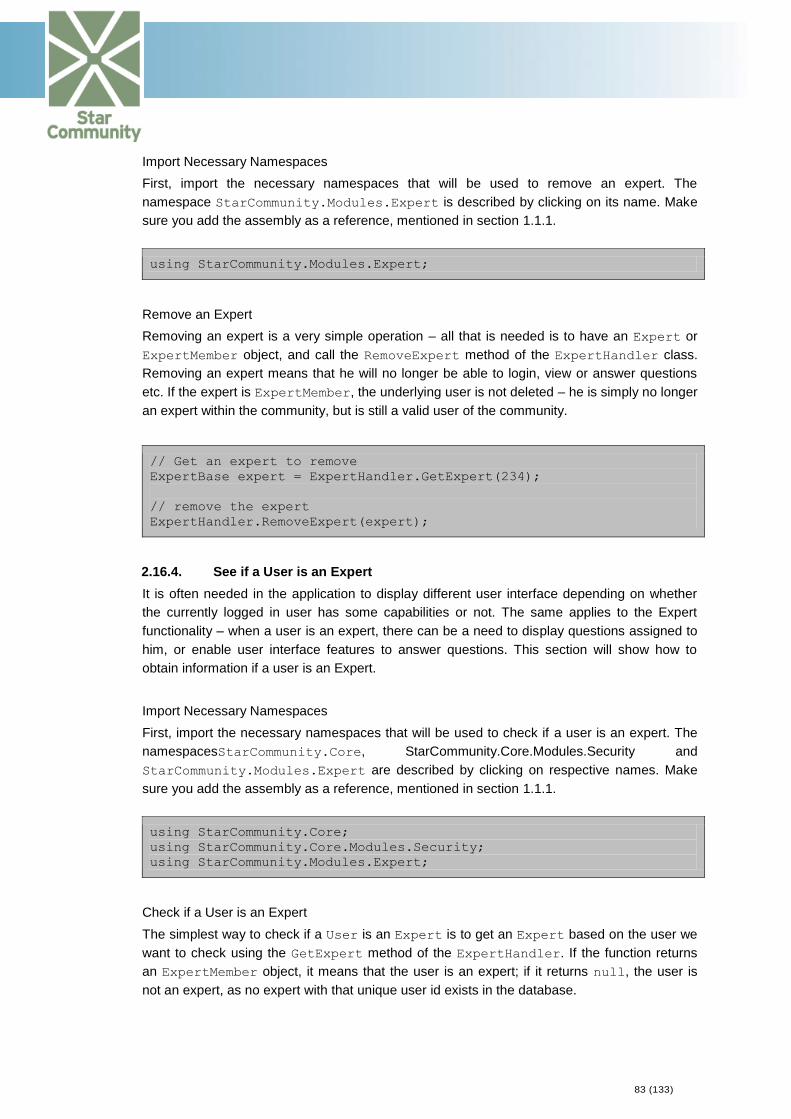
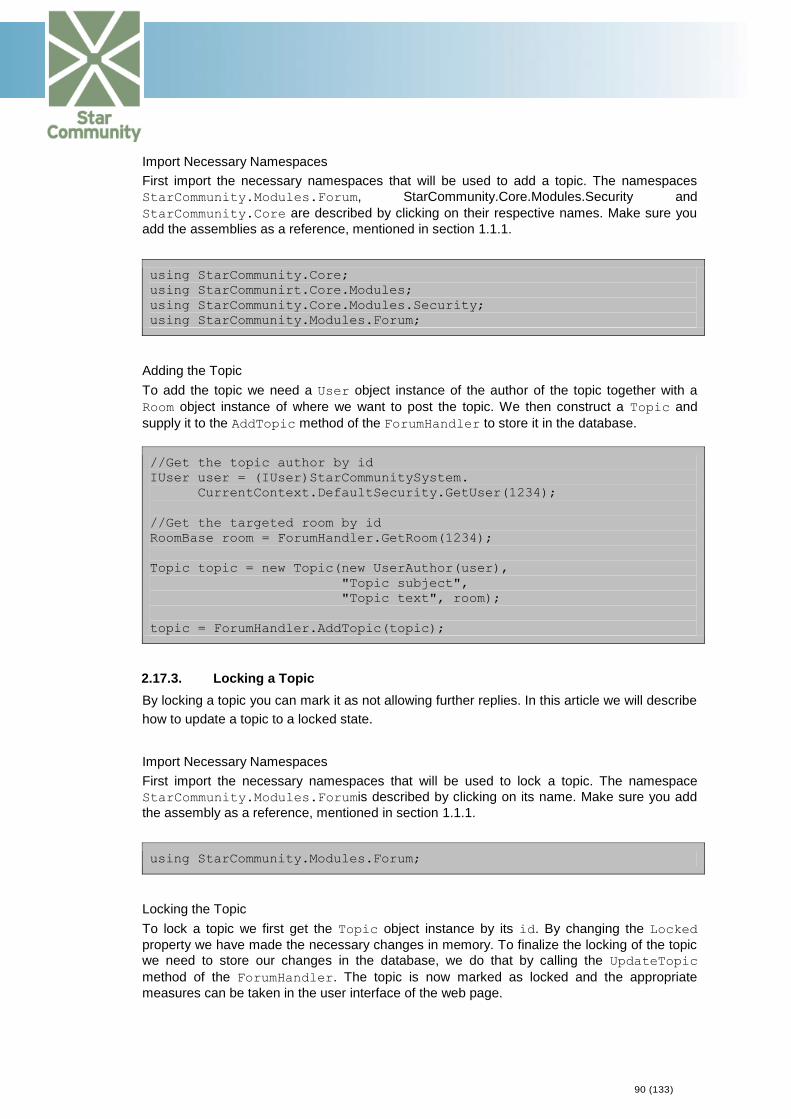
Import Necessary Namespaces
First import the necessary namespaces that will be used to add a user. The namespaces
StarCommunity.Core and StarCommunity.Core.Modules.Security are described by
clicking on their respective names. Make sure you add the assemblies as a reference, mentioned in 1.1.1.
using StarCommunity.Core;
using StarCommunity.Core.Modules.Security;
Declaring a New User Object
We then create a new User object instance by calling the NewUser property. This property
always returns a new User object instance and is handled by the running
SecurityHandler.
Currently the user exists only in memory. Before committing the object, we will need to set a minimum list of properties, or the API will throw an exception when we try to commit it to the database.
In the above example we end with setting the culture. The culture will be used to define the user’s language preference. It is used in the administration interface, but if the user is not
23 (133)
intended to be an administrator, this culture can be used for other purposes. You can read more about attributes under Fel! Hittar inte referenskälla..
Committing the User Object to Database
Up until now the user has only existed in memory, to finalize the creation of the user we need
to commit it to the database. We do this by calling the AddUser method of the currently
running SecurityHandler. Returned is the added user, but with the new unique ID property
set. This object can now be used as a user representation.
newUser = (IUser)StarCommunitySystem.
CurrentContext.DefaultSecurity.AddUser(newUser);
1.2.41. Authenticating a User
When you want to authenticate a login request by a member of a community, this can be done
through running SecurityHandler singleton.
Import Necessary Namespaces
First import the necessary namespaces that will be used to authenticate a user. The
namespace StarCommunity.Core is described by clicking on its name. Make sure you add
the assembly as a reference, mentioned in 1.1.1.
using StarCommunity.Core;
Performing the Authentication
Authentication will require the username and password entered by the user. The call to
AuthenticateUser will return if it was a success or not, with the additional user out
variable. The user variable will be set to the User object instance found if authentication was
successful.
StarSuite.Core.Modules.Security.IUser user = null;
DefaultSecurity.AuthenticateUser("john", "secret", out user);
This should set isAuthenticated to true and the user variable to the instance of the user
we added in 1.2.40.
Where is the Authentication Ticket?
One important thing to remember is that StarCommunity provides the means for
authenticating but does not set an actual authentication ticket in the ASP.NET authentication
framework. To finalize the authentication this will have to be done manually.
24 (133)
ASP.NET Membership Provider
Will be added in a later revision of the StarCommunity 3.0 beta and will be mentioned in this
document. The above section on Authentication Tickets will then be obsolete.
1.2.42. Getting the Currently Logged in User
When a member of a community is logged in, you can get the User object instance from the
running SecurityHandler singleton through its CurrentUser property.
Import Necessary Namespaces
First import the necessary namespaces that will be used to get the currently logged in user.
The namespaces StarCommunity.Core and StarCommunity.Core.Modules.Security are
described by clicking on their respective names. Make sure you add the assemblies as a reference, mentioned in 1.1.1.
using StarCommunity.Core;
using StarCommunity.Core.Modules.Security;
Getting the User Object
The CurrentUser property will return the IUser object instance representing the user with
the username contained in the authentication ticket.
IUser user = (IUser)StarCommunitySystem.CurrentContext.
DefaultSecurity.CurrentUser;
1.2.43. Removing a User
Generally, removing a user in StarCommunity is a process that can be undone, optionally it
can be a permanent action.
This article will show you, the developer, how to remove a user temporarily and permanently
from the system.
Import Necessary Namespaces
First import the necessary namespaces that will be used to remove a user. The namespaces
StarCommunity.Core and using StarCommunity.Core.Modules.Security; are
described by clicking on their respective names. Make sure you add the assemblies as a reference, mentioned in 1.1.1.
using StarCommunity.Core;
using StarCommunity.Core.Modules.Security;
Temporarily Removing the User
When temporarily removing a user we have the option to undo the action afterwards. A removed user still keeps its blog entries, forum topics, polls etc. The user will not be displayed
in listings but when retrieved by id the Removed property of the User object instance will be
After committing a user to the activation storage, we can imagine a scenario where the user
recently received the activation key in an e-mail. We now have the activation Guid, and can
activate the user.
Import Necessary Namespaces
First import the necessary namespaces that will be used to activate a user. The namespaces
StarCommunity.Core and StarCommunity.Core.Modules.Security are described by
clicking on their respective names. Make sure you add the assemblies as a reference, mentioned in 1.1.1.
using StarCommunity.Core;
27 (133)
using StarCommunity.Core.Modules.Security;
Just Activating
In most cases we just want to activate the user:
IUser activatedUser = StarCommunitySystem.
CurrentContext.DefaultSecurity.
ActivateUser(
new Guid("3B78D829-04D5-47B0-BF5A-32C47A460FEC")
);
In the above example we now got the new IUser object instance returned with its ID property
set. The user is now created and fully functioning.
Making Changes Before Activation
In some cases we need to make changes to the user data before activating it. We can do this by presenting the user with the option to change its information before continuing with activation.
The difference is, we retrieve the User object instance based on the activation key through
the GetUserToActivate method, change the UserName property in this case, then commit
the user to the database with the AddUser method. AddUser will recognize the user as a
user from the activation storage and will remove it. The Guid is now no longer valid and the
ID property is hereby the user’s identifier in the primary user storage.
Getting Entries from Specific Dates and Publication Status
When listing blog entries on a webpage, it is often needed to group entries by dates. To do it,
there is a GetEntries method overload that allows passing start and ending date of a
timeframe that the entries were published (or not published).
Blog blog = BlogHandler.GetBlog(12);
// get fist 100 entries that are in "published" state
// between now and two weeks ahead
EntryCollection entries = blog.GetEntries(
DateTime.Now, DateTime.Now.AddDays(14),
EntryPublishState.Published, 1, 100);
2.7.7. Commenting on a Blog Entry
You may or may not want to make it possible for users to comment on posted blog entries. To
do this, we start by creating a new comment.
Import Necessary Namespaces
First import the necessary namespaces that will be used to add a comment to a blog entry.
The namespace StarCommunity.Core, StarCommunity.Core.Modules
This namespace contains the interface IStarCommunityEntity and the abstract
implementation classStarCommunityEntityBase. IStarCommunityEntity implements the
blueprint for tagging, attributes, rating and categorization. Also the Author classes and interfaces are located here, allowing for guests and users to identify themselves when making posts.
StarCommunity.Core.Modules.Security and StarCommunity.Modules.Blogis described
by clicking on its name. Make sure you add the assemblies as a reference, mentioned in 1.1.1.
using StarCommunity.Core;
using StarCommunity.Security;
using StarCommunity.Modules.Blog;
Adding a Blog Entry Comment
To add a comment to a blog entry, we need references to an entry and the author that wrote
the entry. Then we simply create a new instance of the EntryComment class.
This namespace contains the interface IStarCommunityEntity and the abstract
implementation classStarCommunityEntityBase. IStarCommunityEntity implements the
blueprint for tagging, attributes, rating and categorization. Also the Author classes and interfaces are located here, allowing for guests and users to identify themselves when making posts.
StarCommunity.Core.Modules.Securityand StarCommunity.Modules.Calendarare described
by clicking on respective name. Make sure you add the assembly as a reference, mentioned
in 1.1.1.
using StarCommunity.Core;
using StarCommunity.Core.Modules;
using StarCommunity.Core.Modules.Security;
using StarCommunity.Modules.Calendar;
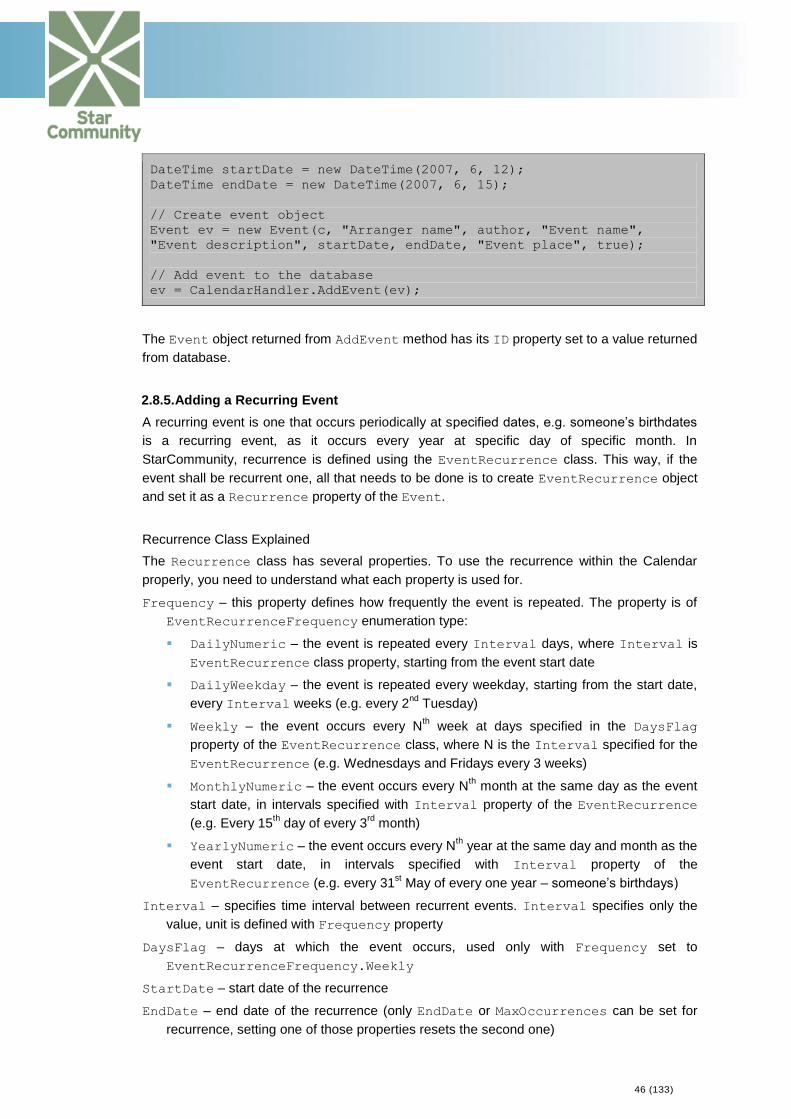
Create Recurrent Event
Creating recurrent event is very similar to creation of a normal event. The only difference is
that a RecurrentEvent class object has to be created, and set to the event Recurrence
property.
Calendar c = CalendarHandler.GetCalendar(1234);
// Create the author of the event
IUser user = (IUser)StarCommunitySystem.CurrentContext.
DefaultSecurity.CurrentUser;
UserAuthor author = new UserAuthor(user);
// Define start and end dates – used to compute event duration
DateTime startDate = DateTime.Now;
DateTime endDate = DateTime.Now.AddDays(1);
// Create event object
Event ev = new Event(c, "Arranger name", author, "Event name",
Management of contacts is done through the ContactHandler class in the
StarCommunity.Contact namespace. The connection between the user and its contact
relations is done via the ContactContainer class. However, a ContactContainer is created
automatically for a user upon user creation, for each site in the system, and it is normally not
done by the developer.
2.12.1. Adding a Contact Relation
To add a ContactRelation, first create an instance of the ContactRelation class (there
are several constructors available). The ContactRelation constructor needs the
ContactContainer for the user that is adding the contact relation (userA), the user to be
added to the contact list (userB) and a ContactType. The contact type can be either
ContactType.Request or ContactType.Contact.ContactType.Request is used
when the contact relation must be approved by userB and ContactType.Contact is used
when the contact relation should come into effect immediately.
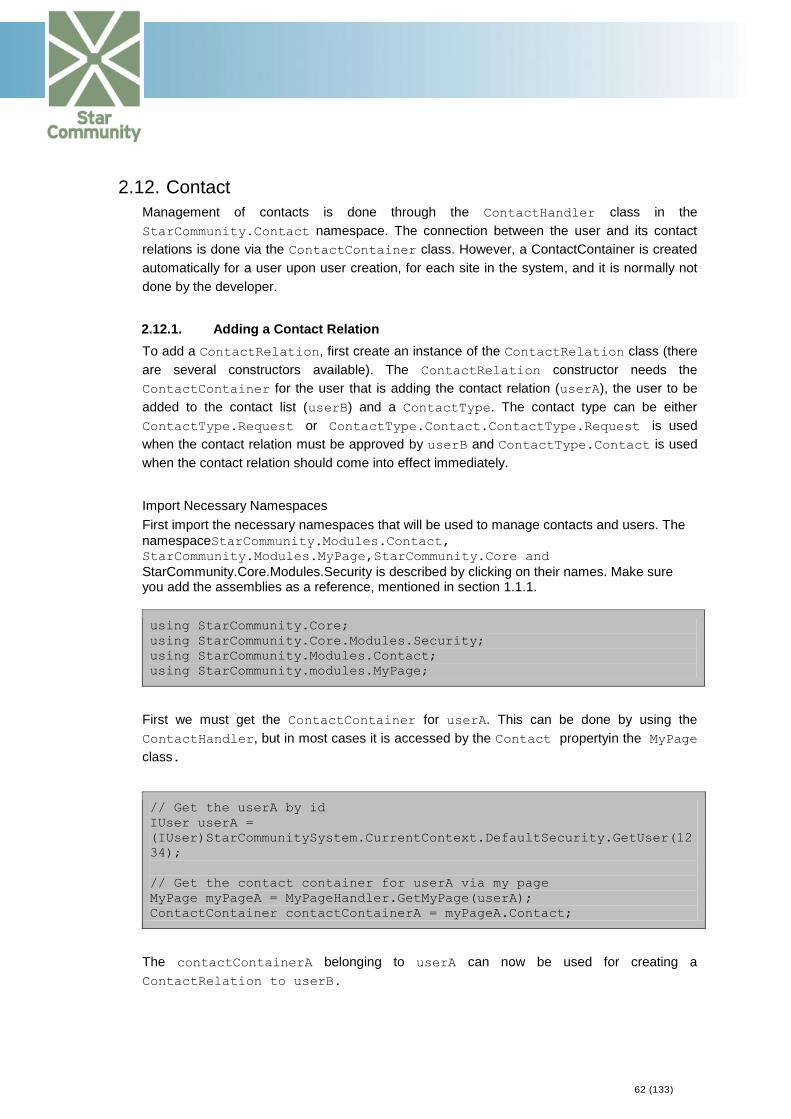
Import Necessary Namespaces
First import the necessary namespaces that will be used to manage contacts and users. The
namespaceStarCommunity.Modules.Contact, StarCommunity.Modules.MyPage,StarCommunity.Core and
StarCommunity.Core.Modules.Security is described by clicking on their names. Make sure you add the assemblies as a reference, mentioned in section 1.1.1.
using StarCommunity.Core;
using StarCommunity.Core.Modules.Security;
using StarCommunity.Modules.Contact;
using StarCommunity.modules.MyPage;
First we must get the ContactContainer for userA. This can be done by using the
ContactHandler, but in most cases it is accessed by the Contact propertyin the MyPage
Note that the AddContactRelation method always returns the committed object with the
unique ID property set. Depending on the Configuration File, a corresponding contact relation
of ContactType.Contact from userB to userA may automatically have been created. This
is the most common way to create contact relations where no contact approval is needed.
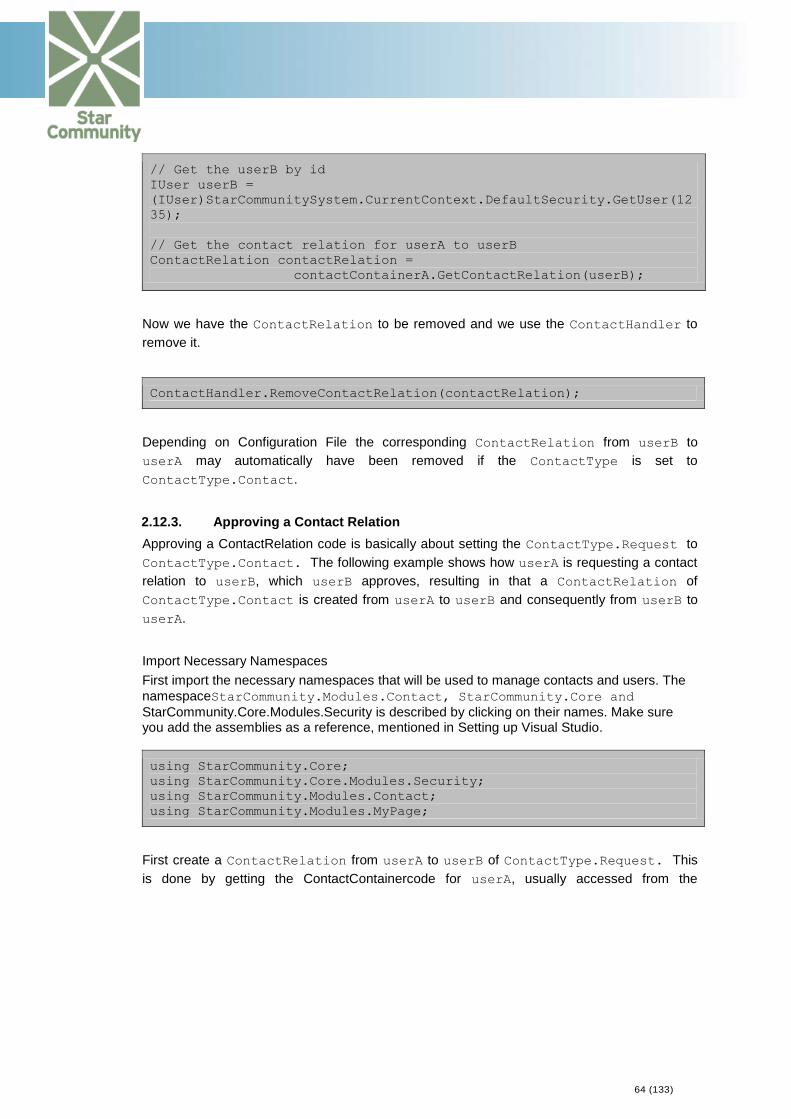
2.12.2. Removing a Contact Relation
First we need to get the ContactRelation object to be removed. This is done via the
ContactContainer for the removing user (userA). The ContactContainer can be
accessed via the ContactHandler but is most often accessed by the Contact property in
the MyPage class.
Import Necessary Namespaces
First import the necessary namespaces that will be used to manage contacts and users. The
namespacesStarCommunity.Modules.Contact, StarCommunity.Core and
StarCommunity.Core.Modules.Security are described by clicking on their names. Make sure you add the assemblies as a reference, as mentioned in Setting up Visual Studio.
Depending on Configuration File the corresponding ContactRelation from userB to
userA may automatically have been removed if the ContactType is set to
ContactType.Contact.
2.12.3. Approving a Contact Relation
Approving a ContactRelation code is basically about setting the ContactType.Request to
ContactType.Contact. The following example shows how userA is requesting a contact
relation to userB, which userB approves, resulting in that a ContactRelation of
ContactType.Contact is created from userA to userB and consequently from userB to
userA.
Import Necessary Namespaces
First import the necessary namespaces that will be used to manage contacts and users. The
namespaceStarCommunity.Modules.Contact, StarCommunity.Core and
StarCommunity.Core.Modules.Security is described by clicking on their names. Make sure you add the assemblies as a reference, mentioned in Setting up Visual Studio.
using StarCommunity.Core;
using StarCommunity.Core.Modules.Security;
using StarCommunity.Modules.Contact;
using StarCommunity.Modules.MyPage;
First create a ContactRelation from userA to userB of ContactType.Request. This
is done by getting the ContactContainercode for userA, usually accessed from the
The AddContactRelation method returns the committed object with the unique ID property
set.
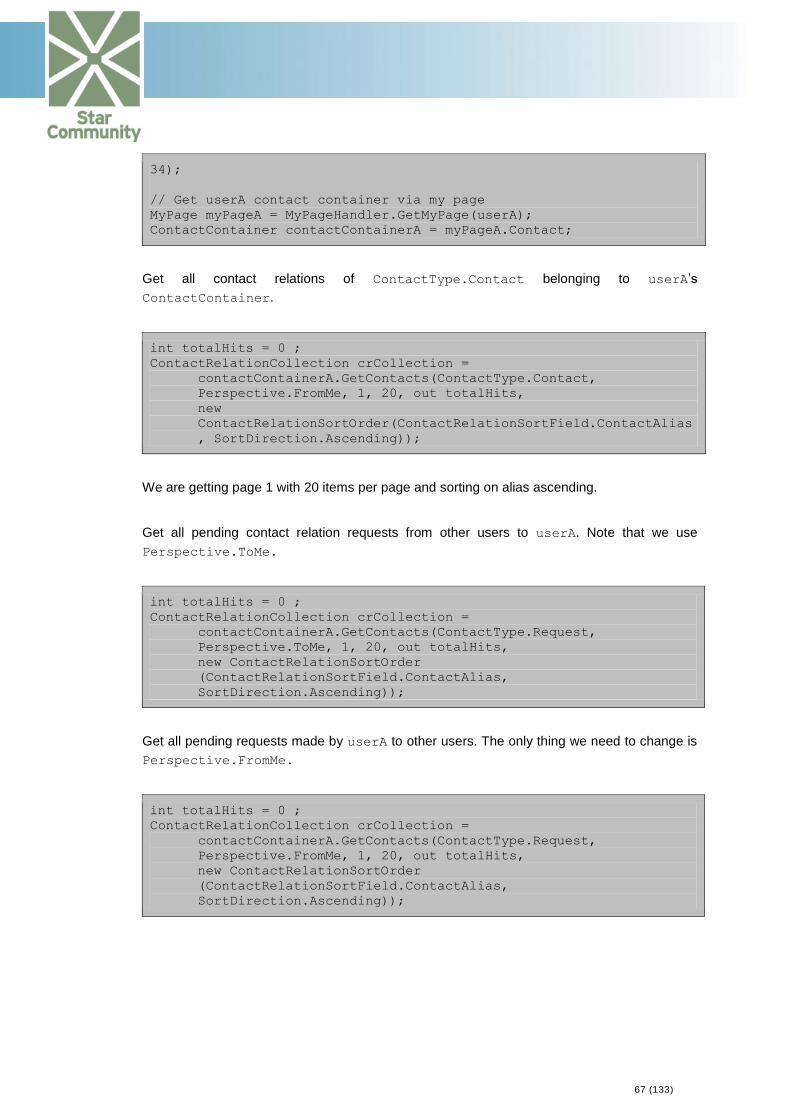
2.12.4. ContactRelationCollections and Perspectives.
To get a ContactRelationCollection we call the GetContactRelations method in
the ContactContainer supplying the ContactType we are interested in. Since a
contact relation request can be either directed towards the current user or a request from the
current user towards another user, we need to introduce the enum Perspective.
Perspective values can be either Perspective.ToMe or Perspective.FromMe. The
following samples show the use of perspectives.
Import Necessary Namespaces
First import the necessary namespaces that will be used to manage contacts and users. The
namespaceStarCommunity.Modules.Contact, StarCommunity.Core and
StarCommunity.Core.Modules.Securityis described by clicking on their names. Make sure you add the assemblies as a reference, mentioned in Setting up Visual Studio.
using StarCommunity.Core;
using StarCommunity.Core.Modules.Security;
using StarCommunity.Modules.Contact;
using StarCommunity.Modules.MyPage;
First we get the userAContactContainer via the MyPage class.
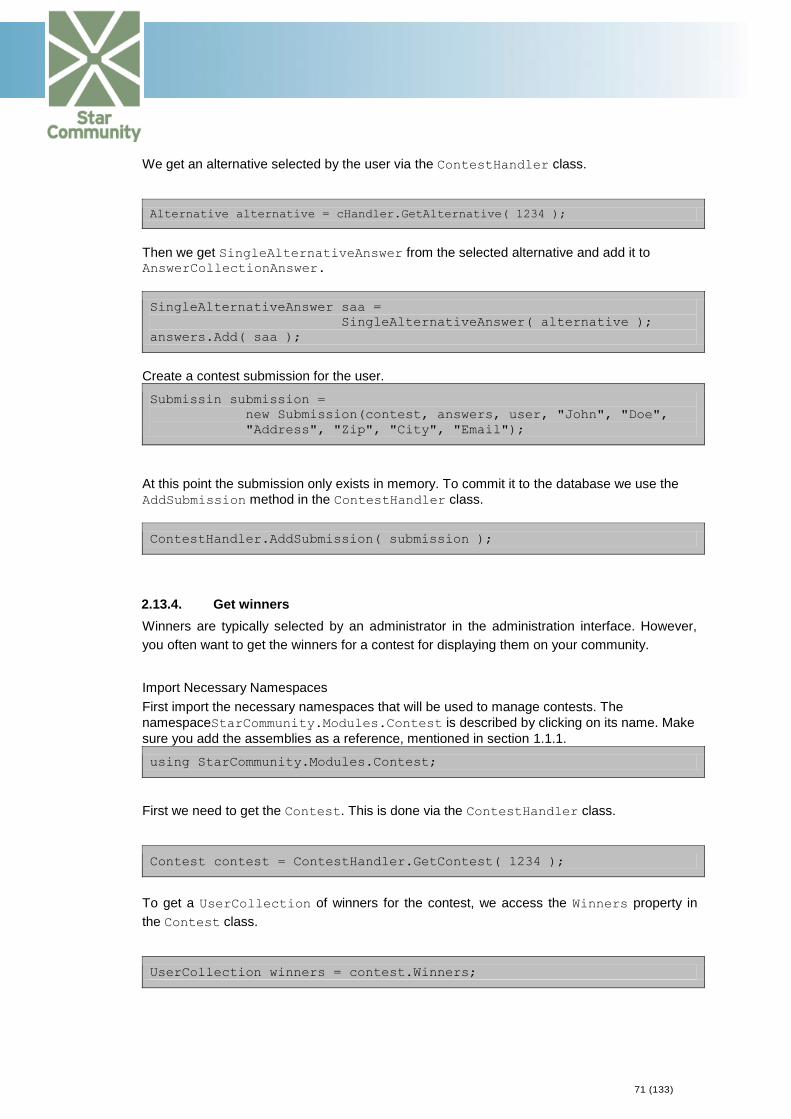
To get a UserCollection of winners for the contest, we access the Winners property in
the Contest class.
UserCollection winners = contest.Winners;
72 (133)
2.14. DirectMessage
Message management is done through the DirectMessageHandler class in the
StarCommunity.Modules.DirectMessagenamespace. Three root folders for each site
are created automatically for each user upon user creation: Inbox, Sent and Draft. The root
folders are accessible via the DirectMessageContainer class, which in turn is often
accessed via the MyPage class.
2.14.1. Send a Message
Import Necessary Namespaces
First import the necessary namespaces that will be used to manage messages and users. The
namespace StarCommunity.Modules.DirectMessage, StarCommunity.Core and
StarCommunity.Core.Modules.Security is described by clicking on their names. Make sure you add the assemblies as a reference, mentioned in Setting up Visual Studio.
using StarCommunity.Core;
using StarCommunity.Core.Modules.Security;
using StarCommunity.Modules.DirectMessage;
using StarCommunity.Modules.MyPage;
We start by creating a new Message providing the user who is sending the message.
Now we can create the document by providing the user that is uploading the file the document archive and a file stream. In this case the archive owner is the same user as the uploader.
//Get the file stream
FileStream stream = new FileStream("foo.doc", FileMode.Open);
79 (133)
//Create the document
Document doc =
new Document( "foo.doc", "foo description", da, user, stream);
Now we add the Document doc using the DocumentArchiveHandler and at the same
time committ it to database, until now it has only been represented in memory.
doc = DocumentArchiveHandler.AddDocument( doc );
doc now contains the committed object with the unique ID property set.
2.15.4. Update a Document
To update an existing document we first need the document. The document can be retrieved
via the DocumentArchiveHandler.
Import Necessary Namespaces
First import the necessary namespaces that will be used to manage the document archive.
The namespace StarCommunity.Modules.DocumentArchive is described by clicking on
its name. Make sure you add the assemblies as a reference, mentioned in Setting up Visual Studio.
using StarCommunity.Modules.DocumentArchive;
Retrieve the document archive using the GetDocument method in the
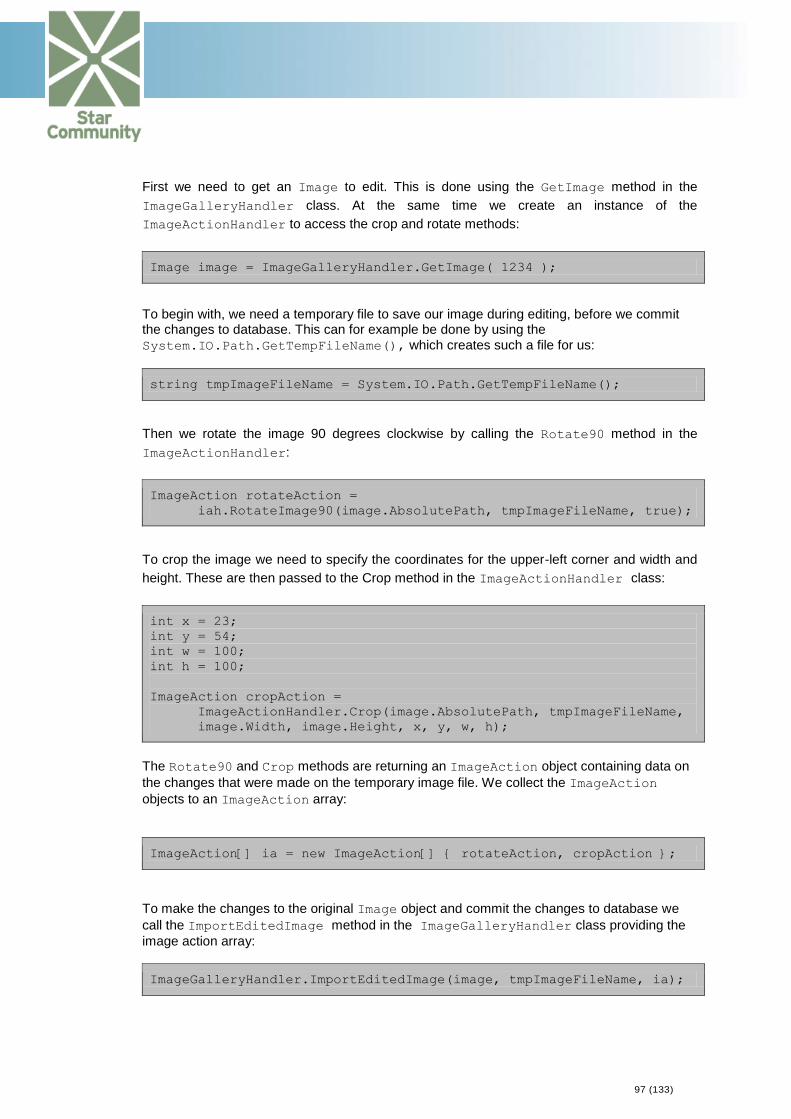
To begin with, we need a temporary file to save our image during editing, before we commit the changes to database. This can for example be done by using the
System.IO.Path.GetTempFileName(), which creates such a file for us:
We get the images in the image gallery imageGallery. We take page 1 with 20 items per
page sorting on image name ascending:
int totalHits = 0;
ImageCollection ic =
imageGallery.GetImages(1, 20, out totalHits,
new ImageSortOrder(ImageSortField.Order,
SortDirection.Ascending));
100 (133)
2.19. Moblog
The Moblog module allows MMS messages from mobile phones to be sent to a community
running StarCommunity. The Moblog module can receive and store text, image, sound and
video content and has a series of configuration options. By defining destination filters in the
StarCommunity administration interface content can be stored in the following places:
DESTINATION DESCRIPTION
MyPage The content is stored in the MyPage Image Gallery/Document Archive. The correct MyPage is found by matching the MMS sender’s phone number against the “msisdn” attribute of the MyPage owner. The attribute to look to can be changed in the Moblog config file.
Selected The content is stored in an Image Gallery/Document Archive selected by the administrator.
Ignore The content of a specific type is ignored.
2.19.1. Redirecting an Unwire MMS to a Specific Destination
The default installation of the Moblog module comes integrated with Unwire. Unwire is a
mobile enabler company that can deliver MMS messages in an easily read XML format. The
Moblog module already handles this format. Though in some cases delivering content to other
parts of the community than the MyPage may be necessary, let’s say to a club matching the
name mentioned in the message. This article will explain how you as a developer can build a
web page that serves as the receiving point of the Unwire message, how to parse it and then
decide its destination before storing it.
Import Necessary Namespaces
First import the necessary namespaces that will be used to redirect an MMS message. The
namespacesStarCommunity.Modules.Moblog,
StarCommunity.Modules.Moblog.ContentProviders.Unwire and
StarCommunity.Modules.ImageGallery, are described by clicking on their respective
names. Make sure you add the assemblies as a reference, mentioned in section 1.1.1.
using StarCommunity.Modules.Moblog;
using StarCommunity.Modules.Moblog.ContentProviders.Unwire;
using StarCommunity.Modules.ImageGallery;
Redirecting the Message
The aim of this web page is to first get the UnwireContentProvider singleton and then
accept the Unwire request for the web page, mentioned in the Unwire documentation. Parse
the XML with the ParseMmsXml method to retrieve an Mms in-memory object instance. The
following code is up to the implementer, but in this case we create an in-memory filter directing
images to a specific ImageGallery, ignoring all other content types, except text, which is
always stored in the message itself. When we finally call the OnMessageReceived method
the message is stored in the database and all images in it will end up in the ImageGallery
we specified in the filter.
UnwireContentProvider unwireCp = null;
101 (133)
foreach(ContentProviderBase cp in
MoblogModule.Instance.ContentProviders)
{
if(cp is UnwireContentProvider)
unwireCp = (UnwireContentProvider)cp;
}
if(unwireCp == null)
throw new ApplicationException("Unwire Content Provider
is
not installed", null);
Response.Clear();
Response.ClearHeaders();
Response.ContentType = "text/plain";
Response.AddHeader("cmd", "asynch-no-trace");
Response.Flush();
System.Xml.XmlDataDocument xmlDoc =
new System.Xml.XmlDataDocument();
xmlDoc.Load(Request.InputStream);
Mms mms = unwireCp.ParseMmsXml(xmlDoc);
//Analyze the mms and create a destination filter
MoblogHandler moblogHandler = new MoblogHandler();
MmsDestinationFilter filter =
new MmsDestinationFilter(mms.ShortCode, mms.MediaCode, null,
MmsContentDestination.Selected,
ImageGalleryHandler.GetImageGallery(12
34), MmsContentDestination.Ignore,
null, MmsContentDestination.Ignore,
null);
//Store the message content in the destinations
//referred to in the filter
unwireCp.OnMessageReceived(mms, filter);
102 (133)
2.20. MyPage
The StarCommunity MyPage module contains the functionality that is used on a user’s profile.
2.20.1. Blocking a User
Blocking a user, flags that user as blocked in the system. This can then be used to stop a user
from communicating with the user that added the block from sending messages, adding as
friend, etc.
Import Necessary Namespaces
First, import the necessary namespaces that will be used to block a user. The
namespacesStarSuite.Core, StarCommunity.Core,
StarCommunity.Core.Modules.Security and StarCommunity.Modules.MyPageare
described by clicking on their respective names. Make sure you add the assembly as a
reference, mentioned in section 1.1.1.
using StarSuite.Core;
using StarCommunity.Core;
using StarCommunity.Core.Modules.Security;
using StarCommunity.Modules.MyPage;
Blocking a User
The code below shows how a user is blocked. Initially, get the two users. Then, get the
MyPage class for the user who is making the block. The block is created by taking the
parameters of this MyPage class and the User object of the one to block.
//Get the logged in user
IUser user = (IUser)StarCommunitySystem.
CurrentContext.DefaultSecurity.CurrentUser;
// Get the user to block
IUser user2 = (IUser)StarCommunitySystem.
CurrentContext.DefaultSecurity.GetUser(1234);
// Get the my page object for the current user and current site
The returned MessageCollection now holds the first 20 messages from the specified
mailbox. This collection can now for example be iterated over to display a message listing,
with all the appropriate information available.
Notes Regarding Handling of Received Messages
It is important to note that Message is the base class for ServerMessage (any message that
has been retrieved from the mail server) and LocalMessage (any message that is being
constructed locally to be sent). Some properties specific to an incoming message is only
available when it is treated as a ServerMessage, so a cast may be necessary if the
message is for example taken from a MessageCollection.
It is also worth noting that accessing the TextBody, HTMLBody and Attachments properties
of a ServerMessage imposes significant overhead compared to other properties, as these
require the full message to be transferred from the mail server. Doing so also sets the
message as read.
It is therefore not advisable to include these properties in message listings and similar if it can
be avoided, but rather only use those when displaying a complete individual message.
2.25.6. Sending a Message
Another very central part of any Webmail implementation is the possibility to send mail. In this
article we will show a basic example of how to send mail.
123 (133)
Import Necessary Namespaces
First, import the necessary namespaces that will be needed for this. The namespaces
StarCommunity.Core, StarCommunity.Core.Modules
This namespace contains the interface IStarCommunityEntity and the abstract
implementation classStarCommunityEntityBase. IStarCommunityEntity implements the
blueprint for tagging, attributes, rating and categorization. Also the Author classes and interfaces are located here, allowing for guests and users to identify themselves when making posts.
StarCommunity.Core.Modules.Security and StarCommunity.Modules.Webmailare
described by clicking on their respective names. Make sure you also add the mentioned assemblies as references, as mentioned in section 1.1.1.
using StarCommunity.Core;
using StarCommunity.Core.Modules.Security;
using StarCommunity.Modules.Webmail;
Sending a Message
First, we get the mail account of the sending user, we use the account to get the sender’s mail
address, so that we can set that as the From address. We then proceed by setting other
properties of the LocalMessage object. To finally send the message, we call SendMessage
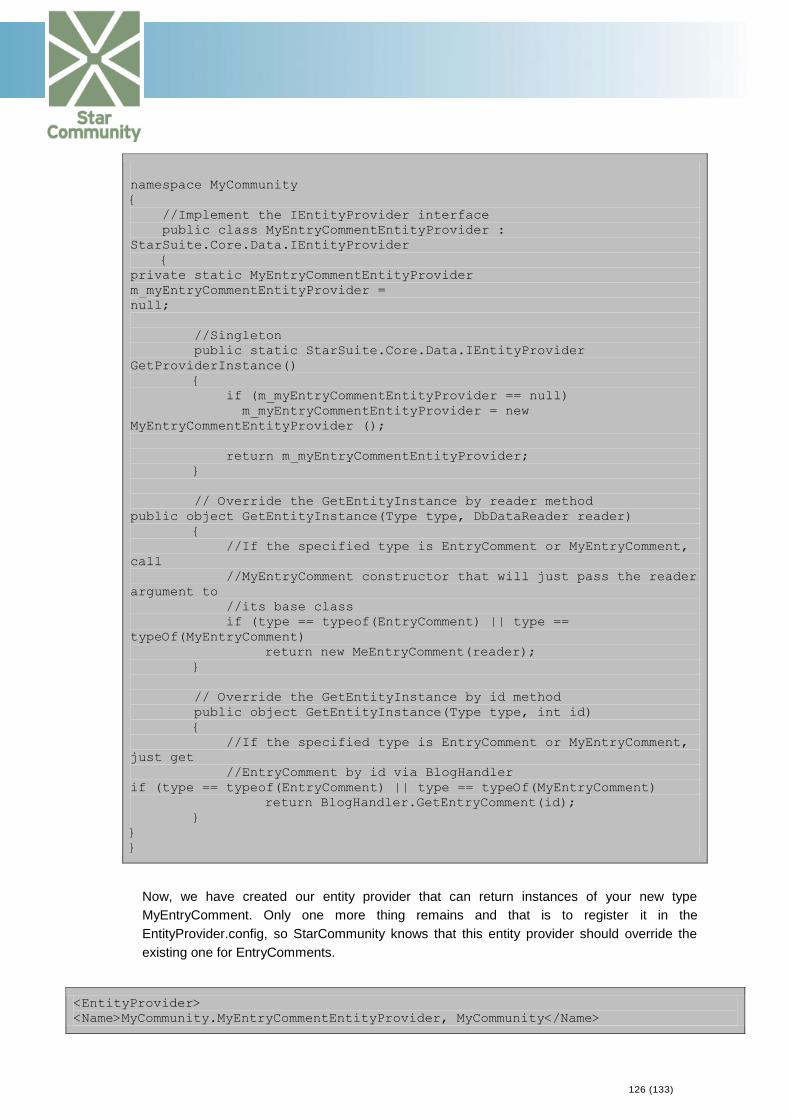
In order to make StarCommunity aware of this new type so instances of the type can be returned, we need to create an EntityProvider.This is done by creating a new
class,implementingIEntityProvider in the StarSuite.Core.Data namespace.
using System.Collections.Generic;
using StarSuite.Core.Data;
using StarCommunity.Modules.Blog;
using StarCommunity.Modules.ImageGallery;
126 (133)
namespace MyCommunity
{
//Implement the IEntityProvider interface
public class MyEntryCommentEntityProvider :
StarSuite.Core.Data.IEntityProvider
{
private static MyEntryCommentEntityProvider
m_myEntryCommentEntityProvider =
null;
//Singleton
public static StarSuite.Core.Data.IEntityProvider
GetProviderInstance()
{
if (m_myEntryCommentEntityProvider == null)
m_myEntryCommentEntityProvider = new
MyEntryCommentEntityProvider ();
return m_myEntryCommentEntityProvider;
}
// Override the GetEntityInstance by reader method
public object GetEntityInstance(Type type, DbDataReader reader)
{
//If the specified type is EntryComment or MyEntryComment,
call
//MyEntryComment constructor that will just pass the reader
argument to
//its base class
if (type == typeof(EntryComment) || type ==
typeOf(MyEntryComment)
return new MeEntryComment(reader);
}
// Override the GetEntityInstance by id method
public object GetEntityInstance(Type type, int id)
{
//If the specified type is EntryComment or MyEntryComment,
just get
//EntryComment by id via BlogHandler
if (type == typeof(EntryComment) || type == typeOf(MyEntryComment)
return BlogHandler.GetEntryComment(id);
}
}
}
Now, we have created our entity provider that can return instances of your new type
MyEntryComment. Only one more thing remains and that is to register it in the
EntityProvider.config, so StarCommunity knows that this entity provider should override the
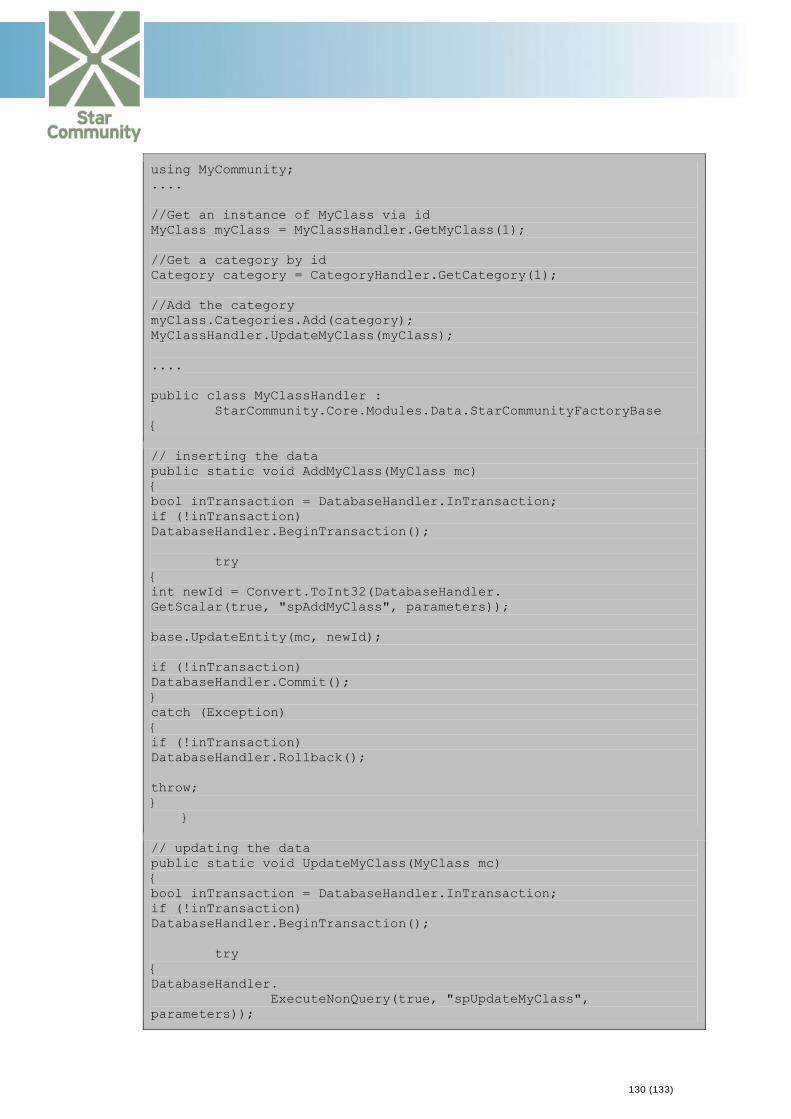
UpdateEntity saves all categories, tags, attributes and rating settings on MyClass. UpdateEntity has two overloads, during an insert we call the overload where we can pass the new id, since it’s not in our object at the moment, and when we do an update, we simply only pass the “mc” variable. This is important to remember, since when passing an ID some initialization may occur which is unnecessary during an update, so keep track of which overload you call.
3.2.2. Retrieving categories for MyClass
To get a collection of all categories connected to an entity, you just call the Categories
property on the categorizable entity MyClass just as for any StarCommunity object.
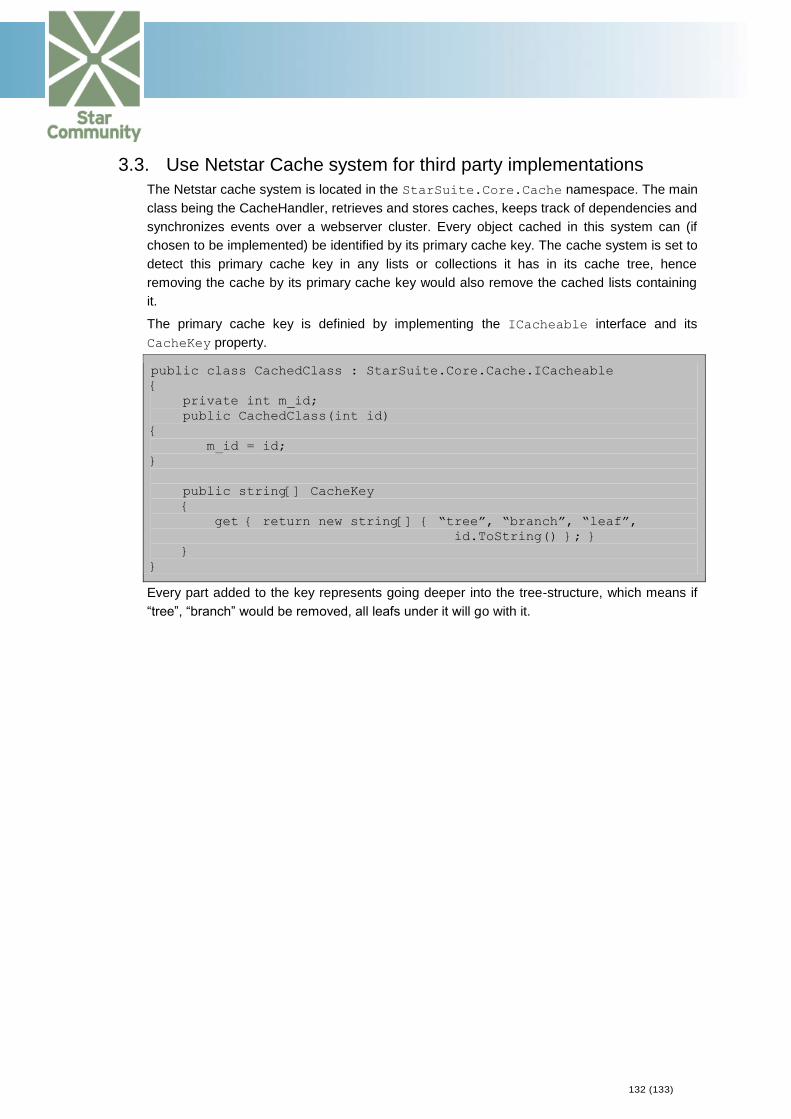
3.3. Use Netstar Cache system for third party implementations
The Netstar cache system is located in the StarSuite.Core.Cache namespace. The main
class being the CacheHandler, retrieves and stores caches, keeps track of dependencies and
synchronizes events over a webserver cluster. Every object cached in this system can (if
chosen to be implemented) be identified by its primary cache key. The cache system is set to
detect this primary cache key in any lists or collections it has in its cache tree, hence
removing the cache by its primary cache key would also remove the cached lists containing
it.
The primary cache key is definied by implementing the ICacheable interface and its
CacheKey property.
public class CachedClass : StarSuite.Core.Cache.ICacheable
{
private int m_id;
public CachedClass(int id)
{
m_id = id;
}
public string[] CacheKey
{
get { return new string[] { “tree”, “branch”, “leaf”,
id.ToString() }; }
}
}
Every part added to the key represents going deeper into the tree-structure, which means if
“tree”, “branch” would be removed, all leafs under it will go with it.
133 (133)
The following code sample shows how the dependencies are automatically being registered
when the containing “co” instance is in the cached list. RemoveCachedObject will also
remove the list from the cache.
List<CachedClass> list = new List<CachedClass>(); CacheHandler.SetCachedObject(list, “tree”, “branch”, “leaflist”); CachedClass co = new CachedClass(1234); List.Add(co); CacheHandler.RemovedCachedObject(co);
Having this is mind and implementing it in a third-party solution can save a lot of time and
boost performance of features implemented into the StarCommunity platform.