43
Neuroadaptive Electrostimulator SCENAR PS705, PS705Ag User’s Guide Issue 2.2 July 2008

Neuroadaptive Electrostimulator
SCENAR PS705, PS705Ag User’s Guide
Issue 2.2
July 2008
2
Before operating the device, please read this User’s Guide thoroughly, and retain it for further reference. Neuroadaptive electrostimulators SCENAR are approved for practical application by the Federal Agency for Public Health and Social Development of the Russian Federation. Registration Certificate No. ФС 022а2006/3749-06. Certificate of Conformance No. РОСС RU.МЕ01.В04123.

Table of Contents
3
TABLE OF CONTENTS
Introduction ................................................................................................. 5
About this Guide ......................................................................................... 6
Read this First ............................................................................................. 7
Copyright Notice ..................................................................................... 7
Safety Requirements and Precautions ....................................................... 8
Using Applications, Attachments and Accessories ................................ 8
Operating the Device.............................................................................. 9
Using the Batteries ............................................................................... 11
Checking the Contents ............................................................................. 13
Quick Start ................................................................................................ 14
Components Guide ................................................................................... 15
Electrodes ............................................................................................ 15
Indication .............................................................................................. 15
Control .................................................................................................. 16
Casing .................................................................................................. 16
Accessories .............................................................................................. 17
Leather case ......................................................................................... 17
Remote Electrode Probes .................................................................... 18
Arrangement and Operation ..................................................................... 19
Getting Started .......................................................................................... 21
Power Supply ....................................................................................... 21
Installing the Batteries .......................................................................... 21
Battery Discharge Level ....................................................................... 22
4
Connecting Remote Electrode Probe ................................................... 23
Operating the Device ................................................................................ 24
Switching the Device On and Off ......................................................... 24
Preliminary Analysis ............................................................................. 24
Conducting the Procedure ................................................................... 25
How to Place the Electrode ...................................................................... 30
Action Time, Intervals and Therapy Period .............................................. 31
Action Time .......................................................................................... 31
Action Range ........................................................................................ 31
Action Intervals ..................................................................................... 32
Number of Procedures in a Course ...................................................... 33
Positions of the Patient During Action ...................................................... 34
Specifications ............................................................................................ 36
Warranty ................................................................................................... 38
Appendices ............................................................................................... 40
Transportation ...................................................................................... 40
Care and Maintenance ......................................................................... 40
Troubleshooting .................................................................................... 43
Introduction
5
INTRODUCTION
Neuroadaptive electrostimulators SCENAR (hereinafter referred to as “devices”) are basic facilities of state-of-the-art technology for highly effective and medication-free rehabilitation of health and improvement of the quality of life. They provide quick recovery of the body after illness due to focused activation of its inherent reserves. The devices are used to prevent diseases, increase the body’s available inherent reserves and evoke its latent potentials. They provide better resistance of the organism to various disorders and harmful environment, prevent early aging, and produce a rejuvenation effect. The action is effected with short-pulse low-frequency signals when the electrodes contact skin. Parameters of the acting signal and time of the procedure are set automatically through the biological feedbacks. SCENAR series models are intended for use at home, at medical and rehabilitative institutions, at emergency stations, for first aid on board of ships, airplanes, trains and other transport, in beauty salons for cosmetic purposes (rejuvenation, smoothing out scars, etc.), tissue regeneration, and restoration of health.
6
ABOUT THIS GUIDE
This User’s Guide provides main features, description of the basic elements of the device and their purposes, operation of SCENAR PS705, PS705Ag as well as typical observations and explanations, which should help the user effectively conduct therapeutic procedures, make preliminary analysis of the area which is going to be acted upon, determine the necessary procedure time, the most effective position of the patient, etc. Each case may require various methods and techniques of action. Any questions, which are not covered in this User’s Guide, and more details concerning particular cases, theory and practical application of the “LET Medical” devices, and new methods and techniques of SCENAR-therapy are discussed at regular seminars conducted by leading professionals of “LET Medical”. For more details about where, when and how you can obtain training at such seminars, see the official web-site of “LET Medical” http://www.scenar.ru The purpose of the present User’s Guide is to introduce the user to the main features of the device and help effectively operate the model. This User’s Guide does not guarantee any results while operating SCENAR series model PS705, PS705Ag by the users, who have not obtained training at seminars provided by professionals of “LET Medical”.
Read this First
7
READ THIS FIRST
Copyright Notice Research Laboratory of Medical Electronics “LET Medical” L.L.C. (Taganrog, Russia) is the inventor, patent owner, developer and producer of SCENAR and COSMODIC series models. "ЛЭТ Медикал"®, “LET Medical”®, "КОСМОДИК"®, "COSMODIC"®, "СКЭНАР"® and "SCENAR"® are trademarks and service marks registered and owned by “LET Medical”. International patents No.1053715 and No.1181951 in Europe. “LET Medical” products are under continual improvement and we reserve the right to make changes without prior notice. The materials used in this User’s Guide are the sole property of “LET Medical”. All rights reserved. No part of this publication may be transmitted or copied in any form whatsoever without the express written permission of “LET Medical”.
8
SAFETY REQUIREMENTS AND PRECAUTIONS
Before operating the device, please ensure that you read and understand the safety requirements and precautions described below. Always ensure that the device is operated correctly. Remember that improper use or operation of the device and non-observance of this User's Guide instructions can deprive you of the right to warranty service and cause costly or irreparable damage to the device. SCENAR series devices should be used, operated and stored at nominal temperatures of +10ºС (50ºF) to +35ºС (95ºF) and relative humidity to 80% at +25ºС (77ºF). SCENAR series devices comply with exposure to mechanical influence requirements of Group 2 of GOST R 50444, with reliability requirements of RD 50-707 in the Russian Federation. SCENAR series devices meet the electric safety requirements and comply with GOST 30324.0 for medical electrical equipment with internal power supply, type BF.
Using Applications, Attachments and Accessories SCENAR series models are designed to perform optimally when used with genuine “LET Medical” brand applications, attachments and accessories. You may connect and/or use non-“LET Medical” brand applications, attachments or accessories with these models. However, “LET Medical” makes no warranties concerning, and is not responsible for damages resulting from, connection and/or use of non-“LET Medical” brand applications, attachments and accessories. Connection and/or use of non-“LET Medical” brand applications, attachments and accessories with SCENAR series models of “LET Medical” will result in loss of warranty service provided by “LET Medical”.
Safety Requirements and Precautions
9
For more details about purchasing the original “LET Medical” applications, attachments and accessories for SCENAR series models contact your distributor or visit the official web-site of “LET Medical” http://www.scenar.ru
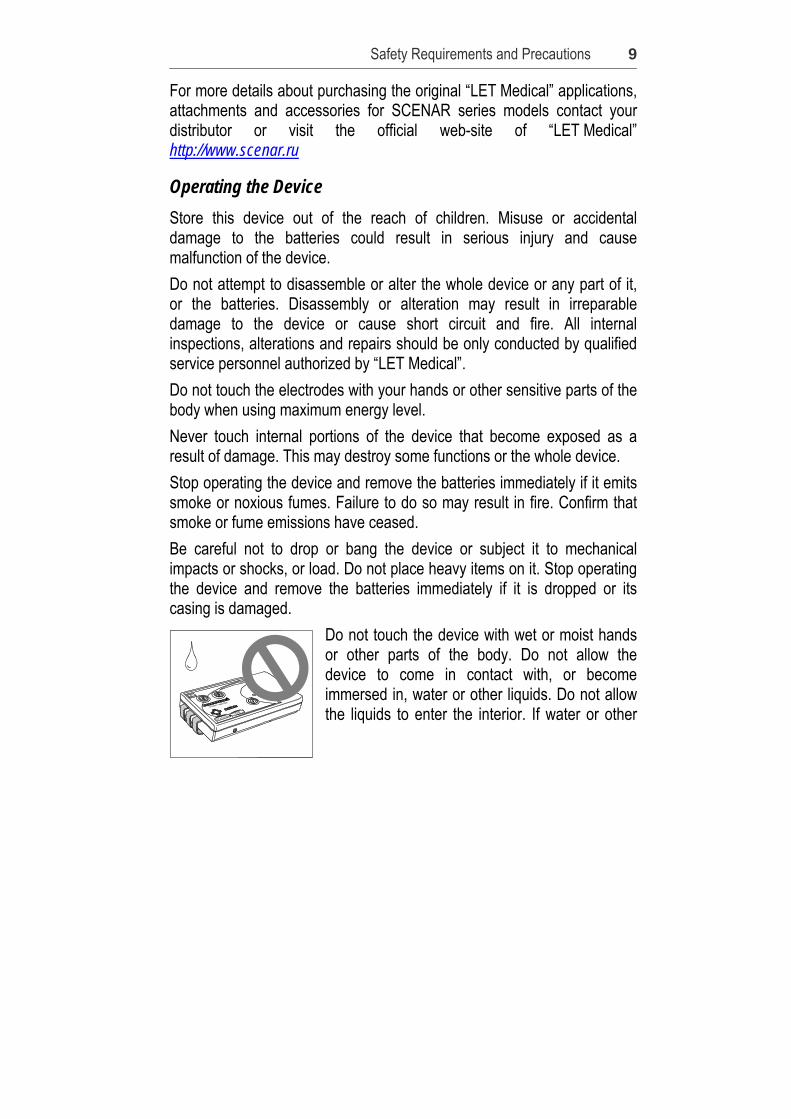
Operating the Device Store this device out of the reach of children. Misuse or accidental damage to the batteries could result in serious injury and cause malfunction of the device. Do not attempt to disassemble or alter the whole device or any part of it, or the batteries. Disassembly or alteration may result in irreparable damage to the device or cause short circuit and fire. All internal inspections, alterations and repairs should be only conducted by qualified service personnel authorized by “LET Medical”. Do not touch the electrodes with your hands or other sensitive parts of the body when using maximum energy level. Never touch internal portions of the device that become exposed as a result of damage. This may destroy some functions or the whole device. Stop operating the device and remove the batteries immediately if it emits smoke or noxious fumes. Failure to do so may result in fire. Confirm that smoke or fume emissions have ceased. Be careful not to drop or bang the device or subject it to mechanical impacts or shocks, or load. Do not place heavy items on it. Stop operating the device and remove the batteries immediately if it is dropped or its casing is damaged.
Do not touch the device with wet or moist hands or other parts of the body. Do not allow the device to come in contact with, or become immersed in, water or other liquids. Do not allow the liquids to enter the interior. If water or other
10
foreign substances enter the interior, immediately stop operating the device and remove the batteries. Continued use of the device may result in fire and cause damage to the device Do not operate the device in close proximity to sources of strong electromagnetic, UHF, vibration and other fields. This may cause mistuning, malfunctions or destroy the device. It is not recommended to use the device in close proximity to sensitive electronics, cellular phones and other equipment. SCENAR device may produce noise or cause mistuning and malfunction of such equipment.
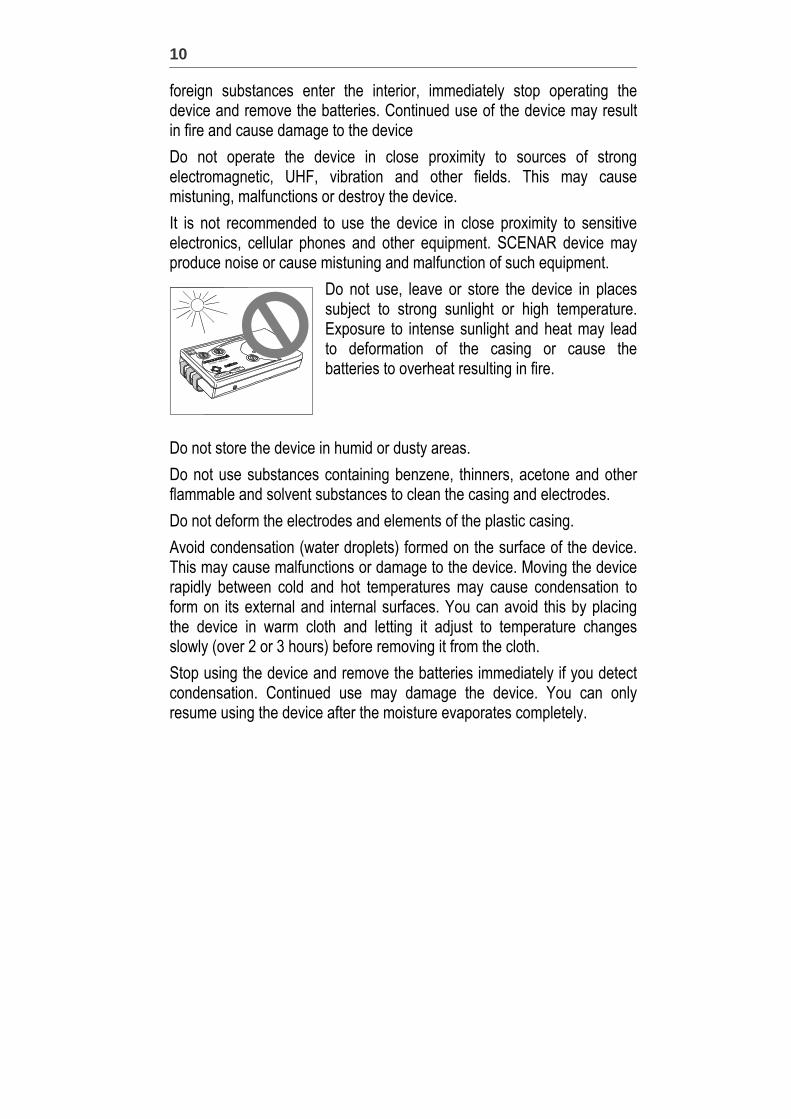
Do not use, leave or store the device in places subject to strong sunlight or high temperature. Exposure to intense sunlight and heat may lead to deformation of the casing or cause the batteries to overheat resulting in fire.
Do not store the device in humid or dusty areas. Do not use substances containing benzene, thinners, acetone and other flammable and solvent substances to clean the casing and electrodes. Do not deform the electrodes and elements of the plastic casing. Avoid condensation (water droplets) formed on the surface of the device. This may cause malfunctions or damage to the device. Moving the device rapidly between cold and hot temperatures may cause condensation to form on its external and internal surfaces. You can avoid this by placing the device in warm cloth and letting it adjust to temperature changes slowly (over 2 or 3 hours) before removing it from the cloth. Stop using the device and remove the batteries immediately if you detect condensation. Continued use may damage the device. You can only resume using the device after the moisture evaporates completely.
Safety Requirements and Precautions
11
Using the Batteries We recommend using AAA type Ni-MH 1.5V rechargeable batteries (preferably) or AAA type 1.5V alkaline batteries, as power source for the device. Do not use saline batteries as a power source for the device!
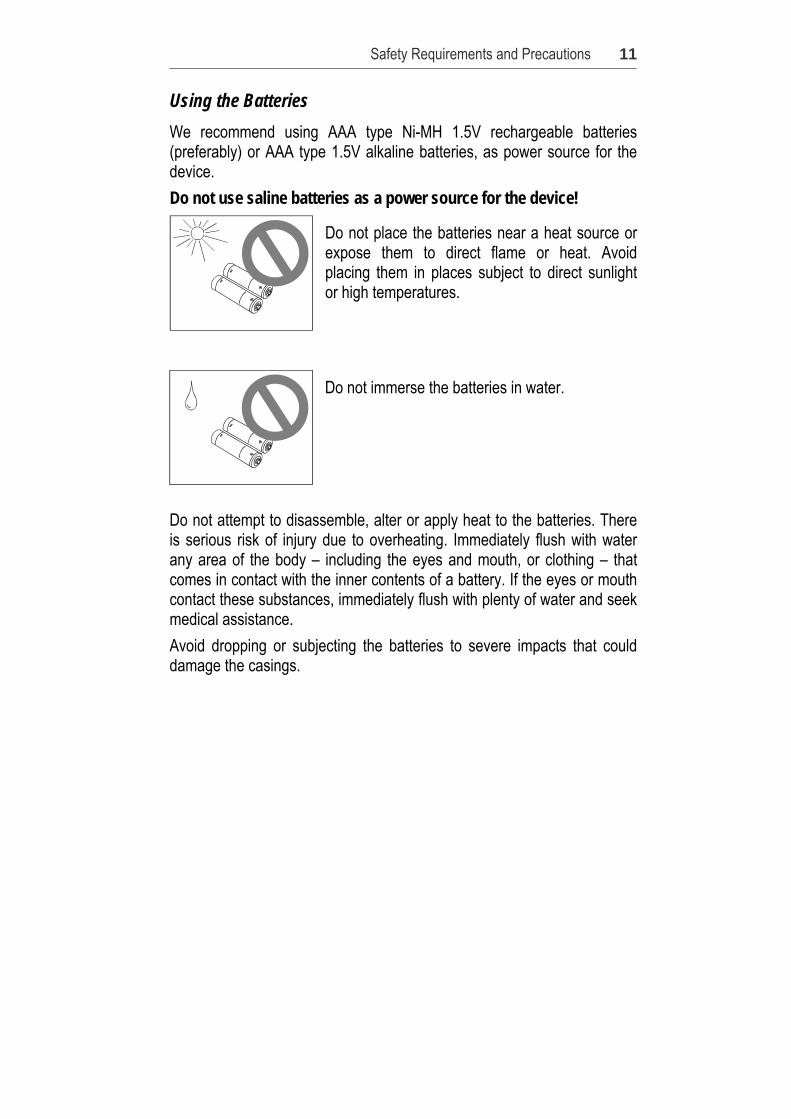
Do not place the batteries near a heat source or expose them to direct flame or heat. Avoid placing them in places subject to direct sunlight or high temperatures.
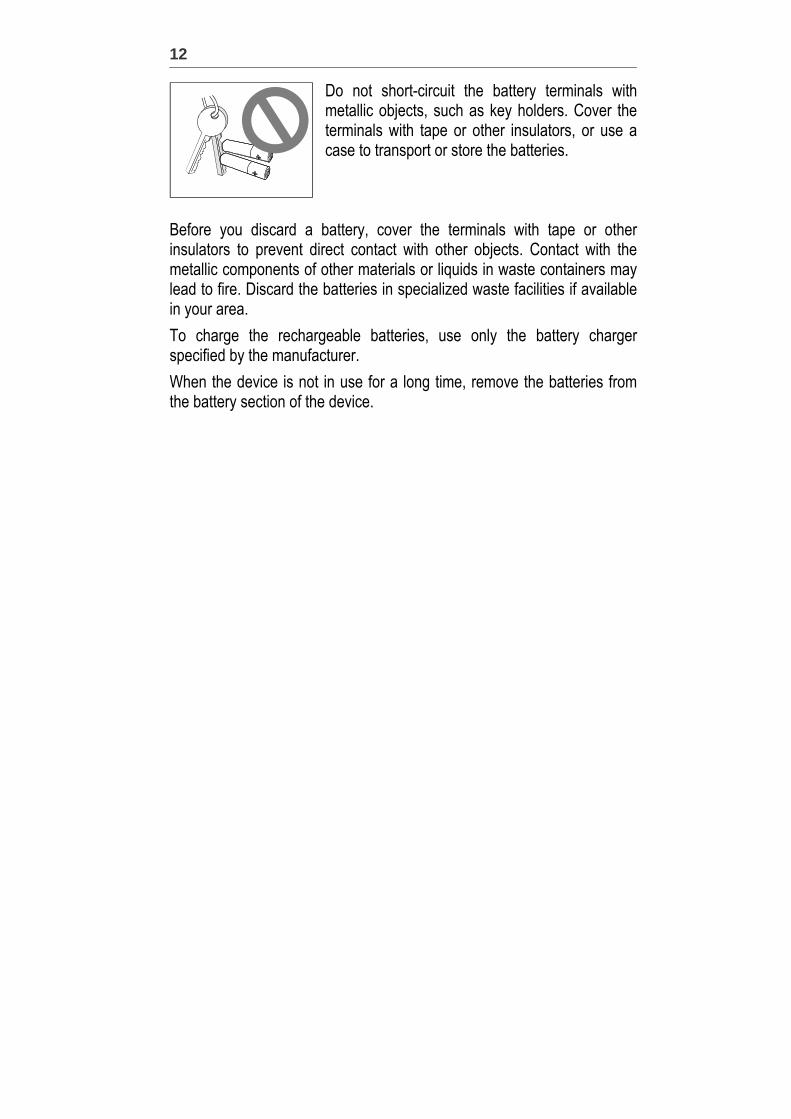
Do not immerse the batteries in water.
Do not attempt to disassemble, alter or apply heat to the batteries. There is serious risk of injury due to overheating. Immediately flush with water any area of the body – including the eyes and mouth, or clothing – that comes in contact with the inner contents of a battery. If the eyes or mouth contact these substances, immediately flush with plenty of water and seek medical assistance. Avoid dropping or subjecting the batteries to severe impacts that could damage the casings.
12
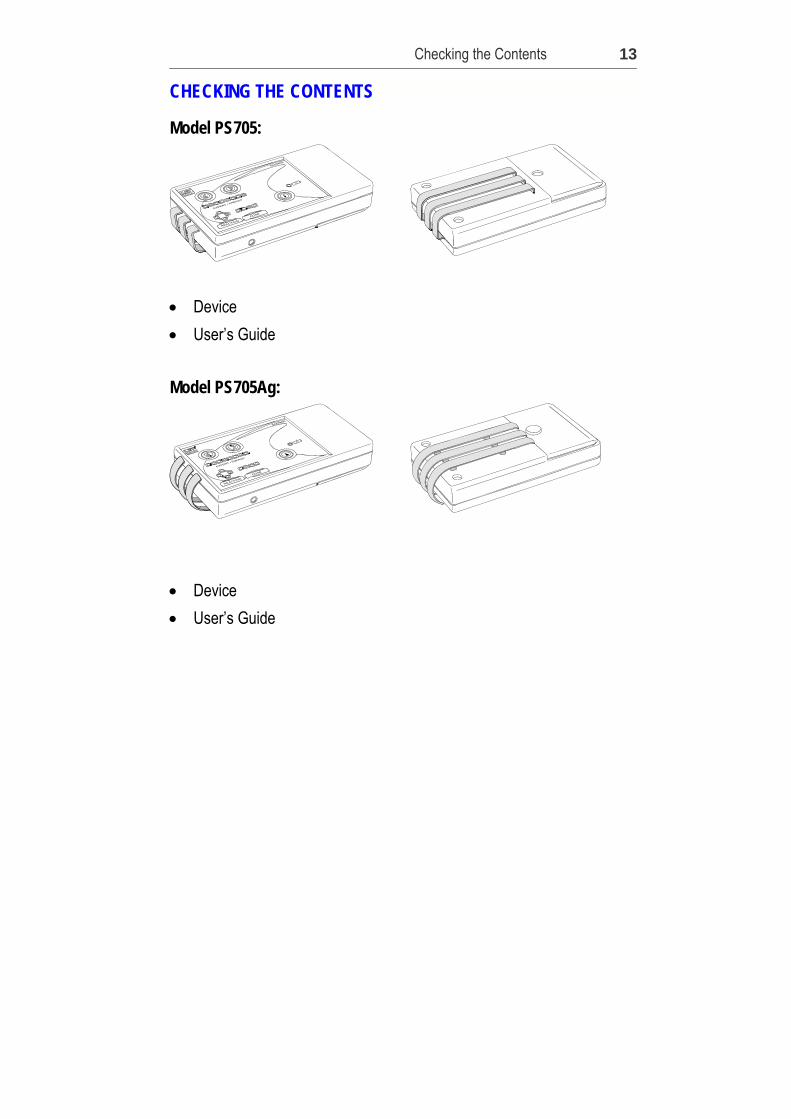
Do not short-circuit the battery terminals with metallic objects, such as key holders. Cover the terminals with tape or other insulators, or use a case to transport or store the batteries.
Before you discard a battery, cover the terminals with tape or other insulators to prevent direct contact with other objects. Contact with the metallic components of other materials or liquids in waste containers may lead to fire. Discard the batteries in specialized waste facilities if available in your area. To charge the rechargeable batteries, use only the battery charger specified by the manufacturer. When the device is not in use for a long time, remove the batteries from the battery section of the device.
Checking the Contents
13
CHECKING THE CONTENTS
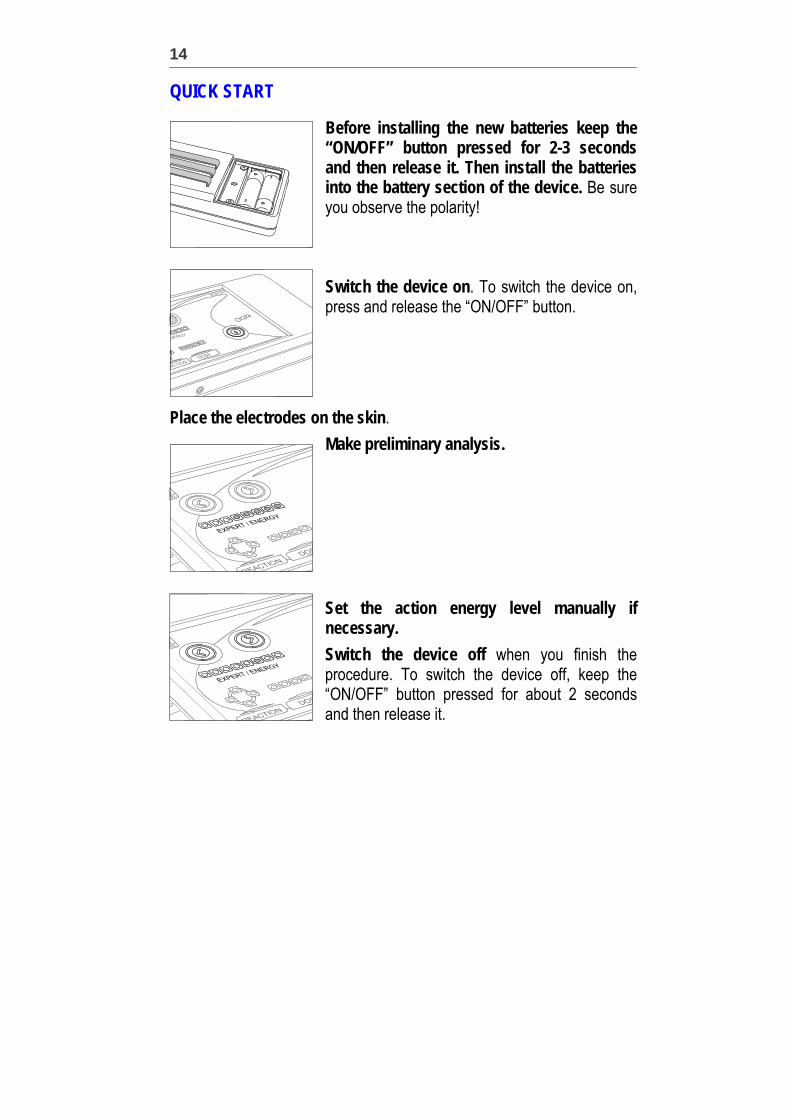
Model PS705:
• Device • User’s Guide Model PS705Ag:
• Device • User’s Guide
14
QUICK START
Before installing the new batteries keep the “ON/OFF” button pressed for 2-3 seconds and then release it. Then install the batteries into the battery section of the device. Be sure you observe the polarity! Switch the device on. To switch the device on, press and release the “ON/OFF” button.
Place the electrodes on the skin. Make preliminary analysis.
Set the action energy level manually if necessary. Switch the device off when you finish the procedure. To switch the device off, keep the “ON/OFF” button pressed for about 2 seconds and then release it.
Components Guide
15
COMPONENTS GUIDE
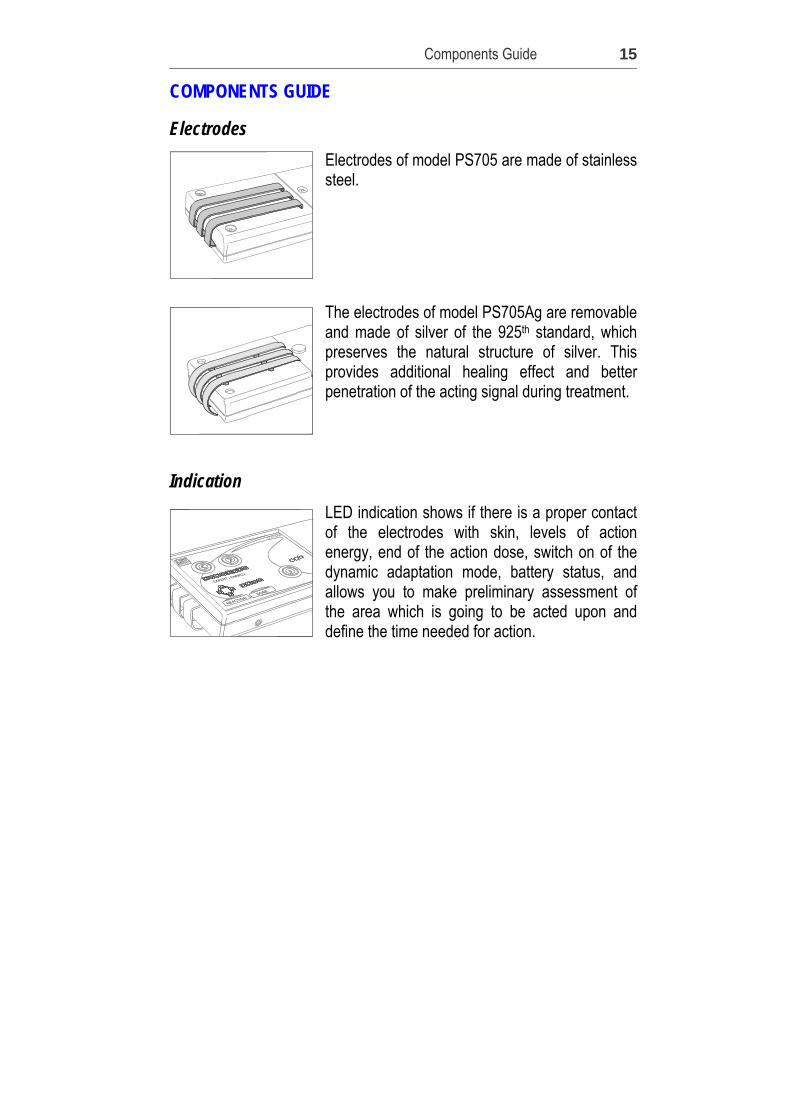
Electrodes Electrodes of model PS705 are made of stainless steel. The electrodes of model PS705Ag are removable and made of silver of the 925th standard, which preserves the natural structure of silver. This provides additional healing effect and better penetration of the acting signal during treatment.
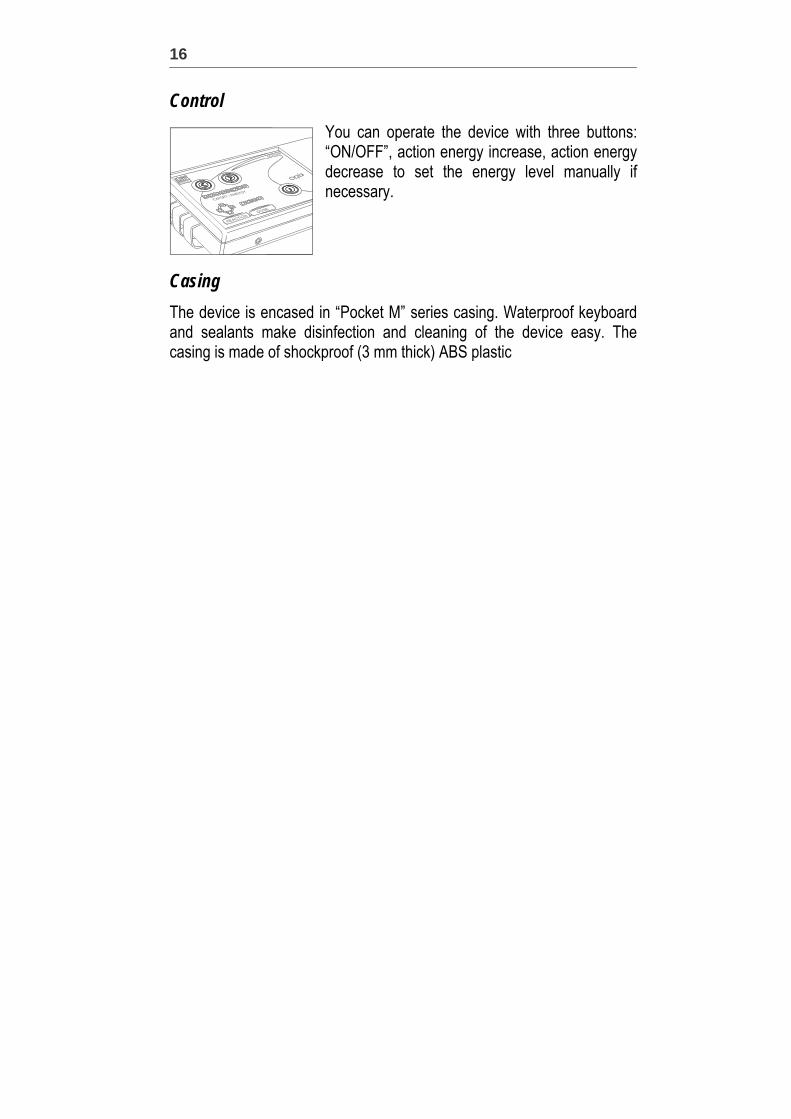
Indication LED indication shows if there is a proper contact of the electrodes with skin, levels of action energy, end of the action dose, switch on of the dynamic adaptation mode, battery status, and allows you to make preliminary assessment of the area which is going to be acted upon and define the time needed for action.
16
Control You can operate the device with three buttons: “ON/OFF”, action energy increase, action energy decrease to set the energy level manually if necessary.
Casing The device is encased in “Pocket M” series casing. Waterproof keyboard and sealants make disinfection and cleaning of the device easy. The casing is made of shockproof (3 mm thick) ABS plastic
Accessories
17
ACCESSORIES
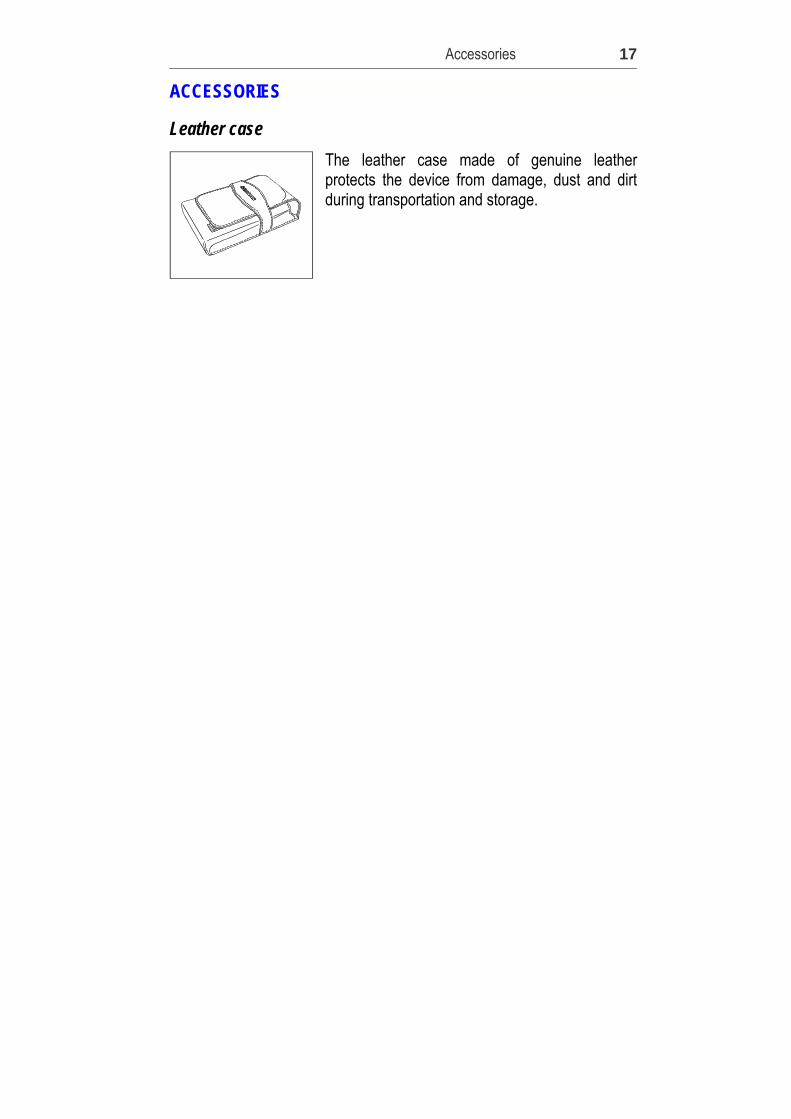
Leather case The leather case made of genuine leather protects the device from damage, dust and dirt during transportation and storage.
18
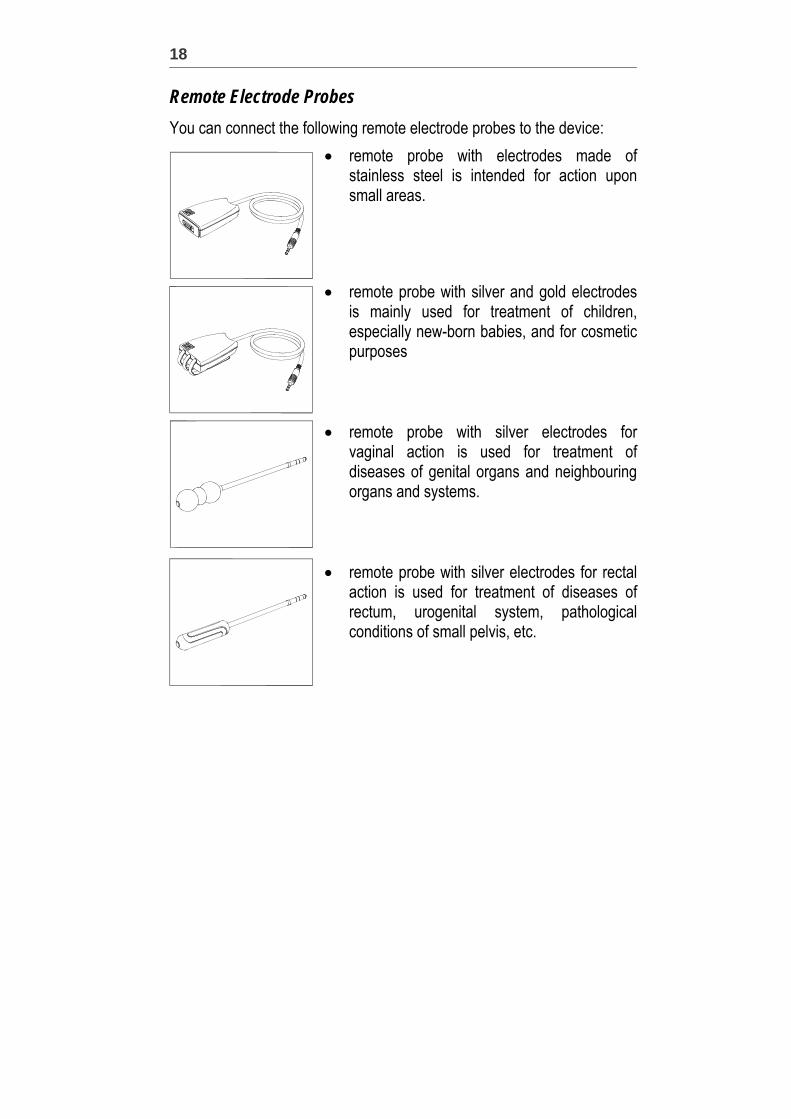
Remote Electrode Probes You can connect the following remote electrode probes to the device:
• remote probe with electrodes made of stainless steel is intended for action upon small areas.
• remote probe with silver and gold electrodes is mainly used for treatment of children, especially new-born babies, and for cosmetic purposes
• remote probe with silver electrodes for
vaginal action is used for treatment of diseases of genital organs and neighbouring organs and systems.
• remote probe with silver electrodes for rectal
action is used for treatment of diseases of rectum, urogenital system, pathological conditions of small pelvis, etc.

Arrangement and Operation
19
ARRANGEMENT AND OPERATION
The device consists of a casing and electrodes placed on the front-end and lower cover of the casing. Such shape of the electrodes allows placing them on the skin in various positions and treat hard-to-reach areas.
Model PS705 has built-in electrodes. The front-end mounted part of the electrode allows acting upon face areas and other hard-to-reach areas. The part of the electrode placed on the lower cover of the casing is mainly used for treatment of large areas. You can lie on the electrodes if you need a long treatment of the same area. Model PS705Ag has a special construction of removable silver electrodes. It allows taking the electrodes out of the casing (which makes disinfection and cleaning easier).
20
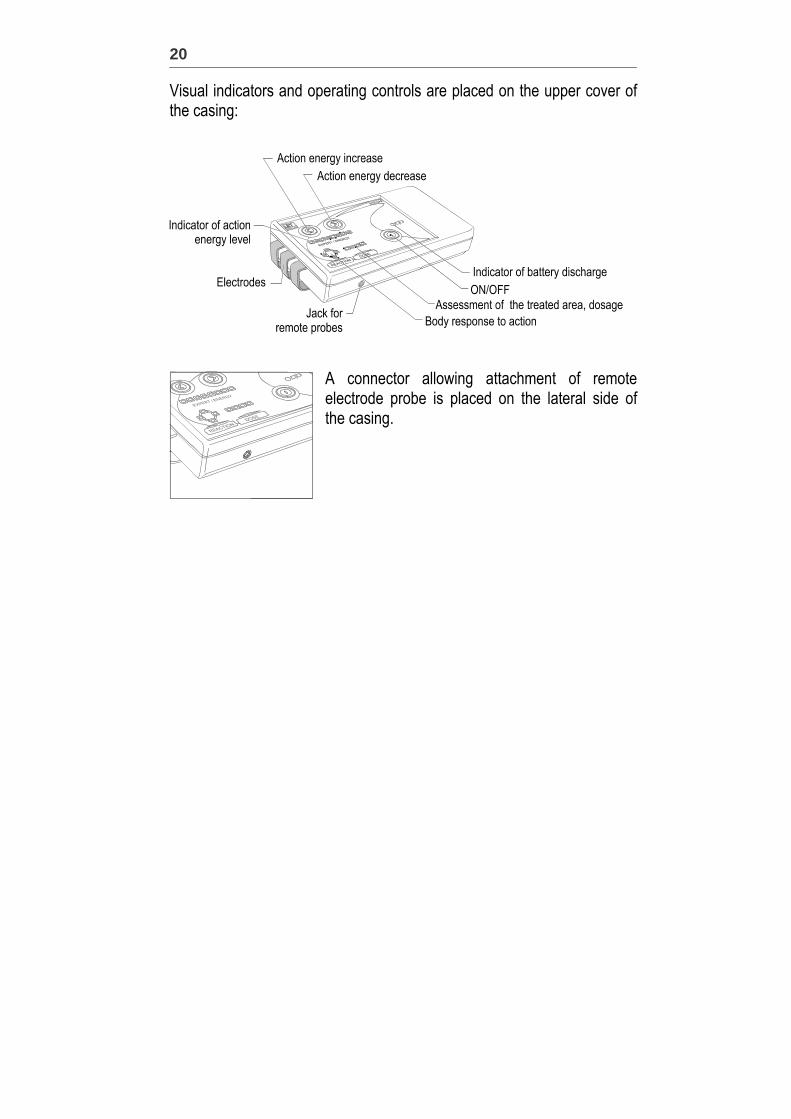
Visual indicators and operating controls are placed on the upper cover of the casing:
A connector allowing attachment of remote electrode probe is placed on the lateral side of the casing.
Getting Started
21
GETTING STARTED
Power Supply The device can only operate on two rechargeable batteries 1.5V (type AAA) or two alkaline batteries 1.5V (type AAA). Do not attempt to use any external power sources, line supplies or other power sources except those recommended in this User’s Guide!
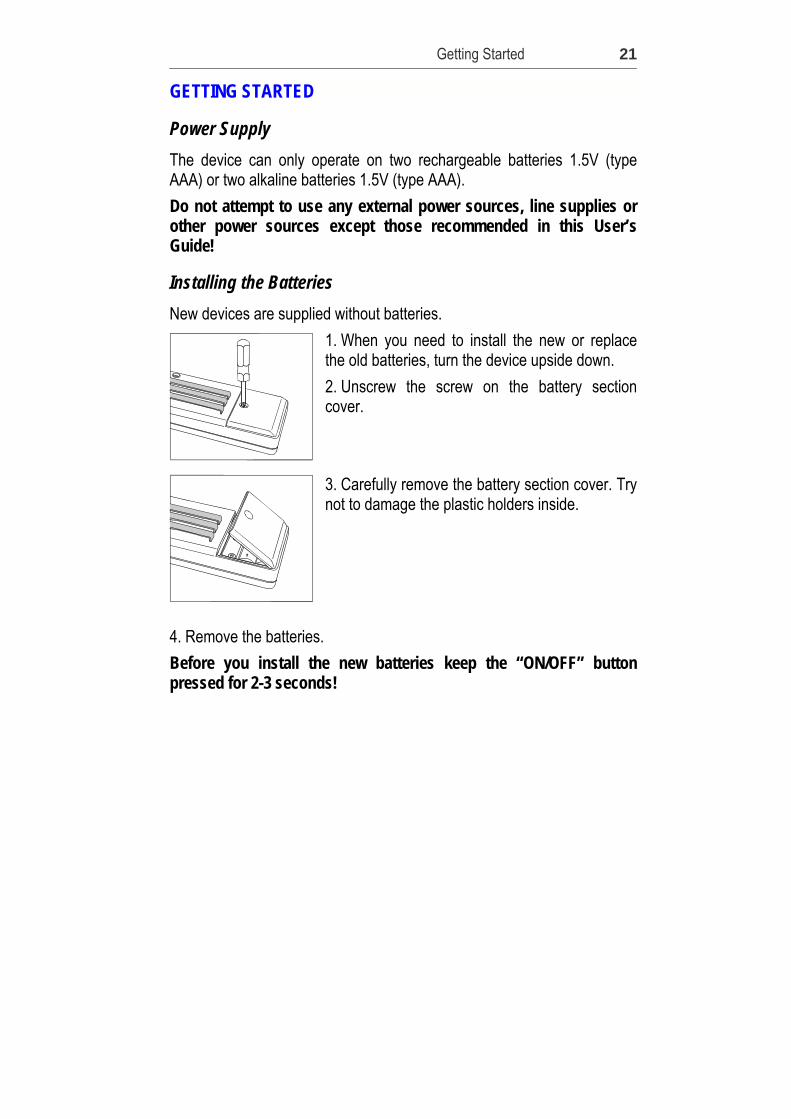
Installing the Batteries New devices are supplied without batteries.
1. When you need to install the new or replace the old batteries, turn the device upside down. 2. Unscrew the screw on the battery section cover. 3. Carefully remove the battery section cover. Try not to damage the plastic holders inside.
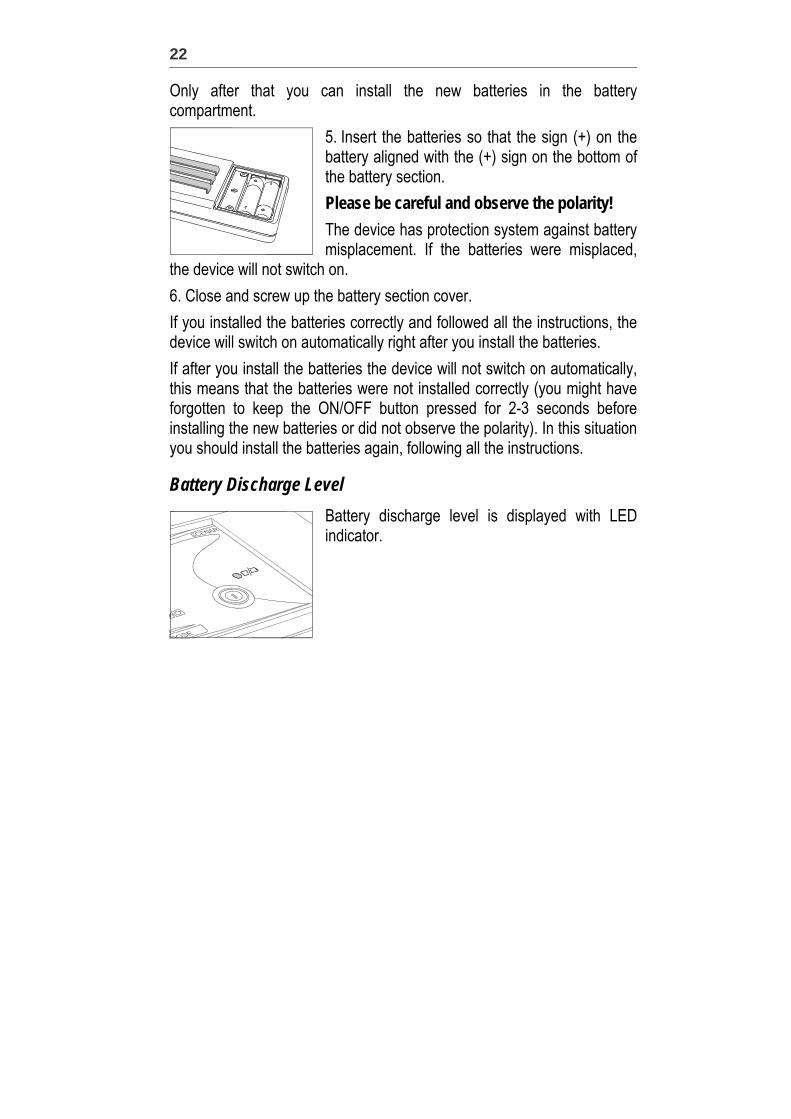
4. Remove the batteries. Before you install the new batteries keep the “ON/OFF” button pressed for 2-3 seconds!
22
Only after that you can install the new batteries in the battery compartment.
5. Insert the batteries so that the sign (+) on the battery aligned with the (+) sign on the bottom of the battery section. Please be careful and observe the polarity! The device has protection system against battery misplacement. If the batteries were misplaced,
the device will not switch on. 6. Close and screw up the battery section cover. If you installed the batteries correctly and followed all the instructions, the device will switch on automatically right after you install the batteries. If after you install the batteries the device will not switch on automatically, this means that the batteries were not installed correctly (you might have forgotten to keep the ON/OFF button pressed for 2-3 seconds before installing the new batteries or did not observe the polarity). In this situation you should install the batteries again, following all the instructions.
Battery Discharge Level Battery discharge level is displayed with LED indicator.
Getting Started
23
Using rechargeable batteries:
slowly blinking indicator means fully charged battery (depends on the type and quality of the batteries you are using), frequently blinking indicator means approximately 1/3 of the charge is left in the battery, very frequently blinking indicator means that the batteries are discharged and need to be replaced.
Using alkaline batteries:
battery indicator switched off means fully charged battery, slowly blinking indicator means approximately half of the charge is left, frequently blinking indicator means approximately 1/3 of the charge is left, very frequently blinking indicator means that the batteries are fully discharged and need to be replaced. Timely replacement will help your rechargeable batteries work effectively for a long time and avoid leakage of the alkaline batteries.
Connecting Remote Electrode Probe Remote electrode probe can be attached to the device through a connector on the lateral side of the plastic casing Remote electrode probe can be connected to the device at any moment it is needed, regardless of whether the device is on or off. The electrodes of the device switch off automatically after connecting the remote electrode probe. The device may switch off while attaching the remote electrode probe. In this case, switch the device on again.
24
OPERATING THE DEVICE
Switching the Device On and Off
Switching On
The device switches on automatically or with the “ON/OFF” button. 1. The device switches on automatically when the electrodes are placed on the skin. This function is essential when a person needs urgent help and in stress or shock conditions. 2. The device can be switched on manually. For that press and release the “ON/OFF” button. Switch on is accompanied by a sound signal. The LED showing minimal level of energy on the “EXPERT/ENERGY” indicator is lit up.
Switching Off
To switch the device off, keep the “ON/OFF” button pressed for 1-2 seconds. Switch off is accompanied by a sound signal. The device will switch off automatically if the electrodes do not contact skin for approximately 2 minutes.
Preliminary Analysis
Active Area Search
For most effective treatment it is recommended to find the part of the area which is optimal for action. It can be defined by activity readings. The most optimal area for action is the one with the highest activity readings. To do that, switch the device on and place the electrode on the skin without moving for approximately 1-2 seconds.
Operating the Device
25
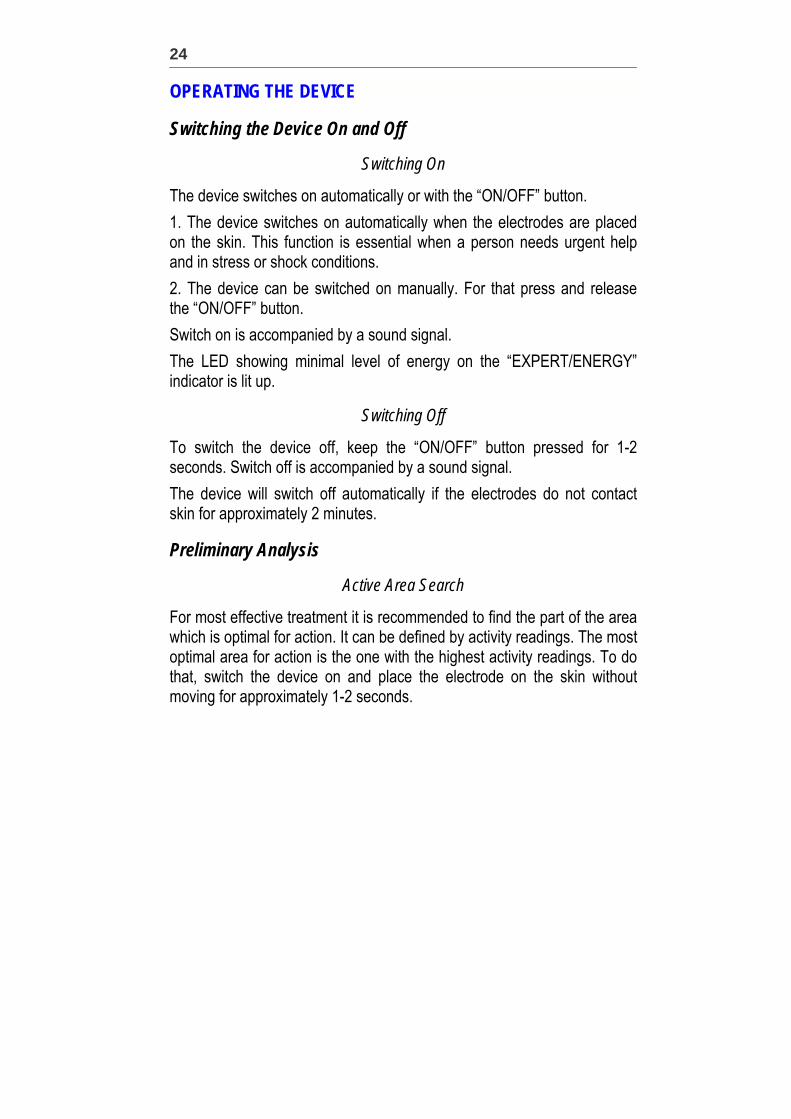
The activity level is defined by a number of LEDs lit up on the “EXPERT/ENERGY” indicator. The more LEDs light up, the higher is the activity level of the part of the area. Beginning and end of the activity measurement is accompanied by sound signals. Activity displays are stored during approximately 3 seconds.
If after that you leave the electrodes on the skin, the LEDs of the “EXPERT/ENERGY” indicator switch on and off alternately, starting from right to left and then back from left to right. After that the device starts working in treatment mode. If after measuring the activity of the area you remove the electrodes from the skin, the LEDs showing activity level will be lit up during approximately 3 seconds after measuring and then the “EXPERT/ENERGY” indicator will show the energy level.
Conducting the Procedure
Contact with Skin
Proper contact of the electrode with skin is essential for effective action. When the electrodes contact skin, the “REACTION” indicator lights up accompanied by sound signal. The “REACTION” indicator may not light up in some medical cases or conditions of skin, and when acting upon hairy areas of the body. In this case, moisten the skin or hair with a cotton wool slightly wet with water.
Action Energy Level
26
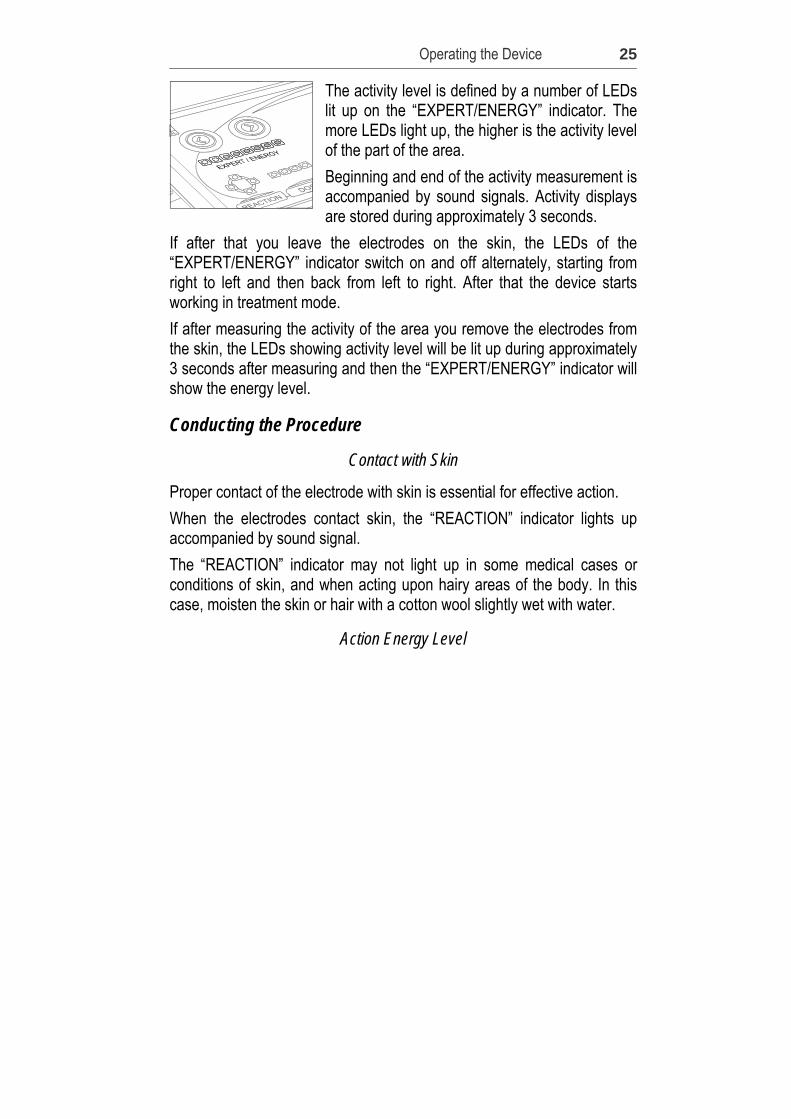
Action energy level is displayed by one of the LEDs of “EXPERT/ENERGY” indicator.
Automatic regulation After the activity level is measured, the minimal energy level which is needed at the area being acted upon is set automatically. During action the energy level may increase or decrease automatically.
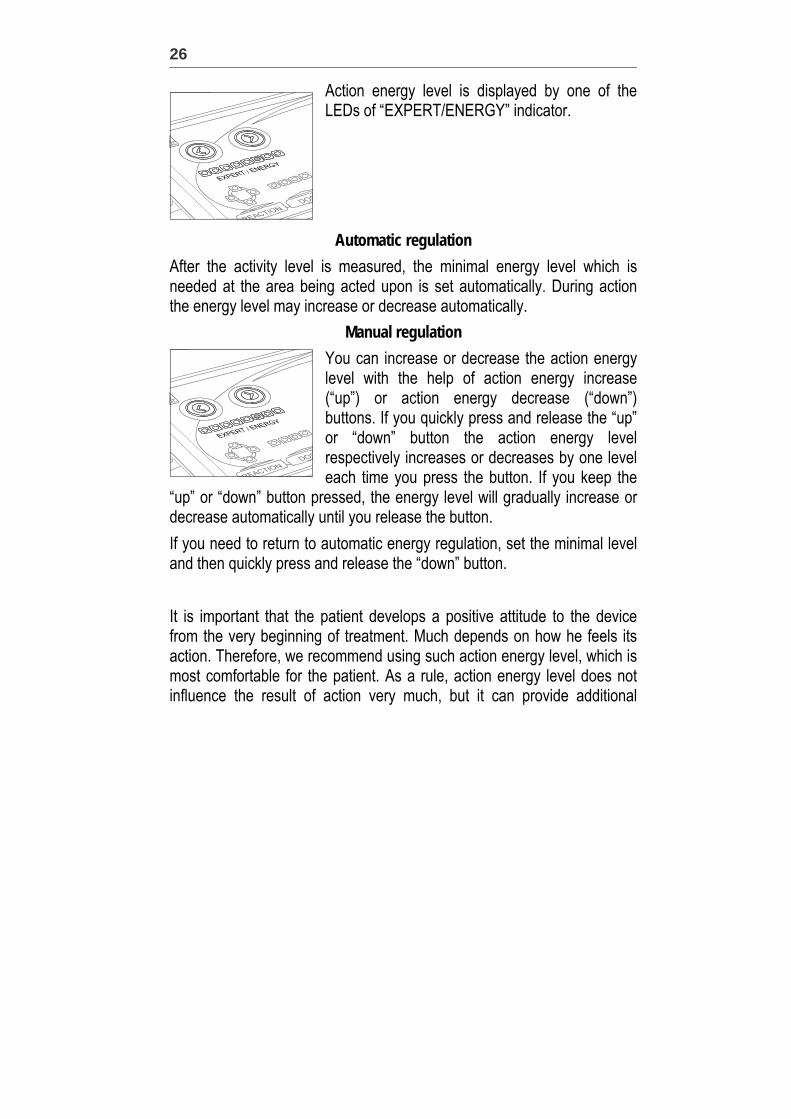
Manual regulation You can increase or decrease the action energy level with the help of action energy increase (“up”) or action energy decrease (“down”) buttons. If you quickly press and release the “up” or “down” button the action energy level respectively increases or decreases by one level each time you press the button. If you keep the
“up” or “down” button pressed, the energy level will gradually increase or decrease automatically until you release the button. If you need to return to automatic energy regulation, set the minimal level and then quickly press and release the “down” button. It is important that the patient develops a positive attitude to the device from the very beginning of treatment. Much depends on how he feels its action. Therefore, we recommend using such action energy level, which is most comfortable for the patient. As a rule, action energy level does not influence the result of action very much, but it can provide additional
Operating the Device
27
positive psychological effects upon some patients, who need to feel the action physically. Children should be treated using minimally sensed action energy levels. While treating elderly and senile patients, you can use maximal action energy level. Increased action energy levels are also used when the patient needs urgent help and for quick abatement or elimination of the problem (e.g. pain, resuscitation, shock conditions, frostbite, burn, etc.). Decreased action energy levels are also used for cosmetic purposes. Sensations produced by decreased action energy level should be comfortable.
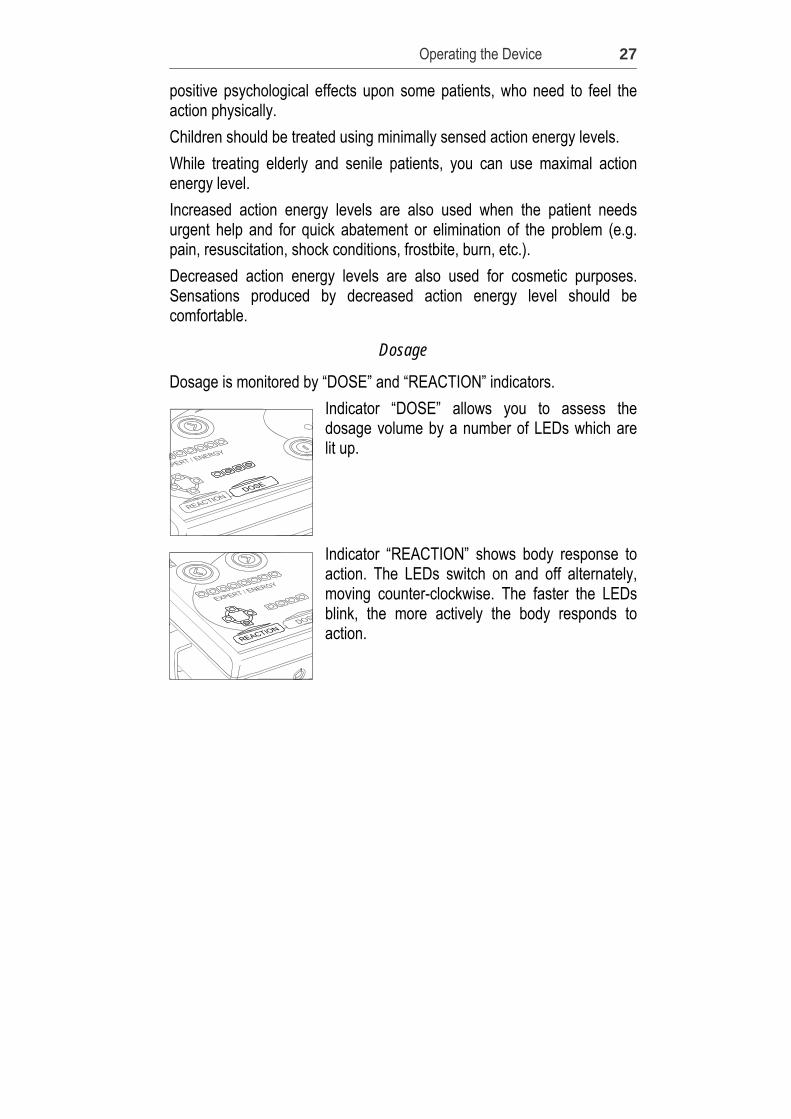
Dosage
Dosage is monitored by “DOSE” and “REACTION” indicators. Indicator “DOSE” allows you to assess the dosage volume by a number of LEDs which are lit up. Indicator “REACTION” shows body response to action. The LEDs switch on and off alternately, moving counter-clockwise. The faster the LEDs blink, the more actively the body responds to action.
28
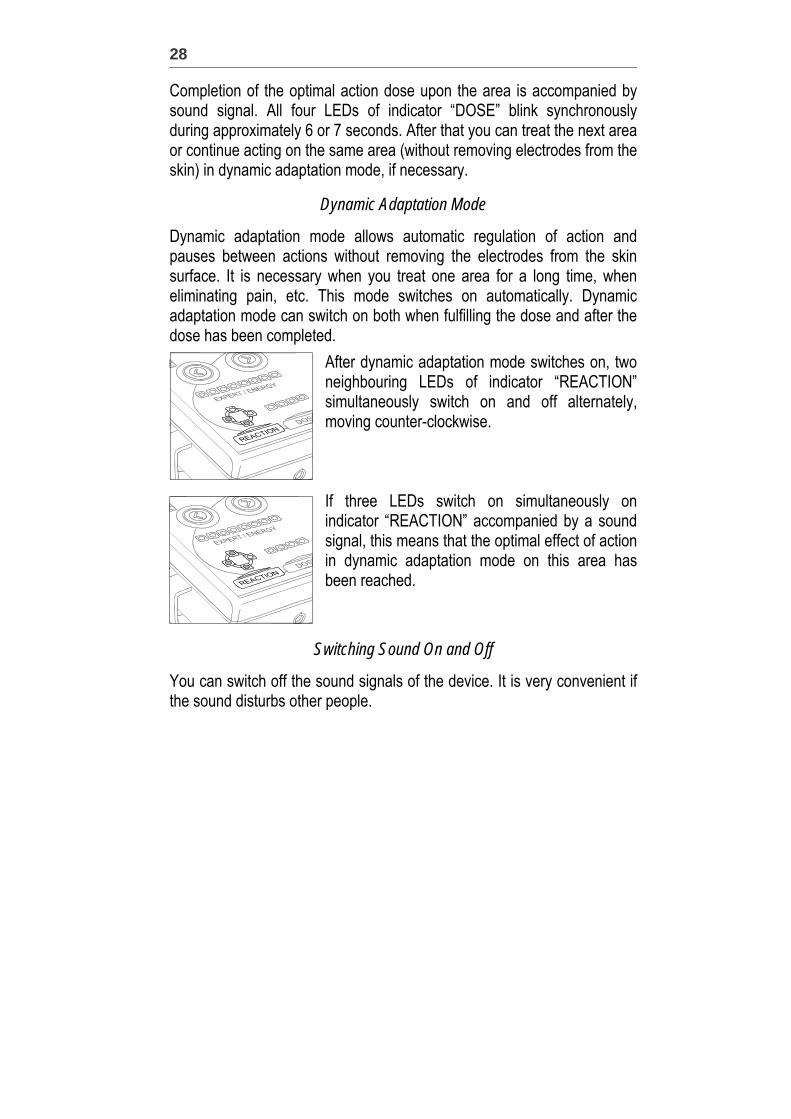
Completion of the optimal action dose upon the area is accompanied by sound signal. All four LEDs of indicator “DOSE” blink synchronously during approximately 6 or 7 seconds. After that you can treat the next area or continue acting on the same area (without removing electrodes from the skin) in dynamic adaptation mode, if necessary.
Dynamic Adaptation Mode
Dynamic adaptation mode allows automatic regulation of action and pauses between actions without removing the electrodes from the skin surface. It is necessary when you treat one area for a long time, when eliminating pain, etc. This mode switches on automatically. Dynamic adaptation mode can switch on both when fulfilling the dose and after the dose has been completed.
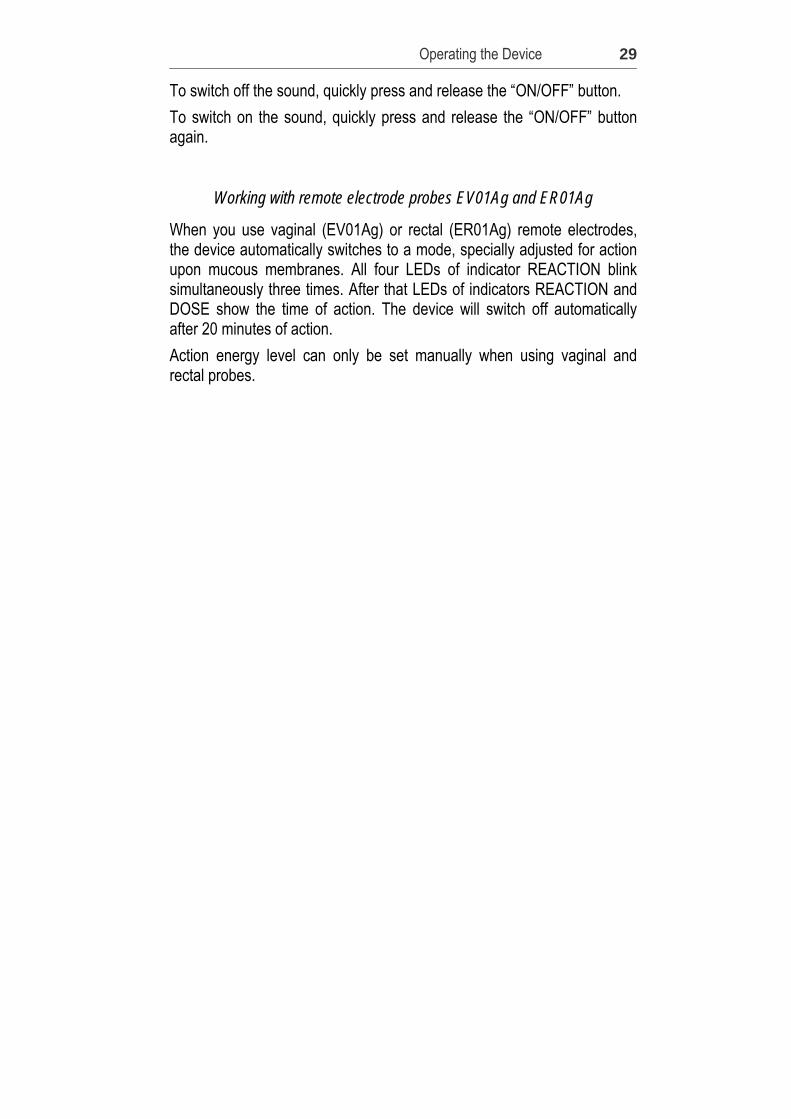
After dynamic adaptation mode switches on, two neighbouring LEDs of indicator “REACTION” simultaneously switch on and off alternately, moving counter-clockwise. If three LEDs switch on simultaneously on indicator “REACTION” accompanied by a sound signal, this means that the optimal effect of action in dynamic adaptation mode on this area has been reached.
Switching Sound On and Off
You can switch off the sound signals of the device. It is very convenient if the sound disturbs other people.
Operating the Device
29
To switch off the sound, quickly press and release the “ON/OFF” button. To switch on the sound, quickly press and release the “ON/OFF” button again.
Working with remote electrode probes EV01Ag and ER01Ag
When you use vaginal (EV01Ag) or rectal (ER01Ag) remote electrodes, the device automatically switches to a mode, specially adjusted for action upon mucous membranes. All four LEDs of indicator REACTION blink simultaneously three times. After that LEDs of indicators REACTION and DOSE show the time of action. The device will switch off automatically after 20 minutes of action. Action energy level can only be set manually when using vaginal and rectal probes.

30
HOW TO PLACE THE ELECTRODE
1. Along muscles and skin folds. 2. Along the segment. 3. On projection of the treated organ. 4. It is recommended to press the electrode to the skin surface to obtain
best effect of action. 5. In any position, just for a variety of action if you have to act upon the
same part of the area for long time.
Action Time, Intervals and Therapy Period
31
ACTION TIME, INTERVALS AND THERAPY PERIOD
Action Time The procedure may last from several minutes (for example, when eliminating toothache) to several days of continuous action (for example, in case of extreme or severe injuries, when it is necessary to save and restore an organ, etc.). Usually a procedure takes 40-60 minutes (minimum – 15-30 minutes). If at the first procedure the action dose is not performed within 20 minutes, you can stop acting upon this part of the area even before the dose will be completed, and place the electrode onto the next part of the area. It is also not recommended to use any additional methods of treatment at the first session of SCENAR-therapy.
Action Range Action range, i.e. how many areas to act upon during one procedure, depends on the following: 1. Physical condition, abilities, potential and age of the patient. The
procedure should not be exhausting. 2. Recovery stage – how many procedures have been already
conducted. The more procedures have been done before, the more areas can be acted upon during one procedure. It is not desirable to act upon the areas that have been acted on at the previous procedure. However, it is possible to act upon the same areas every other procedure.
3. It is not recommended to act upon more than 3 large areas during one procedure.
4. Trigger areas should be acted upon before any others. Trigger areas are the areas with high activity during preliminary analysis, areas

32
where the skin turns red and areas where the electrode “sticks” to skin.
Action Intervals Intervals between the procedures depend on how severe or pronounced the pathological process is. In acute conditions, SCENAR-therapy procedures should be conducted every day or several times a day. However, the intervals between the procedures should not be less than 3 hours. The more chronic, advanced or sluggish the disease, the longer should be intervals between procedures (every other day or 2-3 times a week). Everyday procedures are usually recommended in the following cases: • acute conditions • pronounced active complaints There may appear pronounced acute conditions during the first procedures. Procedures every other day are usually recommended for: • chronic compensated pathological conditions in middle-aged and
elderly patients Slight exacerbations are possible during first procedures. The above recommendations can be referenced to, but are not obligatory for all conditions. Each particular case may require special methods and techniques of action. Such details are discussed and explained at the regular seminars on SCENAR-therapy conducted by leading professionals of “LET Medical” company.

Action Time, Intervals and Therapy Period
33
Number of Procedures in a Course A course of SCENAR-therapy can make up from 1 to 25 procedures, but typically it is 10 to 14 procedures. The number of procedures in a course of SCENAR-therapy depends on how the patient’s body responds to action and how fast its normal functioning is restored. As a rule, when the symptoms and manifestations of the disease disappear and the patient feels well, the action can be finished. Note that each case is individual and may require its own number of procedures necessary for a course of SCENAR-therapy. The more recent the disease, the sooner will be the recovery. For rehabilitation of health in acute conditions, one course of SCENAR-therapy is usually enough. Patients suffering chronic pathological conditions can feel better even during the course of treatment, but the final result should be expected about a month after the course of therapy. Therefore, if the patient needs a repeated course of SCENAR-therapy, it should be conducted at least a month later, so that the effect of the previous course could manifest in full. If after the first course of SCENAR-therapy the patient experiences recurrence, the repeated course can be started earlier than one month interval. If one or two procedures are enough to eliminate the recurrence, it is not necessary to conduct the complete course. The next course should be started one month later.
34
POSITIONS OF THE PATIENT DURING ACTION
Positions of the patient can be varied. First of all, the position of the patient during action should be most comfortable and least painful for the patient and at the same time provide optimal access to the areas, which should be acted upon.
Stand-up position (while the therapist is sitting)
This position is recommended for patients suffering radiculitis. Pains the patients experience in this condition do not allow acting effectively in other positions. This position is also recommended for action upon inguinal areas.
Advantage
In this position of the patient it is possible to monitor important details, signs and processes, which cannot be noticed in other positions.
Disadvantage
In this position the patient may get tired, feel uncomfortable, or not be able to relax. Massaging with the device may be difficult. Some patients may consider such therapist-patient position not very esthetic
Sitting position
This position is very convenient to act on the cervical section of the spine and head.
Advantage
In this position the cervical section is more moveable, than in the lying position. The head of the patient can be easily bent in various directions.
Disadvantage Buttocks, back surface of knees and inguinal areas are inaccessible for action. Massaging is difficult and inconvenient.
Positions of the Patient During Action
35
Lying position
This position is recommended for bed-patients and for the patients whose condition allows conducting action only while lying. Such position is also very convenient for action on the face.
Advantage In this position most areas are easy to reach. Patients prefer this position most often. It provides maximal relaxation of the patient. When the patient is lying, the electrode can be pressed harder to the skin surface. Allows better massaging and deeper action signal.
Disadvantage If the patient is lying on a low couch, the therapist has to bend over the patient, which is inconvenient for him. It is recommended to use the adjustable couch allowing regulation of its height.
Knee-elbow position
This position is recommended for the patients suffering pathological conditions of sacrum, coccyx, and buttocks. It can also be most convenient for action if pathological conditions are accompanied by pains, which in this position are least pronounced. Such position may also be the only one allowing action in pathological conditions of skin (injuries, burns, rash, etc.) or in conditions when action in other positions is difficult.
Advantage This position allows most effective action upon the lower part of the thoracic section and lumbosacral section of the spine.
Disadvantage This position does not allow acting upon some areas.
36
SPECIFICATIONS
Type of the device Personal use device for medication-free therapy.
Acting pulse Bipolar two-phase spike without constant component. Duration of the first phase: 5-100 ± 15% mcsec Duration of the second phase: not more than 300 ± 30% mcsec Amplitude of the first phase 16.5 ± 30% V Amplitude of the second phase 20 ± 30% V
LED indication “EXPERT/ENERGY” – action energy “REACTION” – reaction, end of action “DOSE” – assessment of the treated area, duration of the dose Battery status
Sounds signals Switch on of the device Body reaction End of the dose Switch off of the device
Electrodes Stainless steel 12Х18H10Т (PS705) Silver of 925 standard (PS705Ag)
Connectors Mini-jack 2.5 for removable electrodes (PS705Ag) Mini-jack 2.5 for remote probes
Power supply Two AAA type batteries, 1.5V
Size 110х58х22 mm

Specifications
37
Weight (without batteries)
0,12 kg
Accessories Remote probe with steel electrodes. Remote probe with silver electrodes. Remote probe with silver electrodes for rectal action. Remote probe with silver electrodes for vaginal action. Genuine leather case for the device.

38
WARRANTY
“LET Medical” guarantees compliance of its devices with the requirements of TU 9444-002-24225399-2006. The service life of the device is 4 years (48 months) from the date of production, with average operation time 2 hours a day, provided that all instructions of the present User’s Guide are strictly followed. The warranty period of the device is 1 year (12 months) from the date of purchase, but not longer than 1 year and 3 months (15 months) from the date of shipment for sale, provided that all instructions of the present User’s Guide are strictly followed. If the device proves to be defective during the warranty period, the repair and replacement of the defective parts is free. Postage is not included in the warranty service and is to be covered by the buyer. The warranty is only valid for the internal parts of the device – electronic block inside the plastic casing. “LET Medical” cannot guarantee preservation of the initial state of the parts exposed to external environment and natural wear-out, such as plastic casing of the device, faceplate, electrodes and battery section contacts, during the whole period of using of the device.
Warranty
39
The warranty service shall not be provided in the following cases: • if the device was damaged during transportation after the purchase, • if the device has no, or has a false, trade mark and/or serial number, • if the warranty seals have been damaged, • if the device was attempted to be modified and/or repaired by an
unauthorized person/personnel, • if the defects resulted from connection to, and/or use together with,
non-“LET Medical” brand accessories, attachments and applications, • if the device was used and operated carelessly, safety requirements
and precautions were not observed or the instructions of the present User’s Guide were not followed,
• if the device was used for the purposes it is not intended for, • if the warranty period has expired. “LET Medical” provides paid post-warranty servicing of its devices during the whole service life of the device. While every effort has been made to ensure that the information contained in this User’s Guide is accurate and complete, no liability can be accepted for any errors or omissions. “LET Medical” in no event shall be liable for using SCENAR and COSMODIC series devices for commercial purposes, and for consequential, incidental or indirect damages (including but not limited to damages for loss of business profits and business interruption) resulting from non-functioning of the device and/or during the repair period.
40
APPENDICES
Transportation The devices can be transported by any kind of enclosed vehicle, except aircraft non-heated bays, in accordance with the requirements of GOST R 50444 of the Russian Federation and rules of freight. Climatic category of the devices is UHL 4.2 of the Russian Federation. During transportation the package enclosing the device should be protected from atmospheric precipitation and mechanical damage. The devices can be stored in their original packages according to the storage requirements of GOST 15150 of the Russian Federation. The packages enclosing the devices can only be piled in two rows up.
Care and Maintenance Correct functioning and settings of the device are checked automatically each time you replace the batteries. After you install the batteries you will hear a short sound signal. All LEDs will be blinking successively, beginning with the battery discharge indicator. Then the rightmost LED of “EXPERT/ENERGY” indicator blinks during approximately 2 seconds (not in all devices). If the testing was successful, operating mode is activated and this LED is lit up continuously showing the minimal action energy level. If during testing the device detects errors in its functioning or settings, the battery discharge indicator blinks three times before the operating mode is activated. In this case you should contact the manufacturer. After each procedure the plastic casing of the device and the electrodes should be wiped with a cotton wool slightly moistened with medical antiseptic solution 95% (solutio medicinalis antiseptica 95%). The silver electrodes of model PS705Ag can turn black in the process of action. To clean them, apply any cleanser used for gold and silverware.

Appendices
41
Construction of the silver electrodes of PS705Ag allows taking them out of the casing which makes cleaning and disinfection easier. To remove the electrodes, take a long thin object, wrap it with a soft cloth and put it under the rounded part of one of the side electrodes. Slightly lift the rounded part of the electrode. The same way lift the part of the electrode on the lower cover of the plastic casing. Get back to the rounded part of the electrode and lift it slightly again, then lift the part of the electrode placed on the lower cover of the device. Continue doing so until the electrode can be easily pulled out of the casing. After you remove one of the side electrodes, remove the middle electrode and then the left electrode, the same way. Remove each electrode step by step: first – its rounded part, then the part on the lower cover, so as not to damage or deform the casing or electrodes. Do not press strongly on the device while removing the electrodes. After the electrodes have been cleaned (or while replacing them), insert them back one by one. To install the electrode back, first insert the pin in the opening near the battery section, and then the pin in the opening near the front end of the device. Continue doing so until the electrode is installed in the opening completely. Then insert the middle and the other side electrodes the same way. After cleaning, it is recommended to store the device in its original leather case, which can be purchased additionally (see the price-list on http://www.scenar.ru). Never use substances containing benzene, thinners, acetone and other flammable and solvent substances, synthetic cleansers or water to clean the casing and electrodes of the device. These substances may damage or distort the device. Regularly wipe the metallic terminals in the battery section with a cotton wool slightly moistened with medical antiseptic solution 95% (solutio
42
medicinalis antiseptica 95%). Too dirty terminals can be cleaned with a rubber eraser. Do not use metal or pointed objects to clean the battery section terminals.

Appendices
43
Troubleshooting
Problem Cause Solution The device will not turn on
No batteries in the battery section or the battery charge is insufficient
Insert or replace the batteries
The device will turn off during operation
Poor batteries Replace the batteries with high-power ones
The device will turn off after shaking it
Poor contact between battery section and battery terminals
Carefully bend the terminals of the battery section and wipe them with a cotton wool moistened with medical antiseptic solution 95% (solutio medicinalis antiseptica 95%)
If you have other problems, please contact “LET Medical” company through your distributor.


