29
www.zend.com New Feature Guide Zend Studio 7.1 By Zend Technologies, Inc.

www.zend.com
New Feature Guide Zend Studio 7.1 By Zend Technologies, Inc.

Zend Studio for Eclipse User Guide
Contents What's New in Zend Studio 7.1 ....................................................................................................... 3
Phar Integration ............................................................................................................................... 4
Remote Server Support ................................................................................................................... 5
Remote Systems View .................................................................................................................... 7
Working with Remote Server Explorer ....................................................................................... 10
Creating a Connection via the Server View ............................................................................... 11
Creating a New Remote Project ................................................................................................ 14
Downloading a Project from an Existing Connection ................................................................. 17
Sharing a Local Project to a Connection ................................................................................... 19
Synchronizing a Local Project to a Connection ......................................................................... 20
Upload to a Server ................................................................................................................. 21
Download from a Server ......................................................................................................... 21
Downloading Selected Files from a Folder ................................................................................ 22
Mylyn Integration ........................................................................................................................... 23
Working with Mylyn Integration .................................................................................................. 24
Task List ................................................................................................................................. 24
Task List Presentation ............................................................................................................ 24
Icon Legend and Color Coding............................................................................................... 24
Creating new Tasks ................................................................................................................... 25
Local Tasks ............................................................................................................................ 25
Repository Tasks .................................................................................................................... 26
Context ................................................................................................................................... 27
Elements ................................................................................................................................. 27
Actions .................................................................................................................................... 27
Planning .................................................................................................................................. 27
Task-Focused Interface ............................................................................................................. 28
Task-focused Ordering ........................................................................................................... 28
Task Hyperlinking ................................................................................................................... 29
2

What's New in Zend Studio 7.1
3
What's New in Zend Studio 7.1 The following new features are available in Zend Studio 7.1:
Remote System Explorer
Phar Integration
Mylyn Integration

Phar Integration Phar Integration will enable you to integrate with phar archives. Phar is an archive system that
enables you to group numerous files into a single file for easy distribution and installation. A phar
archive provides a way to distribute a complete PHP application in a single file and run it from that
file without needing to even use a disk. Using a Phar archive library is identical to using any other
PHP library.
Phar Integration contains the following features:
• Export to phar.
• Import to phar.
• Add phar to your project.
Please click here for more information on phar (external link).
Phar integration settings are defined per project and are part of the project library settings.
4

Remote Server Support
RSE (Remote Server Explorer) provides transparent access to remote resources, including the
upload and download of files. RSE helps you to create, view and manage your connections to
remote systems such as FTP and SSHSFTP. This will allow you to work on projects with local
files remotely enabling you to create, view and manage your connections to remote systems.
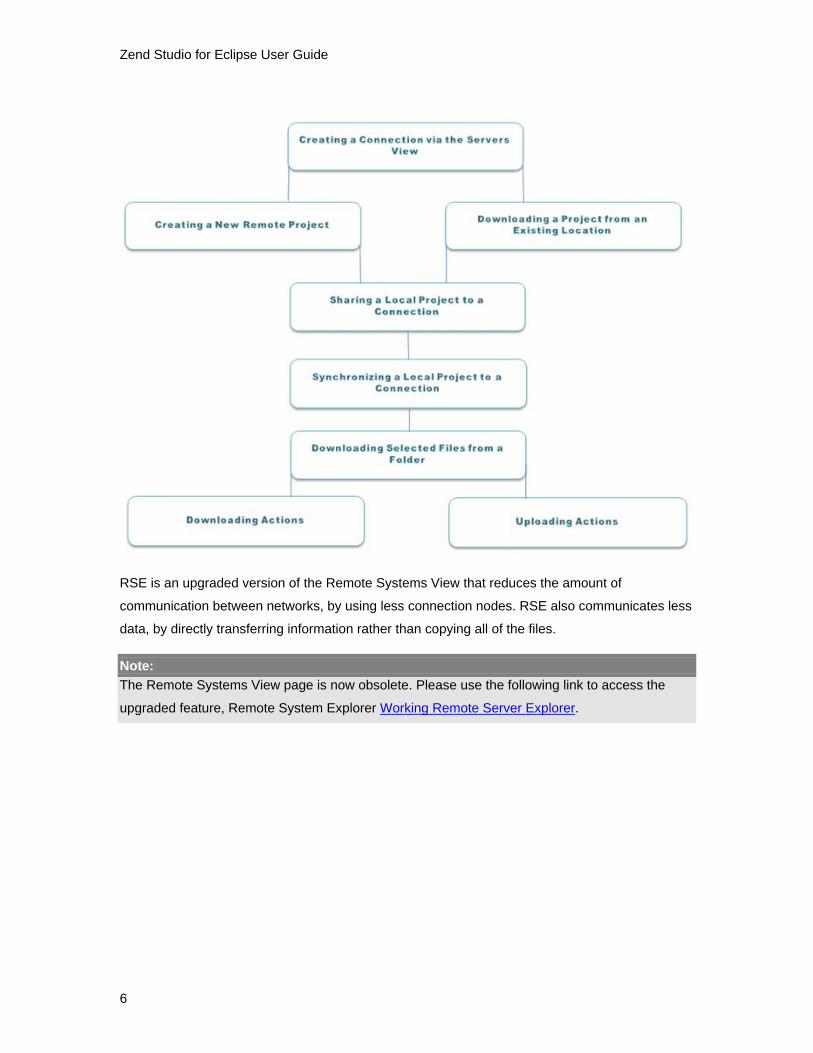
RSE enables you to perform the following tasks:
Creating a Connection via the Server View - Create different types of connections, for
creating and managing projects.
Creating a New Remote Project - This procedure describes how to create a new remote
project. Once the remote server has been set up, you can create a new project which will
be synchronized with one of the remote servers.
Downloading a Project from an Existing Connection - This procedure describes how to
download a project from the server from a connection that already exists.
Sharing a Local Project to a Connection - This procedure describes how to share a
project from your local server to a remote connection.
Synchronizing a Local Project to a Connection - This procedure describes how to
synchronize, download a local project from server and upload a local project to a server
connection.
Downloading Selected Files from a Folder - This procedure describes how you can
import a partial project, ignoring any files that you don’t need and keeping them hidden
on your workspace.
5
Zend Studio for Eclipse User Guide
6
RSE is an upgraded version of the Remote Systems View that reduces the amount of
communication between networks, by using less connection nodes. RSE also communicates less
data, by directly transferring information rather than copying all of the files.
Note: The Remote Systems View page is now obsolete. Please use the following link to access the
upgraded feature, Remote System Explorer Working Remote Server Explorer.

Remote Systems View The Remote Systems view helps you create, view and manage your connections to remote
systems such as FTP and SFTP.
Remote Systems view
Remote Systems view Toolbar Commands
Icon Name Description
Define a
connection to
remote system
Opens the 'New Connection' dialog.
Refresh
information of
selected resource
Refreshes the connection information of selected resources.
Back/Forward Scrolls backwards and forwards through your projects.
Up Navigates up one level
Collapse All Collapses the list of elements
Link with Editor If selected, files will immediately be displayed in the editor
when selected. If unselected, files will be displayed in the
editor when they are double-clicked.
7

Zend Studio for Eclipse User Guide
Remote Systems View Menu Commands
The Remote Systems view menu can be accessed through the view menu icon .
Name Description
New Connection... Opens the 'New Connection' dialog.
Work with Profiles Opens the Team profile view. See 'Remote System
Explorer Profiles''Remote System Explorer Profiles' in the
RSE User Guide for more information.
Note: Additional user guides can be accessed from inside
product-name by going to Help | Help Contents, or from
the Eclipse Online Documentation site
(http://help.eclipse.org/ganymede/index.jsp).
Refresh All Refreshes all connections.
Quality Connection Names Displays the connection names.
Show Filter Pools Displays filter pools. See 'Filters, filter pools, and filter
pool references''Filters, filter pools, and filter pool
references' in the RSE User Guide for more information.
Note: Additional user guides can be accessed from inside
product-name by going to Help | Help Contents, or from
the Eclipse Online Documentation site
(http://help.eclipse.org/ganymede/index.jsp).
Restore Previous State Select this option to use locally cached information
instead of connecting immediately if you are automatically
opening the previously expanded connections when
starting RSE.
Preferences Opens the Remote Systems PreferencesRemote
Systems Preferences page.
Note: The Remote Systems View is displayed by default as part of the PHP Perspective. To manually
open the view, go to Window | Show View | Other | Remote Systems | Remote Systems.
See the RSE User GuideRSE User Guide for more on FTP/SFTP connectivity.
8

Remote Systems View
9
Note: Additional user guides can be accessed from inside product-name by going to Help | Help
Contents, or from the Eclipse Online Documentation site
(http://help.eclipse.org/ganymede/index.jsp).
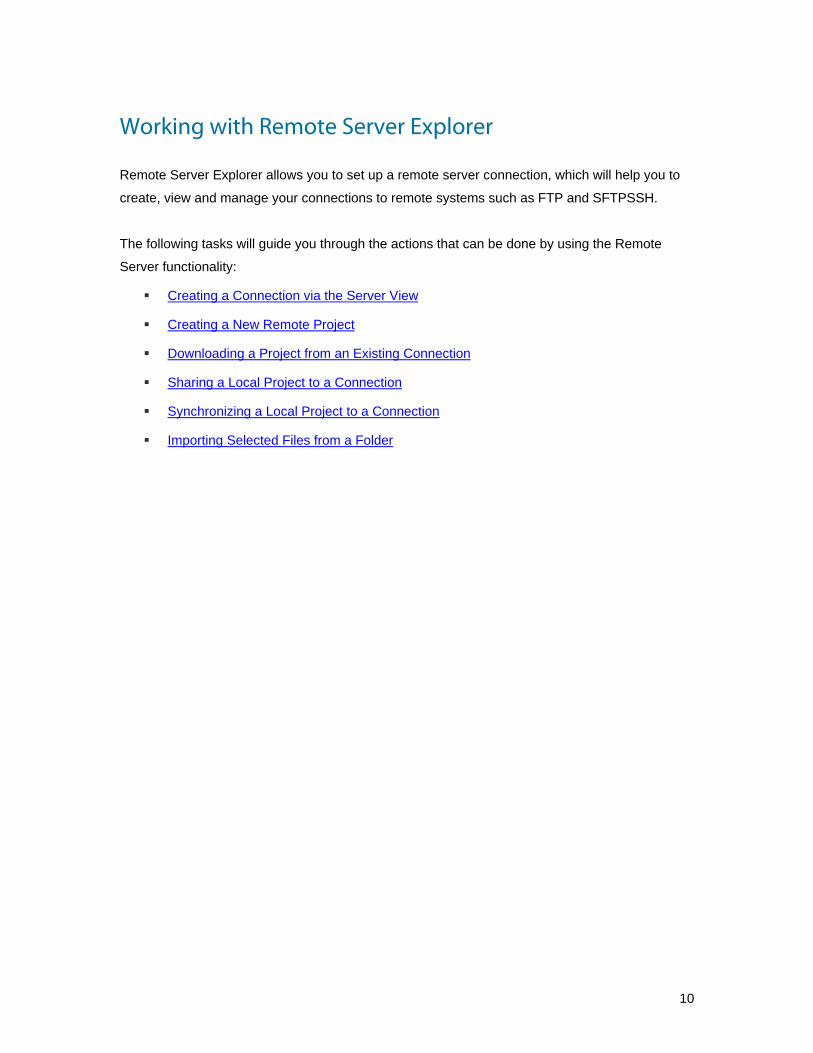
Working with Remote Server Explorer
Remote Server Explorer allows you to set up a remote server connection, which will help you to
create, view and manage your connections to remote systems such as FTP and SFTPSSH.
The following tasks will guide you through the actions that can be done by using the Remote
Server functionality:
Creating a Connection via the Server View
Creating a New Remote Project
Downloading a Project from an Existing Connection
Sharing a Local Project to a Connection
Synchronizing a Local Project to a Connection
Importing Selected Files from a Folder
10

Working with Remote Server Explorer
Creating a Connection via the Server View The Server View allows you to setup different types of connections, for creating and managing
projects.
This procedure describes how to create a connection via the Server view, in order to view the
current status of connection and establish connection to a remote server.
11

Zend Studio for Eclipse User Guide
To create a connection via the Servers View:
1. Open the Servers View, situated at the bottom of the page.
2. Right-click the Connections node and click New | New Connections to open the
New Connections dialog box.
3. Use the New Connection dialog to choose the connection type by clicking on the
location or use the ‘Type Filter Text’ box.The connection options are:
FTP Only – Connect to the FTP access to remote systems.
Local – Connect to your local file system on your computer.
SSH Only – Connect to an SSH to access remote server.
4. Click Next to define the system connection, and enter the following details:
Parent Profile – Your computer profile.
Host Name – Host Name or IP address of the target system.
Connection Name – A unique name that is attached to the profile.
Description – Connection description that will help you to remember what this
12

Working with Remote Server Explorer
connection is.
5. Tick the ‘Verify Host Name’ box if you want to validate your connection now. Zend
Server will attempt to connect to the remote server. If the connection fails this can
mean that the server is not available or the information entered is incorrect, retry
or Click Next to continue.
6. For FTP or Local connection types Click Finish to add your new connection.
7. For SSH connection types, you will now have the option to set one of the following
system checks:
SFTP Files – Work with files on remote systems using the secure Shell (SSH)
protocol.
SSH Shells - Work with shells and commands on remote systems using the
Secure Shell (SSH) protocol.
SSH Terminals - Work with terminals and commands on remote systems using
the Secure Shell (SSH) protocol.
To set system checks on any of these options do the following:
1. Go to the Available Services box in the dialog and select one of the following
options.
SSH/SFTP file services.
SSH connector service.
2. Click on the SSH connector service, to expand the node.
3. Click on SSH Settings.
Use the properties table, to edit your options:
Keepalive (secs) – At regular intervals, the system checks to see that the
connection is alive. If so, you will then receive a server notification.
Timeout (secs) - At regular intervals, the system checks to see if the connection
has timed out, and if so you will be sent a server notification.
4. Change the scheduled checks in the SSH Settings, in the properties table by
clicking on the value of the relevant option and inputting how many seconds apart
you want your checks to run.
5. Click Finish to add your new connection and to set your system checks.
Now that you have completed creating your connection via the server view, you will be able to
work remotely on new and existing projects to import, export and synchronize projects.
13

Zend Studio for Eclipse User Guide
Creating a New Remote Project
This procedure describes how to create a new remote project. Once the remote server has been
set up, you can create a new project which will be synchronized with one of the remote servers.
Before creating a new remote project make sure that you have already created a Creating a
Connection via the Server View .
To create a new remote project: 1. From the menu bar, go to File | New | PHP Project -Or- In PHP Explorer view
2. Right-click and select New | PHP Project. 3. The New PHP Project wizard is displayed.
4. Go to the Remote Server section.
14

Working with Remote Server Explorer
4. Tick the box entitled Enable the Remote Web Site:
5. Browse for your location.
6. Enter the following information:
Project name - The required project name.
Contents – There are three options. Choose the one relevant to your needs.
• Create a new project in the workspace - Creates a new PHP project in the
workspace directory.
• Create a project from an existing source - Creates a PHP project pointing to files
situated outside of the workspace. Click Browse to select the required source
content.
• Create project on a local server - Creates the project on a local server. This option
will only be available if a local Zend Server has been configured in the PHP
Servers Preferences page.
PHP Version - Select whether to use the default PHP version settings or unmark
the 'Enable project specific settings' checkbox to configure the PHP version used
for this project.
See PHP Interpreter Preferences for more information.
Use default PHP settings - Uses the default PHP Interpreter settings.
Use project specific settings - Select the PHP version to be used for the project
and whether ASP tags are used as PHP tags.
See PHP Version Support for more information.
Project Layout - Select whether to:
• Use project as source folder - All resources within the project will be added to the
Build Path by default.
• Create separate folders for source files and public resources - Separate folders
will be created in which you can place resources which should be included or
excluded from the Build Path. See Configuring a Project's PHP Build Path for
more information.
The default setting for this option can be configured from the New Project Layout
Preferences page.
• JavaScript Support - Mark the 'Enable JavaScript support for this project checkbox
for JavaScript functionality (e.g. JavaScript Code Assist options) to be available to
15

Zend Studio for Eclipse User Guide
the project. See Enabling JavaScript Support in PHP Projects for more
information.
7. Click Next to configure the project's Include Path (this can also be done following
the project creation).
8. Click Next to configure the project's PHP Build Path (this can also be done
following project creation).
9. Click Finish.
The new PHP project will be created in your workspace and displayed in PHP Explorer View.
You can now start to develop your application by creating PHP Files or adding other resources to your project.
16
Working with Remote Server Explorer
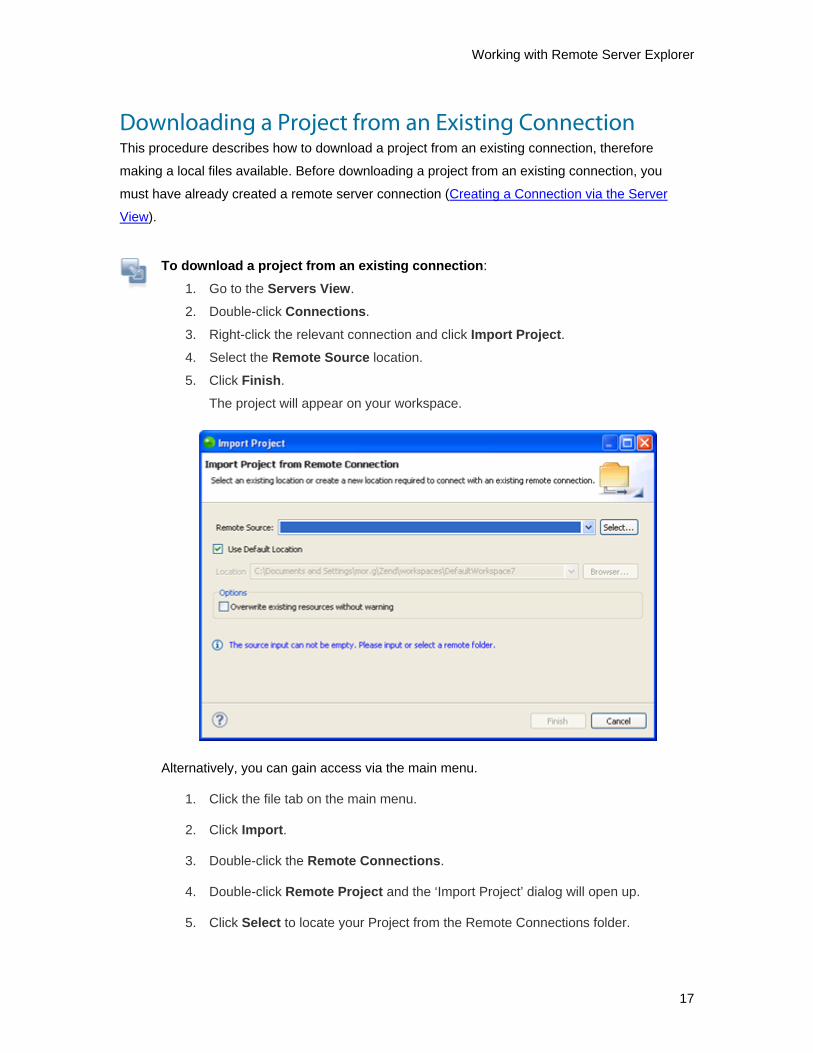
Downloading a Project from an Existing Connection This procedure describes how to download a project from an existing connection, therefore
making a local files available. Before downloading a project from an existing connection, you
must have already created a remote server connection (Creating a Connection via the Server
View).
To download a project from an existing connection:
1. Go to the Servers View.
2. Double-click Connections.
3. Right-click the relevant connection and click Import Project. 4. Select the Remote Source location.
5. Click Finish.
The project will appear on your workspace.
Alternatively, you can gain access via the main menu.
1. Click the file tab on the main menu.
2. Click Import.
3. Double-click the Remote Connections.
4. Double-click Remote Project and the ‘Import Project’ dialog will open up.
5. Click Select to locate your Project from the Remote Connections folder.
17
Zend Studio for Eclipse User Guide
6. Double-click on your project.
7. Click on Finish. The project will be created and appear on your workspace.
18

Working with Remote Server Explorer
Sharing a Local Project to a Connection
This procedure describes how to share a local project to a connection. Before sharing a local
project to a connection, you must have already created a remote server connection (Creating a
Connection via the Server View).
To share a local project to a connection:
1. Right-click on the un-shared project in the workspace.
2. Select Team.
3. Click on Share Project. 4. The Share Project wizard will open, select the Remote Server node and click
Next.
5. Ensure that the correct project has been selected. If not, Browse for the folder
you will be uploading the project to, and select it.
6. Click Finish.
Your shared project will now appear on your workspace, identified with an icon.
19

Zend Studio for Eclipse User Guide
Synchronizing a Local Project to a Connection
This procedure describes how to synchronize a local project to a connection. Before
synchronizing a local project to a connection, you must have already created a remote server
connection.
To synchronize a local project to a connection:
1. Right-click on the shared project.
2. Select Team.
3. Select Synchronize.
4. Double-click on the shared file, in order to automatically open the Compare Editor.
You will now see your project on your workspace.
If there are any conflicting files, double click on the file and the Compare Editor will appear. The
synchronized view will reveal any differences there are between the local and shared files, by
using these icons:
An incoming addition means that a resource has been added to the repository.
Updating will transfer the resource to your workspace.
An incoming change means that the file has changed in the repository. Updating will
transfer the new file revision to your workspace.
An incoming deletion means that a resource was deleted from the server. Updating
will delete your local resource.
An outgoing addition means that the file was added to your workspace and is not yet
in the repository. Adding then Committing will transfer the new file to the repository.
An outgoing change means that the file was change locally. Committing the file will
transfer the changes to the repository and create a new revision of the file.
An outgoing deletion is a resource that has been deleted locally. Committing these
resources will cause the remote resource to be deleted. Note: in CVS directories are
never really deleted from the repository. Instead, files are deleted and empty
directories are pruned from your workspace.
A conflicting additions means that the resource has been added locally and remotely.
A conflicting change means that the file has been changed locally and remotely. A
manual or automatic merge will be required. Also, any entries in the view that contain
children that are conflicts will also be decorated with the conflict icon. This is done to
make conflicts easy to find.
A conflicting deletion means that the resource was deleted locally and remotely.
20
Working with Remote Server Explorer
Upload to a Server This procedure describes how to upload resources to a server. This action enables you to move
files to a local connection. Before uploading, you must have already created a remote server
connection and synchronized the project that contains the resource/s.
To export resource/s via PHP Explorer:
1. Select the chosen resource/s in PHP Explorer.
2. Right-click on the resource and from the right-click menu select | Team | Export. The chosen resource/s will be moved to the remote location.
You can also export resources via the Synchronize View.
To export files via the Synchronize View:
1. Select the chosen resource/s in the Synchronize View.
2. Right-click on the resource and from the right-click menu select | Team | Export.
The chosen resource/s will be moved to the remote location.
Download from a Server This procedure describes how to download resources from a server. Before downloading, you
must have already created a remote server connection and synchronized the project that contains
the resource/s.
To import resources:
1. Select the resource/s in the Synchronize View.
2. Right-click on the resource and from the right-click menu, select Import. The resource/s will appear in your workspace.
You can also import resources via PHP Explorer:
1. Select the resource/s in PHP Explorer.
2. Right-click on the resource and from the right-click menu, select Import.
The resource/s will appear in your workspace.
21
Zend Studio for Eclipse User Guide
22
Downloading Selected Files from a Folder This procedure describes how you can import a partial project, ignoring any files that you don’t
need and keeping them hidden on your workspace. For example, if you were importing a folder
that contained image files that you didn’t need, you could import all of the files, except the image
files.
To import selected files:
1. Right-click on the new resource in PHP Explorer and from the right-click menu,
select Team.
2. Click on Addto.sharedignored to open up a dialog box.
3. Select the files that do not need to be synchronized.
4. Click Finish.
The ignored files will be hidden in a folder on your workspace.
Mylyn Integration Mylyn is a task-focused interface that reduces the overload of information and makes multi-
tasking easy. It does this by making tasks a top priority, and integrating rich and offline editing for
repositories such as Bugzilla, Trac, and JIRA. Once your tasks are integrated, Mylyn monitors
your work activity to identify relevant information, and uses this task context to focus the user
interface on the task-at-hand. This puts the information you need at your fingertips and improves
productivity by reducing searching, scrolling, and navigation. By making task context explicit
Mylyn also facilitates multitasking, planning, reusing past efforts, and sharing expertise.
The Task List allows you to view and manage your tasks. The Task List contains both "Local
Tasks" and shared "Repository Tasks" that are stored in a task repository such as Bugzilla or
Jira. Local tasks are typically contained in categories. Repository tasks are contained in special
categories that represent queries.
Mylyn features the following:
Task List Presentation.
Icon Legend and Color Coding.
Creating New Tasks.
Using Local Tasks.
Repository Tasks.
Task Focused Interface.
Task Focused Ordering.
Task Hyperlinking.
23

Working with Mylyn Integration
Task List Using the Task List enables you to view and manage your tasks.
In order to open the Task List:
1. Go to - Window - Show View | Other... | Mylyn | Task List The Task List will now appear in a new tab.
The Task List contains two types of tasks:"Local Tasks" and shared "repository tasks" that are
stored in a task repository such as Bugzilla or Jira. See how to create new tasks. Local tasks are
typically contained in categories, which you can create by right-clicking on the task list and
selecting New | Category. Repository tasks are contained in special categories that represent
queries.
At the top of the Task List, you will find the following buttons and features:
• New Task - Create a new local or repository task.
• Synchronize - Update repository tasks with changes from the server.
• Task Presentation - Toggle between Scheduled and Categorized presentations.
• Focus on Workweek - See only tasks scheduled for this week.
• Find - search for a task by typing in words from the task summary
• Working set indicator - Indicates the currently active working set. Use the black arrow on
the left to change the working set.
• Current task indicator - Indicates the currently active task. Use the black arrow on the left to
re-activate a recently active task.
Task List Presentation The task list supports several ways to present tasks. You can toggle between the following
modes by using the "Task Presentation" button in the toolbar. Categorized - View tasks grouped
by their category Scheduled - View tasks grouped by the "scheduled date" .
Icon Legend and Color Coding See the legend below to interpret the icons and color coding in the task list. You can view this
legend by selecting "Show UI Legend" from the menu that appears when you click the white
down arrow next to the minimize button in the top right corner of the Task List view.
24

Working with Mylyn Integration
Creating new Tasks You can create new tasks by clicking on the "New Task" button in the Task List's toolbar. This will
open the "New Task" dialog and prompt you to select a repository. There are two main types of
tasks:
• Local tasks
• Repository tasks
Local Tasks You can use local tasks if you do not have a shared task repository or if you would like to create a
private personal task that is local to your workspace.
To create a local task:
1. Select Local Task | Finish from the New Task dialog. You can then provide the following
details about the task:
• Task Description - Your task is called New Task by default. Replace this with a brief
description of your task.
• Priority - Set the priority of your task. This will affect the tasks’ icon and order in the task
list.
• Status - Set your task to "complete" or "incomplete". In your task list, completed tasks
have a strike-through font and will appear lower in the list.
• URL - You can associate a URL with this task.
• "Retrieve Task Description from URL" button - Set the task description to the title of the
associated URL (page)
• "Open with Web Browser" button - Open the URL in the integrated web browser
• Scheduled For - Set the date when you will work on this task. Tasks scheduled for today
or a date in the past will appear in blue in your task list. Tasks scheduled for future days
will appear in black. If your task list is in focused mode, only tasks for the current week
will be visible (unless they have unread changes).
• Due - Set the date when your task must be completed. Overdue tasks and tasks due
today will appear in red in your task list.
• Estimated Hours - Estimate the number of hours it will take to complete this task.
• Active - Displays the total time that you have worked on this task. Time is only recorded
when this task is active and you are actively interacting with the system.
• Notes - Record your personal notes about this task.
25

Zend Studio for Eclipse User Guide
Repository Tasks You can create a new repository task when you would like to share information about the task
with your team using a task repository such as Bugzilla or JIRA. To create a new repository task,
click on the "New Task" button in the Task List's toolbar. You can then select the repository
where you would like to create a task. If you don't see your team's task repository, you will need
to configure it in the task repositories view. Once you have selected a repository, click "Next". If
you are connecting to a Bugzilla repository, select a Product as a top-level category for your task
and click "Finish". A new task editor will appear.
If you are using Bugzilla, you can enter the following required information:
• Description - Enter a brief task description in the text box at the top (this box does not
have a label).
• Component - Specify a "Component" to further categorize this task within the previously
selected "Product".
• Description - Describe the task in detail. Optional
• You can specify additional information about your tasks in the "Attributes" section.
• Personal Planning - You can enter information in this section that will be local to your
workspace and not available on your team's task repository. See "Local Tasks" for more
information about the personal planning fields.
• Assigned to - Specify who should work on the task. Type the first several characters of
the person's email address, and then press ctrl+space to select the address from a list. A
task can be assigned to only one person at a time.
• Add CC - Add the addresses of people who should be notified of changes to this task.
You can add multiple addresses, separated by a comma, e.g. ([email protected],
When finished, click Submit to add your new task to your team's shared task repository.
26
Working with Mylyn Integration
Context The context tab allows you to manage the context of resources associated with the task. You can
view the context tab by selecting it in the lower left of the editor window.
Elements This section lists the resources that are part of the tasks’ context. Because the number of
elements may be large, you can adjust the level of detail using the slider at the top of the Actions
section. Sliding the control all the way to the left will show you all elements in your task context.
As you slide it to the right, only the elements with a high level of interest will be displayed. You
can manually remove elements from your task context by doing the following:
1. Right-Click Remove From Context. You may choose to view all elements and exclude irrelevant items in this way before attaching
the context to the task so that others can download it.
Actions Element Detail Slider - Adjusts the minimum level of interest required for an element to be
displayed in the Elements section.
• Attach Context - Attaches the context to the task so that it is available for download from the
shared task repository. The context consists of the elements shown on the right.
• Retrieve Context - Replaces the current task context with one that is attached to the task in the
shared task repository.
• Copy Context to... - Copy the task context to another task. That task will then have the same
context as the current task.
• Clear Context - Removes all context information from the task.
Planning Use the planning tab to access local information about the task that is private to your workspace.
You can view the planning tab by selecting it in the lower left of the editor window. This tab
contains a large area where you can enter personal notes about the task. See the local task
section for more information about fields in the Personal Planning section.
27

Zend Studio for Eclipse User Guide
Task-Focused Interface The task-focused interface is oriented around tasks and offers several ways to focus the interface
on only what is relevant for the currently active task. You can focus navigator views (e.g. Package
Explorer, Project Explorer, Navigator) by toggling the "Focus on Active Task" button in the
toolbar. When focused, the view will show only the resources that are "interesting" for the
currently active task.
Alt+Click Navigation
To navigate to a new resource that is not a part of the active task's context, you can toggle
"Focus on Active Task" off, browse to the resource, and then click "Focus on Active Task" again
to see only relevant resources. A more efficient way to add new resources is to use Alt+Click
navigation (Clicking the mouse while holding the Alt key). When a view is in Focused mode, you
can Alt+Click a node to temporarily show all of its children. Once an element that was previously
not interesting is selected with the mouse, it becomes interesting the other child elements will
disappear. The clicked element is now a part of the task's context. Alt can be held down while
clicking to drill down from a top-level element to a deeply nested element that is to be added to
the task context. Multiple Alt+Click are supported so that you can add several elements to the
task context. As soon as a normal click is made, uninteresting elements will disappear. Ctrl+Click
(i.e. disjoint selections, use Command key on Mac) are also supported and will cause each
element clicked to become interesting. The first normal click will cause uninteresting elements to
disappear. Note that Ctrl+click elements will become interesting (turn from gray to black) but only
the most recently-clicked one will be selected while Alt is held down. Focusing Editors
Some editors such as the Java editor support focusing. Clicking the Focus button in the toolbar
will fold all declarations that are not part of the active task context.
Task-focused Ordering When a task is active, elements that are interesting are displayed more prominently. For
example, when you open the Java Open Type dialog (Ctrl+Shift+T), types that are interesting for
the active task are shown first. Similarly, when you use ctrl+space to autocomplete a method
name in a Java source file, methods that are in the task context are displayed at the top. Working
Set Integration
When Focus is applied to a navigator view, the working sets filter for that navigator view will be
disabled. This ensures that you see all interesting elements when working on a task that spans
working sets. To enforce visibility of only elements within one working set, do the following: Set
the view to show working sets as top-level elements. Use the Go Into action on the popup menu
of the working set node in the view to scope the view down to just the working set. Open Task
dialog
28
Working with Mylyn Integration
29
An Open Type style dialog is available for opening tasks (Ctrl+F12) and for activating tasks
(Ctrl+F9). The list is initially populated by recently active tasks. The active task can also be
deactivated via Ctrl+Shift+F9. This can be used as a keyboard-only alternative for multi-tasking
without the Task List view visible. These actions appear in the Navigate menu.
Task Hyperlinking In the task editor, comments that include text of the form bug#123 or task#123 or bug 123 will be
hyperlinked. Ctrl+clicking on this text will open the task or bug in the rich task editor. To support
hyperlinks within other text editors such as code or .txt files, the project that contains the file must
be associated with a particular task repository. This is configured by right-clicking on the project
and navigating to "Properties" > "Task Repository" and selecting the task repository used when
working with this project. Reporting Bugs from the Error Log
Bugs can created directly from events in the Error Log view. This will create a new repository task
editor with the summary and description populated with the error event's details. If the Connector
you are using does not have a rich editor, the event details will be placed into the clipboard so
that you can paste them into the web-based editor that will be opened automatically.


