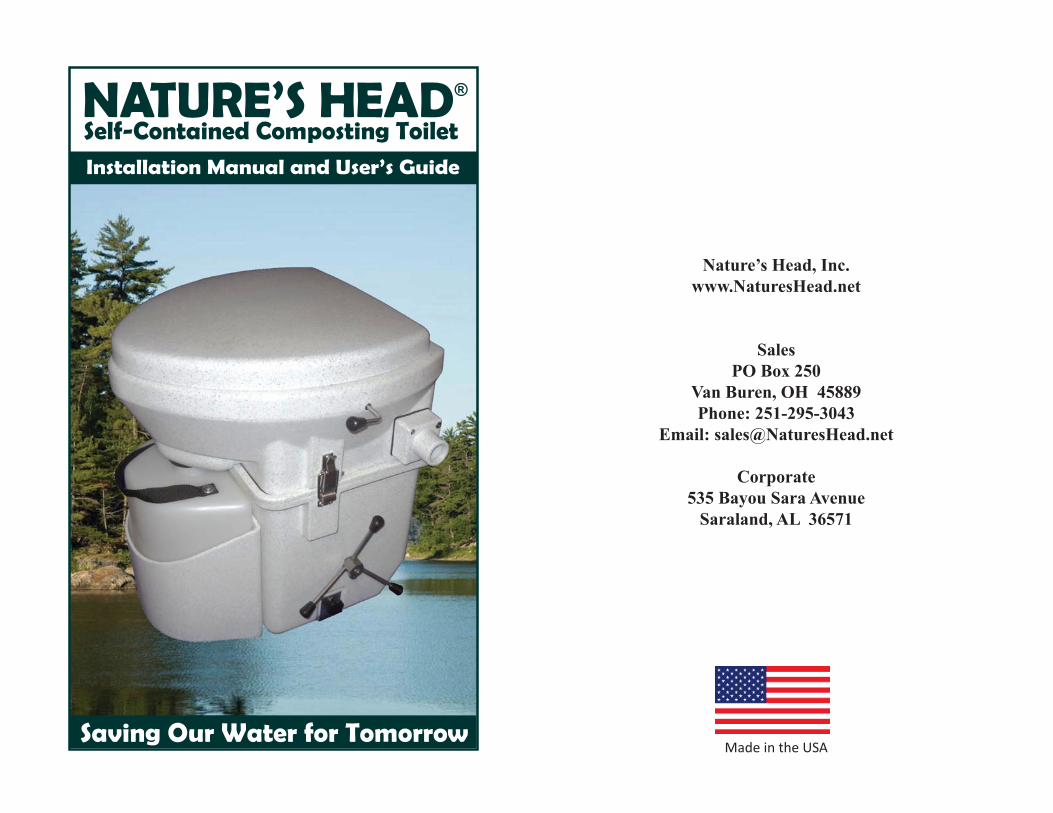
NATURE’S HEAD Self-Contained Composting Toilet Installation Manual and User’s Guide ® Saving Our Water for Tomorrow Nature’s Head, Inc. www.NaturesHead.net Sales PO Box 250 Van Buren, OH 45889 Phone: 251-295-3043 Email: [email protected]Corporate 535 Bayou Sara Avenue Saraland, AL 36571 Made in the USA
Transcript
NATURE’S HEADSelf-Contained Composting ToiletInstallation Manual and User’s Guide
Nature’s Head® Composting ToiletCongratulations on your acquisition of a NATURE’S HEAD® composting toilet! Although the concept of a composting head (toilet) is not a new one, the unit which you have purchased is the freshest of the new generation of this kind of product.
We saw a need for an improved design and more user-friendly product. �������������� �������������������������������������������������������������������������������������������������������������and more affordable alternative to other products. While designed to withstand the rigors of the boating environment, the NATURE’S HEAD® toilet is well suited for many other applications.
Wherever you choose to install your new NATURE’S HEAD® toilet, it is sure to provide you with years of worry-free sanitation solutions without the hassles, inconvenience, expense, and odors of other sanitation systems.
WHAT’S IN THE BOX?
1) Your new NATURE’S HEAD® composting toilet2) Liquids Bottle and Cap3) Basic installation kit:
• 5 feet of 1½ inch inside diameter hose with ends• ����������������• agitator handle• 2 mounting brackets and knobs• �������������������������������������������"• 6’ single pin cable for 12 volt fan• fuse holder and fuse for direct battery attachment• Allen wrench for installation of spider handle
4) Instruction manual5) Warranty Card
Note: The exhaust fan for the head was installed before shipment.
Your NATURE’S HEAD® composting toilet comes with most of the items necessary for completion of your installation. The outside vent is not included because each application is different and many will require a different vent. Also the 12V to 110V Power Transformer (AC Adapter)is not included because all installations do not require this.
What might I need to install Nature’s Head...
... for My Tiny House installation?
If you are using 110 volt house power, you will need our Power Trans-former (AC Adapter). If using 12 volt, batteries and or solar, the toilet comes with the necessary parts. Our PVC vent assembly is an easy way ����������������������������#
... for My RV installation?
The toilet comes with the 12 volt parts needed.You will need our Power Transformer (AC Adapter) to plug into an outlet to power the fan ONLY if using 110 house power. The mushroom vent is an easy way to vent ����������������������#�����$%&��������������������������������venting.You may already have an existing vent to connect to.
... for My Tiny House or Cabin installation?
The toilet comes with everything for a 12 volt system. If using 110, house power you will need our Power Transformer (AC Adapter) to plug into an outlet to power the fan.The PVC vent is a good way to vent ���������������������������������������� ��#
... for My Boat installation?
The toilet comes with the 12 volt parts needed. The venting, you can use the mushroom vent for cabin side or roof. It can also be used over an old ���������������#
Some installations may require increased hose lengths which may be purchased on a per foot basis. PVC pipe, available at most home improvement or hardware stores, may also be substituted for longer hose sections.
Floor Construction'�����������������������������������������������������������bolt may be required. If the installation is on �������������������customers have found it convenient to mount the toilet to a section of plywood rather than trying to drill masonry. The plywood can be ������������������������������������������������������������#�
Electrical RequirementsIf regular household current is available (110 volts), the head can be powered by a 12 volt Power Transformer (AC Adapter). These may be purchased from Nature’s Head, Inc.
Composting MediumSome type of composting medium is required.
Sphagnum Peat Moss: The most commonly used material is sphagnum peat moss (organic) which is available at most garden stores or home improvement stores. It is usually available in a shrink-wrapped 3 ft cubic bale for $8 to $10. This quantity of sphagnum peat moss should sustain use of the head for a year or longer. The sphagnum peat moss should be organic, no additives. DO NOT use MIRACLE-GRO peat moss, as it is enriched with plant food.
Coconut Coir: Coconut � �����������������������coir brick) is also an acceptable composting medium. However, it is more costly and less readily available. It may be obtained at hydroponic gardening outlets or online. The bricks on the left weigh 250 grams (a bit more
than ½ pound each). Coir bricks can be placed in a plastic bag: add 5 measuring cups of water per brick and let sit for 12 hours. This brick will expand to just a little more than 2 ½ gallons.
When selecting the location for your new Nature’s Head®, be certain to allow enough space behind and on both sides for the toilet to function and be serviced.
Be sure that the lid will open fully. You must also be certain that the bowl has enough room to tilt rearward to allow for its removal and for the removal of the liquid tank.
If mounted against a wall or bulkhead, allow a minimum of 1½ inches between the toilet and the wall.
It is necessary to allow adequate room for the hose connection and agitator handle. Both of these may be relocated to the opposite side of the unit if needed. In some space-restricted areas it may be necessary to offset the toilet to one side or even turn the toilet slightly to one side to allow for extra clearance.
With the standard handle attached, the width of the unit is 21 inches. '���������������������������������spider handle decreases the width to 17 ¾ inches. Two inches, to the left side of the head (as you face it), is required to slide the bowl off the slip hinge for servicing the base.
+������������������������������������������������� ��������������the toilet away from the mounting location may be a more desirable method of servicing the unit.
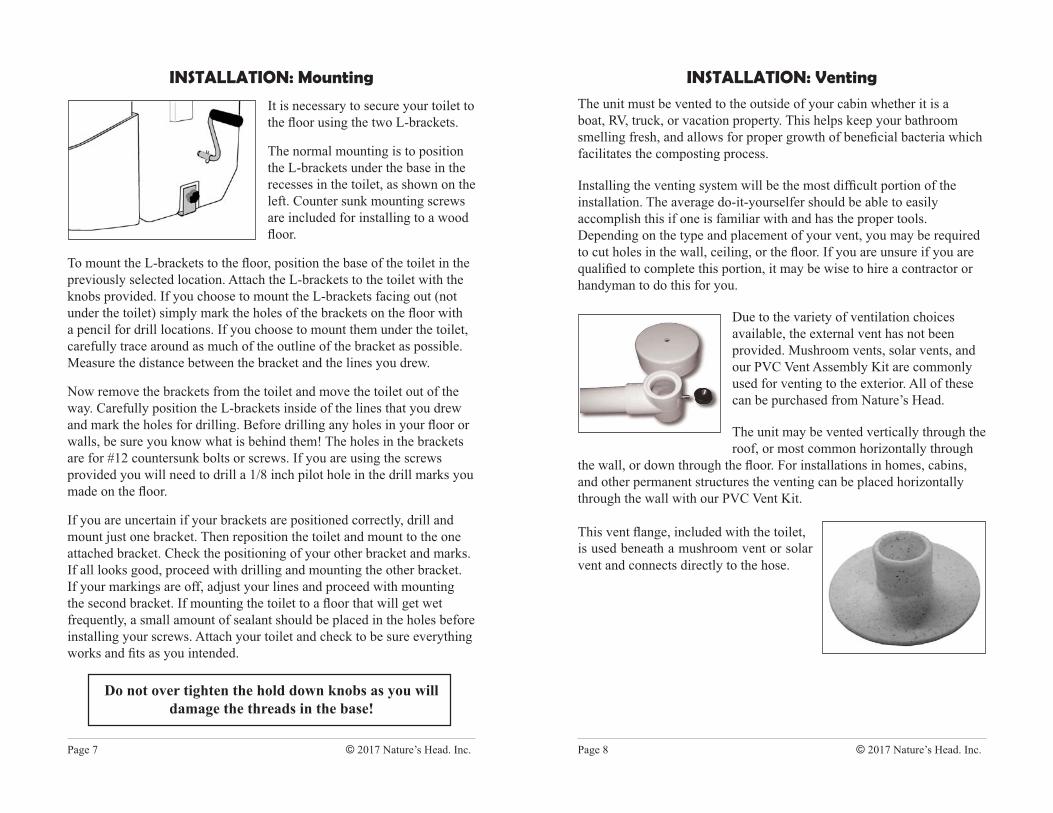
It is necessary to secure your toilet to ��������������������/� ������#�
The normal mounting is to position the L-brackets under the base in the recesses in the toilet, as shown on the left. Counter sunk mounting screws are included for installing to a wood ����#�
�����������/� ���������������������������� ���������������������previously selected location. Attach the L-brackets to the toilet with the knobs provided. If you choose to mount the L-brackets facing out (not �������������"��������������������������� ����������������������a pencil for drill locations. If you choose to mount them under the toilet, carefully trace around as much of the outline of the bracket as possible. Measure the distance between the bracket and the lines you drew.
Now remove the brackets from the toilet and move the toilet out of the way. Carefully position the L-brackets inside of the lines that you drew ������������������������������#�9�����������������������������������������walls, be sure you know what is behind them! The holes in the brackets are for #12 countersunk bolts or screws. If you are using the screws provided you will need to drill a 1/8 inch pilot hole in the drill marks you ���������������#�
If you are uncertain if your brackets are positioned correctly, drill and mount just one bracket. Then reposition the toilet and mount to the one attached bracket. Check the positioning of your other bracket and marks. If all looks good, proceed with drilling and mounting the other bracket. If your markings are off, adjust your lines and proceed with mounting ���������� �����#�+�����������������������������������������frequently, a small amount of sealant should be placed in the holes before installing your screws. Attach your toilet and check to be sure everything ���������������������������#�
Do not over tighten the hold down knobs as you will damage the threads in the base!
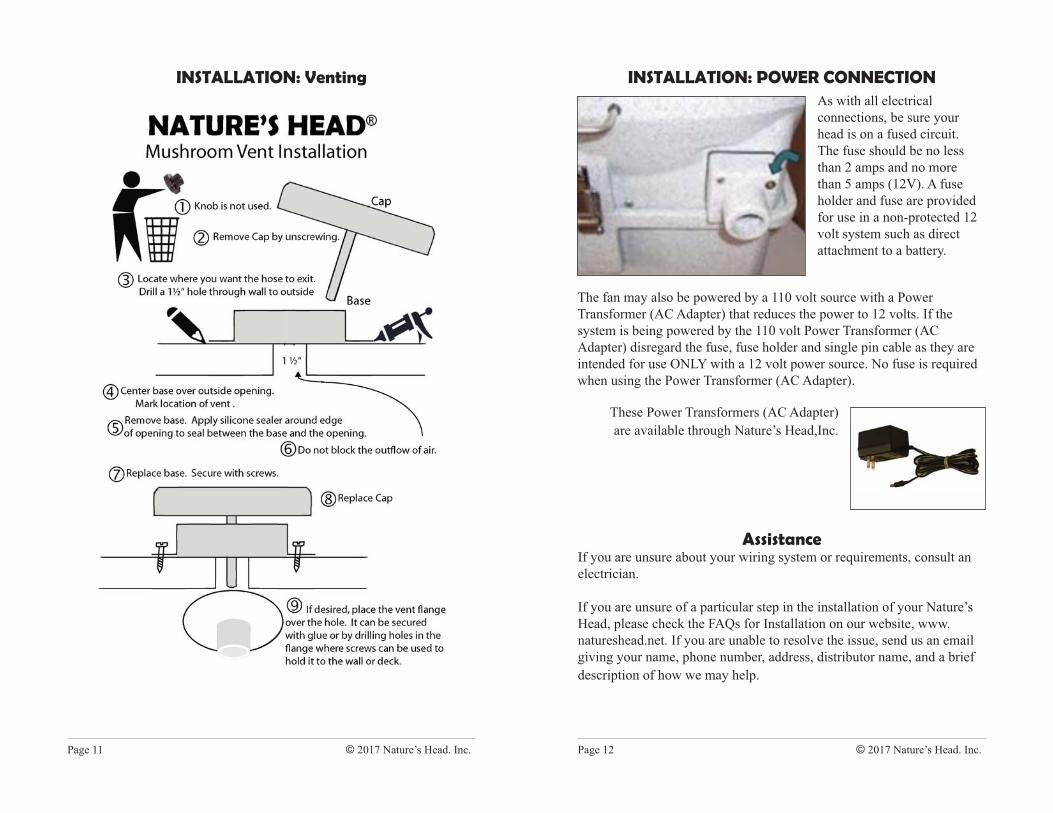
The unit must be vented to the outside of your cabin whether it is a boat, RV, truck, or vacation property. This helps keep your bathroom ��������������������������������������������� ��������� �������������facilitates the composting process.
+������������������������������ �����������������������������installation. The average do-it-yourselfer should be able to easily accomplish this if one is familiar with and has the proper tools. Depending on the type and placement of your vent, you may be required ������������������������������������������#�+����������������������������=���������������������������������� ����������������������������handyman to do this for you.
Due to the variety of ventilation choices available, the external vent has not been provided. Mushroom vents, solar vents, and our PVC Vent Assembly Kit are commonly used for venting to the exterior. All of these can be purchased from Nature’s Head.
The unit may be vented vertically through the roof, or most common horizontally through
�������������������������������#�'��������������������������� �����and other permanent structures the venting can be placed horizontally through the wall with our PVC Vent Kit.
�������������������������������������� is used beneath a mushroom vent or solar vent and connects directly to the hose.
The toilet is shipped with the agitator handle unattached and must be installed before use. The standard handle is attached with a collar and hairpin clip, while the spider handle attaches with an allen set screw and locknut. In the event that the handle must be moved to the opposite site of the base, the agitator must be manually removed, reversed, and reinstalled. A Video showing how to reverse the agitators can be found on NaturesHead.net/Installation
Reversing the Fan and Filter Housing
If installation of the ventilating hose is more favorable on one side of ��������������������������?��������������������������� ���������������������������#��������������������� �������������������the components and their respective housings. A Video showing how �������������������������������������� ����������@�����F���#��?Installation.
If a sharp 90 degree turn from the fan housing is needed, a 1¼ inch PVC street elbow (not provided) may be used to achieve a proper �����������#�
Installations on boats and RV’s are easily managed with the stainless steel mushroom vent with the built-in screen and adjustable top which is self-sealing.
+��������������������������������������������������� ����������������������������������������������������������������������������#�J������� ����������������������� ��������������the mushroom vent mounted over the existing hole. The venting hose provided with the unit will attach directly to the adapter.
Clamping the hose to the fan housing is not necessary on the connection for the head, and normally not necessary on the exterior connecter. With ��������������������������������������������������������������depending on the amount of support provided for the vent hose. If the hose is supported properly, you will probably not need a clamp. The vent hose must be attached to the housing which has the fan inside it. The unit is designed to pull fresh air through the head and ventilate it outside. If you disassemble the fan housing, always check to be certain that the fan is blowing out of the vent before re-attaching the vent hose.
Attaching a mesh fabric or screen (not provided) over the opening is necessary to prevent the entry of insects into the system. Any mesh fabric such as window screen or nylon netting will provide an adequate insect barrier.
INSTALLATION: POWER CONNECTIONAs with all electrical connections, be sure your head is on a fused circuit. The fuse should be no less than 2 amps and no more than 5 amps (12V). A fuse holder and fuse are provided for use in a non-protected 12 volt system such as direct attachment to a battery.
The fan may also be powered by a 110 volt source with a Power Transformer (AC Adapter) that reduces the power to 12 volts. If the system is being powered by the 110 volt Power Transformer (AC Adapter) disregard the fuse, fuse holder and single pin cable as they are intended for use ONLY with a 12 volt power source. No fuse is required when using the Power Transformer (AC Adapter).
These Power Transformers (AC Adapter) are available through Nature’s Head,Inc.
AssistanceIf you are unsure about your wiring system or requirements, consult an electrician.
If you are unsure of a particular step in the installation of your Nature’s Head, please check the FAQs for Installation on our website, www.natureshead.net. If you are unable to resolve the issue, send us an email giving your name, phone number, address, distributor name, and a brief description of how we may help.
USING YOUR NATURE’S HEADThe waterless, urine separating design contributes the extraordinary holding capacity. The composting section holds approximately 60 to 80 uses.
The time frame to empty the solids bin varies with number of people and the time period. The toilet is designed for 1 to 4 people full-time. Generally, two people full-time people’s usage will require emptying approximately every 3 weeks; additional people will shorten the time. If using just on weekends with 2 people, that can extend time to 2 months or more. Just a couple of days of non-use extends the period of time. Usually, the level of the compost will not increase; if it does it will be minimal.
The urine bottle holds 2.2 gallons and will require more frequent emptying; two people might need to empty after 3-4 days.
Before use, it is necessary to add compost material to the base of the unit. Gallon size “ZIPLOC®” type bags are an inexpensive ���������������������������#�������������������������������������������������one-gallon bags of pre-moistened sphagnum ������������������� ���������� ����������toilet. The sphagnum peat moss should rise to the level of, or cover, the agitator bar in a horizontal position.
The sphagnum peat moss should be damp and crumbly, never wet or ����#�+���������������������������������� �����������������������amount of water. When not in use, the lid of the toilet should be in the closed position, preventing the entry of insects and allowing proper ventilation. The peat moss must be regular/organic sphagnum peat moss, no additives. DO NOT use MIRACLE-GRO peat moss.
Do not add additional medium after solids usage. Doing this will result in too much sphagnum peat moss or coconut coir in the unit and will limit your time of usage before emptying.
The primary concept of our composting toilet is the separation of liquids and solid wastes! Be sure to inform your guests as to the proper use of your head. This will allow proper composting action and assist your guests in feeling comfortable with a new piece of equipment.
]������������������������������������������������ �������������� unpleasant odor and prevent proper compost action.
Seated usage is recommended. While seated, the unit may be used with the trap door in the open or closed position. Whether male or female, the user’s liquids and solids will be directed to the correct locations from this position. With any bowel movement, the trap door must be open. Male stand-up usage is less acceptable as splatter may result. In the event that the unit is used in a standing position, the trapdoor must remain closed in order to prevent mingling of liquid and solid wastes.
Toilet paper is typically placed in the toilet. Since paper products do not decompose as quickly as solid wastes, they will be visible long after the solid matter has broken down. Any type of toilet paper is acceptable; less substantial brands (such as marine or RV paper) will compost the quickest.
Diapers, wipes and tampons should not be placed in the solids bin. Many brands of these items are made from a mix of rayon and non-organic cotton, and are commonly chlorine-bleached. These will not decompose.
^�������������������������� ������������������_������� water and 2 oz of white vinegar nearby to spray off the bowl in the event that some solid waste adheres to the bowl. Spritzing of the bowl also assists in cleansing the urine passages.
All urine has an odor. It will not be noticed with normal use. It will be present when the storage container is open to the air for emptying. For persistent urine odors in the container, add a few ounces of white vinegar, and/or a few drops of Dawn dishwashing soap to reduce this odor.
]������������������������������������������������������ ��� must be agitated 2-3 revolutions slowly in order to mix the waste into the compost and promote the composting process. Contents of the solid waste container must be kept moist, not wet, and remain separated from the liquid waste.
USAGE, continuedWhen the toilet is functioning correctly, the composted matter will have a musty or soil-like odor and the visual appearance will be very similar to that of the original sphagnum peat moss. It is not normal for the compost to be wet or for there to be odor problems
If the compost is staying wet and you have odor problems, the solids tank is becoming contaminated with urine and steps must be taken to prevent this. If this persists, and you are unable to determine how it is becoming contaminated, please contact us for help.
Vomiting and diarrhea, if not persistent, are unlikely to affect the head function. If increased wetness of the compost results, the situation may be corrected with the addition of a small amount of dry compost medium.
USAGE: EmptyingThe liquid waste vessel will contain approximately 2.2 gallons of urine. The translucent material of the container allows easy visualization of the liquid level.
To empty the liquid waste container: 1) Release the latches located at both frontsides of the unit which secure the bowl tothe base, 2) Raise the bowl to an angle ofapproximately 45 degrees, install the cap,and remove the bottle, 3) Dispose of thecontents in an appropriate manner. The urine bottle maybe emptied into aconventional toilet or other appropriate facility. Many books and articles����� ���������������� ���������������������������������������`��#�This may also be part of your environmental plan for disposing of wastesin a cabin situation.
{����������������������=������������������������������=�������������������������������������� ��������������������������������excessive. The liquid tank should be emptied frequently and rinsed with water with detergent or vinegar added. Allowing urine to remain in the storage container for extended periods is unwise as this will result in increased odor production. If the toilet is used in combined bathroom/shower, you may wish to drill a drain hole in the urine tank holder if water accumulation becomes a problem.
USAGE: EmptyingWith the bottle assembly removed, lift the seat unit several inches and slide it to the left to disengage the slip hinge. (You may need to unhook your vent hose and power supply if it is necessary to move the bowl to the side.) Remove the knobs from the mounting brackets at each side of the base and the base is now ready to empty.
One of the simplest methods to empty is to place a 13 gallon kitchen bag over the opening of the base (NOTE: the bag does NOT go in the base.) The bag ���������������������������and allow you to invert the base and empty the contents into the bag without spillage. This is especially useful when the toilet is used for boats and other mobile units, as removing the toilet is unnecessary.
It is unnecessary to clean the interior of the solid waste container as composting will continue from the residual matter clinging to the sides.
Cleaning the base unit, especially with any chemicals, may inhibit its ability to generate the good bacteria that is breaking down the solid wastes. Simply empty, put in more sphagnum peat moss, and re-assemble your toilet.
It is best you do not leave the liquid wastes in the tank for extended periods. While everyone is different, some urine will smell bad if allowed to sit for extended periods.
USAGE: DisposalThe recommended procedure for disposing of the contents of the solid waste tank is placing it in a proper composting bin to allow it to fully decompose. When traveling in a boat or RV, this may not be practical. The contents of the solid waste tank may be safely placed into a conventional dumpster if it has been allowed to compost fully. When fully composted, the solid wastes may be used to fertilize non-ingestible plantings. Placing human waste compost on edible plants or vegetables is not recommended.
Full-time users have some special circumstances to deal with. Full-time use does not allow enough time for the solid wastes to compost. The most recent waste, although mixed with the already composted material, will not be decomposed. This also means that the fecal bacteria (present in fresh human wastes) may still be present. We recommend taking precautions such as the use of gloves if you may come into contact with waste material. It is advisable that you delay emptying the solid waste for 6-8 hours after the last use.
Another method for dealing with non-composted wastes (if space allows) is to purchase the “extra base” option and swap out the bases. The extra base comes complete with all the necessary hardware, agitator, and bottle holder. It also comes with a vented lid so the contents can be set aside and allowed to compost. A storage bin utilizing the trash bag method of emptying, placing the bag into a small plastic bucket, ventilating the lid, ��������������������������������� �����������#�+������ ����������contents could be emptied into a traditional compost bin and allowed to ����������#�{�����������������������������������������������������not suitable for use on ingestible plants.
A quick spray of water and white vinegar or a natural cleaner from a squirt bottle is all that is needed to keep your NH fresh between uses. If necessary, a moistened paper towel (no synthetics) is excellent for cleansing the interior (as well as the exterior) of the head.
For more intensive cleansing or dried-on matter, a paper towel moistened with a 1:1 solution of vinegar and water may be used, and disposed of, in the same manner, after cleaning. Bleach, ammonia, and other commercial cleaning compounds should never be added to your composting head as they will interfere with the composting process and may lead to unpleasant odors. These cleaners maybe used to clean the exterior surfaces.
Maintenance requirements for the head are very minimal. All metal parts (bolts, hinges, latches, knobs, agitator, and trapdoor components) are either stainless steel or brass. Filters on each side of the base should be removed and cleaned yearly or when emptying the solid wastes. |�������������������������������������}�$������������ ���#�~������ the bolts, clean and replace. Caution should be taken so that the fan is ��������������������������_�����������#
The full-size molded-in seat of the head is designed for safety and comfort and requires no special care.
CUSTOMER SERVICEWe are committed to providing our customers with outstanding service. If you need assistance please email us, giving us your name, address, telephone number. Approximate date of purchase and name of distributor would be helpful.
We periodically send newsletters to our customers and friends in order to share ideas and solutions suggested by our customers, to alert you to new developments and to provide other relevant information. If you have never received one of our newsletters, we invite you to sign up by clicking the link in the footer of our webpage: www.natureshead.net
TROUBLESHOOTINGFind more troubleshooting and FAQ information online at natureshead.net/
installation_use. Or email us at [email protected] not working. If using 12 volt battery, check for voltage. Be sure the wire marked positive is attached to the positive from the battery. Check the fuse. Check to see if the single pin hookup is making contact. If using the 110 to the 12v Power Transformer (AC Adapter), check voltage at the outlet. Verify the single pin connection. Try unplugging and reconnecting. When the fan is running, make sure the fan is blowing outward. If the fan is still not working, contact Nature’s Head or your distributor for a free replacement.
Compost seems too wet. If too wet due to prolonged diarrhea, add a small amount of sphagnum peat moss. If wet due to excessive condensation, also add a little spagnum peat moss. Make sure excessive wetness is not due to someone urinating directly into the compost section. This can also contribute to an unpleasant odor. The compost area should have only a musty smell. If a sewage odor is present, please contact Nature’s Head for consultation.
Compost seems too dry. If the compost is dry or hard, add some water and turn the agitator after the sphagnum peat moss has absorbed the moisture.
Cold Conditions. Composting works from 55 degrees and warmer. The warmer it is, the faster it composts. When the temperature drops to freezing, the compost will be dormant until heat is introduced to the area.
������������� �����+������������������������������������������������natural Diatomaceous Earth to the compost. This can be purchased at swimming pool supply stores or hardware stores. You may also want to try Gnatrol, following packaging directions. If neither of these work, please call us.
����������� ������ ����������������� If the compost gets dry, the handle may not turn easily. Adding used coffee grounds results in added moisture and keeps the compost loose so that it mixes better.
FAQsWe update our Frequently Asked Questions regularly on our web-���#��$�����������@�����F���#��?��=�����������������������������suggestions and solutions that will be helpful to you.
For enhanced capacity and convenience, consider these options for your NATURE’S HEAD® Composting Toilet. All items are avail-able for purchase on our website www.NaturesHead.net, from our distributors, or by phone at 251-295-3043.
EXTENDED CAPACITYExtra Liquids BottleBottle with cap.
Extra Base, with LidComplete with lids for storage allow for further composting and to extend the use of the unit. Bases have the agitator and hinge pre-installed for rapid change out. Handle is included.
Lid for Solids BinVented lid for use when transporting solids bin is necessary.
Power Transformer (AC Adapter)Optional 110 V adapter, used only when using 110V (house) power.
VENTSMushroom VentilatorPolished 304 sheet stainless steel with a screw down knob to open and close the vent. Includes a stainless steel mesh mosquito screen.
PVC Vent Assembly for StructuresScreened vent assembly for through-the-wall installation in structures such as cabins, homes, workshops, barns. Fits 1 5/8 inch opening. 16" connector pipe can be shortened as required. Can be installed horizontally or ���������#�%������������������������������������#