Page 1
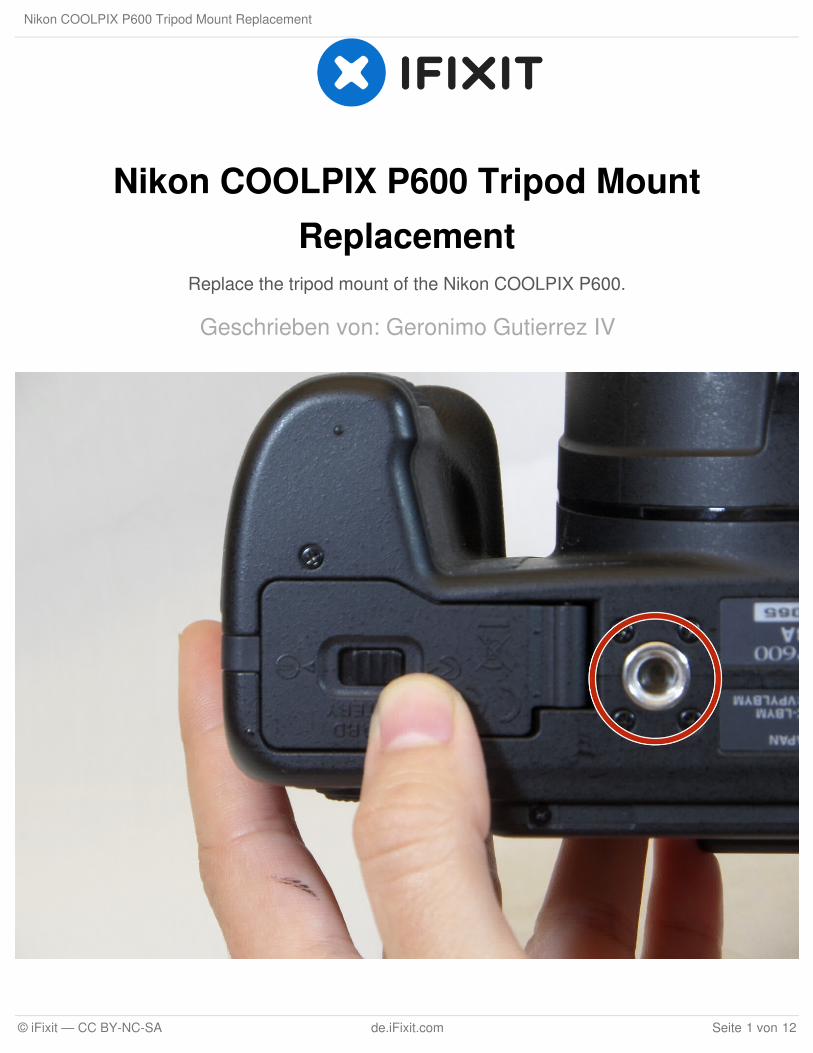
Nikon COOLPIX P600 Tripod MountReplacement
Replace the tripod mount of the Nikon COOLPIX P600.
Geschrieben von: Geronimo Gutierrez IV
Nikon COOLPIX P600 Tripod Mount Replacement
© iFixit — CC BY-NC-SA de.iFixit.com Seite 1 von 12
Page 2
EINLEITUNG
This guide provides thorough step-by-step instructions that teach a user of the Nikon COOLPIXP600 how to replace the tripod mount.
Nikon COOLPIX P600 Tripod Mount Replacement
© iFixit — CC BY-NC-SA de.iFixit.com Seite 2 von 12
Page 3
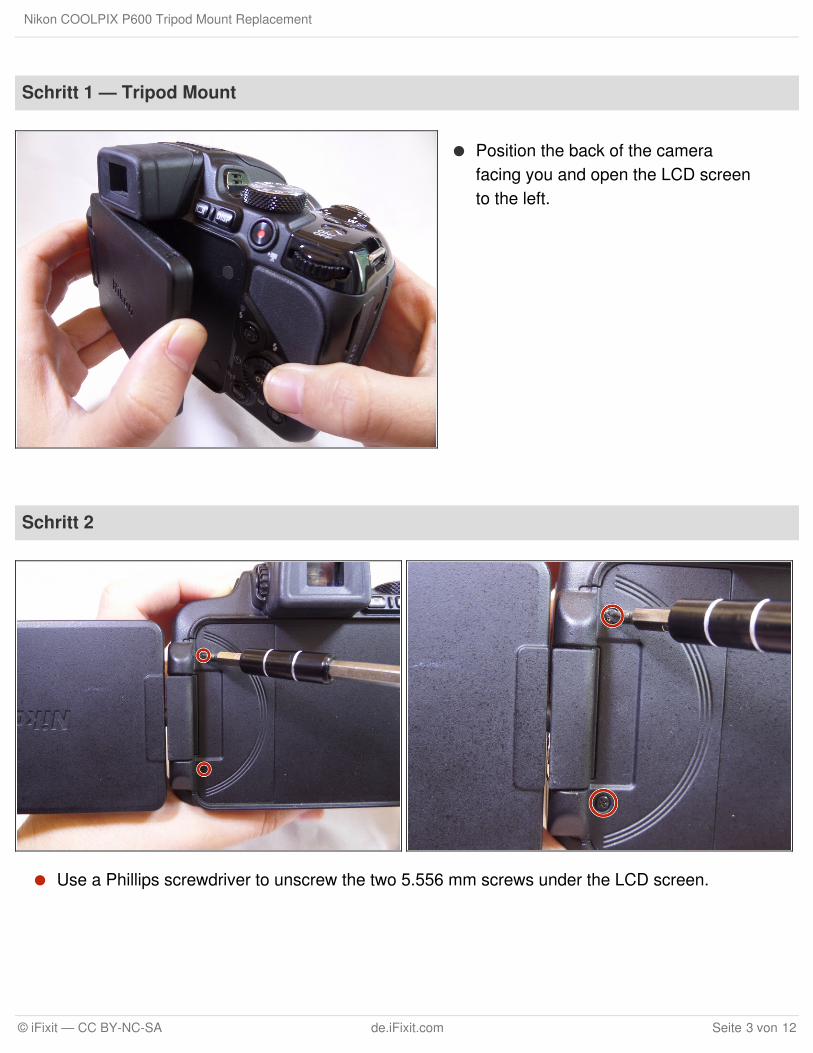
Schritt 1 — Tripod Mount
Position the back of the camerafacing you and open the LCD screento the left.
Schritt 2
Use a Phillips screwdriver to unscrew the two 5.556 mm screws under the LCD screen.
Nikon COOLPIX P600 Tripod Mount Replacement
© iFixit — CC BY-NC-SA de.iFixit.com Seite 3 von 12
Page 4
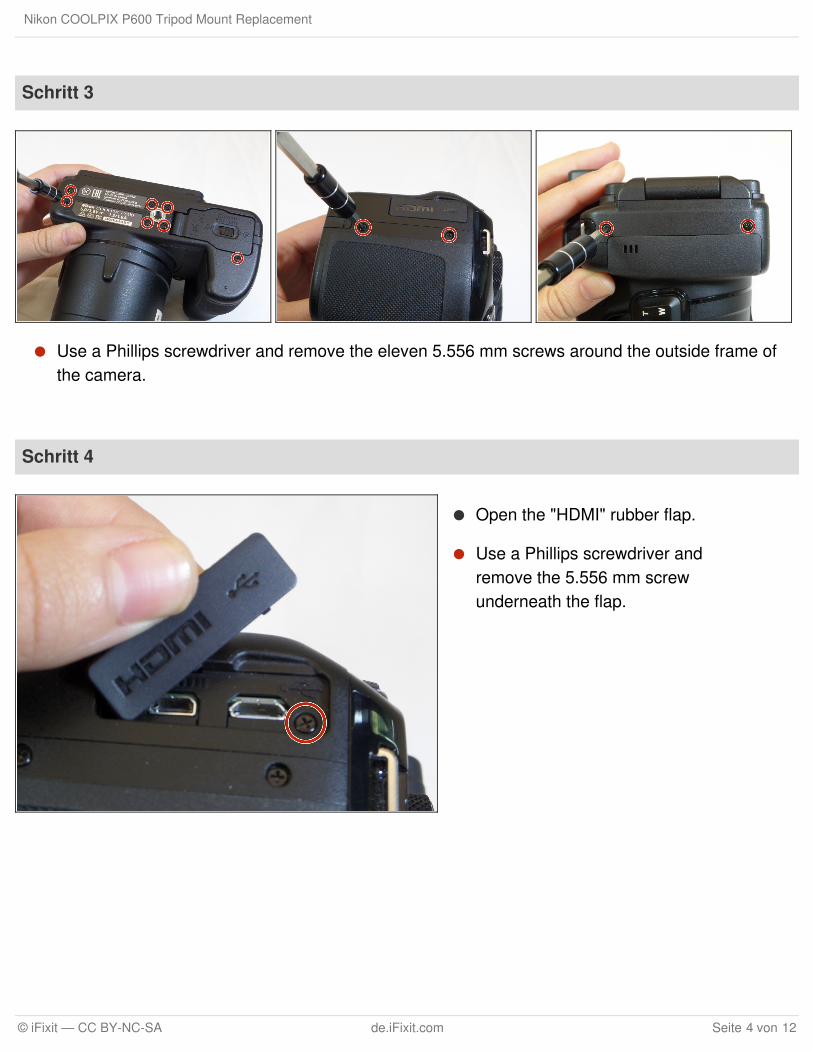
Schritt 3
Use a Phillips screwdriver and remove the eleven 5.556 mm screws around the outside frame ofthe camera.
Schritt 4
Open the "HDMI" rubber flap.
Use a Phillips screwdriver andremove the 5.556 mm screwunderneath the flap.
Nikon COOLPIX P600 Tripod Mount Replacement
© iFixit — CC BY-NC-SA de.iFixit.com Seite 4 von 12
Page 5
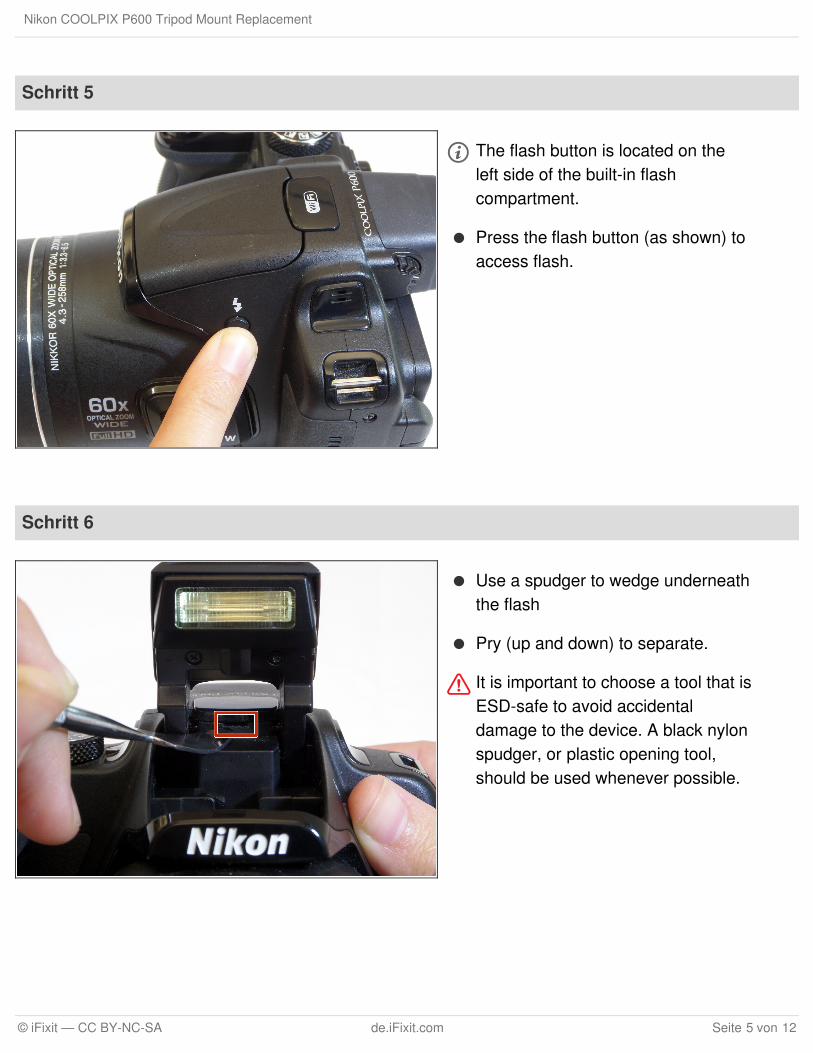
Schritt 5
The flash button is located on theleft side of the built-in flashcompartment.
Press the flash button (as shown) toaccess flash.
Schritt 6
Use a spudger to wedge underneaththe flash
Pry (up and down) to separate.
It is important to choose a tool that isESD-safe to avoid accidentaldamage to the device. A black nylonspudger, or plastic opening tool,should be used whenever possible.
Nikon COOLPIX P600 Tripod Mount Replacement
© iFixit — CC BY-NC-SA de.iFixit.com Seite 5 von 12
Page 6
Schritt 7
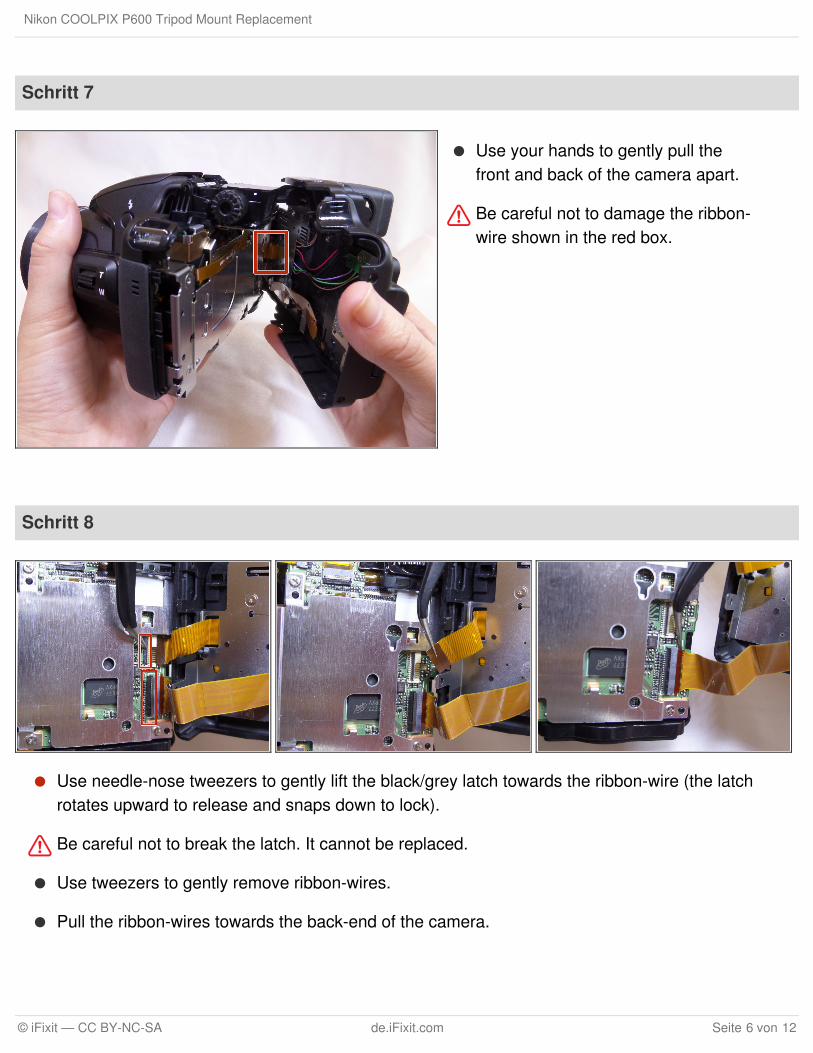
Use your hands to gently pull thefront and back of the camera apart.
Be careful not to damage the ribbon-wire shown in the red box.
Schritt 8
Use needle-nose tweezers to gently lift the black/grey latch towards the ribbon-wire (the latchrotates upward to release and snaps down to lock).
Be careful not to break the latch. It cannot be replaced.
Use tweezers to gently remove ribbon-wires.
Pull the ribbon-wires towards the back-end of the camera.
Nikon COOLPIX P600 Tripod Mount Replacement
© iFixit — CC BY-NC-SA de.iFixit.com Seite 6 von 12
Page 7
Schritt 9
Use a Phillips screwdriver andremove the single 6.350 mm screw,left of the mode-adjustment dial.
Schritt 10
Use needle-nose tweezers to remove the large ribbon-wire located under the screw.
Gently wiggle the ribbon out in an upward motion.
For easier access, you can push the black surface of the camera where the buttons and dials arelocated. Do not push too hard as this may break the plastic.
Nikon COOLPIX P600 Tripod Mount Replacement
© iFixit — CC BY-NC-SA de.iFixit.com Seite 7 von 12
Page 8
Schritt 11
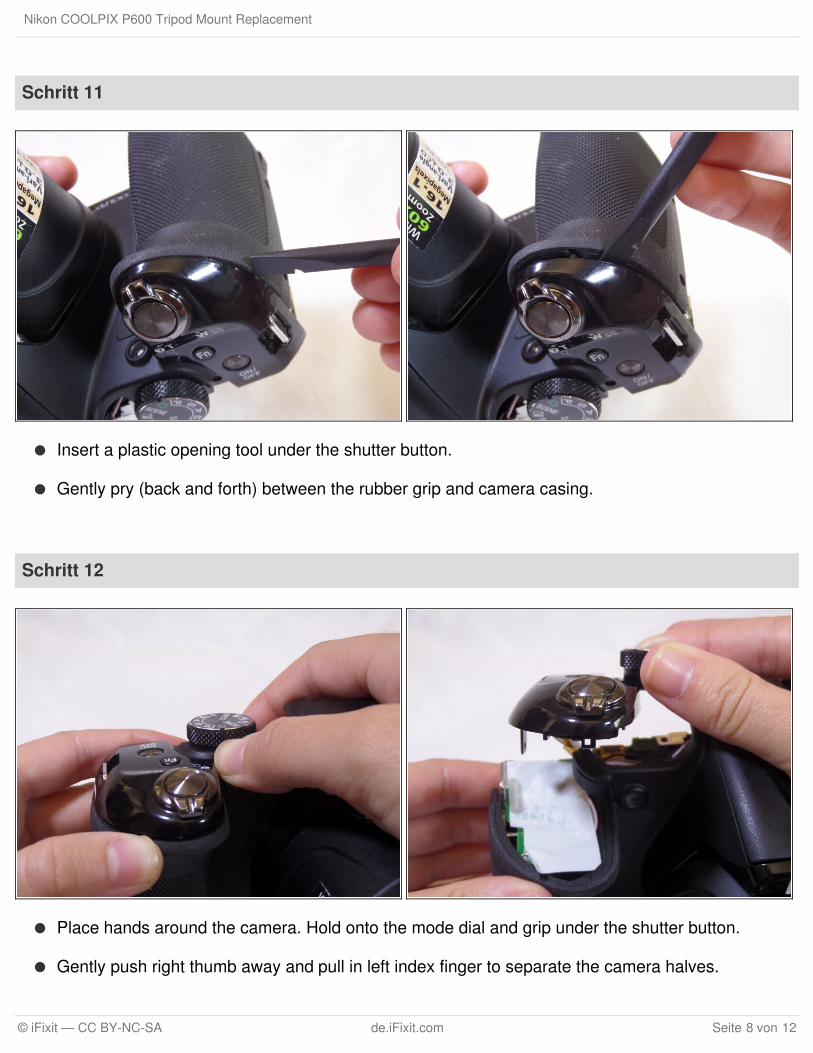
Insert a plastic opening tool under the shutter button.
Gently pry (back and forth) between the rubber grip and camera casing.
Schritt 12
Place hands around the camera. Hold onto the mode dial and grip under the shutter button.
Gently push right thumb away and pull in left index finger to separate the camera halves.
Nikon COOLPIX P600 Tripod Mount Replacement
© iFixit — CC BY-NC-SA de.iFixit.com Seite 8 von 12
Page 9
Schritt 13
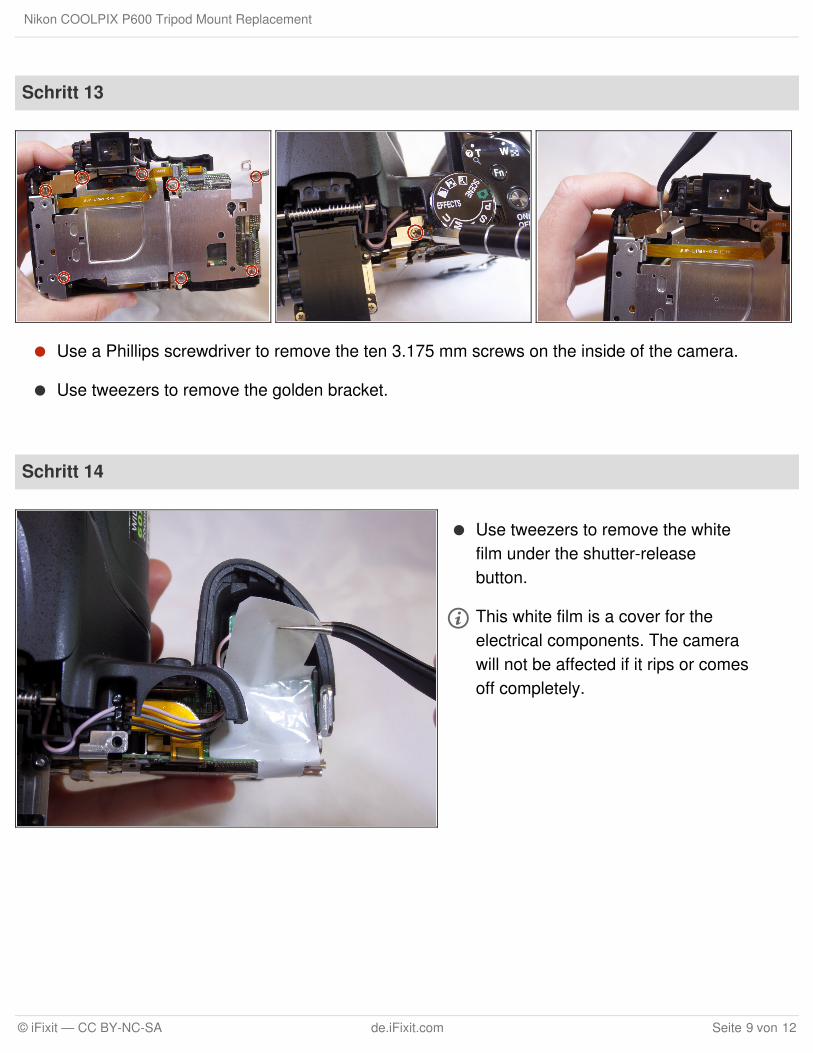
Use a Phillips screwdriver to remove the ten 3.175 mm screws on the inside of the camera.
Use tweezers to remove the golden bracket.
Schritt 14
Use tweezers to remove the whitefilm under the shutter-releasebutton.
This white film is a cover for theelectrical components. The camerawill not be affected if it rips or comesoff completely.
Nikon COOLPIX P600 Tripod Mount Replacement
© iFixit — CC BY-NC-SA de.iFixit.com Seite 9 von 12
Page 10
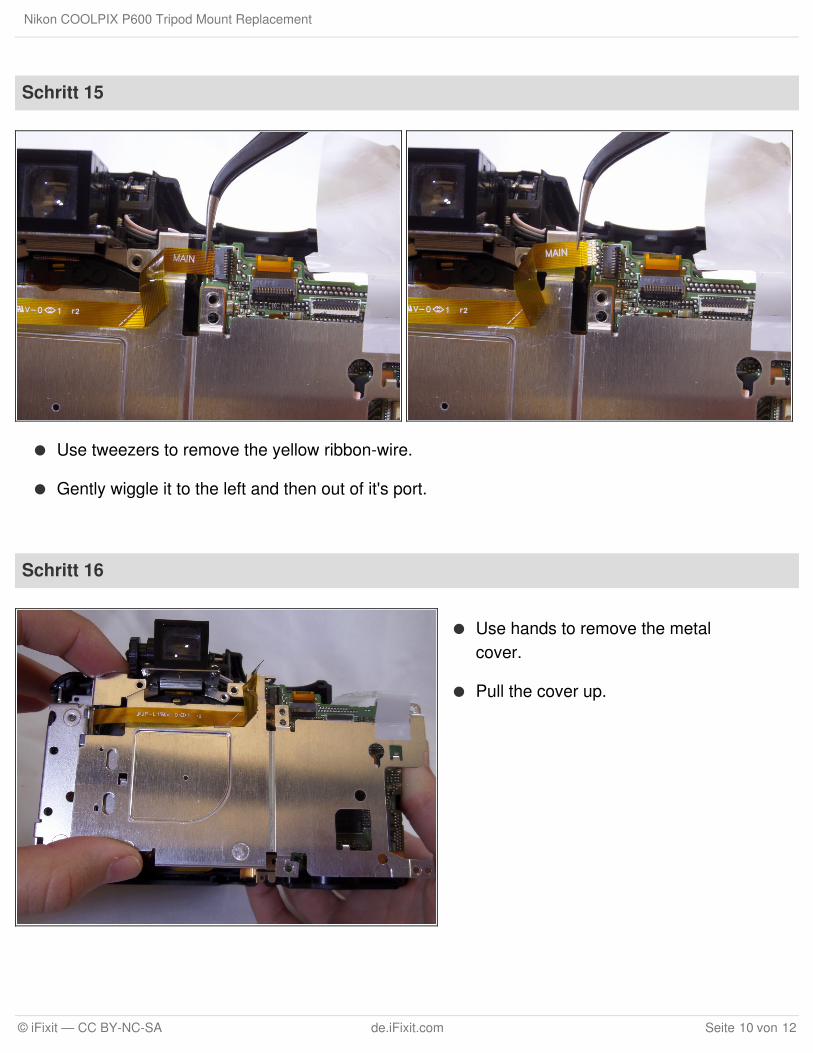
Schritt 15
Use tweezers to remove the yellow ribbon-wire.
Gently wiggle it to the left and then out of it's port.
Schritt 16
Use hands to remove the metalcover.
Pull the cover up.
Nikon COOLPIX P600 Tripod Mount Replacement
© iFixit — CC BY-NC-SA de.iFixit.com Seite 10 von 12
Page 11
To reassemble your device, follow these instructions in reverse order.
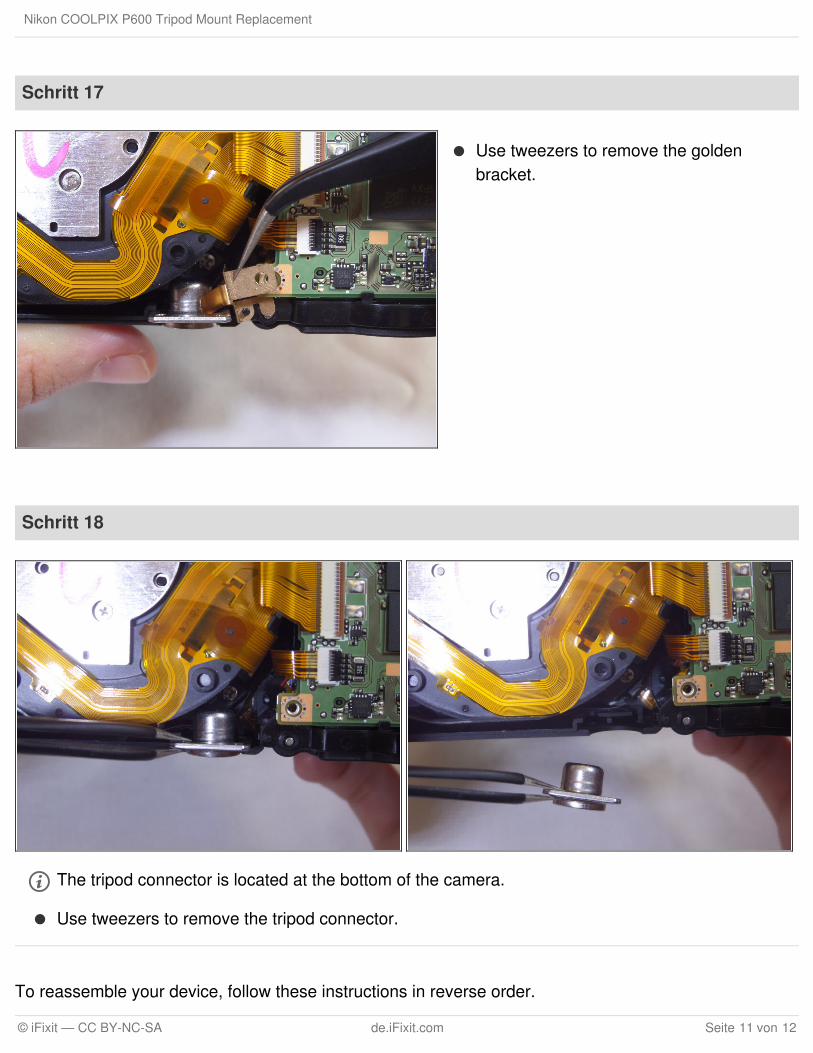
Schritt 17
Use tweezers to remove the goldenbracket.
Schritt 18
The tripod connector is located at the bottom of the camera.
Use tweezers to remove the tripod connector.
Nikon COOLPIX P600 Tripod Mount Replacement
© iFixit — CC BY-NC-SA de.iFixit.com Seite 11 von 12
Page 12
Dieses Dokument wurde zuletzt angelegt am 2018-06-06 09:52:26 AM.
Nikon COOLPIX P600 Tripod Mount Replacement
© iFixit — CC BY-NC-SA de.iFixit.com Seite 12 von 12