Online Quilt Magazine – Vol. 2 No. 6
© Online Quilt Magazine.com All Rights Reserved P a g e | 1
Online Quilt Magazine.com
Discover Silk And
Sashiko with
Kathy McNeil
Free Motion
Quilting a BIG
Quilt on a
Small
Machine
BONUS
PROJECT –
Jelly Roll Quilt
Batik or
Not to
Batik?
Vol.2 No.6 – June 2011
Online Quilt Magazine – Vol. 2 No. 6
© Online Quilt Magazine.com All Rights Reserved P a g e | 2
Online Quilt Magazine Table of Contents
Add Interest to Your Quilt With Simple Sashing ………………………………………………………………………….Page 4
Silk And Sashiko ………………………………………………………………………………………………………………………….Page 8
Free Motion Quilting A BIG Quilt On A Small Machine ….…………………………………………………………….Page 11
Hints and Tips from Brannie ……………………………………………………………………………………………………….Page 18
What’s New From The Fat Quarter Shop …………………………………………………………………………………….Page 20
PROJECT – Moda Jelly Roll Quilt ………………………………………………………………………………………………….Page 24
Batik? Or Not Batik? ……………………………………………………………………………………………………………………Page 28
Book Review ………………………………………..……………………………………………………………………………………..Page 34
BLOCK OF THE MONTH – Corn and Beans Block ……..........................................................................Page 36
Today's Tips........................................................................................................................................Page 38
Quilters' Horoscope............................................................................................................................Page 30
YES – We Want To hear From You......................................................................................................Page 40
Cover Photo “Heron Happiness” detail courtesy of www.kathymcneilquilts.com
Online Quilt Magazine – Vol. 2 No. 6
© Online Quilt Magazine.com All Rights Reserved P a g e | 3
Letter from the Editor
Jody Anderson
Hi!
What a month it’s been! I’ve moved offices and am STILL unpacking…! I’m now generously spread between the
home office and my new one – computer’s here, and all my sewing’s there, and I know it’s only a matter of time
before that’s just not going to work….
We have another fantastic issue for you this month, with all sorts of great new articles from a range of new
contributors too. We’re excited to be able to feature Kathy McNeil’s award winning “Heron Happiness” quilt on
our cover this month, as well as a great article from her on quilting with silk.
We’re thrilled too to be able to welcome Leah Day, as our new regular quilting article contributor. Leah has sent
us a fabulous article on some quilting at home “How to’s” and we know you’re going to love trying her new
designs for freemotion quilting. Check out her Freemotion Quilt Project Blog too.
And we still have your favourites too – a new project from Rose, more info from Penny, and the Quilt Block of
the Month Club Cat, Brannie has been at it again…!
Take care, enjoy this, and have a great month!
Jody
Online Quilt Magazine – Vol. 2 No. 6
© Online Quilt Magazine.com All Rights Reserved P a g e | 4
Your blocks can range from the very simple to the
very complex, and they still might benefit from
sashing.
Sashing is what goes between the blocks in a
quilt. Like quilt blocks, sashing can be very simple
or it can be as complex as your quilt blocks. And
many quilts have no sashing at all.
In this article, you will see a variety of sashing
ideas. Many of them are a part of quilts I have
made. In some cases, the photos are old (as are
the quilts) and discolored.
If I had the quilts, I would take new pictures, but
most of my quilts have been given away, and
what I have are the old, discolored pictures and
the great feeling that those quilts are in the
hands of someone who is enjoying them!
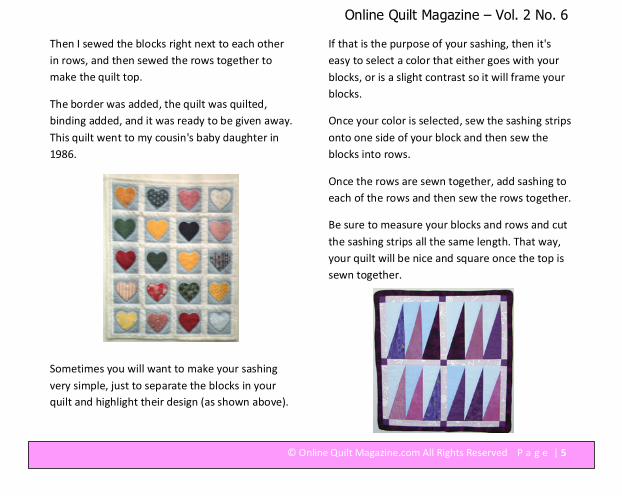
Once you have your quilt blocks made, it's time to
put them together. Yes, you could just sew them
right next to each other, as in the example above.
In this quilt, I machine appliquéd (simple zigzag
stitch around the outside) the hearts onto 4"
squares of white fabric.
Add Interest To Your Quilt With Simple Sashing
By Penny Halgren from www.How-To-Quilt.com
Online Quilt Magazine – Vol. 2 No. 6
© Online Quilt Magazine.com All Rights Reserved P a g e | 5
Then I sewed the blocks right next to each other
in rows, and then sewed the rows together to
make the quilt top.
The border was added, the quilt was quilted,
binding added, and it was ready to be given away.
This quilt went to my cousin's baby daughter in
1986.
Sometimes you will want to make your sashing
very simple, just to separate the blocks in your
quilt and highlight their design (as shown above).
If that is the purpose of your sashing, then it's
easy to select a color that either goes with your
blocks, or is a slight contrast so it will frame your
blocks.
Once your color is selected, sew the sashing strips
onto one side of your block and then sew the
blocks into rows.
Once the rows are sewn together, add sashing to
each of the rows and then sew the rows together.
Be sure to measure your blocks and rows and cut
the sashing strips all the same length. That way,
your quilt will be nice and square once the top is
sewn together.
Online Quilt Magazine – Vol. 2 No. 6
© Online Quilt Magazine.com All Rights Reserved P a g e | 6
Cornerstones are squares of fabric that are
pieced within the sashing and fit in at the corners
of the blocks. Although I had seen cornerstones in
quilts, the first time I used them in a quilt was
when I ran out of fabric in a border.
The light bulb in my brain went off, and I realized
at that moment that many quilt designs were no
doubt created from mistakes and lack of fabric.
Frequently now, I use cornerstones as an
intentional design feature.
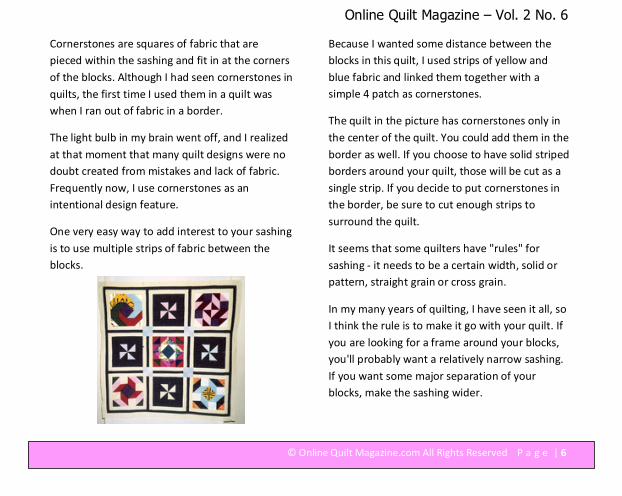
One very easy way to add interest to your sashing
is to use multiple strips of fabric between the
blocks.
Because I wanted some distance between the
blocks in this quilt, I used strips of yellow and
blue fabric and linked them together with a
simple 4 patch as cornerstones.
The quilt in the picture has cornerstones only in
the center of the quilt. You could add them in the
border as well. If you choose to have solid striped
borders around your quilt, those will be cut as a
single strip. If you decide to put cornerstones in
the border, be sure to cut enough strips to
surround the quilt.
It seems that some quilters have "rules" for
sashing - it needs to be a certain width, solid or
pattern, straight grain or cross grain.
In my many years of quilting, I have seen it all, so
I think the rule is to make it go with your quilt. If
you are looking for a frame around your blocks,
you'll probably want a relatively narrow sashing.
If you want some major separation of your
blocks, make the sashing wider.
Online Quilt Magazine – Vol. 2 No. 6
© Online Quilt Magazine.com All Rights Reserved P a g e | 7
In terms of straight grain or cross grain - pay
attention to any design features your fabric has,
and ensure that they are placed in the same
direction. This would mean that the sashing
between the blocks would be cut on the straight
grain and the sashing between the rows would be
cut on the cross grain.
Play with it; because you may decide that for
your quilt, you want to keep the directional fabric
going in the right direction.
The same may be true when you make a pieced
sashing. In the quilt shown here, I have made
Flying Geese and positioned them around the
blocks in specific directions.
In this quilt, you may see that I have also used
little skinny tree blocks as sashing between the
bear blocks.
The bottom line – feel free to get creative with
your sashing. It can be as interesting as your
blocks!
About the Author:
Penny Halgren is a quilter of more than 27 years, and
enjoys sharing her love of quilting with others. Sign up
for her free quilting tips, quilt patterns, and
newsletter at http://www.How-to-Quilt.com
Online Quilt Magazine – Vol. 2 No. 6
© Online Quilt Magazine.com All Rights Reserved P a g e | 8
Long before cotton became readily available to
sewers, women in the early 19th century made
luxurious and elaborate silk quilts. Silk has always
invoked visual and tactile images of classic
elegance.
Traditional Sashiko patterns enhance the natural
luminescence of silk. Light bounces off the quilted
texture, creating a shimmer of wonder.
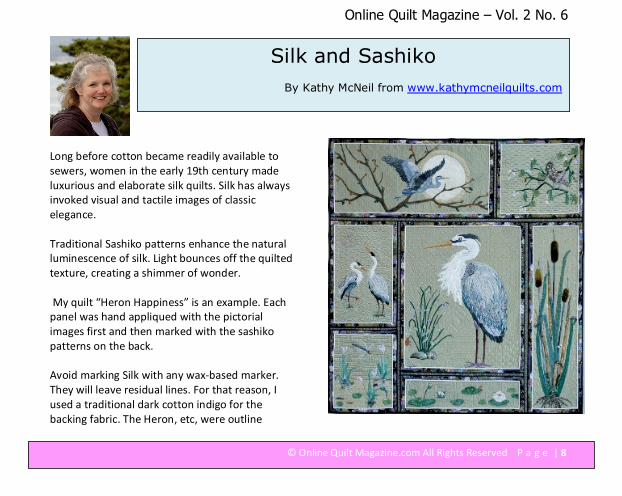
My quilt “Heron Happiness” is an example. Each
panel was hand appliqued with the pictorial
images first and then marked with the sashiko
patterns on the back.
Avoid marking Silk with any wax-based marker.
They will leave residual lines. For that reason, I
used a traditional dark cotton indigo for the
backing fabric. The Heron, etc, were outline
Silk and Sashiko
By Kathy McNeil from www.kathymcneilquilts.com
Online Quilt Magazine – Vol. 2 No. 6
© Online Quilt Magazine.com All Rights Reserved P a g e | 9
quilted from the front. The reverse image showed
on the back and defined the remaining space that
would be filled with the sashiko. Indigo is easy to
mark with chalk that can be wiped off with a
damp rag. Each panel was then quilted from the
back. Hand embroidery was added to both sides.
The panels were put together with sashing front
and back.
Silk quilts beautifully!
I use silk thread and low loft batting for best
results. Working with silk presents challenges but
they are far outweighed by silk’s dramatic effect.
My favorite silk is dupioni. It is a medium-weight
silk, woven from two different threads creating
an iridescent shimmer. Viewed from slightly
different angles, it magically changes color.
Less expensive than you might think, it comes in a
wide range of jewel tones and is readily available
online or at large fabric stores. Dupioni has a
nubby irregularity to the weave that makes it
more stable for quilting than lighter weight silks
(which may need to fused with lightweight
interfacing).
For precision piecing, I recommend pinning silk to
tissue paper first. Lay your template over the
tissue and silk, creating a sandwich. Dupioni has a
color “nap” so adjust your pattern layout to
prevent color variations.
To cut, use very sharp pinking shears or a rotary
cutter with a new blade (straight or pinking) to
Online Quilt Magazine – Vol. 2 No. 6
© Online Quilt Magazine.com All Rights Reserved P a g e | 10
prevent torn edges. To further reduce the risk of
raveling, cut seam allowances slightly larger and
finish the edges with a small zigzag stitch. French
seams or serged edges are also options.
When sewing, use a single-hole throat plate and a
new needle. The microtex sharp needle size
70/10 will slip easily between the fibers and
create only a tiny hole. Never use a ballpoint type
needle on silk. Even universal needles have a
slightly rounded point, which can damage the
fabric.
Silk pins are nice but any sharp pin will work. If
you pin your quilt sandwich prior to quilting, use
new, small sharp safety pins. I have a box that I
save just for pinning silk quilts. If your silk fabric
slips during sewing, leave the tissue paper pinned
to the pattern and sew the seams with the tissue
paper in place. Gently remove the paper after
sewing.
Dupioni silk can be washed in cool water,
preferably prior to cutting, as there is
considerable shrinkage. Be sure to test for color
fastness if the silk will be used for a bed quilt.
Dupioni can also be dry cleaned. To avoid
problems, give your dry cleaner a sample piece of
the silk to test. But be aware that washing or dry
cleaning will change the feel and shimmer of the
silk.
Using Silk in your quilts creates a mood of
elegance from the very beginning.
Kathy’s Quilt “Heron Happiness” featured on our
front cover has won multiple national and
international awards, most recently at the AQS
2011 Paducah Show. – Ed.
About the Author:
Kathy McNeil is an internationally award winning quilt
artist, teacher, judge and designer. Sewing thousands of
little scraps of fabric together by hand, she create quilts
that look like paintings. Her pictorial and traditional quilts
are frequently featured in museums, magazines, calendars
and international shows. Many of her quilts are in private
collections. www.kathymcneilquilts.com for more
information.
Online Quilt Magazine – Vol. 2 No. 6
© Online Quilt Magazine.com All Rights Reserved P a g e | 11
If you open most quilting magazines or check out
the section of books in a quilt shop, what do you
find? Usually hundreds of books or projects on
quilt piecing or appliqué, but hardly any
information about how to QUILT your quilts.
There’s a particularly limited amount of
information on how to quilt your own quilts on
your home sewing machine.
Yet quilting your own quilts is not only possible, it
can actually be easy! I truly believe that if your
machine is good enough and big enough to piece
your quilt top, it should be just fine for free
motion quilting it too.
So here’s a guide to getting started quilting on
your home sewing machine:
1. Start with your Machine Setup - How you set
up your machine on your table is very important!
It’s really essential to have your machine on a
flush surface with the tabletop.
This way you have one solid surface for your quilt
to rest on and you’ve also reduced the drag and
friction of your quilt rubbing against the sides of
your machine.
But how you set up your machine goes beyond
putting it into a flatbed table. You should
combine your sewing table with more folding
tables so you have at least 3 ft to the back of your
machine and 2 ft of table space to the side.
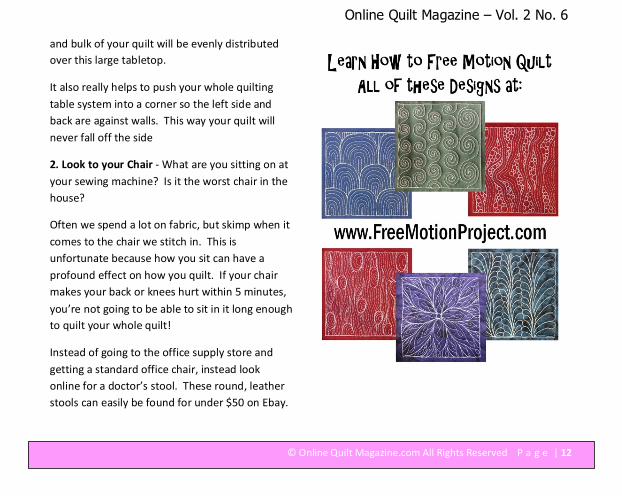
This allows you to quilt even HUGE king sized
quilts on your machine because all the weight
Free Motion Quilting a BIG Quilt on a Small
Machine
By Leah Day from www.FreeMotionQuilt.blogspot.com
Online Quilt Magazine – Vol. 2 No. 6
© Online Quilt Magazine.com All Rights Reserved P a g e | 12
and bulk of your quilt will be evenly distributed
over this large tabletop.
It also really helps to push your whole quilting
table system into a corner so the left side and
back are against walls. This way your quilt will
never fall off the side
2. Look to your Chair - What are you sitting on at
your sewing machine? Is it the worst chair in the
house?
Often we spend a lot on fabric, but skimp when it
comes to the chair we stitch in. This is
unfortunate because how you sit can have a
profound effect on how you quilt. If your chair
makes your back or knees hurt within 5 minutes,
you’re not going to be able to sit in it long enough
to quilt your whole quilt!
Instead of going to the office supply store and
getting a standard office chair, instead look
online for a doctor’s stool. These round, leather
stools can easily be found for under $50 on Ebay.
Online Quilt Magazine – Vol. 2 No. 6
© Online Quilt Magazine.com All Rights Reserved P a g e | 13
Why do I love them so much? Because a doctor’s
chair is actually designed to lift higher than a
standard office chair, which will allow you to sit at
a higher angle and get better control over your
quilt!
The biggest thing you want to avoid while quilting
is hunching over your sewing machine, and a
taller chair will help you keep your back straight
and your arms at right angles to your tabletop.
Both of these things combined: a flush, flatbed
sewing table and a taller doctor’s stool will enable
you to sit at your machine properly and enable
you to quilt for longer periods and with less strain
to your body.
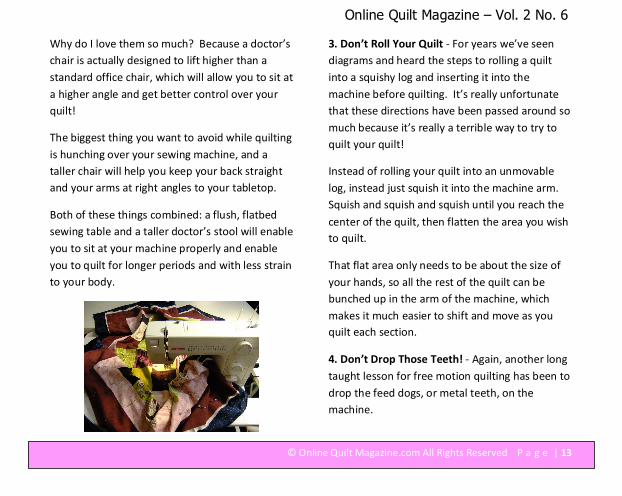
3. Don’t Roll Your Quilt - For years we’ve seen
diagrams and heard the steps to rolling a quilt
into a squishy log and inserting it into the
machine before quilting. It’s really unfortunate
that these directions have been passed around so
much because it’s really a terrible way to try to
quilt your quilt!
Instead of rolling your quilt into an unmovable
log, instead just squish it into the machine arm.
Squish and squish and squish until you reach the
center of the quilt, then flatten the area you wish
to quilt.
That flat area only needs to be about the size of
your hands, so all the rest of the quilt can be
bunched up in the arm of the machine, which
makes it much easier to shift and move as you
quilt each section.
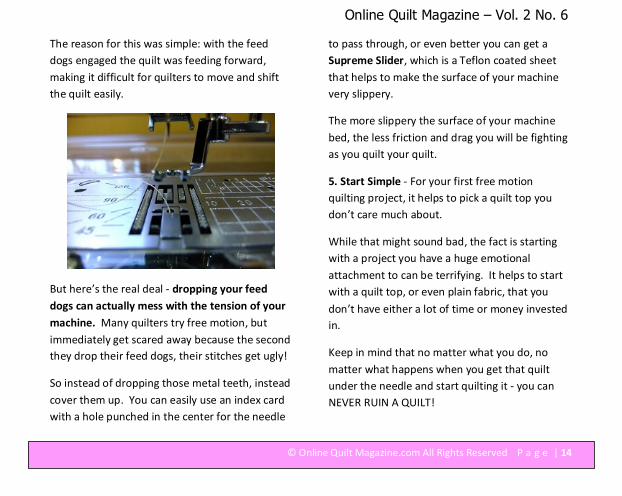
4. Don’t Drop Those Teeth! - Again, another long
taught lesson for free motion quilting has been to
drop the feed dogs, or metal teeth, on the
machine.
Online Quilt Magazine – Vol. 2 No. 6
© Online Quilt Magazine.com All Rights Reserved P a g e | 14
The reason for this was simple: with the feed
dogs engaged the quilt was feeding forward,
making it difficult for quilters to move and shift
the quilt easily.
But here’s the real deal - dropping your feed
dogs can actually mess with the tension of your
machine. Many quilters try free motion, but
immediately get scared away because the second
they drop their feed dogs, their stitches get ugly!
So instead of dropping those metal teeth, instead
cover them up. You can easily use an index card
with a hole punched in the center for the needle
to pass through, or even better you can get a
Supreme Slider, which is a Teflon coated sheet
that helps to make the surface of your machine
very slippery.
The more slippery the surface of your machine
bed, the less friction and drag you will be fighting
as you quilt your quilt.
5. Start Simple - For your first free motion
quilting project, it helps to pick a quilt top you
don’t care much about.
While that might sound bad, the fact is starting
with a project you have a huge emotional
attachment to can be terrifying. It helps to start
with a quilt top, or even plain fabric, that you
don’t have either a lot of time or money invested
in.
Keep in mind that no matter what you do, no
matter what happens when you get that quilt
under the needle and start quilting it - you can
NEVER RUIN A QUILT!
Online Quilt Magazine – Vol. 2 No. 6
© Online Quilt Magazine.com All Rights Reserved P a g e | 15
Seam rippers were invented for a reason, so
never fear that your quilt will be destroyed if you
try to free motion quilt it. Just rip out the
offending stitches and keep going!
6. One design is all it takes - Even though there
are more than 280 designs on the Free Motion
Quilting Project right now, you really only need 1
single design to get started.
If you quilt just 1 design over the surface of your
entire quilt, by the end you will have learned
loads about moving your quilt in free motion,
about the speed of your machine and the
movement of your hands, and you will have
memorized that design so completely you’ll likely
be able to stitch it in your sleep!
This is the best possible way to learn how to free
motion quilt: pick just one design to get started
and stitch it over an entire queen sized quilt.
Here’s a very easy design for you to try:
This is called Heart Confetti and it’s created by
simply stitching heart shapes. Starting on the red
dot (see below), you can trace this stitch by first
following the red line to form the first heart.
Pivot off that red dot again and stitch a second
heart around the first following the blue line:
Online Quilt Magazine – Vol. 2 No. 6
© Online Quilt Magazine.com All Rights Reserved P a g e | 16
Next travel stitch along the last heart (orange
line) and quilt another heart, overlapping the first
set (purple line).
Landscape and Animal Patterns, including the Blue Heron as
the focal point in the award winning quilt Heron Happiness.
Kathy McNeil is an internationally award winning quilt artist,
teacher, judge and designer. She is available to teach and
lecture internationally. Find her on a Quilting Cruise to Alaska
next summer, at Asilomar in April 2012 and NQA and PIQF this
year.
For more information on ordering patterns or contacting her
about lectures and workshops; - www.kathymcneilquilts.com
email [email protected]
Online Quilt Magazine – Vol. 2 No. 6
© Online Quilt Magazine.com All Rights Reserved P a g e | 17
It’s really that easy - stitch hearts all over the
place until your entire quilting space is filled up
with beautiful quilting.
If you’re quilting a bed quilt that you want to be
soft and comfortable, aim to stitch each heart as
big as your hand. If you’d rather try out this free
motion design on a smaller scale, stitch your
hearts around the size of a quarter for a much
denser effect.
So that’s it! Quilting your own quilts (even HUGE
quilts) on your home machine is absolutely
possible. All you need is a few modifications to
your current sewing station and a willingness to
jump in with both feet and try a new design.
I promise, by the time you finish your first full or
queen sized quilt, you will feel 100% more
confident in your ability to free motion quilt!
Let’s go quilt,
Leah Day
About the Author:
Leah Day is the author of the Free Motion Quilting
Project, a blog project dedicated to creating new free
motion quilting designs each week and sharing them
all for FREE! Leah is also the author of From Daisy to
Paisley - 50 Beginner Free Motion Quilting Designs, a
spiral bound book featuring 50 designs from the
project. www.daystyledesigns.com
Don't keep this Online Quilt
Magazine all to yourself – it's FREE,
so share it with your Quilting Guilds
and Friends!
Don't wait - Invite them to
www.OnlineQuiltMagazine.com to
Subscribe and receive each New Issue
as soon as it's Published!
Online Quilt Magazine – Vol. 2 No. 6
© Online Quilt Magazine.com All Rights Reserved P a g e | 18
If your Mum is a quilter like mine, then you
probably have quilts all over the place like we do.
Mum makes them for me to sleep on.
I especially like a long nap under the starry quilt
on the big bed. I spend a lot of time there.
Sometimes, when I climb up the side of the bed
to get under the quilt, I get it a bit wrong and end
up under the doona as well. It's dark and cosy
under all that and I sleep very well, but after a
while it gets too hot! I can't move and it's sooo
hot!! Mum often rescues me. "What are you
doing under all that?" she says and lifts them up
so I can pour myself out and lie flat out on the
floor to recover. Phew! Too hot!
Usually I just crawl under the edge of the quilt,
then it's a dim light and not too hot and heavy. I
can spend a lot of time on that bed. I call it
"Sleeping Under the Stars."
My Mum and Dad's bed has what she calls a
"mystery quilt" on it. I don't know what that
means, but it's a very soft bed to roll around on.
No mystery at all why I like it to sleep on.
Hints and Tips From Brannie
By "Brannie" Mira-Bateman
Online Quilt Magazine – Vol. 2 No. 6
© Online Quilt Magazine.com All Rights Reserved P a g e | 19
It is also a good bed to put the brakes on. When I
get a bit silly and run like a mad thing from the
front door to Mum's bedroom at the other end of
the house, I need something to pull me up before
I hit the wall.
The soft Mystery Quilt is ideal. (I may have pulled
a few threads though, but I don't think she has
noticed yet.)
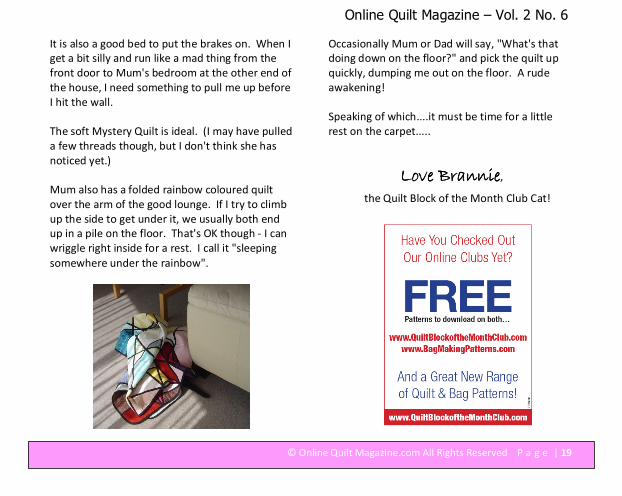
Mum also has a folded rainbow coloured quilt
over the arm of the good lounge. If I try to climb
up the side to get under it, we usually both end
up in a pile on the floor. That's OK though - I can
wriggle right inside for a rest. I call it "sleeping
somewhere under the rainbow".
Occasionally Mum or Dad will say, "What's that
doing down on the floor?" and pick the quilt up
quickly, dumping me out on the floor. A rude
awakening!
Speaking of which....it must be time for a little
rest on the carpet.....
Love BrannieLove BrannieLove BrannieLove Brannie,
the Quilt Block of the Month Club Cat!
Online Quilt Magazine – Vol. 2 No. 6
© Online Quilt Magazine.com All Rights Reserved P a g e | 20
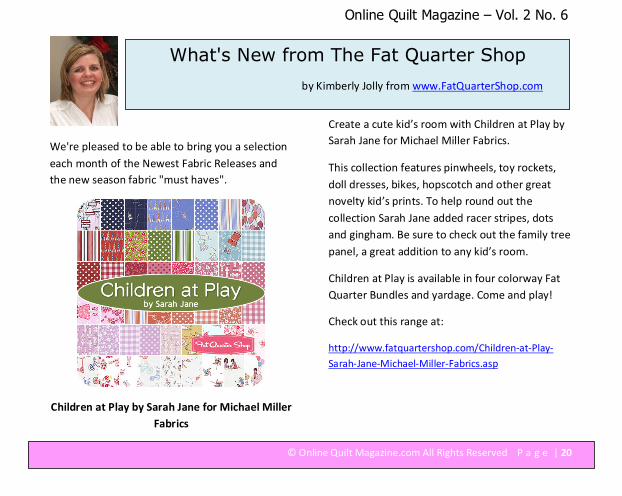
We're pleased to be able to bring you a selection
each month of the Newest Fabric Releases and
the new season fabric "must haves".
Children at Play by Sarah Jane for Michael Miller
Fabrics
Create a cute kid’s room with Children at Play by
Sarah Jane for Michael Miller Fabrics.
This collection features pinwheels, toy rockets,
doll dresses, bikes, hopscotch and other great
novelty kid’s prints. To help round out the
collection Sarah Jane added racer stripes, dots
and gingham. Be sure to check out the family tree
panel, a great addition to any kid’s room.
Children at Play is available in four colorway Fat
Quarter Bundles and yardage. Come and play!
Check out this range at:
http://www.fatquartershop.com/Children-at-Play-
Sarah-Jane-Michael-Miller-Fabrics.asp
What's New from The Fat Quarter Shop
by Kimberly Jolly from www.FatQuarterShop.com
Online Quilt Magazine – Vol. 2 No. 6
© Online Quilt Magazine.com All Rights Reserved P a g e | 21
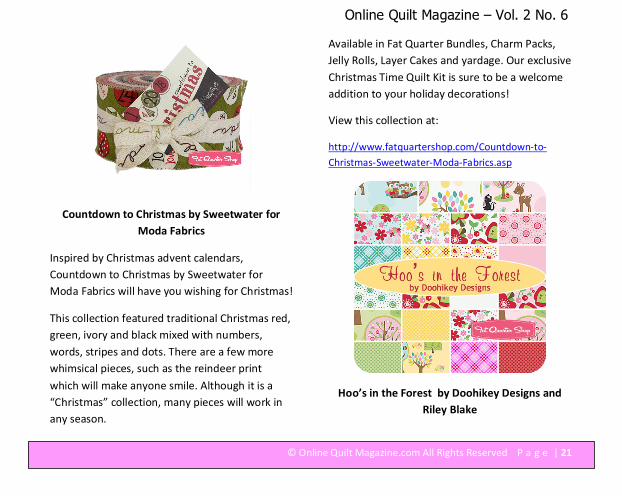
Countdown to Christmas by Sweetwater for
Moda Fabrics
Inspired by Christmas advent calendars,
Countdown to Christmas by Sweetwater for
Moda Fabrics will have you wishing for Christmas!
This collection featured traditional Christmas red,
green, ivory and black mixed with numbers,
words, stripes and dots. There are a few more
whimsical pieces, such as the reindeer print
which will make anyone smile. Although it is a
“Christmas” collection, many pieces will work in
any season.
Available in Fat Quarter Bundles, Charm Packs,
Jelly Rolls, Layer Cakes and yardage. Our exclusive
Christmas Time Quilt Kit is sure to be a welcome
addition to your holiday decorations!
View this collection at:
http://www.fatquartershop.com/Countdown-to-
Christmas-Sweetwater-Moda-Fabrics.asp
Hoo’s in the Forest by Doohikey Designs and
Riley Blake
Online Quilt Magazine – Vol. 2 No. 6
© Online Quilt Magazine.com All Rights Reserved P a g e | 22
Doohikey Designs and Riley Blake want to know
Hoo’s in the Forest? This adorable collection
features cute little forest scenes with owls and
deer, gumdrop trees, heart-shaped apples,
florals, dots and plaids in sunny yellows, pinks,
blues, greens and reds.
Available in Fat Quarter Bundles, 5” Stackers, 2.5”
Rolie Polies, 10” Stackers and yardage.
See this range at:
http://www.fatquartershop.com/Hoos-in-the-Forest-
Riley-Blake-Designs-Doohikey-Designs.asp
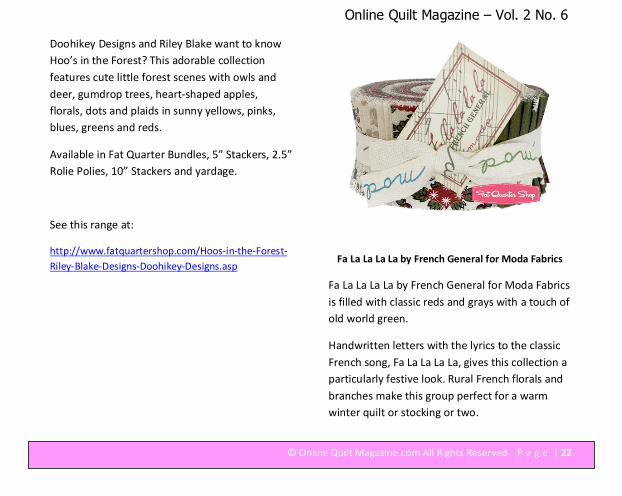
Fa La La La La by French General for Moda Fabrics
Fa La La La La by French General for Moda Fabrics
is filled with classic reds and grays with a touch of
old world green.
Handwritten letters with the lyrics to the classic
French song, Fa La La La La, gives this collection a
particularly festive look. Rural French florals and
branches make this group perfect for a warm
winter quilt or stocking or two.
Online Quilt Magazine – Vol. 2 No. 6
© Online Quilt Magazine.com All Rights Reserved P a g e | 23
Available in Fat Quarter Bundles, Fat Eighth
Bundles, Charm Packs, Jelly Rolls, Layer Cakes,
cotton yardage and 54” wide linen yardage.
Joyeux Noël!
Find this collection at:
http://www.fatquartershop.com/Fa-La-La-La-La-
French-General-Moda-Fabrics.asp
LUDLOW QUILT AND SEW
Discover new and exciting projects to quilt
and sew each month with clear and easy to
follow instructions.
Visit the website and subscribe to Ludlow
Quilt and Sew’s free monthly newsletter
now.
www.ludlowquiltandsew.co.uk
Online Quilt Magazine – Vol. 2 No. 6
© Online Quilt Magazine.com All Rights Reserved P a g e | 24
Moda Jelly Roll Quilt
By Rose Smith from www.ludlowquiltandsew.co.uk
Do you know what I love about the Moda jelly rolls? Apart from the
gorgeous fabric, of course. It's that the edges of the strips have all been cut
by whatever is the mechanical equivalent of pinking shears, so there's no
fraying and threads hanging out from the fabric edges.
I made this jelly roll quilt from a Moda Rural Jardins jelly roll plus a yard each
of two Moda fabrics, one dark and one light, and I'm really pleased with the
way that it turned out.
The quilt block that I used for this jelly roll quilt is called variously Path and
Stiles, Far West, Stile and Paths, and it is also a sort of variation of the Shoofly
quilt block.
Online Quilt Magazine – Vol. 2 No. 6
© Online Quilt Magazine.com All Rights Reserved P a g e | 25
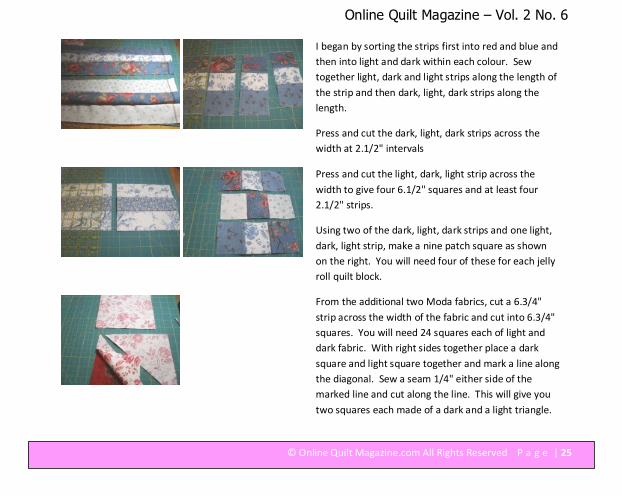
I began by sorting the strips first into red and blue and
then into light and dark within each colour. Sew
together light, dark and light strips along the length of
the strip and then dark, light, dark strips along the
length.
Press and cut the dark, light, dark strips across the
width at 2.1/2" intervals
Press and cut the light, dark, light strip across the
width to give four 6.1/2" squares and at least four
2.1/2" strips.
Using two of the dark, light, dark strips and one light,
dark, light strip, make a nine patch square as shown
on the right. You will need four of these for each jelly
roll quilt block.
From the additional two Moda fabrics, cut a 6.3/4"
strip across the width of the fabric and cut into 6.3/4"
squares. You will need 24 squares each of light and
dark fabric. With right sides together place a dark
square and light square together and mark a line along
the diagonal. Sew a seam 1/4" either side of the
marked line and cut along the line. This will give you
two squares each made of a dark and a light triangle.
Online Quilt Magazine – Vol. 2 No. 6
© Online Quilt Magazine.com All Rights Reserved P a g e | 26
Lay out each Moda jelly roll quilt block with a nine
patch square in the middle, a striped square against
each side of the nine patch square and a triangle
square in each corner as shown.
As you can see, I have kept blue together and red
together, but you could make it completely random if
you chose.
Sew the rows of the quilt block together and then sew
the rows to each other. I used twelve quilt blocks (six
red and six blue) for the Moda jelly roll quilt, sewing
them together in four rows of three blocks to a row. I
opted to alternate the red and blue quilt blocks,
although of course you could sew them together
randomly. At this stage the jelly roll quilt top measures
54" by 72".
As ever, I wanted to use all the fabric so that I wasn't
adding to my stash. I gathered together all the
remaining fabric from the jelly roll and sewed strips
together where possible and cut everything into
2.1/2" squares or strips. These were then sewed
together into two strips 54" long (27 squares) and two
strips 76" long (38 squares) to be used for the Moda
jelly roll quilt border.
Online Quilt Magazine – Vol. 2 No. 6
© Online Quilt Magazine.com All Rights Reserved P a g e | 27
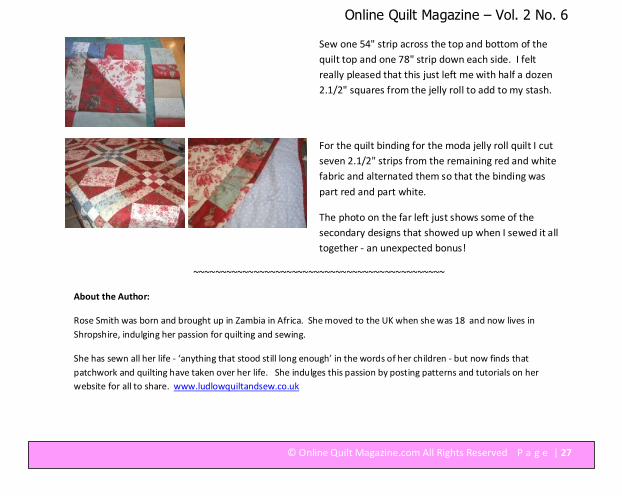
Sew one 54" strip across the top and bottom of the
quilt top and one 78" strip down each side. I felt
really pleased that this just left me with half a dozen
2.1/2" squares from the jelly roll to add to my stash.
For the quilt binding for the moda jelly roll quilt I cut
seven 2.1/2" strips from the remaining red and white
fabric and alternated them so that the binding was
part red and part white.
The photo on the far left just shows some of the
secondary designs that showed up when I sewed it all
together - an unexpected bonus!
~~~~~~~~~~~~~~~~~~~~~~~~~~~~~~~~~~~~~~~~~~~~~~
About the Author:
Rose Smith was born and brought up in Zambia in Africa. She moved to the UK when she was 18 and now lives in
Shropshire, indulging her passion for quilting and sewing.
She has sewn all her life - ‘anything that stood still long enough’ in the words of her children - but now finds that
patchwork and quilting have taken over her life. She indulges this passion by posting patterns and tutorials on her
website for all to share. www.ludlowquiltandsew.co.uk
Online Quilt Magazine – Vol. 2 No. 6
© Online Quilt Magazine.com All Rights Reserved P a g e | 28
Australian patchworkers and quilters alike are
familiar with batik fabrics, with their intense
jewel-like hues, especially those originating from
Bali, which use a modern take on an age-old
process. But did you know that the batik process,
the method which uses traditional wax-resist and
over-dyeing techniques to produce a modern
design, produces just one kind of batik?
You can have one batik process, by which the
molten wax is stamped (using a copper ‘tjap’), or
one which is laboriously hand-drawn, using
‘tjanting’; the tiny dots, which are a feature of
many traditional batik designs, are often made
with a tjanting, a little brass ‘pen’ with a reservoir
for the molten wax and a wooden handle.
Or you can have a combination of the two, where
drawn (tjanting) details are added to a stamped
(tjap) design. In addition, often details are
coloured by hand, and protected by ‘painting’ on
wax before dyeing.
Many sarongs are decorated using a combination
of these processes. Depending on the methods
employed, it can take more than one labour-
intensive month to produce one sarong! It is
indeed a work of art.
Just to complicate matters, the term ‘batik’ can
actually refer to a design as well as to a process.
And you can tell from where a design originates
by the sort of motifs and colours that are used.
Just like the fabrics we buy, traditional batik
designs are now printed.
Batik? or Not Batik? That is the Question…
By Pamela Davis of Patchwork Quint-essential
Online Quilt Magazine – Vol. 2 No. 6
© Online Quilt Magazine.com All Rights Reserved P a g e | 29
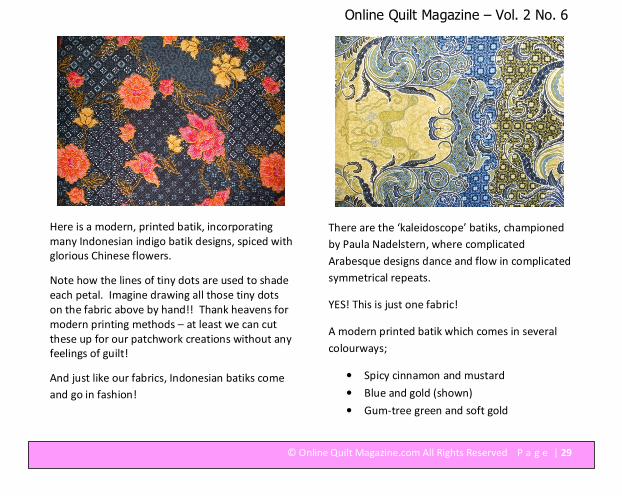
Here is a modern, printed batik, incorporating
many Indonesian indigo batik designs, spiced with
glorious Chinese flowers.
Note how the lines of tiny dots are used to shade
each petal. Imagine drawing all those tiny dots
on the fabric above by hand!! Thank heavens for
modern printing methods – at least we can cut
these up for our patchwork creations without any
feelings of guilt!
And just like our fabrics, Indonesian batiks come
and go in fashion!
There are the ‘kaleidoscope’ batiks, championed
by Paula Nadelstern, where complicated
Arabesque designs dance and flow in complicated
symmetrical repeats.
YES! This is just one fabric!
A modern printed batik which comes in several
colourways;
• Spicy cinnamon and mustard
• Blue and gold (shown)
• Gum-tree green and soft gold
Online Quilt Magazine – Vol. 2 No. 6
© Online Quilt Magazine.com All Rights Reserved P a g e | 30
There are designs which are asking to be in One-
Block hexagon Wonder quilts, or become Stack-
and Whack candidates, par excellence.
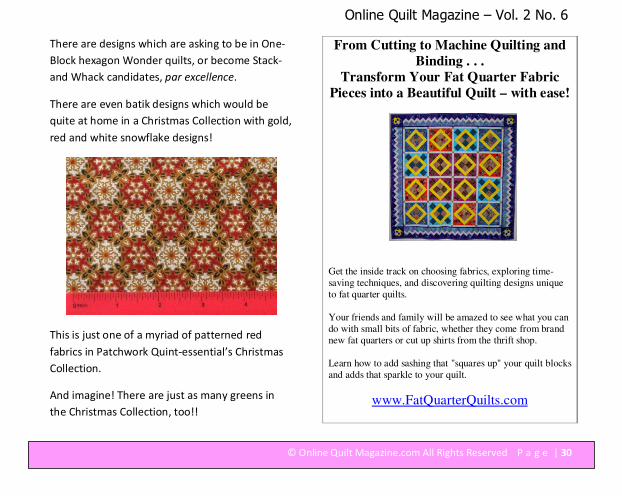
There are even batik designs which would be
quite at home in a Christmas Collection with gold,
red and white snowflake designs!
This is just one of a myriad of patterned red
fabrics in Patchwork Quint-essential’s Christmas
Collection.
And imagine! There are just as many greens in
the Christmas Collection, too!!
From Cutting to Machine Quilting and
Binding . . .
Transform Your Fat Quarter Fabric
Pieces into a Beautiful Quilt – with ease!
Get the inside track on choosing fabrics, exploring time-
saving techniques, and discovering quilting designs unique
to fat quarter quilts.
Your friends and family will be amazed to see what you can
do with small bits of fabric, whether they come from brand
new fat quarters or cut up shirts from the thrift shop.
Learn how to add sashing that "squares up" your quilt blocks
and adds that sparkle to your quilt.
www.FatQuarterQuilts.com
Online Quilt Magazine – Vol. 2 No. 6
© Online Quilt Magazine.com All Rights Reserved P a g e | 31
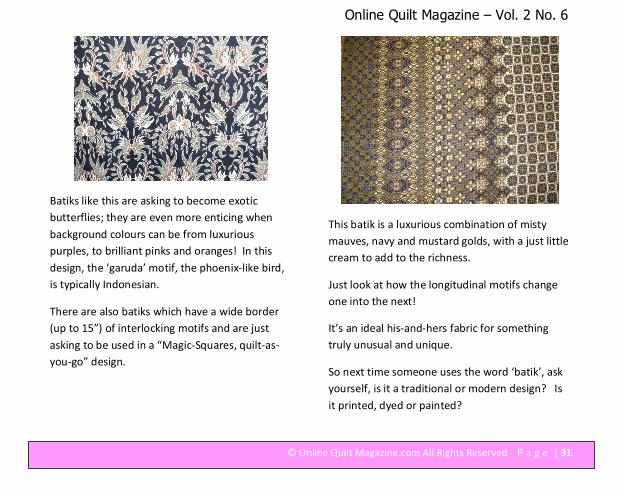
Batiks like this are asking to become exotic
butterflies; they are even more enticing when
background colours can be from luxurious
purples, to brilliant pinks and oranges! In this
design, the ‘garuda’ motif, the phoenix-like bird,
is typically Indonesian.
There are also batiks which have a wide border
(up to 15”) of interlocking motifs and are just
asking to be used in a “Magic-Squares, quilt-as-
you-go” design.
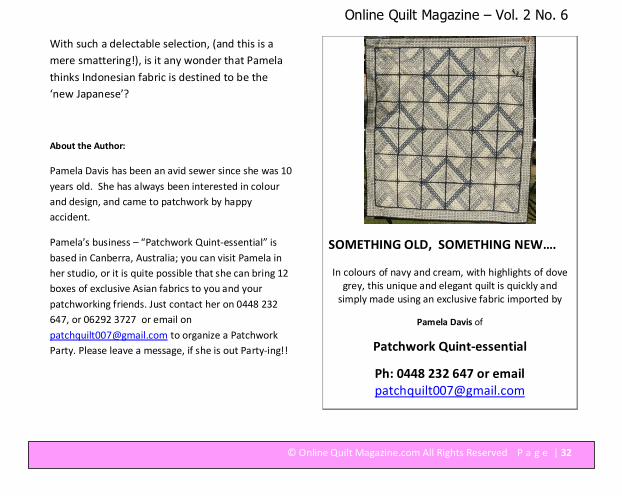
This batik is a luxurious combination of misty
mauves, navy and mustard golds, with a just little
cream to add to the richness.
Just look at how the longitudinal motifs change
one into the next!
It’s an ideal his-and-hers fabric for something
truly unusual and unique.
So next time someone uses the word ‘batik’, ask
yourself, is it a traditional or modern design? Is
it printed, dyed or painted?
Online Quilt Magazine – Vol. 2 No. 6
© Online Quilt Magazine.com All Rights Reserved P a g e | 32
With such a delectable selection, (and this is a
mere smattering!), is it any wonder that Pamela
thinks Indonesian fabric is destined to be the
‘new Japanese’?
About the Author:
Pamela Davis has been an avid sewer since she was 10
years old. She has always been interested in colour
and design, and came to patchwork by happy
accident.
Pamela’s business – “Patchwork Quint-essential” is
based in Canberra, Australia; you can visit Pamela in
her studio, or it is quite possible that she can bring 12
boxes of exclusive Asian fabrics to you and your
patchworking friends. Just contact her on 0448 232
647, or 06292 3727 or email on
[email protected] to organize a Patchwork
Party. Please leave a message, if she is out Party-ing!!
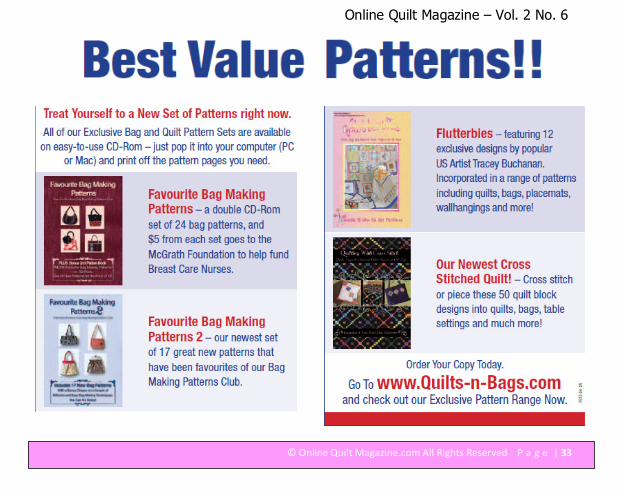
SOMETHING OLD, SOMETHING NEW….
In colours of navy and cream, with highlights of dove
grey, this unique and elegant quilt is quickly and
simply made using an exclusive fabric imported by
Pamela Davis of
Patchwork Quint-essential
Ph: 0448 232 647 or email
[email protected]
Online Quilt Magazine – Vol. 2 No. 6
© Online Quilt Magazine.com All Rights Reserved P a g e | 33
Online Quilt Magazine – Vol. 2 No. 6
© Online Quilt Magazine.com All Rights Reserved P a g e | 34
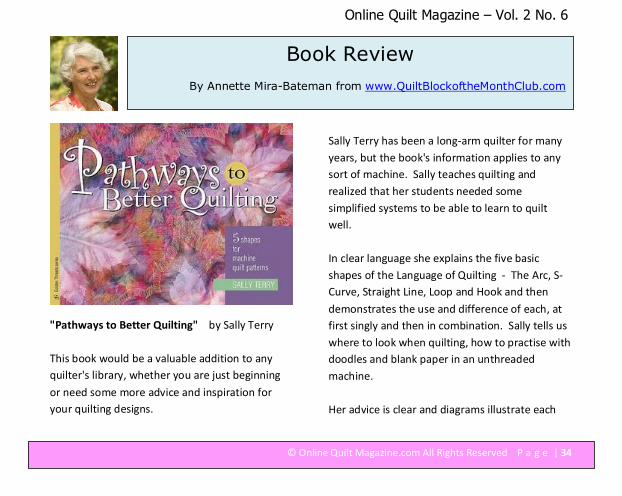
"Pathways to Better Quilting" by Sally Terry
This book would be a valuable addition to any
quilter's library, whether you are just beginning
or need some more advice and inspiration for
your quilting designs.
Sally Terry has been a long-arm quilter for many
years, but the book's information applies to any
sort of machine. Sally teaches quilting and
realized that her students needed some
simplified systems to be able to learn to quilt
well.
In clear language she explains the five basic
shapes of the Language of Quilting - The Arc, S-
Curve, Straight Line, Loop and Hook and then
demonstrates the use and difference of each, at
first singly and then in combination. Sally tells us
where to look when quilting, how to practise with
doodles and blank paper in an unthreaded
machine.
Her advice is clear and diagrams illustrate each
Book Review
By Annette Mira-Bateman from www.QuiltBlockoftheMonthClub.com
Online Quilt Magazine – Vol. 2 No. 6
© Online Quilt Magazine.com All Rights Reserved P a g e | 35
pointer. She even deals with how to stand or sit
at the machine and how to move your arms or
body. It's all about improving your "cell memory".
"Pathways to Better Quilting" is loaded with hints
and tips on resizing and transferring patterns,
counting while quilting to keep the patterns even,
developing your own style and suggestions on
choosing designs which complement the style of
the quilt.
It appears to be a complete book on quilting -
suitable for beginners or experts with concepts
that are easily followed.
Sally Terry makes all of her students recite her
"Machine Quilters' Oath" as follows:
Raise your right hand and repeat after me:
"I_________________________, can machine
quilt.
I will approach my machine with confidence and
dignity.
I will give my machine a loving name and all the
oil it wants.
I will not be afraid to try.
I will enjoy the process.
I will become the quilter I want to be."
We saw Sally in Paducah last year. She told us
that on one occasion, she addressed several
hundred would-be quilters and had them all
repeat the oath after her. As they all finished,
one lone voice piped up and added, "So Help me
God" and as one, the whole audience said,
"Amen".
"Pathways to Better Quilting" is published by the
American Quilter's Society and is available from
AQS, P.O. Box 3290, Paducah, KY 420002 - 3290
or online at www.AQSquilt.com
Online Quilt Magazine – Vol. 2 No. 6
© Online Quilt Magazine.com All Rights Reserved P a g e | 36
This month’s Block is a striking block, albeit with a
rather funny name! You will be able to chain
piece some units for quick construction, and this
block would look great in a repeated setting or
even as a scrappy quilt!
To make this 12 inch block as shown, you will
need three different fabrics and once you have
rotary cut the pieces according to the Cutting
Diagram, you can piece them together as shown
below.
Block of the Month
Online Quilt Magazine – Vol. 2 No. 6
© Online Quilt Magazine.com All Rights Reserved P a g e | 37
Online Quilt Magazine – Vol. 2 No. 6
© Online Quilt Magazine.com All Rights Reserved P a g e | 38
Today’s Tips:
After last month’s scrap quilt article, Julie in
Tennessee sent in her tip for scrappy quilts:
“I love scrap quilts. One of the greatest things I
have found to do with your scrap is to dump them
ALL into a laundry basket or on the floor. NOW
watch what color combos come up that you would
never have thought would look good!
Happens this is the way I store my fabrics,
absolutely NO COLOR coordination in storage!
It can really open your eyes to new ideas.”
And Betty sent in another tip for your scraps –
“Another way to use small scraps is make pillows
for your pets. Use a liner and put into an outer
bag and stitch up. You have a bag for a cat or a
dog.”
Thanks Julie and Betty!
Online Quilt Magazine – Vol. 2 No. 6
© Online Quilt Magazine.com All Rights Reserved P a g e | 39
Quilters' Horoscope
By Pauline Rogers from www.QuiltersWorld.com.au
A humourous compilation of character traits of quilters according to their zodiac signs. Compiled by a
quilting tutor with over twenty years experience teaching patchwork and quilting but zero years writing
horoscopes.
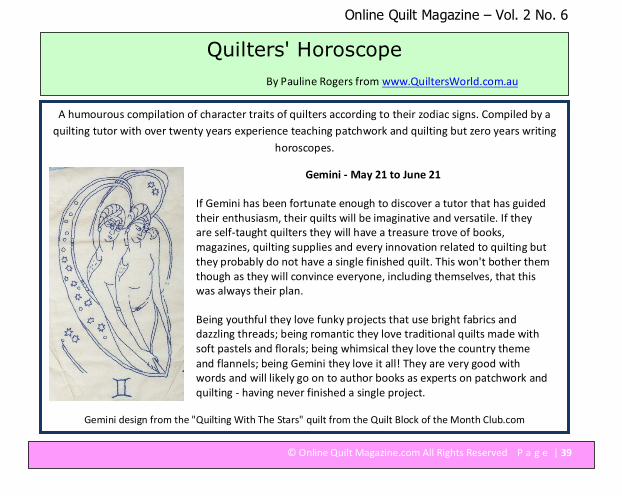
Gemini - May 21 to June 21
If Gemini has been fortunate enough to discover a tutor that has guided
their enthusiasm, their quilts will be imaginative and versatile. If they
are self-taught quilters they will have a treasure trove of books,
magazines, quilting supplies and every innovation related to quilting but
they probably do not have a single finished quilt. This won't bother them
though as they will convince everyone, including themselves, that this
was always their plan.
Being youthful they love funky projects that use bright fabrics and
dazzling threads; being romantic they love traditional quilts made with
soft pastels and florals; being whimsical they love the country theme
and flannels; being Gemini they love it all! They are very good with
words and will likely go on to author books as experts on patchwork and
quilting - having never finished a single project.
Gemini design from the "Quilting With The Stars" quilt from the Quilt Block of the Month Club.com
Online Quilt Magazine – Vol. 2 No. 6
© Online Quilt Magazine.com All Rights Reserved P a g e | 40
YES, We Want to Hear From
You!
As our Online Magazine continues to grow each
month, we need your feedback in order for us to
continue to improve our publication for you.
• We want to know how you liked it.
• We want to know the topics you're
interested in.
• We want to know if you have any
suggestions, Hints or Tips of your own that
you'd like included, or if you know anyone
we should include a story on!
Please send me an email with your Testimonial,
Suggestion or Enhancement – I'd love to hear
from you!
Send all emails to:
[email protected]
If you'd like to submit an Article, or a Project
for Publication, or take advantage of our Very
Very Reasonable Advertising Rates, please
email details or queries to Jody at
[email protected] .
"Quilt-y" Sayings…
• Sewing forever, housework
whenever! • Ready.....set.....SEW! • You know you are drinking too
much coffee when you can
thread a sewing machine while
it's running!