313
Open vSwitch Release 2.8.0 May 05, 2020
Open vSwitchRelease 2.8.0
May 05, 2020

Contents
1 Open vSwitch Documentation 11.1 How the Documentation is Organised . . . . . . . . . . . . . . . . . . . . . . . . . . . . . . . . . . 11.2 First Steps . . . . . . . . . . . . . . . . . . . . . . . . . . . . . . . . . . . . . . . . . . . . . . . . 11.3 Deeper Dive . . . . . . . . . . . . . . . . . . . . . . . . . . . . . . . . . . . . . . . . . . . . . . . 11.4 The Open vSwitch Project . . . . . . . . . . . . . . . . . . . . . . . . . . . . . . . . . . . . . . . . 21.5 Getting Help . . . . . . . . . . . . . . . . . . . . . . . . . . . . . . . . . . . . . . . . . . . . . . . 2
2 Getting Started 32.1 What Is Open vSwitch? . . . . . . . . . . . . . . . . . . . . . . . . . . . . . . . . . . . . . . . . . 4
2.1.1 Overview . . . . . . . . . . . . . . . . . . . . . . . . . . . . . . . . . . . . . . . . . . . . 42.1.2 What’s here? . . . . . . . . . . . . . . . . . . . . . . . . . . . . . . . . . . . . . . . . . . 5
2.2 Why Open vSwitch? . . . . . . . . . . . . . . . . . . . . . . . . . . . . . . . . . . . . . . . . . . . 52.2.1 The mobility of state . . . . . . . . . . . . . . . . . . . . . . . . . . . . . . . . . . . . . . 62.2.2 Responding to network dynamics . . . . . . . . . . . . . . . . . . . . . . . . . . . . . . . 62.2.3 Maintenance of logical tags . . . . . . . . . . . . . . . . . . . . . . . . . . . . . . . . . . . 62.2.4 Hardware integration . . . . . . . . . . . . . . . . . . . . . . . . . . . . . . . . . . . . . . 62.2.5 Summary . . . . . . . . . . . . . . . . . . . . . . . . . . . . . . . . . . . . . . . . . . . . 7
2.3 Installing Open vSwitch . . . . . . . . . . . . . . . . . . . . . . . . . . . . . . . . . . . . . . . . . 72.3.1 Installation from Source . . . . . . . . . . . . . . . . . . . . . . . . . . . . . . . . . . . . 72.3.2 Installation from Packages . . . . . . . . . . . . . . . . . . . . . . . . . . . . . . . . . . . 402.3.3 Upgrades . . . . . . . . . . . . . . . . . . . . . . . . . . . . . . . . . . . . . . . . . . . . 462.3.4 Others . . . . . . . . . . . . . . . . . . . . . . . . . . . . . . . . . . . . . . . . . . . . . . 47
3 Tutorials 513.1 Open vSwitch Advanced Features . . . . . . . . . . . . . . . . . . . . . . . . . . . . . . . . . . . . 51
3.1.1 Getting Started . . . . . . . . . . . . . . . . . . . . . . . . . . . . . . . . . . . . . . . . . 513.1.2 Using GDB . . . . . . . . . . . . . . . . . . . . . . . . . . . . . . . . . . . . . . . . . . . 523.1.3 Motivation . . . . . . . . . . . . . . . . . . . . . . . . . . . . . . . . . . . . . . . . . . . . 533.1.4 Scenario . . . . . . . . . . . . . . . . . . . . . . . . . . . . . . . . . . . . . . . . . . . . . 533.1.5 Setup . . . . . . . . . . . . . . . . . . . . . . . . . . . . . . . . . . . . . . . . . . . . . . 543.1.6 Implementing Table 0: Admission control . . . . . . . . . . . . . . . . . . . . . . . . . . . 543.1.7 Testing Table 0 . . . . . . . . . . . . . . . . . . . . . . . . . . . . . . . . . . . . . . . . . 553.1.8 Implementing Table 1: VLAN Input Processing . . . . . . . . . . . . . . . . . . . . . . . . 563.1.9 Testing Table 1 . . . . . . . . . . . . . . . . . . . . . . . . . . . . . . . . . . . . . . . . . 573.1.10 Implementing Table 2: MAC+VLAN Learning for Ingress Port . . . . . . . . . . . . . . . . 583.1.11 Testing Table 2 . . . . . . . . . . . . . . . . . . . . . . . . . . . . . . . . . . . . . . . . . 593.1.12 Implementing Table 3: Look Up Destination Port . . . . . . . . . . . . . . . . . . . . . . . 60
i
3.1.13 Testing Table 3 . . . . . . . . . . . . . . . . . . . . . . . . . . . . . . . . . . . . . . . . . 613.1.14 Implementing Table 4: Output Processing . . . . . . . . . . . . . . . . . . . . . . . . . . . 633.1.15 Testing Table 4 . . . . . . . . . . . . . . . . . . . . . . . . . . . . . . . . . . . . . . . . . 64
3.2 OVN Sandbox . . . . . . . . . . . . . . . . . . . . . . . . . . . . . . . . . . . . . . . . . . . . . . 663.2.1 Getting Started . . . . . . . . . . . . . . . . . . . . . . . . . . . . . . . . . . . . . . . . . 663.2.2 Using GDB . . . . . . . . . . . . . . . . . . . . . . . . . . . . . . . . . . . . . . . . . . . 663.2.3 Creating OVN Resources . . . . . . . . . . . . . . . . . . . . . . . . . . . . . . . . . . . . 663.2.4 Using ovn-trace . . . . . . . . . . . . . . . . . . . . . . . . . . . . . . . . . . . . . . . . . 67
3.3 OVN OpenStack Tutorial . . . . . . . . . . . . . . . . . . . . . . . . . . . . . . . . . . . . . . . . 683.3.1 Setting Up DevStack . . . . . . . . . . . . . . . . . . . . . . . . . . . . . . . . . . . . . . 683.3.2 DevStack preliminaries . . . . . . . . . . . . . . . . . . . . . . . . . . . . . . . . . . . . . 713.3.3 Shortening UUIDs . . . . . . . . . . . . . . . . . . . . . . . . . . . . . . . . . . . . . . . 713.3.4 Overview . . . . . . . . . . . . . . . . . . . . . . . . . . . . . . . . . . . . . . . . . . . . 723.3.5 Switching . . . . . . . . . . . . . . . . . . . . . . . . . . . . . . . . . . . . . . . . . . . . 733.3.6 Routing . . . . . . . . . . . . . . . . . . . . . . . . . . . . . . . . . . . . . . . . . . . . . 843.3.7 Adding a Gateway . . . . . . . . . . . . . . . . . . . . . . . . . . . . . . . . . . . . . . . 883.3.8 IPv6 . . . . . . . . . . . . . . . . . . . . . . . . . . . . . . . . . . . . . . . . . . . . . . . 923.3.9 ACLs . . . . . . . . . . . . . . . . . . . . . . . . . . . . . . . . . . . . . . . . . . . . . . 953.3.10 DHCP . . . . . . . . . . . . . . . . . . . . . . . . . . . . . . . . . . . . . . . . . . . . . . 973.3.11 Further Directions . . . . . . . . . . . . . . . . . . . . . . . . . . . . . . . . . . . . . . . . 99
4 Deep Dive 1014.1 OVS . . . . . . . . . . . . . . . . . . . . . . . . . . . . . . . . . . . . . . . . . . . . . . . . . . . 101
4.1.1 Design Decisions In Open vSwitch . . . . . . . . . . . . . . . . . . . . . . . . . . . . . . . 1014.1.2 Open vSwitch Datapath Development Guide . . . . . . . . . . . . . . . . . . . . . . . . . . 1164.1.3 Integration Guide for Centralized Control . . . . . . . . . . . . . . . . . . . . . . . . . . . 1204.1.4 Porting Open vSwitch to New Software or Hardware . . . . . . . . . . . . . . . . . . . . . 1234.1.5 OpenFlow Support in Open vSwitch . . . . . . . . . . . . . . . . . . . . . . . . . . . . . . 1274.1.6 Bonding . . . . . . . . . . . . . . . . . . . . . . . . . . . . . . . . . . . . . . . . . . . . . 1324.1.7 OVSDB Replication Implementation . . . . . . . . . . . . . . . . . . . . . . . . . . . . . . 1354.1.8 The DPDK Datapath . . . . . . . . . . . . . . . . . . . . . . . . . . . . . . . . . . . . . . 1374.1.9 OVS-on-Hyper-V Design . . . . . . . . . . . . . . . . . . . . . . . . . . . . . . . . . . . . 1444.1.10 Language Bindings . . . . . . . . . . . . . . . . . . . . . . . . . . . . . . . . . . . . . . . 1504.1.11 Testing . . . . . . . . . . . . . . . . . . . . . . . . . . . . . . . . . . . . . . . . . . . . . 1514.1.12 Tracing packets inside Open vSwitch . . . . . . . . . . . . . . . . . . . . . . . . . . . . . . 1574.1.13 C IDL Compound Indexes . . . . . . . . . . . . . . . . . . . . . . . . . . . . . . . . . . . 158
4.2 OVN . . . . . . . . . . . . . . . . . . . . . . . . . . . . . . . . . . . . . . . . . . . . . . . . . . . 1624.2.1 OVN Gateway High Availability Plan . . . . . . . . . . . . . . . . . . . . . . . . . . . . . 162
5 How-to Guides 1715.1 OVS . . . . . . . . . . . . . . . . . . . . . . . . . . . . . . . . . . . . . . . . . . . . . . . . . . . 171
5.1.1 Open vSwitch with KVM . . . . . . . . . . . . . . . . . . . . . . . . . . . . . . . . . . . . 1715.1.2 Open vSwitch with SELinux . . . . . . . . . . . . . . . . . . . . . . . . . . . . . . . . . . 1725.1.3 Open vSwitch with Libvirt . . . . . . . . . . . . . . . . . . . . . . . . . . . . . . . . . . . 1755.1.4 Open vSwitch with SSL . . . . . . . . . . . . . . . . . . . . . . . . . . . . . . . . . . . . 1765.1.5 Using LISP tunneling . . . . . . . . . . . . . . . . . . . . . . . . . . . . . . . . . . . . . . 1805.1.6 Connecting VMs Using Tunnels . . . . . . . . . . . . . . . . . . . . . . . . . . . . . . . . 1815.1.7 Connecting VMs Using Tunnels (Userspace) . . . . . . . . . . . . . . . . . . . . . . . . . 1845.1.8 Isolating VM Traffic Using VLANs . . . . . . . . . . . . . . . . . . . . . . . . . . . . . . 1885.1.9 Quality of Service (QoS) Rate Limiting . . . . . . . . . . . . . . . . . . . . . . . . . . . . 1905.1.10 How to Use the VTEP Emulator . . . . . . . . . . . . . . . . . . . . . . . . . . . . . . . . 1935.1.11 Monitoring VM Trafic Using sFlow . . . . . . . . . . . . . . . . . . . . . . . . . . . . . . 1965.1.12 Using Open vSwitch with DPDK . . . . . . . . . . . . . . . . . . . . . . . . . . . . . . . . 199
5.2 OVN . . . . . . . . . . . . . . . . . . . . . . . . . . . . . . . . . . . . . . . . . . . . . . . . . . . 209
ii
5.2.1 Open Virtual Networking With Docker . . . . . . . . . . . . . . . . . . . . . . . . . . . . . 2095.2.2 Integration of Containers with OVN and OpenStack . . . . . . . . . . . . . . . . . . . . . . 213
6 Reference Guide 2176.1 Man Pages . . . . . . . . . . . . . . . . . . . . . . . . . . . . . . . . . . . . . . . . . . . . . . . . 217
6.1.1 ovs-test . . . . . . . . . . . . . . . . . . . . . . . . . . . . . . . . . . . . . . . . . . . . . 2176.1.2 ovs-vlan-test . . . . . . . . . . . . . . . . . . . . . . . . . . . . . . . . . . . . . . . . . . 219
7 Open vSwitch FAQ 2237.1 Basic Configuration . . . . . . . . . . . . . . . . . . . . . . . . . . . . . . . . . . . . . . . . . . . 2237.2 Development . . . . . . . . . . . . . . . . . . . . . . . . . . . . . . . . . . . . . . . . . . . . . . . 2267.3 Implementation Details . . . . . . . . . . . . . . . . . . . . . . . . . . . . . . . . . . . . . . . . . 2277.4 General . . . . . . . . . . . . . . . . . . . . . . . . . . . . . . . . . . . . . . . . . . . . . . . . . . 2287.5 Common Configuration Issues . . . . . . . . . . . . . . . . . . . . . . . . . . . . . . . . . . . . . . 2307.6 Using OpenFlow . . . . . . . . . . . . . . . . . . . . . . . . . . . . . . . . . . . . . . . . . . . . . 2357.7 Quality of Service (QoS) . . . . . . . . . . . . . . . . . . . . . . . . . . . . . . . . . . . . . . . . . 2437.8 Releases . . . . . . . . . . . . . . . . . . . . . . . . . . . . . . . . . . . . . . . . . . . . . . . . . 2457.9 Terminology . . . . . . . . . . . . . . . . . . . . . . . . . . . . . . . . . . . . . . . . . . . . . . . 2487.10 VLANs . . . . . . . . . . . . . . . . . . . . . . . . . . . . . . . . . . . . . . . . . . . . . . . . . . 2487.11 VXLANs . . . . . . . . . . . . . . . . . . . . . . . . . . . . . . . . . . . . . . . . . . . . . . . . . 252
8 Open vSwitch Internals 2538.1 Contributing to Open vSwitch . . . . . . . . . . . . . . . . . . . . . . . . . . . . . . . . . . . . . . 253
8.1.1 Submitting Patches . . . . . . . . . . . . . . . . . . . . . . . . . . . . . . . . . . . . . . . 2538.1.2 Backporting patches . . . . . . . . . . . . . . . . . . . . . . . . . . . . . . . . . . . . . . 2598.1.3 Open vSwitch Coding Style . . . . . . . . . . . . . . . . . . . . . . . . . . . . . . . . . . 2628.1.4 Open vSwitch Windows Datapath Coding Style . . . . . . . . . . . . . . . . . . . . . . . . 2708.1.5 Open vSwitch Documentation Style . . . . . . . . . . . . . . . . . . . . . . . . . . . . . . 2728.1.6 Open vSwitch Library ABI Updates . . . . . . . . . . . . . . . . . . . . . . . . . . . . . . 278
8.2 Mailing Lists . . . . . . . . . . . . . . . . . . . . . . . . . . . . . . . . . . . . . . . . . . . . . . . 2808.2.1 ovs-announce . . . . . . . . . . . . . . . . . . . . . . . . . . . . . . . . . . . . . . . . . . 2808.2.2 ovs-discuss . . . . . . . . . . . . . . . . . . . . . . . . . . . . . . . . . . . . . . . . . . . 2808.2.3 ovs-dev . . . . . . . . . . . . . . . . . . . . . . . . . . . . . . . . . . . . . . . . . . . . . 2808.2.4 ovs-git . . . . . . . . . . . . . . . . . . . . . . . . . . . . . . . . . . . . . . . . . . . . . . 2808.2.5 ovs-build . . . . . . . . . . . . . . . . . . . . . . . . . . . . . . . . . . . . . . . . . . . . 2808.2.6 bugs . . . . . . . . . . . . . . . . . . . . . . . . . . . . . . . . . . . . . . . . . . . . . . . 2808.2.7 security . . . . . . . . . . . . . . . . . . . . . . . . . . . . . . . . . . . . . . . . . . . . . 280
8.3 Patchwork . . . . . . . . . . . . . . . . . . . . . . . . . . . . . . . . . . . . . . . . . . . . . . . . 2818.3.1 pwclient . . . . . . . . . . . . . . . . . . . . . . . . . . . . . . . . . . . . . . . . . . . . . 281
8.4 Open vSwitch Release Process . . . . . . . . . . . . . . . . . . . . . . . . . . . . . . . . . . . . . . 2818.4.1 Release Strategy . . . . . . . . . . . . . . . . . . . . . . . . . . . . . . . . . . . . . . . . 2818.4.2 Release Numbering . . . . . . . . . . . . . . . . . . . . . . . . . . . . . . . . . . . . . . . 2828.4.3 Release Scheduling . . . . . . . . . . . . . . . . . . . . . . . . . . . . . . . . . . . . . . . 2828.4.4 Contact . . . . . . . . . . . . . . . . . . . . . . . . . . . . . . . . . . . . . . . . . . . . . 282
8.5 Reporting Bugs in Open vSwitch . . . . . . . . . . . . . . . . . . . . . . . . . . . . . . . . . . . . 2828.6 Open vSwitch’s Security Process . . . . . . . . . . . . . . . . . . . . . . . . . . . . . . . . . . . . 283
8.6.1 What is a vulnerability? . . . . . . . . . . . . . . . . . . . . . . . . . . . . . . . . . . . . . 2838.6.2 Step 1: Reception . . . . . . . . . . . . . . . . . . . . . . . . . . . . . . . . . . . . . . . . 2848.6.3 Step 2: Assessment . . . . . . . . . . . . . . . . . . . . . . . . . . . . . . . . . . . . . . . 2848.6.4 Step 3a: Document . . . . . . . . . . . . . . . . . . . . . . . . . . . . . . . . . . . . . . . 2848.6.5 Step 3b: Fix . . . . . . . . . . . . . . . . . . . . . . . . . . . . . . . . . . . . . . . . . . . 2868.6.6 Step 4: Embargoed Disclosure . . . . . . . . . . . . . . . . . . . . . . . . . . . . . . . . . 2868.6.7 Step 5: Public Disclosure . . . . . . . . . . . . . . . . . . . . . . . . . . . . . . . . . . . . 286
8.7 Expectations for Developers with Open vSwitch Repo Access . . . . . . . . . . . . . . . . . . . . . 287
iii
8.7.1 Pre-requisites . . . . . . . . . . . . . . . . . . . . . . . . . . . . . . . . . . . . . . . . . . 2878.7.2 Review . . . . . . . . . . . . . . . . . . . . . . . . . . . . . . . . . . . . . . . . . . . . . 2878.7.3 Git conventions . . . . . . . . . . . . . . . . . . . . . . . . . . . . . . . . . . . . . . . . . 287
8.8 OVS Committer Grant/Revocation Policy . . . . . . . . . . . . . . . . . . . . . . . . . . . . . . . . 2888.8.1 Granting Commit Access . . . . . . . . . . . . . . . . . . . . . . . . . . . . . . . . . . . . 2888.8.2 Revoking Commit Access . . . . . . . . . . . . . . . . . . . . . . . . . . . . . . . . . . . 2898.8.3 Changing the Policy . . . . . . . . . . . . . . . . . . . . . . . . . . . . . . . . . . . . . . 2908.8.4 Nomination to Grant Commit Access . . . . . . . . . . . . . . . . . . . . . . . . . . . . . 2908.8.5 Vote to Grant Commit Access . . . . . . . . . . . . . . . . . . . . . . . . . . . . . . . . . 2908.8.6 Vote Results for Grant of Commit Access . . . . . . . . . . . . . . . . . . . . . . . . . . . 2918.8.7 Invitation to Accepted Committer . . . . . . . . . . . . . . . . . . . . . . . . . . . . . . . 2918.8.8 Proposal to Remove Commit Access for Inactivity . . . . . . . . . . . . . . . . . . . . . . 2918.8.9 Notification of Commit Removal for Inactivity . . . . . . . . . . . . . . . . . . . . . . . . 2918.8.10 Proposal to Revoke Commit Access for Detrimental Behavior . . . . . . . . . . . . . . . . 2918.8.11 Vote to Revoke Commit Access . . . . . . . . . . . . . . . . . . . . . . . . . . . . . . . . 2928.8.12 Vote Results for Revocation of Commit Access . . . . . . . . . . . . . . . . . . . . . . . . 2928.8.13 Notification of Commit Revocation for Detrimental Behavior . . . . . . . . . . . . . . . . . 292
8.9 Authors . . . . . . . . . . . . . . . . . . . . . . . . . . . . . . . . . . . . . . . . . . . . . . . . . . 2938.10 Committers . . . . . . . . . . . . . . . . . . . . . . . . . . . . . . . . . . . . . . . . . . . . . . . . 3048.11 How Open vSwitch’s Documentation Works . . . . . . . . . . . . . . . . . . . . . . . . . . . . . . 305
8.11.1 reStructuredText and Sphinx . . . . . . . . . . . . . . . . . . . . . . . . . . . . . . . . . . 3058.11.2 ovs-sphinx-theme . . . . . . . . . . . . . . . . . . . . . . . . . . . . . . . . . . . . . . . . 3058.11.3 Read the Docs . . . . . . . . . . . . . . . . . . . . . . . . . . . . . . . . . . . . . . . . . . 3058.11.4 openvswitch.org . . . . . . . . . . . . . . . . . . . . . . . . . . . . . . . . . . . . . . . . . 305
Index 307
iv
CHAPTER 1
Open vSwitch Documentation
1.1 How the Documentation is Organised
The Open vSwitch documentation is organised into multiple sections:
• Installation guides guide you through installing Open vSwitch (OVS) and Open Virtual Network (OVN) on avariety of different platforms
• Tutorials take you through a series of steps to configure OVS and OVN in sandboxed environments
• Topic guides provide a high level overview of OVS and OVN internals and operation
• How-to guides are recipes or use-cases for OVS and OVN. They are more advanced than the tutorials.
• Frequently Asked Questions provide general insight into a variety of topics related to configuration and operationof OVS and OVN.
1.2 First Steps
Getting started with Open vSwitch (OVS) or Open Virtual Network (OVN) for Open vSwitch? Start here.
• Overview: What Is Open vSwitch? | Why Open vSwitch?
• Install: Open vSwitch on Linux, FreeBSD and NetBSD | Open vSwitch without Kernel Support | Open vSwitchon NetBSD | Open vSwitch on Windows | Open vSwitch on Citrix XenServer | Open vSwitch with DPDK |Installation FAQs
• Tutorials: Open vSwitch Advanced Features | OVN Sandbox | OVN OpenStack Tutorial
1.3 Deeper Dive
• Architecture Design Decisions In Open vSwitch | OpenFlow Support in Open vSwitch | Integration Guide forCentralized Control | Porting Open vSwitch to New Software or Hardware
1
Open vSwitch, Release 2.8.0
• DPDK Using Open vSwitch with DPDK | DPDK vHost User Ports
• Windows OVS-on-Hyper-V Design
• Integrations: Language Bindings
• Reference Guides: Reference Guide
• Testing Testing
• Packaging: Debian Packaging for Open vSwitch | RHEL 5.6, 6.x Packaging for Open vSwitch | Fedora, RHEL7.x Packaging for Open vSwitch
1.4 The Open vSwitch Project
Learn more about the Open vSwitch project and about how you can contribute:
• Community: Open vSwitch Release Process | Authors | Mailing Lists | Patchwork | Reporting Bugs in OpenvSwitch | Open vSwitch’s Security Process
• Contributing: Submitting Patches | Backporting patches | Open vSwitch Coding Style | Open vSwitch WindowsDatapath Coding Style
• Maintaining: Committers | Expectations for Developers with Open vSwitch Repo Access | OVS CommitterGrant/Revocation Policy
• Documentation: Open vSwitch Documentation Style | Building Open vSwitch Documentation | How OpenvSwitch’s Documentation Works
1.5 Getting Help
• Seeing an issue of potential bug? Report problems to [email protected]
• Looking for specific information? Try the genindex, modindex or the detailed table of contents.
2 Chapter 1. Open vSwitch Documentation

CHAPTER 2
Getting Started
How to get started with Open vSwitch.
3
Open vSwitch, Release 2.8.0
2.1 What Is Open vSwitch?
2.1.1 Overview
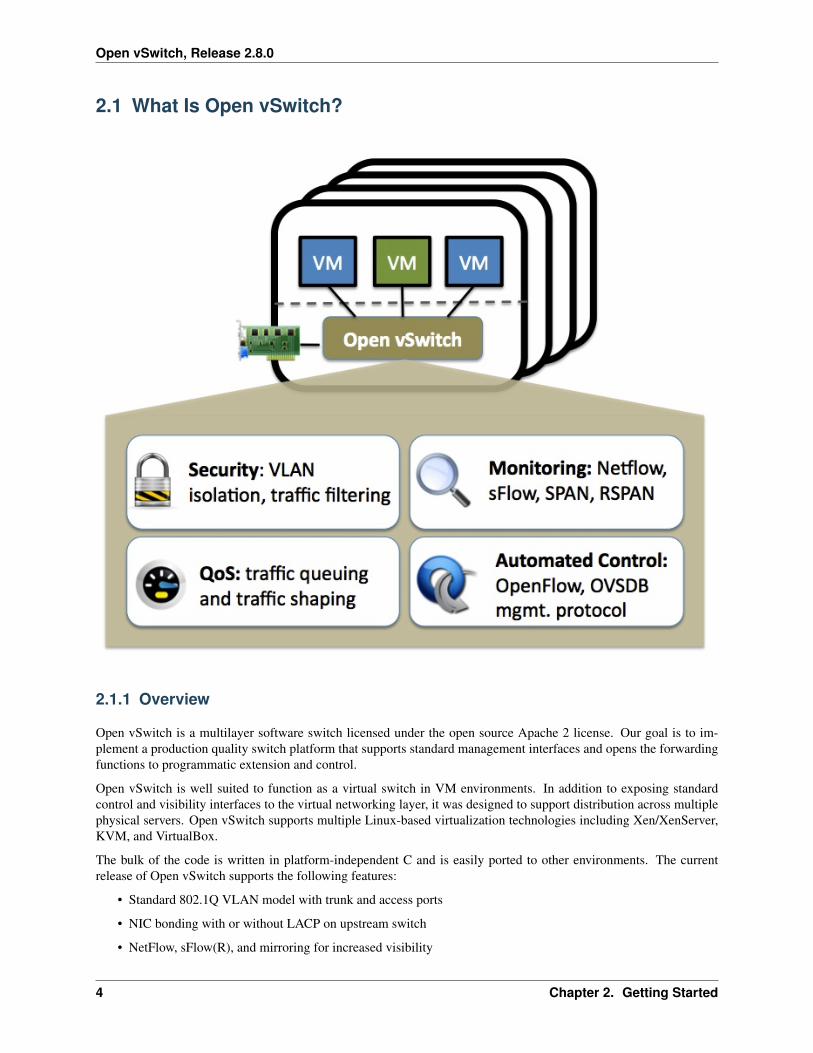
Open vSwitch is a multilayer software switch licensed under the open source Apache 2 license. Our goal is to im-plement a production quality switch platform that supports standard management interfaces and opens the forwardingfunctions to programmatic extension and control.
Open vSwitch is well suited to function as a virtual switch in VM environments. In addition to exposing standardcontrol and visibility interfaces to the virtual networking layer, it was designed to support distribution across multiplephysical servers. Open vSwitch supports multiple Linux-based virtualization technologies including Xen/XenServer,KVM, and VirtualBox.
The bulk of the code is written in platform-independent C and is easily ported to other environments. The currentrelease of Open vSwitch supports the following features:
• Standard 802.1Q VLAN model with trunk and access ports
• NIC bonding with or without LACP on upstream switch
• NetFlow, sFlow(R), and mirroring for increased visibility
4 Chapter 2. Getting Started
Open vSwitch, Release 2.8.0
• QoS (Quality of Service) configuration, plus policing
• Geneve, GRE, VXLAN, STT, and LISP tunneling
• 802.1ag connectivity fault management
• OpenFlow 1.0 plus numerous extensions
• Transactional configuration database with C and Python bindings
• High-performance forwarding using a Linux kernel module
The included Linux kernel module supports Linux 3.10 and up.
Open vSwitch can also operate entirely in userspace without assistance from a kernel module. This userspace imple-mentation should be easier to port than the kernel-based switch. OVS in userspace can access Linux or DPDK devices.Note Open vSwitch with userspace datapath and non DPDK devices is considered experimental and comes with a costin performance.
2.1.2 What’s here?
The main components of this distribution are:
• ovs-vswitchd, a daemon that implements the switch, along with a companion Linux kernel module for flow-based switching.
• ovsdb-server, a lightweight database server that ovs-vswitchd queries to obtain its configuration.
• ovs-dpctl, a tool for configuring the switch kernel module.
• Scripts and specs for building RPMs for Citrix XenServer and Red Hat Enterprise Linux. The XenServer RPMsallow Open vSwitch to be installed on a Citrix XenServer host as a drop-in replacement for its switch, withadditional functionality.
• ovs-vsctl, a utility for querying and updating the configuration of ovs-vswitchd.
• ovs-appctl, a utility that sends commands to running Open vSwitch daemons.
Open vSwitch also provides some tools:
• ovs-ofctl, a utility for querying and controlling OpenFlow switches and controllers.
• ovs-pki, a utility for creating and managing the public-key infrastructure for OpenFlow switches.
• ovs-testcontroller, a simple OpenFlow controller that may be useful for
2.2 Why Open vSwitch?
Hypervisors need the ability to bridge traffic between VMs and with the outside world. On Linux-based hypervisors,this used to mean using the built-in L2 switch (the Linux bridge), which is fast and reliable. So, it is reasonable to askwhy Open vSwitch is used.
The answer is that Open vSwitch is targeted at multi-server virtualization deployments, a landscape for which theprevious stack is not well suited. These environments are often characterized by highly dynamic end-points, the main-tenance of logical abstractions, and (sometimes) integration with or offloading to special purpose switching hardware.
The following characteristics and design considerations help Open vSwitch cope with the above requirements.
2.2. Why Open vSwitch? 5
Open vSwitch, Release 2.8.0
2.2.1 The mobility of state
All network state associated with a network entity (say a virtual machine) should be easily identifiable and migratablebetween different hosts. This may include traditional “soft state” (such as an entry in an L2 learning table), L3forwarding state, policy routing state, ACLs, QoS policy, monitoring configuration (e.g. NetFlow, IPFIX, sFlow), etc.
Open vSwitch has support for both configuring and migrating both slow (configuration) and fast network state betweeninstances. For example, if a VM migrates between end-hosts, it is possible to not only migrate associated configuration(SPAN rules, ACLs, QoS) but any live network state (including, for example, existing state which may be difficult toreconstruct). Further, Open vSwitch state is typed and backed by a real data-model allowing for the development ofstructured automation systems.
2.2.2 Responding to network dynamics
Virtual environments are often characterized by high-rates of change. VMs coming and going, VMs moving backwardsand forwards in time, changes to the logical network environments, and so forth.
Open vSwitch supports a number of features that allow a network control system to respond and adapt as the environ-ment changes. This includes simple accounting and visibility support such as NetFlow, IPFIX, and sFlow. But perhapsmore useful, Open vSwitch supports a network state database (OVSDB) that supports remote triggers. Therefore, apiece of orchestration software can “watch” various aspects of the network and respond if/when they change. This isused heavily today, for example, to respond to and track VM migrations.
Open vSwitch also supports OpenFlow as a method of exporting remote access to control traffic. There are a numberof uses for this including global network discovery through inspection of discovery or link-state traffic (e.g. LLDP,CDP, OSPF, etc.).
2.2.3 Maintenance of logical tags
Distributed virtual switches (such as VMware vDS and Cisco’s Nexus 1000V) often maintain logical context withinthe network through appending or manipulating tags in network packets. This can be used to uniquely identify a VM(in a manner resistant to hardware spoofing), or to hold some other context that is only relevant in the logical domain.Much of the problem of building a distributed virtual switch is to efficiently and correctly manage these tags.
Open vSwitch includes multiple methods for specifying and maintaining tagging rules, all of which are accessibleto a remote process for orchestration. Further, in many cases these tagging rules are stored in an optimized form sothey don’t have to be coupled with a heavyweight network device. This allows, for example, thousands of tagging oraddress remapping rules to be configured, changed, and migrated.
In a similar vein, Open vSwitch supports a GRE implementation that can handle thousands of simultaneous GREtunnels and supports remote configuration for tunnel creation, configuration, and tear-down. This, for example, can beused to connect private VM networks in different data centers.
2.2.4 Hardware integration
Open vSwitch’s forwarding path (the in-kernel datapath) is designed to be amenable to “offloading” packet processingto hardware chipsets, whether housed in a classic hardware switch chassis or in an end-host NIC. This allows for theOpen vSwitch control path to be able to both control a pure software implementation or a hardware switch.
There are many ongoing efforts to port Open vSwitch to hardware chipsets. These include multiple merchant siliconchipsets (Broadcom and Marvell), as well as a number of vendor-specific platforms. The “Porting” section in thedocumentation discusses how one would go about making such a port.
6 Chapter 2. Getting Started
Open vSwitch, Release 2.8.0
The advantage of hardware integration is not only performance within virtualized environments. If physical switchesalso expose the Open vSwitch control abstractions, both bare-metal and virtualized hosting environments can bemanaged using the same mechanism for automated network control.
2.2.5 Summary
In many ways, Open vSwitch targets a different point in the design space than previous hypervisor networking stacks,focusing on the need for automated and dynamic network control in large-scale Linux-based virtualization environ-ments.
The goal with Open vSwitch is to keep the in-kernel code as small as possible (as is necessary for performance) andto re-use existing subsystems when applicable (for example Open vSwitch uses the existing QoS stack). As of Linux3.3, Open vSwitch is included as a part of the kernel and packaging for the userspace utilities are available on mostpopular distributions.
2.3 Installing Open vSwitch
A collection of guides detailing how to install Open vSwitch in a variety of different environments and using differentconfigurations.
2.3.1 Installation from Source
Open vSwitch on Linux, FreeBSD and NetBSD
This document describes how to build and install Open vSwitch on a generic Linux, FreeBSD, or NetBSD host. Forspecifics around installation on a specific platform, refer to one of the other installation guides listed in Installing OpenvSwitch.
Obtaining Open vSwitch Sources
The canonical location for Open vSwitch source code is its Git repository, which you can clone into a directory named“ovs” with:
$ git clone https://github.com/openvswitch/ovs.git
Cloning the repository leaves the “master” branch initially checked out. This is the right branch for general devel-opment. If, on the other hand, if you want to build a particular released version, you can check it out by running acommand such as the following from the “ovs” directory:
$ git checkout v2.7.0
The repository also has a branch for each release series. For example, to obtain the latest fixes in the Open vSwitch2.7.x release series, which might include bug fixes that have not yet been in any released version, you can check it outfrom the “ovs” directory with:
$ git checkout origin/branch-2.7
If you do not want to use Git, you can also obtain tarballs for Open vSwitch release versions via http://openvswitch.org/download/, or download a ZIP file for any snapshot from the web interface at https://github.com/openvswitch/ovs.
2.3. Installing Open vSwitch 7
Open vSwitch, Release 2.8.0
Build Requirements
To compile the userspace programs in the Open vSwitch distribution, you will need the following software:
• GNU make
• A C compiler, such as:
– GCC 4.6 or later.
– Clang 3.4 or later.
– MSVC 2013. Refer to Open vSwitch on Windows for additional Windows build instructions.
While OVS may be compatible with other compilers, optimal support for atomic operations may be missing,making OVS very slow (see lib/ovs-atomic.h).
• libssl, from OpenSSL, is optional but recommended if you plan to connect the Open vSwitch to an OpenFlowcontroller. libssl is required to establish confidentiality and authenticity in the connections from an Open vSwitchto an OpenFlow controller. If libssl is installed, then Open vSwitch will automatically build with support for it.
• libcap-ng, written by Steve Grubb, is optional but recommended. It is required to run OVS daemons as a non-root user with dropped root privileges. If libcap-ng is installed, then Open vSwitch will automatically build withsupport for it.
• Python 2.7. You must also have the Python six library version 1.4.0 or later.
On Linux, you may choose to compile the kernel module that comes with the Open vSwitch distribution or to use thekernel module built into the Linux kernel (version 3.3 or later). See the Open vSwitch FAQ question “What featuresare not available in the Open vSwitch kernel datapath that ships as part of the upstream Linux kernel?” for moreinformation on this trade-off. You may also use the userspace-only implementation, at some cost in features andperformance. Refer to Open vSwitch without Kernel Support for details.
To compile the kernel module on Linux, you must also install the following:
• A supported Linux kernel version.
For optional support of ingress policing, you must enable kernel configuration options NET_CLS_BASIC,NET_SCH_INGRESS, and NET_ACT_POLICE, either built-in or as modules. NET_CLS_POLICE is obsoleteand not needed.)
On kernels before 3.11, the ip_gre module, for GRE tunnels over IP (NET_IPGRE), must not be loaded orcompiled in.
To configure HTB or HFSC quality of service with Open vSwitch, you must enable the respective configurationoptions.
To use Open vSwitch support for TAP devices, you must enable CONFIG_TUN.
• To build a kernel module, you need the same version of GCC that was used to build that kernel.
• A kernel build directory corresponding to the Linux kernel image the module is to run on. Under Debian andUbuntu, for example, each linux-image package containing a kernel binary has a corresponding linux-headerspackage with the required build infrastructure.
If you are working from a Git tree or snapshot (instead of from a distribution tarball), or if you modify the OpenvSwitch build system or the database schema, you will also need the following software:
• Autoconf version 2.63 or later.
• Automake version 1.10 or later.
• libtool version 2.4 or later. (Older versions might work too.)
To run the unit tests, you also need:
8 Chapter 2. Getting Started
Open vSwitch, Release 2.8.0
• Perl. Version 5.10.1 is known to work. Earlier versions should also work.
The datapath tests for userspace and Linux datapaths also rely upon:
• pyftpdlib. Version 1.2.0 is known to work. Earlier versions should also work.
• GNU wget. Version 1.16 is known to work. Earlier versions should also work.
• netcat. Several common implementations are known to work.
• curl. Version 7.47.0 is known to work. Earlier versions should also work.
• tftpy. Version 0.6.2 is known to work. Earlier versions should also work.
The ovs-vswitchd.conf.db(5) manpage will include an E-R diagram, in formats other than plain text, only if you havethe following:
• dot from graphviz (http://www.graphviz.org/).
• Perl. Version 5.10.1 is known to work. Earlier versions should also work.
If you are going to extensively modify Open vSwitch, consider installing the following to obtain better warnings:
• “sparse” version 0.4.4 or later (https://www.kernel.org/pub/software/devel/sparse/dist/).
• GNU make.
• clang, version 3.4 or later
• flake8 along with the hacking flake8 plugin (for Python code). The automatic flake8 check that runs againstPython code has some warnings enabled that come from the “hacking” flake8 plugin. If it’s not installed, thewarnings just won’t occur until it’s run on a system with “hacking” installed.
You may find the ovs-dev script found in utilities/ovs-dev.py useful.
Installation Requirements
The machine you build Open vSwitch on may not be the one you run it on. To simply install and run Open vSwitchyou require the following software:
• Shared libraries compatible with those used for the build.
• On Linux, if you want to use the kernel-based datapath (which is the most common use case), then a kernel witha compatible kernel module. This can be a kernel module built with Open vSwitch (e.g. in the previous step),or the kernel module that accompanies Linux 3.3 and later. Open vSwitch features and performance can varybased on the module and the kernel. Refer to Releases for more information.
• For optional support of ingress policing on Linux, the “tc” program from iproute2 (part of all major distributionsand available at https://wiki.linuxfoundation.org/networking/iproute2).
• Python 2.7. You must also have the Python six library version 1.4.0 or later.
On Linux you should ensure that /dev/urandom exists. To support TAP devices, you must also ensure that /dev/net/tun exists.
Bootstrapping
This step is not needed if you have downloaded a released tarball. If you pulled the sources directly from an OpenvSwitch Git tree or got a Git tree snapshot, then run boot.sh in the top source directory to build the “configure” script:
$ ./boot.sh
2.3. Installing Open vSwitch 9
Open vSwitch, Release 2.8.0
Configuring
Configure the package by running the configure script. You can usually invoke configure without any arguments. Forexample:
$ ./configure
By default all files are installed under /usr/local. Open vSwitch also expects to find its database in /usr/local/etc/openvswitch by default. If you want to install all files into, e.g., /usr and /var instead of /usr/local and /usr/local/var and expect to use /etc/openvswitch as the default database directory,add options as shown here:
$ ./configure --prefix=/usr --localstatedir=/var --sysconfdir=/etc
Note: Open vSwitch installed with packages like .rpm (e.g. via yum install or rpm -ivh) and .deb (e.g. viaapt-get install or dpkg -i) use the above configure options.
By default, static libraries are built and linked against. If you want to use shared libraries instead:
$ ./configure --enable-shared
To use a specific C compiler for compiling Open vSwitch user programs, also specify it on the configure commandline, like so:
$ ./configure CC=gcc-4.2
To use ‘clang’ compiler:
$ ./configure CC=clang
To supply special flags to the C compiler, specify them as CFLAGS on the configure command line. If you want thedefault CFLAGS, which include -g to build debug symbols and -O2 to enable optimizations, you must include themyourself. For example, to build with the default CFLAGS plus -mssse3, you might run configure as follows:
$ ./configure CFLAGS="-g -O2 -mssse3"
For efficient hash computation special flags can be passed to leverage built-in intrinsics. For example on X86_64 withSSE4.2 instruction set support, CRC32 intrinsics can be used by passing -msse4.2:
$ ./configure CFLAGS="-g -O2 -msse4.2"`
If you are on a different processor and don’t know what flags to choose, it is recommended to use -march=nativesettings:
$ ./configure CFLAGS="-g -O2 -march=native"
With this, GCC will detect the processor and automatically set appropriate flags for it. This should not be used if youare compiling OVS outside the target machine.
Note: CFLAGS are not applied when building the Linux kernel module. Custom CFLAGS for the kernel module aresupplied using the EXTRA_CFLAGS variable when running make. For example:
$ make EXTRA_CFLAGS="-Wno-error=date-time"
10 Chapter 2. Getting Started
Open vSwitch, Release 2.8.0
To build the Linux kernel module, so that you can run the kernel-based switch, pass the location of the kernel builddirectory on --with-linux. For example, to build for a running instance of Linux:
$ ./configure --with-linux=/lib/modules/$(uname -r)/build
Note: If --with-linux requests building for an unsupported version of Linux, then configure will fail withan error message. Refer to the Open vSwitch FAQ for advice in that case.
If you wish to build the kernel module for an architecture other than the architecture of the machine used for the build,you may specify the kernel architecture string using the KARCH variable when invoking the configure script. Forexample, to build for MIPS with Linux:
$ ./configure --with-linux=/path/to/linux KARCH=mips
If you plan to do much Open vSwitch development, you might want to add --enable-Werror, which adds the-Werror option to the compiler command line, turning warnings into errors. That makes it impossible to misswarnings generated by the build. For example:
$ ./configure --enable-Werror
To build with gcov code coverage support, add --enable-coverage:
$ ./configure --enable-coverage
The configure script accepts a number of other options and honors additional environment variables. For a full list,invoke configure with the --help option:
$ ./configure --help
You can also run configure from a separate build directory. This is helpful if you want to build Open vSwitch in morethan one way from a single source directory, e.g. to try out both GCC and Clang builds, or to build kernel modules formore than one Linux version. For example:
$ mkdir _gcc && (cd _gcc && ./configure CC=gcc)$ mkdir _clang && (cd _clang && ./configure CC=clang)
Under certains loads the ovsdb-server and other components perform better when using the jemalloc memory allocator,instead of the glibc memory allocator. If you wish to link with jemalloc add it to LIBS:
$ ./configure LIBS=-ljemalloc
Building
1. Run GNU make in the build directory, e.g.:
$ make
or if GNU make is installed as “gmake”:
$ gmake
If you used a separate build directory, run make or gmake from that directory, e.g.:
2.3. Installing Open vSwitch 11
Open vSwitch, Release 2.8.0
$ make -C _gcc$ make -C _clang
For improved warnings if you installed sparse (see “Prerequisites”), add C=1 to the command line.
Note: Some versions of Clang and ccache are not completely compatible. If you see unusual warnings whenyou use both together, consider disabling ccache.
2. Consider running the testsuite. Refer to Testing for instructions.
3. Run make install to install the executables and manpages into the running system, by default under /usr/local:
$ make install
5. If you built kernel modules, you may install them, e.g.:
$ make modules_install
It is possible that you already had a Open vSwitch kernel module installed on your machine that came fromupstream Linux (in a different directory). To make sure that you load the Open vSwitch kernel module you builtfrom this repository, you should create a depmod.d file that prefers your newly installed kernel modules overthe kernel modules from upstream Linux. The following snippet of code achieves the same:
$ config_file="/etc/depmod.d/openvswitch.conf"$ for module in datapath/linux/*.ko; domodname="$(basename ${module})"echo "override ${modname%.ko} * extra" >> "$config_file"echo "override ${modname%.ko} * weak-updates" >> "$config_file"done
$ depmod -a
Finally, load the kernel modules that you need. e.g.:
$ /sbin/modprobe openvswitch
To verify that the modules have been loaded, run /sbin/lsmod and check that openvswitch is listed:
$ /sbin/lsmod | grep openvswitch
Note: If the modprobe operation fails, look at the last few kernel log messages (e.g. with dmesg | tail).Generally, issues like this occur when Open vSwitch is built for a kernel different from the one into which youare trying to load it. Run modinfo on openvswitch.ko and on a module built for the running kernel, e.g.:
$ /sbin/modinfo openvswitch.ko$ /sbin/modinfo /lib/modules/$(uname -r)/kernel/net/bridge/bridge.ko
Compare the “vermagic” lines output by the two commands. If they differ, then Open vSwitch was built for thewrong kernel.
If you decide to report a bug or ask a question related to module loading, include the output from the dmesgand modinfo commands mentioned above.
12 Chapter 2. Getting Started
Open vSwitch, Release 2.8.0
Starting
On Unix-alike systems, such as BSDs and Linux, starting the Open vSwitch suite of daemons is a simple process.Open vSwitch includes a shell script, and helpers, called ovs-ctl which automates much of the tasks for starting andstopping ovsdb-server, and ovs-vswitchd. After installation, the daemons can be started by using the ovs-ctl utility.This will take care to setup initial conditions, and start the daemons in the correct order. The ovs-ctl utility is locatedin ‘$(pkgdatadir)/scripts’, and defaults to ‘/usr/local/share/openvswitch/scripts’. An example after install might be:
$ export PATH=$PATH:/usr/local/share/openvswitch/scripts$ ovs-ctl start
Additionally, the ovs-ctl script allows starting / stopping the daemons individually using specific options. To start justthe ovsdb-server:
$ export PATH=$PATH:/usr/local/share/openvswitch/scripts$ ovs-ctl --no-ovs-vswitchd start
Likewise, to start just the ovs-vswitchd:
$ export PATH=$PATH:/usr/local/share/openvswitch/scripts$ ovs-ctl --no-ovsdb-server start
Refer to ovs-ctl(8) for more information on ovs-ctl.
In addition to using the automated script to start Open vSwitch, you may wish to manually start the various daemons.Before starting ovs-vswitchd itself, you need to start its configuration database, ovsdb-server. Each machine on whichOpen vSwitch is installed should run its own copy of ovsdb-server. Before ovsdb-server itself can be started, configurea database that it can use:
$ mkdir -p /usr/local/etc/openvswitch$ ovsdb-tool create /usr/local/etc/openvswitch/conf.db \
vswitchd/vswitch.ovsschema
Configure ovsdb-server to use database created above, to listen on a Unix domain socket, to connect to any managersspecified in the database itself, and to use the SSL configuration in the database:
$ mkdir -p /usr/local/var/run/openvswitch$ ovsdb-server --remote=punix:/usr/local/var/run/openvswitch/db.sock \
--remote=db:Open_vSwitch,Open_vSwitch,manager_options \--private-key=db:Open_vSwitch,SSL,private_key \--certificate=db:Open_vSwitch,SSL,certificate \--bootstrap-ca-cert=db:Open_vSwitch,SSL,ca_cert \--pidfile --detach --log-file
Note: If you built Open vSwitch without SSL support, then omit --private-key, --certificate, and--bootstrap-ca-cert.)
Initialize the database using ovs-vsctl. This is only necessary the first time after you create the database with ovsdb-tool, though running it at any time is harmless:
$ ovs-vsctl --no-wait init
Start the main Open vSwitch daemon, telling it to connect to the same Unix domain socket:
2.3. Installing Open vSwitch 13
Open vSwitch, Release 2.8.0
$ ovs-vswitchd --pidfile --detach --log-file
Validating
At this point you can use ovs-vsctl to set up bridges and other Open vSwitch features. For example, to create a bridgenamed br0 and add ports eth0 and vif1.0 to it:
$ ovs-vsctl add-br br0$ ovs-vsctl add-port br0 eth0$ ovs-vsctl add-port br0 vif1.0
Refer to ovs-vsctl(8) for more details. You may also wish to refer to Testing for information on more generic testingof OVS.
Upgrading
When you upgrade Open vSwitch from one version to another you should also upgrade the database schema:
Note: The following manual steps may also be accomplished by using ovs-ctl to stop and start the daemons afterupgrade. The ovs-ctl script will automatically upgrade the schema.
1. Stop the Open vSwitch daemons, e.g.:
$ kill `cd /usr/local/var/run/openvswitch && cat ovsdb-server.pid ovs-vswitchd.→˓pid`
2. Install the new Open vSwitch release by using the same configure options as was used for installing the previousversion. If you do not use the same configure options, you can end up with two different versions of OpenvSwitch executables installed in different locations.
3. Upgrade the database, in one of the following two ways:
• If there is no important data in your database, then you may delete the database file and recreate it withovsdb-tool, following the instructions under “Building and Installing Open vSwitch for Linux, FreeBSDor NetBSD”.
• If you want to preserve the contents of your database, back it up first, then use ovsdb-tool convertto upgrade it, e.g.:
$ ovsdb-tool convert /usr/local/etc/openvswitch/conf.db \vswitchd/vswitch.ovsschema
4. Start the Open vSwitch daemons as described under Starting above.
Hot Upgrading
Upgrading Open vSwitch from one version to the next version with minimum disruption of traffic going through thesystem that is using that Open vSwitch needs some considerations:
1. If the upgrade only involves upgrading the userspace utilities and daemons of Open vSwitch, make sure that thenew userspace version is compatible with the previously loaded kernel module.
14 Chapter 2. Getting Started
Open vSwitch, Release 2.8.0
2. An upgrade of userspace daemons means that they have to be restarted. Restarting the daemons means that theOpenFlow flows in the ovs-vswitchd daemon will be lost. One way to restore the flows is to let the controllerre-populate it. Another way is to save the previous flows using a utility like ovs-ofctl and then re-add them afterthe restart. Restoring the old flows is accurate only if the new Open vSwitch interfaces retain the old ‘ofport’values.
3. When the new userspace daemons get restarted, they automatically flush the old flows setup in the kernel. Thiscan be expensive if there are hundreds of new flows that are entering the kernel but userspace daemons are busysetting up new userspace flows from either the controller or an utility like ovs-ofctl. Open vSwitch databaseprovides an option to solve this problem through the other_config:flow-restore-wait column ofthe Open_vSwitch table. Refer to the ovs-vswitchd.conf.db(5) manpage for details.
4. If the upgrade also involves upgrading the kernel module, the old kernel module needs to be unloaded and thenew kernel module should be loaded. This means that the kernel network devices belonging to Open vSwitch isrecreated and the kernel flows are lost. The downtime of the traffic can be reduced if the userspace daemons arerestarted immediately and the userspace flows are restored as soon as possible.
The ovs-ctl utility’s restart function only restarts the userspace daemons, makes sure that the ‘ofport’ val-ues remain consistent across restarts, restores userspace flows using the ovs-ofctl utility and also uses theother_config:flow-restore-wait column to keep the traffic downtime to the minimum. The ovs-ctl util-ity’s force-reload-kmod function does all of the above, but also replaces the old kernel module with the newone. Open vSwitch startup scripts for Debian, XenServer and RHEL use ovs-ctl’s functions and it is recommendedthat these functions be used for other software platforms too.
Reporting Bugs
Report problems to [email protected].
Open vSwitch on NetBSD
On NetBSD, you might want to install requirements from pkgsrc. In that case, you need at least the following packages.
• automake
• libtool-base
• gmake
• python27
• py27-six
• py27-xml
Some components have additional requirements. Refer to Open vSwitch on Linux, FreeBSD and NetBSD for moreinformation.
Assuming you are running NetBSD/amd64 6.1.2, you can download and install pre-built binary packages as the fol-lowing:
$ PKG_PATH=http://ftp.netbsd.org/pub/pkgsrc/packages/NetBSD/amd64/7.0.2/All/$ export PKG_PATH$ pkg_add automake libtool-base gmake python27 py27-six py27-xml \
pkg_alternatives
Note: You might get some warnings about minor version mismatch. These can be safely ignored.
2.3. Installing Open vSwitch 15
Open vSwitch, Release 2.8.0
NetBSD’s /usr/bin/make is not GNU make. GNU make is installed as /usr/pkg/bin/gmake by the abovementioned gmake package.
As all executables installed with pkgsrc are placed in /usr/pkg/bin/ directory, it might be a good idea to add it toyour PATH. Or install ovs by gmake and gmake install.
Open vSwitch on NetBSD is currently “userspace switch” implementation in the sense described in Open vSwitchwithout Kernel Support and Porting Open vSwitch to New Software or Hardware.
Open vSwitch on Windows
Build Requirements
Open vSwitch on Linux uses autoconf and automake for generating Makefiles. It will be useful to maintain the samebuild system while compiling on Windows too. One approach is to compile Open vSwitch in a MinGW environmentthat contains autoconf and automake utilities and then use Visual C++ as a compiler and linker.
The following explains the steps in some detail.
• Mingw
Install Mingw on a Windows machine by following the instructions on mingw.org.
This should install mingw at C:\Mingw and msys at C:\Mingw\msys. Add C:\MinGW\bin andC:\Mingw\msys\1.0\bin to PATH environment variable of Windows.
You can either use the MinGW installer or the command line utility mingw-get to install both the basepackages and additional packages like automake and autoconf(version 2.68).
Also make sure that /mingw mount point exists. If its not, please add/create the following entry in /etc/fstab:
'C:/MinGW /mingw'.
• Python
Install the latest Python 2.x from python.org and verify that its path is part of Windows’ PATH environmentvariable. We require that you have Python six and pypiwin32 libraries installed. The libraries can be installedvia pip command:
$ pip install six$ pip install pypiwin32
• Visual Studio
You will need at least Visual Studio 2013 (update 4) to compile userspace binaries. In addition to that, if youwant to compile the kernel module you will also need to install Windows Driver Kit (WDK) 8.1 Update.
It is important to get the Visual Studio related environment variables and to have the $PATH inside the bashto point to the proper compiler and linker. One easy way to achieve this for VS2013 is to get into the“VS2013 x86 Native Tools Command Prompt” (in a default installation of Visual Studio 2013 this can befound under the following location: C:\Program Files (x86)\Microsoft Visual Studio 12.0\Common7\Tools\Shortcuts) and through it enter into the bash shell available from msys by typingbash --login.
There is support for generating 64 bit binaries too. To compile under x64, open the “VS2013 x64 Native ToolsCommand Prompt” (if your current running OS is 64 bit) or “VS2013 x64 Cross Tools Command Prompt” (ifyour current running OS is not 64 bit) instead of opening its x86 variant. This will point the compiler and thelinker to their 64 bit equivalent.
16 Chapter 2. Getting Started
Open vSwitch, Release 2.8.0
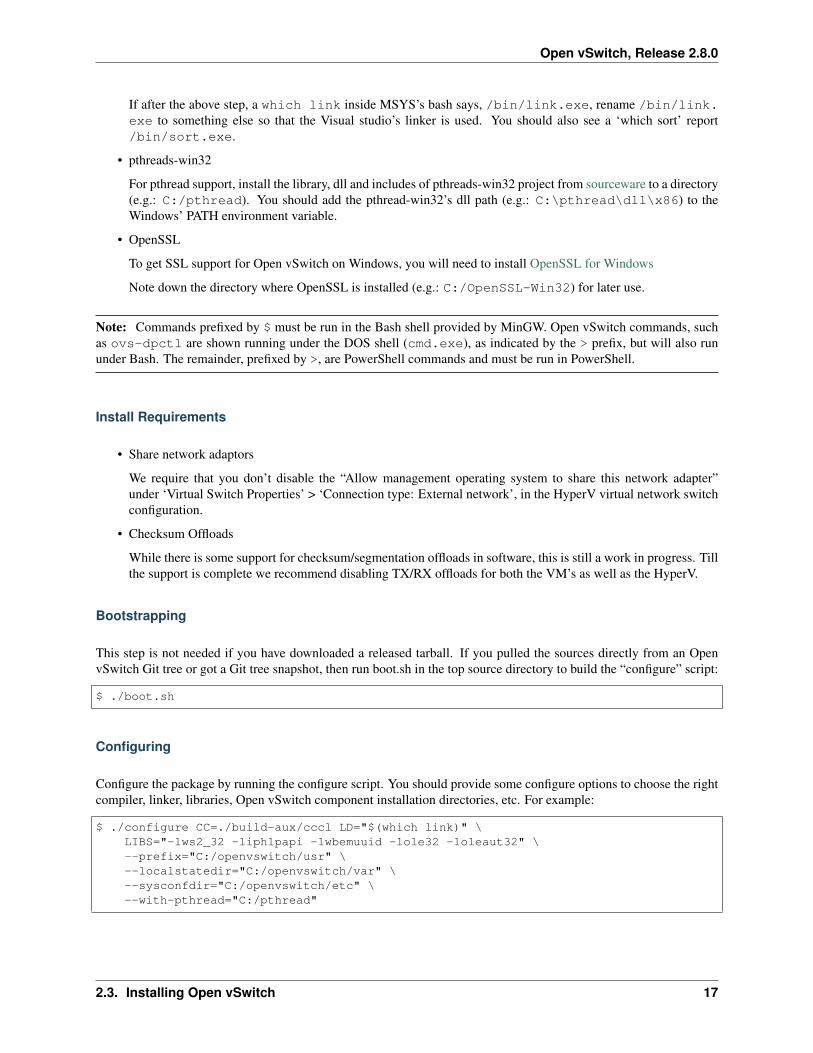
If after the above step, a which link inside MSYS’s bash says, /bin/link.exe, rename /bin/link.exe to something else so that the Visual studio’s linker is used. You should also see a ‘which sort’ report/bin/sort.exe.
• pthreads-win32
For pthread support, install the library, dll and includes of pthreads-win32 project from sourceware to a directory(e.g.: C:/pthread). You should add the pthread-win32’s dll path (e.g.: C:\pthread\dll\x86) to theWindows’ PATH environment variable.
• OpenSSL
To get SSL support for Open vSwitch on Windows, you will need to install OpenSSL for Windows
Note down the directory where OpenSSL is installed (e.g.: C:/OpenSSL-Win32) for later use.
Note: Commands prefixed by $ must be run in the Bash shell provided by MinGW. Open vSwitch commands, suchas ovs-dpctl are shown running under the DOS shell (cmd.exe), as indicated by the > prefix, but will also rununder Bash. The remainder, prefixed by >, are PowerShell commands and must be run in PowerShell.
Install Requirements
• Share network adaptors
We require that you don’t disable the “Allow management operating system to share this network adapter”under ‘Virtual Switch Properties’ > ‘Connection type: External network’, in the HyperV virtual network switchconfiguration.
• Checksum Offloads
While there is some support for checksum/segmentation offloads in software, this is still a work in progress. Tillthe support is complete we recommend disabling TX/RX offloads for both the VM’s as well as the HyperV.
Bootstrapping
This step is not needed if you have downloaded a released tarball. If you pulled the sources directly from an OpenvSwitch Git tree or got a Git tree snapshot, then run boot.sh in the top source directory to build the “configure” script:
$ ./boot.sh
Configuring
Configure the package by running the configure script. You should provide some configure options to choose the rightcompiler, linker, libraries, Open vSwitch component installation directories, etc. For example:
$ ./configure CC=./build-aux/cccl LD="$(which link)" \LIBS="-lws2_32 -liphlpapi -lwbemuuid -lole32 -loleaut32" \--prefix="C:/openvswitch/usr" \--localstatedir="C:/openvswitch/var" \--sysconfdir="C:/openvswitch/etc" \--with-pthread="C:/pthread"
2.3. Installing Open vSwitch 17

Open vSwitch, Release 2.8.0
Note: By default, the above enables compiler optimization for fast code. For default compiler optimization, pass the--with-debug configure option.
To configure with SSL support, add the requisite additional options:
$ ./configure CC=./build-aux/cccl LD="`which link`" \LIBS="-lws2_32 -liphlpapi -lwbemuuid -lole32 -loleaut32" \--prefix="C:/openvswitch/usr" \--localstatedir="C:/openvswitch/var"--sysconfdir="C:/openvswitch/etc" \--with-pthread="C:/pthread" \--enable-ssl --with-openssl="C:/OpenSSL-Win32"
Finally, to the kernel module also:
$ ./configure CC=./build-aux/cccl LD="`which link`" \LIBS="-lws2_32 -liphlpapi -lwbemuuid -lole32 -loleaut32" \--prefix="C:/openvswitch/usr" \--localstatedir="C:/openvswitch/var" \--sysconfdir="C:/openvswitch/etc" \--with-pthread="C:/pthread" \--enable-ssl --with-openssl="C:/OpenSSL-Win32" \--with-vstudiotarget="<target type>"
Possible values for <target type> are: Debug and Release
Note: You can directly use the Visual Studio 2013 IDE to compile the kernel datapath. Open the ovsext.sln file in theIDE and build the solution.
Refer to Open vSwitch on Linux, FreeBSD and NetBSD for information on additional configuration options.
Building
Once correctly configured, building Open vSwitch on Windows is similar to building on Linux, FreeBSD, or NetBSD.
1. Run make for the ported executables in the top source directory, e.g.:
$ make
For faster compilation, you can pass the -j argument to make. For example, to run 4 jobs simultaneously, runmake -j4.
Note: MSYS 1.0.18 has a bug that causes parallel make to hang. You can overcome this by downgrading toMSYS 1.0.17. A simple way to downgrade is to exit all MinGW sessions and then run the below commandfrom MSVC developers command prompt.:
> mingw-get upgrade msys-core-bin=1.0.17-1
2. To run all the unit tests in Open vSwitch, one at a time:
$ make check
18 Chapter 2. Getting Started
Open vSwitch, Release 2.8.0
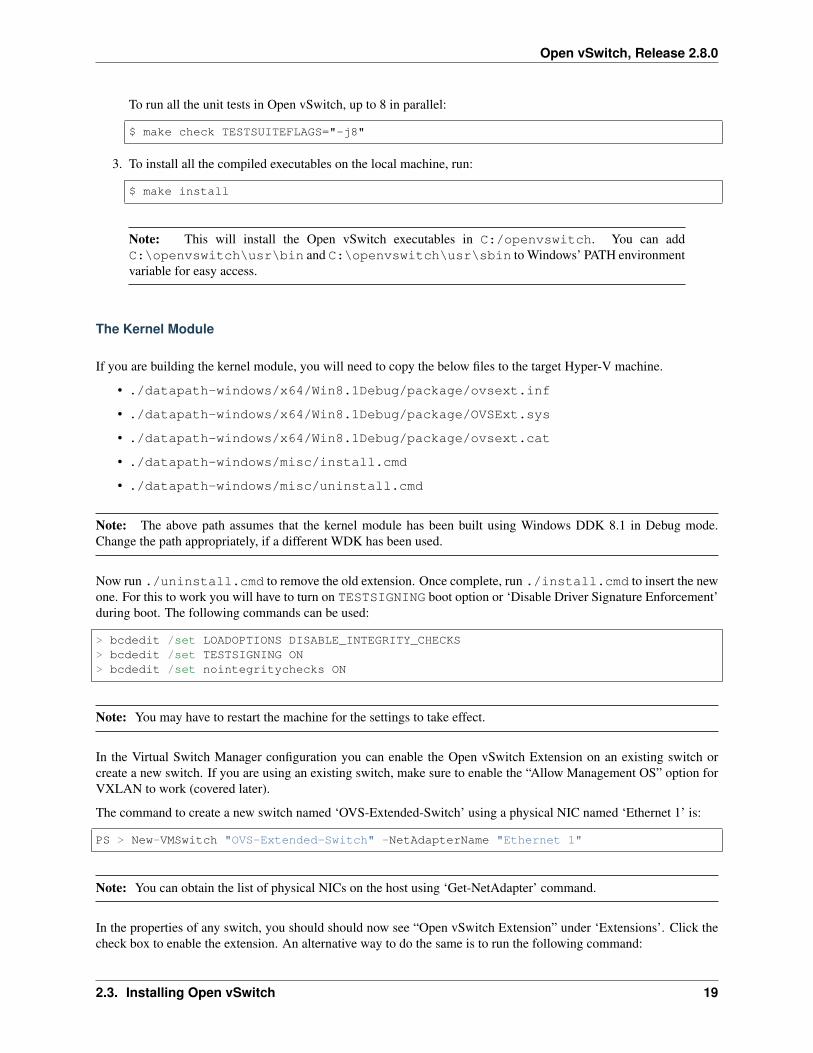
To run all the unit tests in Open vSwitch, up to 8 in parallel:
$ make check TESTSUITEFLAGS="-j8"
3. To install all the compiled executables on the local machine, run:
$ make install
Note: This will install the Open vSwitch executables in C:/openvswitch. You can addC:\openvswitch\usr\bin and C:\openvswitch\usr\sbin to Windows’ PATH environmentvariable for easy access.
The Kernel Module
If you are building the kernel module, you will need to copy the below files to the target Hyper-V machine.
• ./datapath-windows/x64/Win8.1Debug/package/ovsext.inf
• ./datapath-windows/x64/Win8.1Debug/package/OVSExt.sys
• ./datapath-windows/x64/Win8.1Debug/package/ovsext.cat
• ./datapath-windows/misc/install.cmd
• ./datapath-windows/misc/uninstall.cmd
Note: The above path assumes that the kernel module has been built using Windows DDK 8.1 in Debug mode.Change the path appropriately, if a different WDK has been used.
Now run ./uninstall.cmd to remove the old extension. Once complete, run ./install.cmd to insert the newone. For this to work you will have to turn on TESTSIGNING boot option or ‘Disable Driver Signature Enforcement’during boot. The following commands can be used:
> bcdedit /set LOADOPTIONS DISABLE_INTEGRITY_CHECKS> bcdedit /set TESTSIGNING ON> bcdedit /set nointegritychecks ON
Note: You may have to restart the machine for the settings to take effect.
In the Virtual Switch Manager configuration you can enable the Open vSwitch Extension on an existing switch orcreate a new switch. If you are using an existing switch, make sure to enable the “Allow Management OS” option forVXLAN to work (covered later).
The command to create a new switch named ‘OVS-Extended-Switch’ using a physical NIC named ‘Ethernet 1’ is:
PS > New-VMSwitch "OVS-Extended-Switch" -NetAdapterName "Ethernet 1"
Note: You can obtain the list of physical NICs on the host using ‘Get-NetAdapter’ command.
In the properties of any switch, you should should now see “Open vSwitch Extension” under ‘Extensions’. Click thecheck box to enable the extension. An alternative way to do the same is to run the following command:
2.3. Installing Open vSwitch 19
Open vSwitch, Release 2.8.0
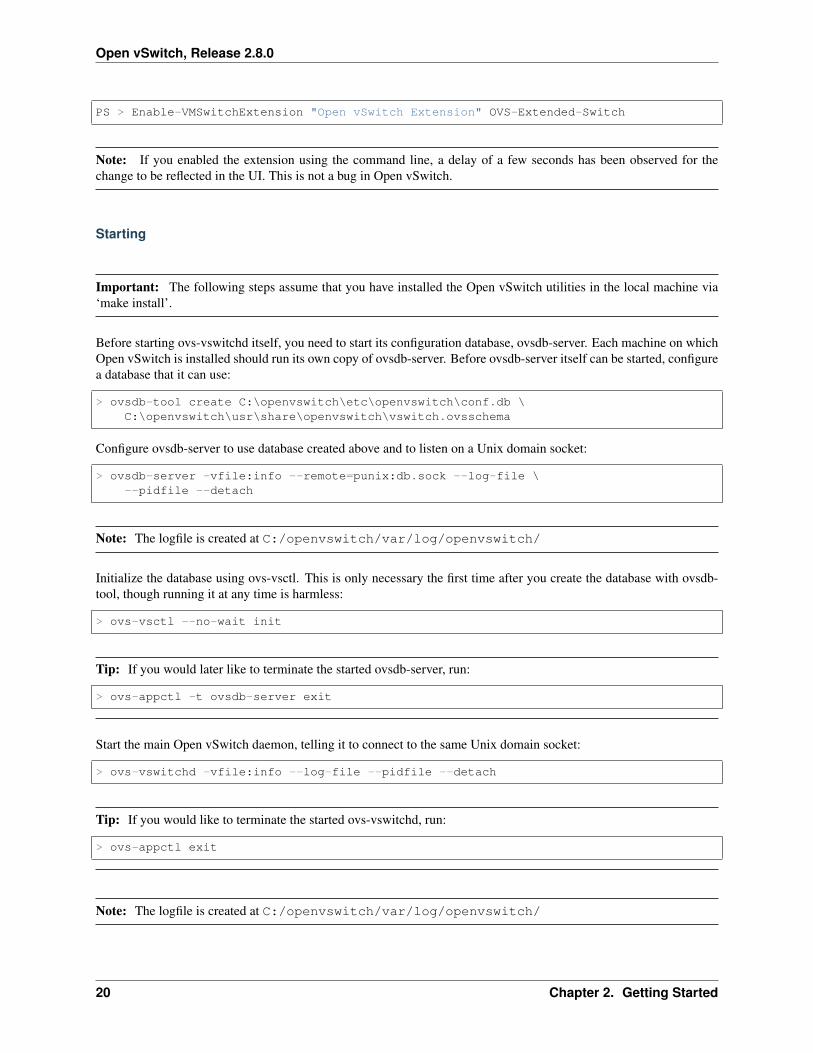
PS > Enable-VMSwitchExtension "Open vSwitch Extension" OVS-Extended-Switch
Note: If you enabled the extension using the command line, a delay of a few seconds has been observed for thechange to be reflected in the UI. This is not a bug in Open vSwitch.
Starting
Important: The following steps assume that you have installed the Open vSwitch utilities in the local machine via‘make install’.
Before starting ovs-vswitchd itself, you need to start its configuration database, ovsdb-server. Each machine on whichOpen vSwitch is installed should run its own copy of ovsdb-server. Before ovsdb-server itself can be started, configurea database that it can use:
> ovsdb-tool create C:\openvswitch\etc\openvswitch\conf.db \C:\openvswitch\usr\share\openvswitch\vswitch.ovsschema
Configure ovsdb-server to use database created above and to listen on a Unix domain socket:
> ovsdb-server -vfile:info --remote=punix:db.sock --log-file \--pidfile --detach
Note: The logfile is created at C:/openvswitch/var/log/openvswitch/
Initialize the database using ovs-vsctl. This is only necessary the first time after you create the database with ovsdb-tool, though running it at any time is harmless:
> ovs-vsctl --no-wait init
Tip: If you would later like to terminate the started ovsdb-server, run:
> ovs-appctl -t ovsdb-server exit
Start the main Open vSwitch daemon, telling it to connect to the same Unix domain socket:
> ovs-vswitchd -vfile:info --log-file --pidfile --detach
Tip: If you would like to terminate the started ovs-vswitchd, run:
> ovs-appctl exit
Note: The logfile is created at C:/openvswitch/var/log/openvswitch/
20 Chapter 2. Getting Started
Open vSwitch, Release 2.8.0
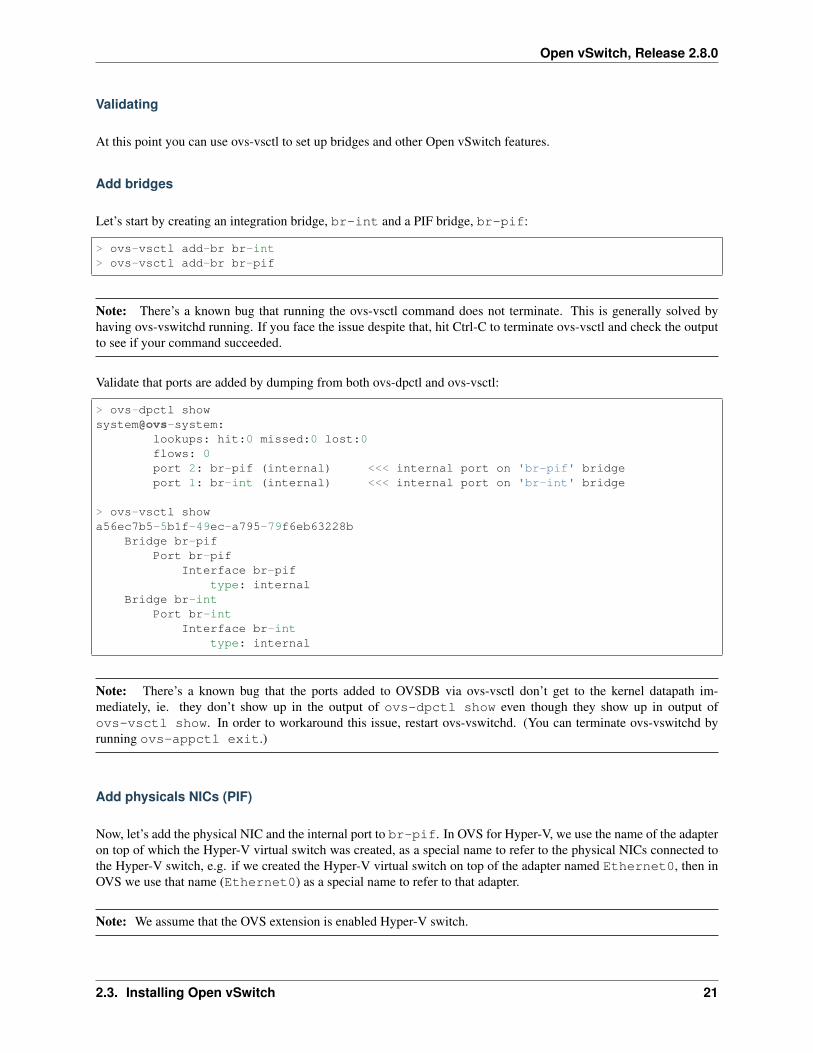
Validating
At this point you can use ovs-vsctl to set up bridges and other Open vSwitch features.
Add bridges
Let’s start by creating an integration bridge, br-int and a PIF bridge, br-pif:
> ovs-vsctl add-br br-int> ovs-vsctl add-br br-pif
Note: There’s a known bug that running the ovs-vsctl command does not terminate. This is generally solved byhaving ovs-vswitchd running. If you face the issue despite that, hit Ctrl-C to terminate ovs-vsctl and check the outputto see if your command succeeded.
Validate that ports are added by dumping from both ovs-dpctl and ovs-vsctl:
> ovs-dpctl showsystem@ovs-system:
lookups: hit:0 missed:0 lost:0flows: 0port 2: br-pif (internal) <<< internal port on 'br-pif' bridgeport 1: br-int (internal) <<< internal port on 'br-int' bridge
> ovs-vsctl showa56ec7b5-5b1f-49ec-a795-79f6eb63228b
Bridge br-pifPort br-pif
Interface br-piftype: internal
Bridge br-intPort br-int
Interface br-inttype: internal
Note: There’s a known bug that the ports added to OVSDB via ovs-vsctl don’t get to the kernel datapath im-mediately, ie. they don’t show up in the output of ovs-dpctl show even though they show up in output ofovs-vsctl show. In order to workaround this issue, restart ovs-vswitchd. (You can terminate ovs-vswitchd byrunning ovs-appctl exit.)
Add physicals NICs (PIF)
Now, let’s add the physical NIC and the internal port to br-pif. In OVS for Hyper-V, we use the name of the adapteron top of which the Hyper-V virtual switch was created, as a special name to refer to the physical NICs connected tothe Hyper-V switch, e.g. if we created the Hyper-V virtual switch on top of the adapter named Ethernet0, then inOVS we use that name (Ethernet0) as a special name to refer to that adapter.
Note: We assume that the OVS extension is enabled Hyper-V switch.
2.3. Installing Open vSwitch 21
Open vSwitch, Release 2.8.0
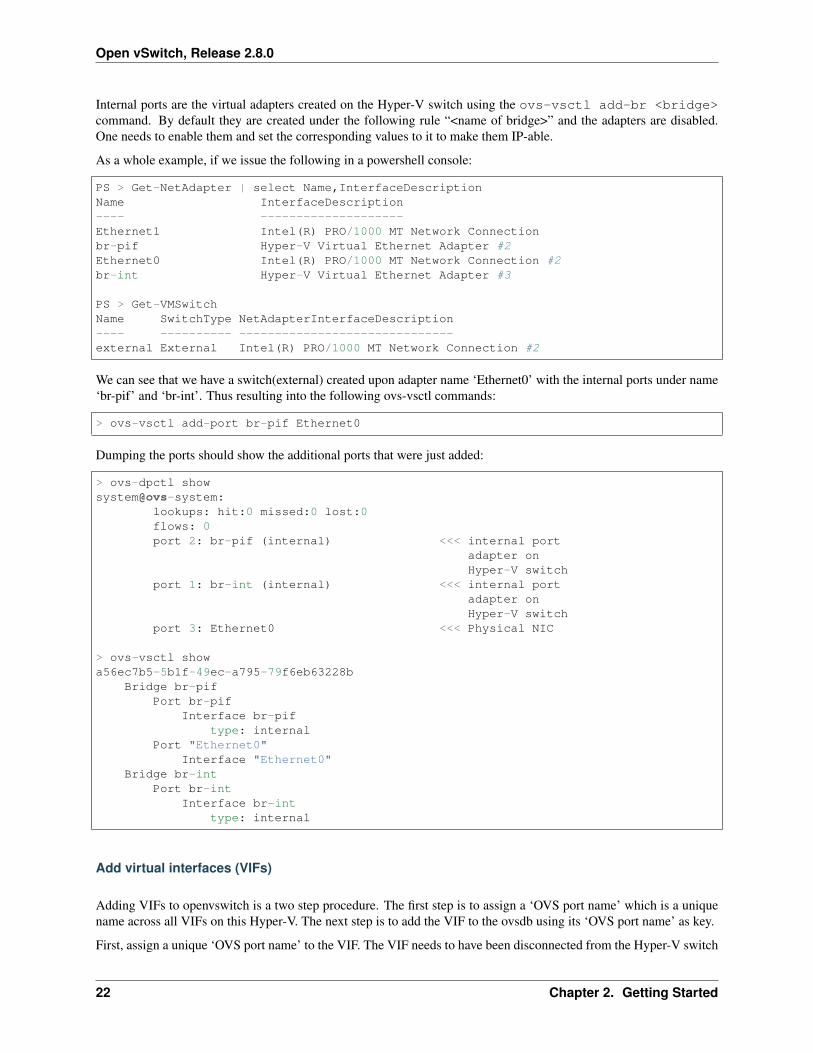
Internal ports are the virtual adapters created on the Hyper-V switch using the ovs-vsctl add-br <bridge>command. By default they are created under the following rule “<name of bridge>” and the adapters are disabled.One needs to enable them and set the corresponding values to it to make them IP-able.
As a whole example, if we issue the following in a powershell console:
PS > Get-NetAdapter | select Name,InterfaceDescriptionName InterfaceDescription---- --------------------Ethernet1 Intel(R) PRO/1000 MT Network Connectionbr-pif Hyper-V Virtual Ethernet Adapter #2Ethernet0 Intel(R) PRO/1000 MT Network Connection #2br-int Hyper-V Virtual Ethernet Adapter #3
PS > Get-VMSwitchName SwitchType NetAdapterInterfaceDescription---- ---------- ------------------------------external External Intel(R) PRO/1000 MT Network Connection #2
We can see that we have a switch(external) created upon adapter name ‘Ethernet0’ with the internal ports under name‘br-pif’ and ‘br-int’. Thus resulting into the following ovs-vsctl commands:
> ovs-vsctl add-port br-pif Ethernet0
Dumping the ports should show the additional ports that were just added:
> ovs-dpctl showsystem@ovs-system:
lookups: hit:0 missed:0 lost:0flows: 0port 2: br-pif (internal) <<< internal port
adapter onHyper-V switch
port 1: br-int (internal) <<< internal portadapter onHyper-V switch
port 3: Ethernet0 <<< Physical NIC
> ovs-vsctl showa56ec7b5-5b1f-49ec-a795-79f6eb63228b
Bridge br-pifPort br-pif
Interface br-piftype: internal
Port "Ethernet0"Interface "Ethernet0"
Bridge br-intPort br-int
Interface br-inttype: internal
Add virtual interfaces (VIFs)
Adding VIFs to openvswitch is a two step procedure. The first step is to assign a ‘OVS port name’ which is a uniquename across all VIFs on this Hyper-V. The next step is to add the VIF to the ovsdb using its ‘OVS port name’ as key.
First, assign a unique ‘OVS port name’ to the VIF. The VIF needs to have been disconnected from the Hyper-V switch
22 Chapter 2. Getting Started
Open vSwitch, Release 2.8.0
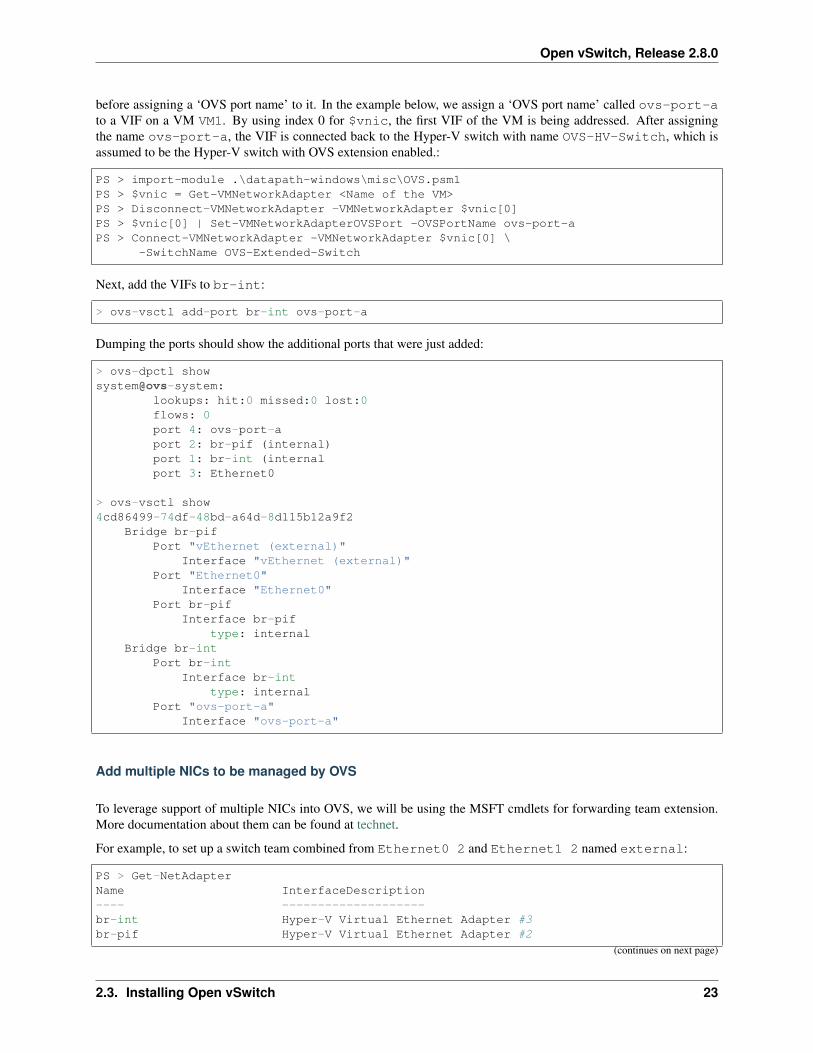
before assigning a ‘OVS port name’ to it. In the example below, we assign a ‘OVS port name’ called ovs-port-ato a VIF on a VM VM1. By using index 0 for $vnic, the first VIF of the VM is being addressed. After assigningthe name ovs-port-a, the VIF is connected back to the Hyper-V switch with name OVS-HV-Switch, which isassumed to be the Hyper-V switch with OVS extension enabled.:
PS > import-module .\datapath-windows\misc\OVS.psm1PS > $vnic = Get-VMNetworkAdapter <Name of the VM>PS > Disconnect-VMNetworkAdapter -VMNetworkAdapter $vnic[0]PS > $vnic[0] | Set-VMNetworkAdapterOVSPort -OVSPortName ovs-port-aPS > Connect-VMNetworkAdapter -VMNetworkAdapter $vnic[0] \
-SwitchName OVS-Extended-Switch
Next, add the VIFs to br-int:
> ovs-vsctl add-port br-int ovs-port-a
Dumping the ports should show the additional ports that were just added:
> ovs-dpctl showsystem@ovs-system:
lookups: hit:0 missed:0 lost:0flows: 0port 4: ovs-port-aport 2: br-pif (internal)port 1: br-int (internalport 3: Ethernet0
> ovs-vsctl show4cd86499-74df-48bd-a64d-8d115b12a9f2
Bridge br-pifPort "vEthernet (external)"
Interface "vEthernet (external)"Port "Ethernet0"
Interface "Ethernet0"Port br-pif
Interface br-piftype: internal
Bridge br-intPort br-int
Interface br-inttype: internal
Port "ovs-port-a"Interface "ovs-port-a"
Add multiple NICs to be managed by OVS
To leverage support of multiple NICs into OVS, we will be using the MSFT cmdlets for forwarding team extension.More documentation about them can be found at technet.
For example, to set up a switch team combined from Ethernet0 2 and Ethernet1 2 named external:
PS > Get-NetAdapterName InterfaceDescription---- --------------------br-int Hyper-V Virtual Ethernet Adapter #3br-pif Hyper-V Virtual Ethernet Adapter #2
(continues on next page)
2.3. Installing Open vSwitch 23
Open vSwitch, Release 2.8.0
(continued from previous page)
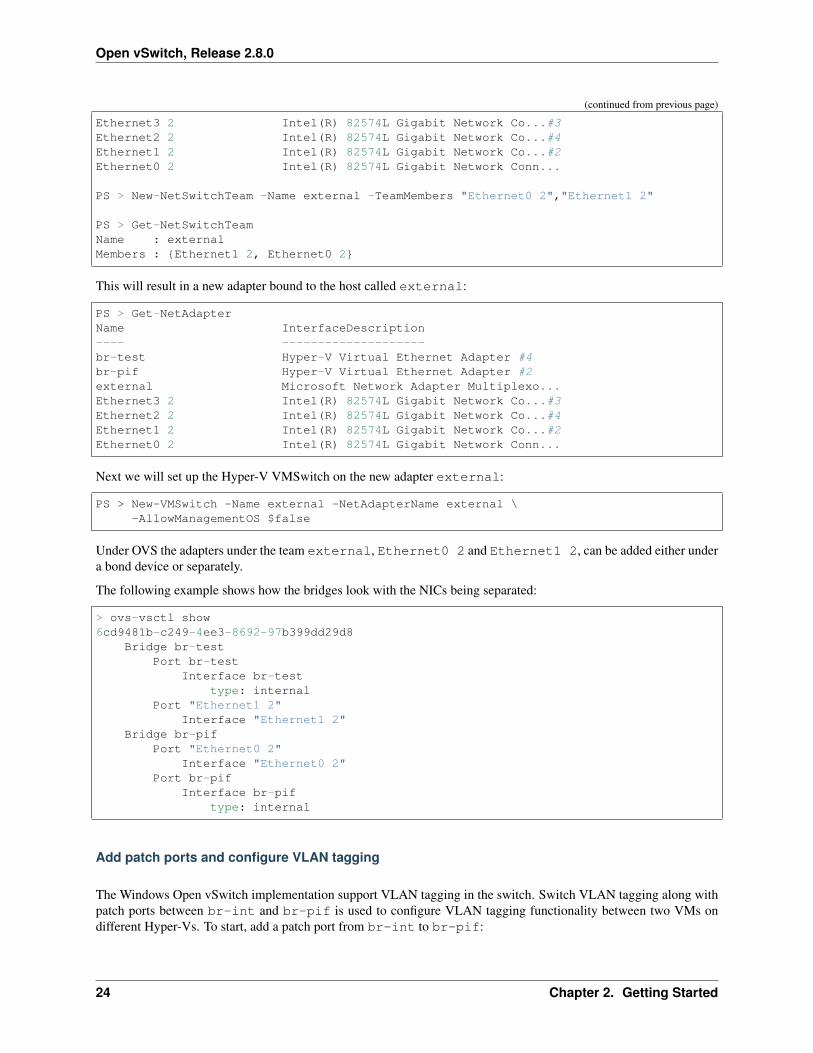
Ethernet3 2 Intel(R) 82574L Gigabit Network Co...#3Ethernet2 2 Intel(R) 82574L Gigabit Network Co...#4Ethernet1 2 Intel(R) 82574L Gigabit Network Co...#2Ethernet0 2 Intel(R) 82574L Gigabit Network Conn...
PS > New-NetSwitchTeam -Name external -TeamMembers "Ethernet0 2","Ethernet1 2"
PS > Get-NetSwitchTeamName : externalMembers : {Ethernet1 2, Ethernet0 2}
This will result in a new adapter bound to the host called external:
PS > Get-NetAdapterName InterfaceDescription---- --------------------br-test Hyper-V Virtual Ethernet Adapter #4br-pif Hyper-V Virtual Ethernet Adapter #2external Microsoft Network Adapter Multiplexo...Ethernet3 2 Intel(R) 82574L Gigabit Network Co...#3Ethernet2 2 Intel(R) 82574L Gigabit Network Co...#4Ethernet1 2 Intel(R) 82574L Gigabit Network Co...#2Ethernet0 2 Intel(R) 82574L Gigabit Network Conn...
Next we will set up the Hyper-V VMSwitch on the new adapter external:
PS > New-VMSwitch -Name external -NetAdapterName external \-AllowManagementOS $false
Under OVS the adapters under the team external, Ethernet0 2 and Ethernet1 2, can be added either undera bond device or separately.
The following example shows how the bridges look with the NICs being separated:
> ovs-vsctl show6cd9481b-c249-4ee3-8692-97b399dd29d8
Bridge br-testPort br-test
Interface br-testtype: internal
Port "Ethernet1 2"Interface "Ethernet1 2"
Bridge br-pifPort "Ethernet0 2"
Interface "Ethernet0 2"Port br-pif
Interface br-piftype: internal
Add patch ports and configure VLAN tagging
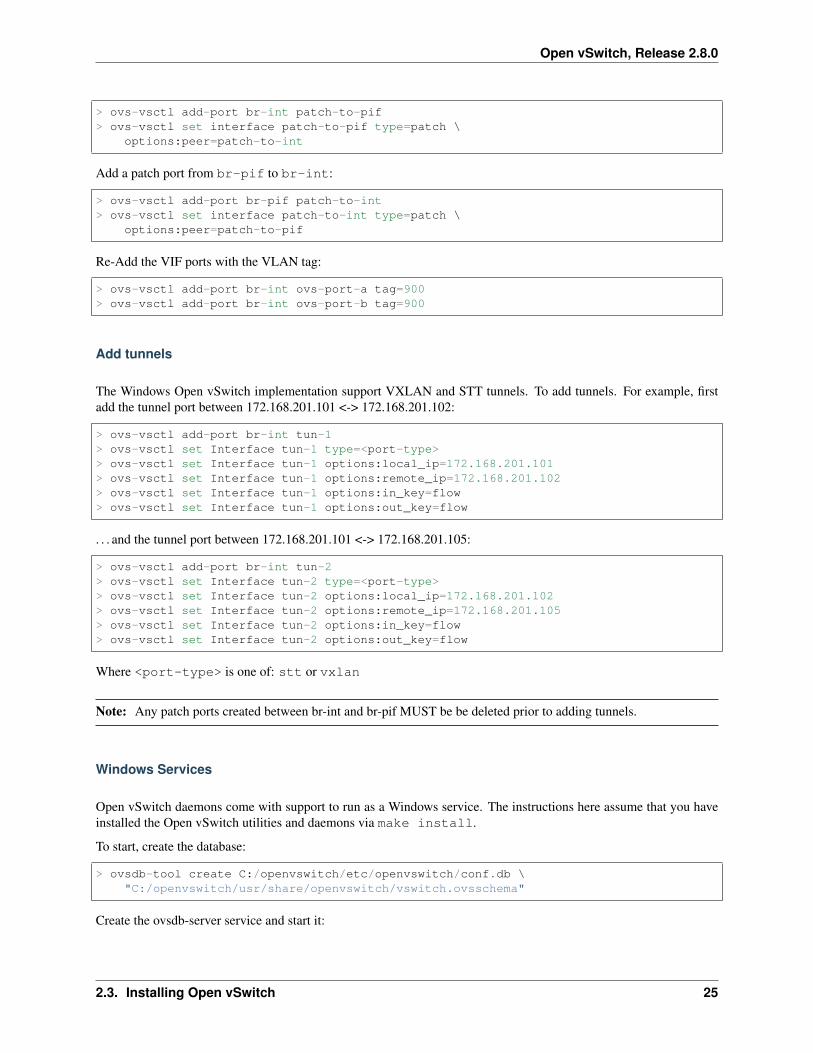
The Windows Open vSwitch implementation support VLAN tagging in the switch. Switch VLAN tagging along withpatch ports between br-int and br-pif is used to configure VLAN tagging functionality between two VMs ondifferent Hyper-Vs. To start, add a patch port from br-int to br-pif:
24 Chapter 2. Getting Started
Open vSwitch, Release 2.8.0
> ovs-vsctl add-port br-int patch-to-pif> ovs-vsctl set interface patch-to-pif type=patch \
options:peer=patch-to-int
Add a patch port from br-pif to br-int:
> ovs-vsctl add-port br-pif patch-to-int> ovs-vsctl set interface patch-to-int type=patch \
options:peer=patch-to-pif
Re-Add the VIF ports with the VLAN tag:
> ovs-vsctl add-port br-int ovs-port-a tag=900> ovs-vsctl add-port br-int ovs-port-b tag=900
Add tunnels
The Windows Open vSwitch implementation support VXLAN and STT tunnels. To add tunnels. For example, firstadd the tunnel port between 172.168.201.101 <-> 172.168.201.102:
> ovs-vsctl add-port br-int tun-1> ovs-vsctl set Interface tun-1 type=<port-type>> ovs-vsctl set Interface tun-1 options:local_ip=172.168.201.101> ovs-vsctl set Interface tun-1 options:remote_ip=172.168.201.102> ovs-vsctl set Interface tun-1 options:in_key=flow> ovs-vsctl set Interface tun-1 options:out_key=flow
. . . and the tunnel port between 172.168.201.101 <-> 172.168.201.105:
> ovs-vsctl add-port br-int tun-2> ovs-vsctl set Interface tun-2 type=<port-type>> ovs-vsctl set Interface tun-2 options:local_ip=172.168.201.102> ovs-vsctl set Interface tun-2 options:remote_ip=172.168.201.105> ovs-vsctl set Interface tun-2 options:in_key=flow> ovs-vsctl set Interface tun-2 options:out_key=flow
Where <port-type> is one of: stt or vxlan
Note: Any patch ports created between br-int and br-pif MUST be be deleted prior to adding tunnels.
Windows Services
Open vSwitch daemons come with support to run as a Windows service. The instructions here assume that you haveinstalled the Open vSwitch utilities and daemons via make install.
To start, create the database:
> ovsdb-tool create C:/openvswitch/etc/openvswitch/conf.db \"C:/openvswitch/usr/share/openvswitch/vswitch.ovsschema"
Create the ovsdb-server service and start it:
2.3. Installing Open vSwitch 25
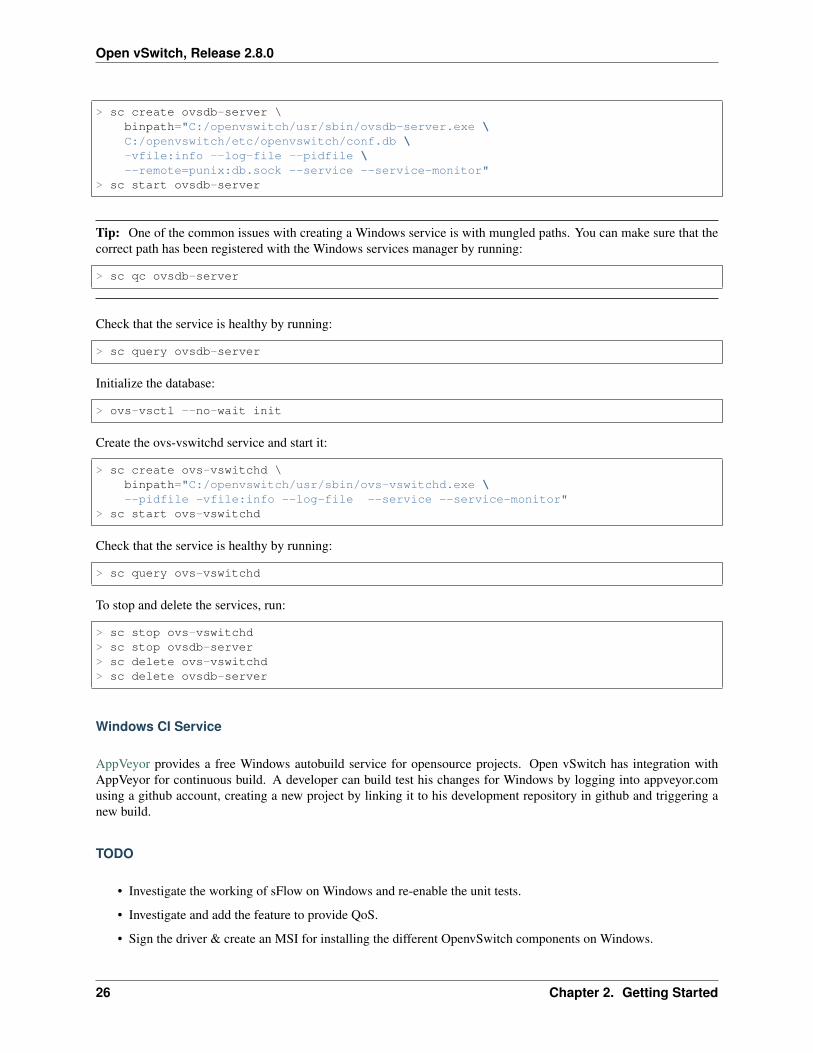
Open vSwitch, Release 2.8.0
> sc create ovsdb-server \binpath="C:/openvswitch/usr/sbin/ovsdb-server.exe \C:/openvswitch/etc/openvswitch/conf.db \-vfile:info --log-file --pidfile \--remote=punix:db.sock --service --service-monitor"
> sc start ovsdb-server
Tip: One of the common issues with creating a Windows service is with mungled paths. You can make sure that thecorrect path has been registered with the Windows services manager by running:
> sc qc ovsdb-server
Check that the service is healthy by running:
> sc query ovsdb-server
Initialize the database:
> ovs-vsctl --no-wait init
Create the ovs-vswitchd service and start it:
> sc create ovs-vswitchd \binpath="C:/openvswitch/usr/sbin/ovs-vswitchd.exe \--pidfile -vfile:info --log-file --service --service-monitor"
> sc start ovs-vswitchd
Check that the service is healthy by running:
> sc query ovs-vswitchd
To stop and delete the services, run:
> sc stop ovs-vswitchd> sc stop ovsdb-server> sc delete ovs-vswitchd> sc delete ovsdb-server
Windows CI Service
AppVeyor provides a free Windows autobuild service for opensource projects. Open vSwitch has integration withAppVeyor for continuous build. A developer can build test his changes for Windows by logging into appveyor.comusing a github account, creating a new project by linking it to his development repository in github and triggering anew build.
TODO
• Investigate the working of sFlow on Windows and re-enable the unit tests.
• Investigate and add the feature to provide QoS.
• Sign the driver & create an MSI for installing the different OpenvSwitch components on Windows.
26 Chapter 2. Getting Started
Open vSwitch, Release 2.8.0
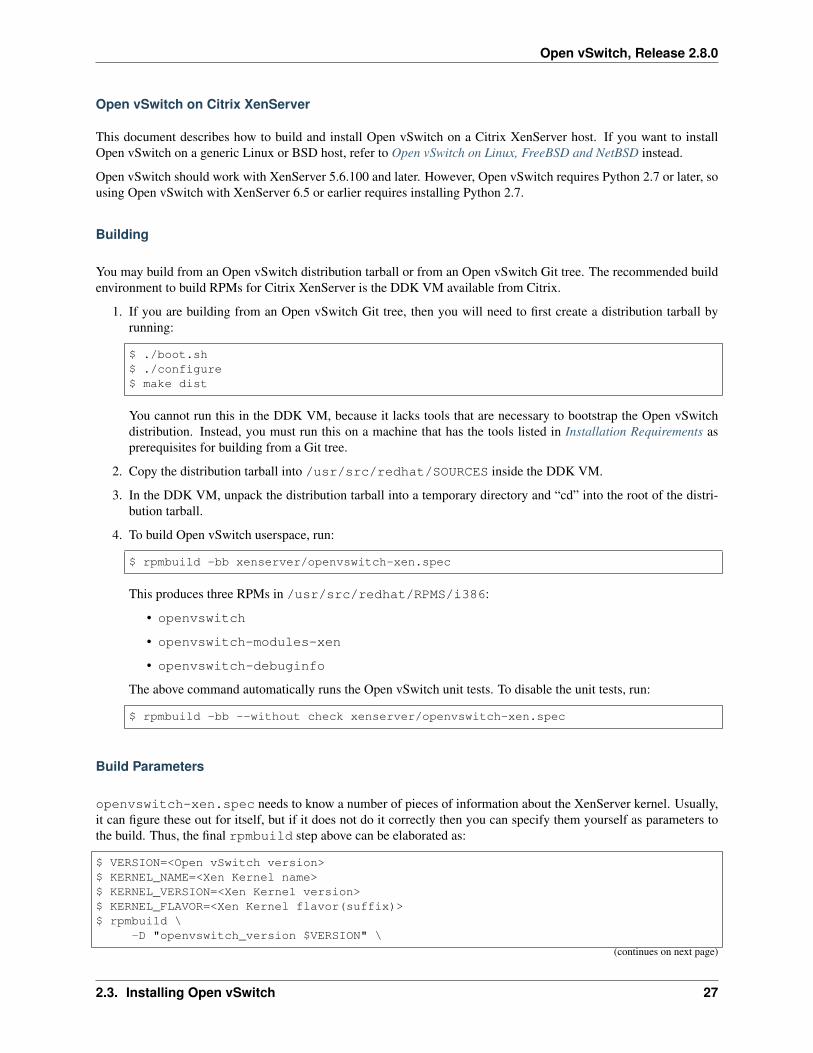
Open vSwitch on Citrix XenServer
This document describes how to build and install Open vSwitch on a Citrix XenServer host. If you want to installOpen vSwitch on a generic Linux or BSD host, refer to Open vSwitch on Linux, FreeBSD and NetBSD instead.
Open vSwitch should work with XenServer 5.6.100 and later. However, Open vSwitch requires Python 2.7 or later, sousing Open vSwitch with XenServer 6.5 or earlier requires installing Python 2.7.
Building
You may build from an Open vSwitch distribution tarball or from an Open vSwitch Git tree. The recommended buildenvironment to build RPMs for Citrix XenServer is the DDK VM available from Citrix.
1. If you are building from an Open vSwitch Git tree, then you will need to first create a distribution tarball byrunning:
$ ./boot.sh$ ./configure$ make dist
You cannot run this in the DDK VM, because it lacks tools that are necessary to bootstrap the Open vSwitchdistribution. Instead, you must run this on a machine that has the tools listed in Installation Requirements asprerequisites for building from a Git tree.
2. Copy the distribution tarball into /usr/src/redhat/SOURCES inside the DDK VM.
3. In the DDK VM, unpack the distribution tarball into a temporary directory and “cd” into the root of the distri-bution tarball.
4. To build Open vSwitch userspace, run:
$ rpmbuild -bb xenserver/openvswitch-xen.spec
This produces three RPMs in /usr/src/redhat/RPMS/i386:
• openvswitch
• openvswitch-modules-xen
• openvswitch-debuginfo
The above command automatically runs the Open vSwitch unit tests. To disable the unit tests, run:
$ rpmbuild -bb --without check xenserver/openvswitch-xen.spec
Build Parameters
openvswitch-xen.spec needs to know a number of pieces of information about the XenServer kernel. Usually,it can figure these out for itself, but if it does not do it correctly then you can specify them yourself as parameters tothe build. Thus, the final rpmbuild step above can be elaborated as:
$ VERSION=<Open vSwitch version>$ KERNEL_NAME=<Xen Kernel name>$ KERNEL_VERSION=<Xen Kernel version>$ KERNEL_FLAVOR=<Xen Kernel flavor(suffix)>$ rpmbuild \
-D "openvswitch_version $VERSION" \
(continues on next page)
2.3. Installing Open vSwitch 27
Open vSwitch, Release 2.8.0
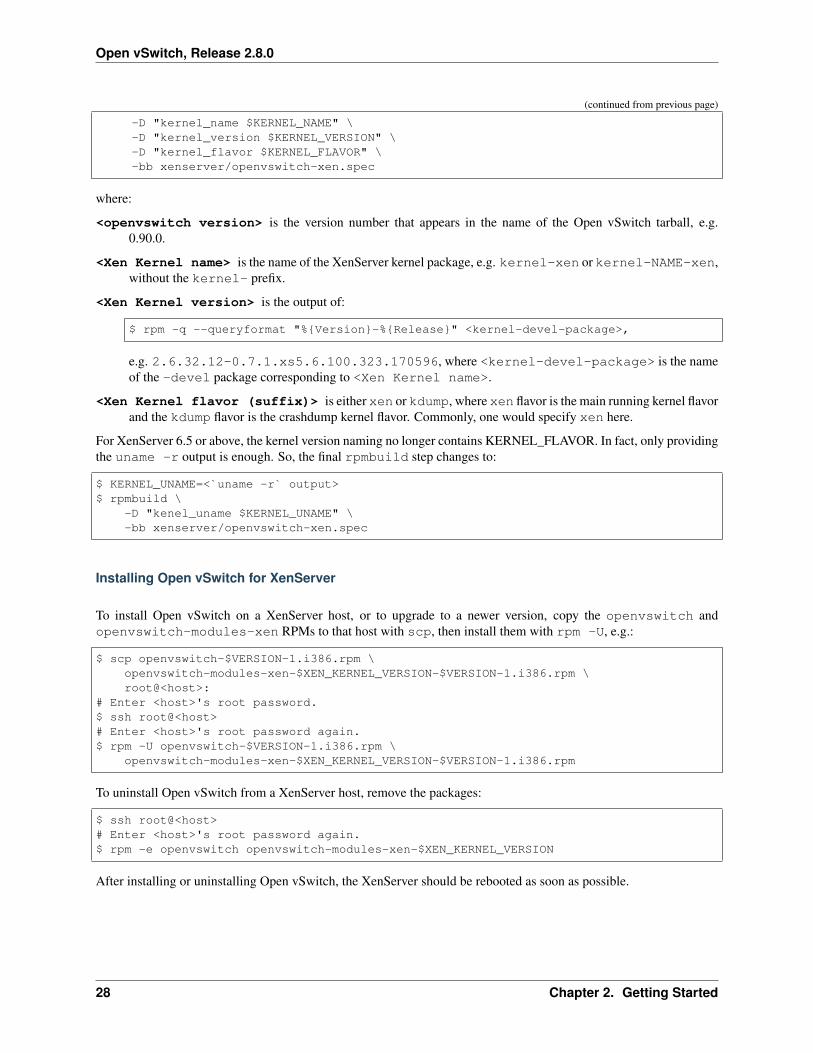
(continued from previous page)
-D "kernel_name $KERNEL_NAME" \-D "kernel_version $KERNEL_VERSION" \-D "kernel_flavor $KERNEL_FLAVOR" \-bb xenserver/openvswitch-xen.spec
where:
<openvswitch version> is the version number that appears in the name of the Open vSwitch tarball, e.g.0.90.0.
<Xen Kernel name> is the name of the XenServer kernel package, e.g. kernel-xen or kernel-NAME-xen,without the kernel- prefix.
<Xen Kernel version> is the output of:
$ rpm -q --queryformat "%{Version}-%{Release}" <kernel-devel-package>,
e.g. 2.6.32.12-0.7.1.xs5.6.100.323.170596, where <kernel-devel-package> is the nameof the -devel package corresponding to <Xen Kernel name>.
<Xen Kernel flavor (suffix)> is either xen or kdump, where xen flavor is the main running kernel flavorand the kdump flavor is the crashdump kernel flavor. Commonly, one would specify xen here.
For XenServer 6.5 or above, the kernel version naming no longer contains KERNEL_FLAVOR. In fact, only providingthe uname -r output is enough. So, the final rpmbuild step changes to:
$ KERNEL_UNAME=<`uname -r` output>$ rpmbuild \
-D "kenel_uname $KERNEL_UNAME" \-bb xenserver/openvswitch-xen.spec
Installing Open vSwitch for XenServer
To install Open vSwitch on a XenServer host, or to upgrade to a newer version, copy the openvswitch andopenvswitch-modules-xen RPMs to that host with scp, then install them with rpm -U, e.g.:
$ scp openvswitch-$VERSION-1.i386.rpm \openvswitch-modules-xen-$XEN_KERNEL_VERSION-$VERSION-1.i386.rpm \root@<host>:
# Enter <host>'s root password.$ ssh root@<host># Enter <host>'s root password again.$ rpm -U openvswitch-$VERSION-1.i386.rpm \
openvswitch-modules-xen-$XEN_KERNEL_VERSION-$VERSION-1.i386.rpm
To uninstall Open vSwitch from a XenServer host, remove the packages:
$ ssh root@<host># Enter <host>'s root password again.$ rpm -e openvswitch openvswitch-modules-xen-$XEN_KERNEL_VERSION
After installing or uninstalling Open vSwitch, the XenServer should be rebooted as soon as possible.
28 Chapter 2. Getting Started
Open vSwitch, Release 2.8.0
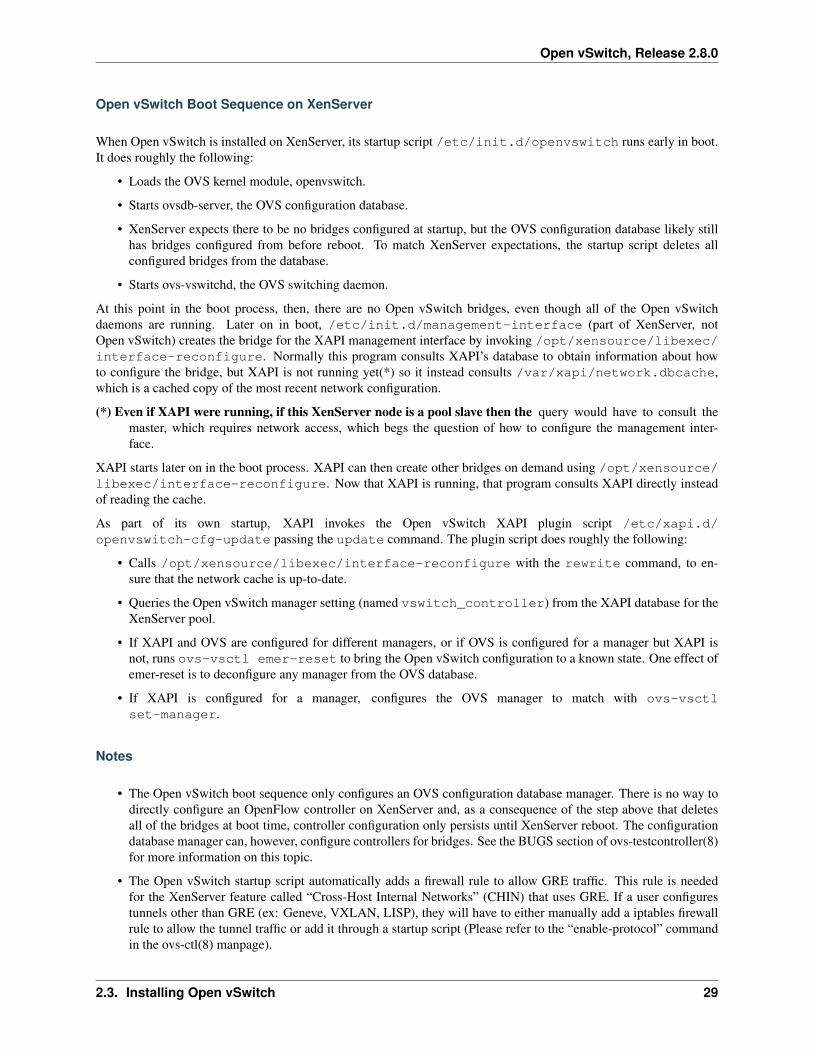
Open vSwitch Boot Sequence on XenServer
When Open vSwitch is installed on XenServer, its startup script /etc/init.d/openvswitch runs early in boot.It does roughly the following:
• Loads the OVS kernel module, openvswitch.
• Starts ovsdb-server, the OVS configuration database.
• XenServer expects there to be no bridges configured at startup, but the OVS configuration database likely stillhas bridges configured from before reboot. To match XenServer expectations, the startup script deletes allconfigured bridges from the database.
• Starts ovs-vswitchd, the OVS switching daemon.
At this point in the boot process, then, there are no Open vSwitch bridges, even though all of the Open vSwitchdaemons are running. Later on in boot, /etc/init.d/management-interface (part of XenServer, notOpen vSwitch) creates the bridge for the XAPI management interface by invoking /opt/xensource/libexec/interface-reconfigure. Normally this program consults XAPI’s database to obtain information about howto configure the bridge, but XAPI is not running yet(*) so it instead consults /var/xapi/network.dbcache,which is a cached copy of the most recent network configuration.
(*) Even if XAPI were running, if this XenServer node is a pool slave then the query would have to consult themaster, which requires network access, which begs the question of how to configure the management inter-face.
XAPI starts later on in the boot process. XAPI can then create other bridges on demand using /opt/xensource/libexec/interface-reconfigure. Now that XAPI is running, that program consults XAPI directly insteadof reading the cache.
As part of its own startup, XAPI invokes the Open vSwitch XAPI plugin script /etc/xapi.d/openvswitch-cfg-update passing the update command. The plugin script does roughly the following:
• Calls /opt/xensource/libexec/interface-reconfigure with the rewrite command, to en-sure that the network cache is up-to-date.
• Queries the Open vSwitch manager setting (named vswitch_controller) from the XAPI database for theXenServer pool.
• If XAPI and OVS are configured for different managers, or if OVS is configured for a manager but XAPI isnot, runs ovs-vsctl emer-reset to bring the Open vSwitch configuration to a known state. One effect ofemer-reset is to deconfigure any manager from the OVS database.
• If XAPI is configured for a manager, configures the OVS manager to match with ovs-vsctlset-manager.
Notes
• The Open vSwitch boot sequence only configures an OVS configuration database manager. There is no way todirectly configure an OpenFlow controller on XenServer and, as a consequence of the step above that deletesall of the bridges at boot time, controller configuration only persists until XenServer reboot. The configurationdatabase manager can, however, configure controllers for bridges. See the BUGS section of ovs-testcontroller(8)for more information on this topic.
• The Open vSwitch startup script automatically adds a firewall rule to allow GRE traffic. This rule is neededfor the XenServer feature called “Cross-Host Internal Networks” (CHIN) that uses GRE. If a user configurestunnels other than GRE (ex: Geneve, VXLAN, LISP), they will have to either manually add a iptables firewallrule to allow the tunnel traffic or add it through a startup script (Please refer to the “enable-protocol” commandin the ovs-ctl(8) manpage).
2.3. Installing Open vSwitch 29
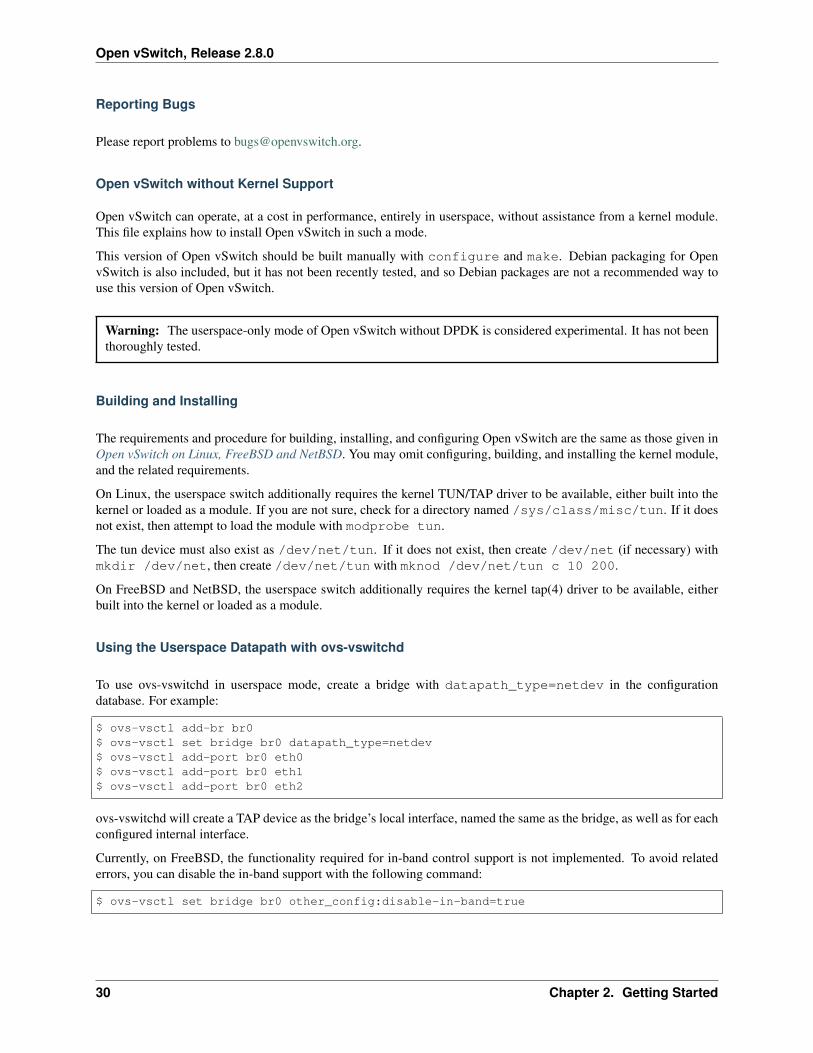
Open vSwitch, Release 2.8.0
Reporting Bugs
Please report problems to [email protected].
Open vSwitch without Kernel Support
Open vSwitch can operate, at a cost in performance, entirely in userspace, without assistance from a kernel module.This file explains how to install Open vSwitch in such a mode.
This version of Open vSwitch should be built manually with configure and make. Debian packaging for OpenvSwitch is also included, but it has not been recently tested, and so Debian packages are not a recommended way touse this version of Open vSwitch.
Warning: The userspace-only mode of Open vSwitch without DPDK is considered experimental. It has not beenthoroughly tested.
Building and Installing
The requirements and procedure for building, installing, and configuring Open vSwitch are the same as those given inOpen vSwitch on Linux, FreeBSD and NetBSD. You may omit configuring, building, and installing the kernel module,and the related requirements.
On Linux, the userspace switch additionally requires the kernel TUN/TAP driver to be available, either built into thekernel or loaded as a module. If you are not sure, check for a directory named /sys/class/misc/tun. If it doesnot exist, then attempt to load the module with modprobe tun.
The tun device must also exist as /dev/net/tun. If it does not exist, then create /dev/net (if necessary) withmkdir /dev/net, then create /dev/net/tun with mknod /dev/net/tun c 10 200.
On FreeBSD and NetBSD, the userspace switch additionally requires the kernel tap(4) driver to be available, eitherbuilt into the kernel or loaded as a module.
Using the Userspace Datapath with ovs-vswitchd
To use ovs-vswitchd in userspace mode, create a bridge with datapath_type=netdev in the configurationdatabase. For example:
$ ovs-vsctl add-br br0$ ovs-vsctl set bridge br0 datapath_type=netdev$ ovs-vsctl add-port br0 eth0$ ovs-vsctl add-port br0 eth1$ ovs-vsctl add-port br0 eth2
ovs-vswitchd will create a TAP device as the bridge’s local interface, named the same as the bridge, as well as for eachconfigured internal interface.
Currently, on FreeBSD, the functionality required for in-band control support is not implemented. To avoid relatederrors, you can disable the in-band support with the following command:
$ ovs-vsctl set bridge br0 other_config:disable-in-band=true
30 Chapter 2. Getting Started
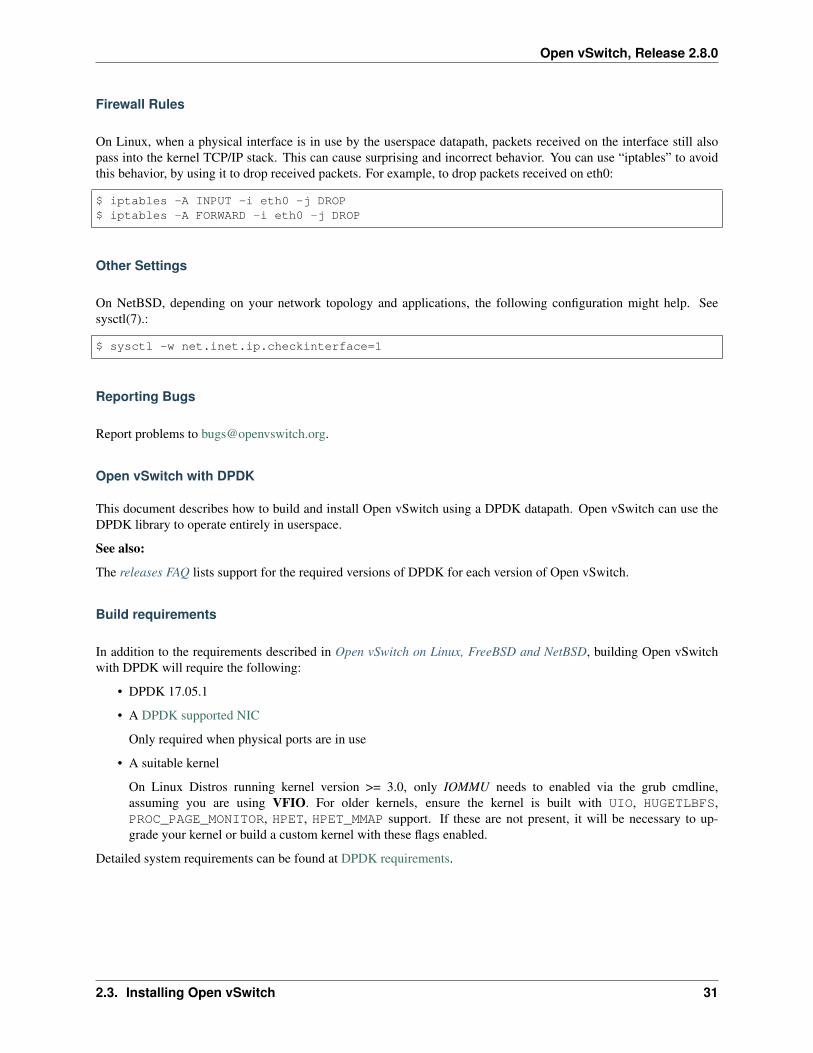
Open vSwitch, Release 2.8.0
Firewall Rules
On Linux, when a physical interface is in use by the userspace datapath, packets received on the interface still alsopass into the kernel TCP/IP stack. This can cause surprising and incorrect behavior. You can use “iptables” to avoidthis behavior, by using it to drop received packets. For example, to drop packets received on eth0:
$ iptables -A INPUT -i eth0 -j DROP$ iptables -A FORWARD -i eth0 -j DROP
Other Settings
On NetBSD, depending on your network topology and applications, the following configuration might help. Seesysctl(7).:
$ sysctl -w net.inet.ip.checkinterface=1
Reporting Bugs
Report problems to [email protected].
Open vSwitch with DPDK
This document describes how to build and install Open vSwitch using a DPDK datapath. Open vSwitch can use theDPDK library to operate entirely in userspace.
See also:
The releases FAQ lists support for the required versions of DPDK for each version of Open vSwitch.
Build requirements
In addition to the requirements described in Open vSwitch on Linux, FreeBSD and NetBSD, building Open vSwitchwith DPDK will require the following:
• DPDK 17.05.1
• A DPDK supported NIC
Only required when physical ports are in use
• A suitable kernel
On Linux Distros running kernel version >= 3.0, only IOMMU needs to enabled via the grub cmdline,assuming you are using VFIO. For older kernels, ensure the kernel is built with UIO, HUGETLBFS,PROC_PAGE_MONITOR, HPET, HPET_MMAP support. If these are not present, it will be necessary to up-grade your kernel or build a custom kernel with these flags enabled.
Detailed system requirements can be found at DPDK requirements.
2.3. Installing Open vSwitch 31
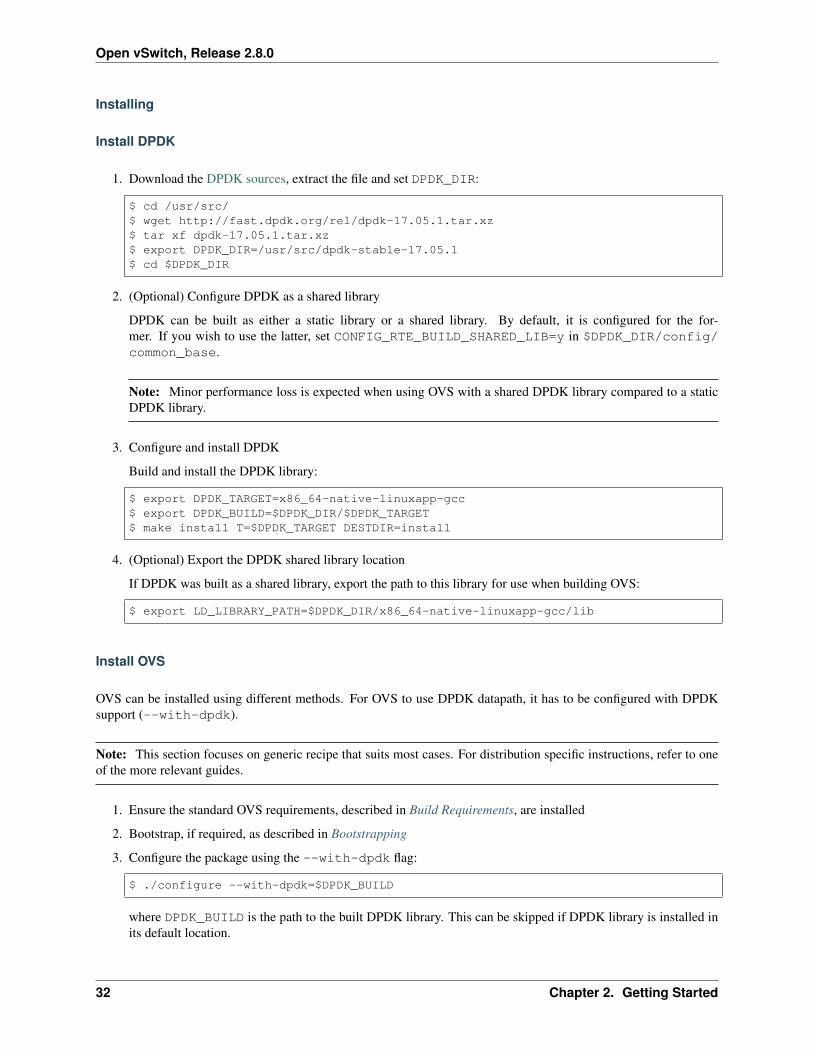
Open vSwitch, Release 2.8.0
Installing
Install DPDK
1. Download the DPDK sources, extract the file and set DPDK_DIR:
$ cd /usr/src/$ wget http://fast.dpdk.org/rel/dpdk-17.05.1.tar.xz$ tar xf dpdk-17.05.1.tar.xz$ export DPDK_DIR=/usr/src/dpdk-stable-17.05.1$ cd $DPDK_DIR
2. (Optional) Configure DPDK as a shared library
DPDK can be built as either a static library or a shared library. By default, it is configured for the for-mer. If you wish to use the latter, set CONFIG_RTE_BUILD_SHARED_LIB=y in $DPDK_DIR/config/common_base.
Note: Minor performance loss is expected when using OVS with a shared DPDK library compared to a staticDPDK library.
3. Configure and install DPDK
Build and install the DPDK library:
$ export DPDK_TARGET=x86_64-native-linuxapp-gcc$ export DPDK_BUILD=$DPDK_DIR/$DPDK_TARGET$ make install T=$DPDK_TARGET DESTDIR=install
4. (Optional) Export the DPDK shared library location
If DPDK was built as a shared library, export the path to this library for use when building OVS:
$ export LD_LIBRARY_PATH=$DPDK_DIR/x86_64-native-linuxapp-gcc/lib
Install OVS
OVS can be installed using different methods. For OVS to use DPDK datapath, it has to be configured with DPDKsupport (--with-dpdk).
Note: This section focuses on generic recipe that suits most cases. For distribution specific instructions, refer to oneof the more relevant guides.
1. Ensure the standard OVS requirements, described in Build Requirements, are installed
2. Bootstrap, if required, as described in Bootstrapping
3. Configure the package using the --with-dpdk flag:
$ ./configure --with-dpdk=$DPDK_BUILD
where DPDK_BUILD is the path to the built DPDK library. This can be skipped if DPDK library is installed inits default location.
32 Chapter 2. Getting Started

Open vSwitch, Release 2.8.0
If no path is provided to --with-dpdk, but a pkg-config configuration for libdpdk is available the includepaths will be generated via an equivalent pkg-config --cflags libdpdk.
Note: While --with-dpdk is required, you can pass any other configuration option described in Configuring.
4. Build and install OVS, as described in Building
Additional information can be found in Open vSwitch on Linux, FreeBSD and NetBSD.
Note: If you are running using the Fedora or Red Hat package, the Open vSwitch daemon will run as a non-root user.This implies that you must have a working IOMMU. Visit the RHEL README for additional information.
Setup
Setup Hugepages
Allocate a number of 2M Huge pages:
• For persistent allocation of huge pages, write to hugepages.conf file in /etc/sysctl.d:
$ echo 'vm.nr_hugepages=2048' > /etc/sysctl.d/hugepages.conf
• For run-time allocation of huge pages, use the sysctl utility:
$ sysctl -w vm.nr_hugepages=N # where N = No. of 2M huge pages
To verify hugepage configuration:
$ grep HugePages_ /proc/meminfo
Mount the hugepages, if not already mounted by default:
$ mount -t hugetlbfs none /dev/hugepages``
Setup DPDK devices using VFIO
VFIO is prefered to the UIO driver when using recent versions of DPDK. VFIO support required support from boththe kernel and BIOS. For the former, kernel version > 3.6 must be used. For the latter, you must enable VT-d in theBIOS and ensure this is configured via grub. To ensure VT-d is enabled via the BIOS, run:
$ dmesg | grep -e DMAR -e IOMMU
If VT-d is not enabled in the BIOS, enable it now.
To ensure VT-d is enabled in the kernel, run:
$ cat /proc/cmdline | grep iommu=pt$ cat /proc/cmdline | grep intel_iommu=on
If VT-d is not enabled in the kernel, enable it now.
Once VT-d is correctly configured, load the required modules and bind the NIC to the VFIO driver:
2.3. Installing Open vSwitch 33
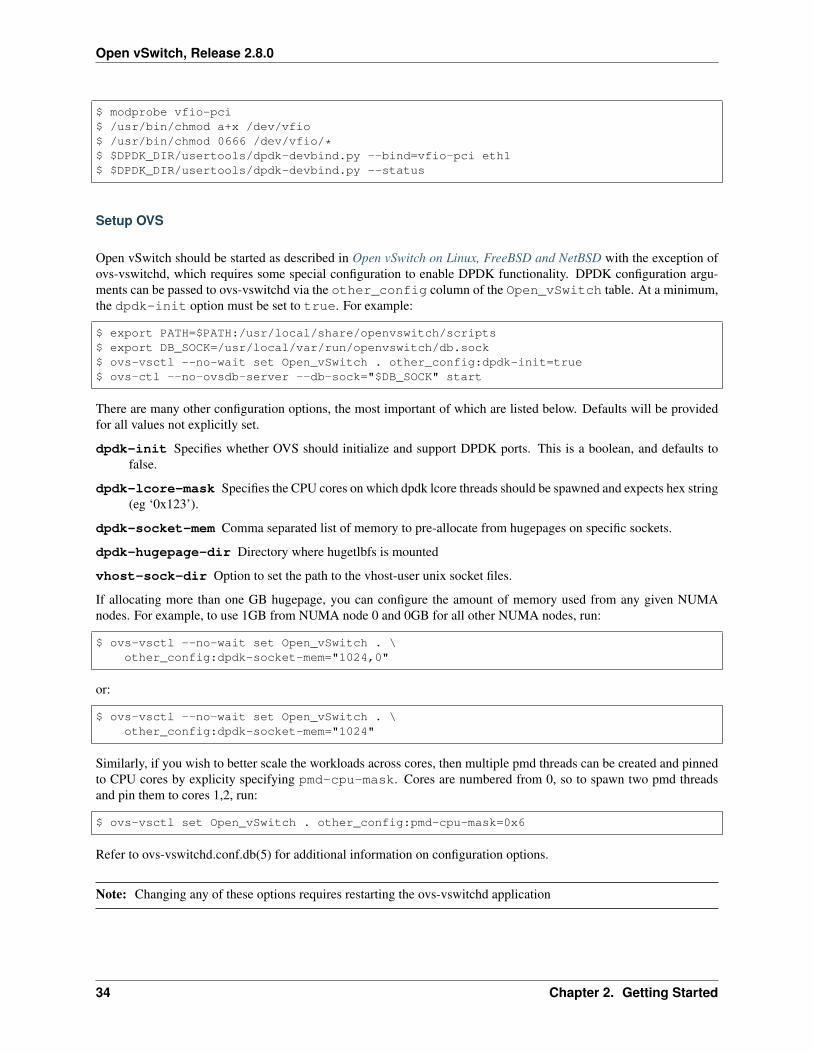
Open vSwitch, Release 2.8.0
$ modprobe vfio-pci$ /usr/bin/chmod a+x /dev/vfio$ /usr/bin/chmod 0666 /dev/vfio/*$ $DPDK_DIR/usertools/dpdk-devbind.py --bind=vfio-pci eth1$ $DPDK_DIR/usertools/dpdk-devbind.py --status
Setup OVS
Open vSwitch should be started as described in Open vSwitch on Linux, FreeBSD and NetBSD with the exception ofovs-vswitchd, which requires some special configuration to enable DPDK functionality. DPDK configuration argu-ments can be passed to ovs-vswitchd via the other_config column of the Open_vSwitch table. At a minimum,the dpdk-init option must be set to true. For example:
$ export PATH=$PATH:/usr/local/share/openvswitch/scripts$ export DB_SOCK=/usr/local/var/run/openvswitch/db.sock$ ovs-vsctl --no-wait set Open_vSwitch . other_config:dpdk-init=true$ ovs-ctl --no-ovsdb-server --db-sock="$DB_SOCK" start
There are many other configuration options, the most important of which are listed below. Defaults will be providedfor all values not explicitly set.
dpdk-init Specifies whether OVS should initialize and support DPDK ports. This is a boolean, and defaults tofalse.
dpdk-lcore-mask Specifies the CPU cores on which dpdk lcore threads should be spawned and expects hex string(eg ‘0x123’).
dpdk-socket-mem Comma separated list of memory to pre-allocate from hugepages on specific sockets.
dpdk-hugepage-dir Directory where hugetlbfs is mounted
vhost-sock-dir Option to set the path to the vhost-user unix socket files.
If allocating more than one GB hugepage, you can configure the amount of memory used from any given NUMAnodes. For example, to use 1GB from NUMA node 0 and 0GB for all other NUMA nodes, run:
$ ovs-vsctl --no-wait set Open_vSwitch . \other_config:dpdk-socket-mem="1024,0"
or:
$ ovs-vsctl --no-wait set Open_vSwitch . \other_config:dpdk-socket-mem="1024"
Similarly, if you wish to better scale the workloads across cores, then multiple pmd threads can be created and pinnedto CPU cores by explicity specifying pmd-cpu-mask. Cores are numbered from 0, so to spawn two pmd threadsand pin them to cores 1,2, run:
$ ovs-vsctl set Open_vSwitch . other_config:pmd-cpu-mask=0x6
Refer to ovs-vswitchd.conf.db(5) for additional information on configuration options.
Note: Changing any of these options requires restarting the ovs-vswitchd application
34 Chapter 2. Getting Started
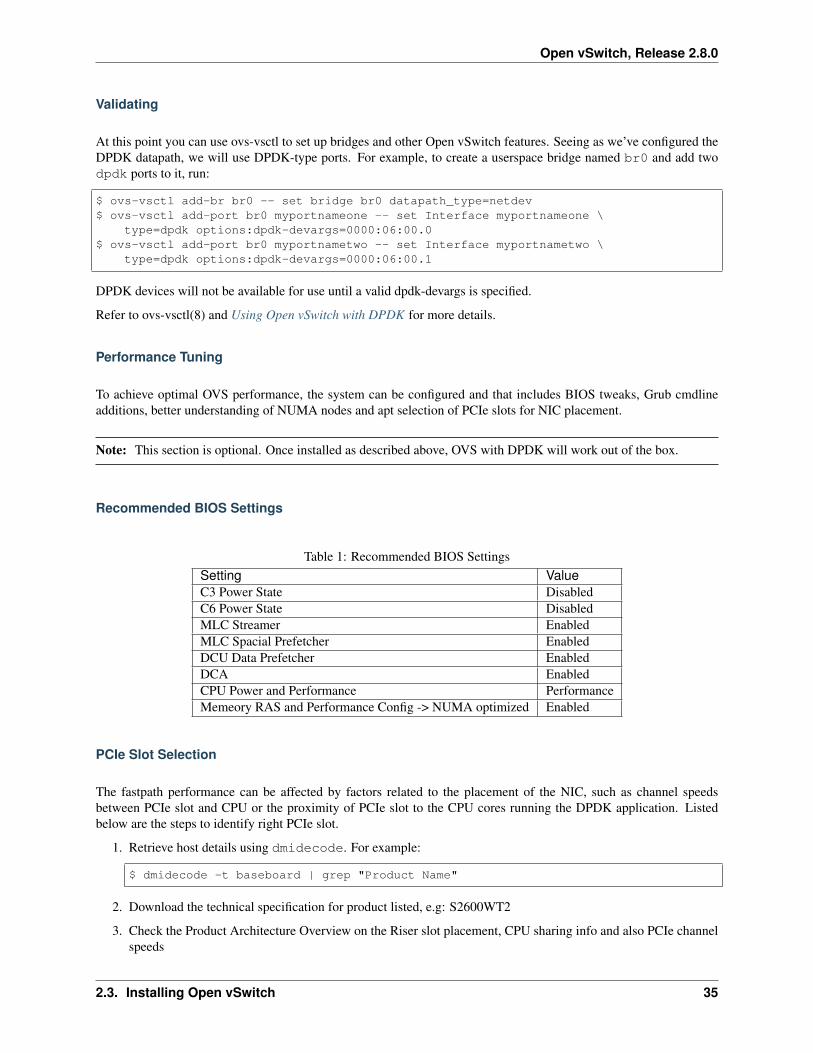
Open vSwitch, Release 2.8.0
Validating
At this point you can use ovs-vsctl to set up bridges and other Open vSwitch features. Seeing as we’ve configured theDPDK datapath, we will use DPDK-type ports. For example, to create a userspace bridge named br0 and add twodpdk ports to it, run:
$ ovs-vsctl add-br br0 -- set bridge br0 datapath_type=netdev$ ovs-vsctl add-port br0 myportnameone -- set Interface myportnameone \
type=dpdk options:dpdk-devargs=0000:06:00.0$ ovs-vsctl add-port br0 myportnametwo -- set Interface myportnametwo \
type=dpdk options:dpdk-devargs=0000:06:00.1
DPDK devices will not be available for use until a valid dpdk-devargs is specified.
Refer to ovs-vsctl(8) and Using Open vSwitch with DPDK for more details.
Performance Tuning
To achieve optimal OVS performance, the system can be configured and that includes BIOS tweaks, Grub cmdlineadditions, better understanding of NUMA nodes and apt selection of PCIe slots for NIC placement.
Note: This section is optional. Once installed as described above, OVS with DPDK will work out of the box.
Recommended BIOS Settings
Table 1: Recommended BIOS SettingsSetting ValueC3 Power State DisabledC6 Power State DisabledMLC Streamer EnabledMLC Spacial Prefetcher EnabledDCU Data Prefetcher EnabledDCA EnabledCPU Power and Performance PerformanceMemeory RAS and Performance Config -> NUMA optimized Enabled
PCIe Slot Selection
The fastpath performance can be affected by factors related to the placement of the NIC, such as channel speedsbetween PCIe slot and CPU or the proximity of PCIe slot to the CPU cores running the DPDK application. Listedbelow are the steps to identify right PCIe slot.
1. Retrieve host details using dmidecode. For example:
$ dmidecode -t baseboard | grep "Product Name"
2. Download the technical specification for product listed, e.g: S2600WT2
3. Check the Product Architecture Overview on the Riser slot placement, CPU sharing info and also PCIe channelspeeds
2.3. Installing Open vSwitch 35
Open vSwitch, Release 2.8.0
For example: On S2600WT, CPU1 and CPU2 share Riser Slot 1 with Channel speed between CPU1 and RiserSlot1 at 32GB/s, CPU2 and Riser Slot1 at 16GB/s. Running DPDK app on CPU1 cores and NIC inserted in toRiser card Slots will optimize OVS performance in this case.
4. Check the Riser Card #1 - Root Port mapping information, on the available slots and individual bus speeds. InS2600WT slot 1, slot 2 has high bus speeds and are potential slots for NIC placement.
Advanced Hugepage Setup
Allocate and mount 1 GB hugepages.
• For persistent allocation of huge pages, add the following options to the kernel bootline:
default_hugepagesz=1GB hugepagesz=1G hugepages=N
For platforms supporting multiple huge page sizes, add multiple options:
default_hugepagesz=<size> hugepagesz=<size> hugepages=N
where:
N number of huge pages requested
size huge page size with an optional suffix [kKmMgG]
• For run-time allocation of huge pages:
$ echo N > /sys/devices/system/node/nodeX/hugepages/hugepages-1048576kB/nr_→˓hugepages
where:
N number of huge pages requested
X NUMA Node
Note: For run-time allocation of 1G huge pages, Contiguous Memory Allocator (CONFIG_CMA) has to besupported by kernel, check your Linux distro.
Now mount the huge pages, if not already done so:
$ mount -t hugetlbfs -o pagesize=1G none /dev/hugepages
Enable HyperThreading
With HyperThreading, or SMT, enabled, a physical core appears as two logical cores. SMT can be utilized to spawnworker threads on logical cores of the same physical core there by saving additional cores.
With DPDK, when pinning pmd threads to logical cores, care must be taken to set the correct bits of thepmd-cpu-mask to ensure that the pmd threads are pinned to SMT siblings.
Take a sample system configuration, with 2 sockets, 2 * 10 core processors, HT enabled. This gives us a total of 40logical cores. To identify the physical core shared by two logical cores, run:
$ cat /sys/devices/system/cpu/cpuN/topology/thread_siblings_list
36 Chapter 2. Getting Started
Open vSwitch, Release 2.8.0
where N is the logical core number.
In this example, it would show that cores 1 and 21 share the same physical core. As cores are counted from 0, thepmd-cpu-mask can be used to enable these two pmd threads running on these two logical cores (one physical core)is:
$ ovs-vsctl set Open_vSwitch . other_config:pmd-cpu-mask=0x200002
Isolate Cores
The isolcpus option can be used to isolate cores from the Linux scheduler. The isolated cores can then be usedto dedicatedly run HPC applications or threads. This helps in better application performance due to zero contextswitching and minimal cache thrashing. To run platform logic on core 0 and isolate cores between 1 and 19 fromscheduler, add isolcpus=1-19 to GRUB cmdline.
Note: It has been verified that core isolation has minimal advantage due to mature Linux scheduler in some circum-stances.
NUMA/Cluster-on-Die
Ideally inter-NUMA datapaths should be avoided where possible as packets will go across QPI and there may be aslight performance penalty when compared with intra NUMA datapaths. On Intel Xeon Processor E5 v3, Cluster OnDie is introduced on models that have 10 cores or more. This makes it possible to logically split a socket into twoNUMA regions and again it is preferred where possible to keep critical datapaths within the one cluster.
It is good practice to ensure that threads that are in the datapath are pinned to cores in the sameNUMA area. e.g. pmd threads and QEMU vCPUs responsible for forwarding. If DPDK is built withCONFIG_RTE_LIBRTE_VHOST_NUMA=y, vHost User ports automatically detect the NUMA socket of the QEMUvCPUs and will be serviced by a PMD from the same node provided a core on this node is enabled in thepmd-cpu-mask. libnuma packages are required for this feature.
Compiler Optimizations
The default compiler optimization level is -O2. Changing this to more aggressive compiler optimization suchas -O3 -march=native with gcc (verified on 5.3.1) can produce performance gains though not siginificant.-march=native will produce optimized code on local machine and should be used when software compilationis done on Testbed.
Affinity
For superior performance, DPDK pmd threads and Qemu vCPU threads needs to be affinitized accordingly.
• PMD thread Affinity
A poll mode driver (pmd) thread handles the I/O of all DPDK interfaces assigned to it. A pmd thread shall pollthe ports for incoming packets, switch the packets and send to tx port. A pmd thread is CPU bound, and needsto be affinitized to isolated cores for optimum performance.
By setting a bit in the mask, a pmd thread is created and pinned to the corresponding CPU core. e.g. to run apmd thread on core 2:
2.3. Installing Open vSwitch 37
Open vSwitch, Release 2.8.0
$ ovs-vsctl set Open_vSwitch . other_config:pmd-cpu-mask=0x4
Note: A pmd thread on a NUMA node is only created if there is at least one DPDK interface from that NUMAnode added to OVS. A pmd thread is created by default on a core of a NUMA node or when a specified pmd-cpu-mask has indicated so. Even though a PMD thread may exist, the thread only starts consuming CPU cyclesif there is least one receive queue assigned to the pmd.
Note: On NUMA systems PCI devices are also local to a NUMA node. Unbound rx queues for a PCI devicewill be assigned to a pmd on it’s local NUMA node if a non-isolated PMD exists on that NUMA node. If not, thequeue will be assigned to a non-isolated pmd on a remote NUMA node. This will result in reduced maximumthroughput on that device and possibly on other devices assigned to that pmd thread. If such a queue assignmentis made a warning message will be logged: “There’s no available (non-isolated) pmd thread on numa node N.Queue Q on port P will be assigned to the pmd on core C (numa node N’). Expect reduced performance.”
• QEMU vCPU thread Affinity
A VM performing simple packet forwarding or running complex packet pipelines has to ensure that the vCPUthreads performing the work has as much CPU occupancy as possible.
For example, on a multicore VM, multiple QEMU vCPU threads shall be spawned. When the DPDK testpmdapplication that does packet forwarding is invoked, the taskset command should be used to affinitize thevCPU threads to the dedicated isolated cores on the host system.
Multiple Poll-Mode Driver Threads
With pmd multi-threading support, OVS creates one pmd thread for each NUMA node by default. However, incases where there are multiple ports/rxq’s producing traffic, performance can be improved by creating multiple pmdthreads running on separate cores. These pmd threads can share the workload by each being responsible for differentports/rxq’s. Assignment of ports/rxq’s to pmd threads is done automatically.
A set bit in the mask means a pmd thread is created and pinned to the corresponding CPU core. For example, to runpmd threads on core 1 and 2:
$ ovs-vsctl set Open_vSwitch . other_config:pmd-cpu-mask=0x6
When using dpdk and dpdkvhostuser ports in a bi-directional VM loopback as shown below, spreading the workloadover 2 or 4 pmd threads shows significant improvements as there will be more total CPU occupancy available:
NIC port0 <-> OVS <-> VM <-> OVS <-> NIC port 1
DPDK Physical Port Rx Queues
$ ovs-vsctl set Interface <DPDK interface> options:n_rxq=<integer>
The above command sets the number of rx queues for DPDK physical interface. The rx queues are assigned to pmdthreads on the same NUMA node in a round-robin fashion.
38 Chapter 2. Getting Started
Open vSwitch, Release 2.8.0
DPDK Physical Port Queue Sizes
$ ovs-vsctl set Interface dpdk0 options:n_rxq_desc=<integer>$ ovs-vsctl set Interface dpdk0 options:n_txq_desc=<integer>
The above command sets the number of rx/tx descriptors that the NIC associated with dpdk0 will be initialised with.
Different n_rxq_desc and n_txq_desc configurations yield different benefits in terms of throughput and latencyfor different scenarios. Generally, smaller queue sizes can have a positive impact for latency at the expense of through-put. The opposite is often true for larger queue sizes. Note: increasing the number of rx descriptors eg. to 4096 mayhave a negative impact on performance due to the fact that non-vectorised DPDK rx functions may be used. This isdependent on the driver in use, but is true for the commonly used i40e and ixgbe DPDK drivers.
Exact Match Cache
Each pmd thread contains one Exact Match Cache (EMC). After initial flow setup in the datapath, the EMC con-tains a single table and provides the lowest level (fastest) switching for DPDK ports. If there is a miss in the EMCthen the next level where switching will occur is the datapath classifier. Missing in the EMC and looking up in thedatapath classifier incurs a significant performance penalty. If lookup misses occur in the EMC because it is toosmall to handle the number of flows, its size can be increased. The EMC size can be modified by editing the defineEM_FLOW_HASH_SHIFT in lib/dpif-netdev.c.
As mentioned above, an EMC is per pmd thread. An alternative way of increasing the aggregate amount of possibleflow entries in EMC and avoiding datapath classifier lookups is to have multiple pmd threads running.
Rx Mergeable Buffers
Rx mergeable buffers is a virtio feature that allows chaining of multiple virtio descriptors to handle large packet sizes.Large packets are handled by reserving and chaining multiple free descriptors together. Mergeable buffer support isnegotiated between the virtio driver and virtio device and is supported by the DPDK vhost library. This behavior issupported and enabled by default, however in the case where the user knows that rx mergeable buffers are not neededi.e. jumbo frames are not needed, it can be forced off by adding mrg_rxbuf=off to the QEMU command lineoptions. By not reserving multiple chains of descriptors it will make more individual virtio descriptors available for rxto the guest using dpdkvhost ports and this can improve performance.
Limitations
• Currently DPDK ports does not use HW offload functionality.
• Network Interface Firmware requirements: Each release of DPDK is validated against a specific firmware ver-sion for a supported Network Interface. New firmware versions introduce bug fixes, performance improvementsand new functionality that DPDK leverages. The validated firmware versions are available as part of the re-lease notes for DPDK. It is recommended that users update Network Interface firmware to match what has beenvalidated for the DPDK release.
The latest list of validated firmware versions can be found in the DPDK release notes.
Reporting Bugs
Report problems to [email protected].
2.3. Installing Open vSwitch 39
Open vSwitch, Release 2.8.0
2.3.2 Installation from Packages
Open vSwitch is packaged on a variety of distributions. The tooling required to build these packages is included in theOpen vSwitch tree. The instructions are provided below.
Distributions packaging Open vSwitch
This document lists various popular distributions packaging Open vSwitch. Open vSwitch is packaged by variousdistributions for multiple platforms and architectures.
Note: The packaged version available with distributions may not be latest Open vSwitch release.
Debian
You can use apt-get or aptitude to install the .deb packages and must be superuser.
1. Debian has openvswitch-switch and openvswitch-common .deb packages that includes the coreuserspace components of the switch.
2. For kernel datapath, openvswitch-datapath-dkms can be installed to automatically build and install OpenvSwitch kernel module for your running kernel.
3. For DPDK datapath, Open vSwitch with DPDK support is bundled in the packageopenvswitch-switch-dpdk.
Fedora
Fedora provides openvswitch, openvswitch-devel, openvswitch-test andopenvswitch-debuginfo rpm packages. You can install openvswitch package in minimum installa-tion. Use yum or dnf to install the rpm packages and must be superuser.
Red Hat
RHEL distributes openvswitch rpm package that supports kernel datapath. DPDK accelerated Open vSwitch canbe installed using openvswitch-dpdk package.
OpenSuSE
OpenSUSE provides openvswitch, openvswitch-switch rpm packages. Also openvswitch-dpdk andopenvswitch-dpdk-switch can be installed for Open vSwitch using DPDK accelerated datapath.
Debian Packaging for Open vSwitch
This document describes how to build Debian packages for Open vSwitch. To install Open vSwitch on Debian withoutbuilding Debian packages, refer to Open vSwitch on Linux, FreeBSD and NetBSD instead.
Note: These instructions should also work on Ubuntu and other Debian derivative distributions.
40 Chapter 2. Getting Started
Open vSwitch, Release 2.8.0
Before You Begin
Before you begin, consider whether you really need to build packages yourself. Debian “wheezy” and “sid”, as wellas recent versions of Ubuntu, contain pre-built Debian packages for Open vSwitch. It is easier to install these than tobuild your own. To use packages from your distribution, skip ahead to “Installing .deb Packages”, below.
Building Open vSwitch Debian packages
You may build from an Open vSwitch distribution tarball or from an Open vSwitch Git tree with these instructions.
You do not need to be the superuser to build the Debian packages.
1. Install the “build-essential” and “fakeroot” packages. For example:
$ apt-get install build-essential fakeroot
2. Obtain and unpack an Open vSwitch source distribution and cd into its top level directory.
3. Install the build dependencies listed under “Build-Depends:” near the top of debian/control. You caninstall these any way you like, e.g. with apt-get install.
Check your work by running dpkg-checkbuilddeps in the top level of your ovs directory. If you’ve installedall the dependencies properly, dpkg-checkbuilddeps will exit without printing anything. If you forgot to installsome dependencies, it will tell you which ones.
4. Build the package:
$ fakeroot debian/rules binary
This will do a serial build that runs the unit tests. This will take approximately 8 to 10 minutes. If you prefer,you can run a faster parallel build:
$ DEB_BUILD_OPTIONS='parallel=8' fakeroot debian/rules binary
If you are in a big hurry, you can even skip the unit tests:
$ DEB_BUILD_OPTIONS='parallel=8 nocheck' fakeroot debian/rules binary
Note: There are a few pitfalls in the Debian packaging building system so that, occasionally, you may find that in atree that you have using for a while, the build command above exits immediately without actually building anything.To fix the problem, run:
$ fakeroot debian/rules clean
or start over from a fresh copy of the source tree.
5. The generated .deb files will be in the parent directory of the Open vSwitch source distribution.
Installing .deb Packages
These instructions apply to installing from Debian packages that you built yourself, as described in the previoussection. In this case, use a command such as dpkg -i to install the .deb files that you build. You will have tomanually install any missing dependencies.
2.3. Installing Open vSwitch 41
Open vSwitch, Release 2.8.0
You can also use these instruction to install from packages provided by Debian or a Debian derivative distributionsuch as Ubuntu. In this case, use a program such as apt-get or aptitude to download and install the providedpackages. These programs will also automatically download and install any missing dependencies.
Important: You must be superuser to install Debian packages.
1. Start by installing an Open vSwitch kernel module. See debian/openvswitch-switch.README.Debian for the available options.
2. Install the openvswitch-switch and openvswitch-common packages. These packages include thecore userspace components of the switch.
Open vSwitch .deb packages not mentioned above are rarely useful. Refer to their individual package descriptionsto find out whether any of them are useful to you.
Reporting Bugs
Report problems to [email protected].
Fedora, RHEL 7.x Packaging for Open vSwitch
This document provides instructions for building and installing Open vSwitch RPM packages on a Fedora Linux host.Instructions for the installation of Open vSwitch on a Fedora Linux host without using RPM packages can be found inthe Open vSwitch on Linux, FreeBSD and NetBSD.
These instructions have been tested with Fedora 23, and are also applicable for RHEL 7.x and its derivatives, includingCentOS 7.x and Scientific Linux 7.x.
Build Requirements
To build packages for a Fedora Linux host, you will need the packages described in the Open vSwitch on Linux,FreeBSD and NetBSD. Specific packages (by package name) include:
• rpm-build
• autoconf automake libtool
• systemd-units openssl openssl-devel
• python2-devel python3-devel
• python2 python2-twisted python2-zope-interface python2-six
• desktop-file-utils
• groff graphviz
• procps-ng
• checkpolicy selinux-policy-devel
And (optionally):
• libcap-ng libcap-ng-devel
• dpdk-devel
42 Chapter 2. Getting Started
Open vSwitch, Release 2.8.0
Bootstraping
Refer to Bootstrapping.
Configuring
Refer to Configuring.
Building
User Space RPMs
To build Open vSwitch user-space RPMs, execute the following from the directory in which ./configure was executed:
$ make rpm-fedora
This will create the RPMs openvswitch, python-openvswitch, openvswitch-test, openvswitch-devel, openvswitch-ovn-common, openvswitch-ovn-central, openvswitch-ovn-host, openvswitch-ovn-vtep, openvswitch-ovn-docker, andopenvswitch-debuginfo.
To enable DPDK support in the openvswitch package, the --with dpdk option can be added:
$ make rpm-fedora RPMBUILD_OPT="--with dpdk --without check"
You can also have the above commands automatically run the Open vSwitch unit tests. This can take several minutes.
$ make rpm-fedora RPMBUILD_OPT="--with check"
Kernel OVS Tree Datapath RPM
To build the Open vSwitch kernel module for the currently running kernel version, run:
$ make rpm-fedora-kmod
To build the Open vSwitch kernel module for another kernel version, the desired kernel version can be specified viathe kversion macro. For example:
$ make rpm-fedora-kmod \RPMBUILD_OPT='-D "kversion 4.3.4-300.fc23.x86_64"'
Installing
RPM packages can be installed by using the command rpm -i. Package installation requires superuser privileges.
The openvswitch-kmod RPM should be installed first if the Linux OVS tree datapath module is to be used. Theopenvswitch-kmod RPM should not be installed if only the in-tree Linux datapath or user-space datapath is needed.Refer to the Open vSwitch FAQ for more information about the various Open vSwitch datapath options.
In most cases only the openvswitch RPM will need to be installed. The python-openvswitch, openvswitch-test,openvswitch-devel, and openvswitch-debuginfo RPMs are optional unless required for a specific purpose.
The openvswitch-ovn-* packages are only needed when using OVN.
2.3. Installing Open vSwitch 43
Open vSwitch, Release 2.8.0
Refer to the RHEL README for additional usage and configuration information.
Reporting Bugs
Report problems to [email protected].
RHEL 5.6, 6.x Packaging for Open vSwitch
This document describes how to build and install Open vSwitch on a Red Hat Enterprise Linux (RHEL) host. If youwant to install Open vSwitch on a generic Linux host, refer to Open vSwitch on Linux, FreeBSD and NetBSD instead.
We have tested these instructions with RHEL 5.6 and RHEL 6.0.
For RHEL 7.x (or derivatives, such as CentOS 7.x), you should follow the instructions in the Fedora, RHEL 7.xPackaging for Open vSwitch. The Fedora spec files are used for RHEL 7.x.
Prerequisites
You may build from an Open vSwitch distribution tarball or from an Open vSwitch Git tree.
The default RPM build directory, _topdir, has five directories in the top-level.
BUILD/ where the software is unpacked and built
RPMS/ where the newly created binary package files are written
SOURCES/ contains the original sources, patches, and icon files
SPECS/ contains the spec files for each package to be built
SRPMS/ where the newly created source package files are written
Before you begin, note the RPM sources directory on your version of RHEL. The command rpmbuild--showrc will show the configuration for each of those directories. Alternatively, the command rpm --eval'%{_topdir}' shows the current configuration for the top level directory and the command rpm --eval'%{_sourcedir}' does the same for the sources directory. On RHEL 5, the default RPM _topdir is /usr/src/redhat and the default RPM sources directory is /usr/src/redhat/SOURCES. On RHEL 6, the default_topdir is $HOME/rpmbuild and the default RPM sources directory is $HOME/rpmbuild/SOURCES.
Build Requirements
To compile the RPMs, you will need to install the packages described in the Open vSwitch on Linux, FreeBSD andNetBSD along with some additional packages. These can be installed with the below command:
$ yum install gcc make python-devel openssl-devel kernel-devel graphviz \kernel-debug-devel autoconf automake rpm-build redhat-rpm-config \libtool checkpolicy selinux-policy-devel
Bootstrapping and Configuring
If you are building from a distribution tarball, skip to Building. If not, you must be building from an Open vSwitch Gittree. Determine what version of Autoconf is installed (e.g. run autoconf --version). If it is not at least version2.63, then you must upgrade or use another machine to build the packages.
44 Chapter 2. Getting Started
Open vSwitch, Release 2.8.0
Assuming all requirements have been met, build the tarball by running:
$ ./boot.sh$ ./configure$ make dist
You must run this on a machine that has the tools listed in Build Requirements as prerequisites for building from a Gittree. Afterward, proceed with the rest of the instructions using the distribution tarball.
Now you have a distribution tarball, named something like openvswitch-x.y.z.tar.gz. Copy this file into theRPM sources directory, e.g.:
$ cp openvswitch-x.y.z.tar.gz $HOME/rpmbuild/SOURCES
Broken build symlink
Some versions of the RHEL 6 kernel-devel package contain a broken build symlink. If you are using such a version,you must fix the problem before continuing.
To find out whether you are affected, run:
$ cd /lib/modules/<version>$ ls -l build/
where <version> is the version number of the RHEL 6 kernel.
Note: The trailing slash in the final command is important. Be sure to include it.
If the ls command produces a directory listing, your kernel-devel package is OK. If it produces a No such fileor directory error, your kernel-devel package is buggy.
If your kernel-devel package is buggy, then you can fix it with:
$ cd /lib/modules/<version>$ rm build$ ln -s /usr/src/kernels/<target> build
where <target> is the name of an existing directory under /usr/src/kernels, whose name should be similarto <version> but may contain some extra parts. Once you have done this, verify the fix with the same procedureyou used above to check for the problem.
Building
You should have a distribution tarball named something like openvswitch-x.y.z.tar.gz. Copy this file into the RPMsources directory:
$ cp openvswitch-x.y.z.tar.gz $HOME/rpmbuild/SOURCES
Make another copy of the distribution tarball in a temporary directory. Then unpack the tarball and cd into its root:
$ tar xzf openvswitch-x.y.z.tar.gz$ cd openvswitch-x.y.z
2.3. Installing Open vSwitch 45
Open vSwitch, Release 2.8.0
Userspace
To build Open vSwitch userspace, run:
$ rpmbuild -bb rhel/openvswitch.spec
This produces two RPMs: “openvswitch” and “openvswitch-debuginfo”.
The above command automatically runs the Open vSwitch unit tests. To disable the unit tests, run:
$ rpmbuild -bb --without check rhel/openvswitch.spec
Note: If the build fails with configure: error: source dir /lib/modules/2.6.32-279.el6.x86_64/build doesn't exist or similar, then the kernel-devel package is missing or buggy.
Kernel Module
On RHEL 6, to build the Open vSwitch kernel module, copy rhel/openvswitch-kmod.files into the RPM sourcesdirectory and run:
$ rpmbuild -bb rhel/openvswitch-kmod-rhel6.spec
You might have to specify a kernel version and/or variants, e.g.:
$ rpmbuild -bb -D “kversion 2.6.32-131.6.1.el6.x86_64” -D “kflavors default debug kdump”rhel/openvswitch-kmod-rhel6.spec
This produces an “kmod-openvswitch” RPM for each kernel variant, in this example: “kmod-openvswitch”, “kmod-openvswitch-debug”, and “kmod-openvswitch-kdump”.
Red Hat Network Scripts Integration
A RHEL host has default firewall rules that prevent any Open vSwitch tunnel traffic from passing through. If a userconfigures Open vSwitch tunnels like Geneve, GRE, VXLAN, LISP etc., they will either have to manually add iptablesfirewall rules to allow the tunnel traffic or add it through a startup script Refer to the “enable-protocol” command inthe ovs-ctl(8) manpage for more information.
In addition, simple integration with Red Hat network scripts has been implemented. Refer to README.RHEL.rst inthe source tree or /usr/share/doc/openvswitch/README.RHEL.rst in the installed openvswitch package for details.
Reporting Bugs
Report problems to [email protected].
2.3.3 Upgrades
OVN Upgrades
Since OVN is a distributed system, special consideration must be given to the process used to upgrade OVN across adeployment. This document discusses the recommended upgrade process.
46 Chapter 2. Getting Started
Open vSwitch, Release 2.8.0
Release Notes
You should always check the OVS and OVN release notes (NEWS file) for any release specific notes on upgrades.
OVS
OVN depends on and is included with OVS. It’s expected that OVS and OVN are upgraded together, partly for con-venience. OVN is included in OVS releases so it’s easiest to upgrade them together. OVN may also make use of newfeatures of OVS only available in that release.
Upgrade ovn-controller
You should start by upgrading ovn-controller on each host it’s running on. First, you upgrade the OVS and OVNpackages. Then, restart the ovn-controller service. You can restart with ovn-ctl:
$ sudo /usr/share/openvswitch/scripts/ovn-ctl restart_controller
or with systemd:
$ sudo systemd restart ovn-controller
Upgrade OVN Databases and ovn-northd
The OVN databases and ovn-northd should be upgraded next. Since ovn-controller has already been upgraded, it willbe ready to operate on any new functionality specified by the database or logical flows created by ovn-northd.
Upgrading the OVN packages installs everything needed for an upgrade. The only step required after upgrading thepackages is to restart ovn-northd, which automatically restarts the databases and upgrades the database schema, aswell.
You may perform this restart using the ovn-ctl script:
$ sudo /usr/share/openvswitch/scripts/ovn-ctl restart_northd
or if you’re using a Linux distribution with systemd:
$ sudo systemctl restart ovn-northd
Upgrading OVN Integration
Lastly, you may also want to upgrade integration with OVN that you may be using. For example, this could be theOpenStack Neutron driver or ovn-kubernetes.
OVN’s northbound database schema is a backwards compatible interface, so you should be able to safely complete anOVN upgrade before upgrading any integration in use.
2.3.4 Others
2.3. Installing Open vSwitch 47

Open vSwitch, Release 2.8.0
Bash command-line completion scripts
There are two completion scripts available: ovs-appctl-bashcomp.bash and ovs-vsctl-bashcomp.bash.
ovs-appctl-bashcomp
ovs-appctl-bashcomp.bash adds bash command-line completion support for ovs-appctl, ovs-dpctl,ovs-ofctl and ovsdb-tool commands.
Features
• Display available completion or complete on unfinished user input (long option, subcommand, and argument).
• Subcommand hints
• Convert between keywords like bridge, port, interface, or dp and the available record in ovsdb.
Limitations
• Only supports a small set of important keywords (dp, datapath, bridge, switch, port, interface,iface).
• Does not support parsing of nested options. For example:
$ ovsdb-tool create [db [schema]]
• Does not support expansion on repeated argument. For example:
$ ovs-dpctl show [dp...]).
• Only supports matching on long options, and only in the format --option [arg]. Do not use--option=[arg].
ovs-vsctl-bashcomp
ovs-vsctl-bashcomp.bash adds Bash command-line completion support for ovs-vsctl command.
Features
• Display available completion and complete on user input for global/local options, command, and argument.
• Query database and expand keywords like table, record, column, or key, to available completions.
• Deal with argument relations like ‘one and more’, ‘zero or one’.
• Complete multiple ovs-vsctl commands cascaded via --.
Limitations
Completion of very long ovs-vsctl commands can take up to several seconds.
48 Chapter 2. Getting Started
Open vSwitch, Release 2.8.0
Usage
The bashcomp scripts should be placed at /etc/bash_completion.d/ to be available for all bash sessions. Run-ning make install will place the scripts to $(sysconfdir)/bash_completion.d/, thus, the user shouldspecify --sysconfdir=/etc at configuration. If OVS is installed from packages, the scripts will automatically beplaced inside /etc/bash_completion.d/.
If you just want to run the scripts in one bash, you can remove them from /etc/bash_completion.d/ and runthe scripts via . ovs-appctl-bashcomp.bash or . ovs-vsctl-bashcomp.bash.
Tests
Unit tests are added in tests/completion.at and integrated into autotest framework. To run the tests, just runmake check.
Open vSwitch Documentation
This document describes how to build the OVS documentation for use offline. A continuously updated, online versioncan be found at docs.openvswitch.org.
Note: These instructions provide information on building the documentation locally. For information on writingdocumentation, refer to Open vSwitch Documentation Style
Build Requirements
As described in the Open vSwitch Documentation Style, the Open vSwitch documentation is written in reStructured-Text and built with Sphinx. A detailed guide on installing Sphinx in many environments is available on the Sphinxwebsite but, for most Linux distributions, you can install with your package manager. For example, on Debian/Ubunturun:
$ sudo apt-get install python-sphinx
Similarly, on RHEL/Fedora run:
$ sudo dnf install python-sphinx
A requirements.txt is also provided in the /Documentation, should you wish to install using pip:
$ virtualenv .venv$ source .venv/bin/activate$ pip install -r Documentation/requirements.txt
Configuring
It’s unlikely that you’ll need to customize any aspect of the configuration. However, the Documentation/conf.py is the go-to place for all configuration. This file is well documented and further information is available on theSphinx website.
2.3. Installing Open vSwitch 49
Open vSwitch, Release 2.8.0
Building
Once Sphinx installed, the documentation can be built using the provided Makefile targets:
$ make docs-check
Important: The docs-check target will fail if there are any syntax errors. However, it won’t catch more succintissues such as style or grammar issues. As a result, you should always inspect changes visually to ensure the result isas intended.
Once built, documentation is available in the /Documentation/_build folder. Open the root index.html tobrowse the documentation.
50 Chapter 2. Getting Started
CHAPTER 3
Tutorials
Getting started with Open vSwitch (OVS) and Open Virtual Network (OVN) for Open vSwitch.
3.1 Open vSwitch Advanced Features
Many tutorials cover the basics of OpenFlow. This is not such a tutorial. Rather, a knowledge of the basics ofOpenFlow is a prerequisite. If you do not already understand how an OpenFlow flow table works, please go read abasic tutorial and then continue reading here afterward.
It is also important to understand the basics of Open vSwitch before you begin. If you have never used ovs-vsctl orovs-ofctl before, you should learn a little about them before proceeding.
Most of the features covered in this tutorial are Open vSwitch extensions to OpenFlow. Also, most of the features inthis tutorial are specific to the software Open vSwitch implementation. If you are using an Open vSwitch port to anASIC-based hardware switch, this tutorial will not help you.
This tutorial does not cover every aspect of the features that it mentions. You can find the details elsewhere inthe Open vSwitch documentation, especially ovs-ofctl(8) and the comments in the include/openflow/nicira-ext.h and include/openvswitch/meta-flow.h header files.
3.1.1 Getting Started
This is a hands-on tutorial. To get the most out of it, you will need Open vSwitch binaries. You do not, on theother hand, need any physical networking hardware or even supervisor privilege on your system. Instead, we willuse a script called ovs-sandbox, which accompanies the tutorial, that constructs a software simulated networkenvironment based on Open vSwitch.
You can use ovs-sandbox three ways:
• If you have already installed Open vSwitch on your system, then you should be able to just run ovs-sandboxfrom this directory without any options.
• If you have not installed Open vSwitch (and you do not want to install it), then you can build Open vSwitchaccording to the instructions in Open vSwitch on Linux, FreeBSD and NetBSD, without installing it. Then run
51
Open vSwitch, Release 2.8.0
./ovs-sandbox -b DIRECTORY from this directory, substituting the Open vSwitch build directory forDIRECTORY.
• As a slight variant on the latter, you can run make sandbox from an Open vSwitch build directory.
When you run ovs-sandbox, it does the following:
1. CAUTION: Deletes any subdirectory of the current directory named “sandbox” and any files in that directory.
2. Creates a new directory “sandbox” in the current directory.
3. Sets up special environment variables that ensure that Open vSwitch programs will look inside the “sandbox”directory instead of in the Open vSwitch installation directory.
4. If you are using a built but not installed Open vSwitch, installs the Open vSwitch manpages in a subdirectory of“sandbox” and adjusts the MANPATH environment variable to point to this directory. This means that you canuse, for example, man ovs-vsctl to see a manpage for the ovs-vsctl program that you built.
5. Creates an empty Open vSwitch configuration database under “sandbox”.
6. Starts ovsdb-server running under “sandbox”.
7. Starts ovs-vswitchd running under “sandbox”, passing special options that enable a special “dummy” modefor testing.
8. Starts a nested interactive shell inside “sandbox”.
At this point, you can run all the usual Open vSwitch utilities from the nested shell environment. You can, for example,use ovs-vsctl to create a bridge:
$ ovs-vsctl add-br br0
From Open vSwitch’s perspective, the bridge that you create this way is as real as any other. You can, for example,connect it to an OpenFlow controller or use ovs-ofctl to examine and modify it and its OpenFlow flow table. Onthe other hand, the bridge is not visible to the operating system’s network stack, so ip cannot see it or affect it, whichmeans that utilities like ping and tcpdump will not work either. (That has its good side, too: you can’t screw upyour computer’s network stack by manipulating a sandboxed OVS.)
When you’re done using OVS from the sandbox, exit the nested shell (by entering the “exit” shell command orpressing Control+D). This will kill the daemons that ovs-sandbox started, but it leaves the “sandbox” directoryand its contents in place.
The sandbox directory contains log files for the Open vSwitch dameons. You can examine them while you’re runningin the sandboxed environment or after you exit.
3.1.2 Using GDB
GDB support is not required to go through the tutorial. It is added in case user wants to explore the internals of OVSprograms.
GDB can already be used to debug any running process, with the usual gdb <program> <process-id> com-mand.
ovs-sandbox also has a -g option for launching ovs-vswitchd under GDB. This option can be handy for settingbreak points before ovs-vswitchd runs, or for catching early segfaults. Similarly, a -d option can be used to runovsdb-server under GDB. Both options can be specified at the same time.
In addition, a -e option also launches ovs-vswitchd under GDB. However, instead of displaying a gdb> prompt andwaiting for user input, ovs-vswitchd will start to execute immediately. -r option is the corresponding option forrunning ovsdb-server under gdb with immediate execution.
52 Chapter 3. Tutorials
Open vSwitch, Release 2.8.0
To avoid GDB mangling with the sandbox sub shell terminal, ovs-sandbox starts a new xterm to run each GDBsession. For systems that do not support X windows, GDB support is effectively disabled.
When launching sandbox through the build tree’s make file, the -g option can be passed via the SANDBOXFLAGSenvironment variable. make sandbox SANDBOXFLAGS=-g will start the sandbox with ovs-vswitchd runningunder GDB in its own xterm if X is available.
3.1.3 Motivation
The goal of this tutorial is to demonstrate the power of Open vSwitch flow tables. The tutorial works through theimplementation of a MAC-learning switch with VLAN trunk and access ports. Outside of the Open vSwitch featuresthat we will discuss, OpenFlow provides at least two ways to implement such a switch:
1. An OpenFlow controller to implement MAC learning in a “reactive” fashion. Whenever a new MAC appears onthe switch, or a MAC moves from one switch port to another, the controller adjusts the OpenFlow flow table tomatch.
2. The “normal” action. OpenFlow defines this action to submit a packet to “the traditional non-OpenFlow pipelineof the switch”. That is, if a flow uses this action, then the packets in the flow go through the switch in the sameway that they would if OpenFlow was not configured on the switch.
Each of these approaches has unfortunate pitfalls. In the first approach, using an OpenFlow controller to implementMAC learning, has a significant cost in terms of network bandwidth and latency. It also makes the controller moredifficult to scale to large numbers of switches, which is especially important in environments with thousands of hy-pervisors (each of which contains a virtual OpenFlow switch). MAC learning at an OpenFlow controller also behavespoorly if the OpenFlow controller fails, slows down, or becomes unavailable due to network problems.
The second approach, using the “normal” action, has different problems. First, little about the “normal” action isstandardized, so it behaves differently on switches from different vendors, and the available features and how thosefeatures are configured (usually not through OpenFlow) varies widely. Second, “normal” does not work well withother OpenFlow actions. It is “all-or-nothing”, with little potential to adjust its behavior slightly or to compose it withother features.
3.1.4 Scenario
We will construct Open vSwitch flow tables for a VLAN-capable, MAC-learning switch that has four ports:
p1 a trunk port that carries all VLANs, on OpenFlow port 1.
p2 an access port for VLAN 20, on OpenFlow port 2.
p3, p4 both access ports for VLAN 30, on OpenFlow ports 3 and 4, respectively.
Note: The ports’ names are not significant. You could call them eth1 through eth4, or any other names you like.
Note: An OpenFlow switch always has a “local” port as well. This scenario won’t use the local port.
Our switch design will consist of five main flow tables, each of which implements one stage in the switch pipeline:
Table 0 Admission control.
Table 1 VLAN input processing.
Table 2 Learn source MAC and VLAN for ingress port.
Table 3 Look up learned port for destination MAC and VLAN.
3.1. Open vSwitch Advanced Features 53
Open vSwitch, Release 2.8.0
Table 4 Output processing.
The section below describes how to set up the scenario, followed by a section for each OpenFlow table.
You can cut and paste the ovs-vsctl and ovs-ofctl commands in each of the sections below into yourovs-sandbox shell. They are also available as shell scripts in this directory, named t-setup, t-stage0,t-stage1, . . . , t-stage4. The ovs-appctl test commands are intended for cutting and pasting and are notsupplied separately.
3.1.5 Setup
To get started, start ovs-sandbox. Inside the interactive shell that it starts, run this command:
$ ovs-vsctl add-br br0 -- set Bridge br0 fail-mode=secure
This command creates a new bridge “br0” and puts “br0” into so-called “fail-secure” mode. For our purpose, this justmeans that the OpenFlow flow table starts out empty.
Note: If we did not do this, then the flow table would start out with a single flow that executes the “normal” action.We could use that feature to yield a switch that behaves the same as the switch we are currently building, but with thecaveats described under “Motivation” above.)
The new bridge has only one port on it so far, the “local port” br0. We need to add p1, p2, p3, and p4. A shell forloop is one way to do it:
for i in 1 2 3 4; doovs-vsctl add-port br0 p$i -- set Interface p$i ofport_request=$iovs-ofctl mod-port br0 p$i up
done
In addition to adding a port, the ovs-vsctl command above sets its ofport_request column to ensure that portp1 is assigned OpenFlow port 1, p2 is assigned OpenFlow port 2, and so on.
Note: We could omit setting the ofport_request and let Open vSwitch choose port numbers for us, but it’s convenientfor the purposes of this tutorial because we can talk about OpenFlow port 1 and know that it corresponds to p1.
The ovs-ofctl command above brings up the simulated interfaces, which are down initially, using an OpenFlowrequest. The effect is similar to ip link up, but the sandbox’s interfaces are not visible to the operating systemand therefore ip would not affect them.
We have not configured anything related to VLANs or MAC learning. That’s because we’re going to implement thosefeatures in the flow table.
To see what we’ve done so far to set up the scenario, you can run a command like ovs-vsctl show or ovs-ofctlshow br0.
3.1.6 Implementing Table 0: Admission control
Table 0 is where packets enter the switch. We use this stage to discard packets that for one reason or another areinvalid. For example, packets with a multicast source address are not valid, so we can add a flow to drop them atingress to the switch with:
54 Chapter 3. Tutorials
Open vSwitch, Release 2.8.0
$ ovs-ofctl add-flow br0 \"table=0, dl_src=01:00:00:00:00:00/01:00:00:00:00:00, actions=drop"
A switch should also not forward IEEE 802.1D Spanning Tree Protocol (STP) packets, so we can also add a flow todrop those and other packets with reserved multicast protocols:
$ ovs-ofctl add-flow br0 \"table=0, dl_dst=01:80:c2:00:00:00/ff:ff:ff:ff:ff:f0, actions=drop"
We could add flows to drop other protocols, but these demonstrate the pattern.
We need one more flow, with a priority lower than the default, so that flows that don’t match either of the “drop” flowswe added above go on to pipeline stage 1 in OpenFlow table 1:
$ ovs-ofctl add-flow br0 "table=0, priority=0, actions=resubmit(,1)"
Note: The “resubmit” action is an Open vSwitch extension to OpenFlow.
3.1.7 Testing Table 0
If we were using Open vSwitch to set up a physical or a virtual switch, then we would naturally test it by sendingpackets through it one way or another, perhaps with common network testing tools like ping and tcpdump or morespecialized tools like Scapy. That’s difficult with our simulated switch, since it’s not visible to the operating system.
But our simulated switch has a few specialized testing tools. The most powerful of these tools is ofproto/trace.Given a switch and the specification of a flow, ofproto/trace shows, step-by-step, how such a flow would betreated as it goes through the switch.
Example 1
Try this command:
$ ovs-appctl ofproto/trace br0 in_port=1,dl_dst=01:80:c2:00:00:05
The output should look something like this:
Flow: in_port=1,vlan_tci=0x0000,dl_src=00:00:00:00:00:00,dl_dst=01:80:c2:00:00:05,dl_→˓type=0x0000
bridge("br0")-------------0. dl_dst=01:80:c2:00:00:00/ff:ff:ff:ff:ff:f0, priority 32768
drop
Final flow: unchangedMegaflow: recirc_id=0,in_port=1,dl_src=00:00:00:00:00:00/01:00:00:00:00:00,dl_→˓dst=01:80:c2:00:00:00/ff:ff:ff:ff:ff:f0,dl_type=0x0000Datapath actions: drop
The first line shows the flow being traced, in slightly greater detail than specified on the command line. It is mostlyzeros because unspecified fields default to zeros.
3.1. Open vSwitch Advanced Features 55
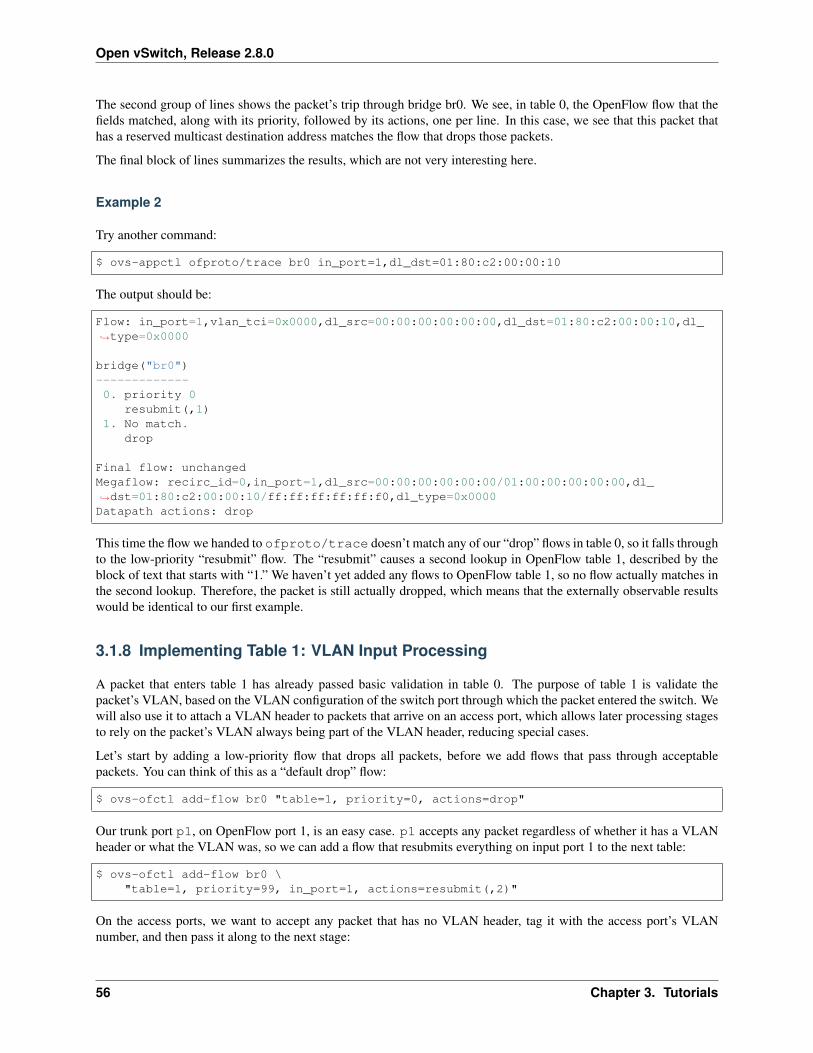
Open vSwitch, Release 2.8.0
The second group of lines shows the packet’s trip through bridge br0. We see, in table 0, the OpenFlow flow that thefields matched, along with its priority, followed by its actions, one per line. In this case, we see that this packet thathas a reserved multicast destination address matches the flow that drops those packets.
The final block of lines summarizes the results, which are not very interesting here.
Example 2
Try another command:
$ ovs-appctl ofproto/trace br0 in_port=1,dl_dst=01:80:c2:00:00:10
The output should be:
Flow: in_port=1,vlan_tci=0x0000,dl_src=00:00:00:00:00:00,dl_dst=01:80:c2:00:00:10,dl_→˓type=0x0000
bridge("br0")-------------0. priority 0
resubmit(,1)1. No match.
drop
Final flow: unchangedMegaflow: recirc_id=0,in_port=1,dl_src=00:00:00:00:00:00/01:00:00:00:00:00,dl_→˓dst=01:80:c2:00:00:10/ff:ff:ff:ff:ff:f0,dl_type=0x0000Datapath actions: drop
This time the flow we handed to ofproto/trace doesn’t match any of our “drop” flows in table 0, so it falls throughto the low-priority “resubmit” flow. The “resubmit” causes a second lookup in OpenFlow table 1, described by theblock of text that starts with “1.” We haven’t yet added any flows to OpenFlow table 1, so no flow actually matches inthe second lookup. Therefore, the packet is still actually dropped, which means that the externally observable resultswould be identical to our first example.
3.1.8 Implementing Table 1: VLAN Input Processing
A packet that enters table 1 has already passed basic validation in table 0. The purpose of table 1 is validate thepacket’s VLAN, based on the VLAN configuration of the switch port through which the packet entered the switch. Wewill also use it to attach a VLAN header to packets that arrive on an access port, which allows later processing stagesto rely on the packet’s VLAN always being part of the VLAN header, reducing special cases.
Let’s start by adding a low-priority flow that drops all packets, before we add flows that pass through acceptablepackets. You can think of this as a “default drop” flow:
$ ovs-ofctl add-flow br0 "table=1, priority=0, actions=drop"
Our trunk port p1, on OpenFlow port 1, is an easy case. p1 accepts any packet regardless of whether it has a VLANheader or what the VLAN was, so we can add a flow that resubmits everything on input port 1 to the next table:
$ ovs-ofctl add-flow br0 \"table=1, priority=99, in_port=1, actions=resubmit(,2)"
On the access ports, we want to accept any packet that has no VLAN header, tag it with the access port’s VLANnumber, and then pass it along to the next stage:
56 Chapter 3. Tutorials
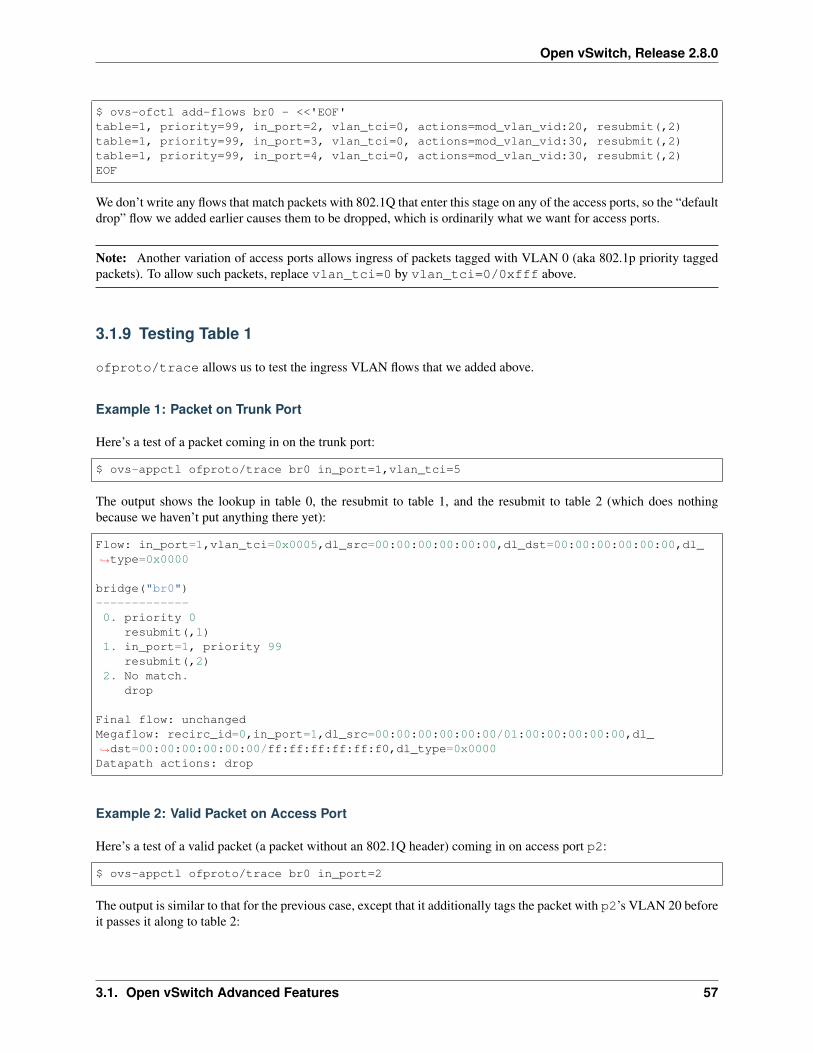
Open vSwitch, Release 2.8.0
$ ovs-ofctl add-flows br0 - <<'EOF'table=1, priority=99, in_port=2, vlan_tci=0, actions=mod_vlan_vid:20, resubmit(,2)table=1, priority=99, in_port=3, vlan_tci=0, actions=mod_vlan_vid:30, resubmit(,2)table=1, priority=99, in_port=4, vlan_tci=0, actions=mod_vlan_vid:30, resubmit(,2)EOF
We don’t write any flows that match packets with 802.1Q that enter this stage on any of the access ports, so the “defaultdrop” flow we added earlier causes them to be dropped, which is ordinarily what we want for access ports.
Note: Another variation of access ports allows ingress of packets tagged with VLAN 0 (aka 802.1p priority taggedpackets). To allow such packets, replace vlan_tci=0 by vlan_tci=0/0xfff above.
3.1.9 Testing Table 1
ofproto/trace allows us to test the ingress VLAN flows that we added above.
Example 1: Packet on Trunk Port
Here’s a test of a packet coming in on the trunk port:
$ ovs-appctl ofproto/trace br0 in_port=1,vlan_tci=5
The output shows the lookup in table 0, the resubmit to table 1, and the resubmit to table 2 (which does nothingbecause we haven’t put anything there yet):
Flow: in_port=1,vlan_tci=0x0005,dl_src=00:00:00:00:00:00,dl_dst=00:00:00:00:00:00,dl_→˓type=0x0000
bridge("br0")-------------0. priority 0
resubmit(,1)1. in_port=1, priority 99
resubmit(,2)2. No match.
drop
Final flow: unchangedMegaflow: recirc_id=0,in_port=1,dl_src=00:00:00:00:00:00/01:00:00:00:00:00,dl_→˓dst=00:00:00:00:00:00/ff:ff:ff:ff:ff:f0,dl_type=0x0000Datapath actions: drop
Example 2: Valid Packet on Access Port
Here’s a test of a valid packet (a packet without an 802.1Q header) coming in on access port p2:
$ ovs-appctl ofproto/trace br0 in_port=2
The output is similar to that for the previous case, except that it additionally tags the packet with p2’s VLAN 20 beforeit passes it along to table 2:
3.1. Open vSwitch Advanced Features 57
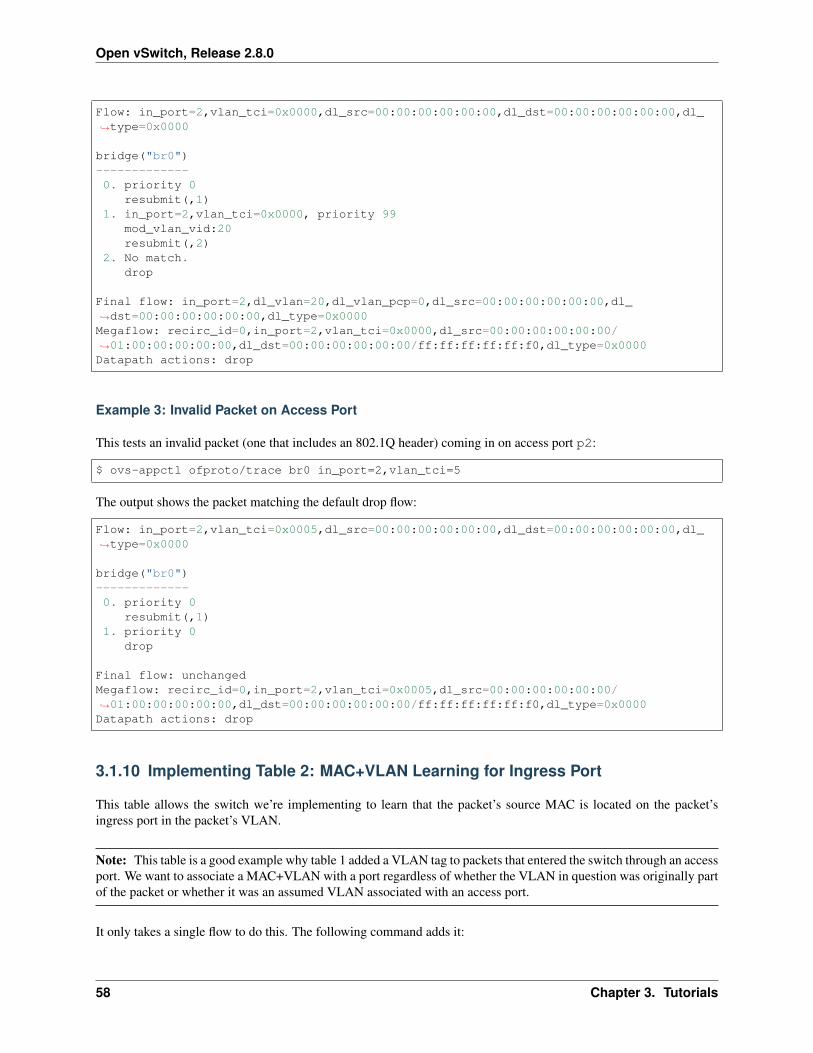
Open vSwitch, Release 2.8.0
Flow: in_port=2,vlan_tci=0x0000,dl_src=00:00:00:00:00:00,dl_dst=00:00:00:00:00:00,dl_→˓type=0x0000
bridge("br0")-------------0. priority 0
resubmit(,1)1. in_port=2,vlan_tci=0x0000, priority 99
mod_vlan_vid:20resubmit(,2)
2. No match.drop
Final flow: in_port=2,dl_vlan=20,dl_vlan_pcp=0,dl_src=00:00:00:00:00:00,dl_→˓dst=00:00:00:00:00:00,dl_type=0x0000Megaflow: recirc_id=0,in_port=2,vlan_tci=0x0000,dl_src=00:00:00:00:00:00/→˓01:00:00:00:00:00,dl_dst=00:00:00:00:00:00/ff:ff:ff:ff:ff:f0,dl_type=0x0000Datapath actions: drop
Example 3: Invalid Packet on Access Port
This tests an invalid packet (one that includes an 802.1Q header) coming in on access port p2:
$ ovs-appctl ofproto/trace br0 in_port=2,vlan_tci=5
The output shows the packet matching the default drop flow:
Flow: in_port=2,vlan_tci=0x0005,dl_src=00:00:00:00:00:00,dl_dst=00:00:00:00:00:00,dl_→˓type=0x0000
bridge("br0")-------------0. priority 0
resubmit(,1)1. priority 0
drop
Final flow: unchangedMegaflow: recirc_id=0,in_port=2,vlan_tci=0x0005,dl_src=00:00:00:00:00:00/→˓01:00:00:00:00:00,dl_dst=00:00:00:00:00:00/ff:ff:ff:ff:ff:f0,dl_type=0x0000Datapath actions: drop
3.1.10 Implementing Table 2: MAC+VLAN Learning for Ingress Port
This table allows the switch we’re implementing to learn that the packet’s source MAC is located on the packet’singress port in the packet’s VLAN.
Note: This table is a good example why table 1 added a VLAN tag to packets that entered the switch through an accessport. We want to associate a MAC+VLAN with a port regardless of whether the VLAN in question was originally partof the packet or whether it was an assumed VLAN associated with an access port.
It only takes a single flow to do this. The following command adds it:
58 Chapter 3. Tutorials
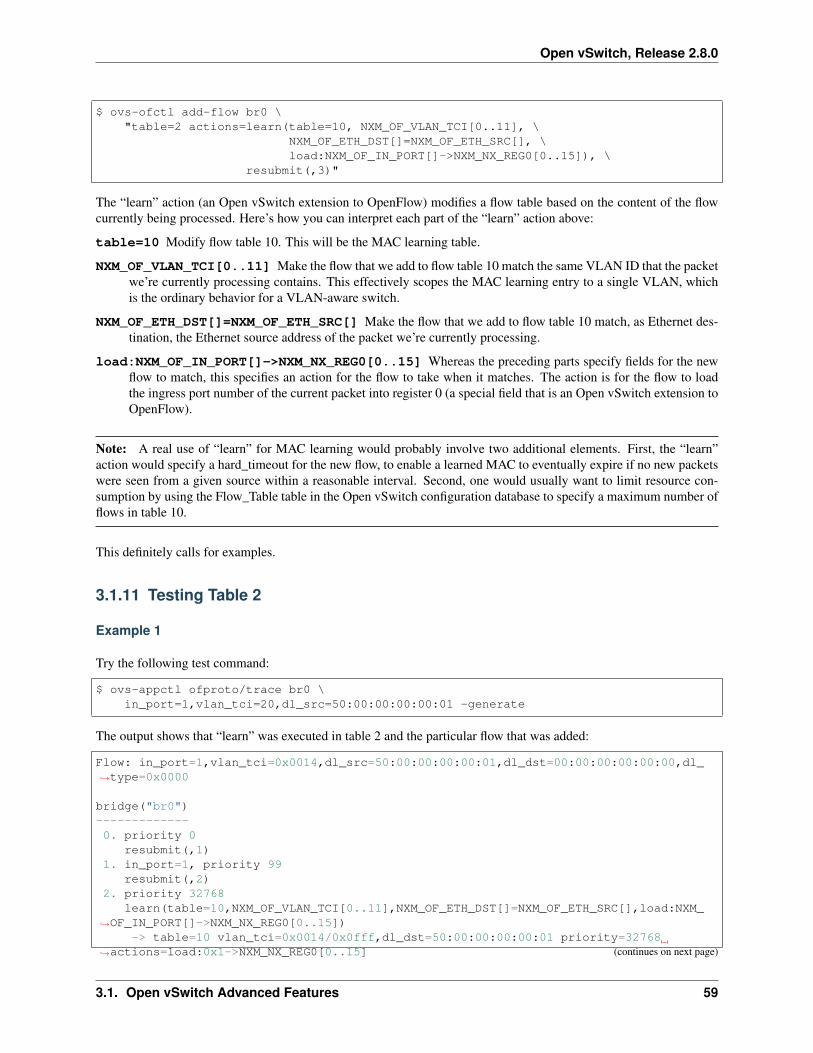
Open vSwitch, Release 2.8.0
$ ovs-ofctl add-flow br0 \"table=2 actions=learn(table=10, NXM_OF_VLAN_TCI[0..11], \
NXM_OF_ETH_DST[]=NXM_OF_ETH_SRC[], \load:NXM_OF_IN_PORT[]->NXM_NX_REG0[0..15]), \
resubmit(,3)"
The “learn” action (an Open vSwitch extension to OpenFlow) modifies a flow table based on the content of the flowcurrently being processed. Here’s how you can interpret each part of the “learn” action above:
table=10 Modify flow table 10. This will be the MAC learning table.
NXM_OF_VLAN_TCI[0..11] Make the flow that we add to flow table 10 match the same VLAN ID that the packetwe’re currently processing contains. This effectively scopes the MAC learning entry to a single VLAN, whichis the ordinary behavior for a VLAN-aware switch.
NXM_OF_ETH_DST[]=NXM_OF_ETH_SRC[] Make the flow that we add to flow table 10 match, as Ethernet des-tination, the Ethernet source address of the packet we’re currently processing.
load:NXM_OF_IN_PORT[]->NXM_NX_REG0[0..15] Whereas the preceding parts specify fields for the newflow to match, this specifies an action for the flow to take when it matches. The action is for the flow to loadthe ingress port number of the current packet into register 0 (a special field that is an Open vSwitch extension toOpenFlow).
Note: A real use of “learn” for MAC learning would probably involve two additional elements. First, the “learn”action would specify a hard_timeout for the new flow, to enable a learned MAC to eventually expire if no new packetswere seen from a given source within a reasonable interval. Second, one would usually want to limit resource con-sumption by using the Flow_Table table in the Open vSwitch configuration database to specify a maximum number offlows in table 10.
This definitely calls for examples.
3.1.11 Testing Table 2
Example 1
Try the following test command:
$ ovs-appctl ofproto/trace br0 \in_port=1,vlan_tci=20,dl_src=50:00:00:00:00:01 -generate
The output shows that “learn” was executed in table 2 and the particular flow that was added:
Flow: in_port=1,vlan_tci=0x0014,dl_src=50:00:00:00:00:01,dl_dst=00:00:00:00:00:00,dl_→˓type=0x0000
bridge("br0")-------------0. priority 0
resubmit(,1)1. in_port=1, priority 99
resubmit(,2)2. priority 32768
learn(table=10,NXM_OF_VLAN_TCI[0..11],NXM_OF_ETH_DST[]=NXM_OF_ETH_SRC[],load:NXM_→˓OF_IN_PORT[]->NXM_NX_REG0[0..15])
-> table=10 vlan_tci=0x0014/0x0fff,dl_dst=50:00:00:00:00:01 priority=32768→˓actions=load:0x1->NXM_NX_REG0[0..15] (continues on next page)
3.1. Open vSwitch Advanced Features 59
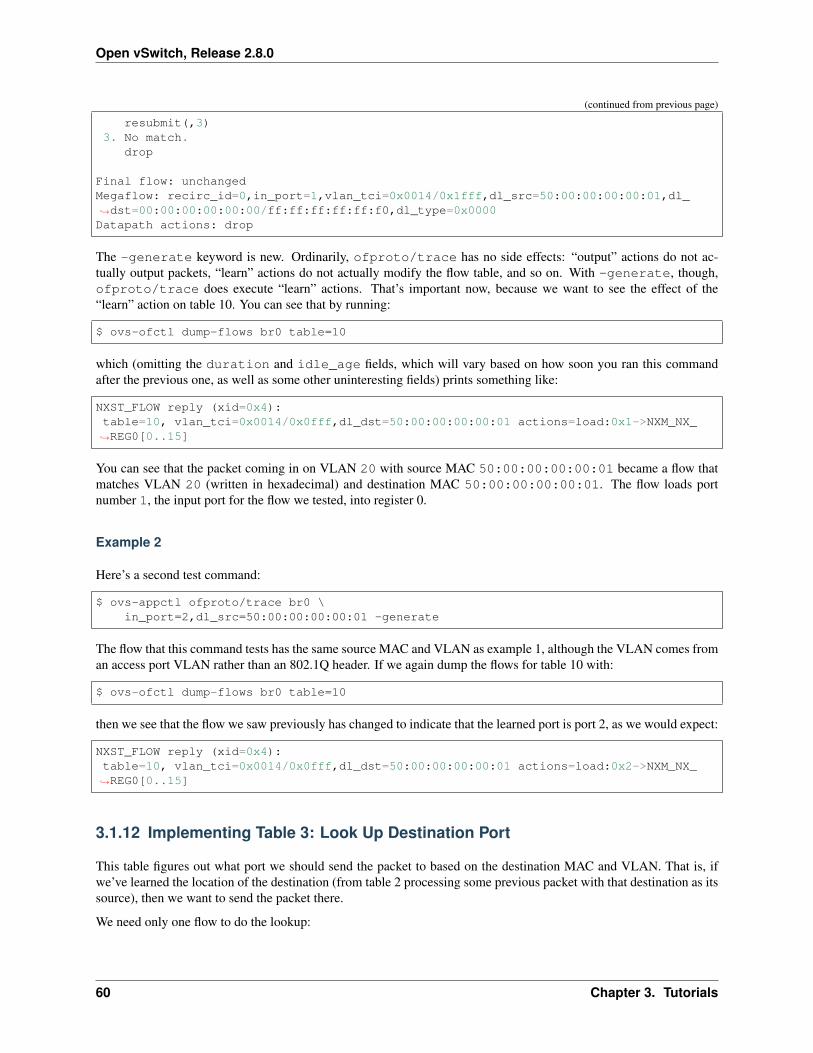
Open vSwitch, Release 2.8.0
(continued from previous page)
resubmit(,3)3. No match.
drop
Final flow: unchangedMegaflow: recirc_id=0,in_port=1,vlan_tci=0x0014/0x1fff,dl_src=50:00:00:00:00:01,dl_→˓dst=00:00:00:00:00:00/ff:ff:ff:ff:ff:f0,dl_type=0x0000Datapath actions: drop
The -generate keyword is new. Ordinarily, ofproto/trace has no side effects: “output” actions do not ac-tually output packets, “learn” actions do not actually modify the flow table, and so on. With -generate, though,ofproto/trace does execute “learn” actions. That’s important now, because we want to see the effect of the“learn” action on table 10. You can see that by running:
$ ovs-ofctl dump-flows br0 table=10
which (omitting the duration and idle_age fields, which will vary based on how soon you ran this commandafter the previous one, as well as some other uninteresting fields) prints something like:
NXST_FLOW reply (xid=0x4):table=10, vlan_tci=0x0014/0x0fff,dl_dst=50:00:00:00:00:01 actions=load:0x1->NXM_NX_→˓REG0[0..15]
You can see that the packet coming in on VLAN 20 with source MAC 50:00:00:00:00:01 became a flow thatmatches VLAN 20 (written in hexadecimal) and destination MAC 50:00:00:00:00:01. The flow loads portnumber 1, the input port for the flow we tested, into register 0.
Example 2
Here’s a second test command:
$ ovs-appctl ofproto/trace br0 \in_port=2,dl_src=50:00:00:00:00:01 -generate
The flow that this command tests has the same source MAC and VLAN as example 1, although the VLAN comes froman access port VLAN rather than an 802.1Q header. If we again dump the flows for table 10 with:
$ ovs-ofctl dump-flows br0 table=10
then we see that the flow we saw previously has changed to indicate that the learned port is port 2, as we would expect:
NXST_FLOW reply (xid=0x4):table=10, vlan_tci=0x0014/0x0fff,dl_dst=50:00:00:00:00:01 actions=load:0x2->NXM_NX_→˓REG0[0..15]
3.1.12 Implementing Table 3: Look Up Destination Port
This table figures out what port we should send the packet to based on the destination MAC and VLAN. That is, ifwe’ve learned the location of the destination (from table 2 processing some previous packet with that destination as itssource), then we want to send the packet there.
We need only one flow to do the lookup:
60 Chapter 3. Tutorials
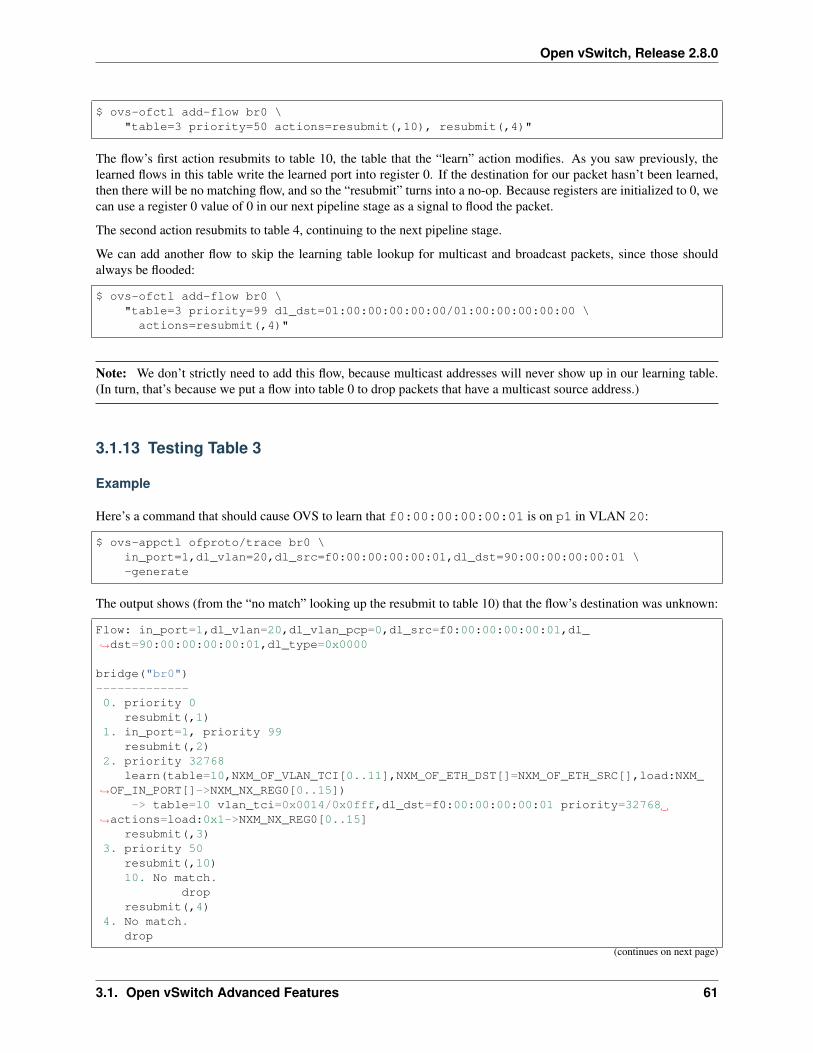
Open vSwitch, Release 2.8.0
$ ovs-ofctl add-flow br0 \"table=3 priority=50 actions=resubmit(,10), resubmit(,4)"
The flow’s first action resubmits to table 10, the table that the “learn” action modifies. As you saw previously, thelearned flows in this table write the learned port into register 0. If the destination for our packet hasn’t been learned,then there will be no matching flow, and so the “resubmit” turns into a no-op. Because registers are initialized to 0, wecan use a register 0 value of 0 in our next pipeline stage as a signal to flood the packet.
The second action resubmits to table 4, continuing to the next pipeline stage.
We can add another flow to skip the learning table lookup for multicast and broadcast packets, since those shouldalways be flooded:
$ ovs-ofctl add-flow br0 \"table=3 priority=99 dl_dst=01:00:00:00:00:00/01:00:00:00:00:00 \
actions=resubmit(,4)"
Note: We don’t strictly need to add this flow, because multicast addresses will never show up in our learning table.(In turn, that’s because we put a flow into table 0 to drop packets that have a multicast source address.)
3.1.13 Testing Table 3
Example
Here’s a command that should cause OVS to learn that f0:00:00:00:00:01 is on p1 in VLAN 20:
$ ovs-appctl ofproto/trace br0 \in_port=1,dl_vlan=20,dl_src=f0:00:00:00:00:01,dl_dst=90:00:00:00:00:01 \-generate
The output shows (from the “no match” looking up the resubmit to table 10) that the flow’s destination was unknown:
Flow: in_port=1,dl_vlan=20,dl_vlan_pcp=0,dl_src=f0:00:00:00:00:01,dl_→˓dst=90:00:00:00:00:01,dl_type=0x0000
bridge("br0")-------------0. priority 0
resubmit(,1)1. in_port=1, priority 99
resubmit(,2)2. priority 32768
learn(table=10,NXM_OF_VLAN_TCI[0..11],NXM_OF_ETH_DST[]=NXM_OF_ETH_SRC[],load:NXM_→˓OF_IN_PORT[]->NXM_NX_REG0[0..15])
-> table=10 vlan_tci=0x0014/0x0fff,dl_dst=f0:00:00:00:00:01 priority=32768→˓actions=load:0x1->NXM_NX_REG0[0..15]
resubmit(,3)3. priority 50
resubmit(,10)10. No match.
dropresubmit(,4)
4. No match.drop
(continues on next page)
3.1. Open vSwitch Advanced Features 61
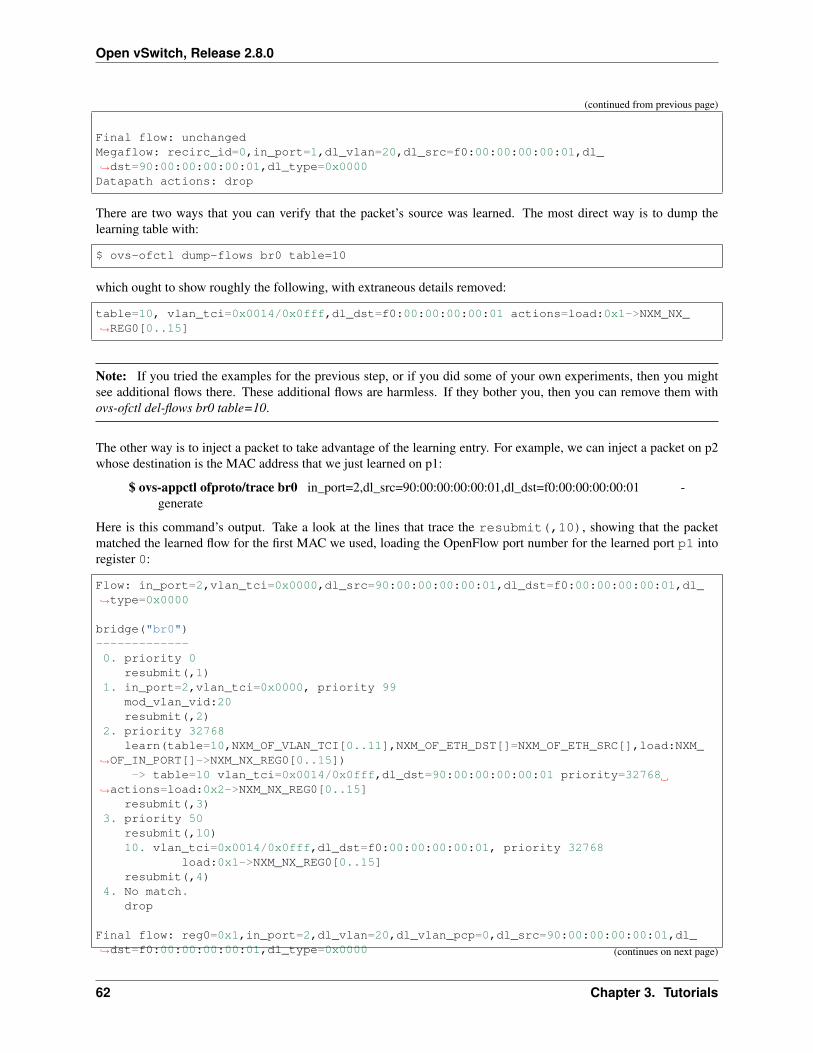
Open vSwitch, Release 2.8.0
(continued from previous page)
Final flow: unchangedMegaflow: recirc_id=0,in_port=1,dl_vlan=20,dl_src=f0:00:00:00:00:01,dl_→˓dst=90:00:00:00:00:01,dl_type=0x0000Datapath actions: drop
There are two ways that you can verify that the packet’s source was learned. The most direct way is to dump thelearning table with:
$ ovs-ofctl dump-flows br0 table=10
which ought to show roughly the following, with extraneous details removed:
table=10, vlan_tci=0x0014/0x0fff,dl_dst=f0:00:00:00:00:01 actions=load:0x1->NXM_NX_→˓REG0[0..15]
Note: If you tried the examples for the previous step, or if you did some of your own experiments, then you mightsee additional flows there. These additional flows are harmless. If they bother you, then you can remove them withovs-ofctl del-flows br0 table=10.
The other way is to inject a packet to take advantage of the learning entry. For example, we can inject a packet on p2whose destination is the MAC address that we just learned on p1:
$ ovs-appctl ofproto/trace br0 in_port=2,dl_src=90:00:00:00:00:01,dl_dst=f0:00:00:00:00:01 -generate
Here is this command’s output. Take a look at the lines that trace the resubmit(,10), showing that the packetmatched the learned flow for the first MAC we used, loading the OpenFlow port number for the learned port p1 intoregister 0:
Flow: in_port=2,vlan_tci=0x0000,dl_src=90:00:00:00:00:01,dl_dst=f0:00:00:00:00:01,dl_→˓type=0x0000
bridge("br0")-------------0. priority 0
resubmit(,1)1. in_port=2,vlan_tci=0x0000, priority 99
mod_vlan_vid:20resubmit(,2)
2. priority 32768learn(table=10,NXM_OF_VLAN_TCI[0..11],NXM_OF_ETH_DST[]=NXM_OF_ETH_SRC[],load:NXM_
→˓OF_IN_PORT[]->NXM_NX_REG0[0..15])-> table=10 vlan_tci=0x0014/0x0fff,dl_dst=90:00:00:00:00:01 priority=32768
→˓actions=load:0x2->NXM_NX_REG0[0..15]resubmit(,3)
3. priority 50resubmit(,10)10. vlan_tci=0x0014/0x0fff,dl_dst=f0:00:00:00:00:01, priority 32768
load:0x1->NXM_NX_REG0[0..15]resubmit(,4)
4. No match.drop
Final flow: reg0=0x1,in_port=2,dl_vlan=20,dl_vlan_pcp=0,dl_src=90:00:00:00:00:01,dl_→˓dst=f0:00:00:00:00:01,dl_type=0x0000 (continues on next page)
62 Chapter 3. Tutorials
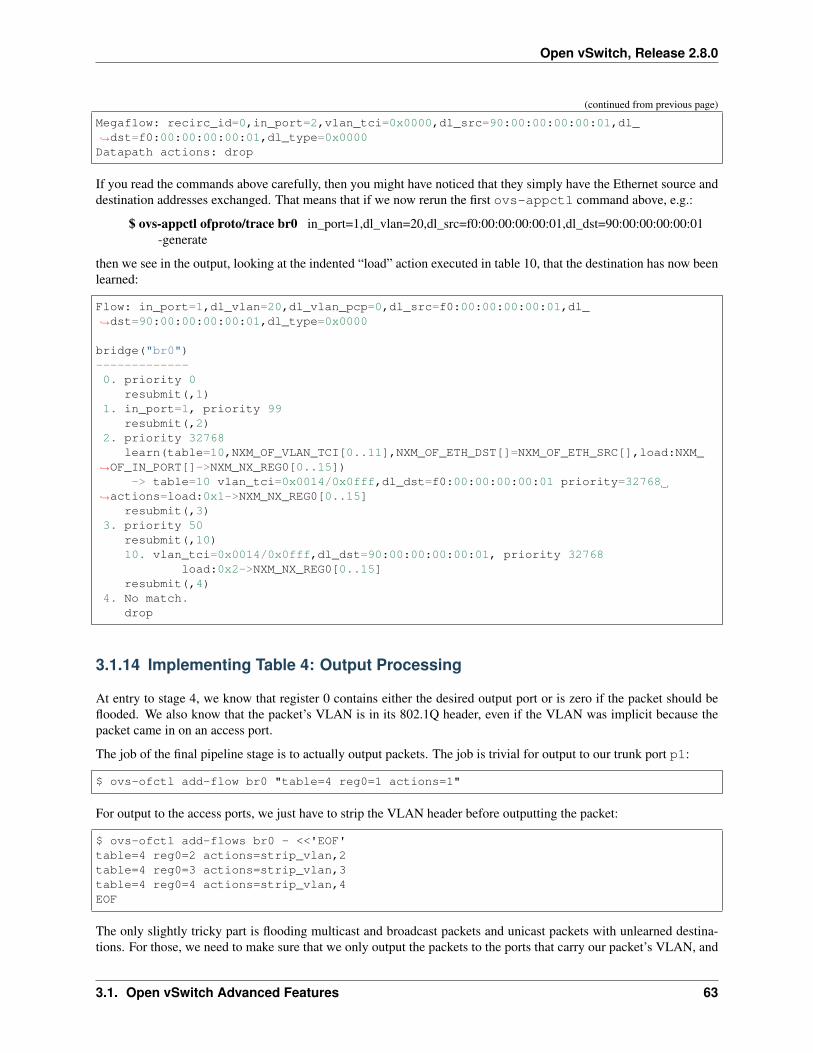
Open vSwitch, Release 2.8.0
(continued from previous page)
Megaflow: recirc_id=0,in_port=2,vlan_tci=0x0000,dl_src=90:00:00:00:00:01,dl_→˓dst=f0:00:00:00:00:01,dl_type=0x0000Datapath actions: drop
If you read the commands above carefully, then you might have noticed that they simply have the Ethernet source anddestination addresses exchanged. That means that if we now rerun the first ovs-appctl command above, e.g.:
$ ovs-appctl ofproto/trace br0 in_port=1,dl_vlan=20,dl_src=f0:00:00:00:00:01,dl_dst=90:00:00:00:00:01-generate
then we see in the output, looking at the indented “load” action executed in table 10, that the destination has now beenlearned:
Flow: in_port=1,dl_vlan=20,dl_vlan_pcp=0,dl_src=f0:00:00:00:00:01,dl_→˓dst=90:00:00:00:00:01,dl_type=0x0000
bridge("br0")-------------0. priority 0
resubmit(,1)1. in_port=1, priority 99
resubmit(,2)2. priority 32768
learn(table=10,NXM_OF_VLAN_TCI[0..11],NXM_OF_ETH_DST[]=NXM_OF_ETH_SRC[],load:NXM_→˓OF_IN_PORT[]->NXM_NX_REG0[0..15])
-> table=10 vlan_tci=0x0014/0x0fff,dl_dst=f0:00:00:00:00:01 priority=32768→˓actions=load:0x1->NXM_NX_REG0[0..15]
resubmit(,3)3. priority 50
resubmit(,10)10. vlan_tci=0x0014/0x0fff,dl_dst=90:00:00:00:00:01, priority 32768
load:0x2->NXM_NX_REG0[0..15]resubmit(,4)
4. No match.drop
3.1.14 Implementing Table 4: Output Processing
At entry to stage 4, we know that register 0 contains either the desired output port or is zero if the packet should beflooded. We also know that the packet’s VLAN is in its 802.1Q header, even if the VLAN was implicit because thepacket came in on an access port.
The job of the final pipeline stage is to actually output packets. The job is trivial for output to our trunk port p1:
$ ovs-ofctl add-flow br0 "table=4 reg0=1 actions=1"
For output to the access ports, we just have to strip the VLAN header before outputting the packet:
$ ovs-ofctl add-flows br0 - <<'EOF'table=4 reg0=2 actions=strip_vlan,2table=4 reg0=3 actions=strip_vlan,3table=4 reg0=4 actions=strip_vlan,4EOF
The only slightly tricky part is flooding multicast and broadcast packets and unicast packets with unlearned destina-tions. For those, we need to make sure that we only output the packets to the ports that carry our packet’s VLAN, and
3.1. Open vSwitch Advanced Features 63
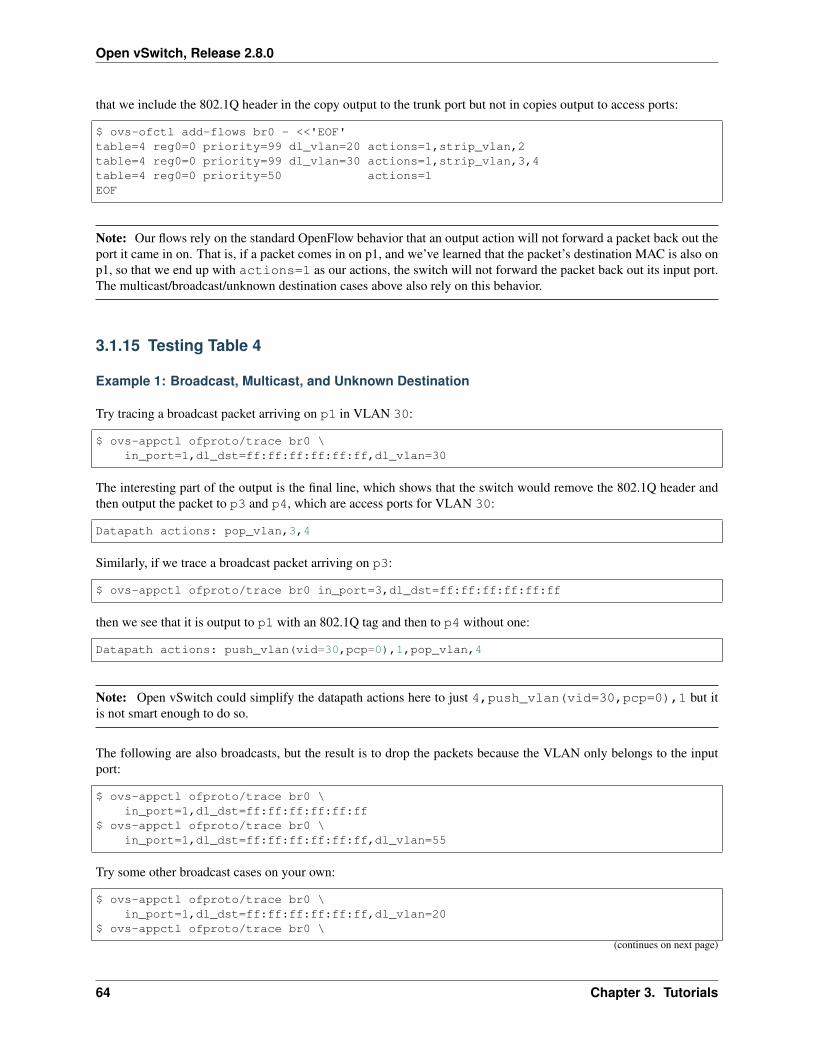
Open vSwitch, Release 2.8.0
that we include the 802.1Q header in the copy output to the trunk port but not in copies output to access ports:
$ ovs-ofctl add-flows br0 - <<'EOF'table=4 reg0=0 priority=99 dl_vlan=20 actions=1,strip_vlan,2table=4 reg0=0 priority=99 dl_vlan=30 actions=1,strip_vlan,3,4table=4 reg0=0 priority=50 actions=1EOF
Note: Our flows rely on the standard OpenFlow behavior that an output action will not forward a packet back out theport it came in on. That is, if a packet comes in on p1, and we’ve learned that the packet’s destination MAC is also onp1, so that we end up with actions=1 as our actions, the switch will not forward the packet back out its input port.The multicast/broadcast/unknown destination cases above also rely on this behavior.
3.1.15 Testing Table 4
Example 1: Broadcast, Multicast, and Unknown Destination
Try tracing a broadcast packet arriving on p1 in VLAN 30:
$ ovs-appctl ofproto/trace br0 \in_port=1,dl_dst=ff:ff:ff:ff:ff:ff,dl_vlan=30
The interesting part of the output is the final line, which shows that the switch would remove the 802.1Q header andthen output the packet to p3 and p4, which are access ports for VLAN 30:
Datapath actions: pop_vlan,3,4
Similarly, if we trace a broadcast packet arriving on p3:
$ ovs-appctl ofproto/trace br0 in_port=3,dl_dst=ff:ff:ff:ff:ff:ff
then we see that it is output to p1 with an 802.1Q tag and then to p4 without one:
Datapath actions: push_vlan(vid=30,pcp=0),1,pop_vlan,4
Note: Open vSwitch could simplify the datapath actions here to just 4,push_vlan(vid=30,pcp=0),1 but itis not smart enough to do so.
The following are also broadcasts, but the result is to drop the packets because the VLAN only belongs to the inputport:
$ ovs-appctl ofproto/trace br0 \in_port=1,dl_dst=ff:ff:ff:ff:ff:ff
$ ovs-appctl ofproto/trace br0 \in_port=1,dl_dst=ff:ff:ff:ff:ff:ff,dl_vlan=55
Try some other broadcast cases on your own:
$ ovs-appctl ofproto/trace br0 \in_port=1,dl_dst=ff:ff:ff:ff:ff:ff,dl_vlan=20
$ ovs-appctl ofproto/trace br0 \
(continues on next page)
64 Chapter 3. Tutorials
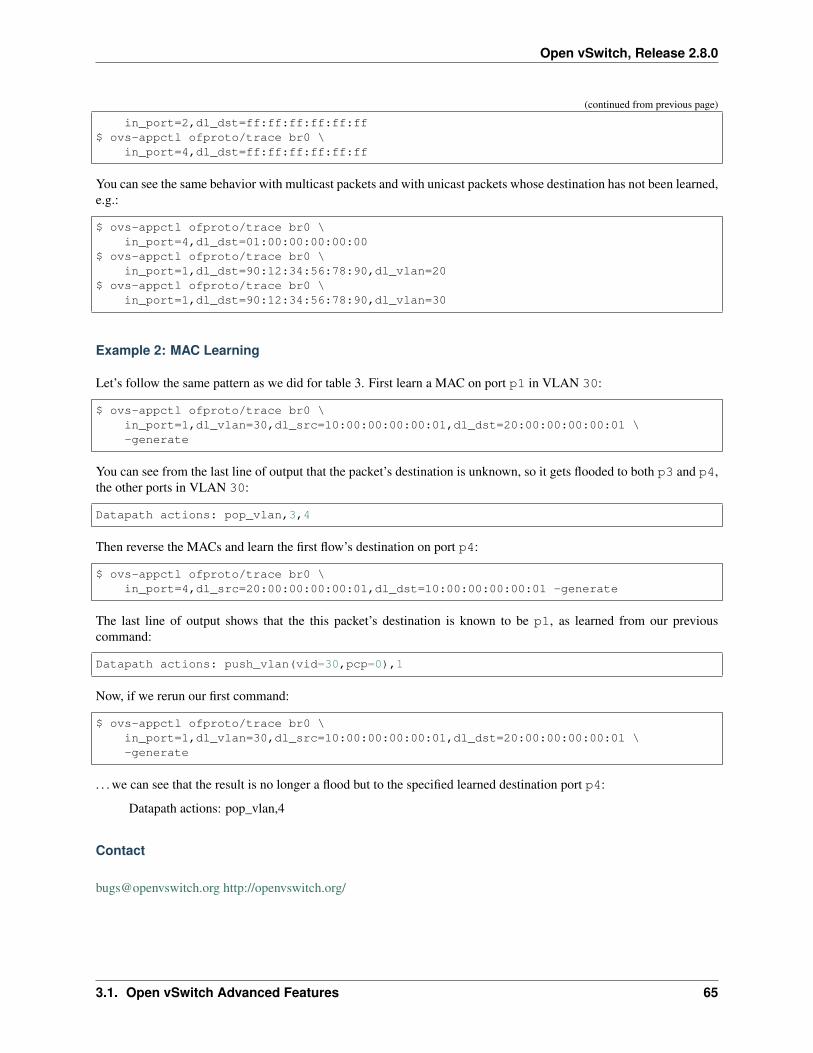
Open vSwitch, Release 2.8.0
(continued from previous page)
in_port=2,dl_dst=ff:ff:ff:ff:ff:ff$ ovs-appctl ofproto/trace br0 \
in_port=4,dl_dst=ff:ff:ff:ff:ff:ff
You can see the same behavior with multicast packets and with unicast packets whose destination has not been learned,e.g.:
$ ovs-appctl ofproto/trace br0 \in_port=4,dl_dst=01:00:00:00:00:00
$ ovs-appctl ofproto/trace br0 \in_port=1,dl_dst=90:12:34:56:78:90,dl_vlan=20
$ ovs-appctl ofproto/trace br0 \in_port=1,dl_dst=90:12:34:56:78:90,dl_vlan=30
Example 2: MAC Learning
Let’s follow the same pattern as we did for table 3. First learn a MAC on port p1 in VLAN 30:
$ ovs-appctl ofproto/trace br0 \in_port=1,dl_vlan=30,dl_src=10:00:00:00:00:01,dl_dst=20:00:00:00:00:01 \-generate
You can see from the last line of output that the packet’s destination is unknown, so it gets flooded to both p3 and p4,the other ports in VLAN 30:
Datapath actions: pop_vlan,3,4
Then reverse the MACs and learn the first flow’s destination on port p4:
$ ovs-appctl ofproto/trace br0 \in_port=4,dl_src=20:00:00:00:00:01,dl_dst=10:00:00:00:00:01 -generate
The last line of output shows that the this packet’s destination is known to be p1, as learned from our previouscommand:
Datapath actions: push_vlan(vid=30,pcp=0),1
Now, if we rerun our first command:
$ ovs-appctl ofproto/trace br0 \in_port=1,dl_vlan=30,dl_src=10:00:00:00:00:01,dl_dst=20:00:00:00:00:01 \-generate
. . . we can see that the result is no longer a flood but to the specified learned destination port p4:
Datapath actions: pop_vlan,4
Contact
[email protected] http://openvswitch.org/
3.1. Open vSwitch Advanced Features 65
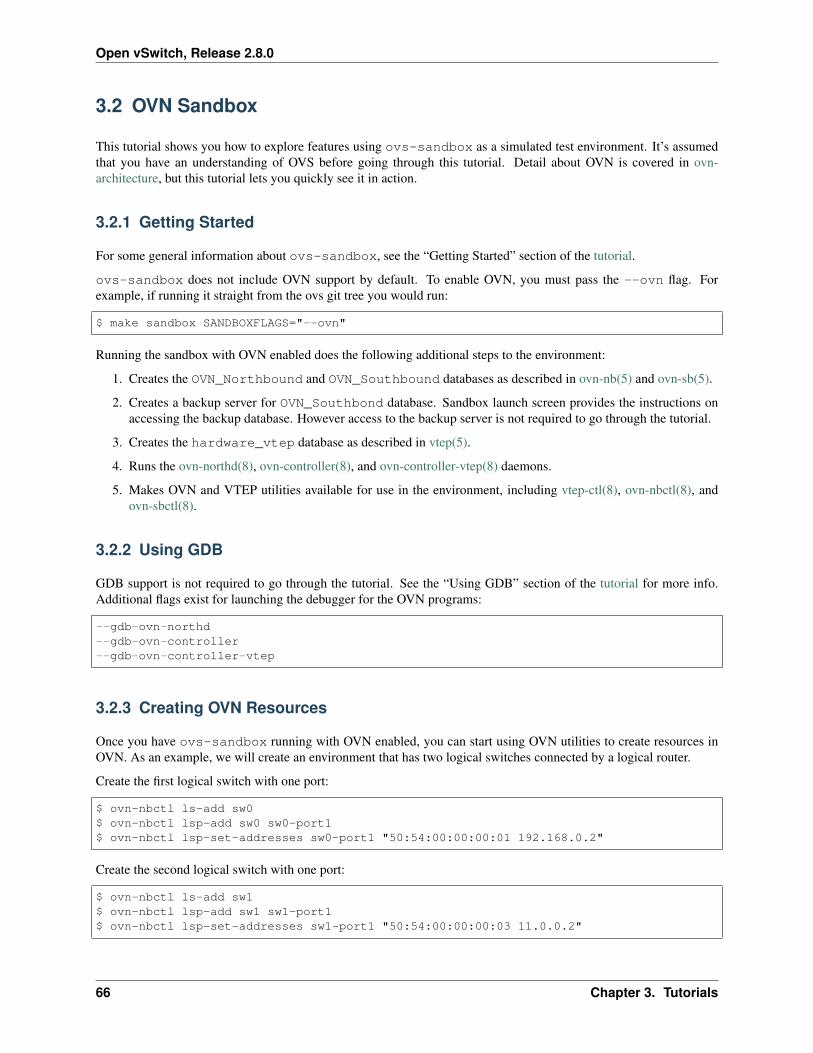
Open vSwitch, Release 2.8.0
3.2 OVN Sandbox
This tutorial shows you how to explore features using ovs-sandbox as a simulated test environment. It’s assumedthat you have an understanding of OVS before going through this tutorial. Detail about OVN is covered in ovn-architecture, but this tutorial lets you quickly see it in action.
3.2.1 Getting Started
For some general information about ovs-sandbox, see the “Getting Started” section of the tutorial.
ovs-sandbox does not include OVN support by default. To enable OVN, you must pass the --ovn flag. Forexample, if running it straight from the ovs git tree you would run:
$ make sandbox SANDBOXFLAGS="--ovn"
Running the sandbox with OVN enabled does the following additional steps to the environment:
1. Creates the OVN_Northbound and OVN_Southbound databases as described in ovn-nb(5) and ovn-sb(5).
2. Creates a backup server for OVN_Southbond database. Sandbox launch screen provides the instructions onaccessing the backup database. However access to the backup server is not required to go through the tutorial.
3. Creates the hardware_vtep database as described in vtep(5).
4. Runs the ovn-northd(8), ovn-controller(8), and ovn-controller-vtep(8) daemons.
5. Makes OVN and VTEP utilities available for use in the environment, including vtep-ctl(8), ovn-nbctl(8), andovn-sbctl(8).
3.2.2 Using GDB
GDB support is not required to go through the tutorial. See the “Using GDB” section of the tutorial for more info.Additional flags exist for launching the debugger for the OVN programs:
--gdb-ovn-northd--gdb-ovn-controller--gdb-ovn-controller-vtep
3.2.3 Creating OVN Resources
Once you have ovs-sandbox running with OVN enabled, you can start using OVN utilities to create resources inOVN. As an example, we will create an environment that has two logical switches connected by a logical router.
Create the first logical switch with one port:
$ ovn-nbctl ls-add sw0$ ovn-nbctl lsp-add sw0 sw0-port1$ ovn-nbctl lsp-set-addresses sw0-port1 "50:54:00:00:00:01 192.168.0.2"
Create the second logical switch with one port:
$ ovn-nbctl ls-add sw1$ ovn-nbctl lsp-add sw1 sw1-port1$ ovn-nbctl lsp-set-addresses sw1-port1 "50:54:00:00:00:03 11.0.0.2"
66 Chapter 3. Tutorials
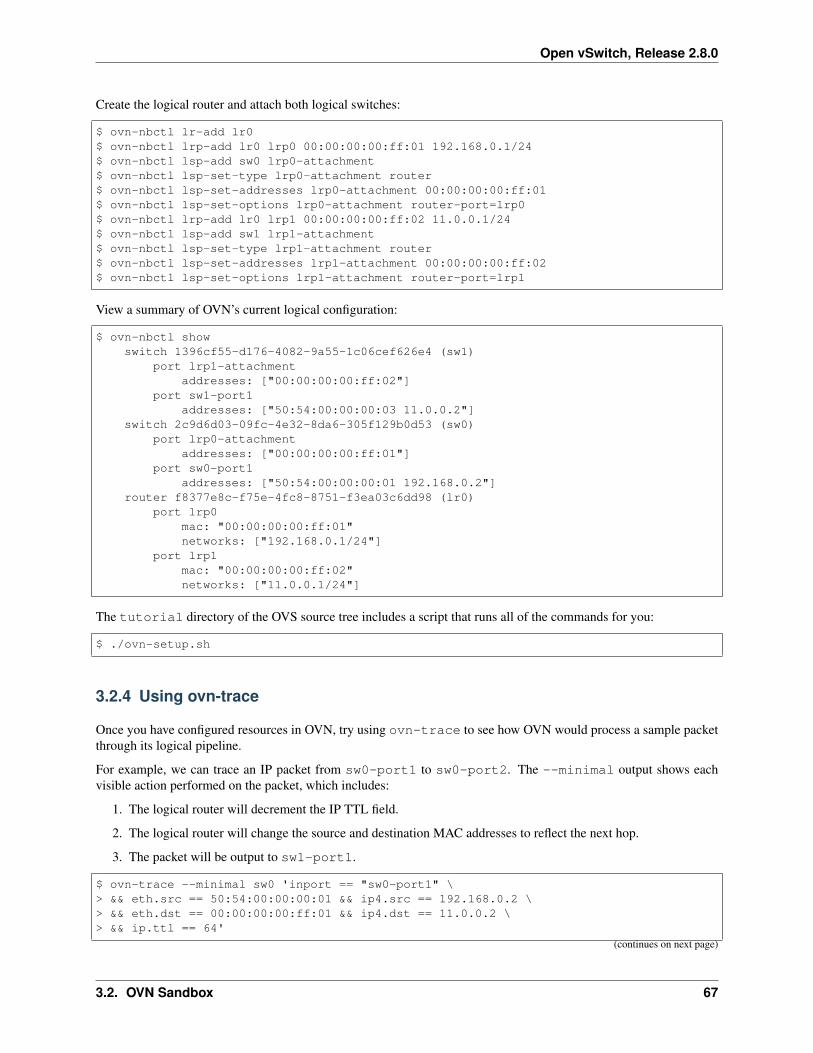
Open vSwitch, Release 2.8.0
Create the logical router and attach both logical switches:
$ ovn-nbctl lr-add lr0$ ovn-nbctl lrp-add lr0 lrp0 00:00:00:00:ff:01 192.168.0.1/24$ ovn-nbctl lsp-add sw0 lrp0-attachment$ ovn-nbctl lsp-set-type lrp0-attachment router$ ovn-nbctl lsp-set-addresses lrp0-attachment 00:00:00:00:ff:01$ ovn-nbctl lsp-set-options lrp0-attachment router-port=lrp0$ ovn-nbctl lrp-add lr0 lrp1 00:00:00:00:ff:02 11.0.0.1/24$ ovn-nbctl lsp-add sw1 lrp1-attachment$ ovn-nbctl lsp-set-type lrp1-attachment router$ ovn-nbctl lsp-set-addresses lrp1-attachment 00:00:00:00:ff:02$ ovn-nbctl lsp-set-options lrp1-attachment router-port=lrp1
View a summary of OVN’s current logical configuration:
$ ovn-nbctl showswitch 1396cf55-d176-4082-9a55-1c06cef626e4 (sw1)
port lrp1-attachmentaddresses: ["00:00:00:00:ff:02"]
port sw1-port1addresses: ["50:54:00:00:00:03 11.0.0.2"]
switch 2c9d6d03-09fc-4e32-8da6-305f129b0d53 (sw0)port lrp0-attachment
addresses: ["00:00:00:00:ff:01"]port sw0-port1
addresses: ["50:54:00:00:00:01 192.168.0.2"]router f8377e8c-f75e-4fc8-8751-f3ea03c6dd98 (lr0)
port lrp0mac: "00:00:00:00:ff:01"networks: ["192.168.0.1/24"]
port lrp1mac: "00:00:00:00:ff:02"networks: ["11.0.0.1/24"]
The tutorial directory of the OVS source tree includes a script that runs all of the commands for you:
$ ./ovn-setup.sh
3.2.4 Using ovn-trace
Once you have configured resources in OVN, try using ovn-trace to see how OVN would process a sample packetthrough its logical pipeline.
For example, we can trace an IP packet from sw0-port1 to sw0-port2. The --minimal output shows eachvisible action performed on the packet, which includes:
1. The logical router will decrement the IP TTL field.
2. The logical router will change the source and destination MAC addresses to reflect the next hop.
3. The packet will be output to sw1-port1.
$ ovn-trace --minimal sw0 'inport == "sw0-port1" \> && eth.src == 50:54:00:00:00:01 && ip4.src == 192.168.0.2 \> && eth.dst == 00:00:00:00:ff:01 && ip4.dst == 11.0.0.2 \> && ip.ttl == 64'
(continues on next page)
3.2. OVN Sandbox 67
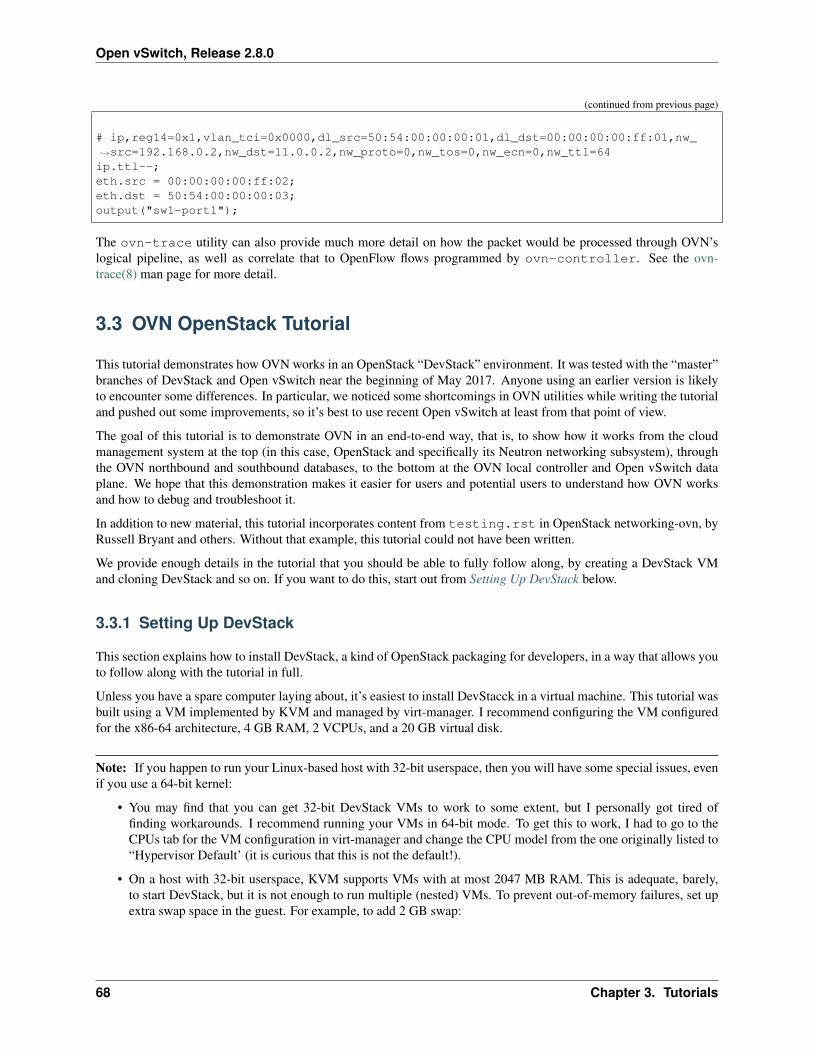
Open vSwitch, Release 2.8.0
(continued from previous page)
# ip,reg14=0x1,vlan_tci=0x0000,dl_src=50:54:00:00:00:01,dl_dst=00:00:00:00:ff:01,nw_→˓src=192.168.0.2,nw_dst=11.0.0.2,nw_proto=0,nw_tos=0,nw_ecn=0,nw_ttl=64ip.ttl--;eth.src = 00:00:00:00:ff:02;eth.dst = 50:54:00:00:00:03;output("sw1-port1");
The ovn-trace utility can also provide much more detail on how the packet would be processed through OVN’slogical pipeline, as well as correlate that to OpenFlow flows programmed by ovn-controller. See the ovn-trace(8) man page for more detail.
3.3 OVN OpenStack Tutorial
This tutorial demonstrates how OVN works in an OpenStack “DevStack” environment. It was tested with the “master”branches of DevStack and Open vSwitch near the beginning of May 2017. Anyone using an earlier version is likelyto encounter some differences. In particular, we noticed some shortcomings in OVN utilities while writing the tutorialand pushed out some improvements, so it’s best to use recent Open vSwitch at least from that point of view.
The goal of this tutorial is to demonstrate OVN in an end-to-end way, that is, to show how it works from the cloudmanagement system at the top (in this case, OpenStack and specifically its Neutron networking subsystem), throughthe OVN northbound and southbound databases, to the bottom at the OVN local controller and Open vSwitch dataplane. We hope that this demonstration makes it easier for users and potential users to understand how OVN worksand how to debug and troubleshoot it.
In addition to new material, this tutorial incorporates content from testing.rst in OpenStack networking-ovn, byRussell Bryant and others. Without that example, this tutorial could not have been written.
We provide enough details in the tutorial that you should be able to fully follow along, by creating a DevStack VMand cloning DevStack and so on. If you want to do this, start out from Setting Up DevStack below.
3.3.1 Setting Up DevStack
This section explains how to install DevStack, a kind of OpenStack packaging for developers, in a way that allows youto follow along with the tutorial in full.
Unless you have a spare computer laying about, it’s easiest to install DevStacck in a virtual machine. This tutorial wasbuilt using a VM implemented by KVM and managed by virt-manager. I recommend configuring the VM configuredfor the x86-64 architecture, 4 GB RAM, 2 VCPUs, and a 20 GB virtual disk.
Note: If you happen to run your Linux-based host with 32-bit userspace, then you will have some special issues, evenif you use a 64-bit kernel:
• You may find that you can get 32-bit DevStack VMs to work to some extent, but I personally got tired offinding workarounds. I recommend running your VMs in 64-bit mode. To get this to work, I had to go to theCPUs tab for the VM configuration in virt-manager and change the CPU model from the one originally listed to“Hypervisor Default’ (it is curious that this is not the default!).
• On a host with 32-bit userspace, KVM supports VMs with at most 2047 MB RAM. This is adequate, barely,to start DevStack, but it is not enough to run multiple (nested) VMs. To prevent out-of-memory failures, set upextra swap space in the guest. For example, to add 2 GB swap:
68 Chapter 3. Tutorials
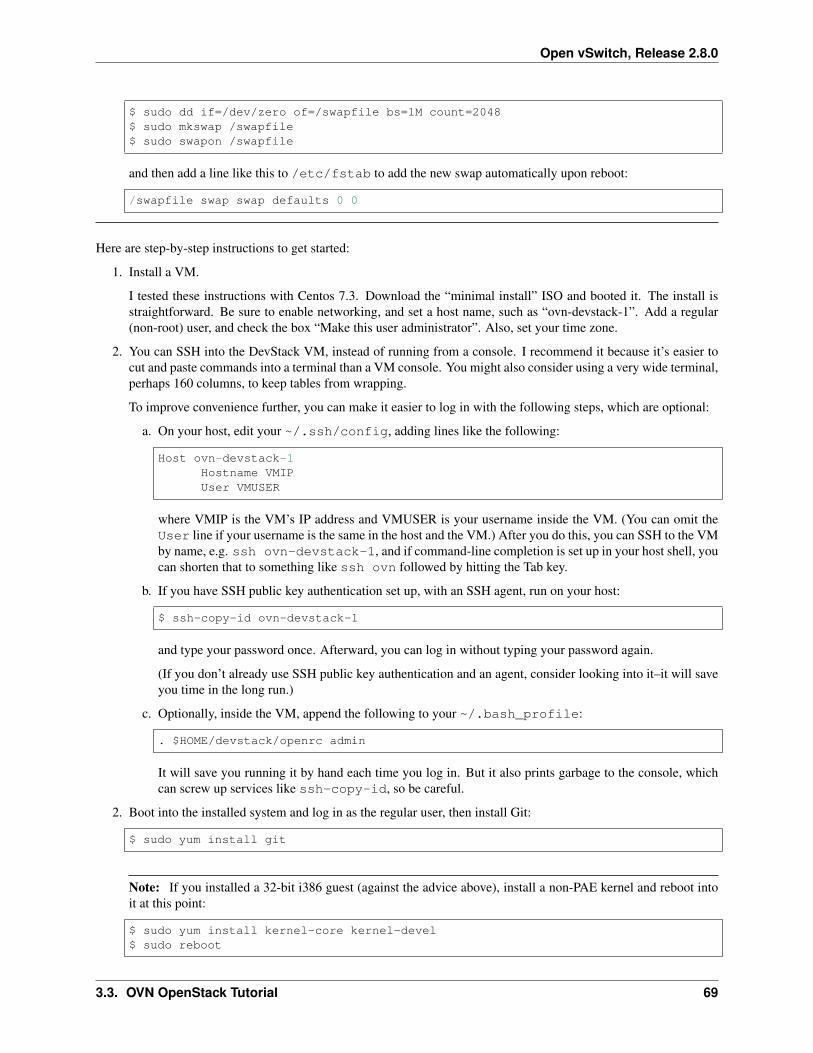
Open vSwitch, Release 2.8.0
$ sudo dd if=/dev/zero of=/swapfile bs=1M count=2048$ sudo mkswap /swapfile$ sudo swapon /swapfile
and then add a line like this to /etc/fstab to add the new swap automatically upon reboot:
/swapfile swap swap defaults 0 0
Here are step-by-step instructions to get started:
1. Install a VM.
I tested these instructions with Centos 7.3. Download the “minimal install” ISO and booted it. The install isstraightforward. Be sure to enable networking, and set a host name, such as “ovn-devstack-1”. Add a regular(non-root) user, and check the box “Make this user administrator”. Also, set your time zone.
2. You can SSH into the DevStack VM, instead of running from a console. I recommend it because it’s easier tocut and paste commands into a terminal than a VM console. You might also consider using a very wide terminal,perhaps 160 columns, to keep tables from wrapping.
To improve convenience further, you can make it easier to log in with the following steps, which are optional:
a. On your host, edit your ~/.ssh/config, adding lines like the following:
Host ovn-devstack-1Hostname VMIPUser VMUSER
where VMIP is the VM’s IP address and VMUSER is your username inside the VM. (You can omit theUser line if your username is the same in the host and the VM.) After you do this, you can SSH to the VMby name, e.g. ssh ovn-devstack-1, and if command-line completion is set up in your host shell, youcan shorten that to something like ssh ovn followed by hitting the Tab key.
b. If you have SSH public key authentication set up, with an SSH agent, run on your host:
$ ssh-copy-id ovn-devstack-1
and type your password once. Afterward, you can log in without typing your password again.
(If you don’t already use SSH public key authentication and an agent, consider looking into it–it will saveyou time in the long run.)
c. Optionally, inside the VM, append the following to your ~/.bash_profile:
. $HOME/devstack/openrc admin
It will save you running it by hand each time you log in. But it also prints garbage to the console, whichcan screw up services like ssh-copy-id, so be careful.
2. Boot into the installed system and log in as the regular user, then install Git:
$ sudo yum install git
Note: If you installed a 32-bit i386 guest (against the advice above), install a non-PAE kernel and reboot intoit at this point:
$ sudo yum install kernel-core kernel-devel$ sudo reboot
3.3. OVN OpenStack Tutorial 69
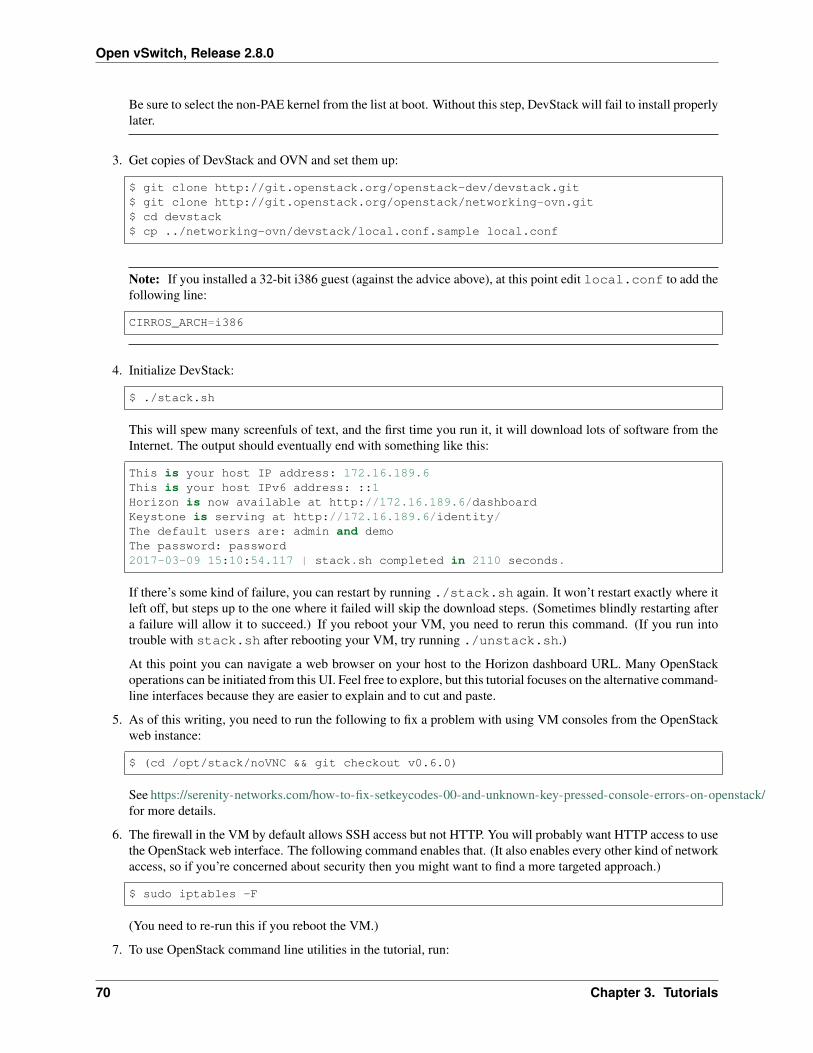
Open vSwitch, Release 2.8.0
Be sure to select the non-PAE kernel from the list at boot. Without this step, DevStack will fail to install properlylater.
3. Get copies of DevStack and OVN and set them up:
$ git clone http://git.openstack.org/openstack-dev/devstack.git$ git clone http://git.openstack.org/openstack/networking-ovn.git$ cd devstack$ cp ../networking-ovn/devstack/local.conf.sample local.conf
Note: If you installed a 32-bit i386 guest (against the advice above), at this point edit local.conf to add thefollowing line:
CIRROS_ARCH=i386
4. Initialize DevStack:
$ ./stack.sh
This will spew many screenfuls of text, and the first time you run it, it will download lots of software from theInternet. The output should eventually end with something like this:
This is your host IP address: 172.16.189.6This is your host IPv6 address: ::1Horizon is now available at http://172.16.189.6/dashboardKeystone is serving at http://172.16.189.6/identity/The default users are: admin and demoThe password: password2017-03-09 15:10:54.117 | stack.sh completed in 2110 seconds.
If there’s some kind of failure, you can restart by running ./stack.sh again. It won’t restart exactly where itleft off, but steps up to the one where it failed will skip the download steps. (Sometimes blindly restarting aftera failure will allow it to succeed.) If you reboot your VM, you need to rerun this command. (If you run intotrouble with stack.sh after rebooting your VM, try running ./unstack.sh.)
At this point you can navigate a web browser on your host to the Horizon dashboard URL. Many OpenStackoperations can be initiated from this UI. Feel free to explore, but this tutorial focuses on the alternative command-line interfaces because they are easier to explain and to cut and paste.
5. As of this writing, you need to run the following to fix a problem with using VM consoles from the OpenStackweb instance:
$ (cd /opt/stack/noVNC && git checkout v0.6.0)
See https://serenity-networks.com/how-to-fix-setkeycodes-00-and-unknown-key-pressed-console-errors-on-openstack/for more details.
6. The firewall in the VM by default allows SSH access but not HTTP. You will probably want HTTP access to usethe OpenStack web interface. The following command enables that. (It also enables every other kind of networkaccess, so if you’re concerned about security then you might want to find a more targeted approach.)
$ sudo iptables -F
(You need to re-run this if you reboot the VM.)
7. To use OpenStack command line utilities in the tutorial, run:
70 Chapter 3. Tutorials
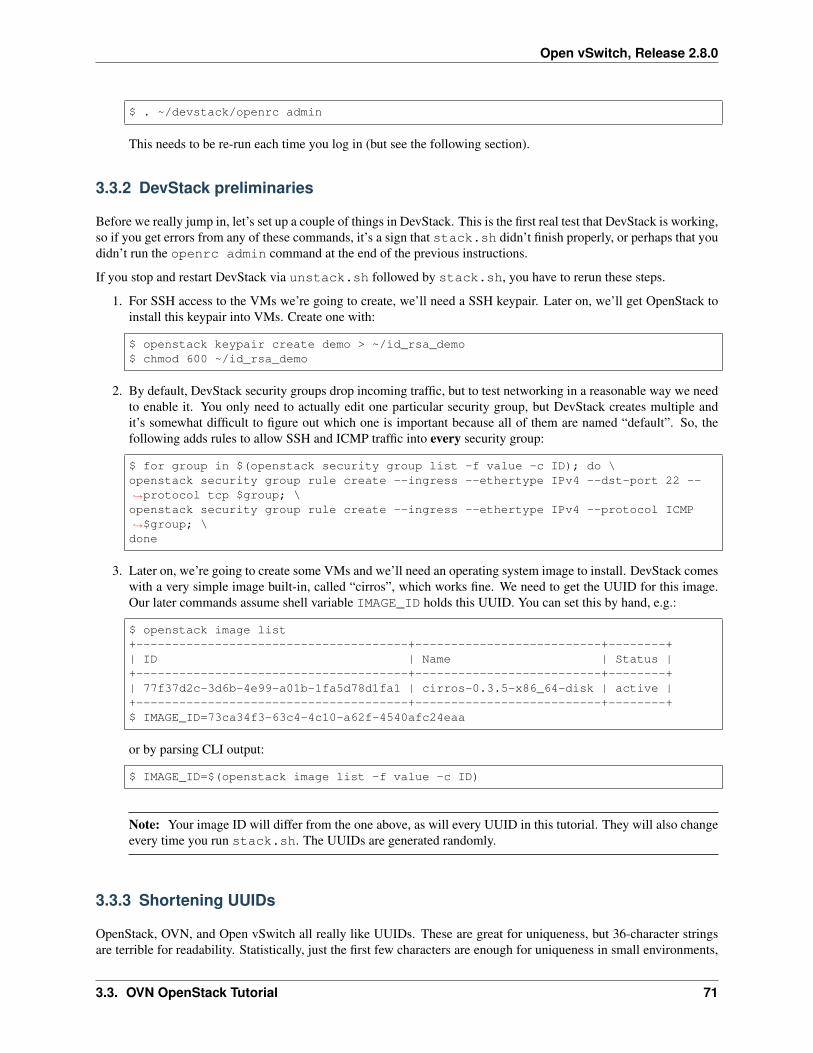
Open vSwitch, Release 2.8.0
$ . ~/devstack/openrc admin
This needs to be re-run each time you log in (but see the following section).
3.3.2 DevStack preliminaries
Before we really jump in, let’s set up a couple of things in DevStack. This is the first real test that DevStack is working,so if you get errors from any of these commands, it’s a sign that stack.sh didn’t finish properly, or perhaps that youdidn’t run the openrc admin command at the end of the previous instructions.
If you stop and restart DevStack via unstack.sh followed by stack.sh, you have to rerun these steps.
1. For SSH access to the VMs we’re going to create, we’ll need a SSH keypair. Later on, we’ll get OpenStack toinstall this keypair into VMs. Create one with:
$ openstack keypair create demo > ~/id_rsa_demo$ chmod 600 ~/id_rsa_demo
2. By default, DevStack security groups drop incoming traffic, but to test networking in a reasonable way we needto enable it. You only need to actually edit one particular security group, but DevStack creates multiple andit’s somewhat difficult to figure out which one is important because all of them are named “default”. So, thefollowing adds rules to allow SSH and ICMP traffic into every security group:
$ for group in $(openstack security group list -f value -c ID); do \openstack security group rule create --ingress --ethertype IPv4 --dst-port 22 --→˓protocol tcp $group; \openstack security group rule create --ingress --ethertype IPv4 --protocol ICMP→˓$group; \done
3. Later on, we’re going to create some VMs and we’ll need an operating system image to install. DevStack comeswith a very simple image built-in, called “cirros”, which works fine. We need to get the UUID for this image.Our later commands assume shell variable IMAGE_ID holds this UUID. You can set this by hand, e.g.:
$ openstack image list+--------------------------------------+--------------------------+--------+| ID | Name | Status |+--------------------------------------+--------------------------+--------+| 77f37d2c-3d6b-4e99-a01b-1fa5d78d1fa1 | cirros-0.3.5-x86_64-disk | active |+--------------------------------------+--------------------------+--------+$ IMAGE_ID=73ca34f3-63c4-4c10-a62f-4540afc24eaa
or by parsing CLI output:
$ IMAGE_ID=$(openstack image list -f value -c ID)
Note: Your image ID will differ from the one above, as will every UUID in this tutorial. They will also changeevery time you run stack.sh. The UUIDs are generated randomly.
3.3.3 Shortening UUIDs
OpenStack, OVN, and Open vSwitch all really like UUIDs. These are great for uniqueness, but 36-character stringsare terrible for readability. Statistically, just the first few characters are enough for uniqueness in small environments,
3.3. OVN OpenStack Tutorial 71
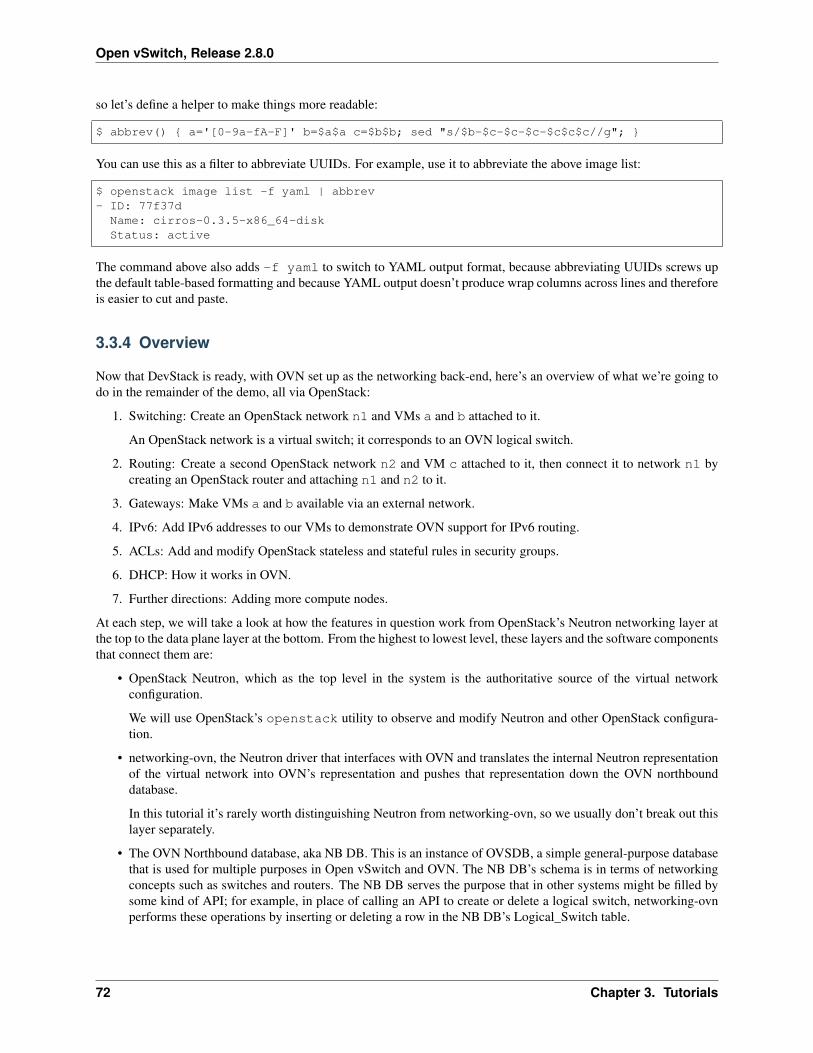
Open vSwitch, Release 2.8.0
so let’s define a helper to make things more readable:
$ abbrev() { a='[0-9a-fA-F]' b=$a$a c=$b$b; sed "s/$b-$c-$c-$c-$c$c$c//g"; }
You can use this as a filter to abbreviate UUIDs. For example, use it to abbreviate the above image list:
$ openstack image list -f yaml | abbrev- ID: 77f37d
Name: cirros-0.3.5-x86_64-diskStatus: active
The command above also adds -f yaml to switch to YAML output format, because abbreviating UUIDs screws upthe default table-based formatting and because YAML output doesn’t produce wrap columns across lines and thereforeis easier to cut and paste.
3.3.4 Overview
Now that DevStack is ready, with OVN set up as the networking back-end, here’s an overview of what we’re going todo in the remainder of the demo, all via OpenStack:
1. Switching: Create an OpenStack network n1 and VMs a and b attached to it.
An OpenStack network is a virtual switch; it corresponds to an OVN logical switch.
2. Routing: Create a second OpenStack network n2 and VM c attached to it, then connect it to network n1 bycreating an OpenStack router and attaching n1 and n2 to it.
3. Gateways: Make VMs a and b available via an external network.
4. IPv6: Add IPv6 addresses to our VMs to demonstrate OVN support for IPv6 routing.
5. ACLs: Add and modify OpenStack stateless and stateful rules in security groups.
6. DHCP: How it works in OVN.
7. Further directions: Adding more compute nodes.
At each step, we will take a look at how the features in question work from OpenStack’s Neutron networking layer atthe top to the data plane layer at the bottom. From the highest to lowest level, these layers and the software componentsthat connect them are:
• OpenStack Neutron, which as the top level in the system is the authoritative source of the virtual networkconfiguration.
We will use OpenStack’s openstack utility to observe and modify Neutron and other OpenStack configura-tion.
• networking-ovn, the Neutron driver that interfaces with OVN and translates the internal Neutron representationof the virtual network into OVN’s representation and pushes that representation down the OVN northbounddatabase.
In this tutorial it’s rarely worth distinguishing Neutron from networking-ovn, so we usually don’t break out thislayer separately.
• The OVN Northbound database, aka NB DB. This is an instance of OVSDB, a simple general-purpose databasethat is used for multiple purposes in Open vSwitch and OVN. The NB DB’s schema is in terms of networkingconcepts such as switches and routers. The NB DB serves the purpose that in other systems might be filled bysome kind of API; for example, in place of calling an API to create or delete a logical switch, networking-ovnperforms these operations by inserting or deleting a row in the NB DB’s Logical_Switch table.
72 Chapter 3. Tutorials
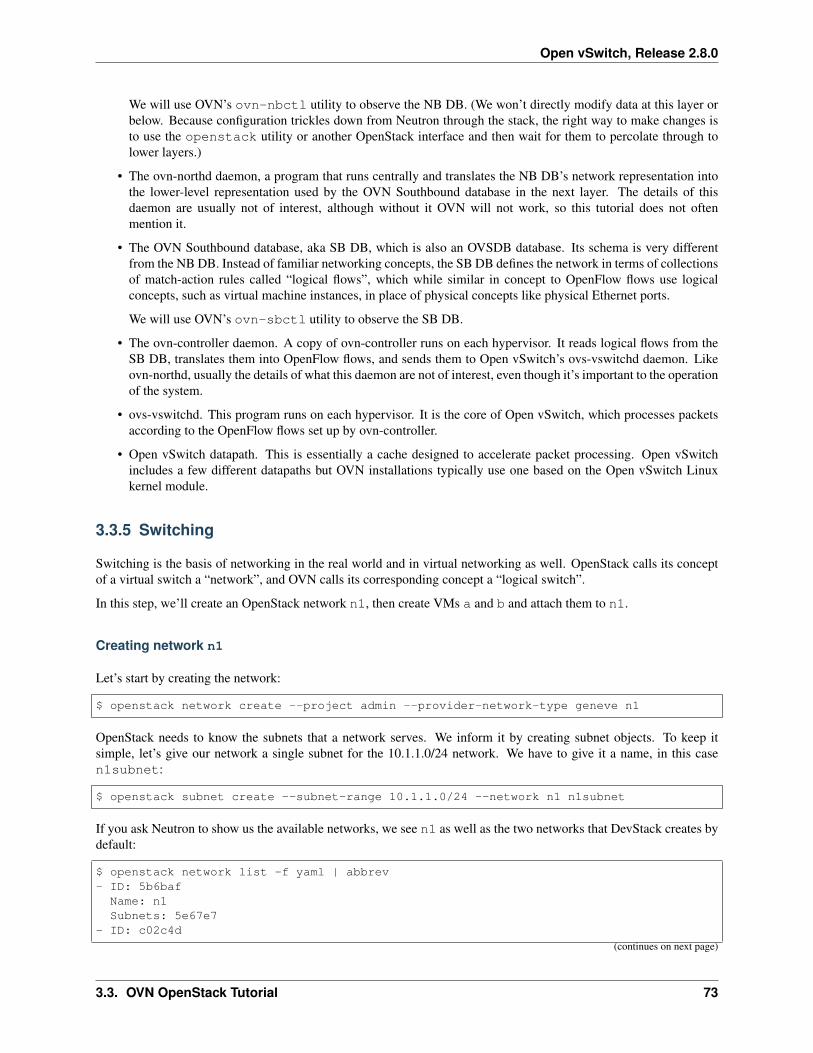
Open vSwitch, Release 2.8.0
We will use OVN’s ovn-nbctl utility to observe the NB DB. (We won’t directly modify data at this layer orbelow. Because configuration trickles down from Neutron through the stack, the right way to make changes isto use the openstack utility or another OpenStack interface and then wait for them to percolate through tolower layers.)
• The ovn-northd daemon, a program that runs centrally and translates the NB DB’s network representation intothe lower-level representation used by the OVN Southbound database in the next layer. The details of thisdaemon are usually not of interest, although without it OVN will not work, so this tutorial does not oftenmention it.
• The OVN Southbound database, aka SB DB, which is also an OVSDB database. Its schema is very differentfrom the NB DB. Instead of familiar networking concepts, the SB DB defines the network in terms of collectionsof match-action rules called “logical flows”, which while similar in concept to OpenFlow flows use logicalconcepts, such as virtual machine instances, in place of physical concepts like physical Ethernet ports.
We will use OVN’s ovn-sbctl utility to observe the SB DB.
• The ovn-controller daemon. A copy of ovn-controller runs on each hypervisor. It reads logical flows from theSB DB, translates them into OpenFlow flows, and sends them to Open vSwitch’s ovs-vswitchd daemon. Likeovn-northd, usually the details of what this daemon are not of interest, even though it’s important to the operationof the system.
• ovs-vswitchd. This program runs on each hypervisor. It is the core of Open vSwitch, which processes packetsaccording to the OpenFlow flows set up by ovn-controller.
• Open vSwitch datapath. This is essentially a cache designed to accelerate packet processing. Open vSwitchincludes a few different datapaths but OVN installations typically use one based on the Open vSwitch Linuxkernel module.
3.3.5 Switching
Switching is the basis of networking in the real world and in virtual networking as well. OpenStack calls its conceptof a virtual switch a “network”, and OVN calls its corresponding concept a “logical switch”.
In this step, we’ll create an OpenStack network n1, then create VMs a and b and attach them to n1.
Creating network n1
Let’s start by creating the network:
$ openstack network create --project admin --provider-network-type geneve n1
OpenStack needs to know the subnets that a network serves. We inform it by creating subnet objects. To keep itsimple, let’s give our network a single subnet for the 10.1.1.0/24 network. We have to give it a name, in this casen1subnet:
$ openstack subnet create --subnet-range 10.1.1.0/24 --network n1 n1subnet
If you ask Neutron to show us the available networks, we see n1 as well as the two networks that DevStack creates bydefault:
$ openstack network list -f yaml | abbrev- ID: 5b6baf
Name: n1Subnets: 5e67e7
- ID: c02c4d
(continues on next page)
3.3. OVN OpenStack Tutorial 73
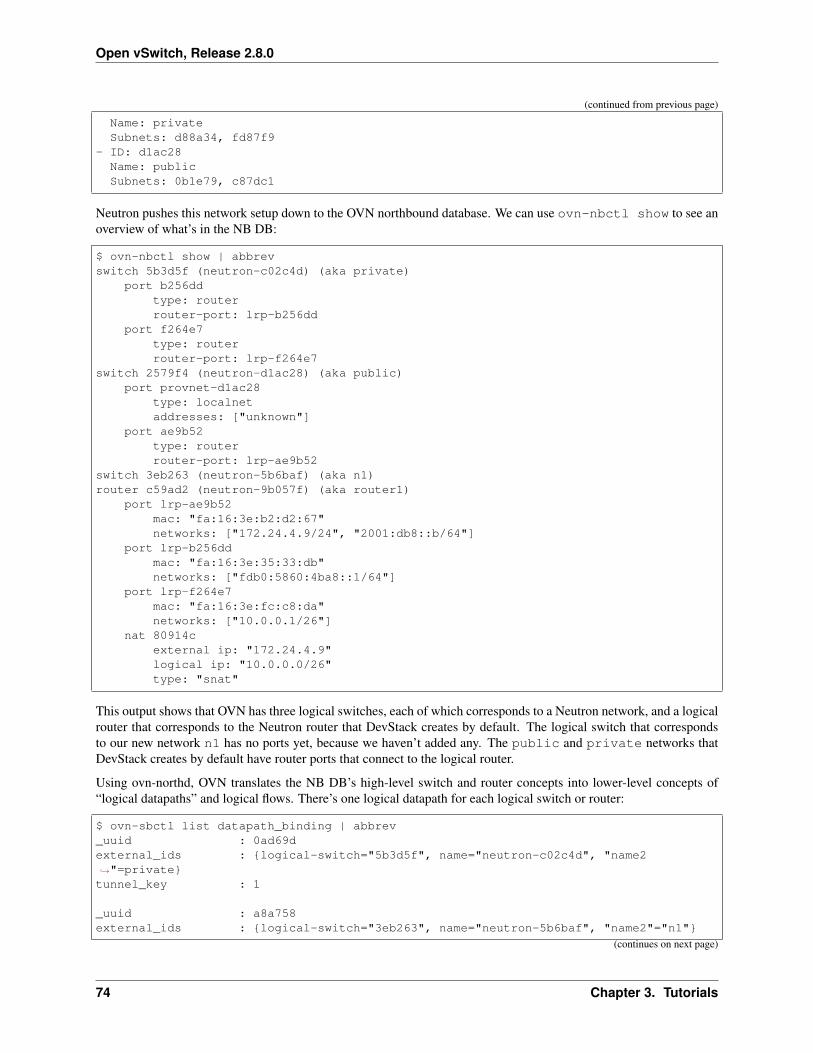
Open vSwitch, Release 2.8.0
(continued from previous page)
Name: privateSubnets: d88a34, fd87f9
- ID: d1ac28Name: publicSubnets: 0b1e79, c87dc1
Neutron pushes this network setup down to the OVN northbound database. We can use ovn-nbctl show to see anoverview of what’s in the NB DB:
$ ovn-nbctl show | abbrevswitch 5b3d5f (neutron-c02c4d) (aka private)
port b256ddtype: routerrouter-port: lrp-b256dd
port f264e7type: routerrouter-port: lrp-f264e7
switch 2579f4 (neutron-d1ac28) (aka public)port provnet-d1ac28
type: localnetaddresses: ["unknown"]
port ae9b52type: routerrouter-port: lrp-ae9b52
switch 3eb263 (neutron-5b6baf) (aka n1)router c59ad2 (neutron-9b057f) (aka router1)
port lrp-ae9b52mac: "fa:16:3e:b2:d2:67"networks: ["172.24.4.9/24", "2001:db8::b/64"]
port lrp-b256ddmac: "fa:16:3e:35:33:db"networks: ["fdb0:5860:4ba8::1/64"]
port lrp-f264e7mac: "fa:16:3e:fc:c8:da"networks: ["10.0.0.1/26"]
nat 80914cexternal ip: "172.24.4.9"logical ip: "10.0.0.0/26"type: "snat"
This output shows that OVN has three logical switches, each of which corresponds to a Neutron network, and a logicalrouter that corresponds to the Neutron router that DevStack creates by default. The logical switch that correspondsto our new network n1 has no ports yet, because we haven’t added any. The public and private networks thatDevStack creates by default have router ports that connect to the logical router.
Using ovn-northd, OVN translates the NB DB’s high-level switch and router concepts into lower-level concepts of“logical datapaths” and logical flows. There’s one logical datapath for each logical switch or router:
$ ovn-sbctl list datapath_binding | abbrev_uuid : 0ad69dexternal_ids : {logical-switch="5b3d5f", name="neutron-c02c4d", "name2→˓"=private}tunnel_key : 1
_uuid : a8a758external_ids : {logical-switch="3eb263", name="neutron-5b6baf", "name2"="n1"}
(continues on next page)
74 Chapter 3. Tutorials
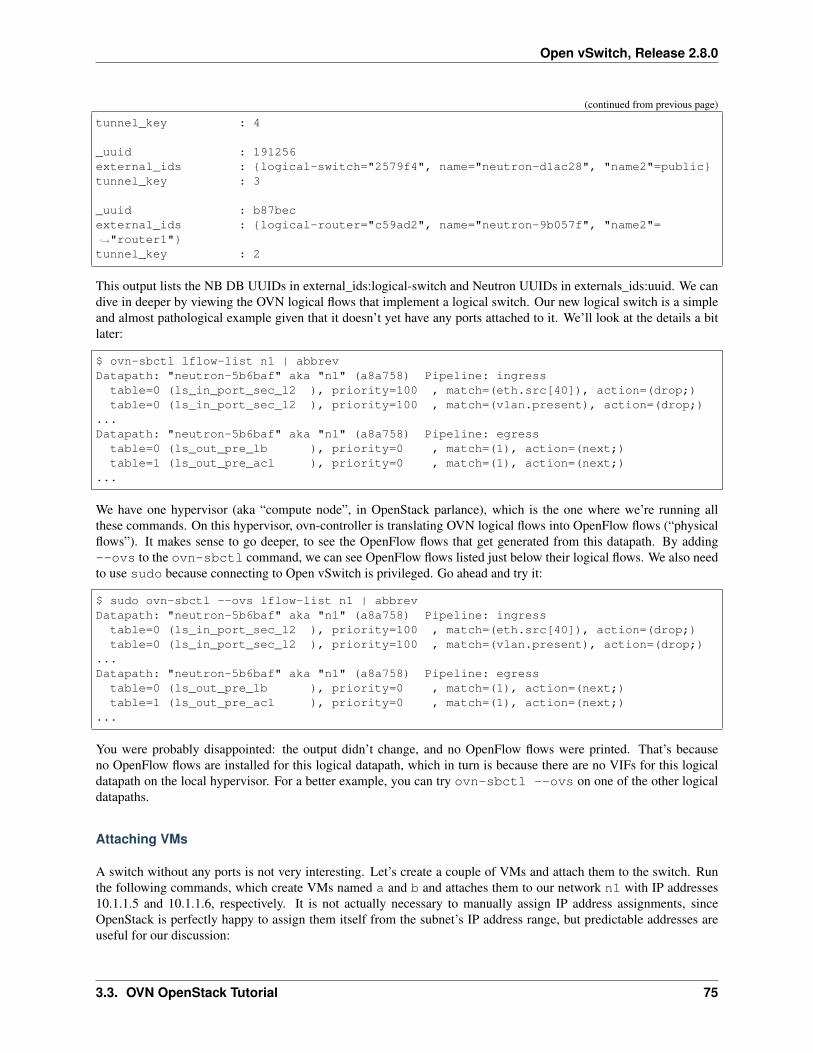
Open vSwitch, Release 2.8.0
(continued from previous page)
tunnel_key : 4
_uuid : 191256external_ids : {logical-switch="2579f4", name="neutron-d1ac28", "name2"=public}tunnel_key : 3
_uuid : b87becexternal_ids : {logical-router="c59ad2", name="neutron-9b057f", "name2"=→˓"router1"}tunnel_key : 2
This output lists the NB DB UUIDs in external_ids:logical-switch and Neutron UUIDs in externals_ids:uuid. We candive in deeper by viewing the OVN logical flows that implement a logical switch. Our new logical switch is a simpleand almost pathological example given that it doesn’t yet have any ports attached to it. We’ll look at the details a bitlater:
$ ovn-sbctl lflow-list n1 | abbrevDatapath: "neutron-5b6baf" aka "n1" (a8a758) Pipeline: ingress
table=0 (ls_in_port_sec_l2 ), priority=100 , match=(eth.src[40]), action=(drop;)table=0 (ls_in_port_sec_l2 ), priority=100 , match=(vlan.present), action=(drop;)
...Datapath: "neutron-5b6baf" aka "n1" (a8a758) Pipeline: egress
table=0 (ls_out_pre_lb ), priority=0 , match=(1), action=(next;)table=1 (ls_out_pre_acl ), priority=0 , match=(1), action=(next;)
...
We have one hypervisor (aka “compute node”, in OpenStack parlance), which is the one where we’re running allthese commands. On this hypervisor, ovn-controller is translating OVN logical flows into OpenFlow flows (“physicalflows”). It makes sense to go deeper, to see the OpenFlow flows that get generated from this datapath. By adding--ovs to the ovn-sbctl command, we can see OpenFlow flows listed just below their logical flows. We also needto use sudo because connecting to Open vSwitch is privileged. Go ahead and try it:
$ sudo ovn-sbctl --ovs lflow-list n1 | abbrevDatapath: "neutron-5b6baf" aka "n1" (a8a758) Pipeline: ingress
table=0 (ls_in_port_sec_l2 ), priority=100 , match=(eth.src[40]), action=(drop;)table=0 (ls_in_port_sec_l2 ), priority=100 , match=(vlan.present), action=(drop;)
...Datapath: "neutron-5b6baf" aka "n1" (a8a758) Pipeline: egress
table=0 (ls_out_pre_lb ), priority=0 , match=(1), action=(next;)table=1 (ls_out_pre_acl ), priority=0 , match=(1), action=(next;)
...
You were probably disappointed: the output didn’t change, and no OpenFlow flows were printed. That’s becauseno OpenFlow flows are installed for this logical datapath, which in turn is because there are no VIFs for this logicaldatapath on the local hypervisor. For a better example, you can try ovn-sbctl --ovs on one of the other logicaldatapaths.
Attaching VMs
A switch without any ports is not very interesting. Let’s create a couple of VMs and attach them to the switch. Runthe following commands, which create VMs named a and b and attaches them to our network n1 with IP addresses10.1.1.5 and 10.1.1.6, respectively. It is not actually necessary to manually assign IP address assignments, sinceOpenStack is perfectly happy to assign them itself from the subnet’s IP address range, but predictable addresses areuseful for our discussion:
3.3. OVN OpenStack Tutorial 75
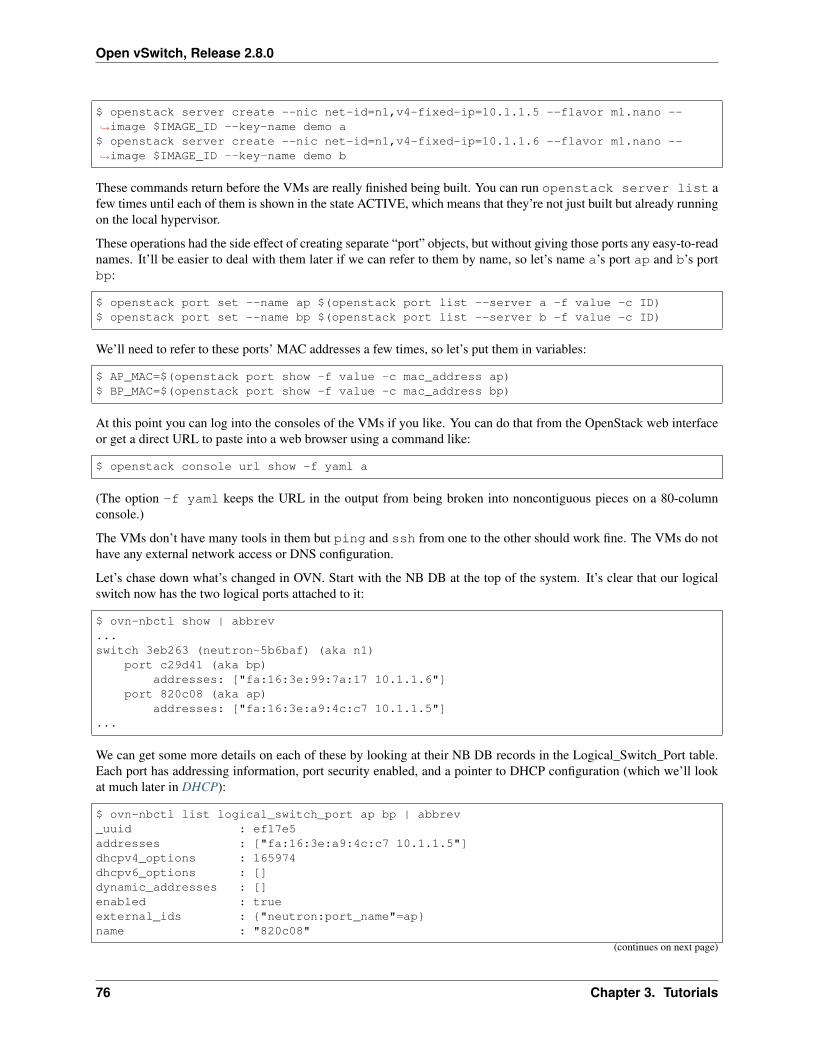
Open vSwitch, Release 2.8.0
$ openstack server create --nic net-id=n1,v4-fixed-ip=10.1.1.5 --flavor m1.nano --→˓image $IMAGE_ID --key-name demo a$ openstack server create --nic net-id=n1,v4-fixed-ip=10.1.1.6 --flavor m1.nano --→˓image $IMAGE_ID --key-name demo b
These commands return before the VMs are really finished being built. You can run openstack server list afew times until each of them is shown in the state ACTIVE, which means that they’re not just built but already runningon the local hypervisor.
These operations had the side effect of creating separate “port” objects, but without giving those ports any easy-to-readnames. It’ll be easier to deal with them later if we can refer to them by name, so let’s name a’s port ap and b’s portbp:
$ openstack port set --name ap $(openstack port list --server a -f value -c ID)$ openstack port set --name bp $(openstack port list --server b -f value -c ID)
We’ll need to refer to these ports’ MAC addresses a few times, so let’s put them in variables:
$ AP_MAC=$(openstack port show -f value -c mac_address ap)$ BP_MAC=$(openstack port show -f value -c mac_address bp)
At this point you can log into the consoles of the VMs if you like. You can do that from the OpenStack web interfaceor get a direct URL to paste into a web browser using a command like:
$ openstack console url show -f yaml a
(The option -f yaml keeps the URL in the output from being broken into noncontiguous pieces on a 80-columnconsole.)
The VMs don’t have many tools in them but ping and ssh from one to the other should work fine. The VMs do nothave any external network access or DNS configuration.
Let’s chase down what’s changed in OVN. Start with the NB DB at the top of the system. It’s clear that our logicalswitch now has the two logical ports attached to it:
$ ovn-nbctl show | abbrev...switch 3eb263 (neutron-5b6baf) (aka n1)
port c29d41 (aka bp)addresses: ["fa:16:3e:99:7a:17 10.1.1.6"]
port 820c08 (aka ap)addresses: ["fa:16:3e:a9:4c:c7 10.1.1.5"]
...
We can get some more details on each of these by looking at their NB DB records in the Logical_Switch_Port table.Each port has addressing information, port security enabled, and a pointer to DHCP configuration (which we’ll lookat much later in DHCP):
$ ovn-nbctl list logical_switch_port ap bp | abbrev_uuid : ef17e5addresses : ["fa:16:3e:a9:4c:c7 10.1.1.5"]dhcpv4_options : 165974dhcpv6_options : []dynamic_addresses : []enabled : trueexternal_ids : {"neutron:port_name"=ap}name : "820c08"
(continues on next page)
76 Chapter 3. Tutorials
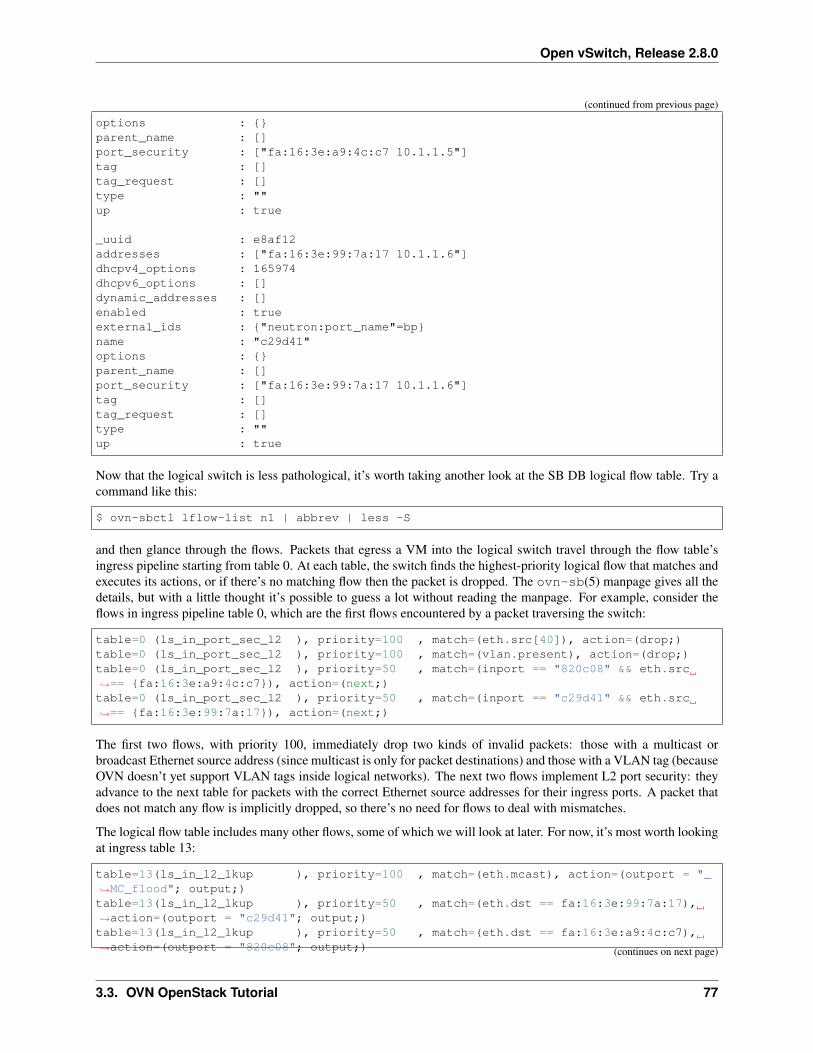
Open vSwitch, Release 2.8.0
(continued from previous page)
options : {}parent_name : []port_security : ["fa:16:3e:a9:4c:c7 10.1.1.5"]tag : []tag_request : []type : ""up : true
_uuid : e8af12addresses : ["fa:16:3e:99:7a:17 10.1.1.6"]dhcpv4_options : 165974dhcpv6_options : []dynamic_addresses : []enabled : trueexternal_ids : {"neutron:port_name"=bp}name : "c29d41"options : {}parent_name : []port_security : ["fa:16:3e:99:7a:17 10.1.1.6"]tag : []tag_request : []type : ""up : true
Now that the logical switch is less pathological, it’s worth taking another look at the SB DB logical flow table. Try acommand like this:
$ ovn-sbctl lflow-list n1 | abbrev | less -S
and then glance through the flows. Packets that egress a VM into the logical switch travel through the flow table’singress pipeline starting from table 0. At each table, the switch finds the highest-priority logical flow that matches andexecutes its actions, or if there’s no matching flow then the packet is dropped. The ovn-sb(5) manpage gives all thedetails, but with a little thought it’s possible to guess a lot without reading the manpage. For example, consider theflows in ingress pipeline table 0, which are the first flows encountered by a packet traversing the switch:
table=0 (ls_in_port_sec_l2 ), priority=100 , match=(eth.src[40]), action=(drop;)table=0 (ls_in_port_sec_l2 ), priority=100 , match=(vlan.present), action=(drop;)table=0 (ls_in_port_sec_l2 ), priority=50 , match=(inport == "820c08" && eth.src→˓== {fa:16:3e:a9:4c:c7}), action=(next;)table=0 (ls_in_port_sec_l2 ), priority=50 , match=(inport == "c29d41" && eth.src→˓== {fa:16:3e:99:7a:17}), action=(next;)
The first two flows, with priority 100, immediately drop two kinds of invalid packets: those with a multicast orbroadcast Ethernet source address (since multicast is only for packet destinations) and those with a VLAN tag (becauseOVN doesn’t yet support VLAN tags inside logical networks). The next two flows implement L2 port security: theyadvance to the next table for packets with the correct Ethernet source addresses for their ingress ports. A packet thatdoes not match any flow is implicitly dropped, so there’s no need for flows to deal with mismatches.
The logical flow table includes many other flows, some of which we will look at later. For now, it’s most worth lookingat ingress table 13:
table=13(ls_in_l2_lkup ), priority=100 , match=(eth.mcast), action=(outport = "_→˓MC_flood"; output;)table=13(ls_in_l2_lkup ), priority=50 , match=(eth.dst == fa:16:3e:99:7a:17),→˓action=(outport = "c29d41"; output;)table=13(ls_in_l2_lkup ), priority=50 , match=(eth.dst == fa:16:3e:a9:4c:c7),→˓action=(outport = "820c08"; output;) (continues on next page)
3.3. OVN OpenStack Tutorial 77
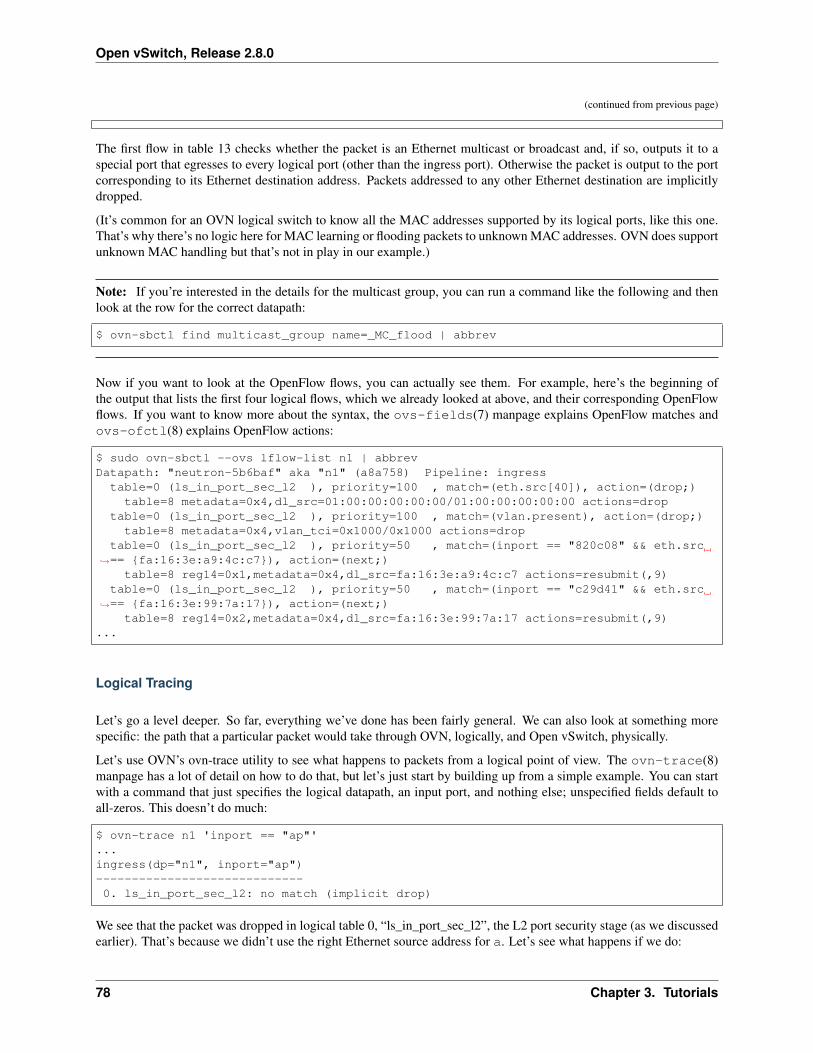
Open vSwitch, Release 2.8.0
(continued from previous page)
The first flow in table 13 checks whether the packet is an Ethernet multicast or broadcast and, if so, outputs it to aspecial port that egresses to every logical port (other than the ingress port). Otherwise the packet is output to the portcorresponding to its Ethernet destination address. Packets addressed to any other Ethernet destination are implicitlydropped.
(It’s common for an OVN logical switch to know all the MAC addresses supported by its logical ports, like this one.That’s why there’s no logic here for MAC learning or flooding packets to unknown MAC addresses. OVN does supportunknown MAC handling but that’s not in play in our example.)
Note: If you’re interested in the details for the multicast group, you can run a command like the following and thenlook at the row for the correct datapath:
$ ovn-sbctl find multicast_group name=_MC_flood | abbrev
Now if you want to look at the OpenFlow flows, you can actually see them. For example, here’s the beginning ofthe output that lists the first four logical flows, which we already looked at above, and their corresponding OpenFlowflows. If you want to know more about the syntax, the ovs-fields(7) manpage explains OpenFlow matches andovs-ofctl(8) explains OpenFlow actions:
$ sudo ovn-sbctl --ovs lflow-list n1 | abbrevDatapath: "neutron-5b6baf" aka "n1" (a8a758) Pipeline: ingress
table=0 (ls_in_port_sec_l2 ), priority=100 , match=(eth.src[40]), action=(drop;)table=8 metadata=0x4,dl_src=01:00:00:00:00:00/01:00:00:00:00:00 actions=drop
table=0 (ls_in_port_sec_l2 ), priority=100 , match=(vlan.present), action=(drop;)table=8 metadata=0x4,vlan_tci=0x1000/0x1000 actions=drop
table=0 (ls_in_port_sec_l2 ), priority=50 , match=(inport == "820c08" && eth.src→˓== {fa:16:3e:a9:4c:c7}), action=(next;)
table=8 reg14=0x1,metadata=0x4,dl_src=fa:16:3e:a9:4c:c7 actions=resubmit(,9)table=0 (ls_in_port_sec_l2 ), priority=50 , match=(inport == "c29d41" && eth.src
→˓== {fa:16:3e:99:7a:17}), action=(next;)table=8 reg14=0x2,metadata=0x4,dl_src=fa:16:3e:99:7a:17 actions=resubmit(,9)
...
Logical Tracing
Let’s go a level deeper. So far, everything we’ve done has been fairly general. We can also look at something morespecific: the path that a particular packet would take through OVN, logically, and Open vSwitch, physically.
Let’s use OVN’s ovn-trace utility to see what happens to packets from a logical point of view. The ovn-trace(8)manpage has a lot of detail on how to do that, but let’s just start by building up from a simple example. You can startwith a command that just specifies the logical datapath, an input port, and nothing else; unspecified fields default toall-zeros. This doesn’t do much:
$ ovn-trace n1 'inport == "ap"'...ingress(dp="n1", inport="ap")-----------------------------0. ls_in_port_sec_l2: no match (implicit drop)
We see that the packet was dropped in logical table 0, “ls_in_port_sec_l2”, the L2 port security stage (as we discussedearlier). That’s because we didn’t use the right Ethernet source address for a. Let’s see what happens if we do:
78 Chapter 3. Tutorials
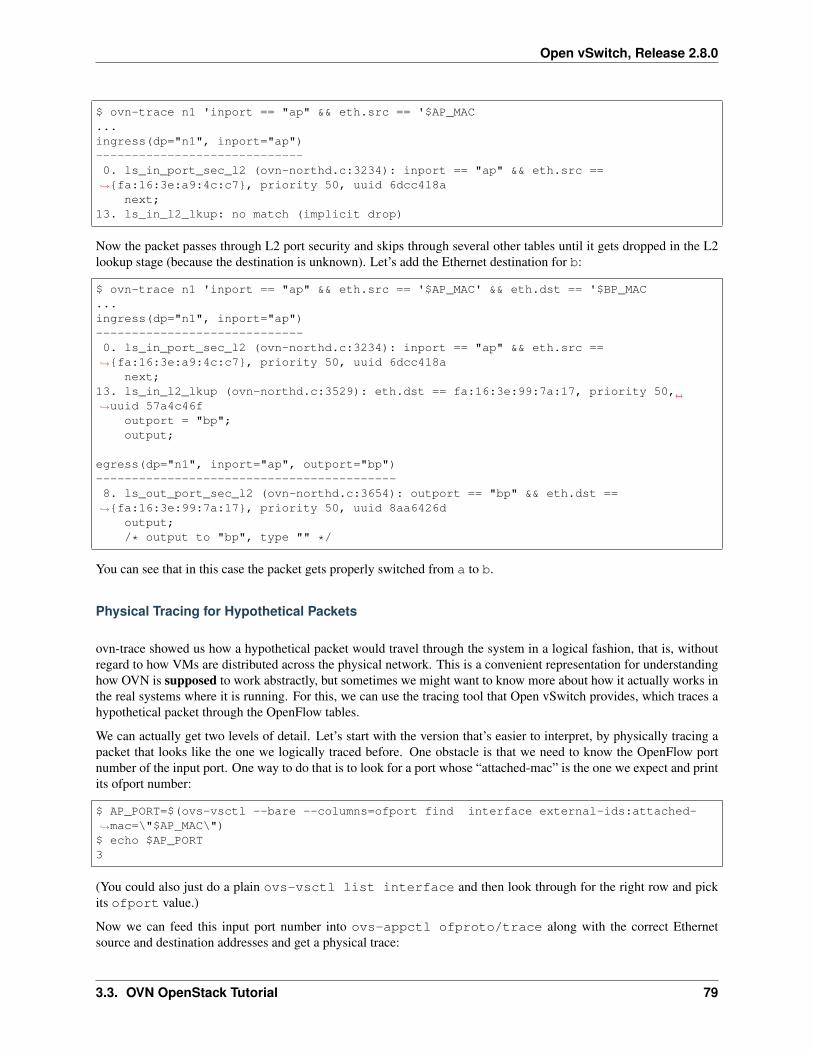
Open vSwitch, Release 2.8.0
$ ovn-trace n1 'inport == "ap" && eth.src == '$AP_MAC...ingress(dp="n1", inport="ap")-----------------------------0. ls_in_port_sec_l2 (ovn-northd.c:3234): inport == "ap" && eth.src ==→˓{fa:16:3e:a9:4c:c7}, priority 50, uuid 6dcc418a
next;13. ls_in_l2_lkup: no match (implicit drop)
Now the packet passes through L2 port security and skips through several other tables until it gets dropped in the L2lookup stage (because the destination is unknown). Let’s add the Ethernet destination for b:
$ ovn-trace n1 'inport == "ap" && eth.src == '$AP_MAC' && eth.dst == '$BP_MAC...ingress(dp="n1", inport="ap")-----------------------------0. ls_in_port_sec_l2 (ovn-northd.c:3234): inport == "ap" && eth.src ==→˓{fa:16:3e:a9:4c:c7}, priority 50, uuid 6dcc418a
next;13. ls_in_l2_lkup (ovn-northd.c:3529): eth.dst == fa:16:3e:99:7a:17, priority 50,→˓uuid 57a4c46f
outport = "bp";output;
egress(dp="n1", inport="ap", outport="bp")------------------------------------------8. ls_out_port_sec_l2 (ovn-northd.c:3654): outport == "bp" && eth.dst ==→˓{fa:16:3e:99:7a:17}, priority 50, uuid 8aa6426d
output;/* output to "bp", type "" */
You can see that in this case the packet gets properly switched from a to b.
Physical Tracing for Hypothetical Packets
ovn-trace showed us how a hypothetical packet would travel through the system in a logical fashion, that is, withoutregard to how VMs are distributed across the physical network. This is a convenient representation for understandinghow OVN is supposed to work abstractly, but sometimes we might want to know more about how it actually works inthe real systems where it is running. For this, we can use the tracing tool that Open vSwitch provides, which traces ahypothetical packet through the OpenFlow tables.
We can actually get two levels of detail. Let’s start with the version that’s easier to interpret, by physically tracing apacket that looks like the one we logically traced before. One obstacle is that we need to know the OpenFlow portnumber of the input port. One way to do that is to look for a port whose “attached-mac” is the one we expect and printits ofport number:
$ AP_PORT=$(ovs-vsctl --bare --columns=ofport find interface external-ids:attached-→˓mac=\"$AP_MAC\")$ echo $AP_PORT3
(You could also just do a plain ovs-vsctl list interface and then look through for the right row and pickits ofport value.)
Now we can feed this input port number into ovs-appctl ofproto/trace along with the correct Ethernetsource and destination addresses and get a physical trace:
3.3. OVN OpenStack Tutorial 79
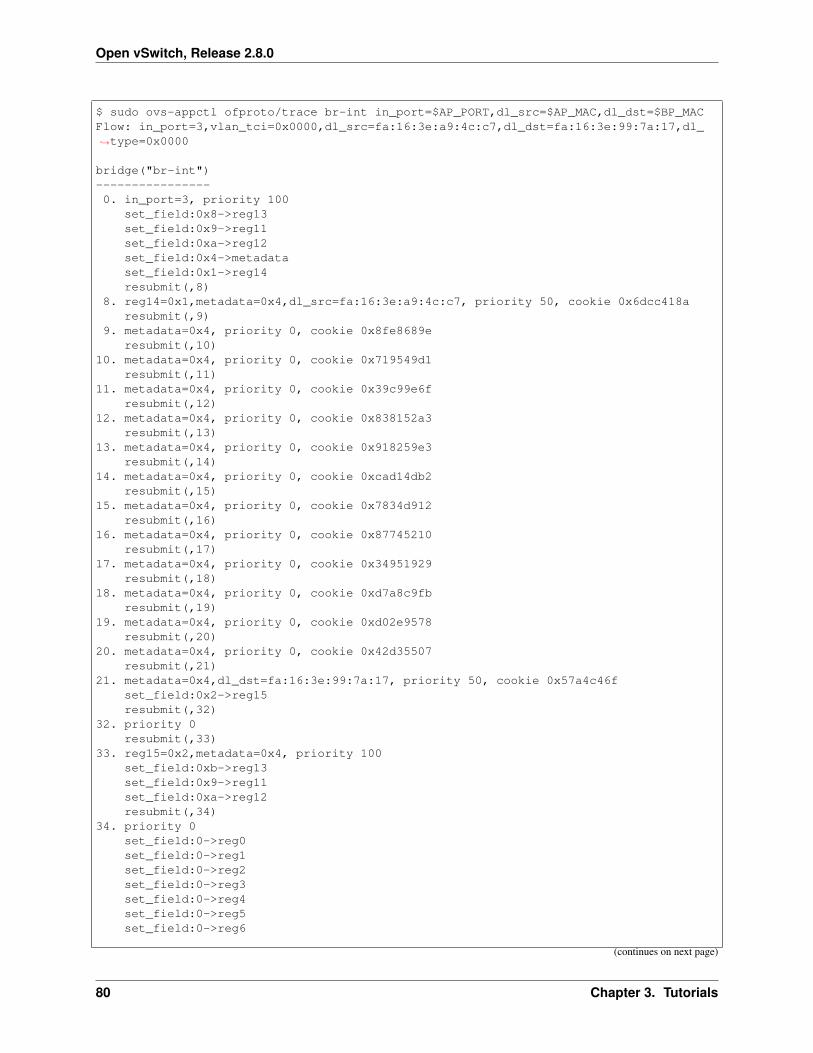
Open vSwitch, Release 2.8.0
$ sudo ovs-appctl ofproto/trace br-int in_port=$AP_PORT,dl_src=$AP_MAC,dl_dst=$BP_MACFlow: in_port=3,vlan_tci=0x0000,dl_src=fa:16:3e:a9:4c:c7,dl_dst=fa:16:3e:99:7a:17,dl_→˓type=0x0000
bridge("br-int")----------------0. in_port=3, priority 100
set_field:0x8->reg13set_field:0x9->reg11set_field:0xa->reg12set_field:0x4->metadataset_field:0x1->reg14resubmit(,8)
8. reg14=0x1,metadata=0x4,dl_src=fa:16:3e:a9:4c:c7, priority 50, cookie 0x6dcc418aresubmit(,9)
9. metadata=0x4, priority 0, cookie 0x8fe8689eresubmit(,10)
10. metadata=0x4, priority 0, cookie 0x719549d1resubmit(,11)
11. metadata=0x4, priority 0, cookie 0x39c99e6fresubmit(,12)
12. metadata=0x4, priority 0, cookie 0x838152a3resubmit(,13)
13. metadata=0x4, priority 0, cookie 0x918259e3resubmit(,14)
14. metadata=0x4, priority 0, cookie 0xcad14db2resubmit(,15)
15. metadata=0x4, priority 0, cookie 0x7834d912resubmit(,16)
16. metadata=0x4, priority 0, cookie 0x87745210resubmit(,17)
17. metadata=0x4, priority 0, cookie 0x34951929resubmit(,18)
18. metadata=0x4, priority 0, cookie 0xd7a8c9fbresubmit(,19)
19. metadata=0x4, priority 0, cookie 0xd02e9578resubmit(,20)
20. metadata=0x4, priority 0, cookie 0x42d35507resubmit(,21)
21. metadata=0x4,dl_dst=fa:16:3e:99:7a:17, priority 50, cookie 0x57a4c46fset_field:0x2->reg15resubmit(,32)
32. priority 0resubmit(,33)
33. reg15=0x2,metadata=0x4, priority 100set_field:0xb->reg13set_field:0x9->reg11set_field:0xa->reg12resubmit(,34)
34. priority 0set_field:0->reg0set_field:0->reg1set_field:0->reg2set_field:0->reg3set_field:0->reg4set_field:0->reg5set_field:0->reg6
(continues on next page)
80 Chapter 3. Tutorials
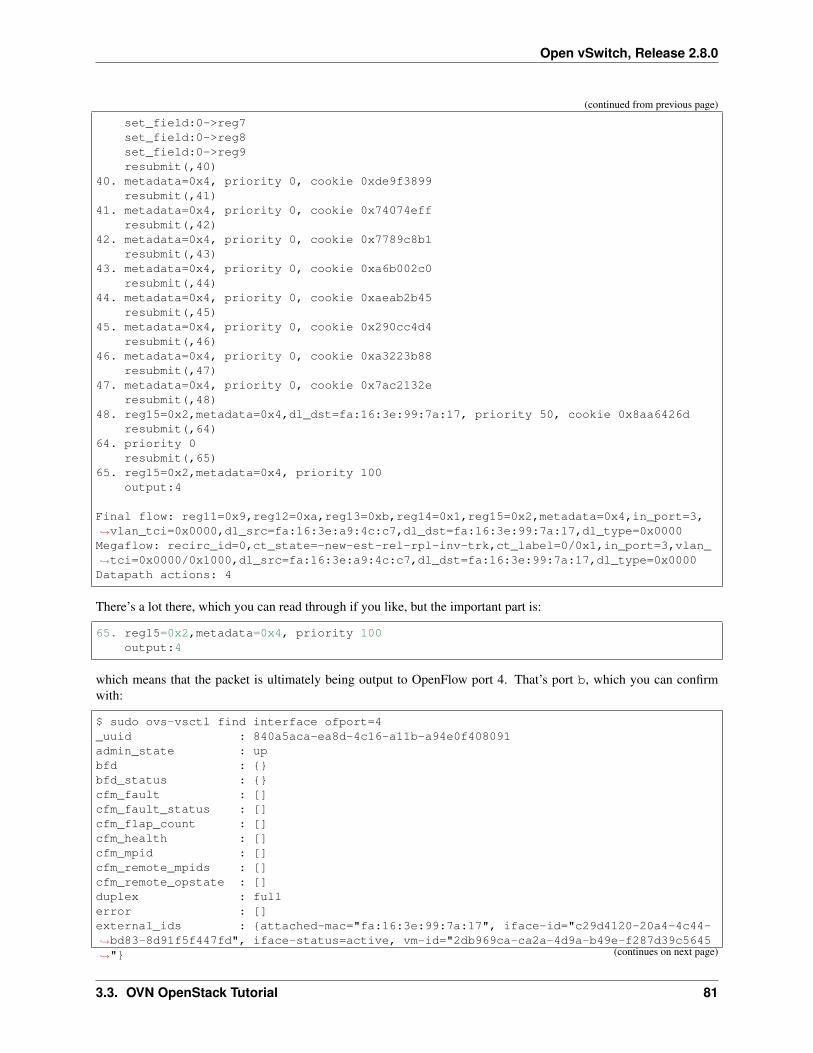
Open vSwitch, Release 2.8.0
(continued from previous page)
set_field:0->reg7set_field:0->reg8set_field:0->reg9resubmit(,40)
40. metadata=0x4, priority 0, cookie 0xde9f3899resubmit(,41)
41. metadata=0x4, priority 0, cookie 0x74074effresubmit(,42)
42. metadata=0x4, priority 0, cookie 0x7789c8b1resubmit(,43)
43. metadata=0x4, priority 0, cookie 0xa6b002c0resubmit(,44)
44. metadata=0x4, priority 0, cookie 0xaeab2b45resubmit(,45)
45. metadata=0x4, priority 0, cookie 0x290cc4d4resubmit(,46)
46. metadata=0x4, priority 0, cookie 0xa3223b88resubmit(,47)
47. metadata=0x4, priority 0, cookie 0x7ac2132eresubmit(,48)
48. reg15=0x2,metadata=0x4,dl_dst=fa:16:3e:99:7a:17, priority 50, cookie 0x8aa6426dresubmit(,64)
64. priority 0resubmit(,65)
65. reg15=0x2,metadata=0x4, priority 100output:4
Final flow: reg11=0x9,reg12=0xa,reg13=0xb,reg14=0x1,reg15=0x2,metadata=0x4,in_port=3,→˓vlan_tci=0x0000,dl_src=fa:16:3e:a9:4c:c7,dl_dst=fa:16:3e:99:7a:17,dl_type=0x0000Megaflow: recirc_id=0,ct_state=-new-est-rel-rpl-inv-trk,ct_label=0/0x1,in_port=3,vlan_→˓tci=0x0000/0x1000,dl_src=fa:16:3e:a9:4c:c7,dl_dst=fa:16:3e:99:7a:17,dl_type=0x0000Datapath actions: 4
There’s a lot there, which you can read through if you like, but the important part is:
65. reg15=0x2,metadata=0x4, priority 100output:4
which means that the packet is ultimately being output to OpenFlow port 4. That’s port b, which you can confirmwith:
$ sudo ovs-vsctl find interface ofport=4_uuid : 840a5aca-ea8d-4c16-a11b-a94e0f408091admin_state : upbfd : {}bfd_status : {}cfm_fault : []cfm_fault_status : []cfm_flap_count : []cfm_health : []cfm_mpid : []cfm_remote_mpids : []cfm_remote_opstate : []duplex : fullerror : []external_ids : {attached-mac="fa:16:3e:99:7a:17", iface-id="c29d4120-20a4-4c44-→˓bd83-8d91f5f447fd", iface-status=active, vm-id="2db969ca-ca2a-4d9a-b49e-f287d39c5645→˓"} (continues on next page)
3.3. OVN OpenStack Tutorial 81
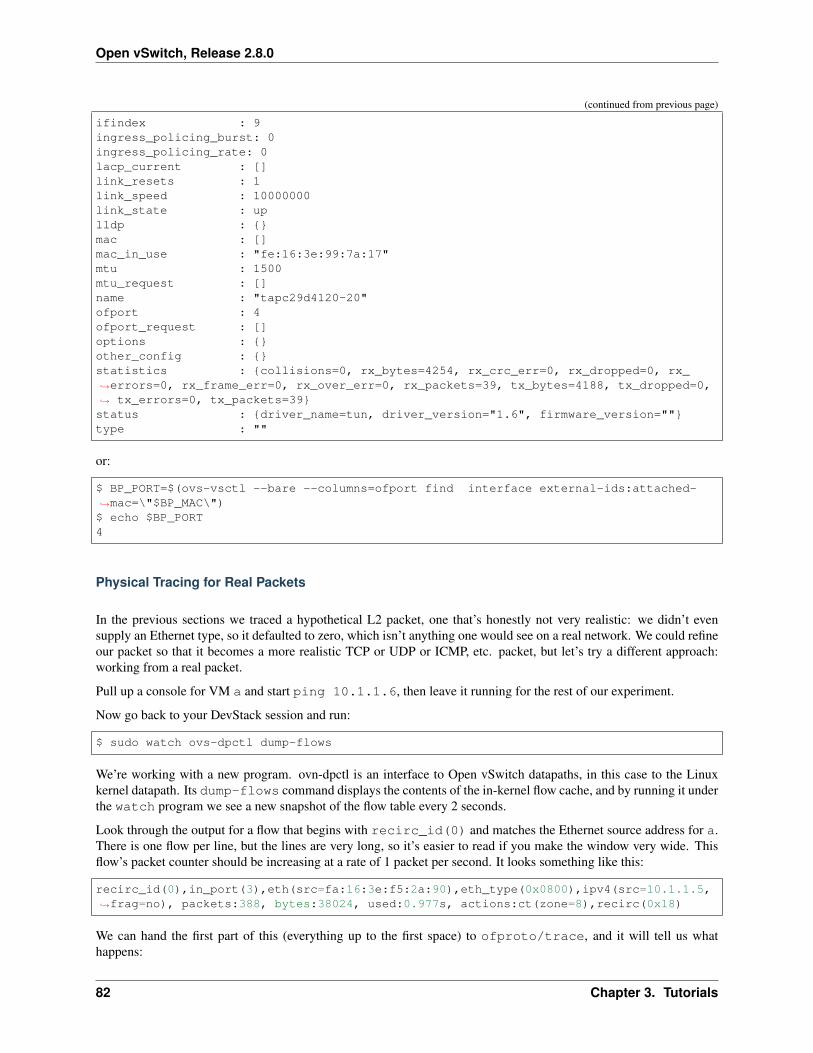
Open vSwitch, Release 2.8.0
(continued from previous page)
ifindex : 9ingress_policing_burst: 0ingress_policing_rate: 0lacp_current : []link_resets : 1link_speed : 10000000link_state : uplldp : {}mac : []mac_in_use : "fe:16:3e:99:7a:17"mtu : 1500mtu_request : []name : "tapc29d4120-20"ofport : 4ofport_request : []options : {}other_config : {}statistics : {collisions=0, rx_bytes=4254, rx_crc_err=0, rx_dropped=0, rx_→˓errors=0, rx_frame_err=0, rx_over_err=0, rx_packets=39, tx_bytes=4188, tx_dropped=0,→˓ tx_errors=0, tx_packets=39}status : {driver_name=tun, driver_version="1.6", firmware_version=""}type : ""
or:
$ BP_PORT=$(ovs-vsctl --bare --columns=ofport find interface external-ids:attached-→˓mac=\"$BP_MAC\")$ echo $BP_PORT4
Physical Tracing for Real Packets
In the previous sections we traced a hypothetical L2 packet, one that’s honestly not very realistic: we didn’t evensupply an Ethernet type, so it defaulted to zero, which isn’t anything one would see on a real network. We could refineour packet so that it becomes a more realistic TCP or UDP or ICMP, etc. packet, but let’s try a different approach:working from a real packet.
Pull up a console for VM a and start ping 10.1.1.6, then leave it running for the rest of our experiment.
Now go back to your DevStack session and run:
$ sudo watch ovs-dpctl dump-flows
We’re working with a new program. ovn-dpctl is an interface to Open vSwitch datapaths, in this case to the Linuxkernel datapath. Its dump-flows command displays the contents of the in-kernel flow cache, and by running it underthe watch program we see a new snapshot of the flow table every 2 seconds.
Look through the output for a flow that begins with recirc_id(0) and matches the Ethernet source address for a.There is one flow per line, but the lines are very long, so it’s easier to read if you make the window very wide. Thisflow’s packet counter should be increasing at a rate of 1 packet per second. It looks something like this:
recirc_id(0),in_port(3),eth(src=fa:16:3e:f5:2a:90),eth_type(0x0800),ipv4(src=10.1.1.5,→˓frag=no), packets:388, bytes:38024, used:0.977s, actions:ct(zone=8),recirc(0x18)
We can hand the first part of this (everything up to the first space) to ofproto/trace, and it will tell us whathappens:
82 Chapter 3. Tutorials
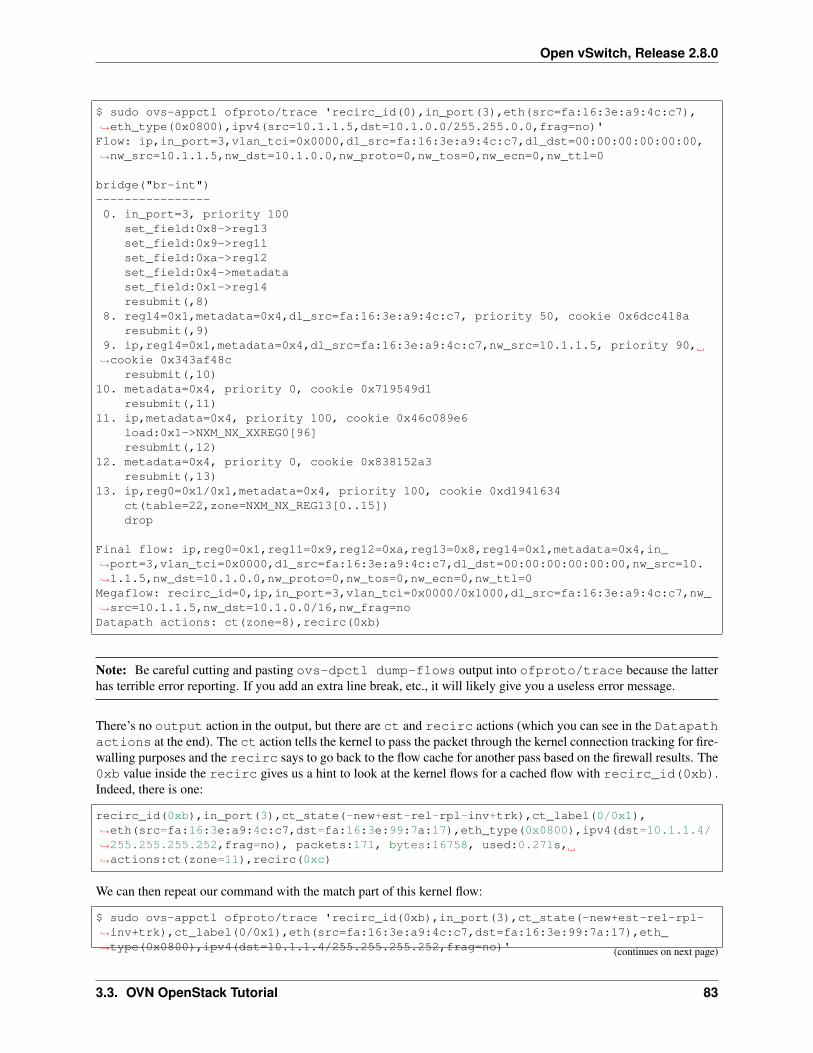
Open vSwitch, Release 2.8.0
$ sudo ovs-appctl ofproto/trace 'recirc_id(0),in_port(3),eth(src=fa:16:3e:a9:4c:c7),→˓eth_type(0x0800),ipv4(src=10.1.1.5,dst=10.1.0.0/255.255.0.0,frag=no)'Flow: ip,in_port=3,vlan_tci=0x0000,dl_src=fa:16:3e:a9:4c:c7,dl_dst=00:00:00:00:00:00,→˓nw_src=10.1.1.5,nw_dst=10.1.0.0,nw_proto=0,nw_tos=0,nw_ecn=0,nw_ttl=0
bridge("br-int")----------------0. in_port=3, priority 100
set_field:0x8->reg13set_field:0x9->reg11set_field:0xa->reg12set_field:0x4->metadataset_field:0x1->reg14resubmit(,8)
8. reg14=0x1,metadata=0x4,dl_src=fa:16:3e:a9:4c:c7, priority 50, cookie 0x6dcc418aresubmit(,9)
9. ip,reg14=0x1,metadata=0x4,dl_src=fa:16:3e:a9:4c:c7,nw_src=10.1.1.5, priority 90,→˓cookie 0x343af48c
resubmit(,10)10. metadata=0x4, priority 0, cookie 0x719549d1
resubmit(,11)11. ip,metadata=0x4, priority 100, cookie 0x46c089e6
load:0x1->NXM_NX_XXREG0[96]resubmit(,12)
12. metadata=0x4, priority 0, cookie 0x838152a3resubmit(,13)
13. ip,reg0=0x1/0x1,metadata=0x4, priority 100, cookie 0xd1941634ct(table=22,zone=NXM_NX_REG13[0..15])drop
Final flow: ip,reg0=0x1,reg11=0x9,reg12=0xa,reg13=0x8,reg14=0x1,metadata=0x4,in_→˓port=3,vlan_tci=0x0000,dl_src=fa:16:3e:a9:4c:c7,dl_dst=00:00:00:00:00:00,nw_src=10.→˓1.1.5,nw_dst=10.1.0.0,nw_proto=0,nw_tos=0,nw_ecn=0,nw_ttl=0Megaflow: recirc_id=0,ip,in_port=3,vlan_tci=0x0000/0x1000,dl_src=fa:16:3e:a9:4c:c7,nw_→˓src=10.1.1.5,nw_dst=10.1.0.0/16,nw_frag=noDatapath actions: ct(zone=8),recirc(0xb)
Note: Be careful cutting and pasting ovs-dpctl dump-flows output into ofproto/trace because the latterhas terrible error reporting. If you add an extra line break, etc., it will likely give you a useless error message.
There’s no output action in the output, but there are ct and recirc actions (which you can see in the Datapathactions at the end). The ct action tells the kernel to pass the packet through the kernel connection tracking for fire-walling purposes and the recirc says to go back to the flow cache for another pass based on the firewall results. The0xb value inside the recirc gives us a hint to look at the kernel flows for a cached flow with recirc_id(0xb).Indeed, there is one:
recirc_id(0xb),in_port(3),ct_state(-new+est-rel-rpl-inv+trk),ct_label(0/0x1),→˓eth(src=fa:16:3e:a9:4c:c7,dst=fa:16:3e:99:7a:17),eth_type(0x0800),ipv4(dst=10.1.1.4/→˓255.255.255.252,frag=no), packets:171, bytes:16758, used:0.271s,→˓actions:ct(zone=11),recirc(0xc)
We can then repeat our command with the match part of this kernel flow:
$ sudo ovs-appctl ofproto/trace 'recirc_id(0xb),in_port(3),ct_state(-new+est-rel-rpl-→˓inv+trk),ct_label(0/0x1),eth(src=fa:16:3e:a9:4c:c7,dst=fa:16:3e:99:7a:17),eth_→˓type(0x0800),ipv4(dst=10.1.1.4/255.255.255.252,frag=no)' (continues on next page)
3.3. OVN OpenStack Tutorial 83
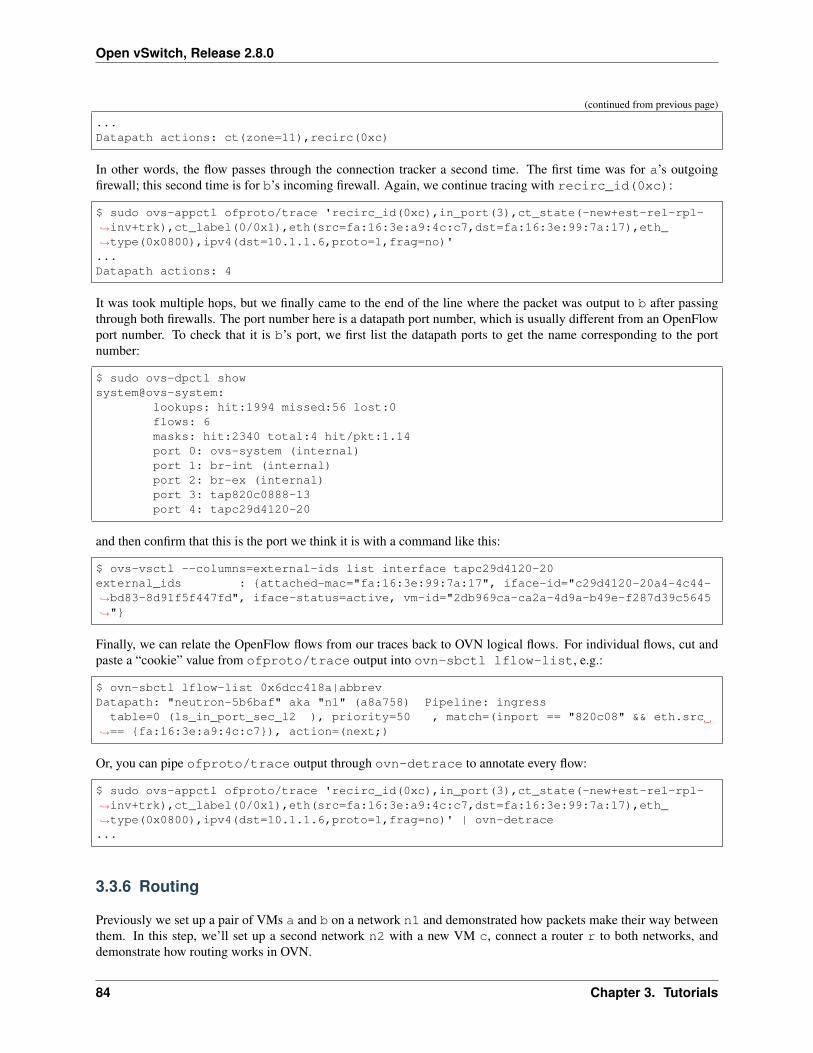
Open vSwitch, Release 2.8.0
(continued from previous page)
...Datapath actions: ct(zone=11),recirc(0xc)
In other words, the flow passes through the connection tracker a second time. The first time was for a’s outgoingfirewall; this second time is for b’s incoming firewall. Again, we continue tracing with recirc_id(0xc):
$ sudo ovs-appctl ofproto/trace 'recirc_id(0xc),in_port(3),ct_state(-new+est-rel-rpl-→˓inv+trk),ct_label(0/0x1),eth(src=fa:16:3e:a9:4c:c7,dst=fa:16:3e:99:7a:17),eth_→˓type(0x0800),ipv4(dst=10.1.1.6,proto=1,frag=no)'...Datapath actions: 4
It was took multiple hops, but we finally came to the end of the line where the packet was output to b after passingthrough both firewalls. The port number here is a datapath port number, which is usually different from an OpenFlowport number. To check that it is b’s port, we first list the datapath ports to get the name corresponding to the portnumber:
$ sudo ovs-dpctl showsystem@ovs-system:
lookups: hit:1994 missed:56 lost:0flows: 6masks: hit:2340 total:4 hit/pkt:1.14port 0: ovs-system (internal)port 1: br-int (internal)port 2: br-ex (internal)port 3: tap820c0888-13port 4: tapc29d4120-20
and then confirm that this is the port we think it is with a command like this:
$ ovs-vsctl --columns=external-ids list interface tapc29d4120-20external_ids : {attached-mac="fa:16:3e:99:7a:17", iface-id="c29d4120-20a4-4c44-→˓bd83-8d91f5f447fd", iface-status=active, vm-id="2db969ca-ca2a-4d9a-b49e-f287d39c5645→˓"}
Finally, we can relate the OpenFlow flows from our traces back to OVN logical flows. For individual flows, cut andpaste a “cookie” value from ofproto/trace output into ovn-sbctl lflow-list, e.g.:
$ ovn-sbctl lflow-list 0x6dcc418a|abbrevDatapath: "neutron-5b6baf" aka "n1" (a8a758) Pipeline: ingress
table=0 (ls_in_port_sec_l2 ), priority=50 , match=(inport == "820c08" && eth.src→˓== {fa:16:3e:a9:4c:c7}), action=(next;)
Or, you can pipe ofproto/trace output through ovn-detrace to annotate every flow:
$ sudo ovs-appctl ofproto/trace 'recirc_id(0xc),in_port(3),ct_state(-new+est-rel-rpl-→˓inv+trk),ct_label(0/0x1),eth(src=fa:16:3e:a9:4c:c7,dst=fa:16:3e:99:7a:17),eth_→˓type(0x0800),ipv4(dst=10.1.1.6,proto=1,frag=no)' | ovn-detrace...
3.3.6 Routing
Previously we set up a pair of VMs a and b on a network n1 and demonstrated how packets make their way betweenthem. In this step, we’ll set up a second network n2 with a new VM c, connect a router r to both networks, anddemonstrate how routing works in OVN.
84 Chapter 3. Tutorials
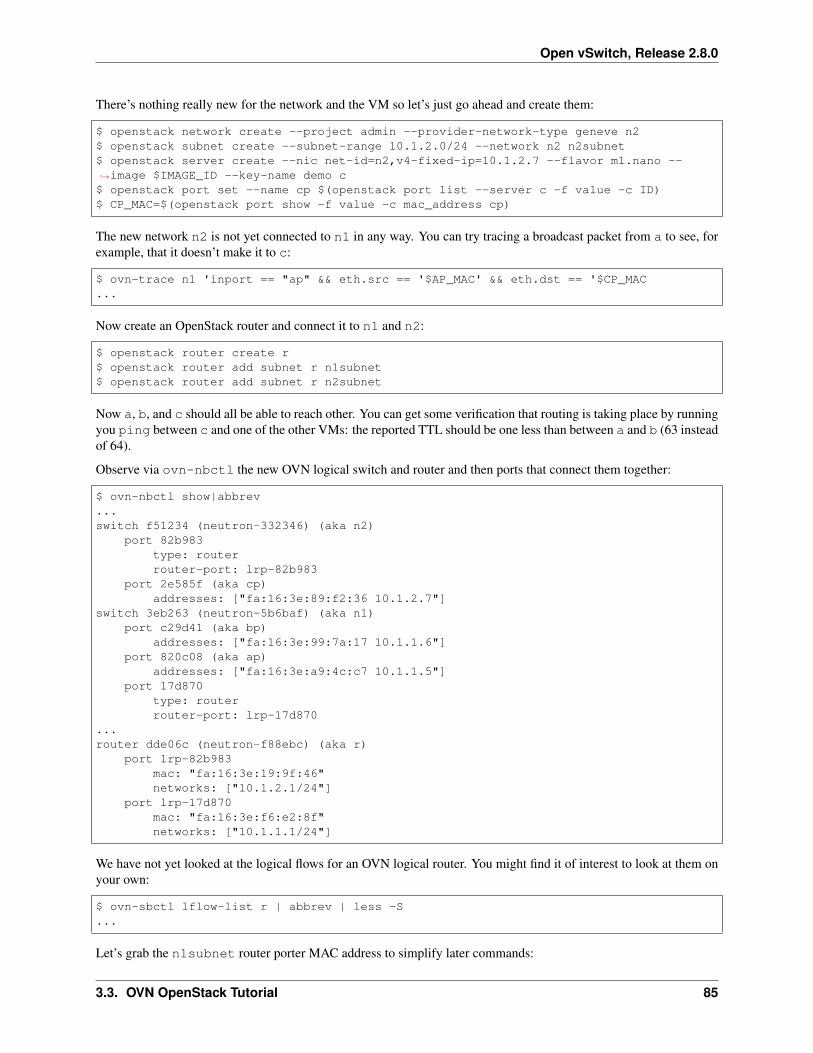
Open vSwitch, Release 2.8.0
There’s nothing really new for the network and the VM so let’s just go ahead and create them:
$ openstack network create --project admin --provider-network-type geneve n2$ openstack subnet create --subnet-range 10.1.2.0/24 --network n2 n2subnet$ openstack server create --nic net-id=n2,v4-fixed-ip=10.1.2.7 --flavor m1.nano --→˓image $IMAGE_ID --key-name demo c$ openstack port set --name cp $(openstack port list --server c -f value -c ID)$ CP_MAC=$(openstack port show -f value -c mac_address cp)
The new network n2 is not yet connected to n1 in any way. You can try tracing a broadcast packet from a to see, forexample, that it doesn’t make it to c:
$ ovn-trace n1 'inport == "ap" && eth.src == '$AP_MAC' && eth.dst == '$CP_MAC...
Now create an OpenStack router and connect it to n1 and n2:
$ openstack router create r$ openstack router add subnet r n1subnet$ openstack router add subnet r n2subnet
Now a, b, and c should all be able to reach other. You can get some verification that routing is taking place by runningyou ping between c and one of the other VMs: the reported TTL should be one less than between a and b (63 insteadof 64).
Observe via ovn-nbctl the new OVN logical switch and router and then ports that connect them together:
$ ovn-nbctl show|abbrev...switch f51234 (neutron-332346) (aka n2)
port 82b983type: routerrouter-port: lrp-82b983
port 2e585f (aka cp)addresses: ["fa:16:3e:89:f2:36 10.1.2.7"]
switch 3eb263 (neutron-5b6baf) (aka n1)port c29d41 (aka bp)
addresses: ["fa:16:3e:99:7a:17 10.1.1.6"]port 820c08 (aka ap)
addresses: ["fa:16:3e:a9:4c:c7 10.1.1.5"]port 17d870
type: routerrouter-port: lrp-17d870
...router dde06c (neutron-f88ebc) (aka r)
port lrp-82b983mac: "fa:16:3e:19:9f:46"networks: ["10.1.2.1/24"]
port lrp-17d870mac: "fa:16:3e:f6:e2:8f"networks: ["10.1.1.1/24"]
We have not yet looked at the logical flows for an OVN logical router. You might find it of interest to look at them onyour own:
$ ovn-sbctl lflow-list r | abbrev | less -S...
Let’s grab the n1subnet router porter MAC address to simplify later commands:
3.3. OVN OpenStack Tutorial 85
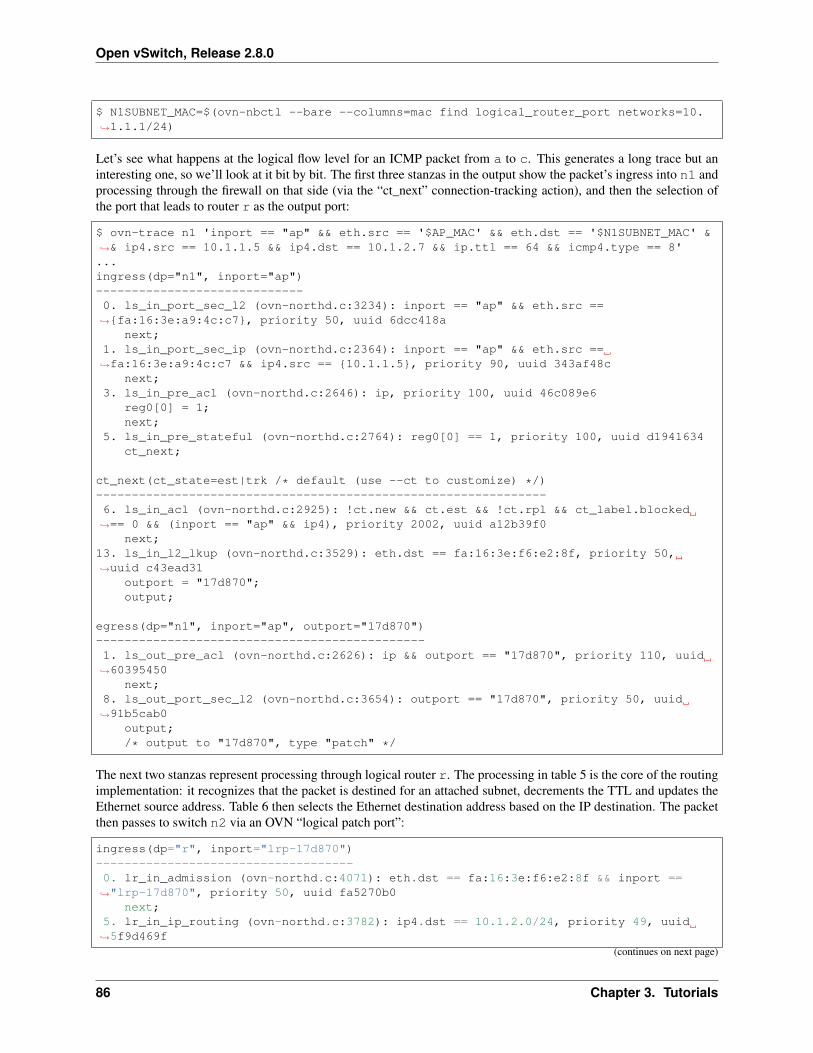
Open vSwitch, Release 2.8.0
$ N1SUBNET_MAC=$(ovn-nbctl --bare --columns=mac find logical_router_port networks=10.→˓1.1.1/24)
Let’s see what happens at the logical flow level for an ICMP packet from a to c. This generates a long trace but aninteresting one, so we’ll look at it bit by bit. The first three stanzas in the output show the packet’s ingress into n1 andprocessing through the firewall on that side (via the “ct_next” connection-tracking action), and then the selection ofthe port that leads to router r as the output port:
$ ovn-trace n1 'inport == "ap" && eth.src == '$AP_MAC' && eth.dst == '$N1SUBNET_MAC' &→˓& ip4.src == 10.1.1.5 && ip4.dst == 10.1.2.7 && ip.ttl == 64 && icmp4.type == 8'...ingress(dp="n1", inport="ap")-----------------------------0. ls_in_port_sec_l2 (ovn-northd.c:3234): inport == "ap" && eth.src ==→˓{fa:16:3e:a9:4c:c7}, priority 50, uuid 6dcc418a
next;1. ls_in_port_sec_ip (ovn-northd.c:2364): inport == "ap" && eth.src ==→˓fa:16:3e:a9:4c:c7 && ip4.src == {10.1.1.5}, priority 90, uuid 343af48c
next;3. ls_in_pre_acl (ovn-northd.c:2646): ip, priority 100, uuid 46c089e6
reg0[0] = 1;next;
5. ls_in_pre_stateful (ovn-northd.c:2764): reg0[0] == 1, priority 100, uuid d1941634ct_next;
ct_next(ct_state=est|trk /* default (use --ct to customize) */)---------------------------------------------------------------6. ls_in_acl (ovn-northd.c:2925): !ct.new && ct.est && !ct.rpl && ct_label.blocked→˓== 0 && (inport == "ap" && ip4), priority 2002, uuid a12b39f0
next;13. ls_in_l2_lkup (ovn-northd.c:3529): eth.dst == fa:16:3e:f6:e2:8f, priority 50,→˓uuid c43ead31
outport = "17d870";output;
egress(dp="n1", inport="ap", outport="17d870")----------------------------------------------1. ls_out_pre_acl (ovn-northd.c:2626): ip && outport == "17d870", priority 110, uuid→˓60395450
next;8. ls_out_port_sec_l2 (ovn-northd.c:3654): outport == "17d870", priority 50, uuid→˓91b5cab0
output;/* output to "17d870", type "patch" */
The next two stanzas represent processing through logical router r. The processing in table 5 is the core of the routingimplementation: it recognizes that the packet is destined for an attached subnet, decrements the TTL and updates theEthernet source address. Table 6 then selects the Ethernet destination address based on the IP destination. The packetthen passes to switch n2 via an OVN “logical patch port”:
ingress(dp="r", inport="lrp-17d870")------------------------------------0. lr_in_admission (ovn-northd.c:4071): eth.dst == fa:16:3e:f6:e2:8f && inport ==→˓"lrp-17d870", priority 50, uuid fa5270b0
next;5. lr_in_ip_routing (ovn-northd.c:3782): ip4.dst == 10.1.2.0/24, priority 49, uuid→˓5f9d469f
(continues on next page)
86 Chapter 3. Tutorials
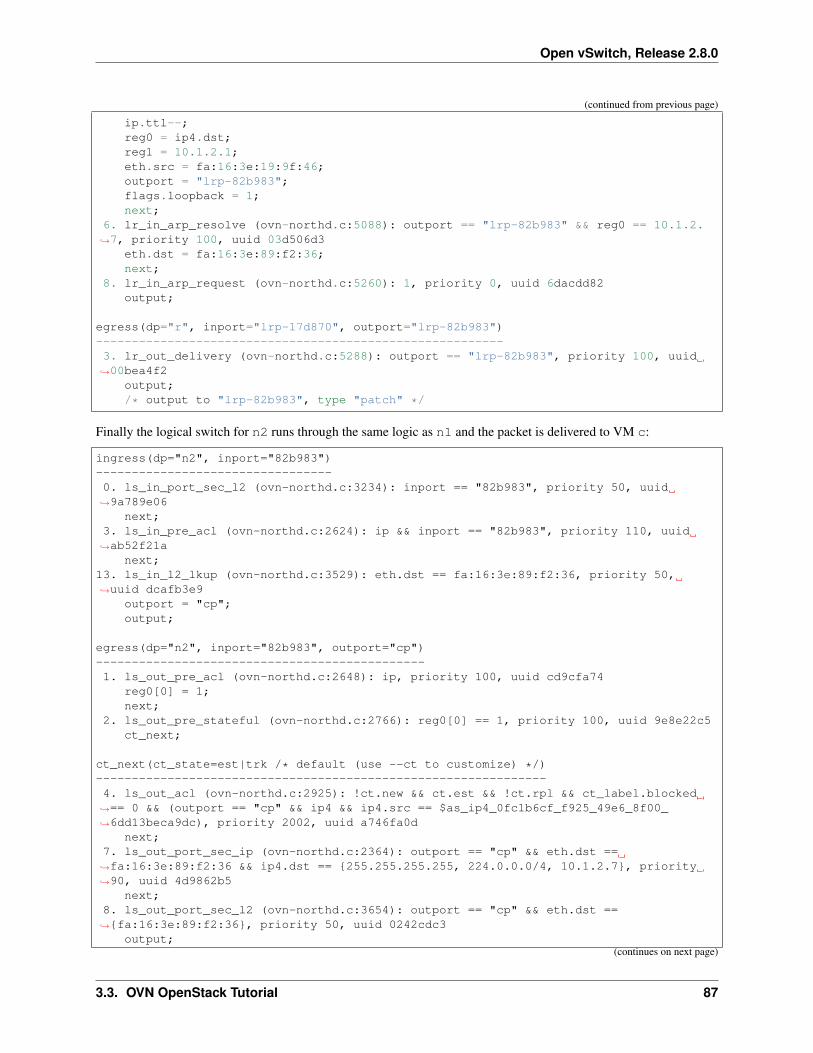
Open vSwitch, Release 2.8.0
(continued from previous page)
ip.ttl--;reg0 = ip4.dst;reg1 = 10.1.2.1;eth.src = fa:16:3e:19:9f:46;outport = "lrp-82b983";flags.loopback = 1;next;
6. lr_in_arp_resolve (ovn-northd.c:5088): outport == "lrp-82b983" && reg0 == 10.1.2.→˓7, priority 100, uuid 03d506d3
eth.dst = fa:16:3e:89:f2:36;next;
8. lr_in_arp_request (ovn-northd.c:5260): 1, priority 0, uuid 6dacdd82output;
egress(dp="r", inport="lrp-17d870", outport="lrp-82b983")---------------------------------------------------------3. lr_out_delivery (ovn-northd.c:5288): outport == "lrp-82b983", priority 100, uuid→˓00bea4f2
output;/* output to "lrp-82b983", type "patch" */
Finally the logical switch for n2 runs through the same logic as n1 and the packet is delivered to VM c:
ingress(dp="n2", inport="82b983")---------------------------------0. ls_in_port_sec_l2 (ovn-northd.c:3234): inport == "82b983", priority 50, uuid→˓9a789e06
next;3. ls_in_pre_acl (ovn-northd.c:2624): ip && inport == "82b983", priority 110, uuid→˓ab52f21a
next;13. ls_in_l2_lkup (ovn-northd.c:3529): eth.dst == fa:16:3e:89:f2:36, priority 50,→˓uuid dcafb3e9
outport = "cp";output;
egress(dp="n2", inport="82b983", outport="cp")----------------------------------------------1. ls_out_pre_acl (ovn-northd.c:2648): ip, priority 100, uuid cd9cfa74
reg0[0] = 1;next;
2. ls_out_pre_stateful (ovn-northd.c:2766): reg0[0] == 1, priority 100, uuid 9e8e22c5ct_next;
ct_next(ct_state=est|trk /* default (use --ct to customize) */)---------------------------------------------------------------4. ls_out_acl (ovn-northd.c:2925): !ct.new && ct.est && !ct.rpl && ct_label.blocked→˓== 0 && (outport == "cp" && ip4 && ip4.src == $as_ip4_0fc1b6cf_f925_49e6_8f00_→˓6dd13beca9dc), priority 2002, uuid a746fa0d
next;7. ls_out_port_sec_ip (ovn-northd.c:2364): outport == "cp" && eth.dst ==→˓fa:16:3e:89:f2:36 && ip4.dst == {255.255.255.255, 224.0.0.0/4, 10.1.2.7}, priority→˓90, uuid 4d9862b5
next;8. ls_out_port_sec_l2 (ovn-northd.c:3654): outport == "cp" && eth.dst ==→˓{fa:16:3e:89:f2:36}, priority 50, uuid 0242cdc3
output;(continues on next page)
3.3. OVN OpenStack Tutorial 87
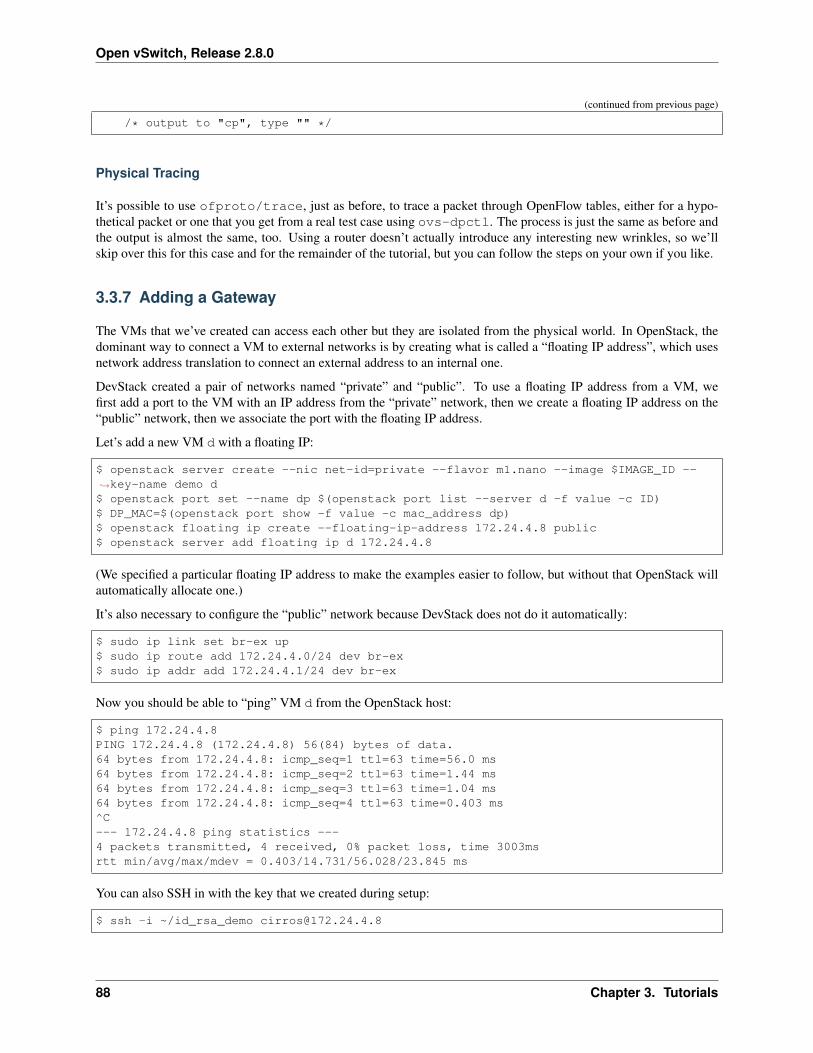
Open vSwitch, Release 2.8.0
(continued from previous page)
/* output to "cp", type "" */
Physical Tracing
It’s possible to use ofproto/trace, just as before, to trace a packet through OpenFlow tables, either for a hypo-thetical packet or one that you get from a real test case using ovs-dpctl. The process is just the same as before andthe output is almost the same, too. Using a router doesn’t actually introduce any interesting new wrinkles, so we’llskip over this for this case and for the remainder of the tutorial, but you can follow the steps on your own if you like.
3.3.7 Adding a Gateway
The VMs that we’ve created can access each other but they are isolated from the physical world. In OpenStack, thedominant way to connect a VM to external networks is by creating what is called a “floating IP address”, which usesnetwork address translation to connect an external address to an internal one.
DevStack created a pair of networks named “private” and “public”. To use a floating IP address from a VM, wefirst add a port to the VM with an IP address from the “private” network, then we create a floating IP address on the“public” network, then we associate the port with the floating IP address.
Let’s add a new VM d with a floating IP:
$ openstack server create --nic net-id=private --flavor m1.nano --image $IMAGE_ID --→˓key-name demo d$ openstack port set --name dp $(openstack port list --server d -f value -c ID)$ DP_MAC=$(openstack port show -f value -c mac_address dp)$ openstack floating ip create --floating-ip-address 172.24.4.8 public$ openstack server add floating ip d 172.24.4.8
(We specified a particular floating IP address to make the examples easier to follow, but without that OpenStack willautomatically allocate one.)
It’s also necessary to configure the “public” network because DevStack does not do it automatically:
$ sudo ip link set br-ex up$ sudo ip route add 172.24.4.0/24 dev br-ex$ sudo ip addr add 172.24.4.1/24 dev br-ex
Now you should be able to “ping” VM d from the OpenStack host:
$ ping 172.24.4.8PING 172.24.4.8 (172.24.4.8) 56(84) bytes of data.64 bytes from 172.24.4.8: icmp_seq=1 ttl=63 time=56.0 ms64 bytes from 172.24.4.8: icmp_seq=2 ttl=63 time=1.44 ms64 bytes from 172.24.4.8: icmp_seq=3 ttl=63 time=1.04 ms64 bytes from 172.24.4.8: icmp_seq=4 ttl=63 time=0.403 ms^C--- 172.24.4.8 ping statistics ---4 packets transmitted, 4 received, 0% packet loss, time 3003msrtt min/avg/max/mdev = 0.403/14.731/56.028/23.845 ms
You can also SSH in with the key that we created during setup:
$ ssh -i ~/id_rsa_demo [email protected]
88 Chapter 3. Tutorials
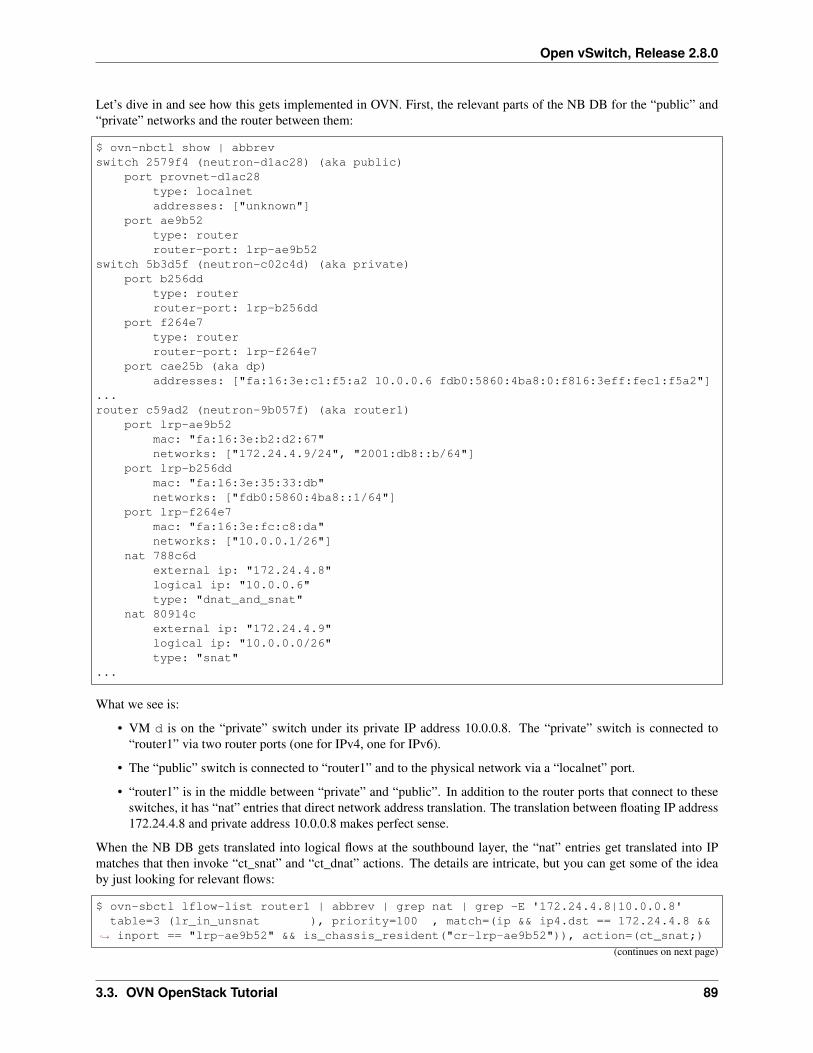
Open vSwitch, Release 2.8.0
Let’s dive in and see how this gets implemented in OVN. First, the relevant parts of the NB DB for the “public” and“private” networks and the router between them:
$ ovn-nbctl show | abbrevswitch 2579f4 (neutron-d1ac28) (aka public)
port provnet-d1ac28type: localnetaddresses: ["unknown"]
port ae9b52type: routerrouter-port: lrp-ae9b52
switch 5b3d5f (neutron-c02c4d) (aka private)port b256dd
type: routerrouter-port: lrp-b256dd
port f264e7type: routerrouter-port: lrp-f264e7
port cae25b (aka dp)addresses: ["fa:16:3e:c1:f5:a2 10.0.0.6 fdb0:5860:4ba8:0:f816:3eff:fec1:f5a2"]
...router c59ad2 (neutron-9b057f) (aka router1)
port lrp-ae9b52mac: "fa:16:3e:b2:d2:67"networks: ["172.24.4.9/24", "2001:db8::b/64"]
port lrp-b256ddmac: "fa:16:3e:35:33:db"networks: ["fdb0:5860:4ba8::1/64"]
port lrp-f264e7mac: "fa:16:3e:fc:c8:da"networks: ["10.0.0.1/26"]
nat 788c6dexternal ip: "172.24.4.8"logical ip: "10.0.0.6"type: "dnat_and_snat"
nat 80914cexternal ip: "172.24.4.9"logical ip: "10.0.0.0/26"type: "snat"
...
What we see is:
• VM d is on the “private” switch under its private IP address 10.0.0.8. The “private” switch is connected to“router1” via two router ports (one for IPv4, one for IPv6).
• The “public” switch is connected to “router1” and to the physical network via a “localnet” port.
• “router1” is in the middle between “private” and “public”. In addition to the router ports that connect to theseswitches, it has “nat” entries that direct network address translation. The translation between floating IP address172.24.4.8 and private address 10.0.0.8 makes perfect sense.
When the NB DB gets translated into logical flows at the southbound layer, the “nat” entries get translated into IPmatches that then invoke “ct_snat” and “ct_dnat” actions. The details are intricate, but you can get some of the ideaby just looking for relevant flows:
$ ovn-sbctl lflow-list router1 | abbrev | grep nat | grep -E '172.24.4.8|10.0.0.8'table=3 (lr_in_unsnat ), priority=100 , match=(ip && ip4.dst == 172.24.4.8 &&
→˓ inport == "lrp-ae9b52" && is_chassis_resident("cr-lrp-ae9b52")), action=(ct_snat;)
(continues on next page)
3.3. OVN OpenStack Tutorial 89
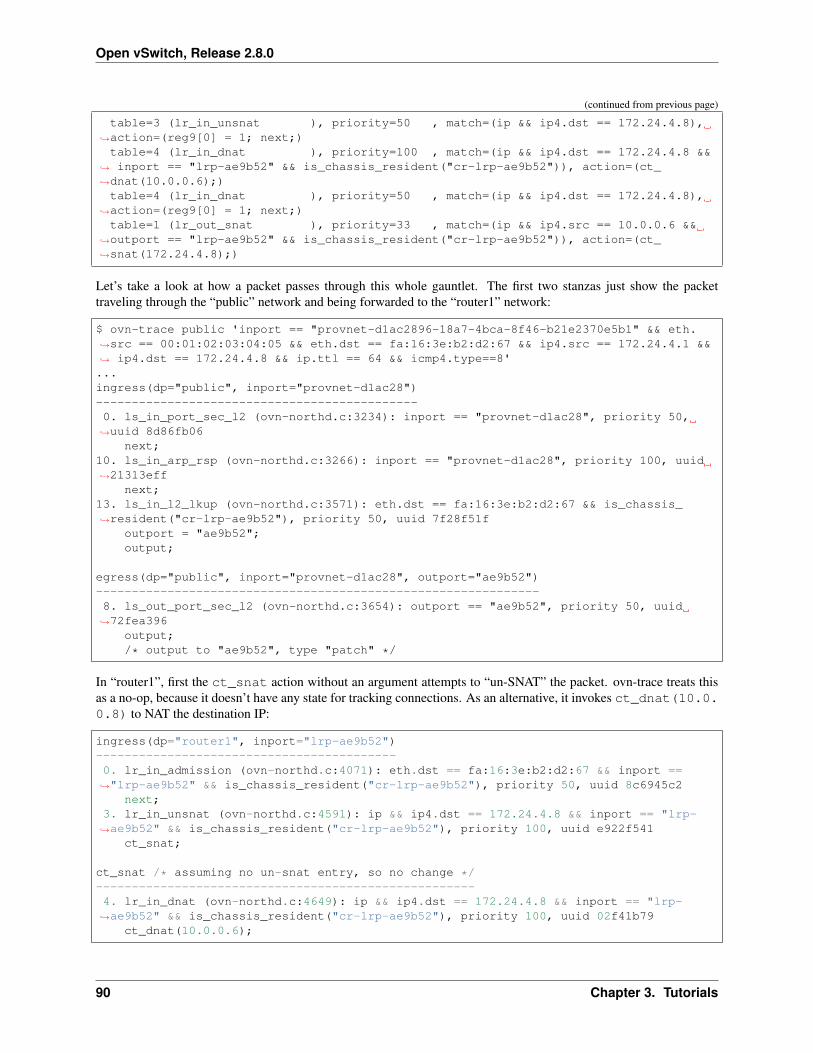
Open vSwitch, Release 2.8.0
(continued from previous page)
table=3 (lr_in_unsnat ), priority=50 , match=(ip && ip4.dst == 172.24.4.8),→˓action=(reg9[0] = 1; next;)table=4 (lr_in_dnat ), priority=100 , match=(ip && ip4.dst == 172.24.4.8 &&
→˓ inport == "lrp-ae9b52" && is_chassis_resident("cr-lrp-ae9b52")), action=(ct_→˓dnat(10.0.0.6);)table=4 (lr_in_dnat ), priority=50 , match=(ip && ip4.dst == 172.24.4.8),
→˓action=(reg9[0] = 1; next;)table=1 (lr_out_snat ), priority=33 , match=(ip && ip4.src == 10.0.0.6 &&
→˓outport == "lrp-ae9b52" && is_chassis_resident("cr-lrp-ae9b52")), action=(ct_→˓snat(172.24.4.8);)
Let’s take a look at how a packet passes through this whole gauntlet. The first two stanzas just show the packettraveling through the “public” network and being forwarded to the “router1” network:
$ ovn-trace public 'inport == "provnet-d1ac2896-18a7-4bca-8f46-b21e2370e5b1" && eth.→˓src == 00:01:02:03:04:05 && eth.dst == fa:16:3e:b2:d2:67 && ip4.src == 172.24.4.1 &&→˓ ip4.dst == 172.24.4.8 && ip.ttl == 64 && icmp4.type==8'...ingress(dp="public", inport="provnet-d1ac28")---------------------------------------------0. ls_in_port_sec_l2 (ovn-northd.c:3234): inport == "provnet-d1ac28", priority 50,→˓uuid 8d86fb06
next;10. ls_in_arp_rsp (ovn-northd.c:3266): inport == "provnet-d1ac28", priority 100, uuid→˓21313eff
next;13. ls_in_l2_lkup (ovn-northd.c:3571): eth.dst == fa:16:3e:b2:d2:67 && is_chassis_→˓resident("cr-lrp-ae9b52"), priority 50, uuid 7f28f51f
outport = "ae9b52";output;
egress(dp="public", inport="provnet-d1ac28", outport="ae9b52")--------------------------------------------------------------8. ls_out_port_sec_l2 (ovn-northd.c:3654): outport == "ae9b52", priority 50, uuid→˓72fea396
output;/* output to "ae9b52", type "patch" */
In “router1”, first the ct_snat action without an argument attempts to “un-SNAT” the packet. ovn-trace treats thisas a no-op, because it doesn’t have any state for tracking connections. As an alternative, it invokes ct_dnat(10.0.0.8) to NAT the destination IP:
ingress(dp="router1", inport="lrp-ae9b52")------------------------------------------0. lr_in_admission (ovn-northd.c:4071): eth.dst == fa:16:3e:b2:d2:67 && inport ==→˓"lrp-ae9b52" && is_chassis_resident("cr-lrp-ae9b52"), priority 50, uuid 8c6945c2
next;3. lr_in_unsnat (ovn-northd.c:4591): ip && ip4.dst == 172.24.4.8 && inport == "lrp-→˓ae9b52" && is_chassis_resident("cr-lrp-ae9b52"), priority 100, uuid e922f541
ct_snat;
ct_snat /* assuming no un-snat entry, so no change */-----------------------------------------------------4. lr_in_dnat (ovn-northd.c:4649): ip && ip4.dst == 172.24.4.8 && inport == "lrp-→˓ae9b52" && is_chassis_resident("cr-lrp-ae9b52"), priority 100, uuid 02f41b79
ct_dnat(10.0.0.6);
90 Chapter 3. Tutorials
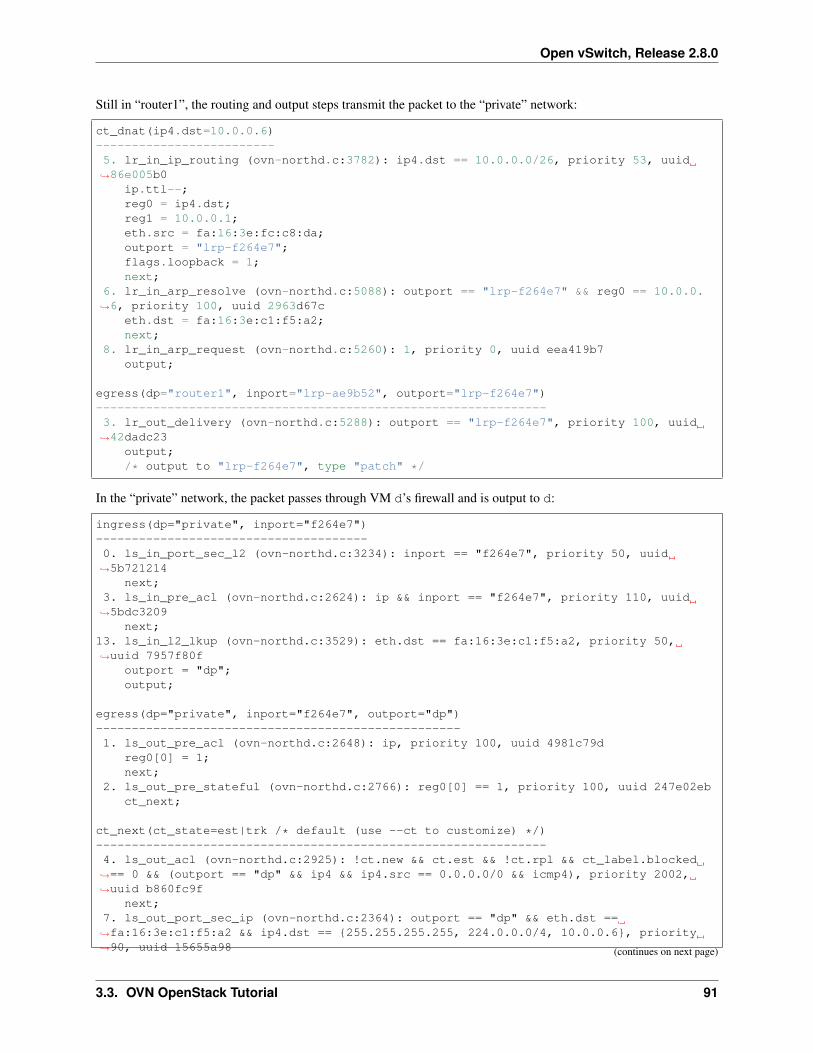
Open vSwitch, Release 2.8.0
Still in “router1”, the routing and output steps transmit the packet to the “private” network:
ct_dnat(ip4.dst=10.0.0.6)-------------------------5. lr_in_ip_routing (ovn-northd.c:3782): ip4.dst == 10.0.0.0/26, priority 53, uuid→˓86e005b0
ip.ttl--;reg0 = ip4.dst;reg1 = 10.0.0.1;eth.src = fa:16:3e:fc:c8:da;outport = "lrp-f264e7";flags.loopback = 1;next;
6. lr_in_arp_resolve (ovn-northd.c:5088): outport == "lrp-f264e7" && reg0 == 10.0.0.→˓6, priority 100, uuid 2963d67c
eth.dst = fa:16:3e:c1:f5:a2;next;
8. lr_in_arp_request (ovn-northd.c:5260): 1, priority 0, uuid eea419b7output;
egress(dp="router1", inport="lrp-ae9b52", outport="lrp-f264e7")---------------------------------------------------------------3. lr_out_delivery (ovn-northd.c:5288): outport == "lrp-f264e7", priority 100, uuid→˓42dadc23
output;/* output to "lrp-f264e7", type "patch" */
In the “private” network, the packet passes through VM d’s firewall and is output to d:
ingress(dp="private", inport="f264e7")--------------------------------------0. ls_in_port_sec_l2 (ovn-northd.c:3234): inport == "f264e7", priority 50, uuid→˓5b721214
next;3. ls_in_pre_acl (ovn-northd.c:2624): ip && inport == "f264e7", priority 110, uuid→˓5bdc3209
next;13. ls_in_l2_lkup (ovn-northd.c:3529): eth.dst == fa:16:3e:c1:f5:a2, priority 50,→˓uuid 7957f80f
outport = "dp";output;
egress(dp="private", inport="f264e7", outport="dp")---------------------------------------------------1. ls_out_pre_acl (ovn-northd.c:2648): ip, priority 100, uuid 4981c79d
reg0[0] = 1;next;
2. ls_out_pre_stateful (ovn-northd.c:2766): reg0[0] == 1, priority 100, uuid 247e02ebct_next;
ct_next(ct_state=est|trk /* default (use --ct to customize) */)---------------------------------------------------------------4. ls_out_acl (ovn-northd.c:2925): !ct.new && ct.est && !ct.rpl && ct_label.blocked→˓== 0 && (outport == "dp" && ip4 && ip4.src == 0.0.0.0/0 && icmp4), priority 2002,→˓uuid b860fc9f
next;7. ls_out_port_sec_ip (ovn-northd.c:2364): outport == "dp" && eth.dst ==→˓fa:16:3e:c1:f5:a2 && ip4.dst == {255.255.255.255, 224.0.0.0/4, 10.0.0.6}, priority→˓90, uuid 15655a98 (continues on next page)
3.3. OVN OpenStack Tutorial 91
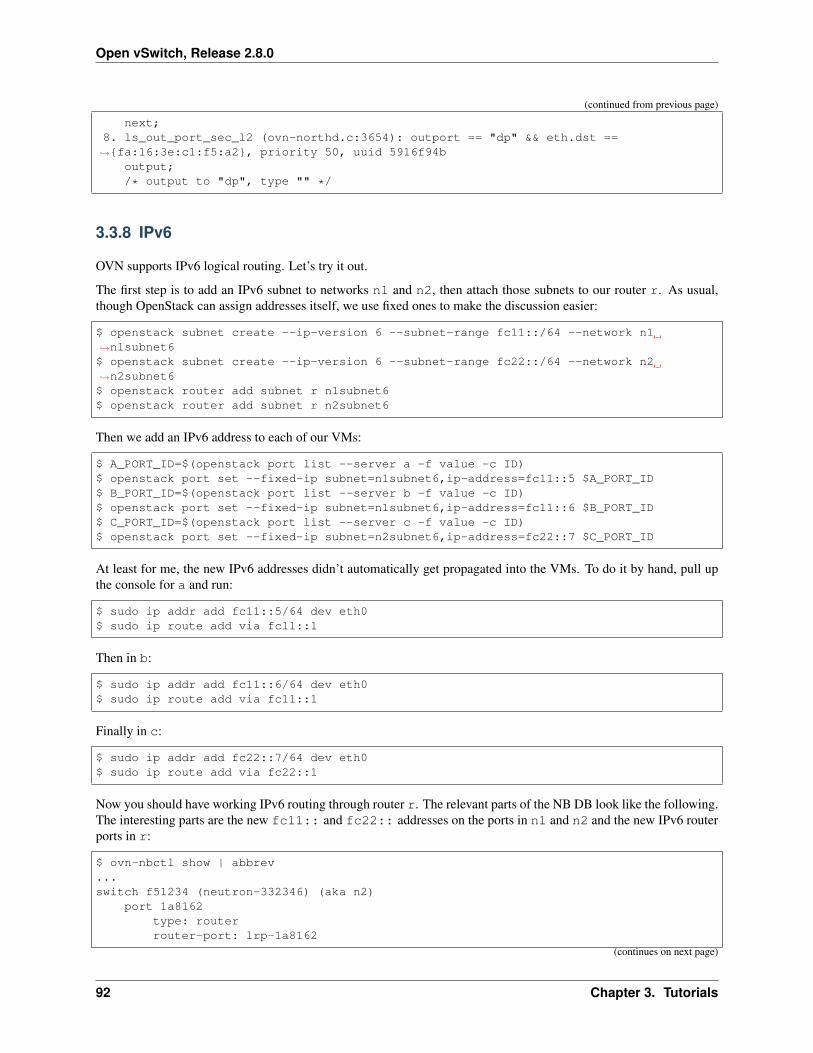
Open vSwitch, Release 2.8.0
(continued from previous page)
next;8. ls_out_port_sec_l2 (ovn-northd.c:3654): outport == "dp" && eth.dst ==→˓{fa:16:3e:c1:f5:a2}, priority 50, uuid 5916f94b
output;/* output to "dp", type "" */
3.3.8 IPv6
OVN supports IPv6 logical routing. Let’s try it out.
The first step is to add an IPv6 subnet to networks n1 and n2, then attach those subnets to our router r. As usual,though OpenStack can assign addresses itself, we use fixed ones to make the discussion easier:
$ openstack subnet create --ip-version 6 --subnet-range fc11::/64 --network n1→˓n1subnet6$ openstack subnet create --ip-version 6 --subnet-range fc22::/64 --network n2→˓n2subnet6$ openstack router add subnet r n1subnet6$ openstack router add subnet r n2subnet6
Then we add an IPv6 address to each of our VMs:
$ A_PORT_ID=$(openstack port list --server a -f value -c ID)$ openstack port set --fixed-ip subnet=n1subnet6,ip-address=fc11::5 $A_PORT_ID$ B_PORT_ID=$(openstack port list --server b -f value -c ID)$ openstack port set --fixed-ip subnet=n1subnet6,ip-address=fc11::6 $B_PORT_ID$ C_PORT_ID=$(openstack port list --server c -f value -c ID)$ openstack port set --fixed-ip subnet=n2subnet6,ip-address=fc22::7 $C_PORT_ID
At least for me, the new IPv6 addresses didn’t automatically get propagated into the VMs. To do it by hand, pull upthe console for a and run:
$ sudo ip addr add fc11::5/64 dev eth0$ sudo ip route add via fc11::1
Then in b:
$ sudo ip addr add fc11::6/64 dev eth0$ sudo ip route add via fc11::1
Finally in c:
$ sudo ip addr add fc22::7/64 dev eth0$ sudo ip route add via fc22::1
Now you should have working IPv6 routing through router r. The relevant parts of the NB DB look like the following.The interesting parts are the new fc11:: and fc22:: addresses on the ports in n1 and n2 and the new IPv6 routerports in r:
$ ovn-nbctl show | abbrev...switch f51234 (neutron-332346) (aka n2)
port 1a8162type: routerrouter-port: lrp-1a8162
(continues on next page)
92 Chapter 3. Tutorials
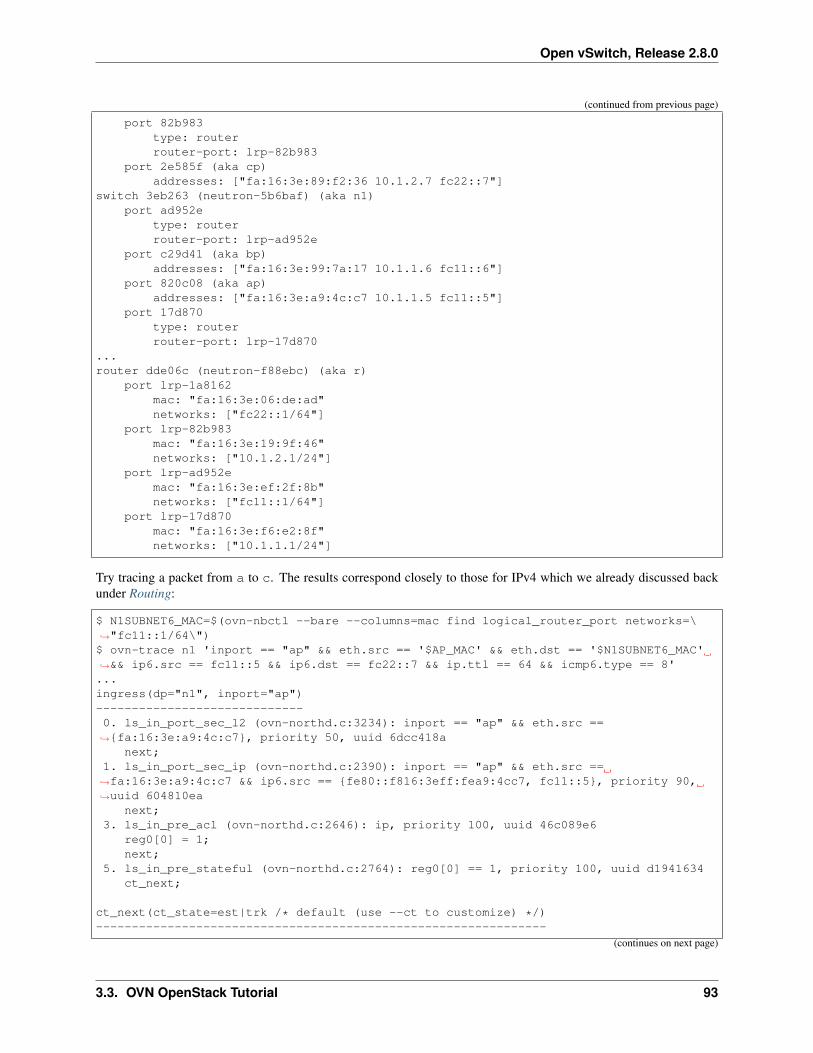
Open vSwitch, Release 2.8.0
(continued from previous page)
port 82b983type: routerrouter-port: lrp-82b983
port 2e585f (aka cp)addresses: ["fa:16:3e:89:f2:36 10.1.2.7 fc22::7"]
switch 3eb263 (neutron-5b6baf) (aka n1)port ad952e
type: routerrouter-port: lrp-ad952e
port c29d41 (aka bp)addresses: ["fa:16:3e:99:7a:17 10.1.1.6 fc11::6"]
port 820c08 (aka ap)addresses: ["fa:16:3e:a9:4c:c7 10.1.1.5 fc11::5"]
port 17d870type: routerrouter-port: lrp-17d870
...router dde06c (neutron-f88ebc) (aka r)
port lrp-1a8162mac: "fa:16:3e:06:de:ad"networks: ["fc22::1/64"]
port lrp-82b983mac: "fa:16:3e:19:9f:46"networks: ["10.1.2.1/24"]
port lrp-ad952emac: "fa:16:3e:ef:2f:8b"networks: ["fc11::1/64"]
port lrp-17d870mac: "fa:16:3e:f6:e2:8f"networks: ["10.1.1.1/24"]
Try tracing a packet from a to c. The results correspond closely to those for IPv4 which we already discussed backunder Routing:
$ N1SUBNET6_MAC=$(ovn-nbctl --bare --columns=mac find logical_router_port networks=\→˓"fc11::1/64\")$ ovn-trace n1 'inport == "ap" && eth.src == '$AP_MAC' && eth.dst == '$N1SUBNET6_MAC'→˓&& ip6.src == fc11::5 && ip6.dst == fc22::7 && ip.ttl == 64 && icmp6.type == 8'...ingress(dp="n1", inport="ap")-----------------------------0. ls_in_port_sec_l2 (ovn-northd.c:3234): inport == "ap" && eth.src ==→˓{fa:16:3e:a9:4c:c7}, priority 50, uuid 6dcc418a
next;1. ls_in_port_sec_ip (ovn-northd.c:2390): inport == "ap" && eth.src ==→˓fa:16:3e:a9:4c:c7 && ip6.src == {fe80::f816:3eff:fea9:4cc7, fc11::5}, priority 90,→˓uuid 604810ea
next;3. ls_in_pre_acl (ovn-northd.c:2646): ip, priority 100, uuid 46c089e6
reg0[0] = 1;next;
5. ls_in_pre_stateful (ovn-northd.c:2764): reg0[0] == 1, priority 100, uuid d1941634ct_next;
ct_next(ct_state=est|trk /* default (use --ct to customize) */)---------------------------------------------------------------
(continues on next page)
3.3. OVN OpenStack Tutorial 93
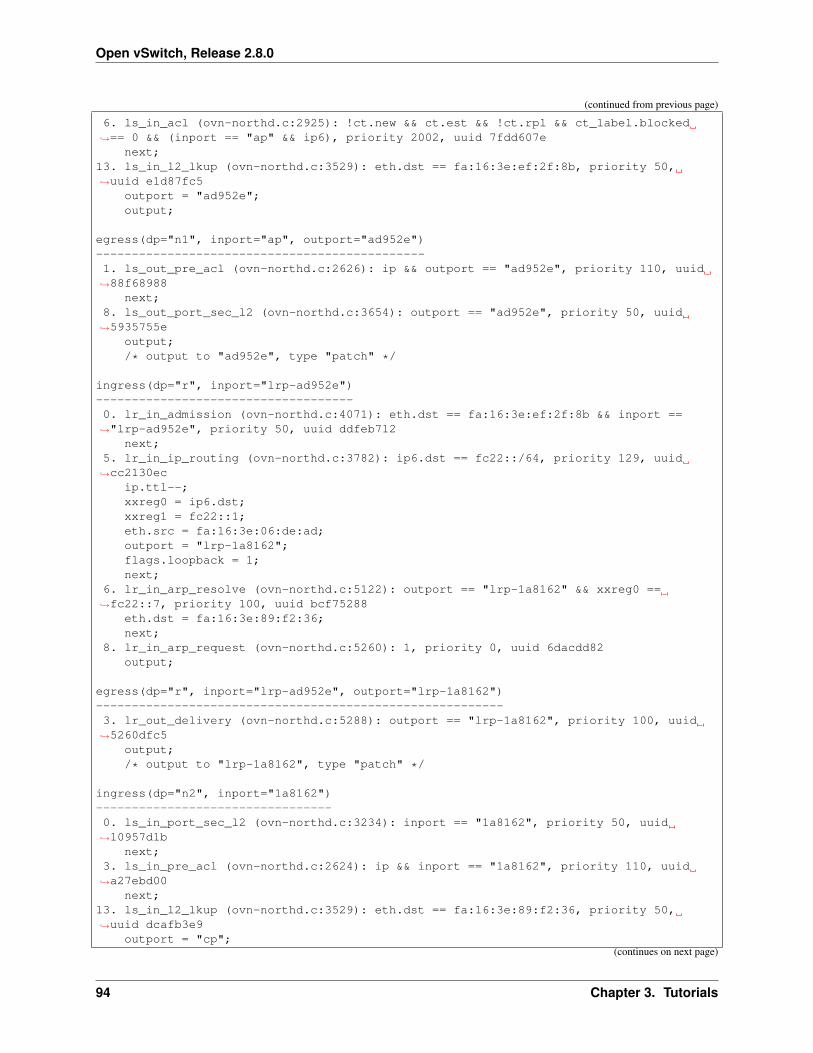
Open vSwitch, Release 2.8.0
(continued from previous page)
6. ls_in_acl (ovn-northd.c:2925): !ct.new && ct.est && !ct.rpl && ct_label.blocked→˓== 0 && (inport == "ap" && ip6), priority 2002, uuid 7fdd607e
next;13. ls_in_l2_lkup (ovn-northd.c:3529): eth.dst == fa:16:3e:ef:2f:8b, priority 50,→˓uuid e1d87fc5
outport = "ad952e";output;
egress(dp="n1", inport="ap", outport="ad952e")----------------------------------------------1. ls_out_pre_acl (ovn-northd.c:2626): ip && outport == "ad952e", priority 110, uuid→˓88f68988
next;8. ls_out_port_sec_l2 (ovn-northd.c:3654): outport == "ad952e", priority 50, uuid→˓5935755e
output;/* output to "ad952e", type "patch" */
ingress(dp="r", inport="lrp-ad952e")------------------------------------0. lr_in_admission (ovn-northd.c:4071): eth.dst == fa:16:3e:ef:2f:8b && inport ==→˓"lrp-ad952e", priority 50, uuid ddfeb712
next;5. lr_in_ip_routing (ovn-northd.c:3782): ip6.dst == fc22::/64, priority 129, uuid→˓cc2130ec
ip.ttl--;xxreg0 = ip6.dst;xxreg1 = fc22::1;eth.src = fa:16:3e:06:de:ad;outport = "lrp-1a8162";flags.loopback = 1;next;
6. lr_in_arp_resolve (ovn-northd.c:5122): outport == "lrp-1a8162" && xxreg0 ==→˓fc22::7, priority 100, uuid bcf75288
eth.dst = fa:16:3e:89:f2:36;next;
8. lr_in_arp_request (ovn-northd.c:5260): 1, priority 0, uuid 6dacdd82output;
egress(dp="r", inport="lrp-ad952e", outport="lrp-1a8162")---------------------------------------------------------3. lr_out_delivery (ovn-northd.c:5288): outport == "lrp-1a8162", priority 100, uuid→˓5260dfc5
output;/* output to "lrp-1a8162", type "patch" */
ingress(dp="n2", inport="1a8162")---------------------------------0. ls_in_port_sec_l2 (ovn-northd.c:3234): inport == "1a8162", priority 50, uuid→˓10957d1b
next;3. ls_in_pre_acl (ovn-northd.c:2624): ip && inport == "1a8162", priority 110, uuid→˓a27ebd00
next;13. ls_in_l2_lkup (ovn-northd.c:3529): eth.dst == fa:16:3e:89:f2:36, priority 50,→˓uuid dcafb3e9
outport = "cp";(continues on next page)
94 Chapter 3. Tutorials
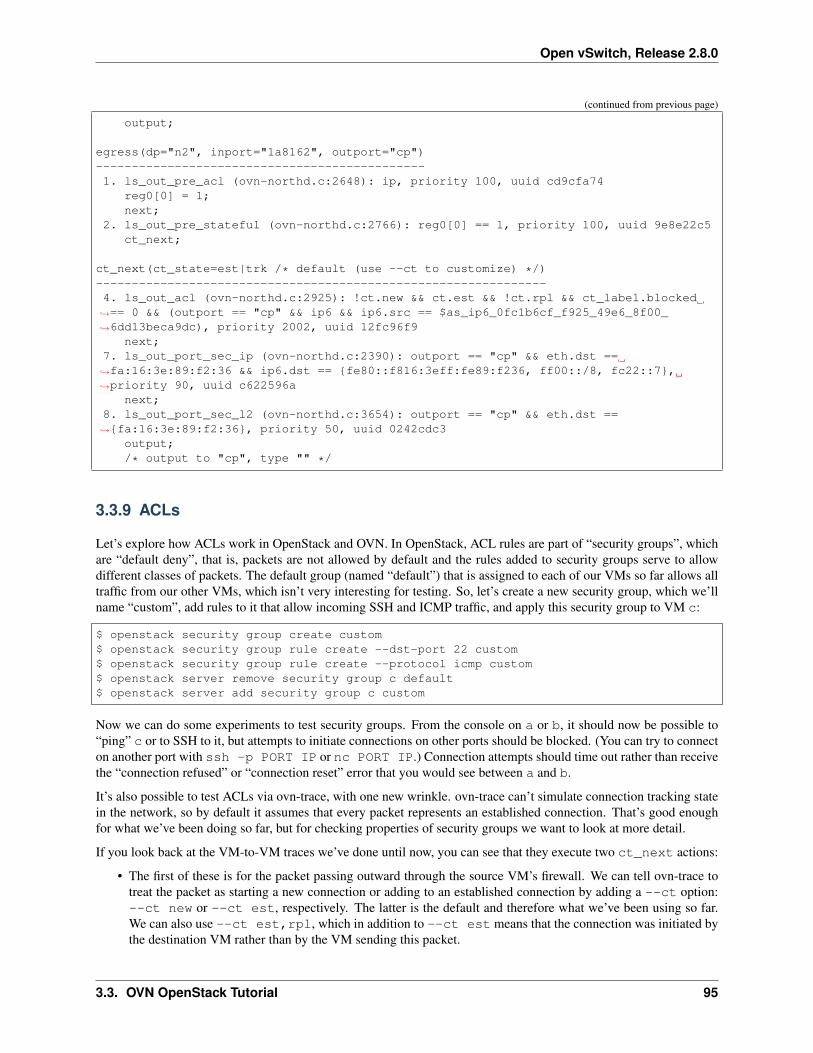
Open vSwitch, Release 2.8.0
(continued from previous page)
output;
egress(dp="n2", inport="1a8162", outport="cp")----------------------------------------------1. ls_out_pre_acl (ovn-northd.c:2648): ip, priority 100, uuid cd9cfa74
reg0[0] = 1;next;
2. ls_out_pre_stateful (ovn-northd.c:2766): reg0[0] == 1, priority 100, uuid 9e8e22c5ct_next;
ct_next(ct_state=est|trk /* default (use --ct to customize) */)---------------------------------------------------------------4. ls_out_acl (ovn-northd.c:2925): !ct.new && ct.est && !ct.rpl && ct_label.blocked→˓== 0 && (outport == "cp" && ip6 && ip6.src == $as_ip6_0fc1b6cf_f925_49e6_8f00_→˓6dd13beca9dc), priority 2002, uuid 12fc96f9
next;7. ls_out_port_sec_ip (ovn-northd.c:2390): outport == "cp" && eth.dst ==→˓fa:16:3e:89:f2:36 && ip6.dst == {fe80::f816:3eff:fe89:f236, ff00::/8, fc22::7},→˓priority 90, uuid c622596a
next;8. ls_out_port_sec_l2 (ovn-northd.c:3654): outport == "cp" && eth.dst ==→˓{fa:16:3e:89:f2:36}, priority 50, uuid 0242cdc3
output;/* output to "cp", type "" */
3.3.9 ACLs
Let’s explore how ACLs work in OpenStack and OVN. In OpenStack, ACL rules are part of “security groups”, whichare “default deny”, that is, packets are not allowed by default and the rules added to security groups serve to allowdifferent classes of packets. The default group (named “default”) that is assigned to each of our VMs so far allows alltraffic from our other VMs, which isn’t very interesting for testing. So, let’s create a new security group, which we’llname “custom”, add rules to it that allow incoming SSH and ICMP traffic, and apply this security group to VM c:
$ openstack security group create custom$ openstack security group rule create --dst-port 22 custom$ openstack security group rule create --protocol icmp custom$ openstack server remove security group c default$ openstack server add security group c custom
Now we can do some experiments to test security groups. From the console on a or b, it should now be possible to“ping” c or to SSH to it, but attempts to initiate connections on other ports should be blocked. (You can try to connecton another port with ssh -p PORT IP or nc PORT IP.) Connection attempts should time out rather than receivethe “connection refused” or “connection reset” error that you would see between a and b.
It’s also possible to test ACLs via ovn-trace, with one new wrinkle. ovn-trace can’t simulate connection tracking statein the network, so by default it assumes that every packet represents an established connection. That’s good enoughfor what we’ve been doing so far, but for checking properties of security groups we want to look at more detail.
If you look back at the VM-to-VM traces we’ve done until now, you can see that they execute two ct_next actions:
• The first of these is for the packet passing outward through the source VM’s firewall. We can tell ovn-trace totreat the packet as starting a new connection or adding to an established connection by adding a --ct option:--ct new or --ct est, respectively. The latter is the default and therefore what we’ve been using so far.We can also use --ct est,rpl, which in addition to --ct est means that the connection was initiated bythe destination VM rather than by the VM sending this packet.
3.3. OVN OpenStack Tutorial 95
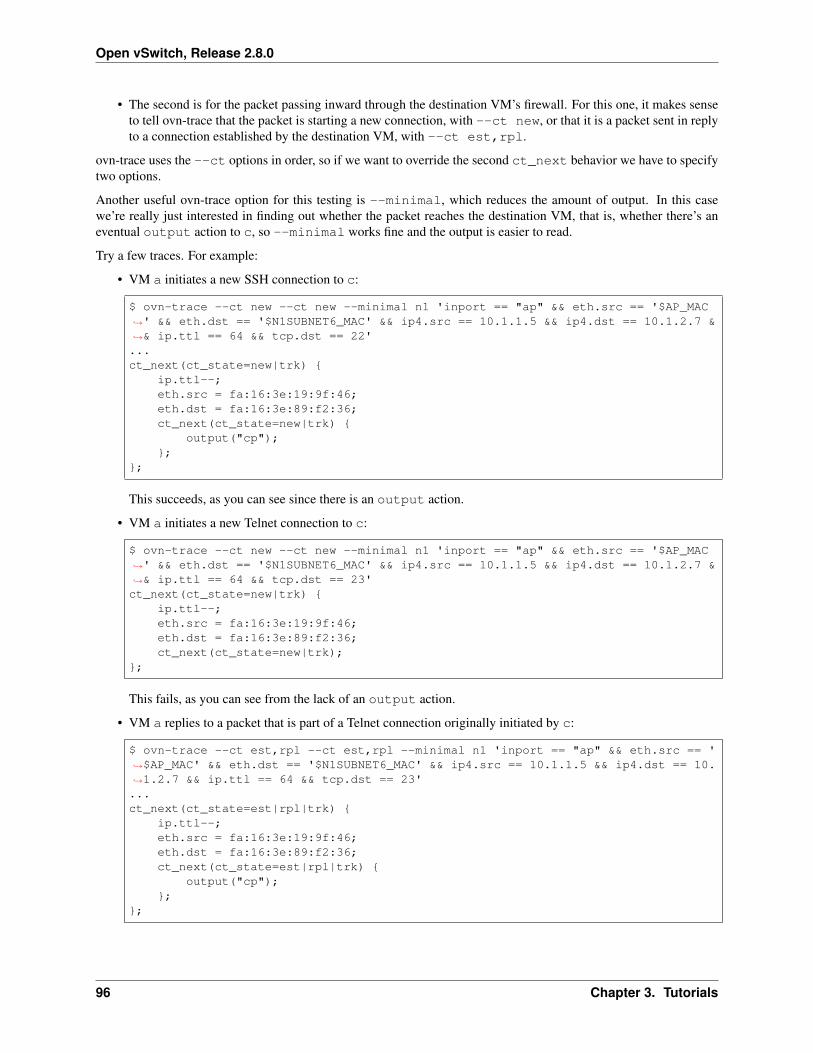
Open vSwitch, Release 2.8.0
• The second is for the packet passing inward through the destination VM’s firewall. For this one, it makes senseto tell ovn-trace that the packet is starting a new connection, with --ct new, or that it is a packet sent in replyto a connection established by the destination VM, with --ct est,rpl.
ovn-trace uses the --ct options in order, so if we want to override the second ct_next behavior we have to specifytwo options.
Another useful ovn-trace option for this testing is --minimal, which reduces the amount of output. In this casewe’re really just interested in finding out whether the packet reaches the destination VM, that is, whether there’s aneventual output action to c, so --minimal works fine and the output is easier to read.
Try a few traces. For example:
• VM a initiates a new SSH connection to c:
$ ovn-trace --ct new --ct new --minimal n1 'inport == "ap" && eth.src == '$AP_MAC→˓' && eth.dst == '$N1SUBNET6_MAC' && ip4.src == 10.1.1.5 && ip4.dst == 10.1.2.7 &→˓& ip.ttl == 64 && tcp.dst == 22'...ct_next(ct_state=new|trk) {
ip.ttl--;eth.src = fa:16:3e:19:9f:46;eth.dst = fa:16:3e:89:f2:36;ct_next(ct_state=new|trk) {
output("cp");};
};
This succeeds, as you can see since there is an output action.
• VM a initiates a new Telnet connection to c:
$ ovn-trace --ct new --ct new --minimal n1 'inport == "ap" && eth.src == '$AP_MAC→˓' && eth.dst == '$N1SUBNET6_MAC' && ip4.src == 10.1.1.5 && ip4.dst == 10.1.2.7 &→˓& ip.ttl == 64 && tcp.dst == 23'ct_next(ct_state=new|trk) {
ip.ttl--;eth.src = fa:16:3e:19:9f:46;eth.dst = fa:16:3e:89:f2:36;ct_next(ct_state=new|trk);
};
This fails, as you can see from the lack of an output action.
• VM a replies to a packet that is part of a Telnet connection originally initiated by c:
$ ovn-trace --ct est,rpl --ct est,rpl --minimal n1 'inport == "ap" && eth.src == '→˓$AP_MAC' && eth.dst == '$N1SUBNET6_MAC' && ip4.src == 10.1.1.5 && ip4.dst == 10.→˓1.2.7 && ip.ttl == 64 && tcp.dst == 23'...ct_next(ct_state=est|rpl|trk) {
ip.ttl--;eth.src = fa:16:3e:19:9f:46;eth.dst = fa:16:3e:89:f2:36;ct_next(ct_state=est|rpl|trk) {
output("cp");};
};
96 Chapter 3. Tutorials
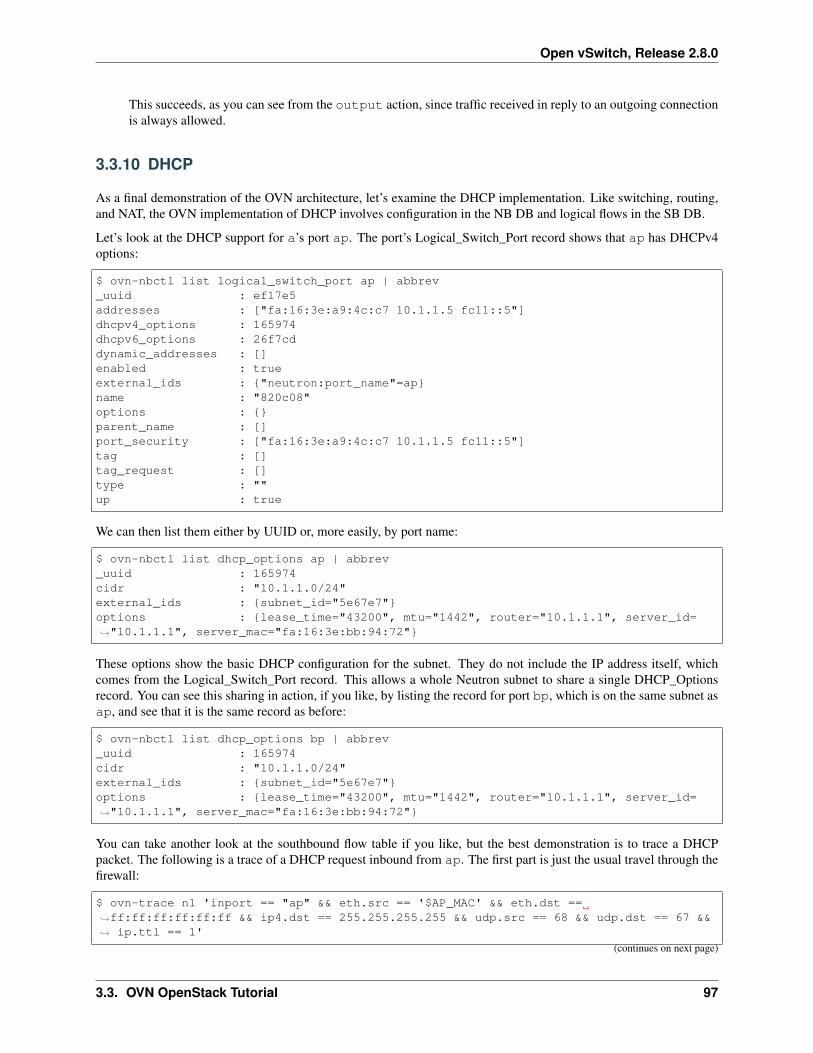
Open vSwitch, Release 2.8.0
This succeeds, as you can see from the output action, since traffic received in reply to an outgoing connectionis always allowed.
3.3.10 DHCP
As a final demonstration of the OVN architecture, let’s examine the DHCP implementation. Like switching, routing,and NAT, the OVN implementation of DHCP involves configuration in the NB DB and logical flows in the SB DB.
Let’s look at the DHCP support for a’s port ap. The port’s Logical_Switch_Port record shows that ap has DHCPv4options:
$ ovn-nbctl list logical_switch_port ap | abbrev_uuid : ef17e5addresses : ["fa:16:3e:a9:4c:c7 10.1.1.5 fc11::5"]dhcpv4_options : 165974dhcpv6_options : 26f7cddynamic_addresses : []enabled : trueexternal_ids : {"neutron:port_name"=ap}name : "820c08"options : {}parent_name : []port_security : ["fa:16:3e:a9:4c:c7 10.1.1.5 fc11::5"]tag : []tag_request : []type : ""up : true
We can then list them either by UUID or, more easily, by port name:
$ ovn-nbctl list dhcp_options ap | abbrev_uuid : 165974cidr : "10.1.1.0/24"external_ids : {subnet_id="5e67e7"}options : {lease_time="43200", mtu="1442", router="10.1.1.1", server_id=→˓"10.1.1.1", server_mac="fa:16:3e:bb:94:72"}
These options show the basic DHCP configuration for the subnet. They do not include the IP address itself, whichcomes from the Logical_Switch_Port record. This allows a whole Neutron subnet to share a single DHCP_Optionsrecord. You can see this sharing in action, if you like, by listing the record for port bp, which is on the same subnet asap, and see that it is the same record as before:
$ ovn-nbctl list dhcp_options bp | abbrev_uuid : 165974cidr : "10.1.1.0/24"external_ids : {subnet_id="5e67e7"}options : {lease_time="43200", mtu="1442", router="10.1.1.1", server_id=→˓"10.1.1.1", server_mac="fa:16:3e:bb:94:72"}
You can take another look at the southbound flow table if you like, but the best demonstration is to trace a DHCPpacket. The following is a trace of a DHCP request inbound from ap. The first part is just the usual travel through thefirewall:
$ ovn-trace n1 'inport == "ap" && eth.src == '$AP_MAC' && eth.dst ==→˓ff:ff:ff:ff:ff:ff && ip4.dst == 255.255.255.255 && udp.src == 68 && udp.dst == 67 &&→˓ ip.ttl == 1'
(continues on next page)
3.3. OVN OpenStack Tutorial 97
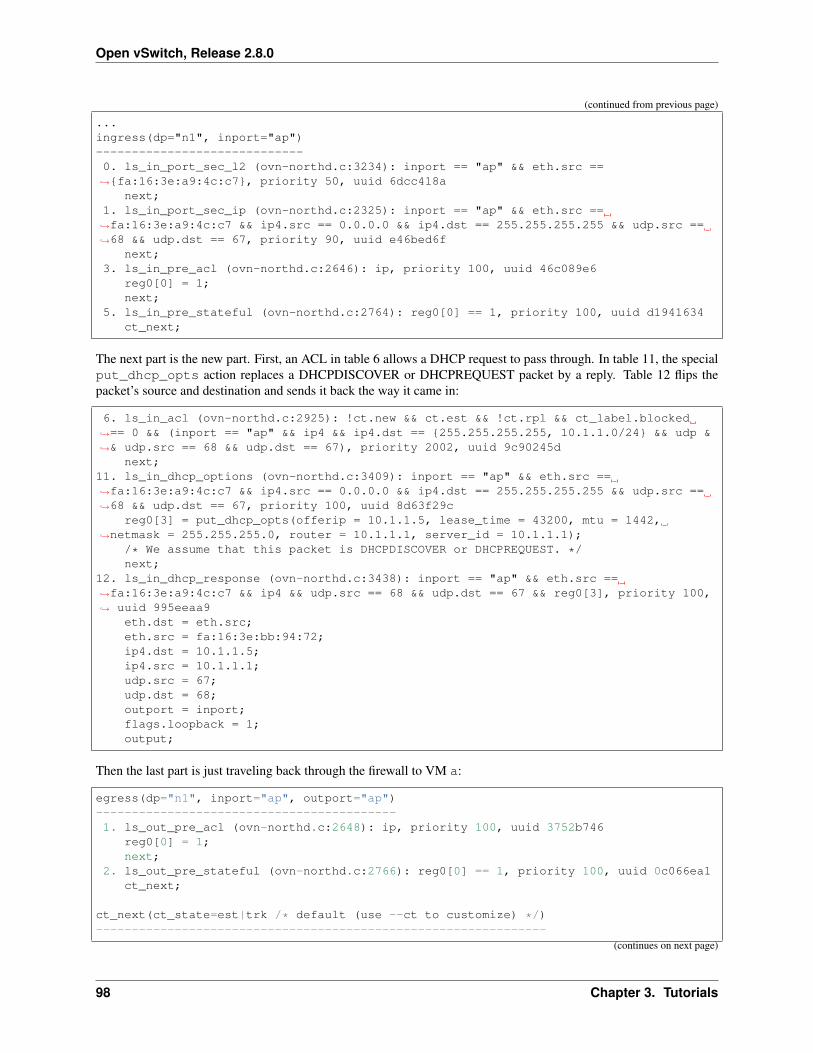
Open vSwitch, Release 2.8.0
(continued from previous page)
...ingress(dp="n1", inport="ap")-----------------------------0. ls_in_port_sec_l2 (ovn-northd.c:3234): inport == "ap" && eth.src ==→˓{fa:16:3e:a9:4c:c7}, priority 50, uuid 6dcc418a
next;1. ls_in_port_sec_ip (ovn-northd.c:2325): inport == "ap" && eth.src ==→˓fa:16:3e:a9:4c:c7 && ip4.src == 0.0.0.0 && ip4.dst == 255.255.255.255 && udp.src ==→˓68 && udp.dst == 67, priority 90, uuid e46bed6f
next;3. ls_in_pre_acl (ovn-northd.c:2646): ip, priority 100, uuid 46c089e6
reg0[0] = 1;next;
5. ls_in_pre_stateful (ovn-northd.c:2764): reg0[0] == 1, priority 100, uuid d1941634ct_next;
The next part is the new part. First, an ACL in table 6 allows a DHCP request to pass through. In table 11, the specialput_dhcp_opts action replaces a DHCPDISCOVER or DHCPREQUEST packet by a reply. Table 12 flips thepacket’s source and destination and sends it back the way it came in:
6. ls_in_acl (ovn-northd.c:2925): !ct.new && ct.est && !ct.rpl && ct_label.blocked→˓== 0 && (inport == "ap" && ip4 && ip4.dst == {255.255.255.255, 10.1.1.0/24} && udp &→˓& udp.src == 68 && udp.dst == 67), priority 2002, uuid 9c90245d
next;11. ls_in_dhcp_options (ovn-northd.c:3409): inport == "ap" && eth.src ==→˓fa:16:3e:a9:4c:c7 && ip4.src == 0.0.0.0 && ip4.dst == 255.255.255.255 && udp.src ==→˓68 && udp.dst == 67, priority 100, uuid 8d63f29c
reg0[3] = put_dhcp_opts(offerip = 10.1.1.5, lease_time = 43200, mtu = 1442,→˓netmask = 255.255.255.0, router = 10.1.1.1, server_id = 10.1.1.1);
/* We assume that this packet is DHCPDISCOVER or DHCPREQUEST. */next;
12. ls_in_dhcp_response (ovn-northd.c:3438): inport == "ap" && eth.src ==→˓fa:16:3e:a9:4c:c7 && ip4 && udp.src == 68 && udp.dst == 67 && reg0[3], priority 100,→˓ uuid 995eeaa9
eth.dst = eth.src;eth.src = fa:16:3e:bb:94:72;ip4.dst = 10.1.1.5;ip4.src = 10.1.1.1;udp.src = 67;udp.dst = 68;outport = inport;flags.loopback = 1;output;
Then the last part is just traveling back through the firewall to VM a:
egress(dp="n1", inport="ap", outport="ap")------------------------------------------1. ls_out_pre_acl (ovn-northd.c:2648): ip, priority 100, uuid 3752b746
reg0[0] = 1;next;
2. ls_out_pre_stateful (ovn-northd.c:2766): reg0[0] == 1, priority 100, uuid 0c066ea1ct_next;
ct_next(ct_state=est|trk /* default (use --ct to customize) */)---------------------------------------------------------------
(continues on next page)
98 Chapter 3. Tutorials
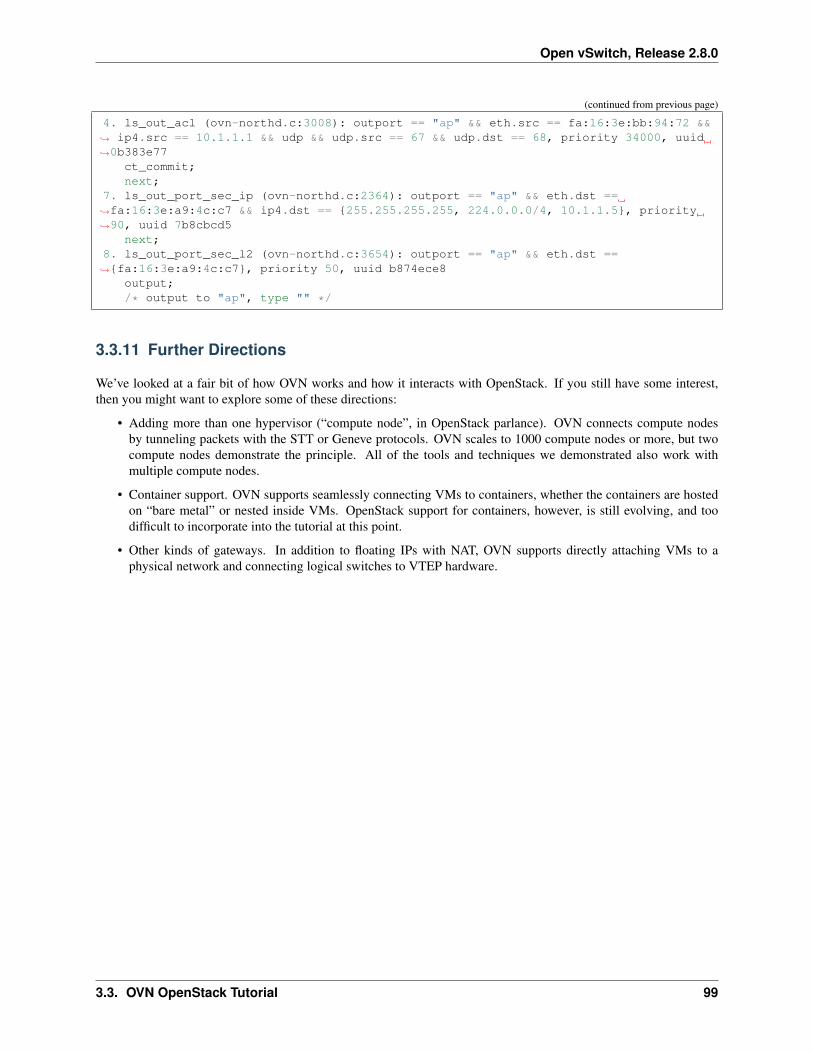
Open vSwitch, Release 2.8.0
(continued from previous page)
4. ls_out_acl (ovn-northd.c:3008): outport == "ap" && eth.src == fa:16:3e:bb:94:72 &&→˓ ip4.src == 10.1.1.1 && udp && udp.src == 67 && udp.dst == 68, priority 34000, uuid→˓0b383e77
ct_commit;next;
7. ls_out_port_sec_ip (ovn-northd.c:2364): outport == "ap" && eth.dst ==→˓fa:16:3e:a9:4c:c7 && ip4.dst == {255.255.255.255, 224.0.0.0/4, 10.1.1.5}, priority→˓90, uuid 7b8cbcd5
next;8. ls_out_port_sec_l2 (ovn-northd.c:3654): outport == "ap" && eth.dst ==→˓{fa:16:3e:a9:4c:c7}, priority 50, uuid b874ece8
output;/* output to "ap", type "" */
3.3.11 Further Directions
We’ve looked at a fair bit of how OVN works and how it interacts with OpenStack. If you still have some interest,then you might want to explore some of these directions:
• Adding more than one hypervisor (“compute node”, in OpenStack parlance). OVN connects compute nodesby tunneling packets with the STT or Geneve protocols. OVN scales to 1000 compute nodes or more, but twocompute nodes demonstrate the principle. All of the tools and techniques we demonstrated also work withmultiple compute nodes.
• Container support. OVN supports seamlessly connecting VMs to containers, whether the containers are hostedon “bare metal” or nested inside VMs. OpenStack support for containers, however, is still evolving, and toodifficult to incorporate into the tutorial at this point.
• Other kinds of gateways. In addition to floating IPs with NAT, OVN supports directly attaching VMs to aphysical network and connecting logical switches to VTEP hardware.
3.3. OVN OpenStack Tutorial 99

Open vSwitch, Release 2.8.0
100 Chapter 3. Tutorials
CHAPTER 4
Deep Dive
How Open vSwitch and OVN are implemented and, where necessary, why it was implemented that way.
4.1 OVS
4.1.1 Design Decisions In Open vSwitch
This document describes design decisions that went into implementing Open vSwitch. While we believe these to bereasonable decisions, it is impossible to predict how Open vSwitch will be used in all environments. Understandingassumptions made by Open vSwitch is critical to a successful deployment. The end of this document contains contactinformation that can be used to let us know how we can make Open vSwitch more generally useful.
Asynchronous Messages
Over time, Open vSwitch has added many knobs that control whether a given controller receives OpenFlow asyn-chronous messages. This section describes how all of these features interact.
First, a service controller never receives any asynchronous messages unless it changes its miss_send_len from theservice controller default of zero in one of the following ways:
• Sending an OFPT_SET_CONFIG message with nonzero miss_send_len.
• Sending any NXT_SET_ASYNC_CONFIG message: as a side effect, this message changes themiss_send_len to OFP_DEFAULT_MISS_SEND_LEN (128) for service controllers.
Second, OFPT_FLOW_REMOVED and NXT_FLOW_REMOVED messages are generated only if the flow that was re-moved had the OFPFF_SEND_FLOW_REM flag set.
Third, OFPT_PACKET_IN and NXT_PACKET_IN messages are sent only to OpenFlow controller connections thathave the correct connection ID (see struct nx_controller_id and struct nx_action_controller):
• For packet-in messages generated by a NXAST_CONTROLLER action, the controller ID specified in the action.
101
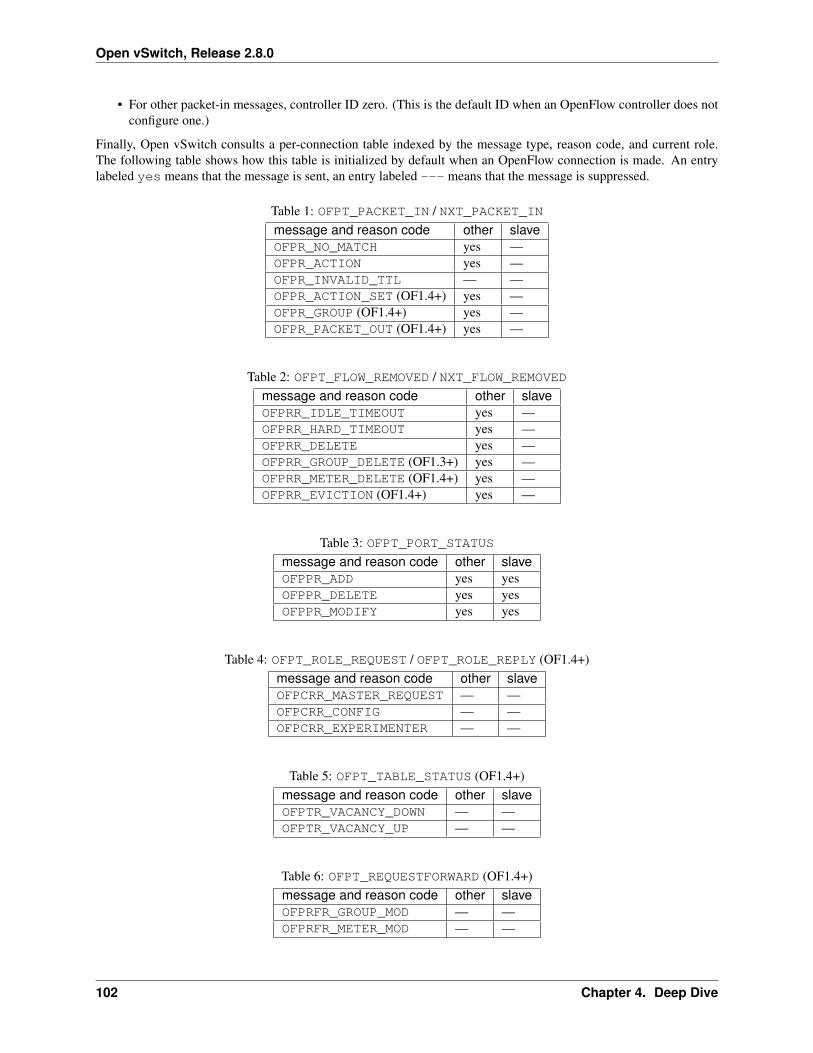
Open vSwitch, Release 2.8.0
• For other packet-in messages, controller ID zero. (This is the default ID when an OpenFlow controller does notconfigure one.)
Finally, Open vSwitch consults a per-connection table indexed by the message type, reason code, and current role.The following table shows how this table is initialized by default when an OpenFlow connection is made. An entrylabeled yes means that the message is sent, an entry labeled --- means that the message is suppressed.
Table 1: OFPT_PACKET_IN / NXT_PACKET_INmessage and reason code other slaveOFPR_NO_MATCH yes —OFPR_ACTION yes —OFPR_INVALID_TTL — —OFPR_ACTION_SET (OF1.4+) yes —OFPR_GROUP (OF1.4+) yes —OFPR_PACKET_OUT (OF1.4+) yes —
Table 2: OFPT_FLOW_REMOVED / NXT_FLOW_REMOVEDmessage and reason code other slaveOFPRR_IDLE_TIMEOUT yes —OFPRR_HARD_TIMEOUT yes —OFPRR_DELETE yes —OFPRR_GROUP_DELETE (OF1.3+) yes —OFPRR_METER_DELETE (OF1.4+) yes —OFPRR_EVICTION (OF1.4+) yes —
Table 3: OFPT_PORT_STATUSmessage and reason code other slaveOFPPR_ADD yes yesOFPPR_DELETE yes yesOFPPR_MODIFY yes yes
Table 4: OFPT_ROLE_REQUEST / OFPT_ROLE_REPLY (OF1.4+)message and reason code other slaveOFPCRR_MASTER_REQUEST — —OFPCRR_CONFIG — —OFPCRR_EXPERIMENTER — —
Table 5: OFPT_TABLE_STATUS (OF1.4+)message and reason code other slaveOFPTR_VACANCY_DOWN — —OFPTR_VACANCY_UP — —
Table 6: OFPT_REQUESTFORWARD (OF1.4+)message and reason code other slaveOFPRFR_GROUP_MOD — —OFPRFR_METER_MOD — —
102 Chapter 4. Deep Dive
Open vSwitch, Release 2.8.0
The NXT_SET_ASYNC_CONFIG message directly sets all of the values in this table for the current connection.The OFPC_INVALID_TTL_TO_CONTROLLER bit in the OFPT_SET_CONFIG message controls the setting forOFPR_INVALID_TTL for the “master” role.
OFPAT_ENQUEUE
The OpenFlow 1.0 specification requires the output port of the OFPAT_ENQUEUE action to “refer to a valid phys-ical port (i.e. < OFPP_MAX) or OFPP_IN_PORT”. Although OFPP_LOCAL is not less than OFPP_MAX, it is an‘internal’ port which can have QoS applied to it in Linux. Since we allow the OFPAT_ENQUEUE to apply to ‘inter-nal’ ports whose port numbers are less than OFPP_MAX, we interpret OFPP_LOCAL as a physical port and supportOFPAT_ENQUEUE on it as well.
OFPT_FLOW_MOD
The OpenFlow specification for the behavior of OFPT_FLOW_MOD is confusing. The following tables summarize theOpen vSwitch implementation of its behavior in the following categories:
“match on priority” Whether the flow_mod acts only on flows whose priority matches that included in theflow_mod message.
“match on out_port” Whether the flow_mod acts only on flows that output to the out_port included in theflow_mod message (if out_port is not OFPP_NONE). OpenFlow 1.1 and later have a similar feature (not listedseparately here) for out_group.
“match on flow_cookie”: Whether the flow_mod acts only on flows whose flow_cookie matches an optionalcontroller-specified value and mask.
“updates flow_cookie”: Whether the flow_mod changes the flow_cookie of the flow or flows that it matchesto the flow_cookie included in the flow_mod message.
“updates OFPFF_ flags”: Whether the flow_mod changes the OFPFF_SEND_FLOW_REM flag of the flow or flowsthat it matches to the setting included in the flags of the flow_mod message.
“honors OFPFF_CHECK_OVERLAP”: Whether the OFPFF_CHECK_OVERLAP flag in the flow_mod is significant.
“updates idle_timeout” and “updates hard_timeout”: Whether the idle_timeout and hard_timeout inthe flow_mod, respectively, have an effect on the flow or flows matched by the flow_mod.
“updates idle timer”: Whether the flow_mod resets the per-flow timer that measures how long a flow has beenidle.
“updates hard timer”: Whether the flow_mod resets the per-flow timer that measures how long it has been since aflow was modified.
“zeros counters”: Whether the flow_mod resets per-flow packet and byte counters to zero.
“may add a new flow”: Whether the flow_modmay add a new flow to the flow table. (Obviously this is always truefor “add” commands but in some OpenFlow versions “modify” and “modify-strict” can also add new flows.)
“sends flow_removed message”: Whether the flow_mod generates a flow_removed message for the flow or flowsthat it affects.
An entry labeled yes means that the flow mod type does have the indicated behavior, --- means that it does not, anempty cell means that the property is not applicable, and other values are explained below the table.
4.1. OVS 103
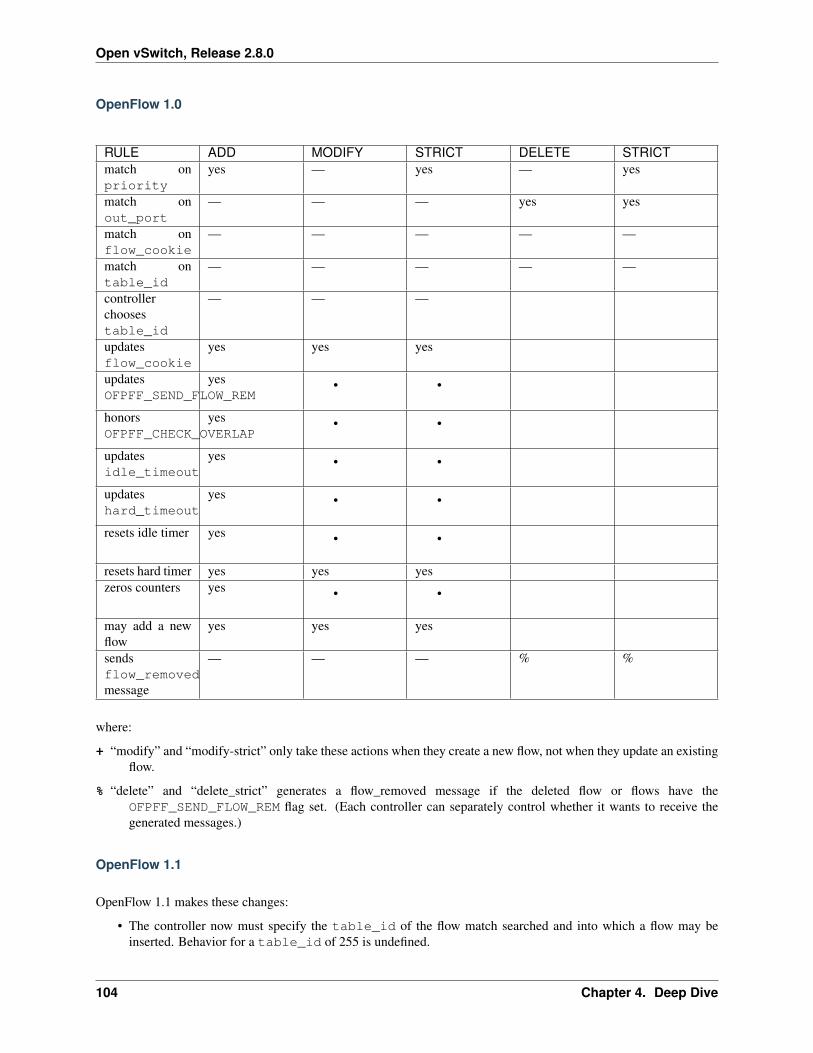
Open vSwitch, Release 2.8.0
OpenFlow 1.0
RULE ADD MODIFY STRICT DELETE STRICTmatch onpriority
yes — yes — yes
match onout_port
— — — yes yes
match onflow_cookie
— — — — —
match ontable_id
— — — — —
controllerchoosestable_id
— — —
updatesflow_cookie
yes yes yes
updatesOFPFF_SEND_FLOW_REM
yes • •
honorsOFPFF_CHECK_OVERLAP
yes • •
updatesidle_timeout
yes • •
updateshard_timeout
yes • •
resets idle timer yes • •
resets hard timer yes yes yeszeros counters yes • •
may add a newflow
yes yes yes
sendsflow_removedmessage
— — — % %
where:
+ “modify” and “modify-strict” only take these actions when they create a new flow, not when they update an existingflow.
% “delete” and “delete_strict” generates a flow_removed message if the deleted flow or flows have theOFPFF_SEND_FLOW_REM flag set. (Each controller can separately control whether it wants to receive thegenerated messages.)
OpenFlow 1.1
OpenFlow 1.1 makes these changes:
• The controller now must specify the table_id of the flow match searched and into which a flow may beinserted. Behavior for a table_id of 255 is undefined.
104 Chapter 4. Deep Dive
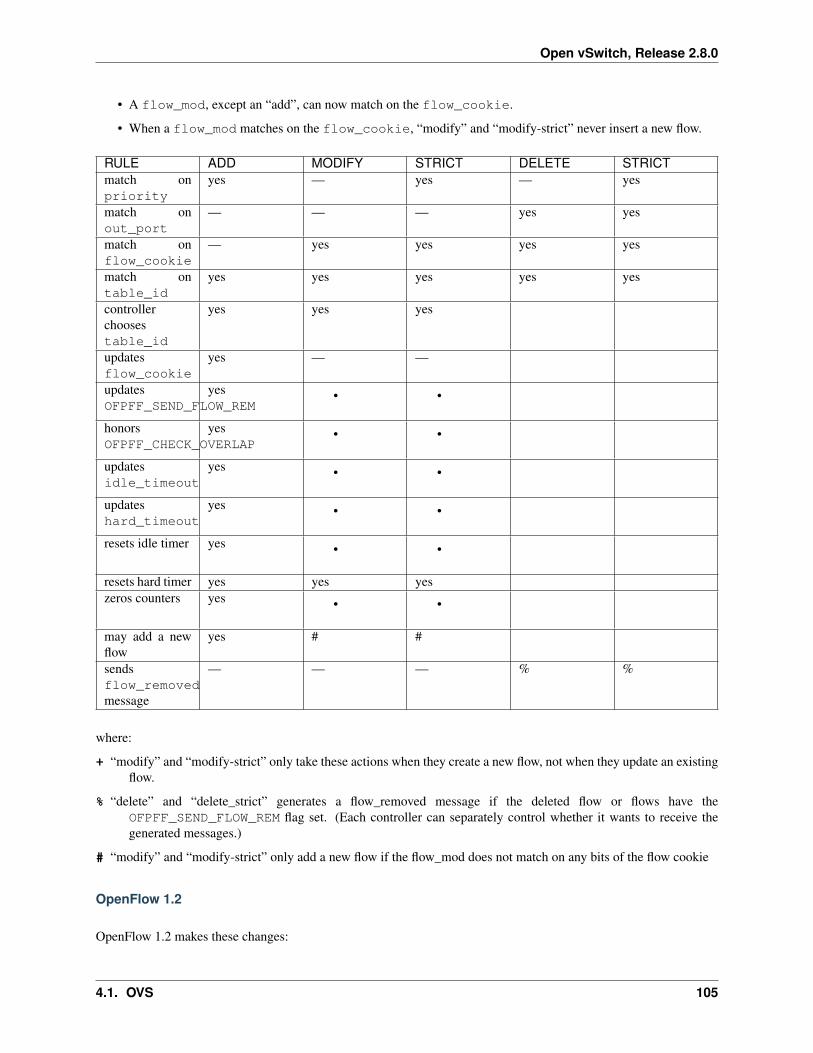
Open vSwitch, Release 2.8.0
• A flow_mod, except an “add”, can now match on the flow_cookie.
• When a flow_mod matches on the flow_cookie, “modify” and “modify-strict” never insert a new flow.
RULE ADD MODIFY STRICT DELETE STRICTmatch onpriority
yes — yes — yes
match onout_port
— — — yes yes
match onflow_cookie
— yes yes yes yes
match ontable_id
yes yes yes yes yes
controllerchoosestable_id
yes yes yes
updatesflow_cookie
yes — —
updatesOFPFF_SEND_FLOW_REM
yes • •
honorsOFPFF_CHECK_OVERLAP
yes • •
updatesidle_timeout
yes • •
updateshard_timeout
yes • •
resets idle timer yes • •
resets hard timer yes yes yeszeros counters yes • •
may add a newflow
yes # #
sendsflow_removedmessage
— — — % %
where:
+ “modify” and “modify-strict” only take these actions when they create a new flow, not when they update an existingflow.
% “delete” and “delete_strict” generates a flow_removed message if the deleted flow or flows have theOFPFF_SEND_FLOW_REM flag set. (Each controller can separately control whether it wants to receive thegenerated messages.)
# “modify” and “modify-strict” only add a new flow if the flow_mod does not match on any bits of the flow cookie
OpenFlow 1.2
OpenFlow 1.2 makes these changes:
4.1. OVS 105
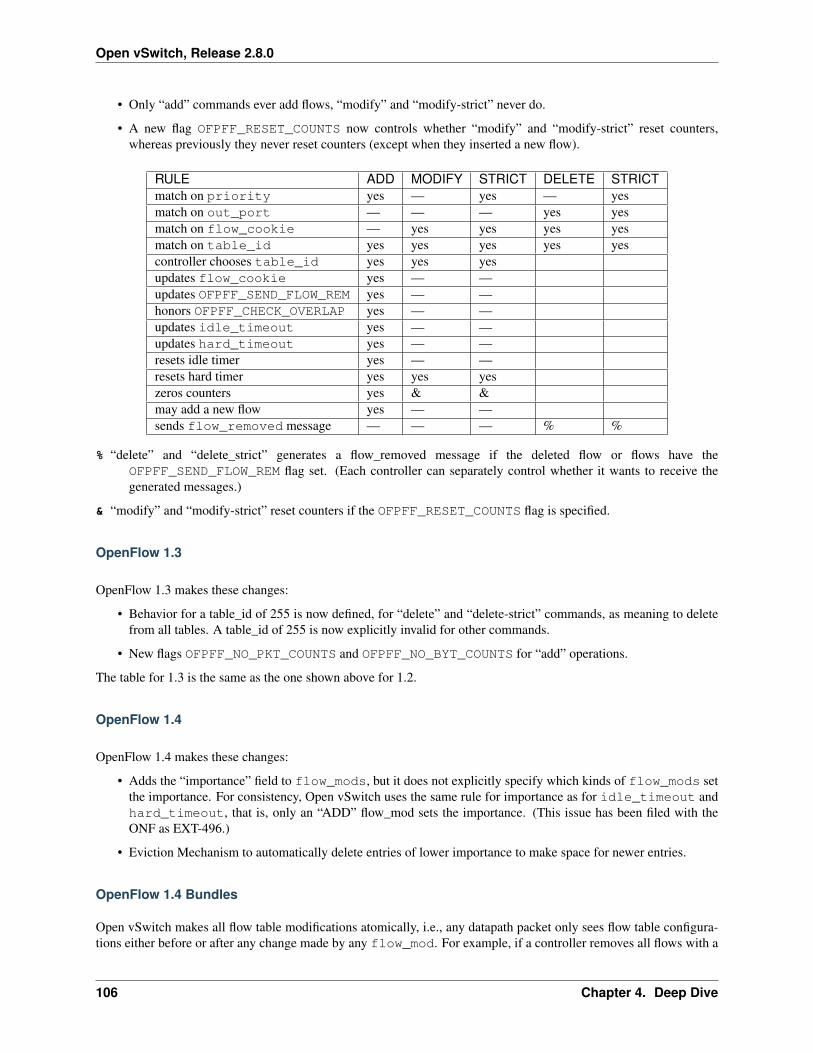
Open vSwitch, Release 2.8.0
• Only “add” commands ever add flows, “modify” and “modify-strict” never do.
• A new flag OFPFF_RESET_COUNTS now controls whether “modify” and “modify-strict” reset counters,whereas previously they never reset counters (except when they inserted a new flow).
RULE ADD MODIFY STRICT DELETE STRICTmatch on priority yes — yes — yesmatch on out_port — — — yes yesmatch on flow_cookie — yes yes yes yesmatch on table_id yes yes yes yes yescontroller chooses table_id yes yes yesupdates flow_cookie yes — —updates OFPFF_SEND_FLOW_REM yes — —honors OFPFF_CHECK_OVERLAP yes — —updates idle_timeout yes — —updates hard_timeout yes — —resets idle timer yes — —resets hard timer yes yes yeszeros counters yes & &may add a new flow yes — —sends flow_removed message — — — % %
% “delete” and “delete_strict” generates a flow_removed message if the deleted flow or flows have theOFPFF_SEND_FLOW_REM flag set. (Each controller can separately control whether it wants to receive thegenerated messages.)
& “modify” and “modify-strict” reset counters if the OFPFF_RESET_COUNTS flag is specified.
OpenFlow 1.3
OpenFlow 1.3 makes these changes:
• Behavior for a table_id of 255 is now defined, for “delete” and “delete-strict” commands, as meaning to deletefrom all tables. A table_id of 255 is now explicitly invalid for other commands.
• New flags OFPFF_NO_PKT_COUNTS and OFPFF_NO_BYT_COUNTS for “add” operations.
The table for 1.3 is the same as the one shown above for 1.2.
OpenFlow 1.4
OpenFlow 1.4 makes these changes:
• Adds the “importance” field to flow_mods, but it does not explicitly specify which kinds of flow_mods setthe importance. For consistency, Open vSwitch uses the same rule for importance as for idle_timeout andhard_timeout, that is, only an “ADD” flow_mod sets the importance. (This issue has been filed with theONF as EXT-496.)
• Eviction Mechanism to automatically delete entries of lower importance to make space for newer entries.
OpenFlow 1.4 Bundles
Open vSwitch makes all flow table modifications atomically, i.e., any datapath packet only sees flow table configura-tions either before or after any change made by any flow_mod. For example, if a controller removes all flows with a
106 Chapter 4. Deep Dive
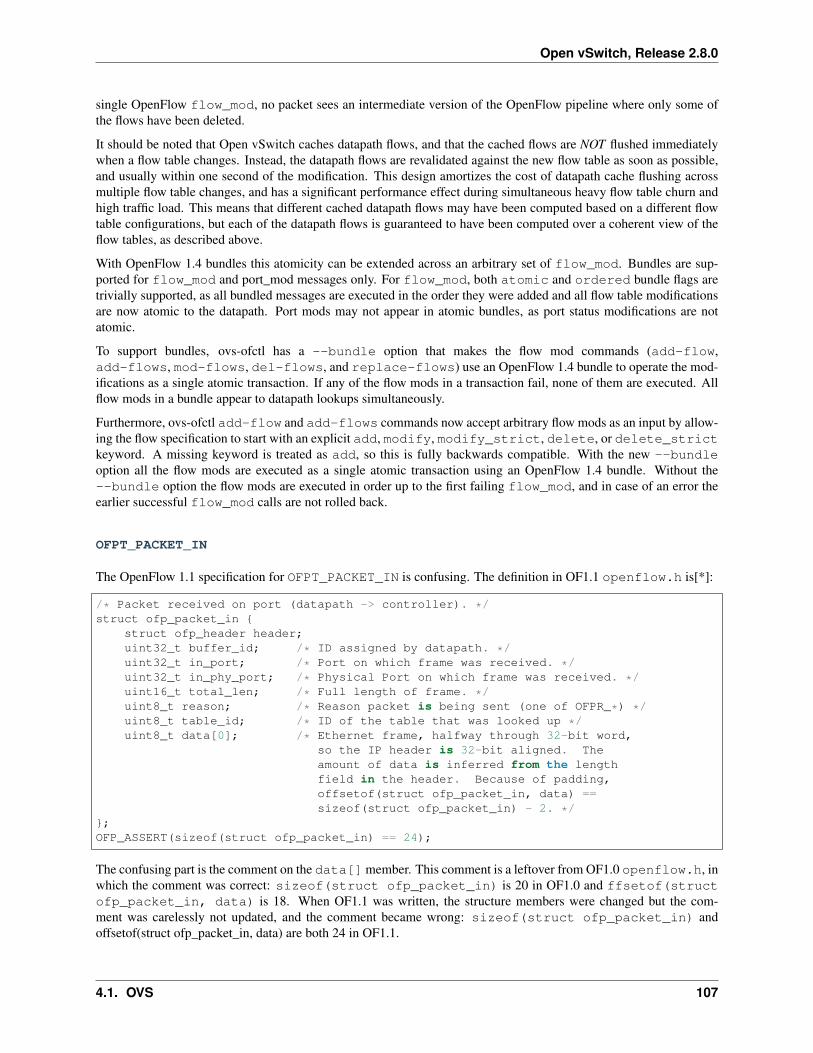
Open vSwitch, Release 2.8.0
single OpenFlow flow_mod, no packet sees an intermediate version of the OpenFlow pipeline where only some ofthe flows have been deleted.
It should be noted that Open vSwitch caches datapath flows, and that the cached flows are NOT flushed immediatelywhen a flow table changes. Instead, the datapath flows are revalidated against the new flow table as soon as possible,and usually within one second of the modification. This design amortizes the cost of datapath cache flushing acrossmultiple flow table changes, and has a significant performance effect during simultaneous heavy flow table churn andhigh traffic load. This means that different cached datapath flows may have been computed based on a different flowtable configurations, but each of the datapath flows is guaranteed to have been computed over a coherent view of theflow tables, as described above.
With OpenFlow 1.4 bundles this atomicity can be extended across an arbitrary set of flow_mod. Bundles are sup-ported for flow_mod and port_mod messages only. For flow_mod, both atomic and ordered bundle flags aretrivially supported, as all bundled messages are executed in the order they were added and all flow table modificationsare now atomic to the datapath. Port mods may not appear in atomic bundles, as port status modifications are notatomic.
To support bundles, ovs-ofctl has a --bundle option that makes the flow mod commands (add-flow,add-flows, mod-flows, del-flows, and replace-flows) use an OpenFlow 1.4 bundle to operate the mod-ifications as a single atomic transaction. If any of the flow mods in a transaction fail, none of them are executed. Allflow mods in a bundle appear to datapath lookups simultaneously.
Furthermore, ovs-ofctl add-flow and add-flows commands now accept arbitrary flow mods as an input by allow-ing the flow specification to start with an explicit add, modify, modify_strict, delete, or delete_strictkeyword. A missing keyword is treated as add, so this is fully backwards compatible. With the new --bundleoption all the flow mods are executed as a single atomic transaction using an OpenFlow 1.4 bundle. Without the--bundle option the flow mods are executed in order up to the first failing flow_mod, and in case of an error theearlier successful flow_mod calls are not rolled back.
OFPT_PACKET_IN
The OpenFlow 1.1 specification for OFPT_PACKET_IN is confusing. The definition in OF1.1 openflow.h is[*]:
/* Packet received on port (datapath -> controller). */struct ofp_packet_in {
struct ofp_header header;uint32_t buffer_id; /* ID assigned by datapath. */uint32_t in_port; /* Port on which frame was received. */uint32_t in_phy_port; /* Physical Port on which frame was received. */uint16_t total_len; /* Full length of frame. */uint8_t reason; /* Reason packet is being sent (one of OFPR_*) */uint8_t table_id; /* ID of the table that was looked up */uint8_t data[0]; /* Ethernet frame, halfway through 32-bit word,
so the IP header is 32-bit aligned. Theamount of data is inferred from the lengthfield in the header. Because of padding,offsetof(struct ofp_packet_in, data) ==sizeof(struct ofp_packet_in) - 2. */
};OFP_ASSERT(sizeof(struct ofp_packet_in) == 24);
The confusing part is the comment on the data[]member. This comment is a leftover from OF1.0 openflow.h, inwhich the comment was correct: sizeof(struct ofp_packet_in) is 20 in OF1.0 and ffsetof(structofp_packet_in, data) is 18. When OF1.1 was written, the structure members were changed but the com-ment was carelessly not updated, and the comment became wrong: sizeof(struct ofp_packet_in) andoffsetof(struct ofp_packet_in, data) are both 24 in OF1.1.
4.1. OVS 107
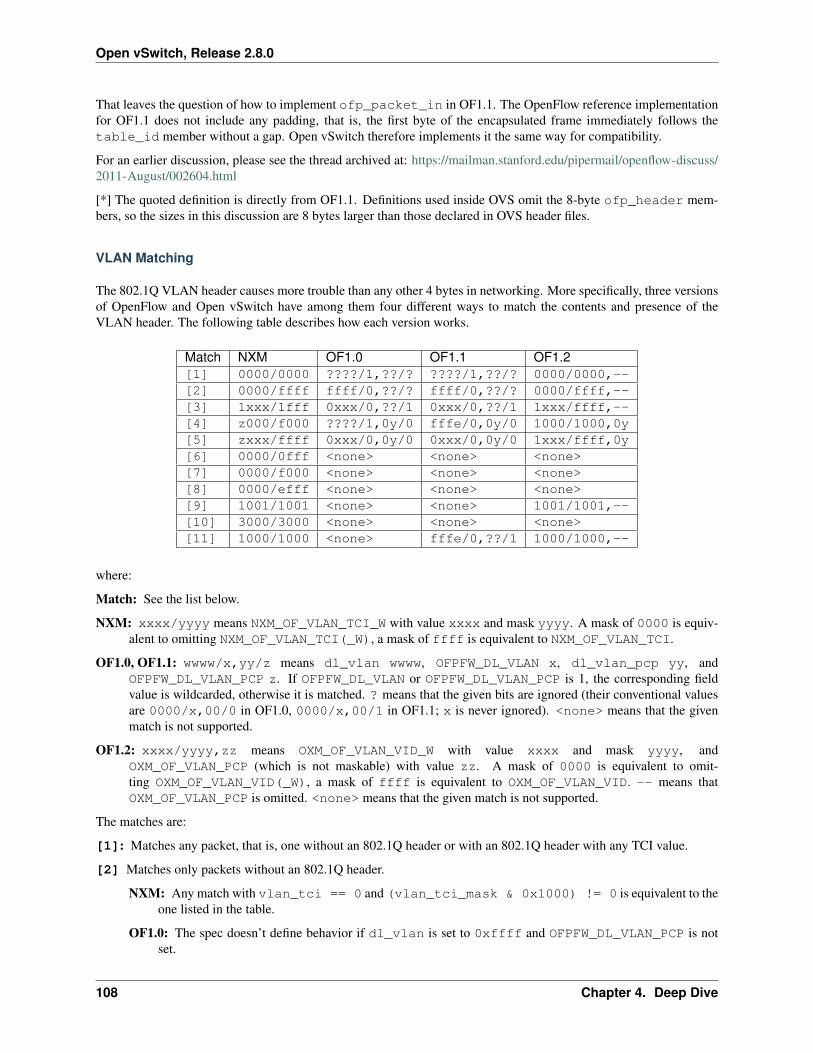
Open vSwitch, Release 2.8.0
That leaves the question of how to implement ofp_packet_in in OF1.1. The OpenFlow reference implementationfor OF1.1 does not include any padding, that is, the first byte of the encapsulated frame immediately follows thetable_id member without a gap. Open vSwitch therefore implements it the same way for compatibility.
For an earlier discussion, please see the thread archived at: https://mailman.stanford.edu/pipermail/openflow-discuss/2011-August/002604.html
[*] The quoted definition is directly from OF1.1. Definitions used inside OVS omit the 8-byte ofp_header mem-bers, so the sizes in this discussion are 8 bytes larger than those declared in OVS header files.
VLAN Matching
The 802.1Q VLAN header causes more trouble than any other 4 bytes in networking. More specifically, three versionsof OpenFlow and Open vSwitch have among them four different ways to match the contents and presence of theVLAN header. The following table describes how each version works.
Match NXM OF1.0 OF1.1 OF1.2[1] 0000/0000 ????/1,??/? ????/1,??/? 0000/0000,--[2] 0000/ffff ffff/0,??/? ffff/0,??/? 0000/ffff,--[3] 1xxx/1fff 0xxx/0,??/1 0xxx/0,??/1 1xxx/ffff,--[4] z000/f000 ????/1,0y/0 fffe/0,0y/0 1000/1000,0y[5] zxxx/ffff 0xxx/0,0y/0 0xxx/0,0y/0 1xxx/ffff,0y[6] 0000/0fff <none> <none> <none>[7] 0000/f000 <none> <none> <none>[8] 0000/efff <none> <none> <none>[9] 1001/1001 <none> <none> 1001/1001,--[10] 3000/3000 <none> <none> <none>[11] 1000/1000 <none> fffe/0,??/1 1000/1000,--
where:
Match: See the list below.
NXM: xxxx/yyyy means NXM_OF_VLAN_TCI_W with value xxxx and mask yyyy. A mask of 0000 is equiv-alent to omitting NXM_OF_VLAN_TCI(_W), a mask of ffff is equivalent to NXM_OF_VLAN_TCI.
OF1.0, OF1.1: wwww/x,yy/z means dl_vlan wwww, OFPFW_DL_VLAN x, dl_vlan_pcp yy, andOFPFW_DL_VLAN_PCP z. If OFPFW_DL_VLAN or OFPFW_DL_VLAN_PCP is 1, the corresponding fieldvalue is wildcarded, otherwise it is matched. ? means that the given bits are ignored (their conventional valuesare 0000/x,00/0 in OF1.0, 0000/x,00/1 in OF1.1; x is never ignored). <none> means that the givenmatch is not supported.
OF1.2: xxxx/yyyy,zz means OXM_OF_VLAN_VID_W with value xxxx and mask yyyy, andOXM_OF_VLAN_PCP (which is not maskable) with value zz. A mask of 0000 is equivalent to omit-ting OXM_OF_VLAN_VID(_W), a mask of ffff is equivalent to OXM_OF_VLAN_VID. -- means thatOXM_OF_VLAN_PCP is omitted. <none> means that the given match is not supported.
The matches are:
[1]: Matches any packet, that is, one without an 802.1Q header or with an 802.1Q header with any TCI value.
[2] Matches only packets without an 802.1Q header.
NXM: Any match with vlan_tci == 0 and (vlan_tci_mask & 0x1000) != 0 is equivalent to theone listed in the table.
OF1.0: The spec doesn’t define behavior if dl_vlan is set to 0xffff and OFPFW_DL_VLAN_PCP is notset.
108 Chapter 4. Deep Dive
Open vSwitch, Release 2.8.0
OF1.1: The spec says explicitly to ignore dl_vlan_pcp when dl_vlan is set to 0xffff.
OF1.2: The spec doesn’t say what should happen if vlan_vid == 0 and (vlan_vid_mask &0x1000) != 0 but vlan_vid_mask != 0x1000, but it would be straightforward to also interpretas [2].
[3] Matches only packets that have an 802.1Q header with VID xxx (and any PCP).
[4] Matches only packets that have an 802.1Q header with PCP y (and any VID).
NXM: z is (y << 1) | 1.
OF1.0: The spec isn’t very clear, but OVS implements it this way.
OF1.2: Presumably other masks such that (vlan_vid_mask & 0x1fff) == 0x1000would also work,but the spec doesn’t define their behavior.
[5] Matches only packets that have an 802.1Q header with VID xxx and PCP y.
NXM: z is ((y << 1) | 1).
OF1.2: Presumably other masks such that (vlan_vid_mask & 0x1fff) == 0x1fffwould also work.
[6] Matches packets with no 802.1Q header or with an 802.1Q header with a VID of 0. Only possible with NXM.
[7] Matches packets with no 802.1Q header or with an 802.1Q header with a PCP of 0. Only possible with NXM.
[8] Matches packets with no 802.1Q header or with an 802.1Q header with both VID and PCP of 0. Only possiblewith NXM.
[9] Matches only packets that have an 802.1Q header with an odd-numbered VID (and any PCP). Only possiblewith NXM and OF1.2. (This is just an example; one can match on any desired VID bit pattern.)
[10] Matches only packets that have an 802.1Q header with an odd-numbered PCP (and any VID). Only possiblewith NXM. (This is just an example; one can match on any desired VID bit pattern.)
[11] Matches any packet with an 802.1Q header, regardless of VID or PCP.
Additional notes:
OF1.2: The top three bits of OXM_OF_VLAN_VID are fixed to zero, so bits 13, 14, and 15 in the masks listed in thetable may be set to arbitrary values, as long as the corresponding value bits are also zero. The suggested ffffmask for [2], [3], and [5] allows a shorter OXM representation (the mask is omitted) than the minimal 1fffmask.
Flow Cookies
OpenFlow 1.0 and later versions have the concept of a “flow cookie”, which is a 64-bit integer value attached to eachflow. The treatment of the flow cookie has varied greatly across OpenFlow versions, however.
In OpenFlow 1.0:
• OFPFC_ADD set the cookie in the flow that it added.
• OFPFC_MODIFY and OFPFC_MODIFY_STRICT updated the cookie for the flow or flows that it modified.
• OFPST_FLOW messages included the flow cookie.
• OFPT_FLOW_REMOVED messages reported the cookie of the flow that was removed.
OpenFlow 1.1 made the following changes:
4.1. OVS 109
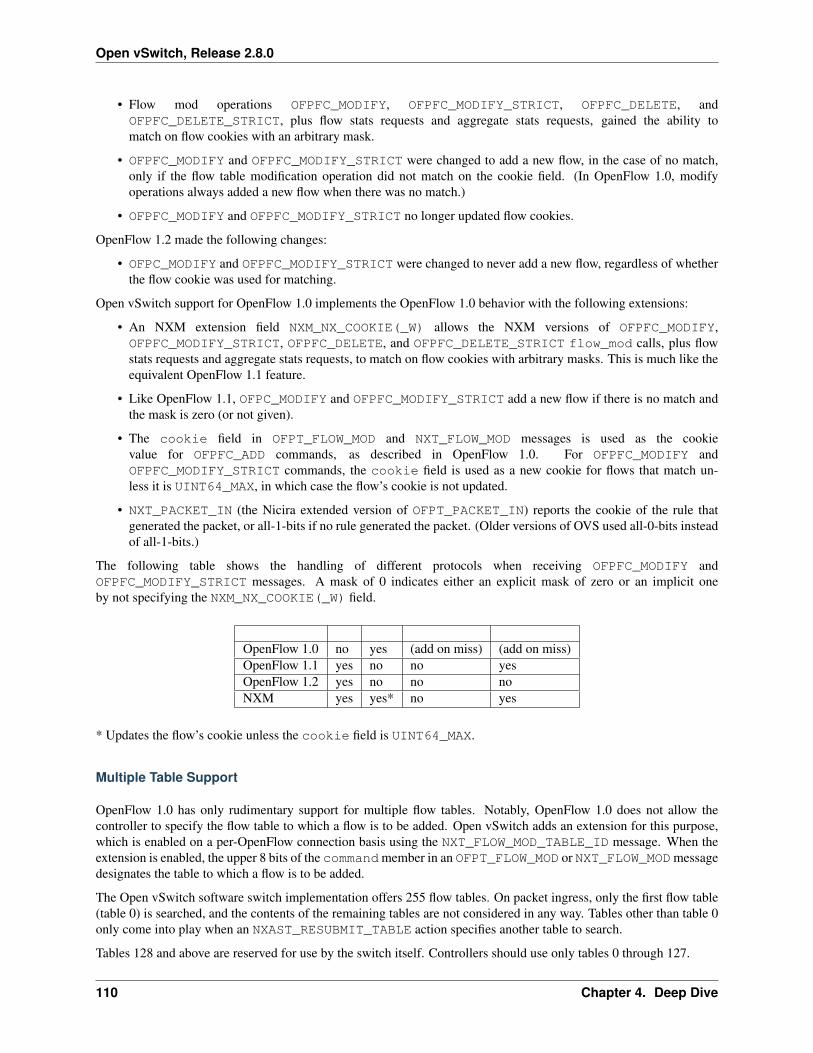
Open vSwitch, Release 2.8.0
• Flow mod operations OFPFC_MODIFY, OFPFC_MODIFY_STRICT, OFPFC_DELETE, andOFPFC_DELETE_STRICT, plus flow stats requests and aggregate stats requests, gained the ability tomatch on flow cookies with an arbitrary mask.
• OFPFC_MODIFY and OFPFC_MODIFY_STRICT were changed to add a new flow, in the case of no match,only if the flow table modification operation did not match on the cookie field. (In OpenFlow 1.0, modifyoperations always added a new flow when there was no match.)
• OFPFC_MODIFY and OFPFC_MODIFY_STRICT no longer updated flow cookies.
OpenFlow 1.2 made the following changes:
• OFPC_MODIFY and OFPFC_MODIFY_STRICT were changed to never add a new flow, regardless of whetherthe flow cookie was used for matching.
Open vSwitch support for OpenFlow 1.0 implements the OpenFlow 1.0 behavior with the following extensions:
• An NXM extension field NXM_NX_COOKIE(_W) allows the NXM versions of OFPFC_MODIFY,OFPFC_MODIFY_STRICT, OFPFC_DELETE, and OFPFC_DELETE_STRICT flow_mod calls, plus flowstats requests and aggregate stats requests, to match on flow cookies with arbitrary masks. This is much like theequivalent OpenFlow 1.1 feature.
• Like OpenFlow 1.1, OFPC_MODIFY and OFPFC_MODIFY_STRICT add a new flow if there is no match andthe mask is zero (or not given).
• The cookie field in OFPT_FLOW_MOD and NXT_FLOW_MOD messages is used as the cookievalue for OFPFC_ADD commands, as described in OpenFlow 1.0. For OFPFC_MODIFY andOFPFC_MODIFY_STRICT commands, the cookie field is used as a new cookie for flows that match un-less it is UINT64_MAX, in which case the flow’s cookie is not updated.
• NXT_PACKET_IN (the Nicira extended version of OFPT_PACKET_IN) reports the cookie of the rule thatgenerated the packet, or all-1-bits if no rule generated the packet. (Older versions of OVS used all-0-bits insteadof all-1-bits.)
The following table shows the handling of different protocols when receiving OFPFC_MODIFY andOFPFC_MODIFY_STRICT messages. A mask of 0 indicates either an explicit mask of zero or an implicit oneby not specifying the NXM_NX_COOKIE(_W) field.
OpenFlow 1.0 no yes (add on miss) (add on miss)OpenFlow 1.1 yes no no yesOpenFlow 1.2 yes no no noNXM yes yes* no yes
* Updates the flow’s cookie unless the cookie field is UINT64_MAX.
Multiple Table Support
OpenFlow 1.0 has only rudimentary support for multiple flow tables. Notably, OpenFlow 1.0 does not allow thecontroller to specify the flow table to which a flow is to be added. Open vSwitch adds an extension for this purpose,which is enabled on a per-OpenFlow connection basis using the NXT_FLOW_MOD_TABLE_ID message. When theextension is enabled, the upper 8 bits of the commandmember in an OFPT_FLOW_MOD or NXT_FLOW_MODmessagedesignates the table to which a flow is to be added.
The Open vSwitch software switch implementation offers 255 flow tables. On packet ingress, only the first flow table(table 0) is searched, and the contents of the remaining tables are not considered in any way. Tables other than table 0only come into play when an NXAST_RESUBMIT_TABLE action specifies another table to search.
Tables 128 and above are reserved for use by the switch itself. Controllers should use only tables 0 through 127.
110 Chapter 4. Deep Dive
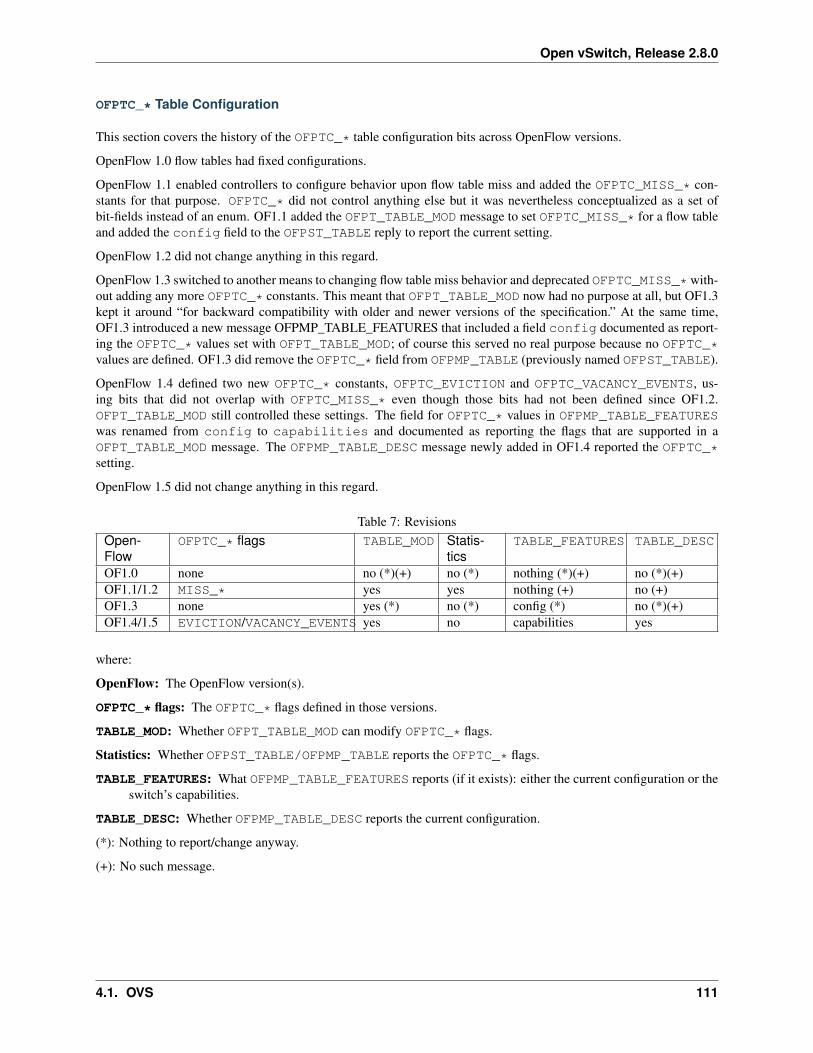
Open vSwitch, Release 2.8.0
OFPTC_* Table Configuration
This section covers the history of the OFPTC_* table configuration bits across OpenFlow versions.
OpenFlow 1.0 flow tables had fixed configurations.
OpenFlow 1.1 enabled controllers to configure behavior upon flow table miss and added the OFPTC_MISS_* con-stants for that purpose. OFPTC_* did not control anything else but it was nevertheless conceptualized as a set ofbit-fields instead of an enum. OF1.1 added the OFPT_TABLE_MOD message to set OFPTC_MISS_* for a flow tableand added the config field to the OFPST_TABLE reply to report the current setting.
OpenFlow 1.2 did not change anything in this regard.
OpenFlow 1.3 switched to another means to changing flow table miss behavior and deprecated OFPTC_MISS_*with-out adding any more OFPTC_* constants. This meant that OFPT_TABLE_MOD now had no purpose at all, but OF1.3kept it around “for backward compatibility with older and newer versions of the specification.” At the same time,OF1.3 introduced a new message OFPMP_TABLE_FEATURES that included a field config documented as report-ing the OFPTC_* values set with OFPT_TABLE_MOD; of course this served no real purpose because no OFPTC_*values are defined. OF1.3 did remove the OFPTC_* field from OFPMP_TABLE (previously named OFPST_TABLE).
OpenFlow 1.4 defined two new OFPTC_* constants, OFPTC_EVICTION and OFPTC_VACANCY_EVENTS, us-ing bits that did not overlap with OFPTC_MISS_* even though those bits had not been defined since OF1.2.OFPT_TABLE_MOD still controlled these settings. The field for OFPTC_* values in OFPMP_TABLE_FEATURESwas renamed from config to capabilities and documented as reporting the flags that are supported in aOFPT_TABLE_MOD message. The OFPMP_TABLE_DESC message newly added in OF1.4 reported the OFPTC_*setting.
OpenFlow 1.5 did not change anything in this regard.
Table 7: RevisionsOpen-Flow
OFPTC_* flags TABLE_MOD Statis-tics
TABLE_FEATURES TABLE_DESC
OF1.0 none no (*)(+) no (*) nothing (*)(+) no (*)(+)OF1.1/1.2 MISS_* yes yes nothing (+) no (+)OF1.3 none yes (*) no (*) config (*) no (*)(+)OF1.4/1.5 EVICTION/VACANCY_EVENTS yes no capabilities yes
where:
OpenFlow: The OpenFlow version(s).
OFPTC_* flags: The OFPTC_* flags defined in those versions.
TABLE_MOD: Whether OFPT_TABLE_MOD can modify OFPTC_* flags.
Statistics: Whether OFPST_TABLE/OFPMP_TABLE reports the OFPTC_* flags.
TABLE_FEATURES: What OFPMP_TABLE_FEATURES reports (if it exists): either the current configuration or theswitch’s capabilities.
TABLE_DESC: Whether OFPMP_TABLE_DESC reports the current configuration.
(*): Nothing to report/change anyway.
(+): No such message.
4.1. OVS 111
Open vSwitch, Release 2.8.0
IPv6
Open vSwitch supports stateless handling of IPv6 packets. Flows can be written to support matching TCP, UDP, andICMPv6 headers within an IPv6 packet. Deeper matching of some Neighbor Discovery messages is also supported.
IPv6 was not designed to interact well with middle-boxes. This, combined with Open vSwitch’s stateless nature, haveaffected the processing of IPv6 traffic, which is detailed below.
Extension Headers
The base IPv6 header is incredibly simple with the intention of only containing information relevant for routingpackets between two endpoints. IPv6 relies heavily on the use of extension headers to provide any other functionality.Unfortunately, the extension headers were designed in such a way that it is impossible to move to the next header(including the layer-4 payload) unless the current header is understood.
Open vSwitch will process the following extension headers and continue to the next header:
• Fragment (see the next section)
• AH (Authentication Header)
• Hop-by-Hop Options
• Routing
• Destination Options
When a header is encountered that is not in that list, it is considered “terminal”. A terminal header’s IPv6 protocolvalue is stored in nw_proto for matching purposes. If a terminal header is TCP, UDP, or ICMPv6, the packet willbe further processed in an attempt to extract layer-4 information.
Fragments
IPv6 requires that every link in the internet have an MTU of 1280 octets or greater (RFC 2460). As such, a terminalheader (as described above in “Extension Headers”) in the first fragment should generally be reachable. In this case,the terminal header’s IPv6 protocol type is stored in the nw_proto field for matching purposes. If a terminal headercannot be found in the first fragment (one with a fragment offset of zero), the nw_proto field is set to 0. Subsequentfragments (those with a non-zero fragment offset) have the nw_proto field set to the IPv6 protocol type for fragments(44).
Jumbograms
An IPv6 jumbogram (RFC 2675) is a packet containing a payload longer than 65,535 octets. A jumbogram is onlyrelevant in subnets with a link MTU greater than 65,575 octets, and are not required to be supported on nodes that donot connect to link with such large MTUs. Currently, Open vSwitch doesn’t process jumbograms.
In-Band Control
Motivation
An OpenFlow switch must establish and maintain a TCP network connection to its controller. There are two basicways to categorize the network that this connection traverses: either it is completely separate from the one that theswitch is otherwise controlling, or its path may overlap the network that the switch controls. We call the former case“out-of-band control”, the latter case “in-band control”.
112 Chapter 4. Deep Dive
Open vSwitch, Release 2.8.0
Out-of-band control has the following benefits:
• Simplicity: Out-of-band control slightly simplifies the switch implementation.
• Reliability: Excessive switch traffic volume cannot interfere with control traffic.
• Integrity: Machines not on the control network cannot impersonate a switch or a controller.
• Confidentiality: Machines not on the control network cannot snoop on control traffic.
In-band control, on the other hand, has the following advantages:
• No dedicated port: There is no need to dedicate a physical switch port to control, which is important on switchesthat have few ports (e.g. wireless routers, low-end embedded platforms).
• No dedicated network: There is no need to build and maintain a separate control network. This is important inmany environments because it reduces proliferation of switches and wiring.
Open vSwitch supports both out-of-band and in-band control. This section describes the principles behind in-bandcontrol. See the description of the Controller table in ovs-vswitchd.conf.db(5) to configure OVS for in-band control.
Principles
The fundamental principle of in-band control is that an OpenFlow switch must recognize and switch control trafficwithout involving the OpenFlow controller. All the details of implementing in-band control are special cases of thisprinciple.
The rationale for this principle is simple. If the switch does not handle in-band control traffic itself, then it will becaught in a contradiction: it must contact the controller, but it cannot, because only the controller can set up the flowsthat are needed to contact the controller.
The following points describe important special cases of this principle.
• In-band control must be implemented regardless of whether the switch is connected.
It is tempting to implement the in-band control rules only when the switch is not connected to the controller,using the reasoning that the controller should have complete control once it has established a connection withthe switch.
This does not work in practice. Consider the case where the switch is connected to the controller. Occasionallyit can happen that the controller forgets or otherwise needs to obtain the MAC address of the switch. To do so,the controller sends a broadcast ARP request. A switch that implements the in-band control rules only when it isdisconnected will then send an OFPT_PACKET_IN message up to the controller. The controller will be unableto respond, because it does not know the MAC address of the switch. This is a deadlock situation that can onlybe resolved by the switch noticing that its connection to the controller has hung and reconnecting.
• In-band control must override flows set up by the controller.
It is reasonable to assume that flows set up by the OpenFlow controller should take precedence over in-bandcontrol, on the basis that the controller should be in charge of the switch.
Again, this does not work in practice. Reasonable controller implementations may set up a “last resort” fallbackrule that wildcards every field and, e.g., sends it up to the controller or discards it. If a controller does that, thenit will isolate itself from the switch.
• The switch must recognize all control traffic.
The fundamental principle of in-band control states, in part, that a switch must recognize control traffic withoutinvolving the OpenFlow controller. More specifically, the switch must recognize all control traffic. “Falsenegatives”, that is, packets that constitute control traffic but that the switch does not recognize as control traffic,lead to control traffic storms.
4.1. OVS 113
Open vSwitch, Release 2.8.0
Consider an OpenFlow switch that only recognizes control packets sent to or from that switch. Now supposethat two switches of this type, named A and B, are connected to ports on an Ethernet hub (not a switch) and thatan OpenFlow controller is connected to a third hub port. In this setup, control traffic sent by switch A will beseen by switch B, which will send it to the controller as part of an OFPT_PACKET_IN message. Switch A willthen see the OFPT_PACKET_IN message’s packet, re-encapsulate it in another OFPT_PACKET_IN, and sendit to the controller. Switch B will then see that OFPT_PACKET_IN, and so on in an infinite loop.
Incidentally, the consequences of “false positives”, where packets that are not control traffic are neverthelessrecognized as control traffic, are much less severe. The controller will not be able to control their behavior, butthe network will remain in working order. False positives do constitute a security problem.
• The switch should use echo-requests to detect disconnection.
TCP will notice that a connection has hung, but this can take a considerable amount of time. For example, withdefault settings the Linux kernel TCP implementation will retransmit for between 13 and 30 minutes, depend-ing on the connection’s retransmission timeout, according to kernel documentation. This is far too long for aswitch to be disconnected, so an OpenFlow switch should implement its own connection timeout. OpenFlowOFPT_ECHO_REQUEST messages are the best way to do this, since they test the OpenFlow connection itself.
Implementation
This section describes how Open vSwitch implements in-band control. Correctly implementing in-band control hasproven difficult due to its many subtleties, and has thus gone through many iterations. Please read through andunderstand the reasoning behind the chosen rules before making modifications.
Open vSwitch implements in-band control as “hidden” flows, that is, flows that are not visible through OpenFlow,and at a higher priority than wildcarded flows can be set up through OpenFlow. This is done so that the OpenFlowcontroller cannot interfere with them and possibly break connectivity with its switches. It is possible to see all flows,including in-band ones, with the ovs-appctl “bridge/dump-flows” command.
The Open vSwitch implementation of in-band control can hide traffic to arbitrary “remotes”, where each remoteis one TCP port on one IP address. Currently the remotes are automatically configured as the in-band OpenFlowcontrollers plus the OVSDB managers, if any. (The latter is a requirement because OVSDB managers are responsiblefor configuring OpenFlow controllers, so if the manager cannot be reached then OpenFlow cannot be reconfigured.)
The following rules (with the OFPP_NORMAL action) are set up on any bridge that has any remotes:
(a) DHCP requests sent from the local port.
(b) ARP replies to the local port’s MAC address.
(c) ARP requests from the local port’s MAC address.
In-band also sets up the following rules for each unique next-hop MAC address for the remotes’ IPs (the “next hop” iseither the remote itself, if it is on a local subnet, or the gateway to reach the remote):
(d) ARP replies to the next hop’s MAC address.
(e) ARP requests from the next hop’s MAC address.
In-band also sets up the following rules for each unique remote IP address:
(f) ARP replies containing the remote’s IP address as a target.
(g) ARP requests containing the remote’s IP address as a source.
In-band also sets up the following rules for each unique remote (IP,port) pair:
(h) TCP traffic to the remote’s IP and port.
(i) TCP traffic from the remote’s IP and port.
114 Chapter 4. Deep Dive
Open vSwitch, Release 2.8.0
The goal of these rules is to be as narrow as possible to allow a switch to join a network and be able to communicatewith the remotes. As mentioned earlier, these rules have higher priority than the controller’s rules, so if they are toobroad, they may prevent the controller from implementing its policy. As such, in-band actively monitors some aspectsof flow and packet processing so that the rules can be made more precise.
In-band control monitors attempts to add flows into the datapath that could interfere with its duties. The datapath onlyallows exact match entries, so in-band control is able to be very precise about the flows it prevents. Flows that missin the datapath are sent to userspace to be processed, so preventing these flows from being cached in the “fast path”does not affect correctness. The only type of flow that is currently prevented is one that would prevent DHCP repliesfrom being seen by the local port. For example, a rule that forwarded all DHCP traffic to the controller would not beallowed, but one that forwarded to all ports (including the local port) would.
As mentioned earlier, packets that miss in the datapath are sent to the userspace for processing. The userspace hasits own flow table, the “classifier”, so in-band checks whether any special processing is needed before the classifier isconsulted. If a packet is a DHCP response to a request from the local port, the packet is forwarded to the local port,regardless of the flow table. Note that this requires L7 processing of DHCP replies to determine whether the ‘chaddr’field matches the MAC address of the local port.
It is interesting to note that for an L3-based in-band control mechanism, the majority of rules are devoted to ARPtraffic. At first glance, some of these rules appear redundant. However, each serves an important role. First, in order todetermine the MAC address of the remote side (controller or gateway) for other ARP rules, we must allow ARP trafficfor our local port with rules (b) and (c). If we are between a switch and its connection to the remote, we have to allowthe other switch’s ARP traffic to through. This is done with rules (d) and (e), since we do not know the addresses ofthe other switches a priori, but do know the remote’s or gateway’s. Finally, if the remote is running in a local guestVM that is not reached through the local port, the switch that is connected to the VM must allow ARP traffic based onthe remote’s IP address, since it will not know the MAC address of the local port that is sending the traffic or the MACaddress of the remote in the guest VM.
With a few notable exceptions below, in-band should work in most network setups. The following are considered“supported” in the current implementation:
• Locally Connected. The switch and remote are on the same subnet. This uses rules (a), (b), (c), (h), and (i).
• Reached through Gateway. The switch and remote are on different subnets and must go through a gateway. Thisuses rules (a), (b), (c), (h), and (i).
• Between Switch and Remote. This switch is between another switch and the remote, and we want to allow theother switch’s traffic through. This uses rules (d), (e), (h), and (i). It uses (b) and (c) indirectly in order to knowthe MAC address for rules (d) and (e). Note that DHCP for the other switch will not work unless an OpenFlowcontroller explicitly lets this switch pass the traffic.
• Between Switch and Gateway. This switch is between another switch and the gateway, and we want to allowthe other switch’s traffic through. This uses the same rules and logic as the “Between Switch and Remote”configuration described earlier.
• Remote on Local VM. The remote is a guest VM on the system running in-band control. This uses rules (a),(b), (c), (h), and (i).
• Remote on Local VM with Different Networks. The remote is a guest VM on the system running in-bandcontrol, but the local port is not used to connect to the remote. For example, an IP address is configured oneth0 of the switch. The remote’s VM is connected through eth1 of the switch, but an IP address has not beenconfigured for that port on the switch. As such, the switch will use eth0 to connect to the remote, and eth1’srules about the local port will not work. In the example, the switch attached to eth0 would use rules (a), (b), (c),(h), and (i) on eth0. The switch attached to eth1 would use rules (f), (g), (h), and (i).
The following are explicitly not supported by in-band control:
• Specify Remote by Name. Currently, the remote must be identified by IP address. A naive approach would beto permit all DNS traffic. Unfortunately, this would prevent the controller from defining any policy over DNS.Since switches that are located behind us need to connect to the remote, in-band cannot simply add a rule that
4.1. OVS 115
Open vSwitch, Release 2.8.0
allows DNS traffic from the local port. The “correct” way to support this is to parse DNS requests to allow alltraffic related to a request for the remote’s name through. Due to the potential security problems and amount ofprocessing, we decided to hold off for the time-being.
• Differing Remotes for Switches. All switches must know the L3 addresses for all the remotes that other switchesmay use, since rules need to be set up to allow traffic related to those remotes through. See rules (f), (g), (h),and (i).
• Differing Routes for Switches. In order for the switch to allow other switches to connect to a remote through agateway, it allows the gateway’s traffic through with rules (d) and (e). If the routes to the remote differ for thetwo switches, we will not know the MAC address of the alternate gateway.
Action Reproduction
It seems likely that many controllers, at least at startup, use the OpenFlow “flow statistics” request to obtain existingflows, then compare the flows’ actions against the actions that they expect to find. Before version 1.8.0, Open vSwitchalways returned exact, byte-for-byte copies of the actions that had been added to the flow table. The current versionof Open vSwitch does not always do this in some exceptional cases. This section lists the exceptions that controllerauthors must keep in mind if they compare actual actions against desired actions in a bytewise fashion:
• Open vSwitch zeros padding bytes in action structures, regardless of their values when the flows were added.
• Open vSwitch “normalizes” the instructions in OpenFlow 1.1 (and later) in the following way:
– OVS sorts the instructions into the following order: Apply-Actions, Clear-Actions, Write-Actions, Write-Metadata, Goto-Table.
– OVS drops Apply-Actions instructions that have empty action lists.
– OVS drops Write-Actions instructions that have empty action sets.
Please report other discrepancies, if you notice any, so that we can fix or document them.
Suggestions
Suggestions to improve Open vSwitch are welcome at [email protected].
4.1.2 Open vSwitch Datapath Development Guide
The Open vSwitch kernel module allows flexible userspace control over flow-level packet processing on selectednetwork devices. It can be used to implement a plain Ethernet switch, network device bonding, VLAN processing,network access control, flow-based network control, and so on.
The kernel module implements multiple “datapaths” (analogous to bridges), each of which can have multiple “vports”(analogous to ports within a bridge). Each datapath also has associated with it a “flow table” that userspace populateswith “flows” that map from keys based on packet headers and metadata to sets of actions. The most common actionforwards the packet to another vport; other actions are also implemented.
When a packet arrives on a vport, the kernel module processes it by extracting its flow key and looking it up in theflow table. If there is a matching flow, it executes the associated actions. If there is no match, it queues the packet touserspace for processing (as part of its processing, userspace will likely set up a flow to handle further packets of thesame type entirely in-kernel).
116 Chapter 4. Deep Dive
Open vSwitch, Release 2.8.0
Flow Key Compatibility
Network protocols evolve over time. New protocols become important and existing protocols lose their prominence.For the Open vSwitch kernel module to remain relevant, it must be possible for newer versions to parse additionalprotocols as part of the flow key. It might even be desirable, someday, to drop support for parsing protocols that havebecome obsolete. Therefore, the Netlink interface to Open vSwitch is designed to allow carefully written userspaceapplications to work with any version of the flow key, past or future.
To support this forward and backward compatibility, whenever the kernel module passes a packet to userspace, it alsopasses along the flow key that it parsed from the packet. Userspace then extracts its own notion of a flow key from thepacket and compares it against the kernel-provided version:
• If userspace’s notion of the flow key for the packet matches the kernel’s, then nothing special is necessary.
• If the kernel’s flow key includes more fields than the userspace version of the flow key, for example if the kerneldecoded IPv6 headers but userspace stopped at the Ethernet type (because it does not understand IPv6), thenagain nothing special is necessary. Userspace can still set up a flow in the usual way, as long as it uses thekernel-provided flow key to do it.
• If the userspace flow key includes more fields than the kernel’s, for example if userspace decoded an IPv6 headerbut the kernel stopped at the Ethernet type, then userspace can forward the packet manually, without setting upa flow in the kernel. This case is bad for performance because every packet that the kernel considers part of theflow must go to userspace, but the forwarding behavior is correct. (If userspace can determine that the values ofthe extra fields would not affect forwarding behavior, then it could set up a flow anyway.)
How flow keys evolve over time is important to making this work, so the following sections go into detail.
Flow Key Format
A flow key is passed over a Netlink socket as a sequence of Netlink attributes. Some attributes represent packetmetadata, defined as any information about a packet that cannot be extracted from the packet itself, e.g. the vport onwhich the packet was received. Most attributes, however, are extracted from headers within the packet, e.g. sourceand destination addresses from Ethernet, IP, or TCP headers.
The <linux/openvswitch.h> header file defines the exact format of the flow key attributes. For informal ex-planatory purposes here, we write them as comma-separated strings, with parentheses indicating arguments and nest-ing. For example, the following could represent a flow key corresponding to a TCP packet that arrived on vport1:
in_port(1), eth(src=e0:91:f5:21:d0:b2, dst=00:02:e3:0f:80:a4),eth_type(0x0800), ipv4(src=172.16.0.20, dst=172.18.0.52, proto=17, tos=0,frag=no), tcp(src=49163, dst=80)
Often we ellipsize arguments not important to the discussion, e.g.:
in_port(1), eth(...), eth_type(0x0800), ipv4(...), tcp(...)
Wildcarded Flow Key Format
A wildcarded flow is described with two sequences of Netlink attributes passed over the Netlink socket. A flow key,exactly as described above, and an optional corresponding flow mask.
A wildcarded flow can represent a group of exact match flows. Each 1 bit in the mask specifies an exact match withthe corresponding bit in the flow key. A 0 bit specifies a don’t care bit, which will match either a 1 or 0 bit of anincoming packet. Using a wildcarded flow can improve the flow set up rate by reducing the number of new flows thatneed to be processed by the user space program.
4.1. OVS 117

Open vSwitch, Release 2.8.0
Support for the mask Netlink attribute is optional for both the kernel and user space program. The kernel can ignorethe mask attribute, installing an exact match flow, or reduce the number of don’t care bits in the kernel to less than whatwas specified by the user space program. In this case, variations in bits that the kernel does not implement will simplyresult in additional flow setups. The kernel module will also work with user space programs that neither support norsupply flow mask attributes.
Since the kernel may ignore or modify wildcard bits, it can be difficult for the userspace program to know exactly whatmatches are installed. There are two possible approaches: reactively install flows as they miss the kernel flow table(and therefore not attempt to determine wildcard changes at all) or use the kernel’s response messages to determinethe installed wildcards.
When interacting with userspace, the kernel should maintain the match portion of the key exactly as originally installed.This will provides a handle to identify the flow for all future operations. However, when reporting the mask of aninstalled flow, the mask should include any restrictions imposed by the kernel.
The behavior when using overlapping wildcarded flows is undefined. It is the responsibility of the user space programto ensure that any incoming packet can match at most one flow, wildcarded or not. The current implementationperforms best-effort detection of overlapping wildcarded flows and may reject some but not all of them. However, thisbehavior may change in future versions.
Unique Flow Identifiers
An alternative to using the original match portion of a key as the handle for flow identification is a unique flowidentifier, or “UFID”. UFIDs are optional for both the kernel and user space program.
User space programs that support UFID are expected to provide it during flow setup in addition to the flow, then referto the flow using the UFID for all future operations. The kernel is not required to index flows by the original flow keyif a UFID is specified.
Basic Rule for Evolving Flow Keys
Some care is needed to really maintain forward and backward compatibility for applications that follow the rules listedunder “Flow key compatibility” above.
The basic rule is obvious:
New network protocol support must only supplement existing flow key attributes. It must not change themeaning of already defined flow key attributes.
This rule does have less-obvious consequences so it is worth working through a few examples. Suppose, for exam-ple, that the kernel module did not already implement VLAN parsing. Instead, it just interpreted the 802.1Q TPID(0x8100) as the Ethertype then stopped parsing the packet. The flow key for any packet with an 802.1Q header wouldlook essentially like this, ignoring metadata:
eth(...), eth_type(0x8100)
Naively, to add VLAN support, it makes sense to add a new “vlan” flow key attribute to contain the VLAN tag, thencontinue to decode the encapsulated headers beyond the VLAN tag using the existing field definitions. With thischange, a TCP packet in VLAN 10 would have a flow key much like this:
eth(...), vlan(vid=10, pcp=0), eth_type(0x0800), ip(proto=6, ...), tcp(...)
But this change would negatively affect a userspace application that has not been updated to understand the new “vlan”flow key attribute. The application could, following the flow compatibility rules above, ignore the “vlan” attribute thatit does not understand and therefore assume that the flow contained IP packets. This is a bad assumption (the flowonly contains IP packets if one parses and skips over the 802.1Q header) and it could cause the application’s behaviorto change across kernel versions even though it follows the compatibility rules.
118 Chapter 4. Deep Dive
Open vSwitch, Release 2.8.0
The solution is to use a set of nested attributes. This is, for example, why 802.1Q support uses nested attributes. ATCP packet in VLAN 10 is actually expressed as:
eth(...), eth_type(0x8100), vlan(vid=10, pcp=0), encap(eth_type(0x0800),ip(proto=6, ...), tcp(...)))
Notice how the eth_type, ip, and tcp flow key attributes are nested inside the encap attribute. Thus, an appli-cation that does not understand the vlan key will not see either of those attributes and therefore will not misinterpretthem. (Also, the outer eth_type is still 0x8100, not changed to 0x0800)
Handling Malformed Packets
Don’t drop packets in the kernel for malformed protocol headers, bad checksums, etc. This would prevent userspacefrom implementing a simple Ethernet switch that forwards every packet.
Instead, in such a case, include an attribute with “empty” content. It doesn’t matter if the empty content could be validprotocol values, as long as those values are rarely seen in practice, because userspace can always forward all packetswith those values to userspace and handle them individually.
For example, consider a packet that contains an IP header that indicates protocol 6 for TCP, but which is truncated justafter the IP header, so that the TCP header is missing. The flow key for this packet would include a tcp attribute withall-zero src and dst, like this:
eth(...), eth_type(0x0800), ip(proto=6, ...), tcp(src=0, dst=0)
As another example, consider a packet with an Ethernet type of 0x8100, indicating that a VLAN TCI should follow,but which is truncated just after the Ethernet type. The flow key for this packet would include an all-zero-bits vlan andan empty encap attribute, like this:
eth(...), eth_type(0x8100), vlan(0), encap()
Unlike a TCP packet with source and destination ports 0, an all-zero-bits VLAN TCI is not that rare, so the CFI bit(aka VLAN_TAG_PRESENT inside the kernel) is ordinarily set in a vlan attribute expressly to allow this situation tobe distinguished. Thus, the flow key in this second example unambiguously indicates a missing or malformed VLANTCI.
Other Rules
The other rules for flow keys are much less subtle:
• Duplicate attributes are not allowed at a given nesting level.
• Ordering of attributes is not significant.
• When the kernel sends a given flow key to userspace, it always composes it the same way. This allows userspaceto hash and compare entire flow keys that it may not be able to fully interpret.
Coding Rules
Implement the headers and codes for compatibility with older kernel in linux/compat/ directory. All publicfunctions should be exported using EXPORT_SYMBOL macro. Public function replacing the same-named kernelfunction should be prefixed with rpl_. Otherwise, the function should be prefixed with ovs_. For special casewhen it is not possible to follow this rule (e.g., the pskb_expand_head() function), the function name mustbe added to linux/compat/build-aux/export-check-whitelist, otherwise, the compilation checkcheck-export-symbol will fail.
4.1. OVS 119
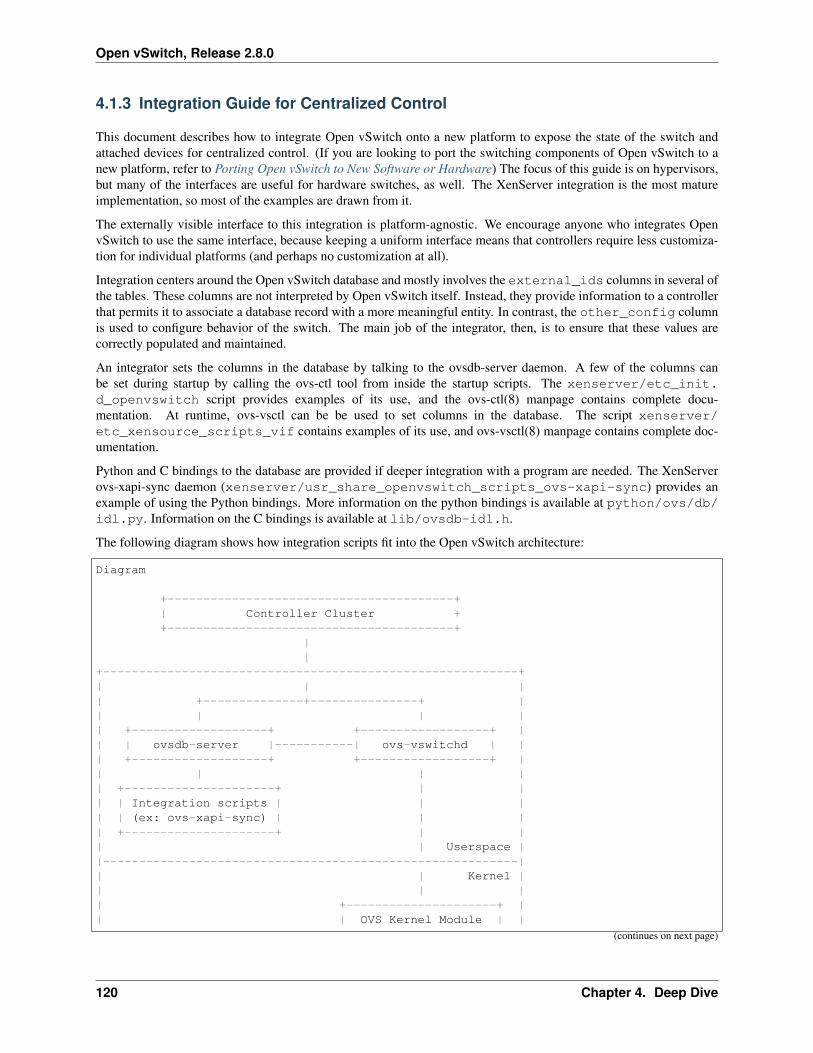
Open vSwitch, Release 2.8.0
4.1.3 Integration Guide for Centralized Control
This document describes how to integrate Open vSwitch onto a new platform to expose the state of the switch andattached devices for centralized control. (If you are looking to port the switching components of Open vSwitch to anew platform, refer to Porting Open vSwitch to New Software or Hardware) The focus of this guide is on hypervisors,but many of the interfaces are useful for hardware switches, as well. The XenServer integration is the most matureimplementation, so most of the examples are drawn from it.
The externally visible interface to this integration is platform-agnostic. We encourage anyone who integrates OpenvSwitch to use the same interface, because keeping a uniform interface means that controllers require less customiza-tion for individual platforms (and perhaps no customization at all).
Integration centers around the Open vSwitch database and mostly involves the external_ids columns in several ofthe tables. These columns are not interpreted by Open vSwitch itself. Instead, they provide information to a controllerthat permits it to associate a database record with a more meaningful entity. In contrast, the other_config columnis used to configure behavior of the switch. The main job of the integrator, then, is to ensure that these values arecorrectly populated and maintained.
An integrator sets the columns in the database by talking to the ovsdb-server daemon. A few of the columns canbe set during startup by calling the ovs-ctl tool from inside the startup scripts. The xenserver/etc_init.d_openvswitch script provides examples of its use, and the ovs-ctl(8) manpage contains complete docu-mentation. At runtime, ovs-vsctl can be be used to set columns in the database. The script xenserver/etc_xensource_scripts_vif contains examples of its use, and ovs-vsctl(8) manpage contains complete doc-umentation.
Python and C bindings to the database are provided if deeper integration with a program are needed. The XenServerovs-xapi-sync daemon (xenserver/usr_share_openvswitch_scripts_ovs-xapi-sync) provides anexample of using the Python bindings. More information on the python bindings is available at python/ovs/db/idl.py. Information on the C bindings is available at lib/ovsdb-idl.h.
The following diagram shows how integration scripts fit into the Open vSwitch architecture:
Diagram
+----------------------------------------+| Controller Cluster ++----------------------------------------+
||
+----------------------------------------------------------+| | || +--------------+---------------+ || | | || +-------------------+ +------------------+ || | ovsdb-server |-----------| ovs-vswitchd | || +-------------------+ +------------------+ || | | || +---------------------+ | || | Integration scripts | | || | (ex: ovs-xapi-sync) | | || +---------------------+ | || | Userspace ||----------------------------------------------------------|| | Kernel || | || +---------------------+ || | OVS Kernel Module | |
(continues on next page)
120 Chapter 4. Deep Dive
Open vSwitch, Release 2.8.0
(continued from previous page)
| +---------------------+ |+----------------------------------------------------------+
A description of the most relevant fields for integration follows. By setting these values, controllers are able tounderstand the network and manage it more dynamically and precisely. For more details about the database and eachindividual column, please refer to the ovs-vswitchd.conf.db(5) manpage.
Open_vSwitch table
The Open_vSwitch table describes the switch as a whole. The system_type and system_version columnsidentify the platform to the controller. The external_ids:system-id key uniquely identifies the physical host.In XenServer, the system-id will likely be the same as the UUID returned by xe host-list. This key allowscontrollers to distinguish between multiple hypervisors.
Most of this configuration can be done with the ovs-ctl command at startup. For example:
$ ovs-ctl --system-type="XenServer" --system-version="6.0.0-50762p" \--system-id="${UUID}" "${other_options}" start
Alternatively, the ovs-vsctl command may be used to set a particular value at runtime. For example:
$ ovs-vsctl set open_vswitch . external-ids:system-id='"${UUID}"'
The other_config:enable-statistics key may be set to true to have OVS populate the database withstatistics (e.g., number of CPUs, memory, system load) for the controller’s use.
Bridge table
The Bridge table describes individual bridges within an Open vSwitch instance. The external-ids:bridge-idkey uniquely identifies a particular bridge. In XenServer, this will likely be the same as the UUID returned by xenetwork-list for that particular bridge.
For example, to set the identifier for bridge “br0”, the following command can be used:
$ ovs-vsctl set Bridge br0 external-ids:bridge-id='"${UUID}"'
The MAC address of the bridge may be manually configured by setting it with the other_config:hwaddr key.For example:
$ ovs-vsctl set Bridge br0 other_config:hwaddr="12:34:56:78:90:ab"
Interface table
The Interface table describes an interface under the control of Open vSwitch. The external_ids column containskeys that are used to provide additional information about the interface:
attached-mac
This field contains the MAC address of the device attached to the interface. On a hypervisor, this isthe MAC address of the interface as seen inside a VM. It does not necessarily correlate to the host-side MAC address. For example, on XenServer, the MAC address on a VIF in the hypervisor is alwaysFE:FF:FF:FF:FF:FF, but inside the VM a normal MAC address is seen.
iface-id
4.1. OVS 121
Open vSwitch, Release 2.8.0
This field uniquely identifies the interface. In hypervisors, this allows the controller to follow VM networkinterfaces as VMs migrate. A well-chosen identifier should also allow an administrator or a controller toassociate the interface with the corresponding object in the VM management system. For example, theOpen vSwitch integration with XenServer by default uses the XenServer assigned UUID for a VIF recordas the iface-id.
iface-status
In a hypervisor, there are situations where there are multiple interface choices for a single virtual ethernetinterface inside a VM. Valid values are “active” and “inactive”. A complete description is available in theovs-vswitchd.conf.db(5) manpage.
vm-id
This field uniquely identifies the VM to which this interface belongs. A single VM may have multipleinterfaces attached to it.
As in the previous tables, the ovs-vsctl command may be used to configure the values. For example, to set theiface-id on eth0, the following command can be used:
$ ovs-vsctl set Interface eth0 external-ids:iface-id='"${UUID}"'
HA for OVN DB servers using pacemaker
The ovsdb servers can work in either active or backup mode. In backup mode, db server will be connected to an activeserver and replicate the active servers contents. At all times, the data can be transacted only from the active server.When the active server dies for some reason, entire OVN operations will be stalled.
Pacemaker is a cluster resource manager which can manage a defined set of resource across a set of clustered nodes.Pacemaker manages the resource with the help of the resource agents. One among the resource agent is OCF
OCF is nothing but a shell script which accepts a set of actions and returns an appropriate status code.
With the help of the OCF resource agent ovn/utilities/ovndb-servers.ocf, one can defined a resource for the pacemakersuch that pacemaker will always maintain one running active server at any time.
After creating a pacemaker cluster, use the following commands to create one active and multiple backup servers forOVN databases:
$ pcs resource create ovndb_servers ocf:ovn:ovndb-servers \master_ip=x.x.x.x \ovn_ctl=<path of the ovn-ctl script> \op monitor interval="10s" \op monitor role=Master interval="15s"
$ pcs resource master ovndb_servers-master ovndb_servers \meta notify="true"
The master_ip and ovn_ctl are the parameters that will be used by the OCF script. ovn_ctl is optional, if not given,it assumes a default value of /usr/share/openvswitch/scripts/ovn-ctl. master_ip is the IP address on which the activedatabase server is expected to be listening, the slave node uses it to connect to the master node. You can add the optionalparameters ‘nb_master_port’, ‘nb_master_protocol’, ‘sb_master_port’, ‘sb_master_protocol’ to set the protocol andport.
Whenever the active server dies, pacemaker is responsible to promote one of the backup servers to be active. Bothovn-controller and ovn-northd needs the ip-address at which the active server is listening. With pacemaker changingthe node at which the active server is run, it is not efficient to instruct all the ovn-controllers and the ovn-northd tolisten to the latest active server’s ip-address.
122 Chapter 4. Deep Dive
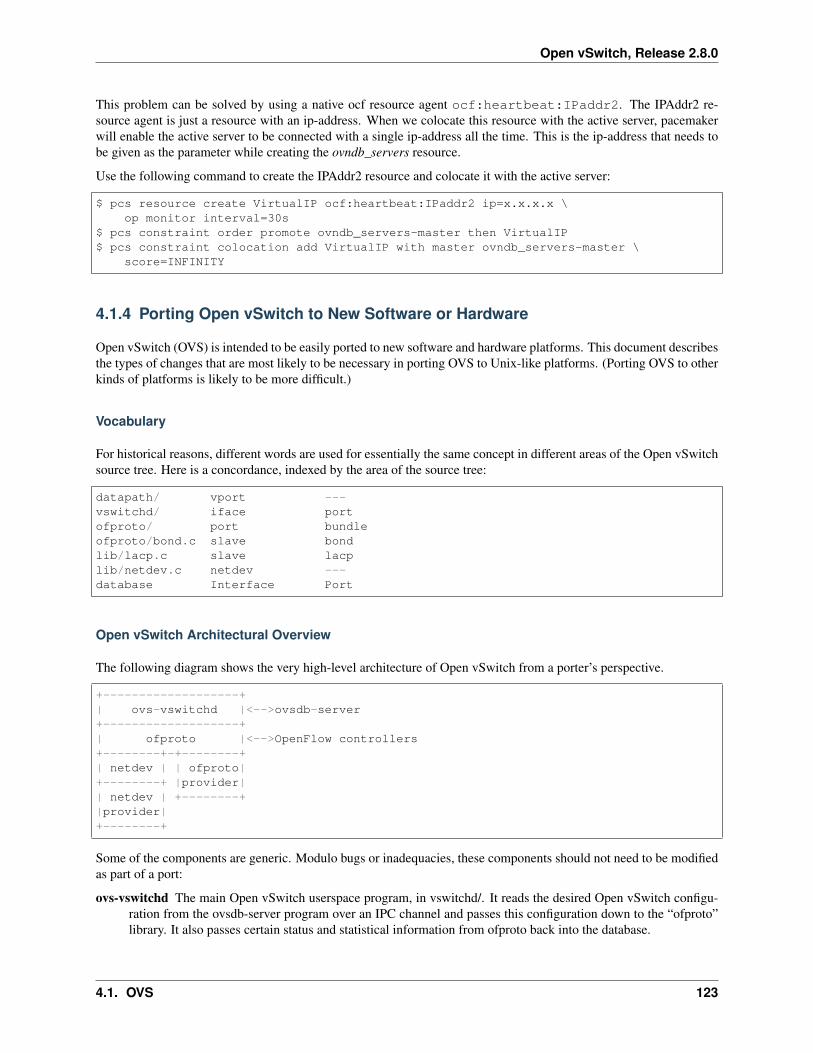
Open vSwitch, Release 2.8.0
This problem can be solved by using a native ocf resource agent ocf:heartbeat:IPaddr2. The IPAddr2 re-source agent is just a resource with an ip-address. When we colocate this resource with the active server, pacemakerwill enable the active server to be connected with a single ip-address all the time. This is the ip-address that needs tobe given as the parameter while creating the ovndb_servers resource.
Use the following command to create the IPAddr2 resource and colocate it with the active server:
$ pcs resource create VirtualIP ocf:heartbeat:IPaddr2 ip=x.x.x.x \op monitor interval=30s
$ pcs constraint order promote ovndb_servers-master then VirtualIP$ pcs constraint colocation add VirtualIP with master ovndb_servers-master \
score=INFINITY
4.1.4 Porting Open vSwitch to New Software or Hardware
Open vSwitch (OVS) is intended to be easily ported to new software and hardware platforms. This document describesthe types of changes that are most likely to be necessary in porting OVS to Unix-like platforms. (Porting OVS to otherkinds of platforms is likely to be more difficult.)
Vocabulary
For historical reasons, different words are used for essentially the same concept in different areas of the Open vSwitchsource tree. Here is a concordance, indexed by the area of the source tree:
datapath/ vport ---vswitchd/ iface portofproto/ port bundleofproto/bond.c slave bondlib/lacp.c slave lacplib/netdev.c netdev ---database Interface Port
Open vSwitch Architectural Overview
The following diagram shows the very high-level architecture of Open vSwitch from a porter’s perspective.
+-------------------+| ovs-vswitchd |<-->ovsdb-server+-------------------+| ofproto |<-->OpenFlow controllers+--------+-+--------+| netdev | | ofproto|+--------+ |provider|| netdev | +--------+|provider|+--------+
Some of the components are generic. Modulo bugs or inadequacies, these components should not need to be modifiedas part of a port:
ovs-vswitchd The main Open vSwitch userspace program, in vswitchd/. It reads the desired Open vSwitch configu-ration from the ovsdb-server program over an IPC channel and passes this configuration down to the “ofproto”library. It also passes certain status and statistical information from ofproto back into the database.
4.1. OVS 123
Open vSwitch, Release 2.8.0
ofproto The Open vSwitch library, in ofproto/, that implements an OpenFlow switch. It talks to OpenFlow controllersover the network and to switch hardware or software through an “ofproto provider”, explained further below.
netdev The Open vSwitch library, in lib/netdev.c, that abstracts interacting with network devices, that is, Ethernetinterfaces. The netdev library is a thin layer over “netdev provider” code, explained further below.
The other components may need attention during a port. You will almost certainly have to implement a “netdevprovider”. Depending on the type of port you are doing and the desired performance, you may also have to implementan “ofproto provider” or a lower-level component called a “dpif” provider.
The following sections talk about these components in more detail.
Writing a netdev Provider
A “netdev provider” implements an operating system and hardware specific interface to “network devices”, e.g. eth0on Linux. Open vSwitch must be able to open each port on a switch as a netdev, so you will need to implement a“netdev provider” that works with your switch hardware and software.
struct netdev_class, in lib/netdev-provider.h, defines the interfaces required to implement a netdev.That structure contains many function pointers, each of which has a comment that is meant to describe its behavior indetail. If the requirements are unclear, report this as a bug.
The netdev interface can be divided into a few rough categories:
• Functions required to properly implement OpenFlow features. For example, OpenFlow requires the ability toreport the Ethernet hardware address of a port. These functions must be implemented for minimally correctoperation.
• Functions required to implement optional Open vSwitch features. For example, the Open vSwitch support forin-band control requires netdev support for inspecting the TCP/IP stack’s ARP table. These functions must beimplemented if the corresponding OVS features are to work, but may be omitted initially.
• Functions needed in some implementations but not in others. For example, most kinds of ports (see below) donot need functionality to receive packets from a network device.
The existing netdev implementations may serve as useful examples during a port:
• lib/netdev-linux.c implements netdev functionality for Linux network devices, using Linux kernel calls. It maybe a good place to start for full-featured netdev implementations.
• lib/netdev-vport.c provides support for “virtual ports” implemented by the Open vSwitch datapath module forthe Linux kernel. This may serve as a model for minimal netdev implementations.
• lib/netdev-dummy.c is a fake netdev implementation useful only for testing.
Porting Strategies
After a netdev provider has been implemented for a system’s network devices, you may choose among three basicporting strategies.
The lowest-effort strategy is to use the “userspace switch” implementation built into Open vSwitch. This ought towork, without writing any more code, as long as the netdev provider that you implemented supports receiving packets.It yields poor performance, however, because every packet passes through the ovs-vswitchd process. Refer to OpenvSwitch without Kernel Support for instructions on how to configure a userspace switch.
If the userspace switch is not the right choice for your port, then you will have to write more code. You may implementeither an “ofproto provider” or a “dpif provider”. Which you should choose depends on a few different factors:
• Only an ofproto provider can take full advantage of hardware with built-in support for wildcards (e.g. an ACLtable or a TCAM).
124 Chapter 4. Deep Dive
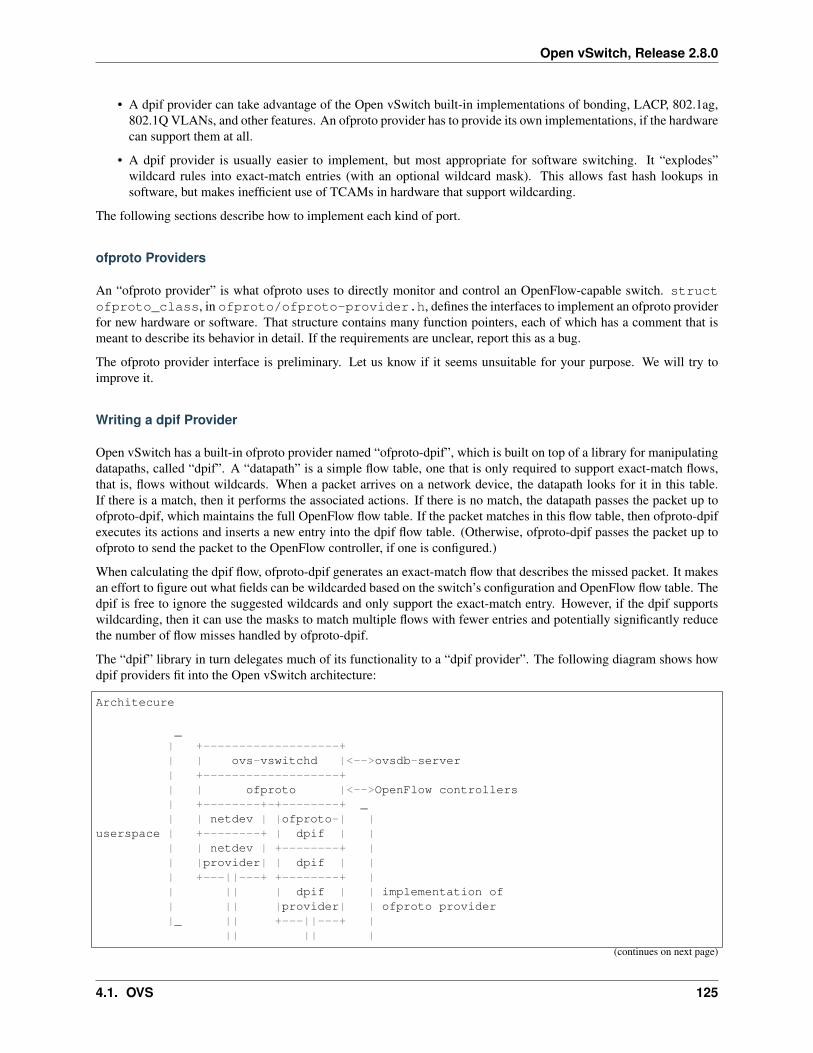
Open vSwitch, Release 2.8.0
• A dpif provider can take advantage of the Open vSwitch built-in implementations of bonding, LACP, 802.1ag,802.1Q VLANs, and other features. An ofproto provider has to provide its own implementations, if the hardwarecan support them at all.
• A dpif provider is usually easier to implement, but most appropriate for software switching. It “explodes”wildcard rules into exact-match entries (with an optional wildcard mask). This allows fast hash lookups insoftware, but makes inefficient use of TCAMs in hardware that support wildcarding.
The following sections describe how to implement each kind of port.
ofproto Providers
An “ofproto provider” is what ofproto uses to directly monitor and control an OpenFlow-capable switch. structofproto_class, in ofproto/ofproto-provider.h, defines the interfaces to implement an ofproto providerfor new hardware or software. That structure contains many function pointers, each of which has a comment that ismeant to describe its behavior in detail. If the requirements are unclear, report this as a bug.
The ofproto provider interface is preliminary. Let us know if it seems unsuitable for your purpose. We will try toimprove it.
Writing a dpif Provider
Open vSwitch has a built-in ofproto provider named “ofproto-dpif”, which is built on top of a library for manipulatingdatapaths, called “dpif”. A “datapath” is a simple flow table, one that is only required to support exact-match flows,that is, flows without wildcards. When a packet arrives on a network device, the datapath looks for it in this table.If there is a match, then it performs the associated actions. If there is no match, the datapath passes the packet up toofproto-dpif, which maintains the full OpenFlow flow table. If the packet matches in this flow table, then ofproto-dpifexecutes its actions and inserts a new entry into the dpif flow table. (Otherwise, ofproto-dpif passes the packet up toofproto to send the packet to the OpenFlow controller, if one is configured.)
When calculating the dpif flow, ofproto-dpif generates an exact-match flow that describes the missed packet. It makesan effort to figure out what fields can be wildcarded based on the switch’s configuration and OpenFlow flow table. Thedpif is free to ignore the suggested wildcards and only support the exact-match entry. However, if the dpif supportswildcarding, then it can use the masks to match multiple flows with fewer entries and potentially significantly reducethe number of flow misses handled by ofproto-dpif.
The “dpif” library in turn delegates much of its functionality to a “dpif provider”. The following diagram shows howdpif providers fit into the Open vSwitch architecture:
Architecure
_| +-------------------+| | ovs-vswitchd |<-->ovsdb-server| +-------------------+| | ofproto |<-->OpenFlow controllers| +--------+-+--------+ _| | netdev | |ofproto-| |
userspace | +--------+ | dpif | || | netdev | +--------+ || |provider| | dpif | || +---||---+ +--------+ || || | dpif | | implementation of| || |provider| | ofproto provider|_ || +---||---+ |
|| || |
(continues on next page)
4.1. OVS 125
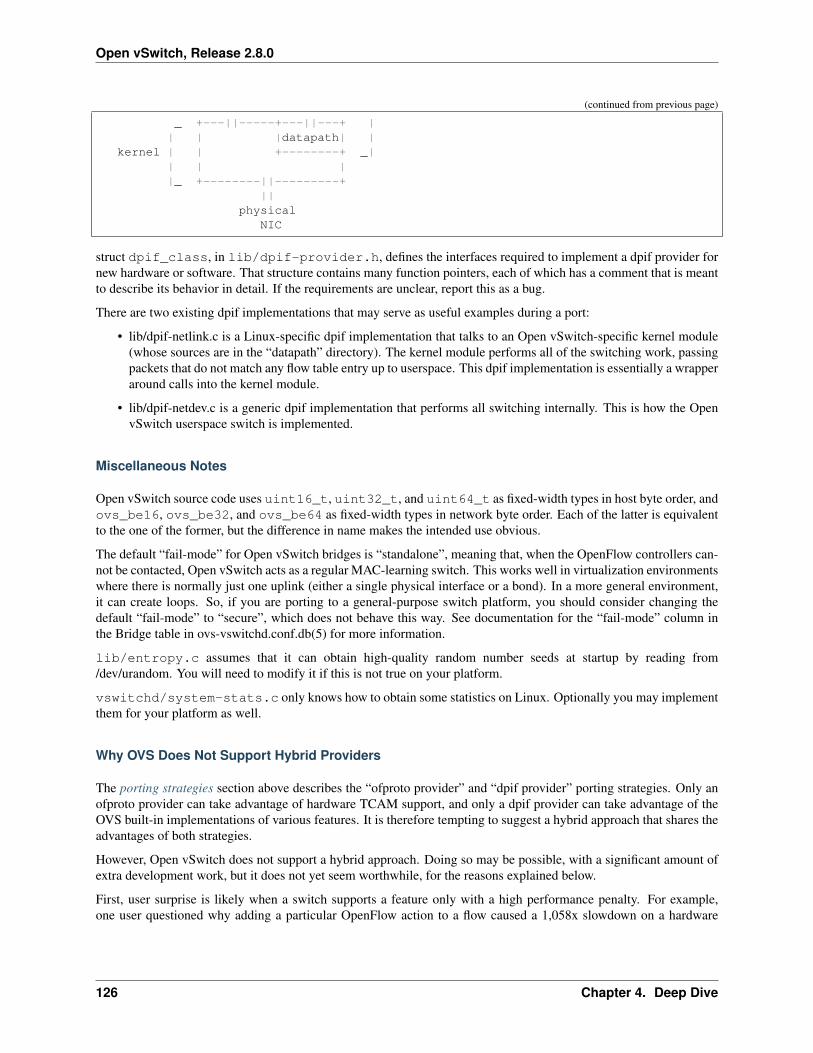
Open vSwitch, Release 2.8.0
(continued from previous page)
_ +---||-----+---||---+ || | |datapath| |
kernel | | +--------+ _|| | ||_ +--------||---------+
||physical
NIC
struct dpif_class, in lib/dpif-provider.h, defines the interfaces required to implement a dpif provider fornew hardware or software. That structure contains many function pointers, each of which has a comment that is meantto describe its behavior in detail. If the requirements are unclear, report this as a bug.
There are two existing dpif implementations that may serve as useful examples during a port:
• lib/dpif-netlink.c is a Linux-specific dpif implementation that talks to an Open vSwitch-specific kernel module(whose sources are in the “datapath” directory). The kernel module performs all of the switching work, passingpackets that do not match any flow table entry up to userspace. This dpif implementation is essentially a wrapperaround calls into the kernel module.
• lib/dpif-netdev.c is a generic dpif implementation that performs all switching internally. This is how the OpenvSwitch userspace switch is implemented.
Miscellaneous Notes
Open vSwitch source code uses uint16_t, uint32_t, and uint64_t as fixed-width types in host byte order, andovs_be16, ovs_be32, and ovs_be64 as fixed-width types in network byte order. Each of the latter is equivalentto the one of the former, but the difference in name makes the intended use obvious.
The default “fail-mode” for Open vSwitch bridges is “standalone”, meaning that, when the OpenFlow controllers can-not be contacted, Open vSwitch acts as a regular MAC-learning switch. This works well in virtualization environmentswhere there is normally just one uplink (either a single physical interface or a bond). In a more general environment,it can create loops. So, if you are porting to a general-purpose switch platform, you should consider changing thedefault “fail-mode” to “secure”, which does not behave this way. See documentation for the “fail-mode” column inthe Bridge table in ovs-vswitchd.conf.db(5) for more information.
lib/entropy.c assumes that it can obtain high-quality random number seeds at startup by reading from/dev/urandom. You will need to modify it if this is not true on your platform.
vswitchd/system-stats.c only knows how to obtain some statistics on Linux. Optionally you may implementthem for your platform as well.
Why OVS Does Not Support Hybrid Providers
The porting strategies section above describes the “ofproto provider” and “dpif provider” porting strategies. Only anofproto provider can take advantage of hardware TCAM support, and only a dpif provider can take advantage of theOVS built-in implementations of various features. It is therefore tempting to suggest a hybrid approach that shares theadvantages of both strategies.
However, Open vSwitch does not support a hybrid approach. Doing so may be possible, with a significant amount ofextra development work, but it does not yet seem worthwhile, for the reasons explained below.
First, user surprise is likely when a switch supports a feature only with a high performance penalty. For example,one user questioned why adding a particular OpenFlow action to a flow caused a 1,058x slowdown on a hardware
126 Chapter 4. Deep Dive
Open vSwitch, Release 2.8.0
OpenFlow implementation1. The action required the flow to be implemented in software.
Given that implementing a flow in software on the slow management CPU of a hardware switch causes a majorslowdown, software-implemented flows would only make sense for very low-volume traffic. But many of the featuresbuilt into the OVS software switch implementation would need to apply to every flow to be useful. There is no value,for example, in applying bonding or 802.1Q VLAN support only to low-volume traffic.
Besides supporting features of OpenFlow actions, a hybrid approach could also support forms of matching not sup-ported by particular switching hardware, by sending all packets that might match a rule to software. But again this cancause an unacceptable slowdown by forcing bulk traffic through software in the hardware switch’s slow managementCPU. Consider, for example, a hardware switch that can match on the IPv6 Ethernet type but not on fields in IPv6 head-ers. An OpenFlow table that matched on the IPv6 Ethernet type would perform well, but adding a rule that matchedonly UDPv6 would force every IPv6 packet to software, slowing down not just UDPv6 but all IPv6 processing.
Questions
Direct porting questions to [email protected]. We will try to use questions to improve this porting guide.
4.1.5 OpenFlow Support in Open vSwitch
Open vSwitch support for OpenFlow 1.1 and beyond is a work in progress. This file describes the work still to bedone.
The Plan
OpenFlow version support is not a build-time option. A single build of Open vSwitch must be able to handle allsupported versions of OpenFlow. Ideally, even at runtime it should be able to support all protocol versions at the sametime on different OpenFlow bridges (and perhaps even on the same bridge).
At the same time, it would be a shame to litter the core of the OVS code with lots of ugly code concerned with thedetails of various OpenFlow protocol versions.
The primary approach to compatibility is to abstract most of the details of the differences from the core code, byadding a protocol layer that translates between OF1.x and a slightly higher-level abstract representation. The core ofthis approach is the many struct ofputil_* structures in include/openvswitch/ofp-util.h.
As a consequence of this approach, OVS cannot use OpenFlow protocol definitions that closely resemble thosein the OpenFlow specification, because openflow.h in different versions of the OpenFlow specification definesthe same identifier with different values. Instead, openflow-common.h contains definitions that are common toall the specifications and separate protocol version-specific headers contain protocol-specific definitions renamed soas not to conflict, e.g. OFPAT10_ENQUEUE and OFPAT11_ENQUEUE for the OpenFlow 1.0 and 1.1 values forOFPAT_ENQUEUE. Generally, in cases of conflict, the protocol layer will define a more abstract OFPUTIL_* orstruct ofputil_*.
Here are the current approaches in a few tricky areas:
• Port numbering.
OpenFlow 1.0 has 16-bit port numbers and later OpenFlow versions have 32-bit port numbers. For now, OVSsupport for later protocol versions requires all port numbers to fall into the 16-bit range, translating the reservedOFPP_* port numbers.
1 Aaron Rosen, “Modify packet fields extremely slow”, openflow-discuss mailing list, June 26, 2011, archived at https://mailman.stanford.edu/pipermail/openflow-discuss/2011-June/002386.html.
4.1. OVS 127
Open vSwitch, Release 2.8.0
• Actions.
OpenFlow 1.0 and later versions have very different ideas of actions. OVS reconciles by translating all theversions’ actions (and instructions) to and from a common internal representation.
OpenFlow 1.1
OpenFlow 1.1 support is complete.
OpenFlow 1.2
OpenFlow 1.2 support is complete.
OpenFlow 1.3
OpenFlow 1.3 support requires OpenFlow 1.2 as a prerequisite, plus the following additional work. (This is based onthe change log at the end of the OF1.3 spec, reusing most of the section titles directly. I didn’t compare the specscarefully yet.)
• Add support for multipart requests.
Currently we always report OFPBRC_MULTIPART_BUFFER_OVERFLOW.
(optional for OF1.3+)
• IPv6 extension header handling support.
Fully implementing this requires kernel support. This likely will take some careful and probably time-consuming design work. The actual coding, once that is all done, is probably 2 or 3 days work.
(optional for OF1.3+)
• Per-flow meters.
OpenFlow protocol support is now implemented. Support for the special OFPM_SLOWPATH andOFPM_CONTROLLER meters is missing. Support for the software switch is under review.
(optional for OF1.3+)
• Auxiliary connections.
An implementation in generic code might be a week’s worth of work. The value of an implementation ingeneric code is questionable, though, since much of the benefit of axuiliary connections is supposed to be totake advantage of hardware support. (We could make the kernel module somehow send packets across theauxiliary connections directly, for some kind of “hardware” support, if we judged it useful enough.)
(optional for OF1.3+)
• Provider Backbone Bridge tagging.
I don’t plan to implement this (but we’d accept an implementation).
(optional for OF1.3+)
• On-demand flow counters.
I think this might be a real optimization in some cases for the software switch.
(optional for OF1.3+)
128 Chapter 4. Deep Dive
Open vSwitch, Release 2.8.0
OpenFlow 1.4 & ONF Extensions for 1.3.X Pack1
The following features are both defined as a set of ONF Extensions for 1.3 and integrated in 1.4.
When defined as an ONF Extension for 1.3, the feature is using the Experimenter mechanism with the ONF Experi-menter ID.
When defined integrated in 1.4, the feature use the standard OpenFlow structures (for example defined in openflow-1.4.h).
The two definitions for each feature are independent and can exist in parallel in OVS.
• Flow entry notifications
This seems to be modelled after OVS’s NXST_FLOW_MONITOR.
(EXT-187) (optional for OF1.4+)
• Role Status
Already implemented as a 1.4 feature.
(EXT-191)
(required for OF1.4+)
• Flow entry eviction
OVS has flow eviction functionality. table_mod OFPTC_EVICTION, flow_mod 'importance', andtable_desc ofp_table_mod_prop_eviction need to be implemented.
(EXT-192-e)
(optional for OF1.4+)
• Vacancy events
(EXT-192-v)
(optional for OF1.4+)
• Bundle
Transactional modification. OpenFlow 1.4 requires to support flow_mods and port_mods in a bundle ifbundle is supported. (Not related to OVS’s ‘ofbundle’ stuff.)
Implemented as an OpenFlow 1.4 feature. Only flow_mods and port_mods are supported in a bundle. If thebundle includes port mods, it may not specify the OFPBF_ATOMIC flag. Nevertheless, port mods and flowmods in a bundle are always applied in order and consecutive flow mods between port mods are made availableto lookups atomically.
(EXT-230)
(optional for OF1.4+)
• Table synchronisation
Probably not so useful to the software switch.
(EXT-232)
(optional for OF1.4+)
• Group and Meter change notifications
(EXT-235)
(optional for OF1.4+)
4.1. OVS 129
Open vSwitch, Release 2.8.0
• Bad flow entry priority error
Probably not so useful to the software switch.
(EXT-236)
(optional for OF1.4+)
• Set async config error
(EXT-237)
(optional for OF1.4+)
• PBB UCA header field
See comment on Provider Backbone Bridge in section about OpenFlow 1.3.
(EXT-256)
(optional for OF1.4+)
• Multipart timeout error
(EXT-264)
(required for OF1.4+)
OpenFlow 1.4 only
Those features are those only available in OpenFlow 1.4, other OpenFlow 1.4 features are listed in the previous section.
• More extensible wire protocol
Many on-wire structures got TLVs.
All required features are now supported. Remaining optional: table desc, table-status
(EXT-262)
(required for OF1.4+)
• Optical port properties
(EXT-154)
(optional for OF1.4+)
OpenFlow 1.5 & ONF Extensions for 1.3.X Pack2
The following features are both defined as a set of ONF Extensions for 1.3 and integrated in 1.5. Note that this list isnot definitive as those are not yet published.
When defined as an ONF Extension for 1.3, the feature is using the Experimenter mechanism with the ONF Experi-menter ID. When defined integrated in 1.5, the feature use the standard OpenFlow structures (for example defined inopenflow-1.5.h).
The two definitions for each feature are independent and can exist in parallel in OVS.
• Time scheduled bundles
(EXT-340)
(optional for OF1.5+)
130 Chapter 4. Deep Dive
Open vSwitch, Release 2.8.0
OpenFlow 1.5 only
Those features are those only available in OpenFlow 1.5, other OpenFlow 1.5 features are listed in the previous section.Note that this list is not definitive as OpenFlow 1.5 is not yet published.
• Egress Tables
(EXT-306)
(optional for OF1.5+)
• Packet Type aware pipeline
Prototype for OVS was done during specification.
(EXT-112)
(optional for OF1.5+)
• Extensible Flow Entry Statistics
(EXT-334)
(required for OF1.5+)
• Flow Entry Statistics Trigger
(EXT-335)
(optional for OF1.5+)
• Controller connection status
Prototype for OVS was done during specification.
(EXT-454)
(optional for OF1.5+)
• Meter action
(EXT-379)
(required for OF1.5+ if metering is supported)
• Port properties for pipeline fields
Prototype for OVS was done during specification.
(EXT-388)
(optional for OF1.5+)
• Port property for recirculation
Prototype for OVS was done during specification.
(EXT-399)
(optional for OF1.5+)
General
• ovs-ofctl(8) often lists as Nicira extensions features that later OpenFlow versions support in standard ways.
4.1. OVS 131
Open vSwitch, Release 2.8.0
How to contribute
If you plan to contribute code for a feature, please let everyone know on ovs-dev before you start work. This will helpavoid duplicating work.
Consider the following:
• Testing.
Please test your code.
• Unit tests.
Consider writing some. The tests directory has many examples that you can use as a starting point.
• ovs-ofctl.
If you add a feature that is useful for some ovs-ofctl command then you should add support for it there.
• Documentation.
If you add a user-visible feature, then you should document it in the appropriate manpage and mention it inNEWS as well.
Refer to Contributing to Open vSwitch for more information.
4.1.6 Bonding
Bonding allows two or more interfaces (the “slaves”) to share network traffic. From a high-level point of view, bondedinterfaces act like a single port, but they have the bandwidth of multiple network devices, e.g. two 1 GB physicalinterfaces act like a single 2 GB interface. Bonds also increase robustness: the bonded port does not go down as longas at least one of its slaves is up.
In vswitchd, a bond always has at least two slaves (and may have more). If a configuration error, etc. would cause abond to have only one slave, the port becomes an ordinary port, not a bonded port, and none of the special features ofbonded ports described in this section apply.
There are many forms of bonding of which ovs-vswitchd implements only a few. The most complex bond ovs-vswitchdimplements is called “source load balancing” or SLB bonding. SLB bonding divides traffic among the slaves based onthe Ethernet source address. This is useful only if the traffic over the bond has multiple Ethernet source addresses, forexample if network traffic from multiple VMs are multiplexed over the bond.
Note: Most of the ovs-vswitchd implementation is in vswitchd/bridge.c, so code references below should beassumed to refer to that file except as otherwise specified.
Enabling and Disabling Slaves
When a bond is created, a slave is initially enabled or disabled based on whether carrier is detected on the NIC (seeiface_create()). After that, a slave is disabled if its carrier goes down for a period of time longer than the down-delay, and it is enabled if carrier comes up for longer than the updelay (see bond_link_status_update()).There is one exception where the updelay is skipped: if no slaves at all are currently enabled, then the first slave onwhich carrier comes up is enabled immediately.
The updelay should be set to a time longer than the STP forwarding delay of the physical switch to which the bondport is connected (if STP is enabled on that switch). Otherwise, the slave will be enabled, and load may be shifted toit, before the physical switch starts forwarding packets on that port, which can cause some data to be “blackholed” for
132 Chapter 4. Deep Dive
Open vSwitch, Release 2.8.0
a time. The exception for a single enabled slave does not cause any problem in this regard because when no slaves areenabled all output packets are blackholed anyway.
When a slave becomes disabled, the vswitch immediately chooses a new output port for traffic that was destined forthat slave (see bond_enable_slave()). It also sends a “gratuitous learning packet”, specifically a RARP, on thebond port (on the newly chosen slave) for each MAC address that the vswitch has learned on a port other than the bond(see bundle_send_learning_packets()), to teach the physical switch that the new slave should be used inplace of the one that is now disabled. (This behavior probably makes sense only for a vswitch that has only one port(the bond) connected to a physical switch; vswitchd should probably provide a way to disable or configure it in otherscenarios.)
Bond Packet Input
Bonding accepts unicast packets on any bond slave. This can occasionally cause packet duplication for the first fewpackets sent to a given MAC, if the physical switch attached to the bond is flooding packets to that MAC because ithas not yet learned the correct slave for that MAC.
Bonding only accepts multicast (and broadcast) packets on a single bond slave (the “active slave”) at any given time.Multicast packets received on other slaves are dropped. Otherwise, every multicast packet would be duplicated, oncefor every bond slave, because the physical switch attached to the bond will flood those packets.
Bonding also drops received packets when the vswitch has learned that the packet’s MAC is on a port other than thebond port itself. This is because it is likely that the vswitch itself sent the packet out the bond port on a differentslave and is now receiving the packet back. This occurs when the packet is multicast or the physical switch has notyet learned the MAC and is flooding it. However, the vswitch makes an exception to this rule for broadcast ARPreplies, which indicate that the MAC has moved to another switch, probably due to VM migration. (ARP replies arenormally unicast, so this exception does not match normal ARP replies. It will match the learning packets sent onbond fail-over.)
The active slave is simply the first slave to be enabled after the bond is created (seebond_choose_active_slave()). If the active slave is disabled, then a new active slave is chosen among theslaves that remain active. Currently due to the way that configuration works, this tends to be the remaining slavewhose interface name is first alphabetically, but this is by no means guaranteed.
Bond Packet Output
When a packet is sent out a bond port, the bond slave actually used is selected based on the packet’s source MAC andVLAN tag (see bond_choose_output_slave()). In particular, the source MAC and VLAN tag are hashed intoone of 256 values, and that value is looked up in a hash table (the “bond hash”) kept in the bond_hash member ofstruct port. The hash table entry identifies a bond slave. If no bond slave has yet been chosen for that hash table entry,vswitchd chooses one arbitrarily.
Every 10 seconds, vswitchd rebalances the bond slaves (see bond_rebalance()). To rebalance, vswitchd exam-ines the statistics for the number of bytes transmitted by each slave over approximately the past minute, with datasent more recently weighted more heavily than data sent less recently. It considers each of the slaves in order frommost-loaded to least-loaded. If highly loaded slave H is significantly more heavily loaded than the least-loaded slaveL, and slave H carries at least two hashes, then vswitchd shifts one of H’s hashes to L. However, vswitchd will onlyshift a hash from H to L if it will decrease the ratio of the load between H and L by at least 0.1.
Currently, “significantly more loaded” means that H must carry at least 1 Mbps more traffic, and that traffic must be atleast 3% greater than L’s.
Bond Balance Modes
Each bond balancing mode has different considerations, described below.
4.1. OVS 133
Open vSwitch, Release 2.8.0
LACP Bonding
LACP bonding requires the remote switch to implement LACP, but it is otherwise very simple in that, after LACPnegotiation is complete, there is no need for special handling of received packets.
Several of the physical switches that support LACP block all traffic for ports that are configured to use LACP, untilLACP is negotiated with the host. When configuring a LACP bond on a OVS host (eg: XenServer), this means thatthere will be an interruption of the network connectivity between the time the ports on the physical switch and thebond on the OVS host are configured. The interruption may be relatively long, if different people are responsible formanaging the switches and the OVS host.
Such network connectivity failure can be avoided if LACP can be configured on the OVS host before configuring thephysical switch, and having the OVS host fall back to a bond mode (active-backup) till the physical switch LACPconfiguration is complete. An option “lacp-fallback-ab” exists to provide such behavior on openvswitch.
Active Backup Bonding
Active Backup bonds send all traffic out one “active” slave until that slave becomes unavailable. Since they aresignificantly less complicated than SLB bonds, they are preferred when LACP is not an option. Additionally, they arethe only bond mode which supports attaching each slave to a different upstream switch.
SLB Bonding
SLB bonding allows a limited form of load balancing without the remote switch’s knowledge or cooperation. Thebasics of SLB are simple. SLB assigns each source MAC+VLAN pair to a link and transmits all packets from thatMAC+VLAN through that link. Learning in the remote switch causes it to send packets to that MAC+VLAN throughthe same link.
SLB bonding has the following complications:
0. When the remote switch has not learned the MAC for the destination of a unicast packet and hence floods thepacket to all of the links on the SLB bond, Open vSwitch will forward duplicate packets, one per link, to eachother switch port.
Open vSwitch does not solve this problem.
1. When the remote switch receives a multicast or broadcast packet from a port not on the SLB bond, it will forwardit to all of the links in the SLB bond. This would cause packet duplication if not handled specially.
Open vSwitch avoids packet duplication by accepting multicast and broadcast packets on only the active slave,and dropping multicast and broadcast packets on all other slaves.
2. When Open vSwitch forwards a multicast or broadcast packet to a link in the SLB bond other than the activeslave, the remote switch will forward it to all of the other links in the SLB bond, including the active slave.Without special handling, this would mean that Open vSwitch would forward a second copy of the packet toeach switch port (other than the bond), including the port that originated the packet.
Open vSwitch deals with this case by dropping packets received on any SLB bonded link that have a sourceMAC+VLAN that has been learned on any other port. (This means that SLB as implemented in Open vSwitchrelies critically on MAC learning. Notably, SLB is incompatible with the “flood_vlans” feature.)
3. Suppose that a MAC+VLAN moves to an SLB bond from another port (e.g. when a VM is migrated from thishypervisor to a different one). Without additional special handling, Open vSwitch will not notice until the MAClearning entry expires, up to 60 seconds later as a consequence of rule #2.
Open vSwitch avoids a 60-second delay by listening for gratuitous ARPs, which VMs commonly emit uponmigration. As an exception to rule #2, a gratuitous ARP received on an SLB bond is not dropped and updates
134 Chapter 4. Deep Dive
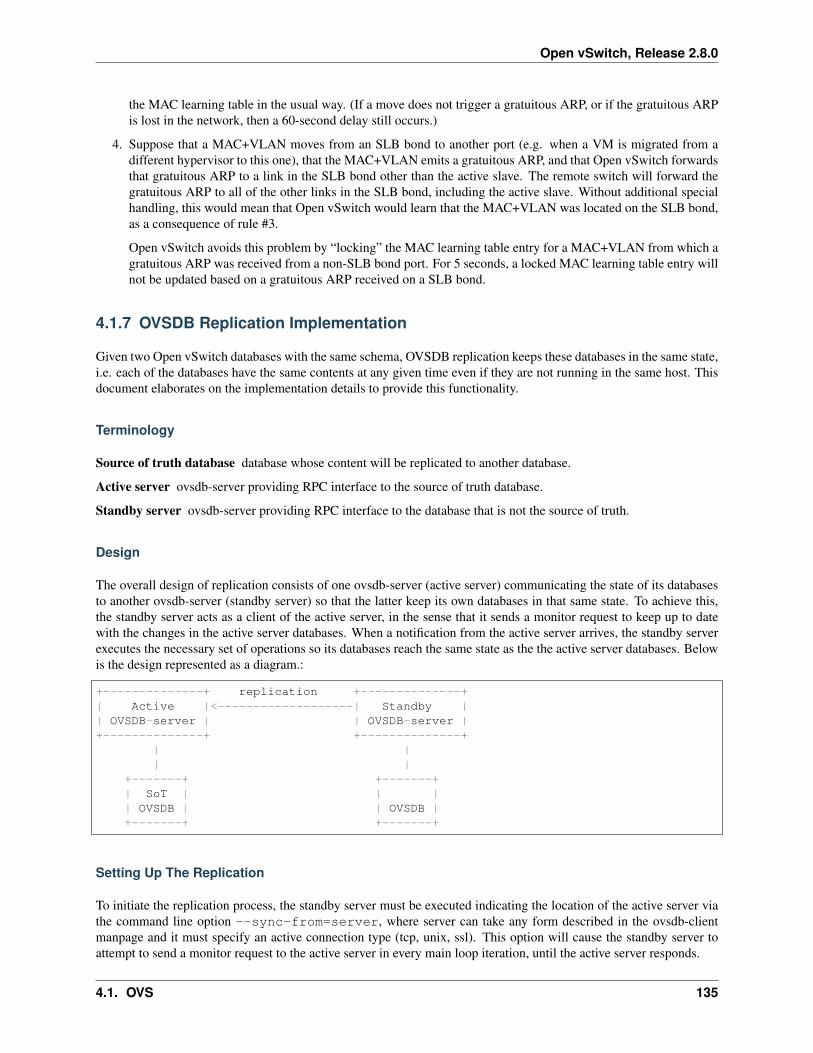
Open vSwitch, Release 2.8.0
the MAC learning table in the usual way. (If a move does not trigger a gratuitous ARP, or if the gratuitous ARPis lost in the network, then a 60-second delay still occurs.)
4. Suppose that a MAC+VLAN moves from an SLB bond to another port (e.g. when a VM is migrated from adifferent hypervisor to this one), that the MAC+VLAN emits a gratuitous ARP, and that Open vSwitch forwardsthat gratuitous ARP to a link in the SLB bond other than the active slave. The remote switch will forward thegratuitous ARP to all of the other links in the SLB bond, including the active slave. Without additional specialhandling, this would mean that Open vSwitch would learn that the MAC+VLAN was located on the SLB bond,as a consequence of rule #3.
Open vSwitch avoids this problem by “locking” the MAC learning table entry for a MAC+VLAN from which agratuitous ARP was received from a non-SLB bond port. For 5 seconds, a locked MAC learning table entry willnot be updated based on a gratuitous ARP received on a SLB bond.
4.1.7 OVSDB Replication Implementation
Given two Open vSwitch databases with the same schema, OVSDB replication keeps these databases in the same state,i.e. each of the databases have the same contents at any given time even if they are not running in the same host. Thisdocument elaborates on the implementation details to provide this functionality.
Terminology
Source of truth database database whose content will be replicated to another database.
Active server ovsdb-server providing RPC interface to the source of truth database.
Standby server ovsdb-server providing RPC interface to the database that is not the source of truth.
Design
The overall design of replication consists of one ovsdb-server (active server) communicating the state of its databasesto another ovsdb-server (standby server) so that the latter keep its own databases in that same state. To achieve this,the standby server acts as a client of the active server, in the sense that it sends a monitor request to keep up to datewith the changes in the active server databases. When a notification from the active server arrives, the standby serverexecutes the necessary set of operations so its databases reach the same state as the the active server databases. Belowis the design represented as a diagram.:
+--------------+ replication +--------------+| Active |<-------------------| Standby || OVSDB-server | | OVSDB-server |+--------------+ +--------------+
| || |
+-------+ +-------+| SoT | | || OVSDB | | OVSDB |+-------+ +-------+
Setting Up The Replication
To initiate the replication process, the standby server must be executed indicating the location of the active server viathe command line option --sync-from=server, where server can take any form described in the ovsdb-clientmanpage and it must specify an active connection type (tcp, unix, ssl). This option will cause the standby server toattempt to send a monitor request to the active server in every main loop iteration, until the active server responds.
4.1. OVS 135
Open vSwitch, Release 2.8.0
When sending a monitor request the standby server is doing the following:
1. Erase the content of the databases for which it is providing a RPC interface.
2. Open the jsonrpc channel to communicate with the active server.
3. Fetch all the databases located in the active server.
4. For each database with the same schema in both the active and standby servers: construct and send a monitorrequest message specifying the tables that will be monitored (i.e all the tables on the database except the onesblacklisted [*]).
5. Set the standby database to the current state of the active database.
Once the monitor request message is sent, the standby server will continuously receive notifications of changes occur-ring to the tables specified in the request. The process of handling this notifications is detailed in the next section.
[*] A set of tables that will be excluded from replication can be configure as a blacklist of tables via the commandline option --sync-exclude-tables=db:table[,db:table]..., where db corresponds to the databasewhere the table resides.
Replication Process
The replication process consists on handling the update notifications received in the standby server caused by themonitor request that was previously sent to the active server. In every loop iteration, the standby server attempts toreceive a message from the active server which can be an error, an echo message (used to keep the connection alive) oran update notification. In case the message is a fatal error, the standby server will disconnect from the active withoutdropping the replicated data. If it is an echo message, the standby server will reply with an echo message as well. Ifthe message is an update notification, the following process occurs:
1. Create a new transaction.
2. Get the <table-updates> object from the params member of the notification.
3. For each <table-update> in the <table-updates> object do:
1. For each <row-update> in <table-update> check what kind of operation should be executed ac-cording to the following criteria about the presence of the object members:
• If old member is not present, execute an insert operation using <row> from the new member.
• If old member is present and new member is not present, execute a delete operation using <row>from the old member
• If both old and new members are present, execute an update operation using <row> from the newmember.
4. Commit the transaction.
If an error occurs during the replication process, all replication is restarted by resending a new monitor requestas described in the section “Setting up the replication”.
Runtime Management Commands
Runtime management commands can be sent to a running standby server via ovs-appctl in order to configure thereplication functionality. The available commands are the following.
ovsdb-server/set-remote-ovsdb-server {server} sets the name of the active server
ovsdb-server/get-remote-ovsdb-server gets the name of the active server
136 Chapter 4. Deep Dive
Open vSwitch, Release 2.8.0
ovsdb-server/connect-remote-ovsdb-server causes the server to attempt to send a monitor requestevery main loop iteration
ovsdb-server/disconnect-remote-ovsdb-server closes the jsonrpc channel between the active serverand frees the memory used for the replication configuration.
ovsdb-server/set-sync-exclude-tables {db:table,...} sets the tables list that will be excludedfrom being replicated
ovsdb-server/get-sync-excluded-tables gets the tables list that is currently excluded from replication
4.1.8 The DPDK Datapath
DPDK vHost User Ports
The DPDK datapath provides DPDK-backed vHost user ports as a primary way to interact with guests. For moreinformation on vHost User, refer to the QEMU documentation on same.
Quick Example
This example demonstrates how to add two dpdkvhostuserclient ports to an existing bridge called br0:
$ ovs-vsctl add-port br0 dpdkvhostclient0 \-- set Interface dpdkvhostclient0 type=dpdkvhostuserclient \
options:vhost-server-path=/tmp/dpdkvhostclient0$ ovs-vsctl add-port br0 dpdkvhostclient1 \
-- set Interface dpdkvhostclient1 type=dpdkvhostuserclient \options:vhost-server-path=/tmp/dpdkvhostclient1
For the above examples to work, an appropriate server socket must be created at the paths specified (/tmp/dpdkvhostclient0 and /tmp/dpdkvhostclient0). These sockets can be created with QEMU; see thevhost-user client section for details.
vhost-user vs. vhost-user-client
Open vSwitch provides two types of vHost User ports:
• vhost-user (dpdkvhostuser)
• vhost-user-client (dpdkvhostuserclient)
vHost User uses a client-server model. The server creates/manages/destroys the vHost User sockets, and the clientconnects to the server. Depending on which port type you use, dpdkvhostuser or dpdkvhostuserclient, adifferent configuration of the client-server model is used.
For vhost-user ports, Open vSwitch acts as the server and QEMU the client. This means if OVS dies, all VMs mustbe restarted. On the other hand, for vhost-user-client ports, OVS acts as the client and QEMU the server. This meansOVS can die and be restarted without issue, and it is also possible to restart an instance itself. For this reason, vhost-user-client ports are the preferred type for all known use cases; the only limitation is that vhost-user client mode portsrequire QEMU version 2.7. Ports of type vhost-user are currently deprecated and will be removed in a future release.
4.1. OVS 137
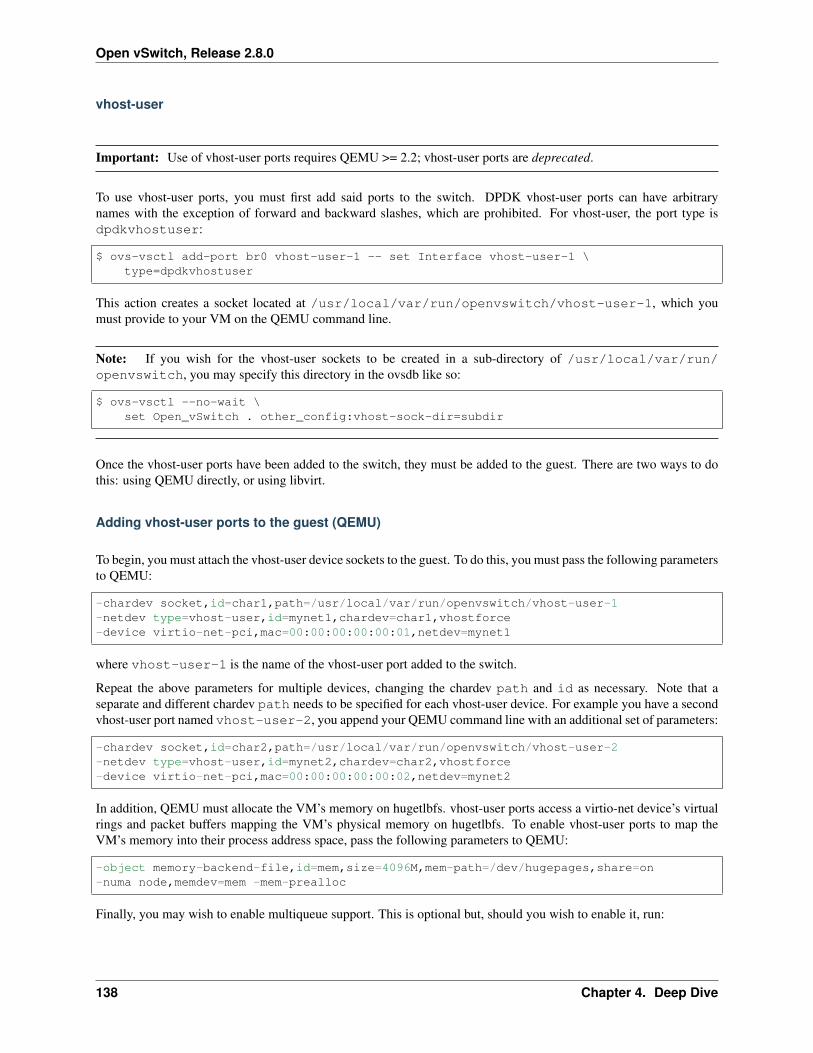
Open vSwitch, Release 2.8.0
vhost-user
Important: Use of vhost-user ports requires QEMU >= 2.2; vhost-user ports are deprecated.
To use vhost-user ports, you must first add said ports to the switch. DPDK vhost-user ports can have arbitrarynames with the exception of forward and backward slashes, which are prohibited. For vhost-user, the port type isdpdkvhostuser:
$ ovs-vsctl add-port br0 vhost-user-1 -- set Interface vhost-user-1 \type=dpdkvhostuser
This action creates a socket located at /usr/local/var/run/openvswitch/vhost-user-1, which youmust provide to your VM on the QEMU command line.
Note: If you wish for the vhost-user sockets to be created in a sub-directory of /usr/local/var/run/openvswitch, you may specify this directory in the ovsdb like so:
$ ovs-vsctl --no-wait \set Open_vSwitch . other_config:vhost-sock-dir=subdir
Once the vhost-user ports have been added to the switch, they must be added to the guest. There are two ways to dothis: using QEMU directly, or using libvirt.
Adding vhost-user ports to the guest (QEMU)
To begin, you must attach the vhost-user device sockets to the guest. To do this, you must pass the following parametersto QEMU:
-chardev socket,id=char1,path=/usr/local/var/run/openvswitch/vhost-user-1-netdev type=vhost-user,id=mynet1,chardev=char1,vhostforce-device virtio-net-pci,mac=00:00:00:00:00:01,netdev=mynet1
where vhost-user-1 is the name of the vhost-user port added to the switch.
Repeat the above parameters for multiple devices, changing the chardev path and id as necessary. Note that aseparate and different chardev path needs to be specified for each vhost-user device. For example you have a secondvhost-user port named vhost-user-2, you append your QEMU command line with an additional set of parameters:
-chardev socket,id=char2,path=/usr/local/var/run/openvswitch/vhost-user-2-netdev type=vhost-user,id=mynet2,chardev=char2,vhostforce-device virtio-net-pci,mac=00:00:00:00:00:02,netdev=mynet2
In addition, QEMU must allocate the VM’s memory on hugetlbfs. vhost-user ports access a virtio-net device’s virtualrings and packet buffers mapping the VM’s physical memory on hugetlbfs. To enable vhost-user ports to map theVM’s memory into their process address space, pass the following parameters to QEMU:
-object memory-backend-file,id=mem,size=4096M,mem-path=/dev/hugepages,share=on-numa node,memdev=mem -mem-prealloc
Finally, you may wish to enable multiqueue support. This is optional but, should you wish to enable it, run:
138 Chapter 4. Deep Dive
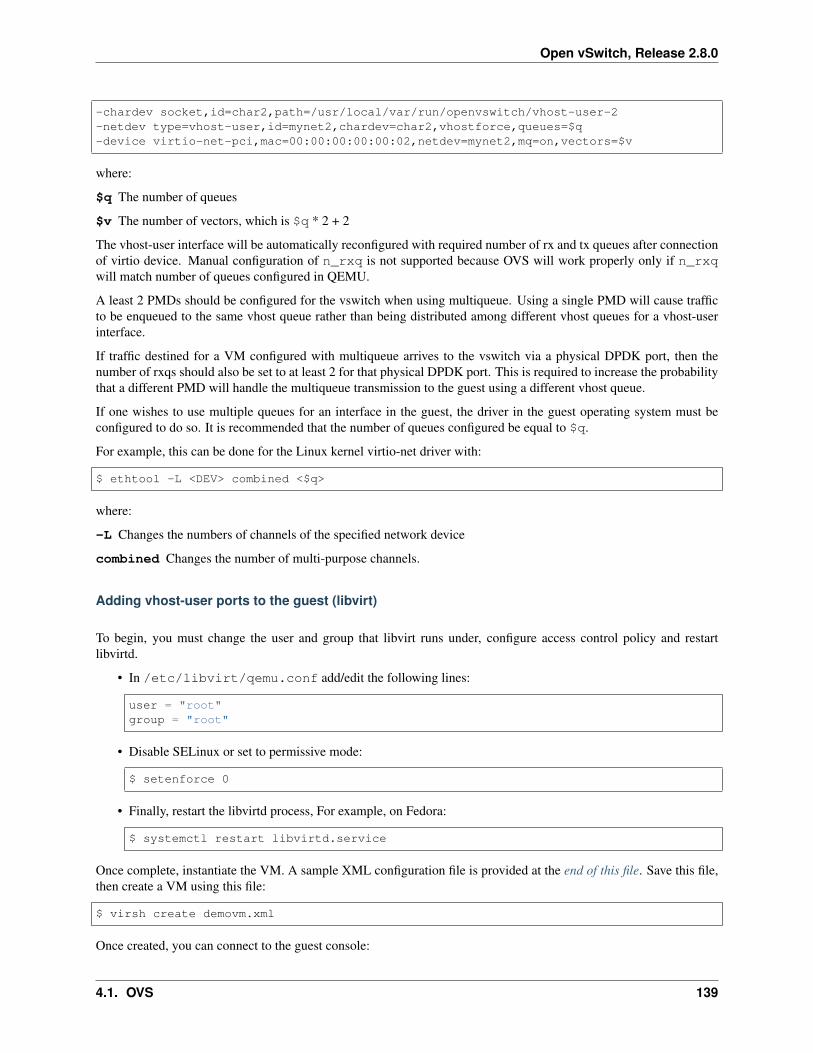
Open vSwitch, Release 2.8.0
-chardev socket,id=char2,path=/usr/local/var/run/openvswitch/vhost-user-2-netdev type=vhost-user,id=mynet2,chardev=char2,vhostforce,queues=$q-device virtio-net-pci,mac=00:00:00:00:00:02,netdev=mynet2,mq=on,vectors=$v
where:
$q The number of queues
$v The number of vectors, which is $q * 2 + 2
The vhost-user interface will be automatically reconfigured with required number of rx and tx queues after connectionof virtio device. Manual configuration of n_rxq is not supported because OVS will work properly only if n_rxqwill match number of queues configured in QEMU.
A least 2 PMDs should be configured for the vswitch when using multiqueue. Using a single PMD will cause trafficto be enqueued to the same vhost queue rather than being distributed among different vhost queues for a vhost-userinterface.
If traffic destined for a VM configured with multiqueue arrives to the vswitch via a physical DPDK port, then thenumber of rxqs should also be set to at least 2 for that physical DPDK port. This is required to increase the probabilitythat a different PMD will handle the multiqueue transmission to the guest using a different vhost queue.
If one wishes to use multiple queues for an interface in the guest, the driver in the guest operating system must beconfigured to do so. It is recommended that the number of queues configured be equal to $q.
For example, this can be done for the Linux kernel virtio-net driver with:
$ ethtool -L <DEV> combined <$q>
where:
-L Changes the numbers of channels of the specified network device
combined Changes the number of multi-purpose channels.
Adding vhost-user ports to the guest (libvirt)
To begin, you must change the user and group that libvirt runs under, configure access control policy and restartlibvirtd.
• In /etc/libvirt/qemu.conf add/edit the following lines:
user = "root"group = "root"
• Disable SELinux or set to permissive mode:
$ setenforce 0
• Finally, restart the libvirtd process, For example, on Fedora:
$ systemctl restart libvirtd.service
Once complete, instantiate the VM. A sample XML configuration file is provided at the end of this file. Save this file,then create a VM using this file:
$ virsh create demovm.xml
Once created, you can connect to the guest console:
4.1. OVS 139
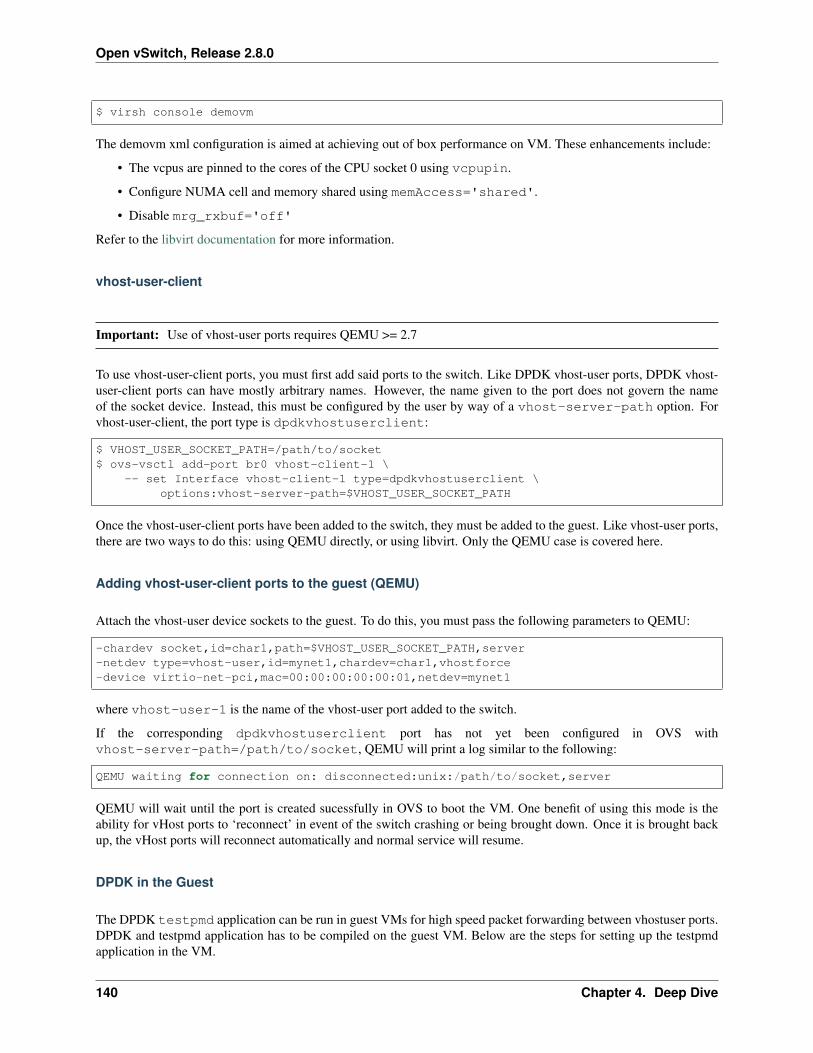
Open vSwitch, Release 2.8.0
$ virsh console demovm
The demovm xml configuration is aimed at achieving out of box performance on VM. These enhancements include:
• The vcpus are pinned to the cores of the CPU socket 0 using vcpupin.
• Configure NUMA cell and memory shared using memAccess='shared'.
• Disable mrg_rxbuf='off'
Refer to the libvirt documentation for more information.
vhost-user-client
Important: Use of vhost-user ports requires QEMU >= 2.7
To use vhost-user-client ports, you must first add said ports to the switch. Like DPDK vhost-user ports, DPDK vhost-user-client ports can have mostly arbitrary names. However, the name given to the port does not govern the nameof the socket device. Instead, this must be configured by the user by way of a vhost-server-path option. Forvhost-user-client, the port type is dpdkvhostuserclient:
$ VHOST_USER_SOCKET_PATH=/path/to/socket$ ovs-vsctl add-port br0 vhost-client-1 \
-- set Interface vhost-client-1 type=dpdkvhostuserclient \options:vhost-server-path=$VHOST_USER_SOCKET_PATH
Once the vhost-user-client ports have been added to the switch, they must be added to the guest. Like vhost-user ports,there are two ways to do this: using QEMU directly, or using libvirt. Only the QEMU case is covered here.
Adding vhost-user-client ports to the guest (QEMU)
Attach the vhost-user device sockets to the guest. To do this, you must pass the following parameters to QEMU:
-chardev socket,id=char1,path=$VHOST_USER_SOCKET_PATH,server-netdev type=vhost-user,id=mynet1,chardev=char1,vhostforce-device virtio-net-pci,mac=00:00:00:00:00:01,netdev=mynet1
where vhost-user-1 is the name of the vhost-user port added to the switch.
If the corresponding dpdkvhostuserclient port has not yet been configured in OVS withvhost-server-path=/path/to/socket, QEMU will print a log similar to the following:
QEMU waiting for connection on: disconnected:unix:/path/to/socket,server
QEMU will wait until the port is created sucessfully in OVS to boot the VM. One benefit of using this mode is theability for vHost ports to ‘reconnect’ in event of the switch crashing or being brought down. Once it is brought backup, the vHost ports will reconnect automatically and normal service will resume.
DPDK in the Guest
The DPDK testpmd application can be run in guest VMs for high speed packet forwarding between vhostuser ports.DPDK and testpmd application has to be compiled on the guest VM. Below are the steps for setting up the testpmdapplication in the VM.
140 Chapter 4. Deep Dive

Open vSwitch, Release 2.8.0
Note: Support for DPDK in the guest requires QEMU >= 2.2
To begin, instantiate a guest as described in vhost-user or vhost-user-client. Once started, connect to the VM, downloadthe DPDK sources to VM and build DPDK:
$ cd /root/dpdk/$ wget http://fast.dpdk.org/rel/dpdk-17.05.1.tar.xz$ tar xf dpdk-17.05.1.tar.xz$ export DPDK_DIR=/root/dpdk/dpdk-stable-17.05.1$ export DPDK_TARGET=x86_64-native-linuxapp-gcc$ export DPDK_BUILD=$DPDK_DIR/$DPDK_TARGET$ cd $DPDK_DIR$ make install T=$DPDK_TARGET DESTDIR=install
Build the test-pmd application:
$ cd app/test-pmd$ export RTE_SDK=$DPDK_DIR$ export RTE_TARGET=$DPDK_TARGET$ make
Setup huge pages and DPDK devices using UIO:
$ sysctl vm.nr_hugepages=1024$ mkdir -p /dev/hugepages$ mount -t hugetlbfs hugetlbfs /dev/hugepages # only if not already mounted$ modprobe uio$ insmod $DPDK_BUILD/kmod/igb_uio.ko$ $DPDK_DIR/usertools/dpdk-devbind.py --status$ $DPDK_DIR/usertools/dpdk-devbind.py -b igb_uio 00:03.0 00:04.0
Note: vhost ports pci ids can be retrieved using:
lspci | grep Ethernet
Finally, start the application:
# TODO
Sample XML
<domain type='kvm'><name>demovm</name><uuid>4a9b3f53-fa2a-47f3-a757-dd87720d9d1d</uuid><memory unit='KiB'>4194304</memory><currentMemory unit='KiB'>4194304</currentMemory><memoryBacking><hugepages>
<page size='2' unit='M' nodeset='0'/></hugepages>
</memoryBacking><vcpu placement='static'>2</vcpu>
(continues on next page)
4.1. OVS 141
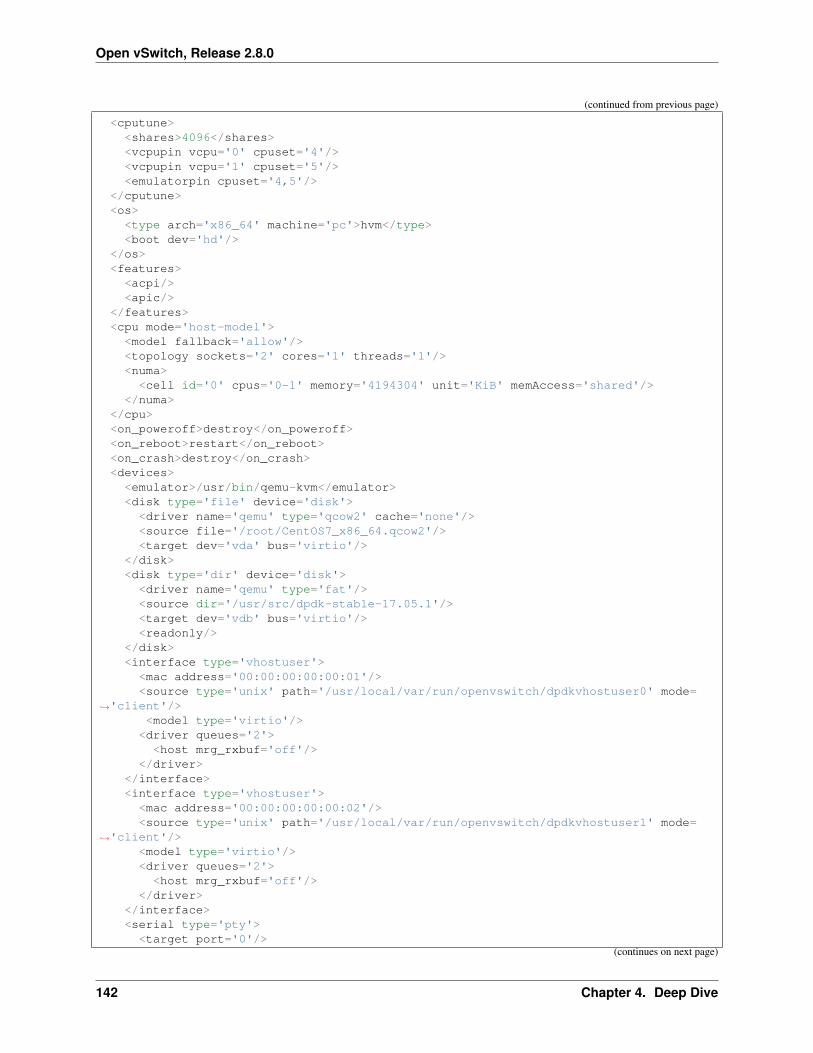
Open vSwitch, Release 2.8.0
(continued from previous page)
<cputune><shares>4096</shares><vcpupin vcpu='0' cpuset='4'/><vcpupin vcpu='1' cpuset='5'/><emulatorpin cpuset='4,5'/>
</cputune><os><type arch='x86_64' machine='pc'>hvm</type><boot dev='hd'/>
</os><features><acpi/><apic/>
</features><cpu mode='host-model'><model fallback='allow'/><topology sockets='2' cores='1' threads='1'/><numa>
<cell id='0' cpus='0-1' memory='4194304' unit='KiB' memAccess='shared'/></numa>
</cpu><on_poweroff>destroy</on_poweroff><on_reboot>restart</on_reboot><on_crash>destroy</on_crash><devices><emulator>/usr/bin/qemu-kvm</emulator><disk type='file' device='disk'>
<driver name='qemu' type='qcow2' cache='none'/><source file='/root/CentOS7_x86_64.qcow2'/><target dev='vda' bus='virtio'/>
</disk><disk type='dir' device='disk'>
<driver name='qemu' type='fat'/><source dir='/usr/src/dpdk-stable-17.05.1'/><target dev='vdb' bus='virtio'/><readonly/>
</disk><interface type='vhostuser'>
<mac address='00:00:00:00:00:01'/><source type='unix' path='/usr/local/var/run/openvswitch/dpdkvhostuser0' mode=
→˓'client'/><model type='virtio'/>
<driver queues='2'><host mrg_rxbuf='off'/>
</driver></interface><interface type='vhostuser'>
<mac address='00:00:00:00:00:02'/><source type='unix' path='/usr/local/var/run/openvswitch/dpdkvhostuser1' mode=
→˓'client'/><model type='virtio'/><driver queues='2'>
<host mrg_rxbuf='off'/></driver>
</interface><serial type='pty'>
<target port='0'/>(continues on next page)
142 Chapter 4. Deep Dive
Open vSwitch, Release 2.8.0
(continued from previous page)
</serial><console type='pty'>
<target type='serial' port='0'/></console>
</devices></domain>
DPDK Ring Ports
Warning: DPDK ring interfaces cannot be used for guest communication and are retained mainly for backwardscompatibility purposes. In nearly all cases, vhost-user ports are a better choice and should be used instead.
The DPDK datapath provides DPDK-backed ring ports that are implemented using DPDK’s librte_ring library.For more information on this library, refer to the DPDK documentation.
Quick Example
This example demonstrates how to add a dpdkr port to an existing bridge called br0:
$ ovs-vsctl add-port br0 dpdkr0 -- set Interface dpdkr0 type=dpdkr
dpdkr
To use ring ports, you must first add said ports to the switch. Unlike vhost-user ports, ring port names must take aspecific format, dpdkrNN, where NN is the port ID. For example:
$ ovs-vsctl add-port br0 dpdkr0 -- set Interface dpdkr0 type=dpdkr
Once the port has been added to the switch, they can be used by host processes. A sample loopback application -test-dpdkr - is included with Open vSwitch. To use this, run the following:
$ ./tests/test-dpdkr -c 1 -n 4 --proc-type=secondary -- -n 0
Further functionality would require developing your own application. Refer to the DPDK documentation for moreinformation on how to do this.
Adding dpdkr ports to the guest
It is not recommended to use ring ports from guests. Historically, this was possible using a patched version of QEMUand the IVSHMEM feature provided with DPDK. However, this functionality was removed because:
• The IVSHMEM library was removed from DPDK in DPDK 16.11
• Support for IVSHMEM was never upstreamed to QEMU and has been publicly rejected by the QEMU commu-nity
• vhost-user interfaces are the defacto DPDK-based path to guests
4.1. OVS 143
Open vSwitch, Release 2.8.0
4.1.9 OVS-on-Hyper-V Design
This document provides details of the effort to develop Open vSwitch on Microsoft Hyper-V. This document shouldgive enough information to understand the overall design.
Note: The userspace portion of the OVS has been ported to Hyper-V in a separate effort, and committed to theopenvswitch repo. This document will mostly emphasize on the kernel driver, though we touch upon some of theaspects of userspace as well.
Background Info
Microsoft’s hypervisor solution - Hyper-V1 implements a virtual switch that is extensible and provides opportunitiesfor other vendors to implement functional extensions2. The extensions need to be implemented as NDIS drivers thatbind within the extensible switch driver stack provided. The extensions can broadly provide the functionality of moni-toring, modifying and forwarding packets to destination ports on the Hyper-V extensible switch. Correspondingly, theextensions can be categorized into the following types and provide the functionality noted:
• Capturing extensions: monitoring packets
• Filtering extensions: monitoring, modifying packets
• Forwarding extensions: monitoring, modifying, forwarding packets
As can be expected, the kernel portion (datapath) of OVS on Hyper-V solution will be implemented as a forwardingextension.
In Hyper-V, the virtual machine is called the Child Partition. Each VIF or physical NIC on the Hyper-V extensibleswitch is attached via a port. Each port is both on the ingress path or the egress path of the switch. The ingress pathis used for packets being sent out of a port, and egress is used for packet being received on a port. By design, NDISprovides a layered interface. In this layered interface, higher level layers call into lower level layers, in the ingresspath. In the egress path, it is the other way round. In addition, there is a object identifier (OID) interface for controloperations Eg. addition of a port. The workflow for the calls is similar in nature to the packets, where higher levellayers call into the lower level layers. A good representational diagram of this architecture is in4.
Windows Filtering Platform (WFP)5 is a platform implemented on Hyper-V that provides APIs and services for filter-ing packets. WFP has been utilized to filter on some of the packets that OVS is not equipped to handle directly. Moredetails in later sections.
IP Helper6 is a set of API available on Hyper-V to retrieve information related to the network configuration informationon the host machine. IP Helper has been used to retrieve some of the configuration information that OVS needs.
Design
Various blocks of the OVS Windows implementation
+-------------------------------+| || CHILD PARTITION |
(continues on next page)
1 Hyper-V Extensible Switch https://msdn.microsoft.com/windows/hardware/drivers/network/hyper-v-extensible-switch2 Hyper-V Extensible Switch Extensions https://msdn.microsoft.com/windows/hardware/drivers/network/hyper-v-extensible-switch-extensions4 Hyper-V Extensible Switch Components https://msdn.microsoft.com/windows/hardware/drivers/network/
hyper-v-extensible-switch-components5 Windows Filtering Platform https://msdn.microsoft.com/en-us/library/windows/desktop/aa366510(v=vs.85).aspx6 IP Helper https://msdn.microsoft.com/windows/hardware/drivers/network/ip-helper
144 Chapter 4. Deep Dive
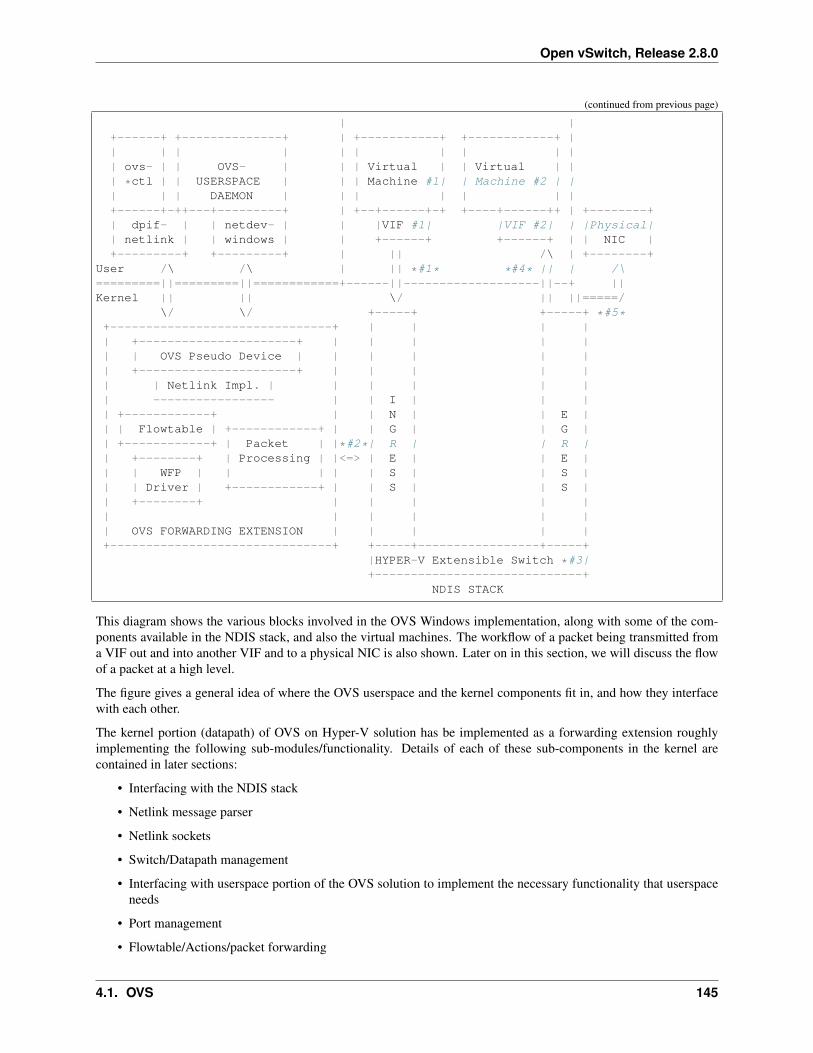
Open vSwitch, Release 2.8.0
(continued from previous page)
| |+------+ +--------------+ | +-----------+ +------------+ || | | | | | | | | || ovs- | | OVS- | | | Virtual | | Virtual | || *ctl | | USERSPACE | | | Machine #1| | Machine #2 | || | | DAEMON | | | | | | |+------+-++---+---------+ | +--+------+-+ +----+------++ | +--------+| dpif- | | netdev- | | |VIF #1| |VIF #2| | |Physical|| netlink | | windows | | +------+ +------+ | | NIC |+---------+ +---------+ | || /\ | +--------+
User /\ /\ | || *#1* *#4* || | /\=========||=========||============+------||-------------------||--+ ||Kernel || || \/ || ||=====/
\/ \/ +-----+ +-----+ *#5*+-------------------------------+ | | | || +----------------------+ | | | | || | OVS Pseudo Device | | | | | || +----------------------+ | | | | || | Netlink Impl. | | | | | || ----------------- | | I | | || +------------+ | | N | | E || | Flowtable | +------------+ | | G | | G || +------------+ | Packet | |*#2*| R | | R || +--------+ | Processing | |<=> | E | | E || | WFP | | | | | S | | S || | Driver | +------------+ | | S | | S || +--------+ | | | | || | | | | || OVS FORWARDING EXTENSION | | | | |+-------------------------------+ +-----+-----------------+-----+
|HYPER-V Extensible Switch *#3|+-----------------------------+
NDIS STACK
This diagram shows the various blocks involved in the OVS Windows implementation, along with some of the com-ponents available in the NDIS stack, and also the virtual machines. The workflow of a packet being transmitted froma VIF out and into another VIF and to a physical NIC is also shown. Later on in this section, we will discuss the flowof a packet at a high level.
The figure gives a general idea of where the OVS userspace and the kernel components fit in, and how they interfacewith each other.
The kernel portion (datapath) of OVS on Hyper-V solution has be implemented as a forwarding extension roughlyimplementing the following sub-modules/functionality. Details of each of these sub-components in the kernel arecontained in later sections:
• Interfacing with the NDIS stack
• Netlink message parser
• Netlink sockets
• Switch/Datapath management
• Interfacing with userspace portion of the OVS solution to implement the necessary functionality that userspaceneeds
• Port management
• Flowtable/Actions/packet forwarding
4.1. OVS 145
Open vSwitch, Release 2.8.0
• Tunneling
• Event notifications
The datapath for the OVS on Linux is a kernel module, and cannot be directly ported since there are significant differ-ences in architecture even though the end functionality provided would be similar. Some examples of the differencesare:
• Interfacing with the NDIS stack to hook into the NDIS callbacks for functionality such as receiving and sendingpackets, packet completions, OIDs used for events such as a new port appearing on the virtual switch.
• Interface between the userspace and the kernel module.
• Event notifications are significantly different.
• The communication interface between DPIF and the kernel module need not be implemented in the way OVSon Linux does. That said, it would be advantageous to have a similar interface to the kernel module for reasonsof readability and maintainability.
• Any licensing issues of using Linux kernel code directly.
Due to these differences, it was a straightforward decision to develop the datapath for OVS on Hyper-V from scratchrather than porting the one on Linux. A re-development focused on the following goals:
• Adhere to the existing requirements of userspace portion of OVS (such as ovs-vswitchd), to minimize changesin the userspace workflow.
• Fit well into the typical workflow of a Hyper-V extensible switch forwarding extension.
The userspace portion of the OVS solution is mostly POSIX code, and not very Linux specific. Majority of theuserspace code does not interface directly with the kernel datapath and was ported independently of the kernel datapatheffort.
As explained in the OVS porting design document7, DPIF is the portion of userspace that interfaces with the kernelportion of the OVS. The interface that each DPIF provider has to implement is defined in dpif-provider.h3.Though each platform is allowed to have its own implementation of the DPIF provider, it was found, via communityfeedback, that it is desired to share code whenever possible. Thus, the DPIF provider for OVS on Hyper-V shares codewith the DPIF provider on Linux. This interface is implemented in dpif-netlink.c.
We’ll elaborate more on kernel-userspace interface in a dedicated section below. Here it suffices to say that the DPIFprovider implementation for Windows is netlink-based and shares code with the Linux one.
Kernel Module (Datapath)
Interfacing with the NDIS Stack
For each virtual switch on Hyper-V, the OVS extensible switch extension can be enabled/disabled. We support enablingthe OVS extension on only one switch. This is consistent with using a single datapath in the kernel on Linux. All thephysical adapters are connected as external adapters to the extensible switch.
When the OVS switch extension registers itself as a filter driver, it also registers callbacks for the switch/port man-agement and datapath functions. In other words, when a switch is created on the Hyper-V root partition (host), theextension gets an activate callback upon which it can initialize the data structures necessary for OVS to function.Similarly, there are callbacks for when a port gets added to the Hyper-V switch, and an External Network adapter or aVM Network adapter is connected/disconnected to the port. There are also callbacks for when a VIF (NIC of a childpartition) send out a packet, or a packet is received on an external NIC.
7 How to Port Open vSwitch to New Software or Hardware Porting Open vSwitch to New Software or Hardware3 DPIF Provider http://openvswitch.sourcearchive.com/documentation/1.1.0-1/dpif-provider_8h_source.html
146 Chapter 4. Deep Dive
Open vSwitch, Release 2.8.0
As shown in the figures, an extensible switch extension gets to see a packet sent by the VM (VIF) twice - once on theingress path and once on the egress path. Forwarding decisions are to be made on the ingress path. Correspondingly,we will be hooking onto the following interfaces:
• Ingress send indication: intercept packets for performing flow based forwarding.This includes straight forward-ing to output ports. Any packet modifications needed to be performed are done here either inline or by creatinga new packet. A forwarding action is performed as the flow actions dictate.
• Ingress completion indication: cleanup and free packets that we generated on the ingress send path, pass-throughfor packets that we did not generate.
• Egress receive indication: pass-through.
• Egress completion indication: pass-through.
Interfacing with OVS Userspace
We have implemented a pseudo device interface for letting OVS userspace talk to the OVS kernel module. This isequivalent to the typical character device interface on POSIX platforms where we can register custom functions forread, write and ioctl functionality. The pseudo device supports a whole bunch of ioctls that netdev and DPIF on OVSuserspace make use of.
Netlink Message Parser
The communication between OVS userspace and OVS kernel datapath is in the form of Netlink messages1,8. Moredetails about this are provided below. In the kernel, a full fledged netlink message parser has been implemented alongthe lines of the netlink message parser in OVS userspace. In fact, a lot of the code is ported code.
On the lines of struct ofpbuf in OVS userspace, a managed buffer has been implemented in the kernel datapathto make it easier to parse and construct netlink messages.
Netlink Sockets
On Linux, OVS userspace utilizes netlink sockets to pass back and forth netlink messages. Since much of userspacecode including DPIF provider in dpif-netlink.c (formerly dpif-linux.c) has been reused, pseudo-netlink sockets havebeen implemented in OVS userspace. As it is known, Windows lacks native netlink socket support, and also the socketfamily is not extensible either. Hence it is not possible to provide a native implementation of netlink socket. Weemulate netlink sockets in lib/netlink-socket.c and support all of the nl_* APIs to higher levels. The implementationopens a handle to the pseudo device for each netlink socket. Some more details on this topic are provided in theuserspace section on netlink sockets.
Typical netlink semantics of read message, write message, dump, and transaction have been implemented so thathigher level layers are not affected by the netlink implementation not being native.
Switch/Datapath Management
As explained above, we hook onto the management callback functions in the NDIS interface for when to initialize theOVS data structures, flow tables etc. Some of this code is also driven by OVS userspace code which sends down ioctlsfor operations like creating a tunnel port etc.
8 Netlink https://en.wikipedia.org/wiki/Netlink
4.1. OVS 147
Open vSwitch, Release 2.8.0
Port Management
As explained above, we hook onto the management callback functions in the NDIS interface to know when a port isadded/connected to the Hyper-V switch. We use these callbacks to initialize the port related data structures in OVS.Also, some of the ports are tunnel ports that don’t exist on the Hyper-V switch and get added from OVS userspace.
In order to identify a Hyper-V port, we use the value of ‘FriendlyName’ field in each Hyper-V port. We call this the“OVS-port-name”. The idea is that OVS userspace sets ‘OVS-port-name’ in each Hyper-V port to the same value asthe ‘name’ field of the ‘Interface’ table in OVSDB. When OVS userspace calls into the kernel datapath to add a port,we match the name of the port with the ‘OVS-port-name’ of a Hyper-V port.
We maintain separate hash tables, and separate counters for ports that have been added from the Hyper-V switch, andfor ports that have been added from OVS userspace.
Flowtable/Actions/Packet Forwarding
The flowtable and flow actions based packet forwarding is the core of the OVS datapath functionality. For each packeton the ingress path, we consult the flowtable and execute the corresponding actions. The actions can be limited tosimple forwarding to a particular destination port(s), or more commonly involves modifying the packet to insert atunnel context or a VLAN ID, and thereafter forwarding to the external port to send the packet to a destination host.
Tunneling
We make use of the Internal Port on a Hyper-V switch for implementing tunneling. The Internal Port is a virtualadapter that is exposed on the Hyper- V host, and connected to the Hyper-V switch. Basically, it is an interfacebetween the host and the virtual switch. The Internal Port acts as the Tunnel end point for the host (aka VTEP), andholds the VTEP IP address.
Tunneling ports are not actual ports on the Hyper-V switch. These are virtual ports that OVS maintains and whileexecuting actions, if the outport is a tunnel port, we short circuit by performing the encapsulation action based onthe tunnel context. The encapsulated packet gets forwarded to the external port, and appears to the outside world asthough it was set from the VTEP.
Similarly, when a tunneled packet enters the OVS from the external port bound to the internal port (VTEP), and if yes,we short circuit the path, and directly forward the inner packet to the destination port (mostly a VIF, but dictated bythe flow). We leverage the Windows Filtering Platform (WFP) framework to be able to receive tunneled packets thatcannot be decapsulated by OVS right away. Currently, fragmented IP packets fall into that category, and we leveragethe code in the host IP stack to reassemble the packet, and performing decapsulation on the reassembled packet.
We’ll also be using the IP helper library to provide us IP address and other information corresponding to the Internalport.
Event Notifications
The pseudo device interface described above is also used for providing event notifications back to OVS userspace. Ashared memory/overlapped IO model is used.
Userspace Components
The userspace portion of the OVS solution is mostly POSIX code, and not very Linux specific. Majority of theuserspace code does not interface directly with the kernel datapath and was ported independently of the kernel datapatheffort.
148 Chapter 4. Deep Dive
Open vSwitch, Release 2.8.0
In this section, we cover the userspace components that interface with the kernel datapath.
As explained earlier, OVS on Hyper-V shares the DPIF provider implementation with Linux. The DPIF provider onLinux uses netlink sockets and netlink messages. Netlink sockets and messages are extensively used on Linux toexchange information between userspace and kernel. In order to satisfy these dependencies, netlink socket (pseudoand non-native) and netlink messages are implemented on Hyper-V.
The following are the major advantages of sharing DPIF provider code:
1. Maintenance is simpler:
Any change made to the interface defined in dpif-provider.h need not be propagated to multiple implementations.Also, developers familiar with the Linux implementation of the DPIF provider can easily ramp on the Hyper-Vimplementation as well.
2. Netlink messages provides inherent advantages:
Netlink messages are known for their extensibility. Each message is versioned, so the provided data structuresoffer a mechanism to perform version checking and forward/backward compatibility with the kernel module.
Netlink Sockets
As explained in other sections, an emulation of netlink sockets has been implemented in lib/netlink-socket.cfor Windows. The implementation creates a handle to the OVS pseudo device, and emulates netlink socket semanticsof receive message, send message, dump, and transact. Most of the nl_* functions are supported.
The fact that the implementation is non-native manifests in various ways. One example is that PID for the netlinksocket is not automatically assigned in userspace when a handle is created to the OVS pseudo device. There’s an extracommand (defined in OvsDpInterfaceExt.h) that is used to grab the PID generated in the kernel.
DPIF Provider
As has been mentioned in earlier sections, the netlink socket and netlink message based DPIF provider on Linux hasbeen ported to Windows.
Most of the code is common. Some divergence is in the code to receive packets. The Linux implementation usesepoll()9 which is not natively supported on Windows.
netdev-windows
We have a Windows implementation of the interface defined in lib/netdev-provider.h. The implementationprovides functionality to get extended information about an interface. It is limited in functionality compared to theLinux implementation of the netdev provider and cannot be used to add any interfaces in the kernel such as a tap in-terface or to send/receive packets. The netdev-windows implementation uses the datapath interface extensions definedin datapath-windows/include/OvsDpInterfaceExt.h.
Powershell Extensions to Set OVS-port-name
As explained in the section on “Port management”, each Hyper-V port has a ‘FriendlyName’ field, which we call as the“OVS-port-name” field. We have implemented powershell command extensions to be able to set the “OVS-port-name”of a Hyper-V port.
9 epoll https://en.wikipedia.org/wiki/Epoll
4.1. OVS 149
Open vSwitch, Release 2.8.0
Kernel-Userspace Interface
openvswitch.h and OvsDpInterfaceExt.h
Since the DPIF provider is shared with Linux, the kernel datapath provides the same interface as the Linux datapath.The interface is defined in datapath/linux/compat/include/linux/openvswitch.h. Derivatives ofthis interface file are created during OVS userspace compilation. The derivative for the kernel datapath on Hyper-V isprovided in datapath-windows/include/OvsDpInterface.h.
That said, there are Windows specific extensions that are defined in the interface file datapath-windows/include/OvsDpInterfaceExt.h.
Flow of a Packet
Figure 2 shows the numbered steps in which a packets gets sent out of a VIF and is forwarded to another VIF or aphysical NIC. As mentioned earlier, each VIF is attached to the switch via a port, and each port is both on the ingressand egress path of the switch, and depending on whether a packet is being transmitted or received, one of the pathsgets used. In the figure, each step n is annotated as #n
The steps are as follows:
1. When a packet is sent out of a VIF or an physical NIC or an internal port, the packet is part of the ingress path.
2. The OVS kernel driver gets to intercept this packet.
a. OVS looks up the flows in the flowtable for this packet, and executes the corresponding action.
b. If there is not action, the packet is sent up to OVS userspace to examine the packet and figure out theactions.
c. Userspace executes the packet by specifying the actions, and might also insert a flow for such a packet inthe future.
d. The destination ports are added to the packet and sent down to the Hyper- V switch.
3. The Hyper-V forwards the packet to the destination ports specified in the packet, and sends it out on the egresspath.
4. The packet gets forwarded to the destination VIF.
5. It might also get forwarded to a physical NIC as well, if the physical NIC has been added as a destination portby OVS.
Build/Deployment
The userspace components added as part of OVS Windows implementation have been integrated with autoconf, andcan be built using the steps mentioned in the BUILD.Windows file. Additional targets need to be specified to make.
The OVS kernel code is part of a Visual Studio 2013 solution, and is compiled from the IDE. There are plans in thefuture to move this to a compilation mode such that we can compile it without an IDE as well.
Once compiled, we have an install script that can be used to load the kernel driver.
References
4.1.10 Language Bindings
Bindings exist for Open vSwitch in a variety of languages.
150 Chapter 4. Deep Dive
Open vSwitch, Release 2.8.0
Official Bindings
Python
The Python bindings are part of the Open vSwitch package. You can install the bindings using pip:
$ pip install ovs
Third-Party Bindings
Lua
• LJIT2ovs: LuaJIT binding for Open vSwitch
Go
• go-odp: A Go library to control the Open vSwitch in-kernel datapath
4.1.11 Testing
It is possible to test Open vSwitch using both tooling provided with Open vSwitch and using a variety of third partytooling.
Built-in Tooling
Open vSwitch provides a number of different test suites and other tooling for validating basic functionality of OVS.Before running any of the tests described here, you must bootstrap, configure and build Open vSwitch as described inOpen vSwitch on Linux, FreeBSD and NetBSD. You do not need to install Open vSwitch or to build or load the kernelmodule to run these test suites. You do not need supervisor privilege to run these test suites.
Unit Tests
Open vSwitch includes a suite of self-tests. Before you submit patches upstream, we advise that you run the tests andensure that they pass. If you add new features to Open vSwitch, then adding tests for those features will ensure yourfeatures don’t break as developers modify other areas of Open vSwitch.
To run all the unit tests in Open vSwitch, one at a time, run:
$ make check
This takes under 5 minutes on a modern desktop system.
To run all the unit tests in Open vSwitch in parallel, run:
$ make check TESTSUITEFLAGS=-j8
You can run up to eight threads. This takes under a minute on a modern 4-core desktop system.
To see a list of all the available tests, run:
4.1. OVS 151
Open vSwitch, Release 2.8.0
$ make check TESTSUITEFLAGS=--list
To run only a subset of tests, e.g. test 123 and tests 477 through 484, run:
$ make check TESTSUITEFLAGS='123 477-484'
Tests do not have inter-dependencies, so you may run any subset.
To run tests matching a keyword, e.g. ovsdb, run:
$ make check TESTSUITEFLAGS='-k ovsdb'
To see a complete list of test options, run:
$ make check TESTSUITEFLAGS=--help
The results of a testing run are reported in tests/testsuite.log. Report report test failures as bugs and includethe testsuite.log in your report.
Note: Sometimes a few tests may fail on some runs but not others. This is usually a bug in the testsuite, not abug in Open vSwitch itself. If you find that a test fails intermittently, please report it, since the developers may nothave noticed. You can make the testsuite automatically rerun tests that fail, by adding RECHECK=yes to the makecommand line, e.g.:
$ make check TESTSUITEFLAGS=-j8 RECHECK=yes
Coverage
If the build was configured with --enable-coverage and the lcov utility is installed, you can run the testsuiteand generate a code coverage report by using the check-lcov target:
$ make check-lcov
All the same options are avaiable via TESTSUITEFLAGS. For example:
$ make check-lcov TESTSUITEFLAGS='-j8 -k ovn'
Valgrind
If you have valgrind installed, you can run the testsuite under valgrind by using the check-valgrind target:
$ make check-valgrind
When you do this, the “valgrind” results for test <N> are reported in files named tests/testsuite.dir/<N>/valgrind.*.
All the same options are available via TESTSUITEFLAGS.
Hint: You may find that the valgrind results are easier to interpret if you put -q in ~/.valgrindrc, since thatreduces the amount of output.
152 Chapter 4. Deep Dive
Open vSwitch, Release 2.8.0
OFTest
OFTest is an OpenFlow protocol testing suite. Open vSwitch includes a Makefile target to run OFTest with OpenvSwitch in “dummy mode”. In this mode of testing, no packets travel across physical or virtual networks. Instead,Unix domain sockets stand in as simulated networks. This simulation is imperfect, but it is much easier to set up, doesnot require extra physical or virtual hardware, and does not require supervisor privileges.
To run OFTest with Open vSwitch, you must obtain a copy of OFTest and install its prerequisites. You need a copy ofOFTest that includes commit 406614846c5 (make ovs-dummy platform work again). This commit was merged intothe OFTest repository on Feb 1, 2013, so any copy of OFTest more recent than that should work. Testing OVS indummy mode does not require root privilege, so you may ignore that requirement.
Optionally, add the top-level OFTest directory (containing the oft program) to your $PATH. This slightly simplifiesrunning OFTest later.
To run OFTest in dummy mode, run the following command from your Open vSwitch build directory:
$ make check-oftest OFT=<oft-binary>
where <oft-binary> is the absolute path to the oft program in OFTest. If you added “oft” to your $PATH, youmay omit the OFT variable assignment
By default, check-oftest passes oft just enough options to enable dummy mode. You can use OFTFLAGS topass additional options. For example, to run just the basic.Echo test instead of all tests (the default) and enableverbose logging, run:
$ make check-oftest OFT=<oft-binary> OFTFLAGS='--verbose -T basic.Echo'
If you use OFTest that does not include commit 4d1f3eb2c792 (oft: change default port to 6653), merged into theOFTest repository in October 2013, then you need to add an option to use the IETF-assigned controller port:
$ make check-oftest OFT=<oft-binary> OFTFLAGS='--port=6653'
Interpret OFTest results cautiously. Open vSwitch can fail a given test in OFTest for many reasons, including bugs inOpen vSwitch, bugs in OFTest, bugs in the “dummy mode” integration, and differing interpretations of the OpenFlowstandard and other standards.
Note: Open vSwitch has not been validated against OFTest. Report test failures that you believe to represent bugs inOpen vSwitch. Include the precise versions of Open vSwitch and OFTest in your bug report, plus any other informationneeded to reproduce the problem.
Ryu
Ryu is an OpenFlow controller written in Python that includes an extensive OpenFlow testsuite. Open vSwitch includesa Makefile target to run Ryu in “dummy mode”. See OFTest above for an explanation of dummy mode.
To run Ryu tests with Open vSwitch, first read and follow the instructions under Testing above. Second, obtain a copyof Ryu, install its prerequisites, and build it. You do not need to install Ryu (some of the tests do not get installed, soit does not help).
To run Ryu tests, run the following command from your Open vSwitch build directory:
$ make check-ryu RYUDIR=<ryu-source-dir>
4.1. OVS 153
Open vSwitch, Release 2.8.0
where <ryu-source-dir> is the absolute path to the root of the Ryu source distribution. The default<ryu-source-dir> is $srcdir/../ryu where $srcdir is your Open vSwitch source directory. If this iscorrect, omit RYUDIR
Note: Open vSwitch has not been validated against Ryu. Report test failures that you believe to represent bugs inOpen vSwitch. Include the precise versions of Open vSwitch and Ryu in your bug report, plus any other informationneeded to reproduce the problem.
Datapath testing
Open vSwitch includes a suite of tests specifically for datapath functionality, which can be run against the userspaceor kernel datapaths. If you are developing datapath features, it is recommended that you use these tests and build uponthem to verify your implementation.
The datapath tests make some assumptions about the environment. They must be run under root privileges on a Linuxsystem with support for network namespaces. For ease of use, the OVS source tree includes a vagrant box to invokethese tests. Running the tests inside Vagrant provides kernel isolation, protecting your development host from kernelpanics or configuration conflicts in the testsuite. If you wish to run the tests without using the vagrant box, there arefurther instructions below.
Vagrant
Important: Requires Vagrant (version 1.7.0 or later) and a compatible hypervisor
Note: You must bootstrap and configure the sources (see doc:/intro/install/general) before you run the steps describedhere.
A Vagrantfile is provided allowing to compile and provision the source tree as found locally in a virtual machine usingthe following command:
$ vagrant up
This will bring up a Fedora 23 VM by default. If you wish to use a different box or a vagrant backend not supportedby the default box, the Vagrantfile can be modified to use a different box as base.
The VM can be reprovisioned at any time:
$ vagrant provision
OVS out-of-tree compilation environment can be set up with:
$ ./boot.sh$ vagrant provision --provision-with configure_ovs,build_ovs
This will set up an out-of-tree build environment inside the VM in /root/build. The source code can be found in/vagrant.
To recompile and reinstall OVS in the VM using RPM:
154 Chapter 4. Deep Dive
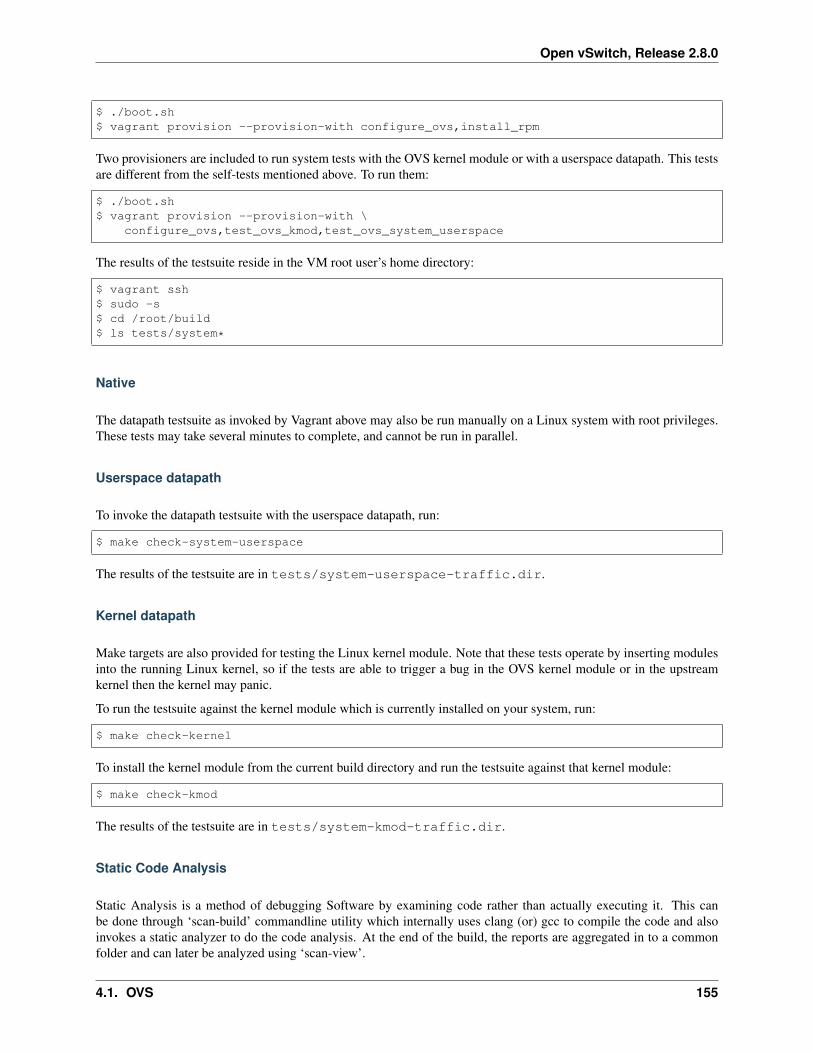
Open vSwitch, Release 2.8.0
$ ./boot.sh$ vagrant provision --provision-with configure_ovs,install_rpm
Two provisioners are included to run system tests with the OVS kernel module or with a userspace datapath. This testsare different from the self-tests mentioned above. To run them:
$ ./boot.sh$ vagrant provision --provision-with \
configure_ovs,test_ovs_kmod,test_ovs_system_userspace
The results of the testsuite reside in the VM root user’s home directory:
$ vagrant ssh$ sudo -s$ cd /root/build$ ls tests/system*
Native
The datapath testsuite as invoked by Vagrant above may also be run manually on a Linux system with root privileges.These tests may take several minutes to complete, and cannot be run in parallel.
Userspace datapath
To invoke the datapath testsuite with the userspace datapath, run:
$ make check-system-userspace
The results of the testsuite are in tests/system-userspace-traffic.dir.
Kernel datapath
Make targets are also provided for testing the Linux kernel module. Note that these tests operate by inserting modulesinto the running Linux kernel, so if the tests are able to trigger a bug in the OVS kernel module or in the upstreamkernel then the kernel may panic.
To run the testsuite against the kernel module which is currently installed on your system, run:
$ make check-kernel
To install the kernel module from the current build directory and run the testsuite against that kernel module:
$ make check-kmod
The results of the testsuite are in tests/system-kmod-traffic.dir.
Static Code Analysis
Static Analysis is a method of debugging Software by examining code rather than actually executing it. This canbe done through ‘scan-build’ commandline utility which internally uses clang (or) gcc to compile the code and alsoinvokes a static analyzer to do the code analysis. At the end of the build, the reports are aggregated in to a commonfolder and can later be analyzed using ‘scan-view’.
4.1. OVS 155
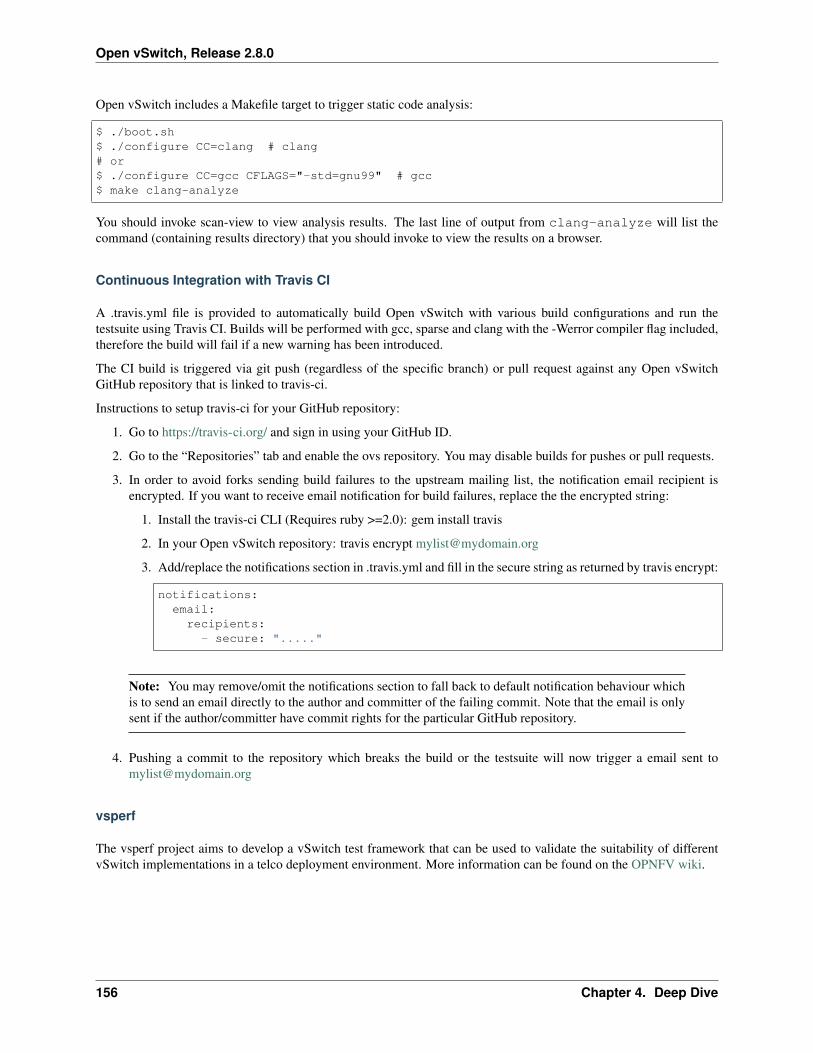
Open vSwitch, Release 2.8.0
Open vSwitch includes a Makefile target to trigger static code analysis:
$ ./boot.sh$ ./configure CC=clang # clang# or$ ./configure CC=gcc CFLAGS="-std=gnu99" # gcc$ make clang-analyze
You should invoke scan-view to view analysis results. The last line of output from clang-analyze will list thecommand (containing results directory) that you should invoke to view the results on a browser.
Continuous Integration with Travis CI
A .travis.yml file is provided to automatically build Open vSwitch with various build configurations and run thetestsuite using Travis CI. Builds will be performed with gcc, sparse and clang with the -Werror compiler flag included,therefore the build will fail if a new warning has been introduced.
The CI build is triggered via git push (regardless of the specific branch) or pull request against any Open vSwitchGitHub repository that is linked to travis-ci.
Instructions to setup travis-ci for your GitHub repository:
1. Go to https://travis-ci.org/ and sign in using your GitHub ID.
2. Go to the “Repositories” tab and enable the ovs repository. You may disable builds for pushes or pull requests.
3. In order to avoid forks sending build failures to the upstream mailing list, the notification email recipient isencrypted. If you want to receive email notification for build failures, replace the the encrypted string:
1. Install the travis-ci CLI (Requires ruby >=2.0): gem install travis
2. In your Open vSwitch repository: travis encrypt [email protected]
3. Add/replace the notifications section in .travis.yml and fill in the secure string as returned by travis encrypt:
notifications:email:recipients:- secure: "....."
Note: You may remove/omit the notifications section to fall back to default notification behaviour whichis to send an email directly to the author and committer of the failing commit. Note that the email is onlysent if the author/committer have commit rights for the particular GitHub repository.
4. Pushing a commit to the repository which breaks the build or the testsuite will now trigger a email sent [email protected]
vsperf
The vsperf project aims to develop a vSwitch test framework that can be used to validate the suitability of differentvSwitch implementations in a telco deployment environment. More information can be found on the OPNFV wiki.
156 Chapter 4. Deep Dive
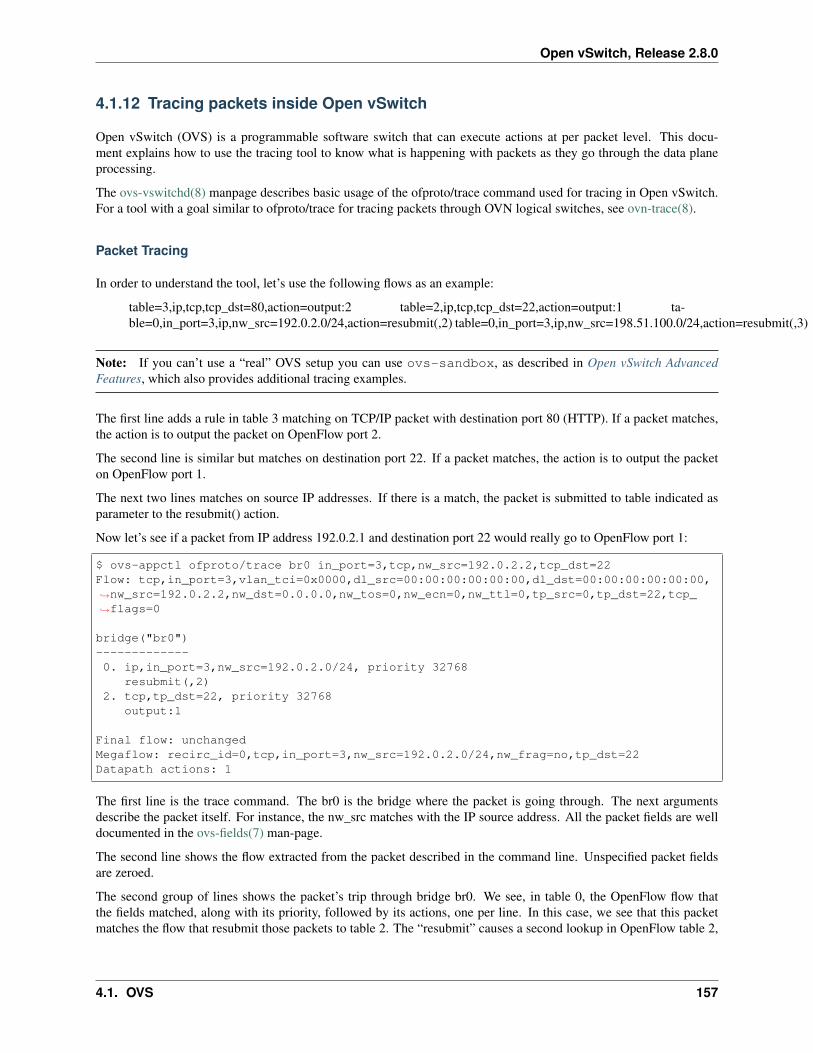
Open vSwitch, Release 2.8.0
4.1.12 Tracing packets inside Open vSwitch
Open vSwitch (OVS) is a programmable software switch that can execute actions at per packet level. This docu-ment explains how to use the tracing tool to know what is happening with packets as they go through the data planeprocessing.
The ovs-vswitchd(8) manpage describes basic usage of the ofproto/trace command used for tracing in Open vSwitch.For a tool with a goal similar to ofproto/trace for tracing packets through OVN logical switches, see ovn-trace(8).
Packet Tracing
In order to understand the tool, let’s use the following flows as an example:
table=3,ip,tcp,tcp_dst=80,action=output:2 table=2,ip,tcp,tcp_dst=22,action=output:1 ta-ble=0,in_port=3,ip,nw_src=192.0.2.0/24,action=resubmit(,2) table=0,in_port=3,ip,nw_src=198.51.100.0/24,action=resubmit(,3)
Note: If you can’t use a “real” OVS setup you can use ovs-sandbox, as described in Open vSwitch AdvancedFeatures, which also provides additional tracing examples.
The first line adds a rule in table 3 matching on TCP/IP packet with destination port 80 (HTTP). If a packet matches,the action is to output the packet on OpenFlow port 2.
The second line is similar but matches on destination port 22. If a packet matches, the action is to output the packeton OpenFlow port 1.
The next two lines matches on source IP addresses. If there is a match, the packet is submitted to table indicated asparameter to the resubmit() action.
Now let’s see if a packet from IP address 192.0.2.1 and destination port 22 would really go to OpenFlow port 1:
$ ovs-appctl ofproto/trace br0 in_port=3,tcp,nw_src=192.0.2.2,tcp_dst=22Flow: tcp,in_port=3,vlan_tci=0x0000,dl_src=00:00:00:00:00:00,dl_dst=00:00:00:00:00:00,→˓nw_src=192.0.2.2,nw_dst=0.0.0.0,nw_tos=0,nw_ecn=0,nw_ttl=0,tp_src=0,tp_dst=22,tcp_→˓flags=0
bridge("br0")-------------0. ip,in_port=3,nw_src=192.0.2.0/24, priority 32768
resubmit(,2)2. tcp,tp_dst=22, priority 32768
output:1
Final flow: unchangedMegaflow: recirc_id=0,tcp,in_port=3,nw_src=192.0.2.0/24,nw_frag=no,tp_dst=22Datapath actions: 1
The first line is the trace command. The br0 is the bridge where the packet is going through. The next argumentsdescribe the packet itself. For instance, the nw_src matches with the IP source address. All the packet fields are welldocumented in the ovs-fields(7) man-page.
The second line shows the flow extracted from the packet described in the command line. Unspecified packet fieldsare zeroed.
The second group of lines shows the packet’s trip through bridge br0. We see, in table 0, the OpenFlow flow thatthe fields matched, along with its priority, followed by its actions, one per line. In this case, we see that this packetmatches the flow that resubmit those packets to table 2. The “resubmit” causes a second lookup in OpenFlow table 2,
4.1. OVS 157
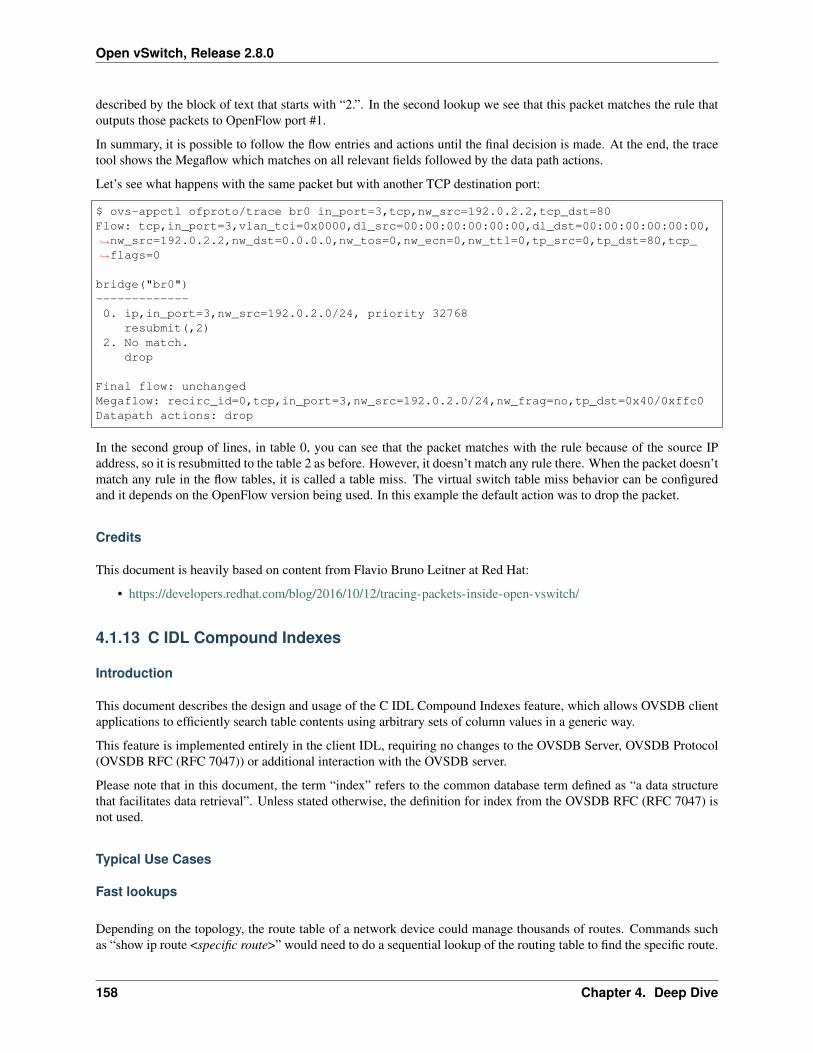
Open vSwitch, Release 2.8.0
described by the block of text that starts with “2.”. In the second lookup we see that this packet matches the rule thatoutputs those packets to OpenFlow port #1.
In summary, it is possible to follow the flow entries and actions until the final decision is made. At the end, the tracetool shows the Megaflow which matches on all relevant fields followed by the data path actions.
Let’s see what happens with the same packet but with another TCP destination port:
$ ovs-appctl ofproto/trace br0 in_port=3,tcp,nw_src=192.0.2.2,tcp_dst=80Flow: tcp,in_port=3,vlan_tci=0x0000,dl_src=00:00:00:00:00:00,dl_dst=00:00:00:00:00:00,→˓nw_src=192.0.2.2,nw_dst=0.0.0.0,nw_tos=0,nw_ecn=0,nw_ttl=0,tp_src=0,tp_dst=80,tcp_→˓flags=0
bridge("br0")-------------0. ip,in_port=3,nw_src=192.0.2.0/24, priority 32768
resubmit(,2)2. No match.
drop
Final flow: unchangedMegaflow: recirc_id=0,tcp,in_port=3,nw_src=192.0.2.0/24,nw_frag=no,tp_dst=0x40/0xffc0Datapath actions: drop
In the second group of lines, in table 0, you can see that the packet matches with the rule because of the source IPaddress, so it is resubmitted to the table 2 as before. However, it doesn’t match any rule there. When the packet doesn’tmatch any rule in the flow tables, it is called a table miss. The virtual switch table miss behavior can be configuredand it depends on the OpenFlow version being used. In this example the default action was to drop the packet.
Credits
This document is heavily based on content from Flavio Bruno Leitner at Red Hat:
• https://developers.redhat.com/blog/2016/10/12/tracing-packets-inside-open-vswitch/
4.1.13 C IDL Compound Indexes
Introduction
This document describes the design and usage of the C IDL Compound Indexes feature, which allows OVSDB clientapplications to efficiently search table contents using arbitrary sets of column values in a generic way.
This feature is implemented entirely in the client IDL, requiring no changes to the OVSDB Server, OVSDB Protocol(OVSDB RFC (RFC 7047)) or additional interaction with the OVSDB server.
Please note that in this document, the term “index” refers to the common database term defined as “a data structurethat facilitates data retrieval”. Unless stated otherwise, the definition for index from the OVSDB RFC (RFC 7047) isnot used.
Typical Use Cases
Fast lookups
Depending on the topology, the route table of a network device could manage thousands of routes. Commands suchas “show ip route <specific route>” would need to do a sequential lookup of the routing table to find the specific route.
158 Chapter 4. Deep Dive
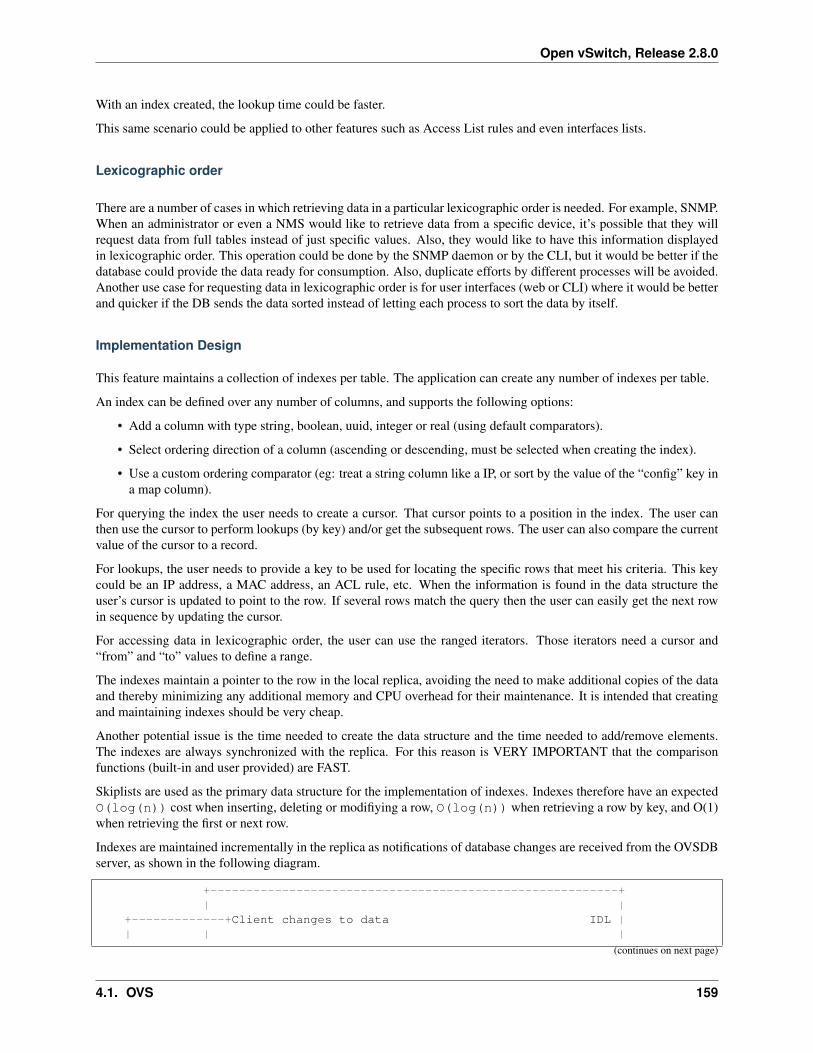
Open vSwitch, Release 2.8.0
With an index created, the lookup time could be faster.
This same scenario could be applied to other features such as Access List rules and even interfaces lists.
Lexicographic order
There are a number of cases in which retrieving data in a particular lexicographic order is needed. For example, SNMP.When an administrator or even a NMS would like to retrieve data from a specific device, it’s possible that they willrequest data from full tables instead of just specific values. Also, they would like to have this information displayedin lexicographic order. This operation could be done by the SNMP daemon or by the CLI, but it would be better if thedatabase could provide the data ready for consumption. Also, duplicate efforts by different processes will be avoided.Another use case for requesting data in lexicographic order is for user interfaces (web or CLI) where it would be betterand quicker if the DB sends the data sorted instead of letting each process to sort the data by itself.
Implementation Design
This feature maintains a collection of indexes per table. The application can create any number of indexes per table.
An index can be defined over any number of columns, and supports the following options:
• Add a column with type string, boolean, uuid, integer or real (using default comparators).
• Select ordering direction of a column (ascending or descending, must be selected when creating the index).
• Use a custom ordering comparator (eg: treat a string column like a IP, or sort by the value of the “config” key ina map column).
For querying the index the user needs to create a cursor. That cursor points to a position in the index. The user canthen use the cursor to perform lookups (by key) and/or get the subsequent rows. The user can also compare the currentvalue of the cursor to a record.
For lookups, the user needs to provide a key to be used for locating the specific rows that meet his criteria. This keycould be an IP address, a MAC address, an ACL rule, etc. When the information is found in the data structure theuser’s cursor is updated to point to the row. If several rows match the query then the user can easily get the next rowin sequence by updating the cursor.
For accessing data in lexicographic order, the user can use the ranged iterators. Those iterators need a cursor and“from” and “to” values to define a range.
The indexes maintain a pointer to the row in the local replica, avoiding the need to make additional copies of the dataand thereby minimizing any additional memory and CPU overhead for their maintenance. It is intended that creatingand maintaining indexes should be very cheap.
Another potential issue is the time needed to create the data structure and the time needed to add/remove elements.The indexes are always synchronized with the replica. For this reason is VERY IMPORTANT that the comparisonfunctions (built-in and user provided) are FAST.
Skiplists are used as the primary data structure for the implementation of indexes. Indexes therefore have an expectedO(log(n)) cost when inserting, deleting or modifiying a row, O(log(n)) when retrieving a row by key, and O(1)when retrieving the first or next row.
Indexes are maintained incrementally in the replica as notifications of database changes are received from the OVSDBserver, as shown in the following diagram.
+---------------------------------------------------------+| |
+-------------+Client changes to data IDL || | |
(continues on next page)
4.1. OVS 159
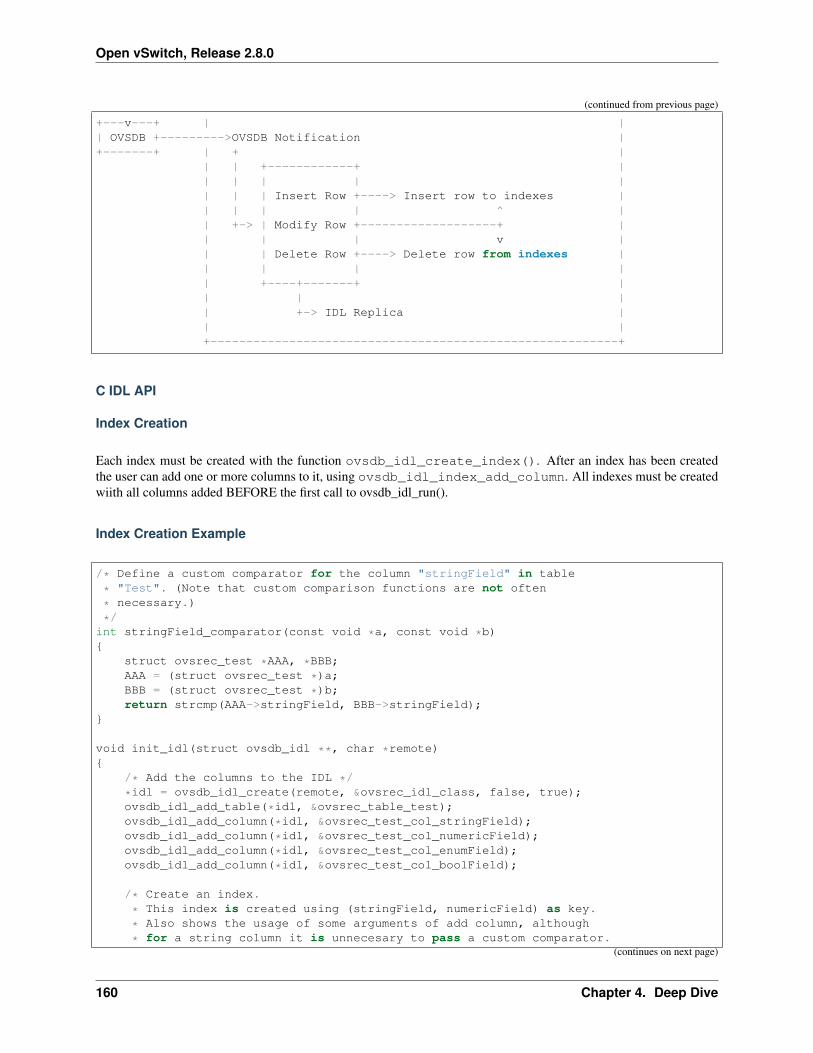
Open vSwitch, Release 2.8.0
(continued from previous page)
+---v---+ | || OVSDB +--------->OVSDB Notification |+-------+ | + |
| | +------------+ || | | | || | | Insert Row +----> Insert row to indexes || | | | ^ || +-> | Modify Row +-------------------+ || | | v || | Delete Row +----> Delete row from indexes || | | || +----+-------+ || | || +-> IDL Replica || |+---------------------------------------------------------+
C IDL API
Index Creation
Each index must be created with the function ovsdb_idl_create_index(). After an index has been createdthe user can add one or more columns to it, using ovsdb_idl_index_add_column. All indexes must be createdwiith all columns added BEFORE the first call to ovsdb_idl_run().
Index Creation Example
/* Define a custom comparator for the column "stringField" in table
* "Test". (Note that custom comparison functions are not often
* necessary.)
*/int stringField_comparator(const void *a, const void *b){
struct ovsrec_test *AAA, *BBB;AAA = (struct ovsrec_test *)a;BBB = (struct ovsrec_test *)b;return strcmp(AAA->stringField, BBB->stringField);
}
void init_idl(struct ovsdb_idl **, char *remote){
/* Add the columns to the IDL */
*idl = ovsdb_idl_create(remote, &ovsrec_idl_class, false, true);ovsdb_idl_add_table(*idl, &ovsrec_table_test);ovsdb_idl_add_column(*idl, &ovsrec_test_col_stringField);ovsdb_idl_add_column(*idl, &ovsrec_test_col_numericField);ovsdb_idl_add_column(*idl, &ovsrec_test_col_enumField);ovsdb_idl_add_column(*idl, &ovsrec_test_col_boolField);
/* Create an index.
* This index is created using (stringField, numericField) as key.
* Also shows the usage of some arguments of add column, although
* for a string column it is unnecesary to pass a custom comparator.(continues on next page)
160 Chapter 4. Deep Dive
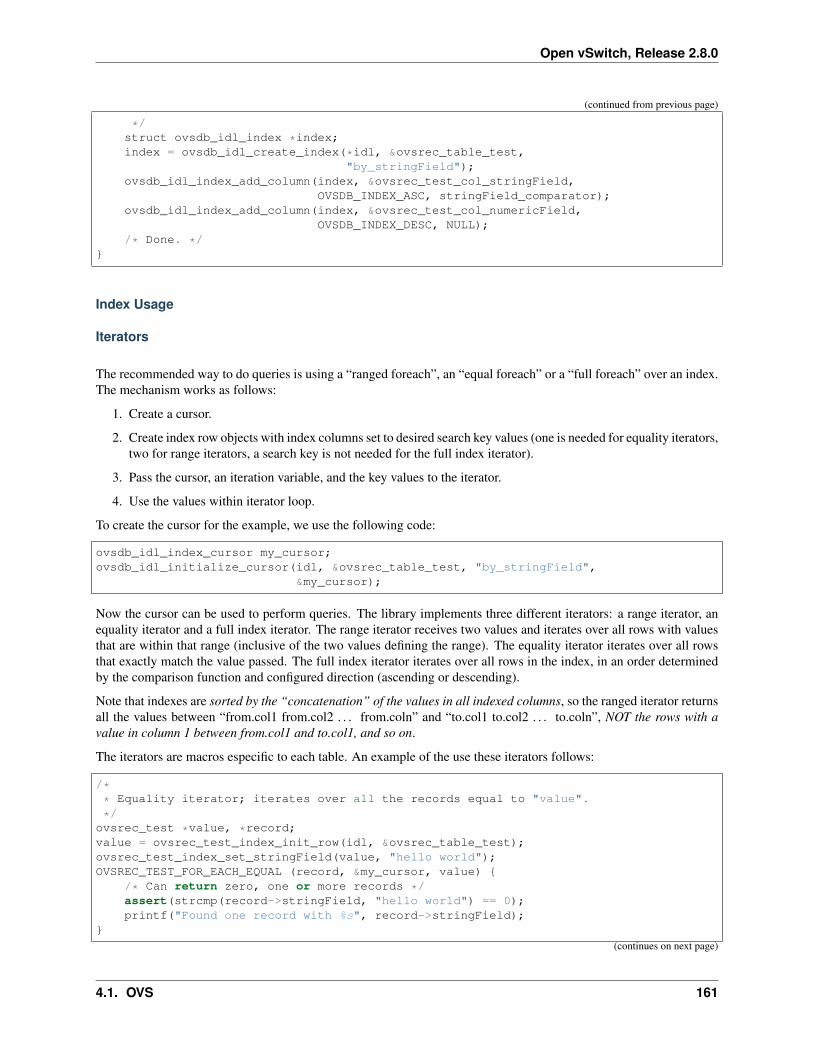
Open vSwitch, Release 2.8.0
(continued from previous page)
*/struct ovsdb_idl_index *index;index = ovsdb_idl_create_index(*idl, &ovsrec_table_test,
"by_stringField");ovsdb_idl_index_add_column(index, &ovsrec_test_col_stringField,
OVSDB_INDEX_ASC, stringField_comparator);ovsdb_idl_index_add_column(index, &ovsrec_test_col_numericField,
OVSDB_INDEX_DESC, NULL);/* Done. */
}
Index Usage
Iterators
The recommended way to do queries is using a “ranged foreach”, an “equal foreach” or a “full foreach” over an index.The mechanism works as follows:
1. Create a cursor.
2. Create index row objects with index columns set to desired search key values (one is needed for equality iterators,two for range iterators, a search key is not needed for the full index iterator).
3. Pass the cursor, an iteration variable, and the key values to the iterator.
4. Use the values within iterator loop.
To create the cursor for the example, we use the following code:
ovsdb_idl_index_cursor my_cursor;ovsdb_idl_initialize_cursor(idl, &ovsrec_table_test, "by_stringField",
&my_cursor);
Now the cursor can be used to perform queries. The library implements three different iterators: a range iterator, anequality iterator and a full index iterator. The range iterator receives two values and iterates over all rows with valuesthat are within that range (inclusive of the two values defining the range). The equality iterator iterates over all rowsthat exactly match the value passed. The full index iterator iterates over all rows in the index, in an order determinedby the comparison function and configured direction (ascending or descending).
Note that indexes are sorted by the “concatenation” of the values in all indexed columns, so the ranged iterator returnsall the values between “from.col1 from.col2 . . . from.coln” and “to.col1 to.col2 . . . to.coln”, NOT the rows with avalue in column 1 between from.col1 and to.col1, and so on.
The iterators are macros especific to each table. An example of the use these iterators follows:
/** Equality iterator; iterates over all the records equal to "value".
*/ovsrec_test *value, *record;value = ovsrec_test_index_init_row(idl, &ovsrec_table_test);ovsrec_test_index_set_stringField(value, "hello world");OVSREC_TEST_FOR_EACH_EQUAL (record, &my_cursor, value) {
/* Can return zero, one or more records */assert(strcmp(record->stringField, "hello world") == 0);printf("Found one record with %s", record->stringField);
}
(continues on next page)
4.1. OVS 161
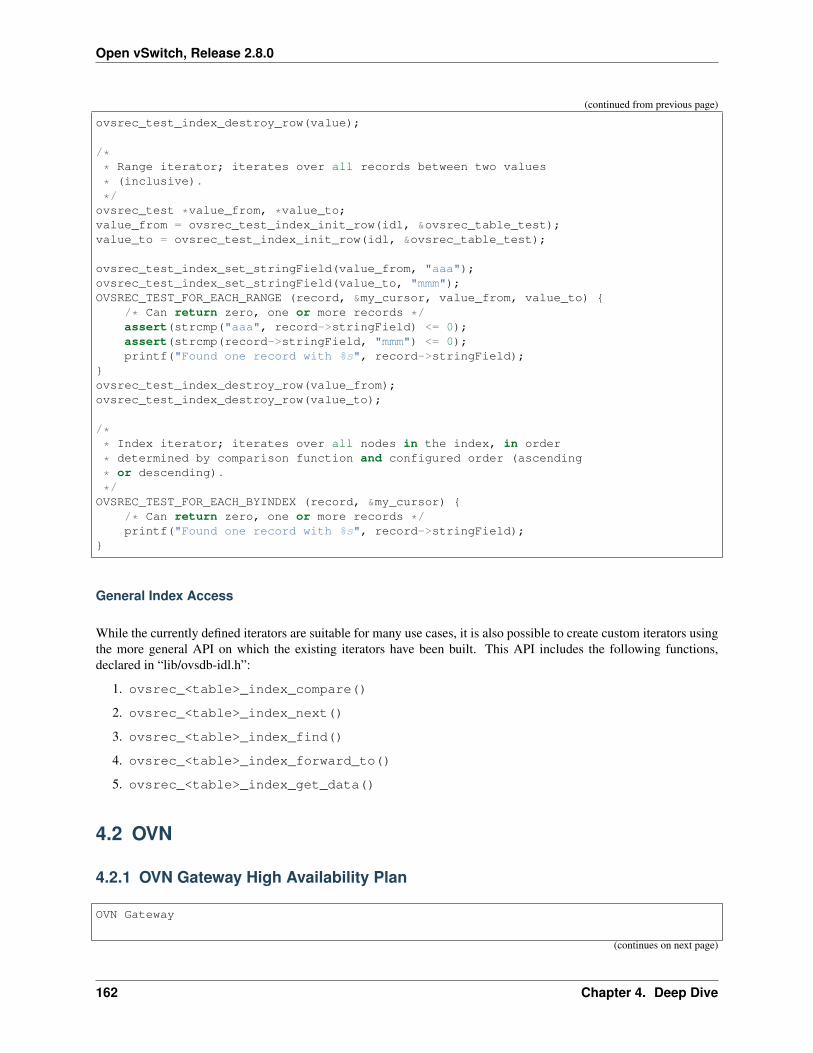
Open vSwitch, Release 2.8.0
(continued from previous page)
ovsrec_test_index_destroy_row(value);
/** Range iterator; iterates over all records between two values
* (inclusive).
*/ovsrec_test *value_from, *value_to;value_from = ovsrec_test_index_init_row(idl, &ovsrec_table_test);value_to = ovsrec_test_index_init_row(idl, &ovsrec_table_test);
ovsrec_test_index_set_stringField(value_from, "aaa");ovsrec_test_index_set_stringField(value_to, "mmm");OVSREC_TEST_FOR_EACH_RANGE (record, &my_cursor, value_from, value_to) {
/* Can return zero, one or more records */assert(strcmp("aaa", record->stringField) <= 0);assert(strcmp(record->stringField, "mmm") <= 0);printf("Found one record with %s", record->stringField);
}ovsrec_test_index_destroy_row(value_from);ovsrec_test_index_destroy_row(value_to);
/** Index iterator; iterates over all nodes in the index, in order
* determined by comparison function and configured order (ascending
* or descending).
*/OVSREC_TEST_FOR_EACH_BYINDEX (record, &my_cursor) {
/* Can return zero, one or more records */printf("Found one record with %s", record->stringField);
}
General Index Access
While the currently defined iterators are suitable for many use cases, it is also possible to create custom iterators usingthe more general API on which the existing iterators have been built. This API includes the following functions,declared in “lib/ovsdb-idl.h”:
1. ovsrec_<table>_index_compare()
2. ovsrec_<table>_index_next()
3. ovsrec_<table>_index_find()
4. ovsrec_<table>_index_forward_to()
5. ovsrec_<table>_index_get_data()
4.2 OVN
4.2.1 OVN Gateway High Availability Plan
OVN Gateway
(continues on next page)
162 Chapter 4. Deep Dive
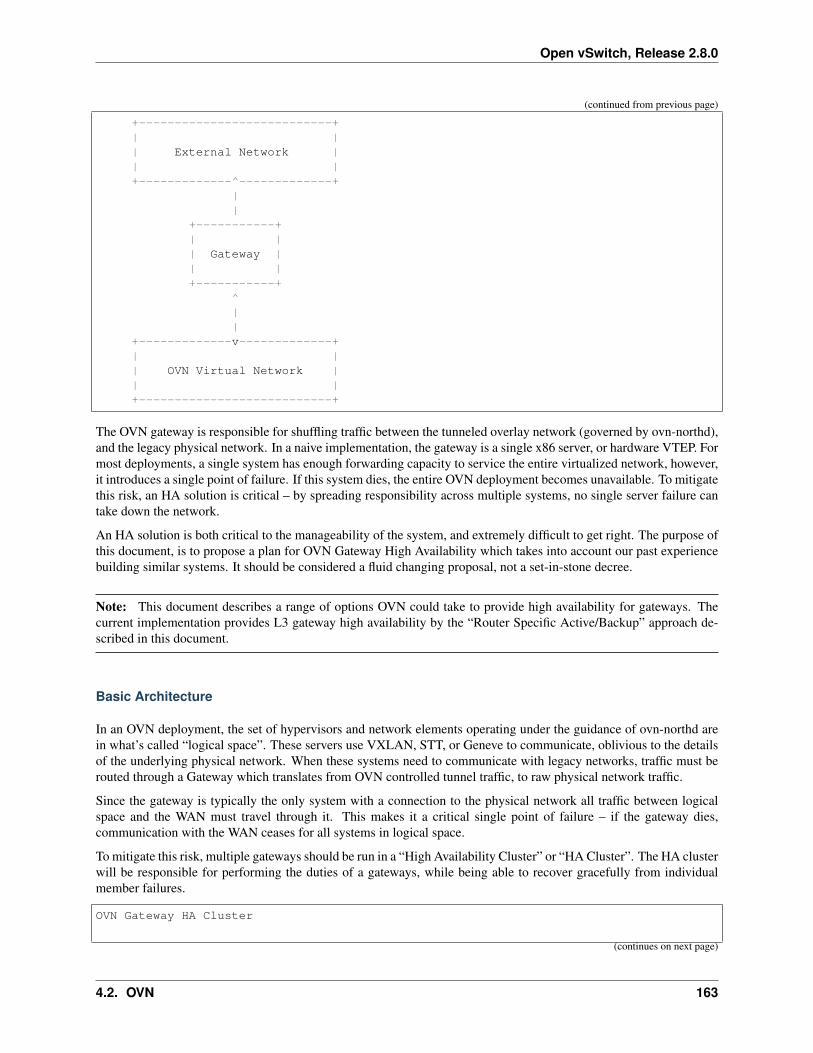
Open vSwitch, Release 2.8.0
(continued from previous page)
+---------------------------+| || External Network || |+-------------^-------------+
||
+-----------+| || Gateway || |+-----------+
^||
+-------------v-------------+| || OVN Virtual Network || |+---------------------------+
The OVN gateway is responsible for shuffling traffic between the tunneled overlay network (governed by ovn-northd),and the legacy physical network. In a naive implementation, the gateway is a single x86 server, or hardware VTEP. Formost deployments, a single system has enough forwarding capacity to service the entire virtualized network, however,it introduces a single point of failure. If this system dies, the entire OVN deployment becomes unavailable. To mitigatethis risk, an HA solution is critical – by spreading responsibility across multiple systems, no single server failure cantake down the network.
An HA solution is both critical to the manageability of the system, and extremely difficult to get right. The purpose ofthis document, is to propose a plan for OVN Gateway High Availability which takes into account our past experiencebuilding similar systems. It should be considered a fluid changing proposal, not a set-in-stone decree.
Note: This document describes a range of options OVN could take to provide high availability for gateways. Thecurrent implementation provides L3 gateway high availability by the “Router Specific Active/Backup” approach de-scribed in this document.
Basic Architecture
In an OVN deployment, the set of hypervisors and network elements operating under the guidance of ovn-northd arein what’s called “logical space”. These servers use VXLAN, STT, or Geneve to communicate, oblivious to the detailsof the underlying physical network. When these systems need to communicate with legacy networks, traffic must berouted through a Gateway which translates from OVN controlled tunnel traffic, to raw physical network traffic.
Since the gateway is typically the only system with a connection to the physical network all traffic between logicalspace and the WAN must travel through it. This makes it a critical single point of failure – if the gateway dies,communication with the WAN ceases for all systems in logical space.
To mitigate this risk, multiple gateways should be run in a “High Availability Cluster” or “HA Cluster”. The HA clusterwill be responsible for performing the duties of a gateways, while being able to recover gracefully from individualmember failures.
OVN Gateway HA Cluster
(continues on next page)
4.2. OVN 163
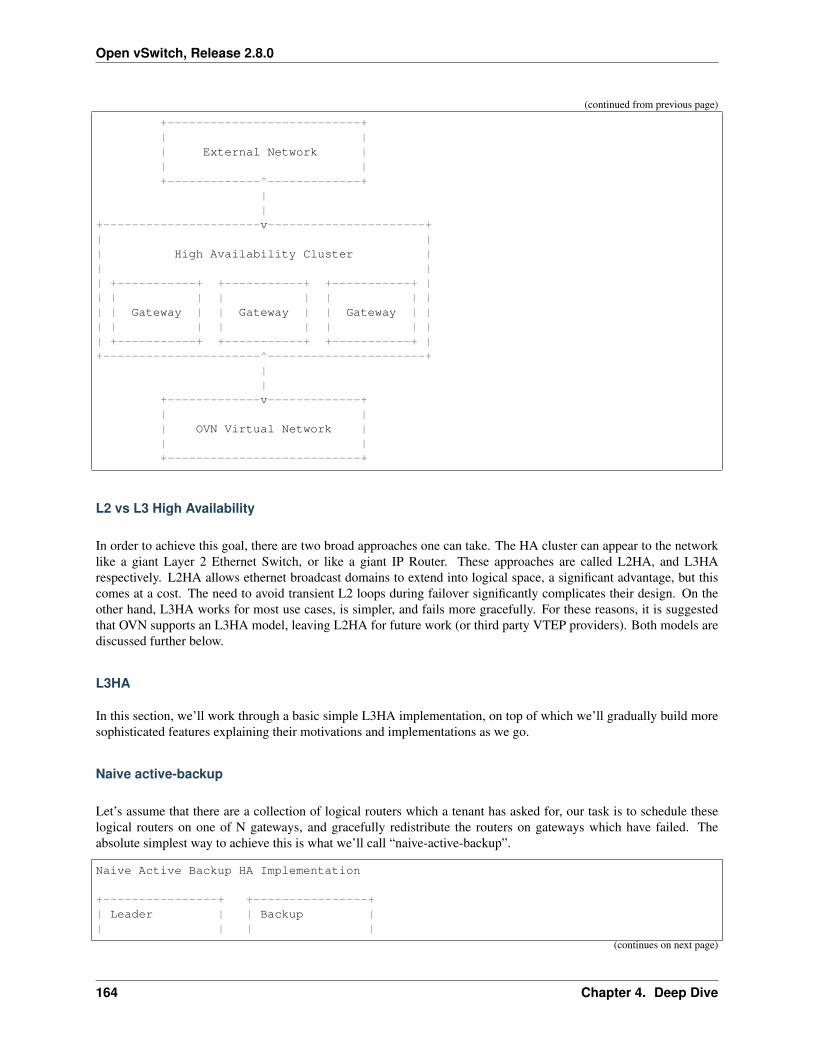
Open vSwitch, Release 2.8.0
(continued from previous page)
+---------------------------+| || External Network || |+-------------^-------------+
||
+----------------------v----------------------+| || High Availability Cluster || || +-----------+ +-----------+ +-----------+ || | | | | | | || | Gateway | | Gateway | | Gateway | || | | | | | | || +-----------+ +-----------+ +-----------+ |+----------------------^----------------------+
||
+-------------v-------------+| || OVN Virtual Network || |+---------------------------+
L2 vs L3 High Availability
In order to achieve this goal, there are two broad approaches one can take. The HA cluster can appear to the networklike a giant Layer 2 Ethernet Switch, or like a giant IP Router. These approaches are called L2HA, and L3HArespectively. L2HA allows ethernet broadcast domains to extend into logical space, a significant advantage, but thiscomes at a cost. The need to avoid transient L2 loops during failover significantly complicates their design. On theother hand, L3HA works for most use cases, is simpler, and fails more gracefully. For these reasons, it is suggestedthat OVN supports an L3HA model, leaving L2HA for future work (or third party VTEP providers). Both models arediscussed further below.
L3HA
In this section, we’ll work through a basic simple L3HA implementation, on top of which we’ll gradually build moresophisticated features explaining their motivations and implementations as we go.
Naive active-backup
Let’s assume that there are a collection of logical routers which a tenant has asked for, our task is to schedule theselogical routers on one of N gateways, and gracefully redistribute the routers on gateways which have failed. Theabsolute simplest way to achieve this is what we’ll call “naive-active-backup”.
Naive Active Backup HA Implementation
+----------------+ +----------------+| Leader | | Backup || | | |
(continues on next page)
164 Chapter 4. Deep Dive
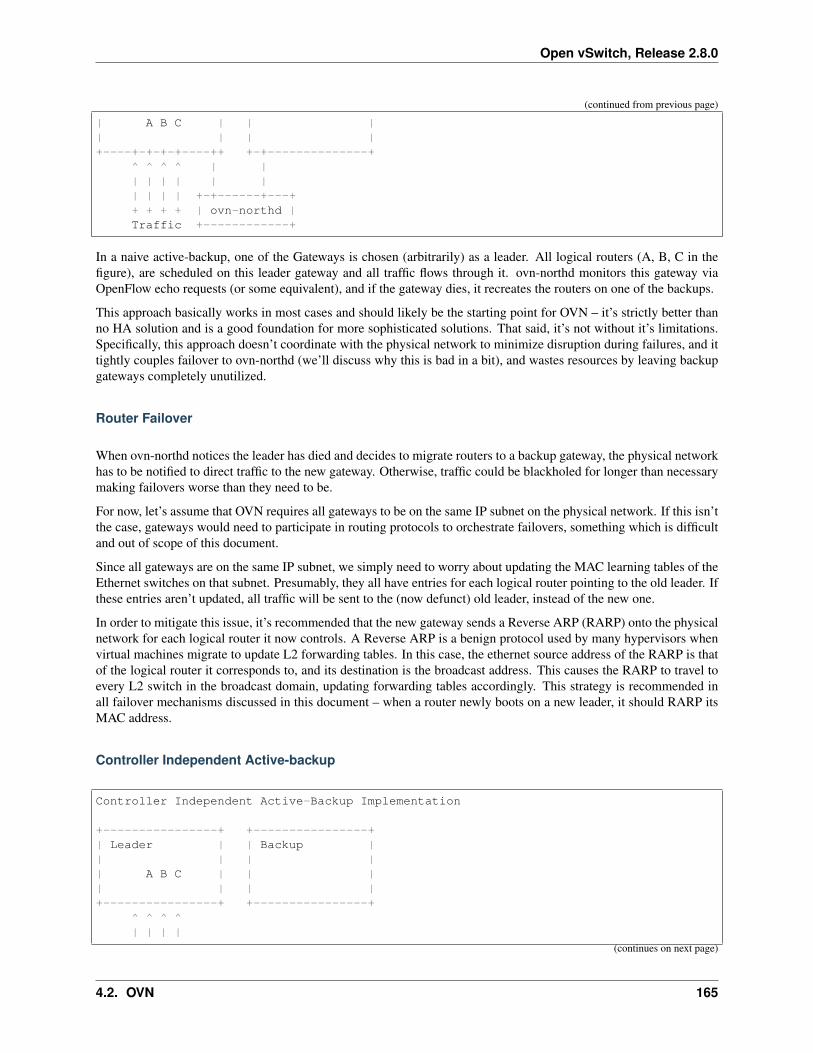
Open vSwitch, Release 2.8.0
(continued from previous page)
| A B C | | || | | |+----+-+-+-+----++ +-+--------------+
^ ^ ^ ^ | || | | | | || | | | +-+------+---++ + + + | ovn-northd |Traffic +------------+
In a naive active-backup, one of the Gateways is chosen (arbitrarily) as a leader. All logical routers (A, B, C in thefigure), are scheduled on this leader gateway and all traffic flows through it. ovn-northd monitors this gateway viaOpenFlow echo requests (or some equivalent), and if the gateway dies, it recreates the routers on one of the backups.
This approach basically works in most cases and should likely be the starting point for OVN – it’s strictly better thanno HA solution and is a good foundation for more sophisticated solutions. That said, it’s not without it’s limitations.Specifically, this approach doesn’t coordinate with the physical network to minimize disruption during failures, and ittightly couples failover to ovn-northd (we’ll discuss why this is bad in a bit), and wastes resources by leaving backupgateways completely unutilized.
Router Failover
When ovn-northd notices the leader has died and decides to migrate routers to a backup gateway, the physical networkhas to be notified to direct traffic to the new gateway. Otherwise, traffic could be blackholed for longer than necessarymaking failovers worse than they need to be.
For now, let’s assume that OVN requires all gateways to be on the same IP subnet on the physical network. If this isn’tthe case, gateways would need to participate in routing protocols to orchestrate failovers, something which is difficultand out of scope of this document.
Since all gateways are on the same IP subnet, we simply need to worry about updating the MAC learning tables of theEthernet switches on that subnet. Presumably, they all have entries for each logical router pointing to the old leader. Ifthese entries aren’t updated, all traffic will be sent to the (now defunct) old leader, instead of the new one.
In order to mitigate this issue, it’s recommended that the new gateway sends a Reverse ARP (RARP) onto the physicalnetwork for each logical router it now controls. A Reverse ARP is a benign protocol used by many hypervisors whenvirtual machines migrate to update L2 forwarding tables. In this case, the ethernet source address of the RARP is thatof the logical router it corresponds to, and its destination is the broadcast address. This causes the RARP to travel toevery L2 switch in the broadcast domain, updating forwarding tables accordingly. This strategy is recommended inall failover mechanisms discussed in this document – when a router newly boots on a new leader, it should RARP itsMAC address.
Controller Independent Active-backup
Controller Independent Active-Backup Implementation
+----------------+ +----------------+| Leader | | Backup || | | || A B C | | || | | |+----------------+ +----------------+
^ ^ ^ ^| | | |
(continues on next page)
4.2. OVN 165
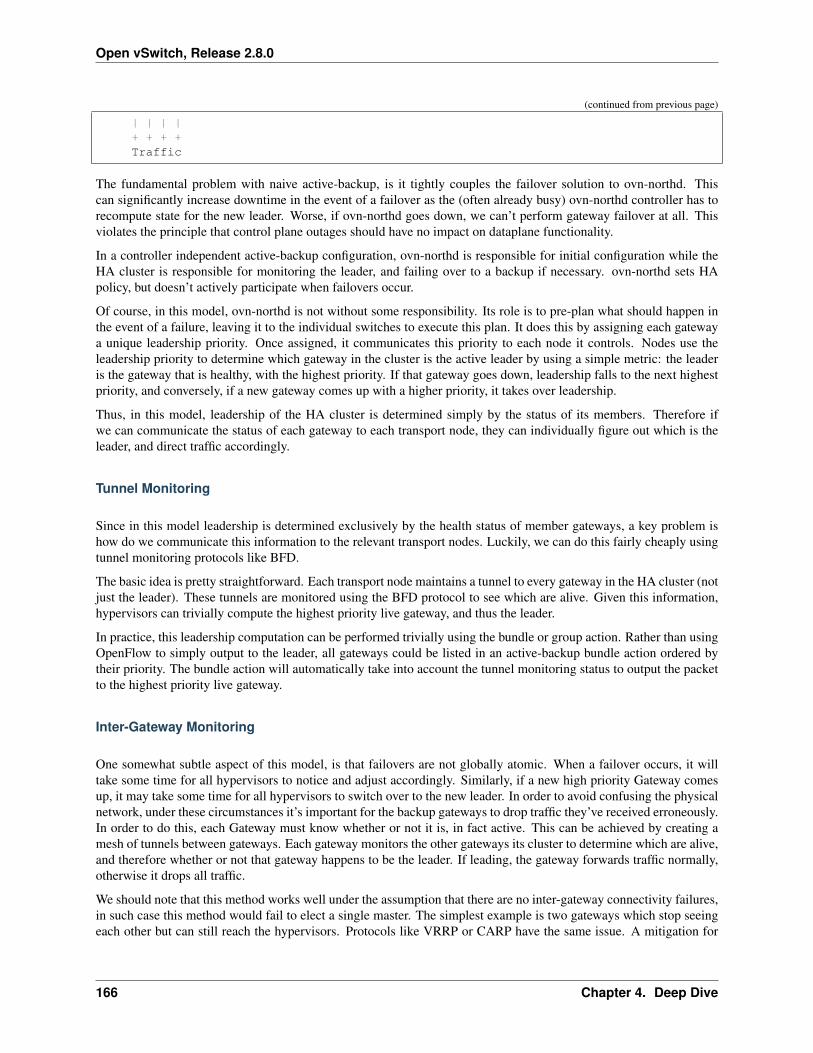
Open vSwitch, Release 2.8.0
(continued from previous page)
| | | |+ + + +Traffic
The fundamental problem with naive active-backup, is it tightly couples the failover solution to ovn-northd. Thiscan significantly increase downtime in the event of a failover as the (often already busy) ovn-northd controller has torecompute state for the new leader. Worse, if ovn-northd goes down, we can’t perform gateway failover at all. Thisviolates the principle that control plane outages should have no impact on dataplane functionality.
In a controller independent active-backup configuration, ovn-northd is responsible for initial configuration while theHA cluster is responsible for monitoring the leader, and failing over to a backup if necessary. ovn-northd sets HApolicy, but doesn’t actively participate when failovers occur.
Of course, in this model, ovn-northd is not without some responsibility. Its role is to pre-plan what should happen inthe event of a failure, leaving it to the individual switches to execute this plan. It does this by assigning each gatewaya unique leadership priority. Once assigned, it communicates this priority to each node it controls. Nodes use theleadership priority to determine which gateway in the cluster is the active leader by using a simple metric: the leaderis the gateway that is healthy, with the highest priority. If that gateway goes down, leadership falls to the next highestpriority, and conversely, if a new gateway comes up with a higher priority, it takes over leadership.
Thus, in this model, leadership of the HA cluster is determined simply by the status of its members. Therefore ifwe can communicate the status of each gateway to each transport node, they can individually figure out which is theleader, and direct traffic accordingly.
Tunnel Monitoring
Since in this model leadership is determined exclusively by the health status of member gateways, a key problem ishow do we communicate this information to the relevant transport nodes. Luckily, we can do this fairly cheaply usingtunnel monitoring protocols like BFD.
The basic idea is pretty straightforward. Each transport node maintains a tunnel to every gateway in the HA cluster (notjust the leader). These tunnels are monitored using the BFD protocol to see which are alive. Given this information,hypervisors can trivially compute the highest priority live gateway, and thus the leader.
In practice, this leadership computation can be performed trivially using the bundle or group action. Rather than usingOpenFlow to simply output to the leader, all gateways could be listed in an active-backup bundle action ordered bytheir priority. The bundle action will automatically take into account the tunnel monitoring status to output the packetto the highest priority live gateway.
Inter-Gateway Monitoring
One somewhat subtle aspect of this model, is that failovers are not globally atomic. When a failover occurs, it willtake some time for all hypervisors to notice and adjust accordingly. Similarly, if a new high priority Gateway comesup, it may take some time for all hypervisors to switch over to the new leader. In order to avoid confusing the physicalnetwork, under these circumstances it’s important for the backup gateways to drop traffic they’ve received erroneously.In order to do this, each Gateway must know whether or not it is, in fact active. This can be achieved by creating amesh of tunnels between gateways. Each gateway monitors the other gateways its cluster to determine which are alive,and therefore whether or not that gateway happens to be the leader. If leading, the gateway forwards traffic normally,otherwise it drops all traffic.
We should note that this method works well under the assumption that there are no inter-gateway connectivity failures,in such case this method would fail to elect a single master. The simplest example is two gateways which stop seeingeach other but can still reach the hypervisors. Protocols like VRRP or CARP have the same issue. A mitigation for
166 Chapter 4. Deep Dive
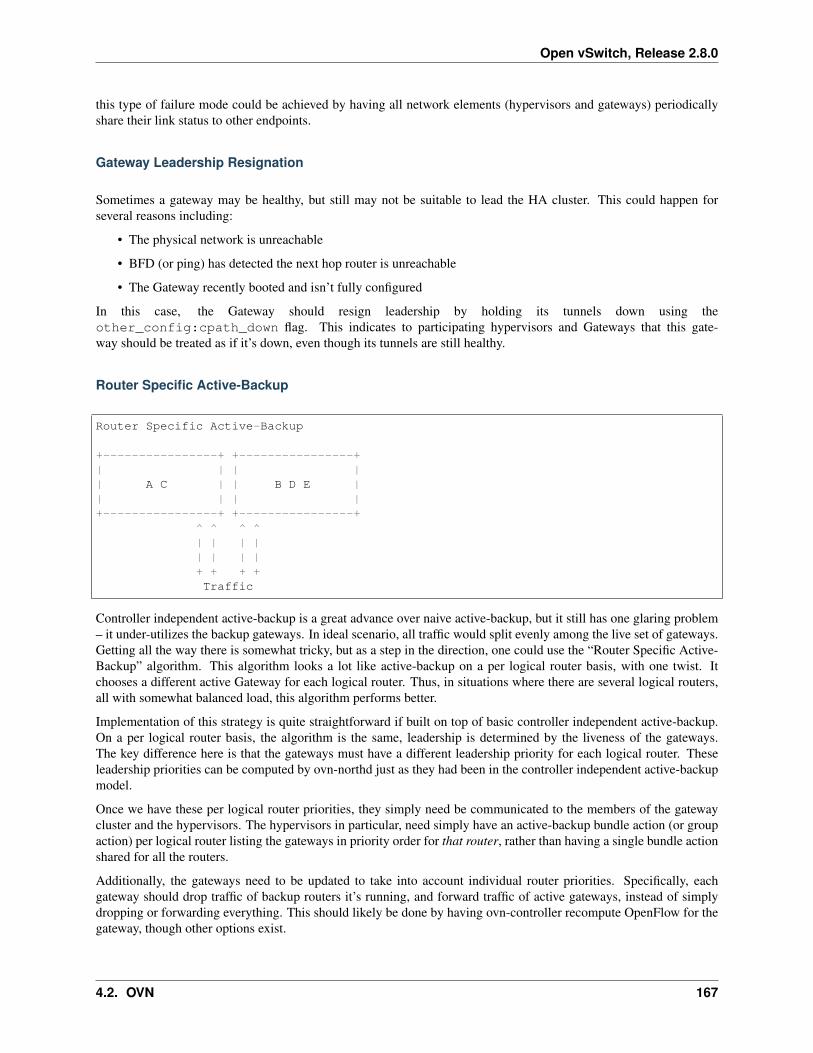
Open vSwitch, Release 2.8.0
this type of failure mode could be achieved by having all network elements (hypervisors and gateways) periodicallyshare their link status to other endpoints.
Gateway Leadership Resignation
Sometimes a gateway may be healthy, but still may not be suitable to lead the HA cluster. This could happen forseveral reasons including:
• The physical network is unreachable
• BFD (or ping) has detected the next hop router is unreachable
• The Gateway recently booted and isn’t fully configured
In this case, the Gateway should resign leadership by holding its tunnels down using theother_config:cpath_down flag. This indicates to participating hypervisors and Gateways that this gate-way should be treated as if it’s down, even though its tunnels are still healthy.
Router Specific Active-Backup
Router Specific Active-Backup
+----------------+ +----------------+| | | || A C | | B D E || | | |+----------------+ +----------------+
^ ^ ^ ^| | | || | | |+ + + +Traffic
Controller independent active-backup is a great advance over naive active-backup, but it still has one glaring problem– it under-utilizes the backup gateways. In ideal scenario, all traffic would split evenly among the live set of gateways.Getting all the way there is somewhat tricky, but as a step in the direction, one could use the “Router Specific Active-Backup” algorithm. This algorithm looks a lot like active-backup on a per logical router basis, with one twist. Itchooses a different active Gateway for each logical router. Thus, in situations where there are several logical routers,all with somewhat balanced load, this algorithm performs better.
Implementation of this strategy is quite straightforward if built on top of basic controller independent active-backup.On a per logical router basis, the algorithm is the same, leadership is determined by the liveness of the gateways.The key difference here is that the gateways must have a different leadership priority for each logical router. Theseleadership priorities can be computed by ovn-northd just as they had been in the controller independent active-backupmodel.
Once we have these per logical router priorities, they simply need be communicated to the members of the gatewaycluster and the hypervisors. The hypervisors in particular, need simply have an active-backup bundle action (or groupaction) per logical router listing the gateways in priority order for that router, rather than having a single bundle actionshared for all the routers.
Additionally, the gateways need to be updated to take into account individual router priorities. Specifically, eachgateway should drop traffic of backup routers it’s running, and forward traffic of active gateways, instead of simplydropping or forwarding everything. This should likely be done by having ovn-controller recompute OpenFlow for thegateway, though other options exist.
4.2. OVN 167
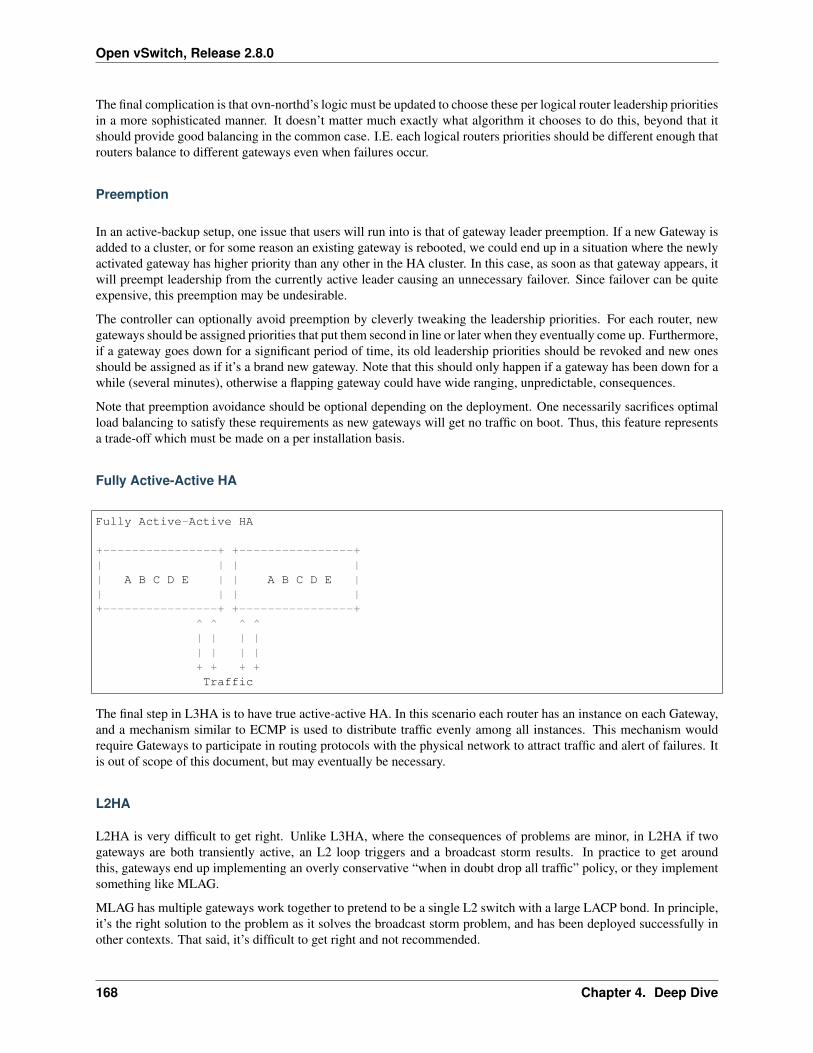
Open vSwitch, Release 2.8.0
The final complication is that ovn-northd’s logic must be updated to choose these per logical router leadership prioritiesin a more sophisticated manner. It doesn’t matter much exactly what algorithm it chooses to do this, beyond that itshould provide good balancing in the common case. I.E. each logical routers priorities should be different enough thatrouters balance to different gateways even when failures occur.
Preemption
In an active-backup setup, one issue that users will run into is that of gateway leader preemption. If a new Gateway isadded to a cluster, or for some reason an existing gateway is rebooted, we could end up in a situation where the newlyactivated gateway has higher priority than any other in the HA cluster. In this case, as soon as that gateway appears, itwill preempt leadership from the currently active leader causing an unnecessary failover. Since failover can be quiteexpensive, this preemption may be undesirable.
The controller can optionally avoid preemption by cleverly tweaking the leadership priorities. For each router, newgateways should be assigned priorities that put them second in line or later when they eventually come up. Furthermore,if a gateway goes down for a significant period of time, its old leadership priorities should be revoked and new onesshould be assigned as if it’s a brand new gateway. Note that this should only happen if a gateway has been down for awhile (several minutes), otherwise a flapping gateway could have wide ranging, unpredictable, consequences.
Note that preemption avoidance should be optional depending on the deployment. One necessarily sacrifices optimalload balancing to satisfy these requirements as new gateways will get no traffic on boot. Thus, this feature representsa trade-off which must be made on a per installation basis.
Fully Active-Active HA
Fully Active-Active HA
+----------------+ +----------------+| | | || A B C D E | | A B C D E || | | |+----------------+ +----------------+
^ ^ ^ ^| | | || | | |+ + + +Traffic
The final step in L3HA is to have true active-active HA. In this scenario each router has an instance on each Gateway,and a mechanism similar to ECMP is used to distribute traffic evenly among all instances. This mechanism wouldrequire Gateways to participate in routing protocols with the physical network to attract traffic and alert of failures. Itis out of scope of this document, but may eventually be necessary.
L2HA
L2HA is very difficult to get right. Unlike L3HA, where the consequences of problems are minor, in L2HA if twogateways are both transiently active, an L2 loop triggers and a broadcast storm results. In practice to get aroundthis, gateways end up implementing an overly conservative “when in doubt drop all traffic” policy, or they implementsomething like MLAG.
MLAG has multiple gateways work together to pretend to be a single L2 switch with a large LACP bond. In principle,it’s the right solution to the problem as it solves the broadcast storm problem, and has been deployed successfully inother contexts. That said, it’s difficult to get right and not recommended.
168 Chapter 4. Deep Dive

Open vSwitch, Release 2.8.0
ovn-architecture(7) (pdf) (html) (plain text)
4.2. OVN 169

Open vSwitch, Release 2.8.0
170 Chapter 4. Deep Dive
CHAPTER 5
How-to Guides
Answers to common “How do I?”-style questions. For more information on the topics covered herein, refer to DeepDive.
5.1 OVS
5.1.1 Open vSwitch with KVM
This document describes how to use Open vSwitch with the Kernel-based Virtual Machine (KVM).
Note: This document assumes that you have Open vSwitch set up on a Linux system.
Setup
KVM uses tunctl to handle various bridging modes, which you can install with the Debian/Ubuntu packageuml-utilities:
$ apt-get install uml-utilities
Next, you will need to modify or create custom versions of the qemu-ifup and qemu-ifdown scripts. In thisguide, we’ll create custom versions that make use of example Open vSwitch bridges that we’ll describe in this guide.
Create the following two files and store them in known locations. For example:
$ cat << 'EOF' > /etc/ovs-ifup#!/bin/sh
switch='br0'ip link set $1 up
(continues on next page)
171

Open vSwitch, Release 2.8.0
(continued from previous page)
ovs-vsctl add-port ${switch} $1EOF
$ cat << 'EOF' > /etc/ovs-ifdown#!/bin/sh
switch='br0'ip addr flush dev $1ip link set $1 downovs-vsctl del-port ${switch} $1EOF
The basic usage of Open vSwitch is described at the end of Open vSwitch on Linux, FreeBSD and NetBSD. If youhaven’t already, create a bridge named br0 with the following command:
$ ovs-vsctl add-br br0
Then, add a port to the bridge for the NIC that you want your guests to communicate over (e.g. eth0):
$ ovs-vsctl add-port br0 eth0
Refer to ovs-vsctl(8) for more details.
Next, we’ll start a guest that will use our ifup and ifdown scripts:
$ kvm -m 512 -net nic,macaddr=00:11:22:EE:EE:EE -net \tap,script=/etc/ovs-ifup,downscript=/etc/ovs-ifdown -drive \file=/path/to/disk-image,boot=on
This will start the guest and associate a tap device with it. The ovs-ifup script will add a port on the br0 bridge sothat the guest will be able to communicate over that bridge.
To get some more information and for debugging you can use Open vSwitch utilities such as ovs-dpctl and ovs-ofctl,For example:
$ ovs-dpctl show$ ovs-ofctl show br0
You should see tap devices for each KVM guest added as ports to the bridge (e.g. tap0)
Refer to ovs-dpctl(8) and ovs-ofctl(8) for more details.
Bug Reporting
Please report problems to [email protected].
5.1.2 Open vSwitch with SELinux
Security-Enhanced Linux (SELinux) is a Linux kernel security module that limits “the malicious things” that certainprocesses, including OVS, can do to the system in case they get compromised. In our case SELinux basically servesas the “second line of defense” that limits the things that OVS processes are allowed to do. The “first line of defense”is proper input validation that eliminates code paths that could be used by attacker to do any sort of “escape attacks”,such as file name escape, shell escape, command line argument escape, buffer escape. Since developers don’t alwaysimplement proper input validation, then SELinux Access Control’s goal is to confine damage of such attacks, if theyturned out to be possible.
172 Chapter 5. How-to Guides
Open vSwitch, Release 2.8.0
Besides Type Enforcement there are other SELinux features, but they are out of scope for this document.
Currently there are two SELinux policies for Open vSwitch:
• the one that ships with your Linux distribution (i.e. selinux-policy-targeted package)
• the one that ships with OVS (i.e. openvswitch-selinux-policy package)
Limitations
If Open vSwitch is directly started from command line, then it will run under unconfined_t SELinux domain thatbasically lets daemon to do whatever it likes. This is very important for developers to understand, because they mightintroduced code in OVS that invokes new system calls that SELinux policy did not anticipate. This means that theirfeature may have worked out just fine for them. However, if someone else would try to run the same code when OpenvSwitch is started through systemctl, then Open vSwitch would get Permission Denied errors.
Currently the only distributions that enforce SELinux on OVS by default are RHEL, CentOS and Fedora. WhileUbuntu and Debian also have some SELinux support, they run Open vSwitch under the unrestricted unconfineddomain. Also, it seems that Ubuntu is leaning towards Apparmor that works slightly differently than SELinux.
SELinux and Open vSwitch are moving targets. What this means is that, if you solely rely on your Linux distribution’sSELinux policy, then this policy might not have correctly anticipated that a newer Open vSwitch version needs extrawhite list rules. However, if you solely rely on SELinux policy that ships with Open vSwitch, then Open vSwitchdevelopers might not have correctly anticipated the feature set that your SELinux implementation supports.
Installation
Refer to Fedora, RHEL 7.x Packaging for Open vSwitch for instructions on how to build all Open vSwitch rpmpackages.
Once the package is built, install it on your Linux distribution:
$ dnf install openvswitch-selinux-policy-2.4.1-1.el7.centos.noarch.rpm
Restart Open vSwitch:
$ systemctl restart openvswitch
Troubleshooting
When SELinux was implemented some of the standard system utilities acquired -Z flag (e.g. ps -Z, ls -Z). Forexample, to find out under which SELinux security domain process runs, use:
$ ps -AZ | grep ovs-vswitchdsystem_u:system_r:openvswitch_t:s0 854 ? ovs-vswitchd
To find out the SELinux label of file or directory, use:
$ ls -Z /etc/openvswitch/conf.dbsystem_u:object_r:openvswitch_rw_t:s0 /etc/openvswitch/conf.db
If, for example, SELinux policy for Open vSwitch is too strict, then you might see in Open vSwitch log files “Permis-sion Denied” errors:
5.1. OVS 173
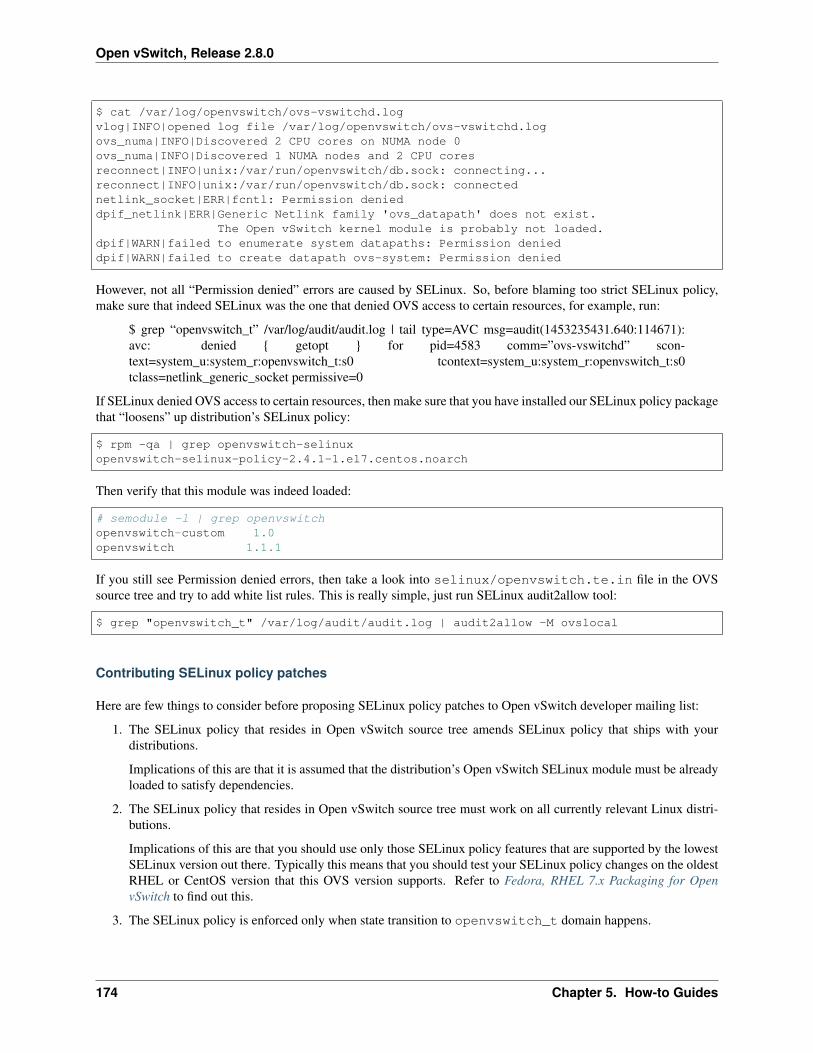
Open vSwitch, Release 2.8.0
$ cat /var/log/openvswitch/ovs-vswitchd.logvlog|INFO|opened log file /var/log/openvswitch/ovs-vswitchd.logovs_numa|INFO|Discovered 2 CPU cores on NUMA node 0ovs_numa|INFO|Discovered 1 NUMA nodes and 2 CPU coresreconnect|INFO|unix:/var/run/openvswitch/db.sock: connecting...reconnect|INFO|unix:/var/run/openvswitch/db.sock: connectednetlink_socket|ERR|fcntl: Permission denieddpif_netlink|ERR|Generic Netlink family 'ovs_datapath' does not exist.
The Open vSwitch kernel module is probably not loaded.dpif|WARN|failed to enumerate system datapaths: Permission denieddpif|WARN|failed to create datapath ovs-system: Permission denied
However, not all “Permission denied” errors are caused by SELinux. So, before blaming too strict SELinux policy,make sure that indeed SELinux was the one that denied OVS access to certain resources, for example, run:
$ grep “openvswitch_t” /var/log/audit/audit.log | tail type=AVC msg=audit(1453235431.640:114671):avc: denied { getopt } for pid=4583 comm=”ovs-vswitchd” scon-text=system_u:system_r:openvswitch_t:s0 tcontext=system_u:system_r:openvswitch_t:s0tclass=netlink_generic_socket permissive=0
If SELinux denied OVS access to certain resources, then make sure that you have installed our SELinux policy packagethat “loosens” up distribution’s SELinux policy:
$ rpm -qa | grep openvswitch-selinuxopenvswitch-selinux-policy-2.4.1-1.el7.centos.noarch
Then verify that this module was indeed loaded:
# semodule -l | grep openvswitchopenvswitch-custom 1.0openvswitch 1.1.1
If you still see Permission denied errors, then take a look into selinux/openvswitch.te.in file in the OVSsource tree and try to add white list rules. This is really simple, just run SELinux audit2allow tool:
$ grep "openvswitch_t" /var/log/audit/audit.log | audit2allow -M ovslocal
Contributing SELinux policy patches
Here are few things to consider before proposing SELinux policy patches to Open vSwitch developer mailing list:
1. The SELinux policy that resides in Open vSwitch source tree amends SELinux policy that ships with yourdistributions.
Implications of this are that it is assumed that the distribution’s Open vSwitch SELinux module must be alreadyloaded to satisfy dependencies.
2. The SELinux policy that resides in Open vSwitch source tree must work on all currently relevant Linux distri-butions.
Implications of this are that you should use only those SELinux policy features that are supported by the lowestSELinux version out there. Typically this means that you should test your SELinux policy changes on the oldestRHEL or CentOS version that this OVS version supports. Refer to Fedora, RHEL 7.x Packaging for OpenvSwitch to find out this.
3. The SELinux policy is enforced only when state transition to openvswitch_t domain happens.
174 Chapter 5. How-to Guides

Open vSwitch, Release 2.8.0
Implications of this are that perhaps instead of loosening SELinux policy you can do certain things at the timerpm package is installed.
Reporting Bugs
Report problems to [email protected].
5.1.3 Open vSwitch with Libvirt
This document describes how to use Open vSwitch with Libvirt 0.9.11 or later. This document assumes that youfollowed Open vSwitch on Linux, FreeBSD and NetBSD or installed Open vSwitch from distribution packaging suchas a .deb or .rpm. The Open vSwitch support is included by default in Libvirt 0.9.11. Consult www.libvirt.org forinstructions on how to build the latest Libvirt, if your Linux distribution by default comes with an older Libvirt release.
Limitations
Currently there is no Open vSwitch support for networks that are managed by libvirt (e.g. NAT). As of now, onlybridged networks are supported (those where the user has to manually create the bridge).
Setup
First, create the Open vSwitch bridge by using the ovs-vsctl utility (this must be done with administrative privileges):
$ ovs-vsctl add-br ovsbr
Once that is done, create a VM, if necessary, and edit its Domain XML file:
$ virsh edit <vm>
Lookup in the Domain XML file the <interface> section. There should be one such XML section for eachinterface the VM has:
<interface type='network'><mac address='52:54:00:71:b1:b6'/><source network='default'/><address type='pci' domain='0x0000' bus='0x00' slot='0x03' function='0x0'/>
</interface>
And change it to something like this:
<interface type='bridge'><mac address='52:54:00:71:b1:b6'/><source bridge='ovsbr'/><virtualport type='openvswitch'/><address type='pci' domain='0x0000' bus='0x00' slot='0x03' function='0x0'/>
</interface>
The interface type must be set to bridge. The <source> XML element specifies to which bridge this interface willbe attached to. The <virtualport> element indicates that the bridge in <source> element is an Open vSwitchbridge.
Then (re)start the VM and verify if the guest’s vnet interface is attached to the ovsbr bridge:
5.1. OVS 175
Open vSwitch, Release 2.8.0
$ ovs-vsctl show
Troubleshooting
If the VM does not want to start, then try to run the libvirtd process either from the terminal, so that all errors areprinted in console, or inspect Libvirt/Open vSwitch log files for possible root cause.
Bug Reporting
Report problems to [email protected].
5.1.4 Open vSwitch with SSL
If you plan to configure Open vSwitch to connect across the network to an OpenFlow controller, then we recom-mend that you build Open vSwitch with OpenSSL. SSL support ensures integrity and confidentiality of the OpenFlowconnections, increasing network security.
This document describes how to configure an Open vSwitch to connect to an OpenFlow controller over SSL. Refer toOpen vSwitch on Linux, FreeBSD and NetBSD. for instructions on building Open vSwitch with SSL support.
Open vSwitch uses TLS version 1.0 or later (TLSv1), as specified by RFC 2246, which is very similar to SSL version3.0. TLSv1 was released in January 1999, so all current software and hardware should implement it.
This document assumes basic familiarity with public-key cryptography and public-key infrastructure.
SSL Concepts for OpenFlow
This section is an introduction to the public-key infrastructure architectures that Open vSwitch supports for SSLauthentication.
To connect over SSL, every Open vSwitch must have a unique private/public key pair and a certificate that signs thatpublic key. Typically, the Open vSwitch generates its own public/private key pair. There are two common ways toobtain a certificate for a switch:
• Self-signed certificates: The Open vSwitch signs its certificate with its own private key. In this case, each switchmust be individually approved by the OpenFlow controller(s), since there is no central authority.
This is the only switch PKI model currently supported by NOX (http://noxrepo.org).
• Switch certificate authority: A certificate authority (the “switch CA”) signs each Open vSwitch’s public key.The OpenFlow controllers then check that any connecting switches’ certificates are signed by that certificateauthority.
This is the only switch PKI model supported by the simple OpenFlow controller included with Open vSwitch.
Each Open vSwitch must also have a copy of the CA certificate for the certificate authority that signs OpenFlowcontrollers’ keys (the “controller CA” certificate). Typically, the same controller CA certificate is installed on all ofthe switches within a given administrative unit. There are two common ways for a switch to obtain the controller CAcertificate:
• Manually copy the certificate to the switch through some secure means, e.g. using a USB flash drive, or overthe network with “scp”, or even FTP or HTTP followed by manual verification.
• Open vSwitch “bootstrap” mode, in which Open vSwitch accepts and saves the controller CA certificate thatit obtains from the OpenFlow controller on its first connection. Thereafter the switch will only connect tocontrollers signed by the same CA certificate.
176 Chapter 5. How-to Guides
Open vSwitch, Release 2.8.0
Establishing a Public Key Infrastructure
Open vSwitch can make use of your existing public key infrastructure. If you already have a PKI, you may skipforward to the next section. Otherwise, if you do not have a PKI, the ovs-pki script included with Open vSwitch canhelp. To create an initial PKI structure, invoke it as:
$ ovs-pki init
This will create and populate a new PKI directory. The default location for the PKI directory depends on how theOpen vSwitch tree was configured (to see the configured default, look for the --dir option description in the outputof ovs-pki --help).
The pki directory contains two important subdirectories. The controllerca subdirectory contains controller CA files,including the following:
cacert.pem Root certificate for the controller certificate authority. Each Open vSwitch must have a copy of this file toallow it to authenticate valid controllers.
private/cakey.pem Private signing key for the controller certificate authority. This file must be kept secret. There isno need for switches or controllers to have a copy of it.
The switchca subdirectory contains switch CA files, analogous to those in the controllerca subdirectory:
cacert.pem Root certificate for the switch certificate authority. The OpenFlow controller must have this file to enableit to authenticate valid switches.
private/cakey.pem Private signing key for the switch certificate authority. This file must be kept secret. There is noneed for switches or controllers to have a copy of it.
After you create the initial structure, you can create keys and certificates for switches and controllers with ovs-pki.Refer to the ovs-pki(8) manage for complete details. A few examples of its use follow:
Controller Key Generation
To create a controller private key and certificate in files named ctl-privkey.pem and ctl-cert.pem, run the following onthe machine that contains the PKI structure:
$ ovs-pki req+sign ctl controller
ctl-privkey.pem and ctl-cert.pem would need to be copied to the controller for its use at runtime. If, for testing purposes,you were to use ovs-testcontroller, the simple OpenFlow controller included with Open vSwitch, then the –private-keyand –certificate options, respectively, would point to these files.
It is very important to make sure that no stray copies of ctl-privkey.pem are created, because they could be used toimpersonate the controller.
Switch Key Generation with Self-Signed Certificates
If you are using self-signed certificates (see “SSL Concepts for OpenFlow”), this is one way to create an acceptablecertificate for your controller to approve.
1. Run the following command on the Open vSwitch itself:
$ ovs-pki self-sign sc
5.1. OVS 177
Open vSwitch, Release 2.8.0
Note: This command does not require a copy of any of the PKI files generated by ovs-pki init, and youshould not copy them to the switch because some of them have contents that must remain secret for security.)
The ovs-pki self-sign command has the following output:
sc-privkey.pem the switch private key file. For security, the contents of this file must remain secret. There isordinarily no need to copy this file off the Open vSwitch.
sc-cert.pem the switch certificate, signed by the switch’s own private key. Its contents are not a secret.
2. Optionally, copy controllerca/cacert.pem from the machine that has the OpenFlow PKI structure and verify thatit is correct. (Otherwise, you will have to use CA certificate bootstrapping when you configure Open vSwitchin the next step.)
3. Configure Open vSwitch to use the keys and certificates (see “Configuring SSL Support”, below).
Switch Key Generation with a Switch PKI (Easy Method)
If you are using a switch PKI (see “SSL Concepts for OpenFlow”, above), this method of switch key generation is alittle easier than the alternate method described below, but it is also a little less secure because it requires copying asensitive private key from file from the machine hosting the PKI to the switch.
1. Run the following on the machine that contains the PKI structure:
$ ovs-pki req+sign sc switch
This command has the following output:
sc-privkey.pem the switch private key file. For security, the contents of this file must remain secret.
sc-cert.pem the switch certificate. Its contents are not a secret.
2. Copy sc-privkey.pem and sc-cert.pem, plus controllerca/cacert.pem, to the Open vSwitch.
3. Delete the copies of sc-privkey.pem and sc-cert.pem on the PKI machine and any other copies that may havebeen made in transit. It is very important to make sure that there are no stray copies of sc-privkey.pem, becausethey could be used to impersonate the switch.
Warning: Don’t delete controllerca/cacert.pem! It is not security-sensitive and you will need it to configureadditional switches.
4. Configure Open vSwitch to use the keys and certificates (see “Configuring SSL Support”, below).
Switch Key Generation with a Switch PKI (More Secure)
If you are using a switch PKI (see “SSL Concepts for OpenFlow”, above), then, compared to the previous method, themethod described here takes a little more work, but it does not involve copying the private key from one machine toanother, so it may also be a little more secure.
1. Run the following command on the Open vSwitch itself:
$ ovs-pki req sc
178 Chapter 5. How-to Guides
Open vSwitch, Release 2.8.0
Note: This command does not require a copy of any of the PKI files generated by “ovs-pki init”, and youshould not copy them to the switch because some of them have contents that must remain secret for security.
The “ovs-pki req” command has the following output:
sc-privkey.pem the switch private key file. For security, the contents of this file must remain secret. There isordinarily no need to copy this file off the Open vSwitch.
sc-req.pem the switch “certificate request”, which is essentially the switch’s public key. Its contents are not asecret.
a fingerprint this is output on stdout.
2. Write the fingerprint down on a slip of paper and copy sc-req.pem to the machine that contains the PKI structure.
3. On the machine that contains the PKI structure, run:
$ ovs-pki sign sc switch
This command will output a fingerprint to stdout and request that you verify it. Check that it is the same as thefingerprint that you wrote down on the slip of paper before you answer “yes”.
ovs-pki sign creates a file named sc-cert.pem, which is the switch certificate. Its contents are not a secret.
4. Copy the generated sc-cert.pem, plus controllerca/cacert.pem from the PKI structure, to the Open vSwitch, andverify that they were copied correctly.
You may delete sc-cert.pem from the machine that hosts the PKI structure now, although it is not important thatyou do so.
Warning: Don’t delete controllerca/cacert.pem! It is not security-sensitive and you will need it to configureadditional switches.
5. Configure Open vSwitch to use the keys and certificates (see “Configuring SSL Support”, below).
Configuring SSL Support
SSL configuration requires three additional configuration files. The first two of these are unique to each Open vSwitch.If you used the instructions above to build your PKI, then these files will be named sc-privkey.pem and sc-cert.pem,respectively:
• A private key file, which contains the private half of an RSA or DSA key.
This file can be generated on the Open vSwitch itself, for the greatest security, or it can be generated elsewhereand copied to the Open vSwitch.
The contents of the private key file are secret and must not be exposed.
• A certificate file, which certifies that the private key is that of a trustworthy Open vSwitch.
This file has to be generated on a machine that has the private key for the switch certification authority, whichshould not be an Open vSwitch; ideally, it should be a machine that is not networked at all.
The certificate file itself is not a secret.
The third configuration file is typically the same across all the switches in a given administrative unit. If you used theinstructions above to build your PKI, then this file will be named cacert.pem:
5.1. OVS 179
Open vSwitch, Release 2.8.0
• The root certificate for the controller certificate authority. The Open vSwitch verifies it that is authorized toconnect to an OpenFlow controller by verifying a signature against this CA certificate.
Once you have these files, configure ovs-vswitchd to use them using the ovs-vsctl set-ssl command, e.g.:
$ ovs-vsctl set-ssl /etc/openvswitch/sc-privkey.pem \/etc/openvswitch/sc-cert.pem /etc/openvswitch/cacert.pem
Substitute the correct file names, of course, if they differ from the ones used above. You should use absolute filenames (ones that begin with /), because ovs-vswitchd’s current directory is unrelated to the one from which you runovs-vsctl.
If you are using self-signed certificates (see “SSL Concepts for OpenFlow”) and you did not copy con-trollerca/cacert.pem from the PKI machine to the Open vSwitch, then add the --bootstrap option, e.g.:
$ ovs-vsctl -- --bootstrap set-ssl /etc/openvswitch/sc-privkey.pem \/etc/openvswitch/sc-cert.pem /etc/openvswitch/cacert.pem
After you have added all of these configuration keys, you may specify ssl: connection methods elsewhere in theconfiguration database. tcp: connection methods are still allowed even after SSL has been configured, so for securityyou should use only ssl: connections.
Reporting Bugs
Report problems to [email protected].
5.1.5 Using LISP tunneling
LISP is a layer 3 tunneling mechanism, meaning that encapsulated packets do not carry Ethernet headers, and ARPrequests shouldn’t be sent over the tunnel. Because of this, there are some additional steps required for setting up LISPtunnels in Open vSwitch, until support for L3 tunnels will improve.
This guide assumes tunneling between two VMs connected to OVS bridges on different hypervisors reachable overIPv4. Of course, more than one VM may be connected to any of the hypervisors, and a hypervisor may communicatewith several different hypervisors over the same lisp tunneling interface. A LISP “map-cache” can be implementedusing flows, see example at the bottom of this file.
There are several scenarios:
1) the VMs have IP addresses in the same subnet and the hypervisors are also in a single subnet (although onedifferent from the VM’s);
2) the VMs have IP addresses in the same subnet but the hypervisors are separated by a router;
3) the VMs are in different subnets.
In cases 1) and 3) ARP resolution can work as normal: ARP traffic is configured not to go through the LISP tunnel.For case 1) ARP is able to reach the other VM, if both OVS instances default to MAC address learning. Case 3)requires the hypervisor be configured as the default router for the VMs.
In case 2) the VMs expect ARP replies from each other, but this is not possible over a layer 3 tunnel. One solutionis to have static MAC address entries preconfigured on the VMs (e.g., arp -f /etc/ethers on startup on Unixbased VMs), or have the hypervisor do proxy ARP. In this scenario, the eth0 interfaces need not be added to the br0bridge in the examples below.
On the receiving side, the packet arrives without the original MAC header. The LISP tunneling code attaches a headerwith harcoded source and destination MAC address 02:00:00:00:00:00. This address has all bits set to 0, exceptthe locally administered bit, in order to avoid potential collisions with existing allocations. In order for packets to
180 Chapter 5. How-to Guides
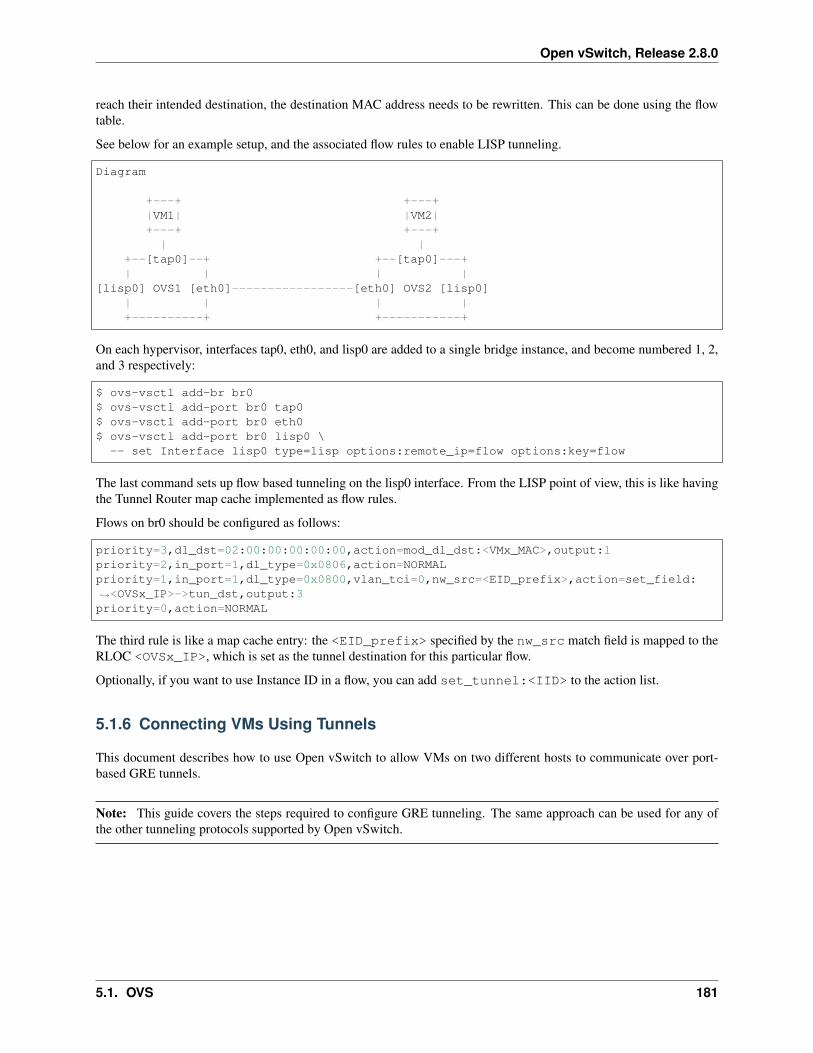
Open vSwitch, Release 2.8.0
reach their intended destination, the destination MAC address needs to be rewritten. This can be done using the flowtable.
See below for an example setup, and the associated flow rules to enable LISP tunneling.
Diagram
+---+ +---+|VM1| |VM2|+---+ +---+| |
+--[tap0]--+ +--[tap0]---+| | | |
[lisp0] OVS1 [eth0]-----------------[eth0] OVS2 [lisp0]| | | |+----------+ +-----------+
On each hypervisor, interfaces tap0, eth0, and lisp0 are added to a single bridge instance, and become numbered 1, 2,and 3 respectively:
$ ovs-vsctl add-br br0$ ovs-vsctl add-port br0 tap0$ ovs-vsctl add-port br0 eth0$ ovs-vsctl add-port br0 lisp0 \
-- set Interface lisp0 type=lisp options:remote_ip=flow options:key=flow
The last command sets up flow based tunneling on the lisp0 interface. From the LISP point of view, this is like havingthe Tunnel Router map cache implemented as flow rules.
Flows on br0 should be configured as follows:
priority=3,dl_dst=02:00:00:00:00:00,action=mod_dl_dst:<VMx_MAC>,output:1priority=2,in_port=1,dl_type=0x0806,action=NORMALpriority=1,in_port=1,dl_type=0x0800,vlan_tci=0,nw_src=<EID_prefix>,action=set_field:→˓<OVSx_IP>->tun_dst,output:3priority=0,action=NORMAL
The third rule is like a map cache entry: the <EID_prefix> specified by the nw_src match field is mapped to theRLOC <OVSx_IP>, which is set as the tunnel destination for this particular flow.
Optionally, if you want to use Instance ID in a flow, you can add set_tunnel:<IID> to the action list.
5.1.6 Connecting VMs Using Tunnels
This document describes how to use Open vSwitch to allow VMs on two different hosts to communicate over port-based GRE tunnels.
Note: This guide covers the steps required to configure GRE tunneling. The same approach can be used for any ofthe other tunneling protocols supported by Open vSwitch.
5.1. OVS 181
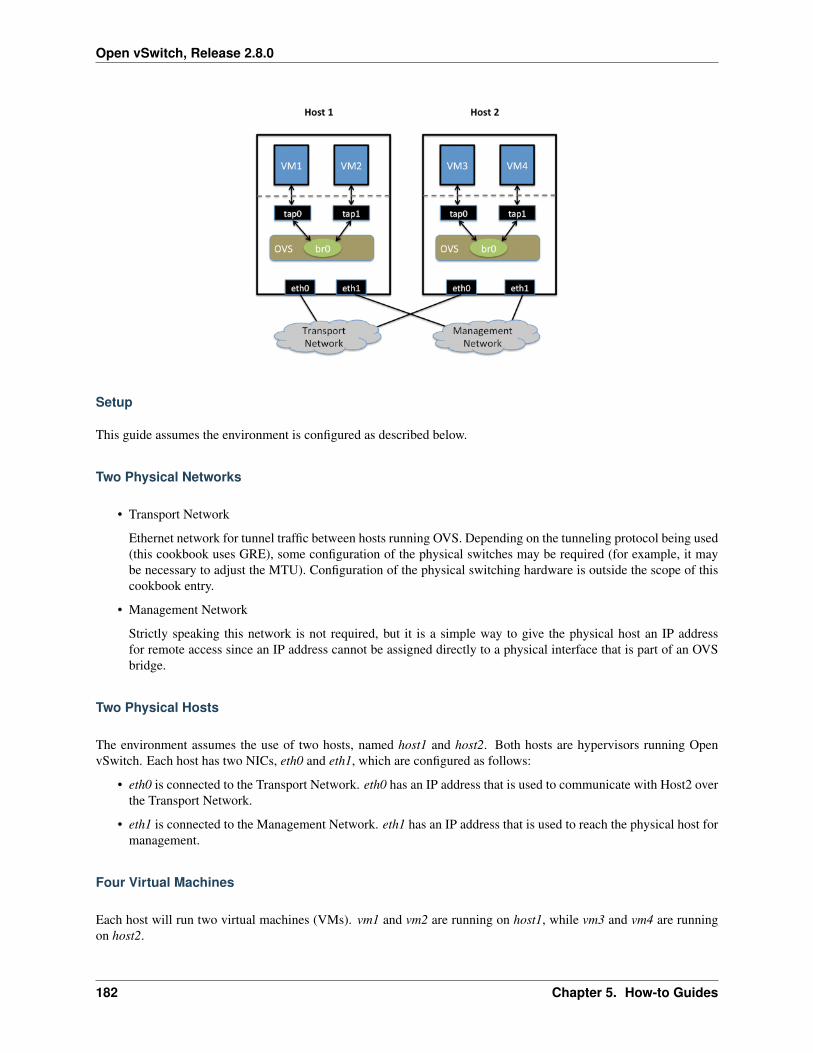
Open vSwitch, Release 2.8.0
Setup
This guide assumes the environment is configured as described below.
Two Physical Networks
• Transport Network
Ethernet network for tunnel traffic between hosts running OVS. Depending on the tunneling protocol being used(this cookbook uses GRE), some configuration of the physical switches may be required (for example, it maybe necessary to adjust the MTU). Configuration of the physical switching hardware is outside the scope of thiscookbook entry.
• Management Network
Strictly speaking this network is not required, but it is a simple way to give the physical host an IP addressfor remote access since an IP address cannot be assigned directly to a physical interface that is part of an OVSbridge.
Two Physical Hosts
The environment assumes the use of two hosts, named host1 and host2. Both hosts are hypervisors running OpenvSwitch. Each host has two NICs, eth0 and eth1, which are configured as follows:
• eth0 is connected to the Transport Network. eth0 has an IP address that is used to communicate with Host2 overthe Transport Network.
• eth1 is connected to the Management Network. eth1 has an IP address that is used to reach the physical host formanagement.
Four Virtual Machines
Each host will run two virtual machines (VMs). vm1 and vm2 are running on host1, while vm3 and vm4 are runningon host2.
182 Chapter 5. How-to Guides
Open vSwitch, Release 2.8.0
Each VM has a single interface that appears as a Linux device (e.g., tap0) on the physical host.
Note: For Xen/XenServer, VM interfaces appears as Linux devices with names like vif1.0. Other Linux systemsmay present these interfaces as vnet0, vnet1, etc.
Configuration Steps
Before you begin, you’ll want to ensure that you know the IP addresses assigned to eth0 on both host1 and host2, asthey will be needed during the configuration.
Perform the following configuration on host1.
1. Create an OVS bridge:
$ ovs-vsctl add-br br0
Note: You will not add eth0 to the OVS bridge.
2. Boot vm1 and vm2 on host1. If the VMs are not automatically attached to OVS, add them to the OVS bridgeyou just created (the commands below assume tap0 is for vm1 and tap1 is for vm2):
$ ovs-vsctl add-port br0 tap0$ ovs-vsctl add-port br0 tap1
3. Add a port for the GRE tunnel:
$ ovs-vsctl add-port br0 gre0 \-- set interface gre0 type=gre options:remote_ip=<IP of eth0 on host2>
Create a mirrored configuration on host2 using the same basic steps:
1. Create an OVS bridge, but do not add any physical interfaces to the bridge:
$ ovs-vsctl add-br br0
2. Launch vm3 and vm4 on host2, adding them to the OVS bridge if needed (again, tap0 is assumed to be for vm3and tap1 is assumed to be for vm4):
$ ovs-vsctl add-port br0 tap0$ ovs-vsctl add-port br0 tap1
3. Create the GRE tunnel on host2, this time using the IP address for eth0 on host1 when specifying theremote_ip option:
$ ovs-vsctl add-port br0 gre0 – set interface gre0 type=gre options:remote_ip=<IP of eth0 onhost1>
Testing
Pings between any of the VMs should work, regardless of whether the VMs are running on the same host or differenthosts.
Using ip route show (or equivalent command), the routing table of the operating system running inside the VMshould show no knowledge of the IP subnets used by the hosts, only the IP subnet(s) configured within the VM’s
5.1. OVS 183
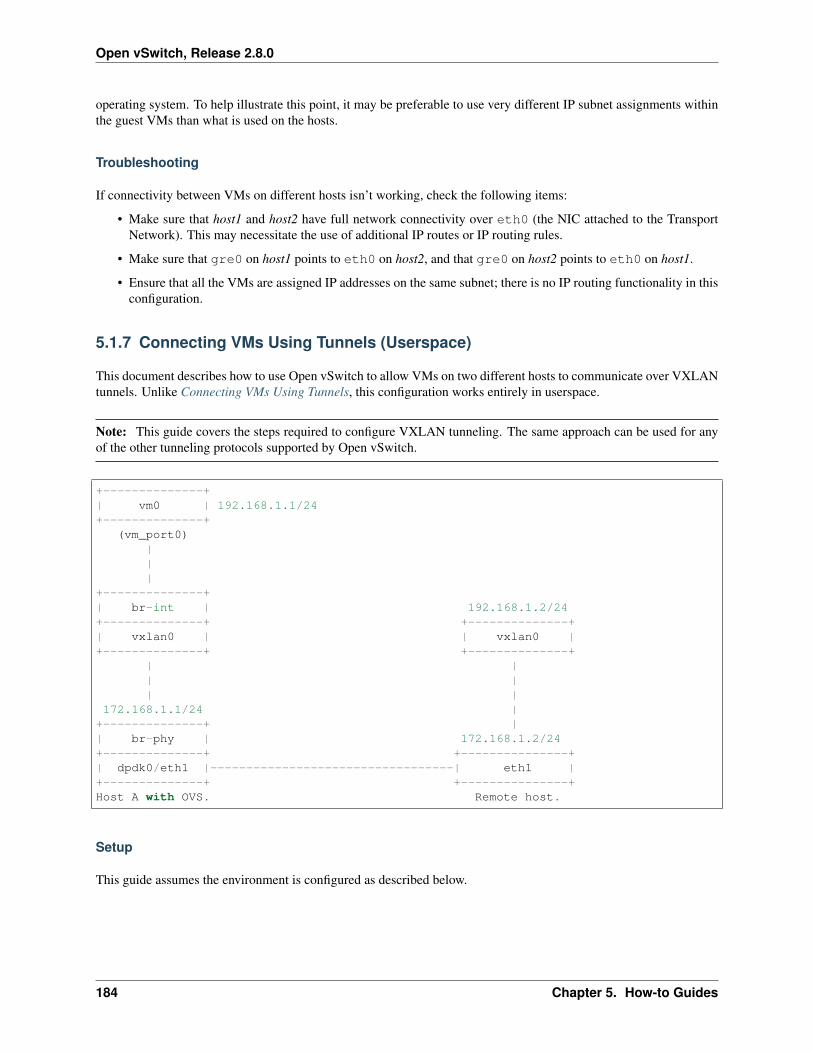
Open vSwitch, Release 2.8.0
operating system. To help illustrate this point, it may be preferable to use very different IP subnet assignments withinthe guest VMs than what is used on the hosts.
Troubleshooting
If connectivity between VMs on different hosts isn’t working, check the following items:
• Make sure that host1 and host2 have full network connectivity over eth0 (the NIC attached to the TransportNetwork). This may necessitate the use of additional IP routes or IP routing rules.
• Make sure that gre0 on host1 points to eth0 on host2, and that gre0 on host2 points to eth0 on host1.
• Ensure that all the VMs are assigned IP addresses on the same subnet; there is no IP routing functionality in thisconfiguration.
5.1.7 Connecting VMs Using Tunnels (Userspace)
This document describes how to use Open vSwitch to allow VMs on two different hosts to communicate over VXLANtunnels. Unlike Connecting VMs Using Tunnels, this configuration works entirely in userspace.
Note: This guide covers the steps required to configure VXLAN tunneling. The same approach can be used for anyof the other tunneling protocols supported by Open vSwitch.
+--------------+| vm0 | 192.168.1.1/24+--------------+
(vm_port0)|||
+--------------+| br-int | 192.168.1.2/24+--------------+ +--------------+| vxlan0 | | vxlan0 |+--------------+ +--------------+
| || || |
172.168.1.1/24 |+--------------+ || br-phy | 172.168.1.2/24+--------------+ +---------------+| dpdk0/eth1 |----------------------------------| eth1 |+--------------+ +---------------+Host A with OVS. Remote host.
Setup
This guide assumes the environment is configured as described below.
184 Chapter 5. How-to Guides
Open vSwitch, Release 2.8.0
Two Physical Hosts
The environment assumes the use of two hosts, named host1 and host2. We only detail the configuration of host1 buta similar configuration can be used for host2. Both hosts should be configured with Open vSwitch (with or withoutthe DPDK datapath), QEMU/KVM and suitable VM images. Open vSwitch should be running before proceeding.
Configuration Steps
Perform the folowing configuration on host1:
1. Create a br-int bridge:
$ ovs-vsctl --may-exist add-br br-int \-- set Bridge br-int datapath_type=netdev \-- br-set-external-id br-int bridge-id br-int \-- set bridge br-int fail-mode=standalone
2. Add a port to this bridge. If using tap ports, first boot a VM and then add the port to the bridge:
$ ovs-vsctl add-port br0 tap0
If using DPDK vhost-user ports, add the port and then boot the VM accordingly, using vm_port0 as theinterface name:
$ ovs-vsctl add-port br-int vm_port0 \-- set Interface vm_port0 type=dpdkvhostuser
3. Configure the IP address of the VM interface in the VM itself :
$ ip addr add 192.168.1.1/24 dev eth0$ ip link set eth0 up
4. On host1, add a port for the VXLAN tunnel:
$ ovs-vsctl add-port br-int vxlan0 \-- set interface vxlan0 type=vxlan options:remote_ip=172.168.1.2
Note: 172.168.1.2 is the remote tunnel end point address. On the remote host this will be 172.168.1.1
5. Create a br-phy bridge:
$ ovs-vsctl --may-exist add-br br-phy \-- set Bridge br-phy datapath_type=netdev \-- br-set-external-id br-phy bridge-id br-phy \-- set bridge br-phy fail-mode=standalone \
other_config:hwaddr=<mac address of eth1 interface>
Note: This additional bridge is required when running Open vSwitch in userspace rather than kernel-basedOpen vSwitch. The purpose of this bridge is to allow use of the kernel network stack for routing and ARPresolution. The datapath needs to look-up the routing table and ARP table to prepare the tunnel header andtransmit data to the output port.
5.1. OVS 185
Open vSwitch, Release 2.8.0
Note: eth1 is used rather than eth0. This is to ensure network connectivity is retained.
6. Attach eth1/dpdk0 to the br-phy bridge.
If the physical port eth1 is operating as a kernel network interface, run:
$ ovs-vsctl --timeout 10 add-port br-phy eth1$ ip addr add 172.168.1.1/24 dev br-phy$ ip link set br-phy up$ ip addr flush dev eth1 2>/dev/null$ ip link set eth1 up$ iptables -F
If instead the interface is a DPDK interface and bound to the igb_uio or vfio driver, run:
$ ovs-vsctl --timeout 10 add-port br-phy dpdk0 \-- set Interface dpdk0 type=dpdk options:dpdk-devargs=0000:06:00.0
$ ip addr add 172.168.1.1/24 dev br-phy$ ip link set br-phy up$ iptables -F
The commands are different as DPDK interfaces are not managed by the kernel, thus, the port details are notvisible to any ip commands.
Important: Attempting to use the kernel network commands for a DPDK interface will result in a loss ofconnectivity through eth1. Refer to Basic Configuration for more details.
Once complete, check the cached routes using ovs-appctl command:
$ ovs-appctl ovs/route/show
If the tunnel route is missing, adding it now:
$ ovs-appctl ovs/route/add 172.168.1.1/24 br-eth1
Repeat these steps if necessary for host2, but using 192.168.1.1 and 172.168.1.2 for the VM and tunnelinterface IP addresses, respectively.
Testing
With this setup, ping to VXLAN target device (192.168.1.2) should work. Traffic will be VXLAN encapsulatedand sent over the eth1/dpdk0 interface.
Tunneling-related Commands
Tunnel routing table
To add route:
$ ovs-appctl ovs/route/add <IP address>/<prefix length> <output-bridge-name> <gw>
To see all routes configured:
186 Chapter 5. How-to Guides
Open vSwitch, Release 2.8.0
$ ovs-appctl ovs/route/show
To delete route:
$ ovs-appctl ovs/route/del <IP address>/<prefix length>
To look up and display the route for a destination:
$ ovs-appctl ovs/route/lookup <IP address>
ARP
To see arp cache content:
$ ovs-appctl tnl/arp/show
To flush arp cache:
$ ovs-appctl tnl/arp/flush
To set a specific arp entry:
$ ovs-appctl tnl/arp/set <bridge> <IP address> <MAC address>
Ports
To check tunnel ports listening in ovs-vswitchd:
$ ovs-appctl tnl/ports/show
To set range for VxLan UDP source port:
$ ovs-appctl tnl/egress_port_range <num1> <num2>
To show current range:
$ ovs-appctl tnl/egress_port_range
Datapath
To check datapath ports:
$ ovs-appctl dpif/show
To check datapath flows:
$ ovs-appctl dpif/dump-flows
5.1. OVS 187
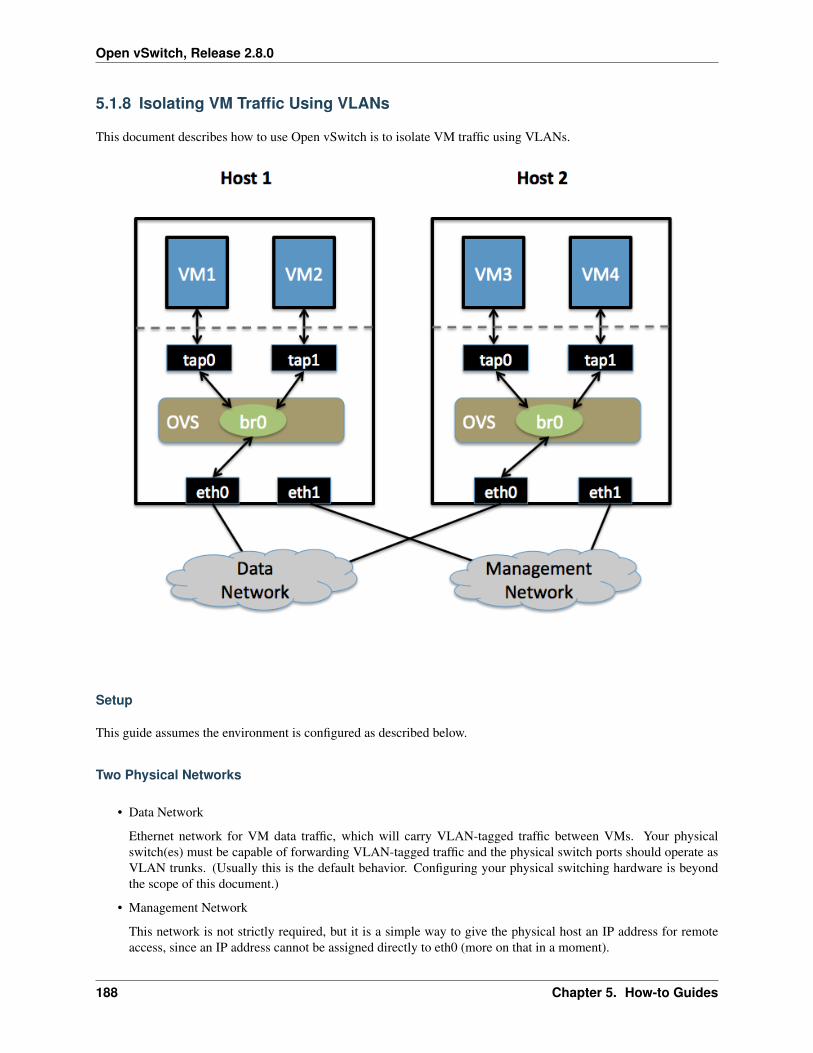
Open vSwitch, Release 2.8.0
5.1.8 Isolating VM Traffic Using VLANs
This document describes how to use Open vSwitch is to isolate VM traffic using VLANs.
Setup
This guide assumes the environment is configured as described below.
Two Physical Networks
• Data Network
Ethernet network for VM data traffic, which will carry VLAN-tagged traffic between VMs. Your physicalswitch(es) must be capable of forwarding VLAN-tagged traffic and the physical switch ports should operate asVLAN trunks. (Usually this is the default behavior. Configuring your physical switching hardware is beyondthe scope of this document.)
• Management Network
This network is not strictly required, but it is a simple way to give the physical host an IP address for remoteaccess, since an IP address cannot be assigned directly to eth0 (more on that in a moment).
188 Chapter 5. How-to Guides
Open vSwitch, Release 2.8.0
Two Physical Hosts
The environment assumes the use of two hosts: host1 and host2. Both hosts are running Open vSwitch. Each host hastwo NICs, eth0 and eth1, which are configured as follows:
• eth0 is connected to the Data Network. No IP address is assigned to eth0.
• eth1 is connected to the Management Network (if necessary). eth1 has an IP address that is used to reach thephysical host for management.
Four Virtual Machines
Each host will run two virtual machines (VMs). vm1 and vm2 are running on host1, while vm3 and vm4 are runningon host2.
Each VM has a single interface that appears as a Linux device (e.g., tap0) on the physical host.
Note: For Xen/XenServer, VM interfaces appears as Linux devices with names like vif1.0. Other Linux systemsmay present these interfaces as vnet0, vnet1, etc.
Configuration Steps
Perform the following configuration on host1:
1. Create an OVS bridge:
$ ovs-vsctl add-br br0
2. Add eth0 to the bridge:
$ ovs-vsctl add-port br0 eth0
Note: By default, all OVS ports are VLAN trunks, so eth0 will pass all VLANs
Note: When you add eth0 to the OVS bridge, any IP addresses that might have been assigned to eth0 stopworking. IP address assigned to eth0 should be migrated to a different interface before adding eth0 to the OVSbridge. This is the reason for the separate management connection via eth1.
3. Add vm1 as an “access port” on VLAN 100. This means that traffic coming into OVS from VM1 will beuntagged and considered part of VLAN 100:
$ ovs-vsctl add-port br0 tap0 tag=100
Add VM2 on VLAN 200:
$ ovs-vsctl add-port br0 tap1 tag=200
Repeat these steps on host2:
1. Setup a bridge with eth0 as a VLAN trunk:
5.1. OVS 189
Open vSwitch, Release 2.8.0
$ ovs-vsctl add-br br0$ ovs-vsctl add-port br0 eth0
2. Add VM3 to VLAN 100:
$ ovs-vsctl add-port br0 tap0 tag=100
3. Add VM4 to VLAN 200:
$ ovs-vsctl add-port br0 tap1 tag=200
Validation
Pings from vm1 to vm3 should succeed, as these two VMs are on the same VLAN.
Pings from vm2 to vm4 should also succeed, since these VMs are also on the same VLAN as each other.
Pings from vm1/vm3 to vm2/vm4 should not succeed, as these VMs are on different VLANs. If you have a routerconfigured to forward between the VLANs, then pings will work, but packets arriving at vm3 should have the sourceMAC address of the router, not of vm1.
5.1.9 Quality of Service (QoS) Rate Limiting
This document explains how to use Open vSwitch to rate-limit traffic by a VM to either 1 Mbps or 10 Mbps.
190 Chapter 5. How-to Guides
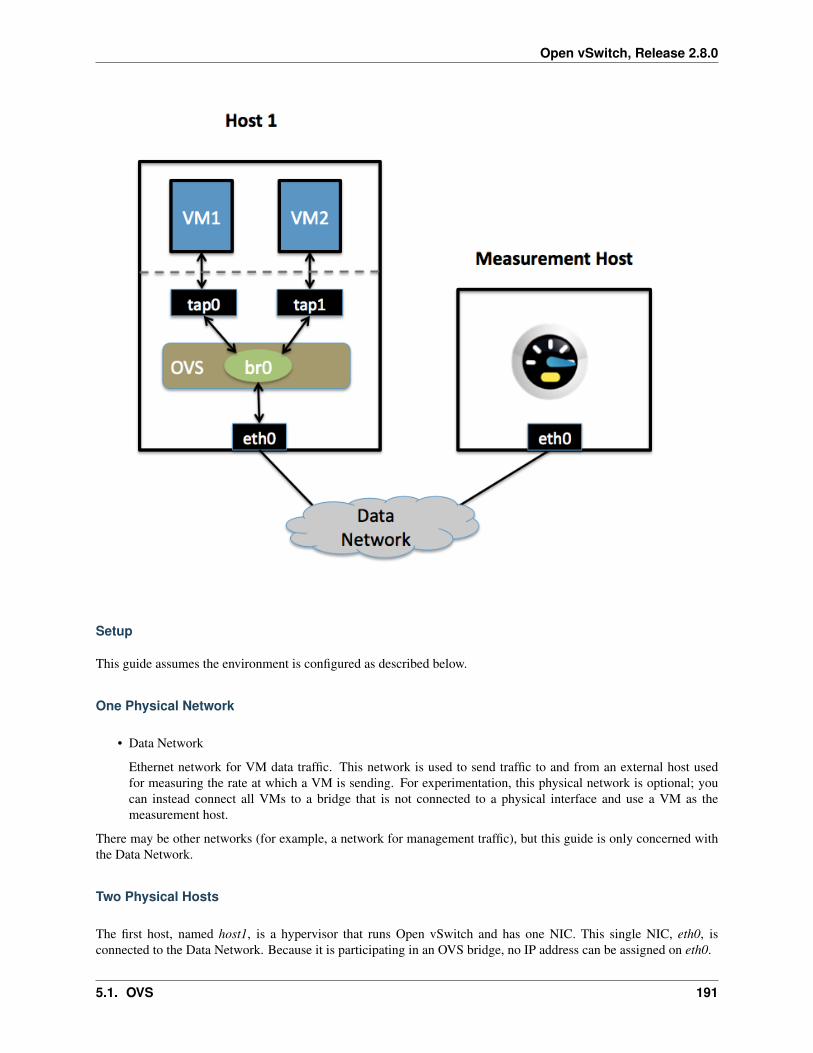
Open vSwitch, Release 2.8.0
Setup
This guide assumes the environment is configured as described below.
One Physical Network
• Data Network
Ethernet network for VM data traffic. This network is used to send traffic to and from an external host usedfor measuring the rate at which a VM is sending. For experimentation, this physical network is optional; youcan instead connect all VMs to a bridge that is not connected to a physical interface and use a VM as themeasurement host.
There may be other networks (for example, a network for management traffic), but this guide is only concerned withthe Data Network.
Two Physical Hosts
The first host, named host1, is a hypervisor that runs Open vSwitch and has one NIC. This single NIC, eth0, isconnected to the Data Network. Because it is participating in an OVS bridge, no IP address can be assigned on eth0.
5.1. OVS 191
Open vSwitch, Release 2.8.0
The second host, named Measurement Host, can be any host capable of measuring throughput from a VM. For thisguide, we use netperf, a free tool for testing the rate at which one host can send to another. The Measurement Hosthas only a single NIC, eth0, which is connected to the Data Network. eth0 has an IP address that can reach any VMon host1.
Two VMs
Both VMs (vm1 and vm2) run on host1.
Each VM has a single interface that appears as a Linux device (e.g., tap0) on the physical host.
Note: For Xen/XenServer, VM interfaces appears as Linux devices with names like vif1.0. Other Linux systemsmay present these interfaces as vnet0, vnet1, etc.
Configuration Steps
For both VMs, we modify the Interface table to configure an ingress policing rule. There are two values to set:
ingress_policing_rate the maximum rate (in Kbps) that this VM should be allowed to send
ingress_policing_burst a parameter to the policing algorithm to indicate the maximum amount of data (inKb) that this interface can send beyond the policing rate.
To rate limit VM1 to 1 Mbps, use these commands:
$ ovs-vsctl set interface tap0 ingress_policing_rate=1000$ ovs-vsctl set interface tap0 ingress_policing_burst=100
Similarly, to limit vm2 to 10 Mbps, enter these commands on host1:
$ ovs-vsctl set interface tap1 ingress_policing_rate=10000$ ovs-vsctl set interface tap1 ingress_policing_burst=1000
To see the current limits applied to VM1, run this command:
$ ovs-vsctl list interface tap0
Testing
To test the configuration, make sure netperf is installed and running on both VMs and on the Measurement Host.netperf consists of a client (netperf) and a server (netserver). In this example, we run netserver on theMeasurement Host (installing Netperf usually starts netserver as a daemon, meaning this is running by default).
For this example, we assume that the Measurement Host has an IP of 10.0.0.100 and is reachable from both VMs.
From vm1, run this command:
$ netperf -H 10.0.0.100
This will cause VM1 to send TCP traffic as quickly as it can to the Measurement Host. After 10 seconds, this willoutput a series of values. We are interested in the “Throughput” value, which is measured in Mbps (10^6 bits/sec).For VM1 this value should be near 1. Running the same command on VM2 should give a result near 10.
192 Chapter 5. How-to Guides
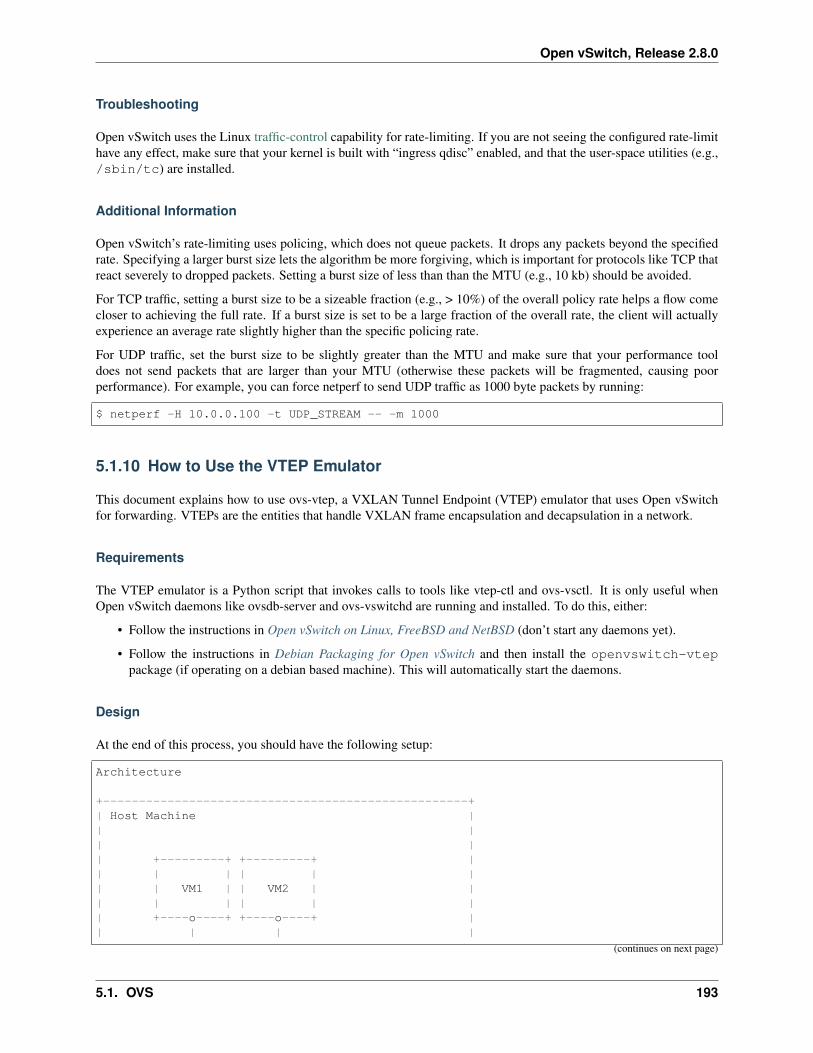
Open vSwitch, Release 2.8.0
Troubleshooting
Open vSwitch uses the Linux traffic-control capability for rate-limiting. If you are not seeing the configured rate-limithave any effect, make sure that your kernel is built with “ingress qdisc” enabled, and that the user-space utilities (e.g.,/sbin/tc) are installed.
Additional Information
Open vSwitch’s rate-limiting uses policing, which does not queue packets. It drops any packets beyond the specifiedrate. Specifying a larger burst size lets the algorithm be more forgiving, which is important for protocols like TCP thatreact severely to dropped packets. Setting a burst size of less than than the MTU (e.g., 10 kb) should be avoided.
For TCP traffic, setting a burst size to be a sizeable fraction (e.g., > 10%) of the overall policy rate helps a flow comecloser to achieving the full rate. If a burst size is set to be a large fraction of the overall rate, the client will actuallyexperience an average rate slightly higher than the specific policing rate.
For UDP traffic, set the burst size to be slightly greater than the MTU and make sure that your performance tooldoes not send packets that are larger than your MTU (otherwise these packets will be fragmented, causing poorperformance). For example, you can force netperf to send UDP traffic as 1000 byte packets by running:
$ netperf -H 10.0.0.100 -t UDP_STREAM -- -m 1000
5.1.10 How to Use the VTEP Emulator
This document explains how to use ovs-vtep, a VXLAN Tunnel Endpoint (VTEP) emulator that uses Open vSwitchfor forwarding. VTEPs are the entities that handle VXLAN frame encapsulation and decapsulation in a network.
Requirements
The VTEP emulator is a Python script that invokes calls to tools like vtep-ctl and ovs-vsctl. It is only useful whenOpen vSwitch daemons like ovsdb-server and ovs-vswitchd are running and installed. To do this, either:
• Follow the instructions in Open vSwitch on Linux, FreeBSD and NetBSD (don’t start any daemons yet).
• Follow the instructions in Debian Packaging for Open vSwitch and then install the openvswitch-vteppackage (if operating on a debian based machine). This will automatically start the daemons.
Design
At the end of this process, you should have the following setup:
Architecture
+---------------------------------------------------+| Host Machine || || || +---------+ +---------+ || | | | | || | VM1 | | VM2 | || | | | | || +----o----+ +----o----+ || | | |
(continues on next page)
5.1. OVS 193
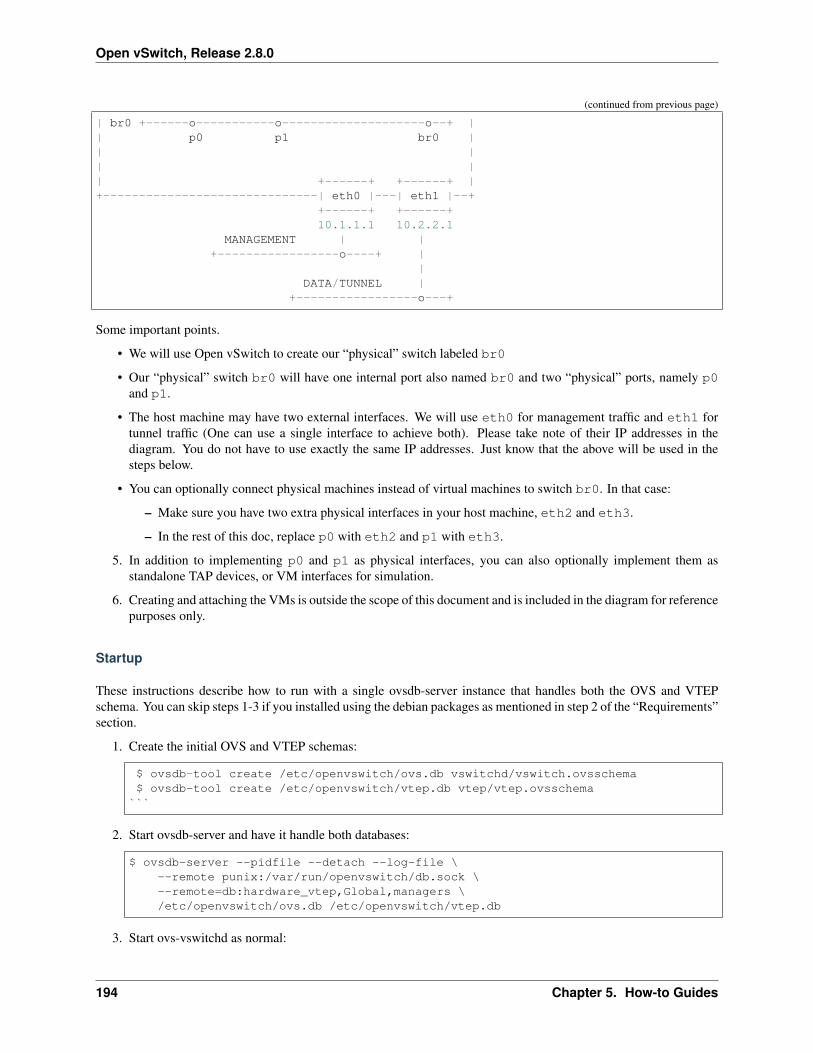
Open vSwitch, Release 2.8.0
(continued from previous page)
| br0 +------o-----------o--------------------o--+ || p0 p1 br0 || || || +------+ +------+ |+------------------------------| eth0 |---| eth1 |--+
+------+ +------+10.1.1.1 10.2.2.1
MANAGEMENT | |+-----------------o----+ |
|DATA/TUNNEL |
+-----------------o---+
Some important points.
• We will use Open vSwitch to create our “physical” switch labeled br0
• Our “physical” switch br0 will have one internal port also named br0 and two “physical” ports, namely p0and p1.
• The host machine may have two external interfaces. We will use eth0 for management traffic and eth1 fortunnel traffic (One can use a single interface to achieve both). Please take note of their IP addresses in thediagram. You do not have to use exactly the same IP addresses. Just know that the above will be used in thesteps below.
• You can optionally connect physical machines instead of virtual machines to switch br0. In that case:
– Make sure you have two extra physical interfaces in your host machine, eth2 and eth3.
– In the rest of this doc, replace p0 with eth2 and p1 with eth3.
5. In addition to implementing p0 and p1 as physical interfaces, you can also optionally implement them asstandalone TAP devices, or VM interfaces for simulation.
6. Creating and attaching the VMs is outside the scope of this document and is included in the diagram for referencepurposes only.
Startup
These instructions describe how to run with a single ovsdb-server instance that handles both the OVS and VTEPschema. You can skip steps 1-3 if you installed using the debian packages as mentioned in step 2 of the “Requirements”section.
1. Create the initial OVS and VTEP schemas:
$ ovsdb-tool create /etc/openvswitch/ovs.db vswitchd/vswitch.ovsschema$ ovsdb-tool create /etc/openvswitch/vtep.db vtep/vtep.ovsschema```
2. Start ovsdb-server and have it handle both databases:
$ ovsdb-server --pidfile --detach --log-file \--remote punix:/var/run/openvswitch/db.sock \--remote=db:hardware_vtep,Global,managers \/etc/openvswitch/ovs.db /etc/openvswitch/vtep.db
3. Start ovs-vswitchd as normal:
194 Chapter 5. How-to Guides
Open vSwitch, Release 2.8.0
$ ovs-vswitchd --log-file --detach --pidfile \unix:/var/run/openvswitch/db.sock
4. Create a “physical” switch and its ports in OVS:
$ ovs-vsctl add-br br0$ ovs-vsctl add-port br0 p0$ ovs-vsctl add-port br0 p1
5. Configure the physical switch in the VTEP database:
$ vtep-ctl add-ps br0$ vtep-ctl set Physical_Switch br0 tunnel_ips=10.2.2.1
6. Start the VTEP emulator. If you installed the components following Open vSwitch on Linux, FreeBSD andNetBSD, run the following from the vtep directory:
$ ./ovs-vtep --log-file=/var/log/openvswitch/ovs-vtep.log \--pidfile=/var/run/openvswitch/ovs-vtep.pid \--detach br0
If the installation was done by installing the openvswitch-vtep package, you can find ovs-vtep at /usr/share/openvswitch/scripts.
7. Configure the VTEP database’s manager to point at an NVC:
$ vtep-ctl set-manager tcp:<CONTROLLER IP>:6640
Where <CONTROLLER IP> is your controller’s IP address that is accessible via the Host Machine’s eth0interface.
Simulating an NVC
A VTEP implementation expects to be driven by a Network Virtualization Controller (NVC), such as NSX. If onedoes not exist, it’s possible to use vtep-ctl to simulate one:
1. Create a logical switch:
$ vtep-ctl add-ls ls0
2. Bind the logical switch to a port:
$ vtep-ctl bind-ls br0 p0 0 ls0$ vtep-ctl set Logical_Switch ls0 tunnel_key=33
3. Direct unknown destinations out a tunnel.
For handling L2 broadcast, multicast and unknown unicast traffic, packets can be sent to all members of a logicalswitch referenced by a physical switch. The “unknown-dst” address below is used to represent these packets.There are different modes to replicate the packets. The default mode of replication is to send the traffic to aservice node, which can be a hypervisor, server or appliance, and let the service node handle replication to othertransport nodes (hypervisors or other VTEP physical switches). This mode is called service node replication.An alternate mode of replication, called source node replication, involves the source node sending to all othertransport nodes. Hypervisors are always responsible for doing their own replication for locally attached VMs inboth modes. Service node mode is the default. Service node replication mode is considered a basic requirementbecause it only requires sending the packet to a single transport node. The following configuration is for servicenode replication mode as only a single transport node destination is specified for the unknown-dst address:
5.1. OVS 195
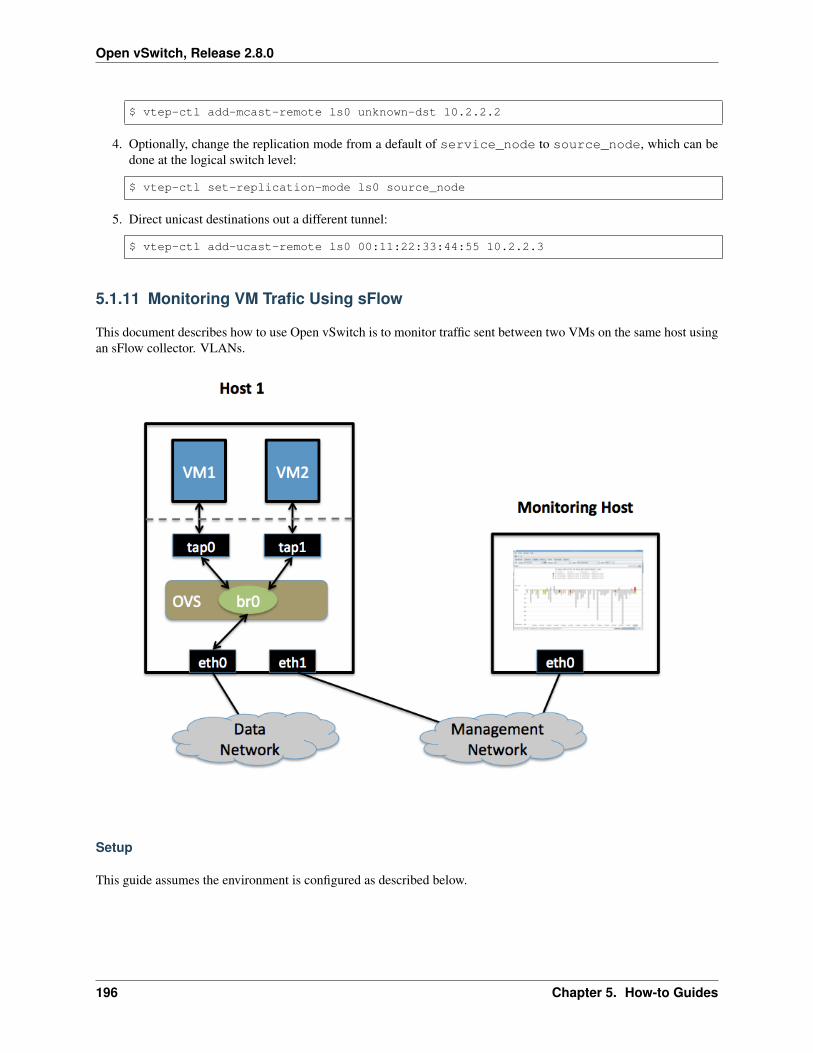
Open vSwitch, Release 2.8.0
$ vtep-ctl add-mcast-remote ls0 unknown-dst 10.2.2.2
4. Optionally, change the replication mode from a default of service_node to source_node, which can bedone at the logical switch level:
$ vtep-ctl set-replication-mode ls0 source_node
5. Direct unicast destinations out a different tunnel:
$ vtep-ctl add-ucast-remote ls0 00:11:22:33:44:55 10.2.2.3
5.1.11 Monitoring VM Trafic Using sFlow
This document describes how to use Open vSwitch is to monitor traffic sent between two VMs on the same host usingan sFlow collector. VLANs.
Setup
This guide assumes the environment is configured as described below.
196 Chapter 5. How-to Guides
Open vSwitch, Release 2.8.0
Two Physical Networks
• Data Network
Ethernet network for VM data traffic. For experimentation, this physical network is optional. Youcan instead connect all VMs to a bridge that is not connected to a physical interface.
• Management Network
This network must exist, as it is used to send sFlow data from the agent to the remote collector.
Two Physical Hosts
The environment assumes the use of two hosts: host1 and hostMon. host is a hypervisor that run Open vSwitch andhas two NICs:
• eth0 is connected to the Data Network. No IP address can be assigned on eth0 because it is part of an OVSbridge.
• eth1 is connected to the Management Network. eth1 has an IP address for management traffic, including sFlow.
hostMon can be any computer that can run the sFlow collector. For this cookbook entry, we use sFlowTrend, a freesFlow collector that is a simple cross-platform Java download. Other sFlow collectors should work equally well.hostMon has a single NIC, eth0, that is connected to the Management Network. eth0 has an IP adress that can reacheth1 on host1.
Two Virtual Machines
This guide uses two virtual machines - vm1 and vm2- running on host1.
Note: For Xen/XenServer, VM interfaces appears as Linux devices with names like vif1.0. Other Linux systemsmay present these interfaces as vnet0, vnet1, etc.
Configuration Steps
On host1, define the following configuration values in your shell environment:
COLLECTOR_IP=10.0.0.1COLLECTOR_PORT=6343AGENT_IP=eth1HEADER_BYTES=128SAMPLING_N=64POLLING_SECS=10
Port 6343 (COLLECTOR_PORT) is the default port number for sFlowTrend. If you are using an sFlow collector otherthan sFlowTrend, set this value to the appropriate port for your particular collector. Set your own IP address for thecollector in the place of 10.0.0.1 (COLLECTOR_IP). Setting the AGENT_IP value to eth1 indicates that the sFlowagent should send traffic from eth1’s IP address. The other values indicate settings regarding the frequency and typeof packet sampling that sFlow should perform.
Still on host1, run the following command to create an sFlow configuration and attach it to bridge br0:
5.1. OVS 197
Open vSwitch, Release 2.8.0
$ ovs-vsctl -- --id=@sflow create sflow agent=${AGENT_IP} \target="${COLLECTOR_IP}:${COLLECTOR_PORT}" header=${HEADER_BYTES} \sampling=${SAMPLING_N} polling=${POLLING_SECS} \
-- set bridge br0 sflow=@sflow
Make note of the UUID that is returned by this command; this value is necessary to remove the sFlow configuration.
On hostMon, go to the sFlowTrend and click “Install” in the upper right-hand corner. If you have Java installed, thiswill download and start the sFlowTrend application. Once sFlowTrend is running, the light in the lower right-handcorner of the sFlowTrend application should blink green to indicate that the collector is receiving traffic.
The sFlow configuration is now complete, and sFlowTrend on hostMon should be receiving sFlow data from OVS onhost1.
To configure sFlow on additional bridges, just replace br0 in the above command with a different bridge name.
To remove sFlow configuration from a bridge (in this case, br0), run this command, where “sFlow UUID” is theUUID returned by the command used to set the sFlow configuration initially:
$ ovs-vsctl remove bridge br0 sflow <sFlow UUID>
To see all current sets of sFlow configuration parameters, run:
$ ovs-vsctl list sflow
Troubleshooting
If sFlow data isn’t being collected and displayed by sFlowTrend, check the following items:
• Make sure the VMs are sending/receiving network traffic over bridge br0, preferably to multiple other hosts andusing a variety of protocols.
• To confirm that the agent is sending traffic, check that running the following command shows that the agent onthe physical server is sending traffic to the collector IP address (change the port below to match the port yourcollector is using):
$ tcpdump -ni eth1 udp port 6343
If no traffic is being sent, there is a problem with the configuration of OVS. If traffic is being sent but nothing is visiblein the sFlowTrend user interface, this may indicate a configuration problem with the collector.
Check to make sure the host running the collector (hostMon) does not have a firewall that would prevent UDP port6343 from reaching the collector.
Credit
This document is heavily based on content from Neil McKee at InMon:
• https://mail.openvswitch.org/pipermail/ovs-dev/2010-July/165245.html
• http://blog.sflow.com/2010/01/open-vswitch.html (note: the configuration syntax is out of date, but the high-level descriptions are correct)
198 Chapter 5. How-to Guides
Open vSwitch, Release 2.8.0
5.1.12 Using Open vSwitch with DPDK
This document describes how to use Open vSwitch with DPDK datapath.
Important: Using the DPDK datapath requires building OVS with DPDK support. Refer to Open vSwitch withDPDK for more information.
Ports and Bridges
ovs-vsctl can be used to set up bridges and other Open vSwitch features. Bridges should be created with adatapath_type=netdev:
$ ovs-vsctl add-br br0 -- set bridge br0 datapath_type=netdev
ovs-vsctl can also be used to add DPDK devices. ovs-vswitchd should print the number of dpdk devices found in thelog file:
$ ovs-vsctl add-port br0 dpdk-p0 -- set Interface dpdk-p0 type=dpdk \options:dpdk-devargs=0000:01:00.0
$ ovs-vsctl add-port br0 dpdk-p1 -- set Interface dpdk-p1 type=dpdk \options:dpdk-devargs=0000:01:00.1
After the DPDK ports get added to switch, a polling thread continuously polls DPDK devices and consumes 100% ofthe core, as can be checked from top and ps commands:
$ top -H$ ps -eLo pid,psr,comm | grep pmd
Creating bonds of DPDK interfaces is slightly different to creating bonds of system interfaces. For DPDK, the interfacetype and devargs must be explicitly set. For example:
$ ovs-vsctl add-bond br0 dpdkbond p0 p1 \-- set Interface p0 type=dpdk options:dpdk-devargs=0000:01:00.0 \-- set Interface p1 type=dpdk options:dpdk-devargs=0000:01:00.1
To stop ovs-vswitchd & delete bridge, run:
$ ovs-appctl -t ovs-vswitchd exit$ ovs-appctl -t ovsdb-server exit$ ovs-vsctl del-br br0
PMD Thread Statistics
To show current stats:
$ ovs-appctl dpif-netdev/pmd-stats-show
To clear previous stats:
$ ovs-appctl dpif-netdev/pmd-stats-clear
5.1. OVS 199

Open vSwitch, Release 2.8.0
Port/RXQ Assigment to PMD Threads
To show port/rxq assignment:
$ ovs-appctl dpif-netdev/pmd-rxq-show
To change default rxq assignment to pmd threads, rxqs may be manually pinned to desired cores using:
$ ovs-vsctl set Interface <iface> \other_config:pmd-rxq-affinity=<rxq-affinity-list>
where:
• <rxq-affinity-list> is a CSV list of <queue-id>:<core-id> values
For example:
$ ovs-vsctl set interface dpdk-p0 options:n_rxq=4 \other_config:pmd-rxq-affinity="0:3,1:7,3:8"
This will ensure:
• Queue #0 pinned to core 3
• Queue #1 pinned to core 7
• Queue #2 not pinned
• Queue #3 pinned to core 8
After that PMD threads on cores where RX queues was pinned will become isolated. This means that this threadwill poll only pinned RX queues.
Warning: If there are no non-isolated PMD threads, non-pinned RX queues will not be polled. Also, ifprovided core_id is not available (ex. this core_id not in pmd-cpu-mask), RX queue will not be polled byany PMD thread.
QoS
Assuming you have a vhost-user port transmitting traffic consisting of packets of size 64 bytes, the following commandwould limit the egress transmission rate of the port to ~1,000,000 packets per second:
$ ovs-vsctl set port vhost-user0 qos=@newqos -- \--id=@newqos create qos type=egress-policer other-config:cir=46000000 \other-config:cbs=2048`
To examine the QoS configuration of the port, run:
$ ovs-appctl -t ovs-vswitchd qos/show vhost-user0
To clear the QoS configuration from the port and ovsdb, run:
$ ovs-vsctl destroy QoS vhost-user0 -- clear Port vhost-user0 qos
Refer to vswitch.xml for more details on egress-policer.
200 Chapter 5. How-to Guides

Open vSwitch, Release 2.8.0
Rate Limiting
Here is an example on Ingress Policing usage. Assuming you have a vhost-user port receiving traffic consisting ofpackets of size 64 bytes, the following command would limit the reception rate of the port to ~1,000,000 packets persecond:
$ ovs-vsctl set interface vhost-user0 ingress_policing_rate=368000 \ingress_policing_burst=1000`
To examine the ingress policer configuration of the port:
$ ovs-vsctl list interface vhost-user0
To clear the ingress policer configuration from the port:
$ ovs-vsctl set interface vhost-user0 ingress_policing_rate=0
Refer to vswitch.xml for more details on ingress-policer.
Flow Control
Flow control can be enabled only on DPDK physical ports. To enable flow control support at tx side while adding aport, run:
$ ovs-vsctl add-port br0 dpdk-p0 -- set Interface dpdk-p0 type=dpdk \options:dpdk-devargs=0000:01:00.0 options:tx-flow-ctrl=true
Similarly, to enable rx flow control, run:
$ ovs-vsctl add-port br0 dpdk-p0 -- set Interface dpdk-p0 type=dpdk \options:dpdk-devargs=0000:01:00.0 options:rx-flow-ctrl=true
To enable flow control auto-negotiation, run:
$ ovs-vsctl add-port br0 dpdk-p0 -- set Interface dpdk-p0 type=dpdk \options:dpdk-devargs=0000:01:00.0 options:flow-ctrl-autoneg=true
To turn ON the tx flow control at run time for an existing port, run:
$ ovs-vsctl set Interface dpdk-p0 options:tx-flow-ctrl=true
The flow control parameters can be turned off by setting false to the respective parameter. To disable the flowcontrol at tx side, run:
$ ovs-vsctl set Interface dpdk-p0 options:tx-flow-ctrl=false
pdump
pdump allows you to listen on DPDK ports and view the traffic that is passing on them. To use this utility, one musthave libpcap installed on the system. Furthermore, DPDK must be built with CONFIG_RTE_LIBRTE_PDUMP=yand CONFIG_RTE_LIBRTE_PMD_PCAP=y.
Warning: A performance decrease is expected when using a monitoring application like the DPDK pdump app.
5.1. OVS 201
Open vSwitch, Release 2.8.0
To use pdump, simply launch OVS as usual, then navigate to the app/pdump directory in DPDK, make the applica-tion and run like so:
$ sudo ./build/app/dpdk-pdump -- \--pdump port=0,queue=0,rx-dev=/tmp/pkts.pcap \--server-socket-path=/usr/local/var/run/openvswitch
The above command captures traffic received on queue 0 of port 0 and stores it in /tmp/pkts.pcap. Other com-binations of port numbers, queues numbers and pcap locations are of course also available to use. For example, tocapture all packets that traverse port 0 in a single pcap file:
$ sudo ./build/app/dpdk-pdump -- \--pdump 'port=0,queue=*,rx-dev=/tmp/pkts.pcap,tx-dev=/tmp/pkts.pcap' \--server-socket-path=/usr/local/var/run/openvswitch
server-socket-path must be set to the value of ovs_rundir() which typically resolves to /usr/local/var/run/openvswitch.
Many tools are available to view the contents of the pcap file. Once example is tcpdump. Issue the following commandto view the contents of pkts.pcap:
$ tcpdump -r pkts.pcap
More information on the pdump app and its usage can be found in the DPDK docs.
Jumbo Frames
By default, DPDK ports are configured with standard Ethernet MTU (1500B). To enable Jumbo Frames support for aDPDK port, change the Interface’s mtu_request attribute to a sufficiently large value. For example, to add a DPDKPhy port with MTU of 9000:
$ ovs-vsctl add-port br0 dpdk-p0 -- set Interface dpdk-p0 type=dpdk \options:dpdk-devargs=0000:01:00.0 mtu_request=9000
Similarly, to change the MTU of an existing port to 6200:
$ ovs-vsctl set Interface dpdk-p0 mtu_request=6200
Some additional configuration is needed to take advantage of jumbo frames with vHost ports:
1. mergeable buffers must be enabled for vHost ports, as demonstrated in the QEMU command line snippet below:
-netdev type=vhost-user,id=mynet1,chardev=char0,vhostforce \-device virtio-net-pci,mac=00:00:00:00:00:01,netdev=mynet1,mrg_rxbuf=on
2. Where virtio devices are bound to the Linux kernel driver in a guest environment (i.e. interfaces are not bound toan in-guest DPDK driver), the MTU of those logical network interfaces must also be increased to a sufficientlylarge value. This avoids segmentation of Jumbo Frames received in the guest. Note that ‘MTU’ refers to thelength of the IP packet only, and not that of the entire frame.
To calculate the exact MTU of a standard IPv4 frame, subtract the L2 header and CRC lengths (i.e. 18B) fromthe max supported frame size. So, to set the MTU for a 9018B Jumbo Frame:
$ ip link set eth1 mtu 9000
When Jumbo Frames are enabled, the size of a DPDK port’s mbuf segments are increased, such that a full JumboFrame of a specific size may be accommodated within a single mbuf segment.
202 Chapter 5. How-to Guides
Open vSwitch, Release 2.8.0
Jumbo frame support has been validated against 9728B frames, which is the largest frame size supported by FortvilleNIC using the DPDK i40e driver, but larger frames and other DPDK NIC drivers may be supported. These cases arecommon for use cases involving East-West traffic only.
Rx Checksum Offload
By default, DPDK physical ports are enabled with Rx checksum offload.
Rx checksum offload can offer performance improvement only for tunneling traffic in OVS-DPDK because the check-sum validation of tunnel packets is offloaded to the NIC. Also enabling Rx checksum may slightly reduce the perfor-mance of non-tunnel traffic, specifically for smaller size packet.
Extended Statistics
DPDK Extended Statistics API allows PMD to expose unique set of statistics. The Extended statistics are implementedand supported only for DPDK physical and vHost ports.
To enable statistics, you have to enable OpenFlow 1.4 support for OVS. Configure bridge br0 to support OpenFlowversion 1.4:
$ ovs-vsctl set bridge br0 datapath_type=netdev \protocols=OpenFlow10,OpenFlow11,OpenFlow12,OpenFlow13,OpenFlow14
Check the OVSDB protocols column in the bridge table if OpenFlow 1.4 support is enabled for OVS:
$ ovsdb-client dump Bridge protocols
Query the port statistics by explicitly specifying -O OpenFlow14 option:
$ ovs-ofctl -O OpenFlow14 dump-ports br0
Note: vHost ports supports only partial statistics. RX packet size based counter are only supported and doesn’t includeTX packet size counters.
Port Hotplug
OVS supports port hotplugging, allowing the use of ports that were not bound to DPDK when vswitchd was started.In order to attach a port, it has to be bound to DPDK using the dpdk_nic_bind.py script:
$ $DPDK_DIR/tools/dpdk_nic_bind.py --bind=igb_uio 0000:01:00.0
Then it can be attached to OVS:
$ ovs-vsctl add-port br0 dpdkx -- set Interface dpdkx type=dpdk \options:dpdk-devargs=0000:01:00.0
Detaching will be performed while processing del-port command:
$ ovs-vsctl del-port dpdkx
Sometimes, the del-port command may not detach the device. Detaching can be confirmed by the appearance of anINFO log. For example:
INFO|Device '0000:04:00.1' has been detached
5.1. OVS 203
Open vSwitch, Release 2.8.0
If the log is not seen, then the port can be detached using:
$ ovs-appctl netdev-dpdk/detach 0000:01:00.0
Detaching can be confirmed by console output:
Device '0000:04:00.1' has been detached
Warning: Detaching should not be done if a device is known to be non-detachable, as this may cause the deviceto behave improperly when added back with add-port. The Chelsio Terminator adapters which use the cxgbe driverseem to be an example of this behavior; check the driver documentation if this is suspected.
This feature does not work with some NICs. For more information please refer to the DPDK Port Hotplug Framework.
Vdev Support
DPDK provides drivers for both physical and virtual devices. Physical DPDK devices are added to OVS by specifyinga valid PCI address in ‘dpdk-devargs’. Virtual DPDK devices which do not have PCI addresses can be added using adifferent format for ‘dpdk-devargs’.
Typically, the format expected is ‘eth_<driver_name><x>’ where ‘x’ is a unique identifier of your choice for the givenport.
For example to add a dpdk port that uses the ‘null’ DPDK PMD driver:
$ ovs-vsctl add-port br0 null0 -- set Interface null0 type=dpdk \options:dpdk-devargs=eth_null0
Similarly, to add a dpdk port that uses the ‘af_packet’ DPDK PMD driver:
$ ovs-vsctl add-port br0 myeth0 -- set Interface myeth0 type=dpdk \options:dpdk-devargs=eth_af_packet0,iface=eth0
More information on the different types of virtual DPDK PMDs can be found in the DPDK documentation.
Note: Not all DPDK virtual PMD drivers have been tested and verified to work.
EMC Insertion Probability
By default 1 in every 100 flows are inserted into the Exact Match Cache (EMC). It is possible to change this insertionprobability by setting the emc-insert-inv-prob option:
$ ovs-vsctl --no-wait set Open_vSwitch . other_config:emc-insert-inv-prob=N
where:
N is a positive integer representing the inverse probability of insertion ie. on average 1 in every N packets with aunique flow will generate an EMC insertion.
If N is set to 1, an insertion will be performed for every flow. If set to 0, no insertions will be performed and the EMCwill effectively be disabled.
With default N set to 100, higher megaflow hits will occur initially as observed with pmd stats:
204 Chapter 5. How-to Guides
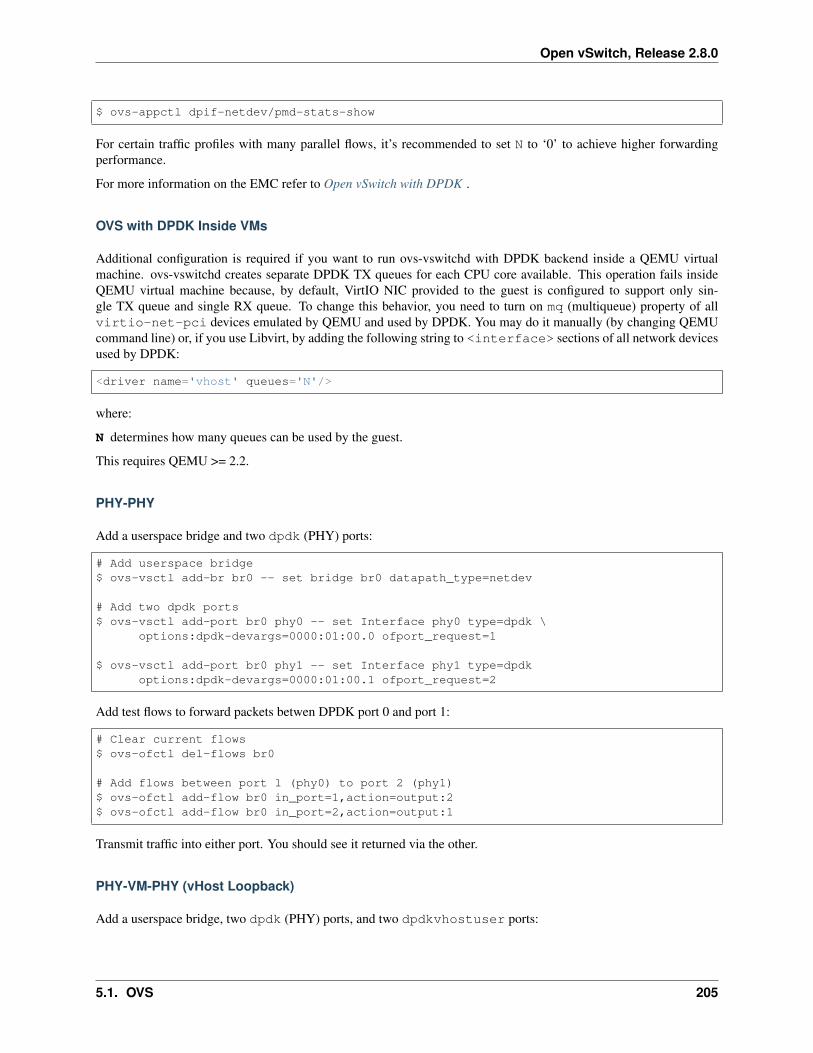
Open vSwitch, Release 2.8.0
$ ovs-appctl dpif-netdev/pmd-stats-show
For certain traffic profiles with many parallel flows, it’s recommended to set N to ‘0’ to achieve higher forwardingperformance.
For more information on the EMC refer to Open vSwitch with DPDK .
OVS with DPDK Inside VMs
Additional configuration is required if you want to run ovs-vswitchd with DPDK backend inside a QEMU virtualmachine. ovs-vswitchd creates separate DPDK TX queues for each CPU core available. This operation fails insideQEMU virtual machine because, by default, VirtIO NIC provided to the guest is configured to support only sin-gle TX queue and single RX queue. To change this behavior, you need to turn on mq (multiqueue) property of allvirtio-net-pci devices emulated by QEMU and used by DPDK. You may do it manually (by changing QEMUcommand line) or, if you use Libvirt, by adding the following string to <interface> sections of all network devicesused by DPDK:
<driver name='vhost' queues='N'/>
where:
N determines how many queues can be used by the guest.
This requires QEMU >= 2.2.
PHY-PHY
Add a userspace bridge and two dpdk (PHY) ports:
# Add userspace bridge$ ovs-vsctl add-br br0 -- set bridge br0 datapath_type=netdev
# Add two dpdk ports$ ovs-vsctl add-port br0 phy0 -- set Interface phy0 type=dpdk \
options:dpdk-devargs=0000:01:00.0 ofport_request=1
$ ovs-vsctl add-port br0 phy1 -- set Interface phy1 type=dpdkoptions:dpdk-devargs=0000:01:00.1 ofport_request=2
Add test flows to forward packets betwen DPDK port 0 and port 1:
# Clear current flows$ ovs-ofctl del-flows br0
# Add flows between port 1 (phy0) to port 2 (phy1)$ ovs-ofctl add-flow br0 in_port=1,action=output:2$ ovs-ofctl add-flow br0 in_port=2,action=output:1
Transmit traffic into either port. You should see it returned via the other.
PHY-VM-PHY (vHost Loopback)
Add a userspace bridge, two dpdk (PHY) ports, and two dpdkvhostuser ports:
5.1. OVS 205
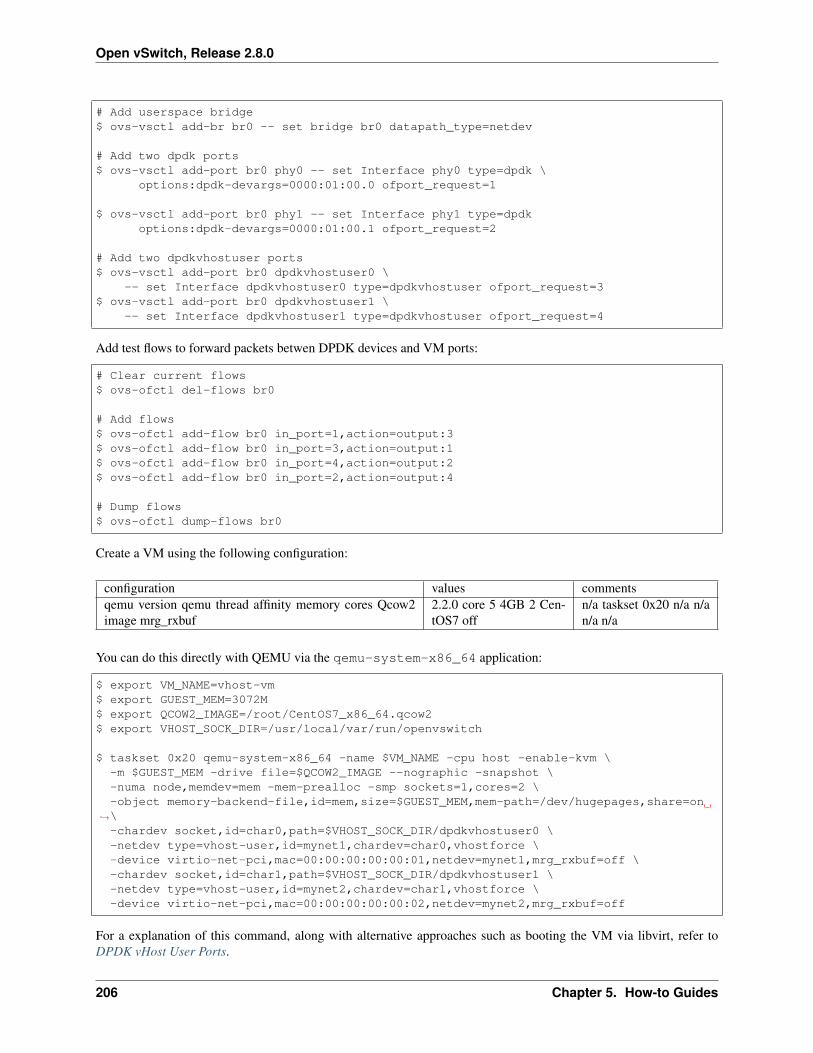
Open vSwitch, Release 2.8.0
# Add userspace bridge$ ovs-vsctl add-br br0 -- set bridge br0 datapath_type=netdev
# Add two dpdk ports$ ovs-vsctl add-port br0 phy0 -- set Interface phy0 type=dpdk \
options:dpdk-devargs=0000:01:00.0 ofport_request=1
$ ovs-vsctl add-port br0 phy1 -- set Interface phy1 type=dpdkoptions:dpdk-devargs=0000:01:00.1 ofport_request=2
# Add two dpdkvhostuser ports$ ovs-vsctl add-port br0 dpdkvhostuser0 \
-- set Interface dpdkvhostuser0 type=dpdkvhostuser ofport_request=3$ ovs-vsctl add-port br0 dpdkvhostuser1 \
-- set Interface dpdkvhostuser1 type=dpdkvhostuser ofport_request=4
Add test flows to forward packets betwen DPDK devices and VM ports:
# Clear current flows$ ovs-ofctl del-flows br0
# Add flows$ ovs-ofctl add-flow br0 in_port=1,action=output:3$ ovs-ofctl add-flow br0 in_port=3,action=output:1$ ovs-ofctl add-flow br0 in_port=4,action=output:2$ ovs-ofctl add-flow br0 in_port=2,action=output:4
# Dump flows$ ovs-ofctl dump-flows br0
Create a VM using the following configuration:
configuration values commentsqemu version qemu thread affinity memory cores Qcow2image mrg_rxbuf
2.2.0 core 5 4GB 2 Cen-tOS7 off
n/a taskset 0x20 n/a n/an/a n/a
You can do this directly with QEMU via the qemu-system-x86_64 application:
$ export VM_NAME=vhost-vm$ export GUEST_MEM=3072M$ export QCOW2_IMAGE=/root/CentOS7_x86_64.qcow2$ export VHOST_SOCK_DIR=/usr/local/var/run/openvswitch
$ taskset 0x20 qemu-system-x86_64 -name $VM_NAME -cpu host -enable-kvm \-m $GUEST_MEM -drive file=$QCOW2_IMAGE --nographic -snapshot \-numa node,memdev=mem -mem-prealloc -smp sockets=1,cores=2 \-object memory-backend-file,id=mem,size=$GUEST_MEM,mem-path=/dev/hugepages,share=on
→˓\-chardev socket,id=char0,path=$VHOST_SOCK_DIR/dpdkvhostuser0 \-netdev type=vhost-user,id=mynet1,chardev=char0,vhostforce \-device virtio-net-pci,mac=00:00:00:00:00:01,netdev=mynet1,mrg_rxbuf=off \-chardev socket,id=char1,path=$VHOST_SOCK_DIR/dpdkvhostuser1 \-netdev type=vhost-user,id=mynet2,chardev=char1,vhostforce \-device virtio-net-pci,mac=00:00:00:00:00:02,netdev=mynet2,mrg_rxbuf=off
For a explanation of this command, along with alternative approaches such as booting the VM via libvirt, refer toDPDK vHost User Ports.
206 Chapter 5. How-to Guides
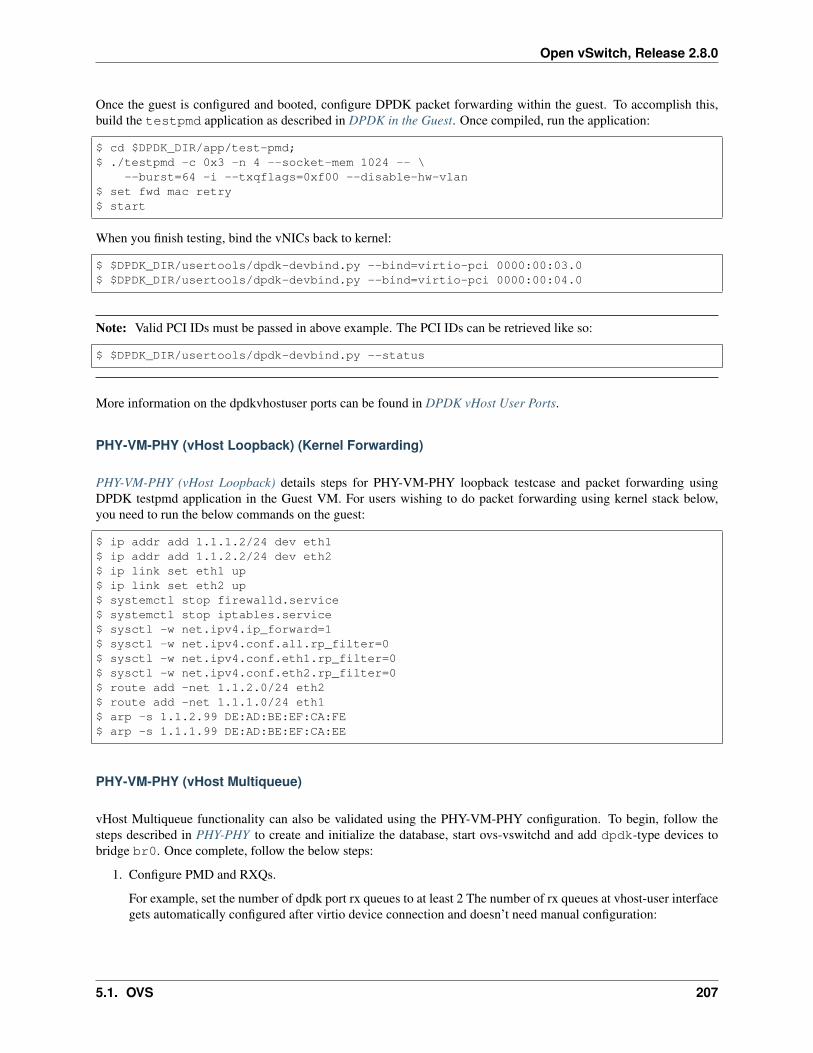
Open vSwitch, Release 2.8.0
Once the guest is configured and booted, configure DPDK packet forwarding within the guest. To accomplish this,build the testpmd application as described in DPDK in the Guest. Once compiled, run the application:
$ cd $DPDK_DIR/app/test-pmd;$ ./testpmd -c 0x3 -n 4 --socket-mem 1024 -- \
--burst=64 -i --txqflags=0xf00 --disable-hw-vlan$ set fwd mac retry$ start
When you finish testing, bind the vNICs back to kernel:
$ $DPDK_DIR/usertools/dpdk-devbind.py --bind=virtio-pci 0000:00:03.0$ $DPDK_DIR/usertools/dpdk-devbind.py --bind=virtio-pci 0000:00:04.0
Note: Valid PCI IDs must be passed in above example. The PCI IDs can be retrieved like so:
$ $DPDK_DIR/usertools/dpdk-devbind.py --status
More information on the dpdkvhostuser ports can be found in DPDK vHost User Ports.
PHY-VM-PHY (vHost Loopback) (Kernel Forwarding)
PHY-VM-PHY (vHost Loopback) details steps for PHY-VM-PHY loopback testcase and packet forwarding usingDPDK testpmd application in the Guest VM. For users wishing to do packet forwarding using kernel stack below,you need to run the below commands on the guest:
$ ip addr add 1.1.1.2/24 dev eth1$ ip addr add 1.1.2.2/24 dev eth2$ ip link set eth1 up$ ip link set eth2 up$ systemctl stop firewalld.service$ systemctl stop iptables.service$ sysctl -w net.ipv4.ip_forward=1$ sysctl -w net.ipv4.conf.all.rp_filter=0$ sysctl -w net.ipv4.conf.eth1.rp_filter=0$ sysctl -w net.ipv4.conf.eth2.rp_filter=0$ route add -net 1.1.2.0/24 eth2$ route add -net 1.1.1.0/24 eth1$ arp -s 1.1.2.99 DE:AD:BE:EF:CA:FE$ arp -s 1.1.1.99 DE:AD:BE:EF:CA:EE
PHY-VM-PHY (vHost Multiqueue)
vHost Multiqueue functionality can also be validated using the PHY-VM-PHY configuration. To begin, follow thesteps described in PHY-PHY to create and initialize the database, start ovs-vswitchd and add dpdk-type devices tobridge br0. Once complete, follow the below steps:
1. Configure PMD and RXQs.
For example, set the number of dpdk port rx queues to at least 2 The number of rx queues at vhost-user interfacegets automatically configured after virtio device connection and doesn’t need manual configuration:
5.1. OVS 207
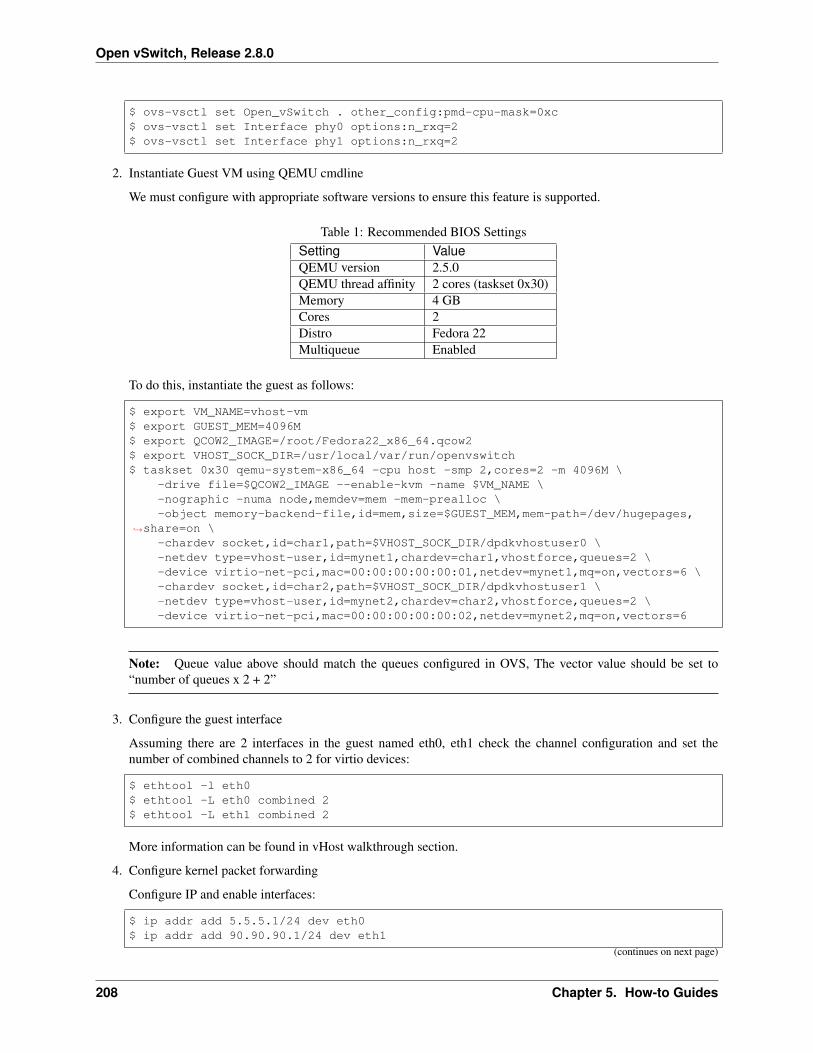
Open vSwitch, Release 2.8.0
$ ovs-vsctl set Open_vSwitch . other_config:pmd-cpu-mask=0xc$ ovs-vsctl set Interface phy0 options:n_rxq=2$ ovs-vsctl set Interface phy1 options:n_rxq=2
2. Instantiate Guest VM using QEMU cmdline
We must configure with appropriate software versions to ensure this feature is supported.
Table 1: Recommended BIOS SettingsSetting ValueQEMU version 2.5.0QEMU thread affinity 2 cores (taskset 0x30)Memory 4 GBCores 2Distro Fedora 22Multiqueue Enabled
To do this, instantiate the guest as follows:
$ export VM_NAME=vhost-vm$ export GUEST_MEM=4096M$ export QCOW2_IMAGE=/root/Fedora22_x86_64.qcow2$ export VHOST_SOCK_DIR=/usr/local/var/run/openvswitch$ taskset 0x30 qemu-system-x86_64 -cpu host -smp 2,cores=2 -m 4096M \
-drive file=$QCOW2_IMAGE --enable-kvm -name $VM_NAME \-nographic -numa node,memdev=mem -mem-prealloc \-object memory-backend-file,id=mem,size=$GUEST_MEM,mem-path=/dev/hugepages,
→˓share=on \-chardev socket,id=char1,path=$VHOST_SOCK_DIR/dpdkvhostuser0 \-netdev type=vhost-user,id=mynet1,chardev=char1,vhostforce,queues=2 \-device virtio-net-pci,mac=00:00:00:00:00:01,netdev=mynet1,mq=on,vectors=6 \-chardev socket,id=char2,path=$VHOST_SOCK_DIR/dpdkvhostuser1 \-netdev type=vhost-user,id=mynet2,chardev=char2,vhostforce,queues=2 \-device virtio-net-pci,mac=00:00:00:00:00:02,netdev=mynet2,mq=on,vectors=6
Note: Queue value above should match the queues configured in OVS, The vector value should be set to“number of queues x 2 + 2”
3. Configure the guest interface
Assuming there are 2 interfaces in the guest named eth0, eth1 check the channel configuration and set thenumber of combined channels to 2 for virtio devices:
$ ethtool -l eth0$ ethtool -L eth0 combined 2$ ethtool -L eth1 combined 2
More information can be found in vHost walkthrough section.
4. Configure kernel packet forwarding
Configure IP and enable interfaces:
$ ip addr add 5.5.5.1/24 dev eth0$ ip addr add 90.90.90.1/24 dev eth1
(continues on next page)
208 Chapter 5. How-to Guides
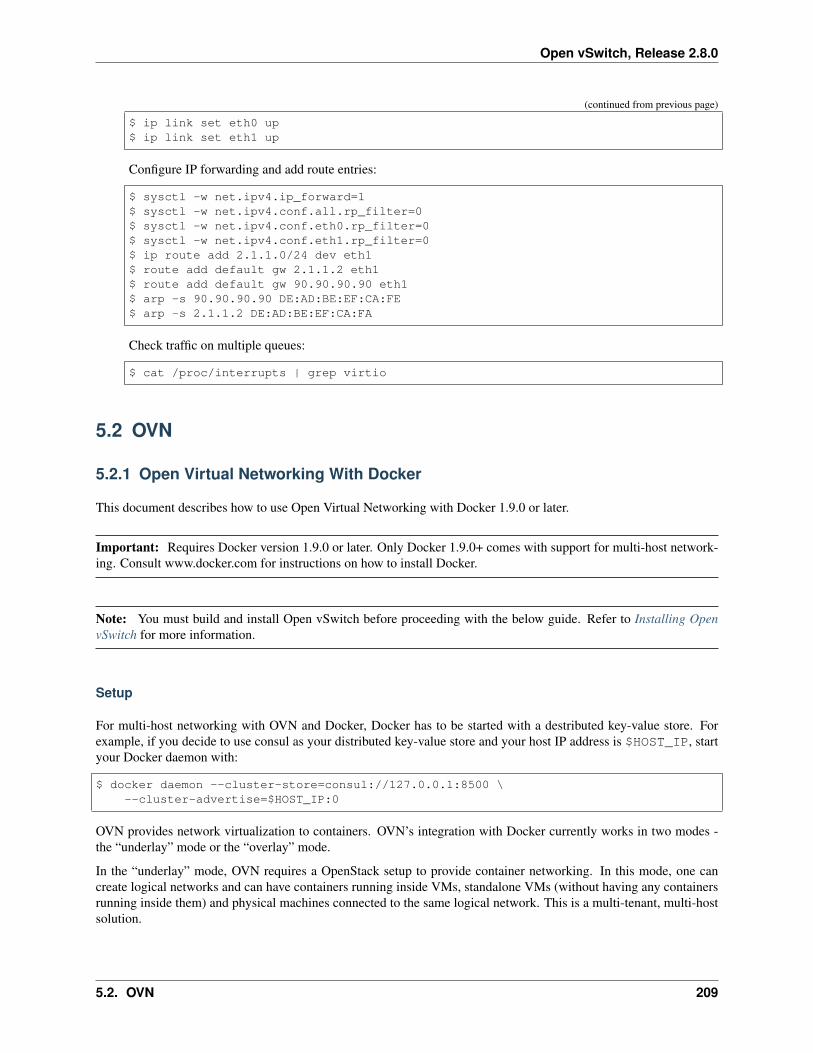
Open vSwitch, Release 2.8.0
(continued from previous page)
$ ip link set eth0 up$ ip link set eth1 up
Configure IP forwarding and add route entries:
$ sysctl -w net.ipv4.ip_forward=1$ sysctl -w net.ipv4.conf.all.rp_filter=0$ sysctl -w net.ipv4.conf.eth0.rp_filter=0$ sysctl -w net.ipv4.conf.eth1.rp_filter=0$ ip route add 2.1.1.0/24 dev eth1$ route add default gw 2.1.1.2 eth1$ route add default gw 90.90.90.90 eth1$ arp -s 90.90.90.90 DE:AD:BE:EF:CA:FE$ arp -s 2.1.1.2 DE:AD:BE:EF:CA:FA
Check traffic on multiple queues:
$ cat /proc/interrupts | grep virtio
5.2 OVN
5.2.1 Open Virtual Networking With Docker
This document describes how to use Open Virtual Networking with Docker 1.9.0 or later.
Important: Requires Docker version 1.9.0 or later. Only Docker 1.9.0+ comes with support for multi-host network-ing. Consult www.docker.com for instructions on how to install Docker.
Note: You must build and install Open vSwitch before proceeding with the below guide. Refer to Installing OpenvSwitch for more information.
Setup
For multi-host networking with OVN and Docker, Docker has to be started with a destributed key-value store. Forexample, if you decide to use consul as your distributed key-value store and your host IP address is $HOST_IP, startyour Docker daemon with:
$ docker daemon --cluster-store=consul://127.0.0.1:8500 \--cluster-advertise=$HOST_IP:0
OVN provides network virtualization to containers. OVN’s integration with Docker currently works in two modes -the “underlay” mode or the “overlay” mode.
In the “underlay” mode, OVN requires a OpenStack setup to provide container networking. In this mode, one cancreate logical networks and can have containers running inside VMs, standalone VMs (without having any containersrunning inside them) and physical machines connected to the same logical network. This is a multi-tenant, multi-hostsolution.
5.2. OVN 209
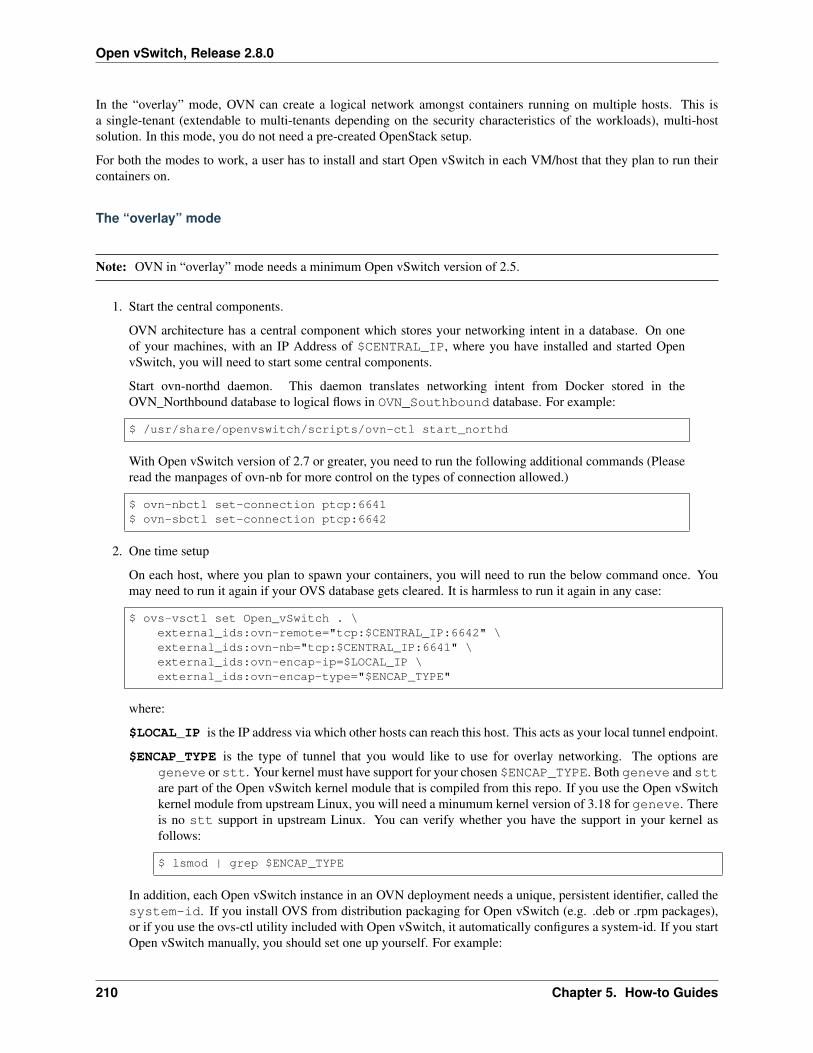
Open vSwitch, Release 2.8.0
In the “overlay” mode, OVN can create a logical network amongst containers running on multiple hosts. This isa single-tenant (extendable to multi-tenants depending on the security characteristics of the workloads), multi-hostsolution. In this mode, you do not need a pre-created OpenStack setup.
For both the modes to work, a user has to install and start Open vSwitch in each VM/host that they plan to run theircontainers on.
The “overlay” mode
Note: OVN in “overlay” mode needs a minimum Open vSwitch version of 2.5.
1. Start the central components.
OVN architecture has a central component which stores your networking intent in a database. On oneof your machines, with an IP Address of $CENTRAL_IP, where you have installed and started OpenvSwitch, you will need to start some central components.
Start ovn-northd daemon. This daemon translates networking intent from Docker stored in theOVN_Northbound database to logical flows in OVN_Southbound database. For example:
$ /usr/share/openvswitch/scripts/ovn-ctl start_northd
With Open vSwitch version of 2.7 or greater, you need to run the following additional commands (Pleaseread the manpages of ovn-nb for more control on the types of connection allowed.)
$ ovn-nbctl set-connection ptcp:6641$ ovn-sbctl set-connection ptcp:6642
2. One time setup
On each host, where you plan to spawn your containers, you will need to run the below command once. Youmay need to run it again if your OVS database gets cleared. It is harmless to run it again in any case:
$ ovs-vsctl set Open_vSwitch . \external_ids:ovn-remote="tcp:$CENTRAL_IP:6642" \external_ids:ovn-nb="tcp:$CENTRAL_IP:6641" \external_ids:ovn-encap-ip=$LOCAL_IP \external_ids:ovn-encap-type="$ENCAP_TYPE"
where:
$LOCAL_IP is the IP address via which other hosts can reach this host. This acts as your local tunnel endpoint.
$ENCAP_TYPE is the type of tunnel that you would like to use for overlay networking. The options aregeneve or stt. Your kernel must have support for your chosen $ENCAP_TYPE. Both geneve and sttare part of the Open vSwitch kernel module that is compiled from this repo. If you use the Open vSwitchkernel module from upstream Linux, you will need a minumum kernel version of 3.18 for geneve. Thereis no stt support in upstream Linux. You can verify whether you have the support in your kernel asfollows:
$ lsmod | grep $ENCAP_TYPE
In addition, each Open vSwitch instance in an OVN deployment needs a unique, persistent identifier, called thesystem-id. If you install OVS from distribution packaging for Open vSwitch (e.g. .deb or .rpm packages),or if you use the ovs-ctl utility included with Open vSwitch, it automatically configures a system-id. If you startOpen vSwitch manually, you should set one up yourself. For example:
210 Chapter 5. How-to Guides
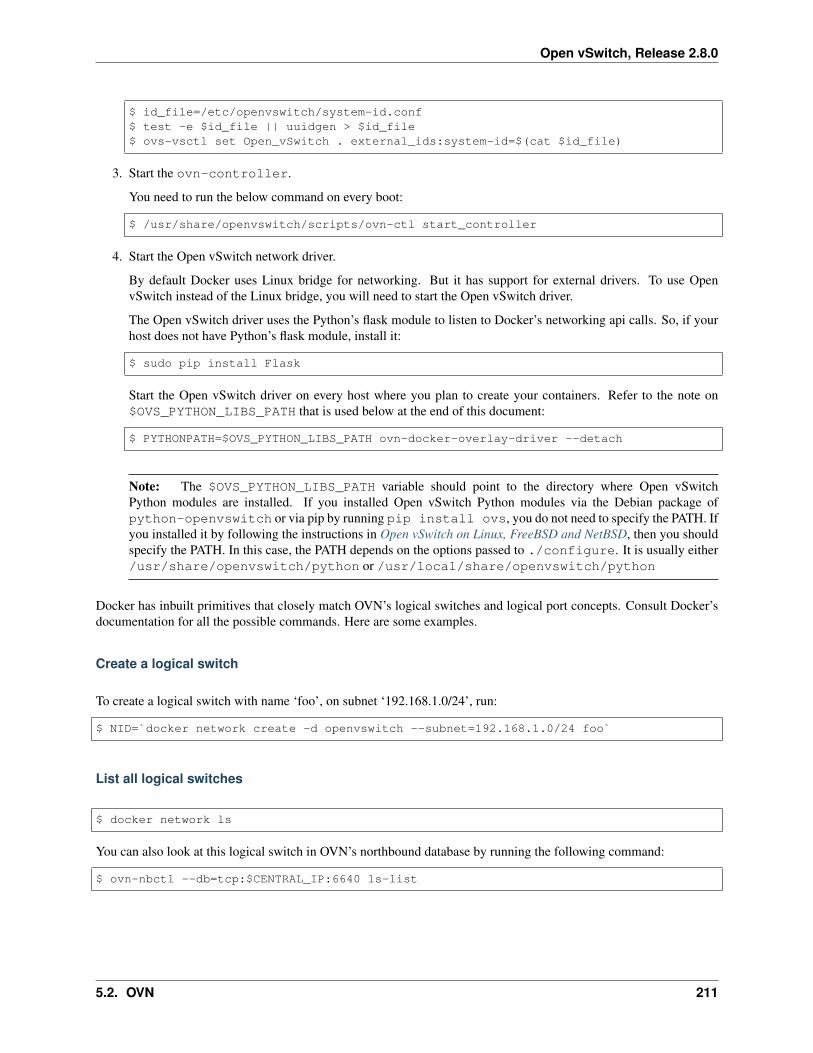
Open vSwitch, Release 2.8.0
$ id_file=/etc/openvswitch/system-id.conf$ test -e $id_file || uuidgen > $id_file$ ovs-vsctl set Open_vSwitch . external_ids:system-id=$(cat $id_file)
3. Start the ovn-controller.
You need to run the below command on every boot:
$ /usr/share/openvswitch/scripts/ovn-ctl start_controller
4. Start the Open vSwitch network driver.
By default Docker uses Linux bridge for networking. But it has support for external drivers. To use OpenvSwitch instead of the Linux bridge, you will need to start the Open vSwitch driver.
The Open vSwitch driver uses the Python’s flask module to listen to Docker’s networking api calls. So, if yourhost does not have Python’s flask module, install it:
$ sudo pip install Flask
Start the Open vSwitch driver on every host where you plan to create your containers. Refer to the note on$OVS_PYTHON_LIBS_PATH that is used below at the end of this document:
$ PYTHONPATH=$OVS_PYTHON_LIBS_PATH ovn-docker-overlay-driver --detach
Note: The $OVS_PYTHON_LIBS_PATH variable should point to the directory where Open vSwitchPython modules are installed. If you installed Open vSwitch Python modules via the Debian package ofpython-openvswitch or via pip by running pip install ovs, you do not need to specify the PATH. Ifyou installed it by following the instructions in Open vSwitch on Linux, FreeBSD and NetBSD, then you shouldspecify the PATH. In this case, the PATH depends on the options passed to ./configure. It is usually either/usr/share/openvswitch/python or /usr/local/share/openvswitch/python
Docker has inbuilt primitives that closely match OVN’s logical switches and logical port concepts. Consult Docker’sdocumentation for all the possible commands. Here are some examples.
Create a logical switch
To create a logical switch with name ‘foo’, on subnet ‘192.168.1.0/24’, run:
$ NID=`docker network create -d openvswitch --subnet=192.168.1.0/24 foo`
List all logical switches
$ docker network ls
You can also look at this logical switch in OVN’s northbound database by running the following command:
$ ovn-nbctl --db=tcp:$CENTRAL_IP:6640 ls-list
5.2. OVN 211
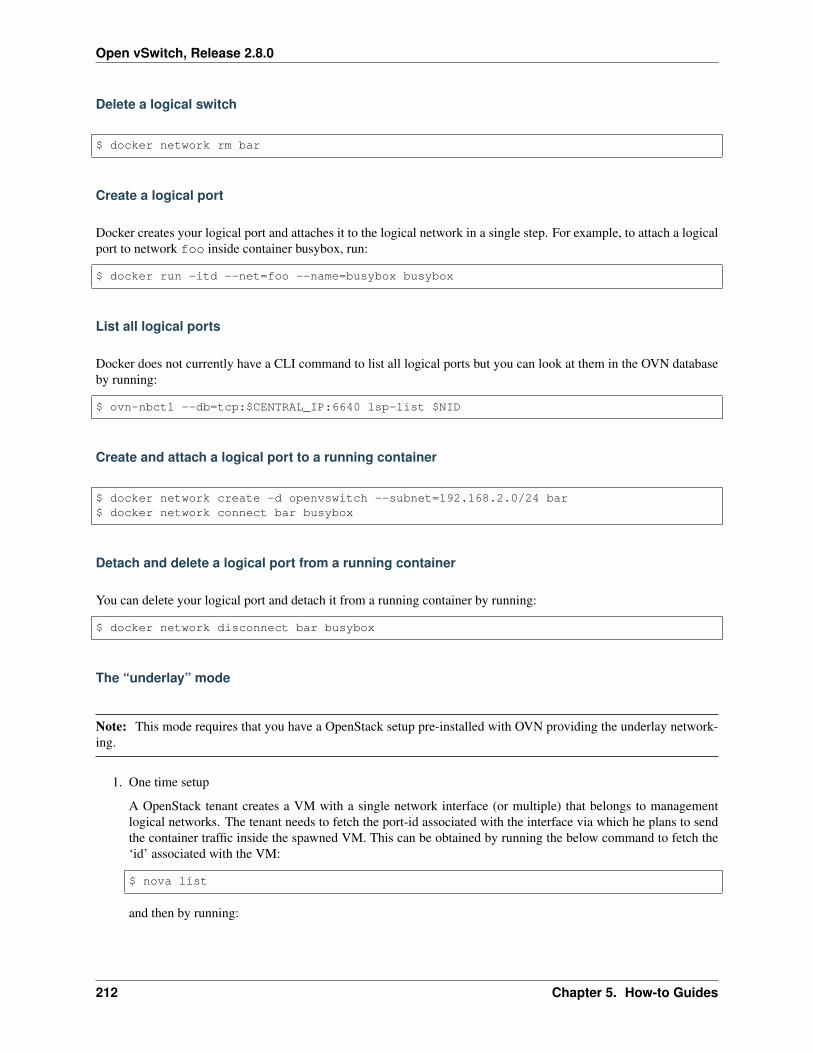
Open vSwitch, Release 2.8.0
Delete a logical switch
$ docker network rm bar
Create a logical port
Docker creates your logical port and attaches it to the logical network in a single step. For example, to attach a logicalport to network foo inside container busybox, run:
$ docker run -itd --net=foo --name=busybox busybox
List all logical ports
Docker does not currently have a CLI command to list all logical ports but you can look at them in the OVN databaseby running:
$ ovn-nbctl --db=tcp:$CENTRAL_IP:6640 lsp-list $NID
Create and attach a logical port to a running container
$ docker network create -d openvswitch --subnet=192.168.2.0/24 bar$ docker network connect bar busybox
Detach and delete a logical port from a running container
You can delete your logical port and detach it from a running container by running:
$ docker network disconnect bar busybox
The “underlay” mode
Note: This mode requires that you have a OpenStack setup pre-installed with OVN providing the underlay network-ing.
1. One time setup
A OpenStack tenant creates a VM with a single network interface (or multiple) that belongs to managementlogical networks. The tenant needs to fetch the port-id associated with the interface via which he plans to sendthe container traffic inside the spawned VM. This can be obtained by running the below command to fetch the‘id’ associated with the VM:
$ nova list
and then by running:
212 Chapter 5. How-to Guides
Open vSwitch, Release 2.8.0
$ neutron port-list --device_id=$id
Inside the VM, download the OpenStack RC file that contains the tenant information (henceforth referred to asopenrc.sh). Edit the file and add the previously obtained port-id information to the file by appending thefollowing line:
$ export OS_VIF_ID=$port_id
After this edit, the file will look something like:
#!/bin/bashexport OS_AUTH_URL=http://10.33.75.122:5000/v2.0export OS_TENANT_ID=fab106b215d943c3bad519492278443dexport OS_TENANT_NAME="demo"export OS_USERNAME="demo"export OS_VIF_ID=e798c371-85f4-4f2d-ad65-d09dd1d3c1c9
2. Create the Open vSwitch bridge
If your VM has one ethernet interface (e.g.: ‘eth0’), you will need to add that device as a port to an OpenvSwitch bridge ‘breth0’ and move its IP address and route related information to that bridge. (If it has multiplenetwork interfaces, you will need to create and attach an Open vSwitch bridge for the interface via which youplan to send your container traffic.)
If you use DHCP to obtain an IP address, then you should kill the DHCP client that was listening on the physicalEthernet interface (e.g. eth0) and start one listening on the Open vSwitch bridge (e.g. breth0).
Depending on your VM, you can make the above step persistent across reboots. For example, if your VM isDebian/Ubuntu-based, read openvswitch-switch.README.Debian found in debian folder. If your VM is RHEL-based, refer to RHEL 5.6, 6.x Packaging for Open vSwitch.
3. Start the Open vSwitch network driver
The Open vSwitch driver uses the Python’s flask module to listen to Docker’s networking api calls. The driveralso uses OpenStack’s python-neutronclient libraries. If your host does not have Python’s flaskmodule or python-neutronclient you must install them. For example:
$ pip install python-neutronclient$ pip install Flask
Once installed, source the openrc file:
$ . ./openrc.sh
Start the network driver and provide your OpenStack tenant password when prompted:
$ PYTHONPATH=$OVS_PYTHON_LIBS_PATH ovn-docker-underlay-driver \--bridge breth0 --detach
From here-on you can use the same Docker commands as described in docker-overlay.
Refer the the ovs-architecture man pages (man ovn-architecture) to understand OVN’s architecture in detail.
5.2.2 Integration of Containers with OVN and OpenStack
Isolation between containers is weaker than isolation between VMs, so some environments deploy containers fordifferent tenants in separate VMs as an additional security measure. This document describes creation of containersinside VMs and how they can be made part of the logical networks securely. The created logical network can include
5.2. OVN 213
Open vSwitch, Release 2.8.0
VMs, containers and physical machines as endpoints. To better understand the proposed integration of containers withOVN and OpenStack, this document describes the end to end workflow with an example.
• A OpenStack tenant creates a VM (say VM-A) with a single network interface that belongs to a managementlogical network. The VM is meant to host containers. OpenStack Nova chooses the hypervisor on which VM-Ais created.
• A Neutron port may have been created in advance and passed in to Nova with the request to create a new VM.If not, Nova will issue a request to Neutron to create a new port. The ID of the logical port from Neutron willalso be used as the vif-id for the virtual network interface (VIF) of VM-A.
• When VM-A is created on a hypervisor, its VIF gets added to the Open vSwitch integration bridge. This createsa row in the Interface table of the Open_vSwitch database. As explained in the integration guide, the vif-idassociated with the VM network interface gets added in the external_ids:iface-id column of the newlycreated row in the Interface table.
• Since VM-A belongs to a logical network, it gets an IP address. This IP address is used to spawn containers(either manually or through container orchestration systems) inside that VM and to monitor the health of thecreated containers.
• The vif-id associated with the VM’s network interface can be obtained by making a call to Neutron using tenantcredentials.
• This flow assumes a component called a “container network plugin”. If you take Docker as an example forcontainers, you could envision the plugin to be either a wrapper around Docker or a feature of Docker itself thatunderstands how to perform part of this workflow to get a container connected to a logical network managed byNeutron. The rest of the flow refers to this logical component that does not yet exist as the “container networkplugin”.
• All the calls to Neutron will need tenant credentials. These calls can either be made from inside the tenantVM as part of a container network plugin or from outside the tenant VM (if the tenant is not comfortable usingtemporary Keystone tokens from inside the tenant VMs). For simplicity, this document explains the work flowusing the former method.
• The container hosting VM will need Open vSwitch installed in it. The only work for Open vSwitch inside theVM is to tag network traffic coming from containers.
• When a container needs to be created inside the VM with a container network interface that is expected to beattached to a particular logical switch, the network plugin in that VM chooses any unused VLAN (This VLANtag only needs to be unique inside that VM. This limits the number of container interfaces to 4096 inside a singleVM). This VLAN tag is stripped out in the hypervisor by OVN and is only useful as a context (or metadata) forOVN.
• The container network plugin then makes a call to Neutron to create a logical port. In addition to all the inputsthat a call to create a port in Neutron that are currently needed, it sends the vif-id and the VLAN tag as inputs.
• Neutron in turn will verify that the vif-id belongs to the tenant in question and then uses the OVN specific pluginto create a new row in the Logical_Switch_Port table of the OVN Northbound Database. Neutron responds backwith an IP address and MAC address for that network interface. So Neutron becomes the IPAM system andprovides unique IP and MAC addresses across VMs and containers in the same logical network.
• The Neutron API call above to create a logical port for the container could add a relatively significant amount oftime to container creation. However, an optimization is possible here. Logical ports could be created in advanceand reused by the container system doing container orchestration. Additional Neutron API calls would only beneeded if the port needs to be attached to a different logical network.
• When a container is eventually deleted, the network plugin in that VM may make a call to Neutron to deletethat port. Neutron in turn will delete the entry in the Logical_Switch_Port table of the OVN NorthboundDatabase.
214 Chapter 5. How-to Guides
Open vSwitch, Release 2.8.0
As an example, consider Docker containers. Since Docker currently does not have a network plugin feature, thisexample uses a hypothetical wrapper around Docker to make calls to Neutron.
• Create a Logical switch:
$ ovn-docker --cred=cca86bd13a564ac2a63ddf14bf45d37f create network LS1
The above command will make a call to Neutron with the credentials to create a logical switch. The above isoptional if the logical switch has already been created from outside the VM.
• List networks available to the tenant:
$ ovn-docker --cred=cca86bd13a564ac2a63ddf14bf45d37f list networks
• Create a container and attach a interface to the previously created switch as a logical port:
$ ovn-docker --cred=cca86bd13a564ac2a63ddf14bf45d37f --vif-id=$VIF_ID \--network=LS1 run -d --net=none ubuntu:14.04 /bin/sh -c \"while true; do echo hello world; sleep 1; done"
The above command will make a call to Neutron with all the inputs it currently needs to create a logical port. Inaddition, it passes the $VIF_ID and a unused VLAN. Neutron will add that information in OVN and return backa MAC address and IP address for that interface. ovn-docker will then create a veth pair, insert one end insidethe container as ‘eth0’ and the other end as a port of a local OVS bridge as an access port of the chosen VLAN.
5.2. OVN 215

Open vSwitch, Release 2.8.0
216 Chapter 5. How-to Guides
CHAPTER 6
Reference Guide
6.1 Man Pages
The following man pages are written in rST and converted to roff at compile time:
6.1.1 ovs-test
Synopsis
ovs-test -s port
ovs-test -c server1 server2 [-b targetbandwidth] [-i testinterval] [-d] [-l vlantag] [-t tunnelmodes]
Description
The ovs-test program may be used to check for problems sending 802.1Q or GRE traffic that Open vSwitch mayuncover. These problems, for example, can occur when Open vSwitch is used to send 802.1Q traffic through physicalinterfaces running certain drivers of certain Linux kernel versions. To run a test, configure IP addresses on server1 andserver2 for interfaces you intended to test. These interfaces could also be already configured OVS bridges that havea physical interface attached to them. Then, on one of the nodes, run ovs-test in server mode and on the othernode run it in client mode. The client will connect to ovs-test server and schedule tests between both of them. Theovs-test client will perform UDP and TCP tests.
UDP tests can report packet loss and achieved bandwidth for various datagram sizes. By default target bandwidth forUDP tests is 1Mbit/s.
TCP tests report only achieved bandwidth, because kernel TCP stack takes care of flow control and packet loss. TCPtests are essential to detect potential TSO related issues.
To determine whether Open vSwitch is encountering any problems, the user must compare packet loss and achievedbandwidth in a setup where traffic is being directly sent and in one where it is not. If in the 802.1Q or L3 tunneled testsboth ovs-test processes are unable to communicate or the achieved bandwidth is much lower compared to directsetup, then, most likely, Open vSwitch has encountered a pre-existing kernel or driver bug.
217
Open vSwitch, Release 2.8.0
Some examples of the types of problems that may be encountered are:
• When NICs use VLAN stripping on receive they must pass a pointer to a vlan_group when reporting the strippedtag to the networking core. If no vlan_group is in use then some drivers just drop the extracted tag. Drivers aresupposed to only enable stripping if a vlan_group is registered but not all of them do that.
• On receive, some drivers handle priority tagged packets specially and don’t pass the tag onto the network stackat all, so Open vSwitch never has a chance to see it.
• Some drivers size their receive buffers based on whether a vlan_group is enabled, meaning that a maximum sizepacket with a VLAN tag will not fit if no vlan_group is configured.
• On transmit, some drivers expect that VLAN acceleration will be used if it is available, which can only be doneif a vlan_group is configured. In these cases, the driver may fail to parse the packet and correctly setup checksumoffloading or TSO.
Client Mode An ovs-test client will connect to two ovs-test servers and will ask them to exchange test traffic.It is also possible to spawn an ovs-test server automatically from the client.
Server Mode To conduct tests, two ovs-test servers must be running on two different hosts where the client canconnect. The actual test traffic is exchanged only between both ovs-test servers. It is recommended thatboth servers have their IP addresses in the same subnet, otherwise one would have to make sure that routing isset up correctly.
Options
-s <port>, --server <port>Run in server mode and wait for the client to establish XML RPC Control Connection on this TCP port. It isrecommended to have ethtool(8) installed on the server so that it could retrieve information about the NIC driver.
-c <server1> <server2>, --client <server1> <server2>Run in client mode and schedule tests between server1 and server2, where each server must be given in thefollowing format:
OuterIP[:OuterPort],InnerIP[/Mask][:InnerPort].
The OuterIP must be already assigned to the physical interface which is going to be tested. This is the IP addresswhere client will try to establish XML RPC connection. If OuterIP is 127.0.0.1 then client will automaticallyspawn a local instance of ovs-test server. OuterPort is TCP port where server is listening for incomingXML/RPC control connections to schedule tests (by default it is 15531). The ovs-test will automaticallyassign InnerIP[/Mask] to the interfaces that will be created on the fly for testing purposes. It is important thatInnerIP[/Mask] does not interfere with already existing IP addresses on both ovs-test servers and client.InnerPort is port which will be used by server to listen for test traffic that will be encapsulated (by default it is15532).
-b <targetbandwidth>, --bandwidth <targetbandwidth>Target bandwidth for UDP tests. The targetbandwidth must be given in bits per second. It is possible to usepostfix M or K to alter the target bandwidth magnitude.
-i <testinterval>, --interval <testinterval>How long each test should run. By default 5 seconds.
-h, --helpPrints a brief help message to the console.
-V, --versionPrints version information to the console.
The following test modes are supported by ovs-test. It is possible to combine multiple of them in a singleovs-test invocation.
218 Chapter 6. Reference Guide
Open vSwitch, Release 2.8.0
-d, --directPerform direct tests between both OuterIP addresses. These tests could be used as a reference to compare802.1Q or L3 tunneling test results.
-l <vlantag>, --vlan-tag <vlantag>Perform 802.1Q tests between both servers. These tests will create a temporary OVS bridge, if necessary, andattach a VLAN tagged port to it for testing purposes.
-t <tunnelmodes>, --tunnel-modes <tunnelmodes>Perform L3 tunneling tests. The given argument is a comma sepa- rated string that specifies all the L3 tunnelmodes that should be tested (e.g. gre). The L3 tunnels are terminated on interface that has the OuterIP addressassigned.
Examples
On host 1.2.3.4 start ovs-test in server mode:
ovs-test -s 15531
On host 1.2.3.5 start ovs-test in client mode and do direct, VLAN and GRE tests between both nodes:
ovs-test -c 127.0.0.1,1.1.1.1/30 1.2.3.4,1.1.1.2/30 -d -l 123 -tgre
See Also
ovs-vswitchd(8), ovs-ofctl(8), ovs-vsctl(8), ovs-vlan-test, ethtool(8), uname(1)
6.1.2 ovs-vlan-test
Synopsis
ovs-vlan-test [-s | –server] control_ip vlan_ip
Description
The ovs-vlan-test utility has some limitations, for example, it does not use TCP in its tests. Also it doesnot take into account MTU to detect potential edge cases. To overcome those limitations a new tool was devel-oped - ovs-test. ovs-test is currently supported only on Debian so, if possible, try to use that on instead ofovs-vlan-test.
The ovs-vlan-test program may be used to check for problems sending 802.1Q traffic which may occur whenrunning Open vSwitch. These problems can occur when Open vSwitch is used to send 802.1Q traffic through physicalinterfaces running certain drivers of certain Linux kernel versions. To run a test, configure Open vSwitch to tag trafficoriginating from vlan_ip and forward it out the target interface. Then run the ovs-vlan-test in client modeconnecting to an ovs-vlan-test server. ovs-vlan-test will display “OK” if it did not detect problems.
Some examples of the types of problems that may be encountered are:
• When NICs use VLAN stripping on receive they must pass a pointer to a vlan_group when reporting the strippedtag to the networking core. If no vlan_group is in use then some drivers just drop the extracted tag. Drivers aresupposed to only enable stripping if a vlan_group is registered but not all of them do that.
6.1. Man Pages 219
Open vSwitch, Release 2.8.0
• On receive, some drivers handle priority tagged packets specially and don’t pass the tag onto the network stackat all, so Open vSwitch never has a chance to see it.
• Some drivers size their receive buffers based on whether a vlan_group is enabled, meaning that a maximum sizepacket with a VLAN tag will not fit if no vlan_group is configured.
• On transmit, some drivers expect that VLAN acceleration will be used if it is available, which can only be doneif a vlan_group is configured. In these cases, the driver may fail to parse the packet and correctly setup checksumoffloading or TSO.
Client Mode An ovs-vlan-test client may be run on a host to check for VLAN connectivity problems. Theclient must be able to establish HTTP connections with an ovs-vlan-test server located at the specifiedcontrol_ip address. UDP traffic sourced at vlan_ip should be tagged and directed out the interface whose con-nectivity is being tested.
Server Mode To conduct tests, an ovs-vlan-test server must be running on a host known not to have VLANconnectivity problems. The server must have a control_ip on a non-VLAN network which clients can establishconnectivity with. It must also have a vlan_ip address on a VLAN network which clients will use to test theirVLAN connectivity. Multiple clients may test against a single ovs-vlan-test server concurrently.
Options
-s, --serverRun in server mode.
-h, --helpPrints a brief help message to the console.
-V, --versionPrints version information to the console.
Examples
Display the Linux kernel version and driver of eth1:
uname -rethtool -i eth1
Set up a bridge which forwards traffic originating from 1.2.3.4 out eth1 with VLAN tag 10:
ovs-vsctl -- add-br vlan-br \-- add-port vlan-br eth1 \-- add-port vlan-br vlan-br-tag tag=10 \-- set Interface vlan-br-tag type=internal
ip addr add 1.2.3.4/8 dev vlan-br-tagip link set vlan-br-tag up
Run an ovs-vlan-test server listening for client control traffic on 172.16.0.142 port 8080 and VLAN traffic onthe default port of 1.2.3.3:
ovs-vlan-test -s 172.16.0.142:8080 1.2.3.3
Run an ovs-vlan-test client with a control server located at 172.16.0.142 port 8080 and a local VLAN IP of1.2.3.4:
ovs-vlan-test 172.16.0.142:8080 1.2.3.4
220 Chapter 6. Reference Guide
Open vSwitch, Release 2.8.0
See Also
ovs-vswitchd(8), ovs-ofctl(8), ovs-vsctl(8), ovs-test, ethtool(8), uname(1)
The remainder are still in roff format can be found below:
ovn-architecture(7) (pdf) (html) (plain text)ovn-controller(8) (pdf) (html) (plain text)ovn-controller-vtep(8) (pdf) (html) (plain text)ovn-ctl(8) (pdf) (html) (plain text)ovn-nb(5) (pdf) (html) (plain text)ovn-nbctl(8) (pdf) (html) (plain text)ovn-northd(8) (pdf) (html) (plain text)ovn-sb(5) (pdf) (html) (plain text)ovn-sbctl(8) (pdf) (html) (plain text)ovn-trace(8) (pdf) (html) (plain text)ovs-appctl(8) (pdf) (html) (plain text)ovs-bugtool(8) (pdf) (html) (plain text)ovs-ctl(8) (pdf) (html) (plain text)ovsdb-client(1) (pdf) (html) (plain text)ovsdb-server(1) (pdf) (html) (plain text)ovsdb-tool(1) (pdf) (html) (plain text)ovs-dpctl(8) (pdf) (html) (plain text)ovs-dpctl-top(8) (pdf) (html) (plain text)ovs-fields(7) (pdf) (html) (plain text)ovs-l3ping(8) (pdf) (html) (plain text)ovs-ofctl(8) (pdf) (html) (plain text)ovs-parse-backtrace(8) (pdf) (html) (plain text)ovs-pcap(1) (pdf) (html) (plain text)ovs-pki(8) (pdf) (html) (plain text)ovs-tcpdump(8) (pdf) (html) (plain text)ovs-tcpundump(1) (pdf) (html) (plain text)ovs-test(8) (pdf) (html) (plain text)ovs-testcontroller(8) (pdf) (html) (plain text)ovs-vlan-bug-workaround(8) (pdf) (html) (plain text)ovs-vlan-test(8) (pdf) (html) (plain text)ovs-vsctl(8) (pdf) (html) (plain text)ovs-vswitchd(8) (pdf) (html) (plain text)ovs-vswitchd.conf.db(5) (pdf) (html) (plain text)vtep(5) (pdf) (html) (plain text)vtep-ctl(8) (pdf) (html) (plain text)
6.1. Man Pages 221

Open vSwitch, Release 2.8.0
222 Chapter 6. Reference Guide
CHAPTER 7
Open vSwitch FAQ
7.1 Basic Configuration
Q: How do I configure a port as an access port?
A. Add tag=VLAN to your ovs-vsctl add-port command. For example, the following commandsconfigure br0 with eth0 as a trunk port (the default) and tap0 as an access port for VLAN 9:
$ ovs-vsctl add-br br0$ ovs-vsctl add-port br0 eth0$ ovs-vsctl add-port br0 tap0 tag=9
If you want to configure an already added port as an access port, use ovs-vsctl set, e.g.:
$ ovs-vsctl set port tap0 tag=9
Q: How do I configure a port as a SPAN port, that is, enable mirroring of all traffic to that port?
A. The following commands configure br0 with eth0 and tap0 as trunk ports. All traffic coming in orgoing out on eth0 or tap0 is also mirrored to tap1; any traffic arriving on tap1 is dropped:
$ ovs-vsctl add-br br0$ ovs-vsctl add-port br0 eth0$ ovs-vsctl add-port br0 tap0$ ovs-vsctl add-port br0 tap1 \
-- --id=@p get port tap1 \-- --id=@m create mirror name=m0 select-all=true output-port=@p \-- set bridge br0 mirrors=@m
To later disable mirroring, run:
$ ovs-vsctl clear bridge br0 mirrors
Q: Does Open vSwitch support configuring a port in promiscuous mode?
A: Yes. How you configure it depends on what you mean by “promiscuous mode”:
223
Open vSwitch, Release 2.8.0
• Conventionally, “promiscuous mode” is a feature of a network interface card. Ordinarily, a NICpasses to the CPU only the packets actually destined to its host machine. It discards the rest toavoid wasting memory and CPU cycles. When promiscuous mode is enabled, however, it passesevery packet to the CPU. On an old-style shared-media or hub-based network, this allows the hostto spy on all packets on the network. But in the switched networks that are almost everywhere thesedays, promiscuous mode doesn’t have much effect, because few packets not destined to a host aredelivered to the host’s NIC.
This form of promiscuous mode is configured in the guest OS of the VMs on your bridge, e.g. with“ip link set <device> promisc”.
• The VMware vSwitch uses a different definition of “promiscuous mode”. When you configurepromiscuous mode on a VMware vNIC, the vSwitch sends a copy of every packet received by thevSwitch to that vNIC. That has a much bigger effect than just enabling promiscuous mode in a guestOS. Rather than getting a few stray packets for which the switch does not yet know the correctdestination, the vNIC gets every packet. The effect is similar to replacing the vSwitch by a virtualhub.
This “promiscuous mode” is what switches normally call “port mirroring” or “SPAN”. For infor-mation on how to configure SPAN, see “How do I configure a port as a SPAN port, that is, enablemirroring of all traffic to that port?”
Q: How do I configure a DPDK port as an access port?
A: Firstly, you must have a DPDK-enabled version of Open vSwitch.
If your version is DPDK-enabled it will support the other-config:dpdk-init configuration in the databaseand will display lines with “EAL:. . . ” during startup when other_config:dpdk-init is set to ‘true’.
Secondly, when adding a DPDK port, unlike a system port, the type for the interface and valid dpdk-devargs must be specified. For example:
$ ovs-vsctl add-br br0$ ovs-vsctl add-port br0 myportname -- set Interface myportname \
type=dpdk options:dpdk-devargs=0000:06:00.0
Refer to Open vSwitch with DPDK for more information on enabling and using DPDK with OpenvSwitch.
Q: How do I configure a VLAN as an RSPAN VLAN, that is, enable mirroring of all traffic to that VLAN?
A: The following commands configure br0 with eth0 as a trunk port and tap0 as an access port for VLAN10. All traffic coming in or going out on tap0, as well as traffic coming in or going out on eth0 in VLAN10, is also mirrored to VLAN 15 on eth0. The original tag for VLAN 10, in cases where one is present, isdropped as part of mirroring:
$ ovs-vsctl add-br br0$ ovs-vsctl add-port br0 eth0$ ovs-vsctl add-port br0 tap0 tag=10$ ovs-vsctl \
-- --id=@m create mirror name=m0 select-all=true select-vlan=10 \output-vlan=15 \
-- set bridge br0 mirrors=@m
To later disable mirroring, run:
$ ovs-vsctl clear bridge br0 mirrors
Mirroring to a VLAN can disrupt a network that contains unmanaged switches. See ovs-vswitchd.conf.db(5) for details. Mirroring to a GRE tunnel has fewer caveats than mirroring to a VLAN
224 Chapter 7. Open vSwitch FAQ
Open vSwitch, Release 2.8.0
and should generally be preferred.
Q: Can I mirror more than one input VLAN to an RSPAN VLAN?
A: Yes, but mirroring to a VLAN strips the original VLAN tag in favor of the specified output-vlan. Thisloss of information may make the mirrored traffic too hard to interpret.
To mirror multiple VLANs, use the commands above, but specify a comma-separated list of VLANs asthe value for select-vlan. To mirror every VLAN, use the commands above, but omit select-vlan and itsvalue entirely.
When a packet arrives on a VLAN that is used as a mirror output VLAN, the mirror is disregarded.Instead, in standalone mode, OVS floods the packet across all the ports for which the mirror outputVLAN is configured. (If an OpenFlow controller is in use, then it can override this behavior through theflow table.) If OVS is used as an intermediate switch, rather than an edge switch, this ensures that theRSPAN traffic is distributed through the network.
Mirroring to a VLAN can disrupt a network that contains unmanaged switches. See ovs-vswitchd.conf.db(5) for details. Mirroring to a GRE tunnel has fewer caveats than mirroring to a VLANand should generally be preferred.
Q: How do I configure mirroring of all traffic to a GRE tunnel?
A: The following commands configure br0 with eth0 and tap0 as trunk ports. All traffic coming in orgoing out on eth0 or tap0 is also mirrored to gre0, a GRE tunnel to the remote host 192.168.1.10; anytraffic arriving on gre0 is dropped:
$ ovs-vsctl add-br br0$ ovs-vsctl add-port br0 eth0$ ovs-vsctl add-port br0 tap0$ ovs-vsctl add-port br0 gre0 \
-- set interface gre0 type=gre options:remote_ip=192.168.1.10 \-- --id=@p get port gre0 \-- --id=@m create mirror name=m0 select-all=true output-port=@p \-- set bridge br0 mirrors=@m
To later disable mirroring and destroy the GRE tunnel:
$ ovs-vsctl clear bridge br0 mirrors$ ovs-vsctl del-port br0 gre0
Q: Does Open vSwitch support ERSPAN?
A: No. As an alternative, Open vSwitch supports mirroring to a GRE tunnel (see above).
Q: How do I connect two bridges?
A: First, why do you want to do this? Two connected bridges are not much different from a single bridge,so you might as well just have a single bridge with all your ports on it.
If you still want to connect two bridges, you can use a pair of patch ports. The following example createsbridges br0 and br1, adds eth0 and tap0 to br0, adds tap1 to br1, and then connects br0 and br1 with a pairof patch ports.
$ ovs-vsctl add-br br0$ ovs-vsctl add-port br0 eth0$ ovs-vsctl add-port br0 tap0$ ovs-vsctl add-br br1$ ovs-vsctl add-port br1 tap1$ ovs-vsctl \
-- add-port br0 patch0 \(continues on next page)
7.1. Basic Configuration 225
Open vSwitch, Release 2.8.0
(continued from previous page)
-- set interface patch0 type=patch options:peer=patch1 \-- add-port br1 patch1 \-- set interface patch1 type=patch options:peer=patch0
Bridges connected with patch ports are much like a single bridge. For instance, if the example above alsoadded eth1 to br1, and both eth0 and eth1 happened to be connected to the same next-hop switch, thenyou could loop your network just as you would if you added eth0 and eth1 to the same bridge (see the“Configuration Problems” section below for more information).
If you are using Open vSwitch 1.9 or an earlier version, then you need to be using the kernel modulebundled with Open vSwitch rather than the one that is integrated into Linux 3.3 and later, because OpenvSwitch 1.9 and earlier versions need kernel support for patch ports. This also means that in Open vSwitch1.9 and earlier, patch ports will not work with the userspace datapath, only with the kernel module.
Q: How do I configure a bridge without an OpenFlow local port? (Local port in the sense of OFPP_LOCAL)
A: Open vSwitch does not support such a configuration. Bridges always have their local ports.
7.2 Development
Q: How do I implement a new OpenFlow message?
A: Add your new message to enum ofpraw and enum ofptype in lib/ofp-msgs.h, followingthe existing pattern. Then recompile and fix all of the new warnings, implementing new functionality forthe new message as needed. (If you configure with --enable-Werror, as described in Open vSwitchon Linux, FreeBSD and NetBSD, then it is impossible to miss any warnings.)
If you need to add an OpenFlow vendor extension message for a vendor that doesn’t yet have any extensionmessages, then you will also need to edit build-aux/extract-ofp-msgs.
Q: How do I add support for a new field or header?
A: Add new members for your field to struct flow in lib/flow.h, and add new enumerations foryour new field to enum mf_field_id in lib/meta-flow.h, following the existing pattern. Also,add support to miniflow_extract() in lib/flow.c for extracting your new field from a packetinto struct miniflow, and to nx_put_raw() in lib/nx-match.c to output your new field in OXMmatches. Then recompile and fix all of the new warnings, implementing new functionality for the newfield or header as needed. (If you configure with --enable-Werror, as described in Open vSwitch onLinux, FreeBSD and NetBSD, then it is impossible to miss any warnings.)
If you want kernel datapath support for your new field, you also need to modify the kernel module for theoperating systems you are interested in. This isn’t mandatory, since fields understood only by userspacework too (with a performance penalty), so it’s reasonable to start development without it. If you implementkernel module support for Linux, then the Linux kernel “netdev” mailing list is the place to submit thatsupport first; please read up on the Linux kernel development process separately. The Windows datapathkernel module support, on the other hand, is maintained within the OVS tree, so patches for that can godirectly to ovs-dev.
Q: How do I add support for a new OpenFlow action?
A: Add your new action to enum ofp_raw_action_type in lib/ofp-actions.c, followingthe existing pattern. Then recompile and fix all of the new warnings, implementing new functionality forthe new action as needed. (If you configure with --enable-Werror, as described in the Open vSwitchon Linux, FreeBSD and NetBSD, then it is impossible to miss any warnings.)
If you need to add an OpenFlow vendor extension action for a vendor that doesn’t yet have any extensionactions, then you will also need to edit build-aux/extract-ofp-actions.
226 Chapter 7. Open vSwitch FAQ
Open vSwitch, Release 2.8.0
7.3 Implementation Details
Q: I hear OVS has a couple of kinds of flows. Can you tell me about them?
A: Open vSwitch uses different kinds of flows for different purposes:
• OpenFlow flows are the most important kind of flow. OpenFlow controllers use these flows to definea switch’s policy. OpenFlow flows support wildcards, priorities, and multiple tables.
When in-band control is in use, Open vSwitch sets up a few “hidden” flows, with priority higherthan a controller or the user can configure, that are not visible via OpenFlow. (See the “Controller”section of the FAQ for more information about hidden flows.)
• The Open vSwitch software switch implementation uses a second kind of flow internally. Theseflows, called “datapath” or “kernel” flows, do not support priorities and comprise only a singletable, which makes them suitable for caching. (Like OpenFlow flows, datapath flows do supportwildcarding, in Open vSwitch 1.11 and later.) OpenFlow flows and datapath flows also supportdifferent actions and number ports differently.
Datapath flows are an implementation detail that is subject to change in future versions of OpenvSwitch. Even with the current version of Open vSwitch, hardware switch implementations do notnecessarily use this architecture.
Users and controllers directly control only the OpenFlow flow table. Open vSwitch manages the datapath flow tableitself, so users should not normally be concerned with it.
Q: Why are there so many different ways to dump flows?
A: Open vSwitch has two kinds of flows (see the previous question), so it has commands with differentpurposes for dumping each kind of flow:
• ovs-ofctl dump-flows <br> dumps OpenFlow flows, excluding hidden flows. This is themost commonly useful form of flow dump. (Unlike the other commands, this should work with anyOpenFlow switch, not just Open vSwitch.)
• ovs-appctl bridge/dump-flows <br> dumps OpenFlow flows, including hidden flows.This is occasionally useful for troubleshooting suspected issues with in-band control.
• ovs-dpctl dump-flows [dp] dumps the datapath flow table entries for a Linux kernel-baseddatapath. In Open vSwitch 1.10 and later, ovs-vswitchd merges multiple switches into a single data-path, so it will show all the flows on all your kernel-based switches. This command can occasionallybe useful for debugging.
• ovs-appctl dpif/dump-flows <br>, new in Open vSwitch 1.10, dumps datapath flowsfor only the specified bridge, regardless of the type.
Q: How does multicast snooping works with VLANs?
A: Open vSwitch maintains snooping tables for each VLAN.
Q: Can OVS populate the kernel flow table in advance instead of in reaction to packets?
A: No. There are several reasons:
• Kernel flows are not as sophisticated as OpenFlow flows, which means that some OpenFlow policiescould require a large number of kernel flows. The “conjunctive match” feature is an extreme exam-ple: the number of kernel flows it requires is the product of the number of flows in each dimension.
• With multiple OpenFlow flow tables and simple sets of actions, the number of kernel flows requiredcan be as large as the product of the number of flows in each dimension. With more sophisticatedactions, the number of kernel flows could be even larger.
7.3. Implementation Details 227
Open vSwitch, Release 2.8.0
• Open vSwitch is designed so that any version of OVS userspace interoperates with any version ofthe OVS kernel module. This forward and backward compatibility requires that userspace observehow the kernel module parses received packets. This is only possible in a straightforward way whenuserspace adds kernel flows in reaction to received packets.
For more relevant information on the architecture of Open vSwitch, please read “The Design and Imple-mentation of Open vSwitch”, published in USENIX NSDI 2015.
Q: How many packets does OVS buffer?
A: Open vSwitch fast path packet processing uses a “run to completion” model in which every packet iscompletely handled in a single pass. Therefore, in the common case where a packet just passes throughthe fast path, Open vSwitch does not buffer packets itself. The operating system and the network driversinvolved in receiving and later in transmitting the packet do often include buffering. Open vSwitch is onlya middleman between these and does not have direct access or influence over their buffers.
Outside the common case, Open vSwitch does sometimes buffer packets. When the OVS fast path pro-cesses a packet that does not match any of the flows in its megaflow cache, it passes that packet to theOpen vSwitch slow path. This procedure queues a copy of the packet to the Open vSwitch userspacewhich processes it and, if necessary, passes it back to the kernel module. Queuing the packet to userspaceas part of this process involves buffering. (Going the opposite direction does not, because the kernel actu-ally processes the request synchronously.) A few other exceptional cases also queue packets to userspacefor processing; most of these are due to OpenFlow actions that the fast path cannot handle and that musttherefore be handled by the slow path instead.
OpenFlow also has a concept of packet buffering. When an OpenFlow switch sends a packet to a con-troller, it may opt to retain a copy of the packet in an OpenFlow “packet buffer”. Later, if the controllerwants to tell the switch to forward a copy of that packet, it can refer to the packet through its assignedbuffer, instead of sending the whole packet back to the switch, thereby saving bandwidth in the OpenFlowcontrol channel. Before Open vSwitch 2.7, OVS implemented such buffering; Open vSwitch 2.7 and laterdo not.
7.4 General
Q: What is Open vSwitch?
A: Open vSwitch is a production quality open source software switch designed to be used as a vswitch invirtualized server environments. A vswitch forwards traffic between different VMs on the same physicalhost and also forwards traffic between VMs and the physical network. Open vSwitch supports standardmanagement interfaces (e.g. sFlow, NetFlow, IPFIX, RSPAN, CLI), and is open to programmatic exten-sion and control using OpenFlow and the OVSDB management protocol.
Open vSwitch as designed to be compatible with modern switching chipsets. This means that it can beported to existing high-fanout switches allowing the same flexible control of the physical infrastructureas the virtual infrastructure. It also means that Open vSwitch will be able to take advantage of on-NICswitching chipsets as their functionality matures.
Q: What virtualization platforms can use Open vSwitch?
A: Open vSwitch can currently run on any Linux-based virtualization platform (kernel 3.10 and newer),including: KVM, VirtualBox, Xen, Xen Cloud Platform, XenServer. As of Linux 3.3 it is part of themainline kernel. The bulk of the code is written in platform- independent C and is easily ported to otherenvironments. We welcome inquires about integrating Open vSwitch with other virtualization platforms.
Q: How can I try Open vSwitch?
228 Chapter 7. Open vSwitch FAQ
Open vSwitch, Release 2.8.0
A: The Open vSwitch source code can be built on a Linux system. You can build and experiment withOpen vSwitch on any Linux machine. Packages for various Linux distributions are available on manyplatforms, including: Debian, Ubuntu, Fedora.
You may also download and run a virtualization platform that already has Open vSwitch integrated. Forexample, download a recent ISO for XenServer or Xen Cloud Platform. Be aware that the version inte-grated with a particular platform may not be the most recent Open vSwitch release.
Q: Does Open vSwitch only work on Linux?
A: No, Open vSwitch has been ported to a number of different operating systems and hardware platforms.Most of the development work occurs on Linux, but the code should be portable to any POSIX system.We’ve seen Open vSwitch ported to a number of different platforms, including FreeBSD, Windows, andeven non-POSIX embedded systems.
By definition, the Open vSwitch Linux kernel module only works on Linux and will provide the highestperformance. However, a userspace datapath is available that should be very portable.
Q: What’s involved with porting Open vSwitch to a new platform or switching ASIC?
A: Porting Open vSwitch to New Software or Hardware describes how one would go about porting OpenvSwitch to a new operating system or hardware platform.
Q: Why would I use Open vSwitch instead of the Linux bridge?
A: Open vSwitch is specially designed to make it easier to manage VM network configuration and mon-itor state spread across many physical hosts in dynamic virtualized environments. Refer to Why OpenvSwitch? for a more detailed description of how Open vSwitch relates to the Linux Bridge.
Q: How is Open vSwitch related to distributed virtual switches like the VMware vNetwork distributed switch or theCisco Nexus 1000V?
A: Distributed vswitch applications (e.g., VMware vNetwork distributed switch, Cisco Nexus 1000V)provide a centralized way to configure and monitor the network state of VMs that are spread acrossmany physical hosts. Open vSwitch is not a distributed vswitch itself, rather it runs on each physicalhost and supports remote management in a way that makes it easier for developers of virtualization/cloudmanagement platforms to offer distributed vswitch capabilities.
To aid in distribution, Open vSwitch provides two open protocols that are specially designed for remotemanagement in virtualized network environments: OpenFlow, which exposes flow-based forwarding state,and the OVSDB management protocol, which exposes switch port state. In addition to the switch imple-mentation itself, Open vSwitch includes tools (ovs-ofctl, ovs-vsctl) that developers can script and extendto provide distributed vswitch capabilities that are closely integrated with their virtualization managementplatform.
Q: Why doesn’t Open vSwitch support distribution?
A: Open vSwitch is intended to be a useful component for building flexible network infrastructure. Thereare many different approaches to distribution which balance trade-offs between simplicity, scalability,hardware compatibility, convergence times, logical forwarding model, etc. The goal of Open vSwitch isto be able to support all as a primitive building block rather than choose a particular point in the distributeddesign space.
Q: How can I contribute to the Open vSwitch Community?
A: You can start by joining the mailing lists and helping to answer questions. You can also suggestimprovements to documentation. If you have a feature or bug you would like to work on, send a mail toone of the mailing lists.
Q: Why can I no longer connect to my OpenFlow controller or OVSDB manager?
7.4. General 229
Open vSwitch, Release 2.8.0
A: Starting in OVS 2.4, we switched the default ports to the IANA-specified port numbers for OpenFlow(6633->6653) and OVSDB (6632->6640). We recommend using these port numbers, but if you cannot,all the programs allow overriding the default port. See the appropriate man page.
7.5 Common Configuration Issues
Q: I created a bridge and added my Ethernet port to it, using commands like these:
$ ovs-vsctl add-br br0$ ovs-vsctl add-port br0 eth0
and as soon as I ran the “add-port” command I lost all connectivity through eth0. Help!
A: A physical Ethernet device that is part of an Open vSwitch bridge should not have an IP address. Ifone does, then that IP address will not be fully functional.
You can restore functionality by moving the IP address to an Open vSwitch “internal” device, suchas the network device named after the bridge itself. For example, assuming that eth0’s IP address is192.168.128.5, you could run the commands below to fix up the situation:
$ ip addr flush dev eth0$ ip addr add 192.168.128.5/24 dev br0$ ip link set br0 up
(If your only connection to the machine running OVS is through the IP address in question, then youwould want to run all of these commands on a single command line, or put them into a script.) If therewere any additional routes assigned to eth0, then you would also want to use commands to adjust theseroutes to go through br0.
If you use DHCP to obtain an IP address, then you should kill the DHCP client that was listening on thephysical Ethernet interface (e.g. eth0) and start one listening on the internal interface (e.g. br0). Youmight still need to manually clear the IP address from the physical interface (e.g. with “ip addr flush deveth0”).
There is no compelling reason why Open vSwitch must work this way. However, this is the way that theLinux kernel bridge module has always worked, so it’s a model that those accustomed to Linux bridgingare already used to. Also, the model that most people expect is not implementable without kernel changeson all the versions of Linux that Open vSwitch supports.
By the way, this issue is not specific to physical Ethernet devices. It applies to all network devices exceptOpen vSwitch “internal” devices.
Q: I created a bridge and added a couple of Ethernet ports to it, using commands like these:
$ ovs-vsctl add-br br0$ ovs-vsctl add-port br0 eth0$ ovs-vsctl add-port br0 eth1
and now my network seems to have melted: connectivity is unreliable (even connectivity that doesn’t go through OpenvSwitch), all the LEDs on my physical switches are blinking, wireshark shows duplicated packets, and CPU usage isvery high.
A: More than likely, you’ve looped your network. Probably, eth0 and eth1 are connected to the samephysical Ethernet switch. This yields a scenario where OVS receives a broadcast packet on eth0 andsends it out on eth1, then the physical switch connected to eth1 sends the packet back on eth0, and so onforever. More complicated scenarios, involving a loop through multiple switches, are possible too.
The solution depends on what you are trying to do:
230 Chapter 7. Open vSwitch FAQ
Open vSwitch, Release 2.8.0
• If you added eth0 and eth1 to get higher bandwidth or higher reliability between OVS and yourphysical Ethernet switch, use a bond. The following commands create br0 and then add eth0 andeth1 as a bond:
$ ovs-vsctl add-br br0$ ovs-vsctl add-bond br0 bond0 eth0 eth1
Bonds have tons of configuration options. Please read the documentation on the Port table in ovs-vswitchd.conf.db(5) for all the details.
Configuration for DPDK-enabled interfaces is slightly less straightforward. Refer to Open vSwitchwith DPDK for more information.
• Perhaps you don’t actually need eth0 and eth1 to be on the same bridge. For example, if you simplywant to be able to connect each of them to virtual machines, then you can put each of them on abridge of its own:
$ ovs-vsctl add-br br0$ ovs-vsctl add-port br0 eth0
$ ovs-vsctl add-br br1$ ovs-vsctl add-port br1 eth1
and then connect VMs to br0 and br1. (A potential disadvantage is that traffic cannot directly passbetween br0 and br1. Instead, it will go out eth0 and come back in eth1, or vice versa.)
• If you have a redundant or complex network topology and you want to prevent loops, turn on span-ning tree protocol (STP). The following commands create br0, enable STP, and add eth0 and eth1 tothe bridge. The order is important because you don’t want have to have a loop in your network eventransiently:
$ ovs-vsctl add-br br0$ ovs-vsctl set bridge br0 stp_enable=true$ ovs-vsctl add-port br0 eth0$ ovs-vsctl add-port br0 eth1
The Open vSwitch implementation of STP is not well tested. Report any bugs you observe, but ifyou’d rather avoid acting as a beta tester then another option might be your best shot.
Q: I can’t seem to use Open vSwitch in a wireless network.
A: Wireless base stations generally only allow packets with the source MAC address of NIC that com-pleted the initial handshake. Therefore, without MAC rewriting, only a single device can communicateover a single wireless link.
This isn’t specific to Open vSwitch, it’s enforced by the access point, so the same problems will show upwith the Linux bridge or any other way to do bridging.
Q: I can’t seem to add my PPP interface to an Open vSwitch bridge.
A: PPP most commonly carries IP packets, but Open vSwitch works only with Ethernet frames. Thecorrect way to interface PPP to an Ethernet network is usually to use routing instead of switching.
Q: Is there any documentation on the database tables and fields?
A: Yes. ovs-vswitchd.conf.db(5) is a comprehensive reference.
Q: When I run ovs-dpctl I no longer see the bridges I created. Instead, I only see a datapath called “ovs-system”. Howcan I see datapath information about a particular bridge?
A: In version 1.9.0, OVS switched to using a single datapath that is shared by all bridges of that type. Theovs-appctl dpif/* commands provide similar functionality that is scoped by the bridge.
7.5. Common Configuration Issues 231
Open vSwitch, Release 2.8.0
Q: I created a GRE port using ovs-vsctl so why can’t I send traffic or see the port in the datapath?
A: On Linux kernels before 3.11, the OVS GRE module and Linux GRE module cannot be loaded at thesame time. It is likely that on your system the Linux GRE module is already loaded and blocking OVS(to confirm, check dmesg for errors regarding GRE registration). To fix this, unload all GRE modulesthat appear in lsmod as well as the OVS kernel module. You can then reload the OVS module followingthe directions in Open vSwitch on Linux, FreeBSD and NetBSD , which will ensure that dependencies aresatisfied.
Q: Open vSwitch does not seem to obey my packet filter rules.
A: It depends on mechanisms and configurations you want to use.
You cannot usefully use typical packet filters, like iptables, on physical Ethernet ports that you add toan Open vSwitch bridge. This is because Open vSwitch captures packets from the interface at a layerlower below where typical packet-filter implementations install their hooks. (This actually applies to anyinterface of type “system” that you might add to an Open vSwitch bridge.)
You can usefully use typical packet filters on Open vSwitch internal ports as they are mostly ordinaryinterfaces from the point of view of packet filters.
For example, suppose you create a bridge br0 and add Ethernet port eth0 to it. Then you can usefully addiptables rules to affect the internal interface br0, but not the physical interface eth0. (br0 is also where youwould add an IP address, as discussed elsewhere in the FAQ.)
For simple filtering rules, it might be possible to achieve similar results by installing appropriate Open-Flow flows instead. The OVS conntrack feature (see the “ct” action in ovs-ofctl(8)) can implement astateful firewall.
If the use of a particular packet filter setup is essential, Open vSwitch might not be the best choice foryou. On Linux, you might want to consider using the Linux Bridge. (This is the only choice if you wantto use ebtables rules.) On NetBSD, you might want to consider using the bridge(4) with BRIDGE_IPFoption.
Q: It seems that Open vSwitch does nothing when I removed a port and then immediately put it back. For example,consider that p1 is a port of type=internal:
$ ovs-vsctl del-port br0 p1 -- \add-port br0 p1 -- \set interface p1 type=internal
Any other type of port gets the same effect.
A: It’s an expected behaviour.
If del-port and add-port happen in a single OVSDB transaction as your example, Open vSwitch always“skips” the intermediate steps. Even if they are done in multiple transactions, it’s still allowed for OpenvSwitch to skip the intermediate steps and just implement the overall effect. In both cases, your examplewould be turned into a no-op.
If you want to make Open vSwitch actually destroy and then re-create the port for some side effectslike resetting kernel setting for the corresponding interface, you need to separate operations into multipleOVSDB transactions and ensure that at least the first one does not have --no-wait. In the followingexample, the first ovs-vsctl will block until Open vSwitch reloads the new configuration and removes theport:
$ ovs-vsctl del-port br0 p1$ ovs-vsctl add-port br0 p1 -- \
set interface p1 type=internal
232 Chapter 7. Open vSwitch FAQ

Open vSwitch, Release 2.8.0
Q: I want to add thousands of ports to an Open vSwitch bridge, but it takes too long (minutes or hours) to do it withovs-vsctl. How can I do it faster?
A: If you add them one at a time with ovs-vsctl, it can take a long time to add thousands of ports to anOpen vSwitch bridge. This is because every invocation of ovs-vsctl first reads the current configurationfrom OVSDB. As the number of ports grows, this starts to take an appreciable amount of time, and whenit is repeated thousands of times the total time becomes significant.
The solution is to add the ports in one invocation of ovs-vsctl (or a small number of them). For example,using bash:
$ ovs-vsctl add-br br0$ cmds=; for i in {1..5000}; do cmds+=" -- add-port br0 p$i"; done$ ovs-vsctl $cmds
takes seconds, not minutes or hours, in the OVS sandbox environment.
Q: I created a bridge named br0. My bridge shows up in “ovs-vsctl show”, but “ovs-ofctl show br0” just prints “br0 isnot a bridge or a socket”.
A: Open vSwitch wasn’t able to create the bridge. Check the ovs-vswitchd log for details (Debian andRed Hat packaging for Open vSwitch put it in /var/log/openvswitch/ovs-vswitchd.log).
In general, the Open vSwitch database reflects the desired configuration state. ovs-vswitchd monitors thedatabase and, when it changes, reconfigures the system to reflect the new desired state. This normallyhappens very quickly. Thus, a discrepancy between the database and the actual state indicates that ovs-vswitchd could not implement the configuration, and so one should check the log to find out why. (Anotherpossible cause is that ovs-vswitchd is not running. This will make ovs-vsctl commands hang, if theychange the configuration, unless one specifies --no-wait.)
Q: I have a bridge br0. I added a new port vif1.0, and it shows up in “ovs-vsctl show”, but “ovs-vsctl list port” saysthat it has OpenFlow port (“ofport”) -1, and “ovs-ofctl show br0” doesn’t show vif1.0 at all.
A: Open vSwitch wasn’t able to create the port. Check the ovs-vswitchd log for details (Debian and RedHat packaging for Open vSwitch put it in /var/log/openvswitch/ovs-vswitchd.log). Please see the previousquestion for more information.
You may want to upgrade to Open vSwitch 2.3 (or later), in which ovs-vsctl will immediately report whenthere is an issue creating a port.
Q: I created a tap device tap0, configured an IP address on it, and added it to a bridge, like this:
$ tunctl -t tap0$ ip addr add 192.168.0.123/24 dev tap0$ ip link set tap0 up$ ovs-vsctl add-br br0$ ovs-vsctl add-port br0 tap0
I expected that I could then use this IP address to contact other hosts on the network, but it doesn’t work. Why not?
A: The short answer is that this is a misuse of a “tap” device. Use an “internal” device implemented byOpen vSwitch, which works differently and is designed for this use. To solve this problem with an internaldevice, instead run:
$ ovs-vsctl add-br br0$ ovs-vsctl add-port br0 int0 -- set Interface int0 type=internal$ ip addr add 192.168.0.123/24 dev int0$ ip link set int0 up
Even more simply, you can take advantage of the internal port that every bridge has under the name of thebridge:
7.5. Common Configuration Issues 233
Open vSwitch, Release 2.8.0
$ ovs-vsctl add-br br0$ ip addr add 192.168.0.123/24 dev br0$ ip link set br0 up
In more detail, a “tap” device is an interface between the Linux (or BSD) network stack and a user programthat opens it as a socket. When the “tap” device transmits a packet, it appears in the socket opened bythe userspace program. Conversely, when the userspace program writes to the “tap” socket, the kernelTCP/IP stack processes the packet as if it had been received by the “tap” device.
Consider the configuration above. Given this configuration, if you “ping” an IP address in the 192.168.0.xsubnet, the Linux kernel routing stack will transmit an ARP on the tap0 device. Open vSwitch userspacetreats “tap” devices just like any other network device; that is, it doesn’t open them as “tap” sockets. Thatmeans that the ARP packet will simply get dropped.
You might wonder why the Open vSwitch kernel module doesn’t intercept the ARP packet and bridgeit. After all, Open vSwitch intercepts packets on other devices. The answer is that Open vSwitch onlyintercepts received packets, but this is a packet being transmitted. The same thing happens for all othertypes of network devices, except for Open vSwitch “internal” ports. If you, for example, add a physicalEthernet port to an OVS bridge, configure an IP address on a physical Ethernet port, and then issue a“ping” to an address in that subnet, the same thing happens: an ARP gets transmitted on the physicalEthernet port and Open vSwitch never sees it. (You should not do that, as documented at the beginning ofthis section.)
It can make sense to add a “tap” device to an Open vSwitch bridge, if some userspace program (other thanOpen vSwitch) has opened the tap socket. This is the case, for example, if the “tap” device was createdby KVM (or QEMU) to simulate a virtual NIC. In such a case, when OVS bridges a packet to the “tap”device, the kernel forwards that packet to KVM in userspace, which passes it along to the VM, and in theother direction, when the VM sends a packet, KVM writes it to the “tap” socket, which causes OVS toreceive it and bridge it to the other OVS ports. Please note that in such a case no IP address is configuredon the “tap” device (there is normally an IP address configured in the virtual NIC inside the VM, but thisis not visible to the host Linux kernel or to Open vSwitch).
There is one special case in which Open vSwitch does directly read and write “tap” sockets. This is animplementation detail of the Open vSwitch userspace switch, which implements its “internal” ports asLinux (or BSD) “tap” sockets. In such a userspace switch, OVS receives packets sent on the “tap” deviceused to implement an “internal” port by reading the associated “tap” socket, and bridges them to the restof the switch. In the other direction, OVS transmits packets bridged to the “internal” port by writing themto the “tap” socket, causing them to be processed by the kernel TCP/IP stack as if they had been receivedon the “tap” device. Users should not need to be concerned with this implementation detail.
Open vSwitch has a network device type called “tap”. This is intended only for implementing “internal”ports in the OVS userspace switch and should not be used otherwise. In particular, users should notconfigure KVM “tap” devices as type “tap” (use type “system”, the default, instead).
Q: I observe packet loss at the beginning of RFC2544 tests on a server running few hundred container apps bridged toOVS with traffic generated by HW traffic generator. How can I fix this?
A: This is expected behavior on virtual switches. RFC2544 tests were designed for hardware switches,which don’t have caches on the fastpath that need to be heated. Traffic generators in order to prime theswitch use learning phase to heat the caches before sending the actual traffic in test phase. In case of OVSthe cache is flushed quickly and to accommodate the traffic generator’s delay between learning and testphase, the max-idle timeout settings should be changed to 50000 ms.:
$ ovs-vsctl --no-wait set Open_vSwitch . other_config:max-idle=50000
Q: How can I configure the bridge internal interface MTU? Why does Open vSwitch keep changing internal portsMTU?
234 Chapter 7. Open vSwitch FAQ
Open vSwitch, Release 2.8.0
A: By default Open vSwitch overrides the internal interfaces (e.g. br0) MTU. If you have just an internalinterface (e.g. br0) and a physical interface (e.g. eth0), then every change in MTU to eth0 will be reflectedto br0. Any manual MTU configuration using ip on internal interfaces is going to be overridden by OpenvSwitch to match the current bridge minimum.
Sometimes this behavior is not desirable, for example with tunnels. The MTU of an internal interface canbe explicitly set using the following command:
$ ovs-vsctl set int br0 mtu_request=1450
After this, Open vSwitch will configure br0 MTU to 1450. Since this setting is in the database it will bepersistent (compared to what happens with ip).
The MTU configuration can be removed to restore the default behavior with:
$ ovs-vsctl set int br0 mtu_request=[]
The mtu_request column can be used to configure MTU even for physical interfaces (e.g. eth0).
Q: I just upgraded and I see a performance drop. Why?
A: The OVS kernel datapath may have been updated to a newer version than the OVS userspace com-ponents. Sometimes new versions of OVS kernel module add functionality that is backwards compatiblewith older userspace components but may cause a drop in performance with them. Especially, if a kernelmodule from OVS 2.1 or newer is paired with OVS userspace 1.10 or older, there will be a performancedrop for TCP traffic.
Updating the OVS userspace components to the latest released version should fix the performance degra-dation.
To get the best possible performance and functionality, it is recommended to pair the same versions of thekernel module and OVS userspace.
7.6 Using OpenFlow
Q: What versions of OpenFlow does Open vSwitch support?
A: The following table lists the versions of OpenFlow supported by each version of Open vSwitch:
Open vSwitch OF1.0 OF1.1 OF1.2 OF1.3 OF1.4 OF1.5 OF1.61.9 and earlier yes — — — — — —1.10, 1.11 yes — (*) (*) — — —2.0, 2.1 yes (*) (*) (*) — — —2.2 yes (*) (*) (*) (%) (*) —2.3, 2.4 yes yes yes yes (*) (*) —2.5, 2.6, 2.7 yes yes yes yes (*) (*) (*)2.8 yes yes yes yes yes (*) (*)
—Not supported. yes Supported and enabled by default (*) Supported, but missing features, and must beenabled by user. (%) Experimental, unsafe implementation.
In any case, the user may override the default:
• To enable OpenFlow 1.0, 1.1, 1.2, and 1.3 on bridge br0:
$ ovs-vsctl set bridge br0 \protocols=OpenFlow10,OpenFlow11,OpenFlow12,OpenFlow13
7.6. Using OpenFlow 235
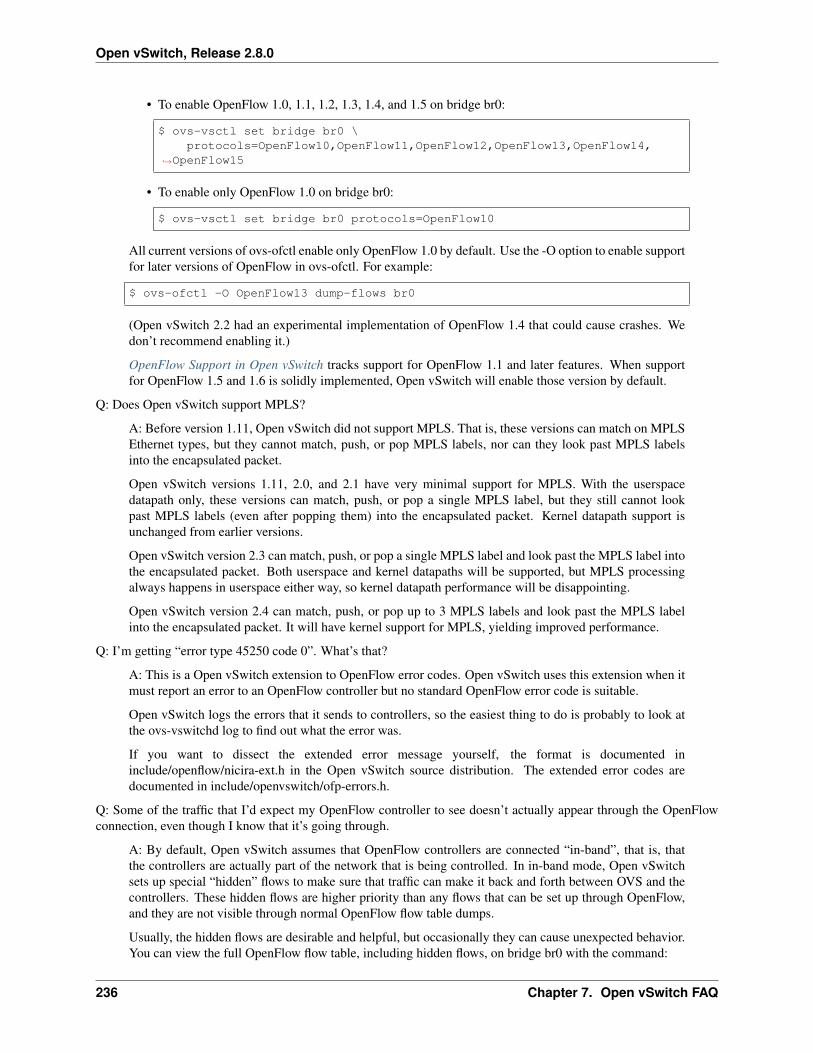
Open vSwitch, Release 2.8.0
• To enable OpenFlow 1.0, 1.1, 1.2, 1.3, 1.4, and 1.5 on bridge br0:
$ ovs-vsctl set bridge br0 \protocols=OpenFlow10,OpenFlow11,OpenFlow12,OpenFlow13,OpenFlow14,
→˓OpenFlow15
• To enable only OpenFlow 1.0 on bridge br0:
$ ovs-vsctl set bridge br0 protocols=OpenFlow10
All current versions of ovs-ofctl enable only OpenFlow 1.0 by default. Use the -O option to enable supportfor later versions of OpenFlow in ovs-ofctl. For example:
$ ovs-ofctl -O OpenFlow13 dump-flows br0
(Open vSwitch 2.2 had an experimental implementation of OpenFlow 1.4 that could cause crashes. Wedon’t recommend enabling it.)
OpenFlow Support in Open vSwitch tracks support for OpenFlow 1.1 and later features. When supportfor OpenFlow 1.5 and 1.6 is solidly implemented, Open vSwitch will enable those version by default.
Q: Does Open vSwitch support MPLS?
A: Before version 1.11, Open vSwitch did not support MPLS. That is, these versions can match on MPLSEthernet types, but they cannot match, push, or pop MPLS labels, nor can they look past MPLS labelsinto the encapsulated packet.
Open vSwitch versions 1.11, 2.0, and 2.1 have very minimal support for MPLS. With the userspacedatapath only, these versions can match, push, or pop a single MPLS label, but they still cannot lookpast MPLS labels (even after popping them) into the encapsulated packet. Kernel datapath support isunchanged from earlier versions.
Open vSwitch version 2.3 can match, push, or pop a single MPLS label and look past the MPLS label intothe encapsulated packet. Both userspace and kernel datapaths will be supported, but MPLS processingalways happens in userspace either way, so kernel datapath performance will be disappointing.
Open vSwitch version 2.4 can match, push, or pop up to 3 MPLS labels and look past the MPLS labelinto the encapsulated packet. It will have kernel support for MPLS, yielding improved performance.
Q: I’m getting “error type 45250 code 0”. What’s that?
A: This is a Open vSwitch extension to OpenFlow error codes. Open vSwitch uses this extension when itmust report an error to an OpenFlow controller but no standard OpenFlow error code is suitable.
Open vSwitch logs the errors that it sends to controllers, so the easiest thing to do is probably to look atthe ovs-vswitchd log to find out what the error was.
If you want to dissect the extended error message yourself, the format is documented ininclude/openflow/nicira-ext.h in the Open vSwitch source distribution. The extended error codes aredocumented in include/openvswitch/ofp-errors.h.
Q: Some of the traffic that I’d expect my OpenFlow controller to see doesn’t actually appear through the OpenFlowconnection, even though I know that it’s going through.
A: By default, Open vSwitch assumes that OpenFlow controllers are connected “in-band”, that is, thatthe controllers are actually part of the network that is being controlled. In in-band mode, Open vSwitchsets up special “hidden” flows to make sure that traffic can make it back and forth between OVS and thecontrollers. These hidden flows are higher priority than any flows that can be set up through OpenFlow,and they are not visible through normal OpenFlow flow table dumps.
Usually, the hidden flows are desirable and helpful, but occasionally they can cause unexpected behavior.You can view the full OpenFlow flow table, including hidden flows, on bridge br0 with the command:
236 Chapter 7. Open vSwitch FAQ
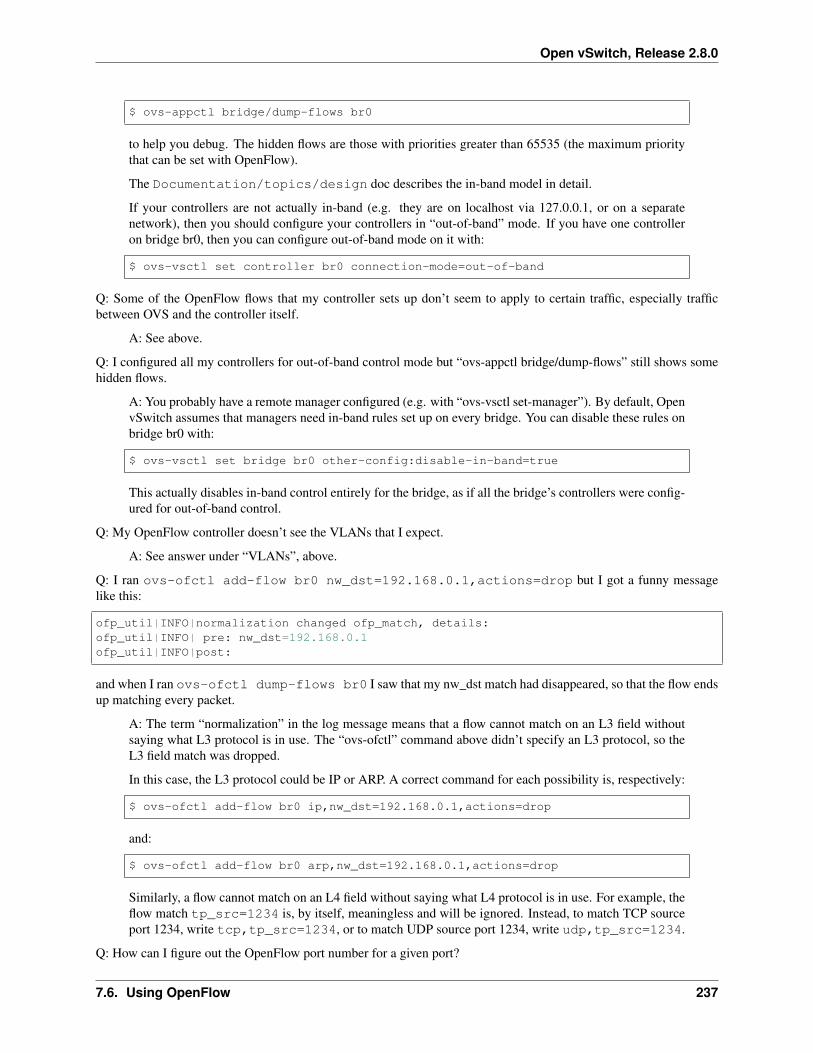
Open vSwitch, Release 2.8.0
$ ovs-appctl bridge/dump-flows br0
to help you debug. The hidden flows are those with priorities greater than 65535 (the maximum prioritythat can be set with OpenFlow).
The Documentation/topics/design doc describes the in-band model in detail.
If your controllers are not actually in-band (e.g. they are on localhost via 127.0.0.1, or on a separatenetwork), then you should configure your controllers in “out-of-band” mode. If you have one controlleron bridge br0, then you can configure out-of-band mode on it with:
$ ovs-vsctl set controller br0 connection-mode=out-of-band
Q: Some of the OpenFlow flows that my controller sets up don’t seem to apply to certain traffic, especially trafficbetween OVS and the controller itself.
A: See above.
Q: I configured all my controllers for out-of-band control mode but “ovs-appctl bridge/dump-flows” still shows somehidden flows.
A: You probably have a remote manager configured (e.g. with “ovs-vsctl set-manager”). By default, OpenvSwitch assumes that managers need in-band rules set up on every bridge. You can disable these rules onbridge br0 with:
$ ovs-vsctl set bridge br0 other-config:disable-in-band=true
This actually disables in-band control entirely for the bridge, as if all the bridge’s controllers were config-ured for out-of-band control.
Q: My OpenFlow controller doesn’t see the VLANs that I expect.
A: See answer under “VLANs”, above.
Q: I ran ovs-ofctl add-flow br0 nw_dst=192.168.0.1,actions=drop but I got a funny messagelike this:
ofp_util|INFO|normalization changed ofp_match, details:ofp_util|INFO| pre: nw_dst=192.168.0.1ofp_util|INFO|post:
and when I ran ovs-ofctl dump-flows br0 I saw that my nw_dst match had disappeared, so that the flow endsup matching every packet.
A: The term “normalization” in the log message means that a flow cannot match on an L3 field withoutsaying what L3 protocol is in use. The “ovs-ofctl” command above didn’t specify an L3 protocol, so theL3 field match was dropped.
In this case, the L3 protocol could be IP or ARP. A correct command for each possibility is, respectively:
$ ovs-ofctl add-flow br0 ip,nw_dst=192.168.0.1,actions=drop
and:
$ ovs-ofctl add-flow br0 arp,nw_dst=192.168.0.1,actions=drop
Similarly, a flow cannot match on an L4 field without saying what L4 protocol is in use. For example, theflow match tp_src=1234 is, by itself, meaningless and will be ignored. Instead, to match TCP sourceport 1234, write tcp,tp_src=1234, or to match UDP source port 1234, write udp,tp_src=1234.
Q: How can I figure out the OpenFlow port number for a given port?
7.6. Using OpenFlow 237
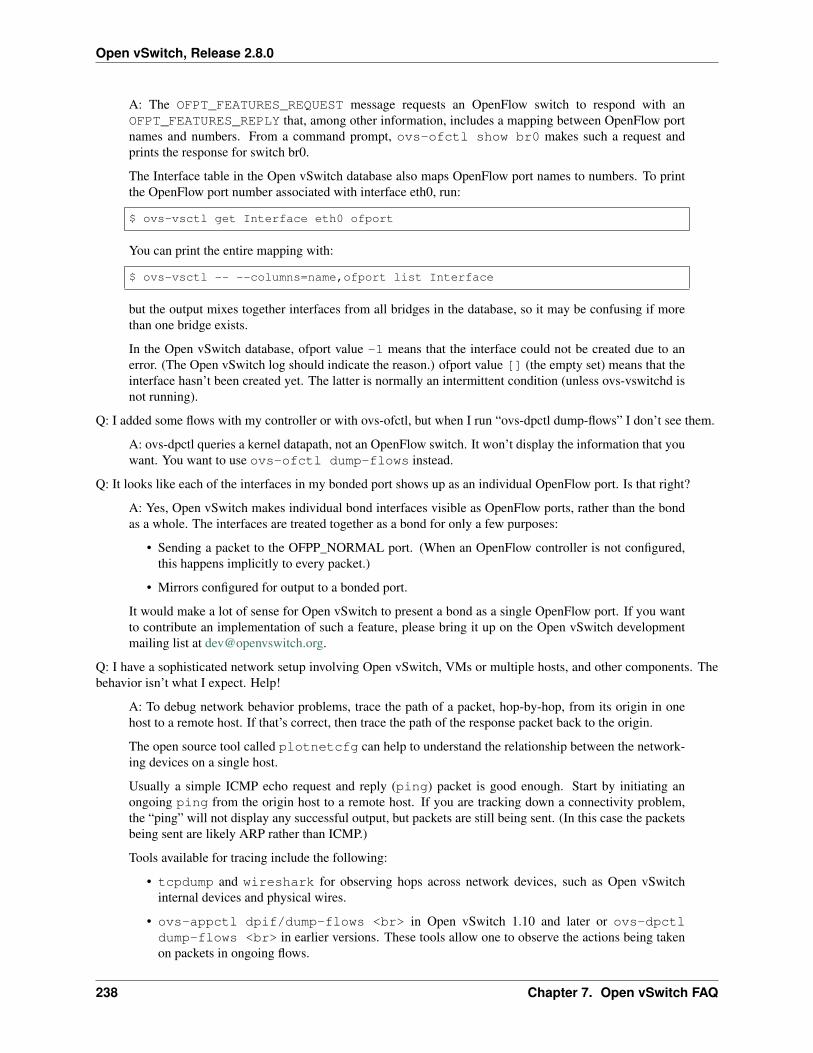
Open vSwitch, Release 2.8.0
A: The OFPT_FEATURES_REQUEST message requests an OpenFlow switch to respond with anOFPT_FEATURES_REPLY that, among other information, includes a mapping between OpenFlow portnames and numbers. From a command prompt, ovs-ofctl show br0 makes such a request andprints the response for switch br0.
The Interface table in the Open vSwitch database also maps OpenFlow port names to numbers. To printthe OpenFlow port number associated with interface eth0, run:
$ ovs-vsctl get Interface eth0 ofport
You can print the entire mapping with:
$ ovs-vsctl -- --columns=name,ofport list Interface
but the output mixes together interfaces from all bridges in the database, so it may be confusing if morethan one bridge exists.
In the Open vSwitch database, ofport value -1 means that the interface could not be created due to anerror. (The Open vSwitch log should indicate the reason.) ofport value [] (the empty set) means that theinterface hasn’t been created yet. The latter is normally an intermittent condition (unless ovs-vswitchd isnot running).
Q: I added some flows with my controller or with ovs-ofctl, but when I run “ovs-dpctl dump-flows” I don’t see them.
A: ovs-dpctl queries a kernel datapath, not an OpenFlow switch. It won’t display the information that youwant. You want to use ovs-ofctl dump-flows instead.
Q: It looks like each of the interfaces in my bonded port shows up as an individual OpenFlow port. Is that right?
A: Yes, Open vSwitch makes individual bond interfaces visible as OpenFlow ports, rather than the bondas a whole. The interfaces are treated together as a bond for only a few purposes:
• Sending a packet to the OFPP_NORMAL port. (When an OpenFlow controller is not configured,this happens implicitly to every packet.)
• Mirrors configured for output to a bonded port.
It would make a lot of sense for Open vSwitch to present a bond as a single OpenFlow port. If you wantto contribute an implementation of such a feature, please bring it up on the Open vSwitch developmentmailing list at [email protected].
Q: I have a sophisticated network setup involving Open vSwitch, VMs or multiple hosts, and other components. Thebehavior isn’t what I expect. Help!
A: To debug network behavior problems, trace the path of a packet, hop-by-hop, from its origin in onehost to a remote host. If that’s correct, then trace the path of the response packet back to the origin.
The open source tool called plotnetcfg can help to understand the relationship between the network-ing devices on a single host.
Usually a simple ICMP echo request and reply (ping) packet is good enough. Start by initiating anongoing ping from the origin host to a remote host. If you are tracking down a connectivity problem,the “ping” will not display any successful output, but packets are still being sent. (In this case the packetsbeing sent are likely ARP rather than ICMP.)
Tools available for tracing include the following:
• tcpdump and wireshark for observing hops across network devices, such as Open vSwitchinternal devices and physical wires.
• ovs-appctl dpif/dump-flows <br> in Open vSwitch 1.10 and later or ovs-dpctldump-flows <br> in earlier versions. These tools allow one to observe the actions being takenon packets in ongoing flows.
238 Chapter 7. Open vSwitch FAQ

Open vSwitch, Release 2.8.0
See ovs-vswitchd(8) for ovs-appctl dpif/dump-flows documentation, ovs-dpctl(8) forovs-dpctl dump-flows documentation, and “Why are there so many different ways to dumpflows?” above for some background.
• ovs-appctl ofproto/trace to observe the logic behind how ovs-vswitchd treats pack-ets. See ovs-vswitchd(8) for documentation. You can out more details about a given flow thatovs-dpctl dump-flows displays, by cutting and pasting a flow from the output into anovs-appctl ofproto/trace command.
• SPAN, RSPAN, and ERSPAN features of physical switches, to observe what goes on at these phys-ical hops.
Starting at the origin of a given packet, observe the packet at each hop in turn. For example, in oneplausible scenario, you might:
1. tcpdump the eth interface through which an ARP egresses a VM, from inside the VM.
2. tcpdump the vif or tap interface through which the ARP ingresses the host machine.
3. Use ovs-dpctl dump-flows to spot the ARP flow and observe the host interface throughwhich the ARP egresses the physical machine. You may need to use ovs-dpctl show to interpretthe port numbers. If the output seems surprising, you can use ovs-appctl ofproto/traceto observe details of how ovs-vswitchd determined the actions in the ovs-dpctl dump-flowsoutput.
4. tcpdump the eth interface through which the ARP egresses the physical machine.
5. tcpdump the eth interface through which the ARP ingresses the physical machine, at the remotehost that receives the ARP.
6. Use ovs-dpctl dump-flows to spot the ARP flow on the remote host remote host that re-ceives the ARP and observe the VM vif or tap interface to which the flow is directed. Again,ovs-dpctl show and ovs-appctl ofproto/trace might help.
7. tcpdump the vif or tap interface to which the ARP is directed.
8. tcpdump the eth interface through which the ARP ingresses a VM, from inside the VM.
It is likely that during one of these steps you will figure out the problem. If not, then follow the ARP replyback to the origin, in reverse.
Q: How do I make a flow drop packets?
A: To drop a packet is to receive it without forwarding it. OpenFlow explicitly specifies forwardingactions. Thus, a flow with an empty set of actions does not forward packets anywhere, causing them to bedropped. You can specify an empty set of actions with actions= on the ovs-ofctl command line. Forexample:
$ ovs-ofctl add-flow br0 priority=65535,actions=
would cause every packet entering switch br0 to be dropped.
You can write “drop” explicitly if you like. The effect is the same. Thus, the following command alsocauses every packet entering switch br0 to be dropped:
$ ovs-ofctl add-flow br0 priority=65535,actions=drop
drop is not an action, either in OpenFlow or Open vSwitch. Rather, it is only a way to say that there areno actions.
Q: I added a flow to send packets out the ingress port, like this:
7.6. Using OpenFlow 239
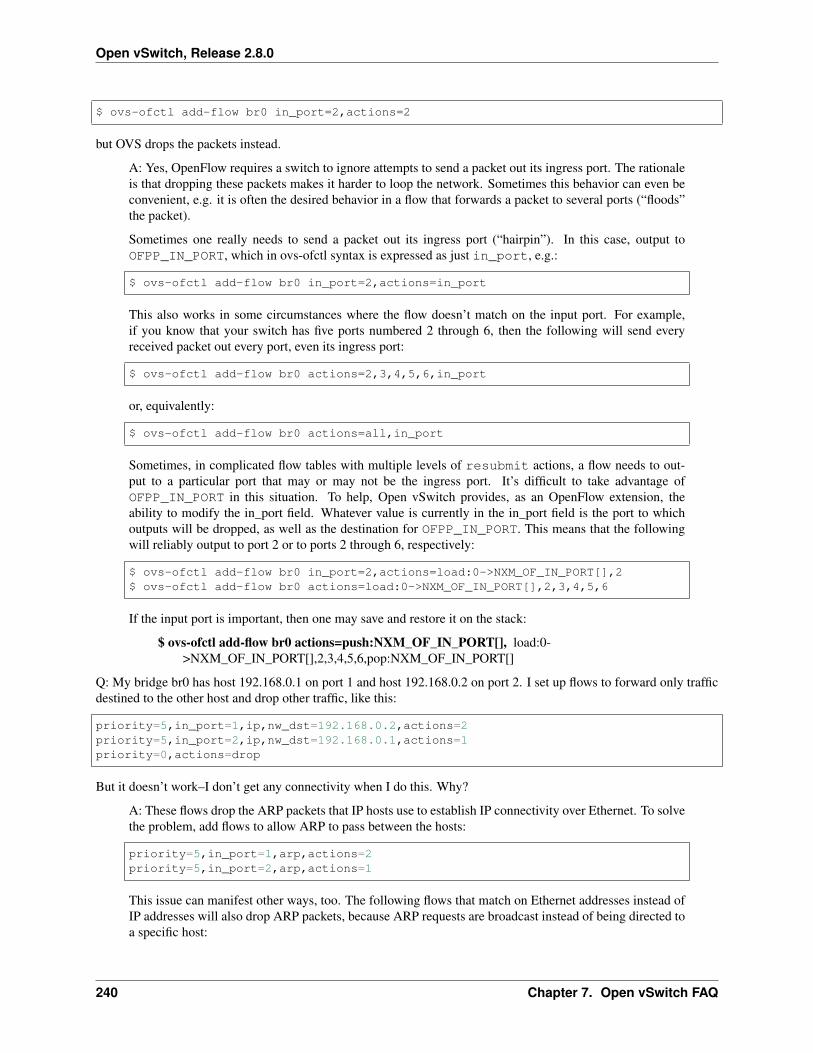
Open vSwitch, Release 2.8.0
$ ovs-ofctl add-flow br0 in_port=2,actions=2
but OVS drops the packets instead.
A: Yes, OpenFlow requires a switch to ignore attempts to send a packet out its ingress port. The rationaleis that dropping these packets makes it harder to loop the network. Sometimes this behavior can even beconvenient, e.g. it is often the desired behavior in a flow that forwards a packet to several ports (“floods”the packet).
Sometimes one really needs to send a packet out its ingress port (“hairpin”). In this case, output toOFPP_IN_PORT, which in ovs-ofctl syntax is expressed as just in_port, e.g.:
$ ovs-ofctl add-flow br0 in_port=2,actions=in_port
This also works in some circumstances where the flow doesn’t match on the input port. For example,if you know that your switch has five ports numbered 2 through 6, then the following will send everyreceived packet out every port, even its ingress port:
$ ovs-ofctl add-flow br0 actions=2,3,4,5,6,in_port
or, equivalently:
$ ovs-ofctl add-flow br0 actions=all,in_port
Sometimes, in complicated flow tables with multiple levels of resubmit actions, a flow needs to out-put to a particular port that may or may not be the ingress port. It’s difficult to take advantage ofOFPP_IN_PORT in this situation. To help, Open vSwitch provides, as an OpenFlow extension, theability to modify the in_port field. Whatever value is currently in the in_port field is the port to whichoutputs will be dropped, as well as the destination for OFPP_IN_PORT. This means that the followingwill reliably output to port 2 or to ports 2 through 6, respectively:
$ ovs-ofctl add-flow br0 in_port=2,actions=load:0->NXM_OF_IN_PORT[],2$ ovs-ofctl add-flow br0 actions=load:0->NXM_OF_IN_PORT[],2,3,4,5,6
If the input port is important, then one may save and restore it on the stack:
$ ovs-ofctl add-flow br0 actions=push:NXM_OF_IN_PORT[], load:0->NXM_OF_IN_PORT[],2,3,4,5,6,pop:NXM_OF_IN_PORT[]
Q: My bridge br0 has host 192.168.0.1 on port 1 and host 192.168.0.2 on port 2. I set up flows to forward only trafficdestined to the other host and drop other traffic, like this:
priority=5,in_port=1,ip,nw_dst=192.168.0.2,actions=2priority=5,in_port=2,ip,nw_dst=192.168.0.1,actions=1priority=0,actions=drop
But it doesn’t work–I don’t get any connectivity when I do this. Why?
A: These flows drop the ARP packets that IP hosts use to establish IP connectivity over Ethernet. To solvethe problem, add flows to allow ARP to pass between the hosts:
priority=5,in_port=1,arp,actions=2priority=5,in_port=2,arp,actions=1
This issue can manifest other ways, too. The following flows that match on Ethernet addresses instead ofIP addresses will also drop ARP packets, because ARP requests are broadcast instead of being directed toa specific host:
240 Chapter 7. Open vSwitch FAQ
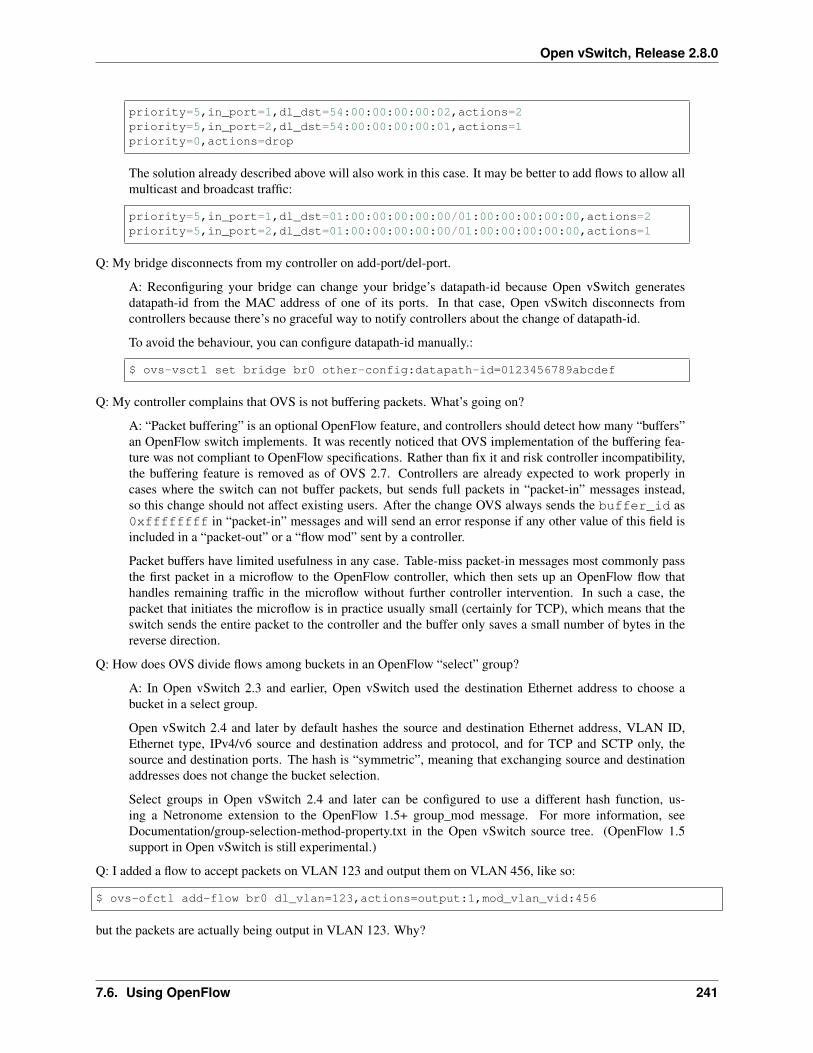
Open vSwitch, Release 2.8.0
priority=5,in_port=1,dl_dst=54:00:00:00:00:02,actions=2priority=5,in_port=2,dl_dst=54:00:00:00:00:01,actions=1priority=0,actions=drop
The solution already described above will also work in this case. It may be better to add flows to allow allmulticast and broadcast traffic:
priority=5,in_port=1,dl_dst=01:00:00:00:00:00/01:00:00:00:00:00,actions=2priority=5,in_port=2,dl_dst=01:00:00:00:00:00/01:00:00:00:00:00,actions=1
Q: My bridge disconnects from my controller on add-port/del-port.
A: Reconfiguring your bridge can change your bridge’s datapath-id because Open vSwitch generatesdatapath-id from the MAC address of one of its ports. In that case, Open vSwitch disconnects fromcontrollers because there’s no graceful way to notify controllers about the change of datapath-id.
To avoid the behaviour, you can configure datapath-id manually.:
$ ovs-vsctl set bridge br0 other-config:datapath-id=0123456789abcdef
Q: My controller complains that OVS is not buffering packets. What’s going on?
A: “Packet buffering” is an optional OpenFlow feature, and controllers should detect how many “buffers”an OpenFlow switch implements. It was recently noticed that OVS implementation of the buffering fea-ture was not compliant to OpenFlow specifications. Rather than fix it and risk controller incompatibility,the buffering feature is removed as of OVS 2.7. Controllers are already expected to work properly incases where the switch can not buffer packets, but sends full packets in “packet-in” messages instead,so this change should not affect existing users. After the change OVS always sends the buffer_id as0xffffffff in “packet-in” messages and will send an error response if any other value of this field isincluded in a “packet-out” or a “flow mod” sent by a controller.
Packet buffers have limited usefulness in any case. Table-miss packet-in messages most commonly passthe first packet in a microflow to the OpenFlow controller, which then sets up an OpenFlow flow thathandles remaining traffic in the microflow without further controller intervention. In such a case, thepacket that initiates the microflow is in practice usually small (certainly for TCP), which means that theswitch sends the entire packet to the controller and the buffer only saves a small number of bytes in thereverse direction.
Q: How does OVS divide flows among buckets in an OpenFlow “select” group?
A: In Open vSwitch 2.3 and earlier, Open vSwitch used the destination Ethernet address to choose abucket in a select group.
Open vSwitch 2.4 and later by default hashes the source and destination Ethernet address, VLAN ID,Ethernet type, IPv4/v6 source and destination address and protocol, and for TCP and SCTP only, thesource and destination ports. The hash is “symmetric”, meaning that exchanging source and destinationaddresses does not change the bucket selection.
Select groups in Open vSwitch 2.4 and later can be configured to use a different hash function, us-ing a Netronome extension to the OpenFlow 1.5+ group_mod message. For more information, seeDocumentation/group-selection-method-property.txt in the Open vSwitch source tree. (OpenFlow 1.5support in Open vSwitch is still experimental.)
Q: I added a flow to accept packets on VLAN 123 and output them on VLAN 456, like so:
$ ovs-ofctl add-flow br0 dl_vlan=123,actions=output:1,mod_vlan_vid:456
but the packets are actually being output in VLAN 123. Why?
7.6. Using OpenFlow 241
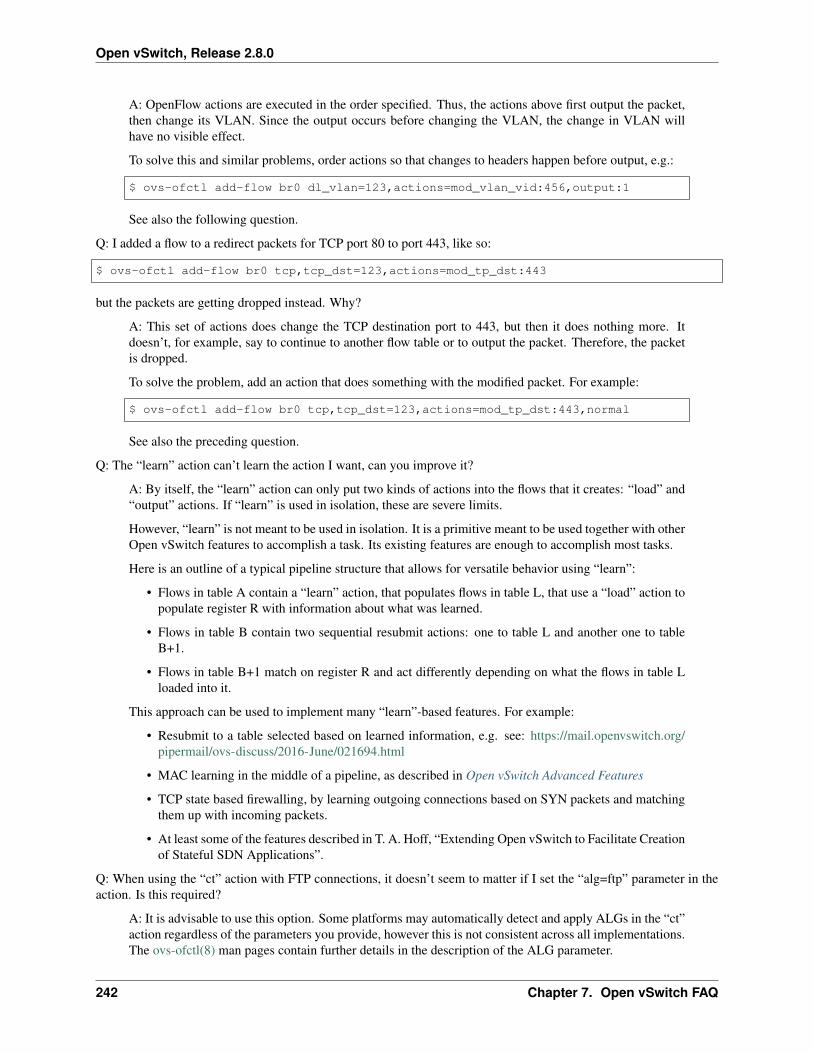
Open vSwitch, Release 2.8.0
A: OpenFlow actions are executed in the order specified. Thus, the actions above first output the packet,then change its VLAN. Since the output occurs before changing the VLAN, the change in VLAN willhave no visible effect.
To solve this and similar problems, order actions so that changes to headers happen before output, e.g.:
$ ovs-ofctl add-flow br0 dl_vlan=123,actions=mod_vlan_vid:456,output:1
See also the following question.
Q: I added a flow to a redirect packets for TCP port 80 to port 443, like so:
$ ovs-ofctl add-flow br0 tcp,tcp_dst=123,actions=mod_tp_dst:443
but the packets are getting dropped instead. Why?
A: This set of actions does change the TCP destination port to 443, but then it does nothing more. Itdoesn’t, for example, say to continue to another flow table or to output the packet. Therefore, the packetis dropped.
To solve the problem, add an action that does something with the modified packet. For example:
$ ovs-ofctl add-flow br0 tcp,tcp_dst=123,actions=mod_tp_dst:443,normal
See also the preceding question.
Q: The “learn” action can’t learn the action I want, can you improve it?
A: By itself, the “learn” action can only put two kinds of actions into the flows that it creates: “load” and“output” actions. If “learn” is used in isolation, these are severe limits.
However, “learn” is not meant to be used in isolation. It is a primitive meant to be used together with otherOpen vSwitch features to accomplish a task. Its existing features are enough to accomplish most tasks.
Here is an outline of a typical pipeline structure that allows for versatile behavior using “learn”:
• Flows in table A contain a “learn” action, that populates flows in table L, that use a “load” action topopulate register R with information about what was learned.
• Flows in table B contain two sequential resubmit actions: one to table L and another one to tableB+1.
• Flows in table B+1 match on register R and act differently depending on what the flows in table Lloaded into it.
This approach can be used to implement many “learn”-based features. For example:
• Resubmit to a table selected based on learned information, e.g. see: https://mail.openvswitch.org/pipermail/ovs-discuss/2016-June/021694.html
• MAC learning in the middle of a pipeline, as described in Open vSwitch Advanced Features
• TCP state based firewalling, by learning outgoing connections based on SYN packets and matchingthem up with incoming packets.
• At least some of the features described in T. A. Hoff, “Extending Open vSwitch to Facilitate Creationof Stateful SDN Applications”.
Q: When using the “ct” action with FTP connections, it doesn’t seem to matter if I set the “alg=ftp” parameter in theaction. Is this required?
A: It is advisable to use this option. Some platforms may automatically detect and apply ALGs in the “ct”action regardless of the parameters you provide, however this is not consistent across all implementations.The ovs-ofctl(8) man pages contain further details in the description of the ALG parameter.
242 Chapter 7. Open vSwitch FAQ
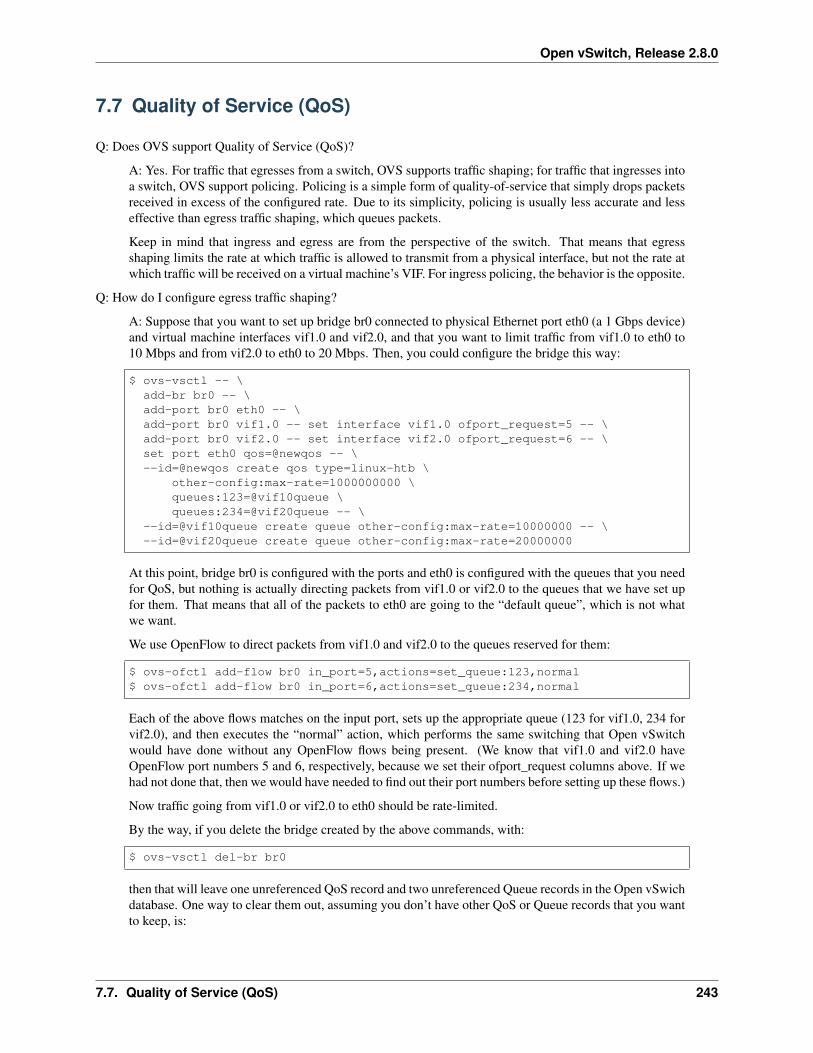
Open vSwitch, Release 2.8.0
7.7 Quality of Service (QoS)
Q: Does OVS support Quality of Service (QoS)?
A: Yes. For traffic that egresses from a switch, OVS supports traffic shaping; for traffic that ingresses intoa switch, OVS support policing. Policing is a simple form of quality-of-service that simply drops packetsreceived in excess of the configured rate. Due to its simplicity, policing is usually less accurate and lesseffective than egress traffic shaping, which queues packets.
Keep in mind that ingress and egress are from the perspective of the switch. That means that egressshaping limits the rate at which traffic is allowed to transmit from a physical interface, but not the rate atwhich traffic will be received on a virtual machine’s VIF. For ingress policing, the behavior is the opposite.
Q: How do I configure egress traffic shaping?
A: Suppose that you want to set up bridge br0 connected to physical Ethernet port eth0 (a 1 Gbps device)and virtual machine interfaces vif1.0 and vif2.0, and that you want to limit traffic from vif1.0 to eth0 to10 Mbps and from vif2.0 to eth0 to 20 Mbps. Then, you could configure the bridge this way:
$ ovs-vsctl -- \add-br br0 -- \add-port br0 eth0 -- \add-port br0 vif1.0 -- set interface vif1.0 ofport_request=5 -- \add-port br0 vif2.0 -- set interface vif2.0 ofport_request=6 -- \set port eth0 qos=@newqos -- \--id=@newqos create qos type=linux-htb \
other-config:max-rate=1000000000 \queues:123=@vif10queue \queues:234=@vif20queue -- \
--id=@vif10queue create queue other-config:max-rate=10000000 -- \--id=@vif20queue create queue other-config:max-rate=20000000
At this point, bridge br0 is configured with the ports and eth0 is configured with the queues that you needfor QoS, but nothing is actually directing packets from vif1.0 or vif2.0 to the queues that we have set upfor them. That means that all of the packets to eth0 are going to the “default queue”, which is not whatwe want.
We use OpenFlow to direct packets from vif1.0 and vif2.0 to the queues reserved for them:
$ ovs-ofctl add-flow br0 in_port=5,actions=set_queue:123,normal$ ovs-ofctl add-flow br0 in_port=6,actions=set_queue:234,normal
Each of the above flows matches on the input port, sets up the appropriate queue (123 for vif1.0, 234 forvif2.0), and then executes the “normal” action, which performs the same switching that Open vSwitchwould have done without any OpenFlow flows being present. (We know that vif1.0 and vif2.0 haveOpenFlow port numbers 5 and 6, respectively, because we set their ofport_request columns above. If wehad not done that, then we would have needed to find out their port numbers before setting up these flows.)
Now traffic going from vif1.0 or vif2.0 to eth0 should be rate-limited.
By the way, if you delete the bridge created by the above commands, with:
$ ovs-vsctl del-br br0
then that will leave one unreferenced QoS record and two unreferenced Queue records in the Open vSwichdatabase. One way to clear them out, assuming you don’t have other QoS or Queue records that you wantto keep, is:
7.7. Quality of Service (QoS) 243
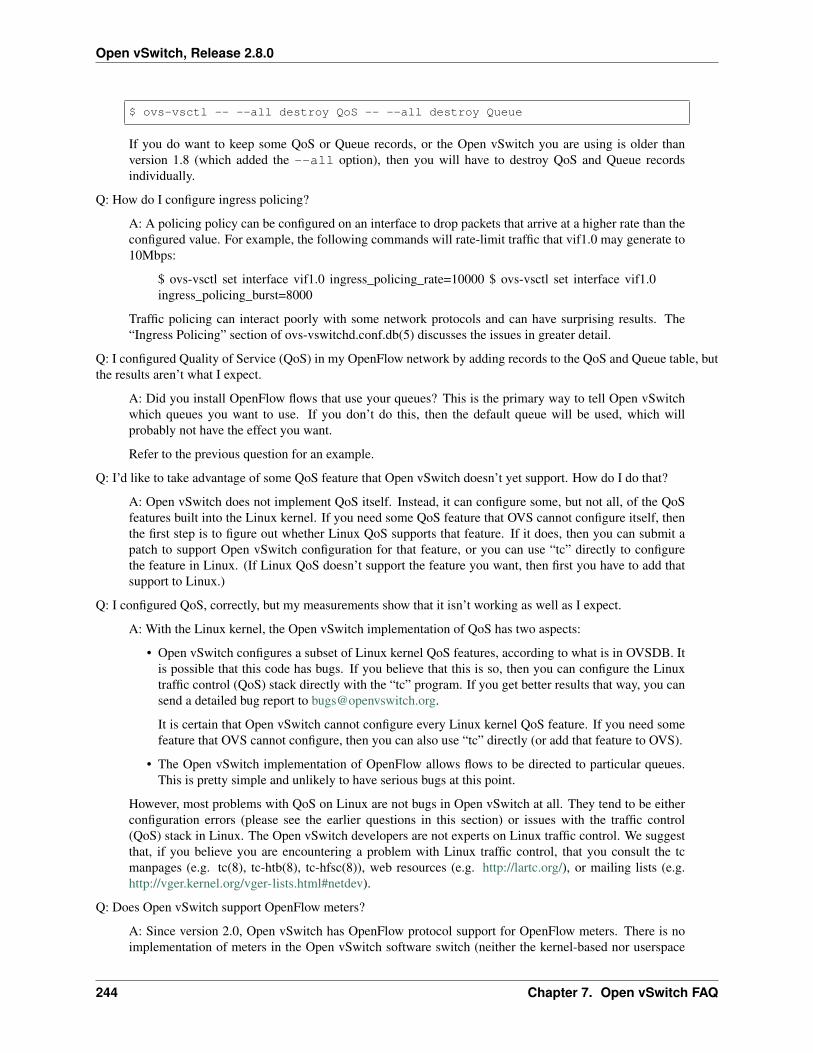
Open vSwitch, Release 2.8.0
$ ovs-vsctl -- --all destroy QoS -- --all destroy Queue
If you do want to keep some QoS or Queue records, or the Open vSwitch you are using is older thanversion 1.8 (which added the --all option), then you will have to destroy QoS and Queue recordsindividually.
Q: How do I configure ingress policing?
A: A policing policy can be configured on an interface to drop packets that arrive at a higher rate than theconfigured value. For example, the following commands will rate-limit traffic that vif1.0 may generate to10Mbps:
$ ovs-vsctl set interface vif1.0 ingress_policing_rate=10000 $ ovs-vsctl set interface vif1.0ingress_policing_burst=8000
Traffic policing can interact poorly with some network protocols and can have surprising results. The“Ingress Policing” section of ovs-vswitchd.conf.db(5) discusses the issues in greater detail.
Q: I configured Quality of Service (QoS) in my OpenFlow network by adding records to the QoS and Queue table, butthe results aren’t what I expect.
A: Did you install OpenFlow flows that use your queues? This is the primary way to tell Open vSwitchwhich queues you want to use. If you don’t do this, then the default queue will be used, which willprobably not have the effect you want.
Refer to the previous question for an example.
Q: I’d like to take advantage of some QoS feature that Open vSwitch doesn’t yet support. How do I do that?
A: Open vSwitch does not implement QoS itself. Instead, it can configure some, but not all, of the QoSfeatures built into the Linux kernel. If you need some QoS feature that OVS cannot configure itself, thenthe first step is to figure out whether Linux QoS supports that feature. If it does, then you can submit apatch to support Open vSwitch configuration for that feature, or you can use “tc” directly to configurethe feature in Linux. (If Linux QoS doesn’t support the feature you want, then first you have to add thatsupport to Linux.)
Q: I configured QoS, correctly, but my measurements show that it isn’t working as well as I expect.
A: With the Linux kernel, the Open vSwitch implementation of QoS has two aspects:
• Open vSwitch configures a subset of Linux kernel QoS features, according to what is in OVSDB. Itis possible that this code has bugs. If you believe that this is so, then you can configure the Linuxtraffic control (QoS) stack directly with the “tc” program. If you get better results that way, you cansend a detailed bug report to [email protected].
It is certain that Open vSwitch cannot configure every Linux kernel QoS feature. If you need somefeature that OVS cannot configure, then you can also use “tc” directly (or add that feature to OVS).
• The Open vSwitch implementation of OpenFlow allows flows to be directed to particular queues.This is pretty simple and unlikely to have serious bugs at this point.
However, most problems with QoS on Linux are not bugs in Open vSwitch at all. They tend to be eitherconfiguration errors (please see the earlier questions in this section) or issues with the traffic control(QoS) stack in Linux. The Open vSwitch developers are not experts on Linux traffic control. We suggestthat, if you believe you are encountering a problem with Linux traffic control, that you consult the tcmanpages (e.g. tc(8), tc-htb(8), tc-hfsc(8)), web resources (e.g. http://lartc.org/), or mailing lists (e.g.http://vger.kernel.org/vger-lists.html#netdev).
Q: Does Open vSwitch support OpenFlow meters?
A: Since version 2.0, Open vSwitch has OpenFlow protocol support for OpenFlow meters. There is noimplementation of meters in the Open vSwitch software switch (neither the kernel-based nor userspace
244 Chapter 7. Open vSwitch FAQ
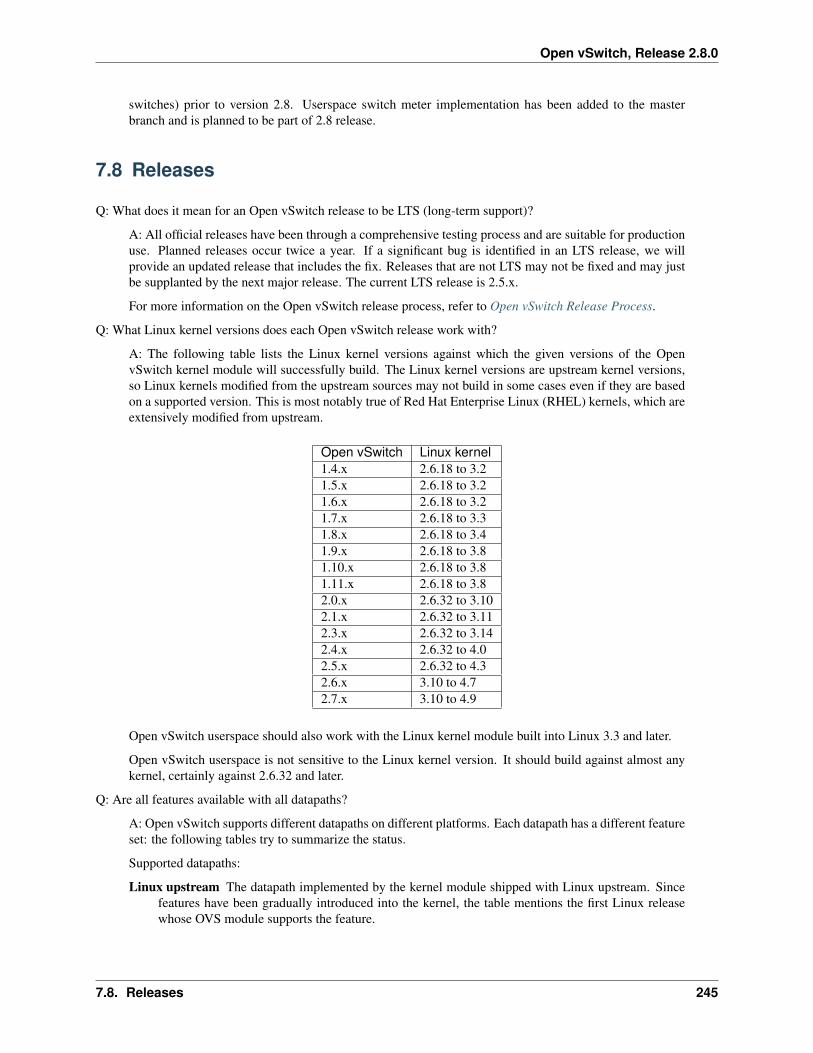
Open vSwitch, Release 2.8.0
switches) prior to version 2.8. Userspace switch meter implementation has been added to the masterbranch and is planned to be part of 2.8 release.
7.8 Releases
Q: What does it mean for an Open vSwitch release to be LTS (long-term support)?
A: All official releases have been through a comprehensive testing process and are suitable for productionuse. Planned releases occur twice a year. If a significant bug is identified in an LTS release, we willprovide an updated release that includes the fix. Releases that are not LTS may not be fixed and may justbe supplanted by the next major release. The current LTS release is 2.5.x.
For more information on the Open vSwitch release process, refer to Open vSwitch Release Process.
Q: What Linux kernel versions does each Open vSwitch release work with?
A: The following table lists the Linux kernel versions against which the given versions of the OpenvSwitch kernel module will successfully build. The Linux kernel versions are upstream kernel versions,so Linux kernels modified from the upstream sources may not build in some cases even if they are basedon a supported version. This is most notably true of Red Hat Enterprise Linux (RHEL) kernels, which areextensively modified from upstream.
Open vSwitch Linux kernel1.4.x 2.6.18 to 3.21.5.x 2.6.18 to 3.21.6.x 2.6.18 to 3.21.7.x 2.6.18 to 3.31.8.x 2.6.18 to 3.41.9.x 2.6.18 to 3.81.10.x 2.6.18 to 3.81.11.x 2.6.18 to 3.82.0.x 2.6.32 to 3.102.1.x 2.6.32 to 3.112.3.x 2.6.32 to 3.142.4.x 2.6.32 to 4.02.5.x 2.6.32 to 4.32.6.x 3.10 to 4.72.7.x 3.10 to 4.9
Open vSwitch userspace should also work with the Linux kernel module built into Linux 3.3 and later.
Open vSwitch userspace is not sensitive to the Linux kernel version. It should build against almost anykernel, certainly against 2.6.32 and later.
Q: Are all features available with all datapaths?
A: Open vSwitch supports different datapaths on different platforms. Each datapath has a different featureset: the following tables try to summarize the status.
Supported datapaths:
Linux upstream The datapath implemented by the kernel module shipped with Linux upstream. Sincefeatures have been gradually introduced into the kernel, the table mentions the first Linux releasewhose OVS module supports the feature.
7.8. Releases 245
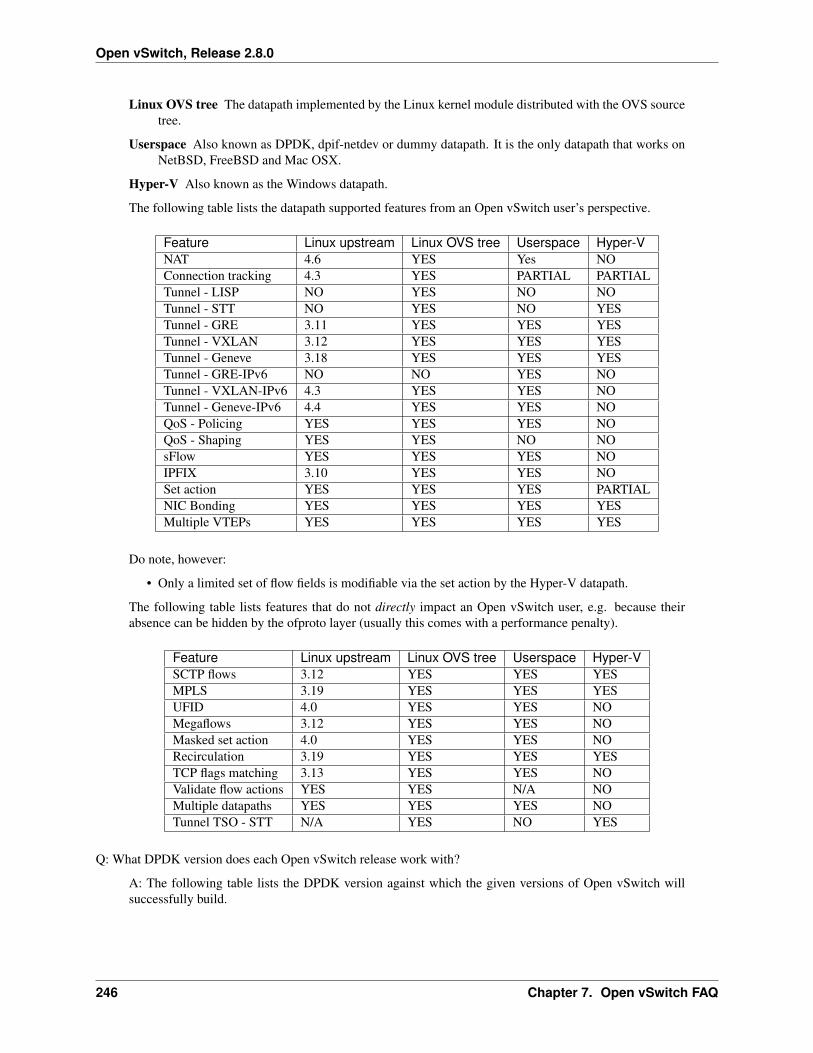
Open vSwitch, Release 2.8.0
Linux OVS tree The datapath implemented by the Linux kernel module distributed with the OVS sourcetree.
Userspace Also known as DPDK, dpif-netdev or dummy datapath. It is the only datapath that works onNetBSD, FreeBSD and Mac OSX.
Hyper-V Also known as the Windows datapath.
The following table lists the datapath supported features from an Open vSwitch user’s perspective.
Feature Linux upstream Linux OVS tree Userspace Hyper-VNAT 4.6 YES Yes NOConnection tracking 4.3 YES PARTIAL PARTIALTunnel - LISP NO YES NO NOTunnel - STT NO YES NO YESTunnel - GRE 3.11 YES YES YESTunnel - VXLAN 3.12 YES YES YESTunnel - Geneve 3.18 YES YES YESTunnel - GRE-IPv6 NO NO YES NOTunnel - VXLAN-IPv6 4.3 YES YES NOTunnel - Geneve-IPv6 4.4 YES YES NOQoS - Policing YES YES YES NOQoS - Shaping YES YES NO NOsFlow YES YES YES NOIPFIX 3.10 YES YES NOSet action YES YES YES PARTIALNIC Bonding YES YES YES YESMultiple VTEPs YES YES YES YES
Do note, however:
• Only a limited set of flow fields is modifiable via the set action by the Hyper-V datapath.
The following table lists features that do not directly impact an Open vSwitch user, e.g. because theirabsence can be hidden by the ofproto layer (usually this comes with a performance penalty).
Feature Linux upstream Linux OVS tree Userspace Hyper-VSCTP flows 3.12 YES YES YESMPLS 3.19 YES YES YESUFID 4.0 YES YES NOMegaflows 3.12 YES YES NOMasked set action 4.0 YES YES NORecirculation 3.19 YES YES YESTCP flags matching 3.13 YES YES NOValidate flow actions YES YES N/A NOMultiple datapaths YES YES YES NOTunnel TSO - STT N/A YES NO YES
Q: What DPDK version does each Open vSwitch release work with?
A: The following table lists the DPDK version against which the given versions of Open vSwitch willsuccessfully build.
246 Chapter 7. Open vSwitch FAQ
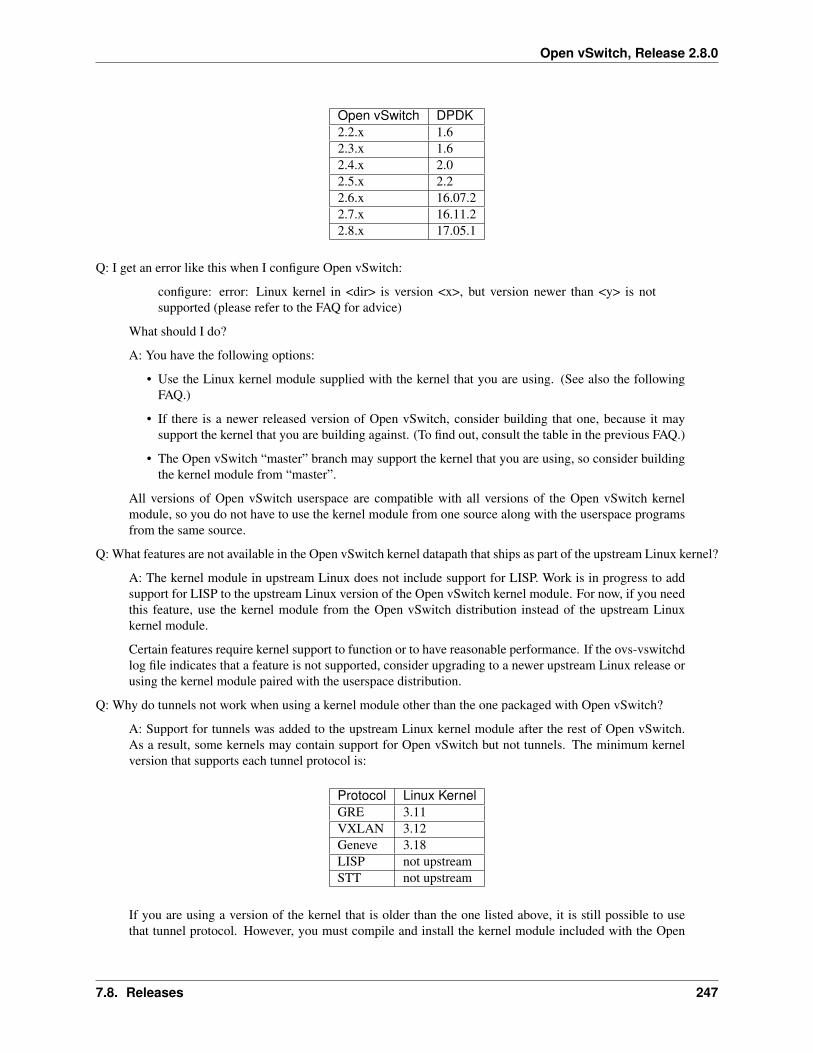
Open vSwitch, Release 2.8.0
Open vSwitch DPDK2.2.x 1.62.3.x 1.62.4.x 2.02.5.x 2.22.6.x 16.07.22.7.x 16.11.22.8.x 17.05.1
Q: I get an error like this when I configure Open vSwitch:
configure: error: Linux kernel in <dir> is version <x>, but version newer than <y> is notsupported (please refer to the FAQ for advice)
What should I do?
A: You have the following options:
• Use the Linux kernel module supplied with the kernel that you are using. (See also the followingFAQ.)
• If there is a newer released version of Open vSwitch, consider building that one, because it maysupport the kernel that you are building against. (To find out, consult the table in the previous FAQ.)
• The Open vSwitch “master” branch may support the kernel that you are using, so consider buildingthe kernel module from “master”.
All versions of Open vSwitch userspace are compatible with all versions of the Open vSwitch kernelmodule, so you do not have to use the kernel module from one source along with the userspace programsfrom the same source.
Q: What features are not available in the Open vSwitch kernel datapath that ships as part of the upstream Linux kernel?
A: The kernel module in upstream Linux does not include support for LISP. Work is in progress to addsupport for LISP to the upstream Linux version of the Open vSwitch kernel module. For now, if you needthis feature, use the kernel module from the Open vSwitch distribution instead of the upstream Linuxkernel module.
Certain features require kernel support to function or to have reasonable performance. If the ovs-vswitchdlog file indicates that a feature is not supported, consider upgrading to a newer upstream Linux release orusing the kernel module paired with the userspace distribution.
Q: Why do tunnels not work when using a kernel module other than the one packaged with Open vSwitch?
A: Support for tunnels was added to the upstream Linux kernel module after the rest of Open vSwitch.As a result, some kernels may contain support for Open vSwitch but not tunnels. The minimum kernelversion that supports each tunnel protocol is:
Protocol Linux KernelGRE 3.11VXLAN 3.12Geneve 3.18LISP not upstreamSTT not upstream
If you are using a version of the kernel that is older than the one listed above, it is still possible to usethat tunnel protocol. However, you must compile and install the kernel module included with the Open
7.8. Releases 247
Open vSwitch, Release 2.8.0
vSwitch distribution rather than the one on your machine. If problems persist after doing this, check tomake sure that the module that is loaded is the one you expect.
Q: Why are UDP tunnel checksums not computed for VXLAN or Geneve?
A: Generating outer UDP checksums requires kernel support that was not part of the initial implementa-tion of these protocols. If using the upstream Linux Open vSwitch module, you must use kernel 4.0 ornewer. The out-of-tree modules from Open vSwitch release 2.4 and later support UDP checksums.
Q: What features are not available when using the userspace datapath?
A: Tunnel virtual ports are not supported, as described in the previous answer. It is also not possible touse queue-related actions. On Linux kernels before 2.6.39, maximum-sized VLAN packets may not betransmitted.
Q: Should userspace or kernel be upgraded first to minimize downtime?
A. In general, the Open vSwitch userspace should be used with the kernel version included in the samerelease or with the version from upstream Linux. However, when upgrading between two releases ofOpen vSwitch it is best to migrate userspace first to reduce the possibility of incompatibilities.
Q: What happened to the bridge compatibility feature?
A: Bridge compatibility was a feature of Open vSwitch 1.9 and earlier. When it was enabled, OpenvSwitch imitated the interface of the Linux kernel “bridge” module. This allowed users to drop OpenvSwitch into environments designed to use the Linux kernel bridge module without adapting the environ-ment to use Open vSwitch.
Open vSwitch 1.10 and later do not support bridge compatibility. The feature was dropped because version1.10 adopted a new internal architecture that made bridge compatibility difficult to maintain. Now thatmany environments use OVS directly, it would be rarely useful in any case.
To use bridge compatibility, install OVS 1.9 or earlier, including the accompanying kernel modules (boththe main and bridge compatibility modules), following the instructions that come with the release. Besure to start the ovs-brcompatd daemon.
7.9 Terminology
Q: I thought Open vSwitch was a virtual Ethernet switch, but the documentation keeps talking about bridges. What’sa bridge?
A: In networking, the terms “bridge” and “switch” are synonyms. Open vSwitch implements an Ethernetswitch, which means that it is also an Ethernet bridge.
Q: What’s a VLAN?
A: See VLANs.
7.10 VLANs
Q: What’s a VLAN?
A: At the simplest level, a VLAN (short for “virtual LAN”) is a way to partition a single switch intomultiple switches. Suppose, for example, that you have two groups of machines, group A and group B.You want the machines in group A to be able to talk to each other, and you want the machine in groupB to be able to talk to each other, but you don’t want the machines in group A to be able to talk to themachines in group B. You can do this with two switches, by plugging the machines in group A into oneswitch and the machines in group B into the other switch.
248 Chapter 7. Open vSwitch FAQ
Open vSwitch, Release 2.8.0
If you only have one switch, then you can use VLANs to do the same thing, by configuring the portsfor machines in group A as VLAN “access ports” for one VLAN and the ports for group B as “accessports” for a different VLAN. The switch will only forward packets between ports that are assigned to thesame VLAN, so this effectively subdivides your single switch into two independent switches, one for eachgroup of machines.
So far we haven’t said anything about VLAN headers. With access ports, like we’ve described so far, noVLAN header is present in the Ethernet frame. This means that the machines (or switches) connected toaccess ports need not be aware that VLANs are involved, just like in the case where we use two differentphysical switches.
Now suppose that you have a whole bunch of switches in your network, instead of just one, and that somemachines in group A are connected directly to both switches 1 and 2. To allow these machines to talk toeach other, you could add an access port for group A’s VLAN to switch 1 and another to switch 2, and thenconnect an Ethernet cable between those ports. That works fine, but it doesn’t scale well as the numberof switches and the number of VLANs increases, because you use up a lot of valuable switch ports justconnecting together your VLANs.
This is where VLAN headers come in. Instead of using one cable and two ports per VLAN to connect apair of switches, we configure a port on each switch as a VLAN “trunk port”. Packets sent and receivedon a trunk port carry a VLAN header that says what VLAN the packet belongs to, so that only two portstotal are required to connect the switches, regardless of the number of VLANs in use. Normally, onlyswitches (either physical or virtual) are connected to a trunk port, not individual hosts, because individualhosts don’t expect to see a VLAN header in the traffic that they receive.
None of the above discussion says anything about particular VLAN numbers. This is because VLANnumbers are completely arbitrary. One must only ensure that a given VLAN is numbered consistentlythroughout a network and that different VLANs are given different numbers. (That said, VLAN 0 isusually synonymous with a packet that has no VLAN header, and VLAN 4095 is reserved.)
Q: VLANs don’t work.
A: Many drivers in Linux kernels before version 3.3 had VLAN-related bugs. If you are having problemswith VLANs that you suspect to be driver related, then you have several options:
• Upgrade to Linux 3.3 or later.
• Build and install a fixed version of the particular driver that is causing trouble, if one is available.
• Use a NIC whose driver does not have VLAN problems.
• Use “VLAN splinters”, a feature in Open vSwitch 1.4 upto 2.5 that works around bugs in kerneldrivers. To enable VLAN splinters on interface eth0, use the command:
$ ovs-vsctl set interface eth0 other-config:enable-vlan-splinters=true
For VLAN splinters to be effective, Open vSwitch must know which VLANs are in use. See the“VLAN splinters” section in the Interface table in ovs-vswitchd.conf.db(5) for details on how OpenvSwitch infers in-use VLANs.
VLAN splinters increase memory use and reduce performance, so use them only if needed.
• Apply the “vlan workaround” patch from the XenServer kernel patch queue, build Open vSwitchagainst this patched kernel, and then use ovs-vlan-bug-workaround(8) to enable the VLANworkaround for each interface whose driver is buggy.
(This is a nontrivial exercise, so this option is included only for completeness.)
It is not always easy to tell whether a Linux kernel driver has buggy VLAN support. The ovs-vlan-test(8)and ovs-test(8) utilities can help you test. See their manpages for details. Of the two utilities, ovs-test(8)is newer and more thorough, but ovs-vlan-test(8) may be easier to use.
7.10. VLANs 249
Open vSwitch, Release 2.8.0
Q: VLANs still don’t work. I’ve tested the driver so I know that it’s OK.
A: Do you have VLANs enabled on the physical switch that OVS is attached to? Make sure that the portis configured to trunk the VLAN or VLANs that you are using with OVS.
Q: Outgoing VLAN-tagged traffic goes through OVS to my physical switch and to its destination host, but OVS seemsto drop incoming return traffic.
A: It’s possible that you have the VLAN configured on your physical switch as the “native” VLAN. Inthis mode, the switch treats incoming packets either tagged with the native VLAN or untagged as part ofthe native VLAN. It may also send outgoing packets in the native VLAN without a VLAN tag.
If this is the case, you have two choices:
• Change the physical switch port configuration to tag packets it forwards to OVS with the nativeVLAN instead of forwarding them untagged.
• Change the OVS configuration for the physical port to a native VLAN mode. For example, thefollowing sets up a bridge with port eth0 in “native-tagged” mode in VLAN 9:
$ ovs-vsctl add-br br0 $ ovs-vsctl add-port br0 eth0 tag=9vlan_mode=native-tagged
In this situation, “native-untagged” mode will probably work equally well. Refer to the documenta-tion for the Port table in ovs-vswitchd.conf.db(5) for more information.
Q: I added a pair of VMs on different VLANs, like this:
$ ovs-vsctl add-br br0$ ovs-vsctl add-port br0 eth0$ ovs-vsctl add-port br0 tap0 tag=9$ ovs-vsctl add-port br0 tap1 tag=10
but the VMs can’t access each other, the external network, or the Internet.
A: It is to be expected that the VMs can’t access each other. VLANs are a means to partition a network.When you configured tap0 and tap1 as access ports for different VLANs, you indicated that they shouldbe isolated from each other.
As for the external network and the Internet, it seems likely that the machines you are trying to access arenot on VLAN 9 (or 10) and that the Internet is not available on VLAN 9 (or 10).
Q: I added a pair of VMs on the same VLAN, like this:
$ ovs-vsctl add-br br0$ ovs-vsctl add-port br0 eth0$ ovs-vsctl add-port br0 tap0 tag=9$ ovs-vsctl add-port br0 tap1 tag=9
The VMs can access each other, but not the external network or the Internet.
A: It seems likely that the machines you are trying to access in the external network are not on VLAN9 and that the Internet is not available on VLAN 9. Also, ensure VLAN 9 is set up as an allowed trunkVLAN on the upstream switch port to which eth0 is connected.
Q: Can I configure an IP address on a VLAN?
A: Yes. Use an “internal port” configured as an access port. For example, the following configures IPaddress 192.168.0.7 on VLAN 9. That is, OVS will forward packets from eth0 to 192.168.0.7 only ifthey have an 802.1Q header with VLAN 9. Conversely, traffic forwarded from 192.168.0.7 to eth0 willbe tagged with an 802.1Q header with VLAN 9:
250 Chapter 7. Open vSwitch FAQ
Open vSwitch, Release 2.8.0
$ ovs-vsctl add-br br0$ ovs-vsctl add-port br0 eth0$ ovs-vsctl add-port br0 vlan9 tag=9 \
-- set interface vlan9 type=internal$ ip addr add 192.168.0.7/24 dev vlan9$ ip link set vlan0 up
See also the following question.
Q: I configured one IP address on VLAN 0 and another on VLAN 9, like this:
$ ovs-vsctl add-br br0$ ovs-vsctl add-port br0 eth0$ ip addr add 192.168.0.5/24 dev br0$ ip link set br0 up$ ovs-vsctl add-port br0 vlan9 tag=9 -- set interface vlan9 type=internal$ ip addr add 192.168.0.9/24 dev vlan9$ ip link set vlan0 up
but other hosts that are only on VLAN 0 can reach the IP address configured on VLAN 9. What’s going on?
A: RFC 1122 section 3.3.4.2 “Multihoming Requirements” describes two approaches to IP address han-dling in Internet hosts:
• In the “Strong ES Model”, where an ES is a host (“End System”), an IP address is primarily as-sociated with a particular interface. The host discards packets that arrive on interface A if theyare destined for an IP address that is configured on interface B. The host never sends packets frominterface A using a source address configured on interface B.
• In the “Weak ES Model”, an IP address is primarily associated with a host. The host accepts packetsthat arrive on any interface if they are destined for any of the host’s IP addresses, even if the addressis configured on some interface other than the one on which it arrived. The host does not restrictitself to sending packets from an IP address associated with the originating interface.
Linux uses the weak ES model. That means that when packets destined to the VLAN 9 IP address arriveon eth0 and are bridged to br0, the kernel IP stack accepts them there for the VLAN 9 IP address, eventhough they were not received on vlan9, the network device for vlan9.
To simulate the strong ES model on Linux, one may add iptables rule to filter packets based on source anddestination address and adjust ARP configuration with sysctls.
BSD uses the strong ES model.
Q: My OpenFlow controller doesn’t see the VLANs that I expect.
A: The configuration for VLANs in the Open vSwitch database (e.g. via ovs-vsctl) only affects traffic thatgoes through Open vSwitch’s implementation of the OpenFlow “normal switching” action. By default,when Open vSwitch isn’t connected to a controller and nothing has been manually configured in the flowtable, all traffic goes through the “normal switching” action. But, if you set up OpenFlow flows on yourown, through a controller or using ovs-ofctl or through other means, then you have to implement VLANhandling yourself.
You can use “normal switching” as a component of your OpenFlow actions, e.g. by putting “normal” intothe lists of actions on ovs-ofctl or by outputting to OFPP_NORMAL from an OpenFlow controller. Insituations where this is not suitable, you can implement VLAN handling yourself, e.g.:
• If a packet comes in on an access port, and the flow table needs to send it out on a trunk port, thenthe flow can add the appropriate VLAN tag with the “mod_vlan_vid” action.
• If a packet comes in on a trunk port, and the flow table needs to send it out on an access port, thenthe flow can strip the VLAN tag with the “strip_vlan” action.
7.10. VLANs 251
Open vSwitch, Release 2.8.0
Q: I configured ports on a bridge as access ports with different VLAN tags, like this:
$ ovs-vsctl add-br br0$ ovs-vsctl set-controller br0 tcp:192.168.0.10:6653$ ovs-vsctl add-port br0 eth0$ ovs-vsctl add-port br0 tap0 tag=9$ ovs-vsctl add-port br0 tap1 tag=10
but the VMs running behind tap0 and tap1 can still communicate, that is, they are not isolated from each other eventhough they are on different VLANs.
A: Do you have a controller configured on br0 (as the commands above do)? If so, then this is a varianton the previous question, “My OpenFlow controller doesn’t see the VLANs that I expect,” and you canrefer to the answer there for more information.
Q: How MAC learning works with VLANs?
A: Open vSwitch implements Independent VLAN Learning (IVL) for OFPP_NORMAL action, e.g. itlogically has separate learning tables for each VLANs.
7.11 VXLANs
Q: What’s a VXLAN?
A: VXLAN stands for Virtual eXtensible Local Area Network, and is a means to solve the scaling chal-lenges of VLAN networks in a multi-tenant environment. VXLAN is an overlay network which transportsan L2 network over an existing L3 network. For more information on VXLAN, please see RFC 7348.
Q: How much of the VXLAN protocol does Open vSwitch currently support?
A: Open vSwitch currently supports the framing format for packets on the wire. There is currently nosupport for the multicast aspects of VXLAN. To get around the lack of multicast support, it is possible topre-provision MAC to IP address mappings either manually or from a controller.
Q: What destination UDP port does the VXLAN implementation in Open vSwitch use?
A: By default, Open vSwitch will use the assigned IANA port for VXLAN, which is 4789. However, it ispossible to configure the destination UDP port manually on a per-VXLAN tunnel basis. An example ofthis configuration is provided below.:
$ ovs-vsctl add-br br0$ ovs-vsctl add-port br0 vxlan1 -- set interface vxlan1 type=vxlan \
options:remote_ip=192.168.1.2 options:key=flow options:dst_port=8472
252 Chapter 7. Open vSwitch FAQ
CHAPTER 8
Open vSwitch Internals
Information for people who want to know more about the Open vSwitch project itself and how they might involved.
8.1 Contributing to Open vSwitch
The below guides provide information on contributing to Open vSwitch itself.
8.1.1 Submitting Patches
Send changes to Open vSwitch as patches to [email protected]. One patch per email. More details are includedbelow.
If you are using Git, then git format-patch takes care of most of the mechanics described below for you.
Before You Start
Before you send patches at all, make sure that each patch makes sense. In particular:
• A given patch should not break anything, even if later patches fix the problems that it causes. The source treeshould still build and work after each patch is applied. (This enables git bisect to work best.)
• A patch should make one logical change. Don’t make multiple, logically unconnected changes to disparatesubsystems in a single patch.
• A patch that adds or removes user-visible features should also update the appropriate user documentation ormanpages. Consider adding an item to NEWS for nontrivial changes. Check “Feature Deprecation Guidelines”section in this document if you intend to remove user-visible feature.
Testing is also important:
• Test a patch that modifies existing code with make check before submission. Refer to the “Unit Tests” inTesting, for more information. We also encourage running the kernel and userspace system tests.
253
Open vSwitch, Release 2.8.0
• Consider testing a patch that adds or deletes files with make distcheck before submission.
• A patch that modifies Linux kernel code should be at least build-tested on various Linux kernel versions beforesubmission. I suggest versions 3.10 and whatever the current latest release version is at the time.
• A patch that adds a new feature should add appropriate tests for the feature. A bug fix patch should preferablyadd a test that would fail if the bug recurs.
If you are using GitHub, then you may utilize the travis-ci.org CI build system by linking your GitHub repository to it.This will run some of the above tests automatically when you push changes to your repository. See the “ContinuousIntegration with Travis-CI” in Testing for details on how to set it up.
Email Subject
The subject line of your email should be in the following format:
[PATCH <n>/<m>] <area>: <summary>
Where:
[PATCH <n>/<m>]: indicates that this is the nth of a series of m patches. It helps reviewers to read patches in thecorrect order. You may omit this prefix if you are sending only one patch.
<area>: indicates the area of the Open vSwitch to which the change applies (often the name of a source file or adirectory). You may omit it if the change crosses multiple distinct pieces of code.
<summary>:
briefly describes the change. Use the the imperative form, e.g. “Force SNAT for multiple gateway routers.”or “Fix daemon exit for bad datapaths or flows.” Try to keep the summary short, about 50 characters wide.
The subject, minus the [PATCH <n>/<m>] prefix, becomes the first line of the commit’s change log message.
Description
The body of the email should start with a more thorough description of the change. This becomes the body of thecommit message, following the subject. There is no need to duplicate the summary given in the subject.
Please limit lines in the description to 75 characters in width. That allows the description to format properly evenwhen indented (e.g. by “git log” or in email quotations).
The description should include:
• The rationale for the change.
• Design description and rationale (but this might be better added as code comments).
• Testing that you performed (or testing that should be done but you could not for whatever reason).
• Tags (see below).
There is no need to describe what the patch actually changed, if the reader can see it for himself.
If the patch refers to a commit already in the Open vSwitch repository, please include both the commit number andthe subject of the patch, e.g. ‘commit 632d136c (vswitch: Remove restriction on datapath names.)’.
If you, the person sending the patch, did not write the patch yourself, then the very first line of the body should takethe form From: <author name> <author email>, followed by a blank line. This will automatically causethe named author to be credited with authorship in the repository.
254 Chapter 8. Open vSwitch Internals
Open vSwitch, Release 2.8.0
Tags
The description ends with a series of tags, written one to a line as the last paragraph of the email. Each tag indicatessome property of the patch in an easily machine-parseable manner.
Examples of common tags follow.
Signed-off-by: Author Name <[email protected]...>
Informally, this indicates that Author Name is the author or submitter of a patch and has the authority tosubmit it under the terms of the license. The formal meaning is to agree to the Developer’s Certificate ofOrigin (see below).
If the author and submitter are different, each must sign off. If the patch has more than one author, allmust sign off.
Signed-off-by: Author Name <[email protected]...>Signed-off-by: Submitter Name <[email protected]...>
Co-authored-by: Author Name <[email protected]...>
Git can only record a single person as the author of a given patch. In the rare event that a patch hasmultiple authors, one must be given the credit in Git and the others must be credited via Co-authored-by:tags. (All co-authors must also sign off.)
Acked-by: Reviewer Name <[email protected]...>
Reviewers will often give an Acked-by: tag to code of which they approve. It is polite for the submitterto add the tag before posting the next version of the patch or applying the patch to the repository. Qualityreviewing is hard work, so this gives a small amount of credit to the reviewer.
Not all reviewers give Acked-by: tags when they provide positive reviews. It’s customary only to addtags from reviewers who actually provide them explicitly.
Tested-by: Tester Name <[email protected]...>
When someone tests a patch, it is customary to add a Tested-by: tag indicating that. It’s rare for a testerto actually provide the tag; usually the patch submitter makes the tag himself in response to an emailindicating successful testing results.
Tested-at: <URL>
When a test report is publicly available, this provides a way to reference it. Typical <URL>s would bebuild logs from autobuilders or references to mailing list archives.
Some autobuilders only retain their logs for a limited amount of time. It is less useful to cite these becausethey may be dead links for a developer reading the commit message months or years later.
Reported-by: Reporter Name <[email protected]...>
When a patch fixes a bug reported by some person, please credit the reporter in the commit log in thisfashion. Please also add the reporter’s name and email address to the list of people who provided helpfulbug reports in the AUTHORS file at the top of the source tree.
Fairly often, the reporter of a bug also tests the fix. Occasionally one sees a combined “Reported-and-tested-by:” tag used to indicate this. It is also acceptable, and more common, to include both tags sepa-rately.
(If a bug report is received privately, it might not always be appropriate to publicly credit the reporter. Ifin doubt, please ask the reporter.)
Requested-by: Requester Name <[email protected]...>
8.1. Contributing to Open vSwitch 255
Open vSwitch, Release 2.8.0
When a patch implements a request or a suggestion made by some person, please credit that person in thecommit log in this fashion. For a helpful suggestion, please also add the person’s name and email addressto the list of people who provided suggestions in the AUTHORS file at the top of the source tree.
(If a suggestion or a request is received privately, it might not always be appropriate to publicly give credit.If in doubt, please ask.)
Suggested-by: Suggester Name <[email protected]...>
See Requested-by:.
CC: Person <name@email>
This is a way to tag a patch for the attention of a person when no more specific tag is appropriate. Oneuse is to request a review from a particular person. It doesn’t make sense to include the same person inCC and another tag, so e.g. if someone who is CCed later provides an Acked-by, add the Acked-by andremove the CC at the same time.
Reported-at: <URL>
If a patch fixes or is otherwise related to a bug reported in a public bug tracker, please include a referenceto the bug in the form of a URL to the specific bug, e.g.:
Reported-at: https://bugs.debian.org/743635
This is also an appropriate way to refer to bug report emails in public email archives, e.g.:
Reported-at: http://openvswitch.org/pipermail/dev/2014-June/040952.html
Submitted-at: <URL>
If a patch was submitted somewhere other than the Open vSwitch development mailing list, such as aGitHub pull request, this header can be used to reference the source.
Submitted-at: https://github.com/openvswitch/ovs/pull/92
VMware-BZ: #1234567
If a patch fixes or is otherwise related to a bug reported in a private bug tracker, you may include sometracking ID for the bug for your own reference. Please include some identifier to make the origin clear,e.g. “VMware-BZ” refers to VMware’s internal Bugzilla instance and “ONF-JIRA” refers to the OpenNetworking Foundation’s JIRA bug tracker.
ONF-JIRA: EXT-12345
See VMware-BZ:.
Bug #1234567.
These are obsolete forms of VMware-BZ: that can still be seen in old change log entries. (They areobsolete because they do not tell the reader what bug tracker is referred to.)
Issue: 1234567
See Bug:.
Fixes: 63bc9fb1c69f (“packets: Reorder CS_* flags to remove gap.”)
If you would like to record which commit introduced a bug being fixed, you may do that with a “Fixes”header. This assists in determining which OVS releases have the bug, so the patch can be applied to allaffected versions. The easiest way to generate the header in the proper format is with this git command.This command also CCs the author of the commit being fixed, which makes sense unless the author alsomade the fix or is already named in another tag:
256 Chapter 8. Open vSwitch Internals
Open vSwitch, Release 2.8.0
$ git log -1 --pretty=format:"CC: %an <%ae>%nFixes: %h (\"%s\")" \--abbrev=12 COMMIT_REF
Vulnerability: CVE-2016-2074
Specifies that the patch fixes or is otherwise related to a security vulnerability with the given CVE identi-fier. Other identifiers in public vulnerability databases are also suitable.
If the vulnerability was reported publicly, then it is also appropriate to cite the URL to the report in aReported-at tag. Use a Reported-by tag to acknowledge the reporters.
Developer’s Certificate of Origin
To help track the author of a patch as well as the submission chain, and be clear that the developer has authority tosubmit a patch for inclusion in openvswitch please sign off your work. The sign off certifies the following:
Developer's Certificate of Origin 1.1
By making a contribution to this project, I certify that:
(a) The contribution was created in whole or in part by me and Ihave the right to submit it under the open source licenseindicated in the file; or
(b) The contribution is based upon previous work that, to the bestof my knowledge, is covered under an appropriate open sourcelicense and I have the right under that license to submit thatwork with modifications, whether created in whole or in partby me, under the same open source license (unless I ampermitted to submit under a different license), as indicatedin the file; or
(c) The contribution was provided directly to me by some otherperson who certified (a), (b) or (c) and I have not modifiedit.
(d) I understand and agree that this project and the contributionare public and that a record of the contribution (including allpersonal information I submit with it, including my sign-off) ismaintained indefinitely and may be redistributed consistent withthis project or the open source license(s) involved.
See also http://developercertificate.org/.
Feature Deprecation Guidelines
Open vSwitch is intended to be user friendly. This means that under normal circumstances we don’t abruptly removefeatures from OVS that some users might still be using. Otherwise, if we would, then we would possibly break ouruser setup when they upgrade and would receive bug reports.
Typical process to deprecate a feature in Open vSwitch is to:
(a) Mention deprecation of a feature in the NEWS file. Also, mention expected release or absolute time when thisfeature would be removed from OVS altogether. Don’t use relative time (e.g. “in 6 months”) because that is notclearly interpretable.
8.1. Contributing to Open vSwitch 257
Open vSwitch, Release 2.8.0
(b) If Open vSwitch is configured to use deprecated feature it should print a warning message to the log files clearlyindicating that feature is deprecated and that use of it should be avoided.
(c) If this feature is mentioned in man pages, then add “Deprecated” keyword to it.
Also, if there is alternative feature to the one that is about to be marked as deprecated, then mention it in (a), (b) and(c) as well.
Remember to follow-up and actually remove the feature from OVS codebase once deprecation grace period has expiredand users had opportunity to use at least one OVS release that would have informed them about feature deprecation!
Comments
If you want to include any comments in your email that should not be part of the commit’s change log message, putthem after the description, separated by a line that contains just ---. It may be helpful to include a diffstat here forchanges that touch multiple files.
Patch
The patch should be in the body of the email following the description, separated by a blank line.
Patches should be in diff -up format. We recommend that you use Git to produce your patches, in which case youshould use the -M -C options to git diff (or other Git tools) if your patch renames or copies files. Quilt might beuseful if you do not want to use Git.
Patches should be inline in the email message. Some email clients corrupt white space or wrap lines in patches. Thereare hints on how to configure many email clients to avoid this problem on kernel.org. If you cannot convince youremail client not to mangle patches, then sending the patch as an attachment is a second choice.
Follow the style used in the code that you are modifying. Open vSwitch Coding Style file describes the coding styleused in most of Open vSwitch. Use Linux kernel coding style for Linux kernel code.
If your code is non-datapath code, you may use the utilities/checkpatch.py utility as a quick check for cer-tain commonly occuring mistakes (improper leading/trailing whitespace, missing signoffs, some improper formattedpatch files). For linux datapath code, it is a good idea to use the linux script checkpatch.pl.
Example
From fa29a1c2c17682879e79a21bb0cdd5bbe67fa7c0 Mon Sep 17 00:00:00 2001From: Jesse Gross <[email protected]>Date: Thu, 8 Dec 2011 13:17:24 -0800Subject: [PATCH] datapath: Alphabetize include/net/ipv6.h compat header.
Signed-off-by: Jesse Gross <[email protected]>---datapath/linux/Modules.mk | 2 +-1 files changed, 1 insertions(+), 1 deletions(-)
diff --git a/datapath/linux/Modules.mk b/datapath/linux/Modules.mkindex fdd952e..f6cb88e 100644--- a/datapath/linux/Modules.mk+++ b/datapath/linux/Modules.mk@@ -56,11 +56,11 @@ openvswitch_headers += \
linux/compat/include/net/dst.h \linux/compat/include/net/genetlink.h \linux/compat/include/net/ip.h \
(continues on next page)
258 Chapter 8. Open vSwitch Internals
Open vSwitch, Release 2.8.0
(continued from previous page)
+ linux/compat/include/net/ipv6.h \linux/compat/include/net/net_namespace.h \linux/compat/include/net/netlink.h \linux/compat/include/net/protocol.h \linux/compat/include/net/route.h \
- linux/compat/include/net/ipv6.h \linux/compat/genetlink.inc
both_modules += brcompat--1.7.7.3
8.1.2 Backporting patches
Note: This is an advanced topic for developers and maintainers. Readers should familiarize themselves with buildingand running Open vSwitch, with the git tool, and with the Open vSwitch patch submission process.
The backporting of patches from one git tree to another takes multiple forms within Open vSwitch, but is broadlyapplied in the following fashion:
• Contributors submit their proposed changes to the latest development branch
• Contributors and maintainers provide feedback on the patches
• When the change is satisfactory, maintainers apply the patch to the development branch.
• Maintainers backport changes from a development branch to release branches.
With regards to Open vSwitch user space code and code that does not comprise the Linux datapath and compat code,the development branch is master in the Open vSwitch repository. Patches are applied first to this branch, then to themost recent branch-X.Y, then earlier branch-X.Z, and so on. The most common kind of patch in this category is abugfix which affects master and other branches.
For Linux datapath code, the primary development branch is in the net-next tree as described in the section below, andpatch discussion occurs on the netdev mailing list. Patches are first applied to the upstream branch by the networkingmaintainer, then the contributor backports the patch to the Open vSwitch master development branch. Patches in thiscategory may include features which have been applied upstream, or bugfixes to the Open vSwitch datapath code.For bugfixes, the patches subsequently follow the regular Open vSwitch process as described above to reach olderbranches.
Changes to userspace components
Patches which are fixing bugs should be considered for backporting from master to release branches. Open vSwitchcontributors submit their patches targeted to the master branch, using the Fixes tag described in Submitting Patches.The maintainer first applies the patch to master, then backports the patch to each older affected tree, as far back as itgoes or at least to all currently supported branches. This is usually each branch back to the most recent LTS releasebranch.
If the fix only affects a particular branch and not master, contributors should submit the change with the targetbranch listed in the subject line of the patch. Contributors should list all versions that the bug affects. The gitformat-patch argument --subject-prefix may be used when posting the patch, for example:
$ git format-patch HEAD --subject-prefix="PATCH branch-2.7"
8.1. Contributing to Open vSwitch 259
Open vSwitch, Release 2.8.0
If a maintainer is backporting a change to older branches and the backport is not a trivial cherry-pick, then the main-tainer may opt to submit the backport for the older branch on the mailinglist for further review. This should be donein the same manner as described above.
Changes to Linux kernel components
The Linux kernel components in Open vSwitch go through initial review in the upstream Linux netdev communitybefore they go into the Open vSwitch tree. As such, backports from upstream to the Open vSwitch tree may includebugfixes or new features. The netdev-FAQ describes the general process for merging patches to the upstream Linuxtree.
To keep track of the changes which are made upstream against the changes which have been backported to the OpenvSwitch tree, backports should be done in the order that they are applied to the upstream net-next tree. For example,if the git history in linux/net/openvswitch/ in the net-next tree lists patches A, B and C that were applied(in that order), then the backports of these patches to openvswitch/datapath/ should be done submitted in theorder A, B, then C.
Patches that are proposed against the Open vSwitch tree, including backports, should follow the guidelines describedin Submitting Patches. Ideally, a series which backports new functionality would also include a series of patches forthe userspace components which show how to use the new functionality, and include tests to validate the behaviour.However, in the interests of keeping the Open vSwitch tree in sync with upstream net-next, contributors may sendOpen vSwitch kernel module changes independently of userspace changes.
How to backport kernel patches
First, the patch should be submitted upstream to netdev. When the patch has been applied to net-next, it is ready to bebackported. Starting from the Linux tree, use git format-patch to format each patch that should be backported.For each of these patches, they may only include changes to linux/net/openvswitch/, or they may includechanges to other directories. Depending on which files the patch touches, the backport may be easier or more difficultto undertake.
Start by formatting the relevant patches from the Linux tree. For example, to format the last 5 patches to net/openvswitch, going back from OVS commit 1234c0ffee5, placing them into /tmp/:
$ git format-patch -5 1234c0ffee5 net/openvswitch/ -o /tmp
Next, change into the Open vSwitch directory and apply the patch:
$ git am -p3 --reject --directory=datapath/ <patch>
If this is successful, proceed to the next patch:
$ git am --continue
If this is unsuccessful, the above command applies all changes that it can to the working tree, and leaves rejected hunksin corresponding *.rej files. Proceed by using git diff to identify the changes, and edit the files so that the hunkmatches what the file looks like when the corresponding commit is checked out in the linux tree. When all hunks arefixed, add the files to the index using git add.
If the patch only changes filepaths under linux/net/openvswitch, then most likely the patch is fully back-ported. At this point, review the patch’s changes and compare with the latest upstream code for the modified functions.Occasionally, there may be bugs introduced in a particular patch which were fixed in a later patch upstream. To preventbreakage in the OVS tree, consider rolling later bugfixes into the current patch - particularly if they are small, clearbugfixes in the logic of this patch. Then proceed to the next patch using git am --continue. If you made anychanges to the patch compared with the original version, describe the changes in the commit message.
260 Chapter 8. Open vSwitch Internals
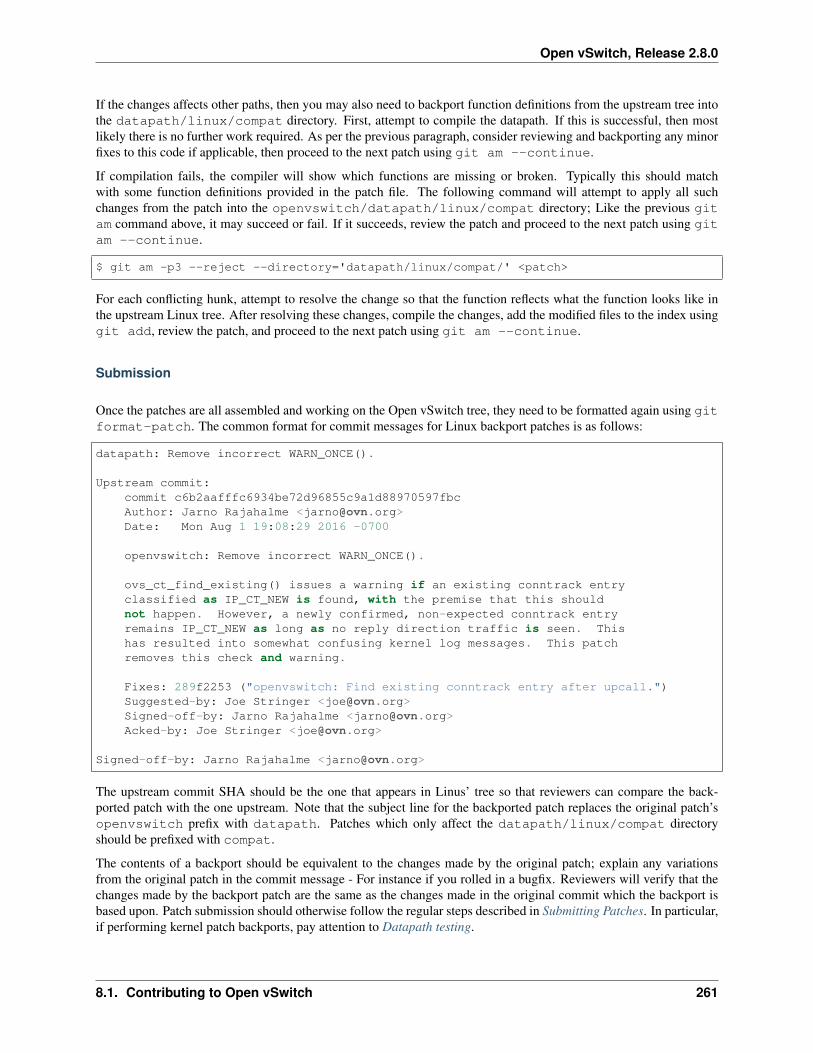
Open vSwitch, Release 2.8.0
If the changes affects other paths, then you may also need to backport function definitions from the upstream tree intothe datapath/linux/compat directory. First, attempt to compile the datapath. If this is successful, then mostlikely there is no further work required. As per the previous paragraph, consider reviewing and backporting any minorfixes to this code if applicable, then proceed to the next patch using git am --continue.
If compilation fails, the compiler will show which functions are missing or broken. Typically this should matchwith some function definitions provided in the patch file. The following command will attempt to apply all suchchanges from the patch into the openvswitch/datapath/linux/compat directory; Like the previous gitam command above, it may succeed or fail. If it succeeds, review the patch and proceed to the next patch using gitam --continue.
$ git am -p3 --reject --directory='datapath/linux/compat/' <patch>
For each conflicting hunk, attempt to resolve the change so that the function reflects what the function looks like inthe upstream Linux tree. After resolving these changes, compile the changes, add the modified files to the index usinggit add, review the patch, and proceed to the next patch using git am --continue.
Submission
Once the patches are all assembled and working on the Open vSwitch tree, they need to be formatted again using gitformat-patch. The common format for commit messages for Linux backport patches is as follows:
datapath: Remove incorrect WARN_ONCE().
Upstream commit:commit c6b2aafffc6934be72d96855c9a1d88970597fbcAuthor: Jarno Rajahalme <[email protected]>Date: Mon Aug 1 19:08:29 2016 -0700
openvswitch: Remove incorrect WARN_ONCE().
ovs_ct_find_existing() issues a warning if an existing conntrack entryclassified as IP_CT_NEW is found, with the premise that this shouldnot happen. However, a newly confirmed, non-expected conntrack entryremains IP_CT_NEW as long as no reply direction traffic is seen. Thishas resulted into somewhat confusing kernel log messages. This patchremoves this check and warning.
Fixes: 289f2253 ("openvswitch: Find existing conntrack entry after upcall.")Suggested-by: Joe Stringer <[email protected]>Signed-off-by: Jarno Rajahalme <[email protected]>Acked-by: Joe Stringer <[email protected]>
Signed-off-by: Jarno Rajahalme <[email protected]>
The upstream commit SHA should be the one that appears in Linus’ tree so that reviewers can compare the back-ported patch with the one upstream. Note that the subject line for the backported patch replaces the original patch’sopenvswitch prefix with datapath. Patches which only affect the datapath/linux/compat directoryshould be prefixed with compat.
The contents of a backport should be equivalent to the changes made by the original patch; explain any variationsfrom the original patch in the commit message - For instance if you rolled in a bugfix. Reviewers will verify that thechanges made by the backport patch are the same as the changes made in the original commit which the backport isbased upon. Patch submission should otherwise follow the regular steps described in Submitting Patches. In particular,if performing kernel patch backports, pay attention to Datapath testing.
8.1. Contributing to Open vSwitch 261
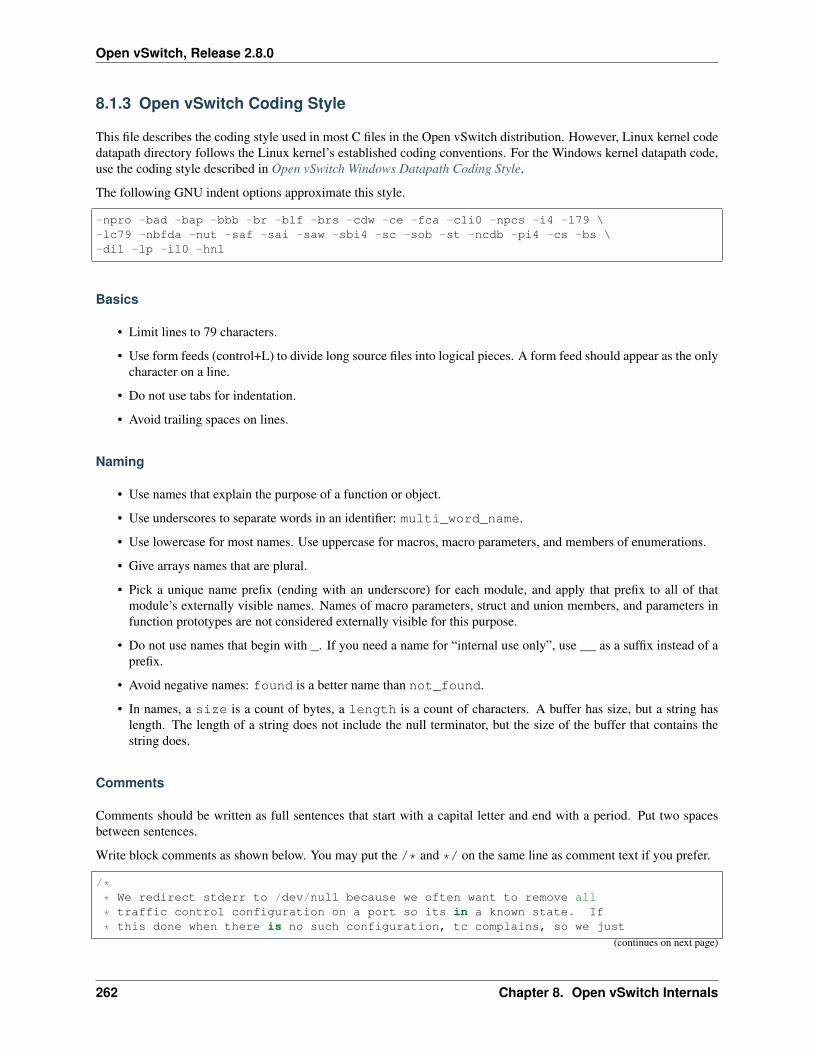
Open vSwitch, Release 2.8.0
8.1.3 Open vSwitch Coding Style
This file describes the coding style used in most C files in the Open vSwitch distribution. However, Linux kernel codedatapath directory follows the Linux kernel’s established coding conventions. For the Windows kernel datapath code,use the coding style described in Open vSwitch Windows Datapath Coding Style.
The following GNU indent options approximate this style.
-npro -bad -bap -bbb -br -blf -brs -cdw -ce -fca -cli0 -npcs -i4 -l79 \-lc79 -nbfda -nut -saf -sai -saw -sbi4 -sc -sob -st -ncdb -pi4 -cs -bs \-di1 -lp -il0 -hnl
Basics
• Limit lines to 79 characters.
• Use form feeds (control+L) to divide long source files into logical pieces. A form feed should appear as the onlycharacter on a line.
• Do not use tabs for indentation.
• Avoid trailing spaces on lines.
Naming
• Use names that explain the purpose of a function or object.
• Use underscores to separate words in an identifier: multi_word_name.
• Use lowercase for most names. Use uppercase for macros, macro parameters, and members of enumerations.
• Give arrays names that are plural.
• Pick a unique name prefix (ending with an underscore) for each module, and apply that prefix to all of thatmodule’s externally visible names. Names of macro parameters, struct and union members, and parameters infunction prototypes are not considered externally visible for this purpose.
• Do not use names that begin with _. If you need a name for “internal use only”, use __ as a suffix instead of aprefix.
• Avoid negative names: found is a better name than not_found.
• In names, a size is a count of bytes, a length is a count of characters. A buffer has size, but a string haslength. The length of a string does not include the null terminator, but the size of the buffer that contains thestring does.
Comments
Comments should be written as full sentences that start with a capital letter and end with a period. Put two spacesbetween sentences.
Write block comments as shown below. You may put the /* and */ on the same line as comment text if you prefer.
/** We redirect stderr to /dev/null because we often want to remove all
* traffic control configuration on a port so its in a known state. If
* this done when there is no such configuration, tc complains, so we just
(continues on next page)
262 Chapter 8. Open vSwitch Internals
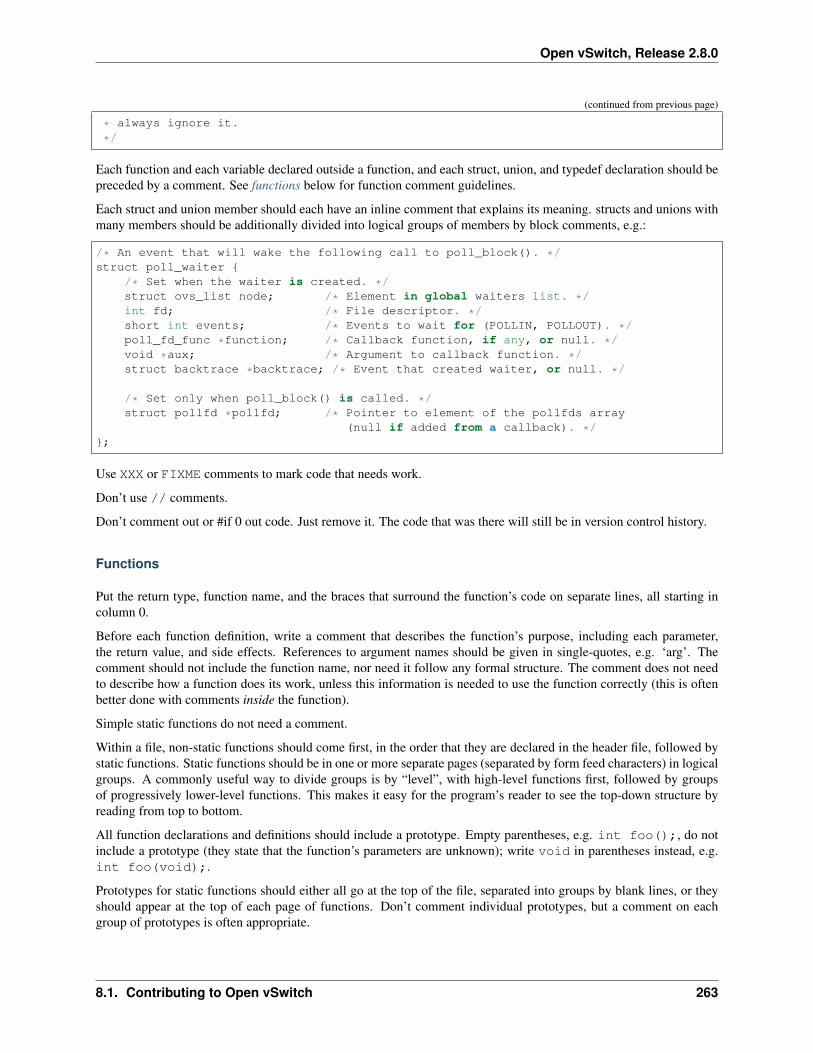
Open vSwitch, Release 2.8.0
(continued from previous page)
* always ignore it.
*/
Each function and each variable declared outside a function, and each struct, union, and typedef declaration should bepreceded by a comment. See functions below for function comment guidelines.
Each struct and union member should each have an inline comment that explains its meaning. structs and unions withmany members should be additionally divided into logical groups of members by block comments, e.g.:
/* An event that will wake the following call to poll_block(). */struct poll_waiter {
/* Set when the waiter is created. */struct ovs_list node; /* Element in global waiters list. */int fd; /* File descriptor. */short int events; /* Events to wait for (POLLIN, POLLOUT). */poll_fd_func *function; /* Callback function, if any, or null. */void *aux; /* Argument to callback function. */struct backtrace *backtrace; /* Event that created waiter, or null. */
/* Set only when poll_block() is called. */struct pollfd *pollfd; /* Pointer to element of the pollfds array
(null if added from a callback). */};
Use XXX or FIXME comments to mark code that needs work.
Don’t use // comments.
Don’t comment out or #if 0 out code. Just remove it. The code that was there will still be in version control history.
Functions
Put the return type, function name, and the braces that surround the function’s code on separate lines, all starting incolumn 0.
Before each function definition, write a comment that describes the function’s purpose, including each parameter,the return value, and side effects. References to argument names should be given in single-quotes, e.g. ‘arg’. Thecomment should not include the function name, nor need it follow any formal structure. The comment does not needto describe how a function does its work, unless this information is needed to use the function correctly (this is oftenbetter done with comments inside the function).
Simple static functions do not need a comment.
Within a file, non-static functions should come first, in the order that they are declared in the header file, followed bystatic functions. Static functions should be in one or more separate pages (separated by form feed characters) in logicalgroups. A commonly useful way to divide groups is by “level”, with high-level functions first, followed by groupsof progressively lower-level functions. This makes it easy for the program’s reader to see the top-down structure byreading from top to bottom.
All function declarations and definitions should include a prototype. Empty parentheses, e.g. int foo();, do notinclude a prototype (they state that the function’s parameters are unknown); write void in parentheses instead, e.g.int foo(void);.
Prototypes for static functions should either all go at the top of the file, separated into groups by blank lines, or theyshould appear at the top of each page of functions. Don’t comment individual prototypes, but a comment on eachgroup of prototypes is often appropriate.
8.1. Contributing to Open vSwitch 263
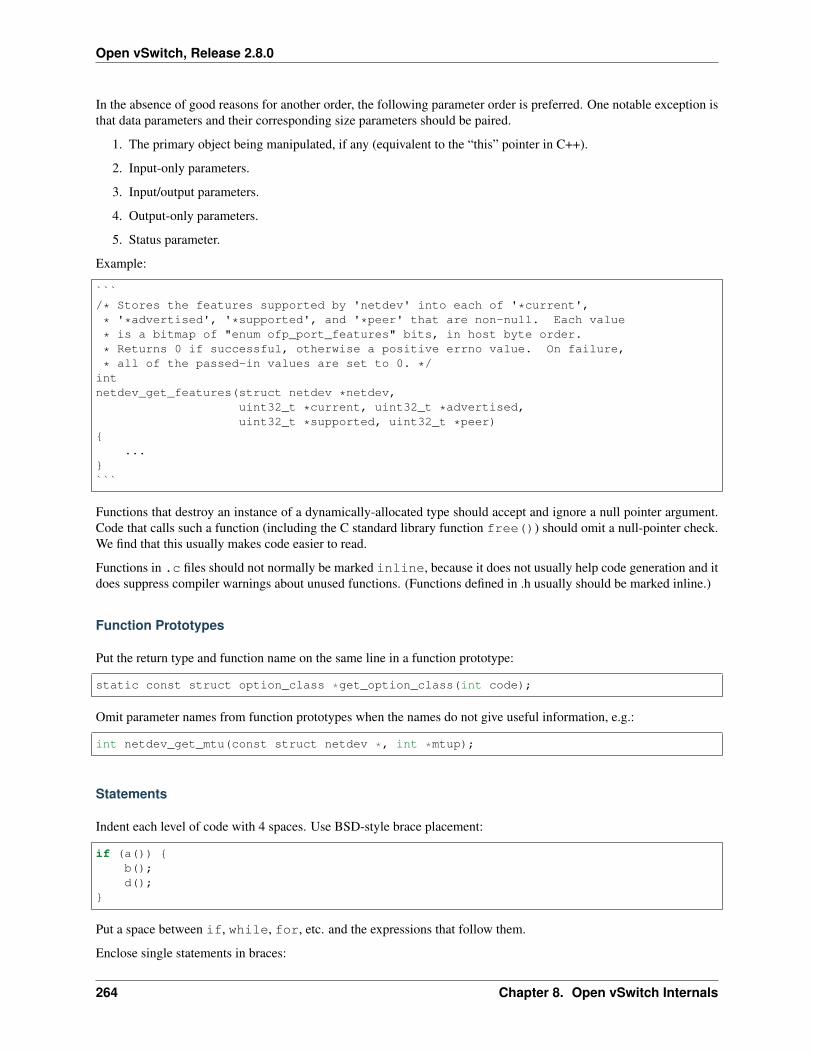
Open vSwitch, Release 2.8.0
In the absence of good reasons for another order, the following parameter order is preferred. One notable exception isthat data parameters and their corresponding size parameters should be paired.
1. The primary object being manipulated, if any (equivalent to the “this” pointer in C++).
2. Input-only parameters.
3. Input/output parameters.
4. Output-only parameters.
5. Status parameter.
Example:
```/* Stores the features supported by 'netdev' into each of '*current',
* '*advertised', '*supported', and '*peer' that are non-null. Each value
* is a bitmap of "enum ofp_port_features" bits, in host byte order.
* Returns 0 if successful, otherwise a positive errno value. On failure,
* all of the passed-in values are set to 0. */intnetdev_get_features(struct netdev *netdev,
uint32_t *current, uint32_t *advertised,uint32_t *supported, uint32_t *peer)
{...
}```
Functions that destroy an instance of a dynamically-allocated type should accept and ignore a null pointer argument.Code that calls such a function (including the C standard library function free()) should omit a null-pointer check.We find that this usually makes code easier to read.
Functions in .c files should not normally be marked inline, because it does not usually help code generation and itdoes suppress compiler warnings about unused functions. (Functions defined in .h usually should be marked inline.)
Function Prototypes
Put the return type and function name on the same line in a function prototype:
static const struct option_class *get_option_class(int code);
Omit parameter names from function prototypes when the names do not give useful information, e.g.:
int netdev_get_mtu(const struct netdev *, int *mtup);
Statements
Indent each level of code with 4 spaces. Use BSD-style brace placement:
if (a()) {b();d();
}
Put a space between if, while, for, etc. and the expressions that follow them.
Enclose single statements in braces:
264 Chapter 8. Open vSwitch Internals
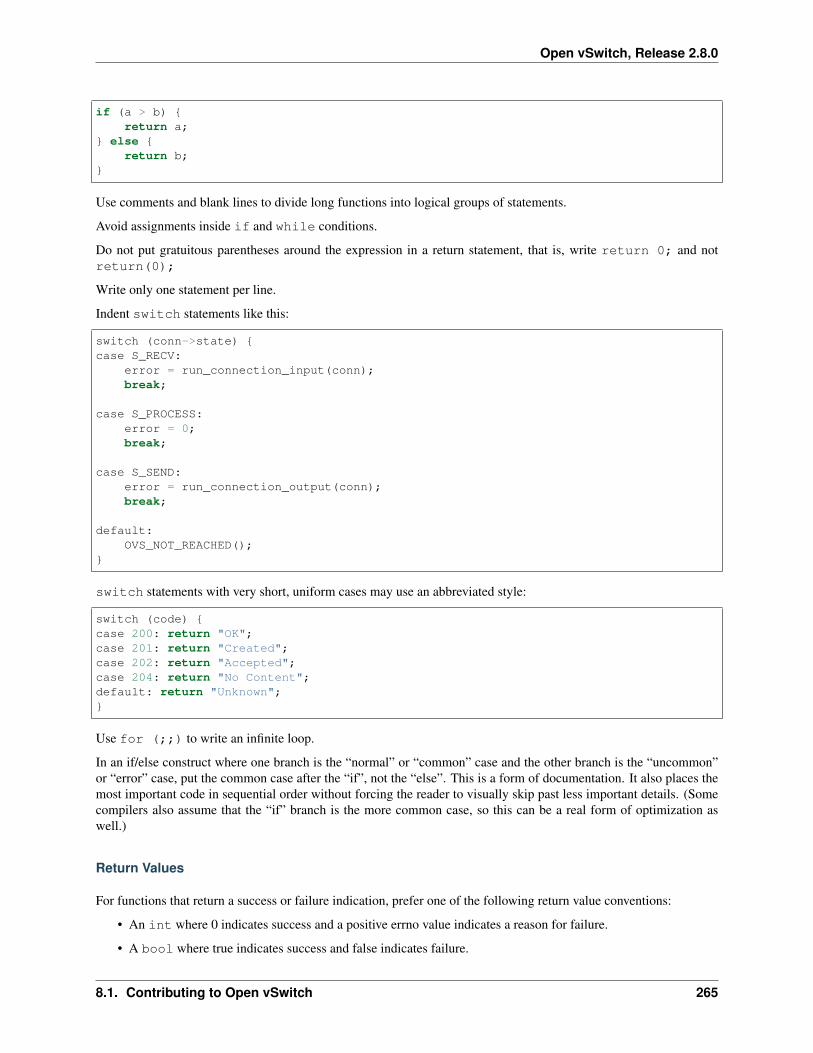
Open vSwitch, Release 2.8.0
if (a > b) {return a;
} else {return b;
}
Use comments and blank lines to divide long functions into logical groups of statements.
Avoid assignments inside if and while conditions.
Do not put gratuitous parentheses around the expression in a return statement, that is, write return 0; and notreturn(0);
Write only one statement per line.
Indent switch statements like this:
switch (conn->state) {case S_RECV:
error = run_connection_input(conn);break;
case S_PROCESS:error = 0;break;
case S_SEND:error = run_connection_output(conn);break;
default:OVS_NOT_REACHED();
}
switch statements with very short, uniform cases may use an abbreviated style:
switch (code) {case 200: return "OK";case 201: return "Created";case 202: return "Accepted";case 204: return "No Content";default: return "Unknown";}
Use for (;;) to write an infinite loop.
In an if/else construct where one branch is the “normal” or “common” case and the other branch is the “uncommon”or “error” case, put the common case after the “if”, not the “else”. This is a form of documentation. It also places themost important code in sequential order without forcing the reader to visually skip past less important details. (Somecompilers also assume that the “if” branch is the more common case, so this can be a real form of optimization aswell.)
Return Values
For functions that return a success or failure indication, prefer one of the following return value conventions:
• An int where 0 indicates success and a positive errno value indicates a reason for failure.
• A bool where true indicates success and false indicates failure.
8.1. Contributing to Open vSwitch 265
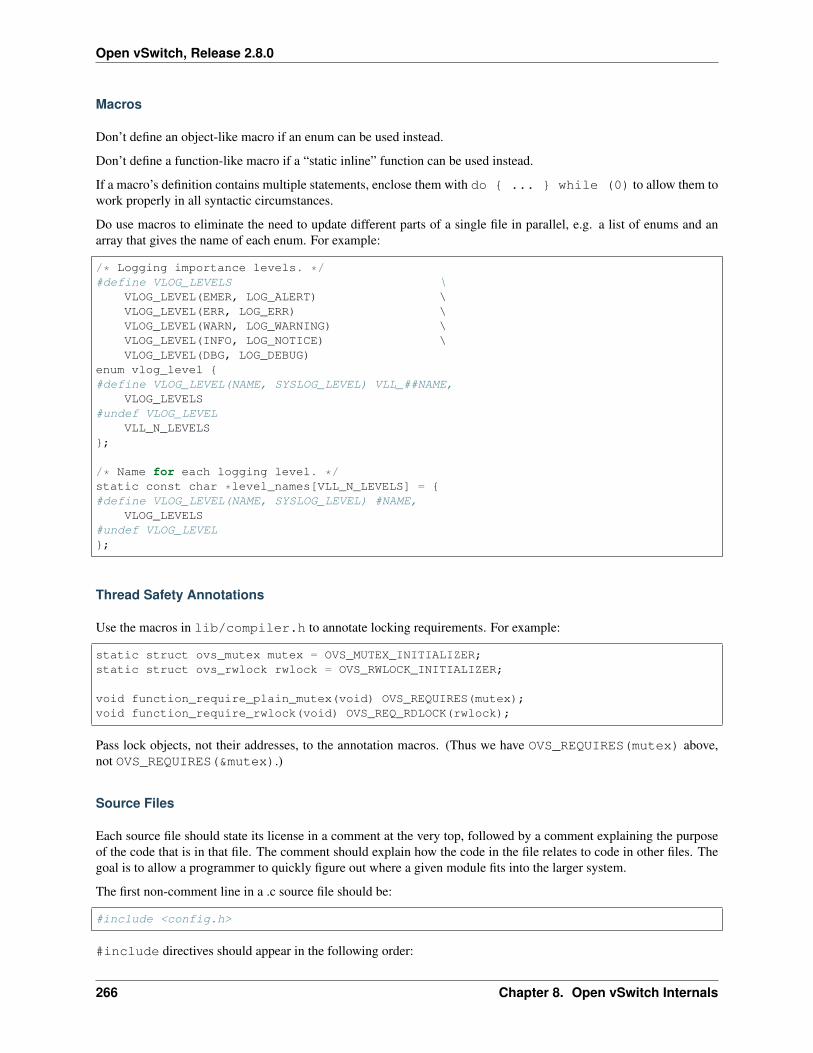
Open vSwitch, Release 2.8.0
Macros
Don’t define an object-like macro if an enum can be used instead.
Don’t define a function-like macro if a “static inline” function can be used instead.
If a macro’s definition contains multiple statements, enclose them with do { ... } while (0) to allow them towork properly in all syntactic circumstances.
Do use macros to eliminate the need to update different parts of a single file in parallel, e.g. a list of enums and anarray that gives the name of each enum. For example:
/* Logging importance levels. */#define VLOG_LEVELS \
VLOG_LEVEL(EMER, LOG_ALERT) \VLOG_LEVEL(ERR, LOG_ERR) \VLOG_LEVEL(WARN, LOG_WARNING) \VLOG_LEVEL(INFO, LOG_NOTICE) \VLOG_LEVEL(DBG, LOG_DEBUG)
enum vlog_level {#define VLOG_LEVEL(NAME, SYSLOG_LEVEL) VLL_##NAME,
VLOG_LEVELS#undef VLOG_LEVEL
VLL_N_LEVELS};
/* Name for each logging level. */static const char *level_names[VLL_N_LEVELS] = {#define VLOG_LEVEL(NAME, SYSLOG_LEVEL) #NAME,
VLOG_LEVELS#undef VLOG_LEVEL};
Thread Safety Annotations
Use the macros in lib/compiler.h to annotate locking requirements. For example:
static struct ovs_mutex mutex = OVS_MUTEX_INITIALIZER;static struct ovs_rwlock rwlock = OVS_RWLOCK_INITIALIZER;
void function_require_plain_mutex(void) OVS_REQUIRES(mutex);void function_require_rwlock(void) OVS_REQ_RDLOCK(rwlock);
Pass lock objects, not their addresses, to the annotation macros. (Thus we have OVS_REQUIRES(mutex) above,not OVS_REQUIRES(&mutex).)
Source Files
Each source file should state its license in a comment at the very top, followed by a comment explaining the purposeof the code that is in that file. The comment should explain how the code in the file relates to code in other files. Thegoal is to allow a programmer to quickly figure out where a given module fits into the larger system.
The first non-comment line in a .c source file should be:
#include <config.h>
#include directives should appear in the following order:
266 Chapter 8. Open vSwitch Internals

Open vSwitch, Release 2.8.0
1. #include <config.h>
2. The module’s own headers, if any. Including this before any other header (besides ) ensures that the module’sheader file is self-contained (see header files below).
3. Standard C library headers and other system headers, preferably in alphabetical order. (Occasionally one en-counters a set of system headers that must be included in a particular order, in which case that order must takeprecedence.)
4. Open vSwitch headers, in alphabetical order. Use "", not <>, to specify Open vSwitch header names.
Header Files
Each header file should start with its license, as described under source files above, followed by a “header guard” tomake the header file idempotent, like so:
#ifndef NETDEV_H#define NETDEV_H 1
...
#endif /* netdev.h */
Header files should be self-contained; that is, they should #include whatever additional headers are required, with-out requiring the client to #include them for it.
Don’t define the members of a struct or union in a header file, unless client code is actually intended to access themdirectly or if the definition is otherwise actually needed (e.g. inline functions defined in the header need them).
Similarly, don’t #include a header file just for the declaration of a struct or union tag (e.g. just for struct ;).Just declare the tag yourself. This reduces the number of header file dependencies.
Types
Use typedefs sparingly. Code is clearer if the actual type is visible at the point of declaration. Do not, in general,declare a typedef for a struct, union, or enum. Do not declare a typedef for a pointer type, because this can be veryconfusing to the reader.
A function type is a good use for a typedef because it can clarify code. The type should be a function type, not apointer-to-function type. That way, the typedef name can be used to declare function prototypes. (It cannot be usedfor function definitions, because that is explicitly prohibited by C89 and C99.)
You may assume that char is exactly 8 bits and that int and long are at least 32 bits.
Don’t assume that long is big enough to hold a pointer. If you need to cast a pointer to an integer, use intptr_t oruintptr_t from .
Use the int_t and uint_t types from for exact-width integer types. Use the PRId, PRIu, and PRIx macros fromfor formatting them with printf() and related functions.
For compatibility with antique printf() implementations:
• Instead of "%zu", use "%"PRIuSIZE.
• Instead of "%td", use "%"PRIdPTR.
• Instead of "%ju", use "%"PRIuMAX.
8.1. Contributing to Open vSwitch 267
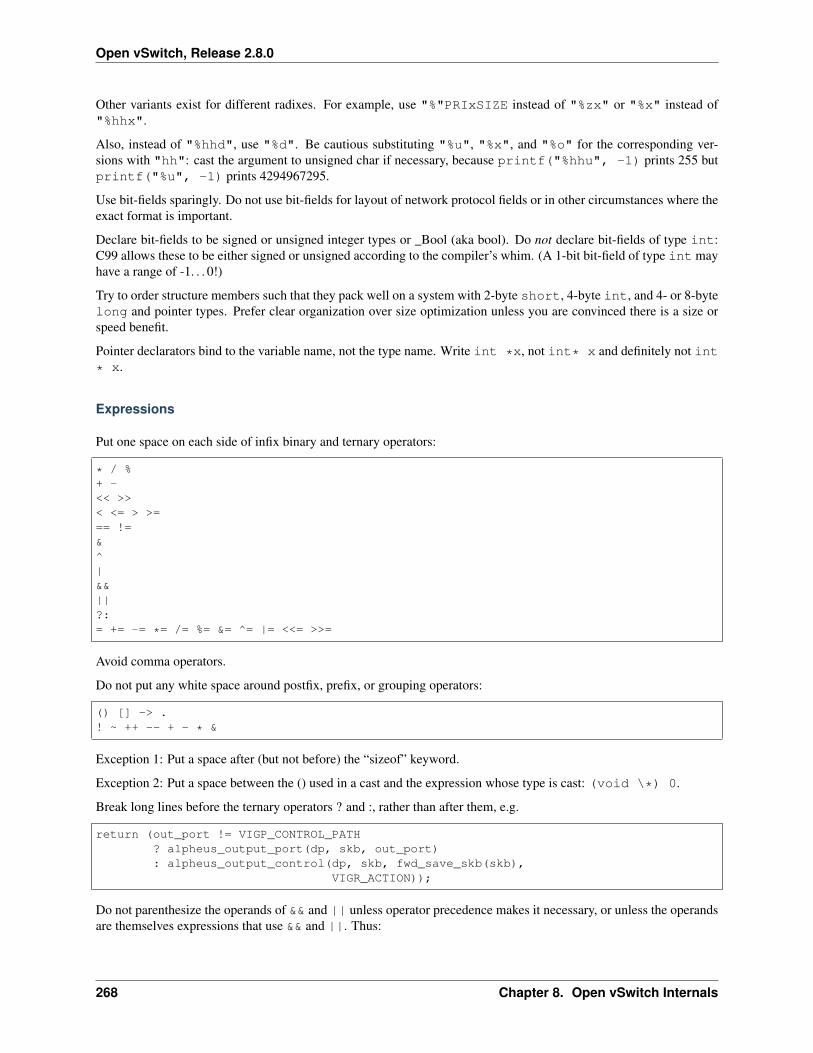
Open vSwitch, Release 2.8.0
Other variants exist for different radixes. For example, use "%"PRIxSIZE instead of "%zx" or "%x" instead of"%hhx".
Also, instead of "%hhd", use "%d". Be cautious substituting "%u", "%x", and "%o" for the corresponding ver-sions with "hh": cast the argument to unsigned char if necessary, because printf("%hhu", -1) prints 255 butprintf("%u", -1) prints 4294967295.
Use bit-fields sparingly. Do not use bit-fields for layout of network protocol fields or in other circumstances where theexact format is important.
Declare bit-fields to be signed or unsigned integer types or _Bool (aka bool). Do not declare bit-fields of type int:C99 allows these to be either signed or unsigned according to the compiler’s whim. (A 1-bit bit-field of type int mayhave a range of -1. . . 0!)
Try to order structure members such that they pack well on a system with 2-byte short, 4-byte int, and 4- or 8-bytelong and pointer types. Prefer clear organization over size optimization unless you are convinced there is a size orspeed benefit.
Pointer declarators bind to the variable name, not the type name. Write int *x, not int* x and definitely not int* x.
Expressions
Put one space on each side of infix binary and ternary operators:
* / %+ -<< >>< <= > >=== !=&^|&&||?:= += -= *= /= %= &= ^= |= <<= >>=
Avoid comma operators.
Do not put any white space around postfix, prefix, or grouping operators:
() [] -> .! ~ ++ -- + - * &
Exception 1: Put a space after (but not before) the “sizeof” keyword.
Exception 2: Put a space between the () used in a cast and the expression whose type is cast: (void \*) 0.
Break long lines before the ternary operators ? and :, rather than after them, e.g.
return (out_port != VIGP_CONTROL_PATH? alpheus_output_port(dp, skb, out_port): alpheus_output_control(dp, skb, fwd_save_skb(skb),
VIGR_ACTION));
Do not parenthesize the operands of && and || unless operator precedence makes it necessary, or unless the operandsare themselves expressions that use && and ||. Thus:
268 Chapter 8. Open vSwitch Internals
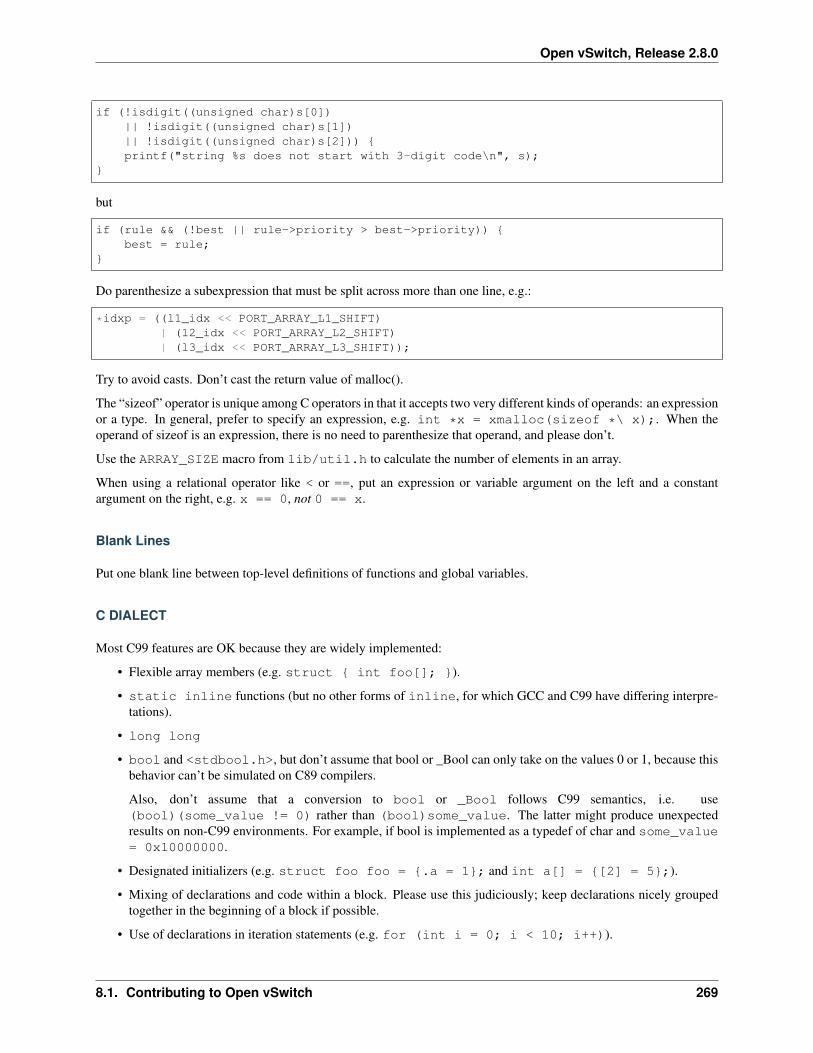
Open vSwitch, Release 2.8.0
if (!isdigit((unsigned char)s[0])|| !isdigit((unsigned char)s[1])|| !isdigit((unsigned char)s[2])) {printf("string %s does not start with 3-digit code\n", s);
}
but
if (rule && (!best || rule->priority > best->priority)) {best = rule;
}
Do parenthesize a subexpression that must be split across more than one line, e.g.:
*idxp = ((l1_idx << PORT_ARRAY_L1_SHIFT)| (l2_idx << PORT_ARRAY_L2_SHIFT)| (l3_idx << PORT_ARRAY_L3_SHIFT));
Try to avoid casts. Don’t cast the return value of malloc().
The “sizeof” operator is unique among C operators in that it accepts two very different kinds of operands: an expressionor a type. In general, prefer to specify an expression, e.g. int *x = xmalloc(sizeof *\ x);. When theoperand of sizeof is an expression, there is no need to parenthesize that operand, and please don’t.
Use the ARRAY_SIZE macro from lib/util.h to calculate the number of elements in an array.
When using a relational operator like < or ==, put an expression or variable argument on the left and a constantargument on the right, e.g. x == 0, not 0 == x.
Blank Lines
Put one blank line between top-level definitions of functions and global variables.
C DIALECT
Most C99 features are OK because they are widely implemented:
• Flexible array members (e.g. struct { int foo[]; }).
• static inline functions (but no other forms of inline, for which GCC and C99 have differing interpre-tations).
• long long
• bool and <stdbool.h>, but don’t assume that bool or _Bool can only take on the values 0 or 1, because thisbehavior can’t be simulated on C89 compilers.
Also, don’t assume that a conversion to bool or _Bool follows C99 semantics, i.e. use(bool)(some_value != 0) rather than (bool)some_value. The latter might produce unexpectedresults on non-C99 environments. For example, if bool is implemented as a typedef of char and some_value= 0x10000000.
• Designated initializers (e.g. struct foo foo = {.a = 1}; and int a[] = {[2] = 5};).
• Mixing of declarations and code within a block. Please use this judiciously; keep declarations nicely groupedtogether in the beginning of a block if possible.
• Use of declarations in iteration statements (e.g. for (int i = 0; i < 10; i++)).
8.1. Contributing to Open vSwitch 269
Open vSwitch, Release 2.8.0
• Use of a trailing comma in an enum declaration (e.g. enum { x = 1, };).
As a matter of style, avoid // comments.
Avoid using GCC or Clang extensions unless you also add a fallback for other compilers. You can, however, useC99 features or GCC extensions also supported by Clang in code that compiles only on GNU/Linux (such as lib/netdev-linux.c), because GCC is the system compiler there.
Python
When introducing new Python code, try to follow Python’s PEP 8 style. Consider running the pep8 or flake8 toolagainst your code to find issues.
Libraries
When introducing a new library, follow Open vSwitch Library ABI guide
8.1.4 Open vSwitch Windows Datapath Coding Style
The coding style guide gives the flexiblity for each platform to use its own coding style for the kernel datapath. Thisfile describes the specific coding style used in most of the C files in the Windows kernel datapath of the Open vSwitchdistribution.
Most of the coding conventions applicable for the Open vSwitch distribution are applicable to the Windows kerneldatapath as well. There are some exceptions and new guidlines owing to the commonly followed practices in Windowskernel/driver code. They are noted as follows:
Basics
• Limit lines to 79 characters.
Many times, this is not possible due to long names of functions and it is fine to go beyond the characters limit.One common example is when calling into NDIS functions.
Types
Use data types defined by Windows for most of the code. This is a common practice in Windows driver code, and itmakes integrating with the data structures and functions defined by Windows easier. Example: DWORD and BOOLEAN.
Use caution in portions of the code that interface with the OVS userspace. OVS userspace does not use Windowsspecific data types, and when copying data back and forth between kernel and userspace, care should be exercised.
Naming
It is common practice to use camel casing for naming variables, functions and files in Windows. For types, especiallystructures, unions and enums, using all upper case letters with words seprated by ‘_’ is common. These practices canbe used for OVS Windows datapath. However, use the following guidelines:
• Use lower case to begin the name of a variable.
• Do not use ‘_’ to begin the name of the variable. ‘_’ is to be used to begin the parameters of a pre-processormacro.
• Use upper case to begin the name of a function, enum, file name etc.
270 Chapter 8. Open vSwitch Internals
Open vSwitch, Release 2.8.0
• Static functions whose scope is limited to the file they are defined in can be prefixed with ‘_’. This is notmandatory though.
• For types, use all upper case for all letters with words separated by ‘_’. If camel casing is preferred, use uppercase for the first letter.
• It is a common practice to define a pointer type by prefixing the letter ‘P’ to a data type. The same practice canbe followed here as well.
For example:
static __inline BOOLEANOvsDetectTunnelRxPkt(POVS_FORWARDING_CONTEXT ovsFwdCtx,
POVS_FLOW_KEY flowKey){
POVS_VPORT_ENTRY tunnelVport = NULL;
if (!flowKey->ipKey.nwFrag &&flowKey->ipKey.nwProto == IPPROTO_UDP &&flowKey->ipKey.l4.tpDst == VXLAN_UDP_PORT_NBO) {tunnelVport = OvsGetTunnelVport(OVSWIN_VPORT_TYPE_VXLAN);ovsActionStats.rxVxlan++;
} else {return FALSE;
}
if (tunnelVport) {ASSERT(ovsFwdCtx->tunnelRxNic == NULL);ovsFwdCtx->tunnelRxNic = tunnelVport;return TRUE;
}
return FALSE;}
For declaring variables of pointer type, use of the pointer data type prefixed with ‘P’ is preferred over using ‘*’. Thisis not mandatory though, and is only prescribed since it is a common practice in Windows.
Example, #1 is preferred over #2 though #2 is also equally correct:
1. PNET_BUFFER_LIST curNbl;
2. NET_BUFFER_LIST *curNbl;
Comments
Comments should be written as full sentences that start with a capital letter and end with a period. Putting two spacesbetween sentances is not necessary.
// can be used for comments as long as the comment is a single line comment. For block comments, use /* */comments
Functions
Put the return type, function name, and the braces that surround the function’s code on separate lines, all starting incolumn 0.
Before each function definition, write a comment that describes the function’s purpose, including each parameter,the return value, and side effects. References to argument names should be given in single-quotes, e.g. ‘arg’. The
8.1. Contributing to Open vSwitch 271
Open vSwitch, Release 2.8.0
comment should not include the function name, nor need it follow any formal structure. The comment does not needto describe how a function does its work, unless this information is needed to use the function correctly (this is oftenbetter done with comments inside the function).
Mention any side effects that the function has that are not obvious based on the name of the function or based on theworkflow it is called from.
In the interest of keeping comments describing functions similar in structure, use the following template.
/**----------------------------------------------------------------------------
* Any description of the function, arguments, return types, assumptions and
* side effects.
*----------------------------------------------------------------------------
*/
Source Files
Each source file should state its license in a comment at the very top, followed by a comment explaining the purposeof the code that is in that file. The comment should explain how the code in the file relates to code in other files. Thegoal is to allow a programmer to quickly figure out where a given module fits into the larger system.
The first non-comment line in a .c source file should be:
#include <precomp.h>
#include directives should appear in the following order:
1. #include <precomp.h>
2. The module’s own headers, if any. Including this before any other header (besides <precomp.h>) ensuresthat the module’s header file is self-contained (see Header Files) below.
3. Standard C library headers and other system headers, preferably in alphabetical order. (Occasionally one en-counters a set of system headers that must be included in a particular order, in which case that order must takeprecedence.)
4. Open vSwitch headers, in alphabetical order. Use "", not <>, to specify Open vSwitch header names.
8.1.5 Open vSwitch Documentation Style
This file describes the documentation style used in all documentation found in Open vSwitch. Documentation includesany documents found in Documentation along with any README, MAINTAINERS, or generally rst suffixeddocuments found in the project tree.
Note: This guide only applies to documentation for Open vSwitch v2.7. or greater. Previous versions of OpenvSwitch used a combination of Markdown and raw plain text, and guidelines for these are not detailed here.
reStructuredText vs. Sphinx
reStructuredText (rST) is the syntax, while Sphinx is a documentation generator. Sphinx introduces a number ofextensions to rST, like the :ref: role, which can and should be used in documentation, but these will not workcorrectly on GitHub. As such, these extensions should not be used in any documentation in the root level, such as theREADME.
272 Chapter 8. Open vSwitch Internals
Open vSwitch, Release 2.8.0
rST Conventions
Basics
Many of the basic documentation guidelines match those of the Open vSwitch Coding Style.
• Use reStructuredText (rST) for all documentation.
Sphinx extensions can be used, but only for documentation in the Documentation folder.
• Limit lines at 79 characters.
Note: An exception to this rule is text within code-block elements that cannot be wrapped and links withinreferences.
• Use spaces for indentation.
• Match indentation levels.
A change in indentation level usually signifies a change in content nesting, by either closing the existing levelor introducing a new level.
• Avoid trailing spaces on lines.
• Include a license (see this file) in all docs.
• Most importantly, always build and display documentation before submitting changes! Docs aren’t unit testable,so visible inspection is necessary.
File Names
• Use hyphens as space delimiters. For example: my-readme-document.rst
Note: An exception to this rule is any man pages, which take an trailing number corresponding to the numberof arguments required. This number is preceded by an underscore.
• Use lowercase filenames.
Note: An exception to this rule is any documents found in the root-level of the project.
Titles
• Use the following headers levels.
======= Heading 0 (reserved for the title in a document)------- Heading 1~~~~~~~ Heading 2+++++++ Heading 3''''''' Heading 4
8.1. Contributing to Open vSwitch 273
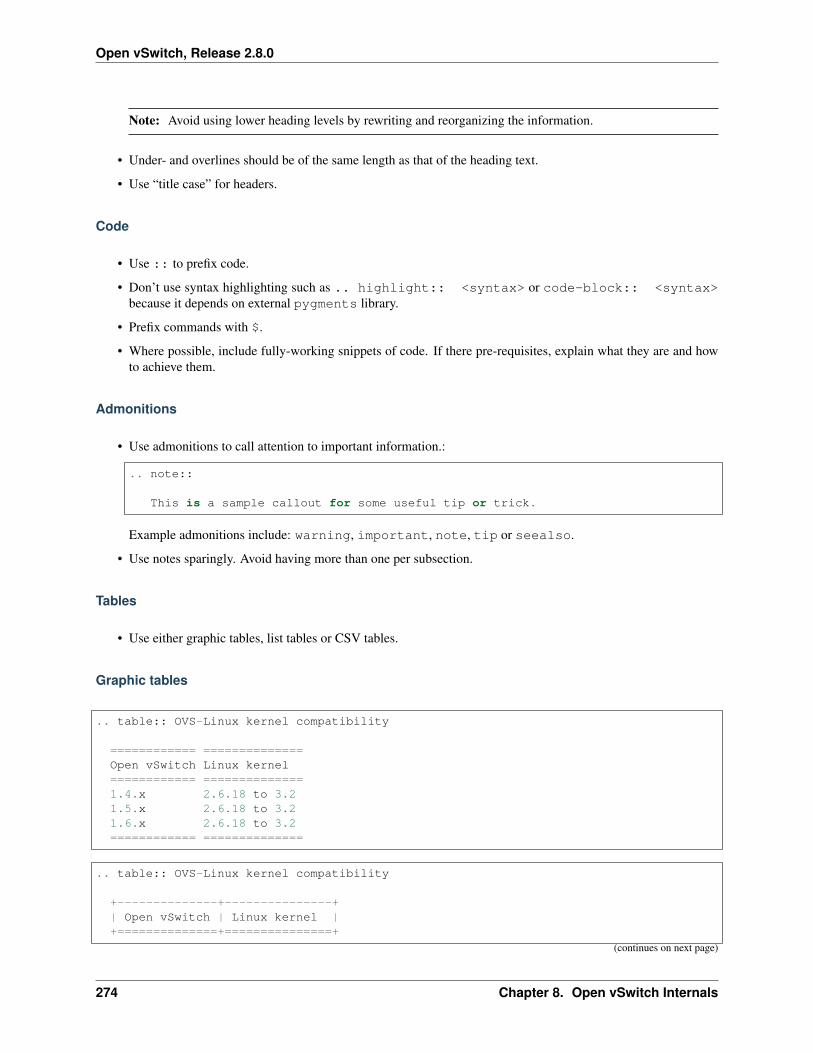
Open vSwitch, Release 2.8.0
Note: Avoid using lower heading levels by rewriting and reorganizing the information.
• Under- and overlines should be of the same length as that of the heading text.
• Use “title case” for headers.
Code
• Use :: to prefix code.
• Don’t use syntax highlighting such as .. highlight:: <syntax> or code-block:: <syntax>because it depends on external pygments library.
• Prefix commands with $.
• Where possible, include fully-working snippets of code. If there pre-requisites, explain what they are and howto achieve them.
Admonitions
• Use admonitions to call attention to important information.:
.. note::
This is a sample callout for some useful tip or trick.
Example admonitions include: warning, important, note, tip or seealso.
• Use notes sparingly. Avoid having more than one per subsection.
Tables
• Use either graphic tables, list tables or CSV tables.
Graphic tables
.. table:: OVS-Linux kernel compatibility
============ ==============Open vSwitch Linux kernel============ ==============1.4.x 2.6.18 to 3.21.5.x 2.6.18 to 3.21.6.x 2.6.18 to 3.2============ ==============
.. table:: OVS-Linux kernel compatibility
+--------------+---------------+| Open vSwitch | Linux kernel |+==============+===============+
(continues on next page)
274 Chapter 8. Open vSwitch Internals
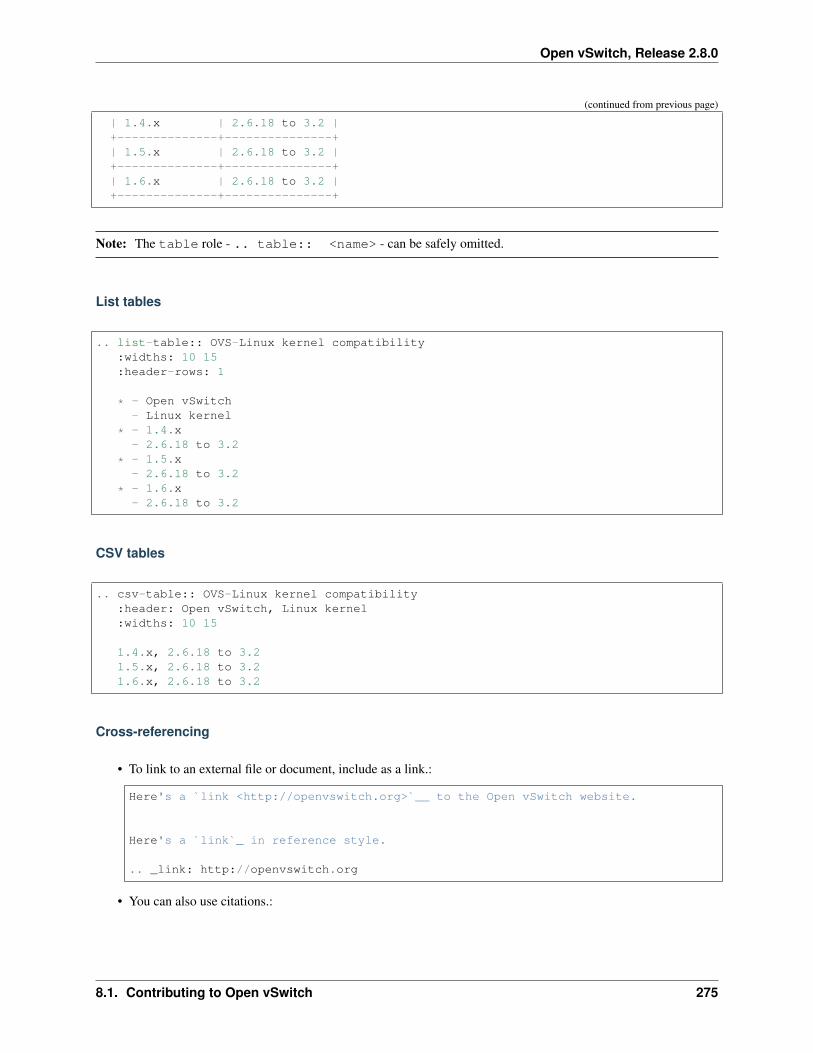
Open vSwitch, Release 2.8.0
(continued from previous page)
| 1.4.x | 2.6.18 to 3.2 |+--------------+---------------+| 1.5.x | 2.6.18 to 3.2 |+--------------+---------------+| 1.6.x | 2.6.18 to 3.2 |+--------------+---------------+
Note: The table role - .. table:: <name> - can be safely omitted.
List tables
.. list-table:: OVS-Linux kernel compatibility:widths: 10 15:header-rows: 1
* - Open vSwitch- Linux kernel
* - 1.4.x- 2.6.18 to 3.2
* - 1.5.x- 2.6.18 to 3.2
* - 1.6.x- 2.6.18 to 3.2
CSV tables
.. csv-table:: OVS-Linux kernel compatibility:header: Open vSwitch, Linux kernel:widths: 10 15
1.4.x, 2.6.18 to 3.21.5.x, 2.6.18 to 3.21.6.x, 2.6.18 to 3.2
Cross-referencing
• To link to an external file or document, include as a link.:
Here's a `link <http://openvswitch.org>`__ to the Open vSwitch website.
Here's a `link`_ in reference style.
.. _link: http://openvswitch.org
• You can also use citations.:
8.1. Contributing to Open vSwitch 275
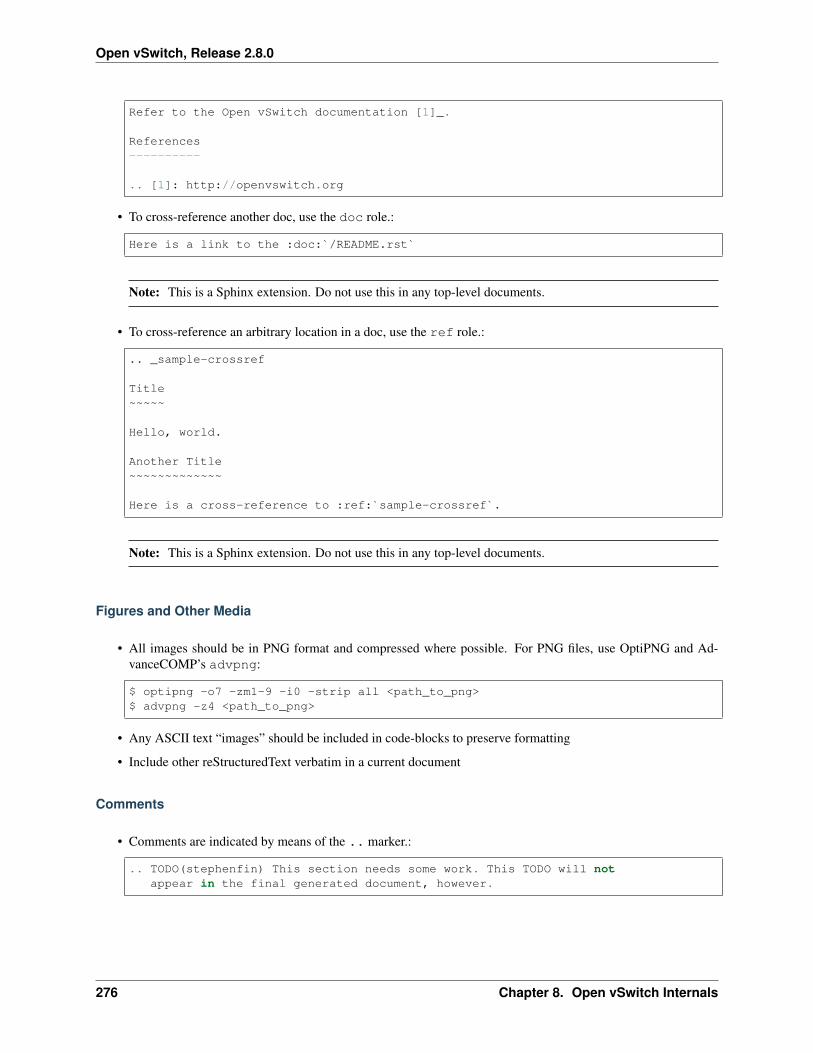
Open vSwitch, Release 2.8.0
Refer to the Open vSwitch documentation [1]_.
References----------
.. [1]: http://openvswitch.org
• To cross-reference another doc, use the doc role.:
Here is a link to the :doc:`/README.rst`
Note: This is a Sphinx extension. Do not use this in any top-level documents.
• To cross-reference an arbitrary location in a doc, use the ref role.:
.. _sample-crossref
Title~~~~~
Hello, world.
Another Title~~~~~~~~~~~~~
Here is a cross-reference to :ref:`sample-crossref`.
Note: This is a Sphinx extension. Do not use this in any top-level documents.
Figures and Other Media
• All images should be in PNG format and compressed where possible. For PNG files, use OptiPNG and Ad-vanceCOMP’s advpng:
$ optipng -o7 -zm1-9 -i0 -strip all <path_to_png>$ advpng -z4 <path_to_png>
• Any ASCII text “images” should be included in code-blocks to preserve formatting
• Include other reStructuredText verbatim in a current document
Comments
• Comments are indicated by means of the .. marker.:
.. TODO(stephenfin) This section needs some work. This TODO will notappear in the final generated document, however.
276 Chapter 8. Open vSwitch Internals
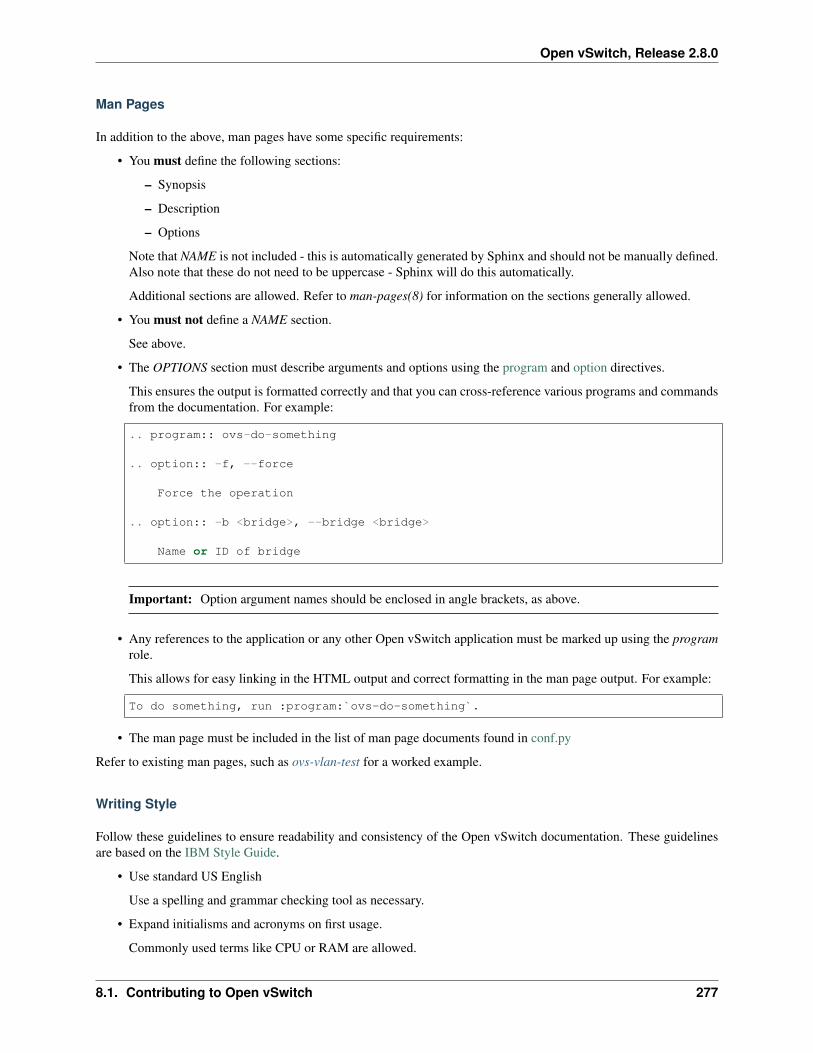
Open vSwitch, Release 2.8.0
Man Pages
In addition to the above, man pages have some specific requirements:
• You must define the following sections:
– Synopsis
– Description
– Options
Note that NAME is not included - this is automatically generated by Sphinx and should not be manually defined.Also note that these do not need to be uppercase - Sphinx will do this automatically.
Additional sections are allowed. Refer to man-pages(8) for information on the sections generally allowed.
• You must not define a NAME section.
See above.
• The OPTIONS section must describe arguments and options using the program and option directives.
This ensures the output is formatted correctly and that you can cross-reference various programs and commandsfrom the documentation. For example:
.. program:: ovs-do-something
.. option:: -f, --force
Force the operation
.. option:: -b <bridge>, --bridge <bridge>
Name or ID of bridge
Important: Option argument names should be enclosed in angle brackets, as above.
• Any references to the application or any other Open vSwitch application must be marked up using the programrole.
This allows for easy linking in the HTML output and correct formatting in the man page output. For example:
To do something, run :program:`ovs-do-something`.
• The man page must be included in the list of man page documents found in conf.py
Refer to existing man pages, such as ovs-vlan-test for a worked example.
Writing Style
Follow these guidelines to ensure readability and consistency of the Open vSwitch documentation. These guidelinesare based on the IBM Style Guide.
• Use standard US English
Use a spelling and grammar checking tool as necessary.
• Expand initialisms and acronyms on first usage.
Commonly used terms like CPU or RAM are allowed.
8.1. Contributing to Open vSwitch 277
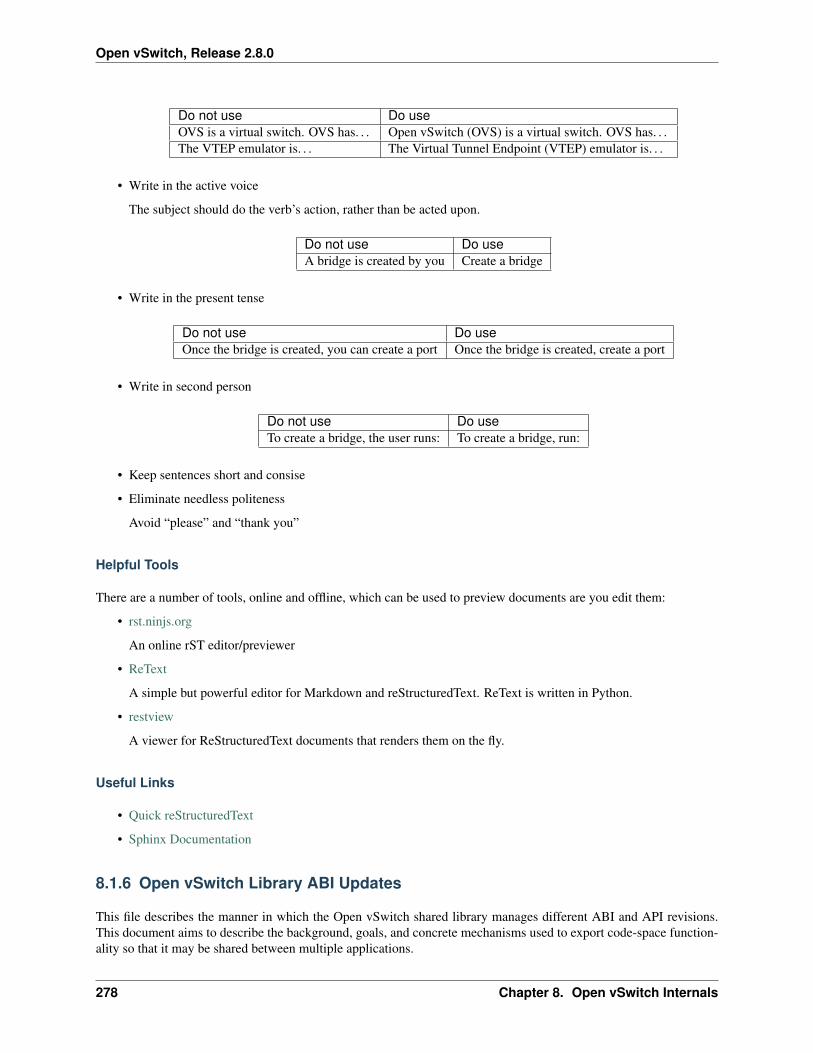
Open vSwitch, Release 2.8.0
Do not use Do useOVS is a virtual switch. OVS has. . . Open vSwitch (OVS) is a virtual switch. OVS has. . .The VTEP emulator is. . . The Virtual Tunnel Endpoint (VTEP) emulator is. . .
• Write in the active voice
The subject should do the verb’s action, rather than be acted upon.
Do not use Do useA bridge is created by you Create a bridge
• Write in the present tense
Do not use Do useOnce the bridge is created, you can create a port Once the bridge is created, create a port
• Write in second person
Do not use Do useTo create a bridge, the user runs: To create a bridge, run:
• Keep sentences short and consise
• Eliminate needless politeness
Avoid “please” and “thank you”
Helpful Tools
There are a number of tools, online and offline, which can be used to preview documents are you edit them:
• rst.ninjs.org
An online rST editor/previewer
• ReText
A simple but powerful editor for Markdown and reStructuredText. ReText is written in Python.
• restview
A viewer for ReStructuredText documents that renders them on the fly.
Useful Links
• Quick reStructuredText
• Sphinx Documentation
8.1.6 Open vSwitch Library ABI Updates
This file describes the manner in which the Open vSwitch shared library manages different ABI and API revisions.This document aims to describe the background, goals, and concrete mechanisms used to export code-space function-ality so that it may be shared between multiple applications.
278 Chapter 8. Open vSwitch Internals
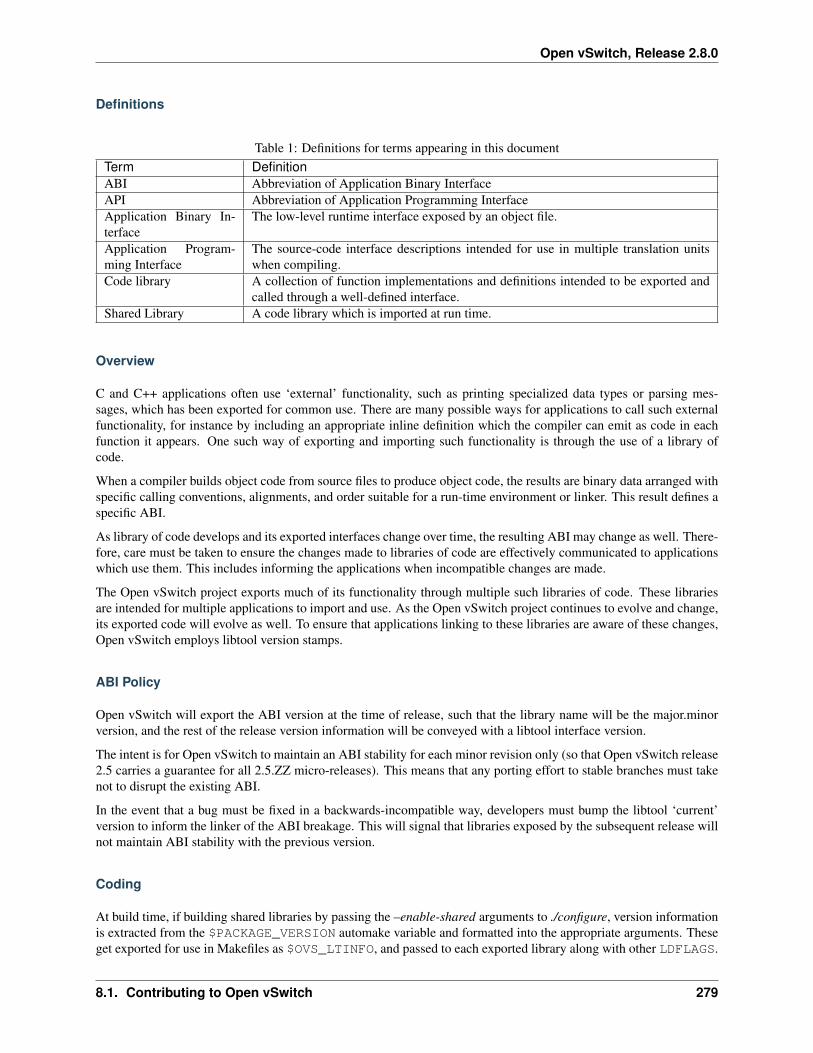
Open vSwitch, Release 2.8.0
Definitions
Table 1: Definitions for terms appearing in this documentTerm DefinitionABI Abbreviation of Application Binary InterfaceAPI Abbreviation of Application Programming InterfaceApplication Binary In-terface
The low-level runtime interface exposed by an object file.
Application Program-ming Interface
The source-code interface descriptions intended for use in multiple translation unitswhen compiling.
Code library A collection of function implementations and definitions intended to be exported andcalled through a well-defined interface.
Shared Library A code library which is imported at run time.
Overview
C and C++ applications often use ‘external’ functionality, such as printing specialized data types or parsing mes-sages, which has been exported for common use. There are many possible ways for applications to call such externalfunctionality, for instance by including an appropriate inline definition which the compiler can emit as code in eachfunction it appears. One such way of exporting and importing such functionality is through the use of a library ofcode.
When a compiler builds object code from source files to produce object code, the results are binary data arranged withspecific calling conventions, alignments, and order suitable for a run-time environment or linker. This result defines aspecific ABI.
As library of code develops and its exported interfaces change over time, the resulting ABI may change as well. There-fore, care must be taken to ensure the changes made to libraries of code are effectively communicated to applicationswhich use them. This includes informing the applications when incompatible changes are made.
The Open vSwitch project exports much of its functionality through multiple such libraries of code. These librariesare intended for multiple applications to import and use. As the Open vSwitch project continues to evolve and change,its exported code will evolve as well. To ensure that applications linking to these libraries are aware of these changes,Open vSwitch employs libtool version stamps.
ABI Policy
Open vSwitch will export the ABI version at the time of release, such that the library name will be the major.minorversion, and the rest of the release version information will be conveyed with a libtool interface version.
The intent is for Open vSwitch to maintain an ABI stability for each minor revision only (so that Open vSwitch release2.5 carries a guarantee for all 2.5.ZZ micro-releases). This means that any porting effort to stable branches must takenot to disrupt the existing ABI.
In the event that a bug must be fixed in a backwards-incompatible way, developers must bump the libtool ‘current’version to inform the linker of the ABI breakage. This will signal that libraries exposed by the subsequent release willnot maintain ABI stability with the previous version.
Coding
At build time, if building shared libraries by passing the –enable-shared arguments to ./configure, version informationis extracted from the $PACKAGE_VERSION automake variable and formatted into the appropriate arguments. Theseget exported for use in Makefiles as $OVS_LTINFO, and passed to each exported library along with other LDFLAGS.
8.1. Contributing to Open vSwitch 279
Open vSwitch, Release 2.8.0
Therefore, when adding a new library to the build system, these version flags should be included with the $LDFLAGSvariable. Nothing else needs to be done.
Changing an exported function definition (from a file in, for instance lib/*.h) is only permitted from minor release tominor release. Likewise changes to library data structures should only occur from minor release to minor release.
8.2 Mailing Lists
Important: Report security issues only to [email protected]. For more information, refer to our securitypolicies.
8.2.1 ovs-announce
The ovs-announce mailing list is used to announce new versions of Open vSwitch and is extremely low-volume.(subscribe) (archives)
8.2.2 ovs-discuss
The ovs-discuss mailing list is used to discuss plans and design decisions for Open vSwitch. It is also an appropriateplace for user questions. (subscribe) (archives)
8.2.3 ovs-dev
The ovs-dev mailing list is used to discuss development and review code before being committed. (subscribe)(archives)
8.2.4 ovs-git
The ovs-git mailing list hooks into Open vSwitch’s version control system to receive commits. (subscribe) (archives)
8.2.5 ovs-build
The ovs-build mailing list hooks into Open vSwitch’s continuous integration system to receive build reports. (sub-scribe) (archives)
8.2.6 bugs
The bugs mailing list is an alias for the discuss mailing list.
8.2.7 security
The security mailing list is for submitting security vulnerabilities to the security team.
280 Chapter 8. Open vSwitch Internals
Open vSwitch, Release 2.8.0
8.3 Patchwork
Open vSwitch uses Patchwork to track the status of patches sent to the ovs-dev mailing list. The Open vSwitchPatchwork instance can be found on ozlabs.org. The pwclientrc file, required for pwclient, can be found on theproject page
Patchwork provides a number of useful features for developers working on Open vSwitch:
• Tracking the lifecycle of patches (accepted, rejected, under-review, . . . )
• Assigning reviewers (delegates) to patches
• Downloading/applying patches via the web UI or the XML-RPC API (see pwclient)
• A usable UI for viewing patch discussions
8.3.1 pwclient
The pwclient tool provides an way to download and apply patches, change the state of patches in Patchwork, and more.You can download pwclient from here. Once downloaded, run:
$ pwclient help
to get more information about the functionality pwclient provides.
8.4 Open vSwitch Release Process
This document describes the process ordinarily used for Open vSwitch development and release. Exceptions aresometimes necessary, so all of the statements here should be taken as subject to change through rough consensus ofOpen vSwitch contributors, obtained through public discussion on, e.g., ovs-dev or the #openvswitch IRC channel.
8.4.1 Release Strategy
Open vSwitch feature development takes place on the “master” branch. Ordinarily, new features are rebased againstmaster and applied directly. For features that take significant development, sometimes it is more appropriate to mergea separate branch into master; please discuss this on ovs-dev in advance.
Periodically, the OVS developers fork a branch from master to become an official release. These release branchesare named for expected release number, e.g. “branch-2.3” for the branch that will yield Open vSwitch 2.3.x. Releasebranches should receive only bug fixes, not new features. Bug fixes applied to release branches should be backportsof corresponding bug fixes to the master branch, except for bugs present only on release branches (which are rare inpractice).
Sometimes there can be exceptions to the rule that a release branch receives only bug fixes. In particular, after arelease branch is created, but before the first actual release from that branch, it can be appropriate to add features. Likebug fixes, new features on release branches should be backports of the corresponding commits on the master branch.Features to be added to release branches should be limited in scope and risk and discussed on ovs-dev before creatingthe branch.
After a period of testing and stabilization, and rough consensus obtained from contributors that the release is ready, thedevelopers release the .0 release on its branch, e.g. 2.3.0 for branch-2.3. To make the actual release, a developer pushesa signed tag named, e.g. v2.3.0, to the Open vSwitch repository, makes a release tarball available on openvswitch.org,and posts a release announcement to ovs-announce.
8.3. Patchwork 281
Open vSwitch, Release 2.8.0
As a number of bug fixes accumulate, or after important bugs or vulnerabilities are fixed, the OVS developers maymake additional releases from a branch: 2.3.1, 2.3.2, and so on. The process is the same for these additional release asfor a .0 release.
At most two release branches are formally maintained at any given time: the latest release and the latest releasedesigned as LTS. An LTS release is one that the OVS project has designated as being maintained for a longer periodof time. Currently, an LTS release is maintained until the next LTS is chosen. There is not currently a strict guidelineon how often a new LTS release is chosen, but so far it has been about every 2 years. That could change based onthe current state of OVS development. For example, we do not want to designate a new release as LTS that includesdisruptive internal changes, as that may make it harder to support for a longer period of time. Discussion aboutchoosing the next LTS release occurs on the OVS development mailing list.
8.4.2 Release Numbering
The version number on master should normally end in .90. This indicates that the Open vSwitch version is “almost”the next version to branch.
Forking master into branch-x.y requires two commits to master. The first is titled “Prepare for x.y.0” and incrementsthe version number to x.y. This is the initial commit on branch-x.y. The second is titled “Prepare for post-x.y.0(x.y.90)” and increments the version number to x.y.90.
The version number on a release branch is x.y.z, where z is initially 0. Making a release requires two commits. Thefirst is titled Set release dates for x.y.z. and updates NEWS and debian/changelog to specify the release date of thenew release. This commit is the one made into a tarball and tagged. The second is titled Prepare for x.y.(z+1). andincrements the version number and adds a blank item to NEWS with an unspecified date.
8.4.3 Release Scheduling
Open vSwitch makes releases at the following six-month cadence, which of course is subject to change.
Time (months) Approximate Dates EventT Mar 1, Sep 1 Release cycle for version x.y beginsT + 4 Jul 1, Jan 1 branch-x.y forks from masterT + 5.5 Aug 15, Feb 15 branch-x.y released as version x.y.0
8.4.4 Contact
Use [email protected] to discuss the Open vSwitch development and release process.
8.5 Reporting Bugs in Open vSwitch
We are eager to hear from users about problems that they have encountered with Open vSwitch. This file documentshow best to report bugs so as to ensure that they can be fixed as quickly as possible.
Please report bugs by sending email to [email protected].
For reporting security vulnerabilities, please read Open vSwitch’s Security Process.
The most important parts of your bug report are the following:
• What you did that make the problem appear.
• What you expected to happen.
282 Chapter 8. Open vSwitch Internals
Open vSwitch, Release 2.8.0
• What actually happened.
Please also include the following information:
• The Open vSwitch version number (as output by ovs-vswitchd --version).
• The Git commit number (as output by git rev-parse HEAD), if you built from a Git snapshot.
• Any local patches or changes you have applied (if any).
The following are also handy sometimes:
• The kernel version on which Open vSwitch is running (from /proc/version) and the distribution and ver-sion number of your OS (e.g. “Centos 5.0”).
• The contents of the vswitchd configuration database (usually /etc/openvswitch/conf.db).
• The output of ovs-dpctl show.
• If you have Open vSwitch configured to connect to an OpenFlow controller, the output of ovs-ofctl show<bridge> for each <bridge> configured in the vswitchd configuration database.
• A fix or workaround, if you have one.
• Any other information that you think might be relevant.
Important: [email protected] is a public mailing list, to which anyone can subscribe, so do not include confi-dential information in your bug report.
8.6 Open vSwitch’s Security Process
This is a proposed security vulnerability reporting and handling process for Open vSwitch. It is based on the Open-Stack vulnerability management process described at https://wiki.openstack.org/wiki/Vulnerability_Management.
The OVS security team coordinates vulnerability management using the ovs-security mailing list. Membership in thesecurity team and subscription to its mailing list consists of a small number of trustworthy people, as determined byrough consensus of the Open vSwitch committers on the ovs-committers mailing list. The Open vSwitch security teamshould include Open vSwitch committers, to ensure prompt and accurate vulnerability assessments and patch review.
We encourage everyone involved in the security process to GPG-sign their emails. We additionally encourage GPG-encrypting one-on-one conversations as part of the security process.
8.6.1 What is a vulnerability?
All vulnerabilities are bugs, but not every bug is a vulnerability. Vulnerabilities compromise one or more of:
• Confidentiality (personal or corporate confidential data).
• Integrity (trustworthiness and correctness).
• Availability (uptime and service).
Here are some examples of vulnerabilities to which one would expect to apply this process:
• A crafted packet that causes a kernel or userspace crash (Availability).
• A flow translation bug that misforwards traffic in a way likely to hop over security boundaries (Integrity).
• An OpenFlow protocol bug that allows a controller to read arbitrary files from the file system (Confidentiality).
8.6. Open vSwitch’s Security Process 283
Open vSwitch, Release 2.8.0
• Misuse of the OpenSSL library that allows bypassing certificate checks (Integrity).
• A bug (memory corruption, overflow, . . . ) that allows one to modify the behaviour of OVS through externalconfiguration interfaces such as OVSDB (Integrity).
• Privileged information is exposed to unprivileged users (Confidentiality).
If in doubt, please do use the vulnerability management process. At worst, the response will be to report the bugthrough the usual channels.
8.6.2 Step 1: Reception
To report an Open vSwitch vulnerability, send an email to the ovs-security mailing list (see contact at the end of thisdocument). A security team member should reply to the reporter acknowledging that the report has been received.
Consider reporting the information mentioned in Reporting Bugs in Open vSwitch, where relevant.
Reporters may ask for a GPG key while initiating contact with the security team to deliver more sensitive reports.
The Linux kernel has its own vulnerability management process. Handling of vulnerabilities that affect both the OpenvSwitch tree and the upstream Linux kernel should be reported through both processes. Send your report as a singleemail to both the kernel and OVS security teams to allow those teams to most easily coordinate among themselves.
8.6.3 Step 2: Assessment
The security team should discuss the vulnerability. The reporter should be included in the discussion (via “CC”) to anappropriate degree.
The assessment should determine which Open vSwitch versions are affected (e.g. every version, only the latest release,only unreleased versions), the privilege required to take advantage of the vulnerability (e.g. any network user, any localL2 network user, any local system user, connected OpenFlow controllers), the severity of the vulnerability, and howthe vulnerability may be mitigated (e.g. by disabling a feature).
The treatment of the vulnerability could end here if the team determines that it is not a realistic vulnerability.
8.6.4 Step 3a: Document
The security team develops a security advisory document. The security team may, at its discretion, include the reporter(via “CC”) in developing the security advisory document, but in any case should accept feedback from the reporterbefore finalizing the document. When the document is final, the security team should obtain a CVE for the vulnerabilityfrom a CNA (https://cve.mitre.org/cve/cna.html).
The document credits the reporter and describes the vulnerability, including all of the relevant information from theassessment in step 2. Suitable sections for the document include:
* Title: The CVE identifier, a short description of thevulnerability. The title should mention Open vSwitch.
In email, the title becomes the subject. Pre-release advisoriesare often passed around in encrypted email, which have plaintextsubjects, so the title should not be too specific.
* Description: A few paragraphs describing the generalcharacteristics of the vulnerability, including the versions ofOpen vSwitch that are vulnerable, the kind of attack thatexposes the vulnerability, and potential consequences of the
(continues on next page)
284 Chapter 8. Open vSwitch Internals
Open vSwitch, Release 2.8.0
(continued from previous page)
attack.
The description should re-state the CVE identifier, in case thesubject is lost when an advisory is sent over email.
* Mitigation: How an Open vSwitch administrator can minimize thepotential for exploitation of the vulnerability, before applyinga fix. If no mitigation is possible or recommended, explainwhy, to reduce the chance that at-risk users believe they arenot at risk.
* Fix: Describe how to fix the vulnerability, perhaps in terms ofapplying a source patch. The patch or patches themselves, ifincluded in the email, should be at the very end of the advisoryto reduce the risk that a reader would stop reading at thispoint.
* Recommendation: A concise description of the security team'srecommendation to users.
* Acknowledgments: Thank the reporters.
* Vulnerability Check: A step-by-step procedure by which a usercan determine whether an installed copy of Open vSwitch isvulnerable.
The procedure should clearly describe how to interpret theresults, including expected results in vulnerable andnot-vulnerable cases. Thus, procedures that produce clear andeasily distinguished results are preferred.
The procedure should assume as little understanding of OpenvSwitch as possible, to make it more likely that a competentadministrator who does not specialize in Open vSwitch canperform it successfully.
The procedure should have minimal dependencies on tools that arenot widely installed.
Given a choice, the procedure should be one that takes at leastsome work to turn into a useful exploit. For example, aprocedure based on "ovs-appctl" commands, which require localadministrator access, is preferred to one that sends testpackets to a machine, which only requires network connectivity.
The section should say which operating systems it is designedfor. If the procedure is likely to be specific to particulararchitectures (e.g. x86-64, i386), it should state on which onesit has been tested.
This section should state the risks of the procedure. Forexample, if it can crash Open vSwitch or disrupt packetforwarding, say so.
It is more useful to explain how to check an installed andrunning Open vSwitch than one built locally from source, but ifit is easy to use the procedure from a sandbox environment, it
(continues on next page)
8.6. Open vSwitch’s Security Process 285
Open vSwitch, Release 2.8.0
(continued from previous page)
can be helpful to explain how to do so.
* Patch: If a patch or patches are available, and it is practicalto include them in the email, put them at the end. Format themas described in :doc:`contributing/submitting-patches`, that is, asoutput by "git format-patch".
The patch subjects should include the version for which they aresuited, e.g. "[PATCH branch-2.3]" for a patch against OpenvSwitch 2.3.x. If there are multiple patches for multipleversions of Open vSwitch, put them in separate sections withclear titles.
Multiple patches for a single version of Open vSwitch, that mustbe stacked on top of each other to fix a single vulnerability,are undesirable because users are less likely to apply all ofthem correctly and in the correct order.
Each patch should include a Vulnerability tag with the CVEidentifier, a Reported-by tag or tags to credit the reporters,and a Signed-off-by tag to acknowledge the Developer'sCertificate of Origin. It should also include other appropriatetags, such as Acked-by tags obtained during review.
CVE-2016-2074 is an example advisory document.
8.6.5 Step 3b: Fix
Steps 3a and 3b may proceed in parallel.
The security team develops and obtains (private) reviews for patches that fix the vulnerability. If necessary, the securityteam pulls in additional developers, who must agree to maintain confidentiality.
8.6.6 Step 4: Embargoed Disclosure
The security advisory and patches are sent to downstream stakeholders, with an embargo date and time set from thetime sent. Downstream stakeholders are expected not to deploy or disclose patches until the embargo is passed.
A disclosure date is negotiated by the security team working with the bug submitter as well as vendors. However, theOpen vSwitch security team holds the final say when setting a disclosure date. The timeframe for disclosure is fromimmediate (esp. if it’s already publicly known) to a few weeks. As a basic default policy, we expect report date todisclosure date to be 10 to 15 business days.
Operating system vendors are obvious downstream stakeholders. It may not be necessary to be too choosy aboutwho to include: any major Open vSwitch user who is interested and can be considered trustworthy enough could beincluded. To become a downstream stakeholder, email the ovs-security mailing list.
If the vulnerability is already public, skip this step.
8.6.7 Step 5: Public Disclosure
When the embargo expires, push the (reviewed) patches to appropriate branches, post the patches to the ovs-devmailing list (noting that they have already been reviewed and applied), post the security advisory to appropriate mailinglists (ovs-announce, ovs-discuss), and post the security advisory on the Open vSwitch webpage.
286 Chapter 8. Open vSwitch Internals
Open vSwitch, Release 2.8.0
When the patch is applied to LTS (long-term support) branches, a new version should be released.
The security advisory should be GPG-signed by a security team member with a key that is in a public web of trust.
Contact
Report security vulnerabilities to the ovs-security mailing list: [email protected]
Report problems with this document to the ovs-bugs mailing list: [email protected]
8.7 Expectations for Developers with Open vSwitch Repo Access
8.7.1 Pre-requisites
Be familar with the guidlines and standards defined in Contributing to Open vSwitch.
8.7.2 Review
Code (yours or others’) must be reviewed publicly (by you or others) before you push it to the repository. With oneexception (see below), every change needs at least one review.
If one or more people know an area of code particularly well, code that affects that area should ordinarily get a reviewfrom one of them.
The riskier, more subtle, or more complicated the change, the more careful the review required. When a change needscareful review, use good judgment regarding the quality of reviews. If a change adds 1000 lines of new code, and areview posted 5 minutes later says just “Looks good,” then this is probably not a quality review.
(The size of a change is correlated with the amount of care needed in review, but it is not strictly tied to it. A searchand replace across many files may not need much review, but one-line optimization changes can have widespreadimplications.)
Your own small changes to fix a recently broken build (“make”) or tests (“make check”), that you believe to be visibleto a large number of developers, may be checked in without review. If you are not sure, ask for review. If you do pusha build fix without review, send the patch to ovs-dev afterward as usual, indicating in the email that you have alreadypushed it.
Regularly review submitted code in areas where you have expertise. Consider reviewing other code as well.
8.7.3 Git conventions
Do not push merge commits to the Git repository without prior discussion on ovs-dev.
If you apply a change (yours or another’s) then it is your responsibility to handle any resulting problems, especiallybroken builds and other regressions. If it is someone else’s change, then you can ask the original submitter to addressit. Regardless, you need to ensure that the problem is fixed in a timely way. The definition of “timely” depends on theseverity of the problem.
If a bug is present on master and other branches, fix it on master first, then backport the fix to other branches. Straight-forward backports do not require additional review (beyond that for the fix on master).
Feature development should be done only on master. Occasionally it makes sense to add a feature to the most recentrelease branch, before the first actual release of that branch. These should be handled in the same way as bug fixes,that is, first implemented on master and then backported.
8.7. Expectations for Developers with Open vSwitch Repo Access 287
Open vSwitch, Release 2.8.0
Keep the authorship of a commit clear by maintaining a correct list of “Signed-off-by:”s. If a confusing situationcomes up, as it occasionally does, bring it up on the mailing list. If you explain the use of “Signed-off-by:” to a newdeveloper, explain not just how but why, since the intended meaning of “Signed-off-by:” is more important than thesyntax. As part of your explanation, quote or provide a URL to the Developer’s Certificate of Origin in SubmittingPatches.
Use Reported-by: and Tested-by: tags in commit messages to indicate the source of a bug report.
Keep the AUTHORS.rst file up to date.
8.8 OVS Committer Grant/Revocation Policy
An OVS committer is a participant in the project with the ability to commit code directly to the master repository.Commit access grants a broad ability to affect the progress of the project as presented by its most important artifact,the code and related resources that produce working binaries of Open vSwitch. As such it represents a significant levelof trust in an individual’s commitment to working with other committers and the community at large for the benefit ofthe project. It can not be granted lightly and, in the worst case, must be revocable if the trust placed in an individualwas inappropriate.
This document suggests guidelines for granting and revoking commit access. It is intended to provide a framework forevaluation of such decisions without specifying deterministic rules that wouldn’t be sensitive to the nuance of specificsituations. In the end the decision to grant or revoke committer privileges is a judgment call made by the existing setof committers.
8.8.1 Granting Commit Access
Granting commit access should be considered when a candidate has demonstrated the following in their interactionwith the project:
• Contribution of significant new features through the patch submission process where:
– Submissions are free of obvious critical defects
– Submissions do not typically require many iterations of improvement to be accepted
• Consistent participation in code review of other’s patches, including existing committers, with comments con-sistent with the overall project standards
• Assistance to those in the community who are less knowledgeable through active participation in project forumssuch as the ovs-discuss mailing list.
• Plans for sustained contribution to the project compatible with the project’s direction as viewed by currentcommitters.
• Commitment to meet the expectations described in the “Expectations of Developer’s with Open vSwitch Access”
The process to grant commit access to a candidate is simple:
• An existing committer nominates the candidate by sending an email to all existing committers with informationsubstantiating the contributions of the candidate in the areas described above.
• All existing committers discuss the pros and cons of granting commit access to the candidate in the email thread.
• When the discussion has converged or a reasonable time has elapsed without discussion developing (e.g. a fewbusiness days) the nominator calls for a final decision on the candidate with a followup email to the thread.
• Each committer may vote yes, no, or abstain by replying to the email thread. A failure to reply is an implicitabstention.
288 Chapter 8. Open vSwitch Internals
Open vSwitch, Release 2.8.0
• After votes from all existing committers have been collected or a reasonable time has elapsed for them to beprovided (e.g. a couple of business days) the votes are evaluated. To be granted commit access the candidatemust receive yes votes from a majority of the existing committers and zero no votes. Since a no vote is effectivelya veto of the candidate it should be accompanied by a reason for the vote.
• The nominator summarizes the result of the vote in an email to all existing committers.
• If the vote to grant commit access passed, the candidate is contacted with an invitation to become a committerto the project which asks them to agree to the committer expectations documented on the project web site.
• If the candidate agrees access is granted by setting up commit access to the repos on github.
8.8.2 Revoking Commit Access
There are two situations in which commit access might be revoked.
The straightforward situation is a committer who is no longer active in the project and has no plans to become activein the near future. The process in this case is:
• Any time after a committer has been inactive for more than 6 months any other committer to the project mayidentify that committer as a candidate for revocation of commit access due to inactivity.
• The plans of revocation should be sent in a private email to the candidate.
• If the candidate for removal states plans to continue participating no action is taken and this process terminates.
• If the candidate replies they no longer require commit access then commit access is removed and a notificationis sent to the candidate and all existing committers.
• If the candidate can not be reached within 1 week of the first attempting to contact this process continues.
• A message proposing removal of commit access is sent to the candidate and all other committers.
– If the candidate for removal states plans to continue participating no action is taken.
– If the candidate replies they no longer require commit access then their access is removed.
– If the candidate can not be reached within 2 months of the second attempting to contact them, access isremoved.
• In any case, where access is removed, this fact is published through an email to all existing committers (includingthe candidate for removal).
The more difficult situation is a committer who is behaving in a manner that is viewed as detrimental to the future ofthe project by other committers. This is a delicate situation with the potential for the creation of division within thegreater community and should be handled with care. The process in this case is:
• Discuss the behavior of concern with the individual privately and explain why you believe it is detrimental tothe project. Stick to the facts and keep the email professional. Avoid personal attacks and the temptation tohypothesize about unknowable information such as the other’s motivations. Make it clear that you would prefernot to discuss the behavior more widely but will have to raise it with other contributors if it does not change.Ideally the behavior is eliminated and no further action is required. If not,
• Start an email thread with all committers, including the source of the behavior, describing the behavior and thereason it is detrimental to the project. The message should have the same tone as the private discussion andshould generally repeat the same points covered in that discussion. The person whose behavior is being ques-tioned should not be surprised by anything presented in this discussion. Ideally the wider discussion providesmore perspective to all participants and the issue is resolved. If not,
• Start an email thread with all committers except the source of the detrimental behavior requesting a vote onrevocation of commit rights. Cite the discussion among all committers and describe all the reasons why it
8.8. OVS Committer Grant/Revocation Policy 289
Open vSwitch, Release 2.8.0
was not resolved satisfactorily. This email should be carefully written with the knowledge that the reasoning itcontains may be published to the larger community to justify the decision.
• Each committer may vote yes, no, or abstain by replying to the email thread. A failure to reply is an implicitabstention.
• After all votes have been collected or a reasonable time has elapsed for them to be provided (e.g. a couple ofbusiness days) the votes are evaluated. For the request to revoke commit access for the candidate to pass it mustreceive yes votes from two thirds of the existing committers.
• anyone that votes no must provide their reasoning, and
• if the proposal passes then counter-arguments for the reasoning in no votes should also be documented alongwith the initial reasons the revocation was proposed. Ideally there should be no new counter-arguments suppliedin a no vote as all concerns should have surfaced in the discussion before the vote.
• The original person to propose revocation summarizes the result of the vote in an email to all existing committersexcepting the candidate for removal.
• If the vote to revoke commit access passes, access is removed and the candidate for revocation is informed ofthat fact and the reasons for it as documented in the email requesting the revocation vote.
• Ideally the revoked committer peacefully leaves the community and no further action is required. However,there is a distinct possibility that he/she will try to generate support for his/her point of view within the largercommunity. In this case the reasoning for removing commit access as described in the request for a vote will bepublished to the community.
8.8.3 Changing the Policy
The process for changing the policy is:
• Propose the changes to the policy in an email to all current committers and request discussion.
• After an appropriate period of discussion (a few days) update the proposal based on feedback if required andresend it to all current committers with a request for a formal vote.
• After all votes have been collected or a reasonable time has elapsed for them to be provided (e.g. a couple ofbusiness days) the votes are evaluated. For the request to modify the policy to pass it must receive yes votesfrom two thirds of the existing committers.
Template Emails
8.8.4 Nomination to Grant Commit Access
I would like to nominate [candidate] for commit access. I believe [he/she] has met the conditions forcommit access described in the committer grant policy on the project web site in the following ways:
[list of requirements & evidence]
Please reply to all in this message thread with your comments and questions. If that discussion concludesfavorably I will request a formal vote on the nomination in a few days.
8.8.5 Vote to Grant Commit Access
I nominated [candidate] for commit access on [date]. Having allowed sufficient time for discussion it’snow time to formally vote on the proposal.
290 Chapter 8. Open vSwitch Internals
Open vSwitch, Release 2.8.0
Please reply to all in this thread with your vote of: YES, NO, or ABSTAIN. A failure to reply will becounted as an abstention. If you vote NO, by our policy you must include the reasons for that vote in yourreply. The deadline for votes is [date and time].
If a majority of committers vote YES and there are zero NO votes commit access will be granted.
8.8.6 Vote Results for Grant of Commit Access
The voting period for granting to commit access to [candidate] initiated at [date and time] is now closedwith the following results:
YES: [count of yes votes] ([% of voters])
NO: [count of no votes] ([% of voters])
ABSTAIN: [count of abstentions] ([% of voters])
Based on these results commit access [is/is NOT] granted.
8.8.7 Invitation to Accepted Committer
Due to your sustained contributions to the Open vSwitch (OVS) project we would like to provide youwith commit access to the project repository. Developers with commit access must agree to fulfill specificresponsibilities described in the source repository:
/Documentation/internals/committer-responsibilities.rst
Please let us know if you would like to accept commit access and if so that you agree to fulfill theseresponsibilities. Once we receive your response we’ll set up access. We’re looking forward continuing towork together to advance the Open vSwitch project.
8.8.8 Proposal to Remove Commit Access for Inactivity
Committer [candidate] has been inactive for [duration]. I have attempted to privately contacted [him/her]and [he/she] could not be reached.
Based on this I would like to formally propose removal of commit access. If a response to this messagedocumenting the reasons to retain commit access is not received by [date] access will be removed.
8.8.9 Notification of Commit Removal for Inactivity
Committer [candidate] has been inactive for [duration]. [He/she] [stated no commit access is re-quired/failed to respond] to the formal proposal to remove access on [date]. Commit access has nowbeen removed.
8.8.10 Proposal to Revoke Commit Access for Detrimental Behavior
I regret that I feel compelled to propose revocation of commit access for [candidate]. I have privatelydiscussed with [him/her] the following reasons I believe [his/her] actions are detrimental to the projectand we have failed to come to a mutual understanding:
[List of reasons and supporting evidence]
Please reply to all in this thread with your thoughts on this proposal. I plan to formally propose a vote onthe proposal on or after [date and time].
8.8. OVS Committer Grant/Revocation Policy 291
Open vSwitch, Release 2.8.0
It is important to get all discussion points both for and against the proposal on the table during the dis-cussion period prior to the vote. Please make it a high priority to respond to this proposal with yourthoughts.
8.8.11 Vote to Revoke Commit Access
I nominated [candidate] for revocation of commit access on [date]. Having allowed sufficient time fordiscussion it’s now time to formally vote on the proposal.
Please reply to all in this thread with your vote of: YES, NO, or ABSTAIN. A failure to reply will becounted as an abstention. If you vote NO, by our policy you must include the reasons for that vote in yourreply. The deadline for votes is [date and time].
If 2/3rds of committers vote YES commit access will be revoked.
The following reasons for revocation have been given in the original proposal or during discussion:
[list of reasons to remove access]
The following reasons for retaining access were discussed:
[list of reasons to retain access]
The counter-argument for each reason for retaining access is:
[list of counter-arguments for retaining access]
8.8.12 Vote Results for Revocation of Commit Access
The voting period for revoking the commit access of [candidate] initiated at [date and time] is now closedwith the following results:
• YES: [count of yes votes] ([% of voters])
• NO: [count of no votes] ([% of voters])
• ABSTAIN: [count of abstentions] ([% of voters])
Based on these results commit access [is/is NOT] revoked. The following reasons for retaining commitaccess were proposed in NO votes:
[list of reasons]
The counter-arguments for each of these reasons are:
[list of counter-arguments]
8.8.13 Notification of Commit Revocation for Detrimental Behavior
After private discussion with you and careful consideration of the situation, the other committers to theOpen vSwitch (OVS) project have concluded that it is in the best interest of the project that your commitaccess to the project repositories be revoked and this has now occurred.
The reasons for this decision are:
[list of reasons for removing access]
While your goals and those of the project no longer appear to be aligned we greatly appreciate all thework you have done for the project and wish you continued success in your future work.
292 Chapter 8. Open vSwitch Internals

Open vSwitch, Release 2.8.0
8.9 Authors
The following people authored or signed off on commits in the Open vSwitch source code or webpage version controlrepository.
Name EmailAaron Conole [email protected] Rosen [email protected] Pevec [email protected] Duyck [email protected] Copot [email protected] Starovoitov [email protected] I. Froloff [email protected] Wang [email protected] Finelli [email protected] Balutoiu [email protected] Serdean [email protected] Arora [email protected] Bose [email protected] Biswas [email protected] Kumar [email protected] Evans [email protected] Beekhof [email protected] Kampjes [email protected] Lambeth [email protected] Hill [email protected] Southgate [email protected] Zhou [email protected] Sharma [email protected] Soman [email protected] Atteka [email protected] Fischetti [email protected] Chanda [email protected] Tubaltsev [email protected] Lutz [email protected] Sharma [email protected] TaheriMonfared [email protected] Swaminathan [email protected] Shanmugam [email protected] Pfaff [email protected] Warren [email protected] Ye [email protected] Vermeulen [email protected] Bodireddy [email protected] O’Mahony [email protected] Xu [email protected] Kruger [email protected] Davie [email protected] Phillippe [email protected] Andreotti [email protected]
Continued on next page
8.9. Authors 293
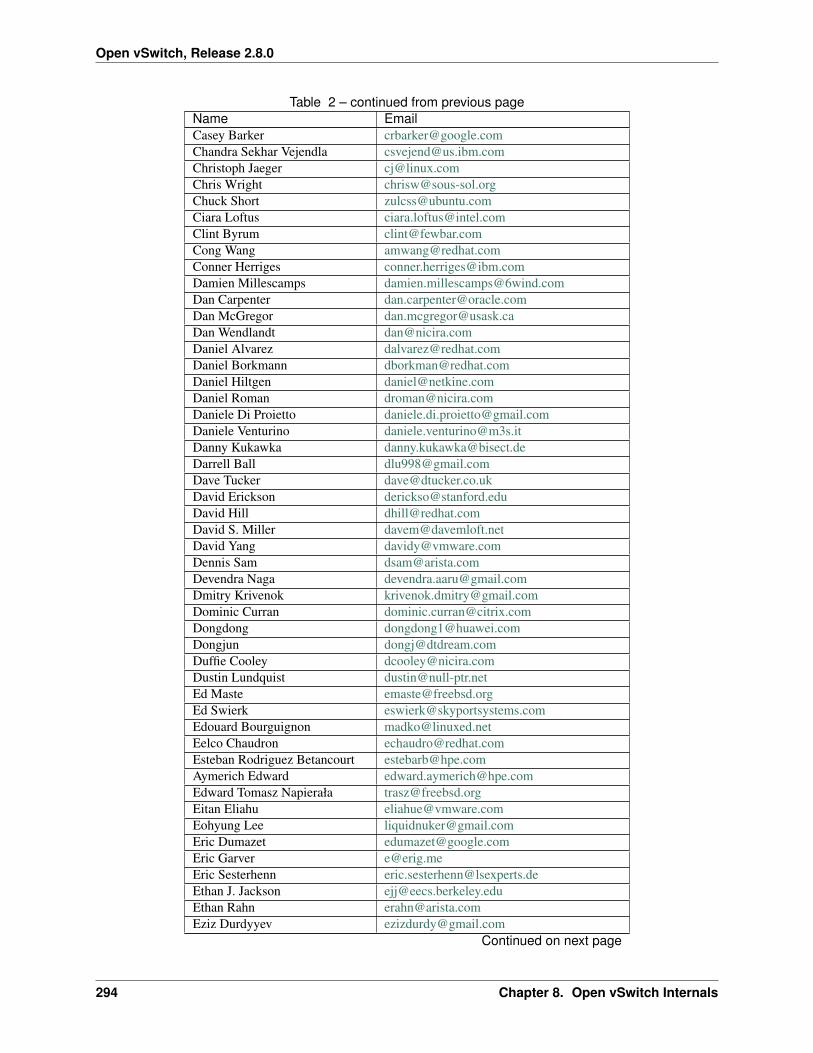
Open vSwitch, Release 2.8.0
Table 2 – continued from previous pageName EmailCasey Barker [email protected] Sekhar Vejendla [email protected] Jaeger [email protected] Wright [email protected] Short [email protected] Loftus [email protected] Byrum [email protected] Wang [email protected] Herriges [email protected] Millescamps [email protected] Carpenter [email protected] McGregor [email protected] Wendlandt [email protected] Alvarez [email protected] Borkmann [email protected] Hiltgen [email protected] Roman [email protected] Di Proietto [email protected] Venturino [email protected] Kukawka [email protected] Ball [email protected] Tucker [email protected] Erickson [email protected] Hill [email protected] S. Miller [email protected] Yang [email protected] Sam [email protected] Naga [email protected] Krivenok [email protected] Curran [email protected] [email protected] [email protected] Cooley [email protected] Lundquist [email protected] Maste [email protected] Swierk [email protected] Bourguignon [email protected] Chaudron [email protected] Rodriguez Betancourt [email protected] Edward [email protected] Tomasz Napierała [email protected] Eliahu [email protected] Lee [email protected] Dumazet [email protected] Garver [email protected] Sesterhenn [email protected] J. Jackson [email protected] Rahn [email protected] Durdyyev [email protected]
Continued on next page
294 Chapter 8. Open vSwitch Internals

Open vSwitch, Release 2.8.0
Table 2 – continued from previous pageName EmailFlavio Fernandes [email protected] Leitner [email protected] Fusco [email protected] Tomonori [email protected] Beged-Dov [email protected] Catalli [email protected] Sagie [email protected] LEsperance [email protected] Wossum [email protected] Merlo [email protected] Lettieri [email protected] Gibb [email protected] Li [email protected] Yang [email protected] Chaitanya Perakam [email protected] Shetty [email protected] Zhou [email protected] Mai [email protected] Zheng [email protected] Schaa [email protected] Kalra [email protected] Han [email protected] Kang [email protected] Campbell [email protected] Stokes [email protected] Maximets [email protected] Yamahata [email protected] Libosvar [email protected] P. [email protected] Page [email protected] Lennox [email protected] Scheurich [email protected] Vansteenkiste [email protected] Rajahalme [email protected] Kölker [email protected] Wessel [email protected] Capel [email protected] Tourrilhes [email protected] Stribling [email protected] van Bemmel [email protected] Gross [email protected] Li [email protected] Ai [email protected] Benc [email protected] Perches [email protected] Stringer [email protected] Vestin [email protected] Arturo Sauma Vargas [email protected] Nakajima [email protected]
Continued on next page
8.9. Authors 295
Open vSwitch, Release 2.8.0
Table 2 – continued from previous pageName EmailJunoZhu [email protected] Pettit [email protected] Amidon [email protected] Ajiro [email protected] Duda [email protected] Ebisawa [email protected] Lo [email protected] Traynor [email protected] Raj [email protected] G [email protected] Murphy [email protected] Kondaka [email protected] Mestery [email protected] Upton [email protected] Richardson [email protected] Kellogg-Stedman [email protected] Huang [email protected] Madsen [email protected] Alterman [email protected] [email protected] Huang [email protected] Sun [email protected] Neudorfer [email protected] Jakab [email protected] Giraudo [email protected] Alvares Gomes [email protected] Petrut [email protected] Rizzo [email protected] E. P. [email protected] Rzasik [email protected] Challa [email protected] Mirecki [email protected] Cabrera [email protected] D. Gray [email protected] Hamilton [email protected] Kavanagh [email protected] Maglana [email protected] Michelson [email protected] Chandras [email protected] Casado [email protected] Fornasa [email protected] Tahhan [email protected] Vásquez [email protected] Coquelin [email protected] Mahajan [email protected] Arnaldi [email protected] Weglicki [email protected] Spiegel [email protected] Angel Ajo [email protected]
Continued on next page
296 Chapter 8. Open vSwitch Internals

Open vSwitch, Release 2.8.0
Table 2 – continued from previous pageName EmailMijo Safradin [email protected] Vaisanen [email protected] TAKAHASHI [email protected] McCauley [email protected] Gude [email protected] McKee [email protected] Zhu [email protected] Desai [email protected] Raju [email protected] Rohilla [email protected] Siddique [email protected] Ben-Yacov [email protected] Gerlitz [email protected] Shoshan [email protected] Krishnan [email protected] Matilainen [email protected] Chandrasekaran [email protected] Boca [email protected] Fazzone [email protected] Ingram [email protected] Raoul [email protected] Ramesh [email protected] Downs [email protected] Jung [email protected] van den Berg [email protected] [email protected] B Shelar [email protected] Szczerbik [email protected] Monnet [email protected] Subramanian [email protected] Rosen [email protected] Ramamurthy [email protected] Sharo [email protected] Kerur [email protected] Burkholder [email protected] Price [email protected] Tronçon [email protected] Lane [email protected] Bamba [email protected] Adams [email protected] Åkerblom-Andersson [email protected] Wojciechowicz [email protected] Hoes [email protected] Dayan [email protected] Lenglet [email protected] Bryant [email protected] D. MOATS [email protected] Wilson [email protected] Venugopal [email protected]
Continued on next page
8.9. Authors 297
Open vSwitch, Release 2.8.0
Table 2 – continued from previous pageName EmailSajjad Lateef [email protected] Jain [email protected] Ghinet [email protected] Sane [email protected] Mohan [email protected] Shah [email protected] Shrivastava [email protected] Lowe [email protected] Mann [email protected] [email protected] Zhang [email protected] Ansari [email protected] Wei [email protected] Ram [email protected] Srivastava [email protected] Li [email protected] Shen [email protected] Horman [email protected] Horman [email protected] Vinturis [email protected] Gebert [email protected] Spans [email protected] A. Sezer [email protected] Finucane [email protected] Ruan [email protected] Chandran [email protected] Kazushi [email protected] Nagao [email protected] Wilson [email protected] NAKAGAWA [email protected] Lima de Souza Cascardo [email protected] F. Herbert [email protected] Goirand [email protected] Graf [email protected] Lacroix [email protected] Puha [email protected] Redaelli [email protected] Deshane [email protected] Everman [email protected] Lindberg [email protected] Slonim [email protected] Nguyen [email protected] Coumbes [email protected] van der Peet [email protected] Zhang [email protected] Gough [email protected] Anil Kommaddi [email protected] Bernet-Rollande [email protected] [email protected]
Continued on next page
298 Chapter 8. Open vSwitch Internals

Open vSwitch, Release 2.8.0
Table 2 – continued from previous pageName EmailWang Sheng-Hui [email protected] Zhike [email protected] Li [email protected] Yongjun [email protected] Zhang [email protected] FultonWilliam Tu [email protected] Liang [email protected] Takashi [email protected] Takamiya [email protected] Wei [email protected] Lin [email protected] Zhiguo [email protected] Liu [email protected] Wang [email protected] [email protected]án Balogh [email protected] Kiss [email protected] LI [email protected] Yong Wu [email protected] MingJie [email protected] Gao [email protected] Lu [email protected] Yangchao [email protected] [email protected] [email protected] [email protected] [email protected] [email protected] [email protected] [email protected] [email protected]
The following additional people are mentioned in commit logs as having provided helpful bug reports or suggestions.
Name EmailAaron M. Ucko [email protected] Singhal [email protected] Heath [email protected] Bilal [email protected] Shieh [email protected] Browaeys [email protected] Yip [email protected] I. Froloff [email protected] Padmanabhan [email protected] Bhide [email protected] Shakimov [email protected]é Ruß [email protected] Beckmann [email protected]
Continued on next page
8.9. Authors 299
Open vSwitch, Release 2.8.0
Table 3 – continued from previous pageName EmailAndrei Andone [email protected] Korolyov [email protected] Manral [email protected] Matsiuk [email protected] Khadka [email protected] Chalvadi [email protected] Tubaltsev [email protected] Ghosh [email protected] Watanabe [email protected]élien Poulain [email protected] Blank [email protected] Basler [email protected] Shastry [email protected] Ball [email protected] Hall [email protected] Heller [email protected] Kelley [email protected] Salisbury [email protected] Field [email protected] Fulton [email protected] Osoro [email protected] Hobbs [email protected] Hydon [email protected] Stigen Larsen [email protected] Paggen [email protected] Li [email protected] Badea [email protected] O’Reilly [email protected] Walker [email protected] Evans [email protected] Palma [email protected] Cormier [email protected] Badiani [email protected] Moon [email protected] Zhi [email protected] Jun [email protected] Spinhirne [email protected] Chiu [email protected] Bulie HaanaesEnas Ahmad [email protected] Lopez [email protected] Roose [email protected] Catalli [email protected] Remaley [email protected] Schmuecking [email protected] Shuklin [email protected] Rogers [email protected] Bahri [email protected] de Candia [email protected]
Continued on next page
300 Chapter 8. Open vSwitch Internals

Open vSwitch, Release 2.8.0
Table 3 – continued from previous pageName EmailGordon Good [email protected] Dahlman [email protected] Rose [email protected] Schaffrath [email protected] Smith [email protected] Yang [email protected] Stavi [email protected] Kanakaraju [email protected] Sasank Bhamidipalli [email protected] Khan [email protected] Oron [email protected] Kumar Mantri [email protected] Amren [email protected] Tanaka [email protected] Miyata [email protected] Shen [email protected] Kim [email protected] Ganichev [email protected] Sever [email protected] Cherkas [email protected] Naous [email protected] Hadi Salim [email protected] Schmidt [email protected] Medved [email protected] Hamme [email protected] Sundell [email protected] Albornoz [email protected] Daniels [email protected] Merrick [email protected] Lee [email protected] Qiu [email protected] Cirer [email protected] Darrington [email protected] Galgay [email protected] Hurley [email protected] Reumann [email protected] Sundaravel [email protected] Thimmaraju [email protected] Holleman [email protected] Lin [email protected] [email protected] Mancuso [email protected] Shanbhog [email protected] KabardinKirkland Spector [email protected] Yagishita [email protected] Khorenko [email protected] zhang [email protected] Miriyala [email protected]
Continued on next page
8.9. Authors 301
Open vSwitch, Release 2.8.0
Table 3 – continued from previous pageName EmailKrishna Mohan Elluru [email protected]ászló Sürü [email protected] Gao [email protected] Rosen [email protected] Falavigna [email protected] Henrique Ozaki [email protected] Singh [email protected] d’Itri [email protected] Vizvary [email protected] Pascual [email protected] Brun [email protected] Venugopal [email protected] A. Collins [email protected] Hu [email protected] J. Smalley [email protected] Mao [email protected] Shigorin [email protected] Stapelberg [email protected] Gangar [email protected] Bursell [email protected] Kruze [email protected] Qing [email protected] Chen [email protected] Doverhag [email protected] Ulinic [email protected] Das [email protected] Shahbaz [email protected] R [email protected] Reddy Jonnala [email protected] van Adrichem [email protected] Andersson [email protected] Thakkar [email protected] Kärkkäinen [email protected] Andersson R [email protected] Cravero [email protected] Shukla [email protected] Amidon [email protected] Balland [email protected] Phaal [email protected] Pattnaik [email protected] Reddy [email protected] Heiringhoff [email protected] Jothikumar [email protected] Reddy [email protected] Li [email protected] Theis [email protected] Maulick [email protected] Sherwood [email protected] Strickler [email protected]
Continued on next page
302 Chapter 8. Open vSwitch Internals

Open vSwitch, Release 2.8.0
Table 3 – continued from previous pageName EmailRoger Leigh [email protected]ério Vinhal NunesRoman Sokolkov [email protected] A. Ferreira [email protected] L. Bull [email protected] Kumar [email protected] Eikelenboom [email protected] St. John [email protected] Hendricks [email protected] Brady [email protected] Andrzej Siewior [email protected]ébastien RICCIO [email protected] Jouet [email protected] Kourtessis [email protected] Samudrala [email protected] Seetharaman [email protected] Sengupta [email protected] Cambria [email protected] Sevinc [email protected] Andrushko [email protected] Hemminger [email protected] Cardall [email protected] Ramachandran [email protected] Nadathur [email protected] Nam [email protected] HAMA [email protected] Koponen [email protected] Morin [email protected] Chen [email protected] Tornkvist [email protected] Ribeiro [email protected] Kurek [email protected] Bud [email protected] Tolstov [email protected] Dasari [email protected] Chen [email protected] Swarankar [email protected] Brajkovic [email protected] T. [email protected] Zhao [email protected] Ba [email protected] Chen [email protected] Liu [email protected] Zhiming [email protected] [email protected] Wang [email protected]án Balogh [email protected] dwivedi [email protected] zhang [email protected]
Continued on next page
8.9. Authors 303
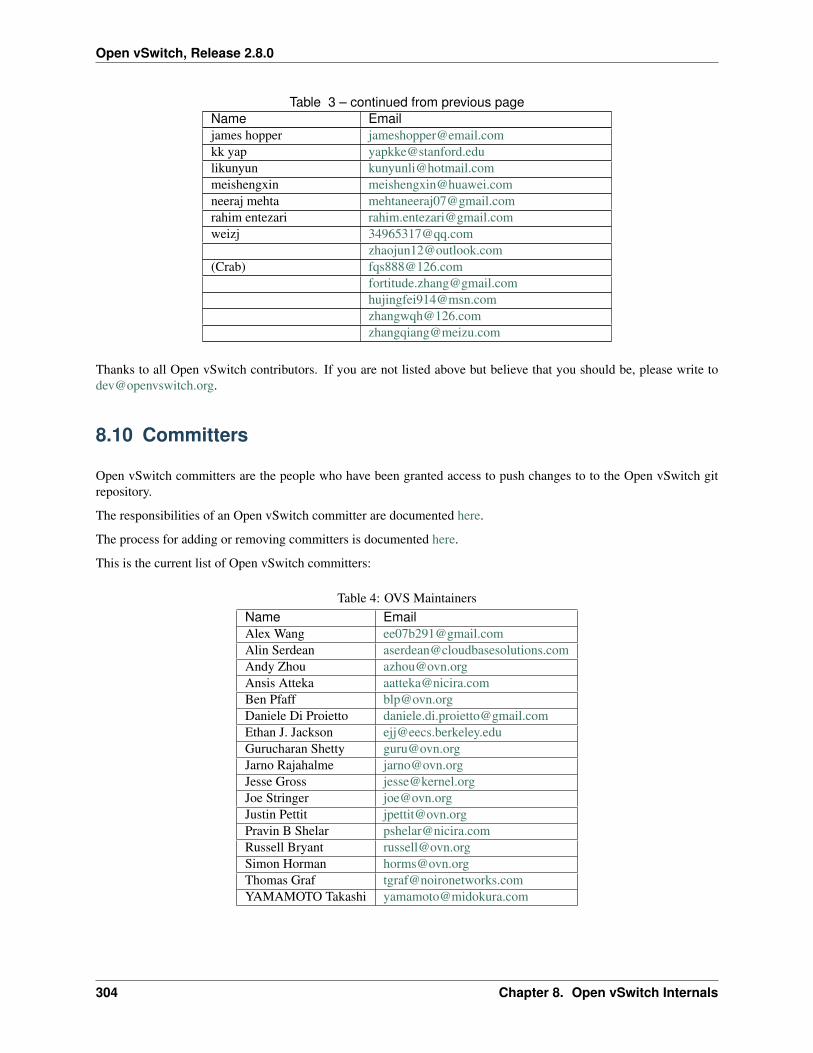
Open vSwitch, Release 2.8.0
Table 3 – continued from previous pageName Emailjames hopper [email protected] yap [email protected] [email protected] [email protected] mehta [email protected] entezari [email protected] [email protected]
[email protected](Crab) [email protected]
[email protected]@[email protected]@meizu.com
Thanks to all Open vSwitch contributors. If you are not listed above but believe that you should be, please write [email protected].
8.10 Committers
Open vSwitch committers are the people who have been granted access to push changes to to the Open vSwitch gitrepository.
The responsibilities of an Open vSwitch committer are documented here.
The process for adding or removing committers is documented here.
This is the current list of Open vSwitch committers:
Table 4: OVS MaintainersName EmailAlex Wang [email protected] Serdean [email protected] Zhou [email protected] Atteka [email protected] Pfaff [email protected] Di Proietto [email protected] J. Jackson [email protected] Shetty [email protected] Rajahalme [email protected] Gross [email protected] Stringer [email protected] Pettit [email protected] B Shelar [email protected] Bryant [email protected] Horman [email protected] Graf [email protected] Takashi [email protected]
304 Chapter 8. Open vSwitch Internals
Open vSwitch, Release 2.8.0
8.11 How Open vSwitch’s Documentation Works
This document provides a brief overview on how the documentation build system within Open vSwitch works. Thisis intended to maximize the “bus factor” and share best practices with other projects.
8.11.1 reStructuredText and Sphinx
Nearly all of Open vSwitch’s documentation is written in reStructuredText, with man pages being the sole exception.Of this documentation, most of it is fed into Sphinx, which provides not only the ability to convert rST to a variety ofother output formats but also allows for things like cross-referencing and indexing. for more information on the two,refer to the Open vSwitch Documentation Style.
8.11.2 ovs-sphinx-theme
The documentation uses its own theme, ovs-sphinx-theme, which can be found on GitHub and is published on pypi.This is packaged separately from Open vSwitch itself to ensure all documentation gets the latest version of the theme(assuming there are no major version bumps in that package). If building locally and the package is installed, it willbe used. If the package is not installed, Sphinx will fallback to the default theme.
The package is currently maintained by Stephen Finucane and Russell Bryant.
8.11.3 Read the Docs
The documentation is hosted on readthedocs.org and a CNAME redirect is in place to allow access fromdocs.openvswitch.org. Read the Docs provides a couple of nifty features for us, such as automatic building of docswhenever there are changes and versioning of documentation.
The Read the Docs project is currently maintained by Stephen Finucane, Russell Bryant and Ben Pfaff.
8.11.4 openvswitch.org
The sources for openvswitch.org are maintained separately from docs.openvswitch.org. For modifications to this site,refer to the GitHub project.
8.11. How Open vSwitch’s Documentation Works 305

Open vSwitch, Release 2.8.0
306 Chapter 8. Open vSwitch Internals
Index
Symbols-V, -version
ovs-test command line option, 218ovs-vlan-test command line option,
220-b <targetbandwidth>, -bandwidth
<targetbandwidth>ovs-test command line option, 218
-c <server1> <server2>, -client<server1> <server2>
ovs-test command line option, 218-d, -direct
ovs-test command line option, 218-h, -help
ovs-test command line option, 218ovs-vlan-test command line option,
220-i <testinterval>, -interval
<testinterval>ovs-test command line option, 218
-l <vlantag>, -vlan-tag <vlantag>ovs-test command line option, 219
-s <port>, -server <port>ovs-test command line option, 218
-s, -serverovs-vlan-test command line option,
220-t <tunnelmodes>, -tunnel-modes
<tunnelmodes>ovs-test command line option, 219
Oovs-test command line option
-V, -version, 218-b <targetbandwidth>, -bandwidth
<targetbandwidth>, 218-c <server1> <server2>, -client
<server1> <server2>, 218-d, -direct, 218
-h, -help, 218-i <testinterval>, -interval
<testinterval>, 218-l <vlantag>, -vlan-tag <vlantag>,
219-s <port>, -server <port>, 218-t <tunnelmodes>, -tunnel-modes
<tunnelmodes>, 219ovs-vlan-test command line option
-V, -version, 220-h, -help, 220-s, -server, 220
307


