Oracle E-Business Suite Release 11i with 9i RAC Installation & Configuration Using AutoConfig This document describe the steps required to install and setup an Oracle Applications Release 11i (11.5.10) environment with Oracle database 9i Release 2 (9.2.0.8) Real Application Cluster (RAC). This document is divided into the following sections: Section 1: Overview Section 2: Environment Section 3: Pre-requisites For RAC conversion. Section 4: Installation/Configuration Section 5: References Section 1: Overview The Oracle E-Business Suite 11i (Release 11.5.10) can be configured in a number of ways depending on varied business scenarios like uptime requirements, hardware sizing and availability. This documents outlines instructions for installation and setup of Oracle E-Business Suite 11i (Release
Transcript
Oracle E-Business Suite Release 11i with 9i RAC Installation amp Configuration Using AutoConfig
This document describe the steps required to install and setup an Oracle Applications Release 11i (11510) environment with Oracle database 9i Release 2 (9208) Real Application Cluster (RAC) This document is divided into the following sections
The Oracle E-Business Suite 11i (Release 11510) can be configured in a number of ways depending on varied business scenarios like uptime requirements hardware sizing and availability This documents outlines instructions for installation and setup of Oracle E-Business Suite 11i (Release
115102) with Oracle Database 9i(9208) Real Application Clusters on RedHat Linux platform In this document instructions outlined are specific for Oracle E-Business Suite 11i and generic for all Unix platforms For Windows platform substitute the appropriate syntax whenever necessary It is assumed that the reader of this document has knowledge of Oracle Database 9i Real Application Clusters (RAC) and Oracle E-Business Suite Release 11i Concurrent Processing (CP) requires configuration with 11i RAC environment Please see Section 46 in this document for more details about configuring CP
System administrators are strongly advised to make complete environment backups before executing these procedures and to make frequent backups at multiple stages of this migration System administrators should test these procedures in test bed environments before executing them in production environments Users must be asked to log off your system while applying these changes
Section 2 Environment
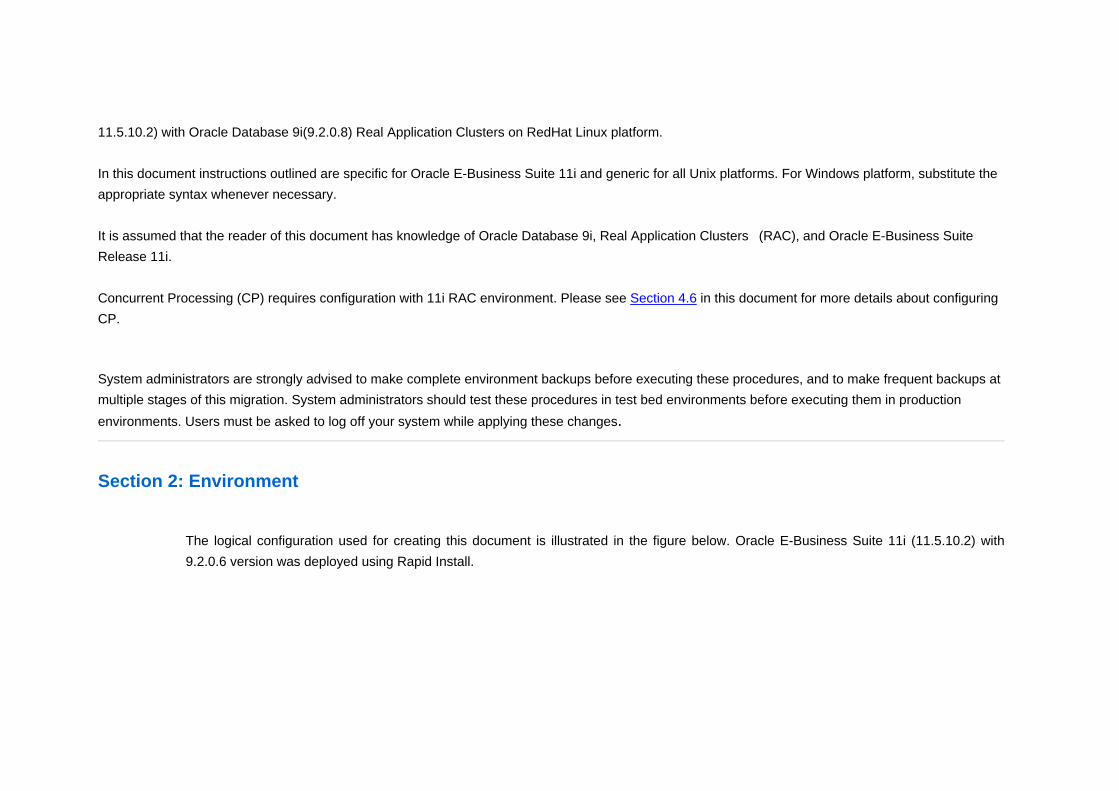
The logical configuration used for creating this document is illustrated in the figure below Oracle E-Business Suite 11i (115102) with 9206 version was deployed using Rapid Install
21 SoftwareHardware Configuration
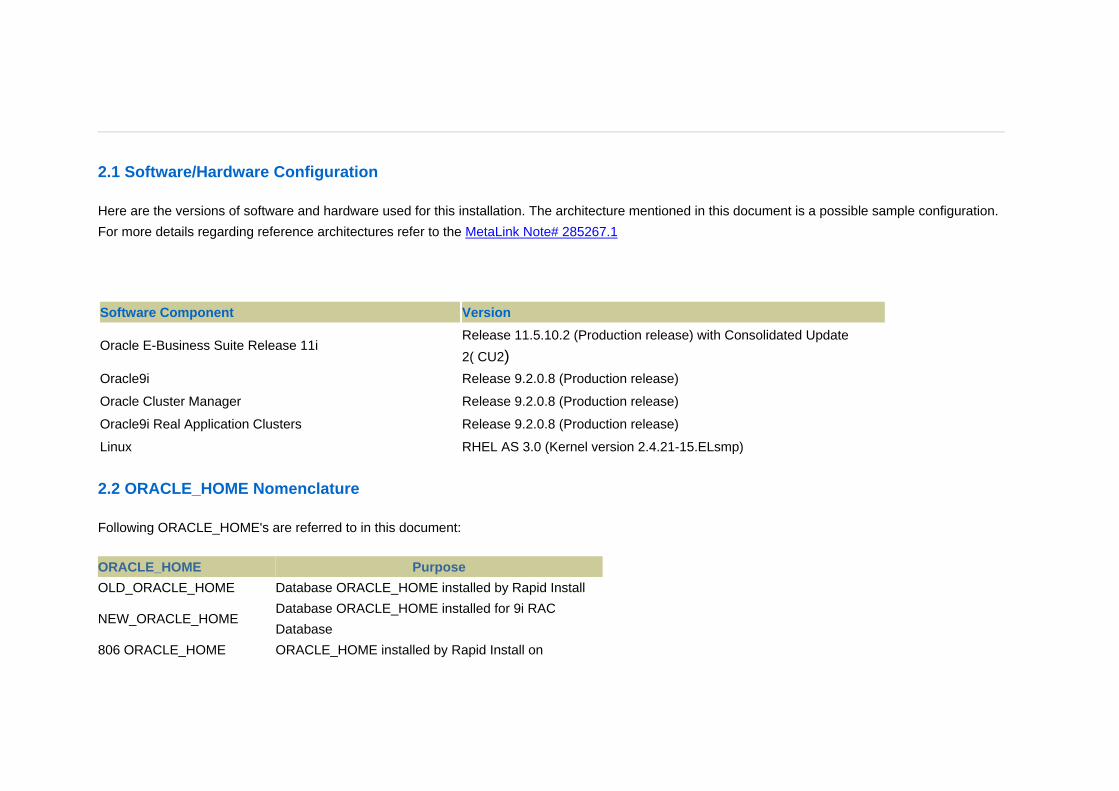
Here are the versions of software and hardware used for this installation The architecture mentioned in this document is a possible sample configuration For more details regarding reference architectures refer to the MetaLink Note 2852671
Software Component Version Release 115102 (Production release) with Consolidated Update 2( CU2)
Oracle E-Business Suite Release 11i
Oracle9i Release 9208 (Production release) Oracle Cluster Manager Release 9208 (Production release) Oracle9i Real Application Clusters Release 9208 (Production release) Linux RHEL AS 30 (Kernel version 2421-15ELsmp)
22 ORACLE_HOME Nomenclature
Following ORACLE_HOMEs are referred to in this document
ORACLE_HOME Purpose OLD_ORACLE_HOME Database ORACLE_HOME installed by Rapid Install
Database ORACLE_HOME installed for 9i RAC Database
NEW_ORACLE_HOME
806 ORACLE_HOME ORACLE_HOME installed by Rapid Install on
Application Tier
Section 3 Pre-requisites for Conversion
You must complete the following steps in your environment prior to conversion For more details refer to Oracle9i Real Application Clusters Setup and Configuration Guide
Set up Cluster Connect the required number of nodes to the cluster interconnect and the shared storage subsystem Install the cluster software and any required Oracle operating system-dependent (OSD) patches such as the Oracle UDLM patch for Sun
Clusters For UNIX platforms refer to your vendor trades operating system-dependent documentation for instructions about installing the cluster software For Sun clusters also install the Oracle UDLM patch from the first CD of the Oracle9i Enterprise Edition CD set
Configure your cluster by adding the desired number of nodes Start up the clusterware on all nodes of your cluster
Set up Shared Storage If your platform supports a cluster file system then set up the cluster file system on shared storage For instructions to setup the cluster file
system on Windows please refer to Appendix A Setup Cluster File System (CFS) on Windows If your platform does not support a cluster file system or you want to use raw devices for database files for performance reasons then
install the vendor specific logical volume manager (for example Veritas Cluster Volume Manager) and set up raw devices on shared disks Start up the shared storage management components such as Logical Volume Manager Veritas Volume Cluster Manager and so on See Also Storage vendor-specific documentation for setting up the shared disk subsystem and for information about how to mirror and
stripe these disks Complete Rapid Install of Oracle Applications
Note If you are not using raw devices as shared storage you can specify the cluster file system location for your datafiles during Rapid Install
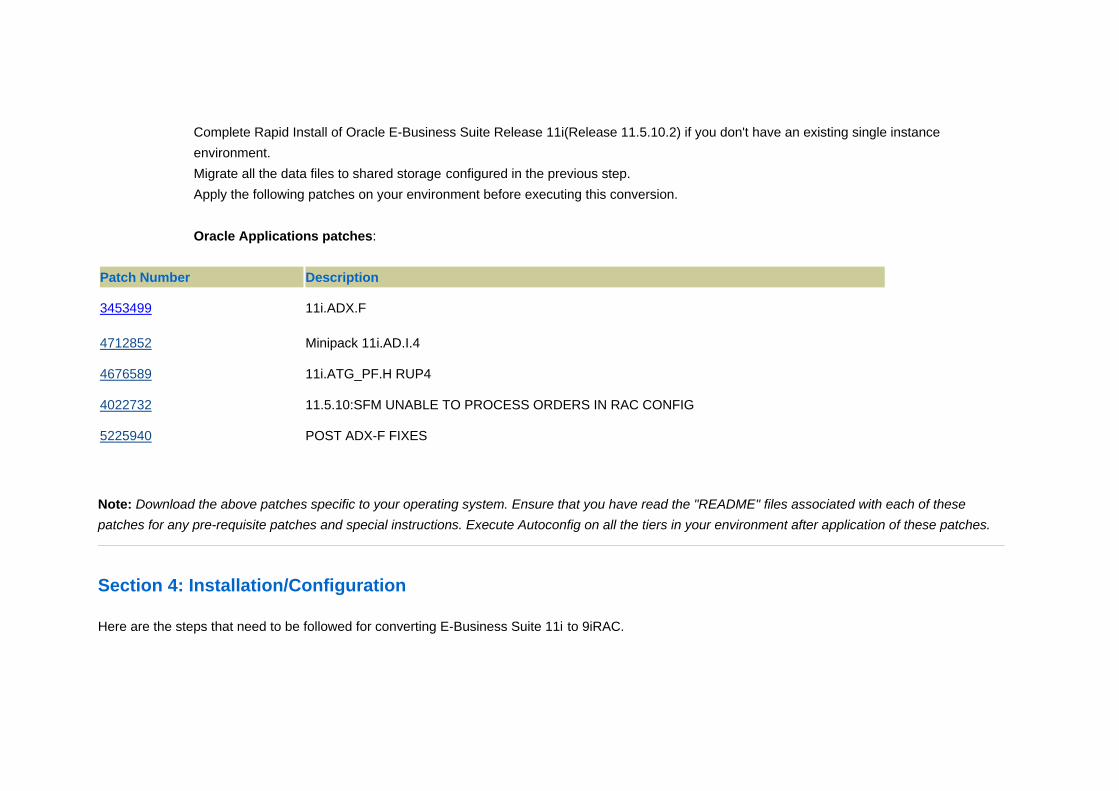
Complete Rapid Install of Oracle E-Business Suite Release 11i(Release 115102) if you dont have an existing single instance environment
Migrate all the data files to shared storage configured in the previous step Apply the following patches on your environment before executing this conversion
Oracle Applications patches
Patch Number Description
3453499 11iADXF
4712852 Minipack 11iADI4
4676589 11iATG_PFH RUP4
4022732 11510SFM UNABLE TO PROCESS ORDERS IN RAC CONFIG
5225940 POST ADX-F FIXES
Note Download the above patches specific to your operating system Ensure that you have read the README files associated with each of these patches for any pre-requisite patches and special instructions Execute Autoconfig on all the tiers in your environment after application of these patches
Section 4 InstallationConfiguration Here are the steps that need to be followed for converting E-Business Suite 11i to 9iRAC
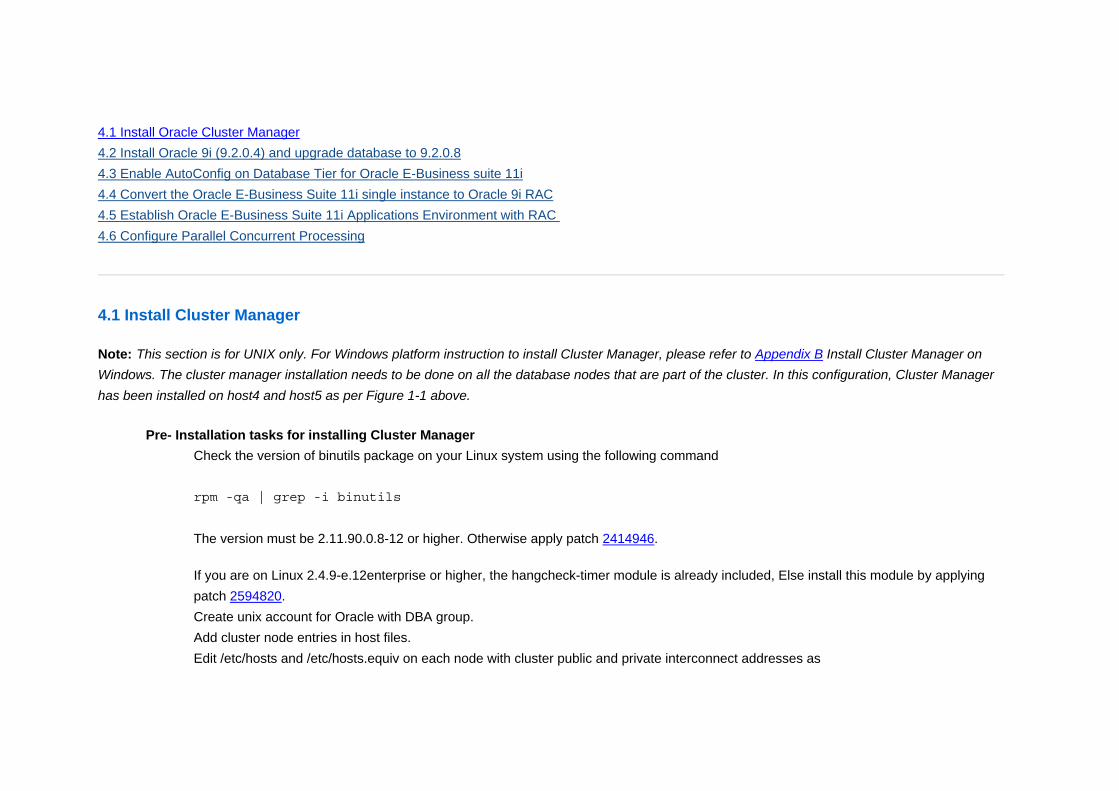
41 Install Oracle Cluster Manager 42 Install Oracle 9i (9204) and upgrade database to 9208 43 Enable AutoConfig on Database Tier for Oracle E-Business suite 11i 44 Convert the Oracle E-Business Suite 11i single instance to Oracle 9i RAC 45 Establish Oracle E-Business Suite 11i Applications Environment with RAC 46 Configure Parallel Concurrent Processing
41 Install Cluster Manager
Note This section is for UNIX only For Windows platform instruction to install Cluster Manager please refer to Appendix B Install Cluster Manager on Windows The cluster manager installation needs to be done on all the database nodes that are part of the cluster In this configuration Cluster Manager has been installed on host4 and host5 as per Figure 1-1 above
Pre- Installation tasks for installing Cluster Manager Check the version of binutils package on your Linux system using the following command
rpm -qa | grep -i binutils The version must be 2119008-12 or higher Otherwise apply patch 2414946
If you are on Linux 249-e12enterprise or higher the hangcheck-timer module is already included Else install this module by applying patch 2594820
Create unix account for Oracle with DBA group Add cluster node entries in host files
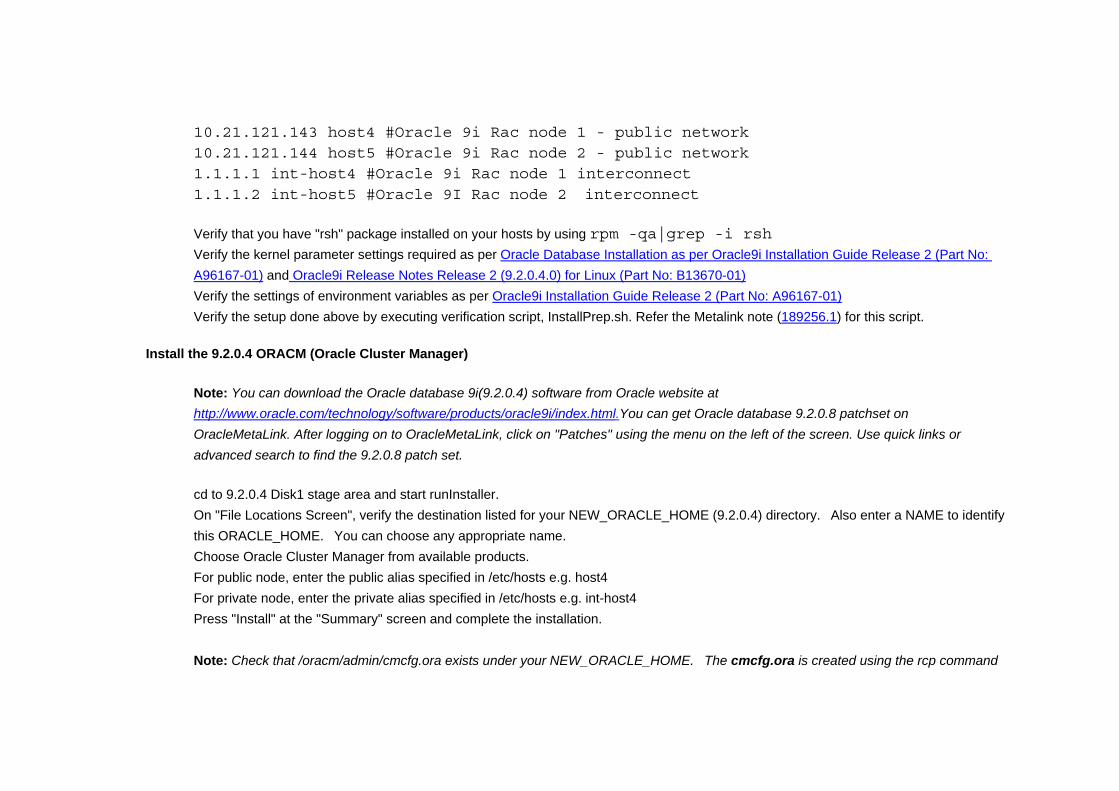
Edit etchosts and etchostsequiv on each node with cluster public and private interconnect addresses as
Verify that you have rsh package installed on your hosts by using rpm -qa|grep -i rsh Verify the kernel parameter settings required as per Oracle Database Installation as per Oracle9i Installation Guide Release 2 (Part No
A96167-01) and Oracle9i Release Notes Release 2 (92040) for Linux (Part No B13670-01) Verify the settings of environment variables as per Oracle9i Installation Guide Release 2 (Part No A96167-01) Verify the setup done above by executing verification script InstallPrepsh Refer the Metalink note (1892561) for this script
Install the 9204 ORACM (Oracle Cluster Manager)
Note You can download the Oracle database 9i(9204) software from Oracle website at httpwwworaclecomtechnologysoftwareproductsoracle9iindexhtmlYou can get Oracle database 9208 patchset on OracleMetaLink After logging on to OracleMetaLink click on Patches using the menu on the left of the screen Use quick links or advanced search to find the 9208 patch set
cd to 9204 Disk1 stage area and start runInstaller On File Locations Screen verify the destination listed for your NEW_ORACLE_HOME (9204) directory Also enter a NAME to identify
this ORACLE_HOME You can choose any appropriate name Choose Oracle Cluster Manager from available products For public node enter the public alias specified in etchosts eg host4 For private node enter the private alias specified in etchosts eg int-host4 Press Install at the Summary screen and complete the installation
Note Check that oracmadmincmcfgora exists under your NEW_ORACLE_HOME The cmcfgora is created using the rcp command
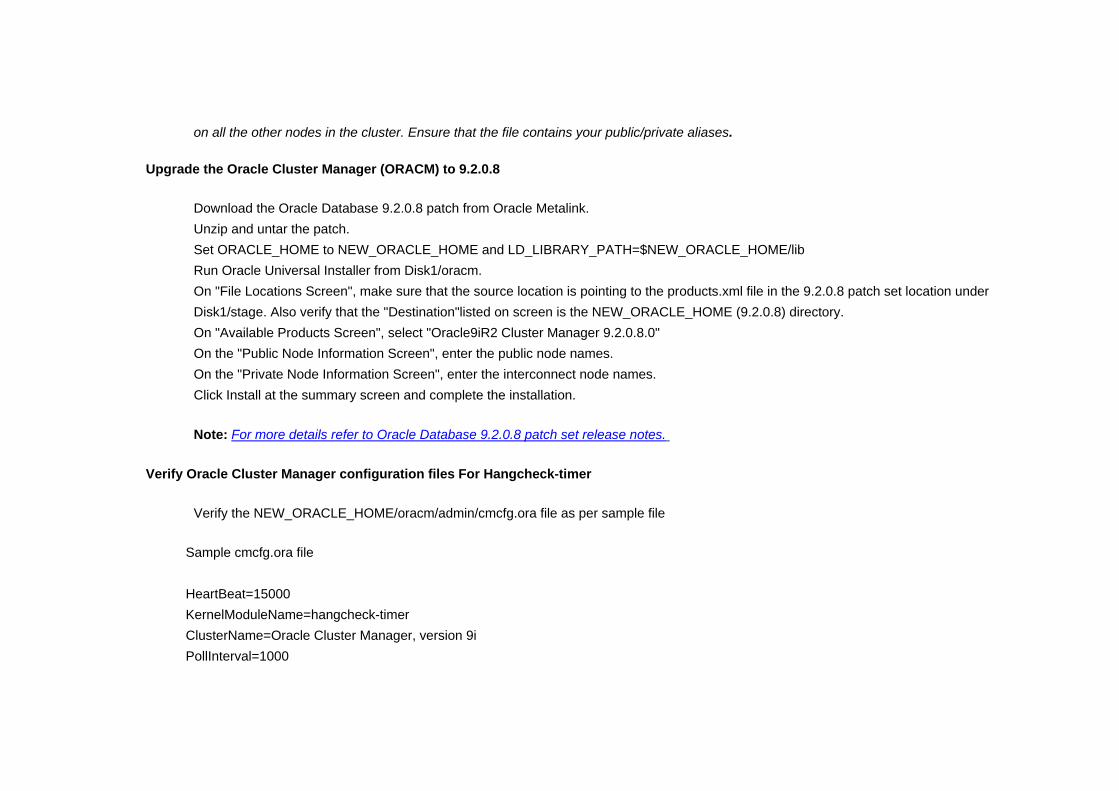
on all the other nodes in the cluster Ensure that the file contains your publicprivate aliases
Upgrade the Oracle Cluster Manager (ORACM) to 9208
Download the Oracle Database 9208 patch from Oracle Metalink Unzip and untar the patch Set ORACLE_HOME to NEW_ORACLE_HOME and LD_LIBRARY_PATH=$NEW_ORACLE_HOMElib Run Oracle Universal Installer from Disk1oracm On File Locations Screen make sure that the source location is pointing to the productsxml file in the 9208 patch set location under
Disk1stage Also verify that the Destinationlisted on screen is the NEW_ORACLE_HOME (9208) directory On Available Products Screen select Oracle9iR2 Cluster Manager 92080 On the Public Node Information Screen enter the public node names On the Private Node Information Screen enter the interconnect node names Click Install at the summary screen and complete the installation
Note For more details refer to Oracle Database 9208 patch set release notes
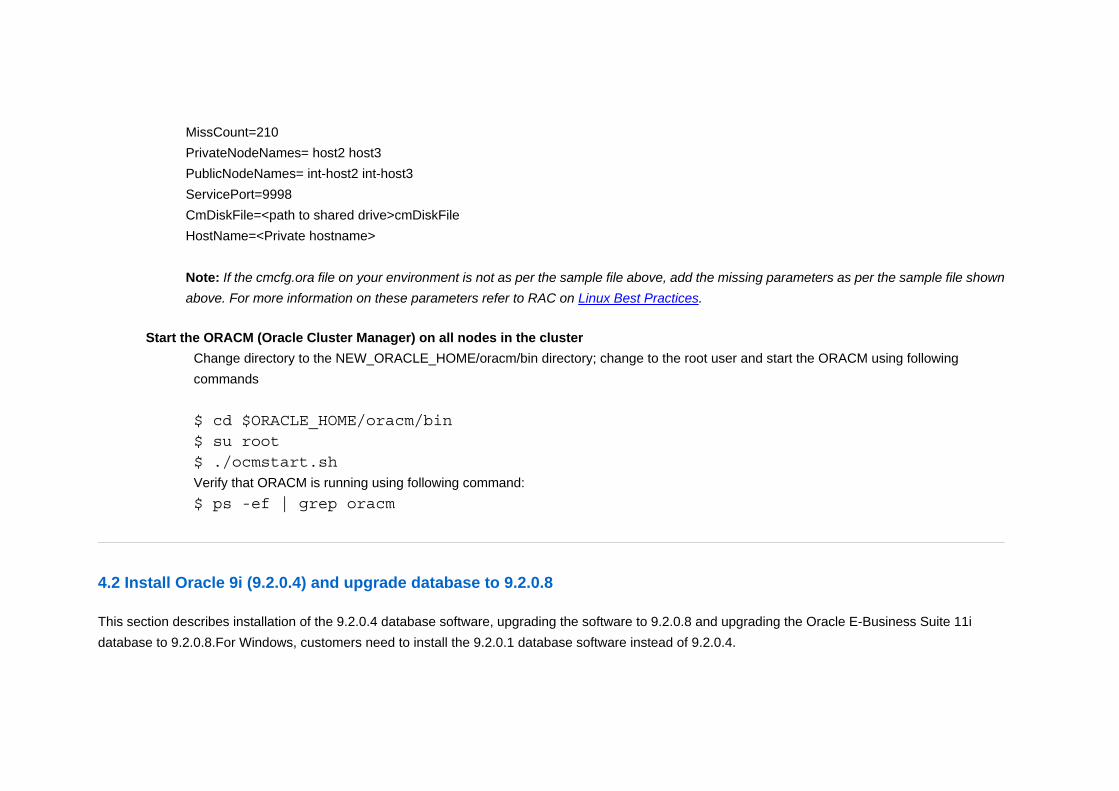
Verify Oracle Cluster Manager configuration files For Hangcheck-timer
Verify the NEW_ORACLE_HOMEoracmadmincmcfgora file as per sample file
Note If the cmcfgora file on your environment is not as per the sample file above add the missing parameters as per the sample file shown above For more information on these parameters refer to RAC on Linux Best Practices
Start the ORACM (Oracle Cluster Manager) on all nodes in the cluster Change directory to the NEW_ORACLE_HOMEoracmbin directory change to the root user and start the ORACM using following
commands $ cd $ORACLE_HOMEoracmbin $ su root $ ocmstartsh
Verify that ORACM is running using following command $ ps -ef | grep oracm
42 Install Oracle 9i (9204) and upgrade database to 9208
This section describes installation of the 9204 database software upgrading the software to 9208 and upgrading the Oracle E-Business Suite 11i database to 9208For Windows customers need to install the 9201 database software instead of 9204
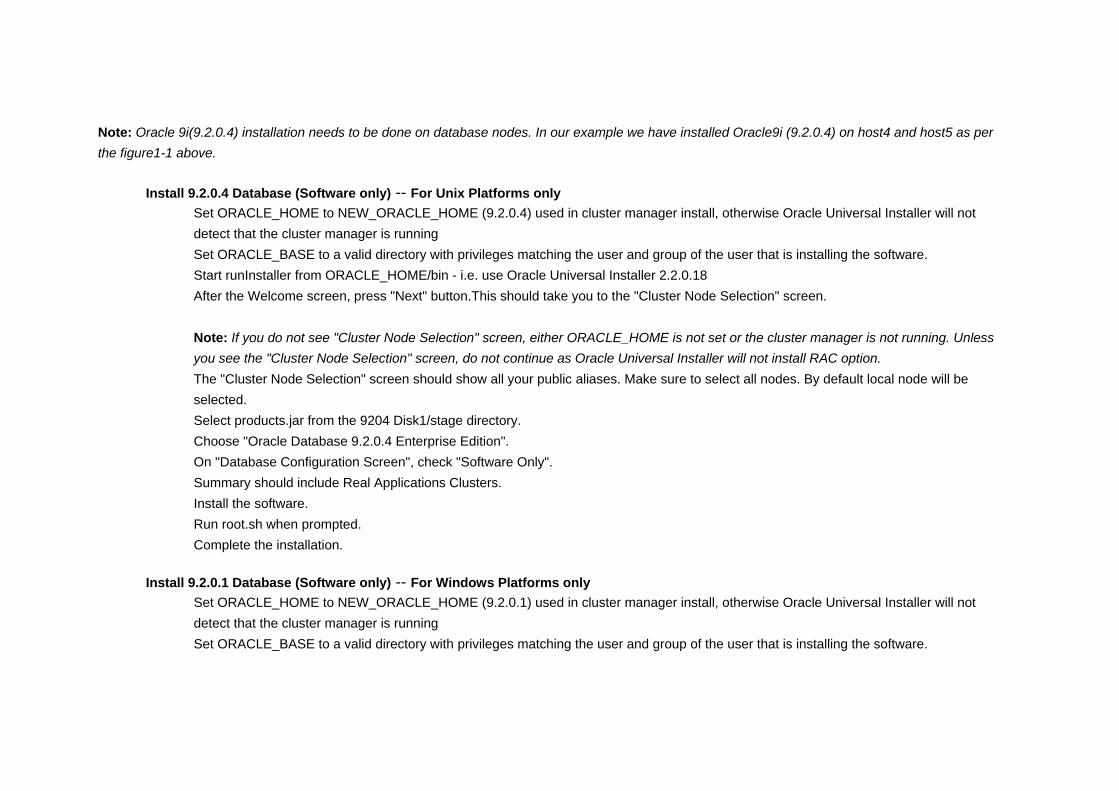
Note Oracle 9i(9204) installation needs to be done on database nodes In our example we have installed Oracle9i (9204) on host4 and host5 as per the figure1-1 above
Install 9204 Database (Software only) -- For Unix Platforms only Set ORACLE_HOME to NEW_ORACLE_HOME (9204) used in cluster manager install otherwise Oracle Universal Installer will not
detect that the cluster manager is running Set ORACLE_BASE to a valid directory with privileges matching the user and group of the user that is installing the software Start runInstaller from ORACLE_HOMEbin - ie use Oracle Universal Installer 22018 After the Welcome screen press Next buttonThis should take you to the Cluster Node Selection screen
Note If you do not see Cluster Node Selection screen either ORACLE_HOME is not set or the cluster manager is not running Unless you see the Cluster Node Selection screen do not continue as Oracle Universal Installer will not install RAC option
The Cluster Node Selection screen should show all your public aliases Make sure to select all nodes By default local node will be selected
Select productsjar from the 9204 Disk1stage directory Choose Oracle Database 9204 Enterprise Edition On Database Configuration Screen check Software Only Summary should include Real Applications Clusters Install the software Run rootsh when prompted Complete the installation
Install 9201 Database (Software only) -- For Windows Platforms only Set ORACLE_HOME to NEW_ORACLE_HOME (9201) used in cluster manager install otherwise Oracle Universal Installer will not
detect that the cluster manager is running Set ORACLE_BASE to a valid directory with privileges matching the user and group of the user that is installing the software
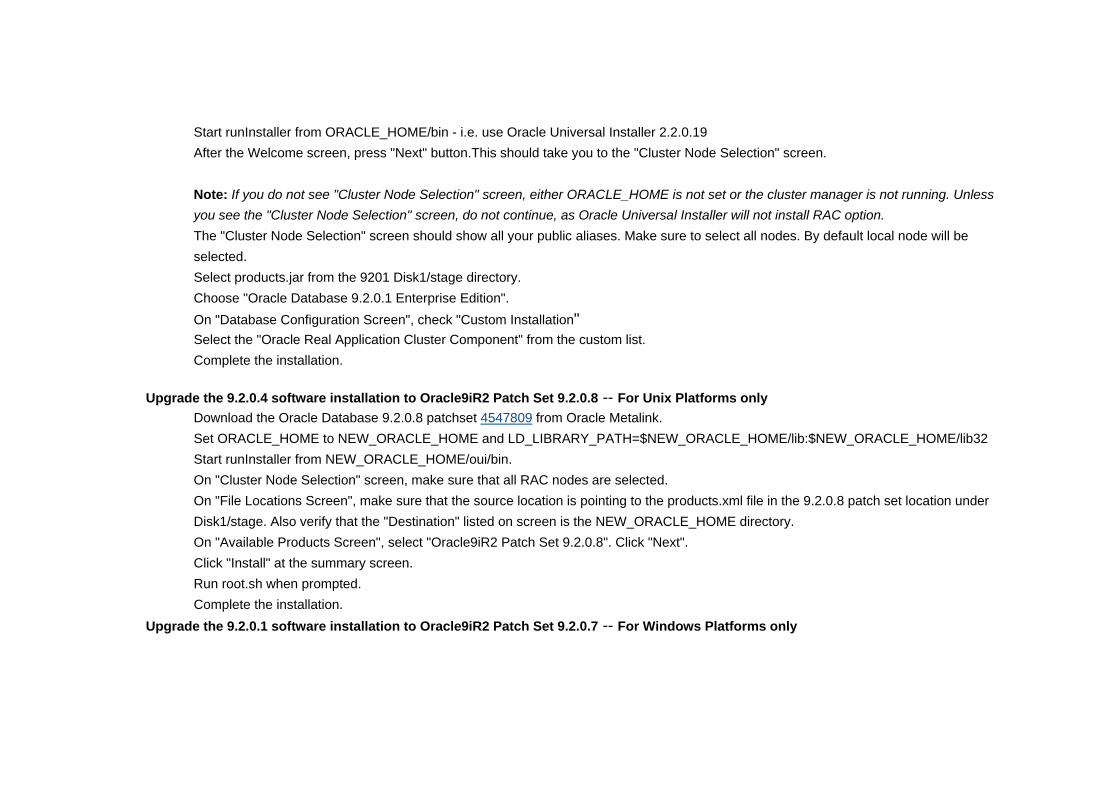
Start runInstaller from ORACLE_HOMEbin - ie use Oracle Universal Installer 22019 After the Welcome screen press Next buttonThis should take you to the Cluster Node Selection screen
Note If you do not see Cluster Node Selection screen either ORACLE_HOME is not set or the cluster manager is not running Unless you see the Cluster Node Selection screen do not continue as Oracle Universal Installer will not install RAC option
The Cluster Node Selection screen should show all your public aliases Make sure to select all nodes By default local node will be selected
Select productsjar from the 9201 Disk1stage directory Choose Oracle Database 9201 Enterprise Edition On Database Configuration Screen check Custom Installation Select the Oracle Real Application Cluster Component from the custom list Complete the installation
Upgrade the 9204 software installation to Oracle9iR2 Patch Set 9208 -- For Unix Platforms only Download the Oracle Database 9208 patchset 4547809 from Oracle Metalink Set ORACLE_HOME to NEW_ORACLE_HOME and LD_LIBRARY_PATH=$NEW_ORACLE_HOMElib$NEW_ORACLE_HOMElib32 Start runInstaller from NEW_ORACLE_HOMEouibin On Cluster Node Selection screen make sure that all RAC nodes are selected On File Locations Screen make sure that the source location is pointing to the productsxml file in the 9208 patch set location under
Disk1stage Also verify that the Destination listed on screen is the NEW_ORACLE_HOME directory On Available Products Screen select Oracle9iR2 Patch Set 9208 Click Next Click Install at the summary screen Run rootsh when prompted Complete the installation
Upgrade the 9201 software installation to Oracle9iR2 Patch Set 9207 -- For Windows Platforms only
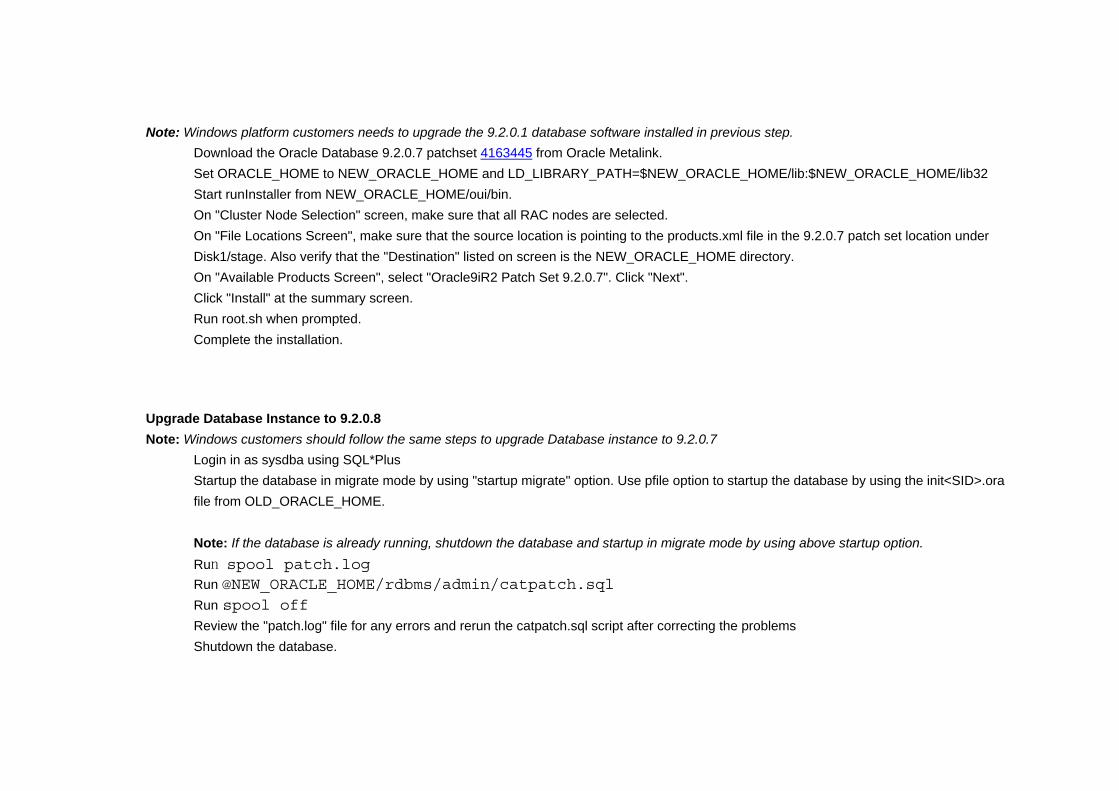
Note Windows platform customers needs to upgrade the 9201 database software installed in previous step Download the Oracle Database 9207 patchset 4163445 from Oracle Metalink Set ORACLE_HOME to NEW_ORACLE_HOME and LD_LIBRARY_PATH=$NEW_ORACLE_HOMElib$NEW_ORACLE_HOMElib32 Start runInstaller from NEW_ORACLE_HOMEouibin On Cluster Node Selection screen make sure that all RAC nodes are selected On File Locations Screen make sure that the source location is pointing to the productsxml file in the 9207 patch set location under
Disk1stage Also verify that the Destination listed on screen is the NEW_ORACLE_HOME directory On Available Products Screen select Oracle9iR2 Patch Set 9207 Click Next Click Install at the summary screen Run rootsh when prompted Complete the installation
Upgrade Database Instance to 9208 Note Windows customers should follow the same steps to upgrade Database instance to 9207
Login in as sysdba using SQLPlus Startup the database in migrate mode by using startup migrate option Use pfile option to startup the database by using the initltSIDgtora
file from OLD_ORACLE_HOME Note If the database is already running shutdown the database and startup in migrate mode by using above startup option
Run spool patchlog Run NEW_ORACLE_HOMErdbmsadmincatpatchsql Run spool off Review the patchlog file for any errors and rerun the catpatchsql script after correcting the problems Shutdown the database
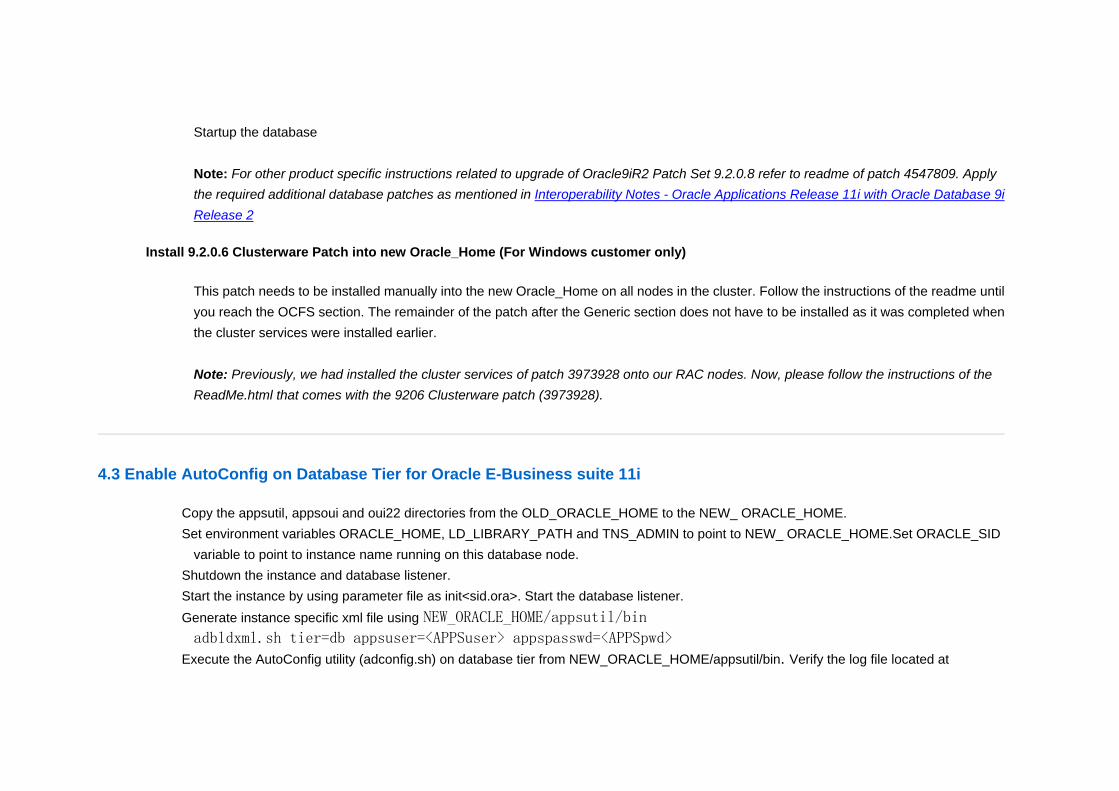
Startup the database Note For other product specific instructions related to upgrade of Oracle9iR2 Patch Set 9208 refer to readme of patch 4547809 Apply the required additional database patches as mentioned in Interoperability Notes - Oracle Applications Release 11i with Oracle Database 9i Release 2
Install 9206 Clusterware Patch into new Oracle_Home (For Windows customer only)
This patch needs to be installed manually into the new Oracle_Home on all nodes in the cluster Follow the instructions of the readme until you reach the OCFS section The remainder of the patch after the Generic section does not have to be installed as it was completed when the cluster services were installed earlier Note Previously we had installed the cluster services of patch 3973928 onto our RAC nodes Now please follow the instructions of the ReadMehtml that comes with the 9206 Clusterware patch (3973928)
43 Enable AutoConfig on Database Tier for Oracle E-Business suite 11i
Copy the appsutil appsoui and oui22 directories from the OLD_ORACLE_HOME to the NEW_ ORACLE_HOME Set environment variables ORACLE_HOME LD_LIBRARY_PATH and TNS_ADMIN to point to NEW_ ORACLE_HOMESet ORACLE_SID
variable to point to instance name running on this database node Shutdown the instance and database listener Start the instance by using parameter file as initltsidoragt Start the database listener Generate instance specific xml file using NEW_ORACLE_HOMEappsutilbin adbldxmlsh tier=db appsuser=ltAPPSusergt appspasswd=ltAPPSpwdgt
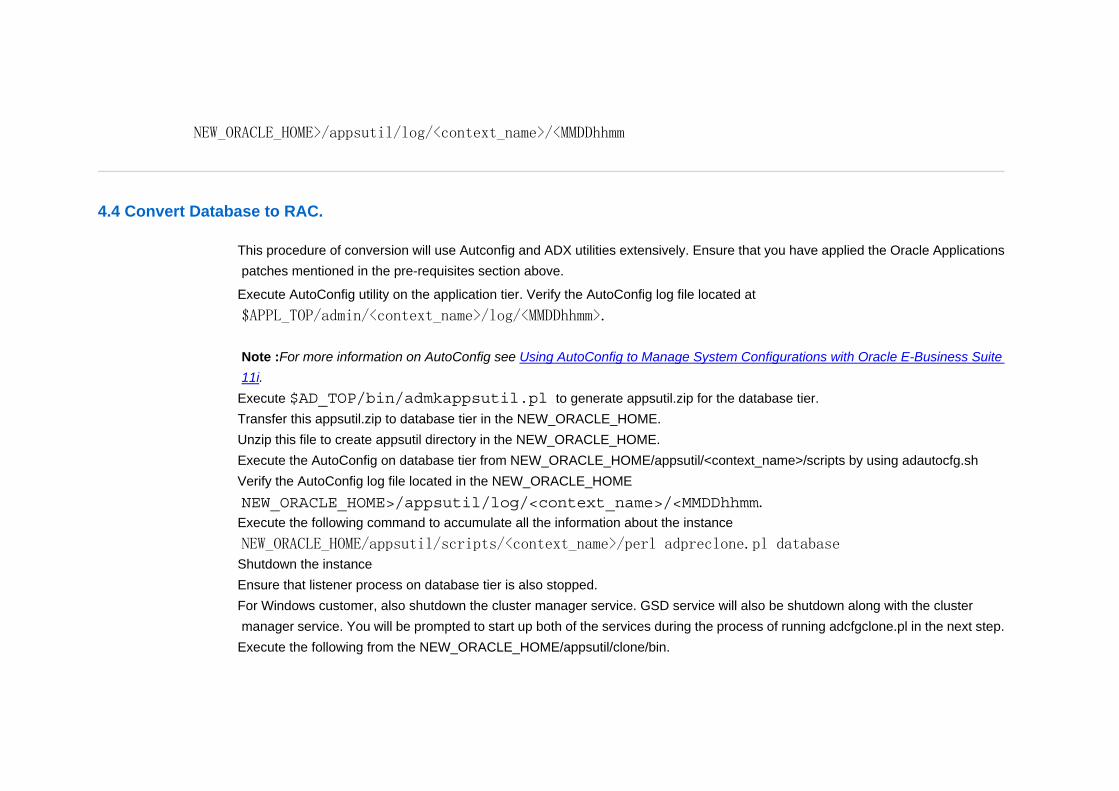
Execute the AutoConfig utility (adconfigsh) on database tier from NEW_ORACLE_HOMEappsutilbin Verify the log file located at
This procedure of conversion will use Autconfig and ADX utilities extensively Ensure that you have applied the Oracle Applications patches mentioned in the pre-requisites section above
Execute AutoConfig utility on the application tier Verify the AutoConfig log file located at $APPL_TOPadminltcontext_namegtlogltMMDDhhmmgt Note For more information on AutoConfig see Using AutoConfig to Manage System Configurations with Oracle E-Business Suite 11i
Execute $AD_TOPbinadmkappsutilpl to generate appsutilzip for the database tier Transfer this appsutilzip to database tier in the NEW_ORACLE_HOME Unzip this file to create appsutil directory in the NEW_ORACLE_HOME Execute the AutoConfig on database tier from NEW_ORACLE_HOMEappsutilltcontext_namegtscripts by using adautocfgsh Verify the AutoConfig log file located in the NEW_ORACLE_HOME NEW_ORACLE_HOMEgtappsutillogltcontext_namegtltMMDDhhmm
Execute the following command to accumulate all the information about the instance NEW_ORACLE_HOMEappsutilscriptsltcontext_namegtperl adpreclonepl database
Shutdown the instance Ensure that listener process on database tier is also stopped For Windows customer also shutdown the cluster manager service GSD service will also be shutdown along with the cluster
manager service You will be prompted to start up both of the services during the process of running adcfgclonepl in the next step Execute the following from the NEW_ORACLE_HOMEappsutilclonebin
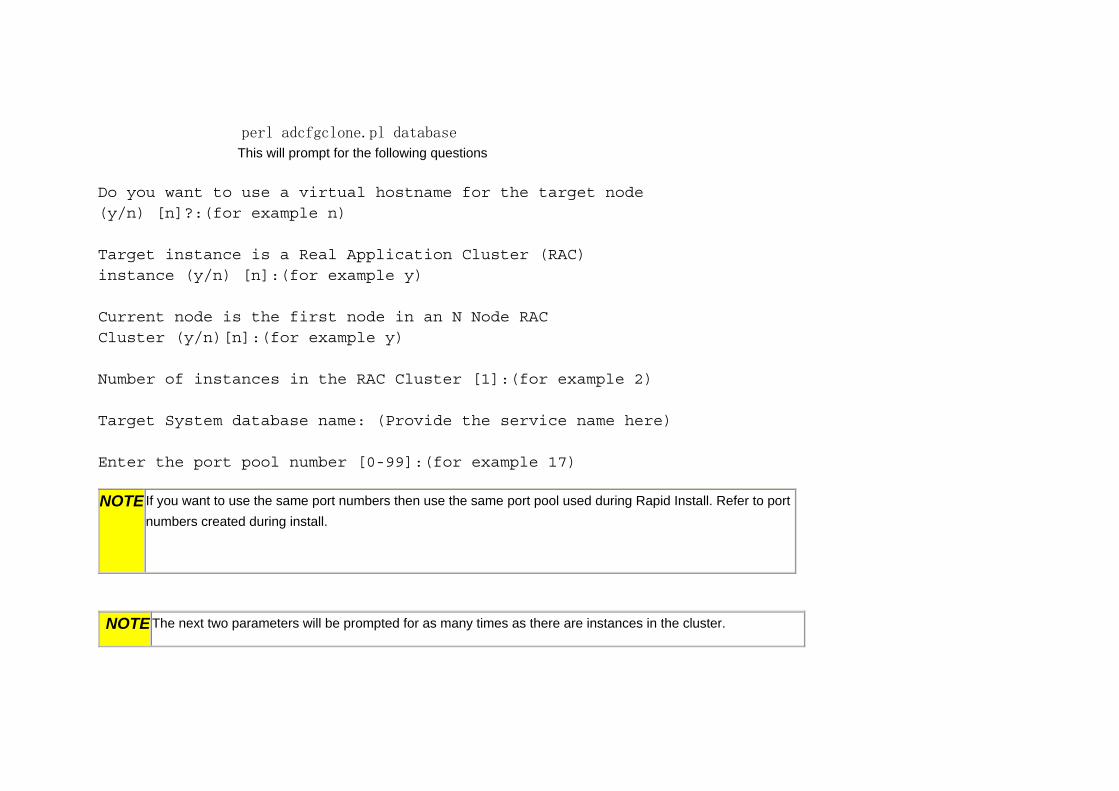
perl adcfgclonepl database This will prompt for the following questions
Do you want to use a virtual hostname for the target node (yn) [n](for example n)
Target instance is a Real Application Cluster (RAC) instance (yn) [n](for example y)
Current node is the first node in an N Node RAC Cluster (yn)[n](for example y)
Number of instances in the RAC Cluster [1](for example 2)
Target System database name (Provide the service name here)
Enter the port pool number [0-99](for example 17)
NOTE If you want to use the same port numbers then use the same port pool used during Rapid Install Refer to port numbers created during install
NOTE The next two parameters will be prompted for as many times as there are instances in the cluster
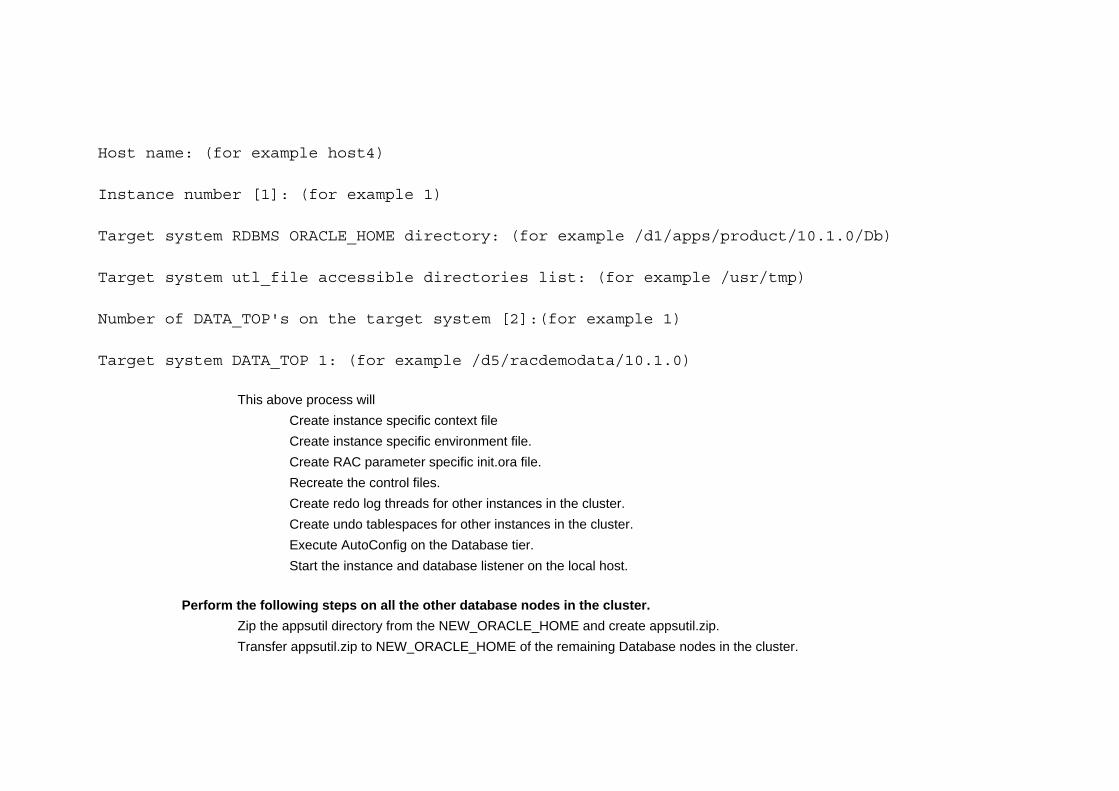
Host name (for example host4)
Instance number [1] (for example 1)
Target system RDBMS ORACLE_HOME directory (for example d1appsproduct1010Db)
Target system utl_file accessible directories list (for example usrtmp)
Number of DATA_TOPs on the target system [2](for example 1)
Target system DATA_TOP 1 (for example d5racdemodata1010)
This above process will Create instance specific context file Create instance specific environment file Create RAC parameter specific initora file Recreate the control files Create redo log threads for other instances in the cluster Create undo tablespaces for other instances in the cluster Execute AutoConfig on the Database tier Start the instance and database listener on the local host
Perform the following steps on all the other database nodes in the cluster Zip the appsutil directory from the NEW_ORACLE_HOME and create appsutilzip Transfer appsutilzip to NEW_ORACLE_HOME of the remaining Database nodes in the cluster
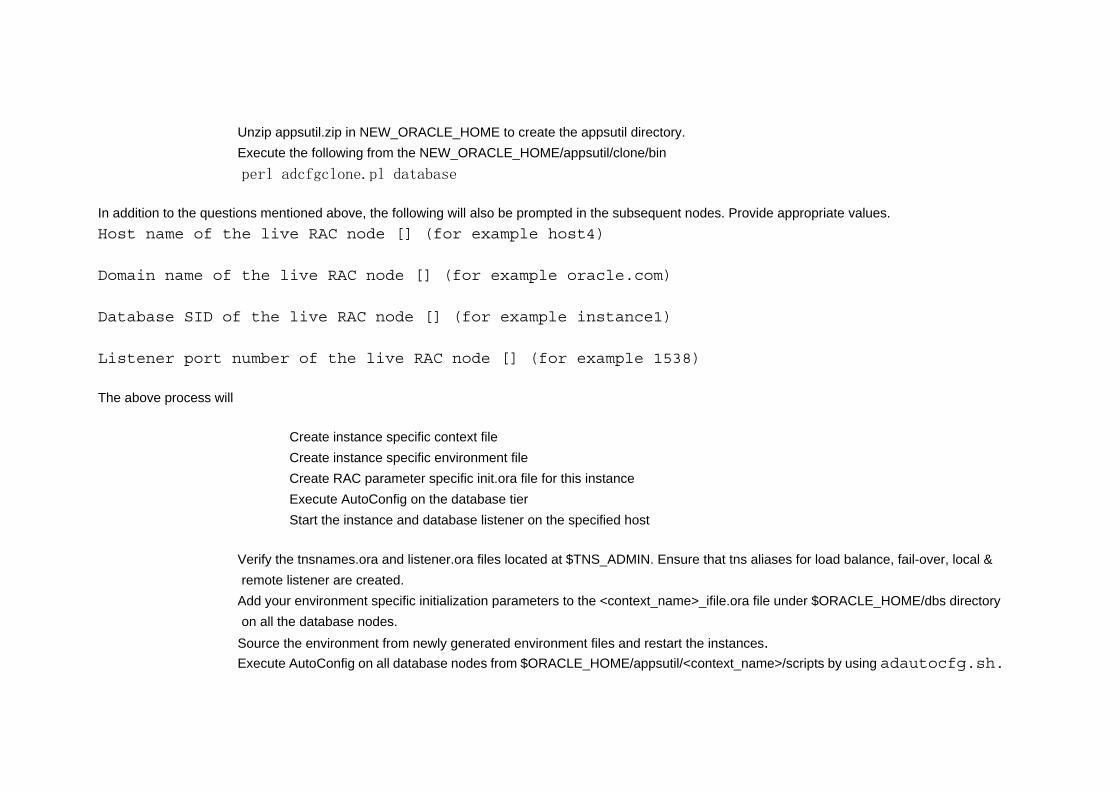
Unzip appsutilzip in NEW_ORACLE_HOME to create the appsutil directory Execute the following from the NEW_ORACLE_HOMEappsutilclonebin perl adcfgclonepl database
In addition to the questions mentioned above the following will also be prompted in the subsequent nodes Provide appropriate values Host name of the live RAC node [] (for example host4)
Domain name of the live RAC node [] (for example oraclecom)
Database SID of the live RAC node [] (for example instance1)
Listener port number of the live RAC node [] (for example 1538)
The above process will
Create instance specific context file Create instance specific environment file Create RAC parameter specific initora file for this instance Execute AutoConfig on the database tier Start the instance and database listener on the specified host
Verify the tnsnamesora and listenerora files located at $TNS_ADMIN Ensure that tns aliases for load balance fail-over local amp remote listener are created
Add your environment specific initialization parameters to the ltcontext_namegt_ifileora file under $ORACLE_HOMEdbs directory on all the database nodes
Source the environment from newly generated environment files and restart the instances Execute AutoConfig on all database nodes from $ORACLE_HOMEappsutilltcontext_namegtscripts by using adautocfgsh
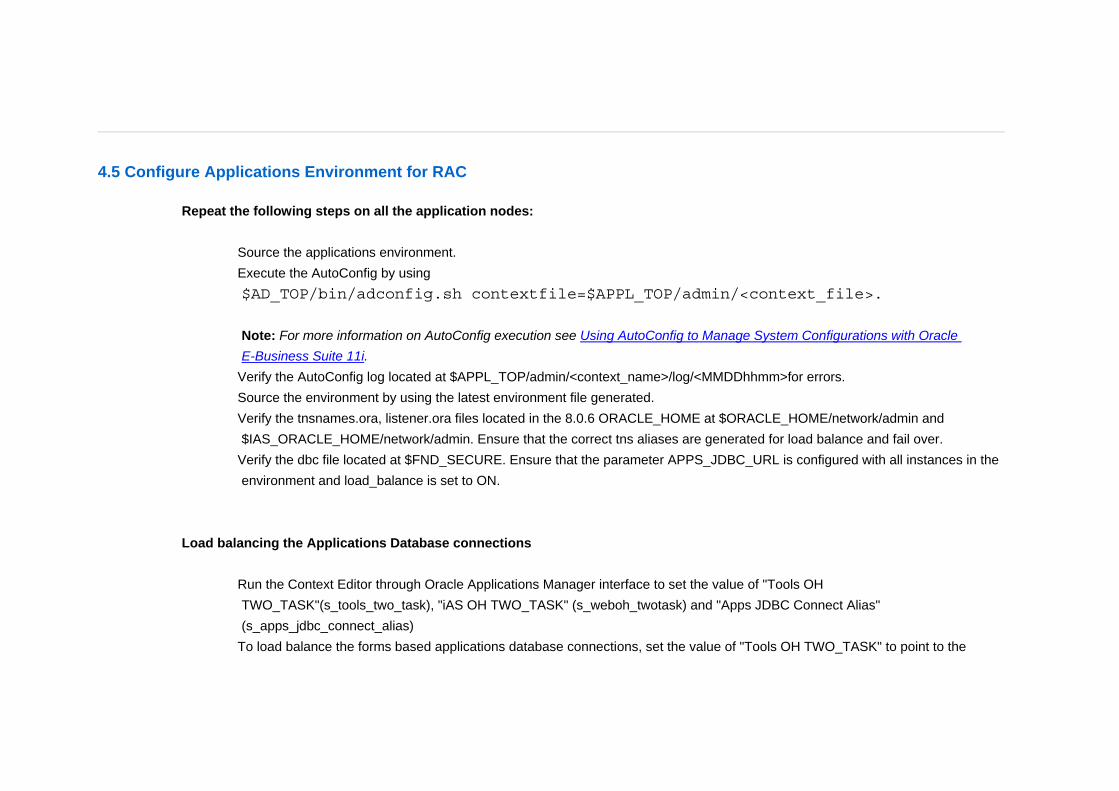
45 Configure Applications Environment for RAC
Repeat the following steps on all the application nodes
Source the applications environment Execute the AutoConfig by using $AD_TOPbinadconfigsh contextfile=$APPL_TOPadminltcontext_filegt Note For more information on AutoConfig execution see Using AutoConfig to Manage System Configurations with Oracle E-Business Suite 11i
Verify the AutoConfig log located at $APPL_TOPadminltcontext_namegtlogltMMDDhhmmgtfor errors Source the environment by using the latest environment file generated Verify the tnsnamesora listenerora files located in the 806 ORACLE_HOME at $ORACLE_HOMEnetworkadmin and
$IAS_ORACLE_HOMEnetworkadmin Ensure that the correct tns aliases are generated for load balance and fail over Verify the dbc file located at $FND_SECURE Ensure that the parameter APPS_JDBC_URL is configured with all instances in the
environment and load_balance is set to ON
Load balancing the Applications Database connections
Run the Context Editor through Oracle Applications Manager interface to set the value of Tools OH TWO_TASK(s_tools_two_task) iAS OH TWO_TASK (s_weboh_twotask) and Apps JDBC Connect Alias (s_apps_jdbc_connect_alias)
To load balance the forms based applications database connections set the value of Tools OH TWO_TASK to point to the
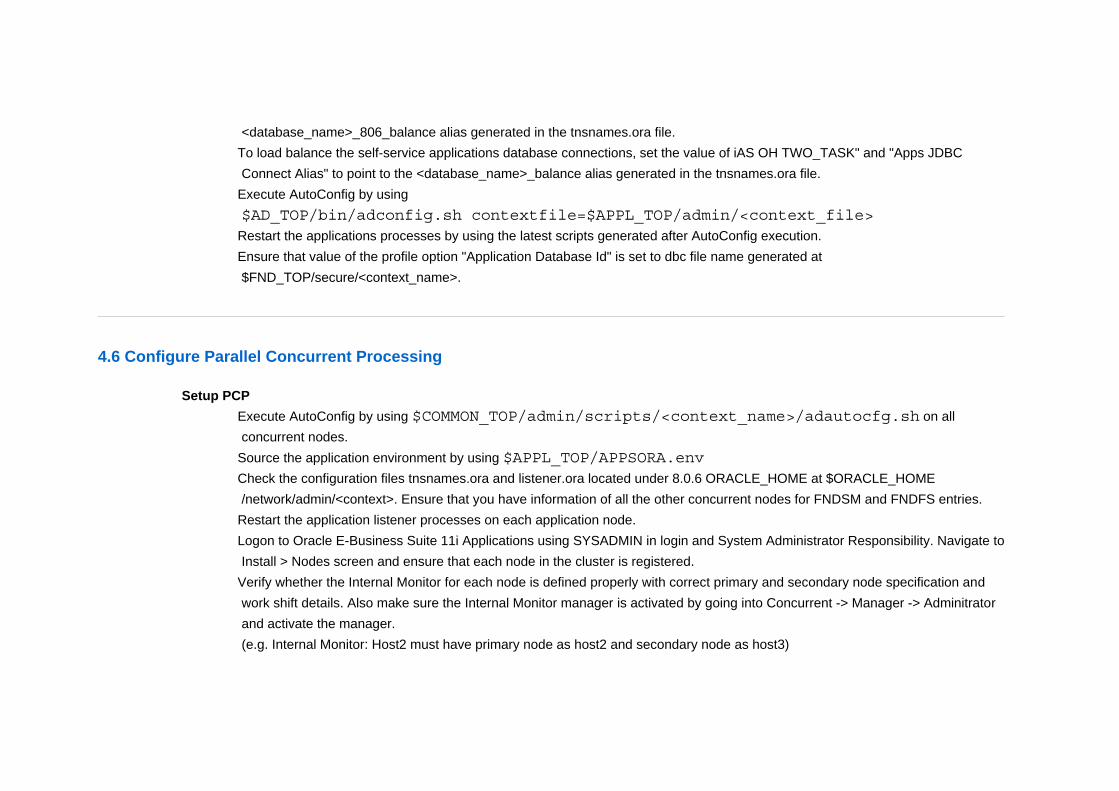
ltdatabase_namegt_806_balance alias generated in the tnsnamesora file To load balance the self-service applications database connections set the value of iAS OH TWO_TASK and Apps JDBC
Connect Alias to point to the ltdatabase_namegt_balance alias generated in the tnsnamesora file Execute AutoConfig by using $AD_TOPbinadconfigsh contextfile=$APPL_TOPadminltcontext_filegt
Restart the applications processes by using the latest scripts generated after AutoConfig execution Ensure that value of the profile option Application Database Id is set to dbc file name generated at
$FND_TOPsecureltcontext_namegt
46 Configure Parallel Concurrent Processing
Setup PCP Execute AutoConfig by using $COMMON_TOPadminscriptsltcontext_namegtadautocfgsh on all
concurrent nodes Source the application environment by using $APPL_TOPAPPSORAenv Check the configuration files tnsnamesora and listenerora located under 806 ORACLE_HOME at $ORACLE_HOME
networkadminltcontextgt Ensure that you have information of all the other concurrent nodes for FNDSM and FNDFS entries Restart the application listener processes on each application node Logon to Oracle E-Business Suite 11i Applications using SYSADMIN in login and System Administrator Responsibility Navigate to
Install gt Nodes screen and ensure that each node in the cluster is registered Verify whether the Internal Monitor for each node is defined properly with correct primary and secondary node specification and
work shift details Also make sure the Internal Monitor manager is activated by going into Concurrent -gt Manager -gt Adminitrator and activate the manager (eg Internal Monitor Host2 must have primary node as host2 and secondary node as host3)
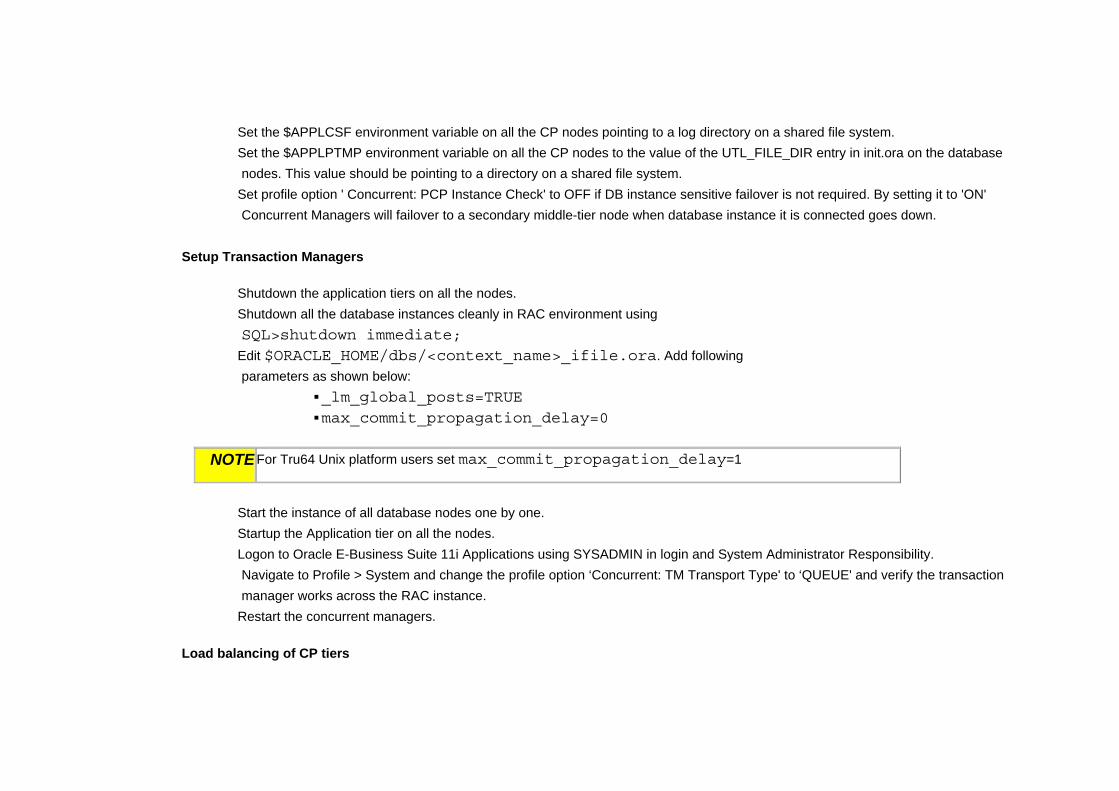
Set the $APPLCSF environment variable on all the CP nodes pointing to a log directory on a shared file system Set the $APPLPTMP environment variable on all the CP nodes to the value of the UTL_FILE_DIR entry in initora on the database
nodes This value should be pointing to a directory on a shared file system Set profile option Concurrent PCP Instance Check to OFF if DB instance sensitive failover is not required By setting it to ON
Concurrent Managers will failover to a secondary middle-tier node when database instance it is connected goes down
Setup Transaction Managers
Shutdown the application tiers on all the nodes Shutdown all the database instances cleanly in RAC environment using SQLgtshutdown immediate
Edit $ORACLE_HOMEdbsltcontext_namegt_ifileora Add following parameters as shown below
NOTE For Tru64 Unix platform users set max_commit_propagation_delay=1
Start the instance of all database nodes one by one Startup the Application tier on all the nodes Logon to Oracle E-Business Suite 11i Applications using SYSADMIN in login and System Administrator Responsibility
Navigate to Profile gt System and change the profile option lsquoConcurrent TM Transport Type to lsquoQUEUE and verify the transaction manager works across the RAC instance
Restart the concurrent managers
Load balancing of CP tiers
Carry oout following steps If you want to load balance the database connection from concurrent processing tier
Create configuration file ltcontext_name_ifileoragt manually under 806 ORACLE_COME at $ORACLE_HOMEnetworkadminltcontextgt on all concurrent nodes
Create load balancing alias similar to ltservice_namegt_806_balance as shown sample in Appendix C
Edit the applications context file through Oracle Applications Manager interface and set the value of Concurrent Manager TWO_TASK to load balancing alias created in previous step
Execute AutoConfig by using $COMMON_TOPadminscriptsltcontext_namegtadautocfgsh on all concurrent nodes
Oracle9i Installation Guide Release 2 (Part No A96167-01)
Oracle9i Release Notes Release 2 (92040) for Linux (Part No B13670-01)
Using AutoConfig to Manage System Configurations with Oracle E-Business Suite 11i
Cloning Oracle Applications Release 11i with Rapid Clone
Oracle9i Real Application Clusters Concepts Release 2 (92) - A96597-01
Oracle Applications System Administrators Guide Release 11i - B13925-01
RAC on Linux Best Practices
Concurrent Processing Transaction Manager Setup and Configuration Requirement in an 11i RAC Environment
Appendix A Setup Cluster File System (CFS) on WINDOWS
Cluster File System Pre-installation Steps Note Perform the preinstallation steps described in this section before installing CFS Windows refers to raw partitions as logical drives If you need more information about creating partitions refer to the Windows online help from within the disk administration tools
Run Windows NT Disk Administrator or Windows 2000 Disk Management from one node to create an extended partition Currently CFS is not supported on Primary partitions For Windows 2000 only use a basic disk Dynamic disks are not supported
Create at least two partitions one for the Oracle home and one for the Oracle database files Create the Oracle home on a local disk as placing it on a CFS disk is not supported at this time Note You do not need to create a partition for the voting disk if you plan to use CFS CFS stores the voting device for OSD clusterware as a file on a CFS partitionThe number of partitions used for CFS affects performance Therefore you should create the minimum number of partitions needed for the CFS option you choose
Before you begin remove (disconnect) any Windows mapped drives that have been created and are not being used Try to ensure that there are no drive letter ldquoholesrdquo ie if c d and f exist change f to e if possible
Create partitions From one of the nodes of the cluster run the Windows disk Administration tool as follows On Windows NT start Disk Administrator using
the pathStartgtProgramsgtAdministrative ToolsgtDisk Administrator On Windows 2000 start Disk Management using the pathStartgtProgramsgtAdministrative ToolsgtComputer ManagementExpand the Storage folder to Disk Management For Windows 2000 only use a basic disk as an extended partition for creating partitions
Click inside an unallocated part of an extended partition For Windows NT choose Create Partition For Windows 2000 choose Create Logical Drive A wizard presents pages for configuring the logical drive Note Do not use Windows disk administration tools to assign drive letters to partitions in this procedure ClusterSetup Wizard does this when you create the cluster For more details check Chapter 2 in Oracle9i Real Application ClustersSetup and Configuration Release 2 (92) Part NumberA96600-02 and Appendix B in Oracle9i Database Installation Guide Release 2 (92010) for Windows Part NumberA95493-01
Enter the size that you want for the partition In general this should be 100 MB or more Ensure that a drive letter is not assigned Cluster Setup Wizard will do this later Note Windows NT automatically assigns a drive letter Remove this drive letter by right-clicking on the new drive and selecting Do not assign a drive letter for the Assign Drive Letter option Do this for any Oracle partitions For Windows 2000 choose the option Do not assign a drive letter and then choose the option Do not format this partition Click Finish on the last page of the wizard
Choose Commit Changes Now from the Partition menu to save the new partition information Alternatively close the Disk Administrator and reboot the machine
Repeat above steps for the second and any additional partitions An optimal configuration is one partition for the Oracle home on a local drive and one CFS partition for Oracle database files Note For an entire Oracle Applications Vision database create a partition of at least 65GB This is usually the easiest method to install Oracle Applications onto a CFS partition and then move the datafiles to other CFS Partitions after the entire Oracle Applications setup is complete to take advantage of fast disks RAID etc
Check all nodes in the cluster to ensure that the partitions are visible on all the nodes and to ensure that none of the Oracle partitions have drive letters assigned If any partitions have drive letters assigned then remove them as described in earlier step
Install Cluster File system To prepare for this procedure perform the tasks described in ClusterFile System Preinstallation Steps in this document if you have not already
done so Download the 9206 Cluster patch 3973928
1 Run clustersetupexe from the preinstall_racclustersetup directory of the downloaded clusterpatch Note Do not run clustersetupexe from the Oracle9i Database product CD
2 The Welcome page for the Oracle Cluster Setup Wizard appearsClick Next Note It is not supported to install remotely via Terminal Server to Windows NT or 2000However one can do a remote install via Terminal Server to Windows 2003 by connecting to the console of the remote server from the client by starting the Terminal Server Client as MSTSC VRemoteServer console Note If you need further assistance in using Terminal Server Client please contact Microsoft Product Support
3 Choose Create a cluster and click Next The Network Selection page appears 4 Choose Use private network for interconnect and click Next The Private Network Configuration page appears
Note If the nodes have a high speed private network connecting them it should be used as the cluster interconnect Otherwise the public network can be selected If you choose Use public network for interconnect then the Public Network Configuration page appears
5 Enter the name for the cluster you are creating and enter the names of the nodes If a private network interconnect was selected in previous step enter the public and private names for the nodes otherwise enter the public names and click Next The Cluster File System Options page appears
6 Choose the option CFS for Datafiles Click Next The CFS for Data files page appears
7 Choose a partition of the required size from the list of available partitions and then choose a drive letter from the Drive Letterdrop-down list For the CFS option that you choose in previous step the partition and drive letter combination will be assigned to the CFS drive letter for all of the volumes in the cluster Note Use the longest common prefix of the node names for the cluster name For example if nodes aredeptclust1 deptclust2 deptclust3 then the cluster name will be deptclust The clustername and each node name must be globally unique to your network Do not change node names once they have been assigned and used in a clusterdatabase
8 Repeat the previous step for each CFS volume and click Next 9 Click Next The wizard checks your cluster interconnect to see if Virtual Interface Architecture (VIA) hardware is detected If VIA is not
detected then the VIA Detection page appears telling you VIA was not detected and TCP will be used for the clusterwareinterconnect Click Next and skip to step 13 If VIA is detected then the VIA Selection page appears Continue to step 11
10 Choose Yes to use VIA for the interconnect and click Next The VIA Configuration page appears If you choose No then TCP will be used 11 Enter the name of the VIA connection and click Next 12 The Install Location page is the last page that appears The default location is windirsystem32osd9i Click Browse to navigate to a
different location if needed 13 Click Finish A progress page displays the actions being performed 14 When complete reboot both nodes Logon and make sure the new CFS partition can be seen from both nodes and has the same drive
letter assigned to it from both nodes
Appendix B Install Cluster Manager on Windows
Pre-installation tasks for installing Cluster Manager on Windows platform Ensure that the ExternalPublic Hostnames are defined in your Directory Network Services (DNS) and that the correct IP addresses
resolve for all nodes in the cluster
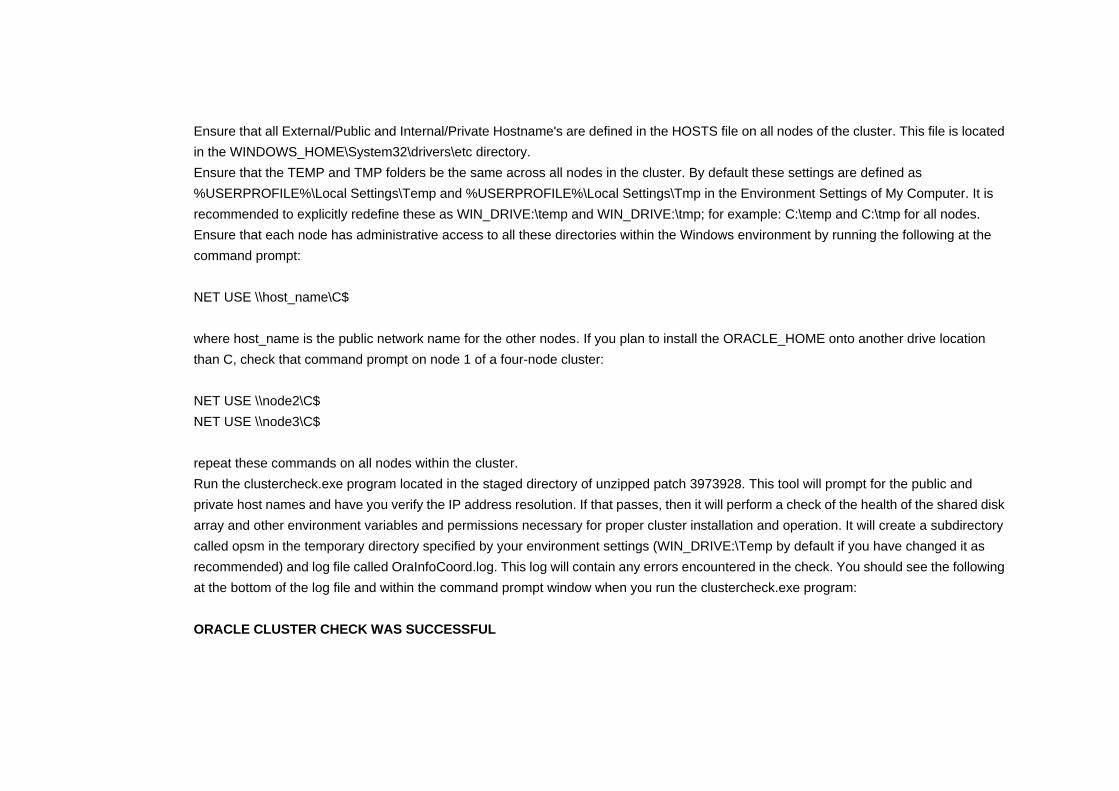
Ensure that all ExternalPublic and InternalPrivate Hostnames are defined in the HOSTS file on all nodes of the cluster This file is located in the WINDOWS_HOMESystem32driversetc directory
Ensure that the TEMP and TMP folders be the same across all nodes in the cluster By default these settings are defined as USERPROFILELocal SettingsTemp and USERPROFILELocal SettingsTmp in the Environment Settings of My Computer It is recommended to explicitly redefine these as WIN_DRIVEtemp and WIN_DRIVEtmp for example Ctemp and Ctmp for all nodes
Ensure that each node has administrative access to all these directories within the Windows environment by running the following at the command prompt NET USE host_nameC$ where host_name is the public network name for the other nodes If you plan to install the ORACLE_HOME onto another drive location than C check that command prompt on node 1 of a four-node cluster NET USE node2C$ NET USE node3C$ repeat these commands on all nodes within the cluster
Run the clustercheckexe program located in the staged directory of unzipped patch 3973928 This tool will prompt for the public and private host names and have you verify the IP address resolution If that passes then it will perform a check of the health of the shared disk array and other environment variables and permissions necessary for proper cluster installation and operation It will create a subdirectory called opsm in the temporary directory specified by your environment settings (WIN_DRIVETemp by default if you have changed it as recommended) and log file called OraInfoCoordlog This log will contain any errors encountered in the check You should see the following at the bottom of the log file and within the command prompt window when you run the clustercheckexe program ORACLE CLUSTER CHECK WAS SUCCESSFUL
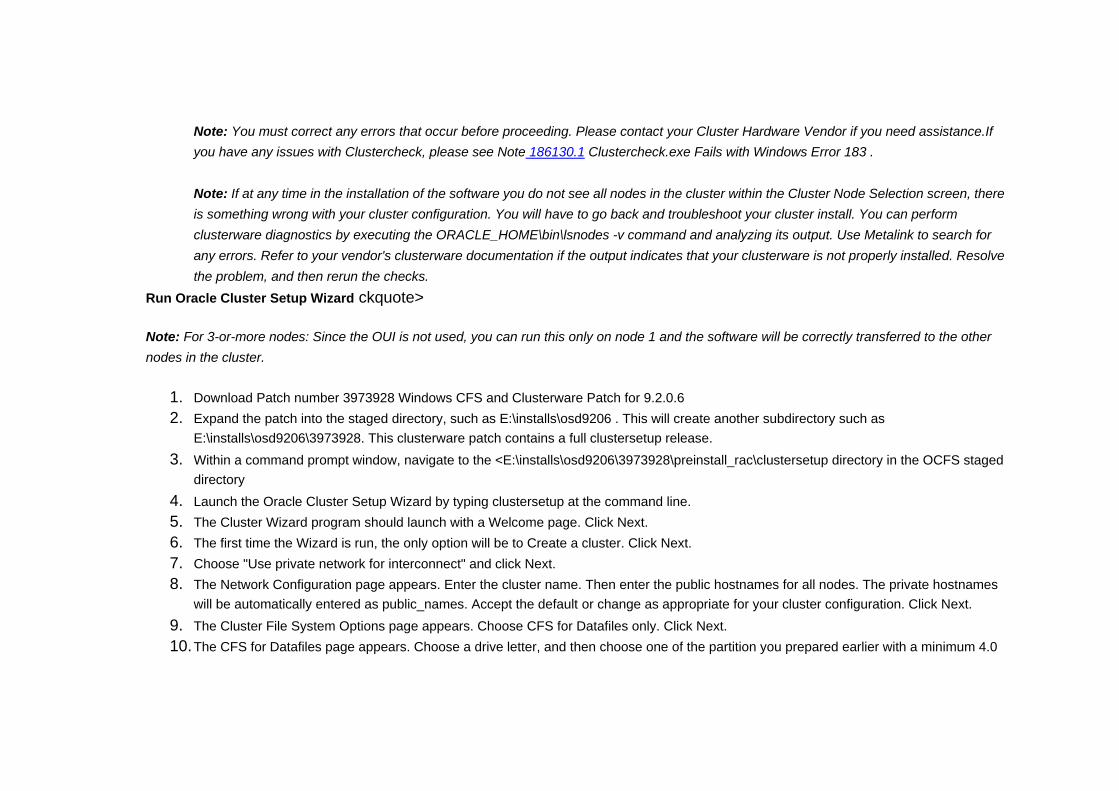
Note You must correct any errors that occur before proceeding Please contact your Cluster Hardware Vendor if you need assistanceIf you have any issues with Clustercheck please see Note 1861301 Clustercheckexe Fails with Windows Error 183 Note If at any time in the installation of the software you do not see all nodes in the cluster within the Cluster Node Selection screen there is something wrong with your cluster configuration You will have to go back and troubleshoot your cluster install You can perform clusterware diagnostics by executing the ORACLE_HOMEbinlsnodes -v command and analyzing its output Use Metalink to search for any errors Refer to your vendors clusterware documentation if the output indicates that your clusterware is not properly installed Resolve the problem and then rerun the checks
Run Oracle Cluster Setup Wizard ckquotegt
Note For 3-or-more nodes Since the OUI is not used you can run this only on node 1 and the software will be correctly transferred to the other nodes in the cluster
1 Download Patch number 3973928 Windows CFS and Clusterware Patch for 9206 2 Expand the patch into the staged directory such as Einstallsosd9206 This will create another subdirectory such as
Einstallsosd92063973928 This clusterware patch contains a full clustersetup release 3 Within a command prompt window navigate to the ltEinstallsosd92063973928preinstall_racclustersetup directory in the OCFS staged
directory 4 Launch the Oracle Cluster Setup Wizard by typing clustersetup at the command line 5 The Cluster Wizard program should launch with a Welcome page Click Next 6 The first time the Wizard is run the only option will be to Create a cluster Click Next 7 Choose Use private network for interconnect and click Next 8 The Network Configuration page appears Enter the cluster name Then enter the public hostnames for all nodes The private hostnames
will be automatically entered as public_names Accept the default or change as appropriate for your cluster configuration Click Next 9 The Cluster File System Options page appears Choose CFS for Datafiles only Click Next 10 The CFS for Datafiles page appears Choose a drive letter and then choose one of the partition you prepared earlier with a minimum 40
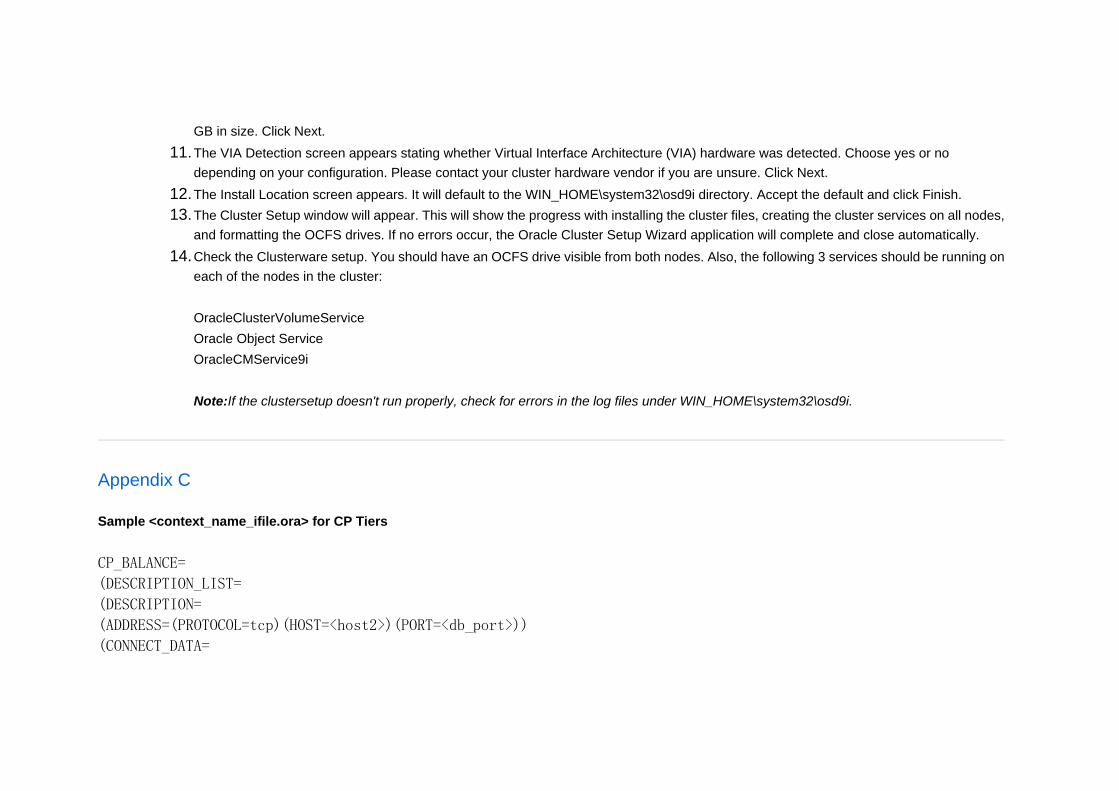
GB in size Click Next 11 The VIA Detection screen appears stating whether Virtual Interface Architecture (VIA) hardware was detected Choose yes or no
depending on your configuration Please contact your cluster hardware vendor if you are unsure Click Next 12 The Install Location screen appears It will default to the WIN_HOMEsystem32osd9i directory Accept the default and click Finish 13 The Cluster Setup window will appear This will show the progress with installing the cluster files creating the cluster services on all nodes
and formatting the OCFS drives If no errors occur the Oracle Cluster Setup Wizard application will complete and close automatically 14 Check the Clusterware setup You should have an OCFS drive visible from both nodes Also the following 3 services should be running on
each of the nodes in the cluster OracleClusterVolumeService Oracle Object Service OracleCMService9i NoteIf the clustersetup doesnt run properly check for errors in the log files under WIN_HOMEsystem32osd9i
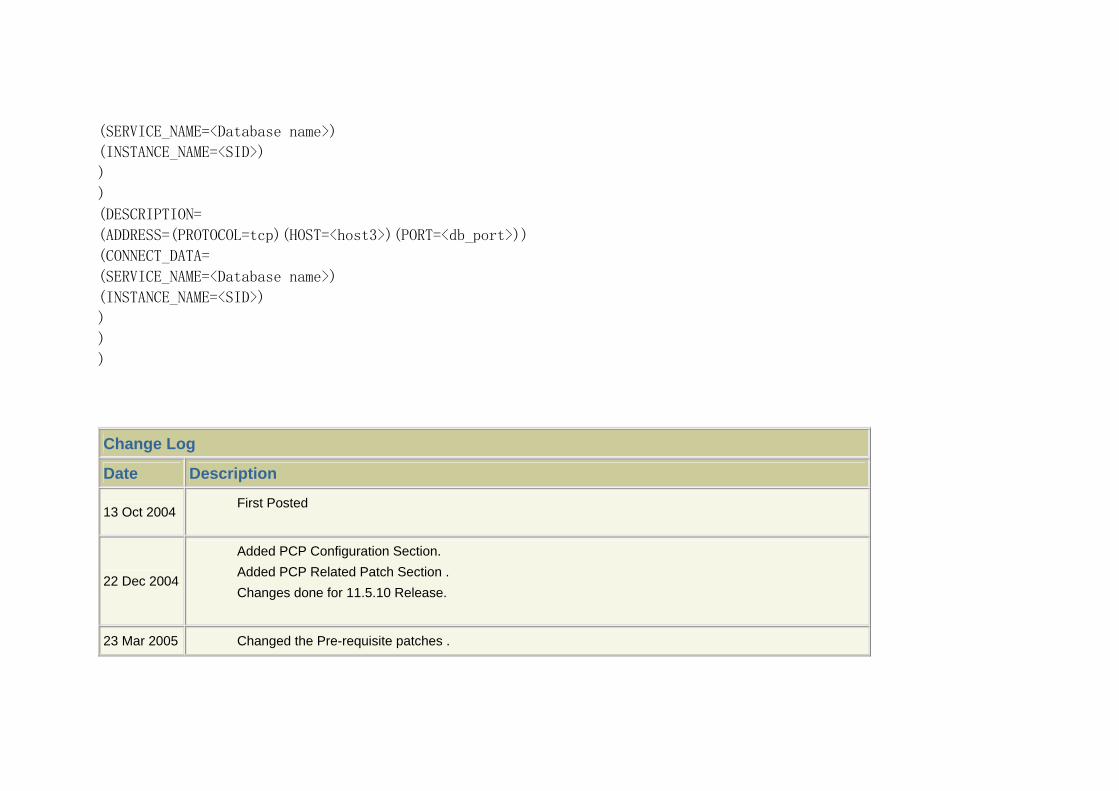
Appendix C Sample ltcontext_name_ifileoragt for CP Tiers
Added PCP Configuration Section Added PCP Related Patch Section Changes done for 11510 Release
23 Mar 2005 Changed the Pre-requisite patches
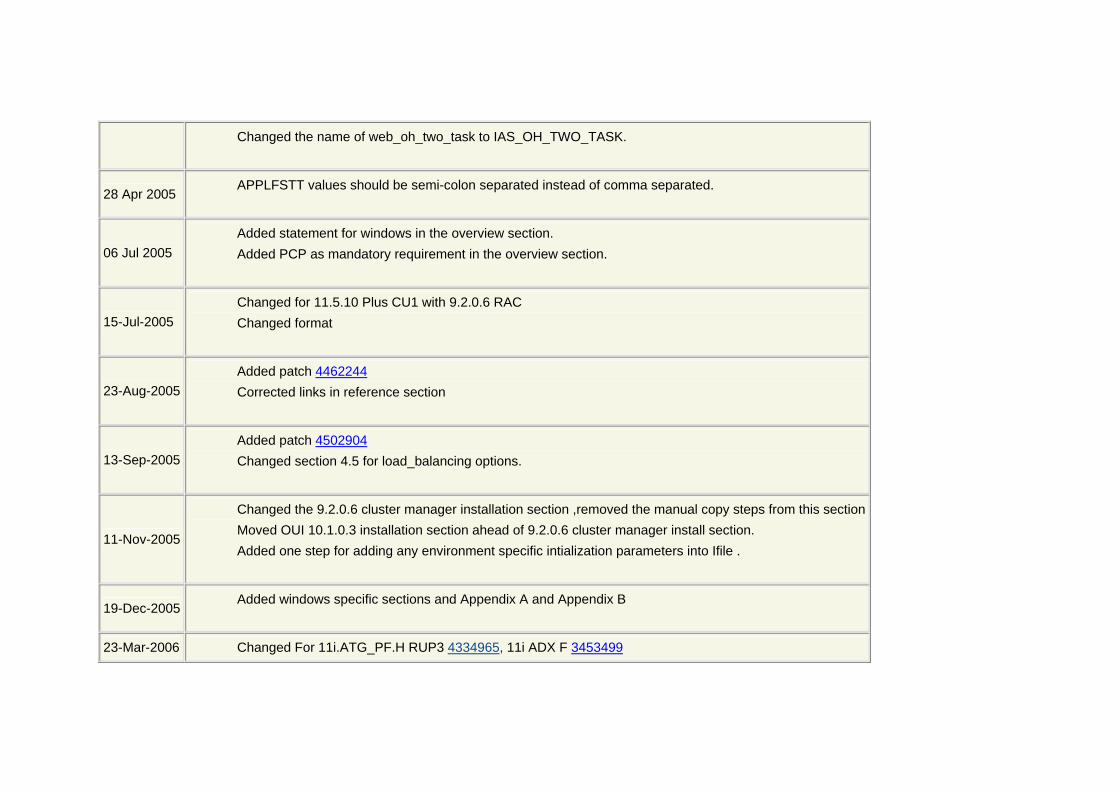
Changed the name of web_oh_two_task to IAS_OH_TWO_TASK
28 Apr 2005 APPLFSTT values should be semi-colon separated instead of comma separated
06 Jul 2005 Added statement for windows in the overview section Added PCP as mandatory requirement in the overview section
15-Jul-2005 Changed for 11510 Plus CU1 with 9206 RAC Changed format
23-Aug-2005 Added patch 4462244 Corrected links in reference section
13-Sep-2005 Added patch 4502904 Changed section 45 for load_balancing options
11-Nov-2005
Changed the 9206 cluster manager installation section removed the manual copy steps from this section Moved OUI 10103 installation section ahead of 9206 cluster manager install section Added one step for adding any environment specific intialization parameters into Ifile
19-Dec-2005 Added windows specific sections and Appendix A and Appendix B
23-Mar-2006 Changed For 11iATG_PFH RUP3 4334965 11i ADX F 3453499
Section 46 Changed for PCP amp Transaction Manager Setup Added Oracle Database Patch 4059639 Added Appendix C for PCP amp Transaction Manager Setup on Windows
31-Aug-2006 Changed for Database Patchset 9207
20-Nov-2006 Changed for Database Patchset 9208 (For Unix Customers Only)
06-Feb-07 Removed windows specific PCP section
Note lt2799561gt by Oracle Applications Development Copyright copy 2007 Oracle Corporation last updated Tuesday 06 Feb 2007
115102) with Oracle Database 9i(9208) Real Application Clusters on RedHat Linux platform In this document instructions outlined are specific for Oracle E-Business Suite 11i and generic for all Unix platforms For Windows platform substitute the appropriate syntax whenever necessary It is assumed that the reader of this document has knowledge of Oracle Database 9i Real Application Clusters (RAC) and Oracle E-Business Suite Release 11i Concurrent Processing (CP) requires configuration with 11i RAC environment Please see Section 46 in this document for more details about configuring CP
System administrators are strongly advised to make complete environment backups before executing these procedures and to make frequent backups at multiple stages of this migration System administrators should test these procedures in test bed environments before executing them in production environments Users must be asked to log off your system while applying these changes
Section 2 Environment
The logical configuration used for creating this document is illustrated in the figure below Oracle E-Business Suite 11i (115102) with 9206 version was deployed using Rapid Install
21 SoftwareHardware Configuration
Here are the versions of software and hardware used for this installation The architecture mentioned in this document is a possible sample configuration For more details regarding reference architectures refer to the MetaLink Note 2852671
Software Component Version Release 115102 (Production release) with Consolidated Update 2( CU2)
Oracle E-Business Suite Release 11i
Oracle9i Release 9208 (Production release) Oracle Cluster Manager Release 9208 (Production release) Oracle9i Real Application Clusters Release 9208 (Production release) Linux RHEL AS 30 (Kernel version 2421-15ELsmp)
22 ORACLE_HOME Nomenclature
Following ORACLE_HOMEs are referred to in this document
ORACLE_HOME Purpose OLD_ORACLE_HOME Database ORACLE_HOME installed by Rapid Install
Database ORACLE_HOME installed for 9i RAC Database
NEW_ORACLE_HOME
806 ORACLE_HOME ORACLE_HOME installed by Rapid Install on
Application Tier
Section 3 Pre-requisites for Conversion
You must complete the following steps in your environment prior to conversion For more details refer to Oracle9i Real Application Clusters Setup and Configuration Guide
Set up Cluster Connect the required number of nodes to the cluster interconnect and the shared storage subsystem Install the cluster software and any required Oracle operating system-dependent (OSD) patches such as the Oracle UDLM patch for Sun
Clusters For UNIX platforms refer to your vendor trades operating system-dependent documentation for instructions about installing the cluster software For Sun clusters also install the Oracle UDLM patch from the first CD of the Oracle9i Enterprise Edition CD set
Configure your cluster by adding the desired number of nodes Start up the clusterware on all nodes of your cluster
Set up Shared Storage If your platform supports a cluster file system then set up the cluster file system on shared storage For instructions to setup the cluster file
system on Windows please refer to Appendix A Setup Cluster File System (CFS) on Windows If your platform does not support a cluster file system or you want to use raw devices for database files for performance reasons then
install the vendor specific logical volume manager (for example Veritas Cluster Volume Manager) and set up raw devices on shared disks Start up the shared storage management components such as Logical Volume Manager Veritas Volume Cluster Manager and so on See Also Storage vendor-specific documentation for setting up the shared disk subsystem and for information about how to mirror and
stripe these disks Complete Rapid Install of Oracle Applications
Note If you are not using raw devices as shared storage you can specify the cluster file system location for your datafiles during Rapid Install
Complete Rapid Install of Oracle E-Business Suite Release 11i(Release 115102) if you dont have an existing single instance environment
Migrate all the data files to shared storage configured in the previous step Apply the following patches on your environment before executing this conversion
Oracle Applications patches
Patch Number Description
3453499 11iADXF
4712852 Minipack 11iADI4
4676589 11iATG_PFH RUP4
4022732 11510SFM UNABLE TO PROCESS ORDERS IN RAC CONFIG
5225940 POST ADX-F FIXES
Note Download the above patches specific to your operating system Ensure that you have read the README files associated with each of these patches for any pre-requisite patches and special instructions Execute Autoconfig on all the tiers in your environment after application of these patches
Section 4 InstallationConfiguration Here are the steps that need to be followed for converting E-Business Suite 11i to 9iRAC
41 Install Oracle Cluster Manager 42 Install Oracle 9i (9204) and upgrade database to 9208 43 Enable AutoConfig on Database Tier for Oracle E-Business suite 11i 44 Convert the Oracle E-Business Suite 11i single instance to Oracle 9i RAC 45 Establish Oracle E-Business Suite 11i Applications Environment with RAC 46 Configure Parallel Concurrent Processing
41 Install Cluster Manager
Note This section is for UNIX only For Windows platform instruction to install Cluster Manager please refer to Appendix B Install Cluster Manager on Windows The cluster manager installation needs to be done on all the database nodes that are part of the cluster In this configuration Cluster Manager has been installed on host4 and host5 as per Figure 1-1 above
Pre- Installation tasks for installing Cluster Manager Check the version of binutils package on your Linux system using the following command
rpm -qa | grep -i binutils The version must be 2119008-12 or higher Otherwise apply patch 2414946
If you are on Linux 249-e12enterprise or higher the hangcheck-timer module is already included Else install this module by applying patch 2594820
Create unix account for Oracle with DBA group Add cluster node entries in host files
Edit etchosts and etchostsequiv on each node with cluster public and private interconnect addresses as
Verify that you have rsh package installed on your hosts by using rpm -qa|grep -i rsh Verify the kernel parameter settings required as per Oracle Database Installation as per Oracle9i Installation Guide Release 2 (Part No
A96167-01) and Oracle9i Release Notes Release 2 (92040) for Linux (Part No B13670-01) Verify the settings of environment variables as per Oracle9i Installation Guide Release 2 (Part No A96167-01) Verify the setup done above by executing verification script InstallPrepsh Refer the Metalink note (1892561) for this script
Install the 9204 ORACM (Oracle Cluster Manager)
Note You can download the Oracle database 9i(9204) software from Oracle website at httpwwworaclecomtechnologysoftwareproductsoracle9iindexhtmlYou can get Oracle database 9208 patchset on OracleMetaLink After logging on to OracleMetaLink click on Patches using the menu on the left of the screen Use quick links or advanced search to find the 9208 patch set
cd to 9204 Disk1 stage area and start runInstaller On File Locations Screen verify the destination listed for your NEW_ORACLE_HOME (9204) directory Also enter a NAME to identify
this ORACLE_HOME You can choose any appropriate name Choose Oracle Cluster Manager from available products For public node enter the public alias specified in etchosts eg host4 For private node enter the private alias specified in etchosts eg int-host4 Press Install at the Summary screen and complete the installation
Note Check that oracmadmincmcfgora exists under your NEW_ORACLE_HOME The cmcfgora is created using the rcp command
on all the other nodes in the cluster Ensure that the file contains your publicprivate aliases
Upgrade the Oracle Cluster Manager (ORACM) to 9208
Download the Oracle Database 9208 patch from Oracle Metalink Unzip and untar the patch Set ORACLE_HOME to NEW_ORACLE_HOME and LD_LIBRARY_PATH=$NEW_ORACLE_HOMElib Run Oracle Universal Installer from Disk1oracm On File Locations Screen make sure that the source location is pointing to the productsxml file in the 9208 patch set location under
Disk1stage Also verify that the Destinationlisted on screen is the NEW_ORACLE_HOME (9208) directory On Available Products Screen select Oracle9iR2 Cluster Manager 92080 On the Public Node Information Screen enter the public node names On the Private Node Information Screen enter the interconnect node names Click Install at the summary screen and complete the installation
Note For more details refer to Oracle Database 9208 patch set release notes
Verify Oracle Cluster Manager configuration files For Hangcheck-timer
Verify the NEW_ORACLE_HOMEoracmadmincmcfgora file as per sample file
Note If the cmcfgora file on your environment is not as per the sample file above add the missing parameters as per the sample file shown above For more information on these parameters refer to RAC on Linux Best Practices
Start the ORACM (Oracle Cluster Manager) on all nodes in the cluster Change directory to the NEW_ORACLE_HOMEoracmbin directory change to the root user and start the ORACM using following
commands $ cd $ORACLE_HOMEoracmbin $ su root $ ocmstartsh
Verify that ORACM is running using following command $ ps -ef | grep oracm
42 Install Oracle 9i (9204) and upgrade database to 9208
This section describes installation of the 9204 database software upgrading the software to 9208 and upgrading the Oracle E-Business Suite 11i database to 9208For Windows customers need to install the 9201 database software instead of 9204
Note Oracle 9i(9204) installation needs to be done on database nodes In our example we have installed Oracle9i (9204) on host4 and host5 as per the figure1-1 above
Install 9204 Database (Software only) -- For Unix Platforms only Set ORACLE_HOME to NEW_ORACLE_HOME (9204) used in cluster manager install otherwise Oracle Universal Installer will not
detect that the cluster manager is running Set ORACLE_BASE to a valid directory with privileges matching the user and group of the user that is installing the software Start runInstaller from ORACLE_HOMEbin - ie use Oracle Universal Installer 22018 After the Welcome screen press Next buttonThis should take you to the Cluster Node Selection screen
Note If you do not see Cluster Node Selection screen either ORACLE_HOME is not set or the cluster manager is not running Unless you see the Cluster Node Selection screen do not continue as Oracle Universal Installer will not install RAC option
The Cluster Node Selection screen should show all your public aliases Make sure to select all nodes By default local node will be selected
Select productsjar from the 9204 Disk1stage directory Choose Oracle Database 9204 Enterprise Edition On Database Configuration Screen check Software Only Summary should include Real Applications Clusters Install the software Run rootsh when prompted Complete the installation
Install 9201 Database (Software only) -- For Windows Platforms only Set ORACLE_HOME to NEW_ORACLE_HOME (9201) used in cluster manager install otherwise Oracle Universal Installer will not
detect that the cluster manager is running Set ORACLE_BASE to a valid directory with privileges matching the user and group of the user that is installing the software
Start runInstaller from ORACLE_HOMEbin - ie use Oracle Universal Installer 22019 After the Welcome screen press Next buttonThis should take you to the Cluster Node Selection screen
Note If you do not see Cluster Node Selection screen either ORACLE_HOME is not set or the cluster manager is not running Unless you see the Cluster Node Selection screen do not continue as Oracle Universal Installer will not install RAC option
The Cluster Node Selection screen should show all your public aliases Make sure to select all nodes By default local node will be selected
Select productsjar from the 9201 Disk1stage directory Choose Oracle Database 9201 Enterprise Edition On Database Configuration Screen check Custom Installation Select the Oracle Real Application Cluster Component from the custom list Complete the installation
Upgrade the 9204 software installation to Oracle9iR2 Patch Set 9208 -- For Unix Platforms only Download the Oracle Database 9208 patchset 4547809 from Oracle Metalink Set ORACLE_HOME to NEW_ORACLE_HOME and LD_LIBRARY_PATH=$NEW_ORACLE_HOMElib$NEW_ORACLE_HOMElib32 Start runInstaller from NEW_ORACLE_HOMEouibin On Cluster Node Selection screen make sure that all RAC nodes are selected On File Locations Screen make sure that the source location is pointing to the productsxml file in the 9208 patch set location under
Disk1stage Also verify that the Destination listed on screen is the NEW_ORACLE_HOME directory On Available Products Screen select Oracle9iR2 Patch Set 9208 Click Next Click Install at the summary screen Run rootsh when prompted Complete the installation
Upgrade the 9201 software installation to Oracle9iR2 Patch Set 9207 -- For Windows Platforms only
Note Windows platform customers needs to upgrade the 9201 database software installed in previous step Download the Oracle Database 9207 patchset 4163445 from Oracle Metalink Set ORACLE_HOME to NEW_ORACLE_HOME and LD_LIBRARY_PATH=$NEW_ORACLE_HOMElib$NEW_ORACLE_HOMElib32 Start runInstaller from NEW_ORACLE_HOMEouibin On Cluster Node Selection screen make sure that all RAC nodes are selected On File Locations Screen make sure that the source location is pointing to the productsxml file in the 9207 patch set location under
Disk1stage Also verify that the Destination listed on screen is the NEW_ORACLE_HOME directory On Available Products Screen select Oracle9iR2 Patch Set 9207 Click Next Click Install at the summary screen Run rootsh when prompted Complete the installation
Upgrade Database Instance to 9208 Note Windows customers should follow the same steps to upgrade Database instance to 9207
Login in as sysdba using SQLPlus Startup the database in migrate mode by using startup migrate option Use pfile option to startup the database by using the initltSIDgtora
file from OLD_ORACLE_HOME Note If the database is already running shutdown the database and startup in migrate mode by using above startup option
Run spool patchlog Run NEW_ORACLE_HOMErdbmsadmincatpatchsql Run spool off Review the patchlog file for any errors and rerun the catpatchsql script after correcting the problems Shutdown the database
Startup the database Note For other product specific instructions related to upgrade of Oracle9iR2 Patch Set 9208 refer to readme of patch 4547809 Apply the required additional database patches as mentioned in Interoperability Notes - Oracle Applications Release 11i with Oracle Database 9i Release 2
Install 9206 Clusterware Patch into new Oracle_Home (For Windows customer only)
This patch needs to be installed manually into the new Oracle_Home on all nodes in the cluster Follow the instructions of the readme until you reach the OCFS section The remainder of the patch after the Generic section does not have to be installed as it was completed when the cluster services were installed earlier Note Previously we had installed the cluster services of patch 3973928 onto our RAC nodes Now please follow the instructions of the ReadMehtml that comes with the 9206 Clusterware patch (3973928)
43 Enable AutoConfig on Database Tier for Oracle E-Business suite 11i
Copy the appsutil appsoui and oui22 directories from the OLD_ORACLE_HOME to the NEW_ ORACLE_HOME Set environment variables ORACLE_HOME LD_LIBRARY_PATH and TNS_ADMIN to point to NEW_ ORACLE_HOMESet ORACLE_SID
variable to point to instance name running on this database node Shutdown the instance and database listener Start the instance by using parameter file as initltsidoragt Start the database listener Generate instance specific xml file using NEW_ORACLE_HOMEappsutilbin adbldxmlsh tier=db appsuser=ltAPPSusergt appspasswd=ltAPPSpwdgt
Execute the AutoConfig utility (adconfigsh) on database tier from NEW_ORACLE_HOMEappsutilbin Verify the log file located at
This procedure of conversion will use Autconfig and ADX utilities extensively Ensure that you have applied the Oracle Applications patches mentioned in the pre-requisites section above
Execute AutoConfig utility on the application tier Verify the AutoConfig log file located at $APPL_TOPadminltcontext_namegtlogltMMDDhhmmgt Note For more information on AutoConfig see Using AutoConfig to Manage System Configurations with Oracle E-Business Suite 11i
Execute $AD_TOPbinadmkappsutilpl to generate appsutilzip for the database tier Transfer this appsutilzip to database tier in the NEW_ORACLE_HOME Unzip this file to create appsutil directory in the NEW_ORACLE_HOME Execute the AutoConfig on database tier from NEW_ORACLE_HOMEappsutilltcontext_namegtscripts by using adautocfgsh Verify the AutoConfig log file located in the NEW_ORACLE_HOME NEW_ORACLE_HOMEgtappsutillogltcontext_namegtltMMDDhhmm
Execute the following command to accumulate all the information about the instance NEW_ORACLE_HOMEappsutilscriptsltcontext_namegtperl adpreclonepl database
Shutdown the instance Ensure that listener process on database tier is also stopped For Windows customer also shutdown the cluster manager service GSD service will also be shutdown along with the cluster
manager service You will be prompted to start up both of the services during the process of running adcfgclonepl in the next step Execute the following from the NEW_ORACLE_HOMEappsutilclonebin
perl adcfgclonepl database This will prompt for the following questions
Do you want to use a virtual hostname for the target node (yn) [n](for example n)
Target instance is a Real Application Cluster (RAC) instance (yn) [n](for example y)
Current node is the first node in an N Node RAC Cluster (yn)[n](for example y)
Number of instances in the RAC Cluster [1](for example 2)
Target System database name (Provide the service name here)
Enter the port pool number [0-99](for example 17)
NOTE If you want to use the same port numbers then use the same port pool used during Rapid Install Refer to port numbers created during install
NOTE The next two parameters will be prompted for as many times as there are instances in the cluster
Host name (for example host4)
Instance number [1] (for example 1)
Target system RDBMS ORACLE_HOME directory (for example d1appsproduct1010Db)
Target system utl_file accessible directories list (for example usrtmp)
Number of DATA_TOPs on the target system [2](for example 1)
Target system DATA_TOP 1 (for example d5racdemodata1010)
This above process will Create instance specific context file Create instance specific environment file Create RAC parameter specific initora file Recreate the control files Create redo log threads for other instances in the cluster Create undo tablespaces for other instances in the cluster Execute AutoConfig on the Database tier Start the instance and database listener on the local host
Perform the following steps on all the other database nodes in the cluster Zip the appsutil directory from the NEW_ORACLE_HOME and create appsutilzip Transfer appsutilzip to NEW_ORACLE_HOME of the remaining Database nodes in the cluster
Unzip appsutilzip in NEW_ORACLE_HOME to create the appsutil directory Execute the following from the NEW_ORACLE_HOMEappsutilclonebin perl adcfgclonepl database
In addition to the questions mentioned above the following will also be prompted in the subsequent nodes Provide appropriate values Host name of the live RAC node [] (for example host4)
Domain name of the live RAC node [] (for example oraclecom)
Database SID of the live RAC node [] (for example instance1)
Listener port number of the live RAC node [] (for example 1538)
The above process will
Create instance specific context file Create instance specific environment file Create RAC parameter specific initora file for this instance Execute AutoConfig on the database tier Start the instance and database listener on the specified host
Verify the tnsnamesora and listenerora files located at $TNS_ADMIN Ensure that tns aliases for load balance fail-over local amp remote listener are created
Add your environment specific initialization parameters to the ltcontext_namegt_ifileora file under $ORACLE_HOMEdbs directory on all the database nodes
Source the environment from newly generated environment files and restart the instances Execute AutoConfig on all database nodes from $ORACLE_HOMEappsutilltcontext_namegtscripts by using adautocfgsh
45 Configure Applications Environment for RAC
Repeat the following steps on all the application nodes
Source the applications environment Execute the AutoConfig by using $AD_TOPbinadconfigsh contextfile=$APPL_TOPadminltcontext_filegt Note For more information on AutoConfig execution see Using AutoConfig to Manage System Configurations with Oracle E-Business Suite 11i
Verify the AutoConfig log located at $APPL_TOPadminltcontext_namegtlogltMMDDhhmmgtfor errors Source the environment by using the latest environment file generated Verify the tnsnamesora listenerora files located in the 806 ORACLE_HOME at $ORACLE_HOMEnetworkadmin and
$IAS_ORACLE_HOMEnetworkadmin Ensure that the correct tns aliases are generated for load balance and fail over Verify the dbc file located at $FND_SECURE Ensure that the parameter APPS_JDBC_URL is configured with all instances in the
environment and load_balance is set to ON
Load balancing the Applications Database connections
Run the Context Editor through Oracle Applications Manager interface to set the value of Tools OH TWO_TASK(s_tools_two_task) iAS OH TWO_TASK (s_weboh_twotask) and Apps JDBC Connect Alias (s_apps_jdbc_connect_alias)
To load balance the forms based applications database connections set the value of Tools OH TWO_TASK to point to the
ltdatabase_namegt_806_balance alias generated in the tnsnamesora file To load balance the self-service applications database connections set the value of iAS OH TWO_TASK and Apps JDBC
Connect Alias to point to the ltdatabase_namegt_balance alias generated in the tnsnamesora file Execute AutoConfig by using $AD_TOPbinadconfigsh contextfile=$APPL_TOPadminltcontext_filegt
Restart the applications processes by using the latest scripts generated after AutoConfig execution Ensure that value of the profile option Application Database Id is set to dbc file name generated at
$FND_TOPsecureltcontext_namegt
46 Configure Parallel Concurrent Processing
Setup PCP Execute AutoConfig by using $COMMON_TOPadminscriptsltcontext_namegtadautocfgsh on all
concurrent nodes Source the application environment by using $APPL_TOPAPPSORAenv Check the configuration files tnsnamesora and listenerora located under 806 ORACLE_HOME at $ORACLE_HOME
networkadminltcontextgt Ensure that you have information of all the other concurrent nodes for FNDSM and FNDFS entries Restart the application listener processes on each application node Logon to Oracle E-Business Suite 11i Applications using SYSADMIN in login and System Administrator Responsibility Navigate to
Install gt Nodes screen and ensure that each node in the cluster is registered Verify whether the Internal Monitor for each node is defined properly with correct primary and secondary node specification and
work shift details Also make sure the Internal Monitor manager is activated by going into Concurrent -gt Manager -gt Adminitrator and activate the manager (eg Internal Monitor Host2 must have primary node as host2 and secondary node as host3)
Set the $APPLCSF environment variable on all the CP nodes pointing to a log directory on a shared file system Set the $APPLPTMP environment variable on all the CP nodes to the value of the UTL_FILE_DIR entry in initora on the database
nodes This value should be pointing to a directory on a shared file system Set profile option Concurrent PCP Instance Check to OFF if DB instance sensitive failover is not required By setting it to ON
Concurrent Managers will failover to a secondary middle-tier node when database instance it is connected goes down
Setup Transaction Managers
Shutdown the application tiers on all the nodes Shutdown all the database instances cleanly in RAC environment using SQLgtshutdown immediate
Edit $ORACLE_HOMEdbsltcontext_namegt_ifileora Add following parameters as shown below
NOTE For Tru64 Unix platform users set max_commit_propagation_delay=1
Start the instance of all database nodes one by one Startup the Application tier on all the nodes Logon to Oracle E-Business Suite 11i Applications using SYSADMIN in login and System Administrator Responsibility
Navigate to Profile gt System and change the profile option lsquoConcurrent TM Transport Type to lsquoQUEUE and verify the transaction manager works across the RAC instance
Restart the concurrent managers
Load balancing of CP tiers
Carry oout following steps If you want to load balance the database connection from concurrent processing tier
Create configuration file ltcontext_name_ifileoragt manually under 806 ORACLE_COME at $ORACLE_HOMEnetworkadminltcontextgt on all concurrent nodes
Create load balancing alias similar to ltservice_namegt_806_balance as shown sample in Appendix C
Edit the applications context file through Oracle Applications Manager interface and set the value of Concurrent Manager TWO_TASK to load balancing alias created in previous step
Execute AutoConfig by using $COMMON_TOPadminscriptsltcontext_namegtadautocfgsh on all concurrent nodes
Oracle9i Installation Guide Release 2 (Part No A96167-01)
Oracle9i Release Notes Release 2 (92040) for Linux (Part No B13670-01)
Using AutoConfig to Manage System Configurations with Oracle E-Business Suite 11i
Cloning Oracle Applications Release 11i with Rapid Clone
Oracle9i Real Application Clusters Concepts Release 2 (92) - A96597-01
Oracle Applications System Administrators Guide Release 11i - B13925-01
RAC on Linux Best Practices
Concurrent Processing Transaction Manager Setup and Configuration Requirement in an 11i RAC Environment
Appendix A Setup Cluster File System (CFS) on WINDOWS
Cluster File System Pre-installation Steps Note Perform the preinstallation steps described in this section before installing CFS Windows refers to raw partitions as logical drives If you need more information about creating partitions refer to the Windows online help from within the disk administration tools
Run Windows NT Disk Administrator or Windows 2000 Disk Management from one node to create an extended partition Currently CFS is not supported on Primary partitions For Windows 2000 only use a basic disk Dynamic disks are not supported
Create at least two partitions one for the Oracle home and one for the Oracle database files Create the Oracle home on a local disk as placing it on a CFS disk is not supported at this time Note You do not need to create a partition for the voting disk if you plan to use CFS CFS stores the voting device for OSD clusterware as a file on a CFS partitionThe number of partitions used for CFS affects performance Therefore you should create the minimum number of partitions needed for the CFS option you choose
Before you begin remove (disconnect) any Windows mapped drives that have been created and are not being used Try to ensure that there are no drive letter ldquoholesrdquo ie if c d and f exist change f to e if possible
Create partitions From one of the nodes of the cluster run the Windows disk Administration tool as follows On Windows NT start Disk Administrator using
the pathStartgtProgramsgtAdministrative ToolsgtDisk Administrator On Windows 2000 start Disk Management using the pathStartgtProgramsgtAdministrative ToolsgtComputer ManagementExpand the Storage folder to Disk Management For Windows 2000 only use a basic disk as an extended partition for creating partitions
Click inside an unallocated part of an extended partition For Windows NT choose Create Partition For Windows 2000 choose Create Logical Drive A wizard presents pages for configuring the logical drive Note Do not use Windows disk administration tools to assign drive letters to partitions in this procedure ClusterSetup Wizard does this when you create the cluster For more details check Chapter 2 in Oracle9i Real Application ClustersSetup and Configuration Release 2 (92) Part NumberA96600-02 and Appendix B in Oracle9i Database Installation Guide Release 2 (92010) for Windows Part NumberA95493-01
Enter the size that you want for the partition In general this should be 100 MB or more Ensure that a drive letter is not assigned Cluster Setup Wizard will do this later Note Windows NT automatically assigns a drive letter Remove this drive letter by right-clicking on the new drive and selecting Do not assign a drive letter for the Assign Drive Letter option Do this for any Oracle partitions For Windows 2000 choose the option Do not assign a drive letter and then choose the option Do not format this partition Click Finish on the last page of the wizard
Choose Commit Changes Now from the Partition menu to save the new partition information Alternatively close the Disk Administrator and reboot the machine
Repeat above steps for the second and any additional partitions An optimal configuration is one partition for the Oracle home on a local drive and one CFS partition for Oracle database files Note For an entire Oracle Applications Vision database create a partition of at least 65GB This is usually the easiest method to install Oracle Applications onto a CFS partition and then move the datafiles to other CFS Partitions after the entire Oracle Applications setup is complete to take advantage of fast disks RAID etc
Check all nodes in the cluster to ensure that the partitions are visible on all the nodes and to ensure that none of the Oracle partitions have drive letters assigned If any partitions have drive letters assigned then remove them as described in earlier step
Install Cluster File system To prepare for this procedure perform the tasks described in ClusterFile System Preinstallation Steps in this document if you have not already
done so Download the 9206 Cluster patch 3973928
1 Run clustersetupexe from the preinstall_racclustersetup directory of the downloaded clusterpatch Note Do not run clustersetupexe from the Oracle9i Database product CD
2 The Welcome page for the Oracle Cluster Setup Wizard appearsClick Next Note It is not supported to install remotely via Terminal Server to Windows NT or 2000However one can do a remote install via Terminal Server to Windows 2003 by connecting to the console of the remote server from the client by starting the Terminal Server Client as MSTSC VRemoteServer console Note If you need further assistance in using Terminal Server Client please contact Microsoft Product Support
3 Choose Create a cluster and click Next The Network Selection page appears 4 Choose Use private network for interconnect and click Next The Private Network Configuration page appears
Note If the nodes have a high speed private network connecting them it should be used as the cluster interconnect Otherwise the public network can be selected If you choose Use public network for interconnect then the Public Network Configuration page appears
5 Enter the name for the cluster you are creating and enter the names of the nodes If a private network interconnect was selected in previous step enter the public and private names for the nodes otherwise enter the public names and click Next The Cluster File System Options page appears
6 Choose the option CFS for Datafiles Click Next The CFS for Data files page appears
7 Choose a partition of the required size from the list of available partitions and then choose a drive letter from the Drive Letterdrop-down list For the CFS option that you choose in previous step the partition and drive letter combination will be assigned to the CFS drive letter for all of the volumes in the cluster Note Use the longest common prefix of the node names for the cluster name For example if nodes aredeptclust1 deptclust2 deptclust3 then the cluster name will be deptclust The clustername and each node name must be globally unique to your network Do not change node names once they have been assigned and used in a clusterdatabase
8 Repeat the previous step for each CFS volume and click Next 9 Click Next The wizard checks your cluster interconnect to see if Virtual Interface Architecture (VIA) hardware is detected If VIA is not
detected then the VIA Detection page appears telling you VIA was not detected and TCP will be used for the clusterwareinterconnect Click Next and skip to step 13 If VIA is detected then the VIA Selection page appears Continue to step 11
10 Choose Yes to use VIA for the interconnect and click Next The VIA Configuration page appears If you choose No then TCP will be used 11 Enter the name of the VIA connection and click Next 12 The Install Location page is the last page that appears The default location is windirsystem32osd9i Click Browse to navigate to a
different location if needed 13 Click Finish A progress page displays the actions being performed 14 When complete reboot both nodes Logon and make sure the new CFS partition can be seen from both nodes and has the same drive
letter assigned to it from both nodes
Appendix B Install Cluster Manager on Windows
Pre-installation tasks for installing Cluster Manager on Windows platform Ensure that the ExternalPublic Hostnames are defined in your Directory Network Services (DNS) and that the correct IP addresses
resolve for all nodes in the cluster
Ensure that all ExternalPublic and InternalPrivate Hostnames are defined in the HOSTS file on all nodes of the cluster This file is located in the WINDOWS_HOMESystem32driversetc directory
Ensure that the TEMP and TMP folders be the same across all nodes in the cluster By default these settings are defined as USERPROFILELocal SettingsTemp and USERPROFILELocal SettingsTmp in the Environment Settings of My Computer It is recommended to explicitly redefine these as WIN_DRIVEtemp and WIN_DRIVEtmp for example Ctemp and Ctmp for all nodes
Ensure that each node has administrative access to all these directories within the Windows environment by running the following at the command prompt NET USE host_nameC$ where host_name is the public network name for the other nodes If you plan to install the ORACLE_HOME onto another drive location than C check that command prompt on node 1 of a four-node cluster NET USE node2C$ NET USE node3C$ repeat these commands on all nodes within the cluster
Run the clustercheckexe program located in the staged directory of unzipped patch 3973928 This tool will prompt for the public and private host names and have you verify the IP address resolution If that passes then it will perform a check of the health of the shared disk array and other environment variables and permissions necessary for proper cluster installation and operation It will create a subdirectory called opsm in the temporary directory specified by your environment settings (WIN_DRIVETemp by default if you have changed it as recommended) and log file called OraInfoCoordlog This log will contain any errors encountered in the check You should see the following at the bottom of the log file and within the command prompt window when you run the clustercheckexe program ORACLE CLUSTER CHECK WAS SUCCESSFUL
Note You must correct any errors that occur before proceeding Please contact your Cluster Hardware Vendor if you need assistanceIf you have any issues with Clustercheck please see Note 1861301 Clustercheckexe Fails with Windows Error 183 Note If at any time in the installation of the software you do not see all nodes in the cluster within the Cluster Node Selection screen there is something wrong with your cluster configuration You will have to go back and troubleshoot your cluster install You can perform clusterware diagnostics by executing the ORACLE_HOMEbinlsnodes -v command and analyzing its output Use Metalink to search for any errors Refer to your vendors clusterware documentation if the output indicates that your clusterware is not properly installed Resolve the problem and then rerun the checks
Run Oracle Cluster Setup Wizard ckquotegt
Note For 3-or-more nodes Since the OUI is not used you can run this only on node 1 and the software will be correctly transferred to the other nodes in the cluster
1 Download Patch number 3973928 Windows CFS and Clusterware Patch for 9206 2 Expand the patch into the staged directory such as Einstallsosd9206 This will create another subdirectory such as
Einstallsosd92063973928 This clusterware patch contains a full clustersetup release 3 Within a command prompt window navigate to the ltEinstallsosd92063973928preinstall_racclustersetup directory in the OCFS staged
directory 4 Launch the Oracle Cluster Setup Wizard by typing clustersetup at the command line 5 The Cluster Wizard program should launch with a Welcome page Click Next 6 The first time the Wizard is run the only option will be to Create a cluster Click Next 7 Choose Use private network for interconnect and click Next 8 The Network Configuration page appears Enter the cluster name Then enter the public hostnames for all nodes The private hostnames
will be automatically entered as public_names Accept the default or change as appropriate for your cluster configuration Click Next 9 The Cluster File System Options page appears Choose CFS for Datafiles only Click Next 10 The CFS for Datafiles page appears Choose a drive letter and then choose one of the partition you prepared earlier with a minimum 40
GB in size Click Next 11 The VIA Detection screen appears stating whether Virtual Interface Architecture (VIA) hardware was detected Choose yes or no
depending on your configuration Please contact your cluster hardware vendor if you are unsure Click Next 12 The Install Location screen appears It will default to the WIN_HOMEsystem32osd9i directory Accept the default and click Finish 13 The Cluster Setup window will appear This will show the progress with installing the cluster files creating the cluster services on all nodes
and formatting the OCFS drives If no errors occur the Oracle Cluster Setup Wizard application will complete and close automatically 14 Check the Clusterware setup You should have an OCFS drive visible from both nodes Also the following 3 services should be running on
each of the nodes in the cluster OracleClusterVolumeService Oracle Object Service OracleCMService9i NoteIf the clustersetup doesnt run properly check for errors in the log files under WIN_HOMEsystem32osd9i
Appendix C Sample ltcontext_name_ifileoragt for CP Tiers
Added PCP Configuration Section Added PCP Related Patch Section Changes done for 11510 Release
23 Mar 2005 Changed the Pre-requisite patches
Changed the name of web_oh_two_task to IAS_OH_TWO_TASK
28 Apr 2005 APPLFSTT values should be semi-colon separated instead of comma separated
06 Jul 2005 Added statement for windows in the overview section Added PCP as mandatory requirement in the overview section
15-Jul-2005 Changed for 11510 Plus CU1 with 9206 RAC Changed format
23-Aug-2005 Added patch 4462244 Corrected links in reference section
13-Sep-2005 Added patch 4502904 Changed section 45 for load_balancing options
11-Nov-2005
Changed the 9206 cluster manager installation section removed the manual copy steps from this section Moved OUI 10103 installation section ahead of 9206 cluster manager install section Added one step for adding any environment specific intialization parameters into Ifile
19-Dec-2005 Added windows specific sections and Appendix A and Appendix B
23-Mar-2006 Changed For 11iATG_PFH RUP3 4334965 11i ADX F 3453499
Section 46 Changed for PCP amp Transaction Manager Setup Added Oracle Database Patch 4059639 Added Appendix C for PCP amp Transaction Manager Setup on Windows
31-Aug-2006 Changed for Database Patchset 9207
20-Nov-2006 Changed for Database Patchset 9208 (For Unix Customers Only)
06-Feb-07 Removed windows specific PCP section
Note lt2799561gt by Oracle Applications Development Copyright copy 2007 Oracle Corporation last updated Tuesday 06 Feb 2007