42
Oracle® Endeca Information Discovery Studio Developer's Guide Version 2.3.0 • April 2012
Oracle® Endeca Information Discovery
Studio Developer's Guide
Version 2.3.0 • April 2012

Copyright and disclaimerCopyright © 2003, 2012, Oracle and/or its affiliates. All rights reserved.
Oracle and Java are registered trademarks of Oracle and/or its affiliates. Other names may be trademarks oftheir respective owners. UNIX is a registered trademark of The Open Group.
This software and related documentation are provided under a license agreement containing restrictions onuse and disclosure and are protected by intellectual property laws. Except as expressly permitted in yourlicense agreement or allowed by law, you may not use, copy, reproduce, translate, broadcast, modify, license,transmit, distribute, exhibit, perform, publish or display any part, in any form, or by any means. Reverseengineering, disassembly, or decompilation of this software, unless required by law for interoperability, isprohibited.
The information contained herein is subject to change without notice and is not warranted to be error-free. Ifyou find any errors, please report them to us in writing.
If this is software or related documentation that is delivered to the U.S. Government or anyone licensing it onbehalf of the U.S. Government, the following notice is applicable:
U.S. GOVERNMENT END USERS: Oracle programs, including any operating system, integrated software,any programs installed on the hardware, and/or documentation, delivered to U.S. Government end users are"commercial computer software" pursuant to the applicable Federal Acquisition Regulation and agency-specific supplemental regulations. As such, use, duplication, disclosure, modification, and adaptation of theprograms, including any operating system, integrated software, any programs installed on the hardware,and/or documentation, shall be subject to license terms and license restrictions applicable to the programs. Noother rights are granted to the U.S. Government.
This software or hardware is developed for general use in a variety of information management applications. Itis not developed or intended for use in any inherently dangerous applications, including applications that maycreate a risk of personal injury. If you use this software or hardware in dangerous applications, then you shallbe responsible to take all appropriate fail-safe, backup, redundancy, and other measures to ensure its safeuse. Oracle Corporation and its affiliates disclaim any liability for any damages caused by use of this softwareor hardware in dangerous applications.
This software or hardware and documentation may provide access to or information on content, products andservices from third parties. Oracle Corporation and its affiliates are not responsible for and expressly disclaimall warranties of any kind with respect to third-party content, products, and services. Oracle Corporation andits affiliates will not be responsible for any loss, costs, or damages incurred due to your access to or use ofthird-party content, products, or services.
Rosette® Linguistics Platform Copyright © 2000-2011 Basis Technology Corp. All rights reserved.
Teragram Language Identification Software Copyright © 1997-2005 Teragram Corporation. All rights reserved.
Oracle® Endeca Information Discovery: Studio Developer's Guide Version 2.3.0 • April 2012
Table of Contents
Copyright and disclaimer ..........................................................ii
Preface..........................................................................vAbout this guide.................................................................vWho should use this guide .........................................................vConventions used in this guide......................................................vContacting Oracle Customer Support .................................................v
Chapter 1: About Extending Studio..................................................1Developer tasks in Studio .........................................................1Licensing requirement for component development.......................................1Other resources for additional information..............................................2
Chapter 2: Security Extensions to Studio.............................................3Security Manager class summary ...................................................3Creating a new Security Manager....................................................4Implementing a new Security Manager ................................................5Using the Security Manager........................................................5
Chapter 3: Managing Data Source State in Studio .....................................6About the State Manager interface ...................................................6Creating a new State Manager......................................................7Implementing a State Manager......................................................7Using the State Manager ..........................................................9
Chapter 4: Installing and Using the Component SDK..................................10Downloading and configuring the Component SDK ......................................10Configuring Eclipse for component development ........................................11Developing a new component .....................................................11
Creating a new component ...................................................12Importing the project in Eclipse.................................................12Building and testing your new component.........................................13Adding and removing components from the WebLogic .ear file .........................13
Modifying the enhancements to the Component SDK ....................................13
Chapter 5: Working with QueryFunction Classes .....................................15Provided QueryFunction filter classes................................................15Provided QueryConfig functions ....................................................19Creating a custom QueryFunction class ..............................................25Implementing a custom QueryFunction class ..........................................26Deploying a custom QueryFunction class .............................................26Adding the custom QueryFunction .jar file to your Eclipse build path .........................27Obtaining query results ..........................................................27
Oracle® Endeca Information Discovery: Studio Developer's Guide Version 2.3.0 • April 2012
Chapter 6: Localizing Studio ......................................................29Configuring localization for a component..............................................29Adding strings to your resource files.................................................30
Including common shared messages ............................................30Including the component name, category, and keywords ..............................30Using tokens in message strings ...............................................31
Guidelines for working with non-Unicode characters .....................................31Localizing a component to a non-Unicode language .....................................31How the build process works with resource files ........................................32Using the LanguageUtils class to retrieve localized messages ..............................33
Calling static methods from Java ...............................................33Using the Discovery taglib in JSP...............................................33Using the LanguageUtils class from JSP..........................................34Instantiating the object and call instance methods from Java/JSP .......................34Retrieving all resource bundle messages in one call .................................34
Adding a translation to a released component..........................................34Switching the locale of a component.................................................35Adding the Language component to your Studio application ...............................35Obtaining more information about portal localization .....................................36
Oracle® Endeca Information Discovery: Studio Developer's Guide Version 2.3.0 • April 2012
PrefaceOracle® Endeca Information Discovery is an enterprise data discovery platform for advanced, yet intuitive,exploration and analysis of complex and varied data.
Information is loaded from disparate source systems and stored in a faceted data model that dynamicallysupports changing data. This integrated and enriched data is made available for search, discovery, andanalysis via interactive and configurable applications.
Oracle Endeca Information Discovery enables an iterative “model-as-you-go” approach that simultaneouslyfrees IT from the burdens of traditional data modeling and supports the broad exploration and analysis needsof business users.
About this guideThis guide provides information on extending the Studio portal of Oracle Endeca Information Discovery.
Who should use this guideThis guide is intended for developers who want to extend Studio.
Conventions used in this guideThis guide uses the following typographical conventions:
Code examples, inline references to code elements, file names, and user input are set in monospace font. Inthe case of long lines of code, or when inline monospace text occurs at the end of a line, the following symbolis used to show that the content continues on to the next line: ¬
When copying and pasting such examples, ensure that any occurrences of the symbol and the correspondingline break are deleted and any remaining space is closed up.
Contacting Oracle Customer SupportOracle Customer Support provides registered users with important information regarding Oracle software,implementation questions, product and solution help, as well as overall news and updates from Oracle.
You can contact Oracle Customer Support through Oracle's Support portal, My Oracle Support athttps://support.oracle.com.
Oracle® Endeca Information Discovery: Studio Developer's Guide Version 2.3.0 • April 2012
Chapter 1
About Extending Studio
Out of the box, Studio includes numerous components that you can use to quickly develop an enterprise-quality search application. In addition, Studio provides a number of extension points for managing query andportlet operations, along with default implementations of the various interfaces that you can modify.
Developer tasks in Studio
Licensing requirement for component development
Other resources for additional information
Developer tasks in StudioDeveloper tasks include both data source development and component customization.
Data source development tasks include:
• Modifying data sources.
• Adjusting security.
• Customizing how data sources interact with each other.
Component customization tasks include:
• Adding or modifying portlet components based on the EndecaPortlet class, using the Studio ComponentSDK.
• Localizing components.
This guide covers all of these developer tasks.
Note: Before modifying data sources, make sure to read the data sources chapter of the OracleEndeca Information Discovery Studio User's Guide. This chapter describes the default interactionmodel between related data sources.
Licensing requirement for component developmentStudio component development may require the purchase of a third party license.
Studio uses Ext JS in its components and in the default components created by its SDK.
The Oracle Endeca Information Discovery license does not bundle licensing for ExtJS.
Therefore, customers developing components with ExtJS must either purchase their own developmentlicenses from ExtJS, or remove ExtJS and develop components without using that Javascript framework.
Oracle® Endeca Information Discovery: Studio Developer's Guide Version 2.3.0 • April 2012
About Extending Studio 2
Other resources for additional informationIn addition to this guide, there are other resources that can help with these development tasks.
Liferay documentation
Because Studio is built upon the Liferay Portal, you can access Liferay's documentation for more informationabout how to perform administrative and developer tasks.
Specifically, the Liferay Portal Administrator's Guide provides extensive information about installing,configuring, and maintaining a portal.
Liferay developer resources
This guide only covers Information Discovery extensions to the Liferay Portal. For additional developersupport, Liferay provides blogs, wikis, and forums. To access this, go to http://www.liferay.com and navigate toCommunity.
Additional Information Discovery documentation
The complete Oracle Endeca Information Discovery documentation set is available from the Oracledocumentation library.
Oracle® Endeca Information Discovery: Studio Developer's Guide Version 2.3.0 • April 2012
Chapter 2
Security Extensions to Studio
You may require more than the default data source role-based security discussed in the Oracle InformationDiscovery Studio User's Guide. If so, you can customize the automated filtering of data from the OracleEndeca Server (based on user profile details such as the user's role or group association) by creating acustom Security Manager.
Security Manager class summary
Creating a new Security Manager
Implementing a new Security Manager
Using the Security Manager
Security Manager class summaryA Security Manager is a concrete class that implementscom.endeca.portal.data.security.MDEXSecurityManager.
Abstract base class com.endeca.portal.data.security.MDEXSecurityManager
Default implementation class com.endeca.portal.data.DefaultMDEXSecurityManager
Description Handles pre-execution query modification based on the user, role, orgroup-based security configuration of filters.
Oracle® Endeca Information Discovery: Studio Developer's Guide Version 2.3.0 • April 2012

Security Extensions to Studio 4
Default implementation behavior The default Security Manager implementation uses the followingproperties:
• securityEnabled. If the value is not present, thensecurityEnabled defaults to false.
• securityFilters. Record filters are the only supported type ofsecurityFilter.
• rolePermissions
• inheritSecurity. If the data source has a parent, theninheritSecurity defaults to true. Otherwise, the value defaultsto false.
• parentDataSource
These properties are defined in data source configurations in order toapply role-based security filters to queries issued to the Endeca Serverbacking a given data source.
Users are assigned to Liferay roles in the Control Panel. The relatedassociations are made available to every component throughout theuser's session.
Users who have not yet logged in are automatically assigned theGuest user role. Any role-based restrictions for the Guest role are alsoapplied to these users.
For each data source, the Security Manager maintains an internal mapof security filters to always apply to queries issued during that user'ssession.
Creating a new Security ManagerThe Studio Component SDK includes Windows and Linux batch scripts for creating a new Security Manager.
To create a new Security Manager project:
1. In a terminal, change your directory to endeca-extensions within the Component SDK's rootdirectory (normally called components).
2. Run one of the following commands:• On Windows: .\create-mdexsecuritymanager.bat <your-security-manager-name>
• On Linux: ./create-mdexsecuritymanager.sh <your-security-manager-name>
This command creates a your-security-manager-name directory under endeca-extensions.This directory is an Eclipse project that you can import directly into Eclipse, if you use Eclipse as yourIDE.
This directory also contains a sample implementation that you can use to help understand how theSecurity Manager can be used. The sample implementation is essentially identical to the defaultimplementation of the Security Manager used by Studio.
Oracle® Endeca Information Discovery: Studio Developer's Guide Version 2.3.0 • April 2012

Security Extensions to Studio 5
Implementing a new Security ManagerYour Security Manager must implement the applySecurity method.
There are two versions of the applySecurity method, one of which your Security Manager must implement:
public void applySecurity(PortletRequest request, MDEXState mdexState, Query query) throwsMDEXSecurityException;
Version 2.3.0 • April 2012
The Query class in this signature is com.endeca.portal.data.Query. This class provides a simple wrapperaround an ENEQuery.
Using the Security ManagerIn order to use your Security Manager, you must specify a new class for Studio to pick up and use in place ofthe default Security Manager implementation.
The your-security-manager-name directory you created contains an ant build file. The ant deploy taskplaces a .jar file containing your Security Manager into the portal/tomcat-<version>/lib/ext directory.
To configure Studio to use your new class:
1. Point the cursor at the Dock in the upper-right corner of the page.
2. In the drop-down menu, choose Control Panel.
3. In the Information Discovery section of the Control Panel navigation panel, select FrameworkSettings.
4. Change the value of the df.mdexSecurityManager property to the full name of your class, similar tofollowing example:
df.mdexSecurityManager = com.endeca.portal.extensions.YourSecurityManagerClass
5. Click Update Settings.
6. Restart Studio so the change can take effect. You may also need to clear any cached user sessions.
Oracle® Endeca Information Discovery: Studio Developer's Guide
Chapter 3
Managing Data Source State in Studio
Studio allows you to define your own interaction model for data sources by creating a custom State Manager.For information on the default interaction model between related data sources, see the Oracle EndecaInformation Discovery Studio User's Guide.
About the State Manager interface
Creating a new State Manager
Implementing a State Manager
Using the State Manager
About the State Manager interfaceThe State Manager controls how data sources interact during updates and query construction.
Interface (required) com.endeca.portal.data.MDEXStateManager
Abstract base class (optional) com.endeca.portal.data.AbstractMDEXStateManager
Default implementation class com.endeca.portal.data.DefaultMDEXStateManager
Description Handles:
• Updating a data source with a new query state (called fromDataSource.setQueryState(QueryState newState))
• Retrieving the current query state from a data source (called fromDataSource.getQueryState())
• Resetting a data source's query state to its initial state (called fromDataSource.resetQueryState())
• Retrieving a copy of the data source's initial state without resettingthe data source (called fromDataSource.getInitialQueryState())
Oracle® Endeca Information Discovery: Studio Developer's Guide Version 2.3.0 • April 2012
Managing Data Source State in Studio 7
Default implementation behavior The default State Manager implementation uses theParentDataSource property from the data source configuration topropagate state changes throughout the hierarchy of data sourcerelationships.
When a component changes the query state of its data source, thatmodification is applied to:
• The parent data source
• All of the children of the parent data source
This is recursive, applying all the way up and back down an ancestortree.
Configuring a hierarchy of data source relationships allows applicationdevelopers to create more advanced interfaces, such as a tabbedresult set where a single Guided Navigation component controls thequery state for Results Table components on different tabs.
Creating a new State ManagerThe endeca-extensions directory of the Component SDK includes scripts for creating a State Managerproject on either Windows or Linux.
To create a new State Manager project:
1. In a terminal, change to the endeca-extensions directory within the Component SDK's rootdirectory (normally called components).
2. Run one of the following commands:• On Windows: .\create-mdexstatemanager.bat <your-state-manager-name>
• On Linux: ./create-mdexstatemanager.sh <your-state-manager-name>
This command creates a <your-state-manager-name> directory under endeca-extensions.This directory is an Eclipse project. If you use Eclipse as your IDE, you can import the project directlyinto Eclipse.
The directory also contains a sample implementation, which is essentially identical to the defaultimplementation of the State Manager used by Studio. You can use this sample implementation to helpunderstand how to use the State Manager.
Implementing a State ManagerCustom State Managers implement the MDEXStateManager interface. There are methods for updating,retrieving, and resetting the data source query state.
Recommendations for implementing
To create a custom State Manager, you must at minimum implement thecom.endeca.portal.data.MDEXStateManager interface. The recommended approach is to extendcom.endeca.portal.data.AbstractMDEXStateManager, which in turn implements MDEXStateManager.
Oracle® Endeca Information Discovery: Studio Developer's Guide Version 2.3.0 • April 2012
Managing Data Source State in Studio 8
You also should extend com.endeca.portal.data.AbstractMDEXStateManager, which in turn implementsMDEXStateManager. The AbstractMDEXStateManager abstract class contains the useful utility methodaddEventTrigger(PortletRequest, MDEXState).
The default state manager implementation is com.endeca.portal.data.DefaultMDEXStateManager. TheStudio Component SDK creates state managers that extend DefaultMDEXStateManager, because they willwork without any modification. If you want your custom state manager to inherit some of the defaultfunctionality, you can extend DefaultMDEXStateManager instead of AbstractMDEXStateManager.
Required methods
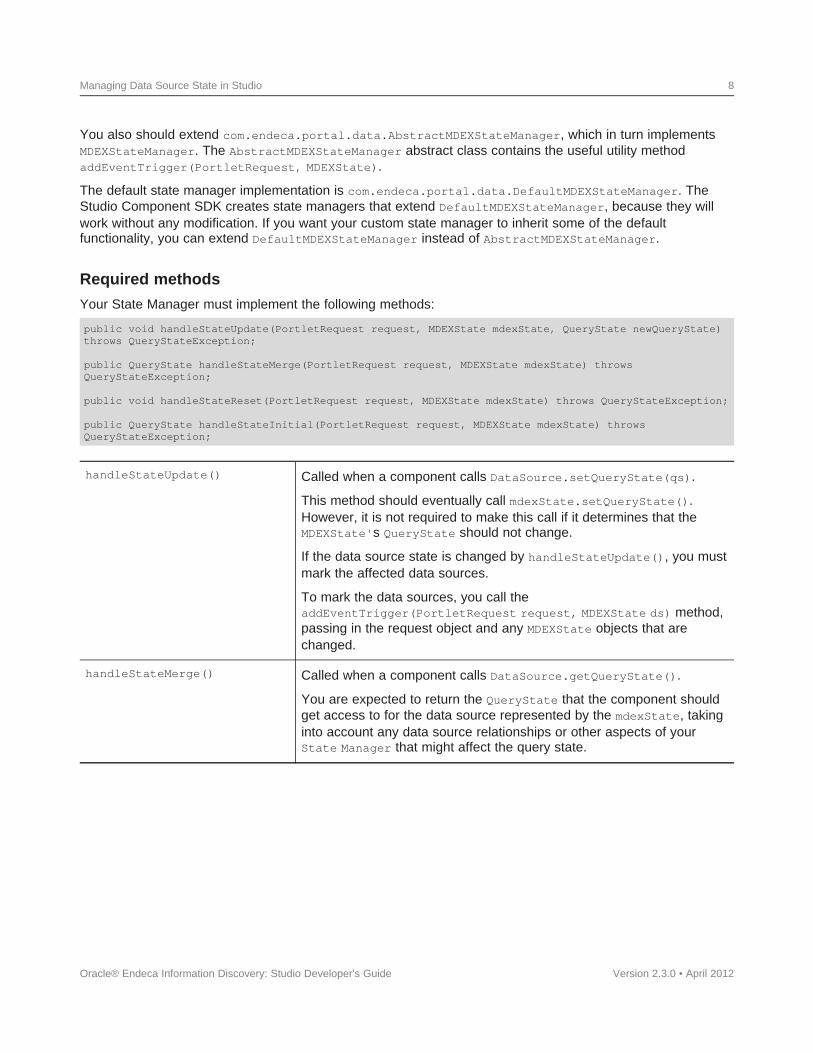
Your State Manager must implement the following methods:
public void handleStateUpdate(PortletRequest request, MDEXState mdexState, QueryState newQueryState)throws QueryStateException;
public QueryState handleStateMerge(PortletRequest request, MDEXState mdexState) throwsQueryStateException;
public void handleStateReset(PortletRequest request, MDEXState mdexState) throws QueryStateException;
public QueryState handleStateInitial(PortletRequest request, MDEXState mdexState) throwsQueryStateException;
Version 2.3.0 • April 2012
handleStateUpdate() Called when a component calls DataSource.setQueryState(qs).
This method should eventually call mdexState.setQueryState().However, it is not required to make this call if it determines that theMDEXState's QueryState should not change.
If the data source state is changed by handleStateUpdate(), you mustmark the affected data sources.
To mark the data sources, you call theaddEventTrigger(PortletRequest request, MDEXState ds) method,passing in the request object and any MDEXState objects that arechanged.
handleStateMerge() Called when a component calls DataSource.getQueryState().
You are expected to return the QueryState that the component shouldget access to for the data source represented by the mdexState, takinginto account any data source relationships or other aspects of yourState Manager that might affect the query state.
Oracle® Endeca Information Discovery: Studio Developer's Guide
Managing Data Source State in Studio 9
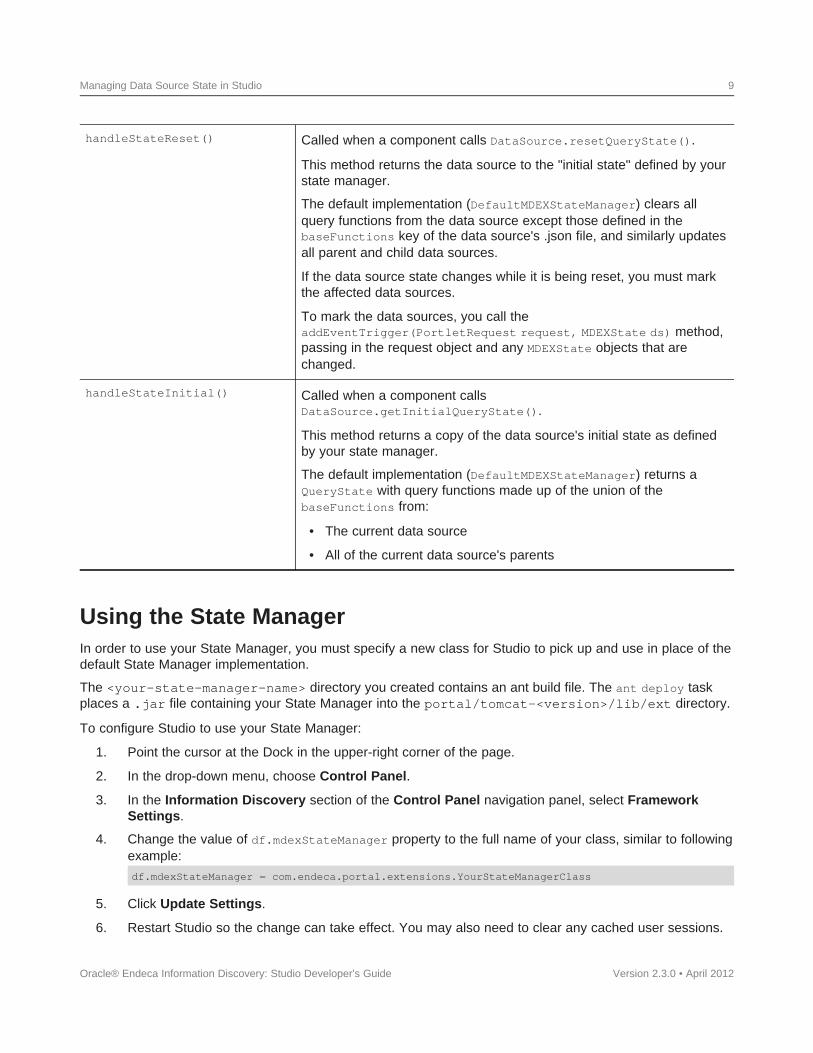
handleStateReset() Called when a component calls DataSource.resetQueryState().
This method returns the data source to the "initial state" defined by yourstate manager.
The default implementation (DefaultMDEXStateManager) clears allquery functions from the data source except those defined in thebaseFunctions key of the data source's .json file, and similarly updatesall parent and child data sources.
If the data source state changes while it is being reset, you must markthe affected data sources.
To mark the data sources, you call theaddEventTrigger(PortletRequest request, MDEXState ds) method,passing in the request object and any MDEXState objects that arechanged.
handleStateInitial() Called when a component callsDataSource.getInitialQueryState().
This method returns a copy of the data source's initial state as definedby your state manager.
The default implementation (DefaultMDEXStateManager) returns aQueryState with query functions made up of the union of thebaseFunctions from:
• The current data source
• All of the current data source's parents
Using the State ManagerIn order to use your State Manager, you must specify a new class for Studio to pick up and use in place of thedefault State Manager implementation.
The <your-state-manager-name> directory you created contains an ant build file. The ant deploy taskplaces a .jar file containing your State Manager into the portal/tomcat-<version>/lib/ext directory.
To configure Studio to use your State Manager:
1. Point the cursor at the Dock in the upper-right corner of the page.
2. In the drop-down menu, choose Control Panel.
3. In the Information Discovery section of the Control Panel navigation panel, select FrameworkSettings.
4. Change the value of df.mdexStateManager property to the full name of your class, similar to followingexample:
df.mdexStateManager = com.endeca.portal.extensions.YourStateManagerClass
Version 2.3.0 • April 2012
5. Click Update Settings.
6. Restart Studio so the change can take effect. You may also need to clear any cached user sessions.
Oracle® Endeca Information Discovery: Studio Developer's Guide
Chapter 4
Installing and Using the Component SDK
You can customize Studio even further by creating your own components.
The Studio Component SDK is a packaged development environment that you can use to add or modifycomponents, themes, and layout templates. It is a modified version of the Liferay Plugins SDK, and includesenhancements such as the EndecaPortlet core class.
Note: The Studio Component SDK is designed to work with the Studio Tomcat bundle. It will not workout-of-the-box on other platforms.
Downloading and configuring the Component SDK
Configuring Eclipse for component development
Developing a new component
Modifying the enhancements to the Component SDK
Downloading and configuring the Component SDKThe Studio Component SDK is available with the Studio installer.
Before installing the Component SDK, download and unzip EID_<version>_portal.zip, as described inthe Studio portion of the Oracle Endeca Information Discovery Installation Guide. This is the base Studiocode, upon which the Component SDK depends. You do not have to start Studio.
Note: Do not install the Component SDK in a directory path that contains spaces.
Note: On Windows, for steps b and d below, backslashes in paths must be escaped. That is, use apath similar to the following:
portal.base.dir=C:\\my_folder\\EID-portal
Version 2.3.0 • April 2012
instead of:
portal.base.dir=C:\my_folder\EID-portal
To install the Component SDK:
1. Download and unzip EID_<version>_components_sdk.zip to a separate directory.
This is the Component SDK itself.
2. Perform the following steps within the Component SDK:(a) Create a file components/build.<user>.properties
where <user> is the user name with which you logged on to this machine.
Oracle® Endeca Information Discovery: Studio Developer's Guide
Installing and Using the Component SDK 11
(b) Within that properties file, add a single propertyportal.base.dir=<absolute_path_to_portal>
where <absolute_path_to_portal> is the path to the unzippedEID_<version>_portal.zip.
(c) Create a shared.properties file in the shared/ directory.
(d) Edit shared/shared.properties and set the single propertyportal.base.dir=<absolute_path_to_portal>
where <absolute_path_to_portal> is the path to the unzippedEID_<version>_portal.zip.
Configuring Eclipse for component developmentBefore using the Component SDK to develop Studio components in Eclipse, you need to create two Eclipseclasspath variables.
Note: Depending on your version of Eclipse, the steps below may vary slightly.
To configure the Eclipse classpath variables for Studio component development:
1. In Eclipse, go to Window>Preferences>Java>Build Path>Classpath Variables.
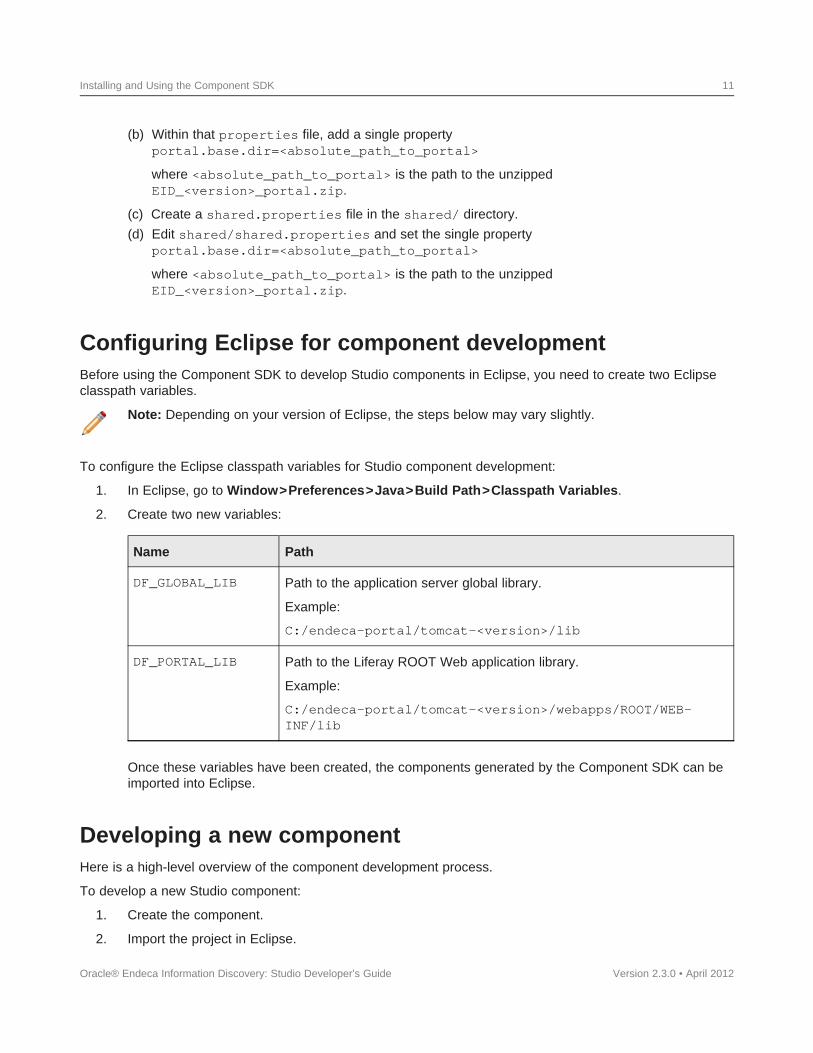
2. Create two new variables:
Name Path
DF_GLOBAL_LIB Path to the application server global library.
Example:
C:/endeca-portal/tomcat-<version>/lib
DF_PORTAL_LIB Path to the Liferay ROOT Web application library.
Example:
C:/endeca-portal/tomcat-<version>/webapps/ROOT/WEB-INF/lib
Once these variables have been created, the components generated by the Component SDK can beimported into Eclipse.
Developing a new componentHere is a high-level overview of the component development process.
To develop a new Studio component:
1. Create the component.
2. Import the project in Eclipse.
Oracle® Endeca Information Discovery: Studio Developer's Guide Version 2.3.0 • April 2012
Installing and Using the Component SDK 12
3. Build and test the new component.
Creating a new componentNew Studio components are extensions of the EndecaPortlet class.
To create a new component:
1. At a command prompt, navigate to the Component SDK directory, and from there tocomponents/portlets.
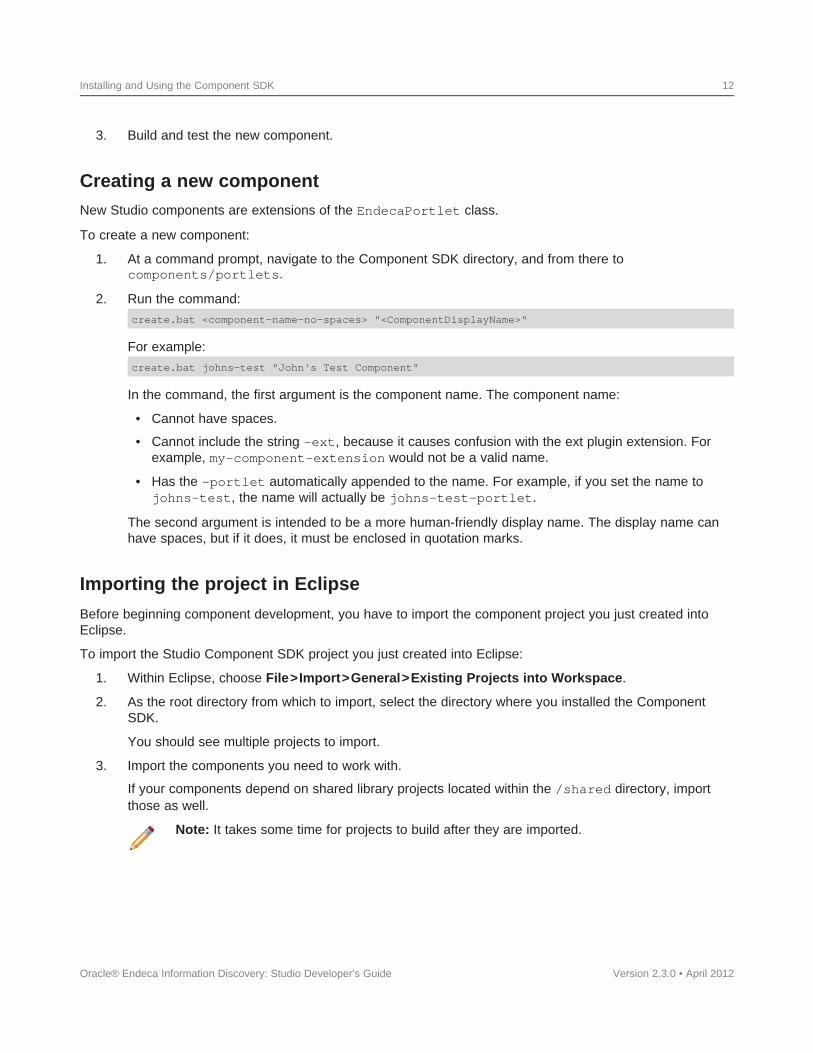
2. Run the command:
create.bat <component-name-no-spaces> "<ComponentDisplayName>"
Version 2.3.0 • April 2012
For example:
create.bat johns-test "John's Test Component"
In the command, the first argument is the component name. The component name:
• Cannot have spaces.
• Cannot include the string -ext, because it causes confusion with the ext plugin extension. Forexample, my-component-extension would not be a valid name.
• Has the -portlet automatically appended to the name. For example, if you set the name tojohns-test, the name will actually be johns-test-portlet.
The second argument is intended to be a more human-friendly display name. The display name canhave spaces, but if it does, it must be enclosed in quotation marks.
Importing the project in Eclipse
Before beginning component development, you have to import the component project you just created intoEclipse.
To import the Studio Component SDK project you just created into Eclipse:
1. Within Eclipse, choose File>Import>General>Existing Projects into Workspace.
2. As the root directory from which to import, select the directory where you installed the ComponentSDK.
You should see multiple projects to import.
3. Import the components you need to work with.
If your components depend on shared library projects located within the /shared directory, importthose as well.
Note: It takes some time for projects to build after they are imported.
Oracle® Endeca Information Discovery: Studio Developer's Guide
Installing and Using the Component SDK 13
Building and testing your new component
Next, you can build your new component in Eclipse and ensure that it is available in Studio.
To build your new component in Eclipse:
1. In your new project, open the build.xml file at the top level.
2. In the outline view, right-click the deploy task and select Run as...>Ant Build.
Note: This step is only necessary if you do not have Build Automatically checked in theEclipse Project menu.
3. If Studio is not already running, start Studio and log in.
4. Look at the Studio logs to confirm that the component was picked up successfully.
5. To test your new component within Studio:
(a) In the Dock menu, click Add Component.
(b) In the Add Component dialog, expand the Sample category.
Your component should be listed in that category.
(c) To add the new component to the Studio page, drag and drop it from the Add Component dialog.
Adding and removing components from the WebLogic .ear file
If you have installed Studio on Oracle WebLogic Server, then you can also add the component to thedeployed .ear file, so that it will be deployed automatically the next time you deploy the file, for example wheninstalling a production instance after you have completed testing on a development instance.
To add components to and remove components from the WebLogic .ear file:
1. To add a custom component to the .ear file:(a) Copy your component to the <LIFERAY_HOME>/deploy directory.
(b) After the component has been processed and moved to the <LIFERAY_HOME>/weblogic-deploy directory, undeploy the .ear file.
(c) Add the processed component .war file to the root of the zipped .ear file.(d) In the .ear file, add an entry for the new component to META-INF/application.xml.
2. To remove a component from the .ear file:
(a) Remove the component .war file from the root of the .ear file.(b) In the .ear file, remove the component entry from META-INF/application.xml.
Modifying the enhancements to the Component SDKThe build.xml file in the root directory of each component created by the Component SDK containsproperties that control whether to include the build enhancements.
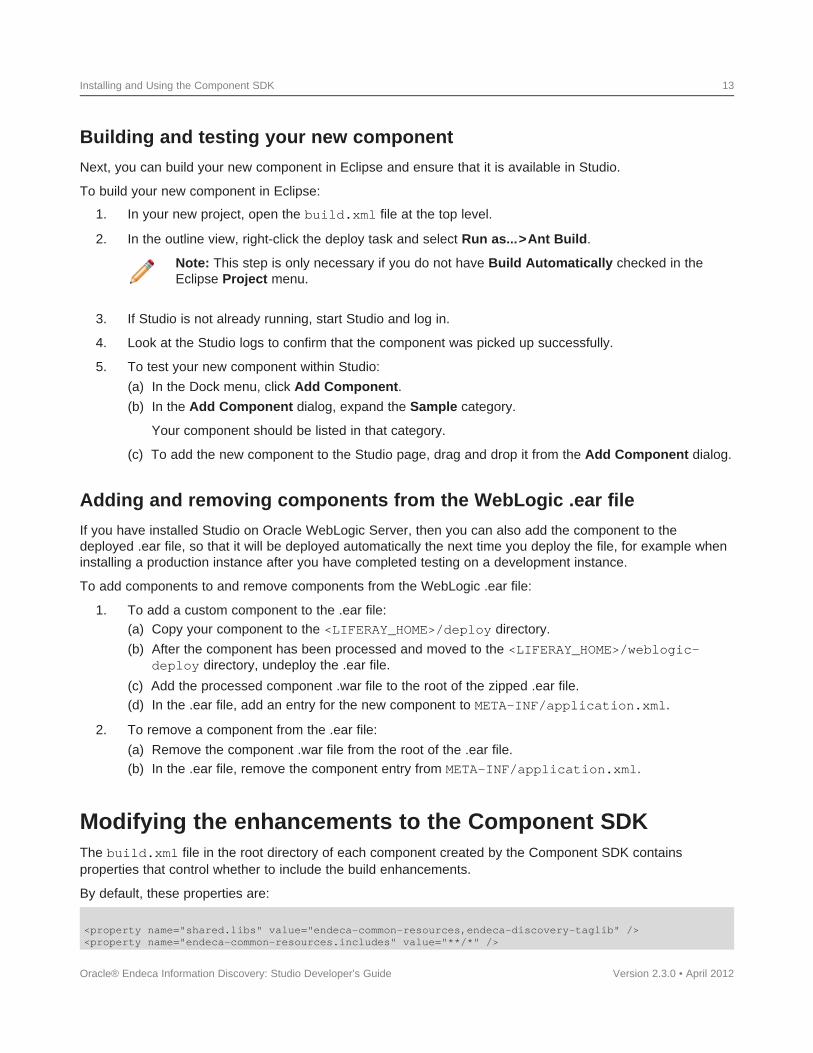
By default, these properties are:
<property name="shared.libs" value="endeca-common-resources,endeca-discovery-taglib" /><property name="endeca-common-resources.includes" value="**/*" />
Version 2.3.0 • April 2012Oracle® Endeca Information Discovery: Studio Developer's Guide
Installing and Using the Component SDK 14
<property name="endeca-common-resources.excludes" value="" />
Version 2.3.0 • April 2012
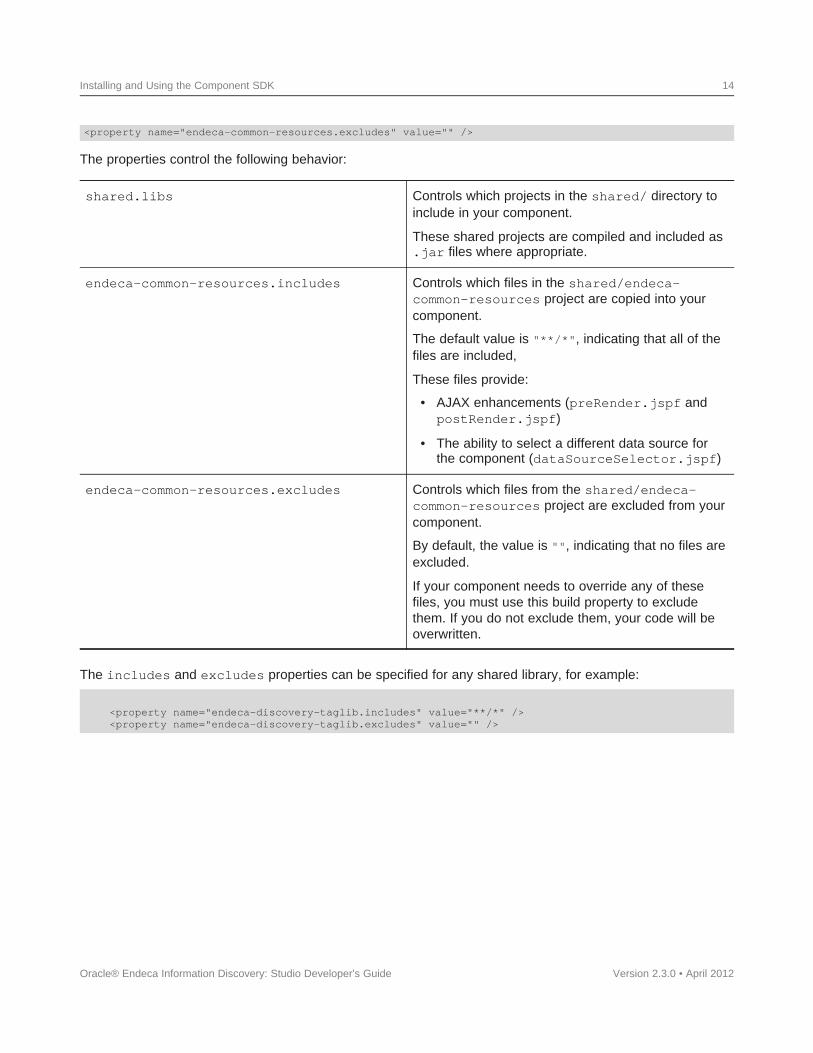
The properties control the following behavior:
shared.libs Controls which projects in the shared/ directory toinclude in your component.
These shared projects are compiled and included as.jar files where appropriate.
endeca-common-resources.includes Controls which files in the shared/endeca-common-resources project are copied into yourcomponent.
The default value is "**/*", indicating that all of thefiles are included,
These files provide:
• AJAX enhancements (preRender.jspf andpostRender.jspf)
• The ability to select a different data source forthe component (dataSourceSelector.jspf)
endeca-common-resources.excludes Controls which files from the shared/endeca-common-resources project are excluded from yourcomponent.
By default, the value is "", indicating that no files areexcluded.
If your component needs to override any of thesefiles, you must use this build property to excludethem. If you do not exclude them, your code will beoverwritten.
The includes and excludes properties can be specified for any shared library, for example:
<property name="endeca-discovery-taglib.includes" value="**/*" /><property name="endeca-discovery-taglib.excludes" value="" />
Oracle® Endeca Information Discovery: Studio Developer's Guide
Chapter 5
Working with QueryFunction Classes
Studio provides a set of QueryFunction classes to allow you to filter and query data. You can also create andimplement your own QueryFunction classes.
Provided QueryFunction filter classes
Provided QueryConfig functions
Creating a custom QueryFunction class
Implementing a custom QueryFunction class
Deploying a custom QueryFunction class
Adding the custom QueryFunction .jar file to your Eclipse build path
Obtaining query results
Provided QueryFunction filter classesStudio provides the following filter classes. Filters are used to change the current query state. They can beused in the definition of a Studio data source, or called by a custom component.
The available filter classes are:
• DataSourceFilter
• RecordFilter
• RefinementFilter
• NegativeRefinementFilter
• RangeFilter
• SearchFilter
Note that the examples below use the syntax for calling the filters from a component. For details onconfiguring filters in a data source definition, see the Oracle Endeca Information Discovery Studio User'sGuide.
DataSourceFilter
Uses an EQL snippet to provide the filtering.
When used in a data source definition, a DataSourceFilter is a permanent filter designed to be used forsecurity purposes.
Oracle® Endeca Information Discovery: Studio Developer's Guide Version 2.3.0 • April 2012
Working with QueryFunction Classes 16
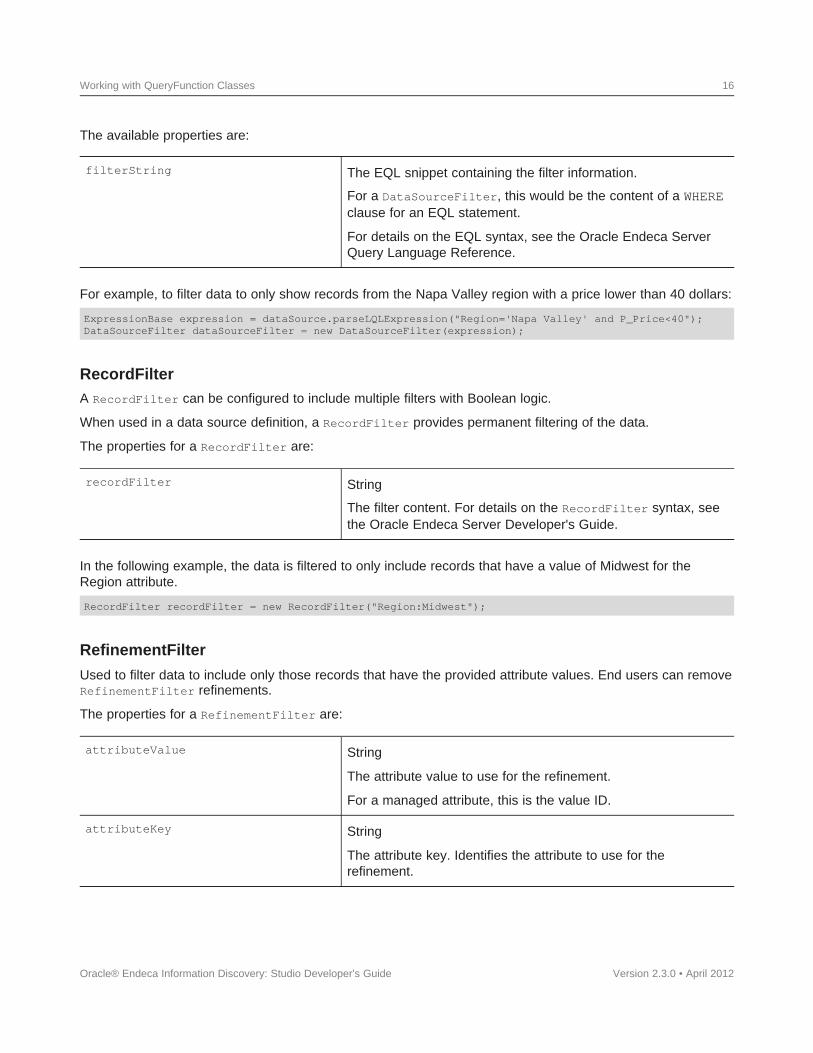
The available properties are:
filterString The EQL snippet containing the filter information.
For a DataSourceFilter, this would be the content of a WHEREclause for an EQL statement.
For details on the EQL syntax, see the Oracle Endeca ServerQuery Language Reference.
For example, to filter data to only show records from the Napa Valley region with a price lower than 40 dollars:
ExpressionBase expression = dataSource.parseLQLExpression("Region='Napa Valley' and P_Price<40");DataSourceFilter dataSourceFilter = new DataSourceFilter(expression);
Version 2.3.0 • April 2012
RecordFilterA RecordFilter can be configured to include multiple filters with Boolean logic.
When used in a data source definition, a RecordFilter provides permanent filtering of the data.
The properties for a RecordFilter are:
recordFilter String
The filter content. For details on the RecordFilter syntax, seethe Oracle Endeca Server Developer's Guide.
In the following example, the data is filtered to only include records that have a value of Midwest for theRegion attribute.
RecordFilter recordFilter = new RecordFilter("Region:Midwest");
RefinementFilter
Used to filter data to include only those records that have the provided attribute values. End users can removeRefinementFilter refinements.
The properties for a RefinementFilter are:
attributeValue String
The attribute value to use for the refinement.
For a managed attribute, this is the value ID.
attributeKey String
The attribute key. Identifies the attribute to use for therefinement.
Oracle® Endeca Information Discovery: Studio Developer's Guide
Working with QueryFunction Classes 17
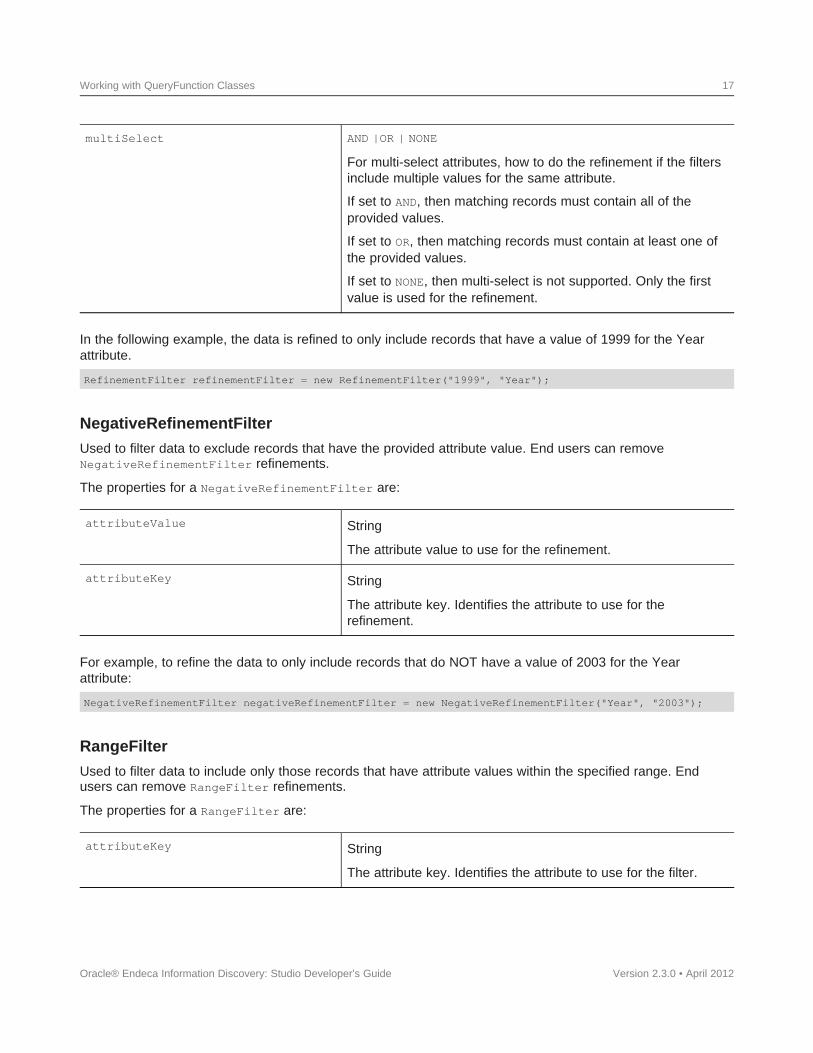
multiSelect AND |OR | NONE
For multi-select attributes, how to do the refinement if the filtersinclude multiple values for the same attribute.
If set to AND, then matching records must contain all of theprovided values.
If set to OR, then matching records must contain at least one ofthe provided values.
If set to NONE, then multi-select is not supported. Only the firstvalue is used for the refinement.
In the following example, the data is refined to only include records that have a value of 1999 for the Yearattribute.
RefinementFilter refinementFilter = new RefinementFilter("1999", "Year");
Version 2.3.0 • April 2012
NegativeRefinementFilter
Used to filter data to exclude records that have the provided attribute value. End users can removeNegativeRefinementFilter refinements.
The properties for a NegativeRefinementFilter are:
attributeValue String
The attribute value to use for the refinement.
attributeKey String
The attribute key. Identifies the attribute to use for therefinement.
For example, to refine the data to only include records that do NOT have a value of 2003 for the Yearattribute:
NegativeRefinementFilter negativeRefinementFilter = new NegativeRefinementFilter("Year", "2003");
RangeFilter
Used to filter data to include only those records that have attribute values within the specified range. Endusers can remove RangeFilter refinements.
The properties for a RangeFilter are:
attributeKey String
The attribute key. Identifies the attribute to use for the filter.
Oracle® Endeca Information Discovery: Studio Developer's Guide

Working with QueryFunction Classes 18
rangeOperator LT | LTEQ |GT |GTEQ| BTWN |GCLT |GCGT | GCBTWN
The type of comparison to use.
• LT - Less than
• LTEQ - Less than or equal to
• GT - Greater than
• GTEQ - Greater than or equal to
• BTWN - Between. Inclusive of the specified range values.
• GCLT - Geocode less than
• GCGT - Geocode greater than
• GCBTWN - Geocode between
rangeType NUMERIC | CURRENCY | DATE | GEOCODE
The type of value that is being compared.
value1 Numeric
The value to use for the comparison.
For BTWN, this is the low value for the range.
For the geocode range operators, the origin point for thecomparison.
value2 Numeric
For a BTWN, this is the high value for the range.
For GCLT and GCGT, this is the value to use for the comparison.
For GCBTWN, this is the low value for the range.
value3 Numeric
Only used for the GCBTWN operator. The high value for therange.
In the following example, the data is refined to only include records where the value of P_Score is a numberbetween 80 and 100:
RangeFilter rangeFilter= new RangeFilter("P_Score", RangeType.NUMERIC, RangeOperator.BTWN, "80", "100");
Version 2.3.0 • April 2012
SearchFilter
Used to filter the data to include records that have the provided search terms. End users can removeSearchFilter refinements.
Oracle® Endeca Information Discovery: Studio Developer's Guide
Working with QueryFunction Classes 19
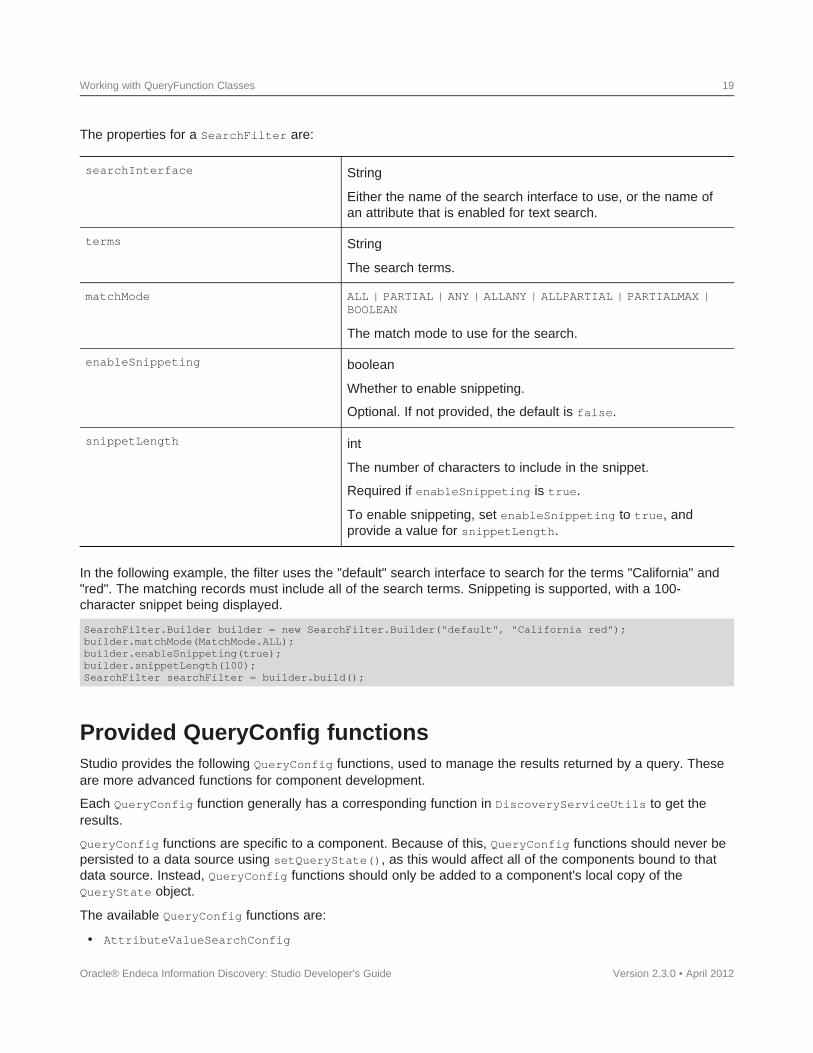
The properties for a SearchFilter are:
searchInterface String
Either the name of the search interface to use, or the name ofan attribute that is enabled for text search.
terms String
The search terms.
matchMode ALL | PARTIAL | ANY | ALLANY | ALLPARTIAL | PARTIALMAX |BOOLEAN
The match mode to use for the search.
enableSnippeting boolean
Whether to enable snippeting.
Optional. If not provided, the default is false.
snippetLength int
The number of characters to include in the snippet.
Required if enableSnippeting is true.
To enable snippeting, set enableSnippeting to true, andprovide a value for snippetLength.
In the following example, the filter uses the "default" search interface to search for the terms "California" and"red". The matching records must include all of the search terms. Snippeting is supported, with a 100-character snippet being displayed.
SearchFilter.Builder builder = new SearchFilter.Builder("default", "California red");builder.matchMode(MatchMode.ALL);builder.enableSnippeting(true);builder.snippetLength(100);SearchFilter searchFilter = builder.build();
Version 2.3.0 • April 2012
Provided QueryConfig functionsStudio provides the following QueryConfig functions, used to manage the results returned by a query. Theseare more advanced functions for component development.
Each QueryConfig function generally has a corresponding function in DiscoveryServiceUtils to get theresults.
QueryConfig functions are specific to a component. Because of this, QueryConfig functions should never bepersisted to a data source using setQueryState(), as this would affect all of the components bound to thatdata source. Instead, QueryConfig functions should only be added to a component's local copy of theQueryState object.
The available QueryConfig functions are:
• AttributeValueSearchConfig
Oracle® Endeca Information Discovery: Studio Developer's Guide
Working with QueryFunction Classes 20
• BreadcrumbsConfig
• ExposeRefinement
• LQLQueryConfig
• NavConfig
• RecordDetailsConfig
• ResultsConfig
• ResultsSummaryConfig
• SearchAdjustmentsConfig
• SearchKeysConfig
• SortConfig
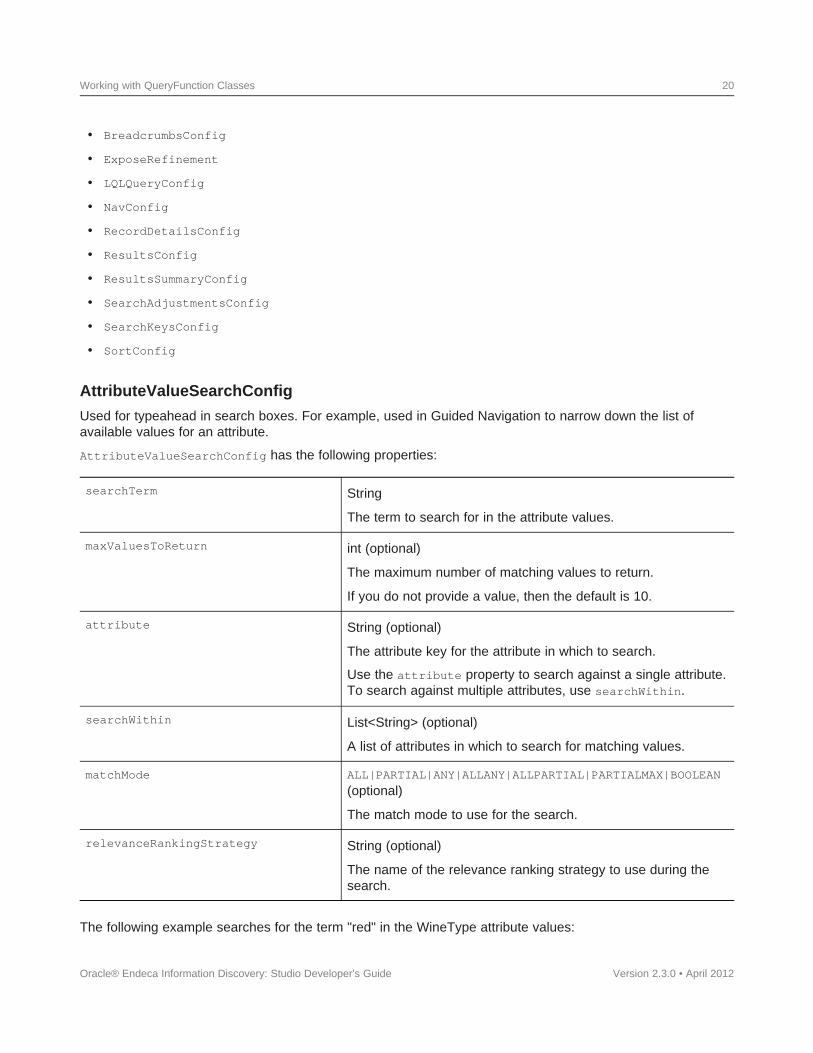
AttributeValueSearchConfig
Used for typeahead in search boxes. For example, used in Guided Navigation to narrow down the list ofavailable values for an attribute.
AttributeValueSearchConfig has the following properties:
searchTerm String
The term to search for in the attribute values.
maxValuesToReturn int (optional)
The maximum number of matching values to return.
If you do not provide a value, then the default is 10.
attribute String (optional)
The attribute key for the attribute in which to search.
Use the attribute property to search against a single attribute.To search against multiple attributes, use searchWithin.
searchWithin List<String> (optional)
A list of attributes in which to search for matching values.
matchMode ALL|PARTIAL|ANY|ALLANY|ALLPARTIAL|PARTIALMAX|BOOLEAN
(optional)
The match mode to use for the search.
relevanceRankingStrategy String (optional)
The name of the relevance ranking strategy to use during thesearch.
The following example searches for the term "red" in the WineType attribute values:
Oracle® Endeca Information Discovery: Studio Developer's Guide Version 2.3.0 • April 2012
Working with QueryFunction Classes 21
AttributeValueSearchConfig attributeValueSearchConfig= new AttributeValueSearchConfig("red", "WineType");
Version 2.3.0 • April 2012
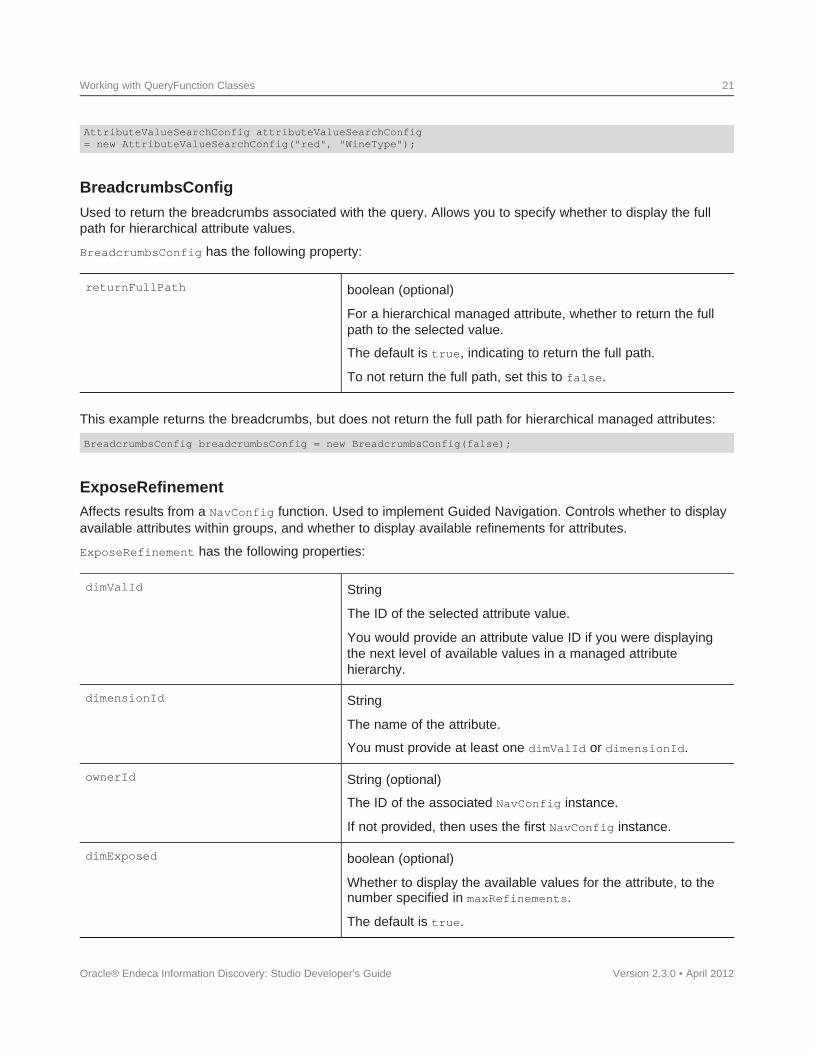
BreadcrumbsConfig
Used to return the breadcrumbs associated with the query. Allows you to specify whether to display the fullpath for hierarchical attribute values.
BreadcrumbsConfig has the following property:
returnFullPath boolean (optional)
For a hierarchical managed attribute, whether to return the fullpath to the selected value.
The default is true, indicating to return the full path.
To not return the full path, set this to false.
This example returns the breadcrumbs, but does not return the full path for hierarchical managed attributes:
BreadcrumbsConfig breadcrumbsConfig = new BreadcrumbsConfig(false);
ExposeRefinementAffects results from a NavConfig function. Used to implement Guided Navigation. Controls whether to displayavailable attributes within groups, and whether to display available refinements for attributes.
ExposeRefinement has the following properties:
dimValId String
The ID of the selected attribute value.
You would provide an attribute value ID if you were displayingthe next level of available values in a managed attributehierarchy.
dimensionId String
The name of the attribute.
You must provide at least one dimValId or dimensionId.
ownerId String (optional)
The ID of the associated NavConfig instance.
If not provided, then uses the first NavConfig instance.
dimExposed boolean (optional)
Whether to display the available values for the attribute, to thenumber specified in maxRefinements.
The default is true.
Oracle® Endeca Information Discovery: Studio Developer's Guide
Working with QueryFunction Classes 22
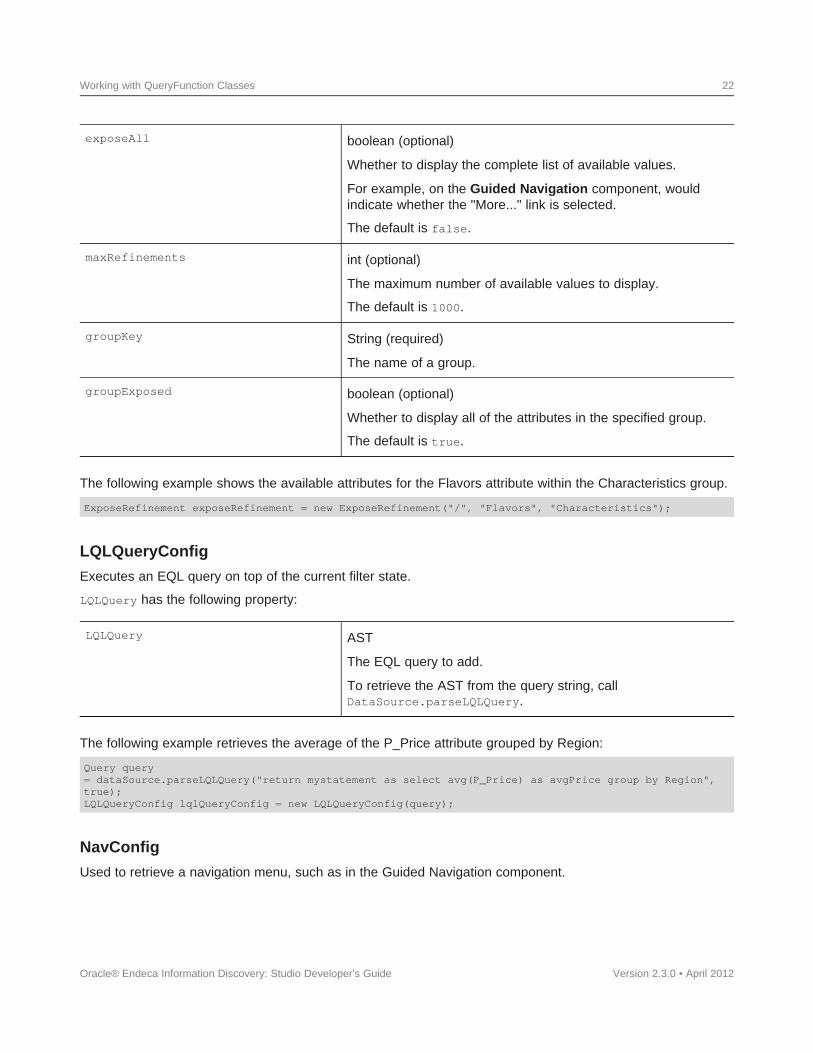
exposeAll boolean (optional)
Whether to display the complete list of available values.
For example, on the Guided Navigation component, wouldindicate whether the "More..." link is selected.
The default is false.
maxRefinements int (optional)
The maximum number of available values to display.
The default is 1000.
groupKey String (required)
The name of a group.
groupExposed boolean (optional)
Whether to display all of the attributes in the specified group.
The default is true.
The following example shows the available attributes for the Flavors attribute within the Characteristics group.
ExposeRefinement exposeRefinement = new ExposeRefinement("/", "Flavors", "Characteristics");
Version 2.3.0 • April 2012
LQLQueryConfig
Executes an EQL query on top of the current filter state.
LQLQuery has the following property:
LQLQuery AST
The EQL query to add.
To retrieve the AST from the query string, callDataSource.parseLQLQuery.
The following example retrieves the average of the P_Price attribute grouped by Region:
Query query= dataSource.parseLQLQuery("return mystatement as select avg(P_Price) as avgPrice group by Region",true);LQLQueryConfig lqlQueryConfig = new LQLQueryConfig(query);
NavConfig
Used to retrieve a navigation menu, such as in the Guided Navigation component.
Oracle® Endeca Information Discovery: Studio Developer's Guide
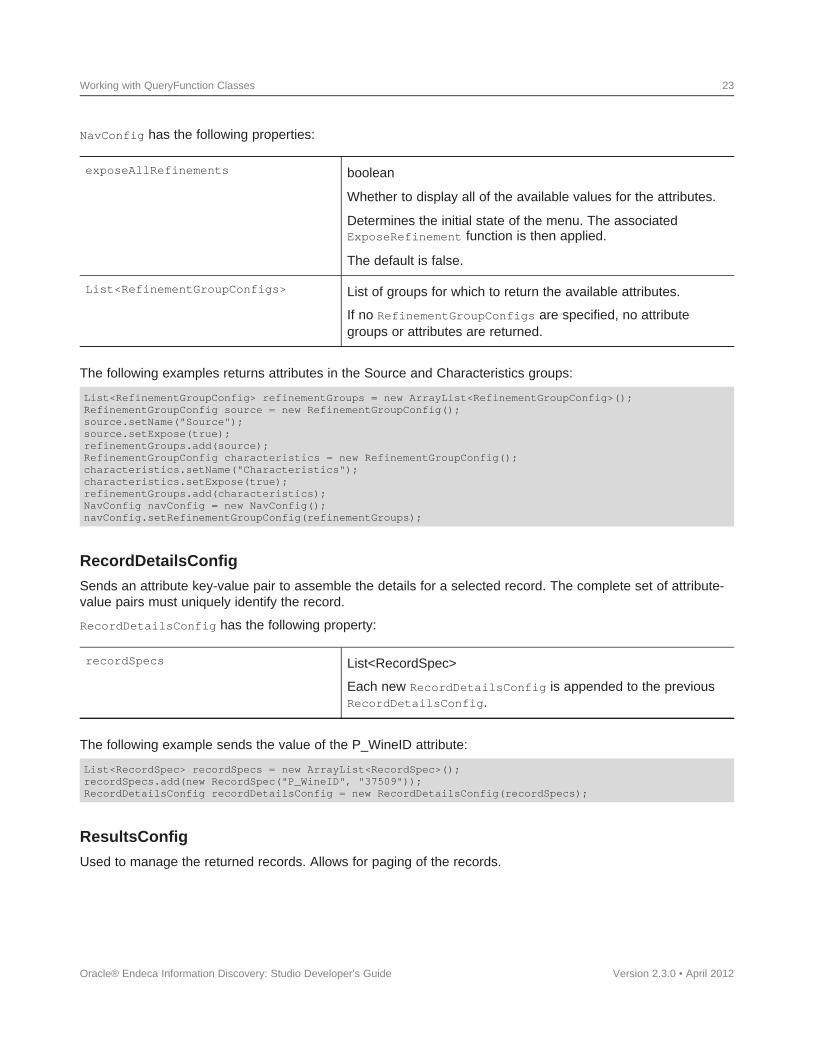
Working with QueryFunction Classes 23
NavConfig has the following properties:
exposeAllRefinements boolean
Whether to display all of the available values for the attributes.
Determines the initial state of the menu. The associatedExposeRefinement function is then applied.
The default is false.
List<RefinementGroupConfigs> List of groups for which to return the available attributes.
If no RefinementGroupConfigs are specified, no attributegroups or attributes are returned.
The following examples returns attributes in the Source and Characteristics groups:
List<RefinementGroupConfig> refinementGroups = new ArrayList<RefinementGroupConfig>();RefinementGroupConfig source = new RefinementGroupConfig();source.setName("Source");source.setExpose(true);refinementGroups.add(source);RefinementGroupConfig characteristics = new RefinementGroupConfig();characteristics.setName("Characteristics");characteristics.setExpose(true);refinementGroups.add(characteristics);NavConfig navConfig = new NavConfig();navConfig.setRefinementGroupConfig(refinementGroups);
Version 2.3.0 • April 2012
RecordDetailsConfig
Sends an attribute key-value pair to assemble the details for a selected record. The complete set of attribute-value pairs must uniquely identify the record.
RecordDetailsConfig has the following property:
recordSpecs List<RecordSpec>
Each new RecordDetailsConfig is appended to the previousRecordDetailsConfig.
The following example sends the value of the P_WineID attribute:
List<RecordSpec> recordSpecs = new ArrayList<RecordSpec>();recordSpecs.add(new RecordSpec("P_WineID", "37509"));RecordDetailsConfig recordDetailsConfig = new RecordDetailsConfig(recordSpecs);
ResultsConfig
Used to manage the returned records. Allows for paging of the records.
Oracle® Endeca Information Discovery: Studio Developer's Guide

Working with QueryFunction Classes 24
ResultsConfig has the following properties:
recordsPerPage long
The number of records to return at a time.
offset long (optional)
The position in the list at which to start. The very first record isat position 0.
For example, if recordsPerPage is 10, then to get the secondpage of results, the offset would be 10.
columns String[] (optional)
The columns to include in the results.
If not specified, then the results include all of the columns.
numBulkRecords int (optional)
The number of records to return. Overrides the value ofrecordsPerPage.
The following example returns a selected set of columns for the third page of records, where each pagecontains 50 records:
ResultsConfig resultsConfig = new ResultsConfig();resultsConfig.setOffset(100);resultsConfig.setRecordsPerPage(50);String[] columns = {"Wine_ID", "Name", "Description", "WineType", "Winery", "Vintage"};resultsConfig.setColumns(columns);
Version 2.3.0 • April 2012
ResultsSummaryConfig
Gets the number of records returned from a query.
ResultsSummaryConfig resultsSummaryConfig = new ResultsSummaryConfig();
SearchAdjustmentsConfig
Returns "Did you mean" and auto-correction items for a search.
SearchAdjustmentsConfig searchAdjustmentsConfig = new SearchAdjustmentsConfig();
SearchKeysConfig
Returns the list of available search interfaces.
SearchKeysConfig searchKeysConfig = new SearchKeysConfig();
SortConfigUsed to sort the results of a query. Used in conjunction with ResultsConfig.
Oracle® Endeca Information Discovery: Studio Developer's Guide
Working with QueryFunction Classes 25
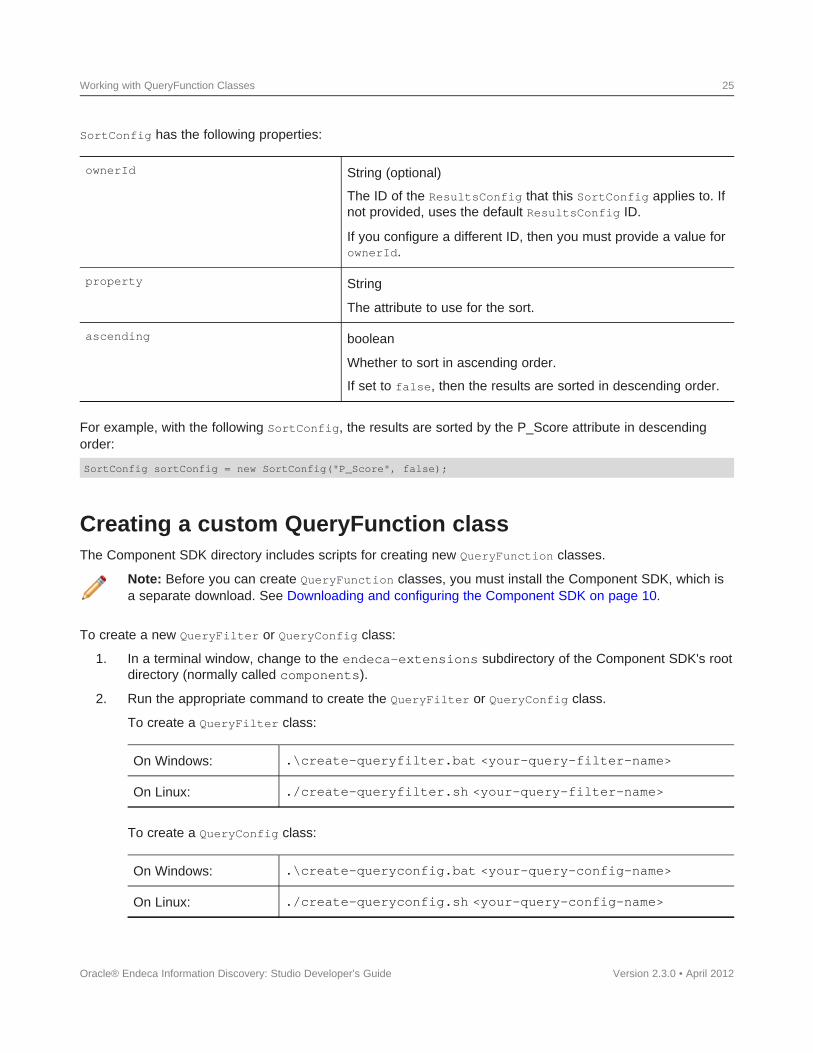
SortConfig has the following properties:
ownerId String (optional)
The ID of the ResultsConfig that this SortConfig applies to. Ifnot provided, uses the default ResultsConfig ID.
If you configure a different ID, then you must provide a value forownerId.
property String
The attribute to use for the sort.
ascending boolean
Whether to sort in ascending order.
If set to false, then the results are sorted in descending order.
For example, with the following SortConfig, the results are sorted by the P_Score attribute in descendingorder:
SortConfig sortConfig = new SortConfig("P_Score", false);
Version 2.3.0 • April 2012
Creating a custom QueryFunction classThe Component SDK directory includes scripts for creating new QueryFunction classes.
Note: Before you can create QueryFunction classes, you must install the Component SDK, which isa separate download. See Downloading and configuring the Component SDK on page 10.
To create a new QueryFilter or QueryConfig class:
1. In a terminal window, change to the endeca-extensions subdirectory of the Component SDK's rootdirectory (normally called components).
2. Run the appropriate command to create the QueryFilter or QueryConfig class.
To create a QueryFilter class:
On Windows: .\create-queryfilter.bat <your-query-filter-name>
On Linux: ./create-queryfilter.sh <your-query-filter-name>
To create a QueryConfig class:
On Windows: .\create-queryconfig.bat <your-query-config-name>
On Linux: ./create-queryconfig.sh <your-query-config-name>
Oracle® Endeca Information Discovery: Studio Developer's Guide
Working with QueryFunction Classes 26
The command creates in the endeca-extensions directory a new directory for the QueryFilter orQueryConfig class:
• For a QueryFilter, the directory is <your-query-filter-name>-filter.
• For a QueryConfig, the directory is <your-query-config-name>-config.
This directory is an Eclipse project that you can import directly into Eclipse, if you use Eclipse as your IDE.
It contains an empty sample implementation of a QueryFilter or QueryConfig. This has no effect onQueryState in its original form.
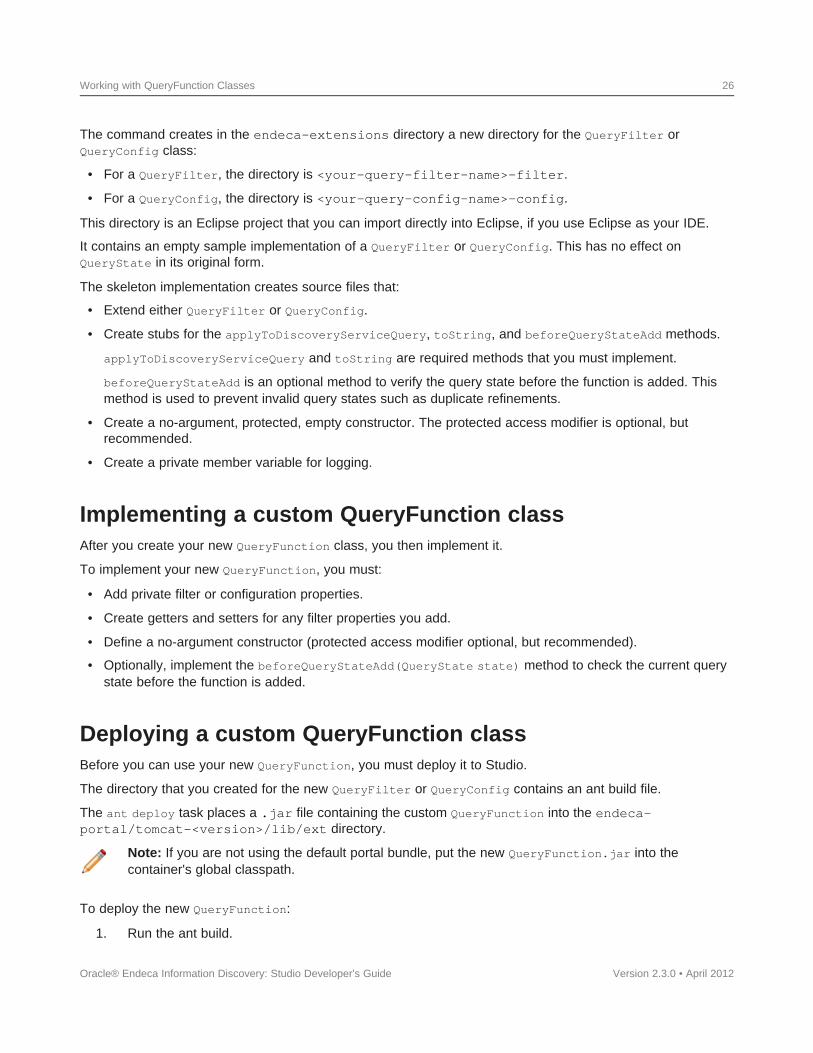
The skeleton implementation creates source files that:
• Extend either QueryFilter or QueryConfig.
• Create stubs for the applyToDiscoveryServiceQuery, toString, and beforeQueryStateAdd methods.
applyToDiscoveryServiceQuery and toString are required methods that you must implement.
beforeQueryStateAdd is an optional method to verify the query state before the function is added. Thismethod is used to prevent invalid query states such as duplicate refinements.
• Create a no-argument, protected, empty constructor. The protected access modifier is optional, butrecommended.
• Create a private member variable for logging.
Implementing a custom QueryFunction classAfter you create your new QueryFunction class, you then implement it.
To implement your new QueryFunction, you must:
• Add private filter or configuration properties.
• Create getters and setters for any filter properties you add.
• Define a no-argument constructor (protected access modifier optional, but recommended).
• Optionally, implement the beforeQueryStateAdd(QueryState state) method to check the current querystate before the function is added.
Deploying a custom QueryFunction classBefore you can use your new QueryFunction, you must deploy it to Studio.
The directory that you created for the new QueryFilter or QueryConfig contains an ant build file.
The ant deploy task places a .jar file containing the custom QueryFunction into the endeca-portal/tomcat-<version>/lib/ext directory.
Note: If you are not using the default portal bundle, put the new QueryFunction.jar into thecontainer's global classpath.
To deploy the new QueryFunction:
1. Run the ant build.
Oracle® Endeca Information Discovery: Studio Developer's Guide Version 2.3.0 • April 2012

Working with QueryFunction Classes 27
2. Restart Studio.
The portal picks up the new class.
After you deploy your custom QueryFunction, you can use it in any component.
Adding the custom QueryFunction .jar file to your Eclipsebuild pathIf you are using Eclipse as your IDE, you need to add the new .jar file to the build path of your customcomponent.
To add the new .jar file to your Eclipse build path:
1. Right-click the project, then select Build Path>Configure Build Path.
2. Click the Libraries tab.
3. Click Add Variable.
4. Select DF_GLOBAL_LIB.
You should have added this variable when you set up the SDK.
5. Click Extend.
6. Open the ext/ directory.
7. Select the .jar file containing your custom QueryFunction.
8. Click OK.
After adding the .jar file to the build path, you can import the class, and use your custom QueryFilter orQueryConfig to modify your QueryState.
Obtaining query resultsThe Results class is used to represent results of queries.
You must add the relevant QueryConfigs to a component in order to specify the types of results it needs.
QueryState query = getDataSource(request).getQueryState();query.addFunction(new NavConfig());QueryResults results = getDataSource(request).execute(query);
Version 2.3.0 • April 2012
You can then get the underlying API results and do whatever manipulation is required by your component.
Results discoveryResults = results.getDiscoveryServiceResults();
Before executing, you can also make other local modifications to your query state by adding filters orconfigurations to your query:
QueryState query = getDataSource(request).getQueryState();query.addFunction(new ResultsConfig());query.addFunction(new RecordFilter("Region:Midwest"));QueryResults results = getDataSource(request).execute(query);
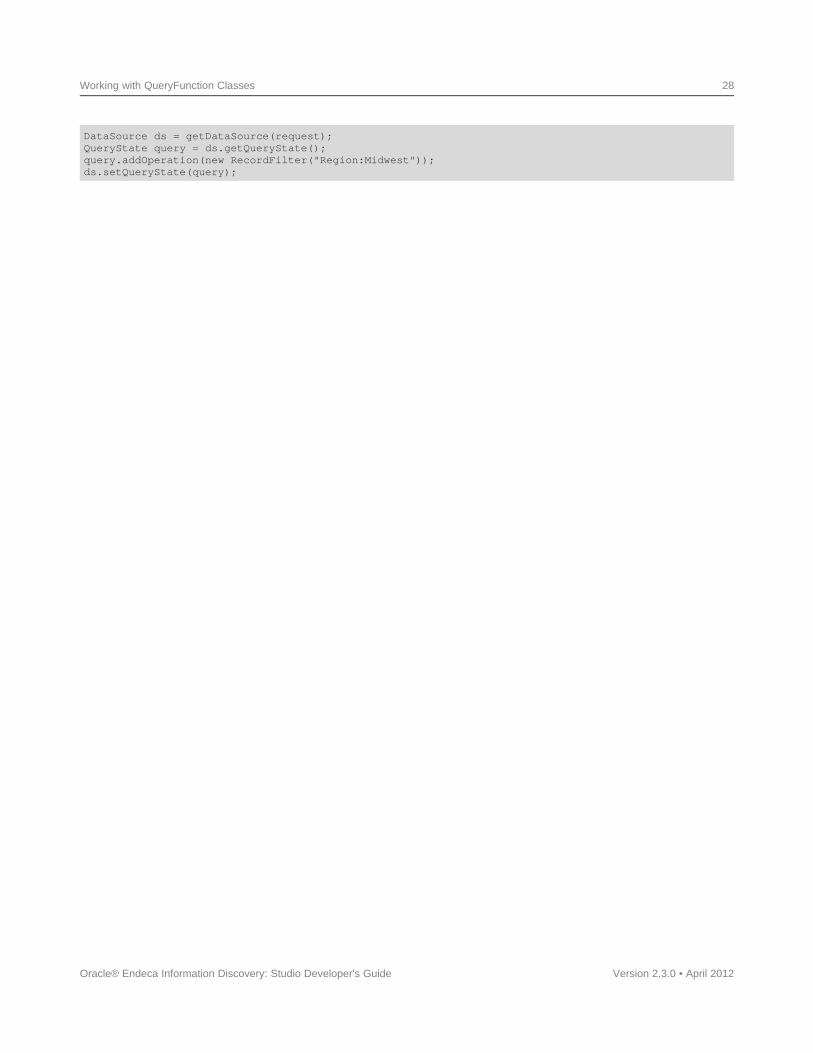
When you need to update a data source's state to update all of the associated components, you must useQueryState instances.
Oracle® Endeca Information Discovery: Studio Developer's Guide
Working with QueryFunction Classes 28
DataSource ds = getDataSource(request);QueryState query = ds.getQueryState();query.addOperation(new RecordFilter("Region:Midwest"));ds.setQueryState(query);
Version 2.3.0 • April 2012Oracle® Endeca Information Discovery: Studio Developer's Guide
Chapter 6
Localizing Studio
Studio is an internationalized application that can be adapted for use in different locales.
Configuring localization for a component
Adding strings to your resource files
Guidelines for working with non-Unicode characters
Localizing a component to a non-Unicode language
How the build process works with resource files
Using the LanguageUtils class to retrieve localized messages
Adding a translation to a released component
Switching the locale of a component
Adding the Language component to your Studio application
Obtaining more information about portal localization
Configuring localization for a componentTo localize a component, you must specify the supported languages in portlet.xml, and then create theresource files for each language.
To set up a component for localization:
1. Update the portlet.xml file to specify the locales this component will support.
The following example enables English and German:
<supported-locale>en</supported-locale><supported-locale>de</supported-locale>
Version 2.3.0 • April 2012
2. Update portlet.xml to specify the location of the component's resource bundle. (The resourcebundle is the mechanism the Liferay Portal uses to add localized content to a component.)
For example, to create custom English and German resource files for the Sample Endeca Portletcomponent, we would include Resource_en.properties and Resource_de.properties in thecomponent's com/endeca/portlet/sample/ directory:
<resource-bundle>com.endeca.portlet.sample.Resource</resource-bundle>
3. Create resource bundles for your supported languages in WEB-INF/src/[path/to/resource/bundle]_[locale].properties.
For example, the bundle for English for the Sample Endeca Portlet component would be WEB-INF/src/com/endeca/portlet/sample/Resource_en.properties.
Oracle® Endeca Information Discovery: Studio Developer's Guide
Localizing Studio 30
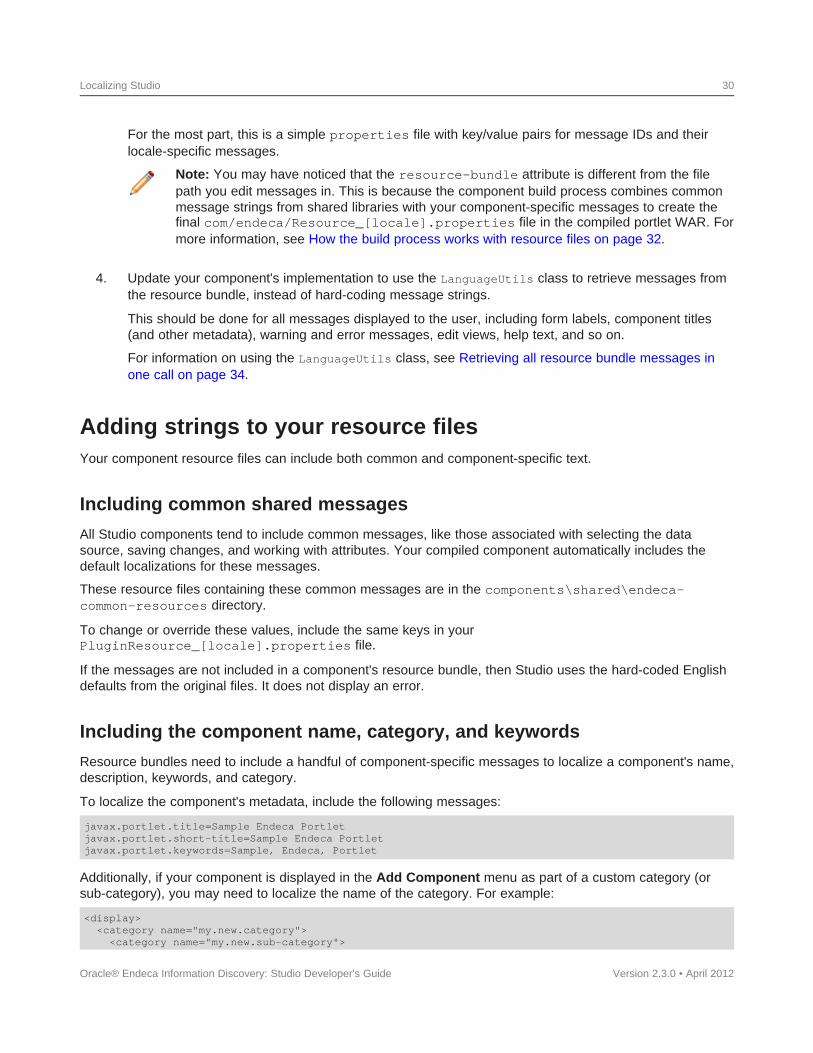
For the most part, this is a simple properties file with key/value pairs for message IDs and theirlocale-specific messages.
Note: You may have noticed that the resource-bundle attribute is different from the filepath you edit messages in. This is because the component build process combines commonmessage strings from shared libraries with your component-specific messages to create thefinal com/endeca/Resource_[locale].properties file in the compiled portlet WAR. Formore information, see How the build process works with resource files on page 32.
4. Update your component's implementation to use the LanguageUtils class to retrieve messages fromthe resource bundle, instead of hard-coding message strings.
This should be done for all messages displayed to the user, including form labels, component titles(and other metadata), warning and error messages, edit views, help text, and so on.
For information on using the LanguageUtils class, see Retrieving all resource bundle messages inone call on page 34.
Adding strings to your resource filesYour component resource files can include both common and component-specific text.
Including common shared messages
All Studio components tend to include common messages, like those associated with selecting the datasource, saving changes, and working with attributes. Your compiled component automatically includes thedefault localizations for these messages.
These resource files containing these common messages are in the components\shared\endeca-common-resources directory.
To change or override these values, include the same keys in yourPluginResource_[locale].properties file.
If the messages are not included in a component's resource bundle, then Studio uses the hard-coded Englishdefaults from the original files. It does not display an error.
Including the component name, category, and keywords
Resource bundles need to include a handful of component-specific messages to localize a component's name,description, keywords, and category.
To localize the component's metadata, include the following messages:
javax.portlet.title=Sample Endeca Portletjavax.portlet.short-title=Sample Endeca Portletjavax.portlet.keywords=Sample, Endeca, Portlet
Version 2.3.0 • April 2012
Additionally, if your component is displayed in the Add Component menu as part of a custom category (orsub-category), you may need to localize the name of the category. For example:
<display><category name="my.new.category"><category name="my.new.sub-category">
Oracle® Endeca Information Discovery: Studio Developer's Guide
Localizing Studio 31
<portlet id="portlet_A" /></category>
</category></display>
Version 2.3.0 • April 2012
To localize the category names, have your component's resource bundle include the following messages:
my.new.category=My Categorymy.new.sub-category=My Sub-Category
All components that declare the same categories should include these messages, since the componentcontainer uses the localized messages from the first component that specifies them.
Using tokens in message strings
Message strings can include tokens that are substituted at runtime.
For example, a search breadcrumb may need to display a spelling correction message such as "No matchesfound for 'bearign'; showing results for 'bearing'". In a .properties file, this message would appear withtokens for the two terms, as in the following example:
autocorrect-msg=No matches found for \'{0}\'; showing results for \'{1}\'
When using theLanguageUtils utility to include this message in your component, you pass in a list ofparameters to substitute for these tokens. This substitution uses the class java.text.MessageFormat. To seethe available token substitution options, refer to the javadoc for that class.
Tokens may also do advanced substitution, such as date substitution formatted appropriately for the locale.
Guidelines for working with non-Unicode charactersBecause Studio is Java-based, it can only read Unicode or Latin-1 characters. In the case of other characters,you can work around this limitation by converting the native file to ASCII, using a converter such asnative2ascii, which is freely available as part of the JDK.
Keep in mind the following guidelines:
1. Use UTF-8 as your encoding. Lesser encodings cannot properly represent Japanese characters.
2. Pick a valid character set, such as Shift-JIS or UTF-8/Unicode, and stick with it. You cannot changecharacter sets midstream—if you change character sets, you must re-enter your values.
3. Make sure the character set in your text editor matches the character set in native2ascii.
For more information about working with non-Unicode characters, see the Liferay Portal website.
Localizing a component to a non-Unicode languageThe following example demonstrates how to localize a component to a double-byte, extended characterlanguage.
If you want to use this example as a learning exercise but do not have non-Unicode text of your own todeploy, you can machine-translate your English-language file and use that text in step 5 below.
Oracle® Endeca Information Discovery: Studio Developer's Guide
Localizing Studio 32
To localize your portlet to a non-Unicode language (such as Japanese):
1. Within your portlet, create a file PluginResource_<locale-code>.properties.native at theappropriate location.
For example, if you are working with Japanese, the file name would bePluginResource_ja.properties.native.
2. Commit both the .native and .properties file to your portlet.
The .properties file is used by the component, but because that file uses escaped Unicodenotation, it is extremely hard for humans to read.
It is easier to make any necessary changes in the .native file.
3. Open the .native file in an encoding- and character-set-aware text editor such as Notepad++.
Make sure the .native file uses UTF-8 as its encoding and Shift-JIS as its character set.
4. Copy the contents of the English resource bundle into the .native file.
5. Within your text editor, using your translation service, replace the English values with the Japanesevalues.
6. Save the file.
7. From the command line, run Java's native2ascii converter. This tool is typically included in theJDK.
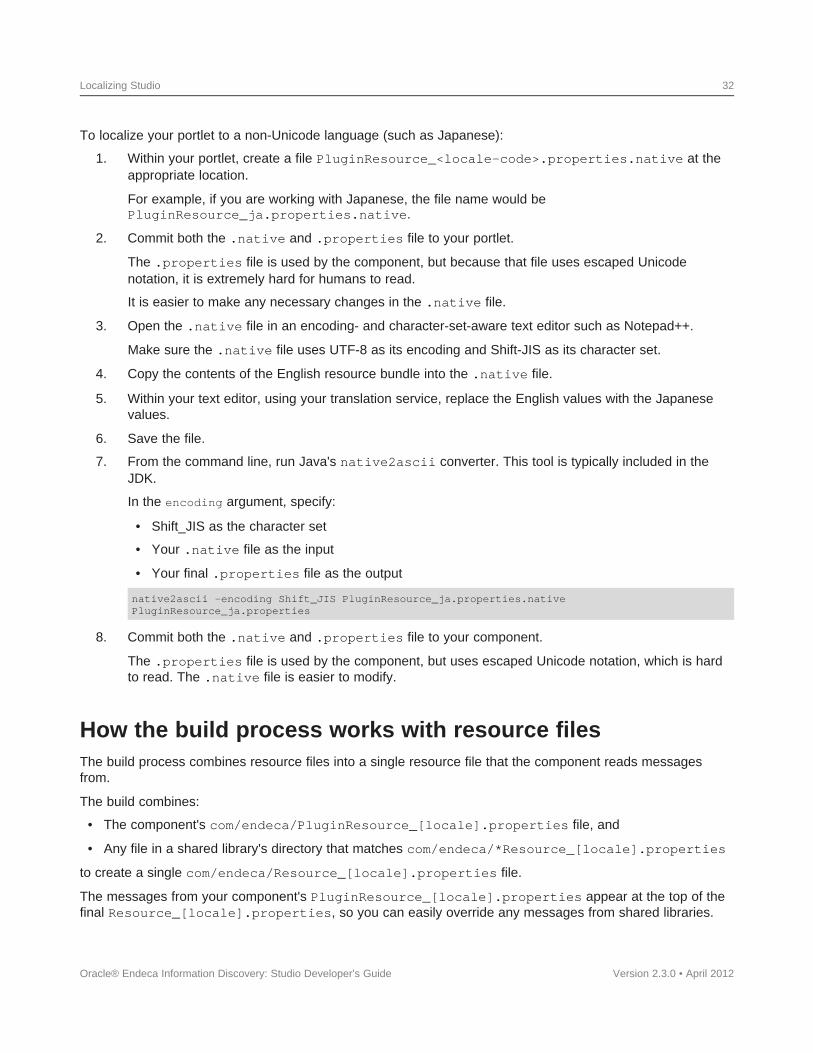
In the encoding argument, specify:
• Shift_JIS as the character set
• Your .native file as the input
• Your final .properties file as the output
native2ascii -encoding Shift_JIS PluginResource_ja.properties.nativePluginResource_ja.properties
Version 2.3.0 • April 2012
8. Commit both the .native and .properties file to your component.
The .properties file is used by the component, but uses escaped Unicode notation, which is hardto read. The .native file is easier to modify.
How the build process works with resource filesThe build process combines resource files into a single resource file that the component reads messagesfrom.
The build combines:
• The component's com/endeca/PluginResource_[locale].properties file, and
• Any file in a shared library's directory that matches com/endeca/*Resource_[locale].properties
to create a single com/endeca/Resource_[locale].properties file.
The messages from your component's PluginResource_[locale].properties appear at the top of thefinal Resource_[locale].properties, so you can easily override any messages from shared libraries.
Oracle® Endeca Information Discovery: Studio Developer's Guide
Localizing Studio 33
However, if your component includes more than one shared library, no guarantee can be made about theorder in which the resource files from shared libraries will be appended.
Localizing your own shared libraries
If you have included localized messages in your shared libraries, make sure you choose a prefix other thanPlugin for the resource file com/endeca/[prefix]Resource_[locale].properties.
If you do not, this file will override your component'scom/endeca/PluginResource_[locale].properties file during the build, and your finalcom/endeca/Resource_[locale].properties will be incorrect.
We recommend that you choose a prefix for your library's resource file that is distinct and similar to yourlibrary's name to avoid file name conflicts with components or other shared libraries.
Using the LanguageUtils class to retrieve localizedmessagesStudio provides the core class com.endeca.portlet.util.LanguageUtils to retrieve the localizedmessages to display on a component. There are several ways to use this class.
Calling static methods from JavaYou can access LanguageUtils by calling static methods from your Java class.
The following example shows the static use of the getMessage methods to retrieve messages (with tokensubstitution in the third line).
LanguageUtils.getMessage(request, "reset");LanguageUtils.getMessage(request, "num-records");LanguageUtils.getMessage(request, "search-for", new String[]{ "American" });
Version 2.3.0 • April 2012
A number of convenience method signatures are provided, allowing the user to specify the component requestand message ID, and optionally to include parameters for token substitution and a default string.
The default string may be useful for shared localized messages, allowing components to function with adefault (un-localized) message if the localized message is not retrieved from the resource bundle.
All method signatures require specifying the PortletRequest.
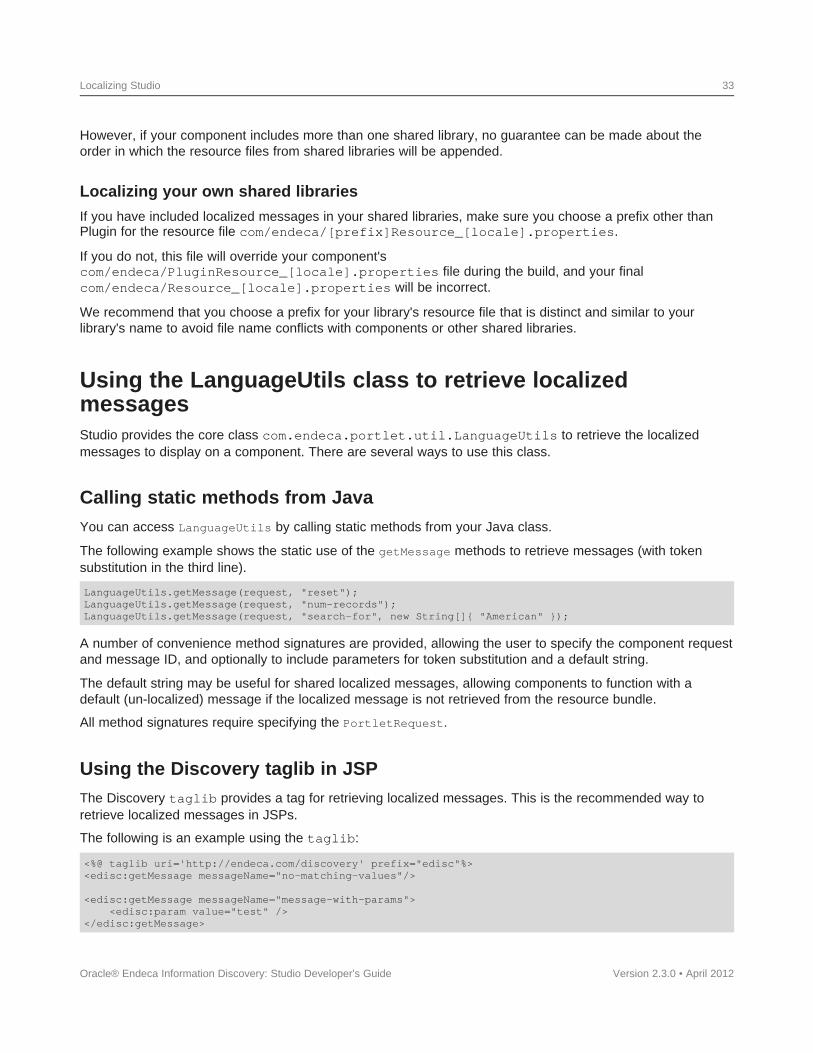
Using the Discovery taglib in JSPThe Discovery taglib provides a tag for retrieving localized messages. This is the recommended way toretrieve localized messages in JSPs.
The following is an example using the taglib:
<%@ taglib uri='http://endeca.com/discovery' prefix="edisc"%><edisc:getMessage messageName="no-matching-values"/>
<edisc:getMessage messageName="message-with-params"><edisc:param value="test" />
</edisc:getMessage>
Oracle® Endeca Information Discovery: Studio Developer's Guide
Localizing Studio 34
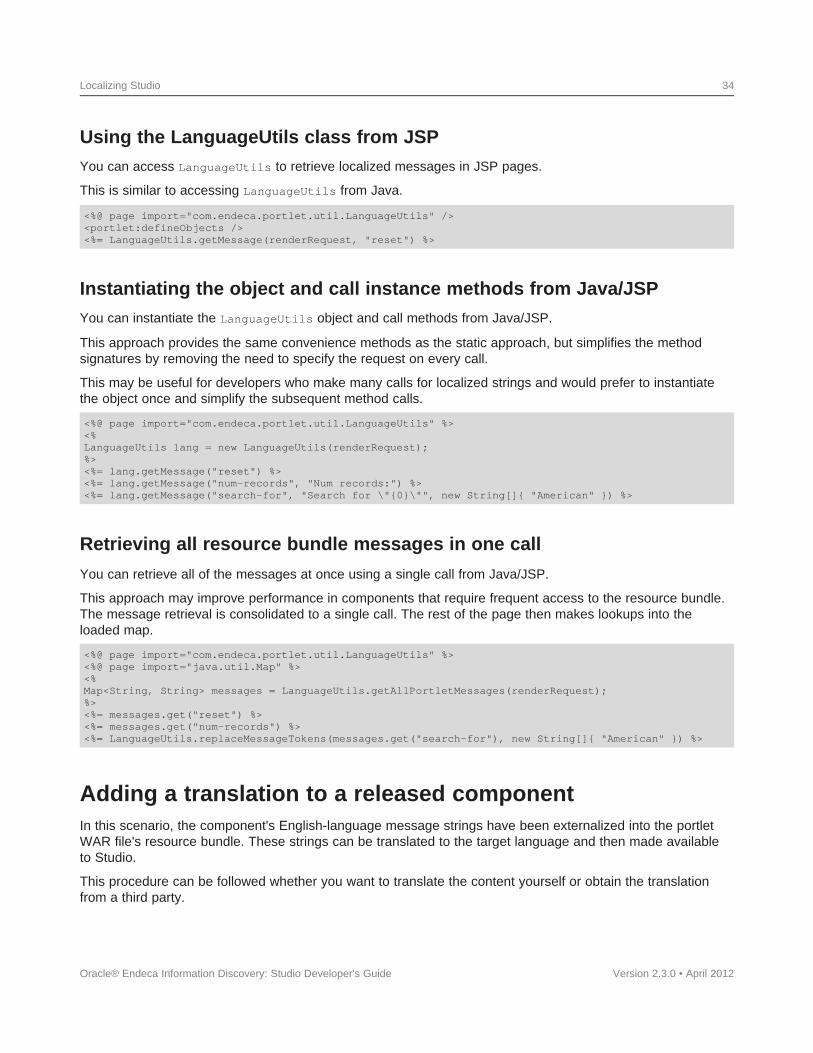
Using the LanguageUtils class from JSPYou can access LanguageUtils to retrieve localized messages in JSP pages.
This is similar to accessing LanguageUtils from Java.
<%@ page import="com.endeca.portlet.util.LanguageUtils" /><portlet:defineObjects /><%= LanguageUtils.getMessage(renderRequest, "reset") %>
Version 2.3.0 • April 2012
Instantiating the object and call instance methods from Java/JSPYou can instantiate the LanguageUtils object and call methods from Java/JSP.
This approach provides the same convenience methods as the static approach, but simplifies the methodsignatures by removing the need to specify the request on every call.
This may be useful for developers who make many calls for localized strings and would prefer to instantiatethe object once and simplify the subsequent method calls.
<%@ page import="com.endeca.portlet.util.LanguageUtils" %><%LanguageUtils lang = new LanguageUtils(renderRequest);%><%= lang.getMessage("reset") %><%= lang.getMessage("num-records", "Num records:") %><%= lang.getMessage("search-for", "Search for \"{0}\"", new String[]{ "American" }) %>
Retrieving all resource bundle messages in one call
You can retrieve all of the messages at once using a single call from Java/JSP.
This approach may improve performance in components that require frequent access to the resource bundle.The message retrieval is consolidated to a single call. The rest of the page then makes lookups into theloaded map.
<%@ page import="com.endeca.portlet.util.LanguageUtils" %><%@ page import="java.util.Map" %><%Map<String, String> messages = LanguageUtils.getAllPortletMessages(renderRequest);%><%= messages.get("reset") %><%= messages.get("num-records") %><%= LanguageUtils.replaceMessageTokens(messages.get("search-for"), new String[]{ "American" }) %>
Adding a translation to a released componentIn this scenario, the component's English-language message strings have been externalized into the portletWAR file's resource bundle. These strings can be translated to the target language and then made availableto Studio.
This procedure can be followed whether you want to translate the content yourself or obtain the translationfrom a third party.
Oracle® Endeca Information Discovery: Studio Developer's Guide
Localizing Studio 35
To add translated message strings to a released component:
1. Unzip the .war file of the localized component you want to modify.
2. Edit its portlet.xml file to enable the additional locale you want to support.
For example, to add French, include <supported-locale>fr</supported-locale>.
3. In WEB-INF/classes/com/endeca/ (or other location, based on your component's class structure),generate a Resource_[locale].properties file for the new language.
This file should contain target-language values of the properties used in the component.
To see the supported properties, refer to the WEB-INF/classes/com/endeca/Resource_en.properties file already in the component.
Your file should contain a version of each of those messages in your target language.
4. Re-zip the .war file of the component and place it in the endeca-portal/deploy directory.
Liferay hot-deploys the component.
5. Repeat steps 1 through 4 for each component you want to enable for your target language.
6. Start Studio, then add your components, as well as the Language component, to the page.
7. In the Language component, click the flag associated with your target language.
Studio displays the component messages from your resource bundle in your target language.
In addition, because the portal itself is also localized, menus and other portal controls also appear inyour target language.
8. In the Language component, to switch back to English, click the United States flag.
Switching the locale of a componentStudio includes resources that you can use to switch a component's locale.
The Language component can be used to change the locale of a portlet.
There are also controls available in the Display Settings section of Liferay's Control Panel (as well asconfiguration properties in the portal.properties file) for setting the default container locale and theavailable locales.
For full details on using these Liferay features, see the Liferay Portal documentation.
Adding the Language component to your Studio applicationThe Language component is the recommended method for selecting a different language in which to displayStudio.
To add the Language component and select a different language:
1. Point the cursor at the Dock in the upper-right corner of the page.
Oracle® Endeca Information Discovery: Studio Developer's Guide Version 2.3.0 • April 2012
Localizing Studio 36
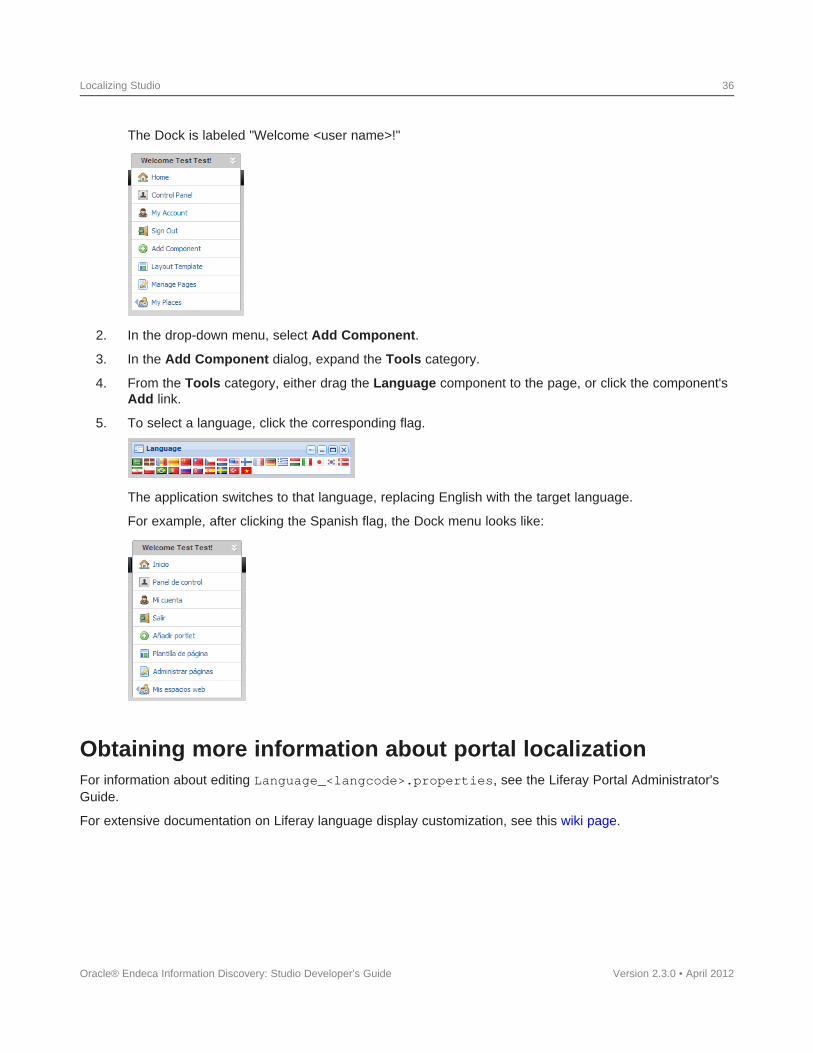
The Dock is labeled "Welcome <user name>!"
2. In the drop-down menu, select Add Component.
3. In the Add Component dialog, expand the Tools category.
4. From the Tools category, either drag the Language component to the page, or click the component'sAdd link.
5. To select a language, click the corresponding flag.
The application switches to that language, replacing English with the target language.
For example, after clicking the Spanish flag, the Dock menu looks like:
Obtaining more information about portal localizationFor information about editing Language_<langcode>.properties, see the Liferay Portal Administrator'sGuide.
For extensive documentation on Liferay language display customization, see this wiki page.
Oracle® Endeca Information Discovery: Studio Developer's Guide Version 2.3.0 • April 2012
Index
localizationBadding a translation to a component 34
build process and localization 32 adding the Language component 35build process 32component-specific messages 30Cincluding common externalized strings 30
class summary non-Unicode example 31Security Manager 3 of shared libraries 33State Manager 6 setting components up for 29
components switching locales 35adding localized message strings to 34 using tokens in message strings 31adding to WebLogic .ear file 13and localization 32 Nbuilding and testing 13component-specific messages for non-Unicode characterslocalization 30 guidelines for working with 31creating 12development overview 11 Oremoving from WebLogic .ear file 13
overview of component development 12setting up for localization 29switching locales 35
Component SDK Qabout 10 QueryFunction classesconfiguring 10 adding jars to the Eclipse build path 27configuring Eclipse for 11 creating custom 25downloading 10 deploying custom 26modifying enhancements to 13 implementing custom 26
QueryFunctionsD provided filter classes 15provided QueryConfig functions 19data sources, obtaining results from 27
data source state, managing 6SDiscovery taglib 33
Security Managerabout 3Eclass summary 3
Eclipse creating 4adding jars for custom QueryFunctions 27 implementing 5configuring classpath variables 11 using 5importing the Component SDK project 12
shared libraries, localizing 33Ext JS licensing requirement 1
State Managerclass summary 6
L creating 7implementing 7Language component, adding 35using 9
LanguageUtilscalling static methods from the JSP 33instantiating from Java/JSP 34 Tretrieving all messages at once 34 taglib use in localization 33using from JSP 34
tokens in message strings 31licensing Ext JS 1
Oracle® Endeca Information Discovery: Studio Developer's Guide Version 2.3.0 • April 2012


