Introduction These installation instructions are for use with Oracle 8i Personal Edition and for Forms Developer 6i as downloaded from the Oracle web site. The instructions apply to PC installation only. This guide does not reproduce all screens that you see, just the main ones. Other dialogue boxes may pop up which will require you to click on the OK button. It is recommended that you read through these instructions prior to starting to install. During the installation system supplied user names and passwords will be displayed on one of the screens. You should make a note of these (particularly the SYSTEM user name and password) as you will require them for initial access to Oracle in order to create users and passwords for your students. They are not reproduced here for security purposes. Note that the version of Oracle 8i Personal Edition that can be downloaded from the Oracle web site is for Windows NT and 2000, but can successfully be installed on Windows XP. These instructions have been written using windows XP as the operating system. If you install on windows XP there will be some elements such as Web forms that cannot be installed. This will not affect the rest of the installation. However you will have a program group created in Windows XP that refers to NT and you will need to use this to configure the database. Installation of Oracle 8i Begin by running the installer for Oracle. You can do this by double clicking on setup.exe. This will automatically give you the Welcome screen.
Transcript
Introduction
These installation instructions are for use with Oracle 8i Personal Edition and for Forms Developer 6i as downloaded from the Oracle web site. The instructions apply to PC installation only.
This guide does not reproduce all screens that you see, just the main ones. Other dialogue boxes may pop up which will require you to click on the OK button. It is recommended that you read through these instructions prior to starting to install.
During the installation system supplied user names and passwords will be displayed on one of the screens. You should make a note of these (particularly the SYSTEM user name and password) as you will require them for initial access to Oracle in order to create users and passwords for your students. They are not reproduced here for security purposes.
Note that the version of Oracle 8i Personal Edition that can be downloaded from the Oracle web site is for Windows NT and 2000, but can successfully be installed on Windows XP. These instructions have been written using windows XP as the operating system. If you install on windows XP there will be some elements such as Web forms that cannot be installed. This will not affect the rest of the installation. However you will have a program group created in Windows XP that refers to NT and you will need to use this to configure the database.
Installation of Oracle 8i
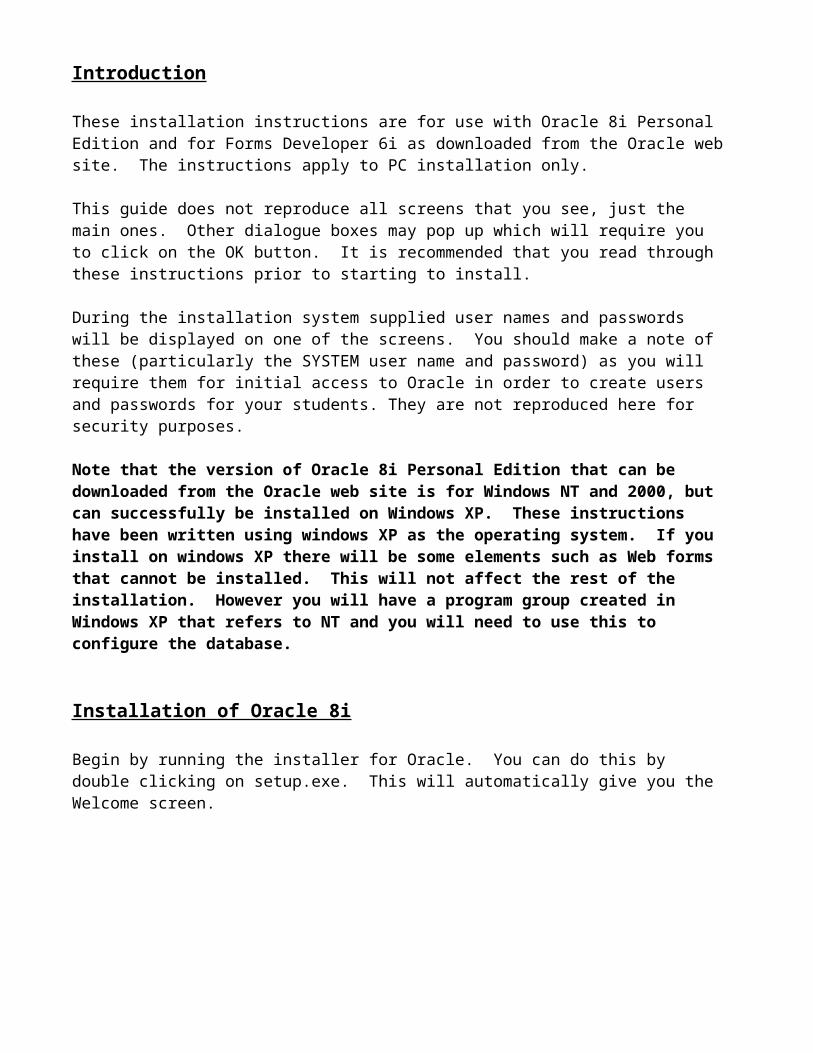
Begin by running the installer for Oracle. You can do this by double clicking on setup.exe. This will automatically give you the Welcome screen.
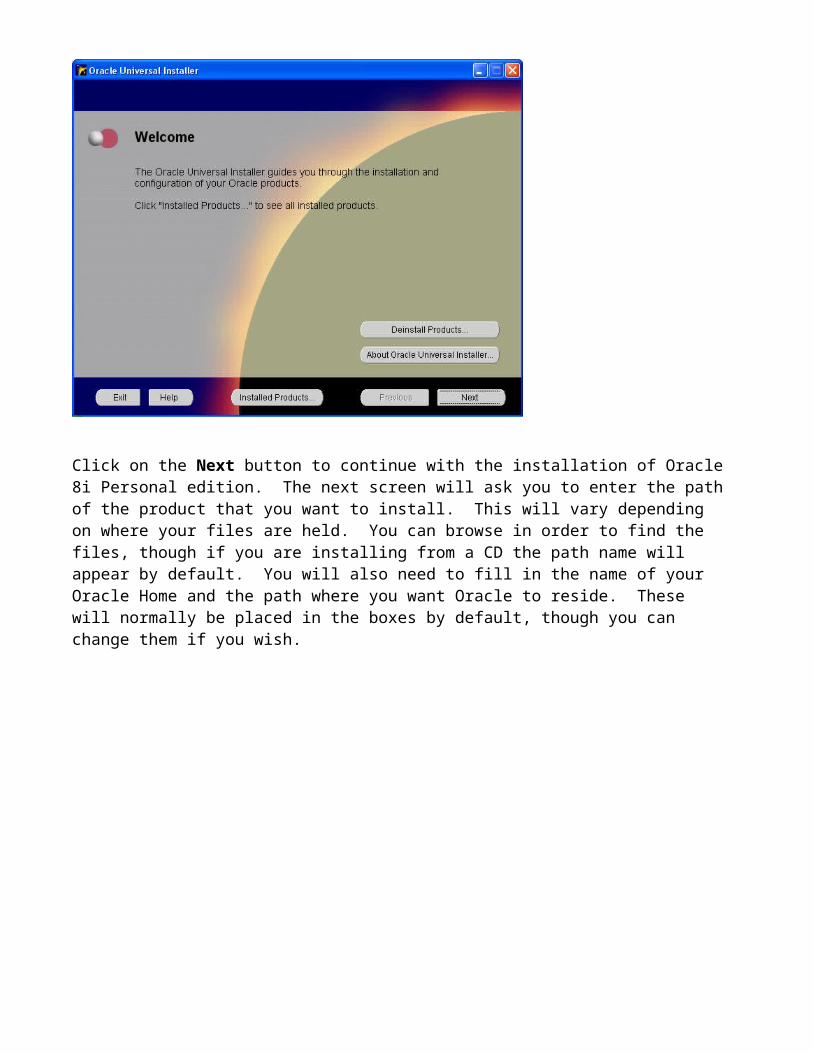
Click on the Next button to continue with the installation of Oracle 8i Personal edition. The next screen will ask you to enter the path of the product that you want to install. This will vary depending on where your files are held. You can browse in order to find the files, though if you are installing from a CD the path name will appear by default. You will also need to fill in the name of your Oracle Home and the path where you want Oracle to reside. These will normally be placed in the boxes by default, though you can change them if you wish.
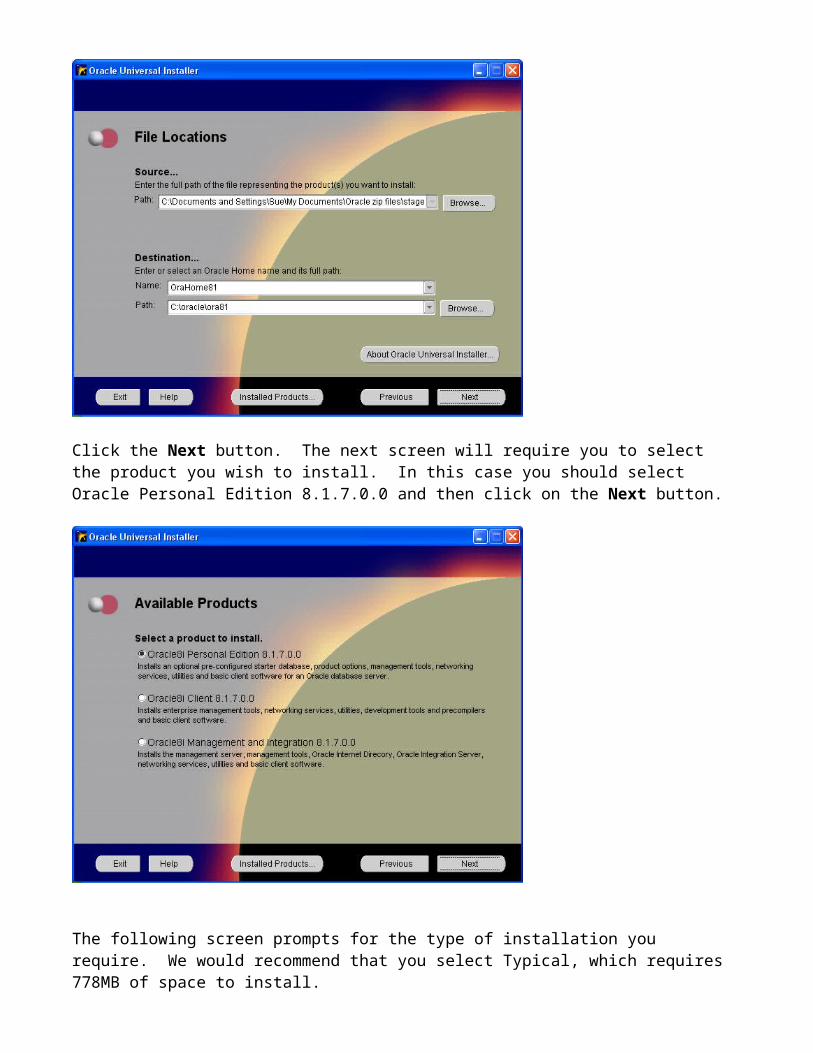
Click the Next button. The next screen will require you to select the product you wish to install. In this case you should select Oracle Personal Edition 8.1.7.0.0 and then click on the Next button.
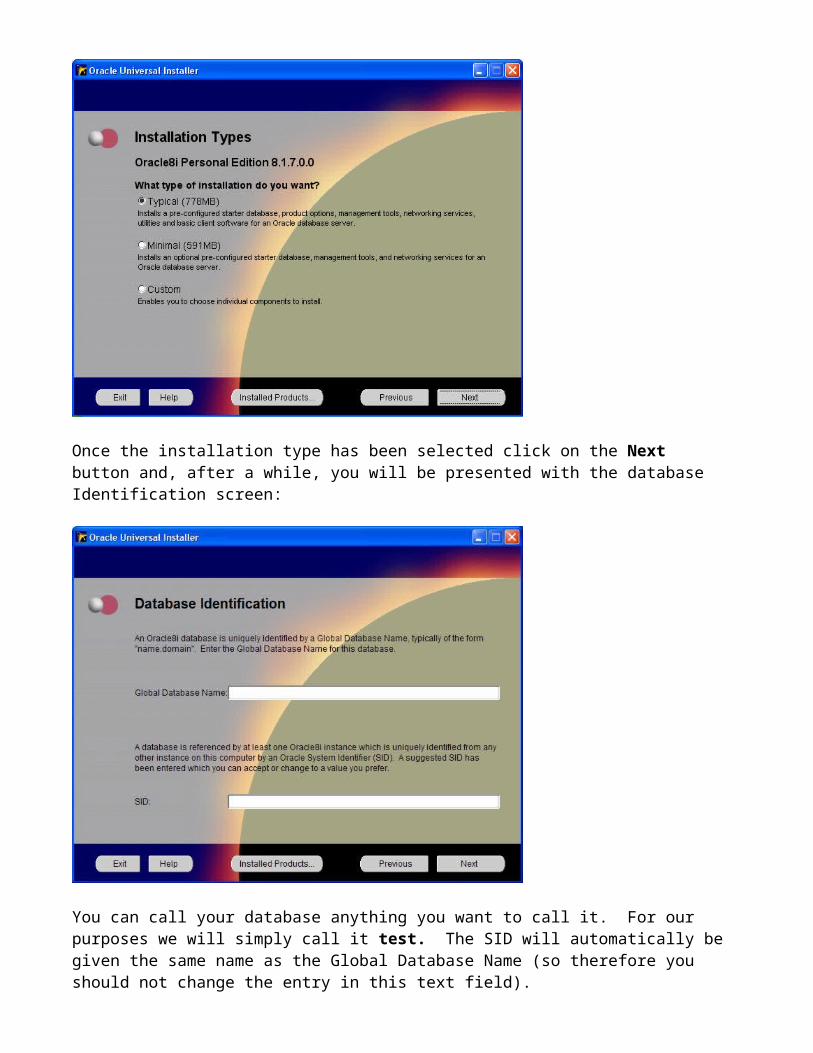
The following screen prompts for the type of installation you require. We would recommend that you select Typical, which requires 778MB of space to install.
Once the installation type has been selected click on the Next button and, after a while, you will be presented with the database Identification screen:
You can call your database anything you want to call it. For our purposes we will simply call it test. The SID will automatically be given the same name as the Global Database Name (so therefore you should not change the entry in this text field).
Make a note of these names as you will need them later to configure the database to run with Forms.
Once you have filled in these details click on Next and you will see a summary screen.Click on Install and the installation process will begin. The installation will take some time so please be patient.
Once all files have been installed you will see a Configuration Assistant Alert which will display the Global Database Name and SID. It is strongly recommended that you take a note of all of these details shown on this screen. Click OK to continue and you should see a successful installation screen. You can then click Exit.
An http server will automatically start up at the end of installation. Close down this screen ready to install Developer 6i.
Installation of Developer 6i
Once again you need to run the installer provided with Developer 6i, by double clicking on the setup.exe application in the Developer folder. This looks a little different from the Oracle 8i installer.
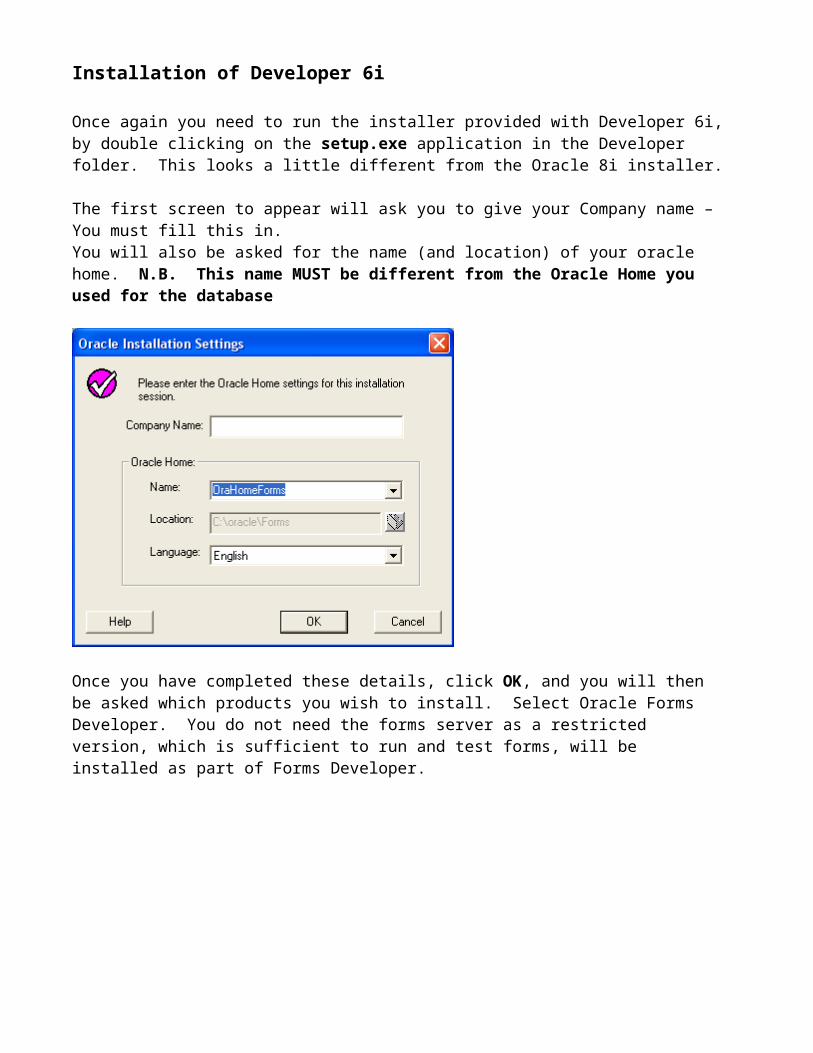
The first screen to appear will ask you to give your Company name – You must fill this in.You will also be asked for the name (and location) of your oracle home. N.B. This name MUST be different from the Oracle Home you used for the database
Once you have completed these details, click OK, and you will then be asked which products you wish to install. Select Oracle Forms Developer. You do not need the forms server as a restricted version, which is sufficient to run and test forms, will be installed as part of Forms Developer.
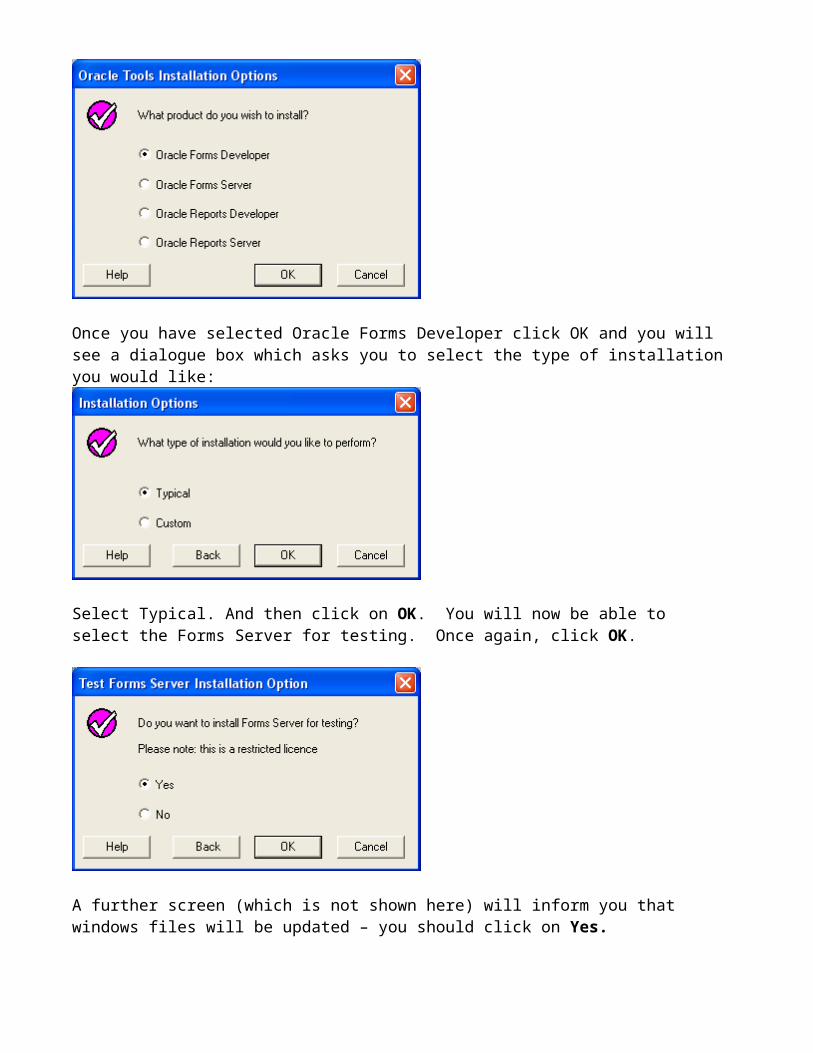
Once you have selected Oracle Forms Developer click OK and you will see a dialogue box which asks you to select the type of installation you would like:
Select Typical. And then click on OK. You will now be able to select the Forms Server for testing. Once again, click OK.
A further screen (which is not shown here) will inform you that windows files will be updated – you should click on Yes.
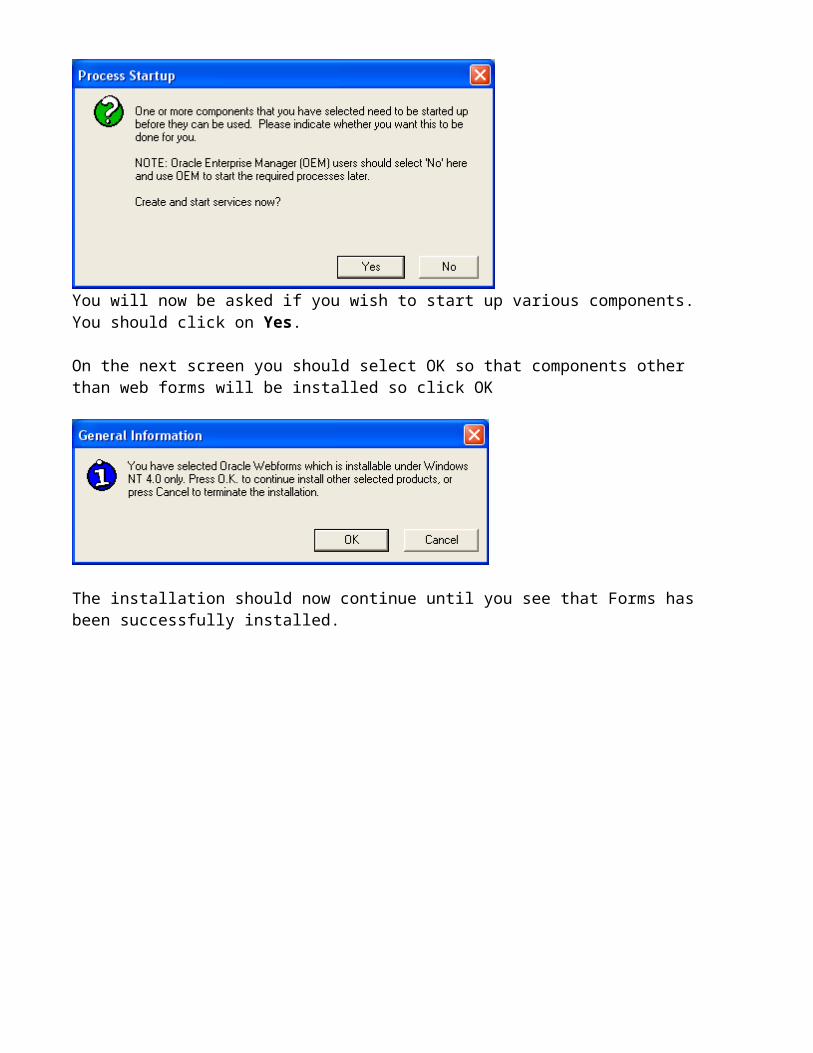
You will now be asked if you wish to start up various components. You should click on Yes.
On the next screen you should select OK so that components other than web forms will be installed so click OK
The installation should now continue until you see that Forms has been successfully installed.
Configuring the database
Now that you have successfully installed both the Oracle 8i database and Forms Developer 6i, you need to configure the database so that they talk to each other. The easiest way to achieve this is through the Net8 Easy Configuration assistant.
Oracle Net 8 Easy Configuration Assistant.
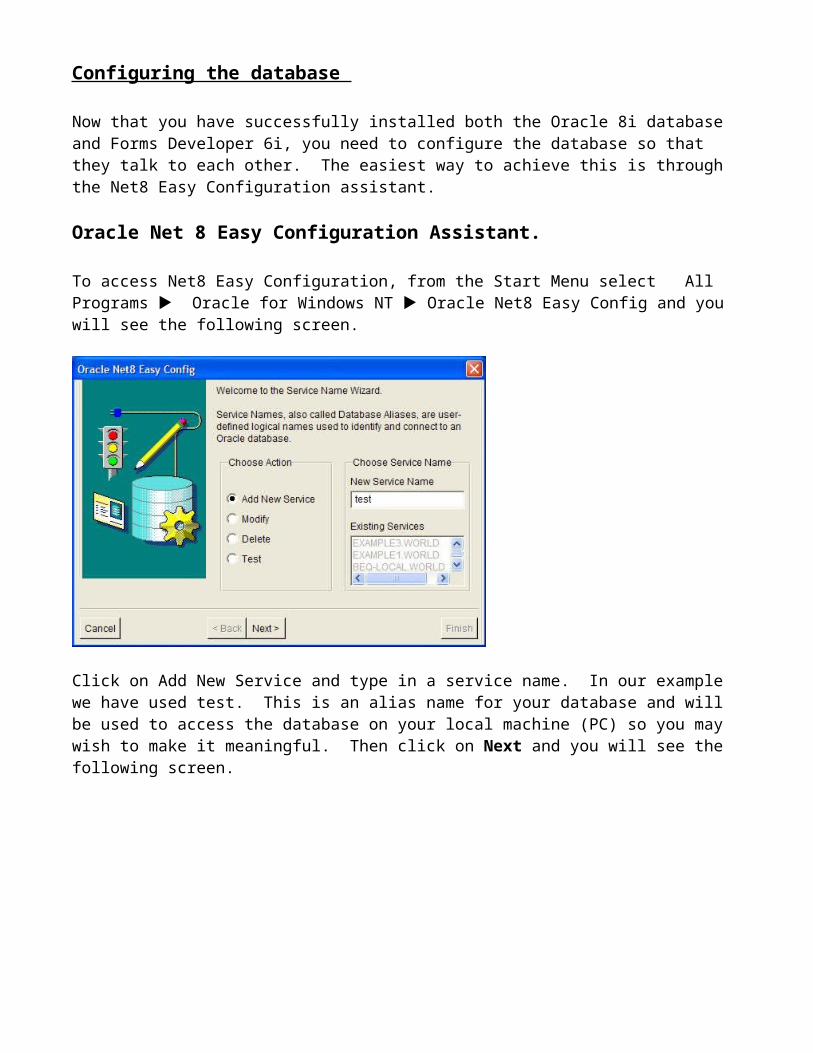
To access Net8 Easy Configuration, from the Start Menu select All Programs Oracle for Windows NT Oracle Net8 Easy Config and you will see the following screen.
Click on Add New Service and type in a service name. In our example we have used test. This is an alias name for your database and will be used to access the database on your local machine (PC) so you may wish to make it meaningful. Then click on Next and you will see the following screen.
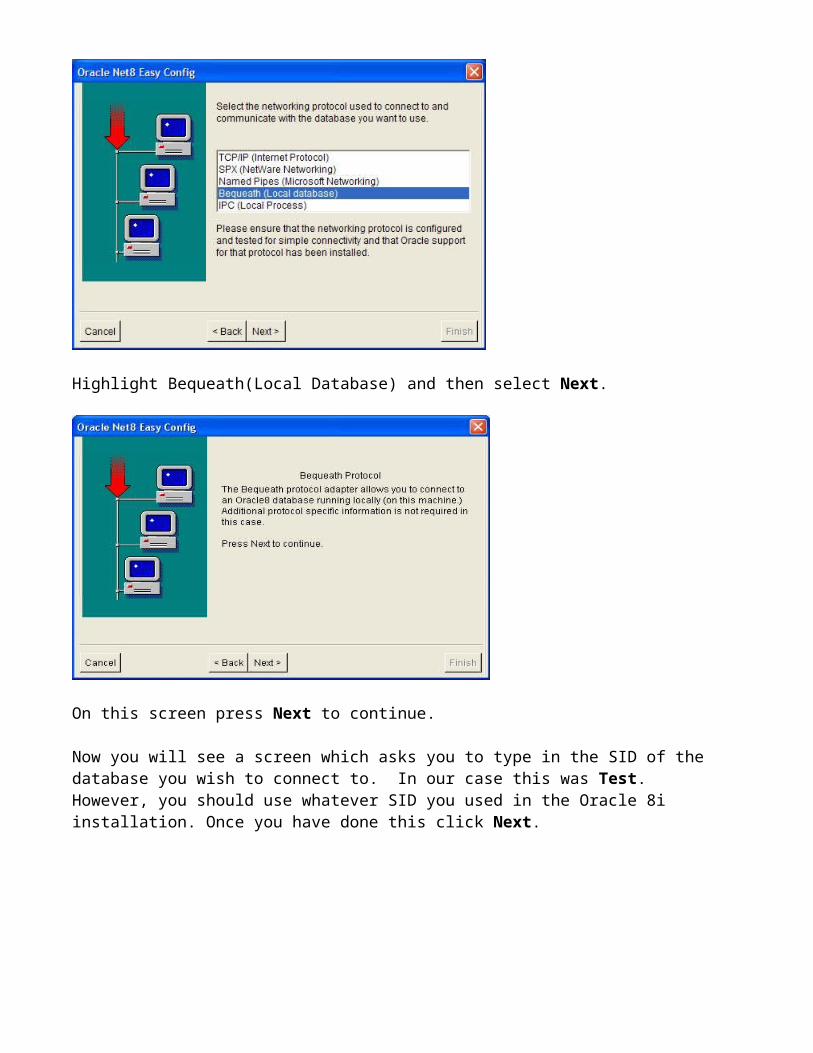
Highlight Bequeath(Local Database) and then select Next.
On this screen press Next to continue.
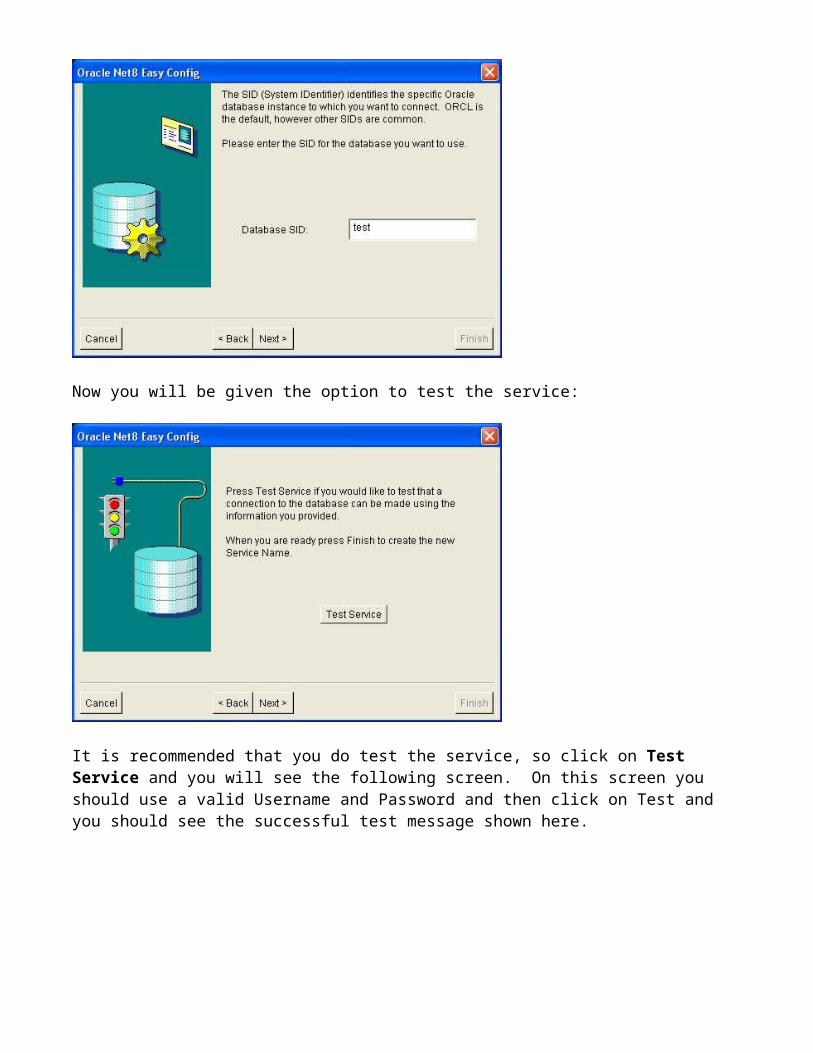
Now you will see a screen which asks you to type in the SID of the database you wish to connect to. In our case this was Test. However, you should use whatever SID you used in the Oracle 8i installation. Once you have done this click Next.
Now you will be given the option to test the service:
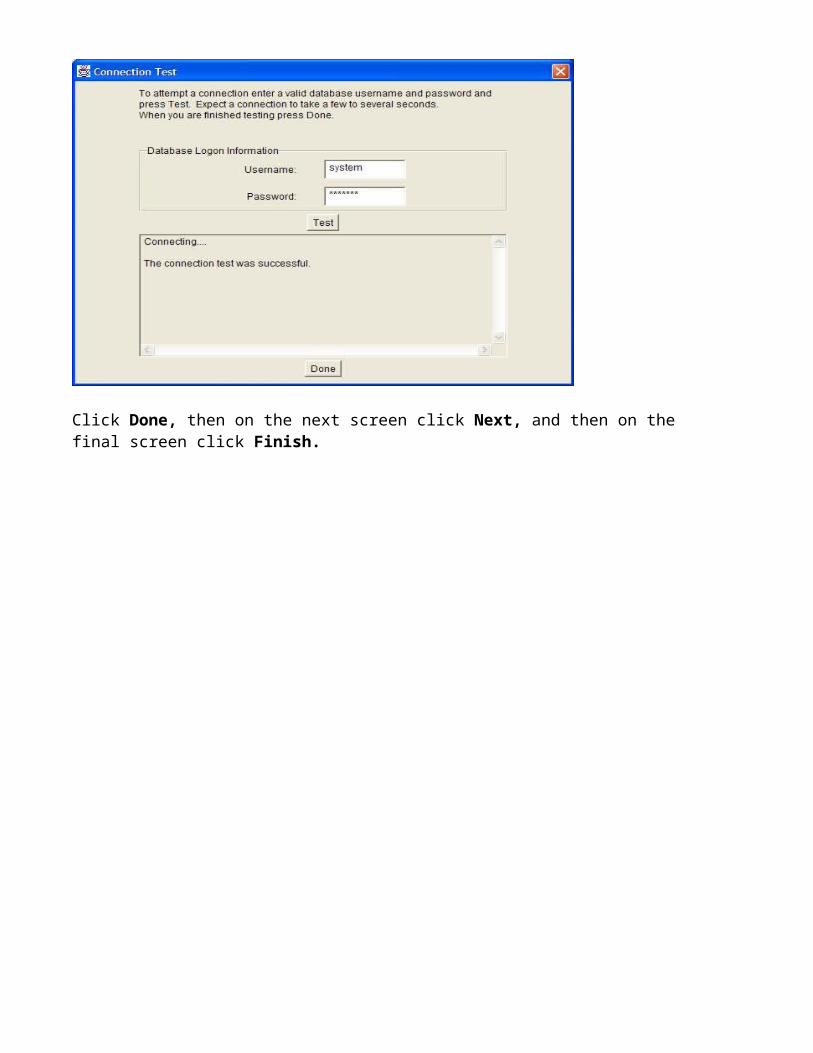
It is recommended that you do test the service, so click on Test Service and you will see the following screen. On this screen you should use a valid Username and Password and then click on Test and you should see the successful test message shown here.
Click Done, then on the next screen click Next, and then on the final screen click Finish.
Using SQL and Forms Developer
N.B. It is assumed that you are familiar with SQL and with how to build forms.
However, it is recommended that you test SQL at this point. From the Start Menu, select All Programs and then Oracle for Windows NT and then SQL Plus 8.0. You should see the Oracle Logon Screen:
In this you should type the SYSTEM User name with its password. The host string is required and is the alias name (or Service Name) that you inserted when configuring the database. On successfully logging on you will see the following SQL screen with the SQL prompt.
You can now create users and enter SQL commands. It is suggested that you run the supplied SQL script to create users for your database at this point. When you have done this, log off, and then log on again as one of the test users supplied to ensure that they are working correctly.
As a final task within SQL you will need to ensure that the property.sql file is run to automatically create the tables and data required for students to work through the Units.
To test that Forms Developer is working OK, it is recommended that you start forms, and create a basic form using the tables supplied in the property.sql file. From the Start Menu, select All Programs and then Oracle Forms 6i and then Forms Builder. Log on to forms using one of the supplied test user accounts and the Database Name (Select File from the Menu and then Connect to do this) and ensure that a form can be created and run successfully.