2.2 PRE-INSTALLATION TASKS AND CONSIDERATIONS .............................................................. 6
2.2.1 Steps to set the environment for FileNet Adapter...................................................... 6
2.2.2 Installing the Adapter files.......................................................................................... 6
2.3 POST-INSTALLATION TASKS AND CONSIDERATIONS .......................................................... 11
2.3.1 Database setup for URM ......................................................................................... 11
2.3.2 Setting up Environment Variables ........................................................................... 11
2.3.3 Adding Custom Object Class and Folder................................................................. 11
2.3.4 Enable removal of documents from URM (Audit Trail) ............................................ 26
Oracle Universal Records Manager Adapter for FileNet Installation Guide 3 of 31
1 Installation Overview
1.1 Overview
This section contains the following topics:
• About This Guide • About Universal Records Manager • Software Requirements • Optional Hardware
Oracle Universal Records Manager Adapter for FileNet Installation Guide 4 of 31
1.2 About the guide
This guide provides instructions on how to install FileNet Adapter on a computer running on Microsoft Windows.
Before proceeding with the installation, make sure that you read the release note that is shipped with the software. It contains up-to-the-minute installation issues and considerations.
1.2.1 Audience
This guide is intended for system administrators who need to run and configure FileNet adapter.
1.2.2 Conventions
The following conventions are used throughout this guide:
• Forward slashes (/) are used to separate parts of an Internet address. For example, http://www.oracle.com/en/index.htm. A forward slash might or might not appear at the end of an Internet address.
• Backward slashes (\) are used to separate the levels in a path to a Windows server, directory, or file. For example, C:\stellent\idcm1\. A backward slash will always appear after the end of a Windows server, directory, or file path.
• File names and file paths within text are indicated by the following convention: <filename> file in the <path_to_directory> directory.
• Script names follow the convention: <script name>. • Variable and class names are indicated by the following convention “classname”,
“variablename”. • Notes, technical tips, important notices, and cautions use these conventions:
Oracle Universal Records Manager Adapter for FileNet Installation Guide 5 of 31
1.3 About Universal Record Manager (URM):
Oracle Universal Records Manager (URM) provides the ability to perform records management, retention management, and litigation support across the entire enterprise. From a single Oracle URM server, organizations can define all their policies for records and retention management, as well as perform legal searches and apply litigation holds. URM allows organizations to manage their records and retention policies, disposition processes, and litigation or audit holds in a central repository known as a URM Server. They can then apply those policies, dispositions, and holds to content stored in multiple repositories through URM adapters. The repositories can be any server or application that holds content whose retention is to be controlled.
1.4 Software Requirements
1.4.1 Supported Databases The current version of the Adapter supports the following databases: Oracle 9i with the following patch: 9.2.0.4.0- 3262468(OLEDB Patch) SQL server 2000 with the service pack 4 (SP4)
1.4.2 Compatibility with URM and Content Server Currently, the Oracle URM Adapter communicates with Oracle Universal Records Manager 10gR3 (10.1.3.3.2). Currently, this version of URM is supported only on Oracle Content Server versions 10gR3 (10.1.3.3.2) and later.
1.4.4 FileNet Server FileNet content engine 3.5 should be installed. The details of the database along with
required patched has been mentioned above in Section 1.4.1.FileNet CE 3.5 runs only on Windows and hence this adapter cannot be used on Linux systems.
Oracle Universal Records Manager Adapter for FileNet Installation Guide 6 of 31
2 Installing Oracle URM Adapter for FileNet
2.1 Overview
This document contains the installation detail of the Universal Records Management adapter for providing record and retention management for FileNet. The Oracle URM Adapter for FileNet obtains all policies from the URM server and applies them to the content items stored in FileNet. The Adapter provides the bridge between URM which manages the retention policies and FileNet which stores the content. The Adapter also sends information back to the URM server, so it can maintain an up-to-date catalog of the enterprise's important content. Thus, companies can apply their records and retention policies to content, more consistently, with less administrative effort, and less disruption for users. This document will help administrators at the users end to configure and set up this adapter on the system.
2.2 Pre-Installation Tasks and Considerations
2.2.1 Steps to set the environment for FileNet Adapter o Install JDK 1.5
2.2.2 Installing the Adapter files
The following are the steps that need to be followed to use the installer for installing the adapter on the user’s machine:
For Windows Machine: o Double click on FileNet Adapter installer (exe file) to start installation. o The Install shield wizard dialog box opens as below.
Oracle Universal Records Manager Adapter for FileNet Installation Guide 7 of 31
o Click on the “Next” button to start with the installation steps
Oracle Universal Records Manager Adapter for FileNet Installation Guide 8 of 31
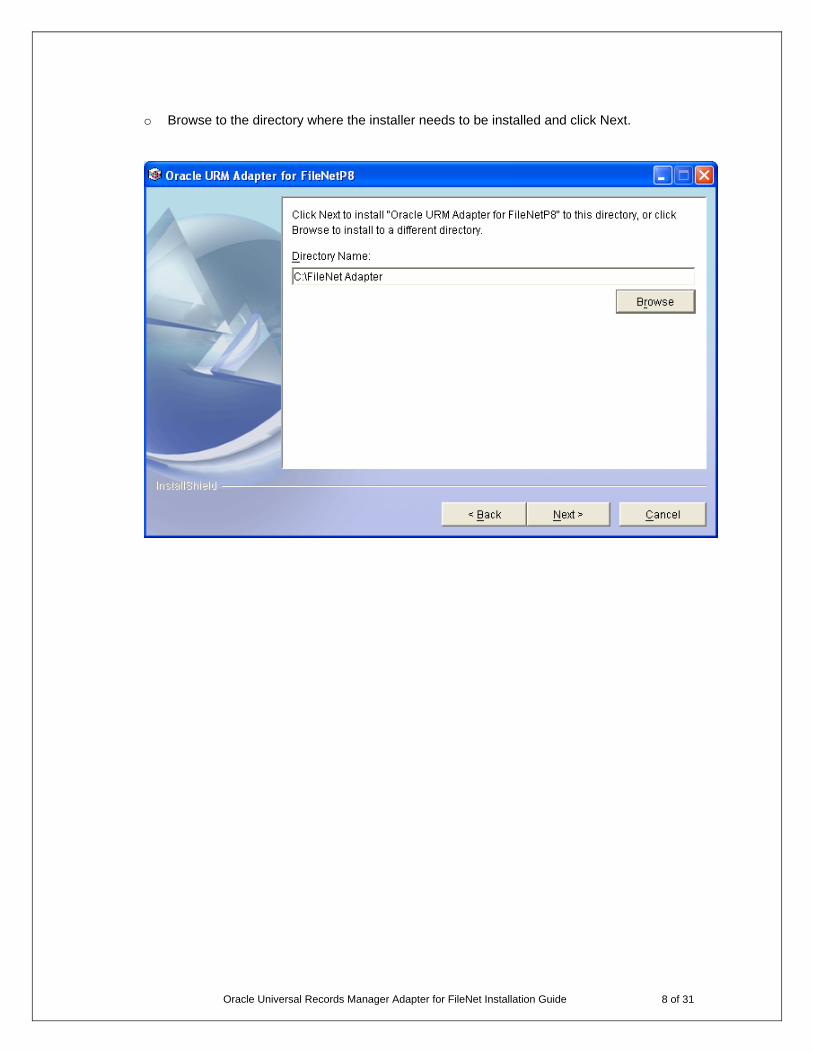
o Browse to the directory where the installer needs to be installed and click Next.
Oracle Universal Records Manager Adapter for FileNet Installation Guide 9 of 31
o A summary is provided as shown below. Click Next.
Oracle Universal Records Manager Adapter for FileNet Installation Guide 10 of 31
o The dialog box shows the progress as the Adapter is installed.
Oracle Universal Records Manager Adapter for FileNet Installation Guide 11 of 31
After clicking the finish button the installer will copy all the adapter related files in the specified folder.
If you want to uninstall the files from the folder, click the uninstaller.exe in the _uninst folder.
2.3 Post-Installation Tasks and Considerations
2.3.1 Database setup for URM
Execute the Database scripts to create the tables related to URM adapter. Run the following scripts (depending on the database being used is oracle or MSSQL):
o <Adapter_Oracle.sql> or <Adapter_MS.sql >
o <Framework_Oracle.sql> or <Framework_MS.sql> These scripts are present in the ‘scripts’ folder of the installed directory of FileNet Adapter.
2.3.2 Setting up Environment Variables
o Add activation.jar, javaapi.jar, log4j-1.2.14.jar, mail.jar, pe.jar, peResources.jar, soap.jar, xalan.jar, xercesImpl.jar, xml-apis.jar in the lib/FileNet folder inside the installed directory of FileNet Adapter. These jars are FileNet specific jars which can be obtained from the folder where FileNet Application Engine is installed on the server (E.g.: C:\Program Files\FileNet\Workplace\WebINF\lib folder).
o Add Database driver for java:-
MS SQL Driver: - sqljdbc.jar in lib/microsoft folder inside the installed directory of the FileNet Adapter.
o Add the ‘WcmApiConfig.properties’ file in the root folder of the installed directory of FileNet Adapter. This properties file can be obtained from the location where FileNet Application Engine is installed (E.g.: C:\Program Files\FileNet\Workplace\WebINF folder)
2.3.3 Adding Custom Object Class and Folder Whenever a document is frozen or marked as a record through Oracle URM, a custom object is created in FileNet CE. The custom object contains three properties: - ‘isFrozen’ ‘isRecord’ and ‘DocId’. A custom object needs to be defined in FileNet CE to achieve the desired functionality. A custom folder needs to be created in FileNet CE to store all the custom objects which are created when the documents are frozen or marked as a record.
Oracle Universal Records Manager Adapter for FileNet Installation Guide 12 of 31
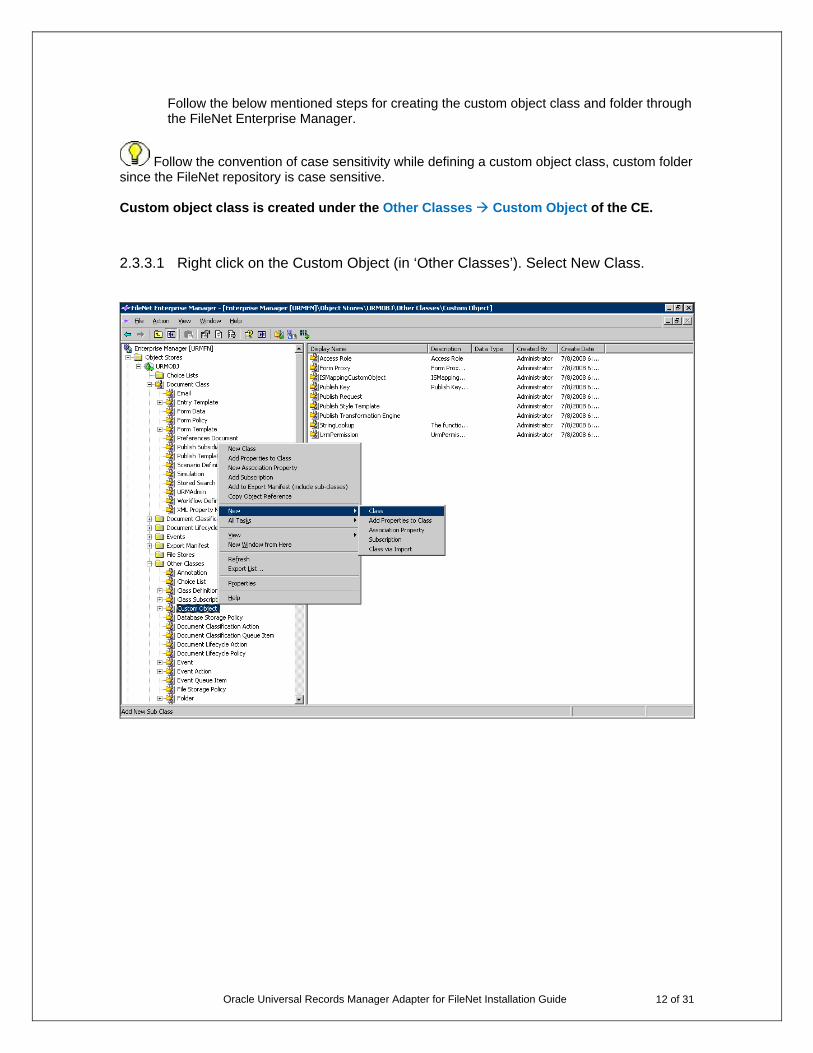
Follow the below mentioned steps for creating the custom object class and folder through the FileNet Enterprise Manager.
Follow the convention of case sensitivity while defining a custom object class, custom folder since the FileNet repository is case sensitive. Custom object class is created under the Other Classes Custom Object of the CE.
2.3.3.1 Right click on the Custom Object (in ‘Other Classes’). Select New Class.
Oracle Universal Records Manager Adapter for FileNet Installation Guide 13 of 31
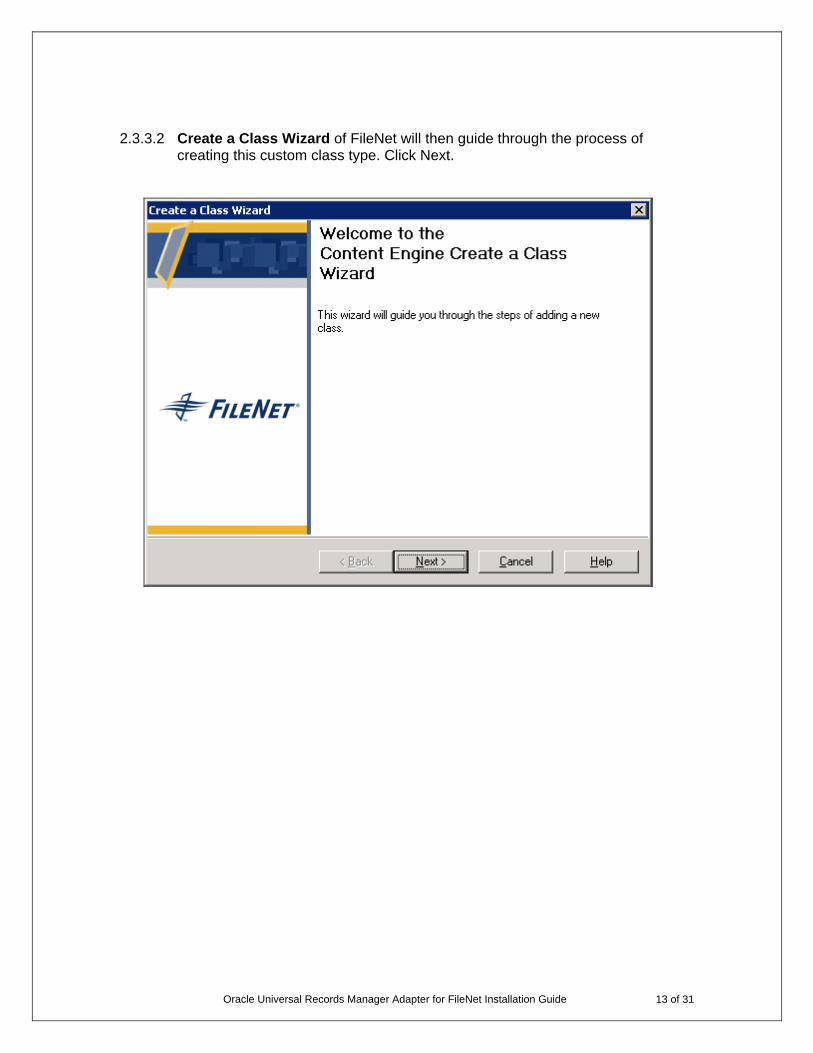
2.3.3.2 Create a Class Wizard of FileNet will then guide through the process of creating this custom class type. Click Next.
Oracle Universal Records Manager Adapter for FileNet Installation Guide 14 of 31
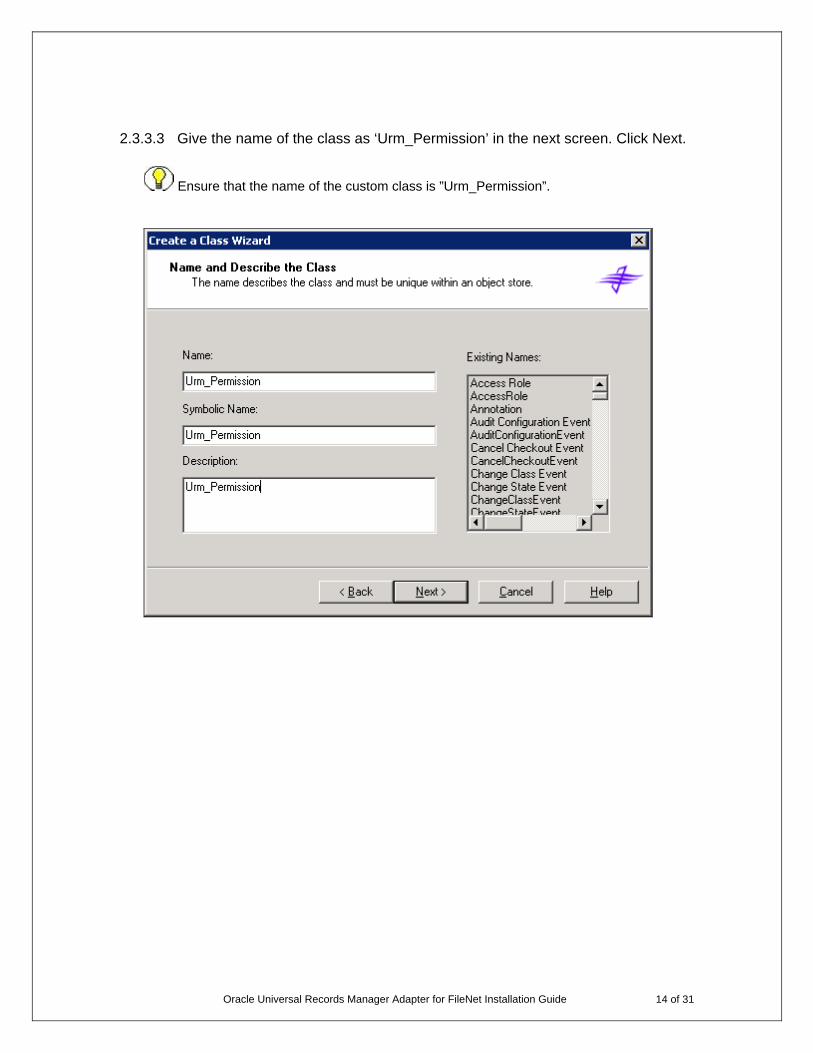
2.3.3.3 Give the name of the class as ‘Urm_Permission’ in the next screen. Click Next.
Ensure that the name of the custom class is ”Urm_Permission”.
Oracle Universal Records Manager Adapter for FileNet Installation Guide 15 of 31
2.3.3.4 Next screen will show all the available properties that can be assigned to this custom object. For creating a new property, click on New button in right lower corner.
Oracle Universal Records Manager Adapter for FileNet Installation Guide 16 of 31
2.3.3.5 A new window will open; give the property name as isFrozen. Click on Next button.
Oracle Universal Records Manager Adapter for FileNet Installation Guide 17 of 31
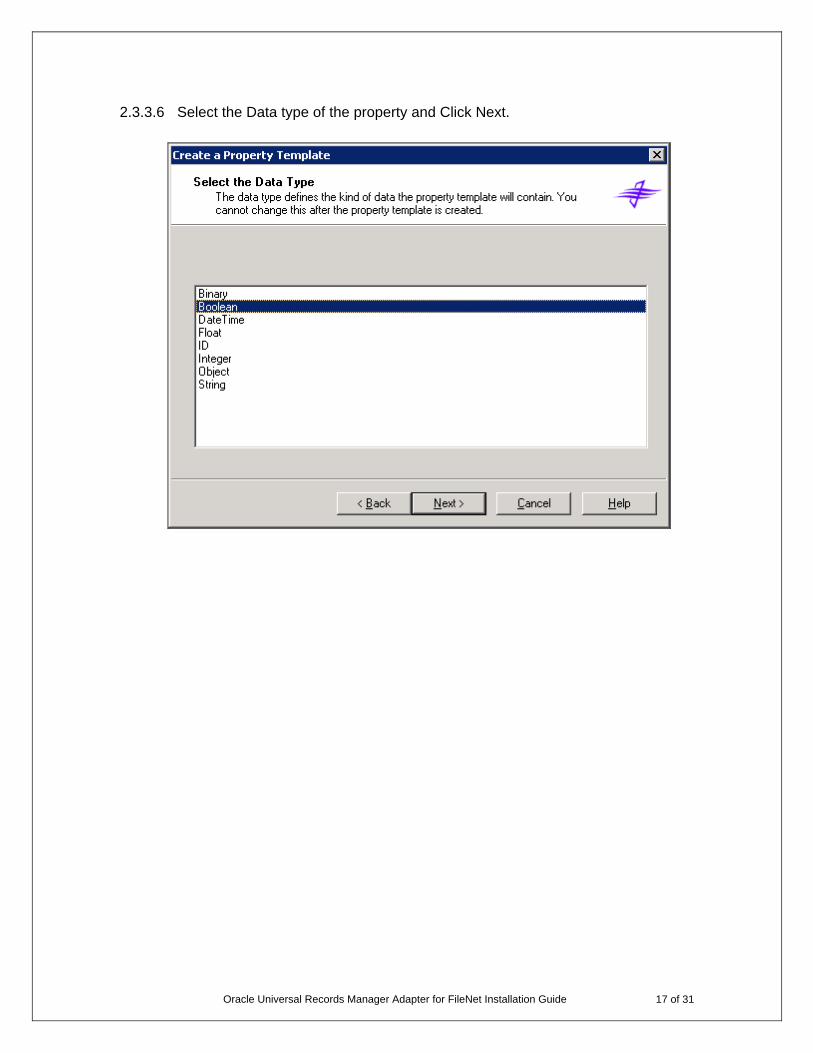
2.3.3.6 Select the Data type of the property and Click Next.
Oracle Universal Records Manager Adapter for FileNet Installation Guide 18 of 31
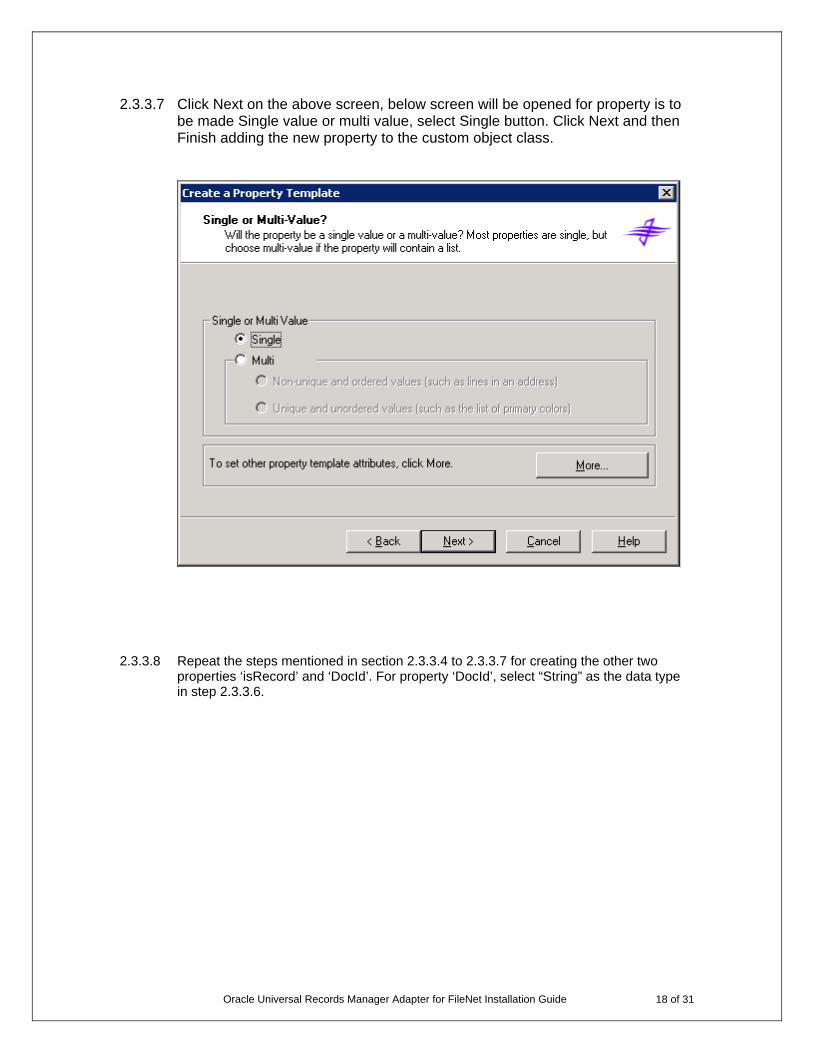
2.3.3.7 Click Next on the above screen, below screen will be opened for property is to be made Single value or multi value, select Single button. Click Next and then Finish adding the new property to the custom object class.
2.3.3.8 Repeat the steps mentioned in section 2.3.3.4 to 2.3.3.7 for creating the other two properties ‘isRecord’ and ‘DocId’. For property ‘DocId’, select “String” as the data type in step 2.3.3.6.
Oracle Universal Records Manager Adapter for FileNet Installation Guide 19 of 31
2.3.3.9 Continue to click Next, until the below screen appears. The last screen shows the details of the name and properties of the class. Click Finish to complete the process of creating the new custom object class.
Oracle Universal Records Manager Adapter for FileNet Installation Guide 20 of 31
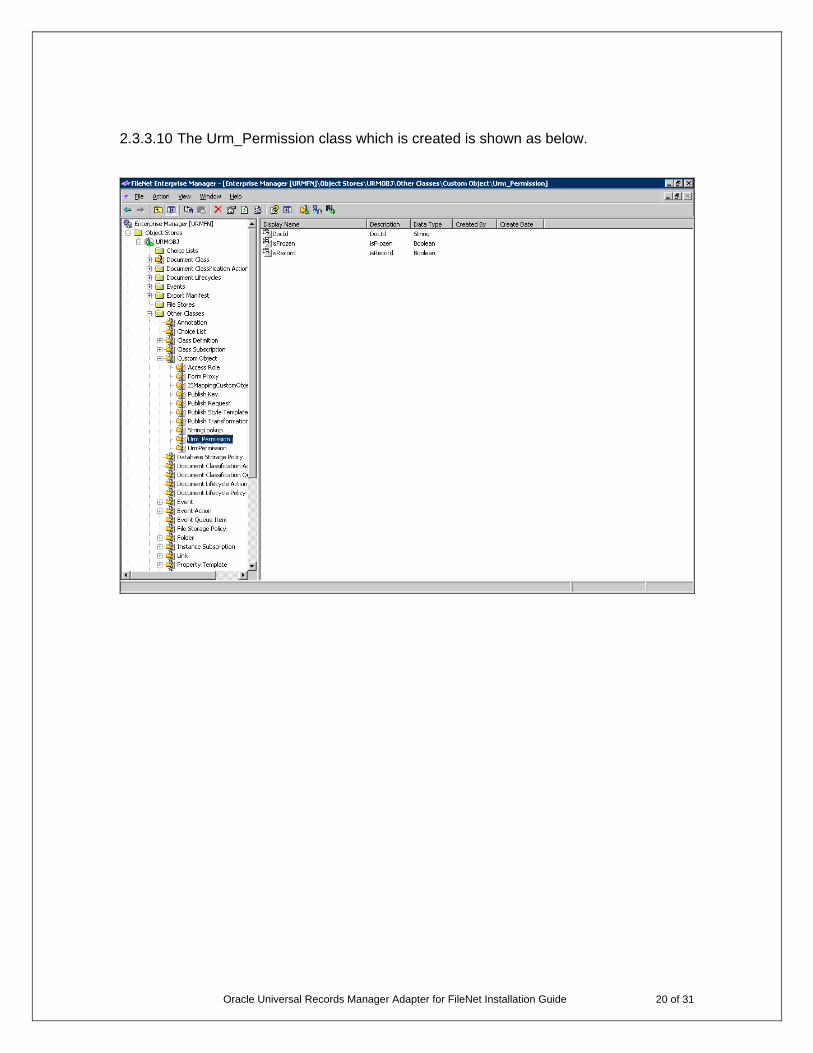
2.3.3.10 The Urm_Permission class which is created is shown as below.
Oracle Universal Records Manager Adapter for FileNet Installation Guide 21 of 31
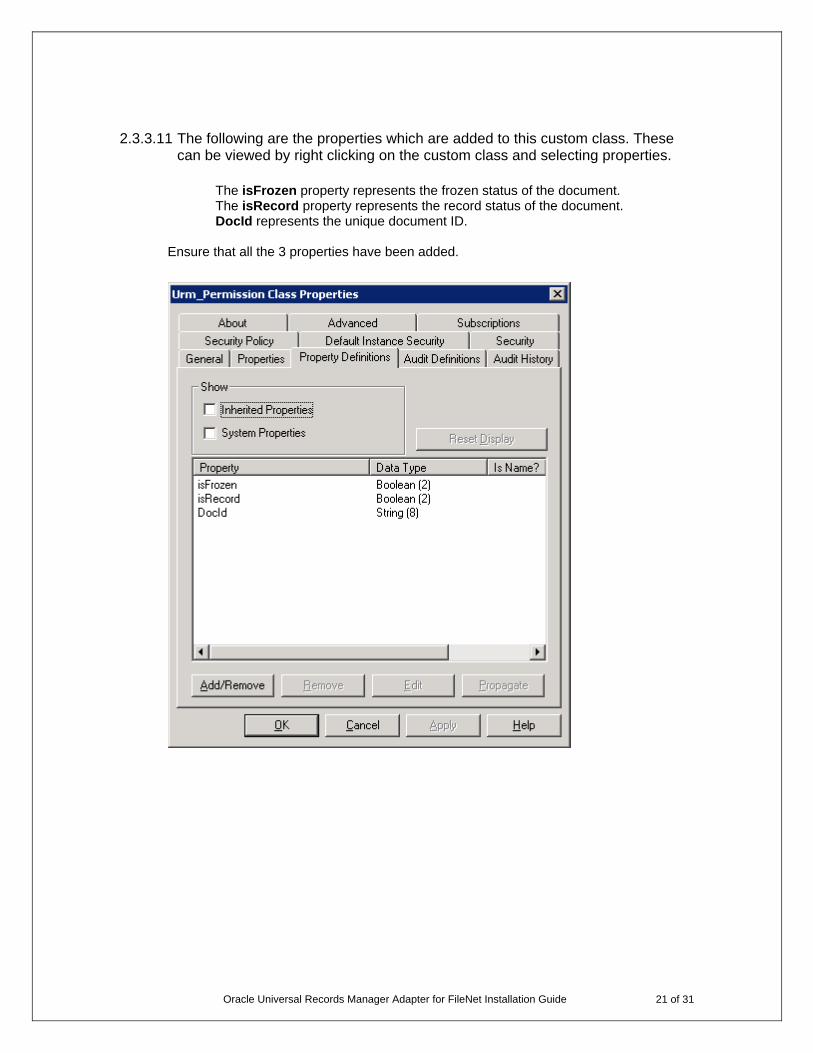
2.3.3.11 The following are the properties which are added to this custom class. These can be viewed by right clicking on the custom class and selecting properties.
The isFrozen property represents the frozen status of the document. The isRecord property represents the record status of the document. DocId represents the unique document ID.
Ensure that all the 3 properties have been added.
Oracle Universal Records Manager Adapter for FileNet Installation Guide 22 of 31
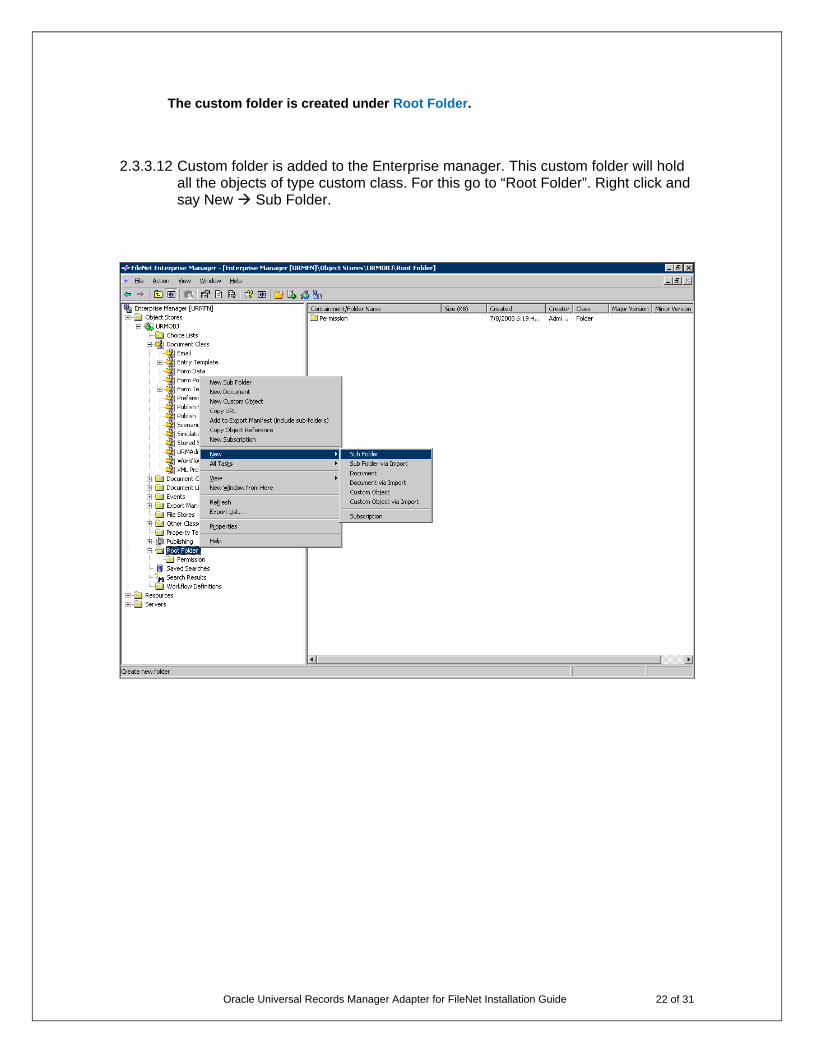
The custom folder is created under Root Folder.
2.3.3.12 Custom folder is added to the Enterprise manager. This custom folder will hold all the objects of type custom class. For this go to “Root Folder”. Right click and say New Sub Folder.
Oracle Universal Records Manager Adapter for FileNet Installation Guide 23 of 31
2.3.3.13 Provide the name of the folder as ‘Urm_Permission’. Click Next.
Ensure that the name of the custom folder is ”Urm_Permission”.
Oracle Universal Records Manager Adapter for FileNet Installation Guide 24 of 31
2.3.3.14 Click Next
Oracle Universal Records Manager Adapter for FileNet Installation Guide 25 of 31
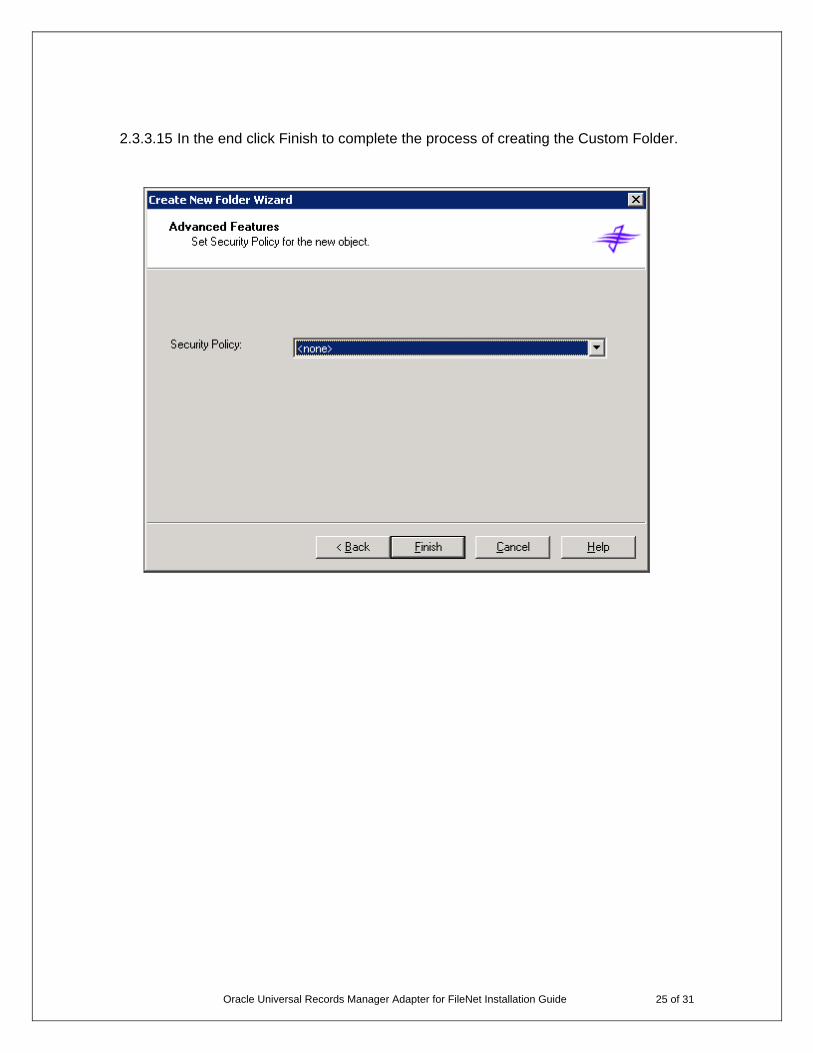
2.3.3.15 In the end click Finish to complete the process of creating the Custom Folder.
Oracle Universal Records Manager Adapter for FileNet Installation Guide 26 of 31
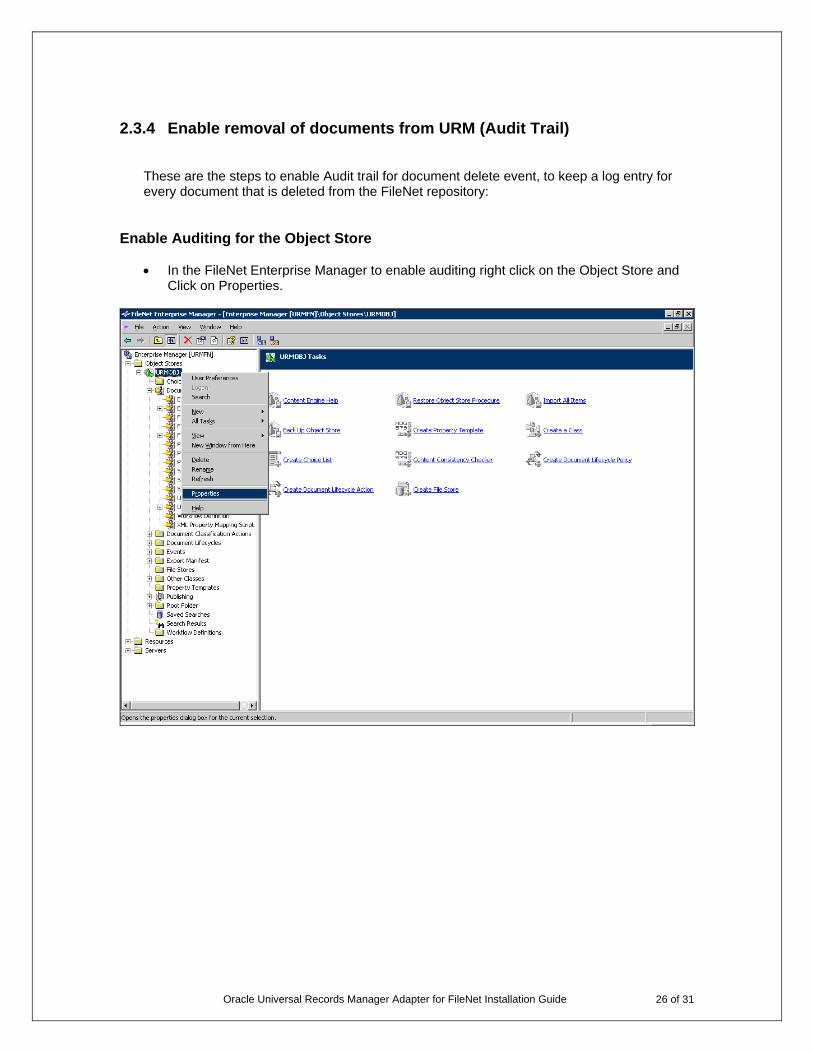
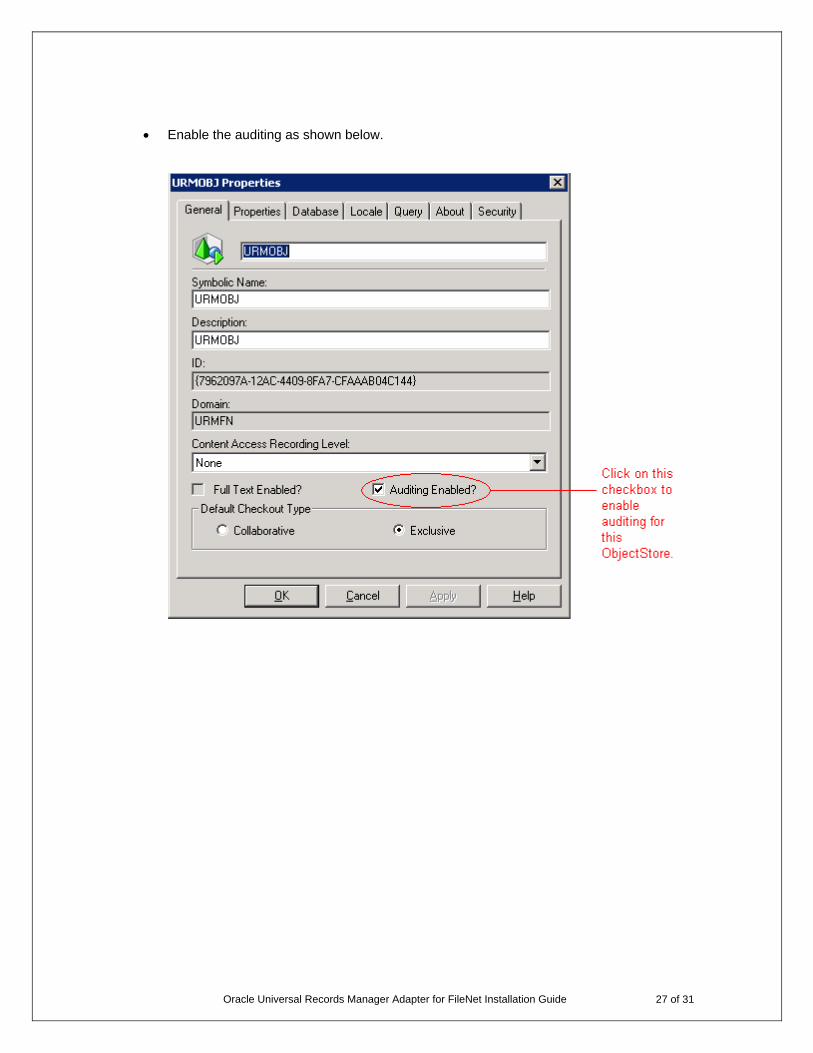
2.3.4 Enable removal of documents from URM (Audit Trail)
These are the steps to enable Audit trail for document delete event, to keep a log entry for every document that is deleted from the FileNet repository:
Enable Auditing for the Object Store • In the FileNet Enterprise Manager to enable auditing right click on the Object Store and
Click on Properties.
Oracle Universal Records Manager Adapter for FileNet Installation Guide 27 of 31
• Enable the auditing as shown below.
Oracle Universal Records Manager Adapter for FileNet Installation Guide 28 of 31
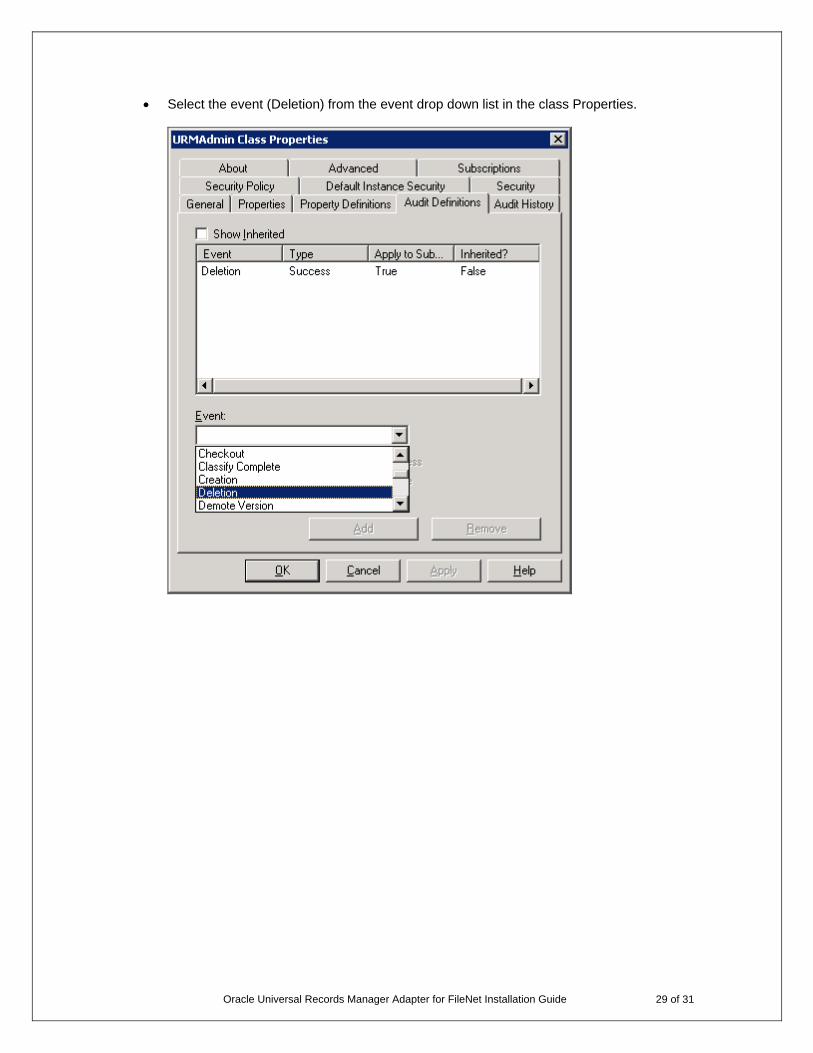
Register events to be audited
Next the “delete” event which needs to be audited has to be registered with the classes whose delete event has to be tracked.
• Right click on the Class for which this ‘Delete’ event has to be registered and select Properties.
Oracle Universal Records Manager Adapter for FileNet Installation Guide 29 of 31
• Select the event (Deletion) from the event drop down list in the class Properties.
Oracle Universal Records Manager Adapter for FileNet Installation Guide 30 of 31
• Now click on the Check box ‘Success’ to indicate that all successful deletion events of
documents this class type will be audited. In case the delete fails for some reasons the event will not be registered. Also Select ‘Apply to Subclasses‘to apply this auditing to all the subclasses of this particular class.
Oracle Universal Records Manager Adapter for FileNet Installation Guide 31 of 31
• The Audit Definition for the class now looks like this.
This auditing can be enabled for all the classes of ‘Document Class’ Type by in a similar way as above. Follow the steps as mentioned above. Make sure to select the ‘Apply to Subclasses’ checkbox to ensure that the auditing gets enabled for all the subclasses. This saves the task of individually enabling the auditing for all the classes.


![Integrated Liquidity Management Oracle FLEXCUBE Universal ... · Integrated Liquidity Management . Oracle FLEXCUBE Universal Banking . Release 12.0 [June] [2012] Oracle Part Number](https://static.documents.pub/doc/80x56/611cd6ededf83d76b801d24b/integrated-liquidity-management-oracle-flexcube-universal-integrated-liquidity.jpg)

![Mudarabah Creation Oracle FLEXCUBE Universal Banking ... · Mudarabah Creation Oracle FLEXCUBE Universal Banking Release 11.3.0 [May] [2011] Oracle Part Number E51511-01](https://static.documents.pub/doc/80x56/5d09b99b88c99339638b954b/mudarabah-creation-oracle-flexcube-universal-banking-mudarabah-creation.jpg)

![Mortgages Oracle FLEXCUBE Universal Banking Release 12.0.1… · 2013-12-19 · Mortgages . Oracle FLEXCUBE Universal Banking . Release 12.0.1.0.0 [January] [2013] Oracle Part Number](https://static.documents.pub/doc/80x56/5f448255fe8c3a08706116a9/mortgages-oracle-flexcube-universal-banking-release-1201-2013-12-19-mortgages.jpg)

![Millionaire Certificate Oracle FLEXCUBE Universal Banking ... · Millionaire Certificate . Oracle FLEXCUBE Universal Banking . Release 11.3.83.02.0 [April] [2014] Oracle Part Number](https://static.documents.pub/doc/80x56/5b93734609d3f2d9098d521d/millionaire-certificate-oracle-flexcube-universal-banking-millionaire-certificate.jpg)

![Istisna Creation Oracle FLEXCUBE Universal Banking · PDF fileIstisna Creation Oracle FLEXCUBE Universal Banking Release 11.3.0 [May] [2011] Oracle Part Number E51511-01](https://static.documents.pub/doc/80x56/5a86896c7f8b9a14748cda27/istisna-creation-oracle-flexcube-universal-banking-creation-oracle-flexcube.jpg)


![Murabaha Creation Oracle FLEXCUBE Universal … Creation Oracle FLEXCUBE Universal Banking Release 12.0.1.0.0 [December] [2012] Oracle Part Number E51465-01 Origination of Murabaha](https://static.documents.pub/doc/80x56/5aedf8817f8b9ac62b8b5b77/murabaha-creation-oracle-flexcube-universal-creation-oracle-flexcube-universal.jpg)
![Debit Card Interface Oracle FLEXCUBE Universal Banking · Debit Card Interface . Oracle FLEXCUBE Universal Banking . Release 12.0 [May] [2012] Oracle Part Number E51465-01 . ... Oracle](https://static.documents.pub/doc/80x56/5e7e9b6cb1c3913575714bd6/debit-card-interface-oracle-flexcube-universal-banking-debit-card-interface-oracle.jpg)
![Implementation Oracle FLEXCUBE Universal BankingImplementation . Oracle FLEXCUBE Universal Banking . Release 12.0 [May] [2012] Oracle Part Number E51465-01](https://static.documents.pub/doc/80x56/5f796a8ba97cd033cd1c743e/implementation-oracle-flexcube-universal-banking-implementation-oracle-flexcube.jpg)

