Make yourself a cute tyrannosaurus by folding the long piece of paper inwards and outwards in order. You will need to have a lot of patience, but it will be well worth it! When you're finished, be sure to take good care of your new pet - display it with some other dinosaur friends, or use it as a bookmark. Assembly instructions Mountain fold (dotted line) *Make a mountain fold. Valley fold (dashed and dotted line) *Make a valley fold. Scissors line (solid line) *Cut along the line. You will need Scissors, a pencil or dried up pen (use it to score along the fold lines for a neater fold), a ruler (use it with the pencil or pen to score along the fold lines) [Caution] Glue, scissors, and other tools may be dangerous to young children so be sure to keep them out of the reach of young children. *You will be folding two layers of paper together, so use your fingertip or fingernail to make the folds as sharp as possible. Be careful, though, not to damage the paper with your fingers. Cut out the pattern, make a crease down the center and fold it in half. Folding both layers of paper, make creases on all the fold lines, and then fold it in half again. Next, fold inward and outward along the fold lines as shown. (Check the diagrams and photos if unsure.) Front Back To make it easier to fold the layered paper, fold the tail area first. Open up the back side and fold along the lines. *The blue lines in the diagram show where the fold lines should be on the back of the paper. (There are no actual fold lines on the back.) Put the piece face up, and fold it in half. Origami Tyrannosaurus : Folding Instructions
Transcript
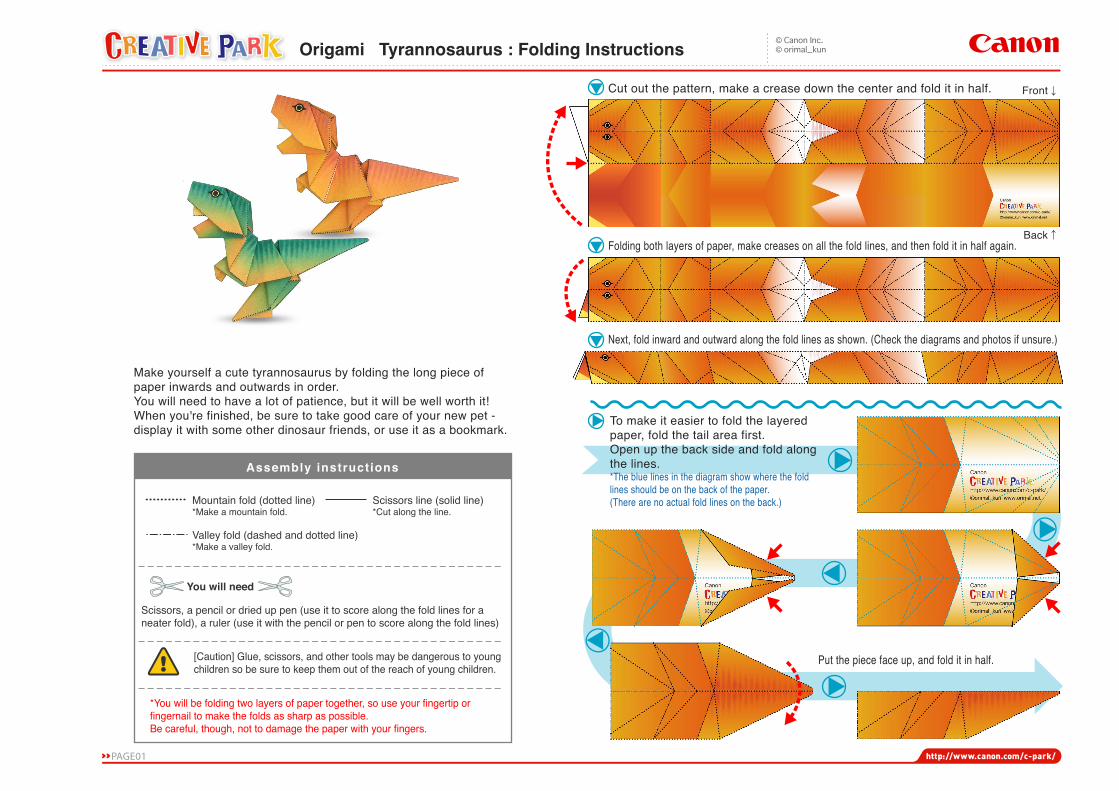
Make yourself a cute tyrannosaurus by folding the long piece of paper inwards and outwards in order. You will need to have a lot of patience, but it will be well worth it!When you're finished, be sure to take good care of your new pet - display it with some other dinosaur friends, or use it as a bookmark.
Assembly instructions
Mountain fold (dotted line)*Make a mountain fold.
Valley fold (dashed and dotted line)*Make a valley fold.
Scissors line (solid line)*Cut along the line.
You will need
Scissors, a pencil or dried up pen (use it to score along the fold lines for a neater fold), a ruler (use it with the pencil or pen to score along the fold lines)
[Caution] Glue, scissors, and other tools may be dangerous to young children so be sure to keep them out of the reach of young children.
*You will be folding two layers of paper together, so use your fingertip or fingernail to make the folds as sharp as possible.Be careful, though, not to damage the paper with your fingers.
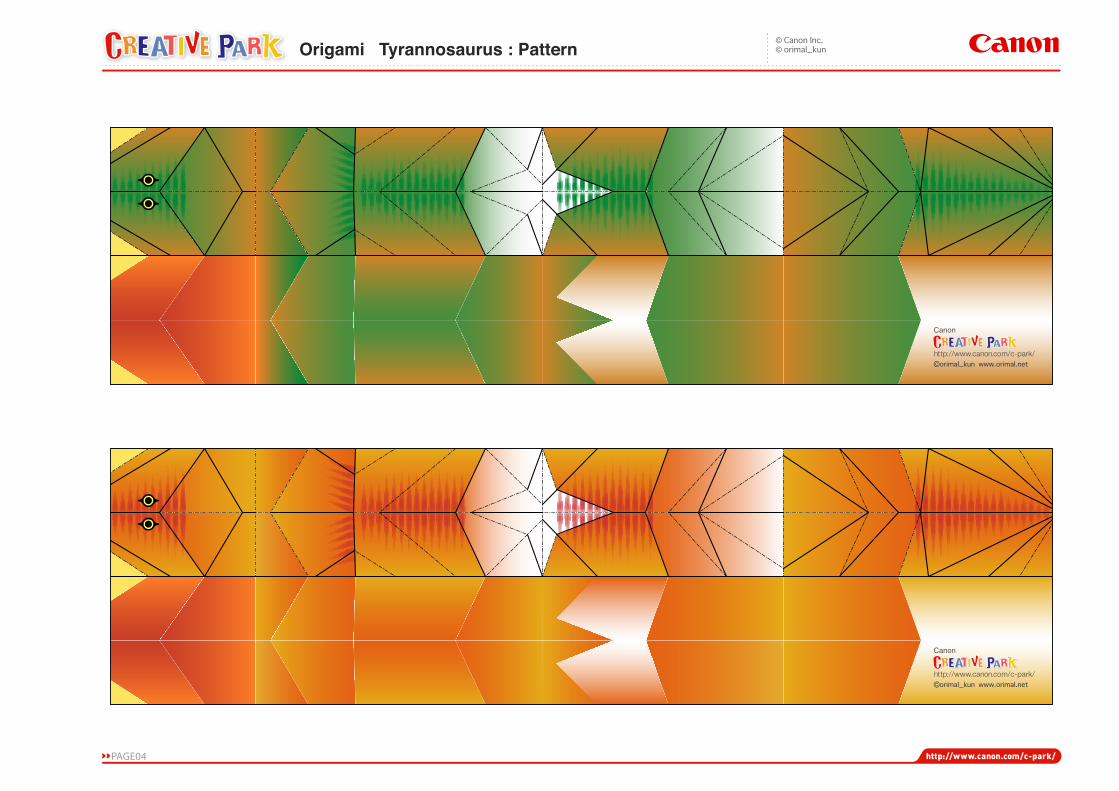
Cut out the pattern, make a crease down the center and fold it in half.
Folding both layers of paper, make creases on all the fold lines, and then fold it in half again.
Next, fold inward and outward along the fold lines as shown. (Check the diagrams and photos if unsure.)
Front
Back
To make it easier to fold the layered paper, fold the tail area first.Open up the back side and fold along the lines.*The blue lines in the diagram show where the fold lines should be on the back of the paper. (There are no actual fold lines on the back.)
Put the piece face up, and fold it in half.
Origami Tyrannosaurus : Folding Instructions
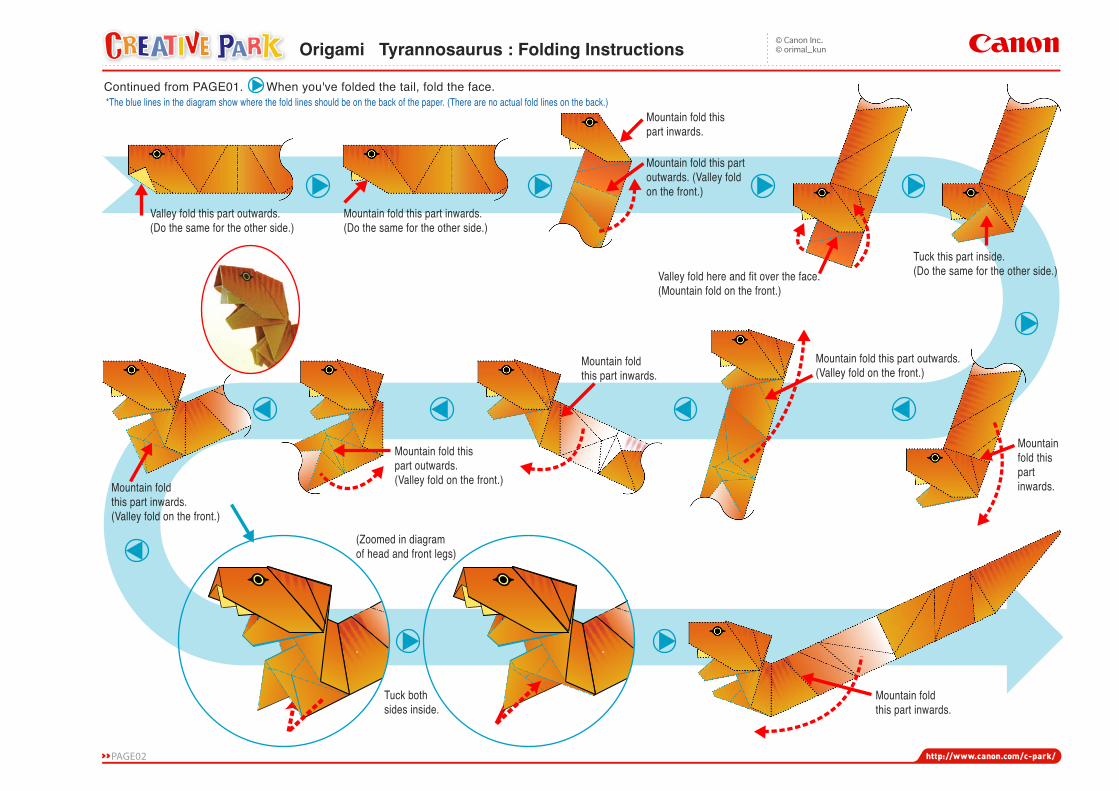
Continued from PAGE01. When you've folded the tail, fold the face.*The blue lines in the diagram show where the fold lines should be on the back of the paper. (There are no actual fold lines on the back.)
Valley fold this part outwards.(Do the same for the other side.)
Mountain fold this part inwards.(Do the same for the other side.)
Mountain fold this part inwards.
Mountain fold this part outwards. (Valley fold on the front.)
Valley fold here and fit over the face.(Mountain fold on the front.)
Tuck this part inside.(Do the same for the other side.)
Mountain fold this part inwards.
Mountain fold this part outwards.(Valley fold on the front.)
Mountain fold this part inwards.
Mountain fold this part outwards.(Valley fold on the front.)Mountain fold
this part inwards.(Valley fold on the front.)
(Zoomed in diagram of head and front legs)
Tuck both sides inside.
Mountain fold this part inwards.
Origami Tyrannosaurus : Folding Instructions
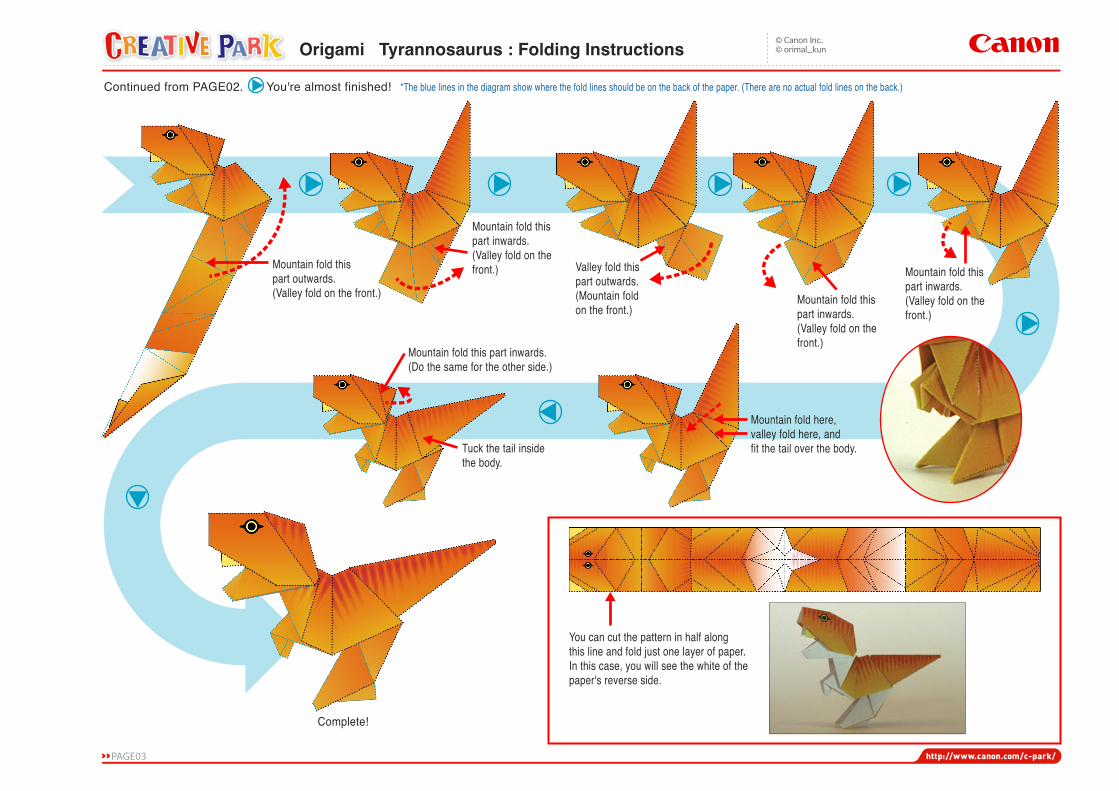
Continued from PAGE02. You're almost finished! *The blue lines in the diagram show where the fold lines should be on the back of the paper. (There are no actual fold lines on the back.)
Mountain fold this part outwards.(Valley fold on the front.)
Mountain fold this part inwards.(Valley fold on the front.) Valley fold this
part outwards.(Mountain fold on the front.)
Mountain fold this part inwards.(Valley fold on the front.)
Mountain fold this part inwards.(Valley fold on the front.)
Mountain fold here, valley fold here, and fit the tail over the body.
Mountain fold this part inwards.(Do the same for the other side.)
Tuck the tail inside the body.
Complete!
You can cut the pattern in half along this line and fold just one layer of paper. In this case, you will see the white of the paper's reverse side.