18
| Date post: | 29-Dec-2015 |
| Category: |
Documents |
| Upload: | aldous-jenkins |
| View: | 214 times |
| Download: | 0 times |

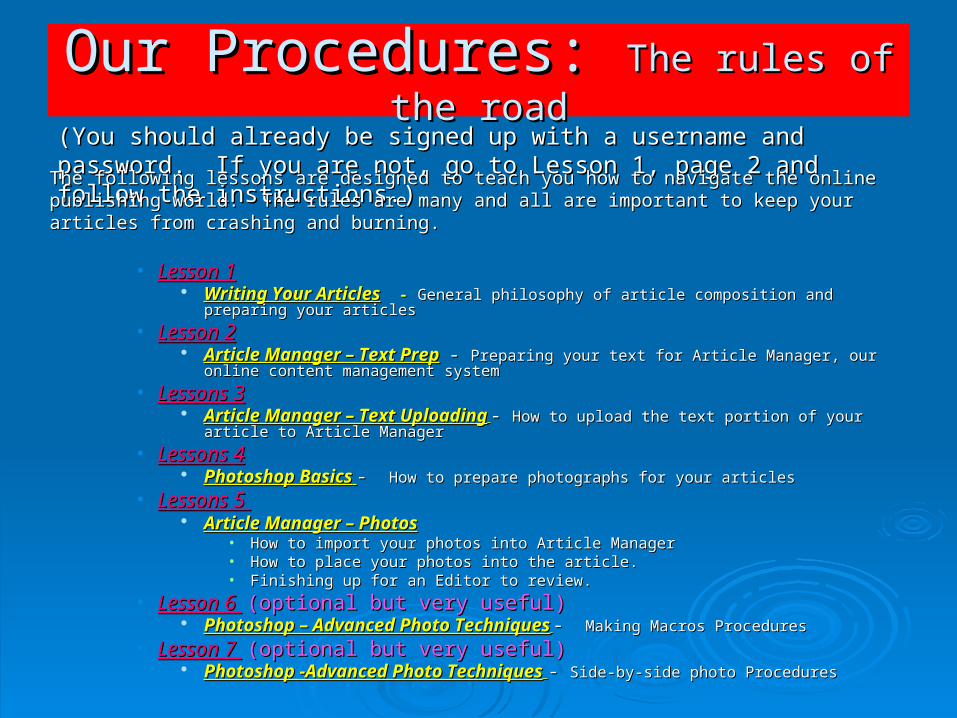
Our Procedures: Our Procedures: The rules of the roadThe rules of the road
• Lesson 1Lesson 1 Writing Your ArticlesWriting Your Articles - - General philosophy of article composition and preparing your articlesGeneral philosophy of article composition and preparing your articles
• Lesson 2Lesson 2 Article Manager – Text PrepArticle Manager – Text Prep - - Preparing your text for Article Manager, our online content Preparing your text for Article Manager, our online content
management systemmanagement system
• Lessons 3Lessons 3 Article Manager – Text UploadingArticle Manager – Text Uploading - - How to upload the text portion of your article to Article How to upload the text portion of your article to Article
ManagerManager
• Lessons 4Lessons 4 Photoshop BasicsPhotoshop Basics - - How to prepare photographs for your articlesHow to prepare photographs for your articles
• Lessons 5 Lessons 5 Article Manager – PhotosArticle Manager – Photos
• How to import your photos into Article Manager How to import your photos into Article Manager • How to place your photos into the article.How to place your photos into the article.• Finishing up for an Editor to review.Finishing up for an Editor to review.
• Lesson 6 Lesson 6 (optional but very useful)(optional but very useful) Photoshop – Advanced Photo TechniquesPhotoshop – Advanced Photo Techniques - - Making Macros ProceduresMaking Macros Procedures
• Lesson 7 Lesson 7 (optional but very useful)(optional but very useful) Photoshop -Advanced Photo TechniquesPhotoshop -Advanced Photo Techniques - - Side-by-side photo ProceduresSide-by-side photo Procedures
(You should already be signed up with a username and password. If you are (You should already be signed up with a username and password. If you are not, go to Lesson 1, page 2 and follow the instructions.)not, go to Lesson 1, page 2 and follow the instructions.)
The following lessons are designed to teach you how to navigate the online publishing world. The The following lessons are designed to teach you how to navigate the online publishing world. The rules are many and all are important to keep your articles from crashing and burning. rules are many and all are important to keep your articles from crashing and burning.
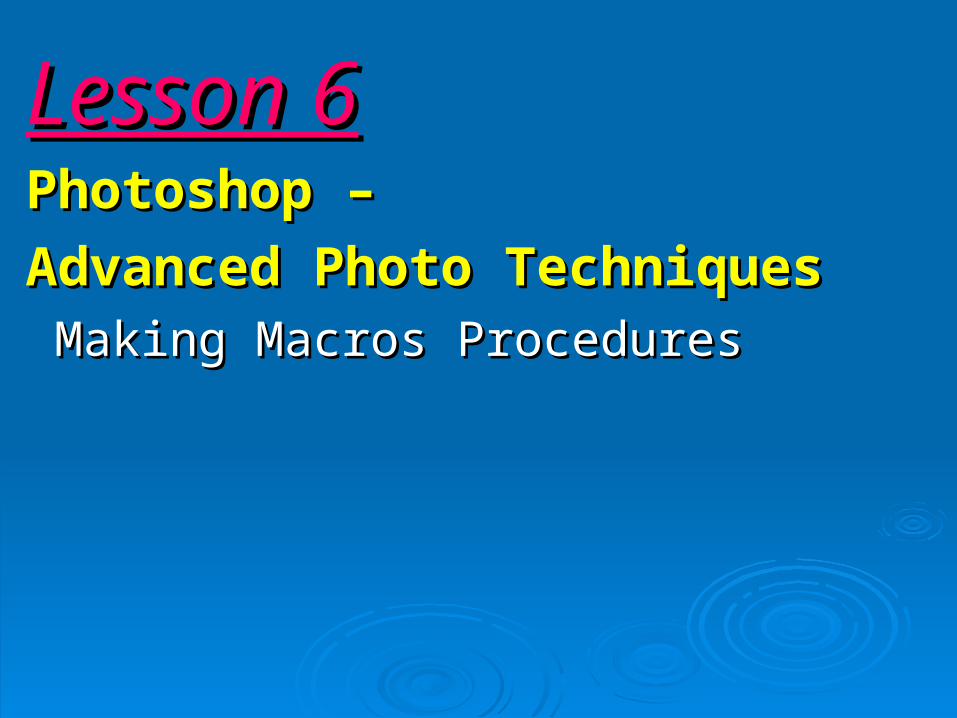
Lesson 6Lesson 6Photoshop – Photoshop –
Advanced Photo TechniquesAdvanced Photo Techniques Making Macros ProceduresMaking Macros Procedures
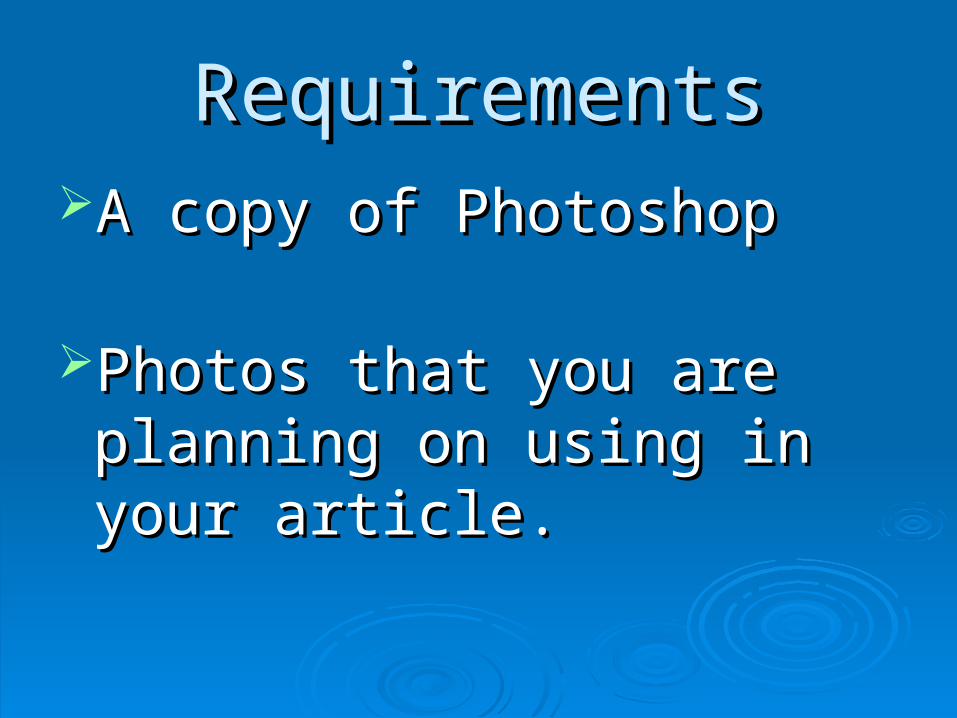
RequirementsRequirementsA copy of PhotoshopA copy of Photoshop
Photos that you are planning Photos that you are planning on using in your article.on using in your article.
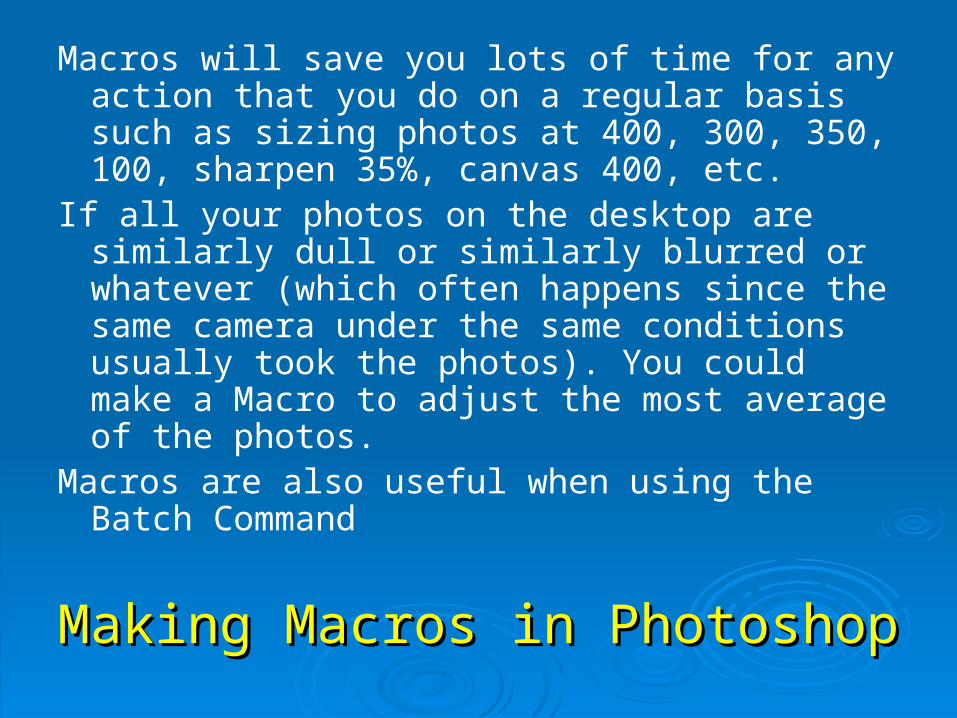
Macros will save you lots of time for any action that you do on a regular basis such as sizing photos at 400, 300, 350, 100, sharpen 35%, canvas 400, etc.
If all your photos on the desktop are similarly dull or similarly blurred or whatever (which often happens since the same camera under the same conditions usually took the photos). You could make a Macro to adjust the most average of the photos.
Macros are also useful when using the Batch Command
Making Macros in PhotoshopMaking Macros in Photoshop
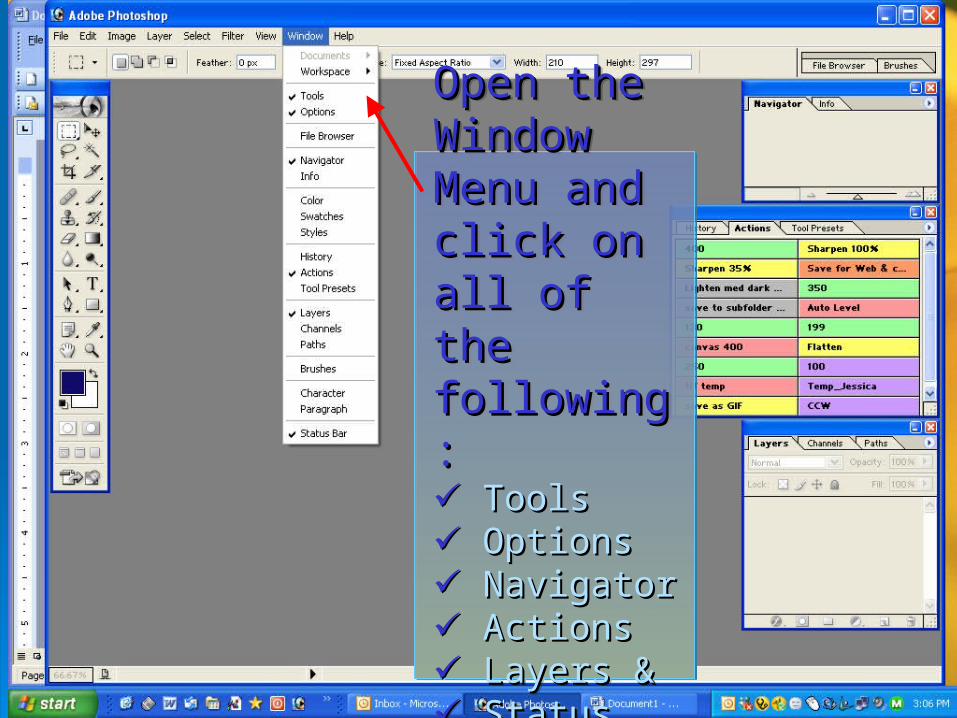
Open the Open the Window Window Menu and Menu and click on all of click on all of the following:the following: ToolsTools Options Options Navigator Navigator Actions Actions Layers & Layers & Status Bar Status Bar
Open the Open the Window Window Menu and Menu and click on all of click on all of the following:the following: ToolsTools Options Options Navigator Navigator Actions Actions Layers & Layers & Status Bar Status Bar
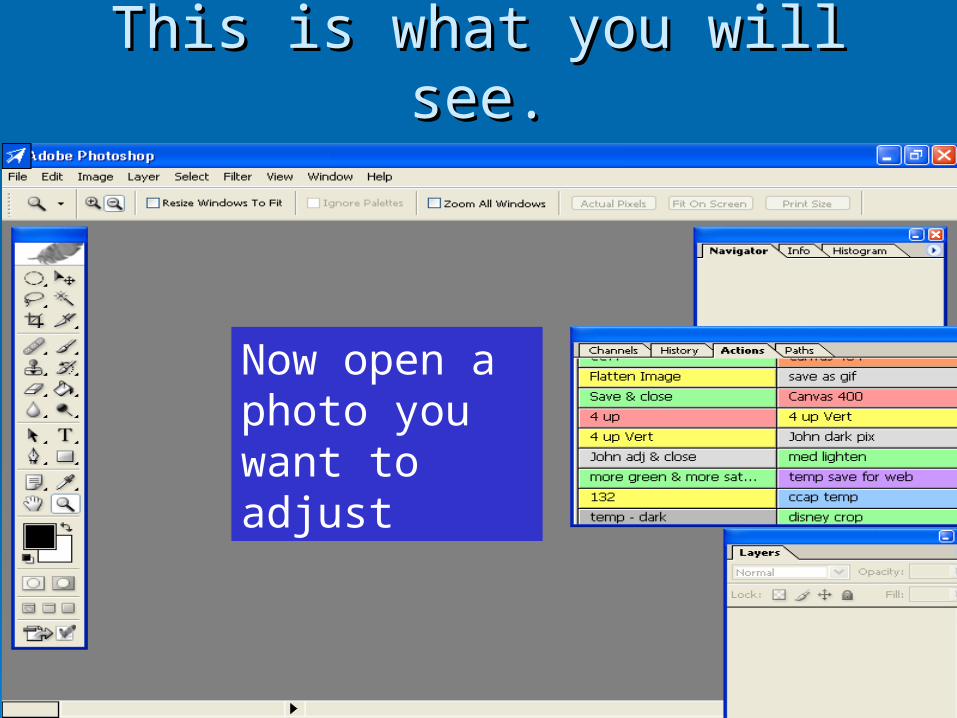
This is what you will see.This is what you will see.
Now open a photo you want to adjust
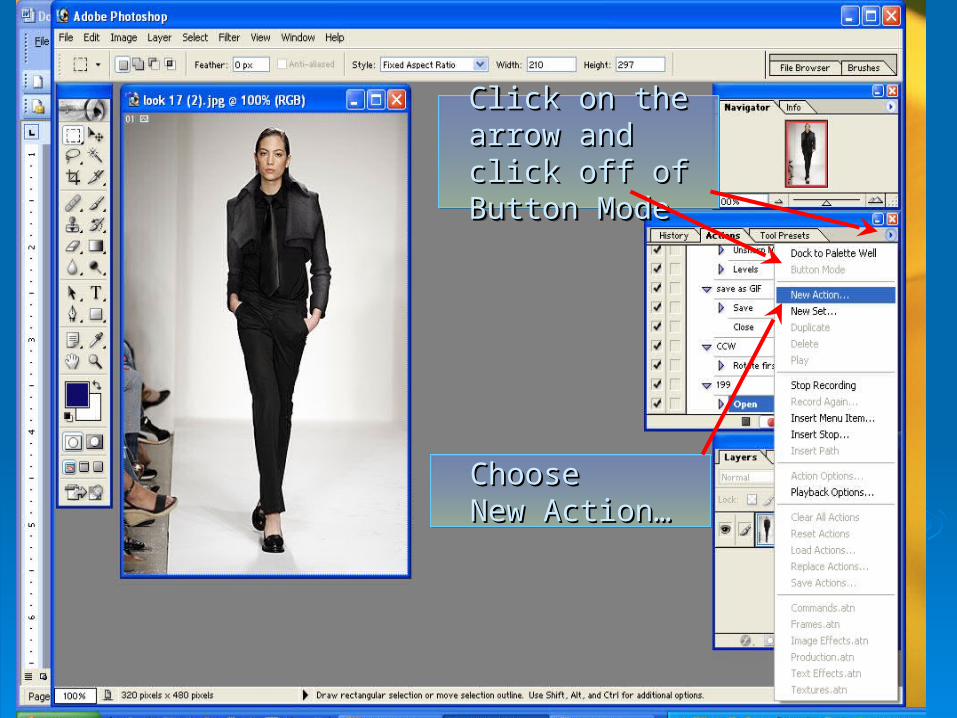
Click on the arrow Click on the arrow and click off of and click off of Button ModeButton Mode
Click on the arrow Click on the arrow and click off of and click off of Button ModeButton Mode
Choose Choose New Action…New Action…Choose Choose New Action…New Action…
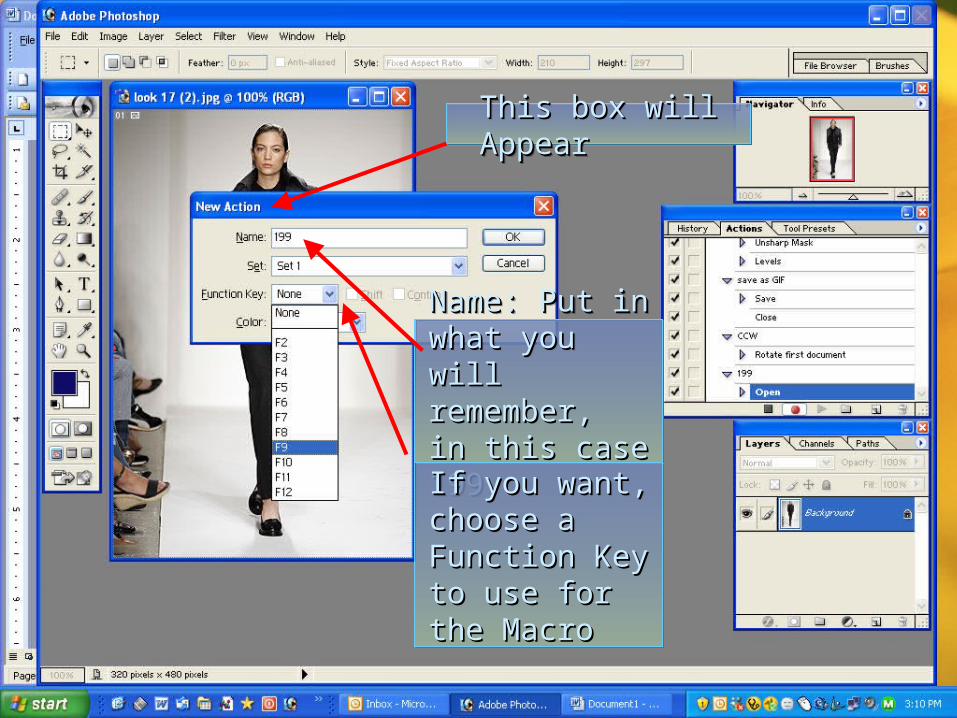
This box will AppearThis box will AppearThis box will AppearThis box will Appear
Name: Put in Name: Put in what you will what you will remember, remember, in this case 199in this case 199
Name: Put in Name: Put in what you will what you will remember, remember, in this case 199in this case 199If you want, If you want, choose a choose a Function Key to Function Key to use for the use for the MacroMacro
If you want, If you want, choose a choose a Function Key to Function Key to use for the use for the MacroMacro
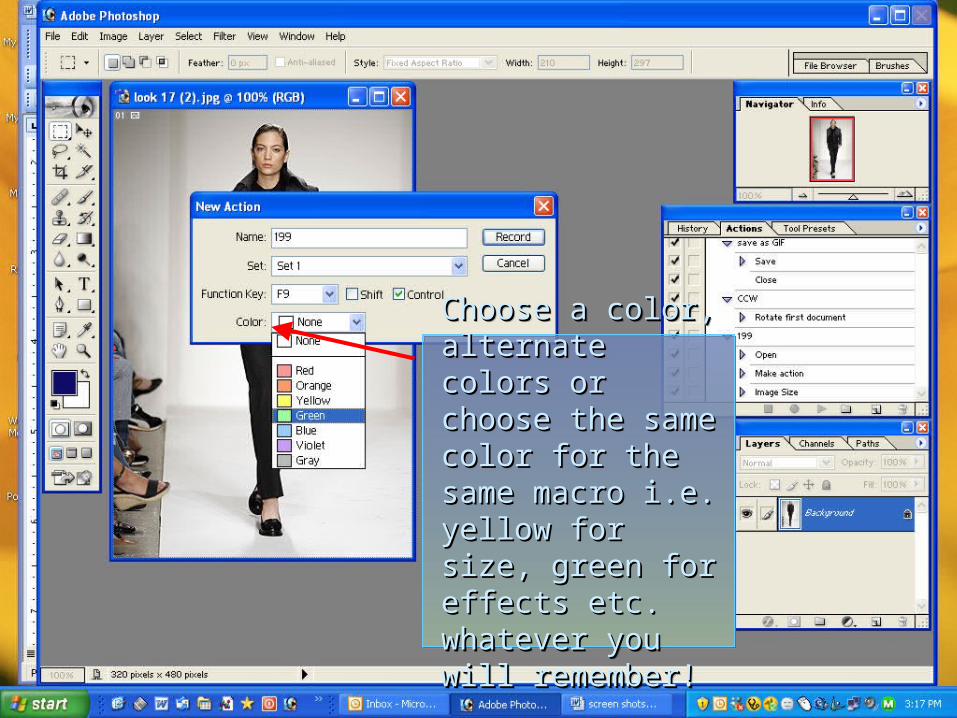
Choose a color, Choose a color, alternate colors or alternate colors or choose the same choose the same color for the same color for the same macro i.e. yellow for macro i.e. yellow for size, green for size, green for effects etc. whatever effects etc. whatever you will remember!you will remember!
Choose a color, Choose a color, alternate colors or alternate colors or choose the same choose the same color for the same color for the same macro i.e. yellow for macro i.e. yellow for size, green for size, green for effects etc. whatever effects etc. whatever you will remember!you will remember!
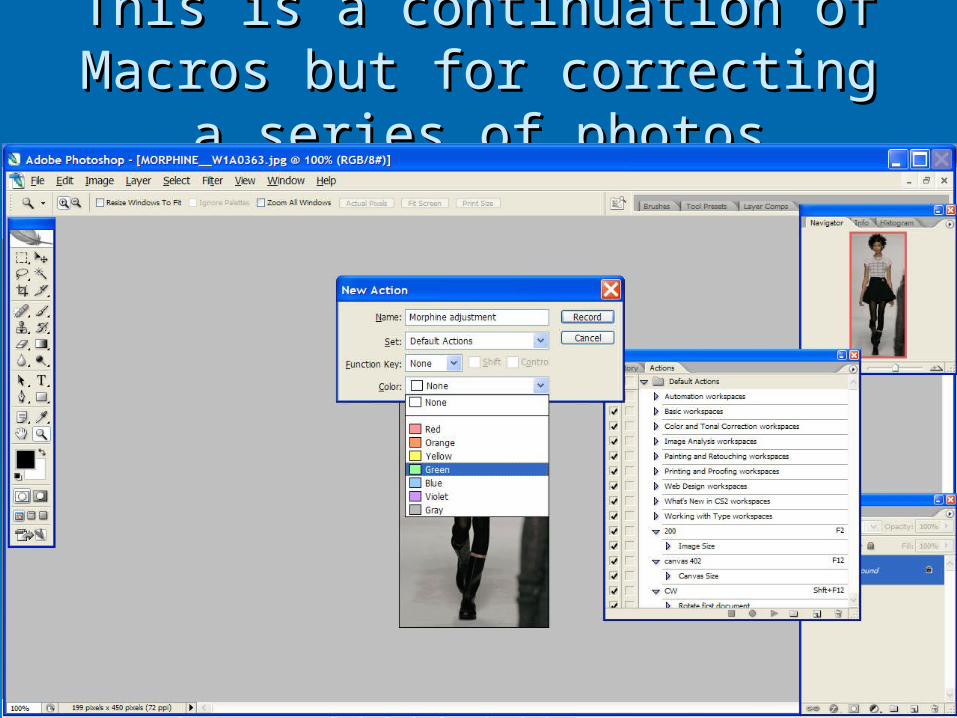
This is a continuation of Macros but This is a continuation of Macros but for correcting a series of photosfor correcting a series of photos
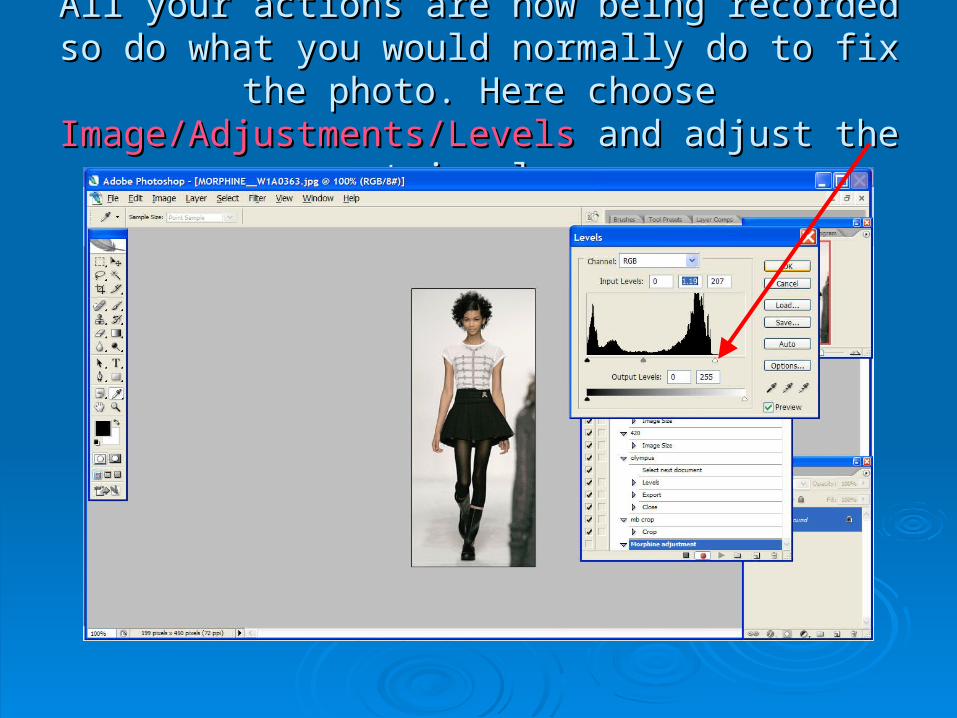
All your actions are now being recorded so do what All your actions are now being recorded so do what you would normally do to fix the photo. Here choose you would normally do to fix the photo. Here choose Image/Adjustments/LevelsImage/Adjustments/Levels and adjust the triangles and adjust the triangles
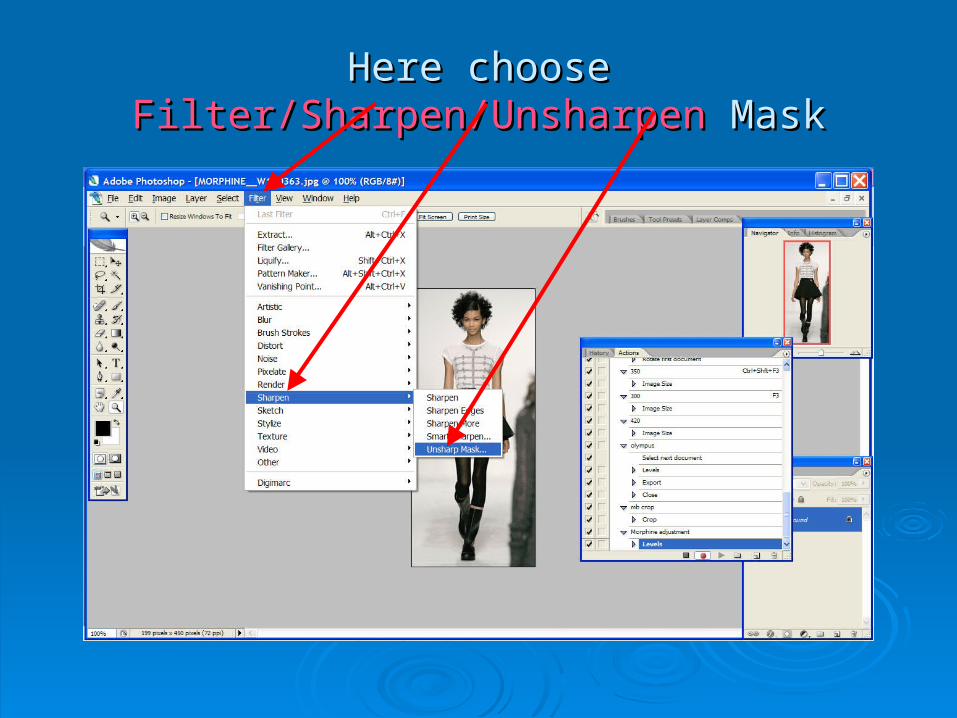
Here choose Here choose Filter/Sharpen/UnsharpenFilter/Sharpen/Unsharpen Mask Mask
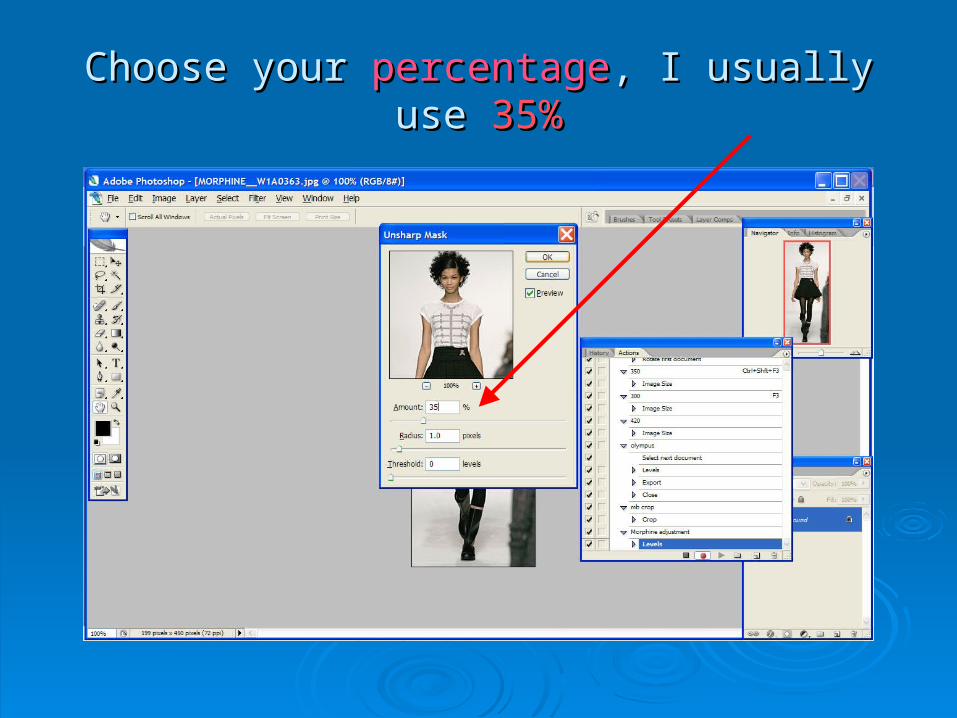
Choose your Choose your percentagepercentage, I usually use , I usually use 35%35%
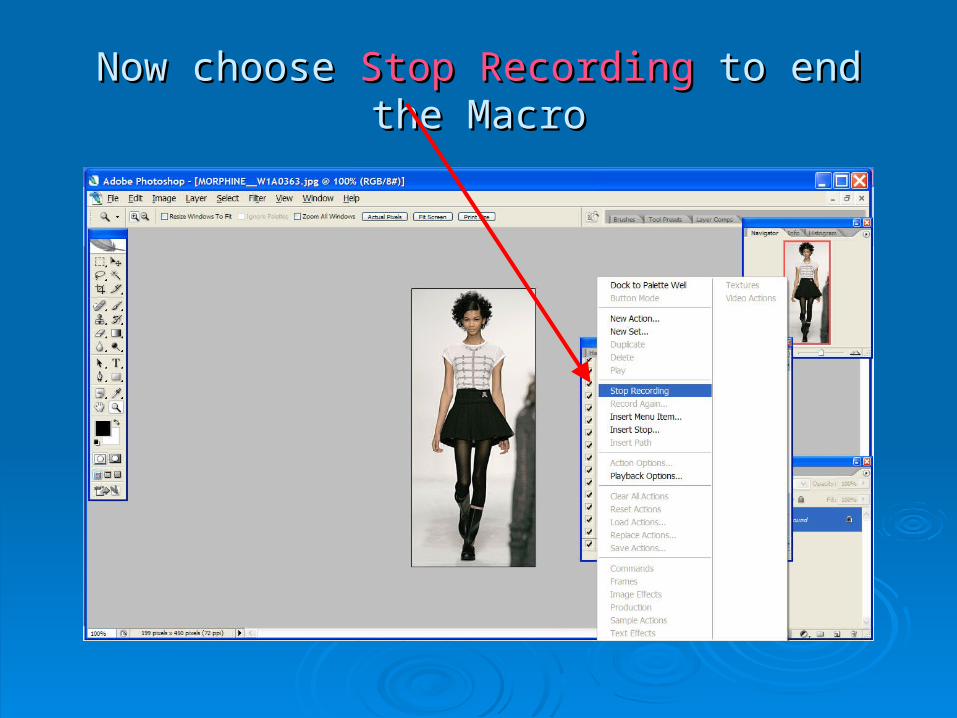
Now choose Now choose Stop RecordingStop Recording to end the Macro to end the Macro
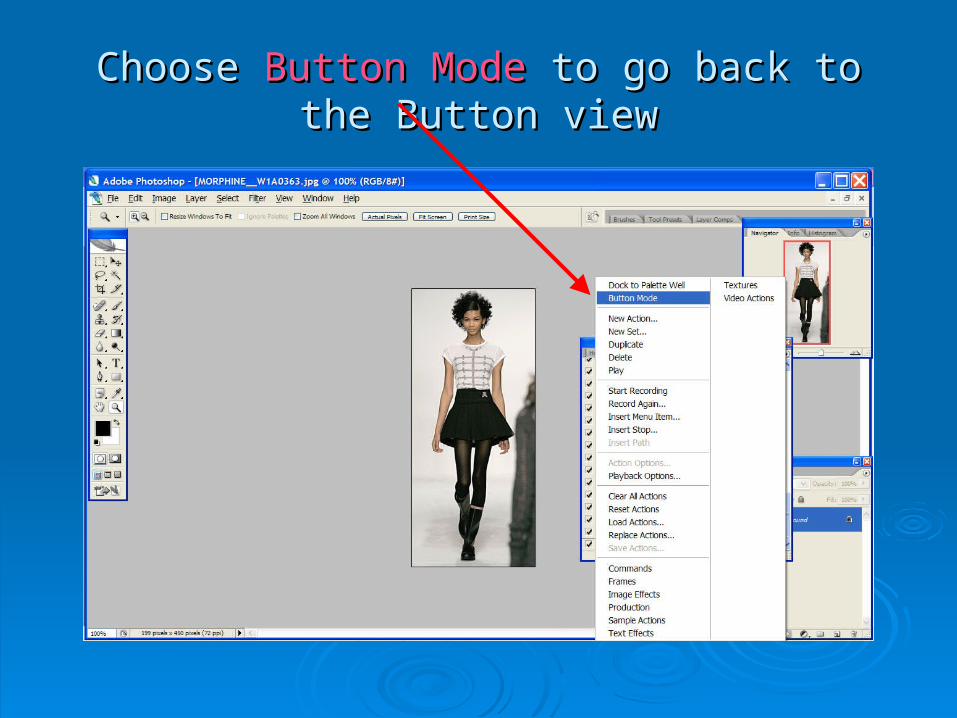
Choose Choose Button ModeButton Mode to go back to the Button to go back to the Button viewview
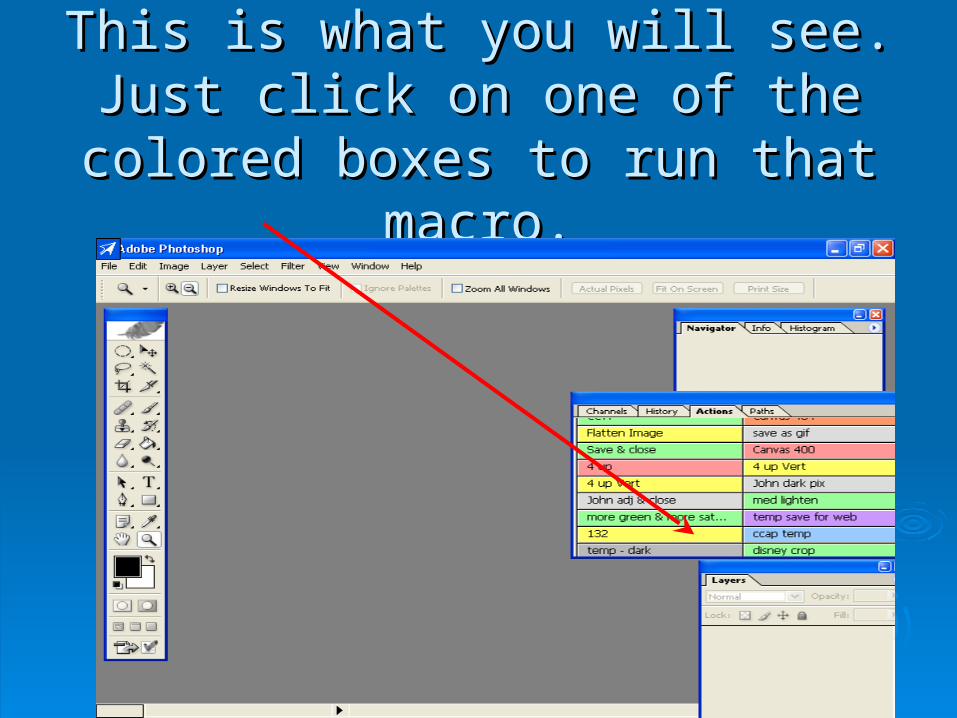
This is what you will see.This is what you will see.Just click on one of the colored Just click on one of the colored
boxes to run that macro.boxes to run that macro.
Congratulations!Congratulations!
You are now done with Lesson #6You are now done with Lesson #6
Please move on to Lesson #7Please move on to Lesson #7
If you have any questions, comments or If you have any questions, comments or suggestions, please email them to suggestions, please email them to [email protected]@lasplash.com
ThanksThanksLawrenceLawrence


