12
Installation Manual 4-2177-01 Rev.A Ozone + UV Sanitation
| Date post: | 22-May-2018 |
| Category: |
Documents |
| Upload: | trinhtuyen |
| View: | 221 times |
| Download: | 2 times |
Installation Manual
4-2177-01 Rev.A
Ozone + UV Sanitation

IMPORTANT SAFETY INSTRUCTIONS
When installing and operating the DEL Spa Solar Eclipse, basic precautions should always be followed:
READ AND FOLLOW ALL INSTRUCTIONS• Read this manual completely before attempting installation.• All permanent electrical connections should be made by a qualified
electrician. • Follow all applicable electrical codes.• Be sure the electrical power is shut OFF at the main circuit breaker
before installing the Spa Solar Eclipse.• If the Spa Solar Eclipse electrical connection is to be attached to the
spa controls, be sure the spa controls are protected by a Ground Fault Circuit Interrupter (G.F.C.I.). If the Spa Solar Eclipse is connected to an independent electrical supply, then a G.F.C.I. must be installed between the Spa Solar Eclipse and the electrical supply.
• WARNING - To reduce the risk of electrical shock, if the power cord is damaged, replace the entire unit immediately.
• The Spa Solar Eclipse must be mounted under the spa skirt sheltered from enviornmental elements (rain, sun, sprinklers).
• Plastic ozone supply tubing is available with the Spa Solar Eclipse. Never replace this tubing with metal tubing.
• Do not operate the Spa Solar Eclipse unless sufficient water flow is being drawn through the unit.
• WARNING: Short term inhalation of high concentrations of ozone and long term inhalations of low concentrations of ozone can cause harmful physiological effects. Do not inhale ozone gas produced by this device.
• WARNING: Exposure to UV light from this device is harmful to skin and eyes. Do not attempt to remove or service the UV lamp while it is lit.
SAVE THESE INSTRUCTIONS!
TABLE OF CONTENTS
Installation Instructions 1. Overview ............................................................................................. 12. Mounting ............................................................................................ 1 3. Plumbing ............................................................................................ 14. Electrical ............................................................................................. 2 5. Operation ............................................................................................ 3 6. Maintenance ....................................................................................... 3
Warranty ................................................................................................. 7

SES Installation & Operations Manual
1
INSTALLATION INSTRUCTIONS
1. OverviewThe Spa Solar Eclipse is a UV/Ozone sanitation unit designed for use in portable spas and to be controlled by the spa’s equipment pack. Please contact DEL Customer Support if the Spa Solar Eclipse is used in an application other than a portable spa.
2. MountingLocate the Mounting Bracket and Mounting Bracket Screws in the Parts Bag and attach the Mounting Bracket to the Spa Solar Eclipse as shown in Figure 1. Mountings Holes are located on both sides of the Spa Solar Eclipse.
Mount the Spa Solar Eclipse to the spa frame with 4 pieces of #8 hardware through the Mounting Bracket slots. Mount as high as possible in the equipment area. The preferred mounting orientation and water flow direction is shown in Figure 2. The unit may also be mounted vertically with the water entering the lower fitting. Contact DEL for other installation options.
3. PlumbingDEL Ozone recommends that the Ozone Injector be installed upstream of the Spa Solar Eclipse so the ozone can interact with the UV light. This interaction leads to Advanced Oxidation Process which will improve sanitation. However, the Spa Solar Eclipse will function properly if the Ozone Injector is installed downstream.a. Connect ozone compatible tubing (1/4” internal diameter) to the
open hose barb on the Spa Solar Eclipse
Figure 1: Mounting Bracket Assembly
Spa Solar EclipseMounting Hole
Mounting Bracket
Mounting Bracket Screw
SES Installation & Operations Manual
2
b. Run tubing to the Ozone Injector or appropriate vacuum source.i. If the Spa Solar Eclipse is mounted above the water line,
tubing may be run directly to the vacuum source.ii. If the Spa Solar Eclipse is mounted below the water line, run
tubing to a point above the water line and back down to the vacuum source.
c. Install the check valve in the tubing above the water line. Ensure flow direction is from the Spa Solar Eclipse to the vacuum source.
d. Secure all tubing connections with hose clamps.
4. Electricala. Verify that there is no power to the spa and connect the Spa
Solar Eclipse cord into the mating connectors on the Spa Controller.
b. Where possible, route the Spa Solar Eclipse power cord away from other electrical lines. Avoid routing the power cord parallel to any low-voltage signal wires.
c. Use a minimum 8 AWG solid copper conductor to connect the bonding lug provided on the Enclosure Base to the spa equipment ground.
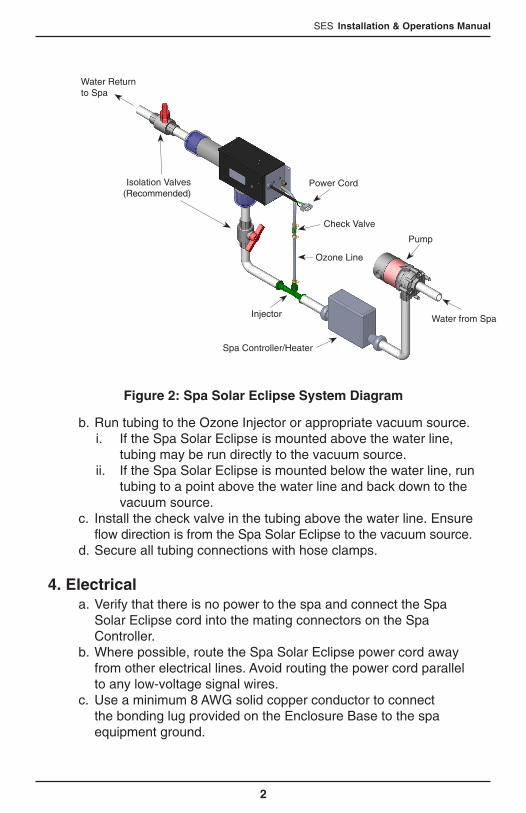
Figure 2: Spa Solar Eclipse System Diagram
Isolation Valves (Recommended)
Pump
Water from SpaInjector
Ozone Line
Spa Controller/Heater
Power Cord
Check Valve
Water Return to Spa

SES Installation & Operations Manual
3
5. OperationIf installed correctly, the Spa Solar Eclipse will turn on and off as required by the Spa Controller. After installation, turn the spa on and verify that the POWER ON (green) and UV LAMP ON (blue) indicator lights are illuminated. Repair any leaks in the water or ozone lines and verify that small bubbles can be seen in the return flow. Finally, turn the Spa off and make sure that the POWER and UV indicator lights are not illuminated.
6. MaintenanceWARNING: Before performing any maintenance on the Spa Solar Eclipse, make sure the spa is shut down.
a. UV Lamp Removal – See Figure 3. If the Green Power Indicator is on, but the Blue UV Lamp Indicator is off, the UV lamp needs to be replaced. For maximum UV sanitation effect, replace the UV Lamp every 18 months.i. Make sure the unit is disconnected from power and the lamp
has cooled before starting maintenance.
Figure 3: Spa Solar Eclipse Exploded View
Enclosure Base
Lamp Connector
Upper Enclosure Assembly
UV Lamp
Lamp Retainer
UV Chamber Cap
Quartz Tube
Retainer Screw
Enclosure Screw
Retainer Washer
Sealing Ring
SES Installation & Operations Manual
4
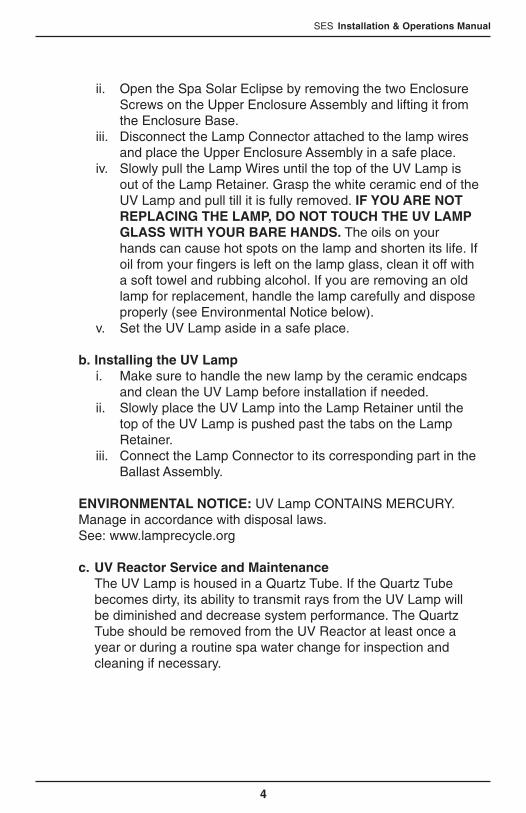
ii. Open the Spa Solar Eclipse by removing the two Enclosure Screws on the Upper Enclosure Assembly and lifting it from the Enclosure Base.
iii. Disconnect the Lamp Connector attached to the lamp wires and place the Upper Enclosure Assembly in a safe place.
iv. Slowly pull the Lamp Wires until the top of the UV Lamp is out of the Lamp Retainer. Grasp the white ceramic end of the UV Lamp and pull till it is fully removed. IF YOU ARE NOT REPLACING THE LAMP, DO NOT TOUCH THE UV LAMP GLASS WITH YOUR BARE HANDS. The oils on your hands can cause hot spots on the lamp and shorten its life. If oil from your fingers is left on the lamp glass, clean it off with a soft towel and rubbing alcohol. If you are removing an old lamp for replacement, handle the lamp carefully and dispose properly (see Environmental Notice below).
v. Set the UV Lamp aside in a safe place.
b. Installing the UV Lampi. Make sure to handle the new lamp by the ceramic endcaps
and clean the UV Lamp before installation if needed.ii. Slowly place the UV Lamp into the Lamp Retainer until the
top of the UV Lamp is pushed past the tabs on the Lamp Retainer.
iii. Connect the Lamp Connector to its corresponding part in the Ballast Assembly.
ENVIRONMENTAL NOTICE: UV Lamp CONTAINS MERCURY. Manage in accordance with disposal laws. See: www.lamprecycle.org
c. UV Reactor Service and Maintenance The UV Lamp is housed in a Quartz Tube. If the Quartz Tube becomes dirty, its ability to transmit rays from the UV Lamp will be diminished and decrease system performance. The Quartz Tube should be removed from the UV Reactor at least once a year or during a routine spa water change for inspection and cleaning if necessary.

SES Installation & Operations Manual
5
d. Quartz Tube Removal and Cleaning
CAUTION: Wear proper eye and skin protection for servicing glass components.
i. Make sure the spa is shut down and the UV Lamp and Quartz Tube have cooled before performing maintenance on the Quartz Tube. If you have installed Isolation Valves, close them before servicing. If you do not have Isolation Valves, the spa must be drained below where the Spa Solar Eclipse is mounted.
ii. Remove the Upper Enclosure Assembly and UV Lamp as described in Section A and set aside in a safe place.
iii. Remove the two Retainer Screws and Retainer Washer from the top of the Lamp Retainer and slowly pull the Lamp Retainer out of the UV Chamber Cap.
CAUTION: If there is any water remaining in the plumbing, it will start to leak after the Lamp Retainer is removed.
iv. Grasp the inside of the Quartz Tube and pull it out of the housing. Make sure the Sealing Ring does not get lost during Quartz Tube removal.
v. Inspect the Sealing Ring for nicks or hardness and replace if necessary.
vi. Clean the Quartz Tube exterior with a mild solution of muriatic acid and water in a ratio of four parts water to one part acid (4:1). DO NOT USE ABRASIVE CLEANERS as they can scratch the high quality quartz glass.
CAUTION: Follow the directions for safe use and handling of muriatic acid on the acid bottle label. Never add water to acid. Always add acid to water.
vii. After cleaning the Quartz Tube, wash it off with water and wipe dry with a soft towel. Inspect the Quartz Tube for cracks and replace if cracks are found.
viii. Make sure the inside of the Quartz Tube is dry before replacing the UV Lamp(s).
SES Installation & Operations Manual
6
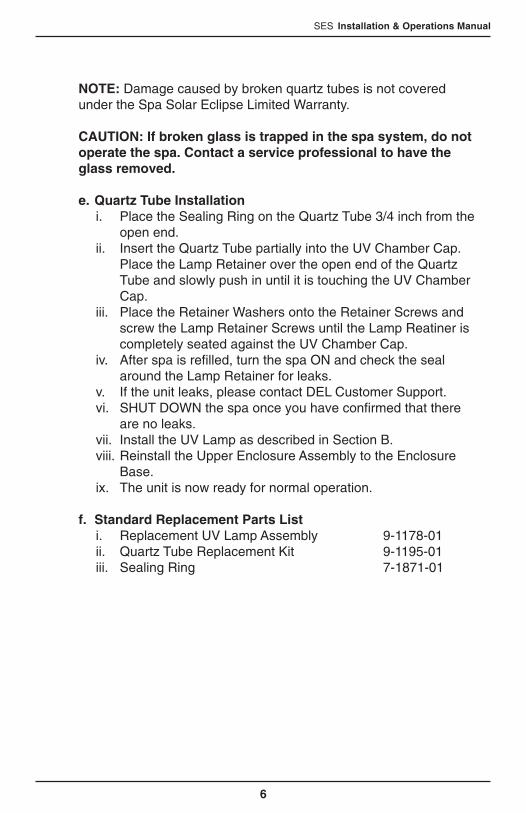
NOTE: Damage caused by broken quartz tubes is not covered under the Spa Solar Eclipse Limited Warranty.
CAUTION: If broken glass is trapped in the spa system, do not operate the spa. Contact a service professional to have the glass removed.
e. Quartz Tube Installationi. Place the Sealing Ring on the Quartz Tube 3/4 inch from the
open end.ii. Insert the Quartz Tube partially into the UV Chamber Cap.
Place the Lamp Retainer over the open end of the Quartz Tube and slowly push in until it is touching the UV Chamber Cap.
iii. Place the Retainer Washers onto the Retainer Screws and screw the Lamp Retainer Screws until the Lamp Reatiner is completely seated against the UV Chamber Cap.
iv. After spa is refilled, turn the spa ON and check the seal around the Lamp Retainer for leaks.
v. If the unit leaks, please contact DEL Customer Support.vi. SHUT DOWN the spa once you have confirmed that there
are no leaks.vii. Install the UV Lamp as described in Section B.viii. Reinstall the Upper Enclosure Assembly to the Enclosure
Base. ix. The unit is now ready for normal operation.
f. Standard Replacement Parts Listi. Replacement UV Lamp Assembly 9-1178-01ii. Quartz Tube Replacement Kit 9-1195-01iii. Sealing Ring 7-1871-01
SES Installation & Operations Manual
7
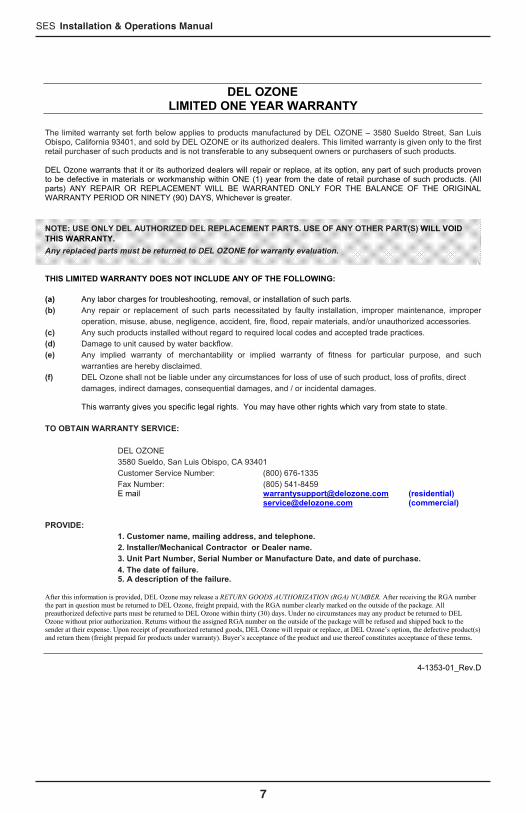
DEL OZONE LIMITED ONE YEAR WARRANTY
The limited warranty set forth below applies to products manufactured by DEL OZONE – 3580 Sueldo Street, San Luis Obispo, California 93401, and sold by DEL OZONE or its authorized dealers. This limited warranty is given only to the first retail purchaser of such products and is not transferable to any subsequent owners or purchasers of such products.
DEL Ozone warrants that it or its authorized dealers will repair or replace, at its option, any part of such products proven to be defective in materials or workmanship within ONE (1) year from the date of retail purchase of such products. (All parts) ANY REPAIR OR REPLACEMENT WILL BE WARRANTED ONLY FOR THE BALANCE OF THE ORIGINAL WARRANTY PERIOD OR NINETY (90) DAYS, Whichever is greater.
NOTE: USE ONLY DEL AUTHORIZED DEL REPLACEMENT PARTS. USE OF ANY OTHER PART(S) WILL VOID THIS WARRANTY.Any replaced parts must be returned to DEL OZONE for warranty evaluation.
THIS LIMITED WARRANTY DOES NOT INCLUDE ANY OF THE FOLLOWING:
(a) Any labor charges for troubleshooting, removal, or installation of such parts. (b) Any repair or replacement of such parts necessitated by faulty installation, improper maintenance, improper
operation, misuse, abuse, negligence, accident, fire, flood, repair materials, and/or unauthorized accessories. (c) Any such products installed without regard to required local codes and accepted trade practices. (d) Damage to unit caused by water backflow. (e) Any implied warranty of merchantability or implied warranty of fitness for particular purpose, and such
warranties are hereby disclaimed. (f) DEL Ozone shall not be liable under any circumstances for loss of use of such product, loss of profits, direct
damages, indirect damages, consequential damages, and / or incidental damages.
This warranty gives you specific legal rights. You may have other rights which vary from state to state.
TO OBTAIN WARRANTY SERVICE:
DEL OZONE 3580 Sueldo, San Luis Obispo, CA 93401 Customer Service Number: (800) 676-1335 Fax Number: (805) 541-8459 E mail [email protected] (residential)
[email protected] (commercial)
PROVIDE: 1. Customer name, mailing address, and telephone. 2. Installer/Mechanical Contractor or Dealer name. 3. Unit Part Number, Serial Number or Manufacture Date, and date of purchase. 4. The date of failure. 5. A description of the failure.
After this information is provided, DEL Ozone may release a RETURN GOODS AUTHORIZATION (RGA) NUMBER. After receiving the RGA number the part in question must be returned to DEL Ozone, freight prepaid, with the RGA number clearly marked on the outside of the package. All preauthorized defective parts must be returned to DEL Ozone within thirty (30) days. Under no circumstances may any product be returned to DEL Ozone without prior authorization. Returns without the assigned RGA number on the outside of the package will be refused and shipped back to the sender at their expense. Upon receipt of preauthorized returned goods, DEL Ozone will repair or replace, at DEL Ozone’s option, the defective product(s) and return them (freight prepaid for products under warranty). Buyer’s acceptance of the product and use thereof constitutes acceptance of these terms.
4-1353-01_Rev.D


3580 Sueldo Street, San Luis Obispo, CA 93401(800) 676-1335 [email protected] Estab. No. 071472-CA-001


