58
Last updated July 2013, NISER, Bhubaneswar LABORATORY MANUAL P241(General physics Lab) School of Physical sciences NATIONAL INSTRITUTE OF SCIENCE EDUCATION AND RESEARCH (NISER) BHUBANESWAR
| Date post: | 29-May-2018 |
| Category: |
Documents |
| Upload: | vuonghuong |
| View: | 216 times |
| Download: | 0 times |

Last updated July 2013, NISER, Bhubaneswar
LABORATORY MANUAL
P241(General physics Lab)
School of Physical sciences
NATIONAL INSTRITUTE OF SCIENCE EDUCATION AND RESEARCH (NISER)
BHUBANESWAR

Last updated July 2013, NISER, Bhubaneswar
CONTENTS
i. General Laboratory instruction
ii. Error Analysis of experimental data
iii. List of experiments
1. Coefficient of linear expansion of a solid by Fizeau’s method
2. Young’s modulus of glass by Cornu’s method
3. Magnetic susceptibility of a paramagnetic solution using Quinck’s
tube method
4. Dielectric constant of different materials
5. Milikan’s oil drop experiment
6. Specific charge of electron (e/m)

Last updated July 2013, NISER, Bhubaneswar
General Instructions for P241 laboratory course
Name of the Lab course: General Physics Instructor’s name: LABORATORY ATTENDANCE POLICY
1) No absences will be permitted without medical excuse or other bona fide causes. 2) Students are required to complete any work missed due to absence. 3) Students are not allowed to work in the lab during a theory course until and unless they
get permission from the theory course instructor to do so. GENERAL LABORATORY POLICIES
1. For each experiment, laboratory manuals will be provided. Also, it is expected that student will consult other reference materials, e.g., textbooks, handbooks, etc.
2. Students are expected to become familiar with the operation of all experimental equipment. Be sure you understand the operation of all equipment before beginning an experiment. If you have any question or confusion, please ask the instructor or TA.
3. No alterations of equipment will be made without the consent of the instructor or TA.
Suggestions for improving the operation of equipment are always welcome.
4. Any necessary equipment (glassware, thermometers, optical elements etc.) and tools, if not already available, must be obtained from an instructor, teaching assistant or laboratory technician and must be returned to them after completing the experiment.
5. At the end of each laboratory period, groups are responsible for ascertaining that water
sources, air or vacuum sources, electrical sources and equipments, etc. dedicated to the concerned experiment are turned off before leaving lab for the day.
6. All data are to be recorded in laboratory log books with PEN. Use of PENCIL for
recording the data is not allowed. You may be required to produce the recorded data at any time. The pages of lab log book must be dated and the recorded data has to be signed by instructors or TA after verification. This is particularly important for invention disclosures and maintaining day-to-day records. The use of paper towels or other slips of paper for recording data will not be allowed. Following points are important while recording the data:

Last updated July 2013, NISER, Bhubaneswar
a. Record actual measurements, not calculated analyses. This is very important when you have to analyze anything that went wrong in the experiment. If the data is processed rather than raw, it becomes more difficult to deconvolute the data and pinpoint the problem at the time of analysis.
b. If multiple values of certain physical quantities are to be recorded or calculated during the experiment, this must be done in a tabular form. The first column of the table must always represent the Serial No. at the top of each of the other columns, the name/symbol of the quantity being measured or calculated along with its unit must be written. Physical quantities that are kept constant during a set of measurements should be recorded outside the table.
c. Record anything of significance that happens during the experiment. The more remarks you have in your lab report, the better you will be able to recall the experiment at the time analysis.
7. Please notify the TA or instructor when there is a shortage of some consumable material.
Irresponsible usage of equipment or consumable supplies may result in stern action against the group.
8. Lab reports (for this week’s experiment) must be submitted in the 1st class of the next
week. Therefore, the students must finish performing the experiment within the present week.
9. If a student is unable to submit the lab report without a genuine reason, he/she will not be
allowed to perform the experiment for the present week. Additionally, the student will be awarded a “zero” for the previous experiment for which he/she has failed to submit the lab report.
10. All the results should be reported in “SI” units.
GENERAL GUIDELINES FOR LABORATORY REPORTS & VIVA-VOCE Some guidelines for the contents and organization of a good lab report are presented below.
1. A technical lab report will be submitted for each experiment by each student. 2. All laboratory reports become the property of the School of Physical Sciences, NISER
and must be submitted to the laboratory instructor/TA/Laboratory Assistant after each experiment. The instructor would take the viva-voce for an experiment while it is being performed and grade the student’s performance for the experiment.

Last updated July 2013, NISER, Bhubaneswar
3. A significant weightage would be given to the performance of students in each experiment while deciding on the final grade for the laboratory course.
4. Each student is responsible for the originality of his/her technical report and the data
utilized. Copying from unidentified sources such as prior reports is unfair, and it is highly discouraged. A significant emphasis is laid on the originality of the report.
Format & Organization
1) Organize the laboratory report into logical sections with titles for each section. For example, Objective(s), Apparatus and Equipments, Theory, Experimental Procedure, Results & Discussion which also contains Error Analysis and Conclusion.
2) If a graph is to be plotted, then decide an appropriate scale so as to utilize most of the graph paper. X-axis should usually be the independent variable and Y-axis the dependent variable. Label each axis with the name or symbol of the quantity being plotted along with its unit. Calculate slope or any polynomial fit (if required) using as much length of the data as possible to reduce error. Also, wherever it is important, put appropriate error bars in the graphs.
3) Each figure must be numbered sequentially and have a caption. Each figure must be
mentioned or discussed in the text. Similarly, ALL tables must be numbered sequentially and must be mentioned or discussed in the text.
4) Set out the calculations clearly indicating the formulae used. Substitute the values of all
the parameters used in the calculation with proper units, rather than giving only the final result.
5) Estimate the error in measurements, as suggested for each experiment and always write
the final result as: (RESULT ± UNCERTAINTY) UNITS Proper termination of decimal places should be made.
Technical Content
1) Technical content deals primarily with the Experimental Procedure, Results, and Discussion sections of your report. You must adequately describe how you obtained the data that you are reporting.
2) ALL of your collected data should be presented in your report, ensuring that anyone could check your calculations and repeat the experiment.

Last updated July 2013, NISER, Bhubaneswar
3) You should also provide pertinent information on difficulties you encountered, if any,
and suggestions for avoiding possible problems.
Safety in the Lab The following are important safety issues and warnings:
1. Whenever dealing with electronics or electricity, make sure there is no power going to
the circuit when modifying it.
2. To prevent shock (especially on high voltage devices) use only one hand to touch the
circuit whenever possible.
3. Using two hands could allow electricity to pass through the body and heart. In our labs,
the voltages and currents used are not large enough for this to be a real risk, but still it is
important to remember this for preventing any kind of shocks.
4. If any circuit you are working with begins generating an excessive amount of heat, it
could be due to a short circuit in the wiring. Immediately remove the power and search
for leads that are unintentionally touching.
5. Capacitors, even when disconnected from a circuit, may retain charge for a long period
of time. They may deliver a painful shock even without power. If you are unsure of
whether a capacitor is still charged, hold a resistor against the two contacts to discharge
it.
6. Never bring your eyes in the path of ANY LASER beam in the visible and near‐infrared
(750 nm < < 1450 nm). It could permanently damage your eyes.
7. Avoid exposing any part of your body to direct laser beam.
8. In laser based experiments, it is important to know where the beam is getting focused.
Do not insert any part of your body close to that region.
9. Don’t reflect the laser beam to any person’s body or eye while working in the lab.
10. The radioactive sources are very dangerous for your health, so please be aware of the radioactive sources. You can see the symbol to recognize that.

Last updated July 2013, NISER, Bhubaneswar
11. If necessary, (in case of strong radioactive sources) please use dosimeter while working
with radioactive sources.
12. Use hand gloves while handling the liquid radioactive sources. Don’t touch the solid radioactive sources at the center; hold them from the side only.
13. Don’t expose yourself for long time to radioactive sources by standing near to the
sources. While date acquisition is going on stay at least a meter away from the sources.
14. Don’t keep your mobile phone near to the detector. This may give your undesired extra
count to your detector.

Last updated July 2013, NISER, Bhubaneswar
ANALYSIS OF EXPERIMENTAL DATA
I. ERROR ANALYSIS AND ACCURACY OF MEASUREMENT
All physical measurement, are subject to various types of errors. It is important to plan
any experiment with accuracy appropriate to its purpose and perform it in such a way that within
the limitations of the experimental setup, errors are reduced to a minimum. It is however, much
more important to estimate and quote the error or uncertainty of the measurement, without
which, the result of the measurement is of little value to somebody, who wishes to make use of
this result. The errors in measurements are of three types: blunders, systematic errors and
random errors.
BLUNDERS: These occur when an experimenter makes a genuine mistake by reading an
instrument wrongly or taking down a reading erroneously. If the experimenter is aware of what
the approximate result should be, gross errors of this type can be avoided. It is helpful to plot the
results on a graph while the measurements are in progress, so as to spot blunders as they happen.
In real life, where the true result is not known, nothing much can be done about blunders, except
to take a lot of readings around the area where a discrepancy is observed.
SYSTEMATIC ERRORS: Errors that are repeated through an entire set of measurements are
termed systematic errors. These errors arise because the experimental arrangement often is
different from that assumed in theory and the correction factor that takes account of this
difference is ignored. For example, the resistance of leads in an electrical experiment and heat
losses in a calorimetric experiment are sources of systematic errors. Another common source of
systematic error is inaccurate apparatus, such as one with wrong calibration or zero offset.
Another source of systematic error is the experimenter’s bias, for example, parallax error. There
are no clear cut ways to eliminate systematic errors, though in case of a faulty apparatus, it can
be checked against a well established standard or in case of the experimenter’s bias, it helps to
have a second person perform the same experiment and see whether there are systematic
differences. But in general, there is no substitute for experience while dealing with systematic

Last updated July 2013, NISER, Bhubaneswar
errors, though it will be useful for the students to be aware of sources of systematic errors in their
measurements.
RANDOM ERRORS:
Random errors are always present in an experiment and arise due to the combined effect of
random fluctuations in the system being measured and the limitations of the measuring
instruments. This error can not be eliminated and must be estimated and quoted as the
uncertainty of the final result. The presence of random errors can be seen if the same
measurement is repeated several times. In the absence of systematic errors, presence of random
errors causes successive readings to spread about the true value of the quantity (Fig. 1(a). If in
addition, a systematic error is also present, the readings spread, not about the true value, but
about some displaced value (Fig.1 (b)).
(a) True value (b) true value
Figure 1
A. ESTIMATE OF RANDOM ERROR IN A MEASUREMENT:
Let us assume that we are trying to measure the diameter of a ball bearing with an
accurate micrometer gauge. No ball bearing is perfectly spherical. So we should take
measurements in different directions and a series of values will result. We define the mean value
of this series, xi (i= 1, 2 . . . N) as
N
iix
Nx
1
1… … … … ... … … … … … 1
The values of xi will be distributed around the mean value x . The standard deviation for the set
xi is defined to be
2
1
1
21
N
ii xx
N … … … … … … 2
It can be shown that 68% of all the data is within the range x to x and 90% of the data
is between the range 6.1x 6.1x . Thus the standard deviation gives an estimated of the

Last updated July 2013, NISER, Bhubaneswar
random error or uncertainty in the measurement of a particular quantity is often estimated
from practical considerations. Suppose we made only two measurements instead of a large
number of repeated measurements. The uncertainty in in this case can be simply taken as:
2121 xx
Where, 1 and 2 are the results of two measurements.
Another situation that may be encountered is when the random error in a measurement happens
to be smaller that the lest cout (LC) of the measuring instrument. In such a case, repeated
measurements cannot be used to estimate the random error and quantity (LC/2) can be taken as
the uncertainty (upper limit) of the result. Also, in case of a single measurement, (LC/2) can be
taken as an estimate of the uncertainty.
B. Combination of Errors:
So far we only discussed the error in a measurement. Frequently, we measure several different
physical quantities, e.g .......,, wyx etc, and combine them together to calculate the value of
quantity z .......,, wyx . As described above, each of the measured quantities, say ,x will have an
error x associated with it. It can be shown (see reference) that the error z of the quantity z
depends on the individual error ,,, zyx etc. as
4...........222
2
ww
zy
y
zx
x
zz
The dependence in some simple situation can be approximately given as follows:
(a) For Cxz (where C is a constant): 5.......................xCz
(b) For both :yxz 6...................yxz
(c) For both yxz . and :/ yxz 7........
y
y
x
x
z
z
Where, the quantity xx / is called fractional error in x and so on. For the repeated
measurements of a certain quantity x, we either directly make an estimate of the fractional error
xx / based on some practical considerations or estimate x by one of the methods

Last updated July 2013, NISER, Bhubaneswar
described above and take xx / as an estimate of xx / . In case measurement xLC /2/ can
be taken as an estimate of ./ xx
(d) For a general case, p
nm
w
yxCz (C is a constant), the fractional error in z is given by
8...................
w
wp
y
yn
x
xm
z
z
Once the combined fractional error zz / is estimated the above procedure, the absolute error
or uncertainty, z in the quantity z can be obtained as
zz
zz
Where z represents the average value of z obtained by repeated measurement of wyx ,, etc.
Often, the overall uncertainty in a calculated quantity is dominated by the uncertainty of the
measured quantity which contributes the maximum error. In such cases, the uncertainties in the
other measured quantities may be neglected. This will become obvious when we discuss below
the termination of decimal places in the measured value of a quantity.
C. Termination of the Decimal Place in the Measured Value:
The uncertainty of a measurement is essentially a probability statement which suggests a range
of measured values that are likely to be obtained in case of repeated measurements and hence,
reflects the accuracy of the measurement. This statement of accuracy is made by terminating and
quoting the value of the measured quantity and its uncertainty up to the same decimal place,
which corresponds to the most significant decimal place of the uncertainty.
Let us illustrate this point through a simple example. Suppose we are measuring the diameter d
of a ball bearing with a scale having an LC of 1 mm and a large number of repeated
measurements lead to measured values between 24-25 mm . This result can be expressed as:
,5.05.24 mmd Where the estimate for d has been taken as mmLC 5.02/ .
Now, if the same measurement is performed with a vernier having an LC of 0.1 mm , and the
repeated measurements lead to a measured value in the range of 24.6-24.7 ,mm the same result
can be expressed as

Last updated July 2013, NISER, Bhubaneswar
,05.065.24 mmd Where mmd 05.0 .
Notice that an improvement in the precision of measurement which results in a decrease in
uncertainty by an order of magnitude permits the result to be quoted with an additional decimal
place. Also note that the first case, it would be meaningless to quote the result beyond the first
place of decimal ,53.24.,. mmge when d is of the order of the 0.5 mm (owing essentially to an
LC of 1 mm ). Thus, it must be realized that a result quoted as 24.534096 for either for the above
situations is nothing short of absurd!
Let us take another example. In a repeated measurement of g , if the calculated value (say
average) turns out to be 9.837418 ,2/ sm then the termination of decimal place in the final results
should depend on the value of g (obtained as above)in the manner shown below:
Thus in general, it is the most significant decimal place in the value of the uncertainty
which decides the number of decimal place that can be legitimately quoted in the final result.
The final result with appropriately terminated decimal places can be presented in different ways
(as shown in the table) but must always be written as:
(AVARAGE VALUE UNCERTAINTY) UNITS:
This example should also make it clear why the uncertainty in the value of a quantity obtained by
measurements of several quantities is dominated by the uncertainty in the quantity, which
contributes maximum error.
II. Linear Fit of a Data Between Two Variables:
One often comes across a situation in which the slope or intercept of a straight line is a
quantity of intercept. The ‘Least squares’ fitting of a straight line is a standard method to obtain
the slope and intercept as well as their uncertainties.
Uncertainty g Final Results gg units ( possible presentations)
0.000736 2/ sm 22 /3.07.983/003.0837.9 scmorsm
2/0523.0 sm 212 /105.04.98/05.0837.9 smorsm
2/974.0 sm 232 /101.00.1/110 scmorsm

Last updated July 2013, NISER, Bhubaneswar
A. Least Squares Fit Line:
Suppose we have N experimental data points ....1,, Niyx we would like to plot these and draw
a straight line which fits best to this data. We know that the equation of a straight line is
.cmxy Therefore, we have find out the best values of m and c for which the error is
minimum. We define the function
10.......................................,1
2
N
iii mxcycmp
We assume that the best fit straight line will minimize cmp , . We consider m and c as
parameters and vary them so that cmp , is minimized, and thus obtain
11......................................20 ii mxcyc
p
12...............................20
iii mxcyxc
p
Therefore, we get the following two equations
13.................................. ii xmcNy
14..........................2iiii xmxcyx
Multiplying Eq.13 by ix and subtracting it from eq. 14 multiplied by N , we get
15..................1
22
ii
ii
iiii yxxDxxN
yxyxNm
Where, x Nxi / and 16........................................2
xxD i
Substituting m and ,c respectively, are given by (see reference)
17.........................2
12
2
N
d
Dm i
18.......................2
122
2
N
d
D
x
Nc i
Where, .cmxyd iii
For a straight line passing through origin, the slope m and its uncertainty m are given by

Last updated July 2013, NISER, Bhubaneswar
19................................2
i
ii
x
yxm
20...................1
12
2
2
N
d
xm i
i
Where, iii mxyd
B. Qualitative Best Fit Line:
In practice, a straight line graph and its uncertainty may also be determined by drawing the
qualitative best fit line, which is drawn in such a way that roughly equal number of data points
lie above as well as below it (Fig.2 (a)). The slope S of such a line is very close to the least
square fit slope. The uncertainty in the slope can be estimated by drawing the limiting lines for
the data, as shown below. The limiting lines are drawn by essentially considering the data points
near the two extreme ends of the set of data. Also, it is often possible to represent the uncertainty
of one or both variables along with the uncertainties at the two ends of the set of data points.
Note that in general, the two limiting lines may intersect the qualitative best fit lines at different
points. In both the above situations, the slope 1S and 2S of the two limiting lines can be used to
estimate the uncertainty in the slope of the qualitative best fit line, which is given by
2121 SSS ……………………………… (21)
Figure 2
X
Y Y
X
(a) (b)

Last updated July 2013, NISER, Bhubaneswar
III. CONCLUDING REMARKS:
As mentioned earlier, the uncertainty of a measurement reflect the accuracy or precision
with which it is performed and is a crucial information to be provided for any meaningful use of
the result of a measurement. As there could be several ways to estimate the uncertainty (some of
the simple ones are discussed above), the choice is essentially determined by the purpose of the
experiments. The purpose is to familiarize the students with some typical situations and also
make them appreciate the inherent flexibility of approach. It is expected that with this exposure,
the students will be decide a course of action in realistic situations.
Acknowledgement:
It is gratefully acknowledged that this write-up is based on the instruction Manual of the Physics
Laboratory of IIT Bombay.
References:
1. Bevington and Robinson, Data Reduction and Error Analysis for the Physical Sciences,
2nd edition, McGraw Hill, NY 1992.
2. John R. Taylor, An Introduction to Error Analysis: The Study of Uncertainties in
Physical Measurements. University Science Books, CA 1999.
3. NIST. Essentials of Expressing Measurement Uncertainty.
http://www.nist.gov/physlab/pubs/tn1297/index.cfm

Last updated July 2013, NISER, Bhubaneswar
List of experiments for 3rd sem 2013-14 (General Physics Lab)
1. Coefficient of linear expansion of a solid by Fizeau’s method
2. Young’s modulus by Cornu’s method
3. Magnetic Susceptibility of paramagnetic solutions using Quincke’s method
4. Dielectric constant of different materials
5. Millikan’s Oil drop experiment
6. Specific charge of electron (e/m)
7. Thermistor Characteristics

Experiment No - 01
Last update, August 2015, NISER, Bhubaneswar 1
Measurement of Coefficient of linear expansion of a
solid by Fizeau’s interferometer configuration
Introduction
This method uses the change in the interference pattern formed in air wedge of variable
thickness. The kind of pattern formed is called Fizeau’s fringes. These fringes are named
after French Physicist Armand Hippolyte Louis Fizeau (1819-1896), who used the
interference of light to measure the dilation of crystals.
Objective
To determine the coefficient of thermal expansion (α) for a copper/aluminum rod using
Fizeau interferometer configuration
Apparatus:
• Two Glass plates (dimensions: 4 x 5 cm2 and 4 x 6 cm
2)
• Thermocouple and temperature indicator
• Travelling Microscope
• Variable transformer (variac)
• Sodium vapour lamp
• Specimen
• Heater
Theoretical background
Linear thermal expansion may be considered as the relative displacement of two
points on a material due to absorption of thermal energy. Let us suppose that some points
of an object are directly connected to optically reflective components such as glass or
mirror etc. Due to heating, if the phase of one (reflected) wave is shifted by one
wavelength (λ), we have passed through one minima and one maxima; thus a wave
displacement of one wavelength corresponds to one fringe. Conversely, if we see the
fringe pattern moving by one fringe, and this is caused by relative displacements between
reflective components (ΔX), we can conclude that this relative displacement would be λ.

Experiment No - 01
Last update, August 2015, NISER, Bhubaneswar 2
Keeping this in mind, we can employ interferometers which measure the optical path
length difference (OPLD) changes between two beams, for measuring the coefficient of
thermal expansion for a material.
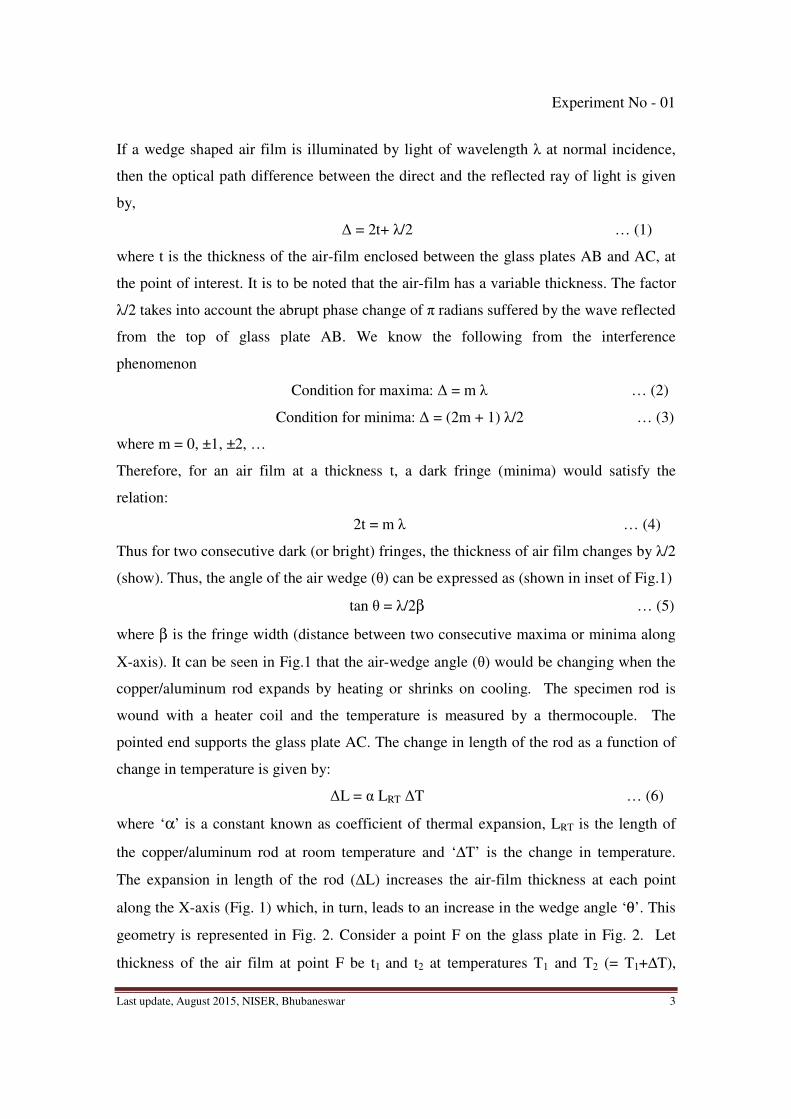
In the present case, the experiment is set up as per Fig. 1. An Air wedge is setup
between two glass plates AB and AC which is hinged at one end A and separated by a
small distance CB at the other end, so that a wedge shaped air film is enclosed between
them. Light from a monochromatic source (sodium vapour lamp S) is rendered parallel
using a collimating lens L. The light falls on the air wedge vertically and an interference
pattern is formed by interference between the direct light wave and the reflected wave
(from the top of glass plate AB). The interference pattern observed as a band of light and
dark fringes can be observed through a travelling microscope (M). The glass plate (G) is
used for splitting the beam to reach M.
Fig. 1 Experimental configuration for measuring the coefficient of thermal expansion of
Aluminium/Copper using a Fizeau’s interferometer
t1 t2
t1- t2
β
θ
Dark
Dark
Experiment No - 01
Last update, August 2015, NISER, Bhubaneswar 3
If a wedge shaped air film is illuminated by light of wavelength λ at normal incidence,
then the optical path difference between the direct and the reflected ray of light is given
by,
Δ = 2t+ λ/2 … (1)
where t is the thickness of the air-film enclosed between the glass plates AB and AC, at
the point of interest. It is to be noted that the air-film has a variable thickness. The factor
λ/2 takes into account the abrupt phase change of π radians suffered by the wave reflected
from the top of glass plate AB. We know the following from the interference
phenomenon
Condition for maxima: Δ = m λ … (2)
Condition for minima: Δ = (2m + 1) λ/2 … (3)
where m = 0, ±1, ±2, …
Therefore, for an air film at a thickness t, a dark fringe (minima) would satisfy the
relation:
2t = m λ … (4)
Thus for two consecutive dark (or bright) fringes, the thickness of air film changes by λ/2
(show). Thus, the angle of the air wedge (θ) can be expressed as (shown in inset of Fig.1)
tan θ = λ/2β … (5)
where β is the fringe width (distance between two consecutive maxima or minima along
X-axis). It can be seen in Fig.1 that the air-wedge angle (θ) would be changing when the
copper/aluminum rod expands by heating or shrinks on cooling. The specimen rod is
wound with a heater coil and the temperature is measured by a thermocouple. The
pointed end supports the glass plate AC. The change in length of the rod as a function of
change in temperature is given by:
ΔL = α LRT ΔT … (6)
where ‘α’ is a constant known as coefficient of thermal expansion, LRT is the length of
the copper/aluminum rod at room temperature and ‘∆T’ is the change in temperature.
The expansion in length of the rod (ΔL) increases the air-film thickness at each point
along the X-axis (Fig. 1) which, in turn, leads to an increase in the wedge angle ‘θ’. This
geometry is represented in Fig. 2. Consider a point F on the glass plate in Fig. 2. Let
thickness of the air film at point F be t1 and t2 at temperatures T1 and T2 (= T1+∆T),

Experiment No - 01
Last update, August 2015, NISER, Bhubaneswar 4
respectively. If the fringe widths are measured to be β1 and β2, then the angles of the
wedges can be calculated respectively as follows
θ1 = tan-1
(λ/2β1)
θ2 = tan-1
(λ/2β2) … (7)
Fig. 2 Geometry to calculate the optical path difference
Thus ΔL can be calculated using the geometry shown in Fig. 2,
∆L = l∆θ = l(θ2 − θ1) … (8)
where ‘l’ is the length of the glass plate ‘AC’.
So finally, by using Eqs. (6-8)
∆
∆≡
∆
∆=
TL
l
TL
l
RTRT
θθα … (9)
The value of
∆
∆
T
θcan be found by plotting a graph for θ ~T.
Typical value of α for copper and aluminium at 250C are 16.6 × 10⁻⁶ K-1 and 5.4× 10⁻⁶ K-
1, respectively (look in the link for reference: http://www.engineeringtoolbox.com/linear-expansion-coefficients-d_95.html)
A
l
B
C
D
θθθθ1 θθθθ2
F
E
t1 t2
∆L

Experiment No - 01
Last update, August 2015, NISER, Bhubaneswar 5
Experimental Procedure
1. Record the initial temperature (room temperature) before beginning the
experiment.
2. Measure length of the copper/aluminum rod (LRT) at room temperature using
vernier callipers.
3. Using scale measure the length (l) of glass plate AC which is the distance between
one edge (A) of the glass plate and the point (C) where the glass plate makes a
physical contact with the copper/aluminum rod.
4. Set the experimental arrangement as shown in Fig. 1 and adjust glass plates AB
and AC properly to obtain fringes, which are known as fringes of equal thickness.
5. Move the travelling microscope approximately to a position where you can
observe nearly straight line fringes (close to the center of the glass plate AB). We
name this point as ‘F’. Record the coordinates of point F for reference.
6. Measure the distance travelled (D) by the travelling microscope for crossing 10
dark fringes about the point ‘F’ (say, 5 on either side). Calculate the fringe width
(β) by using the relation β = D/10.
7. Calculate the air-wedge angle ‘θ’ using Eq. 7 at room temperature.
8. Switch ON the oven which would provide the thermal energy to the
copper/aluminum rod. Rotate the knob very slowly and watch the temperature
reading till it becomes 100C more than room temperature. This will take around
10 minutes time to stabilize. Bring back the travelling microscope to F and repeat
steps 6 and 7.
9. Continue the above step and record your readings for every 10°C interval (up to
100 or 1100C) and repeat the measurements described in steps 6 and 7.
10. Plot a graph between air-wedge angle ‘θ’ vs. temperature ‘T’ and calculate the
slope. Finally use Eq. 9 to calculate the coefficient of thermal expansion ‘α’.

Experiment No - 01
Last update, August 2015, NISER, Bhubaneswar 6
Observations and Result
Measurement of LRT : Least count of vernier callipers = ……. cm
S.No. Reading at position A Difference
(cm)
Mean
LRT
(cm)
Main scale
reading
(cm)
Vernier
scale
reading
(cm)
Total
(cm)
Measurement of l (AC): l = ….
Measurement of fringe width β:
λλλλ = 589.3 nm
Least count of travelling microscope = …..
S.
No.
Temperature
(°C)
Number of
fringes
Distance moved by
microscope (cm)
Fringe
width
(cm)
θ= λ/2 β
Main
scale
Vernier
scale
Total
(cm)
Initial
Final
Initial
Final
Initial
Final
Initial
Final
Initial
Final

Experiment No - 01
Last update, August 2015, NISER, Bhubaneswar 7
Error Analysis
Precautions:
1. Do not touch the heater or the rod by hand when the oven is ON.
2. Rotate the knob of variac slowly.
3. Be careful while handling the glass plates.
References: Born M., Wolf E., Priciples of Optics.

Experiment No - 02
Last updated, August 2015, NISER, Bhubaneswar 1
Determination of Young’s Modulus and Poisson’s ratio
using Cornu’s method
Introduction
In an elegant experiment, Marie Alfred Cornu in the year 1869 first showed that the
interference phenomenon in optics could be used for measuring deformation of a solid
under load. At that time, it was very interesting to find that counting of interference
fringes could provide information about Young’s modulus and Poisson’s ratio for a
transparent material.
Objective
To determine Young’s modulus and Poisson’s ratio of a glass slab using Cornu’s method.
Apparatus
1. Optically plane glass plate
2. Travelling Microscope
3. Sodium lamp
4. Glass beam
5. A square shaped glass slide
6. Slide caliper and screw gauge
7. Pair of knife edges, hangers, loads etc.
Theoretical Background
Young’s modulus, also known as modulus of elasticity is an important
characteristic of a material and is defined to be ratio of longitudinal stress and
longitudinal strain and is given by
LA
LFY
∆=
.
0.
… (1)
which has unit of Pressure (Pascal) and F, A, ΔL and L0 are force, area, extension and
initial length respectively. Young’s modulus can be used to predict elongation or

Experiment No - 02
Last updated, August 2015, NISER, Bhubaneswar 2
compression of an object as long as the stress is less than the yield strength of the
material. Another important elastic constant is Poisson’s ratio. When a sample of
material is stretched in one direction it tends to get thinner in the other two directions.
Poisson’s ratio is a measure of this tendency and is defined as the ratio of the strain in the
direction of applied load to the strain in the transverse direction. A perfectly
incompressible material has Poisson’s ratio σ = 0.5. Most practical engineering materials
have 0 ≤ σ ≥ 0.5. For example, Poisson’s ratio for cork, steel and rubber is 0, 0.3 and 0.5
respectively. Polymer foams have negative Poisson’s ratio, when it is stretched it gets
thicker in other direction.
The method proposed by Cornu employs a glass plate placed on top of a glass
beam. When load is applied on both the sides of the glass beam, it gets deformed due to
strain along the longitudinal direction (X-axis). Since Poisson’s ratio σ ≠ 0, the glass
beam will bend in the transverse direction (Y-axis). Thus the beam deforms into the
shape of horse saddle forming a thin film of air between them. When the film is
illuminated by monochromatic light, interference occurs between the light reflected from
the bottom of the glass plate and the top of the beam as shown in Fig. 1.
Fig. 1 Geometry for obtaining interference fringes

Experiment No - 02
Last updated, August 2015, NISER, Bhubaneswar 3
Let ‘x’ and ‘y’ represent coordinates along longitudinal and transverse direction with the
middle point being the origin (O). Also, let Rx and Ry be the radius of curvature in
longitudinal (X) and transverse (Y) directions respectively. In order to obtain the shape of
the interference fringes, consider that the thickness of air film between the glass plate and
the beam to be ‘t(x,y)’ at appoint (x,y) in the XY-plane. First, let us consider only the X-
dependence of air film i.e. t ≡ t(x). The width ‘t(x)’ of the air film inside the glass beam
and the X-axis through the origin at a coordinate ‘x’ along X-axis can be obtained from
−
= − … (2)
Assuming ‘t(x)’ to be very small we can solve it to get
( )xR
xxt
2
2
= … (3)
Similarly, the width t(y) of the air film inside the glass beam and the XY-plane through
the origin ‘O’ at a coordinate ‘y’ along Y-axis can be obtained from
( )yR
yyt
2
2
−= … (4)
It is to be noted that the sign is negative because along Y-axis the glass beams bents
upward. Therefore width of air film between parallel plate and glass beam at a coordinate
(x, y) is given by
( ) ( ) ( )yx R
y
R
xytxtyxt
22,
22
−=+=
… (5)
The shapes of the fringes are determined by the locus of all points that have identical path
difference. In the present case, the path difference will be identical for points with a
constant value of thickness ‘t(x,y)’. Thus the shape of the fringe will be given by,
222
22a
R
y
R
x
yx
=−
… (6)
where ‘a’ is a constant and this is an equation of hyperbola. Therefore, the fringes will
be hyperbolic.
It is important to note that the light waves passing through glass plate will be
divided into two parts. One component would comprise the reflection from the bottom of
the glass plate-air interface and the second one would be from the top of air film-glass
beam interface. These two components would interfere and produce the fringe pattern.

Experiment No - 02
Last updated, August 2015, NISER, Bhubaneswar 4
The latter one would undergo a phase change of π because of reflection at air film-glass
beam interface. Also, this component traverses the width of the air film twice; therefore
the optical phase difference between these two waves (for almost normal incidence) is
given by,
( )( )[ ] πµλ
πϕ +=∆ yxt ,2
2 … (7)
where ‘μ’ is the refractive index of the film, λ is the free-space wavelength.
Let us consider the fringes along the X-axis and take into account that the air-film has a
refractive index μ = 1. If the distance of N-th dark fringe from the origin is xN, then the
interfering waves are essentially out-of-phase i.e.
( )πϕ 12 +=∆ N
… (8)
( ) λNR
xxt
x
N
N ==2
2
… (9)
It is to be noted that in the case of grating this is precisely the condition for bright fringes.
Therefore, if xN+s is the distance of (N+s)-th dark fringe (along X-axis), we get
( ) ( )λsNR
xxt
x
sN
sN +== ++
2
2 … (10)
Subtracting Eq. (9) from Eq. (10), we get
λs
xxR NsN
x
22 −= + … (11)
For convenience, we define
( ) 22
NsNx xxs −= +ρ
… (12)
Thus, measuring the distance of different fringes from the origin, squaring them and
subtracting we get the radius of curvature of the bent beam along X direction. Since, it is
difficult to find the origin it is convenient to measure the ‘diameter’ (D) of the fringe
which is related by DNx = 2xN and is the distance between N-th dark fringe on left side of
the origin and the N-th dark fringe on right side of the origin.
Once we obtain the radius of curvature along X-direction we can calculate the
bending moment from it. This is given by the following relation

Experiment No - 02
Last updated, August 2015, NISER, Bhubaneswar 5
x
xR
bdYG
1
12.
3
= … (13)
where ‘b’ and ‘d’ are the width and thickness of the glass beam respectively while ‘Y’ is
the Young’s modulus. The factors involving ‘b’ and ‘d’ comes from the moment of
inertia of the glass beam about an axis which is at a distance of ‘Rx’ from the origin ‘O’
(see Fig. 1) and parallel to Y-axis. This internal bending moment should be equal to the
external bending moment applied by the loads hanging from the glass beam. If l is the
distance between the knife-edge (the points where the glass beam is supported to the
base) and the suspension point of the load W (= mg) then Gx = W.l and therefore we can
have,
( )s
sbdYlW
xρ
λ
12..
3
=
… (14)
If we carry out the measurement for two different loads, then we obtain
( )( ) ( )
−=−
sss
bdYglmm
xx
21
3
21
11
12 ρρλ
… (15)
Equation (15) could be used for calculation of Young’s modulus.
In order to calculate the Poisson’s ratio, it is required to obtain the ratio of radius of
curvature in the longitudinal direction to that in the transverse direction. In analogy with
the argument leading to Eq. (11), we can obtain Ry by counting fringes along the Y-
direction as,
λs
yyR NsN
y
22 −= +
… (16)
where yN is the distance of the N-th dark fringe from the center along Y-axis. Therefore
Poisson’s ratio is given by
22
22
NsN
NsN
y
x
yy
xx
R
R
−
−==
+
+σ … (17)
Experimental Procedure:
1. Measure the width and the depth of the glass beam using vernier caliper and
screw gauge. Take at least three readings for avoiding any error.

Experiment No - 02
Last updated, August 2015, NISER, Bhubaneswar 6
2. Place the glass beam on two knife-edges and hang the load (250 gm) on both
sides. Measure the distance between knife-edge and point of suspension.
3. Place the plane glass plate on the glass beam near the middle. Adjust the glass
beam and glass plate so that the fringes appear.
4. Focus the microscope and adjust the beam and plate so that the fringes are
symmetrical on both sides of horizontal cross-wire and tangential to the vertical
cross-wire.
5. Turning screw of the microscope measure longitudinal position (along X) of
every transverse fringe on both sides. Take readings for about 10 fringes on both
sides of the center. To avoid backlash error start from one extreme.
6. Similarly measure transverse position (along Y) of longitudinal fringes by moving
microscope in transverse direction.
7. Increase the load to 300 grams and repeat the procedure from step 3.
Additional Scope:
Use a Convex lens, instead of glass-plate and observe the fringes. Derive the conditions
for determining the shape of the fringes and carry out the measurements as described in
the previous section.
Observations:
m1 = 250 grams
Along X-
Order
of the
fringe
Fringes on the left (x)
Fringes on the right
(x)
Main
Scale
(cm)
Vernier
scale
Total
(cm)
Main
Scale
(cm)
Vernier
scale
Total
(cm)
D
(cm)
D2
(cm2)
ρx
(cm2)
Rx

Experiment No - 02
Last updated, August 2015, NISER, Bhubaneswar 7
Along Y-
Order
of the
fringe
Fringes on the left (y)
Fringes on the right
(y)
Main
Scale
(cm)
Vernier
scale
Total
(cm)
Main
Scale
(cm)
Vernier
scale
Total
(cm)
D
(cm)
D2
(cm2)
ρy
(cm2)
Ry
Measure and tabulate the data in a similar table for m1=300gm .
Calculations: …
1. The correct error analysis and also compare the result with the literature value.
Precautions:
1) Handle the components carefully and make sure that load > 400 grams is not
exerted on the glass beam.
2) Make sure that you get regular shaped fringes. Adjust the glass plate slowly to
change the shape of fringes from any irregular pattern.
3) Be careful about backlash error while taking the readings.
References:
1. Experimental physics, by William Hume (scientific instrument maker).
2. Principles of Optics: Electromagnetic Theory of Propagation, Interference and
Diffraction of Light (7th
Edition), Max Born Emil Wolf.
3. http://iopscience.iop.org/0959-5309/40/1/326/pdf/0959-5309_40_1_326.pdf

Experiment No: 03
Last updated August 2010, NISER, Bhubaneswar 1
Measurement of magnetic susceptibility of paramagnetic solutions by Quincke’s method
Introduction:
It was established by Faraday in 1845 that magnetism is universal property of every
substance. He classified all magnetic substances into two classes, viz., paramagnetic and
diamagnetic. Weber, later on, tried to explain para and diamagnetic properties on the
basis of molecular currents. The molecular current gives rise to the intrinsic magnetic
moment to the molecule, and such substances are attracted in a magnetic field, and called
paramagnetics. The repulsion of diamagnetics is assigned to the induced molecular
current and its respective reverse magnetic moment. The force acting on a substance,
either of repulsion or attraction, can be measured with the help of an accurate balance in
case of solids or with the measurement of rise in level in narrow capillary in case of
liquids. The force depends on the susceptibility χ, of the material, i.e., on ratio of
intensity of magnetisation to magnetising field (I/H). Evidently it refers to that quantity of
substance by virtue of which bodies get magnetised. Quantitatively it refers to the extent
of induced magnetisation in unit field. If the force on the substance and field are
measured, the value of susceptibility can be calculated.
Objective: 1. Determine the magnetic susceptibility χ of a given paramagnetic solution with a
specific concentration.
2. Calculate mass susceptibility χ. Proceed to calculate Molar susceptibility χ, Curie
constant C, Magnetic moment of dipole .
Equipments:
Adjustable electromagnet with pole pieces of 75mm diameter
Constant power supply (0-90 V DC)
Gauss meter, 0-40 K Gauss with 0.5% accuracy
Hall probe for magnetic strength measurement
Traveling Microscope
Quincke’s tube (an U tube)

Experiment No: 03
Last updated August 2010, NISER, Bhubaneswar 2
Measuring Borosil flash
FeCl3, MnCl2, CuSO4 for making solutions
Set-Up and Procedure:
A. Experimental set-up
A schematic diagram of Quinck’s method is shown in Fig A Quinck’s tube is U
shaped glass tube with one limb very narrow and the other one wide. The narrow limb is
placed between the pole-pieces of an electromagnet shown as N-S such that the meniscus
of the liquid lies symmetrically between N-S. The length of the limb is sufficient as to
keep the other lower extreme end of this limb well outside the field H of the magnet. The
diameter of the narrow limb is decided as per rise or fall of the required liquid. The
length of the limb is about 20-30 cm and half the length of the tube is above and half
below the meniscus. The diameter of the limb is about a mm or even less in capillary
range. The rise or fall h is measured by means of a traveling microscope of least count of
the order of 10-3cm or with microscope fitted with a micrometer scale.
Figure 1: Schematic diagram of Quinck’s method.
B. Theory and evaluation:
Consider a paramagnetic medium in the presence of a uniform applied flux density Bo.
Loosely speaking, paramagnets are materials which are attracted to magnets. They
contain microscopic magnetic dipoles of magnetic dipole moment m which are randomly
oriented. However, in the presence of a uniform field Bo each dipole possesses a

Experiment No: 03
Last updated August 2010, NISER, Bhubaneswar 3
magnetic potential energy U = −m• Bo, [1] and so they all tend to align up parallel to Bo,
which is the orientation in which their potential energy is minimum (i.e. most negative).
Consequently, the liquid, which contains many such dipoles, will tend to be drawn into
the region of maximum field since this will minimise its total magnetic potential energy.
In otherwords, the liquid experiences an attractive magnetic force Fm pulling it into the
region of strongest field.
The dipoles in the liquid, MnSO4, are due to Mn2+ ions. A doubly-ionised manganese ion
is paramagnetic in its ground-state electronic configuration, which is such that the “spins”
of several outer electrons are aligned parallel to each other. This gives rise to a net
magnetic moment m which is not compensated (i.e. not cancelled out) by other electrons
in this ion.
A region of empty space permeated by a magnetic field H (where H = Bo/μo ) possesses
an energy whose density (energy per unit volume) is u = ½μoH2 [1]. When a magnetic
substance is present instead of vacuum, this magnetic energy density may be written:
2
2
1Hu (1)
where μ is the magnetic permeability of the substance and H = |H|. For fields which are
not too large, the magnetic permeability μ of a paramagnet can be treated as independent
of the applied field; i.e. it is a “constant”. Note that μ>μo for a paramagnet. The H vector
has the very useful property that its tangential component is continuous across a
boundary, (i.e. this is a “boundary condition” on H - see ref. [1]), so that in Fig. 1 the
value of H in the air above the meniscus is equal to that in the liquid. This is in contrast to
the flux density, where in Fig. 1 that in air Bo, is different (less, in this case) to that in the
liquid B :
BB
H 0
0 (3)
Suppose that, when the field is turned on, the meniscus in the narrow tube rises by an
amount h, relative to its zero-field position (see Fig. 2). A volume r2h of air in the
narrow tube (with permeability μo) is, therefore, replaced by liquid. Hence, the magnetic
potential energy of this volume of space increases by an amount:
h)(2
1 220 rHU (3)

Experiment No: 03
Last updated August 2010, NISER, Bhubaneswar 4
Figure 2: The rise in liquid in the narrow tube and the fall in the wide tube
The work done by the upward magnetic force Fm in raising the liquid by an amount
h is U = Fm h. Hence, we have
220 )(
2
1
hrH
UFm
(4)
When the liquid in the narrow column rises by h, that in the wide tube falls by a (smaller)
amount h′ (where h′= h × r2/R2). The liquid stops rising when the upward force, acting on
the whole volume of liquid between the pole pieces, is balanced by the weight of the head
of liquid, above that of the meniscus in the wider tube, shown as the cross-hatched region
in Figure 2. The downward gravitational force on the head of liquid, of mass m, is given
by
grR
rhgrhhmgFg
22
22 )1(' (5)
where is the density of the liquid. To a very good approximation, balance is achieved
when these two forces cancel, so we may equate equs. (4) and (5). However, there is also
a very small additional upwards force on the liquid due to the buoyancy of the air, which,
strictly, ought to be included (By the Principle of Archimedes, bodies immersed in any
fluid, even air, experience this buoyancy; you are yourself very slightly lighter by virtue
of the surrounding air, though this effect is extremely tiny compared to that which you
h
h′

Experiment No: 03
Last updated August 2010, NISER, Bhubaneswar 5
experience when immersed in a much denser fluid, such as water). The liquid in the
narrow column displaces a volume of air, while that in the wide column is replaced by
air, and this leads to a net upwards buoyancy force on the narrow column given by
grR
rhgrhhF oob
22
22 )1(' (6)
where o is the density of the air. Combining all these forces, we have Fm =Fg -Fb, so that
grR
rhrH oo
22
222 )1()(
2
1 (7)
From Equs. (7) and (2), and the definition of magnetic susceptibility [1]: χm = (μ/μo) - 1
we finally obtain :
22
2
)1)((2B
h
R
rg oo
(8)
The experiment can be done with r=R condition. Then the above eq. can be reduced to
2
)(4B
hg oo (9)
In practice, the corrections due to air are negligible. There will also be a small but
significant diamagnetic (i.e. negative) contribution to the susceptibility mainly due to the
water. If we take an examples as Mn2+, the total susceptibility of the solution is then
given by χ = χMn + χwater. This assumes that the number of water molecules per unit
volume is not very different in the solution from that in pure water. In the present work
you will correct χ to yield the true value of χMn due to the presence of the manganous
sulphate. Keep in mind that water is a diamagnetic, the diamagnetic volume susceptibility
of water χwater=0. 90 x 10-5.
Mass Susceptibility is given by: χ′ = χ (10)
Molar Susceptibility is given by: χ′′ = χ′ M (11)
Where M= Molecular weight
Curie constant is given by: C = χ′′/T (12)
Where T= Temperature of sample
Magnetic moment of dipole of the specimen by relation
= 2.8241C (13)

Experiment No: 03
Last updated August 2010, NISER, Bhubaneswar 6
Where is expressed in Bohr magnetron B of value 9.272 10-24 A-m2
Ions such as divalent manganese Mn2+ possess a permanent magnetic dipole moment. A
substance consisting of a system of such non-interacting magnetic dipoles behaves as a
paramagnet. The dipoles tend to align parallel to a magnetic field giving a net magnetisation
also parallel to the field. Thermal effects on the other hand tend to destroy this alignment, so
the susceptibility of a paramagnet decreases as the temperature T is increased. It may be
shown, using the methods of statistical mechanics, that at high temperatures (kT >> mB) the
contribution χMn of the paramagnetic Mn ions to the volume susceptibility of the solution is
given by,
kT
Np
kT
Nm
B
M oBoo
33
222 (14)
where k is Boltzmann's constant and N i s the number of Mn ions per unit volume and m
= pμ, where p is the magneton number defined in Appendix A. The 1/T dependence of
χMn is known as Curie's Law.
The above theory assumes that the magnetic field acting on each ion is just the applied field
B; field and contributions due to neighboring magnetic ions are neglected. For dilute
paramagnetic materials these other contributions are very small and the approximation is
valid. This is not so for concentrated magnetic materials and ferromagnets and the effect of
the neighboring ions must be included.
C. Experimental Procedure
1. Test and ensure that each unit is functioning properly.
2. Calculate the number of moles of Mn2+ ions per unit volume of the solution. 1 mole of a
substance has a weight in grams equal to its molecular weight, Wm. The molecular
weight is found by adding up the atomic weights of the constituent atoms of the
molecule. If X grams of manganese sulphate, MnSO4 .4H2O were dissolved in V m3 of
the solution, the number of moles is X/Wm. Each mole contains NA (Avagadro’s number)
of molecules. Thus the number of molecules in V m3 is NAX/Wm and N in equation 9 is
NAX/WmV.

Experiment No: 03
Last updated August 2010, NISER, Bhubaneswar 7
3. Measure the density ρ of your solution using a specific gravity bottle. The method here
is to (a) weigh the bottle + stopper when it is dry and empty, (b) fill it with distilled
water and weigh it again, (c) dry it with compressed air and fill it with your solution and
weigh it again. The density ρ may be found, knowing the density of water ρwater, from
ab
acwater
(15)
4. Connect the electromagnet coils in series to the power supply and ammeter. The
field between the pole pieces must be calibrated as a function of current over an
appropriate range. The Hall probe will be used to measure the magnetic B field (how
does this work?). Switch on the Hall probe meter and, with the Hall probe held well
away from any sources of magnetic field, zero the reading. Now, with the U-tube
removed, insert the Hall probe into the field region between the flats of the pole
pieces. Energise the coils and adjust the probe’s position and orientation until it
registers maximum field. Clamp the probe handle firmly in place so that it cannot
move. Measure the applied flux density B over a suitable range of current, and plot
the current-field relationship.
5. If you record your calibration data with sufficiently small increments of current this will
provide the best definition of the entire curve, which will be linear for small values of
current and then the slope will decrease as magnetic saturation occurs in the material of
the pole pieces. Note there may also be some magnetic hysteresis present and for a given
current, the field may be slightly different, depending on whether the current is
increasing or decreasing. The magnetic saturation means that the highest values of
current do not produce an equivalent increase in the values of the magnetic field.
However you should measure the highest fields (subject to the current restrictions given
above) since these will give the largest changes in the height of the magnetic liquids.
6. Fill the liquid solution in the tube. Set the meniscus as directed and centrally with in
the pole-pieces.
7. Focus the microscope on the meniscus and take reading.
8. Apply magnetic field B and note its value from the calibration, which is done earlier
as an auxiliary experiment.
9. Note whether the meniscus rises up or descends down. It rises up for paramagnetic
liquids and solutions while descends down for diamagnetic.

Experiment No: 03
Last updated August 2010, NISER, Bhubaneswar 8
10. Refocus the microscope on meniscus and take reading. Find the difference of two
readings to give h.
11. Record relative density of air from data book for the temp. of the test liquid and
the atmospheric pressure. The value of for dry air at pressure of 760mm mercury
and 20C is 0.001205 Kg/m3.
12. If both the solution and solvent show either rise or fall of meniscus, then use + ve
sign otherwise use – ve sign.
13. Obtain the values of χ for different concentrations and plot the variation of χ with
concentration.
14. Examples of making solutions of different concentration.
Weigh the specimen and dissolve it in a suitable liquid of known volume and
calculate its mass per ml. For example if 10 gm MnCl2 is dissolved to make up 100 ml
solution with water, then mass dissolved per ml. is 0.1 gm/ml. Now the concentration of
the solute in the solution can be calculated as below:
1. Molecular weight of salt MnCl2 = 125.9 gm.
2. Molecular weight of the hydrated salt MnCl2. 4H2O = 197.9 gm.
3. Weight of salt dissolved in 100 ml of water = 10 gm.
Weight dissolved per ml = 0.1 gm/ml.
Now, 197.9gm hydrated salt has 125.9gm MnCl2
0.1 gm/ml hydrated salt will contain, i.e.
Concentration C = 0.0636 gm/ml.
This gives the concentration of the salt.
Another example is CuSO4.5 H2O having molecular weight = 249.5
Observation: A. Record specifications as per expt and use separate table to calibrate and determine H.
B. Determind the relative density and tabulate in Table 1.
Table 1: Measurement of
Wt. of empty R.D. bottle (a) = Wa
Wt. of R.D. bottle filled with test liquid (b) = Wb
Wt. of R.D. bottle filled with distilled water (c) = Wc

Experiment No: 03
Last updated August 2010, NISER, Bhubaneswar 9
S. No. Wa (gm) Wb (gm) Wc(gm)
ab
ac
Temp.
(gm)
Table2. Measurement of (h H)
S.
No.
B
(Tesla)
B2
(Tesla)
Meniscus Reading Difference
h= (b-a)
h/B2
m-T-2 With H=0(a) With H(b)
M.S V.S T.R M.S V.S T.R.
Conclusion and discussion:
Precautions: 1. Scrupulous cleanliness of the U-tube is essential. Thoroughly clean the tube and rinse
it well with distilled water before starting and dry it. 2. Make several sets of measurements to ensure consistency; false readings can arise from
liquid running down the tube or sticking to the sides. 3. Carefully swab down the inside of the U- tube with a cotton bud, to ensure that there
are no droplets of liquid which might interfere with the plastic spacers on the rod which measures the height of the meniscus.
4. Do not use the U-tube for longer than one laboratory period without recleaning. After cleaning ask the laboratory technician to dry the tube for you with compressed air.
5. Try to avoid the backlash error of the travelling microscope. The small change of height may cause you more error in the calculation.
References
[1] I. S. Grant and W.R. Phillips, “Electromagnetism”, (Wiley)
[2] Kaye & Laby, http://www.kayelaby.npl.co.uk (these are mass susceptibilities in
SI units) to convert to dimensionless values multiply by ρ (in kg/m3).

Experiment No: 03
Last updated August 2010, NISER, Bhubaneswar 10
Appendix A: Magnetic moment values
The magnetic susceptibility of a substance is related to the magnetic dipole moments of
its individual atoms or ions. The total angular momentum of an atom or ion arises from
both the orbital motion and the spin of the electrons. The magnetic dipole moment can be
expressed in the form
m = pμB,
where p, the magneton number, is the dipole moment in units of the quantity μB, which is
known as the Bohr magneton. The Bohr magneton is the atomic unit of magnetic moment
defined by,
μB = eh / 4πme
where, in this equation, e and me are the electronic charge and mass and h is Planck's
constant. The dimensionless magneton number p is usually between 1 and 10 for atomic
systems.
The rules for calculating p can be summarised as follows,
(i) the unfilled electron shells for any atom or ion can be found in standard tables.
(ii) the quantum numbers of the individual electrons can be added
i
ilL and i
isS
to give the largest values of L and S consistent with the Pauli Exclusion Principle
(iii) the total quantum number J can be found from
J = L - S first half of the electron shell
J = L + S second half of the electron shell
(iv) the magneton number p is given by,
)1( JJgp where g the so called Landé splitting factor
)1(2
)1()1(
2
3
JJ
LLSSg

Experiment No: 03
Last updated August 2010, NISER, Bhubaneswar 11
takes into account that the spin effectively creates twice as much magnetic moment
as the orbital motion.
(v) the result of these calculations are tabulated in nost textbooks on condensed matter
physics, See the Table 1.
Table 1 Magneton numbers p for some transition metals (TM2+ free ions)
No of electrons
in 3d shell
Ion S L J p
0 Ca2+ 0 0 0 0
1 Sc2+ ½ 2 3/2 1.55
2 Ti2+ 1 3 2 1.63
3 V2+ 3/2 3 3/2 0.77
4 Cr2+ 2 2 0 0
5 Mn2+ 5/2 0 5/2 5.92
6 Fe2+ 2 2 4 6.71
7 Co2+ 3/2 3 9/2 6.63
8 Ni2+ 1 3 4 5.59
9 Cu2+ ½ 2 5/2 3.55
10 Zn2+ 0 0 0 0

187PHYWE Systeme GmbH & Co. KG · D-37070 Göttingen Laboratory Experiments Physics
Electric field Electricity
XX
X
X
X
XX
XX
X
X
X
X
X
X
X
1000
800
600
400
200
0
1,0 2,0 3,0 4,0
plastic
air
Principle:The electric constant 0 is deter-mined by measuring the charge of aplate capacitor to which a voltage isapplied. The dielectric constant isdetermined in the same way, withplastic or glass filling the spacebetween the plates.
Tasks:1. The relation between charge Q
and voltage U is to be measuredusing a plate capacitor.
2. The electric constant 0 is to bedetermined from the relationmeasured under point 1.
3. The charge of a plate capacitor isto be measured as a function ofthe inverse of the distance be -tween the plates, under constantvoltage.
Electrostatic charge Q of a plate capacitor as a function of the applied volt-age Uc, with and with out dielectric (plastic) between the plates (d = 0.98 cm)
4. The relation between charge Qand voltage U is to be measuredby means of a plate capacitor,between the plates of which dif-ferent solid dielectric media areintroduced. The correspondingdielectric constants are deter-mined by comparison with meas-urements performed with airbetween the capacitor plates.
Plate capacitor, d = 260 mm 06220.00 1
Plastic plate 283 x 283 mm 06233.01 1
Glass plate for current conductors 06406.00 1
High value resistors, 10 MΩ 07160.00 1
Universal measuring amplifier 13626.93 1
High voltage supply 0...10 kV 13670.93 1
Capacitor 220 nF/250 V, G2 39105.19 1
Voltmeter 0.3...300 V-, 10...300 V~ 07035.00 1
Connecting cable, 4 mm plug, 32 A, green-yellow, l = 10 cm 07359.15 1
Connecting cable, 4 mm plug, 32 A, red, l = 50 cm 07361.01 1
Connecting cable, 4 mm plug, 32 A, blue, l = 50 cm 07361.04 1
Connecting cable, 30 kV, l = 500 mm 07366.00 1
Screened cable, BNC, l = 750 mm 07542.11 1
Adapter, BNC socket - 4 mm plug 07542.20 1
T type connector, BNC, socket, socket, plug 07542.21 1
Adapter, BNC plug/4 mm socket 07542.26 1
What you need:
Complete Equipment Set, Manual on CD-ROM includedDielectric constant of different materials P2420600
What you can learn about …
Maxwell’s equations Electric constant Capacitance of a plate
capacitor Real charges Free charges Dielectric displacement Dielectric polarisation Dielectric constant
Dielectric constant of different materials 4.2.06-00
QnAs
Uc
kV

LEP4.2.06
-00Dielectric constant of different materials
PHYWE series of publications • Laboratory Experiments • Physics • © PHYWE SYSTEME GMBH & Co. KG • D-37070 Göttingen P2420600 1
Related topicsMaxwell’s equations, electric constant, capacitance of a platecapacitor, real charges, free charges, dielectric displacement,dielectric polarisation, dielectric constant.
PrincipleThe electric constant e0 is determined by measuring thecharge of a plate capacitor to which a voltage is applied. Thedielectric constant is determined in the same way, with plas-tic or glass filling the space between the plates.
EquipmentPlate capacitor, d = 260 mm 06220.00 1Plastic plate 283283 mm 06233.01 1Glass plates f. current conductors 06406.00 1High-value resistor, 10 MOhm 07160.00 1Universal measuring amplifier 13626.93 1High voltage supply unit, 0-10 kV 13670.93 1Capacitor/case 1/0.22 µF 39105.19 1Voltmeter, 0.3-300 VDC, 10-300 VAC 07035.00 1Connecting cord, l = 100 mm, green-yellow 07359.15 1Connecting cord, l = 500 mm, red 07361.01 1Connecting cord, l = 500 mm, blue 07361.04 1Connecting cord, 30 kV, l = 500 mm 07366.00 1Screened cable, BNC, l = 750 mm 07542.11 1Adapter, BNC socket - 4 mm plug 07542.20 1Connector, T type, BNC 07542.21 1Adapter, BNC-plug/socket 4 mm 07542.26 1
Tasks1. The relation between charge Q and voltage U is to be
measured using a plate capacitor.
2. The electric constant e0 is to be determined from the rela-tion measured under point 1.
3. The charge of a plate capacitor is to be measured as a func-tion of the inverse of the distance between the plates, underconstant voltage.
4. The relation between charge Q and voltage U is to bemeasured by means of a plate capacitor, between theplates of which different solid dielectric media are intro-duced. The corresponding dielectric constants are deter-mined by comparison with measurements performed withair between the capacitor plates.
Set-up and procedureThe experimental set-up is shown in fig. 1 and the corre-sponding wiring diagram in fig. 2. The highly insulated capac-itor plate is connected to the upper connector of the high volt-age power supply over the 10 MΩ protective resistor. Both themiddle connector of the high voltage power supply and theopposite capacitor plate are grounded over the 220 nF capac-itor. Correct measurement of the initial voltage is to be assuredby the corresponding adjustment of the toggle switch on theunit. The electrostatic induction charge on the plate capacitorcan be measured over the voltage on the 220 nF capacitor,according to equation (4). The measurement amplifier is set tohigh input resistance, to amplification factor 1 and to timeconstant 0.
Fig. 1: Measurement set-up: Dielectric constant of different materials.

LEP4.2.06
-00Dielectric constant of different materials
P2420600 PHYWE series of publications • Laboratory Experiments • Physics • © PHYWE SYSTEME GMBH & Co. KG • D-37070 Göttingen2
To start with, the surface of the capacitor plates is determinedby means of their radius. The experiment is carried out in twoparts:
1. In the first part, the distance between the plates of the platecapacitor is varied under constant voltage, and the charge onthe capacitor plates is measured. The linear relation betweencharge and plate capacitor voltage is then verified.Measurement data allow to determine the electric constant 0,using equation (4).Be sure not to be near the capacitor during measurements,as otherwise the electric field of the capacitor might be dis-torted.
2. In the second part, the dependence of the electrostaticinduction charge from voltage, with and without plastic plate(without air gap!), is examined in the space between theplates, with the same distance between the plates. The ratiobetween the electrostatic induction charges allows to deter-mine the dielectric constant e0 of plastic. The dielectric con-stant of the glass plate is determined in the same way.
Theory and evaluationElectrostatic processes in vacuum (and with a good degree ofapproximation in air) are described by the following integralform of Maxwell’s equations:
(1)
(2)
where E
is the electric field intensity, Q the charge enclosedby the closed surface A, e0 the electric constant and s aclosed path.
If a voltage Uc is applied between two capacitor plates, an elec-tric field E
will prevail between the plates, which is defined by:
(cf. figure 3). Due to the electric field, electrostatic charges ofthe opposite sign are drawn towards the surfaces of thecapacitor. As voltage sources do not generate charges, butonly can separate them, the absolute values of the oppositeelectrostatic induction charges must be equal.Assuming the field lines of the electric field always to be per-pendicular to the capacitor surfaces of surface A, due to sym-metry, which can be experimentally verified for small distanc-es d between the capacitor plates, one obtains from equa-tion (1):
(3)Q
e0 E ·A Uc · A ·
1d
Uc 2
1
ES
d rS
ES
d SS
0
A
ES
dAS
Q
e0
Fig. 2: Wiring diagram.
Fig. 3: Electric field of a plate capacitor with small distancebetween the plates, as compared to the diameter of theplates. The dotted lines indicate the volume of integra-tion.
Fig. 4: Electrostatic charge Q of a plate capacitor as a functionof the applied voltage Uc (d = 0.2 cm)
Q in nAs

LEP4.2.06
-00Dielectric constant of different materials
PHYWE series of publications • Laboratory Experiments • Physics • © PHYWE SYSTEME GMBH & Co. KG • D-37070 Göttingen P2420600 3
The volume indicated in fig. 3, which only encloses onecapacitor plate, was taken as volume of integration. As thesurface within the capacitor may be displaced without chang-ing the flux, the capacitor field is homogeneous. Both the flowand the electric field E outside the capacitor are zero,because for arbitrary volumes which enclose both capacitorplates, the total enclosed charge is zero.
The charge Q of the capacitor is thus proportional to voltage;the proportionality constant C is called the capacitance of thecapacitor.
(4)
The linear relation between charge Q and voltage U applied tothe otherwise unchanged capacitor is represented in fig. 4.Equation (4) further shows that the capacitance C of thecapacitor is inversely proportional to the distance d betweenthe plates:
(5)
For constant voltage, the inverse distance between the plates,and thus the capacitance, are a measure for the amount ofcharge a capacitor can take (cf. fig. 5). If inversely U, Q, d andA were measured, these measurement data allow to calculatethe electric constant e0:
(6)
In this example of measurement, one obtains e0 = 8.8 · 10–12
As/(Vm), as compared to the exact value of
e0 = 8.8542 · 10–12 As/(Vm)
Equations (4), (5) and (6) are valid only approximately, due tothe assumption that field lines are parallel. With increasing dis-tances between the capacitor plates, capacitance increases,which in turn systematically yields a too large electric constantfrom equation (6). This is why the value of the electric constantshould be determined for a small and constant distance be-tween the plates (cf. fig. 4).
e0 d
A ·
Q
Uc
C e0 · A 1d
Q C Uc e0 A
d · Uc
Things change once insulating material (dielectrics) are insert-ed between the plates. Dielectrics have no free moving chargecarriers, as metals have, but they do have positive nuclei andnegative electrons. These may be arranged along the lines ofan electric field. Formerly nonpolar molecules thus behave aslocally stationary dipoles. As can be seen in fig. 6, the effectsof the single dipoles cancel each other macroscopically insidethe dielectric. However, no partners with opposite charges arepresent on the surfaces; these thus have a stationary charge,called a free charge.The free charges in turn weaken the electric field E
of the real
charges Q, which are on the capacitor plates, within the di-electric.The weakening of the electric field E
within the dielectric is
expressed by the dimensionless, material specific dielectricconstant e (e = 1 in vacuum):
(7)
where E
0 is the electric field generated only by the real charg-es Q. Thus, the opposite field generated by the free chargesmust be
(8)
Neglecting the charges within the volume of the dielectricmacroscopically, only the free surface charges (± Q) generateeffectively the opposite field:
(9)
where p is the total dipole moment of the surface charges. Inthe general case of an inhomogeneous dielectric, equation (9)becomes:
(10)
where P
– total dipole moment per unit volume – is called di-electric polarisation.If additionally a D
-field (dielectric displacement) is defined:
D
= e · e0 · E
(11)
whose field lines only begin or end in real (directly measurable)charges, the three electric magnitudes, field intensity E
, di-
electric displacement D
and dielectric polarisation P
are relat-ed to one another through the following equation:
D
= e0 · E
+ P
= e · e0 ·E
ES
f 1e0
d pS
d V
1e0
PS
ES
f Qf
A e0
Qf · 1
e0 V e0
p
V
ES
f ES
0 ES
e 1e
ES
0
ES
ES
0
e
Fig. 5: Electrostatic charge Q of a plate capacitor as a functionof the inverse distance between the capacitor platesd–1 (Uc = 1.5 kV).
Fig. 6: Generation of free charges in a dielectric throughpolarisation of the molecules in the electric field of aplate capacitor.
E
Q in nAs

LEP4.2.06
-00Dielectric constant of different materials
P2420600 PHYWE series of publications • Laboratory Experiments • Physics • © PHYWE SYSTEME GMBH & Co. KG • D-37070 Göttingen4
If the real charge Q remains on the capacitor, whilst a dielec-tric is inserted between the plates, according to definition (3),voltage Uc between the plates is reduced as compared tovoltage Uvac in vacuum (or to a good approximation, in air) bythe dielectric constant:
(12)
Similarly, one obtains from the definition of capacitance (4):
C = e · C vac (13)
The general form of equation (4) is thus:
(14)
In fig. 7, charge Q on the capacitor is plotted against theapplied plate voltage Uc for comparison to the situation withand without plastic plate between the capacitor plates, allother conditions remaining unchanged: thus, for the samevoltage, the amount of charge of the capacitor is significantlyincreased by the dielectric, in this example by a factor of 2.9.If the charges obtained with and without plastic (equations [4]and [14]) are divided by each other:
(15)
the obtained numerical value is the dielectric constant of theplastic.
For the glass plates, a value of e = 9.1 is obtained similarly.
Qplastic
Qvacuum e
Q e · e0 · A
d · Uc
Uc Uvac
e
In order to take into consideration the above described influ-ence of free charges, Maxwell’s equation (1) is generally com-pleted by the dielectric constant e of the dielectric which fillsthe corresponding volume:
(16)
Thus, equation (14) becomes equation (4).
Measurement results Measurement of the electric constant:
A = 0.0531 m2 Uc = 1.5 kV C = 218 nF
A = 0.0531 m2 d = 0.2 cm C = 218 nF
Measurement of dielectric constant
Plastic: A = 0.0531 m2 d = 0.98 cm C = 218 nF
Glass: d = 0.17 cm U = 5.8 V Q = 1.264 mAs Uc = 500 Veglass = 9.1
Uc [kV] 0.5 1.0 1.5 2.0 2.5 3.0 3.5 4.0
U [V] 0.5 0.92 1.35 1.8 2.3 2.8 3.1 3.7
Q [nAs] 109 201 294 392 501 610 676 807
Q —dAe0
1—Uc 4.6 4.2 4.1 4.1 4.2 4.3 4.0 4.2
Uvac [V] 0.16 0.32 0.51 0.62 0.78 0.95 1.12 1.3
Qvac[nAs] 35 70 111 135 170 207 244 283
Q/Qvac 3.1 2.9 2.6 2.9 2.9 2.9 2.9 2.9
Uc [kV] 0.5 1.0 1.5 2.0 2.5 3.0 3.5 4.0
U [V] 0.5 1.1 1.6 2.05 2.65 3.15 4.0 4.6
Q [nAs] 109 240 348 447 578 687 872 1003
e0 [pAs/Vm] 8.2 9.0 8,7 8.4 8.7 8.6 9.4 9.5
U [V] 3.3 2.4 1.6 1.35 1.2 1.1
d [cm] 0.10 0.15 0.20 0.25 0.30 0.35
1/d [cm–1] 10.0 6.7 5.0 4.0 3.3 2.9
Q [nAs] 719 523 350 294 262 240
e0 [pAs/Vm] 9.00 9.85 8.75 9.25 9.85 10.50
A e · e0 · E
SdA
S D
SdA
S Q
Fig. 7: Electrostatic charge Q of a plate capacitor as a functionof the applied voltage Uc, with and without dielectric(plastic) between the plates (d = 0.98 cm)
Q in nAs

LEP5.1.01Elementary charge and Millikan experiment
PHYWE series of publications • Laboratory Experiments • Physics • PHYWE SYSTEME GMBH • 37070 Göttingen, Germany 25101 1
Related topicsElectric field, viscosity, Stoke’s law, droplet method, electroncharge.
Principle and taskCharged oil droplets subjected to an electric field and to gra-vity between the plates of a capacitor are accelerated byapplication of a voltage. The elementary charge is determinedfrom the velocities in the direction of gravity and in the oppo-site direction.
EquipmentMillikan apparatus 09070.00 1Multi-range meter w. overl. prot. 07021.01 1Power supply, 0…600 VDC 13672.93 1Stage micrometer, 1 mm - 100 div. 62046.00 1Stop watch, interruption type 03076.01 2Cover glasses 18318 mm, 50 pcs. 64685.00 1Commutator switch 06034.03 1Tripod base -PASS- 02002.55 1Stand tube 02060.00 1Connecting cord, 250 mm, black 07360.05 1Connecting cord, 750 mm, red 07362.01 2
Connecting cord, 750 mm, blue 07362.04 2Connecting cord, 750 mm, black 07362.05 3
Optional accessories:Radioactive source, Am-241, 74 kBq 09047.51 1Circular level 02122.00 1FlexCam Scientific 88031.93 1
Problems1. Measurement of the rise and fall times of oil droplets with
various charges at different voltages.
2. Determination of the radii and the charge of the droplets.
Set-up and procedureThe experimental set up is as shown in Fig. 1. The power unitsupplies the necessary voltages for the Millikan apparatus.The lighting system is connected to the 6.3 V a.c. sockets.
First calibrate the eyepiece micrometer with a stage micrometer.By connecting the fixed (300 V d.c.) and the variable (0 to300 V d.c.) outputs in series, a voltage supply of more than300 V d.c. can be obtained. The commutator switch will beused to invert the polarity of the capacitor.
R
Fig. 1: Experimental set up for determining the elementary charge with the Millikan apparatus.

LEP5.1.01 Elementary charge and Millikan experiment
25101 PHYWE series of publications • Laboratory Experiments • Physics • PHYWE SYSTEME GMBH • 37070 Göttingen, Germany2
– Set the capacitor voltage to a value between 300 V and500 V.
– Blow in the oil droplets.
– Select an oil droplet and by operating the commutatorswitch move the droplet between the highest and lowestgraduations on the eyepiece micrometer. Correct the focus-ing of the microscope if necessary.
Note the following criteria when selecting the droplet:
– The droplet must not move too fast, then it has a smallcharge (it should need ca. 1…3 s for the way of 30 div.)
– The droplet must not move too slowly and should not exhi-bit any sqaying movements. Increase the capacitor voltageif required.
– Sum together some rise times using the first stopwatch.
– Sum together some fall times using the second stopwatch.
– The added times should be greater than 5 s in both cases.
Theory and evaluationThe falling and rising movement of a charged oil droplet in theelectric field of the capacitor is obverserved and the velocitiesare determined.
Velocity falling in the electric field y1
Velocity rising in the electric field y2
Capacitor voltage U
Charge on the droplets Q = n · e
Radius of the droplets r
Capacitor interelectrode distance d = 2.5 mm ± 0.01 mm
Density of the silicone oil r1 = 1.03·103 kg m-3
Viscosity of air h = 1.82·10-5 kg (m·s)-1
Gravitational acceleration g = 9.81 ms-2
Density of air r2 = 1,293 kg m-3
The force F experienced by a sphere of radius r and velocity yin a viscous fluid of viscosity h, is:
F = 6 prhy (Stockes’ law). (1)
The sheric droplet of mass m, volume V and density r1 is loca-ted in the earth’s gravitational field.
F = m · g = r1 · V · g (2)
Force of buoyancy is given by
F = r2 · V · g (3)
The Force of the electrical field is given by
(4)
From the sum of the forces affecting a charged particle, the falland rise velocities of the droplets are obtained.
(5)
(6)
Substraction or addition of these equations gives the radiusand the charge of the droplet.with
(7)
C1 = 2.73 · 10-11 kg m (m · s)-1/2
withr = C2 · (8)
C2 = 6.37 · 10-5 (m · s)1/2
Calibrating of the eyepiece micrometer:Scale with 30 div. = 0.89 mm
The measured falling and rising times of 20 droplets are givenin table 1.
Fig. 2 shows that the charge of the droplets have certainvalues which are multiples of the elementary charge e
Q = n · e
As a mean value, the elementary charge is obtained as
e = 1.68 · 10-19 As
C2 532
· ! hg sr1– r2)
Ïy1 – y2?
C1 592
p d · ! h3
g sr1– r2)
Ïy1 – y2?Q 5 C1 ·
y1 1 y2
U
y2 51
6p r h 1Q · E –
43
p r3 g (r1– r2 )2
y1
1 51
6p r h 1QE 1
43
p r 3 g (r1– r2 )2
F 5 Q · E 5 Q · Ud
R
1,20E-18
1,00E-18
8,00E-19
6,00E-19
4,00E-19
2,00E-19
0,00E+000,00E+00
2,00E-07 4,00E-07 6,00E-07 8,00E-07 1,00E-07 1,20E-07
r/m
Q/A
s
Fig. 2: Measurements on various droplets for determining theelementary charge by the Millikan method.

LEP5.1.01Elementary charge and Millikan experiment
PHYWE series of publications • Laboratory Experiments • Physics • PHYWE SYSTEME GMBH • 37070 Göttingen, Germany 25101 3
Alteration of the chargeUsing a radioactive source (e.g. Am-241, 74 kBq) the chargeof the oil droplets in the capacitor chamber can be altered.The radioactive source has to be positioned in front of themica window of the Millikan Unit which is transparent for aparticles.
Observation with Video cameraA video camera, which is used in place of the eye, can beused for the demonstration of the movement of the droplet.The time measurements of the moving droplet becomes mucheasier, and will even be more accurate, due to the better visi-bility. The intensity of the light from the illumination device issufficient for observation with a video camera.
R
U t1 s1 t2/ s2 s1 s2 y1 y2 (y1-y2) r Qn
eV s div. s div. mm mm m/s m/s (m/s) m As As
300 9.6 150 13.5 150 4.45 4.45 4.64E-04 3.30E-04 1.34E-04 7.37E-07 8.54E-19 5 1.71E-19300 7.0 90 11.2 120 2.67 3.56 3.81E-04 3.18E-04 6.36E-05 5.08E-07 5.19E-19 3 1.73E-19300 5.8 90 7.1 60 2.67 1.78 4.60E-04 2.51E-04 2.10E-04 9.22E-07 9.57E-19 6 1.60E-19300 7.4 90 8.8 60 2.67 1.78 3.61E-04 2.02E-04 1.59E-04 8.02E-07 6.59E-19 4 1.65E-19300 6.9 90 8.2 90 2.67 2.67 3.87E-04 3.26E-04 6.13E-05 4.99E-07 5.19E-19 3 1.73E-19300 5.6 90 8.0 60 2.67 1.78 4.77E-04 2.23E-04 2.54E-04 1.02E-06 1.04E-18 6 1.73E-19400 6.9 90 9.8 90 2.67 2.67 3.87E-04 2.72E-04 1.15E-04 6.82E-07 4.92E-19 3 1.64E-19400 6.4 90 8.3 90 2.67 2.67 4.17E-04 3.22E-04 9.55E-05 6.23E-07 5.04E-19 3 1.68E-19400 5.0 90 5.0 60 2.67 1.78 5.34E-04 3.56E-04 1.78E-04 8.50E-07 8.28E-19 5 1.66E-19400 7.0 120 7.9 120 3.56 3.56 5.09E-04 4.51E-04 5.79E-05 4.85E-07 5.09E-19 3 1.70E-19400 6.0 60 8.5 60 1.78 1.78 2.97E-04 2.09E-04 8.73E-05 5.95E-07 3.30E-19 2 1.65E-19400 5.5 90 7.4 90 2.67 2.67 4.85E-04 3.61E-04 1.25E-04 7.11E-07 6.59E-19 4 1.65E-19400 4.7 60 7.8 60 1.78 1.78 3.79E-04 2.28E-04 1.51E-04 7.82E-07 5.19E-19 3 1.73E-19400 5.2 120 10.6 180 3.56 5.34 6.85E-04 5.04E-04 1.81E-04 8.57E-07 1.11E-18 7 1.59E-19400 6.5 60 9.7 60 1.78 1.78 2.74E-04 1.84E-04 9.03E-05 6.05E-07 3.03E-19 2 1.52E-19500 6.4 120 7.2 120 3.56 3.56 5.56E-04 4.94E-04 6.18E-05 5.01E-07 4.61E-19 3 1.54E-19500 5.5 90 9.8 120 2.67 3.56 4.85E-04 3.63E-04 1.22E-04 7.04E-07 5.23E-19 3 1.74E-19500 5.2 60 5.7 60 1.78 1.78 3.42E-04 3.12E-04 3.00E-05 3.49E-07 2.00E-19 1 2.00E-19500 6.4 120 8.9 120 3.56 3.56 5.56E-04 4.00E-04 1.56E-04 7.96E-07 6.67E-19 4 1.67E-19500 5.2 120 5.9 90 3.56 2.67 6.85E-04 4.53E-04 2.32E-04 9.70E-07 9.67E-19 6 1.61E-19
Table 1: Measurements on various droplets for determining the elementary charge by the Millikan method. t1 and t2 are the falland rise times of the droplets.

Experiment No - 06
Last updated, August 2010, NISER, Bhubaneswar 1
Specific charge of the electron: e/m
Introduction:
J. J. Thomson first determined the specific charge (charge to mass ratio e/m) of
the electron in 1887. In his experiment, J. J. Thomson had found a charged particle that
had a specific charge two thousand times that of the hydrogen ion, the lightest particle
known at that time. Once the charge on the particles was measured he could conclude
with certainty that these particles were two thousand times lighter than hydrogen. This
explained how these particles could pass between atoms and make their way out of thin
sheets of gold. Measurement of the specific charge of cathode rays for different metals
made him conclude that the particles that constituted cathode rays form a part of all the
atoms in the universe. For his work J. J. Thomson received the Nobel Prize in Physics in
1906, “in recognition of the great merits of his theoretical and experimental
investigations on the conduction of electricity by gases”.
The direct measurement of mass of the electron is difficult by experiments. It is
easier to determine the specific charge of the electron e/m from which the mass m can be
calculated if the elementary charge e is known:
Objective: 1. Determination of the specific charge of the electron (e/m0) from the path of an
electron beam in crossed electric and magnetic fields of variable strength.
2. Determination of magnetic field B as a function of acceleration potential U of the
electrons at a constant radius r.
3. Determination of Earth’s Magnetic field.
Equipments:
1. Narrow beam tube
2. Pair of Helmholtz coils
3. Power supply, 0...600 VDC and universal

Experiment No - 06
Last updated, August 2010, NISER, Bhubaneswar 2
4. Digital multimeter, Connecting cord
Figure1: Experimental set-up for determining the specific charge of the electron.
Theory and evaluation:
A. Charged particle in a magnetic field accelerated by a potential
An electron moving at velocity v perpendicularly to a homogenous magnetic field B, is
subject to the Lorentz force F:
)( BxveF
(1)
which is perpendicular to the velocity and to the magnetic field.
The electron takes a circular orbit with axis of the
circle defined by the direction of the magnetic field.
The Lorentz force is thus equal to the centripetal force
Which forces an electron into an orbit r (see Fig.2).
r
vmF e
2
(2)
thus Br
v
m
e
e (3)
Figure 2: The path of the electron in a magnetic field

Experiment No - 06
Last updated, August 2010, NISER, Bhubaneswar 3
B. Electrons accelerated by a potential U
In the experiment, the electrons are accelerated in a fine beam tube by the potential U.
The resulting kinetic energy is 2
2vmUe e (4)
Combining equation (3) and (4), the specific charge of the electron thus is
2)(
2
Br
U
m
e
e
(5)
C. The magnetic field generated in a pair of Helmholtz coils
The magnetic field generated by a pair of Helmholtz coils is twice the field generated
by a single coil. The magnetic field generated by a single coil of radius R carrying
current I having N turns is given by
2
322
20
)(2 xR
IRB
(6)
We need to calculate the magnetic field due to both the coils at 2
Rx away from
each coil. This is given by
kIR
IN
xR
INRB
0
2
3
2
322
20
5
4
)(2
2 (7)
WhereR
Nk 0
2
3
5
4
, 26
0 /102566.1 AN .
The field B generated in a pair of Helmholtz coils is proportional to the current I in
the coils.
kIB (8)
The magnetic field should be parallel or anti-parallel to the magnetic field due to
earth Be. If the expression for magnetic field is plugged into equation (5), the
resulting expression is

Experiment No - 06
Last updated, August 2010, NISER, Bhubaneswar 4
2)(
2
Ikr
U
m
e
e
(9)
The proportionality factor k can be calculated either from the coil radius R = 0.2 m and
the winding factor n = 154 per coil.
The fine tube in the discharge tube setup contains hydrogen molecules at low pressure,
which through collisions with electrons are caused to emit light. This makes the orbit of
the electrons indirectly visible and their orbiting radius can be directly measured.
Set-Up and Procedure:
1. Connect the Helmholtz coils in series to the power supply (0-600 VDC)) as shown in
the Figure 3, so that the current travels in the same direction in both the coils.
2. Connect the discharge tube to the power supply (Universal Power supply) as shown
in the Figure 4. Before turning the powers on, make sure that every control knob is in
its zero position.
Figure 3: Circuit diagram for the connection of Helmholtz coil.
3. Rotate the whole coil-discharge tube setup in order to align the axis east-west as best
as you can. This is just to make the magnetic field parallel or anti-parallel to earth’s
magnetic field.
4. The current through the Helmholtz coils should never exceed 4 A. So set the current
limit to 3.5 A before you turn the coil power on.
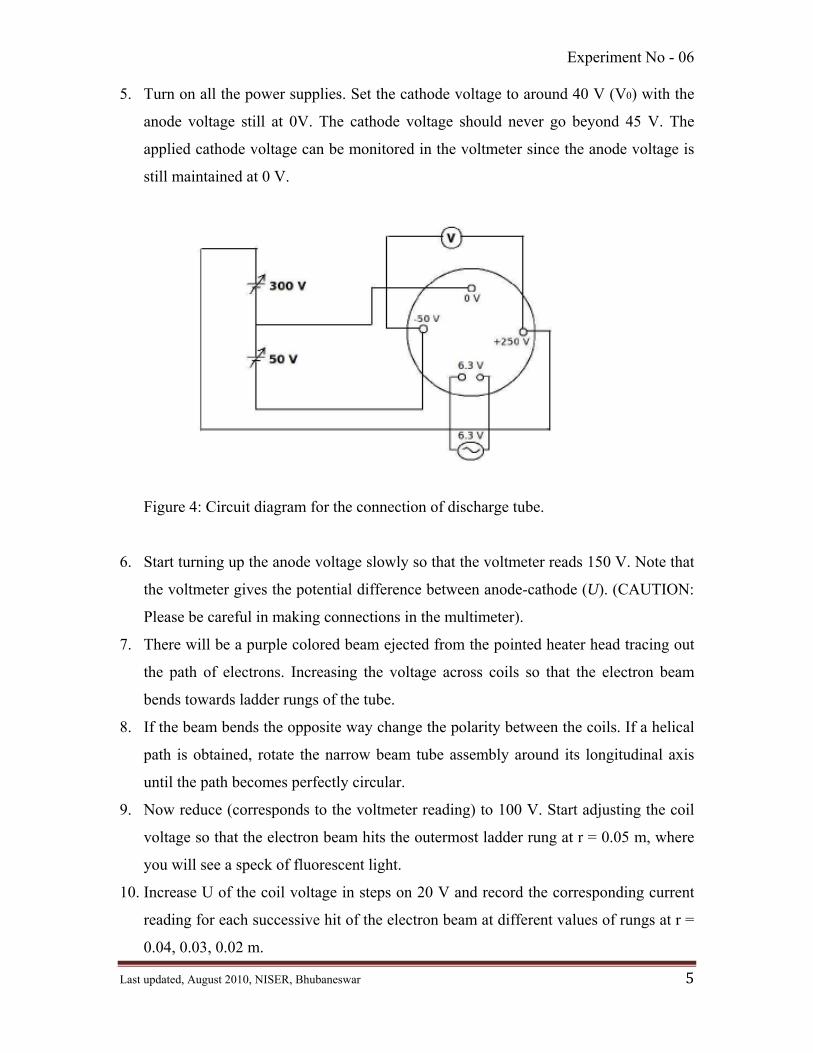
Experiment No - 06
Last updated, August 2010, NISER, Bhubaneswar 5
5. Turn on all the power supplies. Set the cathode voltage to around 40 V (V0) with the
anode voltage still at 0V. The cathode voltage should never go beyond 45 V. The
applied cathode voltage can be monitored in the voltmeter since the anode voltage is
still maintained at 0 V.
Figure 4: Circuit diagram for the connection of discharge tube.
6. Start turning up the anode voltage slowly so that the voltmeter reads 150 V. Note that
the voltmeter gives the potential difference between anode-cathode (U). (CAUTION:
Please be careful in making connections in the multimeter).
7. There will be a purple colored beam ejected from the pointed heater head tracing out
the path of electrons. Increasing the voltage across coils so that the electron beam
bends towards ladder rungs of the tube.
8. If the beam bends the opposite way change the polarity between the coils. If a helical
path is obtained, rotate the narrow beam tube assembly around its longitudinal axis
until the path becomes perfectly circular.
9. Now reduce (corresponds to the voltmeter reading) to 100 V. Start adjusting the coil
voltage so that the electron beam hits the outermost ladder rung at r = 0.05 m, where
you will see a speck of fluorescent light.
10. Increase U of the coil voltage in steps on 20 V and record the corresponding current
reading for each successive hit of the electron beam at different values of rungs at r =
0.04, 0.03, 0.02 m.

Experiment No - 06
Last updated, August 2010, NISER, Bhubaneswar 6
11. While changing the coil voltage to make the beam hit the rungs, if at any time the red
light in the coil power panel starts glowing, stop increasing the voltage and abandon
that rung.
12. The maximum anode voltage is 250 V. So the maximum v should be around 280 V.
Determination of Earth’s Magnetic field:
1. Ensure that Earth’s Magnetic field (Be) direction is approximately parallel to the
magnetic field (BH) due to the current through Helmholtz coil.
2. Fix the value of current through the Helmholtz coil (say I = 1.50 A).
3. Change the anode voltage (U) such that circular path of the fluorescent light hit
the rungs (R = 0.02 m, 0.03 m, 0.04 m and 0.05 m). Note down the anode voltage
as shown in Table 2.
4. Carefully rotate the Helmholtz coil along with the discharge tube set-up by 180
for making “Be” and “BH” anti-parallel to each other. (Caution: Please be very
careful while rotating the discharge tube)
5. Repeat the measurements as mentioned in Step 2 mentioned above.
6. Calculate Earth’s magnetic field using the following relation.
2parallelantiparallel
e
UUCB
(10)
where RmeC
1
/
2 and Uparallel & Uanti-parallel are the anode-potential required
to hit the rung “R”.
Observations/Results: A. Number of turns in the Helmholtz coil, N =154
Radius of the Helmholtz coil, R= 0.20 m
Permeability of free space, 0= 1.2566 10-6 N/A2
Cathode Voltage = ………… volts
The value of R
Nk 0
2
3
5
4
=……………N/A2-m
Using the above value one can obtain the value of e/m

Experiment No - 06
Last updated, August 2010, NISER, Bhubaneswar 7
Table 1: Current strength I and specific charge of the electron, in accordance with equations (2) and (3) for various voltages and various radii R of the electron trajectories. U(V) R=0.02 m R=0.03 m R=0.04 m R=0.05 m
I (A) e/m(1011
As/Kg)
I (A) e/m(1011
As/Kg)
I (A) e/m(1011
As/Kg)
I (A) e/m(1011
As/Kg)
100
120
140
160
180
200
220
240
260
280
Table 2: Voltage (U) required for hitting the rung for constant current through the
Helmholtz coil.
Current though Helmholtz coil = … Amp.
R (m) C U (Volts) with BH & Be
parallel U (Volts) with BH & Be anti-
parallel Be
(Tesla)
0.02
0.03
0.04
0.05
Be – Earth’s Magnetic field
BH – Magnetic field due to current through Helmholtz coil

Experiment No - 06
Last updated, August 2010, NISER, Bhubaneswar 8
RmeC
1
/
2 (“e/m” ratio to be taken from the calculation done using
Table 1 above for each “R”)
B. 1. Calculate e/m using the given formula for each I – √U for all R and obtain the average error.
2. Plot I~√U and determine the e/m from the slope. Put the error bars in the plot
(Figure 5).
3. Compare the results with the literature value (1.759 1011 As/kg) and calculate the
errors.
Figure 5. I ~ √U plot showing straight line fit to the data points corresponding to
different R.

Experiment No - 06
Last updated, August 2010, NISER, Bhubaneswar 9
Discussion: Please discuss the results and errors. Explain a method for calibration of
magnetic field.
Precautions: 1. The Helmholtz coils should be connected with proper polarity else the circular
path of the electrons will appear distorted.
2. The voltage should never exceed the maximum values 250 V mentioned else it might
damage the walls of the discharge tube.
3. The maximum anode voltage should go beyond 45 V
4. If the setup is should be aligned along the east-west direction else the trajectory of the
electrons might not be perfectly circular.
References:
1. D. Halliday and R. Resnick, Fundamentals of Physics, 2nd ed. (John Wiley &
Sons, New York, 1981), pp. 566-567.
2. National Institute of Standards and Technology web site at http://physics.nist.gov


