PACS McKesson Radiology 12 (MR12) Installation Instructions The new PACS update will require the installation of McKesson Radiology Station Lite. Here’s a quick overview of how to install the new update. Setting up Internet Explorer PACS MR12 functions best if run on Internet Explorer 10 or below. If you have Internet Explorer 11 it may be necessary to downgrade the version to Internet Explorer 10. Prior to running the install wizard the Internet Explorer Privacy and Security settings should be configured. It may also be necessary to add PACS to the Compatibility View Settings list. 1. If the Menu Bar is not already present on the Internet Explorer, rightclick on any blank area at the very top of the bar and select the Menu Bar. 2. From the Menu Bar select Tools>Compatibility View settings.
The new PACS update will require the installation of McKesson Radiology Station Lite. Here’s a quick overview of how to install the new update.
Setting up Internet Explorer
PACS MR12 functions best if run on Internet Explorer 10 or below. If you have Internet Explorer 11 it may be necessary to downgrade the version to Internet Explorer 10. Prior to running the install wizard the Internet Explorer Privacy and Security settings should be configured. It may also be necessary to add PACS to the Compatibility View Settings list.
1. If the Menu Bar is not already present on the Internet Explorer, right-‐click on any blank area at the very top of the bar and select the Menu Bar.
2. From the Menu Bar select Tools>Compatibility View settings.
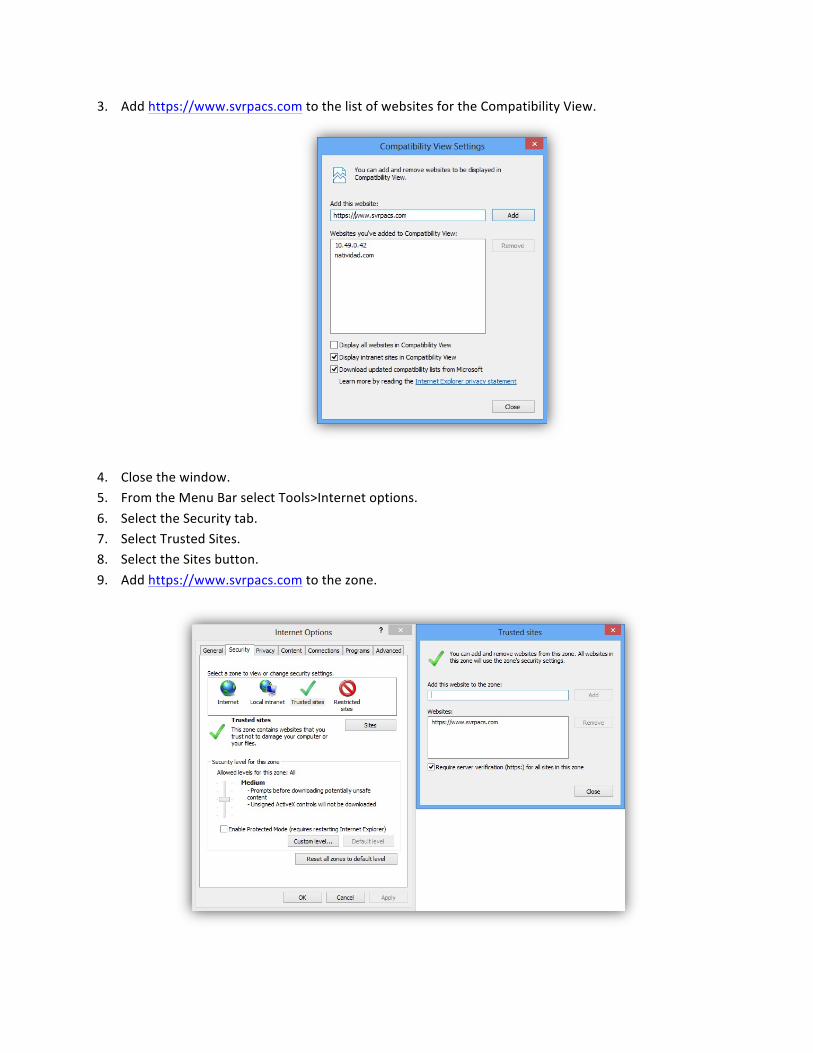
3. Add https://www.svrpacs.com to the list of websites for the Compatibility View.
4. Close the window. 5. From the Menu Bar select Tools>Internet options. 6. Select the Security tab. 7. Select Trusted Sites. 8. Select the Sites button. 9. Add https://www.svrpacs.com to the zone.
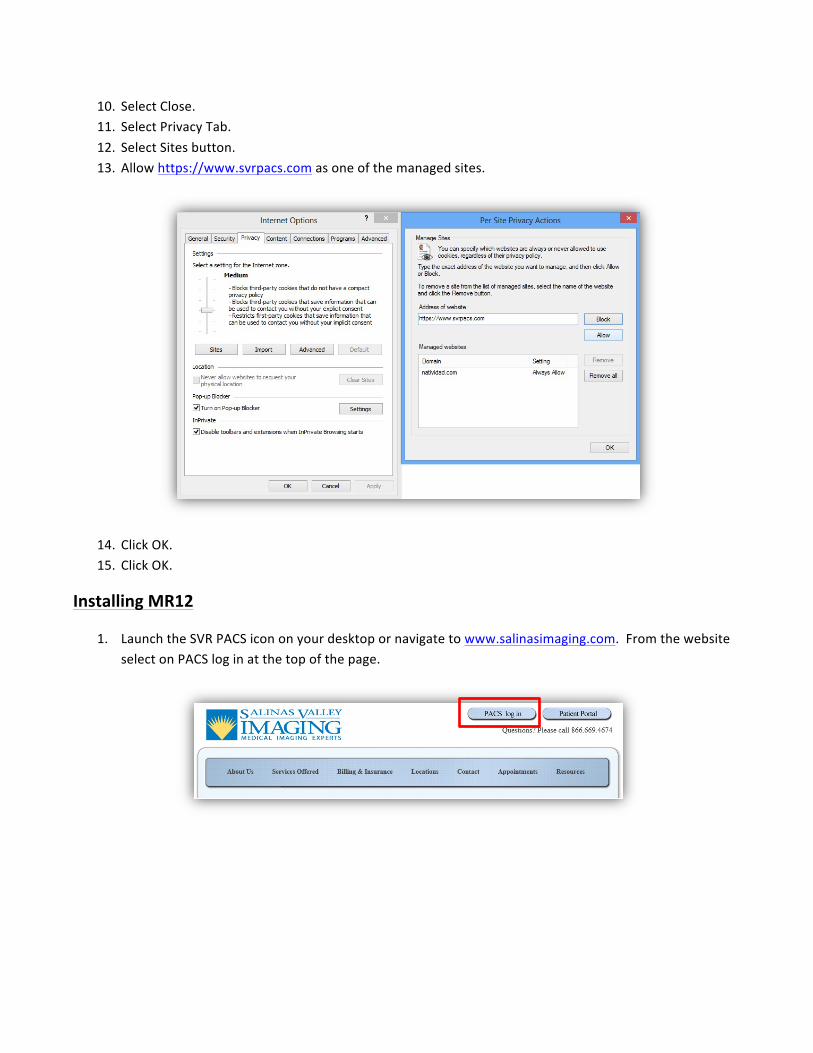
10. Select Close. 11. Select Privacy Tab. 12. Select Sites button. 13. Allow https://www.svrpacs.com as one of the managed sites.
14. Click OK. 15. Click OK.
Installing MR12
1. Launch the SVR PACS icon on your desktop or navigate to www.salinasimaging.com. From the website select on PACS log in at the top of the page.
2. You will see the following page load up. Select the second option: Log in with McKesson Radiology station Lite
3. When ready click on Continue with the installation of McKesson Radiology Station Lite.
4. Wait until the following Installation Wizard appears. Then Click Next.
5. If it is a new install you will see this window. Click Next.
6. Click Install.
7. Once it is available click the Next button.
8. It may prompt you to close an application. Click OK.
9. Click Finish
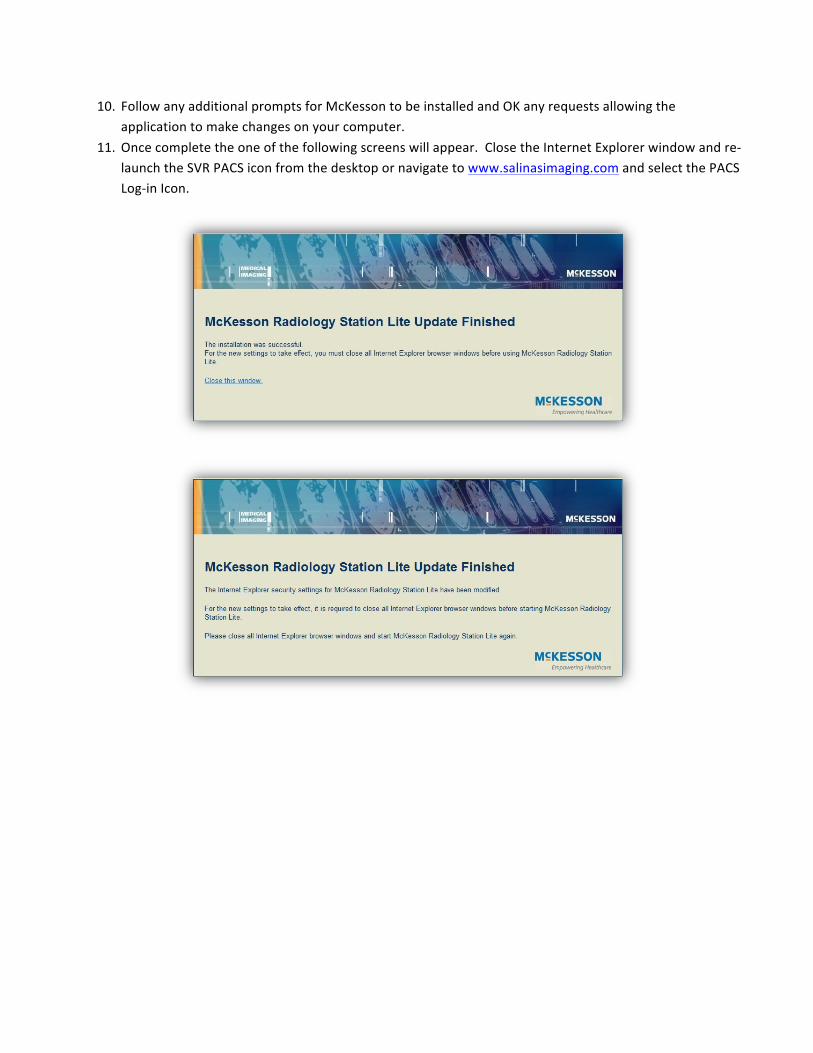
10. Follow any additional prompts for McKesson to be installed and OK any requests allowing the application to make changes on your computer.
11. Once complete the one of the following screens will appear. Close the Internet Explorer window and re-‐launch the SVR PACS icon from the desktop or navigate to www.salinasimaging.com and select the PACS Log-‐in Icon.
12. Login to PACS with your credentials
13. Upon launch you will see the following splash screen.
TROUBLESHOOTING
1. There is an icon but the application won’t launch. a. Verify that the Compatibility View, Privacy and Security settings have been set correctly. b. Verify that the HRSD components have been or are still installed on the workstation. You may
need to launch it again to reinstall. 2. The site keeps getting removed from the Compatibility View List.
a. Verify if the Delete browsing history on exit checkbox is selected. If it is then remove the check and add the site back onto the Compatibility View List. Click OK to save the settings and then restart Internet Explorer.