54
Parallels ® Confixx
Parallels® Confixx

Legal and Copyright Notice
ISBN: N/A
Parallels
660 SW 39th Street
Suite 205
Renton, Washington 98057
USA
Phone: +1 (425) 282 6400
Fax: +1 (425) 282 6444
© Copyright 2008,
Parallels GmbH
All rights reserved
Distribution of this work or derivative of this work in any form is prohibited unless prior written permission is obtained from the copyright holder.
Product and service names mentioned herein are the trademarks of their respective owners.

Contents
Preface 5
Typographical Conventions ........................................................................................................... 5 Feedback ....................................................................................................................................... 6
Before the Installation 7
Required Software ......................................................................................................................... 8 Apache ................................................................................................................................ 9 Perl .................................................................................................................................... 10 PHP 4 ................................................................................................................................ 10 MySQL ............................................................................................................................... 10 FTP Servers ...................................................................................................................... 10 MTA (Mail Transfer Agent) ................................................................................................ 11 Other System Utilities ........................................................................................................ 11
Optional Programs ....................................................................................................................... 11 Webalizer ........................................................................................................................... 12 phpMyAdmin ...................................................................................................................... 12 FrontPage 2000/2002 Server Extensions ......................................................................... 12 mod_ssl ............................................................................................................................. 12 DNS ................................................................................................................................... 12 DNR ................................................................................................................................... 13 Majordomo and Majorcool ................................................................................................. 13 SpamAssassin ................................................................................................................... 13 Internationalized Domain Name Toolkit ............................................................................ 14 ColdFusion ........................................................................................................................ 14 scponly (scp/sftp)............................................................................................................... 14 Quota ................................................................................................................................. 15
MySQL Service Configuration ..................................................................................................... 15
Parallels Confixx Installation 16
Step 1. Unpack the Parallels Confixx Distribution File ................................................................ 17 Step 2. Configure Parallels Confixx Installation Step By Step .................................................... 17 Step 3. Run the Installation Script ............................................................................................... 25 Step 4. Set Up a Secondary Server ............................................................................................ 26
After the Installation 28
Access the Parallels Confixx Web Interface ................................................................................ 29 Register Parallels Confixx ........................................................................................................... 29 Activate/Deactivate Features ....................................................................................................... 29 Test Parallels Confixx .................................................................................................................. 30
Upgrade from Previous Parallels Confixx Versions 31
Appendix A. Performance Requirements 32

Preface 4
Appendix B. Supported Operating Systems and Software Requirements 34
Appendix C. Parallels Confixx Setup on SuSE Servers 35
Recommended Configuration ...................................................................................................... 36 Step 1. Install Third Party Products from the SuSE Distribution ................................................. 37 Step 2. Configure Apache ........................................................................................................... 39 Step 3. Configure MySQL ............................................................................................................ 39 Step 4. Install and Configure Spamassassin ............................................................................... 40 Step 5. Install and Configure Majordomo .................................................................................... 41 Step 6. Install and Configure Majorcool....................................................................................... 42 Step 7. Install IDNKit.................................................................................................................... 44 Step 8. Install ColdFusion ............................................................................................................ 44 Start Parallels Confixx Installation ............................................................................................... 44
Appendix D. Parallels Confixx Setup on Debian Servers 45
Recommended Configuration ...................................................................................................... 46 Step 1. Install Third Party Products from the Debian Distribution ............................................... 47 Step 2. Configure Apache ........................................................................................................... 49 Step 3. Configure MySQL ............................................................................................................ 49 Step 4. Install and Configure Spamassassin ............................................................................... 49 Step 5. Install and Configure Majordomo .................................................................................... 50 Step 6. Install and Configure Majorcool....................................................................................... 51 Step 7. Install IDNKit.................................................................................................................... 53 Step 8. Install ColdFusion ............................................................................................................ 54 Step 9. Configuring Quota ........................................................................................................... 54 Start Parallels Confixx Installation ............................................................................................... 54
In this chapter:
Typographical Conventions ............................................................................... 5 Feedback .......................................................................................................... 6
Typographical Conventions
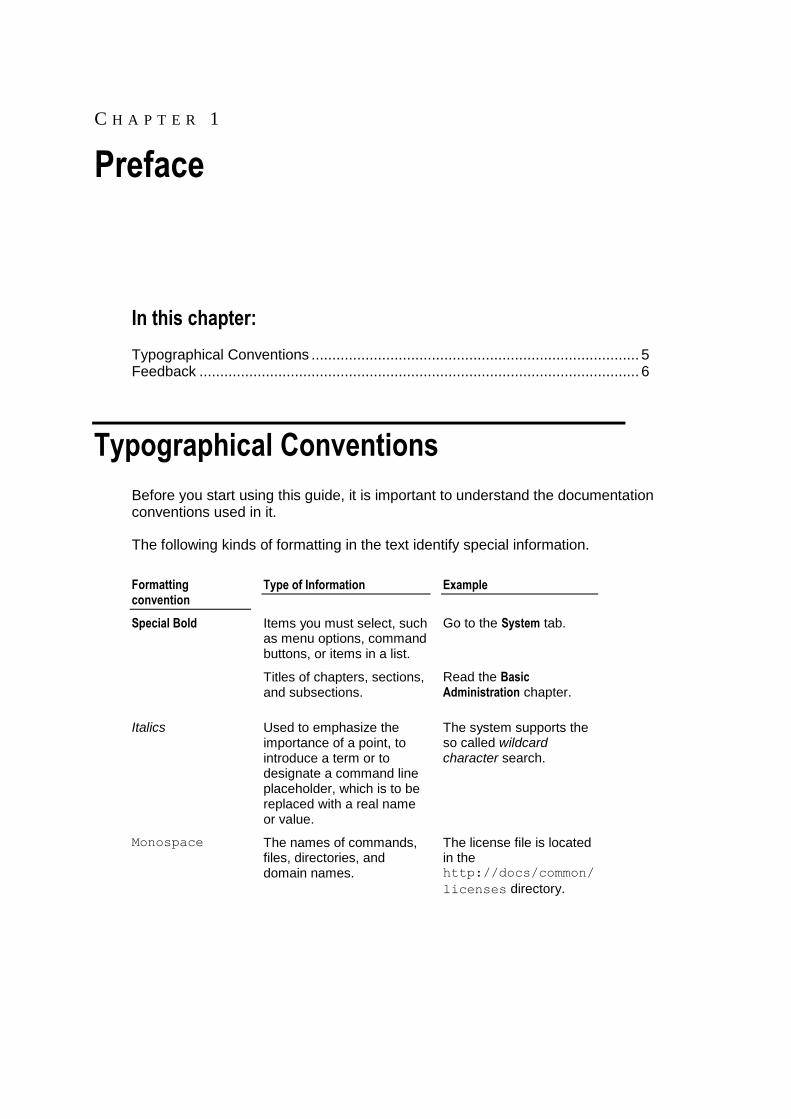
Before you start using this guide, it is important to understand the documentation conventions used in it.
The following kinds of formatting in the text identify special information.
Formatting convention
Type of Information Example
Special Bold Items you must select, such as menu options, command buttons, or items in a list.
Go to the System tab.
Titles of chapters, sections, and subsections.
Read the Basic Administration chapter.
Italics Used to emphasize the importance of a point, to introduce a term or to designate a command line placeholder, which is to be replaced with a real name or value.
The system supports the so called wildcard character search.
Monospace The names of commands, files, directories, and domain names.
The license file is located in the http://docs/common/
licenses directory.
C H A P T E R 1
Preface

6 Preface
Preformatted On-screen computer output in your command-line sessions; source code in XML, C++, or other programming languages.
# ls –al /files
total 14470
Preformatted
Bold What you type, contrasted with on-screen computer output.
# cd /root/rpms/php
CAPITALS Names of keys on the keyboard.
SHIFT, CTRL, ALT
KEY+KEY Key combinations for which the user must press and hold down one key and then press another.
CTRL+P, ALT+F4
Feedback
If you have found a mistake in this guide, or if you have suggestions or ideas on how to improve this guide, please send your feedback using the online form at http://www.parallels.com/en/support/usersdoc/. Please include in your report the guide‟s title, chapter and section titles, and the fragment of text in which you have found an error.

We recommend installing Parallels Confixx on a web server that is not hosting any web pages yet. Since you cannot find two identically configured web servers, there‟re no unified scripts for adding already existing Users to Parallels Confixx. You will have to integrate Users into Parallels Confixx user database manually, or to create a custom script specially configured for your web server settings. We do not guarantee that existing web pages will be fully available after the installation of Parallels Confixx.
See also the pre-installation instructions for servers with the following operating systems:
SuSE (on page 35)
Debian (on page 45)
In this chapter:
Required Software ............................................................................................ 8 Optional Programs ............................................................................................ 11 MySQL Service Configuration ........................................................................... 15
C H A P T E R 2
Before the Installation

8 Before the Installation
Required Software
The basic prerequisite for the installation of Parallels Confixx is a functional Linux system.
In addition, you will need a domain (or subdomain) name by which your server can be reached on the Internet. Optionally you will need a domain with a wildcard entry
(*.stddomain.tld) based on the same or on different domain name. This wildcard
domain is necessary for creating unified default domain names
(user123.stddomain.tld) for all Parallels Confixx users. These domain names can
be used to access users‟ Internet pages in case their own domain names are unavailable.
The standard name server entry for this domain should read as follows:
*.stddomain.tld. IN A 123.456.789.123
If you wish to allow user setting up subdomains, the name server entry must have the following format:
*.userdomain.tld. IN A 123.456.789.123
Subdomains set up without this name server entry (and which aren‟t separately defined in the name server) won‟t work.
If you use the DNS support function, Parallels Confixx will automatically create a corresponding wildcard entry for user‟s domain.
Not every Linux distribution contains every program necessary for a web server and/or for Parallels Confixx. The software listed below is required for correct Parallels Confixx operation. If any of this software hasn‟t been installed on your server, you should download and install the latest versions of these applications.
In this section:
Apache .............................................................................................................. 9 Perl.................................................................................................................... 10 PHP 4 ................................................................................................................ 10 MySQL .............................................................................................................. 10 FTP Servers ...................................................................................................... 10 MTA (Mail Transfer Agent) ................................................................................ 11 Other System Utilities ........................................................................................ 11

Before the Installation 9
Apache
Home Page: http://www.apache.org/
If you want to permit CGI access to Apache, you should ensure that suEXEC has been set up accordingly. Without suEXEC, each CGI will be executed under the Apache user. For this reason, the CGI scripts have the same privileges as Apache users. Apache has “read only” privileges for system files/folders and for all user directories. This means that one Apache user can accesses other users‟ data by running a simple CGI script. If suEXEC has been activated, CGI scripts are executed under the user who is registered in the Apache configuration file. The virtual host entries generated by Parallels Confixx contain this information. If suEXEC is running on your system, you will find an entry in your Apache error log file similar to the following one:
[notice] suEXEC mechanism enabled (wrapper: /usr/local/apache/bin/suexec)
If there is no such entry, please check which path has been compiled in Apache for
suEXEC by executing a httpd V command. Please make sure that suEXEC can be
called up using this path. Furthermore, the SUID bit must be set for the program suEXEC. suEXEC must be owned by user ‟root‟.
To enable CGI scripts operation in user directories while suEXEC is activated, ensure these directories are located in the document root of suEXEC. If you have installed a binary version of Apache, then this document root is usually that of a web server (e.g.
/usr/local/apache/htdocs). You can determine this using the suexec V
command. If the output is similar to the following:
# suexec V
DOC_ROOT=”/home/www” GID_MID=100 HTTPD_USER=”wwwrun” LOG_EXEC=”/var/log/httpd/suexec.log” SAFE_PATH=”/usr/local/bin:/usr/bin:/bin” UID_MID=100 USERDIR_SUFFIX=”public_html”
It means that any directory inside /home/www would be appropriate.
If you are unable to move user directories to this document root, you must re-compile suEXEC. (http://www.apache.org/docs/suexec.html), otherwise none of user scripts will work.
If you want to deactivate CGI in general, suEXEC operation isn‟t necessary.
Parallels Confixx user directory permission scheme does not allow to run CGI scripts in
the ~/html directory with normal suEXEC (though this is allowed in ~/html/
subdirectories).
To resolve the issue we‟ve created a special suEXEC. You can download the version suitable for your OS from http://www.swsoft.com/en/download/Confixx/addons/.

10 Before the Installation
If you use our suEXEC you won‟t need to compile your own suEXEC in order to change DOC_ROOT.
Perl
Home Page: http://www.perl.com/
Some of the Parallels Confixx system programs are written in Perl. Perl must be
located in the directory /usr/bin/perl. If it is stored in another directory, you should
map it accordingly. The modules required by CPAN (http://www.perl.com/CPANlocal/) are included in Parallels Confixx installation. Parallels Confixx is compatible with all versions of Perl starting from 5.6.1.
PHP 4
Home Page: http://www.php.net/
The Parallels Confixx web interface is written in PHP. PHP must be installed as an Apache module, since it is called up from the Apache web server. PHP must run in Safe Mode, otherwise users will have a chance to retrieve other users‟ data. Safe Mode is automatically activated by Parallels Confixx.
Index.php file must be added to the directory index directive in the Apache configuration file, so that these files can be used as index files; “.php” file extension for PHP documents must be activated.
MySQL
Home Page: http://www.mysql.com/
Parallels Confixx saves all user data to a database. To enhance security and performance, this Parallels Confixx database should be installed on the local server. If the required Perl DBD module DBD::mysql hasn‟t been installed, or if only an older version is available, please note that you will have to additionally install developer files (libraries and header files) for MySQL.
FTP Servers
An FTP daemon is required to enable your users to upload their data to the web server.
Supported FTP servers:
WuFTP: http://www.wuftpd.org/
ProFTPD: http://www.proftpd.org/
vsftpd: http://vsftpd.beasts.org/

Before the Installation 11
MTA (Mail Transfer Agent)
If you want to let your users manage email addresses or POP3 boxes on this server, an MTA must be installed and operational. Parallels Confixx supports the following MTAs:
Sendmail: http://www.sendmail.org/
qmail: http://www.qmail.org/
Postfix: http://www.postfix.org/
Other System Utilities
The following utilities should also be installed on your system (in most cases they are
present by default): ifconfig, grep, find, du, cp, chown, chmod, rm, ifconfig,
gzip, tar.
Before installing Parallels Confixx, please verify that all listed software is functioning properly.
Optional Programs
This section lists the software which may be optionally installed with Parallels Confixx.
In this section:
Webalizer .......................................................................................................... 12 phpMyAdmin ..................................................................................................... 12 FrontPage 2000/2002 Server Extensions .......................................................... 12 mod_ssl ............................................................................................................. 12 DNS .................................................................................................................. 12 DNR .................................................................................................................. 13 Majordomo and Majorcool ................................................................................. 13 SpamAssassin .................................................................................................. 13 Internationalized Domain Name Toolkit ............................................................. 14 ColdFusion ........................................................................................................ 14 scponly (scp/sftp) .............................................................................................. 14 Quota ................................................................................................................ 14

12 Before the Installation
Webalizer
Home Page: http://www.webalizer.org/
This program enables you to offer your users a graphical overview of web page access statistics. Parallels Confixx generates the necessary Webalizer configuration file for each user. Parallels Confixx initiates Webalizer whenever user traffic is measured or
monitored. Create the webalizer.conf file in the safe directory within the
installation directory of Parallels Confixx. This file will be appended to the configuration file during the file generation process. The settings you configure during Webalizer setup will overwrite Parallels Confixx default Webalizer settings. This file is not included in the standard Parallels Confixx settings.
phpMyAdmin
Home Page: http://phpmyadmin.sourceforge.net/
phpMyAdmin is a web interface by which your users can manage their MySQL databases. If you install phpMyAdmin, Parallels Confixx interface will show a path to phpMyAdmin.
FrontPage 2000/2002 Server Extensions
To enable your users to use FrontPage, you need to install FrontPage server extensions for Unix. Additionally you need to install a specialized Apache module
mod_frontpage.
Download the Frontpage package suitable for your OS from http://www.swsoft.com/en/download/Confixx/addons/
You also need to install the Confixx_SuEXEC package
mod_ssl
Home Page: http://www.modssl.org/
You need an SSL extension to support secure connections with the Apache web server. At the moment, Parallels Confixx supports only mod_ssl. You also need OpenSSL (http://www.openssl.org/).
DNS
Home Page: http://www.bind.org/
In order to create Name server entries you must install and configure BIND 9.

Before the Installation 13
DNR
In order to register domains automatically, you will require an email template. Ask your domain registration authority to provide you with one. Alternatively, you can manually
edit dnr.php in Parallels Confixx web documents root.
Majordomo and Majorcool
If you wish to allow your users to manage mailing lists through Parallels Confixx interface, you need to install and configure Majordomo (http://www.greatcircle.com/majordomo/) and Majorcool (http://www.conveyanced.com/majorcool/).
SpamAssassin
Home Page: http://www.spamassassin.org/
To have configurable e-mail spam protection for your Parallels Confixx server, install and configure SpamAssassin.
SpamAssassin should be configured to use spamd. Also you need to configure your mail system so that it sends mails to spamd for checking. One way for doing this would
be using procmail with a simple /etc/procmailrc like here:
http://spamassassin.apache.org/full/3.0.x/dist/procmailrc.example
1 Find the string in the above mentioned procmailrc.example:
| spamassassin
2 Replace this string with the following one:
| /usr/bin/spamc –f
or:
| /usr/local/bin/spamc –f
depending on where spamc is located.

14 Before the Installation
Internationalized Domain Name Toolkit
Home Page: http://www.nic.ad.jp/en/idn/
IDN (International Domain Names) is a technology which allows to create and use domain names containing national characters (e.g., umlauts). Server side of IDN support is performed by IDNKit software. Therefore, in order to use it in Parallels Confixx you need to install IDNKit.
ColdFusion
Home Page: http://www.macromedia.com/
Having this product installed you enable your customers to use CFML (ColdFusion Markup Language) on their web sites.
Unlike other described packages, ColdFusion server is not a shareware or open source technology. You can download a trial version from www.macromedia.com (about 100Mb).
Launch the downloaded binary and follow the instructions.
scponly (scp/sftp)
Home Page: http://www.sublimation.org/scponly/
Scponly is an alternative ‟shell‟ for system administrators – a special restricted shell which allows reading and writing of local files, but restricts remote file execution. Functionally, it is best described as a wrapper to the ”tried and true“ ssh suite of applications.
You can install scponly either with our without chroot support.
We recommend installing scponly with chroot support as follows:
# ./configure—enable-chrooted-binary
[..]
# make
[..]
# make install
This will install /usr/local/sbin/scponlyc. If you are asked for scponlyc binary
during installation, enter this path.
With this you can offer your users secure remote file transfer via scp or sftp.

Before the Installation 15
Quota
Quota support for Linux file systems makes it possible to set up hard drive space quotas (contingents) for each system user, i. e. you can specify how much storage space each user may use. This helps to prevent individual users from exceeding the storage space allotted to them. Parallels Confixx supports quota management. The use of quota accelerates the process for measuring storage space occupied by user data as this information is gathered by quota even during operation.
To use Quotas in Parallels Confixx you should already have set up user quotas in your system. For this you need a kernel with quota support enabled and the quota tools
installed. Furthermore you need to set usrquota option in /etc/fstab for each
partition that should support quotas and make sure that quotaon a is run on system
startup.
MySQL Service Configuration
You must specify a password for the root MySQL user. It is also important to delete existing test databases and test users of MySQL.
#~: mysql (as root )
mysql> use mysql;
mysql> DROP DATABASE TEST;
mysql> delete from user where User = ― ;
mysql> delete from db where User = ―;
mysql> update user set Password = Password(‗some_passwd‘) where User = ‗root‘;
mysql> flush privileges;
mysql> exit;
The above listed default settings may vary. If you have already configured MySQL accordingly, you can skip these steps.

This chapter will guide you through the Parallels Confixx installation and configuration.
In this chapter:
Step 1. Unpack the Parallels Confixx Distribution File ....................................... 17 Step 2. Configure Parallels Confixx Installation Step By Step ............................ 17 Step 3. Run the Installation Script ..................................................................... 25 Step 4. Set Up a Secondary Server ................................................................... 26
C H A P T E R 3
Parallels Confixx Installation

Parallels Confixx Installation 17
Step 1. Unpack the Parallels Confixx Distribution File
1 Log into the target server as root.
2 Obtain the Parallels Confixx distribution file (http://download1.swsoft.com/Confixx/ConfixxPro3.3/3.3.2/confixx_pro_3.3.2-6_install.tgz). Copy the Parallels Confixx distribution into the
/root directory and untar the archive:
# cd /root
# tar -xfvz confixx_pro_3.3.2-6_install.tgz
3 Change to the newly created directory.
# cd confixx-install
Step 2. Configure Parallels Confixx Installation Step By Step
Run the configuration program:
# ./configure.pl
The configuration program configure.pl generates an installation file (.config) to
which all entries are saved. Parallels Confixx may not require all the information mentioned above. The configuration can be aborted and restarted without any complications since changes have not yet been made to the system.
You must provide the following information:
Please select your default language
This language will be used during installation and will be set as a default language of Parallels Confixx console utilities and default language for Admin user.
Parallels Confixx saves the user data to a MySQL database. Please note that the database must be installed and configured first.
Note: If the Perl database modules (DBI and DBD::mysql) have been installed properly, enter 0 to proceed. If some modules are missing, the system will display a notification and a list of required modules. In this case, youll have to leave Parallels Confixx installation and install the required modules. After that you can proceed with Parallels Confixx installation.
Please enter the database server for Parallels Confixx

18 Parallels Confixx Installation
It is generally advisable to install a database used by Parallels Confixx on the same server on which Parallels Confixx is running. This is recommended since critical system files and configurations are generated from user information. To enhance security and performance, enter localhost unless you are perfectly sure that you want to install the database on a different server.
Please enter a user with root privileges for the database
This database user must be authorized to create and/or delete databases and tables.
Please enter the password for this database user
Enter the password for the user described above.
Please enter the name for this Parallels Confixx database name
You need to specify a name for the database. Database names are unique and may be assigned only once. Therefore please make sure that the specified name is not used by another database on the same server.
Do you want to create a separate user (not root) for the Parallels Confixx database (recommended)?
It is recommended to create a separate database user; otherwise the system will use Parallels Confixx root user to access the database. If you do not wish to create a special user, choose No.
Please enter a user for the database
Enter the username for the new MySQL user.
What is the name of your server (complete domain name)?
Enter a domain name by which your web server can be accessed on the Internet.
Where do you want Parallels Confixx to be installed?
All Parallels Confixx system programs, with the exception of web interface, will be installed to this directory. This directory can be accessed only by root user. If such user does not exist, it will be created and assigned proper privileges. For security reasons, please check this out after installation is complete.
Where do you want the home directories of the users to be located?
All users home directories will be placed in the folder you specified. Therefore please ensure the storage space of this folder is sufficient. If you specify a new directory (the one which does not exist in the server), this folder will be created automatically. Please bear in mind the limitations imposed by suEXEC.
Which group do you want to assign the end users users to?
Only this group will have access to the user directories. The standard group
nogroup (or similar) may not be used. The value suggested by the wizard is a
good choice. The group will be created during the installation of Parallels Confixx if it does not yet exist. It is imperative that you enter this group in the Apache configuration file (group entry).
Which prefix do you want the end users users to have?
This prefix is a part of the standard username pattern to be used in Parallels
Confixx. If you choose prefix web, your usernames will be web1, web2, etc. If you
have several servers running Parallels Confixx it may be useful to specify a separate prefix for each server. The prefix is alphanumeric, contains not less than 1 and not more than 5 characters, the first character is a letter. Changing prefix at a later time is not recommended!

Parallels Confixx Installation 19
Which Web server do you use?
Please select your installed web server. Select apache1.3 for Apache 1.3.x and apache2.0 for Apache 2.x.x.
Where is the Apache configuration file (httpd.conf) located?
Parallels Confixx creates an entry in httpd.conf; this is necessary for operation
of virtual hosts created by Parallels Confixx. Your previous settings will not be changed. You can make changes to httpd.conf after Parallels Confixx installation is complete. Unlike password or shadow files, the configuration file will not be regenerated each time any changes are made in the system.
Which IP address do you want to use as the standard IP for virtual hosts?
The standard IP address will be used for users who do not get exclusive IP addresses when a virtual host is created.
Where is the Apache web server stop/start script located?
Enter the full path to your initscript (to start/stop/reload Apache). Parallels Confixx will use this script with argument reload to reload Apache if any changes are made to the configuration files. Also it will use argument start if after reload there is no Apache running. You can manually change these commands later in
Confixx_main.conf.
Please enter a name for the group under which Apache is to run.
This group alone has access to all user directories. The standard group nogroup
(or similar) may not be used. The value suggested by the wizard is a good choice. If you specify a group which does not yet exist, it is created during the installation of Parallels Confixx. It is required that you enter this group in the Apache configuration
file (Group entry in httpd.conf).
Where must the Apache Log files be located?
Parallels Confixx will put log files for Web interface and symlinks needed for distributing log entries to users log files into this directory.
At which domain do you want all user pages to be accessible?
Please enter a default domain name for each user. For example, if you specify
stddomain.tld, web pages of user web1 will be accessible at
web1.stddomain.tld. Therefore this user can edit his or her pages in case the
domain name becomes invalid or has not yet been registered. The domain that you
specify here must point to your server with *.stddomain.tld. There must
therefore be a corresponding wildcard name server entry for this domain.
Do you want to offer SSL as a feature?
If you activate SSL, you will later have the option of installing SSL certificates and enabling end users‟ domains to be accessed via https, to ensure safe internet transactions from users web pages. The corresponding entries will automatically be appended to the Apache configuration file. For this to happen, modssl must be installed.
If you choose Yes please specify the following:
In which directory do you want the user SSL keys to be installed?
The user SSL keys (private key) will be copied by Parallels Confixx into this directory. The SSL keys will be called up by Apache if SSL has been activated
for a users domain. A users key file will be called user.key (e.g. web1.key for
user web1).

20 Parallels Confixx Installation
In which directory do you want the user SSL CRTs to be installed?
The user SSL CRTS (certificate) will be copied by Parallels Confixx into this directory. The SSL CRTS will be called up by Apache if SSL has been activated
for a users domain. A users CRT file will be called user.crt (e.g. web1.crt for
user web1).
Note: Make also sure that the binary openssl is installed on your system and
that you know the full path. If Parallels Confixx does not automatically finds it you will be asked for it.
In which directory do you want user vhosts to be installed?
Parallels Confixx stores each users Apache configuration in a special directory. E.g.
user web1 will have a configuration file web1.conf containing all users virtual
hosts and all other Apache directives relating to the user.
Do you want to make Webalizer stats available to your users?
If the program Webalizer is installed on your web server and you answer yes here, a Webalizer configuration file will be created for every user, and webalizer will be executed at regular intervals. The users can find their Webalizer stats in the webalizer folder within their user directories.
The stats are secured by a .htaccess file. Login details needed to access the
Webalizer stats are identical to those of the end user.
Do you want to make FrontPage available to your users?
To do so, FrontPage extensions and Apache module must be installed. If you choose Yes, please specify the following:
Which version of the Frontpage Server Extensions is installed on this machine?
Please choose between FPSE 2000 (4.0) for FrontPage Server Extensions 2000 and FPSE 2002 (5.0) for FrontPage Server Extensions 2002. In any case the correct version already needs to be installed.
What is the name of the FrontPage installation directory?
Specify a directory to which the FrontPage server extensions will be installed. The
standard setting is /usr/local/frontpage. The configuration files for the
individual virtual hosts will subsequently be installed in this directory as well.
Do you want to incorporate DNS?
Choose to activate Parallels Confixx DNS support for Bind9. You already need to have Bind9 installed and configured. If you choose Yes, please specify the following:
Do you want to run the primary name server on this server?
Choose if your primary name server should be located on this server.
Do you want to run the secondary name server on another server?
Choose if your secondary name server should be located on another server.
Where is the Bind configuration file (named.conf) located?
Here you should enter the path to the configuration file for the name server (named.conf).
In which file you like to store the DNS configuration?
Any domain set up in Parallels Confixx will be saved in this file.
In which folder would you like to store the zone files?

Parallels Confixx Installation 21
Any zone file of a domain set up in Parallels Confixx will be saved in this directory.
What is the IP address of your primary name server?
Enter the IP address of your primary name server here.
What is the IP address of your primary name server?
Enter the IP address of your secondary name server here.
Do you want to incorporate DNR?
Choose Yes if you want Parallels Confixx to manage the domain registration process. Parallels Confixx will send automatically generated e-mails to a domain
registrars. You will need to compose a template file (dnr.php in Parallels
Confixx web document root) after installation.
Do you want to use IDN-Support?
Activate this feature if you want to have International Domain Names support in Parallels Confixx (e.g. domain names with German umlauts).
Under which domain name do you want all Parallels Confixx web pages to be accessible?
The Parallels Confixx web interface will be accessible at the domain name that you specify here.
Do you want to use the standard IP for the virtual host?
If you answer yes here, the standard IP that you have stated in a previous step will be used for the virtual host.
Please enter a username for the Parallels Confixx web pages.
This user owns the files of the Parallels Confixx web interface. If this user does not exist, it will be created.
Which group do you want to assign this user to?
If this group does not exist, it will be created.
Where do you want the home directory of this user to be located?
The web interface will be installed in this directory. This is the document root of the virtual host for which the web interface is being created. Please keep in mind the limitations caused by suEXEC.
Please enter an admin username for the Parallels Confixx web interface.
With this user you login to the Parallels Confixx control panel as admin.
Please enter a password for “Administrator”.
Default username of Parallels Confixx admin is Administrator. Please enter a secure password for this user. This password makes it possible to access the web interface of every user and every reseller. You can change the password and username after installation in the Admin interface.
Do you want to use scponly (a secure shell) to provide access to remote users?
This will active Parallels Confixx support of using a secure (even chrooted) shell for users to provide them with secure scp and sftp access to their web files. The program scponly needs the be installed and configured first.
Do you want to use chrooted scponly?
Choose if you have compiled scponly with chroot support (–enable-chrooted-binary). Parallels Confixx will create chrooted environment for you.

22 Parallels Confixx Installation
Please enter the name of directory in which Parallels Confixx would place chrooted environment.
This directory will be created in the same directory where all Parallels Confixx web users home directories are located. Parallels Confixx will create a chrooted environment during installation and copy the files into this directory. Later users will have hard links to those files in their home directories.
Do you want to run the mail server on this server?
Choose no if you want to use external mail server feature on another server.
Which MTA (Mail Transfer Agent) do you use? Please select which of the installed MTAs you want to use. Currently Parallels Confixx supports sendmail, postfix and qmail.
Which group do you want to assign all Parallels Confixx POP3 users to?
The value suggested by wizard is generally a good choice. FTP access will be blocked for the group that you enter here.
What type of mail drop system do you use?
Please select the type of mail drop system:
/var/spool/mail/USER: e-mails in the mail spooler directory with username as mailbox file
HOMEDIR/Mailbox: e-mails in the home directory of the user with a mailbox file
HOMEDIR/Mailbox: e-mails in the home directory of the user with a directory
Where do you want the home directories of the POP3 users to be located?
The home directories of the POP3 users will be created in this directory.
Where is the mailspool directory located?
Please enter the directory in which qmail saves the emails of the POP3 users.
What is the name of the mailbox?
This mailbox will store e-mails received by users POP3 accounts.
What is the name of the mail directory?
This directory will be created in the home directory of POP3 users for mail storage purposes.
If you have chosen Postfix or Sendmai as your MTA, proceed as follows:
Please enter the UID of your MTA.
Please enter the GID of your MTA.
If you use Postfix or Sendmail as your MTA, the UID & GID of your MTA will be used so that the MTA can forward emails to, say, the autoresponder script of Parallels Confixx. The default values should work in most cases.
If youve chosen Qmail as your MTA, please specify the following:
Where is your qmail VIRTUALDOMAINS file installed?
In this file, the email addresses created by the users on your server are saved, including information on where they forward to (POP3, email address). You are now in the directory where qmail has been installed. It is
normally located in the subfolder control and is called virtualdomains.
If this file does not exist, it will be created.

Parallels Confixx Installation 23
Where is your qmail RCPTHOST file located?
This file stores information on the domains for which your MTA accepts emails, i.e. which domains it considers to be local. You are now in the directory where qmail has been installed. It is normally located in the
subfolder control and is called rcpthost. If this file does not exist, it will
be created.
If you have chosen Sendmail as your MTA, proceed as follows:
Where is the Sendmail config file (sendmail.cf) located?
Please state where the Sendmail configuration file is located. Parallels Confixx will make several changes to this file.
Where is the Sendmail alias file located?
Please specify where the alias file of Sendmail is located.
Do you already have an existing VirtUserTable file (text file, not DB)?
In this file, the email addresses created by the users on your server are saved, including information on where they forward to (POP3, email address). The data from this file are saved and inserted into the new
VirtuserTable file.
Where do you want the finished VirtUserTableDB file to be located?
Please state where the finished VirtUserTableDB file (DB) used by
Sendmail is to be located.
Do you already have an existing Sendmail Local Domains file?
This file stores information on the domains for which your MTA accepts emails, i.e. which domains it considers to be local. The data from this file will be saved and inserted into the new Local Domains file. The file will continue to be used.
Where do you want the Sendmail Local Domains file to be located?
If you do not yet have a Local Domains file, you can specify one here.
Do you want to use Majordomo, a manager of maillists?
This will activate the support of Majordomo in Parallels Confixx to enable users of creating mailing lists through their web interface. Majordomo needs to be installed for this. Also Majorcool needs to be installed and properly configured.
If you choose Yes, please specify the following:
Where is the Majordomo home directory located?
Enter the full path of directory where Majordomo is installed.
Where do you want the directories of the mailing lists to be located?
The mailing lists will be placed into this directory.
Please enter the name of the user under which Majordomo is running.
Enter the name of the user you chose for majordomo during installation (or your distribution chose in their package).
Which FTP daemon do you use?
ProFTPD
wuftpd

24 Parallels Confixx Installation
vsftpd
Please select which of the installed FTP daemons you want to use.
If you choose proftpd or vsftpd as your FTP daemons, proceed as follows:
Where is the FTP configuration file located?
Enter the full path to your ftp daemon configuration file.
Which email address do you want to be specified for technical questions/problems?
This email address will be written to the configuration file of the FTP server.
What server type do you use?
Please specify whether the FTP server will be started as a standalone daemon or whether it will be started for each connection by Inetd.
Where is the FTP log file located?
This information is important when measuring user traffic on your server. Parallels Confixx checks this file at regular intervals.
If you choose wuftp as your FTP daemon, proceed as follows:
Where is the program ls for the FTP chroot environment located?
If a Parallels Confixx user connects to the server by FTP, then the user is directed to the html directory of the users home directory. For the user, this is
the root directory /. If the user now wants to view the contents of any
directory, the program /bin/ls will be called up. The normal /bin/ls is
linked dynamically, i.e. it also uses libraries from /lib. For the FTP users, you
will need a statically linked ls that does not need additional files to function.
You may already have such a version of ls, in which case it will have been
installed in the bin directory of the user ftp; otherwise, you will need to
compile a new version of ls yourself. You will find the necessary files at
ftp://ftp.gnu.org/gnu/fileutils/.
Do you want to use quota?
Please enter yes here if you want to use quota and if you have activated quota in the
kernel and /etc/fstab of your Linux system.
Do you want to make ColdFusion available to your users?
ColdFusion server needs to be installed and running on your system to use this feature.
Do you want to make ModPython available to your users?
Please enter yes here if you have mod_python installed and want to make your
users be able to run .py files with mod_python.
Do you want to make SpamAssassin available to your users?
By activating this feature you activate support for SpamAssassin spam protection program. SpamAssassin needs to be installed and integrated into your mail system to use this feature.
If you choose Yes, specify the following:
Where is the SpamAssassin configuration file located?
Enter the full path to your SpamAssassin configuration file local.cf.
Where is the SpamAssassin stop/start script located?

Parallels Confixx Installation 25
Enter the full path to your initscript (to start/stop/reload SpamAssassin). Parallels Confixx will use this script with argument restart to reload SpamAssassin daemon if any changes were made to the configuration files. Also it will use argument start if after reload there is no SpamAssassin daemon running. You
can manually change these commands later in Confixx_main.conf.
Do you want to make cron jobs available to your users?
Activate this if you want to have your users to be able to change/manage crontab settings through Web interface.
Do you want your users to have access to MySQL databases?
If you activate MySQL databases for users, end users will be able to create their own MySQL databases. The name of the databases comprises the username of the end user and the number of the users databases. The user databases can also be installed on a different server.
If you choose Yes, specify the following:
Please enter the user MySQL server.
Enter the hostname of the MySQL server.
Note: The following 3 steps can be skipped if Parallels Confixx database has the same hostname as the server for Parallels Confixx database.
Please enter a user with root privileges for the MySQL database.
This user must be authorized to create and delete databases and users.
Please enter the password for this database user.
Enter the password for the user specified above.
Is the database already running, and do you want to have all entries checked now to make sure that they are correct??
If the server on which you want to install the user databases is accessible from this computer, your information concerning server name, root user and password will be checked for accuracy.
Where is the directory containing the MySQL databases located?
This information is necessary so that the storage space taken up by user databases can be counted.
Do you want to make phpMyAdmin available to your users?
Please answer yes if phpMyAdmin is available to your database server. This is only useful, of course, if you offer MySQL databases to your users. The default path for phpMyAdmin is the directory phpMyAdmin in the document root of your Parallels Confixx web. You can change this later through the control pannel. phpMyAdmin must be configured appropriately to access the user database.
Step 3. Run the Installation Script
To begin the installation, run:
# ./install.pl
26 Parallels Confixx Installation
Now the actual installation of Parallels Confixx will begin, and direct changes will be made to your system.
Step 4. Set Up a Secondary Server
For setting up a secondary server (e.g., external mail server or DNS server) you need the same installation archive (on page 17) as for Parallels Confixx base.
Note: Here and below Parallels Confixx base refers to the main server installation of
Parallels Confixx.
1 Run configure.pl again.
During the installation process you‟re asked to provide the following information:
Please select your default language.
This language will be used during installation and will be set as a default language of Parallels Confixx console utilities.
Which version of Parallels Confixx do you want to install?
You can choose between Parallels Confixx base and External dns/mail server. Choose External DNS/mail server.
What is the name of your server? (complete domain name)
Hostname by which your server can be accessed on the Internet.
Where do you want Parallels Confixx to be installed?
All Parallels Confixx system programs will be installed to this directory. This directory should only be accessible for root user. If this directory doesn‟t exist, it will be created and assigned proper privileges. To ensure adequate security, please check this out after installation is complete.
Note: For questions concerning DNS and EMail configuration please refer to Parallels Confixx Step-by-Step Configuration.
Please enter the database server for Parallels Confixx
Enter the complete hostname or IP address of the server on which the Parallels Confixx base database is running.
Please enter the name for the Parallels Confixx database
Enter the name of the database used by Parallels Confixx base.
Please enter a user with access rights for the database confixxdb
Enter the name of a user who has remote access to the Parallels Confixx database on the remote server.
Please enter the password for database user confixxdb on remotehost.tld
Enter the password for the database user.

Parallels Confixx Installation 27
Note: configure.pl will try and connect to remote Parallels Confixx
database. You cannot continue unless connection to remote database is successful. You need to allow remote connections for that user in the database.
2 As with Parallels Confixx base installation, run install.pl (on page 25)
after you have successfully created the .config file.
3 If you‟ve installed an external mail server, please set $mail_server
in confixx_main.conf on Parallels Confixx base server to 0.
4 If you installed external DNS server and do not want to use the Parallels Confixx base server either as primary or secondary DNS, please
set $dns_server in confixx_main.conf on Parallels Confixx base
server to 0 also.
5 As in Parallels Confixx base installation, set
confixx_updatescript.pl to run from cron every minute.
After the installation has been completed successfully, please restart the web server and your MTA.
In addition, the cron must be completed for the user root. To do so, use the program
crontab and add the following line:
*/1 * * * * /root/confixx/confixx_updatescript.pl
Or, edit the file /etc/crontab and add the following line:
*/1 * * * * root /root/confixx/confixx_updatescript.pl
In both cases /root/confixx should be substituted if you defined another installation
directory.
Now the web interface should be accessible at the domain name that you specified during the installation process.
We recommend protecting Parallels Confixx web interface with SSL, to make sure that all your login-password sessions are encrypted.
In this chapter:
Access the Parallels Confixx Web Interface ...................................................... 29 Register Parallels Confixx ................................................................................. 29 Activate/Deactivate Features ............................................................................. 29 Test Parallels Confixx ........................................................................................ 30
C H A P T E R 4
After the Installation

After the Installation 29
Access the Parallels Confixx Web Interface
Please restart your Apache after installation to be able to access the web interface.
During the configuration of Parallels Confixx, you specified a domain at which Parallels Confixx can be accessed from the Internet. Open this page http://www.myParallelsConfixx.tld/ with your browser and login with the admin username and the password you specified.
In the settings section of the web interface, specify which IP addresses may be used by Parallels Confixx. Furthermore, you should check whether you wish to change the times when Parallels Confixx is scheduled to execute the system update programs. For more detailed information on the web interface settings see the Parallels Confixx Admin Manual.
Register Parallels Confixx
Before any changes from the web interface will be made to the system you need to register your Parallels Confixx license, either from the Web interface or by the console script.
To register Parallels Confixx from the administrator’s control panel:
1 Login as admin user to the Parallels Confixx web interface.
2 Select Genera Licensing Information, then select Unlock license.
3 Follow the interface instructions. Keep your serial number and key ready.
To register Parallels Confixx by the console script:
1 Copy the auto_reg.pl script from the
/root/confixx/admin/contrib/ directory to /root/confixx/
2 Enter your serial and key.
3 Then you can run the manually or have it run by crond (e.g. if you have a rental license).
The script will register your Parallels Confixx license for the first time and update it afterwards.
Activate/Deactivate Features

30 After the Installation
After the installation you can activate or deactivate the features to be supported by Parallels Confixx. Some features will have already been activated or deactivated by the configuration program. Features that have not been activated cannot be assigned to users and are not available on the web interface.
To activate features:
1 Use the admin.pl utility to activate disabled features. This utility is
installed in the folder admin, located in the same directory where
Parallels Confixx is has been installed. If Parallels Confixx was installed in default location, you should run:
# /root/confixx/admin/admin.pl
2 After starting the program, select a section and the feature you wish to activate or deactivate. Your settings will affect the Parallels Confixx web interface.
Important: Use this program carefully if users have already been created, and do not execute it thoughtlessly. Be careful not to deactivate a feature that is already being used by your users!
Test Parallels Confixx
Before you host users on the web servers, please check all critical functions of your web server and of Parallels Confixx. Create users, test whether you can upload your pages via FTP, whether Webalizer is working, whether traffic is being measured correctly, etc.

To upgrade from Parallels Confixx 2.x or Parallels Confixx 3.x to the current Parallels Confixx 3.3.2 version:
1 Obtain the update archive (http://download1.swsoft.com/Confixx/ConfixxPro3.3/3.3.2/confixx_pro_3.3.2-6_update.tgz).
2 Choose your Parallels Confixx update version and download it to
Parallels Confixx server (e.g. to /root/).
Note: It is recommended to backup important system files before installing a Parallels Confixx update. Back up your Parallels Confixx installation directory (e.g.
/root/confixx), your databases, the Parallels Confixx web pages directory and
the user‟s home directories.
3 Change into Parallels Confixx installation directory:
# cd /root/confixx/
4 Rename old admin directory:
# rm rf admin.old
# mv admin admin.old
5 Extract new Parallels Confixx update archive:
# tar -xfvz /root/confixx_pro_3.3.2-6_update.tgz
6 Start Parallels Confixx update:
# ./admin/updates/update_3.x.pl
7 Follow instructions to complete the update.
Note: After the update, depending on your previous version, you might need to
update your license.
8 Also you might want to run /root/confixx/admin/admin.pl to
activate/deactive features (on page 29).
C H A P T E R 5
Upgrade from Previous Parallels Confixx Versions

Parallels Confixx has been optimized to maintain high system performance even with a large number of active users. However, installation of Parallels Confixx cannot overcome the performance limitations imposed by your server configuration. System performance depends on your computer‟s hardware configuration (processor, RAM); certain limits are also introduced by the Linux operating system. Depending on the configuration and distribution of your Linux version, these limits may vary. You should always be aware of the limitations of your web server and use Parallels Confixx carefully.
NUMBER OF SYSTEM USERS (STANDARD: 65,000)
Every system user has a unique user ID (UID) in a Linux system. The number of system users is limited by the number of available user IDs (165,000). During the installation of Parallels Confixx, Parallels Confixx has automatically specified the range
of UIDs that may be used by Parallels Confixx ($min_uid and $max_uid in
Confixx_main.conf). Each user created by Parallels Confixx uses up at least one
system user with the user‟s FTP user (identical to the login to the Parallels Confixx web interface). If users are able to create further FTP and POP3 users, additional users are quickly added per user. If there are no more UIDs available to Parallels Confixx, Parallels Confixx no longer accepts further users, POP3 boxes and FTP users for security reasons.
NUMBER OF FILES IN A DIRECTORY
The number of files and directories that can be created in a directory depends on the file system used in the corresponding partition. This limit of 32,000 (ext2) is generally high enough. On a server utilized by 300 users, 300 directories will be created in a folder.
NUMBER OF FILES IN A PARTITION
The Inode density can be set during the formatting of a partition. It specifies the minimum storage space used by one file. The total storage space of a 1 GB partition with an Inode density of 4 KB is therefore used up by 260,000 files, each with a file size of 0 KB. Add to this the storage space used up by the actual size of the files. You should ensure that there is enough storage space available on the partition to which user directories are saved. Using quota enables you to specify the maximum amount of storage space available to a user.
NUMBER OF SUBDOMAINS AND DOMAINS
The number of subdomains and domains that can be created is limited to 32,000. However, depending on the (sub) domain, a virtual host entry is made to the configuration file of the web server. Subdomains and domains referring to the same directory will be summed up in one entry.
C H A P T E R 6
Appendix A. Performance Requirements

Appendix A. Performance Requirements 33
Wildcard entries (*.domain.tld) present a different situation when creating
subdomains. A virtual host entry is generally made for each wildcard entry. Unlike domains and subdomains, the access log file is specified directly for wildcard entries. The web server keeps these files open during the entire operation. If many log files are open, an accordingly high amount of storage space is used. The performance of the web server may also be severely affected by files that are constantly open. There are varying limits, depending on the web server, for the maximum number of files that may be open. For this reason you should check the RAM available on your server when assigning subdomains, especially in case of subdomains with wildcard entries. You as admin can specify whether a reseller may assign subdomains and wildcard entries to users, and how many.
The standard program used to write the log files is the Parallels Confixx program
pipelog.pl. This determines, on the basis of links in the Parallels Confixx log file
directory, which domain is assigned to which user. However, all information about access to domains without log files is evaluated. If a link does not exist, the program writes to a standard log file in the Parallels Confixx log file directory (format: Domain :: log entry). If there is another standard log file, there will be duplicate logging. In order to prevent this, you can link other domain names to the respective log files and remove the additional entry.

Parallels Confixx was tested using the following Linux distributions:
RedHat 7.3, 9.0
RHEL 3.0
SuSE 7.3, 8.0, 8.1, 8.2, 9.0, 9.1, 9.2, 9.3, 10.0, 10.1, 10.2, 10.3
Debian 3.0 (Woody), 3.1 (Sarge), , 4.0 (Etch)
Fedora Core 1, 2, 3, 4
The following programs must be installed on your system for Parallels Confixx to function. Depending on the Linux distribution and version, the programs are either available in your Linux system or must be installed and configured afterwards. With some systems it is possible to select from several programs. The explicitly tested program versions are listed here as well:
DATABASES
MySQL (>=3.22)
Perl (>=5.6.1)
FTP SERVERS
WuFTP (>=2.4.2 beta)
ProFTP (>=1.2.0)
vsftpd (>=1.1.0)
MTA (MAIL TRANSFER AGENT)
Sendmail (>=8.9.3)
qmail (>=1.0.3)
Postfix (>=1.0)
WEB SERVER
Apache (>=1.3.4)
mod_rewrite
mod_php (>=4.1)
C H A P T E R 7
Appendix B. Supported Operating Systems and Software Requirements

In this chapter you will find step-by-step instructions how to prepare a SuSE server for Paralllels Confixx installation.
In this chapter:
Recommended Configuration ............................................................................ 36 Step 1. Install Third Party Products from the SuSE Distribution ......................... 37 Step 2. Configure Apache ................................................................................. 39 Step 3. Configure MySQL .................................................................................. 39 Step 4. Install and Configure Spamassassin ..................................................... 40 Step 5. Install and Configure Majordomo ........................................................... 41 Step 6. Install and Configure Majorcool ............................................................. 42 Step 7. Install IDNKit ......................................................................................... 44 Step 8. Install ColdFusion .................................................................................. 44 Start Parallels Confixx Installation ..................................................................... 44
C H A P T E R 8
Appendix C. Parallels Confixx Setup on SuSE Servers

Recommended Configuration
Web Server: Apache 2
Database server: MySQL 4.x
Mail transfer agent: Postfix
POP3 daemon: Qpopper
FTP server: Vsftpd
C H A P T E R 9
Appendix C. Parallels Confixx Setup on SuSE Servers 37
Step 1. Install Third Party Products from the SuSE Distribution
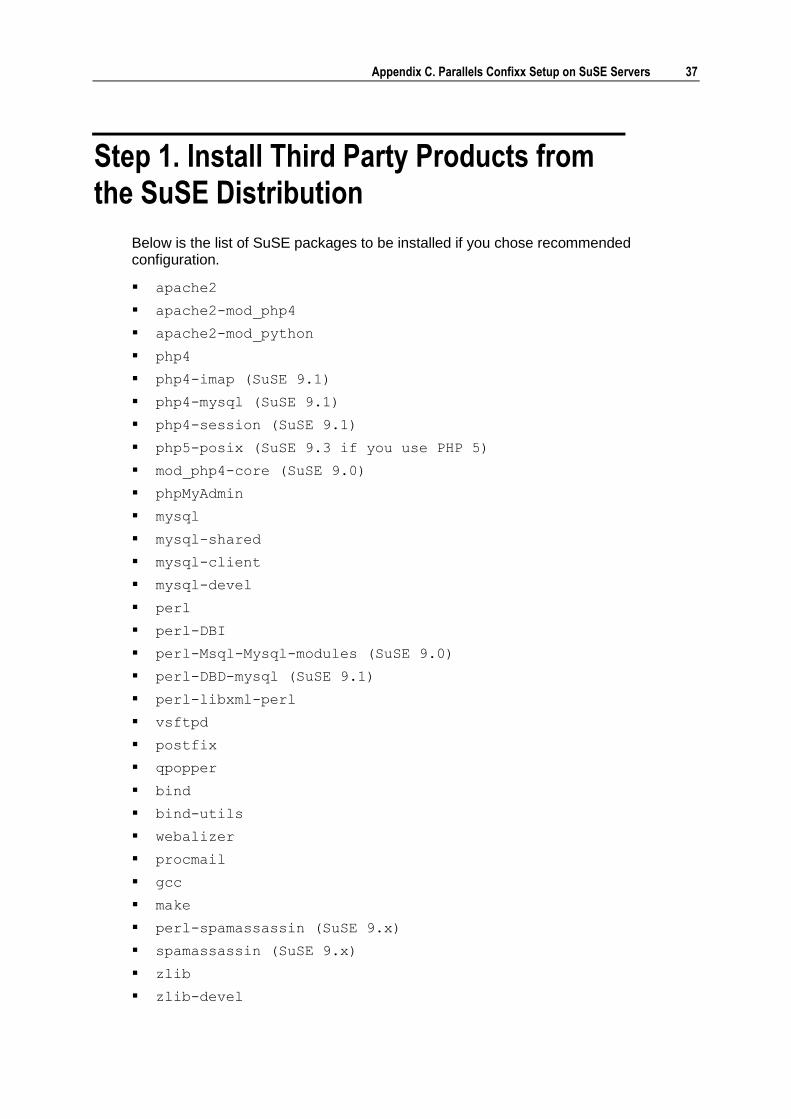
Below is the list of SuSE packages to be installed if you chose recommended configuration.
apache2
apache2-mod_php4
apache2-mod_python
php4
php4-imap (SuSE 9.1)
php4-mysql (SuSE 9.1)
php4-session (SuSE 9.1)
php5-posix (SuSE 9.3 if you use PHP 5)
mod_php4-core (SuSE 9.0)
phpMyAdmin
mysql
mysql-shared
mysql-client
mysql-devel
perl
perl-DBI
perl-Msql-Mysql-modules (SuSE 9.0)
perl-DBD-mysql (SuSE 9.1)
perl-libxml-perl
vsftpd
postfix
qpopper
bind
bind-utils
webalizer
procmail
gcc
make
perl-spamassassin (SuSE 9.x)
spamassassin (SuSE 9.x)
zlib
zlib-devel

38 Appendix C. Parallels Confixx Setup on SuSE Servers
expat
unzip
quota
perl-Compress-Zlib
perl-Expect
perl-IO-Socket-SSL
perl-IO-Zlib
perl-IO-stringy
perl-MIME-Types
perl-MIME-tools
perl-TermReadKey
perl-XML-DOM
perl-XML-Parser
Note: Make sure that the FTP server works properly: try to login after installation on
choosed FTP server (vsftp).
Some of the packages may be reported as already installed. It is not an error, it only means that you do not need to install the package.
Make sure that the FTP server works properly: try to login after installation of chosen FTP server (vsftp).
If you are using SuSE 9.1, you may see messages about undefined PHP function
„mail()‟ while browsing web panel. To avoid this problem you need to upgrade the
following packages:
php4
apache2-mod_php4
You can find these packages (rpm, srpm, patch rpm) at these repositories:
ftp://ftp.suse.com/pub/suse/i386/update/9.1/rpm/i586/
http://www.suse.com/us/private/download/updates/91_i386.html It is strongly recommended to upgrade all php and apache related packages.

Appendix C. Parallels Confixx Setup on SuSE Servers 39
Step 2. Configure Apache
1 Include mod_rewrite
Confixx requires the Apache module mod_rewrite. Check file
/etc/apache2/sysconfig.d/loadmodule.conf if the module is loaded or
not. There should be the following line:
LoadModule rewrite_module /usr/lib/apache2-
prefork/mod_rewrite.so
If the line is absent in loadmodule.conf, then you should open the file
/etc/sysconfig/apache2, find the APACHE_MODULES variable there and
change it adding rewrite to the list of assigned modules. For example:
APACHE_MODULES=”access actions alias auth auth_dbm autoindex
cgi dir env expires include log_config mime negotiation
setenvif ssl suexec userdir php4 rewrite”
2 Activate SSI (Server Side Includes)
To activate the SSI feature in Apache, you need to open the file
/etc/apache2/mod_mime-defaults.conf and uncomment the following lines
(remove the # character at the beginning of the strings), so that they become:
AddType text/html .shtml
AddOutputFilter INCLUDES .shtml
3 Include mod_python
If you are going to use the mod_python module, add python is into the
APACHE_MODULES variable of /etc/sysconfig/apache2:
APACHE_MODULES=”access actions alias auth auth_dbm autoindex
cgi dir env expires include log_config mime negotiation
setenvif ssl suexec userdir php4 rewrite python”
4 Restart Apache:
/etc/init.d/apache2 restart
Step 3. Configure MySQL
1 Login to mysql console from root:
#~: mysql -p
2 When prompted to enter password, press ENTER (without password).
3 Execute the following commands in the MySQL console:
mysql> use mysql;
mysql> delete from user where User = ― ;
mysql> delete from db where User = ―;
mysql> update user set Password = Password(‗some_passwd‘)
where User =
‗root‘;

40 Appendix C. Parallels Confixx Setup on SuSE Servers
mysql> flush privileges;
mysql> exit;
It will create a password for the mysql „root‟ user.
Step 4. Install and Configure Spamassassin
The SpamAssassin (on page 13) software gives an ability to filter SPAM in your customers Mailboxes when receiving mail there.
Skip the step if you do not need SpamAssassin support in Confixx.
1 Install SpamAssassin as an RPM package from SuSE distribution. For
this, install the perl-spamassassin‟ and spamassassin packages.
2 To make SpamAssassin working properly with Confixx on SuSE, open
/etc/sysconfig/spamd and find there a line:
SPAMD_ARGS = “-d -c -a -L”
Edit the line so that it becomes:
SPAMD_ARGS = “-d -x -q -L”
These arguments mean the following:
-d - run daemonized
-L - Use local tests only (no DNS)
-x - Do not use user preferences files (typically, mail users in Parallels Confixx
do not have home directories, so they can not have preferences files).
-q - use a SQL database to keep user preferences.
3 Download and install the /etc/procmailrc file:
#~:wget
http://spamassassin.apache.org/full/3.0.x/dist/procmailrc.exam
ple
#~:mv procmailrc.example /etc/procmailrc
4 Edit the /etc/postfix/main.cf file to set the following option:
mailbox_command = /usr/bin/procmail
5 Make sure that file /etc/mail/spamassassin/local.cf exists
and create it does not:
#~: touch /etc/mail/spamassassin/local.cf
SpamAssassin is now configured.
Note: Never try install SpamAssassin from both RPM packages and the tarball at the same time. If both are installed, you may have problems with detecting and resolving problems. If you choose to use RPM packages, do not install SpamAssassin from the tarball. If you choose to use the tarball installation, do not install SuSE RPM packages.

Appendix C. Parallels Confixx Setup on SuSE Servers 41
Step 5. Install and Configure Majordomo
Majordomo (on page 13) is a program which automates the management of Internet mailing lists. Having this program installed you can offer your customers an ability to create and manage mailing lists via Parallels Confixx web interface.
Skip the step if you do not need Majordomo support in Parallels Confixx.
For SuSE 9.0 and up Majordomo is available as an RPM package. To install it, run:
#~: yast -i majordomo
Alternatively, to install majordomo from a tarball (.tar.gz):
1 Download the latest version of the product from http://www.greatcircle.com/majordomo/
2 Unpack the tarball:
#~: tar xzf majordomo-1.94.5.tar.gz
#~: cd majordomo-1.94.5
3 Create majordomo user and group:
#~: groupadd majordomo
#~: useradd majordomo -g majordomo
4 Get the majordomo user and group ID by running the following
command:
#~: cat /etc/passwd | grep majordomo
You will see the output line like the following one:
majordomo:x:1000:104::/home/majordomo:/bin/bash
Read the majordomo user id (UID; 1000 in the above example) and group id
(GID; 104 in the above example) in output, and remember them.
5 Create the Majordomo installation directory:
#~: mkdir /usr/local/majordomo
6 Edit the makefile:
#~: vi Makefile
a Change the line with the PERL variable definition to
PERL = /usr/bin/perl
b Change the line with the W_HOME variable definition to
W_HOME = /usr/local/majordomo
c Change the lines with W_USER and W_GROUP variables definition to the
remembered majordomo user‟s UID and GID, for example:
W_USER = 1000
W_GROUP = 104
d Set the temporary directory:

42 Appendix C. Parallels Confixx Setup on SuSE Servers
set TMPDIR = /tmp
7 Edit the configuration file:
#~: cp sample.cf majordomo.cf
#~: vi majordomo.cf
Set the $whereami variable to your host name:
$whereami = ―your-host.com‖;
8 Install Majordomo:
#~: make wrapper
#~: make install
#~: make install-wrapper
9 Check the installation:
#~: cd /usr/local/majordomo; ./wrapper config-test
You should see something like:
----------------------- end of tests -----------------------
Nothing bad found! Majordomo should work correctly.
If it doesn‟t, check your configuration file
(/usr/local/majordomo/majordomo.cf)
closely, and if it still looks okay, consider asking the
majordomo-users
mailing list at “[email protected]” for
assistance. Be sure
and fully specify what your problems are, and what type of
machine (and
operating system) you are using.
Enjoy!
I see you haven‟t registered this version of Majordomo. By
registering, you will be notified of patches and further
releases of Majordomo. Shall I send email to majordomo-
[email protected] to register this version? (I‟ll
[yes] no
Ooooh, like to live dangerously, eh?!
After this, Majordomo is installed. The further configuration will be performed by Parallels Confixx.
Step 6. Install and Configure Majorcool
Majorcool (on page 13) is an administrative front-end to the popular mailing list manager (Majordomo), allowing list-owners to manage their list configuration and subscriber base. If you install Majorcool, the user interface will show a link to Majorcool.
Skip the step if you do not need Majordomo support in Parallels Confixx.
1 Install Majorcool.

Appendix C. Parallels Confixx Setup on SuSE Servers 43
For SuSE 9.0 and up, install Majorcool from the RPM package:
#~: yast -i majorcool
#~: cd /usr/lib/majorcool/
Alternatively, you can install MajorCool from a .tar.gz tarball:
1. Download the tarball of the latest version from http://www.conveyanced.com/majorcool/
2. Unpack the distribution:
#~: mkdir majorcool
#~: tar xzf majorcool.tar.gz -C majorcool
#~: cd majorcool
3. Fix the Configure script:
#~: vi Configure
Set the PERLBIN variable to the proper perl binary location:
PERLBIN=‖/usr/bin/perl‖ # How to start a perl script
2. Run the Configure script:
./Configure
The script will prompt you to answer a lot of questions. The most important questions are:
Set the Apache Web server root directory:
$ What is the root directory for your Web server?
$ [/etc/apache2/]:<ENTER>
Set the directory for running CGI scripts:
$ Where is the cgi-bin directory for your Web server?
$ [/var/www/cgi-bin]:<ENTER> $ What is your server‟s URL for „/var/www/cgi-bin‟?
$ [/cgi-bin]:<ENTER>
Set the images directory.
Before you answer the Configure script question, open the Apache configuration
file (/etc/apache2/conf/httpd.conf or /etc/httpd/conf/httpd.conf)
and find there a line starting with Alias /icons/. Usually it looks like:
Alias /icons/ /usr/share/apache2/icons/
The second argument in this line (/usr/share/apache2/icons/) is the images
directory and the first argument (/icons/) is the server‟s URL for it.
$ Where is the image directory for your Web server?
$ [/usr/share/apache/icons]: /usr/share/apache2/icons $ Will place the icons in /usr/share/apache2/icons
$ What is your server‟s URL for „/usr/share/apache/icons‟?
$ [/icons]: /icons
Set the Apache‟s DocumentRoot.
$ Where is the root directory for documents on your Web
server?
$ [/var/www/htdocs]:

44 Appendix C. Parallels Confixx Setup on SuSE Servers
It is highly recommended to answer No to the following questions unless you plan to supply your customers with list create/rename/delete abilities outside Parallels Confixx Control Panel. It is possible to turn the features below off after the installation is complete.
$ Provide list CREATE access [Y]? N
$ Provide list RENAME access [Y]? N
$ Provide list DELETE access [Y]? N
Step 7. Install IDNKit
IDN (on page 14) (International Domain Names) - the technology allows create and use domains having national characters in their names. Server side of IDN support is performed by IDNKit software.
Skip the step if you do not need IDN support in Parallels Confixx.
1 Download the latest tarball (.tar.gz) version from http://www.nic.ad.jp/en/idn/
2 Install the IDNKit tarball:
#~: tar xzf idnkit-1.0-src.tar.gz
#~: cd idnkit-1.0-src
#~: ./configure
#~: make
#~: make install
Step 8. Install ColdFusion
Having this product installed you can offer your customers an ability of using CFML (ColdFusion Markup Language) on their web sites.
Unlike most of the third party packages used in Parallels Confixx, ColdFusion server is not shareware or open source. Trial version could be downloaded from http://www.macromedia.com/ (about 100Mb).
Launch the downloaded binary and follow the instructions.
Start Parallels Confixx Installation
Now you are ready to proceed with the Parallels Confixx installation (on page 16).

In this chapter you will find step-by-step instructions how to prepare a Debian server for Paralllels Confixx installation.
In this chapter:
Recommended Configuration ............................................................................ 46 Step 1. Install Third Party Products from the Debian Distribution ....................... 47 Step 2. Configure Apache ................................................................................. 49 Step 3. Configure MySQL .................................................................................. 49 Step 4. Install and Configure Spamassassin ..................................................... 49 Step 5. Install and Configure Majordomo ........................................................... 50 Step 6. Install and Configure Majorcool ............................................................. 51 Step 7. Install IDNKit ......................................................................................... 53 Step 8. Install ColdFusion .................................................................................. 54 Step 9. Configuring Quota ................................................................................. 54 Start Parallels Confixx Installation ..................................................................... 54
C H A P T E R 1 0
Appendix D. Parallels Confixx Setup on Debian Servers

Recommended Configuration
Web Server: Apache 2
Database server: MySQL 4.x
Mail transfer agent: Postfix
POP3 daemon: Qpopper
FTP server: Vsftpd
C H A P T E R 1 1

Appendix D. Parallels Confixx Setup on Debian Servers 47
Step 1. Install Third Party Products from the Debian Distribution
Below is the list of Debian packages to be installed if you choose the recommended configuration.
apache2
apache2-common
libapache2-mod-php4
libapache2-mod-python
mysql-client
mysql-server
mysql-common
php4
php4-imap
php4-mysql
perl
perl-base
perl-modules
libdbi-perl
libdbd-mysql-perl
vsftpd
postfix
qpopper
bind9
webalizer
procmail
gcc
libc6-dev
make
libmysqlclient12-dev
quota
libquota-perl
libnet-ssleay-perl
libio-stringy-perl
libdata-showtable-perl
libxml-perl
openssl

48 Appendix D. Parallels Confixx Setup on Debian Servers
libssl-dev
libexpat1
libexpat1-dev
zlib1g
zlib1g-dev You can install them all as shown below:
#~: apt-get install apache2 apache2-common libapache2-mod-php4
libapache2-mod-python mysql-client mysql-server mysql-common php4 php4-
imap php4-mysql perl perl-base perl-modules libdbi-perl libdbd-mysql-
perl vsftpd postfix qpopper bind9 webalizer procmail gcc libc6-dev make
libmysqlclient12-dev quota libquota-perl libnet-ssleay-perl libio-
stringy-perl libdata-showtable-perl libxml-perl openssl libssl-dev
libexpat1 libexpat1-dev zlib1g zlib1g-dev
Notes:
Make sure that the FTP server works properly: try to login after the installation on the FTP server (vsftp).
Some of the packages may be reported as already installed. It is not an error - it only means that you do not need to install the package.
Some of third parties could be unavailable on their public locations. You can get a copy of them at ftp://download1.sw-soft.com/Confixx/third_parties/
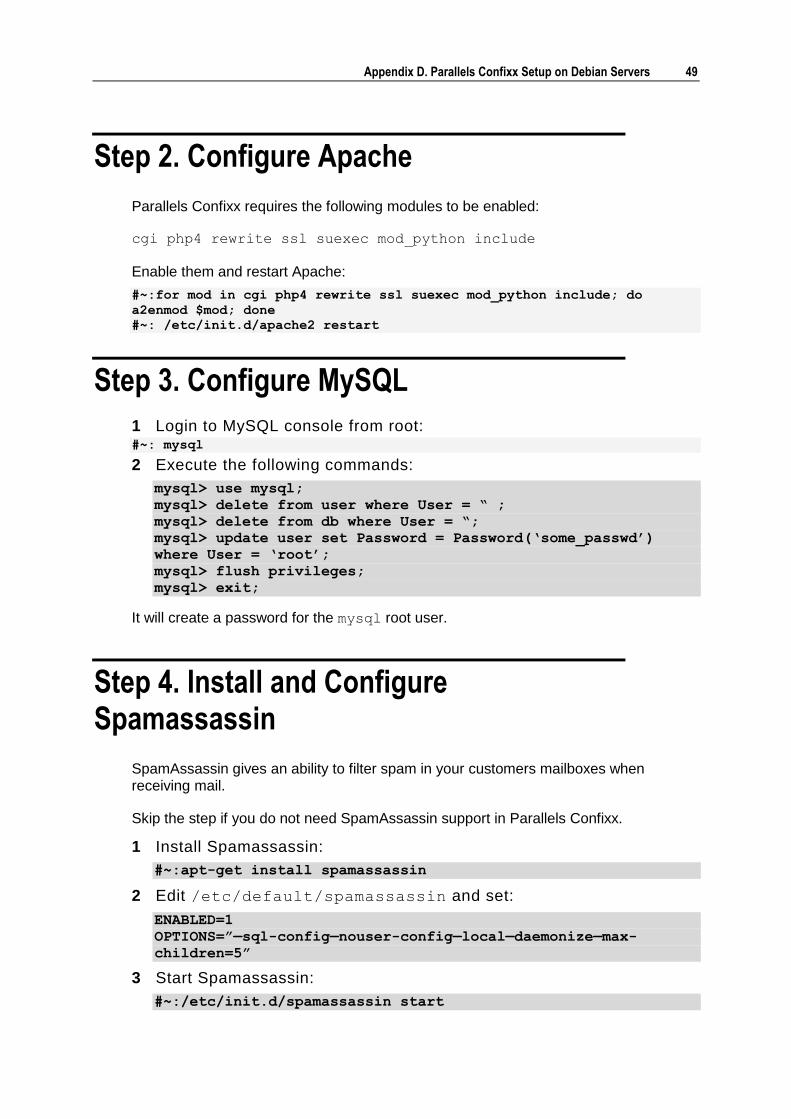
Appendix D. Parallels Confixx Setup on Debian Servers 49
Step 2. Configure Apache
Parallels Confixx requires the following modules to be enabled:
cgi php4 rewrite ssl suexec mod_python include
Enable them and restart Apache:
#~:for mod in cgi php4 rewrite ssl suexec mod_python include; do
a2enmod $mod; done
#~: /etc/init.d/apache2 restart
Step 3. Configure MySQL
1 Login to MySQL console from root: #~: mysql
2 Execute the following commands:
mysql> use mysql;
mysql> delete from user where User = ― ;
mysql> delete from db where User = ―;
mysql> update user set Password = Password(‗some_passwd‘)
where User = ‗root‘;
mysql> flush privileges;
mysql> exit;
It will create a password for the mysql root user.
Step 4. Install and Configure Spamassassin
SpamAssassin gives an ability to filter spam in your customers mailboxes when receiving mail.
Skip the step if you do not need SpamAssassin support in Parallels Confixx.
1 Install Spamassassin:
#~:apt-get install spamassassin
2 Edit /etc/default/spamassassin and set:
ENABLED=1
OPTIONS=‖—sql-config—nouser-config—local—daemonize—max-
children=5‖
3 Start Spamassassin:
#~:/etc/init.d/spamassassin start

50 Appendix D. Parallels Confixx Setup on Debian Servers
4 Install /etc/procmailrc:
#~:wget
http://spamassassin.apache.org/full/3.0.x/dist/procmailrc.exam
ple
#~:mv procmailrc.example /etc/procmailrc
5 Edit /etc/postfix/main.cf and set:
mailbox_command=/usr/bin/procmail
Step 5. Install and Configure Majordomo
Majordomo (on page 13) is a program which automates the management of Internet mailing lists. Having this program installed you can offer your customers an ability to create and manage mailing lists via Confixx web interface.
Skip the step if you do not need Majordomo support in Parallels Confixx.
1 Download the latest version of the product from http://www.greatcircle.com/majordomo/
2 Unpack the tarball:
#~: tar xzf majordomo-1.94.5.tar.gz
#~: cd majordomo-1.94.5
3 Create majordomo user and group:
#~: groupadd majordomo
#~: useradd majordomo -g majordomo
4 Get the majordomo user and group ID by running the following
command:
#~: cat /etc/passwd | grep majordomo
You will see the output line like the following one:
majordomo:x:1000:104::/home/majordomo:/bin/bash
Read the majordomo user id (UID; 1000 in the above example) and group id
(GID; 104 in the above example) in output, and remember them.
5 Create the Majordomo installation directory:
#~: mkdir /usr/local/majordomo
6 Edit the makefile:
#~: vi Makefile
a Change the line with the PERL variable definition to
PERL = /usr/bin/perl
b Change the line with the W_HOME variable definition to
W_HOME = /usr/local/majordomo
c Change the lines with W_USER and W_GROUP variables definition to the
remembered majordomo user‟s UID and GID, for example:

Appendix D. Parallels Confixx Setup on Debian Servers 51
W_USER = 1000
W_GROUP = 104
d Set the temporary directory:
set TMPDIR = /tmp
7 Edit the configuration file:
#~: cp sample.cf majordomo.cf
#~: vi majordomo.cf
Set $whereami variable to your host name and that is enough:
$whereami = ―your-host.com‖;
8 Install the majordomo:
#~: make wrapper
#~: make install
#~: make install-wrapper
9 Check the installation:
#~: cd /usr/local/majordomo; ./wrapper config-test
You should see something like:
----------------------- end of tests -----------------------
Nothing bad found! Majordomo should work correctly.
If it doesn‟t, check your configuration file
(/usr/local/majordomo/majordomo.cf)
closely, and if it still looks okay, consider asking the
majordomo-users
mailing list at “[email protected]” for
assistance. Be sure
and fully specify what your problems are, and what type of
machine (and
operating system) you are using.
Enjoy!
I see you haven‟t registered this version of Majordomo. By
registering, you will be notified of patches and further
releases of Majordomo. Shall I send email to majordomo-
[email protected] to register this version? (I‟ll
[yes] no
Ooooh, like to live dangerously, eh?!
After this, Majordomo is installed. The further configuration will be performed by Parallels Confixx.
Step 6. Install and Configure Majorcool
Majorcool (on page 13) is an administrative front-end to the popular mailing list manager (Majordomo), allowing list-owners to manage their list configuration and subscriber base. If you install Majorcool, the user interface will show a link to Majorcool.

52 Appendix D. Parallels Confixx Setup on Debian Servers
Skip the step if you do not need Majordomo support in Parallels Confixx.
1 Download the tarball of the latest version from http://www.conveyanced.com/majorcool/
2 Unpack the distribution:
#~: mkdir majorcool
#~: tar xzf majorcool.tar.gz -C majorcool
#~: cd majorcool
3 Fix the Configure script:
#~: vi Configure
4 Set the PERLBIN variable to the proper perl binary location:
PERLBIN=‖/usr/bin/perl‖ # How to start a perl script
5 Create the cgi-bin directory:
#~: mkdir /var/www/cgi-bin
6 Run the Configure script:
./Configure
The script will prompt you to answer a lot of questions. The most important questions are:
Set the Apache Web server root directory:
$ What is the root directory for your Web server?
$ [/etc/apache2/]:<ENTER>
Set the directory for running CGI scripts:
$ Where is the cgi-bin directory for your Web server?
$ [/var/www/cgi-bin]:<ENTER> $ What is your server‟s URL for „/var/www/cgi-bin‟?
$ [/cgi-bin]:<ENTER>
Set the images directory.
Before you answer the Configure script question, open the Apache configuration
file (/etc/apache2/conf/httpd.conf or /etc/httpd/conf/httpd.conf)
and find there a line starting with Alias /icons/. Usually it looks like:
Alias /icons/ /usr/share/apache2/icons/
The second argument in this line (/usr/share/apache2/icons/) is the images
directory and the first argument (/icons/) is the server‟s URL for it.
$ Where is the image directory for your Web server?
$ [/usr/share/apache/icons]: /usr/share/apache2/icons $ Will place the icons in /usr/share/apache2/icons
$ What is your server‟s URL for „/usr/share/apache/icons‟?
$ [/icons]: /icons
Set the Apache‟s DocumentRoot.
$ Where is the root directory for documents on your Web
server?
$ [/var/www/]:
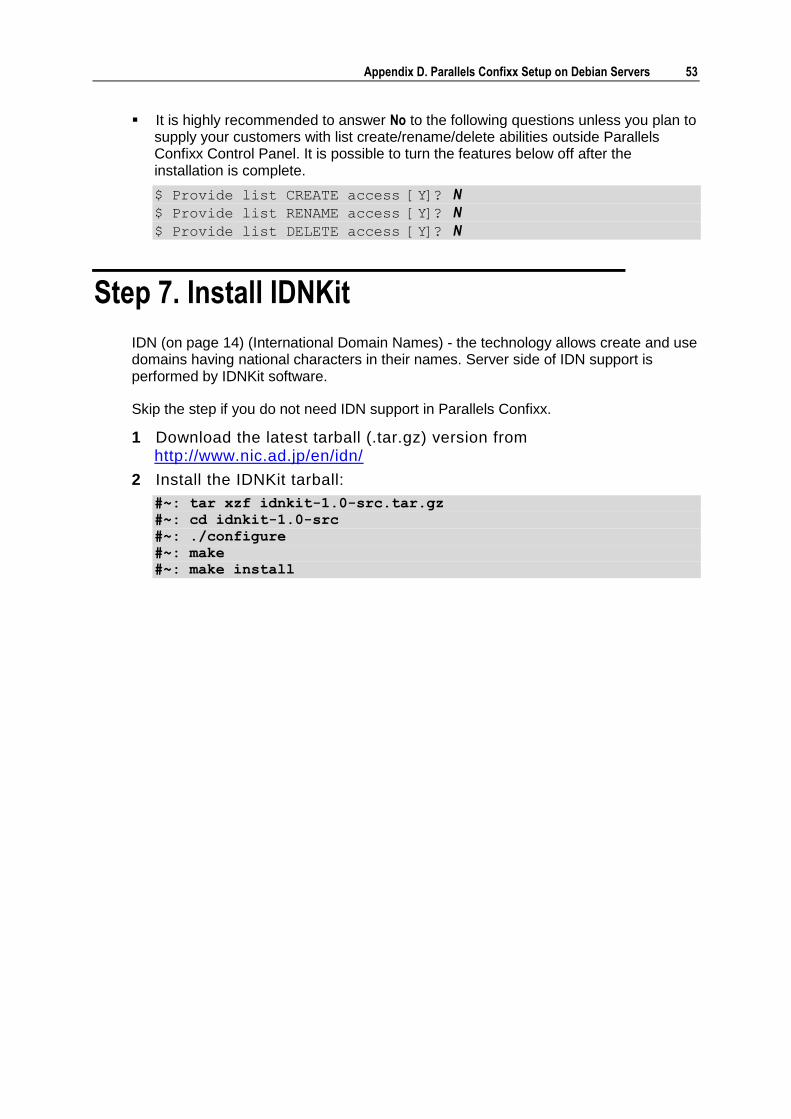
Appendix D. Parallels Confixx Setup on Debian Servers 53
It is highly recommended to answer No to the following questions unless you plan to supply your customers with list create/rename/delete abilities outside Parallels Confixx Control Panel. It is possible to turn the features below off after the installation is complete.
$ Provide list CREATE access [Y]? N
$ Provide list RENAME access [Y]? N
$ Provide list DELETE access [Y]? N
Step 7. Install IDNKit
IDN (on page 14) (International Domain Names) - the technology allows create and use domains having national characters in their names. Server side of IDN support is performed by IDNKit software.
Skip the step if you do not need IDN support in Parallels Confixx.
1 Download the latest tarball (.tar.gz) version from http://www.nic.ad.jp/en/idn/
2 Install the IDNKit tarball:
#~: tar xzf idnkit-1.0-src.tar.gz
#~: cd idnkit-1.0-src
#~: ./configure
#~: make
#~: make install

54 Appendix D. Parallels Confixx Setup on Debian Servers
Step 8. Install ColdFusion
Having this product installed you can offer your customers an ability of using CFML (ColdFusion Markup Language) on their web sites.
Unlike most of the third party packages used in Parallels Confixx, ColdFusion server is not shareware or open source. Trial version could be downloaded from http://www.macromedia.com/ (about 100Mb).
Launch the downloaded binary and follow the instructions.
Step 9. Configuring Quota
1 Launch the following commands:
:~# update-rc.d -f quotarpc remove
:~# update-rc.d -f quota remove
:~# update-rc.d quota defaults 18
2 Edit the /etc/fstab file and add the option usrquota to the root (/)
partition, for example:
/dev/sda2 / ext3 errors=remount-ro,usrquota 01
3 Remount the root partition to apply the userquota option:
# mount -o remount /
4 Enable quota:
:~# quotacheck -ma
:~# quotaon -a
Start Parallels Confixx Installation
Now you are ready to proceed with the Parallels Confixx installation (on page 16).


