38
PARTNER Messaging System User’s Guide 518-100-701 Issue 3 May 2004

PARTNER Messaging System
User’s Guide
518-100-701Issue 3
May 2004

Copyright 2004, Avaya Inc.All Rights Reserved
Notice
Every effort was made to ensure that the information in this document was complete and accurate at the time of printing. However, information is subject to change.
Preventing Toll Fraud
“Toll fraud” is the unauthorized use of your telecommunications system by an unauthorized party (for example, a person who is not a corporate employee, agent, subcontractor, or is not working on your company's behalf). Be aware that there may be a risk of toll fraud associated with your system and that, if toll fraud occurs, it can result in substantial additional charges for your telecommunications services.
Avaya Fraud Intervention
If you suspect that you are being victimized by toll fraud and you need technical assistance or support, in the United States and Canada, call the Technical Service Center's Toll Fraud Intervention Hotline at1-800-643-2353.
How to Get Help
For additional support telephone numbers, go to the Avaya Web site:
http:/www.avaya.com/support/
If you are:• Within the United States, click Escalation
Lists, which includes escalation phone numbers within the USA.
• Outside the United States, click Escalation Lists then click Global Escalation List, which includes phone numbers for the regional Centers of Excellence.
Responsibility for Your Company’s Telecommunications Security
The final responsibility for securing both this system and its networked equipment rests with you - Avaya’s customer system administrator, your telecommunications peers, and your managers. Base the fulfillment of your responsibility on acquired knowledge and resources from a variety of sources including but not limited to:
• Installation documents• System administration documents• Security documents• Hardware-/software-based security tools• Shared information between you and your
peers• Telecommunications security experts
To prevent intrusions to your telecommunications equipment, you and your peers should carefully program and configure:
• Your Avaya-provided telecommunications systems and their interfaces
• Your Avaya-provided software applications, as well as their underlying hardware/software platforms and interfaces
• Any other equipment networked to your Avaya products.
To order copies of this and other documents:
Call: Avaya Publications Center
Voice 1.800.457.1235 or1.207.866.6701FAX 1.800.457.1764 or1.207.626.7269
Write: Globalware Solutions200 Ward Hill AvenueHaverhill, MA 01835 USA
Attention: Avaya Account Management
E-mail: [email protected]
For the most current versions of documentation, go to the Avaya Web site:http://www.avaya.com/support/
Contents
PARTNER Messaging System User’s Guide 3
Getting Started . . . . . . . . . . . . . . . . . . . . . . . . . . . . . . . . . . . . . . .5Logging In From an On-Site Location . . . . . . . . . . . . . . . . . . . . . . . . . . . . . .5Logging In From an Off-Site Location . . . . . . . . . . . . . . . . . . . . . . . . . . . . . .6Options . . . . . . . . . . . . . . . . . . . . . . . . . . . . . . . . . . . . . . . . . . . . . . . . . . . . .7Hints . . . . . . . . . . . . . . . . . . . . . . . . . . . . . . . . . . . . . . . . . . . . . . . . . . . . . . .8Using Dial Code/Button Features . . . . . . . . . . . . . . . . . . . . . . . . . . . . . . . . .9
Personalizing Your Mailbox . . . . . . . . . . . . . . . . . . . . . . . . . . . 11Recording Your Name . . . . . . . . . . . . . . . . . . . . . . . . . . . . . . . . . . . . . . . . . 11Recording or Deleting a Personal Greeting . . . . . . . . . . . . . . . . . . . . . . . . 11Activating a Personal Greeting . . . . . . . . . . . . . . . . . . . . . . . . . . . . . . . . . .13Changing Your Personal Operator . . . . . . . . . . . . . . . . . . . . . . . . . . . . . . .14Changing Your Password . . . . . . . . . . . . . . . . . . . . . . . . . . . . . . . . . . . . . .14Choosing Call Answer Mode . . . . . . . . . . . . . . . . . . . . . . . . . . . . . . . . . . . .15
Your Messages. . . . . . . . . . . . . . . . . . . . . . . . . . . . . . . . . . . . . .17About Message Categories . . . . . . . . . . . . . . . . . . . . . . . . . . . . . . . . . . . . .17Listening to Messages . . . . . . . . . . . . . . . . . . . . . . . . . . . . . . . . . . . . . . . .17Responding to a Message . . . . . . . . . . . . . . . . . . . . . . . . . . . . . . . . . . . . .19Sending a Message . . . . . . . . . . . . . . . . . . . . . . . . . . . . . . . . . . . . . . . . . .20Using the Directory . . . . . . . . . . . . . . . . . . . . . . . . . . . . . . . . . . . . . . . . . . .22
More Mailbox Options . . . . . . . . . . . . . . . . . . . . . . . . . . . . . . . .23Options . . . . . . . . . . . . . . . . . . . . . . . . . . . . . . . . . . . . . . . . . . . . . . . . . . . .23Changing Message Retrieval Order . . . . . . . . . . . . . . . . . . . . . . . . . . . . . .23Listening to New Messages in Preview Mode . . . . . . . . . . . . . . . . . . . . . . .24Listening to Last Heard Message . . . . . . . . . . . . . . . . . . . . . . . . . . . . . . . .24
Using Personal Group Lists . . . . . . . . . . . . . . . . . . . . . . . . . . .25Creating Personal Group Lists . . . . . . . . . . . . . . . . . . . . . . . . . . . . . . . . . .25Reviewing or Modifying Personal Group Lists . . . . . . . . . . . . . . . . . . . . . .26
4 PARTNER Messaging System User’s Guide
Contents
Using Outcalling . . . . . . . . . . . . . . . . . . . . . . . . . . . . . . . . . . . . 29About Outcalling . . . . . . . . . . . . . . . . . . . . . . . . . . . . . . . . . . . . . . . . . . . . . 29Turning Outcalling On or Off . . . . . . . . . . . . . . . . . . . . . . . . . . . . . . . . . . . . 30Setting Your Outcalling Numbers . . . . . . . . . . . . . . . . . . . . . . . . . . . . . . . . 30Guidelines for Setting Outcalling Numbers . . . . . . . . . . . . . . . . . . . . . . . . 32Reviewing Your Outcalling Numbers . . . . . . . . . . . . . . . . . . . . . . . . . . . . . 33Setting Your Outcalling Cycles . . . . . . . . . . . . . . . . . . . . . . . . . . . . . . . . . . 33Setting Your Outcalling Interval . . . . . . . . . . . . . . . . . . . . . . . . . . . . . . . . . 34Setting Your Outcalling Schedule . . . . . . . . . . . . . . . . . . . . . . . . . . . . . . . . 34
Recording/Screening Calls. . . . . . . . . . . . . . . . . . . . . . . . . . . . 37Using the Record-a-Call Feature . . . . . . . . . . . . . . . . . . . . . . . . . . . . . . . . 37Using the Call Screening Feature . . . . . . . . . . . . . . . . . . . . . . . . . . . . . . . 38
PARTNER Messaging System User’s Guide 5
Getting Started
Logging In From an On-Site LocationUse this procedure to log in from a telephone that is connected to your company’s communications system.
1 Dial the PARTNER Messaging extension, �����, to access the Voice Messaging system.
2 Choose an option:
• If you are at your own extension, press �.
• If you are at another telephone, enter your extension number, then press �.
3 Enter your Password, then press �.
The first time you log in, your Password is not set. Press � for Step 3, then follow the system prompts to enter your new Password and record your name.
The system announces the number of new and old messages in your mailbox.

Logging In From an Off-Site Location
6 PARTNER Messaging System User’s Guide
Getting Started
Logging In From an Off-Site LocationUse this procedure to log in from a telephone that is not connected to your company’s communications system (for example, from your home or cell phone).
1 Call in on a line answered by PARTNER Messaging Automated Attendant or Call Answer Service, and press � � when you hear the menu or greeting. (See your System Manager for the Call Answer Service number.)
2 Enter your extension number, then press �.
3 Enter your Password, then press �.
The first time you log in, your Password is not set. Press � for Step 3, then follow the system prompts to enter your new Password and record your name.
The system announces the number of new and old messages in your mailbox.
Options
PARTNER Messaging System User’s Guide 7
Getting Started
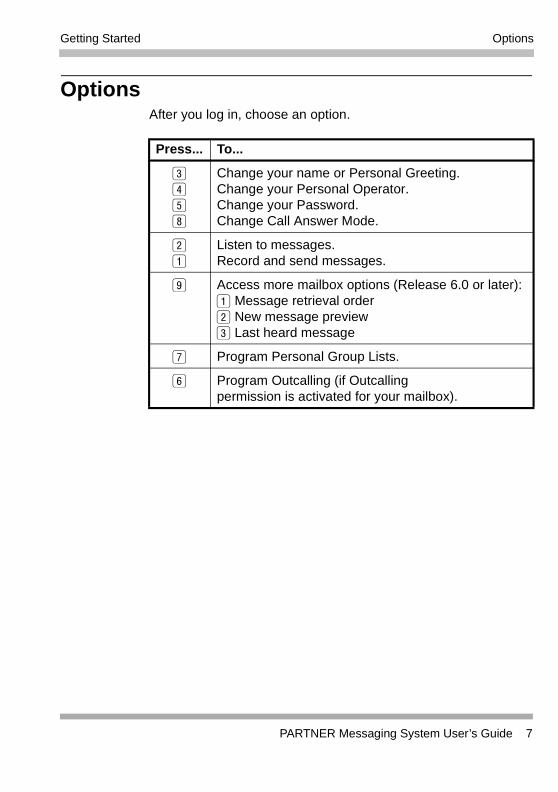
OptionsAfter you log in, choose an option.
Press... To...
����
Change your name or Personal Greeting.Change your Personal Operator.Change your Password.Change Call Answer Mode.
Listen to messages.Record and send messages.
� Access more mailbox options (Release 6.0 or later): Message retrieval order New message preview� Last heard message
� Program Personal Group Lists.
� Program Outcalling (if Outcallingpermission is activated for your mailbox).
Hints
8 PARTNER Messaging System User’s Guide
Getting Started
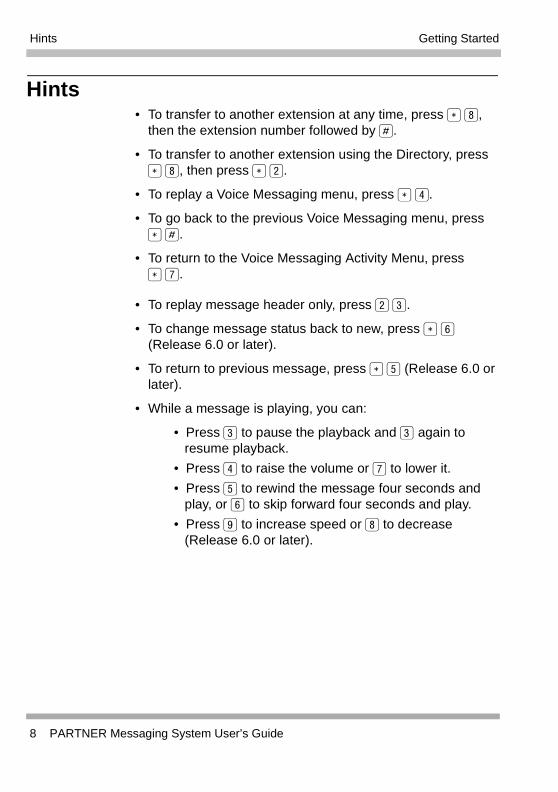
Hints • To transfer to another extension at any time, press ���,
then the extension number followed by �.
• To transfer to another extension using the Directory, press ���, then press ��.
• To replay a Voice Messaging menu, press ���.
• To go back to the previous Voice Messaging menu, press ���.
• To return to the Voice Messaging Activity Menu, press ���.
• To replay message header only, press ��.
• To change message status back to new, press ��� (Release 6.0 or later).
• To return to previous message, press ��� (Release 6.0 or later).
• While a message is playing, you can:
• Press � to pause the playback and � again to resume playback.
• Press � to raise the volume or � to lower it.
• Press � to rewind the message four seconds and play, or � to skip forward four seconds and play.
• Press � to increase speed or � to decrease (Release 6.0 or later).

Using Dial Code/Button Features
PARTNER Messaging System User’s Guide 9
Getting Started
Using Dial Code/Button Features
In some countries, the Voice Mailbox Transfer code is Feature ��. Also, some systems allow you to use Voice Mailbox Transfer from a standard phone by pressing ����, and then the extension number. Check with your System Manager.
To... Press...
Call Voice Mail Service ������� or programmed Voice Mail Auto Dial button.
Turn voice mail coverage on and off
Programmed VMS Cover button. VMS Coverage is on when the light is on.
Send calls to your mailbox without ringing your extension first
Programmed DND button to turn it on (and VMS Cover button if present). If no VMS Cover button is programmed, Automatic VMS must be on.
Transfer outside callers to another user’s mailbox
��� or programmed Voice Mailbox Transfer (VMBox) button, then dial the extension number.
Lock your telephone �� or programmed Station Lock button, then dial the four-digit code. Reenter the code.
Record an active call Programmed Record-a-Call (RAC) button.
Listen to a caller leaving a message in your voice mailbox
Programmed Call Screening button before the call is answered by the PARTNER Messaging System.
Intercom
Feature
Feature

Using Dial Code/Button Features
10 PARTNER Messaging System User’s Guide
Getting Started

PARTNER Messaging System User’s Guide 11
Personalizing Your Mailbox
Recording Your Name1 Log into Voice Messaging.
2 Press � to change your name recording or greeting.
3 Press to change your name recording.
4 Choose an option:
• Press to listen to the current name.
• Press to record your name.
5 Record your name, then press .
6 Choose an option:
• Press ��� to approve your name.
• Press �� to play back your name.
• Press � to re-record your name.
Recording or Deleting a Personal GreetingYou can have up to six different Personal Greetings.
HINT:
If the system is set for Bilingual Mode, you can record your Personal Greeting(s) in both languages. Your greeting(s) should tell the callers they can press �� to hear the Personal Greeting in an alternate language.
1 Log into Voice Messaging.
2 Press � to change your greeting.

Recording or Deleting a Personal Greeting
12 PARTNER Messaging System User’s Guide
Personalizing Your Mailbox
3 Press to change your name recording.
The system announces the current setting(s).
4 Enter the greeting number [1-6].
5 Choose an option:
• If the system is set for Monolingual Mode, go to Step 6.
• If the system is set for Bilingual Mode, press to record your greeting in the Primary Language, or press to record your greeting in the Secondary Language. Then go to Step 6.
6 Choose an option:
• Press to listen to your greeting.
• Press to record your greeting.
• Press ��� to delete your greeting.
7 Record your greeting, then press .
8 Choose an option:
• Press ��� to approve your greeting. Go to Step 6 of “Activating a Personal Greeting”.
• Press �� to play back your greeting.
• Press � to re-record your greeting.
• Press ��� to delete the greeting just recorded.
9 Do one of the following:
• If greeting is not already active, go to Step 6 of “Activating a Personal Greeting”.
• If greeting is currently active, choose one of the following:
— Press ��� to keep current activation setting.
— Press to change, then go to Step 6 of “Activating a Personal Greeting”.

Activating a Personal Greeting
PARTNER Messaging System User’s Guide 13
Personalizing Your Mailbox
Activating a Personal GreetingYou can record up to six Personal Greetings. Activate the Personal Greeting you want a caller to hear. You can activate up to two Personal Greetings. You can have one greeting for internal calls and one greeting for external calls, or you can use the same greeting for both internal and external calls.
1 Log into Voice Messaging.
2 Press � to change your name or greeting.
3 Press to change your greeting.
4 Press � to activate a greeting.
If a Personal Greeting is not active, the system greeting is used.
5 Choose an option:
• Enter the number of the greeting you want to activate.
• Press to activate the system default greeting.
6 Choose an option:
• Press to use this greeting for all calls.
• Press to use this greeting for internal calls only.
• Press to use this greeting for external calls only.
• Press ��� if finished.

Changing Your Personal Operator
14 PARTNER Messaging System User’s Guide
Personalizing Your Mailbox
Changing Your Personal OperatorYour Personal Operator is the person you want to handle your calls when the caller needs immediate assistance and you are not available. In your greeting, be sure to mention that callers can press to reach your Personal Operator or the System Operator.
1 Log into Voice Messaging.
2 Press � to change your Personal Operator.
3 Choose an option:
• Enter your Personal Operator's extension, then press �.
• Press ��� to delete your Personal Operator.
• Press ��� if finished.
Changing Your Password1 Log into Voice Messaging.
2 Press � to change your Password.
3 Enter the new Password, then press �.
4 Re-enter the new Password, then press �.
Choosing Call Answer Mode
PARTNER Messaging System User’s Guide 15
Personalizing Your Mailbox
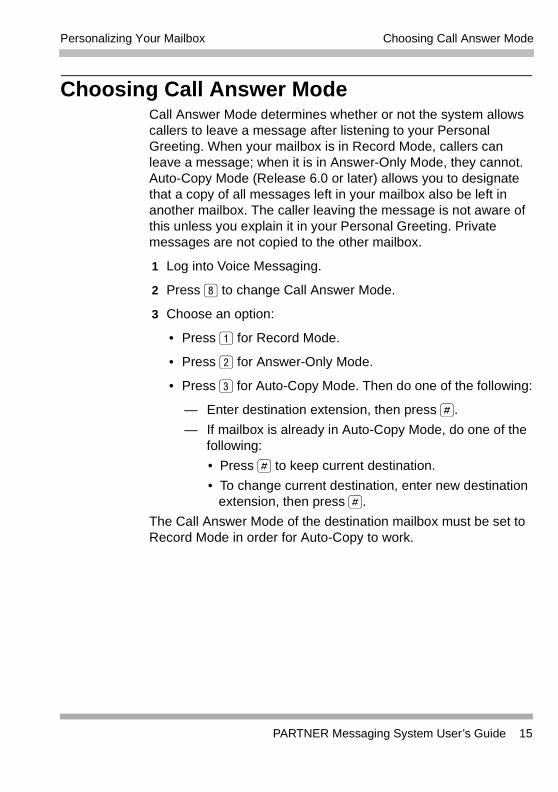
Choosing Call Answer ModeCall Answer Mode determines whether or not the system allows callers to leave a message after listening to your Personal Greeting. When your mailbox is in Record Mode, callers can leave a message; when it is in Answer-Only Mode, they cannot. Auto-Copy Mode (Release 6.0 or later) allows you to designate that a copy of all messages left in your mailbox also be left in another mailbox. The caller leaving the message is not aware of this unless you explain it in your Personal Greeting. Private messages are not copied to the other mailbox.
1 Log into Voice Messaging.
2 Press � to change Call Answer Mode.
3 Choose an option:
• Press for Record Mode.
• Press for Answer-Only Mode.
• Press � for Auto-Copy Mode. Then do one of the following:
— Enter destination extension, then press �.
— If mailbox is already in Auto-Copy Mode, do one of the following:
• Press � to keep current destination.
• To change current destination, enter new destination extension, then press �.
The Call Answer Mode of the destination mailbox must be set to Record Mode in order for Auto-Copy to work.
Choosing Call Answer Mode
16 PARTNER Messaging System User’s Guide
Personalizing Your Mailbox
PARTNER Messaging System User’s Guide 17
Your Messages
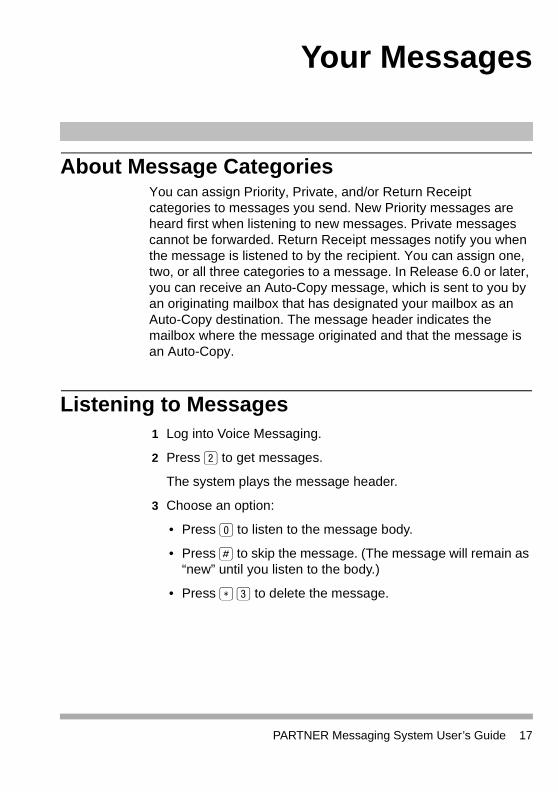
About Message CategoriesYou can assign Priority, Private, and/or Return Receipt categories to messages you send. New Priority messages are heard first when listening to new messages. Private messages cannot be forwarded. Return Receipt messages notify you when the message is listened to by the recipient. You can assign one, two, or all three categories to a message. In Release 6.0 or later, you can receive an Auto-Copy message, which is sent to you by an originating mailbox that has designated your mailbox as an Auto-Copy destination. The message header indicates the mailbox where the message originated and that the message is an Auto-Copy.
Listening to Messages1 Log into Voice Messaging.
2 Press to get messages.
The system plays the message header.
3 Choose an option:
• Press to listen to the message body.
• Press � to skip the message. (The message will remain as “new” until you listen to the body.)
• Press ��� to delete the message.
Listening to Messages
18 PARTNER Messaging System User’s Guide
Your Messages
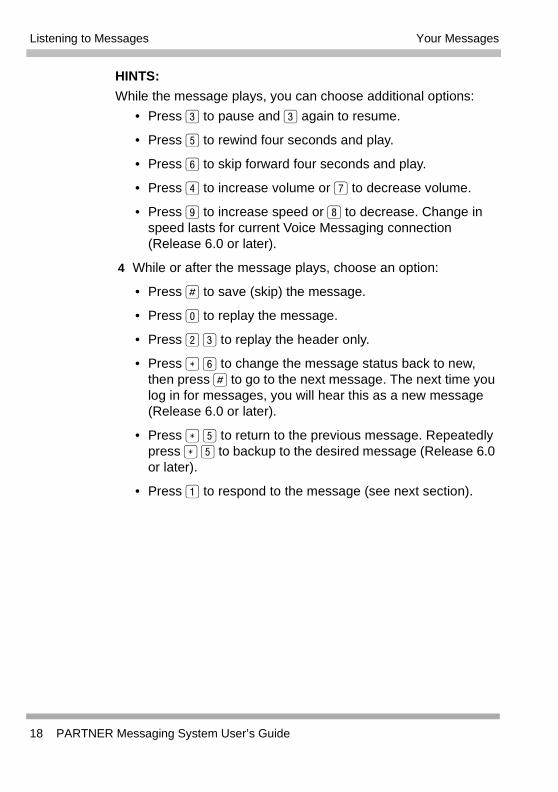
HINTS:
While the message plays, you can choose additional options:
• Press � to pause and � again to resume.
• Press � to rewind four seconds and play.
• Press � to skip forward four seconds and play.
• Press � to increase volume or � to decrease volume.
• Press � to increase speed or � to decrease. Change in speed lasts for current Voice Messaging connection (Release 6.0 or later).
4 While or after the message plays, choose an option:
• Press � to save (skip) the message.
• Press to replay the message.
• Press �� to replay the header only.
• Press ��� to change the message status back to new, then press � to go to the next message. The next time you log in for messages, you will hear this as a new message (Release 6.0 or later).
• Press ��� to return to the previous message. Repeatedly press ��� to backup to the desired message (Release 6.0 or later).
• Press to respond to the message (see next section).
Responding to a Message
PARTNER Messaging System User’s Guide 19
Your Messages
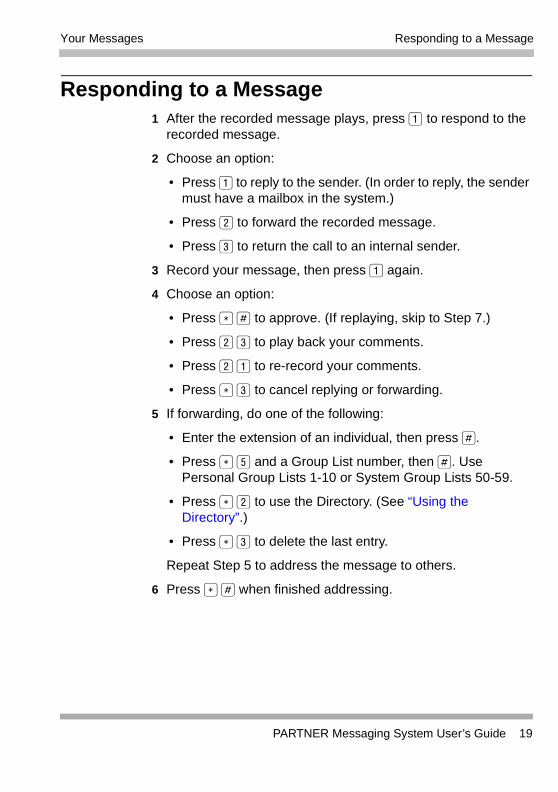
Responding to a Message1 After the recorded message plays, press to respond to the
recorded message.
2 Choose an option:
• Press to reply to the sender. (In order to reply, the sender must have a mailbox in the system.)
• Press to forward the recorded message.
• Press � to return the call to an internal sender.
3 Record your message, then press again.
4 Choose an option:
• Press ��� to approve. (If replaying, skip to Step 7.)
• Press �� to play back your comments.
• Press � to re-record your comments.
• Press ��� to cancel replying or forwarding.
5 If forwarding, do one of the following:
• Enter the extension of an individual, then press �.
• Press ��� and a Group List number, then �. Use Personal Group Lists 1-10 or System Group Lists 50-59.
• Press �� to use the Directory. (See “Using the Directory”.)
• Press ��� to delete the last entry.
Repeat Step 5 to address the message to others.
6 Press ��� when finished addressing.

Sending a Message
20 PARTNER Messaging System User’s Guide
Your Messages
7 Choose an option:
• Press to make this a Private message.
• Press to make this a Priority message.
• Press � to request a Return Receipt.
• Press to cancel the previously selected category.
• Press � to send the recorded message.
After you assign a category to a message, the system gives you the options to assign the other two categories.
8 Return to Step 4 of “Listening to Messages”.
Sending a Message1 Log into Voice Messaging.
2 Press to record a message.
3 Record your message.
4 Press when finished recording.
5 Choose an option:
• Press ��� to approve the recorded message. (Go to Step 6.)
• Press �� to play back the recorded message.
• Press � to re-record the message. (Go to Step 3.)
• Press ��� to delete the recorded message and return to the Voice Messaging Activity Menu.

Sending a Message
PARTNER Messaging System User’s Guide 21
Your Messages
6 Choose an option:
• Enter the extension of an individual, then press �.
• Press ��� and a Group List number, then �. Use Personal Group Lists 1-10 or System Group Lists 50-59.
• Press �� to use the Directory. (See “Using the Directory”.)
• Press ��� to delete the last entry.
Repeat Step 6 to address the recorded message to others.
7 Press ��� when finished addressing.
8 Choose an option:
• Press to make this a Private message.
• Press to make this a Priority message.
• Press � to request a Return Receipt.
• Press to cancel the previously selected category.
• Press � to send the recorded message.
After you assign a category to a message, the system gives you the options to assign the other two categories.

Using the Directory
22 PARTNER Messaging System User’s Guide
Your Messages
Using the DirectoryTo use the Directory to transfer to an extension:
1 Press ��� then �� to transfer to a user’s extension.
2 Enter up to the first ten letters of the name, then �. (Ask your System Manager if users are listed by first or last name.)
To use the Directory to address a message, or to add entries to a Group List:
1 Press �� to access the Directory.
2 Enter up to the first ten letters of the name, and then �.
Use � for the letter Q.
Use � for the letter Z.

PARTNER Messaging System User’s Guide 23
More Mailbox Options
OptionsIn Release 6.0 or later, additional mailbox options are available.
• Change the Message Retrieval Order – you can listen to your messages in First-In First-Out order or Last-In First-Out order.
• Use Message Preview Mode – you can listen to the message body of all new messages and keep the message status marked as new. This feature is particularly helpful when accessing your new messages remotely from a cell phone. Minimal button presses are required to listen to all your new messages.
• Listen to Last Heard Message – you can listen to the last message you heard during your previous message retrieval session.
Changing Message Retrieval Order1 Log into Voice Messaging.
2 Press � for more mailbox options.
3 Press to change the message retrieval order.
The system plays the current setting.
4 Choose an option:
• Press to listen to messages in First-In First-Out order.
• Press to listen to messages in Last-In First-Out order.
• Press ��� if finished.
Listening to New Messages in Preview Mode
24 PARTNER Messaging System User’s Guide
More Mailbox Options
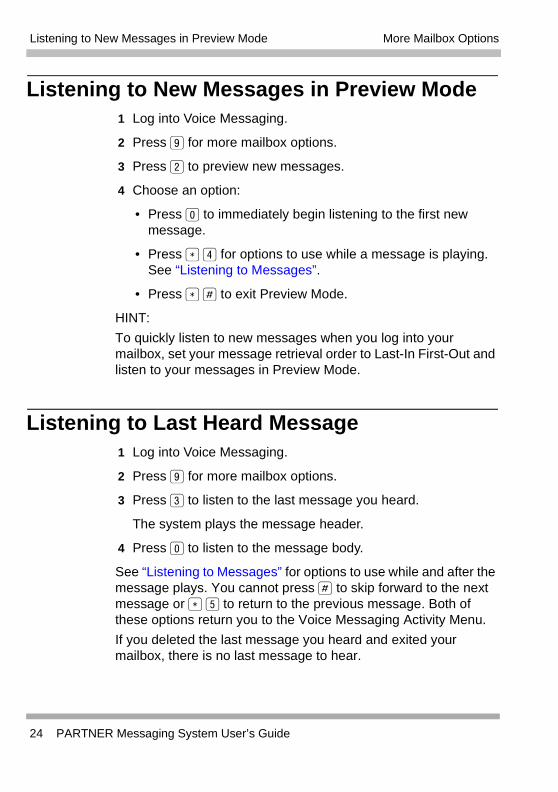
Listening to New Messages in Preview Mode1 Log into Voice Messaging.
2 Press � for more mailbox options.
3 Press to preview new messages.
4 Choose an option:
• Press to immediately begin listening to the first new message.
• Press ��� for options to use while a message is playing. See “Listening to Messages”.
• Press ��� to exit Preview Mode.
HINT:
To quickly listen to new messages when you log into your mailbox, set your message retrieval order to Last-In First-Out and listen to your messages in Preview Mode.
Listening to Last Heard Message1 Log into Voice Messaging.
2 Press � for more mailbox options.
3 Press � to listen to the last message you heard.
The system plays the message header.
4 Press to listen to the message body.
See “Listening to Messages” for options to use while and after the message plays. You cannot press � to skip forward to the next message or ��� to return to the previous message. Both of these options return you to the Voice Messaging Activity Menu.
If you deleted the last message you heard and exited your mailbox, there is no last message to hear.
PARTNER Messaging System User’s Guide 25
Using Personal Group Lists
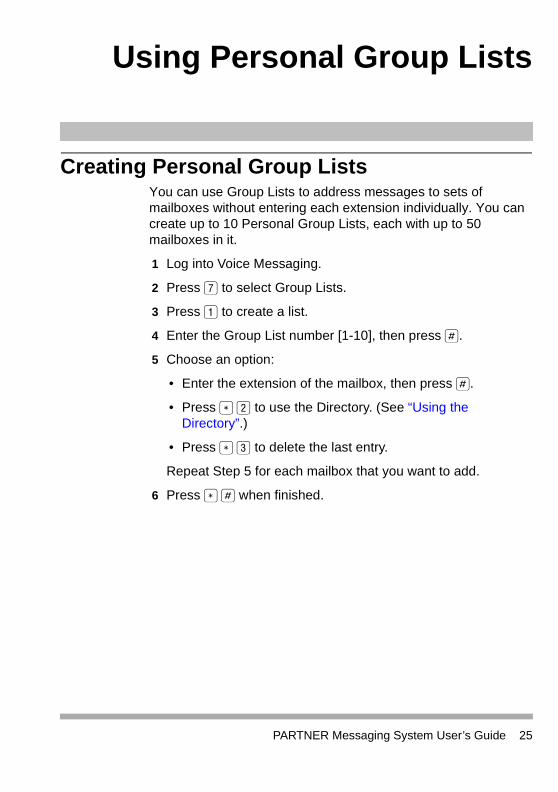
Creating Personal Group ListsYou can use Group Lists to address messages to sets of mailboxes without entering each extension individually. You can create up to 10 Personal Group Lists, each with up to 50 mailboxes in it.
1 Log into Voice Messaging.
2 Press � to select Group Lists.
3 Press to create a list.
4 Enter the Group List number [1-10], then press �.
5 Choose an option:
• Enter the extension of the mailbox, then press �.
• Press �� to use the Directory. (See “Using the Directory”.)
• Press ��� to delete the last entry.
Repeat Step 5 for each mailbox that you want to add.
6 Press ��� when finished.
Reviewing or Modifying Personal Group Lists
26 PARTNER Messaging System User’s Guide
Using Personal Group Lists
Reviewing or Modifying Personal Group Lists1 Log into Voice Messaging.
2 Press � to select Group Lists.
3 Press � to review or modify Group Lists.
The system announces the number of entries in the first Group List.
4 Choose an option:
• Press to review or modify the list. (Go to Step 5.)
• Press ��� to delete the list.
• Press � to skip to the next list. (Repeat Step 4.)
5 Choose an option:
• Press � to skip the extension.
• Press ��� to delete the extension.
• Press to add an extension, then choose an option:
— Enter the extension of the mailbox, then press �.
— Press �� to use the Directory. (See “Using the Directory”.)
6 Press ��� when finished.

Reviewing or Modifying Personal Group Lists
PARTNER Messaging System User’s Guide 27
Using Personal Group Lists
Use this page to keep track of your Personal Group Lists and their members.
Group ListNumber Members (Name and/or Extension)
1
2
3
4
5
6
7
8
9
10
You can put up to 50 extensions in each Personal Group List.

Reviewing or Modifying Personal Group Lists
28 PARTNER Messaging System User’s Guide
Using Personal Group Lists
PARTNER Messaging System User’s Guide 29
Using Outcalling
About OutcallingIf you turn on Outcalling, PARTNER Messaging calls the numbers which you have programmed to signal that a new message has arrived in your mailbox. You can have Outcalling for all messages or just Priority messages.
HINT:
• If you choose Outcalling for Priority messages only, give your callers instructions on how to leave a Priority message.
Check with your System Manager to see if your mailbox has been assigned Outcalling privileges.
Outcalling continues until one of the following happens:
• During the Outcalling message call, you press ��� to cancel Outcalling until a new message arrives for you.
• You log into your mailbox and listen to the message.
• The interval specified in your Outcalling Schedule expires.
• PARTNER Messaging has called all numbers in your Outcalling List the number of times specified by the Cycles option.

Turning Outcalling On or Off
30 PARTNER Messaging System User’s Guide
Using Outcalling
Turning Outcalling On or Off1 Log into Voice Messaging.
2 Press � to select Outcalling.
3 Press and then choose an option:
• Press to turn Outcalling On for all messages.
• Press to turn Outcalling On for Priority messages only.
• Press to turn Outcalling Off.
• Press ��� to return to the Outcalling menu.
Setting Your Outcalling Numbers1 Log into Voice Messaging.
2 Press � to select Outcalling.
3 Press � to change your list of Outcalling Numbers.
4 Choose the entry number [1-5].
If an Outcalling Number is programmed, you hear the Outcalling entry information. If an Outcalling Number is not programmed, you hear, “Entry number x is not used.”
5 Choose an option:
• Press to change or add an Outcalling Number. (Go to Step 6.)
• Press ��� to delete the Outcalling Number.
• Press ��� to keep the Outcalling Number and return to the Outcalling menu.

Setting Your Outcalling Numbers
PARTNER Messaging System User’s Guide 31
Using Outcalling
6 Choose an option:
• Press to enter a telephone Outcalling Number.
• Press to enter a pager Outcalling Number.
• Press ��� to return to the Outcalling menu without making a change.
7 Enter the Outcalling Number and wait five seconds for the system confirmation.
See “Guidelines for Setting Outcalling Numbers” for further details and examples of how to set your Outcalling Numbers.
8 Choose an option:
• When prompted, press ��� if you are finished entering the number. Listen to the Outcalling entry information and go to Step 9.
• Press to enter more digits, then repeat Step 7.
9 Choose an option:
• Press � to confirm your entry.
• Press � to cancel your entry.
Return to Step 4 to program more Outcalling Numbers.

Guidelines for Setting Outcalling Numbers
32 PARTNER Messaging System User’s Guide
Using Outcalling
Guidelines for Setting Outcalling NumbersYou may enter any combination of up to 60 digits including - �, � (for a 1.5-second pause), and � in an Outcalling Number. The Outcalling Number can consist of:
• ��� to access an outside line. (This is required to reach an external number.)
• The telephone number and/or paging system numbers (including area codes, if necessary).
• Your paging system Personal Identification Number (PIN), if any.
• A Callback Number, if Outcalling to a pager.
EXAMPLE:
Your Outcalling Number is a paging system. To place the call, the Voice Messaging system must access an outside line, dial the number, wait several seconds for the paging system to answer, enter your PIN followed by �, and a Callback Number followed by �.
The Outcalling Number you would enter is:�����������������������
To enter this Outcalling Number, you must dial:
• ��� (where � represents a pause) to allow the Voice Messaging system time to access an outside line.
• ����������� to reach your paging system.
• ������������� to allow several seconds for the paging system to answer.
• ����� followed by � as your PIN.
• ������� followed by � as your Callback Number.

Reviewing Your Outcalling Numbers
PARTNER Messaging System User’s Guide 33
Using Outcalling
Reviewing Your Outcalling Numbers1 Log into Voice Messaging.
2 Press � to select Outcalling.
3 Press to review your Outcalling Numbers.
The system announces your list of Outcalling Numbers.
Setting Your Outcalling CyclesYour Outcalling Cycles setting determines the number of times the system will call your list of Outcalling Numbers. The default setting is three times. It is suggested that you use at least two cycles.
1 Log into Voice Messaging.
2 Press � to select Outcalling.
3 Press � to change the number of your Outcalling Cycles.
The system plays the current setting.
4 Choose an option:
• Enter the number of times [1-9] your Outcalling List should be called, then press �.
• Press ��� to keep the current setting and return to the Outcalling menu.
Setting Your Outcalling Interval
34 PARTNER Messaging System User’s Guide
Using Outcalling
Setting Your Outcalling IntervalYour Outcalling Interval is the minimum amount of time (in minutes) the system will wait before calling the next number in your Outcalling List. The system default is 15 minutes.
1 Log into Voice Messaging.
2 Press � to select Outcalling.
3 Press � to change the Outcalling Interval.
The system plays the current setting.
4 Choose an option:
• Enter the number of minutes [5-99] for the Outcalling Interval, then press �.
• Press ��� to keep the current setting and return to the Outcalling menu.
Setting Your Outcalling ScheduleYou can set the time period during which the system will perform Outcalling for your mailbox. The default schedule is set to perform Outcalling 24 hours a day.
1 Log into Voice Messaging.
2 Press � to select Outcalling.
3 Press � to change the Outcalling Schedule.
The system plays the current setting.
4 Choose an option:
• Press to change starting time and/or ending time.
• Press ��� to keep the current schedule and return to the Outcalling menu.
Setting Your Outcalling Schedule
PARTNER Messaging System User’s Guide 35
Using Outcalling
5 Enter the starting time in 24-hour format in the form hhmm (hh=hour, mm=minute), or to keep the current starting time, press �.
6 Enter the ending time in 24-hour format in the form hhmm, or to keep the current ending time, press �.
The system plays the current setting.
7 Choose an option:
• Press ��� to approve your new schedule and return to the Outcalling menu.
• Press to re-enter. (Return to Step 5.)

Setting Your Outcalling Schedule
36 PARTNER Messaging System User’s Guide
Using Outcalling
PARTNER Messaging System User’s Guide 37
Recording/Screening Calls
Using the Record-a-Call FeatureThis feature allows you to record a conversation while you are active on a call at your extension.
The Record-a-Call feature is not available to all users on all systems. See your System Manager for feature availability and about programming a Record-a-Call button on your telephone.
When on a call you want to record, do the following to begin recording:
1 Press the preprogrammed Record-a-Call (RAC) button.
When the system answers, if there is space in your mailbox, the system confirms that it will begin recording. While the system is recording, the RAC button flashes green and red.
2 You and your party should begin speaking.
If the system detects silence for a period of 15 seconds after you have begun recording a conversation, the system automatically turns off the Record-a-Call feature. The system announces the message is saved. If this happens, you can begin recording again by pressing the Record-a-Call button. When you resume recording, the system saves the new recording as a separate message.
If the maximum recording time is reached, the system tells you, and the Record-a-Call feature is turned off.
Using the Call Screening Feature
38 PARTNER Messaging System User’s Guide
Recording/Screening Calls
3 To stop recording the conversation, do one of the following:
• Press the Record-a-Call button again. (You will still be connected to the other party.)
• Hang up. (Recording stops, and you are disconnected from your party.)
Using the Call Screening FeatureThis feature allows you to listen to a caller leaving a message in your voice mailbox.
The Call Screening feature is not available on all systems. See your System Manager for feature availability. For more information about using this feature, see the instructions that came with your communications system.
• You must have a Call Screening button programmed on your telephone in order to use this feature. This feature must be programmed by the System Manager.
• You must activate this feature before or while the incoming call is ringing at your telephone. (It cannot be activated after the call has been sent to the Voice Messaging system.)
• You cannot be active on another call while using this feature.
To use Call Screening:
• Press the preprogrammed Call Screening button to have your telephone begin screening incoming calls automatically.
• If you want to speak to the calling party, pick up your phone's handset and begin speaking. The Voice Messaging system will say goodbye.
• Press the preprogrammed Call Screening button to turn off this feature when you no longer want to screen calls.


