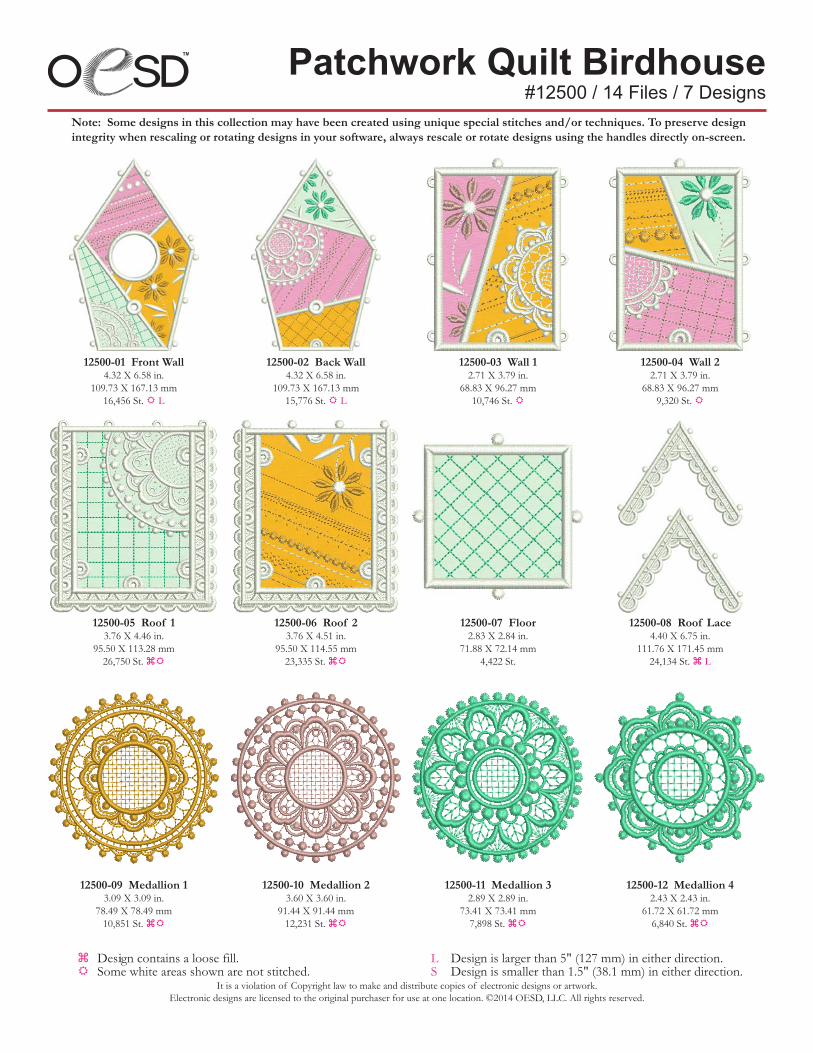
Note: Some designs in this collection may have been created using unique special stitches and/or techniques. To preserve design integrity when rescaling or rotating designs in your software, always rescale or rotate designs using the handles directly on-screen.
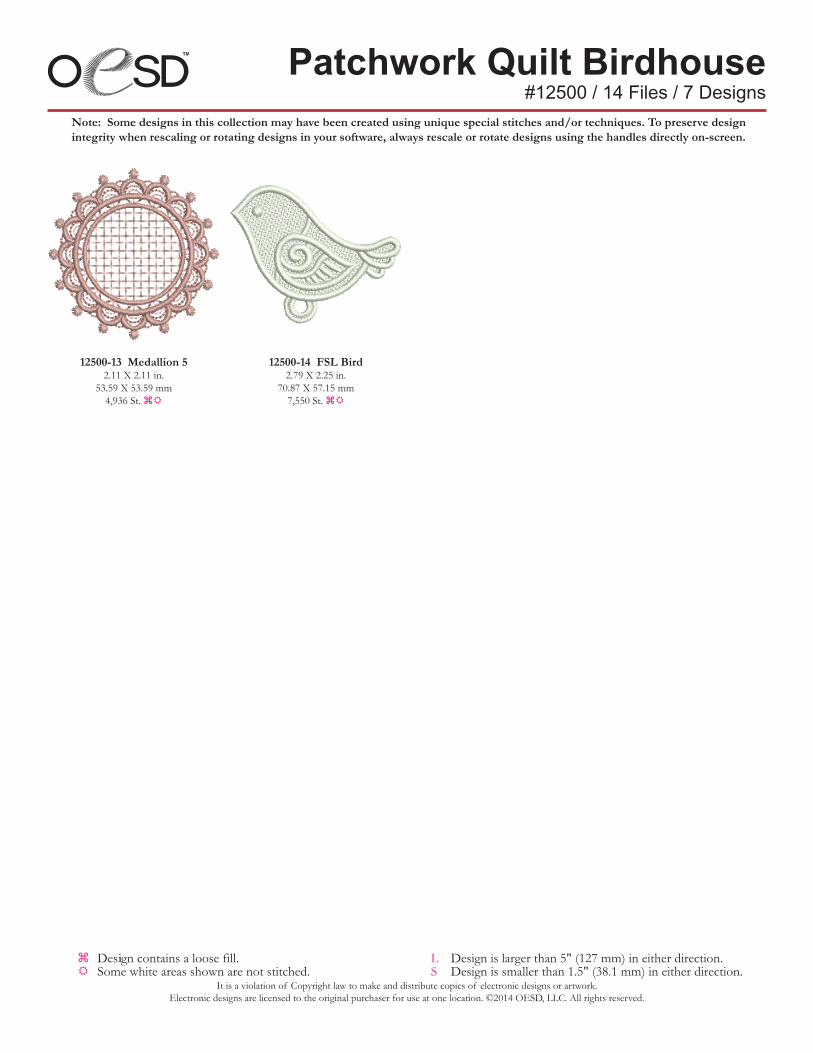
Note: Some designs in this collection may have been created using unique special stitches and/or techniques. To preserve design integrity when rescaling or rotating designs in your software, always rescale or rotate designs using the handles directly on-screen.
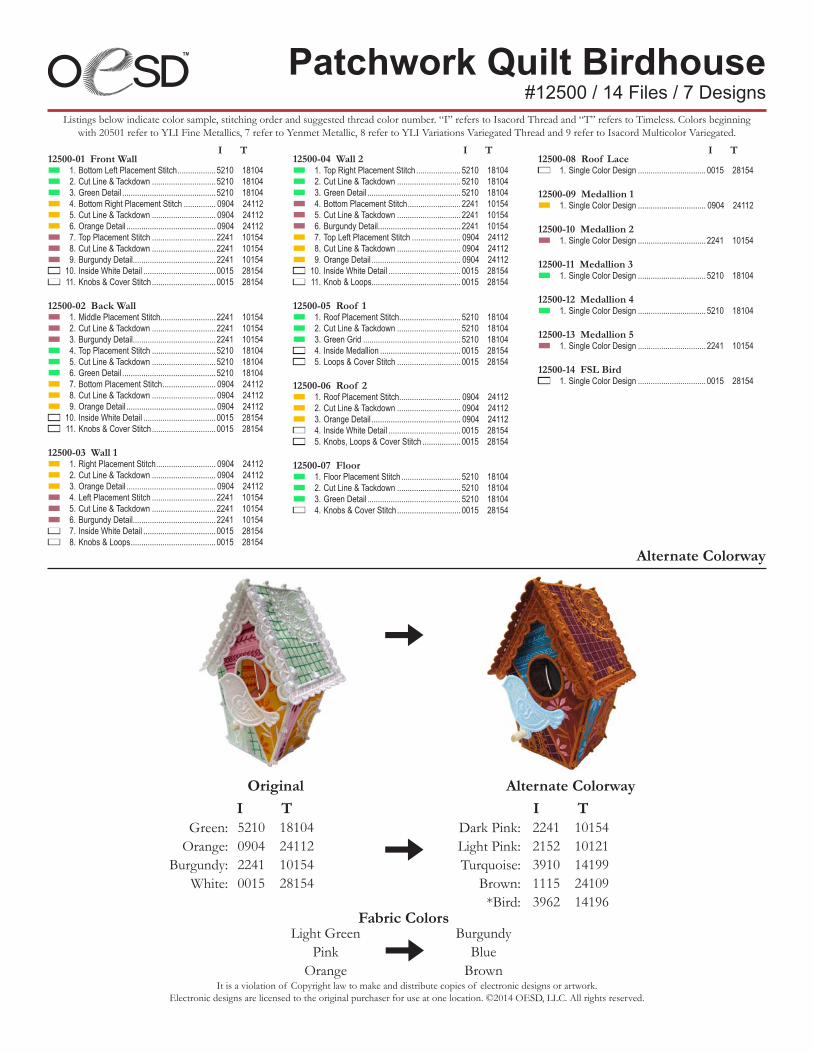
Listings below indicate color sample, stitching order and suggested thread color number. “I” refers to Isacord Thread and “T” refers to Timeless. Colors beginning with 20501 refer to YLI Fine Metallics, 7 refer to Yenmet Metallic, 8 refer to YLI Variations Variegated Thread and 9 refer to Isacord Multicolor Variegated.
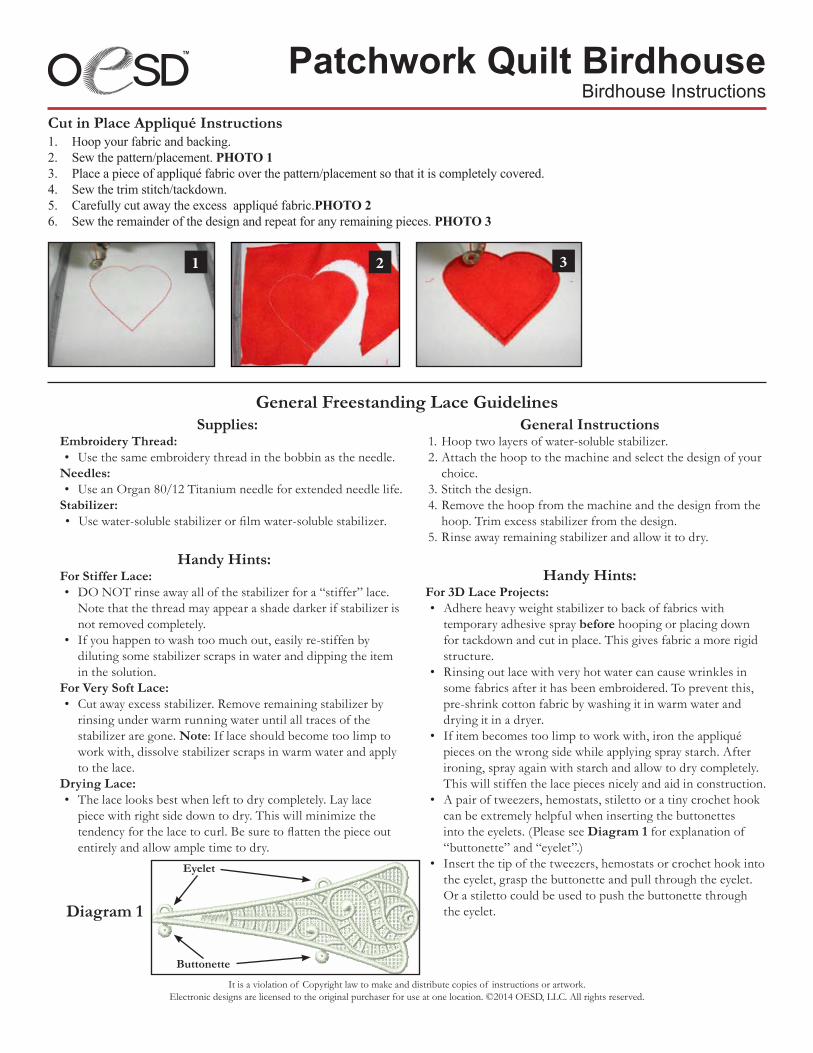
1. Hoop your fabric and backing.2. Sew the pattern/placement. PHOTO 13. Place a piece of appliqué fabric over the pattern/placement so that it is completely covered.4. Sew the trim stitch/tackdown.5. Carefully cut away the excess appliqué fabric.PHOTO 26. Sew the remainder of the design and repeat for any remaining pieces. PHOTO 3
1 2 3
Cut in Place Appliqué Instructions
Supplies:Embroidery Thread:• Use the same embroidery thread in the bobbin as the needle.
Needles:• Use an Organ 80/12 Titanium needle for extended needle life.
Handy Hints:For Stiffer Lace:• DO NOT rinse away all of the stabilizer for a “stiffer” lace.
Note that the thread may appear a shade darker if stabilizer is not removed completely.
• If you happen to wash too much out, easily re-stiffen by diluting some stabilizer scraps in water and dipping the item in the solution.
For Very Soft Lace:• Cut away excess stabilizer. Remove remaining stabilizer by
rinsing under warm running water until all traces of the stabilizer are gone. Note: If lace should become too limp to work with, dissolve stabilizer scraps in warm water and apply to the lace.
Drying Lace:• The lace looks best when left to dry completely. Lay lace
piece with right side down to dry. This will minimize the tendency for the lace to curl. Besuretoflattenthepieceoutentirely and allow ample time to dry.
General Freestanding Lace Guidelines
Diagram 1
Eyelet
Buttonette
General Instructions1. Hoop two layers of water-soluble stabilizer.2. Attach the hoop to the machine and select the design of your
choice.3. Stitch the design.4. Remove the hoop from the machine and the design from the
hoop. Trim excess stabilizer from the design.5. Rinse away remaining stabilizer and allow it to dry.
Handy Hints:For 3D Lace Projects:• Adhere heavy weight stabilizer to back of fabrics with
temporary adhesive spray before hooping or placing down for tackdown and cut in place. This gives fabric a more rigid structure.
• Rinsing out lace with very hot water can cause wrinkles in some fabrics after it has been embroidered. To prevent this, pre-shrink cotton fabric by washing it in warm water and drying it in a dryer.
• If item becomes too limp to work with, iron the appliqué pieces on the wrong side while applying spray starch. After ironing, spray again with starch and allow to dry completely. This will stiffen the lace pieces nicely and aid in construction.
• A pair of tweezers, hemostats, stiletto or a tiny crochet hook can be extremely helpful when inserting the buttonettes into the eyelets. (Please see Diagram 1 for explanation of “buttonette” and “eyelet”.)
• Insert the tip of the tweezers, hemostats or crochet hook into the eyelet, grasp the buttonette and pull through the eyelet. Or a stiletto could be used to push the buttonette through the eyelet.
Build birdhouse walls• Attach the front wall (12500-01) to wall 1 (12500-03) by inserting the three buttonettes along the
right side of the front wall into the three eyelets on the left side of wall 1. Photo 1. Repeat this process to attach the front wall (12500-01) to wall 2 (12500-04).
• Attach the back wall (12500-02) to wall 1 (12500-03) by inserting the three buttonettes along the left side of the back wall into the three eyelets on the right side of wall 1. Repeat this process to attach the back wall (12500-02) to wall 2 (12500-04).
• Set aside birdhouse wall structure.
Build birdhouse roof and attach to walls• Attach roof 1 (12500-05) to roof 2 (12500-06) by inserting the 4 buttonettes along the top edge of
roof 2 into the 4 eyelets along the top edge of roof 1.• To attach roof to the birdhouse wall structure, start by attaching the upper
left buttonettes of the front wall (12500-01) to the inner eyelettes on roof 2 (12500-06). Photo 2
• Attach the upper right buttonettes of the front wall (12500-01) to the inner eyelettes on roof 1 (12500-05).
• Attach the top buttonette of wall 1 (12500-03) to bottom eyelet in roof 1 (12500-05).
• Attach the upper left buttonettes of the back wall (12500-02) to the inner eyelettes on roof 1 (12500-05). Photo 3
• Attach the upper right buttonettes of the back wall (12500-02) to the inner eyelettes on roof 2 (12500-06).
• Attach the top buttonette of wall 2 (12500-04) to bottom eyelet in roof 2 (12500-06).
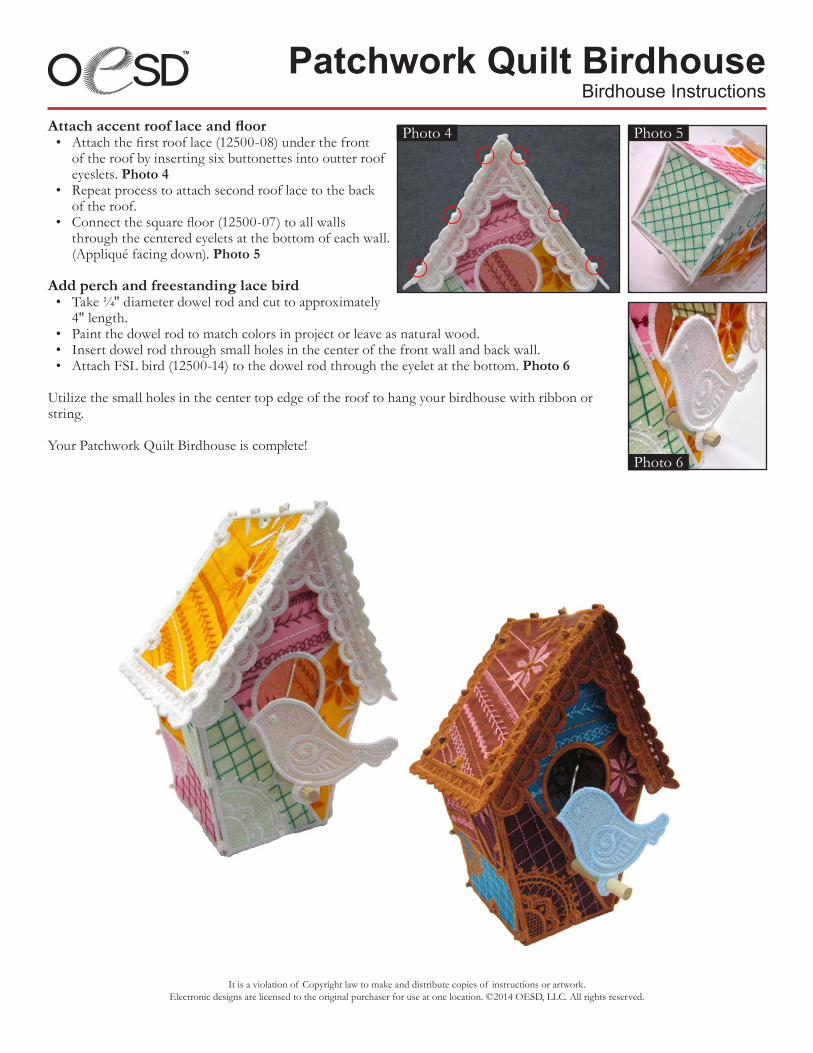
Attach accent roof lace and floor• Attachthefirstrooflace(12500-08)underthefront
of the roof by inserting six buttonettes into outter roof eyeslets. Photo 4
• Repeat process to attach second roof lace to the back of the roof.
• Connectthesquarefloor(12500-07)toallwallsthrough the centered eyelets at the bottom of each wall. (Appliqué facing down). Photo 5
Add perch and freestanding lace bird• Take ¼" diameter dowel rod and cut to approximately
4" length.• Paint the dowel rod to match colors in project or leave as natural wood.• Insert dowel rod through small holes in the center of the front wall and back wall.• Attach FSL bird (12500-14) to the dowel rod through the eyelet at the bottom. Photo 6
Utilize the small holes in the center top edge of the roof to hang your birdhouse with ribbon or string.