Designed by Bonnie Leman, Mary Leman and Judy Martin.
Founder of Quiltmaker1926–2010
Bonnie Leman
1About This Quilt As we honor the memory and
legacy of QM’s founder Bonnie Leman, we are sharing this pattern, designed by Bonnie, with our readers.
To make an applique placement guide for the blocks, fold a 19" square of tracing paper in half vertically and horizontally. Position the 1⁄5 wreath pattern, matching centers with 1 dot-ted line on 1 of the creases. Trace the pattern. Repeat 4 times to complete the wreath.
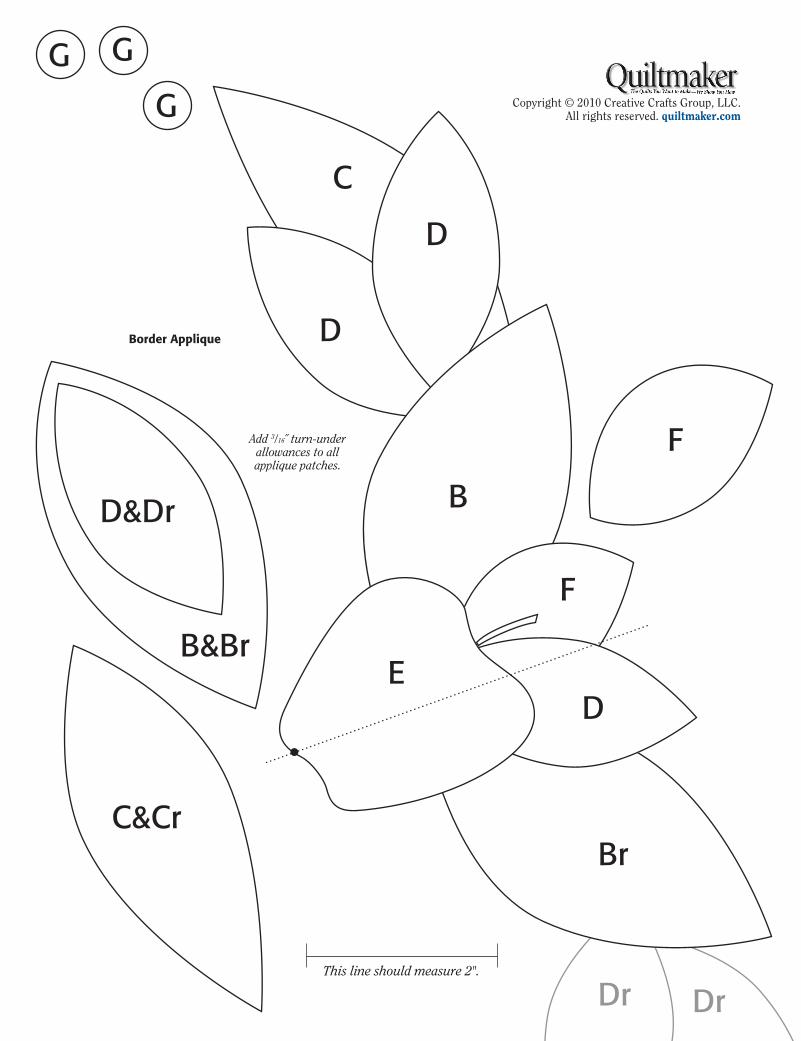
Make an applique placement guide for the border by folding a 5"x 17" piece of tracing paper in half crosswise to find the center. Place the dotted line of the border applique pattern on the center fold and trace the pattern. Flip the pattern to finish tracing Cr and 2 Dr’s. Use the apple and 4 leaves from the center of the border applique for the corner applique.
2Making the Blocks Using a lightbox underneath,
lightly mark the position of the appli-que patches on H. Prepare the patches for turned-edge applique. Arrange the patches on H, tucking ends under other patches as necessary. Pin or baste in place. Use matching thread and a blind stitch to applique the patches in place. Embroider the stems on the apples with brown floss.
Center the applique and trim H to 191⁄2"x 191⁄2". Repeat to make 9 blocks.
cuttingCream Solid for border #3 4 strips 17H”x 95” (trim to 16H”x 95” after applique) 9 squares (H) 20H”x 20H” (trim to 19H”x 19H” after applique) Brown Solid 18 strips 1¼”x 40” for borders #2 and #4 9 pattern A 27 pattern C 28 each patterns D and Dr Rust Solid 9 each patterns A, C and D 50 pattern BGold Solid 9 pattern A 32 pattern Br 64 pattern C 18 pattern D Dark Green Solid 27 pattern C 18 pattern D 32 pattern FMedium Green Solid 9 pattern A 18 each patterns B and C 28 each pattern D and Dr Light Green Solid 9 each patterns A and B 18 pattern C 28 pattern Cr 32 pattern D Red Solid 18 strips 1¼”x 40” for borders #1 and #5 11 strips 2¼”x 40” for binding 77 pattern E Purple Solid 303 pattern G
materialsQueen: 95”x 95”
Finished Blocks: 19”
Cream Solid 8L yards for blocks and border #3Brown Solid 1H yards for blocks and borders #2 and #4Rust Solid 1J yards for appliqueGold Solid 1¼ yards for appliqueDark Green Solid H yard for appliqueMedium Green Solid 1 yard for appliqueLight Green Solid 1J yards for appliqueRed Solid 2 yards for applique, borders #1 and #5 and bindingPurple Solid K yard for appliqueBacking 9J yardsBatting 103”x 103”Brown embroidery flossTracing paper
Mark or lightly crease the center of each cream border strip. Refer to the applique placement diagram to mark the position of each of the border side applique units. Applique the border side units in the same way as the blocks. Center the applique and trim the border width to 161⁄2".
G
G
E
E
E
D
D
C CrF
F
B Br
Br
B
B A
A
H
BlockMake 9
Border Side Unit Applique
Border Corner Unit Applique
Border Applique PlacementMake 4
CD
C
C
D DrD Dr
Center of Border9½”
2½”
2½”
9½”
Join 7 of the red 11⁄4" strips and cut 4 lengths of 61" for the border #1 sides, top and bottom. Join 7 of the brown 11⁄4" strips and cut 4 lengths of 63" for the border #2 sides, top and bottom.
Join 11 of the brown 11⁄4" strips and cut 4 lengths of 96" for the border #4 sides, top and bottom. Join 11 of the red 11⁄4" strips and cut 4 lengths of 98"for the border #5 sides, top and bottom.
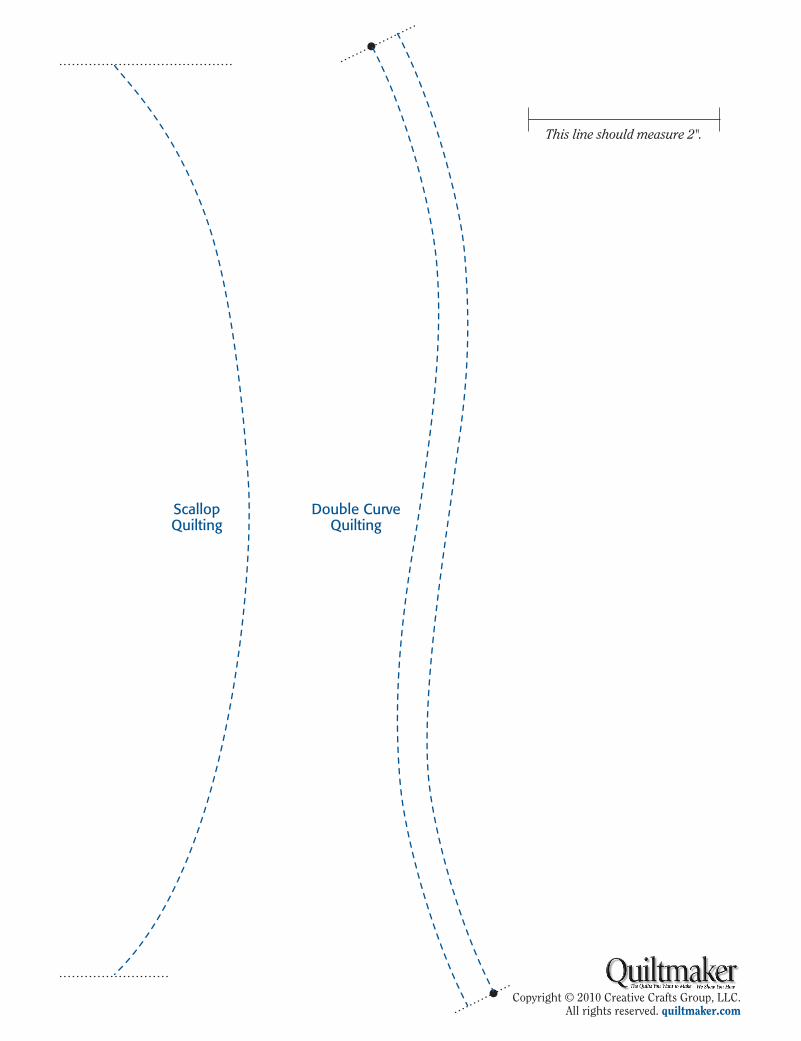
Quilting Placement
Matching centers, sew together the corresponding borders #1–#5 strips. Again matching centers, sew these strips to the quilt, starting and stop-ping 1⁄4" from the edges of the quilt and backstitching. Miter the corners. Trim the seam allowances to 1⁄4" and press them open.
Refer to the applique placement dia-gram and applique a border corner unit to each corner as shown.
4Quilting and Finishing This quilt can be quilted by hand
or by machine. Mark straight lines in the blocks 33⁄4" and 4" from the outside edges as shown. To mark the Double Curve Quilting, match the dots with the dots on the apples in border #3 flipping the motif as shown in red. Mark the Scallop Quilting in border #3 as shown. Mark straight lines 1⁄4" apart in border #3 as shown.
Layer and baste together the backing, batting and quilt top. Quilt the marked lines and motifs. Outline quilt the wreaths, blocks and applique in border #3 as shown. Add echo quilting in the center of the wreaths as shown. Quilt veins in the leaves (A’s). Bind the quilt.