for GED Connection ® , Pre-GED Connection TM , and Workplace Essential Skills This section contains Teacher’s Guide pages for Pre-GED Connection. For more information, visit the LiteracyLink website at www.pbs.org/literacy or contact KET at (800) 354-9067 or www.ketadultlearning.org. TEACHER’S GUIDE PBS LiteracyLink ® VIDEOS WORKBOOKS ONLINE K E N T U C K Y D E P A R T M E N T O F E D U C A T I O N T o e n s u r e f o r e a c h child an internationally superior education a n d a lo v e o f l e a r n i n g
Transcript
for GED Connection®, Pre-GED ConnectionTM,and Workplace Essential Skills
This section contains Teacher’s Guide pages forPre-GED Connection.
For more information, visit the LiteracyLink website atwww.pbs.org/literacy or contact KET at (800) 354-9067 orwww.ketadultlearning.org.
TEACHER’S GUIDE PBS LiteracyLink®
VIDEOS
WORKBOOKS
ONLINE
KEN
TU
CKY DEPARTMENT OF EDUCATION
Toensure for each child an internationally superior educatio
n and a l
ove o
f lea
rnin
g
The GED/Pre-GED Connection System P–1
The G E D / P re-GED Connection S y s t e mLiteracyLink® offers both GED and Pre-GED-level materials to help adult learners prepare to pass theGED Tests. The GED Connection locator tests help instructors place students at the appropriate level ofstudy in each content area.
Many students who intend to take the GED Tests come into adult programs with differences in their ability levels across the content areas. The LiteracyLink GED/Pre-GED Connection System allowsinstructors to customize the learning experience based on student need and ability.
Locator Instrument for Placement
The GED Connection Locator Instrument (see pages L-1 to L-32 of this guide) can be administered to students who are beginning preparation for the GED Tests.
Based on student results of the locator, teachers have three options:■ Placing a student at the Pre-GED level in all subject areas■ Placing a student at the GED level in all subject areas■ Placing a student at the Pre-GED level in some areas and at the GED level in others
Pre-GED Connection
The LiteracyLink Pre-GED Connection series builds the necessary foundation for adult learners who are at the 6th- to 8th-grade reading level. Before these learners can tackle GED-level work, they need to develop basic skills and content-area knowledge at a level that is comfortable for them.
This series consists of 26 videos and five books, one for each of the GED subject areas: ■ Language Arts, Reading■ Language Arts, Writing■ Social Studies■ Science■ Mathematics
The Pre-GED Connection video series consists of 26 of the 39 GED Connection programs (see crosswalk on page P-3 for a complete list of the Pre-GED programs) that have been selectedfor Pre-GED learners. The accompanying five workbooks cover the material that students will need to master to be able to move to GED-level work.
The Pre-GED Connection lesson notes, beginning on page P-6, provide ideas for classroom discussionand activities. Interesting websites are available as online extensions of the workbook and video lessons.The Pre-GED Internet links can be accessed at www.pbs.org/literacy from the learner’s or teacher’s homespace.
Teacher’s GuideP–2
GED Connection
This series consists of 39 videos, three GED-preparation workbooks, and online activities and quizzes.This series covers the basic content and skills needed to pass the GED Tests. The complete list of GED Connection video programs can be found on page P-3.
The LiteracyLink GED preparation workbooks consist of:■ Language Arts, Reading and Writing■ Social Studies and Science■ Mathematics
An overview of the GED Tests and lesson notes for GED Connection begin on page G-1 of this guide.
Online GED activities and quizzes can be accessed at www.pbs.org/literacy.
The GED/Pre-GED Connection System P–3
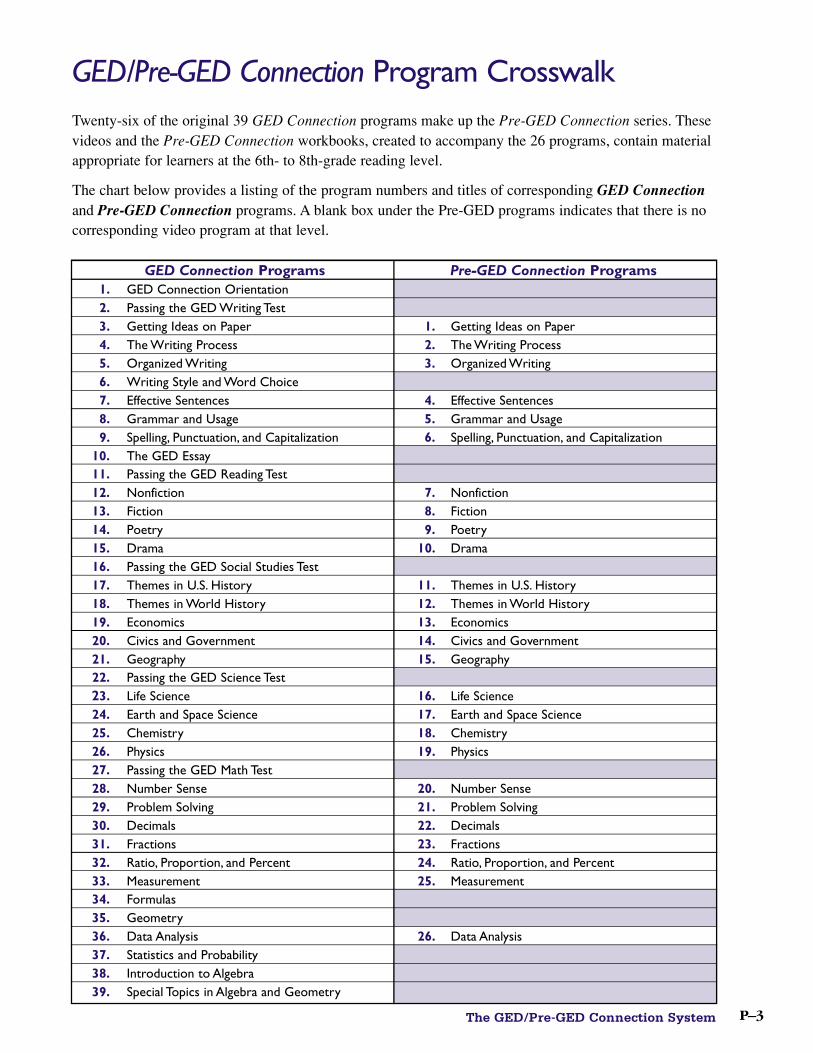
G E D / P re-GED Connection P rogram Cro s sw a l kTwenty-six of the original 39 GED Connection programs make up the Pre-GED Connection series. Thesevideos and the Pre-GED Connection workbooks, created to accompany the 26 programs, contain materialappropriate for learners at the 6th- to 8th-grade reading level.
The chart below provides a listing of the program numbers and titles of corresponding GED Connectionand Pre-GED Connection programs. A blank box under the Pre-GED programs indicates that there is nocorresponding video program at that level.
GED Connection Programs Pre-GED Connection Programs1. GED Connection Orientation2. Passing the GED Writing Test3. Getting Ideas on Paper 1. Getting Ideas on Paper4. The Writing Process 2. The Writing Process5. Organized Writing 3. Organized Writing6. Writing Style and Word Choice7. Effective Sentences 4. Effective Sentences8. Grammar and Usage 5. Grammar and Usage9. Spelling, Punctuation, and Capitalization 6. Spelling, Punctuation, and Capitalization
10. The GED Essay11. Passing the GED Reading Test12. Nonfiction 7. Nonfiction13. Fiction 8. Fiction14. Poetry 9. Poetry15. Drama 10. Drama16. Passing the GED Social Studies Test17. Themes in U.S. History 11. Themes in U.S. History18. Themes in World History 12. Themes in World History19. Economics 13. Economics20. Civics and Government 14. Civics and Government21. Geography 15. Geography22. Passing the GED Science Test23. Life Science 16. Life Science24. Earth and Space Science 17. Earth and Space Science25. Chemistry 18. Chemistry26. Physics 19. Physics27. Passing the GED Math Test28. Number Sense 20. Number Sense29. Problem Solving 21. Problem Solving30. Decimals 22. Decimals31. Fractions 23. Fractions32. Ratio, Proportion, and Percent 24. Ratio, Proportion, and Percent33. Measurement 25. Measurement34. Formulas35. Geometry36. Data Analysis 26. Data Analysis37. Statistics and Probability38. Introduction to Algebra39. Special Topics in Algebra and Geometry
Teacher’s GuideP–4
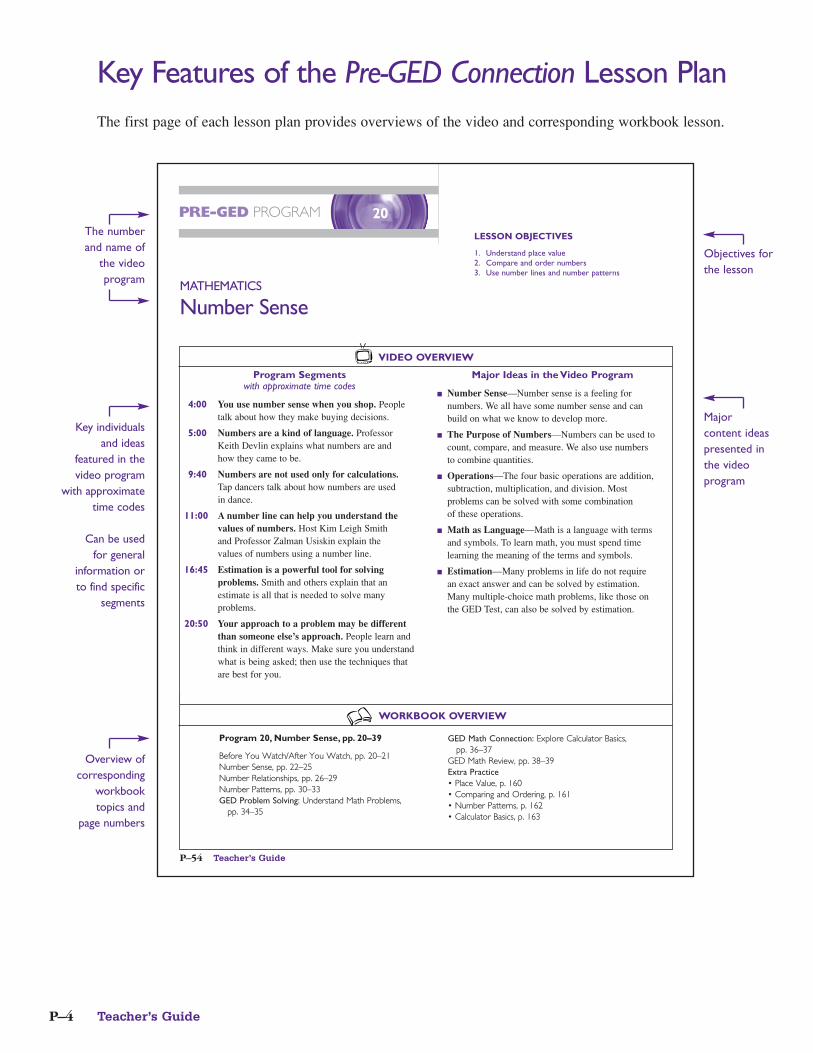
Key Features of the Pre-GED Connection Lesson PlanThe first page of each lesson plan provides overviews of the video and corresponding workbook lesson.
Teacher’s GuideP–54
Number SenseMATHEMATICS
20
WORKBOOK OVERVIEW
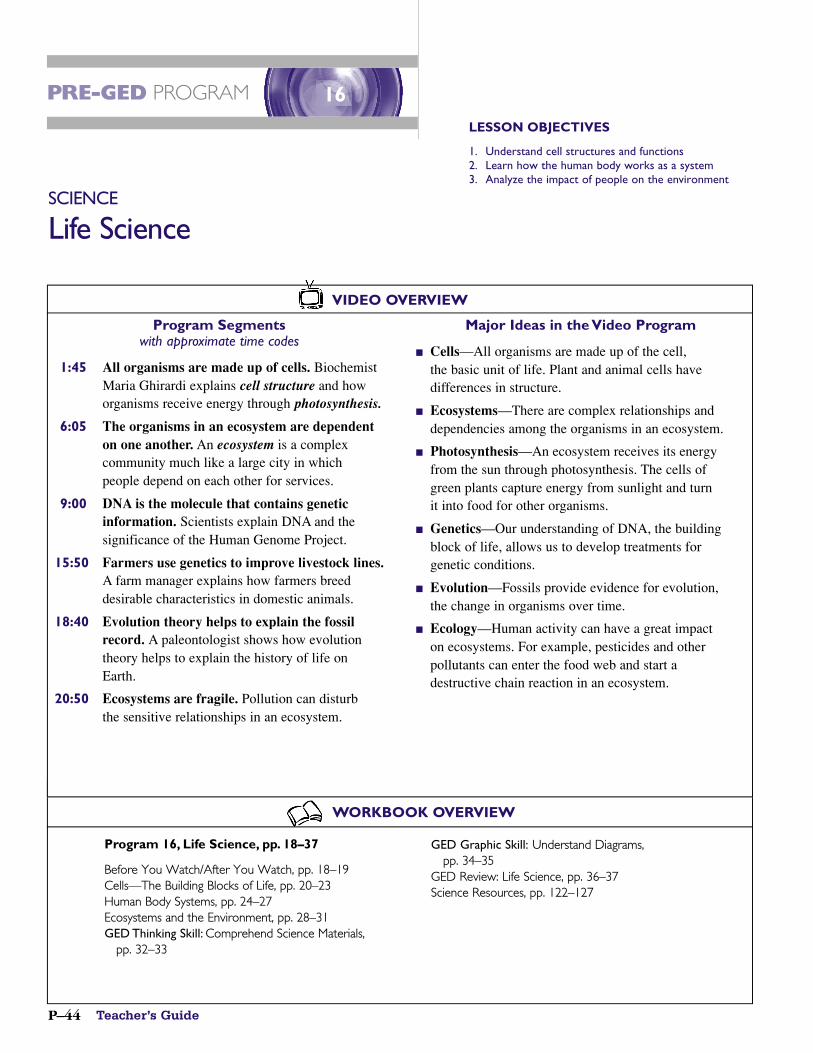
Program Segmentswith approximate time codes
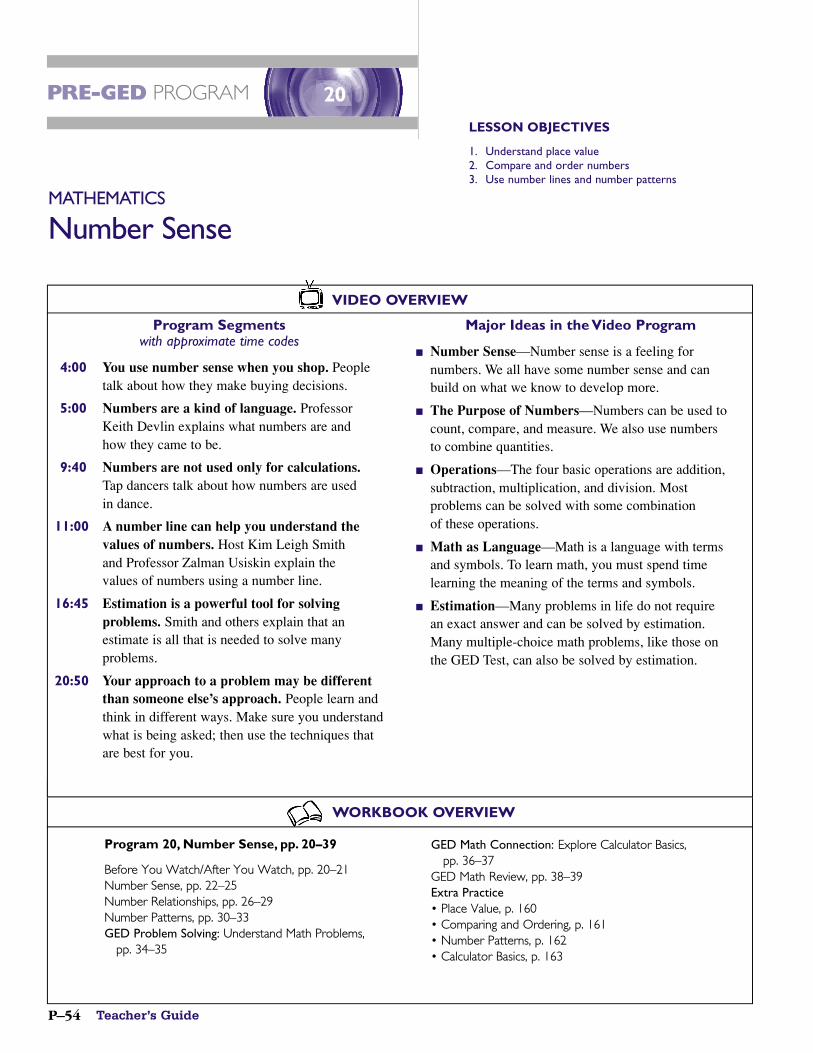
4:00 You use number sense when you shop. Peopletalk about how they make buying decisions.
5:00 Numbers are a kind of language. ProfessorKeith Devlin explains what numbers are and how they came to be.
9:40 Numbers are not used only for calculations.Tap dancers talk about how numbers are used in dance.
11:00 A number line can help you understand thevalues of numbers. Host Kim Leigh Smith and Professor Zalman Usiskin explain the values of numbers using a number line.
16:45 Estimation is a powerful tool for solvingproblems. Smith and others explain that anestimate is all that is needed to solve manyproblems.
20:50 Your approach to a problem may be differentthan someone else’s approach. People learn andthink in different ways. Make sure you understandwhat is being asked; then use the techniques thatare best for you.
Major Ideas in the Video Program
■ Number Sense—Number sense is a feeling fornumbers. We all have some number sense and can build on what we know to develop more.
■ The Purpose of Numbers—Numbers can be used tocount, compare, and measure. We also use numbers to combine quantities.
■ Operations—The four basic operations are addition,subtraction, multiplication, and division. Most problems can be solved with some combination of these operations.
■ Math as Language—Math is a language with terms and symbols. To learn math, you must spend timelearning the meaning of the terms and symbols.
■ Estimation—Many problems in life do not require an exact answer and can be solved by estimation. Many multiple-choice math problems, like those on the GED Test, can also be solved by estimation.
VIDEO OVERVIEW
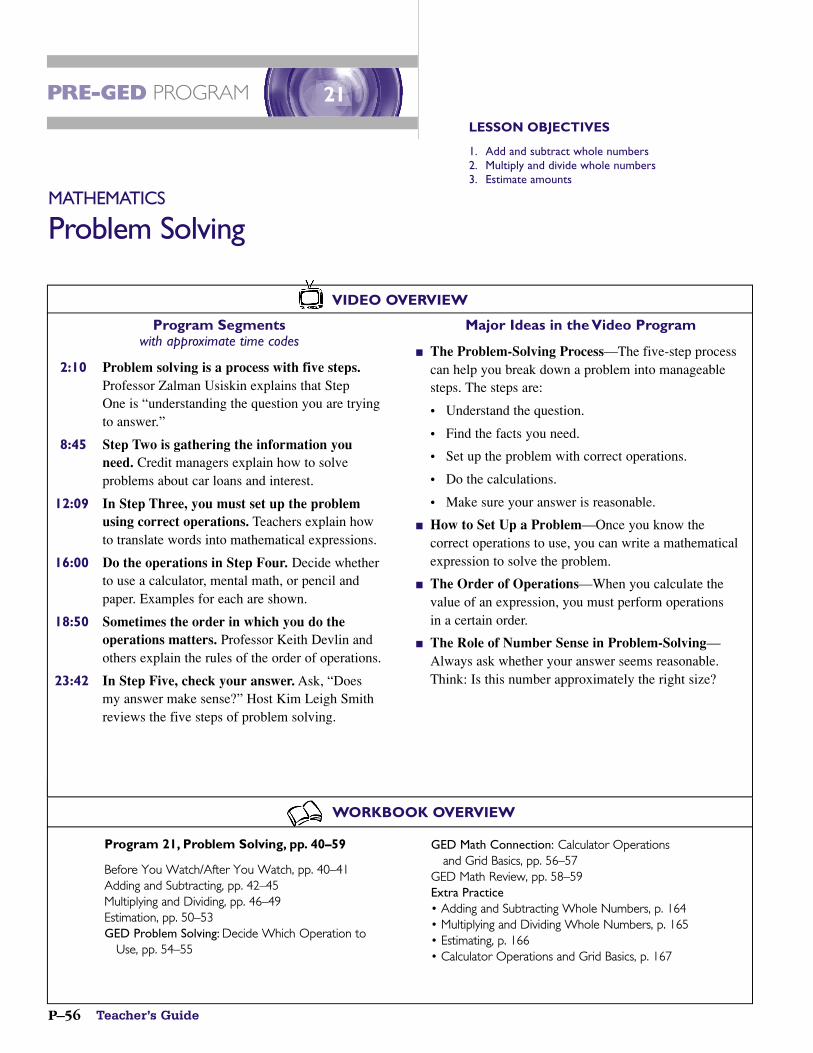
PRE-GED PROGRAM
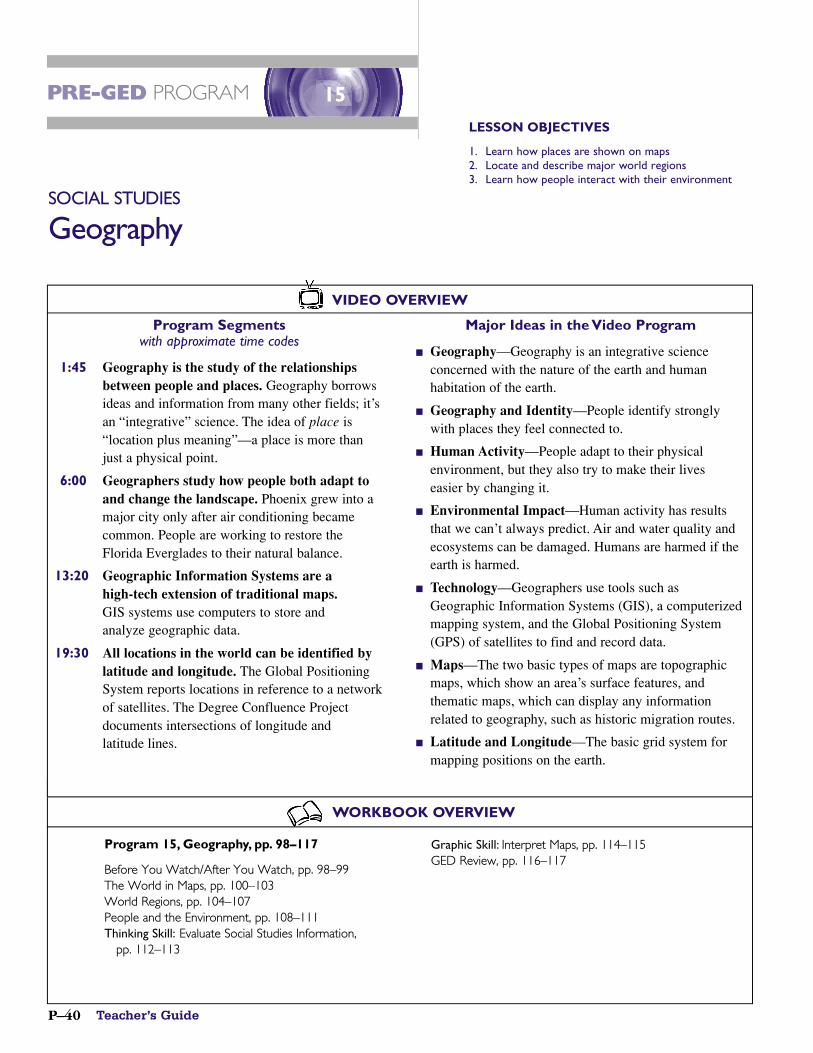
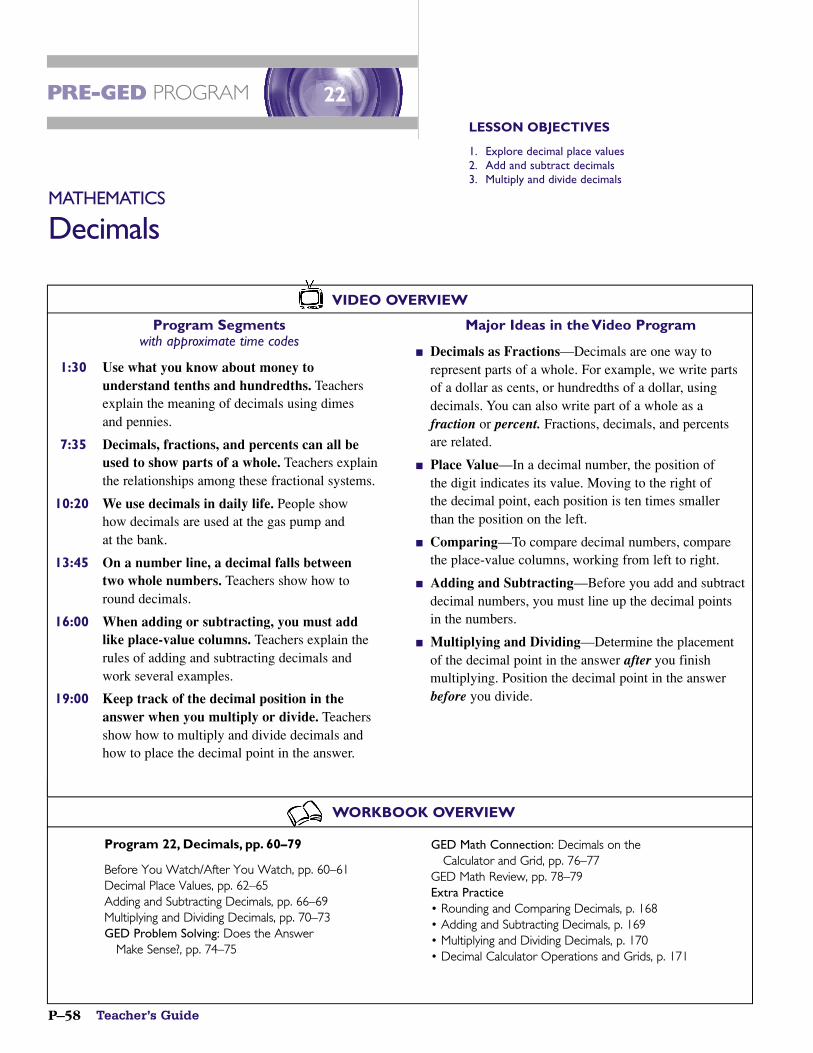
LESSON OBJECTIVES
1. Understand place value2. Compare and order numbers3. Use number lines and number patterns
Program 20, Number Sense, pp. 20–39
Before You Watch/After You Watch, pp. 20–21Number Sense, pp. 22–25Number Relationships, pp. 26–29Number Patterns, pp. 30–33GED Problem Solving: Understand Math Problems,
pp. 34–35
GED Math Connection: Explore Calculator Basics,pp. 36–37
GED Math Review, pp. 38–39Extra Practice• Place Value, p. 160• Comparing and Ordering, p. 161• Number Patterns, p. 162• Calculator Basics, p. 163
The numberand name of
the videoprogram
Key individualsand ideas
featured in thevideo program
with approximate time codes
Can be used for general
information orto find specific
segments
Objectives forthe lesson
Major content ideaspresented inthe videoprogram
Overview ofcorresponding
workbook topics and
page numbers
The GED/Pre-GED Connection System P–5
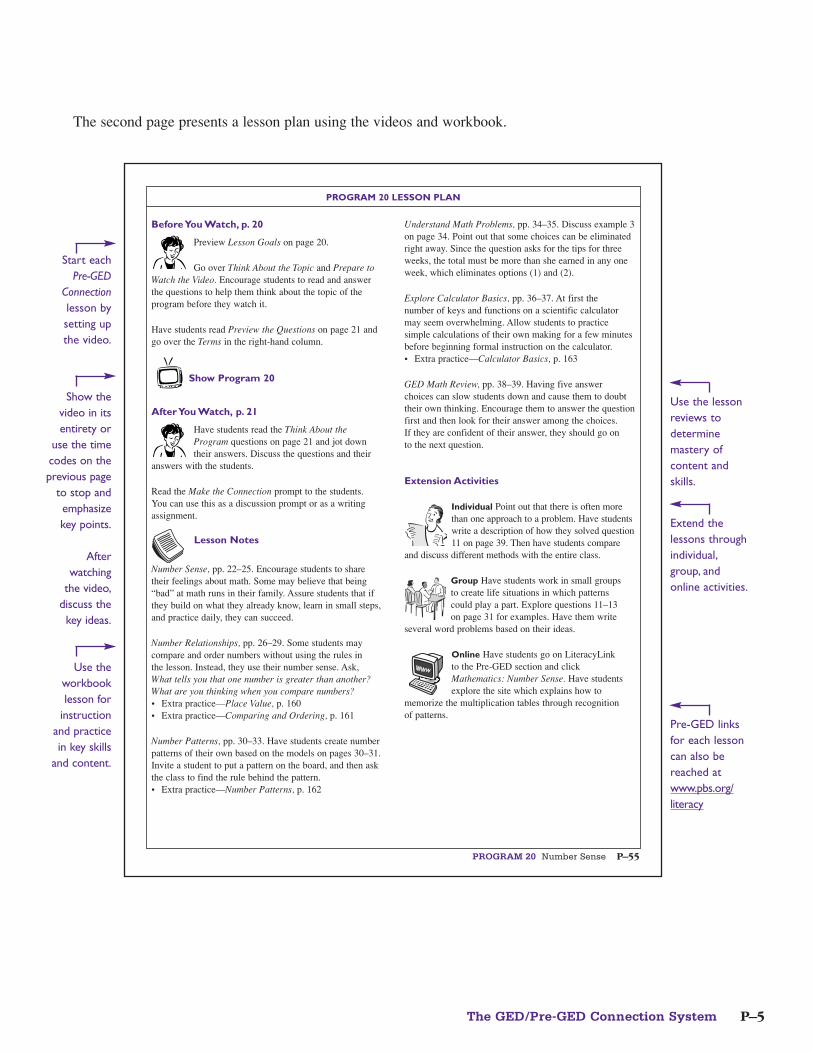
The second page presents a lesson plan using the videos and workbook.
PROGRAM 20 Number Sense P–55
Before You Watch, p. 20
Preview Lesson Goals on page 20.
Go over Think About the Topic and Prepare toWatch the Video. Encourage students to read and answerthe questions to help them think about the topic of theprogram before they watch it.
Have students read Preview the Questions on page 21 andgo over the Terms in the right-hand column.
Show Program 20
After You Watch, p. 21
Have students read the Think About theProgram questions on page 21 and jot downtheir answers. Discuss the questions and their
answers with the students.
Read the Make the Connection prompt to the students. You can use this as a discussion prompt or as a writingassignment.
Lesson Notes
Number Sense, pp. 22–25. Encourage students to sharetheir feelings about math. Some may believe that being“bad” at math runs in their family. Assure students that ifthey build on what they already know, learn in small steps,and practice daily, they can succeed.
Number Relationships, pp. 26–29. Some students maycompare and order numbers without using the rules in the lesson. Instead, they use their number sense. Ask,What tells you that one number is greater than another?What are you thinking when you compare numbers? • Extra practice—Place Value, p. 160• Extra practice—Comparing and Ordering, p. 161
Number Patterns, pp. 30–33. Have students create numberpatterns of their own based on the models on pages 30–31.Invite a student to put a pattern on the board, and then askthe class to find the rule behind the pattern. • Extra practice—Number Patterns, p. 162
Understand Math Problems, pp. 34–35. Discuss example 3on page 34. Point out that some choices can be eliminatedright away. Since the question asks for the tips for threeweeks, the total must be more than she earned in any oneweek, which eliminates options (1) and (2).
Explore Calculator Basics, pp. 36–37. At first the number of keys and functions on a scientific calculatormay seem overwhelming. Allow students to practicesimple calculations of their own making for a few minutesbefore beginning formal instruction on the calculator. • Extra practice—Calculator Basics, p. 163
GED Math Review, pp. 38–39. Having five answer choices can slow students down and cause them to doubttheir own thinking. Encourage them to answer the questionfirst and then look for their answer among the choices. If they are confident of their answer, they should go on to the next question.
Extension Activities
Individual Point out that there is often morethan one approach to a problem. Have studentswrite a description of how they solved question11 on page 39. Then have students compare
and discuss different methods with the entire class.
Group Have students work in small groups to create life situations in which patterns could play a part. Explore questions 11–13 on page 31 for examples. Have them write
several word problems based on their ideas.
Online Have students go on LiteracyLink to the Pre-GED section and click Mathematics: Number Sense. Have studentsexplore the site which explains how to
memorize the multiplication tables through recognition of patterns.
PROGRAM 20 LESSON PLAN
Start each Pre-GED
Connectionlesson bysetting up the video.
Show thevideo in itsentirety or
use the timecodes on theprevious page
to stop andemphasize key points.
Afterwatching
the video,discuss thekey ideas.
Use the lessonreviews todeterminemastery ofcontent and skills.
Extend thelessons throughindividual,group, and online activities.
Pre-GED links for each lesson can also be reached atwww.pbs.org/literacy
Use theworkbooklesson for
instructionand practicein key skills
and content.
Teacher’s GuideP–6
P re-GED Language A rt s ,Writing Ove rv i ewThe GED Language Arts,Writing Test
The GED Language Arts, Writing Test has two parts. The first part consists of multiple-choice questions; the second part is an essay.
Part I: Multiple-choice ■ Fifty multiple-choice questions in 75 minutes■ Questions are based on prose passages drawn from business writing, community documents,
and articles. ■ Errors in the passages are all drawn from specific areas of
Part II: Essay ■ One essay prompt, 45 minutes■ Prompts are based on general, accessible topics. ■ Essays are scored holistically by trained readers.
LiteracyLink® Pre-GED Language Arts,Writing
Adult education learners who are reading at the 6th to 8th grade reading level are most appropriately placed at the Pre-GED level.
Once students have developed a foundation in the writing and editing skills needed to work at the GED level, they can move on to GED Connection: Language Arts, Writing & Reading.
LiteracyLink® Pre-GED Language Arts, Writing materials consist of
■ Six video programsProgram 1 Getting Ideas on PaperProgram 2 The Writing ProcessProgram 3 Organized WritingProgram 4 Effective SentencesProgram 5 Grammar and UsageProgram 6 Spelling, Punctuation, and Capitalization
■ One workbook with corresponding video lessons; each lesson has the following components:Before You Watch/After You Watch video activitiesThree Writing Skills sectionsWriter’s Tool section GED Essay Connection sectionGED Review
■ Online Pre-GED enrichment links at www.pbs.org/literacy
■ Five lesson plans on pages P-8 to P-19 of this guide.
LANGUAGE ARTS, WRITING Overview P–7
Teaching the Writing Process
Students may have unrealistic ideas about how writing gets done. They may not realize the work that goes into a project before a draft is ever even written. You can demystify the writing process for your studentsby using these effective strategies:
■ Model prewriting strategies in the classroom. Conduct discussions and small-group activities that help your student writers get words onto the paper without the pressure of writing correct sentences and structured paragraphs.
■ Emphasize that writing is an exchange between the writer and the reader. Make sure your studentswrite to real people—exchange their writing with each other, write letters to people they know,create writing projects related to their jobs and communities, etc.
■ Let students know that the real work of writing is rewriting. A first draft is just a way to get a pieceof writing started, so you have something to work with. Organize your assignments so that studentshave time to set their writing aside and revise it later.
■ Set up separate peer review sessions for revising and editing. Emphasize that revising and editingare different tasks and that you should not try to do both at the same time. Help studentsconcentrate on higher-level concerns like focus, organization, and development in the revisionprocess. Save sentence editing and proofreading for last.
Introducing Essay Writing
Your students can begin preparing for the challenge of the GED essay right away by becoming familiarwith the style of GED prompts and by learning to write in the multi-paragraph format of an essay.You can introduce your students to essay writing through these effective strategies:
■ Help students learn how to respond to a prompt (topic). In class, discuss a prompt together. If theprompt actually contains a question, brainstorm different focus statements by thinking of differentways to answer the question. If the prompt contains a statement, help students think of differentways to reword the statement to create focus statements.
■ Emphasize that essay writing, especially on the GED, is based on personal experience andreflection. Everyone has a story and the capacity to draw conclusions from their own observationsand experiences in the world. These are the best essay materials.
■ Practice organizing tools and tricks, such as the “guiding hand” in Program 3, Organized Writing.In a test situation, organization is fundamental.
Mastering Sentence Structure, Usage, and Mechanics
Although Part I of the GED Language Arts, Writing Test is based on a limited list of common errors,students’ overall knowledge of standard English will be reflected in their essays. You can help studentsdevelop their skills with these effective strategies:
■ Many students need to learn to identify sentence boundaries and to locate subjects and verbs insimple sentences before they do more advanced work.
■ Look for patterns of error in your students’ writing. Most students do not need to study all the rules of grammar—they make certain types of mistakes over and over.
■ Teach students to use their ears to pick up certain types of errors, such as sentence structure andsubject-verb agreement. Other types of errors, such as punctuation, rely on visual discrimination.Encourage students to read widely as a way to increase their knowledge of standard English.
WORKBOOK OVERVIEW
Teacher’s GuideP–8
Getting Ideas on Pap e rL A N G UAGE A RT S , W R I T I N G
1
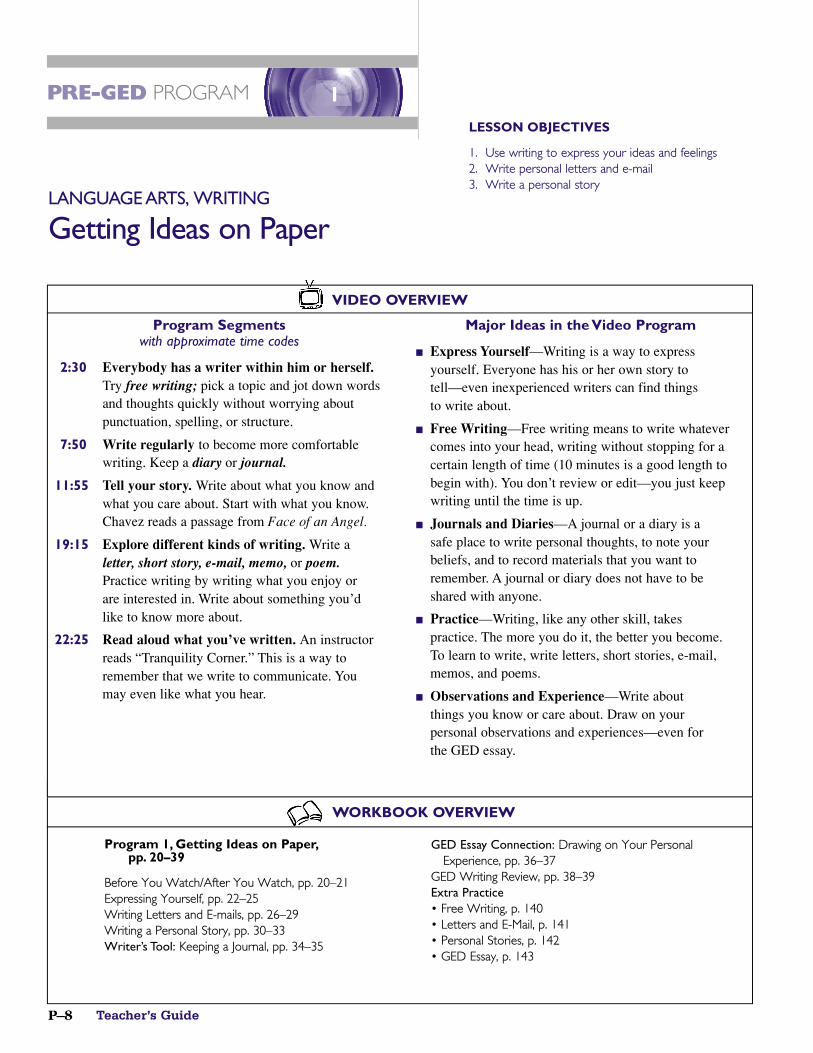
Program Segmentswith approximate time codes
2:30 Everybody has a writer within him or herself. Try free writing; pick a topic and jot down wordsand thoughts quickly without worrying aboutpunctuation, spelling, or structure.
7:50 Write regularly to become more comfortablewriting. Keep a diary or journal.
11:55 Tell your story. Write about what you know andwhat you care about. Start with what you know.Chavez reads a passage from Face of an Angel.
19:15 Explore different kinds of writing. Write aletter, short story, e-mail, memo, or poem.Practice writing by writing what you enjoy or are interested in. Write about something you’dlike to know more about.
22:25 Read aloud what you’ve written. An instructorreads “Tranquility Corner.” This is a way toremember that we write to communicate. Youmay even like what you hear.
Major Ideas in the Video Program
■ Express Yourself—Writing is a way to expressyourself. Everyone has his or her own story to tell—even inexperienced writers can find things to write about.
■ Free Writing—Free writing means to write whatevercomes into your head, writing without stopping for acertain length of time (10 minutes is a good length to begin with). You don’t review or edit—you just keepwriting until the time is up.
■ Journals and Diaries—A journal or a diary is a safe place to write personal thoughts, to note yourbeliefs, and to record materials that you want toremember. A journal or diary does not have to be shared with anyone.
■ Practice—Writing, like any other skill, takes practice. The more you do it, the better you become. To learn to write, write letters, short stories, e-mail,memos, and poems.
■ Observations and Experience—Write about things you know or care about. Draw on your personal observations and experiences—even for the GED essay.
VIDEO OVERVIEW
P R E - G E D P RO G R A MLESSON OBJECTIVES
1. Use writing to express your ideas and feelings2. Write personal letters and e-mail3. Write a personal story
Program 1, Getting Ideas on Paper,pp. 20–39
Before You Watch/After You Watch, pp. 20–21Expressing Yourself, pp. 22–25Writing Letters and E-mails, pp. 26–29Writing a Personal Story, pp. 30–33Writer’s Tool: Keeping a Journal, pp. 34–35
GED Essay Connection: Drawing on Your PersonalExperience, pp. 36–37
GED Writing Review, pp. 38–39Extra Practice• Free Writing, p. 140• Letters and E-Mail, p. 141• Personal Stories, p. 142• GED Essay, p. 143
BeforeYou Watch, pp. 20–21
Preview Lesson Goals on page 20.
Go over Think About the Topic and Prepare toWatch the Video. Have students read and answer thesequestions, which will allow them to think about the topicof the program before they watch it.
Have students read Preview the Questions on page 20 andgo over the Terms in the right-hand column on page 21.
Show Program 1
After You Watch, p. 21
Have students read the Think About theProgram questions on page 21 and jot downsome thoughts. Discuss the questions with
the students.
Read the Make the Connection prompt to the students. You can use this as a discussion prompt or as a writingassignment.
Lesson Notes
Expressing Yourself, pp. 22–25. After students havecompleted the section, ask, Did you like the free writingactivity? Did it help you feel freer to write than with aregular assignment? Do you think you might want to keepa journal or a diary? • Extra practice—Free Writing, p. 140
Writing Letters and E-mail, pp. 26–29. If you have accessto a computer and an e-mail account, have studentspractice writing e-mails. Provide e-mail addresses for themto write to. • Extra practice—Letters and E-Mail, p. 141
Writing a Personal Story, pp. 30–33. Encourage studentsto share the story that they wrote for the assignment onpage 33. You can ask them to read the story out loud or toshare it more privately with a classmate or two.• Extra practice—Personal Stories, p. 142
Keeping a Journal, pp. 34–35. Set a date for bringing a notebook to class and writing the first journal entry.Establish a time every week that students can plan on journal writing in class, but encourage them to write intheir journal as often as they like.
Drawing on Your Personal Experience, pp. 36–37. Before you start the lesson, explain that on the GED, they will have 45 minutes to write an essay. When theywrite the essay, one of the most important ways to makesure they will get a good score is to use a lot of details to develop their ideas. Stress the importance of thisactivity in developing details.
GED Writing Review, pp. 38–39. Go over the writing prompt on the top of the page. Explain that this is similar to the types of topics they will see on the GED.• Extra practice—GED Essay, p. 143
Go over the zooming guidelines on page 39 and helpstudents apply them with question 4 on that page. Whenstudents have finished writing the letter, show them thechecklists on page 191 and encourage them to use thesechecklists as they continue to write.
Extension Activities
Individual Now that students have written their own personal stories, ask them to lookthrough magazines and bring in personal stories that they like. Ask them to show you
the stories, and ask them what they liked—the writing, the characters, the story? Students may not have thoughtabout these aspects of stories, but this will be a start.
Group Encourage students to make a book oftheir personal stories. Assign different roles—cover designer, editor, word processor, etc.
Online Have students go on LiteracyLink to thePre-GED section and click Language Arts:Writing: Getting Ideas on Paper. Have studentsread the information on journal writing.
PROGRAM 1 LESSON PLAN
PROGRAM 1 Getting Ideas on Paper P–9
Teacher’s GuideP–10
The Writing Pro c e s sL A N G UAGE A RT S , W R I T I N G
2
WORKBOOK OVERVIEW
Program Segmentswith approximate time codes
1:00 Writing is a process. Writers don’t create goodwriting all in one step—instead, they brainstorm,draft, revise, and edit.
3:00 Brainstorming helps writers try out ideas.Brainstorming is the writer’s problem-solvingstrategy. Writers brainstorm ideas for a museumexhibit; a class brainstorms ideas for an essayabout a hero.
6:15 Group or cluster ideas that go together. Thinkabout your purpose and audience when youdecide which of your ideas are best.
9:35 Write a rough draft. State your thesis or mainpoint; develop a lead to arouse the reader’sinterest. Use specific examples and personalexperience. Don’t edit as you write!
14:20 Revise. The more you rethink and revise yourwriting, the more your writing can improve.
19:40 Finally, edit for correctness. Save this step for last!
Major Ideas in the Video Program
■ Purpose and Audience—Before you begin, think ofwhy you are writing and for whom you are writing.Knowing what your writing is for helps you think ofgood ideas.
■ Steps in the Process—The video discusses three majorstages in the writing process: prewriting (especiallybrainstorming and clustering), writing, and revising.
■ Brainstorming—Brainstorming is a method ofgenerating ideas to write about. Be open-minded during brainstorming. Ideas can be evaluated andgrouped later.
■ Writing—In the writing stage, writers draft their text.Don’t think about grammar, usage, and spelling at thisstage. Instead, concentrate on introducing your mainidea, supporting it, and drawing a conclusion.
■ Revising—In the revision stage, writers reconsider their audience and purpose, evaluate what they havewritten, rewrite, rearrange, and add and take out text.
■ Editing—After revising, a writer should look for and correct errors, or edit.
■ A Recursive and Flexible Process—Stages in thewriting process overlap and repeat.
VIDEO OVERVIEW
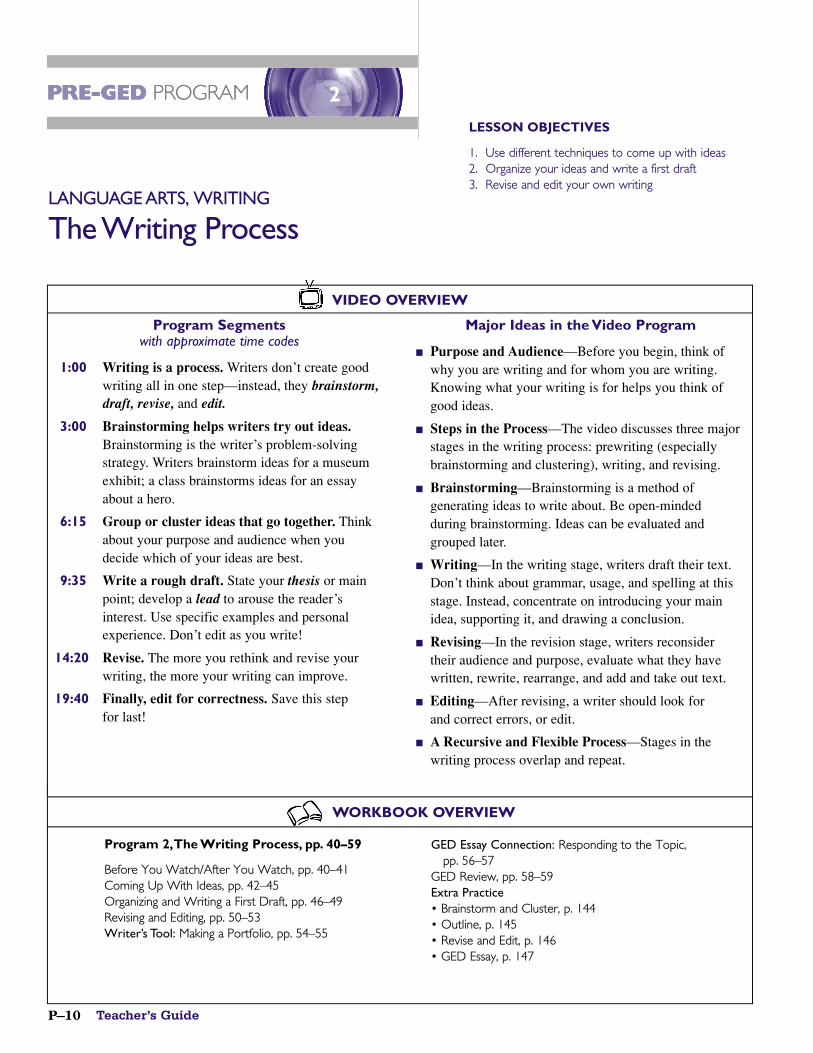
P R E - G E D P RO G R A MLESSON OBJECTIVES
1. Use different techniques to come up with ideas2. Organize your ideas and write a first draft3. Revise and edit your own writing
Program 2,The Writing Process, pp. 40–59
Before You Watch/After You Watch, pp. 40–41Coming Up With Ideas, pp. 42–45Organizing and Writing a First Draft, pp. 46–49Revising and Editing, pp. 50–53Writer’s Tool: Making a Portfolio, pp. 54–55
GED Essay Connection: Responding to the Topic, pp. 56–57
GED Review, pp. 58–59Extra Practice• Brainstorm and Cluster, p. 144• Outline, p. 145• Revise and Edit, p. 146• GED Essay, p. 147
P R E - G E D P RO G R A M
PROGRAM 2 The Writing Process P–11
BeforeYou Watch, pp. 40–41
Preview Lesson Goals on page 40.
Go over Think About the Topic and Prepare toWatch the Video. Have students read and answer thesequestions, which will allow them to think about the topicof the program before they watch it.
Have students read Preview the Questions on page 40 andgo over the Terms in the right-hand column on page 41.
Show Program 2
After You Watch, p. 41
Have students read the Think About theProgram questions on page 41 and jot down some thoughts. Discuss the questions
with the students.
Read the Make the Connection prompt to the students. You can use this as a discussion prompt or as a writingassignment.
Lesson Notes
Coming Up With Ideas, pp. 42–45. Before starting page 42, talk with students about the importance of“prewriting”—activities that help a writer get started. This includes understanding purpose and audience andgenerating ideas.• Extra practice—Brainstorm and Cluster, p. 144
Organizing and Writing a First Draft, pp. 46–49. Beforestudents work on their own, practice organizing details as a class. Create a brainstorm list together; then walkstudents through the organizing process. • Extra practice—Outline, p. 145
Revising and Editing, pp. 50–53. Use Practice 5 toorganize peer review sessions. Present two or three issuesfor students to consider in each other’s papers. Stress thatduring the revision process, students should not correcterrors. Save editing for the very final draft. Conductseparate peer review sessions for revising and editing.• Extra practice—Revise and Edit, p. 146
Making a Portfolio, pp. 54–55. You will need to remind your students to place their writing in theirportfolios. Your students may resist keeping their earliest writings, but these will be important evidence of their writing growth.
Establish a regular routine for collecting and reviewingyour students’ writing. Ask students to write something toyou about their progress in writing and to ask questionsabout their work. Write back to them in response. Thisback-and-forth dialogue will help them become moreconscious of their writing development.
Responding to the Topic, pp. 56–57. Help students see thedifferences between the two thesis statements on page 56. Ask students to generate several more thesis statements inresponse to this topic. Talk about how well each samplestatement responds to the topic.
GED Writing Review, pp. 58–59. After your students have finished drafting their essays, have them discuss how well they have responded to the prompt. Identifyideas that stray from the topic, as well as ideas thataddress the prompt.• Extra practice—GED Essay, p. 147
Extension Activities
Individual Ask students to interview friends orfamily members about their writing processhabits. Have them compare the habits ofseveral different people with their own habits.
Did they come up with any new ideas they want to try?
Group Have students exchange informationabout different people’s writing processes, either their own or those of the people they interviewed. Create a comparison grid,
showing the most common writing process habits. What conclusions can be drawn from the grid? What writing habits seem to be most productive?
Online For more insight into the writingprocess, have students go on LiteracyLink to the Pre-GED section and click LanguageArts: Writing: The Writing Process.
PROGRAM 2 LESSON PLAN
Teacher’s GuideP–12
Organized W r i t i n gL A N G UAGE A RT S , W R I T I N G
3
WORKBOOK OVERVIEW
Program Segmentswith approximate time codes
1:50 Well-organized writing meets the reader’sneeds. Good writing is organized in ways thatreaders expect or understand. Readers findinformation within a clear structure or sequence.
5:30 Write an introduction that prepares the readerto understand the writing. A lead is an openingsentence that gets the reader’s attention. A thesisstatement lets the reader know what your mainpoint is.
9:15 The body of an essay is structured in severalparagraphs. Supporting details such as reasons,facts, and examples help to make writingconvincing. An essay can be structured throughsequence of events, comparison and contrast, or cause and effect.
18:55 Write a conclusion. The conclusion restates themain point and leaves the reader with somethingto think about.
20:10 Use tools to help you organize. Make a graphicorganizer, use index cards, or talk through yourideas out loud.
Major Ideas in the Video Program
■ Organization—Structure helps a writer communicate with a reader. Readers expect ideas to be organized in a certain way.
■ Three-Part Structure—Effective organization involveswriting an introduction, a body, and a conclusion.
■ Introduction—The introduction sets up the main idea(thesis). Several people in the video use the term leadfor the introduction. In the lead, students can restate thetopic in a topic sentence (called a thesis statement in thevideo) and relate it to their experiences.
■ Body—The body must provide convincing support for the thesis by presenting specific and appropriate details.GED students can develop their essays using their ownexperiences, observations, and beliefs.
■ Methods of Organization—Ways to organize the bodyinclude sequence, comparison and contrast, and cause and effect. Organization can be conveyed to the reader by transitional words and phrases.
■ Conclusion—The conclusion sums up an essay orrestates the main idea. It may also offer a twist on themain idea.
VIDEO OVERVIEW
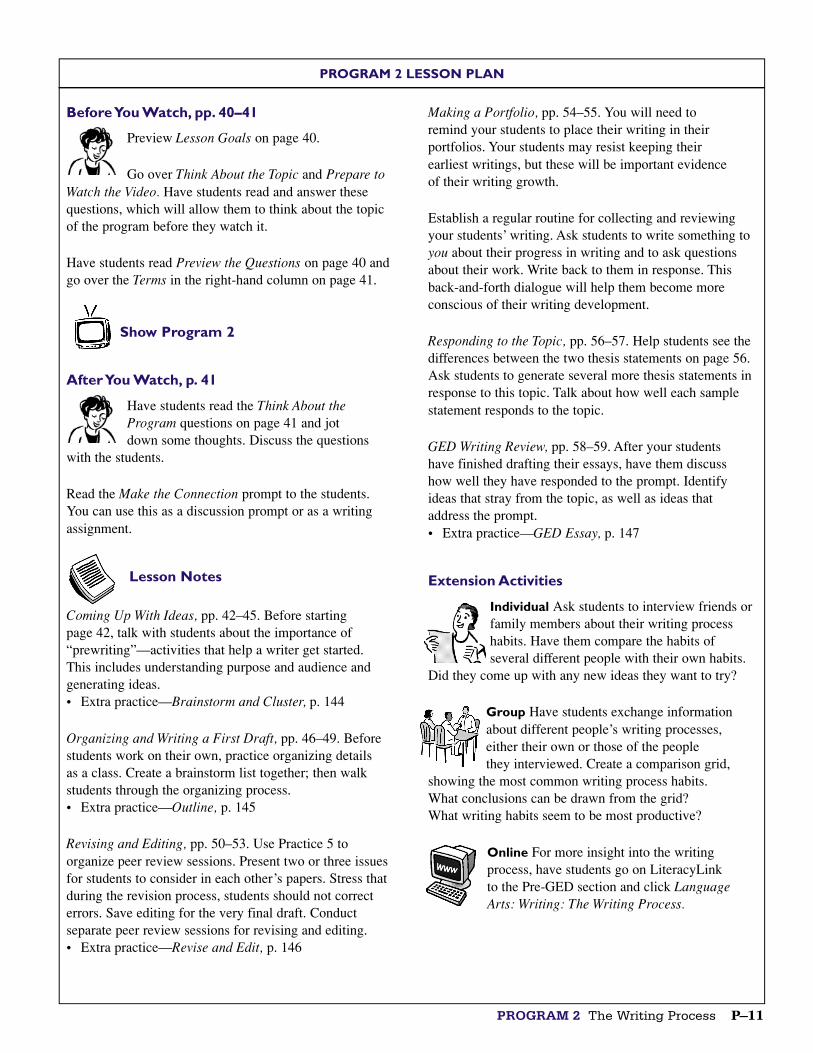
P R E - G E D P RO G R A MLESSON OBJECTIVES
1. Write a topic sentence stating your main idea2. Write paragraphs with details to support your
topic sentence3. Group ideas together in a clear and logical way
that flows
Program 3, Organized Writing, pp. 60–79
Before You Watch/After You Watch, pp. 60–61Writing Topic Sentences, pp. 62–65Writing Paragraphs, pp. 66–69Dividing and Combining Paragraphs, pp. 70–73Writer’s Tool: Using Organizers, pp. 74–75
GED Essay Connection: Writing Introductions and Conclusions, pp. 76–77
GED Review, pp. 78–79Extra Practice• Topic Sentences, p. 148• Organized Paragraphs, p. 149• Divide and Combine Paragraphs, p. 150• GED Essay, p. 151
PROGRAM 3 Organized Writing P–13
BeforeYou Watch, pp. 60–61
Preview Lesson Goals on page 60.
Go over Think About the Topic and Prepare toWatch the Video. Have students read and answer thesequestions, which will allow them to think about the topicof the program before they watch it.
Have students read Preview the Questions on page 60 andgo over the Terms in the right-hand column on page 61.
Show Program 3
After You Watch, p. 61
Have students read the Think About theProgram questions on page 61 and jot downsome thoughts. Discuss the questions with
the students.
Read the Make the Connection prompt to the students. You can use this as a discussion prompt or as a writingassignment.
Lesson Notes
Writing Topic Sentences, pp. 62–65. After students havecompleted this section, ask them what they have learnedabout topic sentences. Have them exchange papers andreview each other’s topic sentences.• Extra practice—Topic Sentences, p. 148
Writing Paragraphs, pp. 66–69. Before students begin thislesson, ask, When you are reading, how do you know whatto expect in a paragraph? Make sure students understandhow a topic sentence sets up the reader’s expectations forthe supporting sentences in a paragraph.• Extra practice—Organized Paragraphs, p. 149
Dividing and Combining Paragraphs, pp. 70–73. Asstudents begin to check the writing in their portfolios forlong and short paragraphs, have them “eyeball” paragraphlength. What looks like a good paragraph length to them?• Extra practice—Divide and Combine Paragraphs, p. 150
Using Organizers, pp. 74–75. Your students may need helpunderstanding how Venn diagrams work. Use these toolsplayfully, but do emphasize that there is a logical systemto setting them up. Using this logic may help your studentsto think more clearly about the relationships between ideasand examples.
If students are drawn to the “guiding hand” techniqueexplained in the video, practice this technique with some different topics. Like clustering, the guiding hand is a tool that helps writers brainstorm and organize at the same time.
Writing Introductions and Conclusions, pp. 76–77. Helpstudents brainstorm interesting leads using the topic onpage 76. It can be difficult to be interesting and to respondclearly to the prompt at the same time—help studentscreate leads that rise to this challenge.
GED Review, pp. 78–79. After your students have finisheddrafting their essays, have them discuss how successfulthey were in organizing their essays.• Extra practice—GED Essay, p. 151
Extension Activities
Individual Ask students to study the paragraphstructure in different newspaper articles that you provide—a news article, a feature, and anopinion column. Have students compare the
articles and report on which paragraphing rules differenttypes of articles seem to follow.
Group Hand out copies of a sample essay.Ask your class to critique its organization. Is the lead interesting? How well are theparagraphs structured? What revisions would
they suggest the writer make? Use this opportunity todiscuss constructive criticism. Ask, What kind of adviceabout your writing is most helpful to you?
Online Have students go on LiteracyLink to the Pre-GED section and click Language Arts: Writing: Organized Writing to see more information about how to improve
the organization of their own writing.
PROGRAM 3 LESSON PLAN
Teacher’s GuideP–14
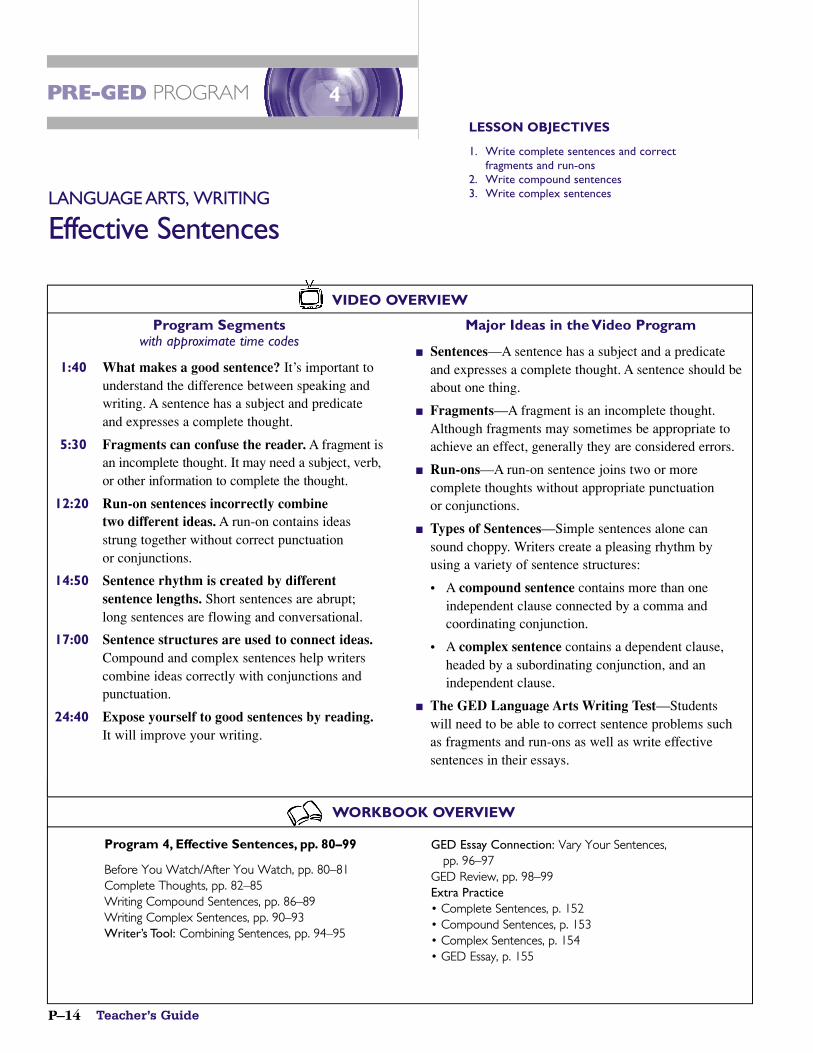
E f fe c t i ve SentencesL A N G UAGE A RT S , W R I T I N G
4
WORKBOOK OVERVIEW
Program Segmentswith approximate time codes
1:40 What makes a good sentence? It’s important tounderstand the difference between speaking andwriting. A sentence has a subject and predicateand expresses a complete thought.
5:30 Fragments can confuse the reader. A fragment isan incomplete thought. It may need a subject, verb,or other information to complete the thought.
12:20 Run-on sentences incorrectly combine two different ideas. A run-on contains ideasstrung together without correct punctuation or conjunctions.
14:50 Sentence rhythm is created by differentsentence lengths. Short sentences are abrupt;long sentences are flowing and conversational.
17:00 Sentence structures are used to connect ideas.Compound and complex sentences help writerscombine ideas correctly with conjunctions andpunctuation.
24:40 Expose yourself to good sentences by reading. It will improve your writing.
Major Ideas in the Video Program
■ Sentences—A sentence has a subject and a predicateand expresses a complete thought. A sentence should beabout one thing.
■ Fragments—A fragment is an incomplete thought.Although fragments may sometimes be appropriate toachieve an effect, generally they are considered errors.
■ Run-ons—A run-on sentence joins two or morecomplete thoughts without appropriate punctuation or conjunctions.
■ Types of Sentences—Simple sentences alone can sound choppy. Writers create a pleasing rhythm byusing a variety of sentence structures:
• A compound sentence contains more than one independent clause connected by a comma and coordinating conjunction.
• A complex sentence contains a dependent clause, headed by a subordinating conjunction, and an independent clause.
■ The GED Language Arts Writing Test—Students will need to be able to correct sentence problems suchas fragments and run-ons as well as write effectivesentences in their essays.
VIDEO OVERVIEW
P R E - G E D P RO G R A MLESSON OBJECTIVES
1. Write complete sentences and correct fragments and run-ons
Before You Watch/After You Watch, pp. 80–81Complete Thoughts, pp. 82–85Writing Compound Sentences, pp. 86–89Writing Complex Sentences, pp. 90–93Writer’s Tool: Combining Sentences, pp. 94–95
GED Essay Connection: Vary Your Sentences, pp. 96–97
GED Review, pp. 98–99Extra Practice• Complete Sentences, p. 152• Compound Sentences, p. 153• Complex Sentences, p. 154• GED Essay, p. 155
PROGRAM 4 Effective Sentences P–15
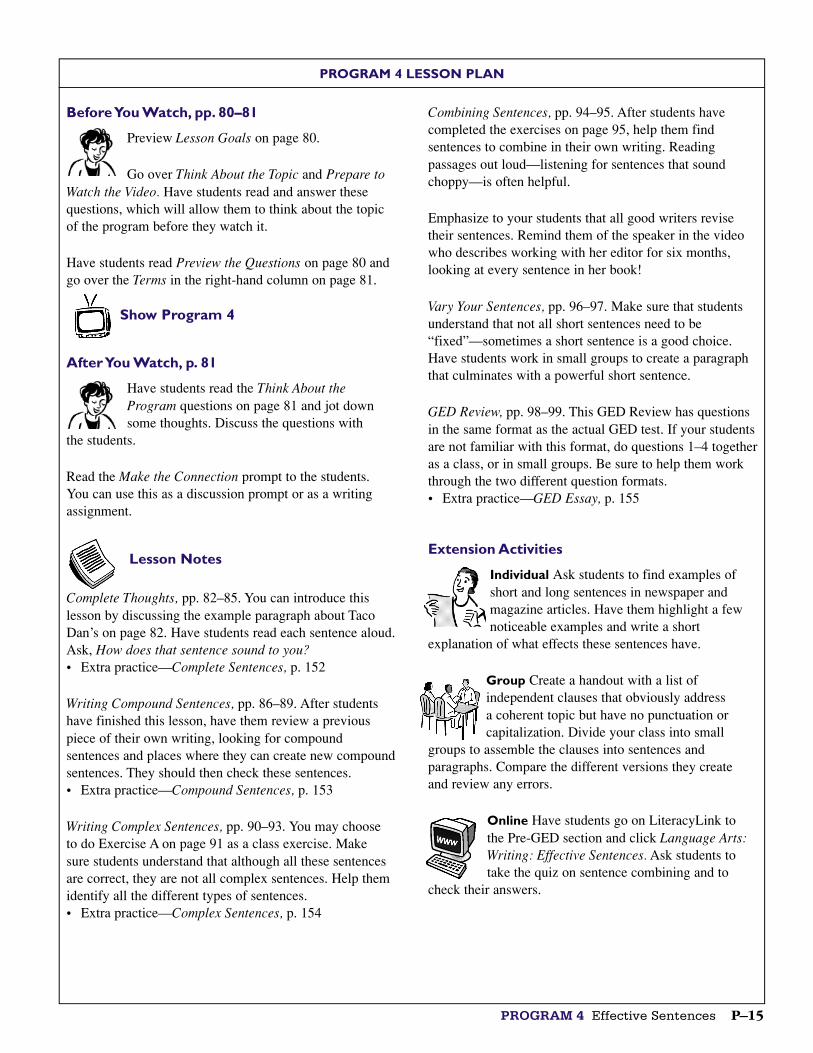
BeforeYou Watch, pp. 80–81
Preview Lesson Goals on page 80.
Go over Think About the Topic and Prepare toWatch the Video. Have students read and answer thesequestions, which will allow them to think about the topicof the program before they watch it.
Have students read Preview the Questions on page 80 andgo over the Terms in the right-hand column on page 81.
Show Program 4
After You Watch, p. 81
Have students read the Think About theProgram questions on page 81 and jot downsome thoughts. Discuss the questions with
the students.
Read the Make the Connection prompt to the students. You can use this as a discussion prompt or as a writingassignment.
Lesson Notes
Complete Thoughts, pp. 82–85. You can introduce thislesson by discussing the example paragraph about TacoDan’s on page 82. Have students read each sentence aloud.Ask, How does that sentence sound to you?• Extra practice—Complete Sentences, p. 152
Writing Compound Sentences, pp. 86–89. After studentshave finished this lesson, have them review a previouspiece of their own writing, looking for compoundsentences and places where they can create new compoundsentences. They should then check these sentences.• Extra practice—Compound Sentences, p. 153
Writing Complex Sentences, pp. 90–93. You may choose to do Exercise A on page 91 as a class exercise. Make sure students understand that although all these sentencesare correct, they are not all complex sentences. Help themidentify all the different types of sentences.• Extra practice—Complex Sentences, p. 154
Combining Sentences, pp. 94–95. After students havecompleted the exercises on page 95, help them findsentences to combine in their own writing. Readingpassages out loud—listening for sentences that soundchoppy—is often helpful.
Emphasize to your students that all good writers revisetheir sentences. Remind them of the speaker in the videowho describes working with her editor for six months,looking at every sentence in her book!
Vary Your Sentences, pp. 96–97. Make sure that studentsunderstand that not all short sentences need to be“fixed”—sometimes a short sentence is a good choice.Have students work in small groups to create a paragraphthat culminates with a powerful short sentence.
GED Review, pp. 98–99. This GED Review has questionsin the same format as the actual GED test. If your studentsare not familiar with this format, do questions 1–4 togetheras a class, or in small groups. Be sure to help them workthrough the two different question formats.• Extra practice—GED Essay, p. 155
Extension Activities
Individual Ask students to find examples of short and long sentences in newspaper andmagazine articles. Have them highlight a fewnoticeable examples and write a short
explanation of what effects these sentences have.
Group Create a handout with a list ofindependent clauses that obviously address a coherent topic but have no punctuation orcapitalization. Divide your class into small
groups to assemble the clauses into sentences andparagraphs. Compare the different versions they create and review any errors.
Online Have students go on LiteracyLink to the Pre-GED section and click Language Arts:Writing: Effective Sentences. Ask students totake the quiz on sentence combining and to
check their answers.
PROGRAM 4 LESSON PLAN
Teacher’s GuideP–16
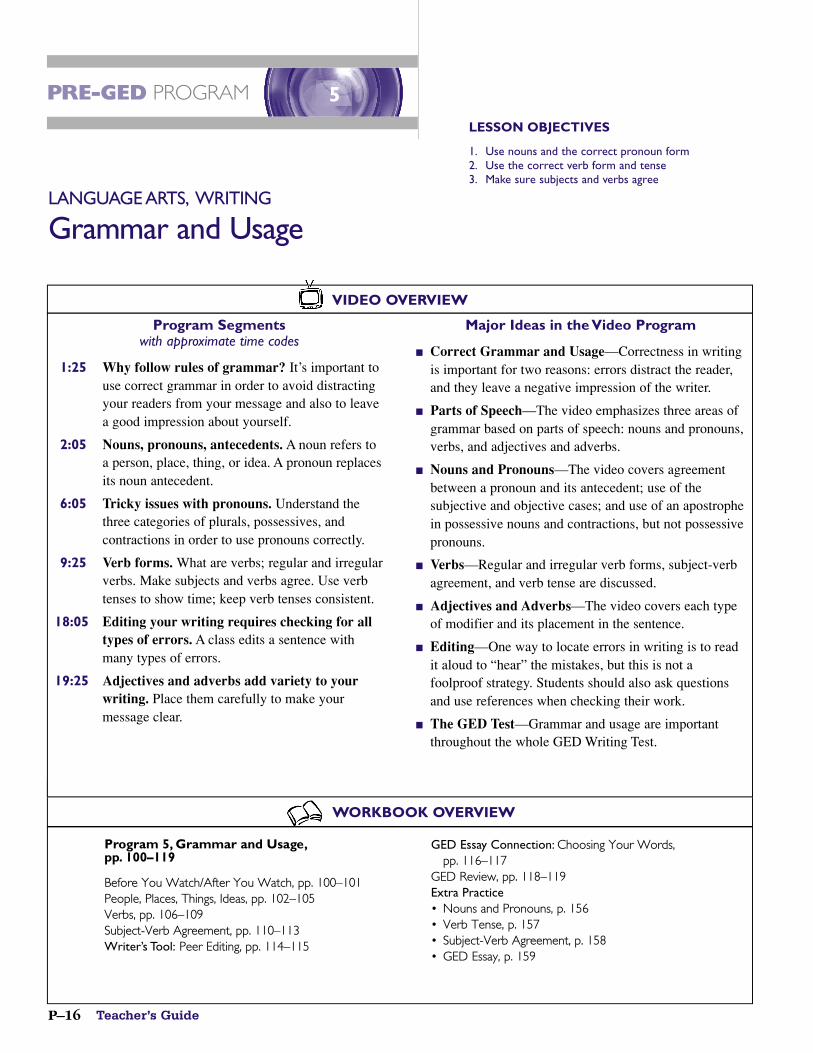
Grammar and UsageL A N G UAGE A RT S , W R I T I N G
5
WORKBOOK OVERVIEW
Program Segmentswith approximate time codes
1:25 Why follow rules of grammar? It’s important touse correct grammar in order to avoid distractingyour readers from your message and also to leavea good impression about yourself.
2:05 Nouns, pronouns, antecedents. A noun refers toa person, place, thing, or idea. A pronoun replacesits noun antecedent.
6:05 Tricky issues with pronouns. Understand thethree categories of plurals, possessives, andcontractions in order to use pronouns correctly.
9:25 Verb forms. What are verbs; regular and irregularverbs. Make subjects and verbs agree. Use verbtenses to show time; keep verb tenses consistent.
18:05 Editing your writing requires checking for alltypes of errors. A class edits a sentence withmany types of errors.
19:25 Adjectives and adverbs add variety to yourwriting. Place them carefully to make yourmessage clear.
Major Ideas in the Video Program
■ Correct Grammar and Usage—Correctness in writingis important for two reasons: errors distract the reader,and they leave a negative impression of the writer.
■ Parts of Speech—The video emphasizes three areas ofgrammar based on parts of speech: nouns and pronouns,verbs, and adjectives and adverbs.
■ Nouns and Pronouns—The video covers agreementbetween a pronoun and its antecedent; use of thesubjective and objective cases; and use of an apostrophein possessive nouns and contractions, but not possessivepronouns.
■ Verbs—Regular and irregular verb forms, subject-verbagreement, and verb tense are discussed.
■ Adjectives and Adverbs—The video covers each typeof modifier and its placement in the sentence.
■ Editing—One way to locate errors in writing is to readit aloud to “hear” the mistakes, but this is not afoolproof strategy. Students should also ask questionsand use references when checking their work.
■ The GED Test—Grammar and usage are importantthroughout the whole GED Writing Test.
VIDEO OVERVIEW
P R E - G E D P RO G R A MLESSON OBJECTIVES
1. Use nouns and the correct pronoun form2. Use the correct verb form and tense3. Make sure subjects and verbs agree
Program 5, Grammar and Usage,pp. 100–119
Before You Watch/After You Watch, pp. 100–101People, Places, Things, Ideas, pp. 102–105Verbs, pp. 106–109Subject-Verb Agreement, pp. 110–113Writer’s Tool: Peer Editing, pp. 114–115
GED Essay Connection: Choosing Your Words, pp. 116–117
GED Review, pp. 118–119Extra Practice• Nouns and Pronouns, p. 156• Verb Tense, p. 157• Subject-Verb Agreement, p. 158• GED Essay, p. 159
PROGRAM 5 Grammar and Usage P–17
BeforeYou Watch, pp. 100–101
Preview Lesson Goals on page 100.
Go over Think About the Topic and Prepare toWatch the Video. Have students read and answer thesequestions, which will allow them to think about the topicof the program before they watch it.
Have students read Preview the Questions on page 100and go over the Terms in the right-hand column on page 101.
Show Program 5
After You Watch, p. 101
Have students read the Think About theProgram questions on page 101 and jot down some thoughts. Discuss the questions
with the students.
Read the Make the Connection prompt to the students. You can use this as a discussion prompt or as a writingassignment.
Lesson Notes
People, Places, Things, Ideas, pp. 102–105. You canintroduce this lesson by writing a list of words on theblackboard and asking students to identify which ones are nouns.• Extra practice—Nouns and Pronouns, p. 156
Verbs, pp. 106–109. Have students practice using differenttenses to convey different ideas about time and sequence.Working from the same basic sentence, generate as manydifferent versions as possible just by changing the verb. • Extra practice—Verb Tense, p. 157
Subject-Verb Agreement, pp.110–113. Most nativespeakers “hear” subject-verb agreement correctly unlessthe subject and verb are not in the usual order. Helpstudents practice finding the simple subject and main verb in practice sentences. Teach them to put invertedsentences in normal sentence order to make locating the subject and verb easier.• Extra practice—Subject-Verb Agreement, p. 158
Peer Editing, pp. 114–115. Train students in peer editingby starting with a sample paper, not written by anyone inyour class. Give everyone a copy and discuss strategies forgiving feedback on this paper. Students are likely to giveonly positive comments unless you model how to giveconstructive criticism.
Organize your class into groups of two or three. Have each student read each other student’s paper and offer peer feedback.
Choosing Your Words, pp. 116–117. Your students mayspeak with more interesting word choice than they use intheir writing. Write a series of ordinary words on the boardand see how many alternatives students can think of; haveteams compete. Reassure students that it’s better to use aprecise word that they are not sure how to spell than tosettle for a vague word.
GED Review, pp. 118–119. This GED review hasquestions in the same format as the actual GED test. Afterstudents have completed the review, discuss individualitems they missed. Talk about why the wrong answers arewrong and how to test different answer choices.• Extra practice—GED Essay, p. 159
Extension Activities
Individual Ask students to highlight the simple subjects and simple verbs in one of their essays. Have them check verb tenses and subject-verb agreement and see if they
find an error pattern.
Group Create a handout by replacing eachpronoun in an article with a blank line. Have students work in groups to restore themissing pronouns. Discuss all options in
situations where more than one pronoun could be used.Ask students to explain the writer’s original choices.
Online Have students go on LiteracyLink to the Pre-GED section and click Language Arts:Writing: Grammar and Usage. They can learnmore about pronoun agreement at this link.
Encourage them to try the Quiz on Pronoun Usage and the Second Quiz on Pronoun Forms.
PROGRAM 5 LESSON PLAN
Teacher’s GuideP–18
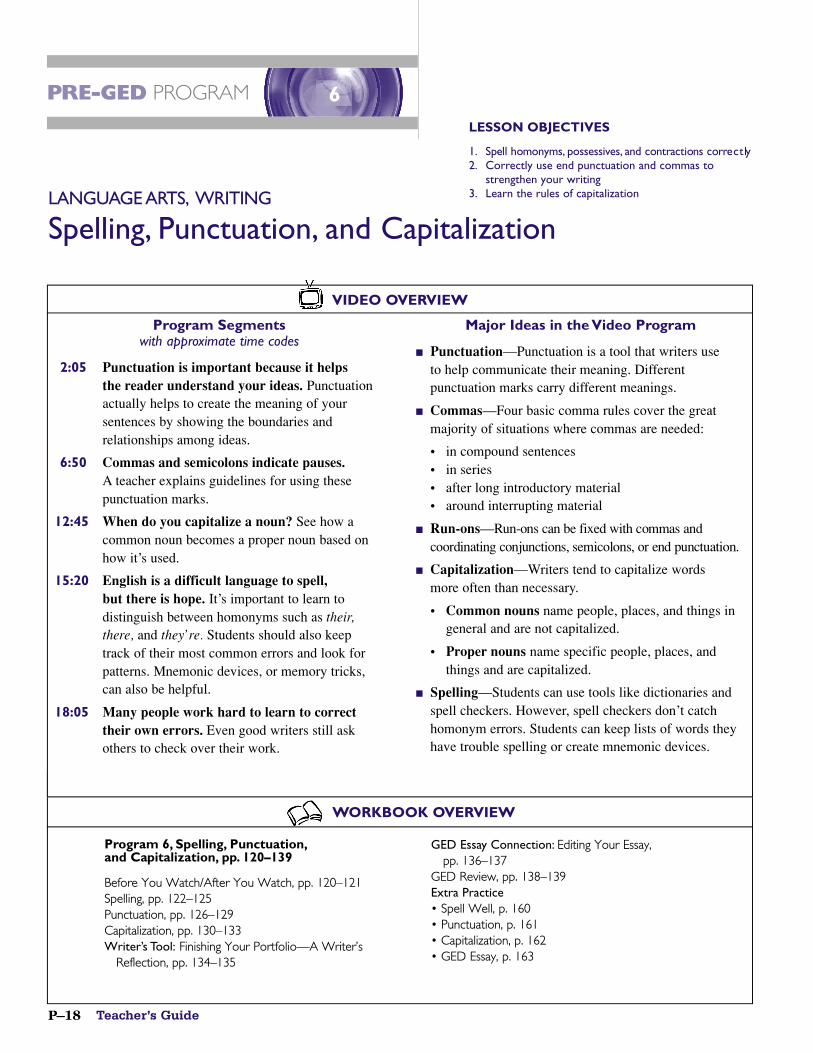
Spelling, Punctuation, and CapitalizationL A N G UAGE A RT S , W R I T I N G
6
WORKBOOK OVERVIEW
Program Segmentswith approximate time codes
2:05 Punctuation is important because it helps the reader understand your ideas. Punctuationactually helps to create the meaning of yoursentences by showing the boundaries andrelationships among ideas.
6:50 Commas and semicolons indicate pauses.A teacher explains guidelines for using thesepunctuation marks.
12:45 When do you capitalize a noun? See how acommon noun becomes a proper noun based onhow it’s used.
15:20 English is a difficult language to spell, but there is hope. It’s important to learn todistinguish between homonyms such as their,there, and they’re. Students should also keep track of their most common errors and look forpatterns. Mnemonic devices, or memory tricks,can also be helpful.
18:05 Many people work hard to learn to correcttheir own errors. Even good writers still askothers to check over their work.
Major Ideas in the Video Program
■ Punctuation—Punctuation is a tool that writers use to help communicate their meaning. Differentpunctuation marks carry different meanings.
■ Commas—Four basic comma rules cover the greatmajority of situations where commas are needed:
• in compound sentences• in series• after long introductory material• around interrupting material
■ Run-ons—Run-ons can be fixed with commas andcoordinating conjunctions, semicolons, or end punctuation.
■ Capitalization—Writers tend to capitalize words more often than necessary.
• Common nouns name people, places, and things in general and are not capitalized.
• Proper nouns name specific people, places, and things and are capitalized.
■ Spelling—Students can use tools like dictionaries andspell checkers. However, spell checkers don’t catchhomonym errors. Students can keep lists of words theyhave trouble spelling or create mnemonic devices.
VIDEO OVERVIEW
P R E - G E D P RO G R A MLESSON OBJECTIVES
1. Spell homony m s , p o s s e s s i ve s , and contractions corre c t ly2. Correctly use end punctuation and commas to
strengthen your writing3. Learn the rules of capitalization
Program 6, Spelling, Punctuation,and Capitalization, pp. 120–139
Before You Watch/After You Watch, pp. 120–121Spelling, pp. 122–125Punctuation, pp. 126–129Capitalization, pp. 130–133Writer’s Tool: Finishing Your Portfolio—A Writer’s
Reflection, pp. 134–135
GED Essay Connection: Editing Your Essay, pp. 136–137
GED Review, pp. 138–139Extra Practice• Spell Well, p. 160• Punctuation, p. 161• Capitalization, p. 162• GED Essay, p. 163
PROGRAM 6 Spelling, Punctuation, and Capitalization P–19
BeforeYou Watch, pp. 120–121
Preview Lesson Goals on page 120.
Go over Think About the Topic and Prepare toWatch the Video. Have students read and answer thesequestions, which will allow them to think about the topicof the program before they watch it.
Have students read P review the Questions on page 120 andgo over the Te r m s in the right-hand column on page 121.
Show Program 6
After You Watch, p. 121
Have students read the Think About theProgram questions on page 121 and jot down some thoughts. Discuss the questions
with the students.
Read the Make the Connection prompt to the students. You can use this as a discussion prompt or as a writingassignment.
Lesson Notes
Spelling, pp. 122–125. As you begin this lesson, reassurestudents that many people have to work hard on theirspelling and that good strategies really do help. Recall theteacher’s story in the video; her husband was able toidentify his particular spelling issue and gain confidence.• Extra practice—Spell Well, p. 160
Punctuation, pp. 126–129. After your students havecompleted this lesson, hand out a paragraph that containsno punctuation. Divide your class into groups, have themadd in the punctuation. Point out the different meaningscreated by using different punctuation.• Extra practice—Punctuation, p. 161
Capitalization, pp.130–133. As students work on thislesson, reinforce the point that they are more likely toovercapitalize than undercapitalize. Practice by creatingpairs of contrasting examples like the one in the video.• Extra practice—Capitalization, p. 162
Finishing Your Port f o l i o — A Wr i t e r’s Reflection,pp. 134–135. This is a very valuable activity to helpstudents take more responsibility for their own writingdevelopment. Make sure that students compare their earliest writings with their later efforts. Help them see the progress they have made, and help them articulatewriting goals they want to continue working on.
If possible, write back in response to students’ reflections.Share your own observations about their strengths andencourage them to continue writing and sharing theirwriting with others.
Editing Your Essay, pp. 136–137. Explain to your studentsthat editing shows a writer taking responsibility forproofreading and correcting errors. Neat editing marks,therefore, are a sign of good writing! Ask your students touse the standard editing marks when they edit their ownand each others’ papers. These marks should be secondnature by the time they take the GED.
GED Review, pp. 138–139. This review has questions inthe same format as the actual GED test. If your studentshave difficulty with these items, consider doing questions1–4 as a class. Highlight the two different item formats.• Extra practice—GED Essay, p. 163
Extension Activities
Individual Have each student create his or herown list of words that have been misspelled intheir writing assignments. Help your studentsfigure out whether certain patterns or types of
words are giving them trouble. Students could also createa personalized editing checklist.
Group Divide your class into groups ofstudents and ask them to locate examples ofcommon and proper nouns on the front page of a newspaper. Have them list the examples
and write a description of the patterns they notice.
Online Have students go on LiteracyLink to the Pre-GED section and click Language Arts:Writing: Spelling, Punctuation, and Capitalization.Here they can study a useful list of common
sound-alike words.
PROGRAM 6 LESSON PLAN
Teacher’s GuideP–20
P re-GED Language A rt s , Reading Ove rv i ewThe GED Language Arts, Reading Test The GED Language Arts, Reading Test consists of:
■ Forty multiple-choice questions in 65 minutes■ Seven selections from different literary and nonfiction genres, with 5 or 6 questions based on each
selection■ Selections will be drawn from the following genres:
■ Nonfiction—two excerpts from business documents, articles, or critical reviews■ Fiction—three passages from novels or short stories; one written before 1920, one written
between 1920 and 1960, and one written after 1960■ Poetry—one poem or excerpt from a poem■ Drama—one excerpt from a play
■ Questions based on the thinking skills of:■ Comprehension■ Application■ Analysis■ Synthesis
LiteracyLink® Pre-GED Language Arts, Reading
Adult education learners who are reading at the 6th to 8th grade reading level are most appropriatelyplaced at the Pre-GED level.
Once students have developed a foundation in the reading skills needed to work at the GED level, theycan move on to GED Connection: Language Arts, Writing and Reading.
LiteracyLink® Pre-GED Language Arts, Writing materials consist of:■ Four video programs
Program 7 NonfictionProgram 8 FictionProgram 9 PoetryProgram 10 Drama
■ One workbook with corresponding video lessons; each lesson has the following components:Before You Watch/After You Watch video activitiesThree Reading Skills sectionsGED Test-Taking Skill section Reading and Writing Connection sectionGED Review
■ Online Pre-GED enrichment links at www.pbs.org/literacy
■ Four lesson plans on pages P-22 to P-29 of this guide.
LANGUAGE ARTS, READING Overview P–21
Teaching Different Genres
In addition to using LiteracyLink® video programs and workbooks, you may wish to use the followingresources to help Pre-GED learners build background knowledge that will help them apply their readingskills in different genres.
■ Emphasize that we are all exposed to nonfiction reading materials, all the time. Ask students tobring in sample documents from the workplace, doctors’ offices, community centers, and so on.Instructions, leaflets, policy manuals, consumer information—all of these are common types ofnonfiction. Discuss how these documents are organized based on their purpose and audience.
■ Keep a stock of library books on hand in the classroom so that you have examples of short stories,novels, poems, and plays to explore and refer to in class. Urge your students to get library cardsand to use the library on a regular basis.
■ Encourage students to watch literary programming on public television and films based on worksof literature. Keep an eye on your local TV and cable listings and watch for programs you canrecommend to your students. Your public or school library will have a collection of videotapes andDVDs that you can borrow for classroom use as well.
■ Are there poetry slams in your community? If so, encourage your students to check them out—ortake a class field trip. If not, maybe you can organize one at your school.
Developing Reading Strategies■ Always encourage your students to read literary passages out loud. Sound is very important in literary
language; writers craft their work to create certain effects through sound and rhythm, even in fiction. ■ In reading nonfiction, always stress the context of the work. Who was the audience? What are their
needs and expectations? How did the writer try to reach his or her audience?■ Teach students to skim, or preview, a reading, then read carefully for meaning, before they begin
looking at the questions based on the reading. As they preview and read, they should jot down theirreactions and questions in the margin or in a reader’s journal.
Teaching Critical Thinking■ Encourage learners to answer GED-type questions by “thinking out loud” and have them provide
support for their answers.■ Use graphic organizers (e.g. Venn diagrams). If you don’t have any graphic organizers, you can
find lots of sources for graphic organizers on the Internet.■ Devise higher-order thinking activities based on literature and nonfiction content. Below are
some possible approaches.■ C o m p rehension: Have students restate, or summarize, short passages using everyday language.This can be very helpful with poetry and other selections that may use specialized literary or figurative devices.■ Application: After you have read a passage, discuss: Given what you’ve read, how would you
expect this character to act in this other situation?■ Analysis: Based on reading material, ask, What was the cause or result of this event?
Why does this character behave this way or make this statement? How does this word or phrase help set the mood or tone in this reading? In this commentary, editorial, or review,underline the facts and circle the opinions.
■ Synthesis: Based on literary material, ask, What is the theme of this selection? How do you know that is the author’s message; what are the clues?
Teacher’s GuideP–22
N o n f i c t i o nL A N G UAGE A RT S , R E A D I N G
7
WORKBOOK OVERVIEW
Program Segmentswith approximate time codes
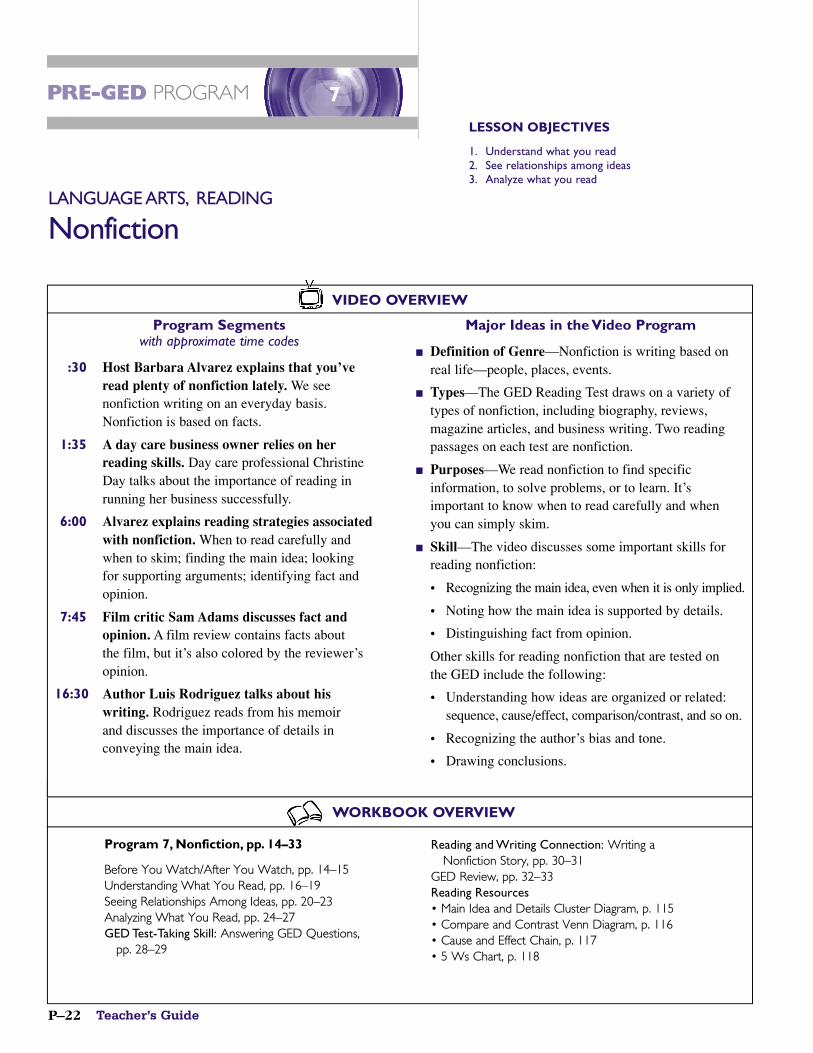
:30 Host Barbara Alvarez explains that you’veread plenty of nonfiction lately. We seenonfiction writing on an everyday basis.Nonfiction is based on facts.
1:35 A day care business owner relies on herreading skills. Day care professional ChristineDay talks about the importance of reading inrunning her business successfully.
6:00 Alvarez explains reading strategies associatedwith nonfiction. When to read carefully andwhen to skim; finding the main idea; looking for supporting arguments; identifying fact andopinion.
7:45 Film critic Sam Adams discusses fact andopinion. A film review contains facts about the film, but it’s also colored by the reviewer’sopinion.
16:30 Author Luis Rodriguez talks about his writing. Rodriguez reads from his memoir and discusses the importance of details inconveying the main idea.
Major Ideas in the Video Program
■ Definition of Genre—Nonfiction is writing based on real life—people, places, events.
■ Types—The GED Reading Test draws on a variety of types of nonfiction, including biography, reviews, magazine articles, and business writing. Two readingpassages on each test are nonfiction.
■ Purposes—We read nonfiction to find specificinformation, to solve problems, or to learn. It’simportant to know when to read carefully and when you can simply skim.
■ Skill—The video discusses some important skills forreading nonfiction:
• Recognizing the main idea, even when it is only implied.
• Noting how the main idea is supported by details.
• Distinguishing fact from opinion.
Other skills for reading nonfiction that are tested on the GED include the following:
• Understanding how ideas are organized or related: sequence, cause/effect, comparison/contrast, and so on.
• Recognizing the author’s bias and tone.
• Drawing conclusions.
VIDEO OVERVIEW
P R E - G E D P RO G R A MLESSON OBJECTIVES
1. Understand what you read2. See relationships among ideas3. Analyze what you read
Program 7, Nonfiction, pp. 14–33
Before You Watch/After You Watch, pp. 14–15Understanding What You Read, pp. 16–19Seeing Relationships Among Ideas, pp. 20–23Analyzing What You Read, pp. 24–27GED Test-Taking Skill: Answering GED Questions,
pp. 28–29
Reading and Writing Connection: Writing a Nonfiction Story, pp. 30–31
GED Review, pp. 32–33Reading Resources• Main Idea and Details Cluster Diagram, p. 115• Compare and Contrast Venn Diagram, p. 116• Cause and Effect Chain, p. 117• 5 Ws Chart, p. 118
PROGRAM 7 Nonfiction P–23
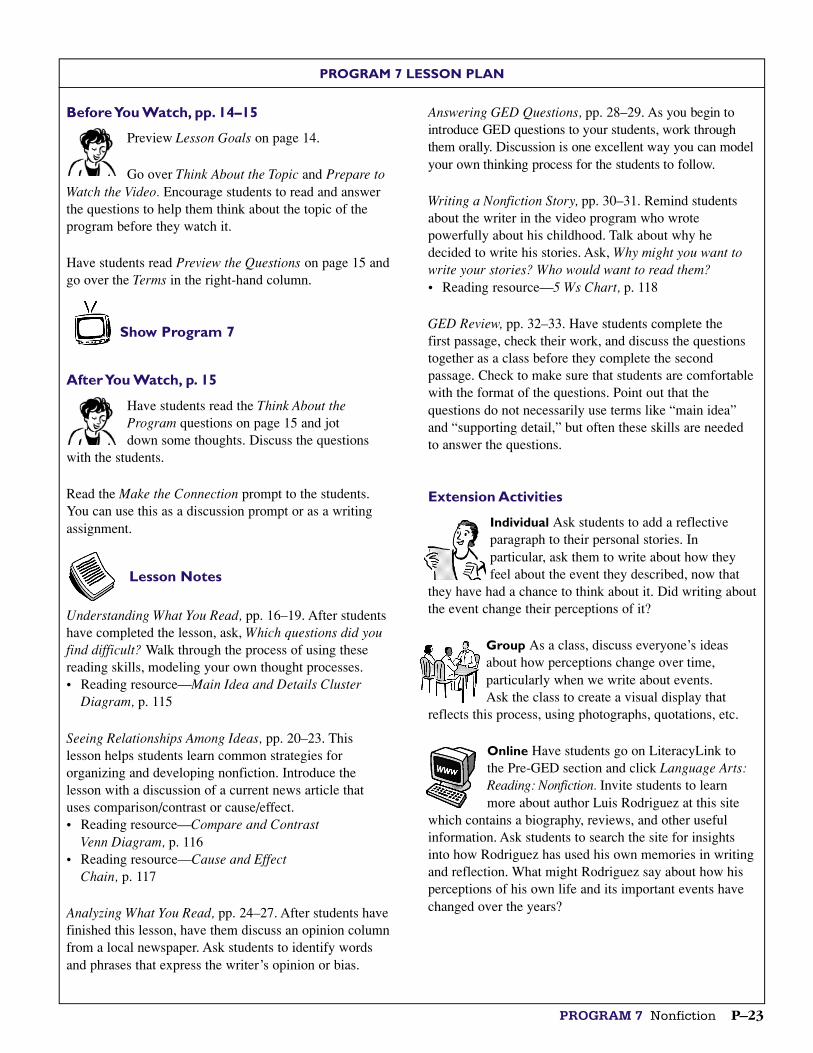
BeforeYou Watch, pp. 14–15
Preview Lesson Goals on page 14.
Go over Think About the Topic and Prepare toWatch the Video. Encourage students to read and answerthe questions to help them think about the topic of theprogram before they watch it.
Have students read Preview the Questions on page 15 andgo over the Terms in the right-hand column.
Show Program 7
After You Watch, p. 15
Have students read the Think About theProgram questions on page 15 and jot down some thoughts. Discuss the questions
with the students.
Read the Make the Connection prompt to the students. You can use this as a discussion prompt or as a writingassignment.
Lesson Notes
Understanding What You Read, pp. 16–19. After studentshave completed the lesson, ask, Which questions did youfind difficult? Walk through the process of using thesereading skills, modeling your own thought processes.• Reading resource—Main Idea and Details Cluster
Diagram, p. 115
Seeing Relationships Among Ideas, pp. 20–23. This lesson helps students learn common strategies fororganizing and developing nonfiction. Introduce the lesson with a discussion of a current news article that uses comparison/contrast or cause/effect. • Reading resource—Compare and Contrast
Venn Diagram, p. 116• Reading resource—Cause and Effect
Chain, p. 117
Analyzing What You Read, pp. 24–27. After students havefinished this lesson, have them discuss an opinion columnfrom a local newspaper. Ask students to identify wordsand phrases that express the writer’s opinion or bias.
Answering GED Questions, pp. 28–29. As you begin tointroduce GED questions to your students, work throughthem orally. Discussion is one excellent way you can modelyour own thinking process for the students to follow.
Writing a Nonfiction Story, pp. 30–31. Remind studentsabout the writer in the video program who wrotepowerfully about his childhood. Talk about why hedecided to write his stories. Ask, Why might you want towrite your stories? Who would want to read them?• Reading resource—5 Ws Chart, p. 118
GED Review, pp. 32–33. Have students complete the first passage, check their work, and discuss the questionstogether as a class before they complete the secondpassage. Check to make sure that students are comfortablewith the format of the questions. Point out that thequestions do not necessarily use terms like “main idea”and “supporting detail,” but often these skills are neededto answer the questions.
Extension Activities
Individual Ask students to add a reflectiveparagraph to their personal stories. Inparticular, ask them to write about how theyfeel about the event they described, now that
they have had a chance to think about it. Did writing aboutthe event change their perceptions of it?
Group As a class, discuss everyone’s ideasabout how perceptions change over time,particularly when we write about events. Ask the class to create a visual display that
reflects this process, using photographs, quotations, etc.
Online Have students go on LiteracyLink to the Pre-GED section and click Language Arts:Reading: Nonfiction. Invite students to learnmore about author Luis Rodriguez at this site
which contains a biography, reviews, and other usefulinformation. Ask students to search the site for insightsinto how Rodriguez has used his own memories in writingand reflection. What might Rodriguez say about how hisperceptions of his own life and its important events havechanged over the years?
PROGRAM 7 LESSON PLAN
Teacher’s GuideP–24
F i c t i o nL A N G UAGE A RT S , R E A D I N G
8
WORKBOOK OVERVIEW
Program Segmentswith approximate time codes
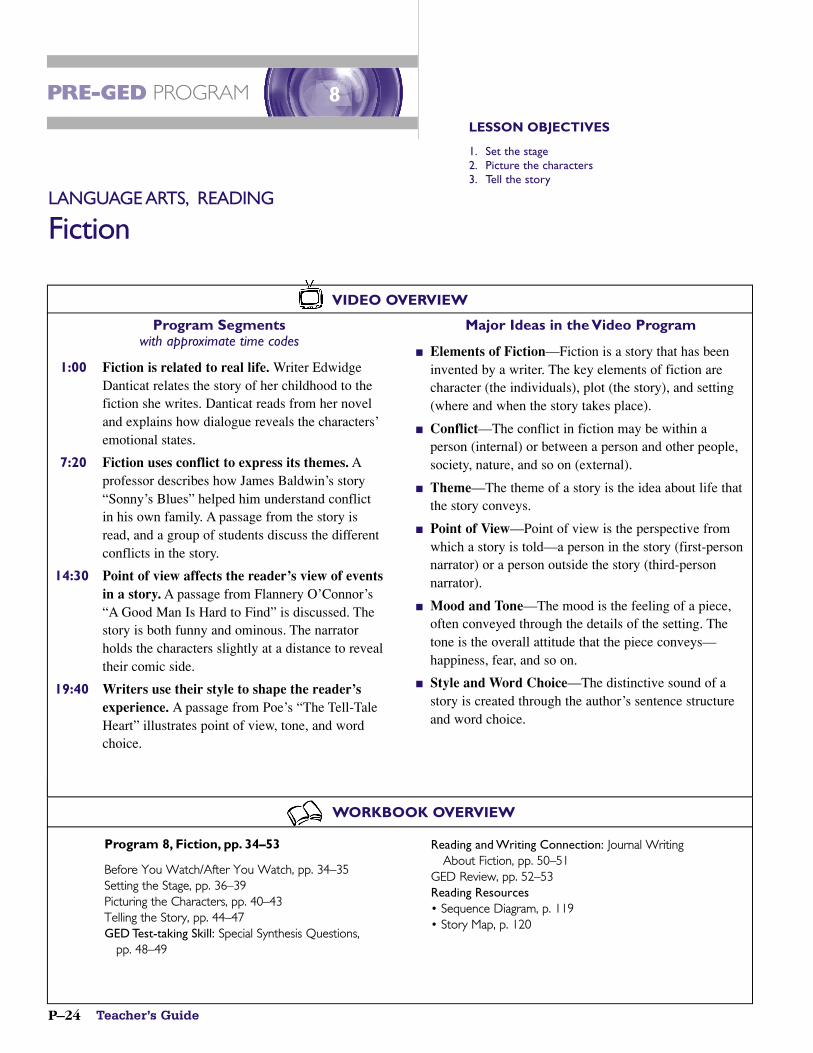
1:00 Fiction is related to real life. Writer EdwidgeDanticat relates the story of her childhood to thefiction she writes. Danticat reads from her noveland explains how dialogue reveals the characters’emotional states.
7:20 Fiction uses conflict to express its themes. Aprofessor describes how James Baldwin’s story“Sonny’s Blues” helped him understand conflictin his own family. A passage from the story isread, and a group of students discuss the differentconflicts in the story.
14:30 Point of view affects the reader’s view of eventsin a story. A passage from Flannery O’Connor’s“A Good Man Is Hard to Find” is discussed. Thestory is both funny and ominous. The narratorholds the characters slightly at a distance to revealtheir comic side.
19:40 Writers use their style to shape the reader’sexperience. A passage from Poe’s “The Tell-TaleHeart” illustrates point of view, tone, and wordchoice.
Major Ideas in the Video Program
■ Elements of Fiction—Fiction is a story that has beeninvented by a writer. The key elements of fiction arecharacter (the individuals), plot (the story), and setting(where and when the story takes place).
■ Conflict—The conflict in fiction may be within aperson (internal) or between a person and other people,society, nature, and so on (external).
■ Theme—The theme of a story is the idea about life thatthe story conveys.
■ Point of View—Point of view is the perspective fromwhich a story is told—a person in the story (first-personnarrator) or a person outside the story (third-personnarrator).
■ Mood and Tone—The mood is the feeling of a piece,often conveyed through the details of the setting. Thetone is the overall attitude that the piece conveys—happiness, fear, and so on.
■ Style and Word Choice—The distinctive sound of astory is created through the author’s sentence structureand word choice.
VIDEO OVERVIEW
P R E - G E D P RO G R A MLESSON OBJECTIVES
1. Set the stage2. Picture the characters3. Tell the story
Program 8, Fiction, pp. 34–53
Before You Watch/After You Watch, pp. 34–35Setting the Stage, pp. 36–39Picturing the Characters, pp. 40–43Telling the Story, pp. 44–47GED Test-taking Skill: Special Synthesis Questions,
pp. 48–49
Reading and Writing Connection: Journal WritingAbout Fiction, pp. 50–51
GED Review, pp. 52–53Reading Resources• Sequence Diagram, p. 119• Story Map, p. 120
PROGRAM 8 Fiction P–25
BeforeYou Watch, pp. 34–35
Preview Lesson Goals on page 34.
Go over Think About the Topic and Prepare toWatch the Video. Encourage students to read and answerthe questions to help them think about the topic of theprogram before they watch it.
Have students read Preview the Questions on page 35 andgo over the Terms in the right-hand column.
Show Program 8
After You Watch, p. 35
Have students read the Think About theProgram questions on page 35 and jot downsome thoughts. Discuss the questions with
the students.
Read the Make the Connection prompt to the students. You can use this as a discussion prompt or as a writingassignment.
Lesson Notes
Setting the Stage, pp. 36–39. As you begin this lesson, askstudents how the settings in which they live and workaffect their feelings, attitudes, and actions. Point out that inliterature, authors use settings to create tone and establishcharacters’ feelings and attitudes.
Picturing the Characters, pp. 40–43. After students havefinished this lesson, reinforce ideas about point of viewand character by comparing the passages on pages 42 and43. Ask, What is the effect of the first-person narrator?How would these passages be different if they used third-person narration?
Telling the Story, pp. 44–47. To introduce literary conflict,relate it to theme. Ask students, If you were going to tell astory to make a point, what story would you tell? Howwould you use your story to make your point? Fictionwriters make their points—express their themes—throughconflict and its resolution.• Reading Resource—Sequence Diagram, p. 119• Reading Resource—Story Map, p. 120
Special Synthesis Questions, pp. 48–49. The samplequestion on page 49 is quite challenging. Work through the answer choices with students—they may be temptedby (3), but this is not the best option. Make sure thatstudents notice the ironic tone of the quote from Twain in the question stem.
Journal Writing About Fiction, pp. 50–51. Students maybe interested to know that many experienced writers andreaders keep reading journals. As they read, they jot downtheir reactions in order to deepen their understanding ofthe piece. You can ask your students to do a samplejournal entry based on a short story you provide. Readtheir journal entries and write back about your ownresponses to the story.
GED Review, pp. 52–53. Have students read the firstpassage and discuss it together as a class before theyattempt the questions. Then see if they can read the second selection and answer the questions on their own.
Extension Activities
Individual Ask students to select a short story or novel to read on their own. Hand out a list of suggestions; if possible, have alibrarian specializing in reader services visit
your class and bring a selection of books and stories that your students would be able to read. Ask students to record their thoughts in a reading journal while reading the book they selected.
Group Read a short story together as a class,and discuss the literary elements explained inthis program. Create a visual display that showsgraphically how the different literary elements
support or reveal the theme of the story.
Online Have students go on LiteracyLink to the Pre-GED section and click Language Arts:Reading: Fiction, which is linked to a searchengine. Invite students to explore online to find
information about an author whose work they like. Afterstudents have done research on their own, discuss whatkinds of information they were able to find and what was most interesting to them.
PROGRAM 8 LESSON PLAN
Teacher’s GuideP–26
Po e t ryL A N G UAGE A RT S , R E A D I N G
9
WORKBOOK OVERVIEW
Program Segmentswith approximate time codes
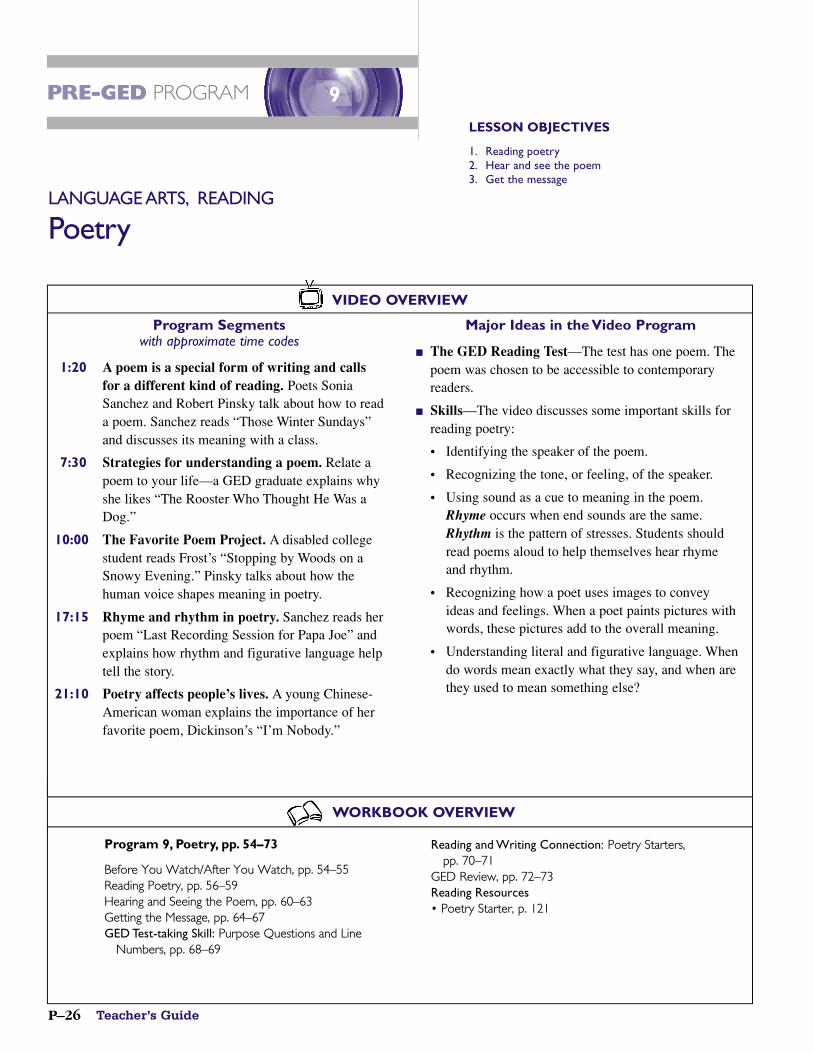
1:20 A poem is a special form of writing and callsfor a different kind of reading. Poets SoniaSanchez and Robert Pinsky talk about how to reada poem. Sanchez reads “Those Winter Sundays”and discusses its meaning with a class.
7:30 Strategies for understanding a poem. Relate apoem to your life—a GED graduate explains whyshe likes “The Rooster Who Thought He Was aDog.”
10:00 The Favorite Poem Project. A disabled collegestudent reads Frost’s “Stopping by Woods on aSnowy Evening.” Pinsky talks about how thehuman voice shapes meaning in poetry.
17:15 Rhyme and rhythm in poetry. Sanchez reads herpoem “Last Recording Session for Papa Joe” andexplains how rhythm and figurative language helptell the story.
21:10 Poetry affects people’s lives. A young Chinese-American woman explains the importance of herfavorite poem, Dickinson’s “I’m Nobody.”
Major Ideas in the Video Program
■ The GED Reading Test—The test has one poem. Thepoem was chosen to be accessible to contemporaryreaders.
■ Skills—The video discusses some important skills forreading poetry:
• Identifying the speaker of the poem.
• Recognizing the tone, or feeling, of the speaker.
• Using sound as a cue to meaning in the poem. Rhyme occurs when end sounds are the same. Rhythm is the pattern of stresses. Students should read poems aloud to help themselves hear rhyme and rhythm.
• Recognizing how a poet uses images to convey ideas and feelings. When a poet paints pictures with words, these pictures add to the overall meaning.
• Understanding literal and figurative language. When do words mean exactly what they say, and when are they used to mean something else?
VIDEO OVERVIEW
P R E - G E D P RO G R A MLESSON OBJECTIVES
1. Reading poetry2. Hear and see the poem3. Get the message
Program 9, Poetry, pp. 54–73
Before You Watch/After You Watch, pp. 54–55Reading Poetry, pp. 56–59Hearing and Seeing the Poem, pp. 60–63Getting the Message, pp. 64–67GED Test-taking Skill: Purpose Questions and Line
Numbers, pp. 68–69
Reading and Writing Connection: Poetry Starters, pp. 70–71
GED Review, pp. 72–73Reading Resources• Poetry Starter, p. 121
PROGRAM 9 Poetry P–27
BeforeYou Watch, pp. 54–55
Preview Lesson Goals on page 54.
Go over Think About the Topic and Prepare toWatch the Video. Encourage students to read and answerthe questions to help them think about the topic of theprogram before they watch it.
Have students read Preview the Questions on page 55 andgo over the Terms in the right-hand column.
Show Program 9
After You Watch, p. 55
Have students read the Think About theProgram questions on page 55 and jot downsome thoughts. Discuss the questions with
the students.
Read the Make the Connection prompt to the students. You can use this as a discussion prompt or as a writingassignment.
Lesson Notes
Reading Poetry, pp. 56–59. As you begin this lesson, askstudents what they remember from poems they have readin the past, and why. Help them see that they already knowa little about what makes a poem special and memorable.
Hearing and Seeing the Poem, pp. 60–63. Be sure to havestudents read the sample poems out loud in this lesson.You can begin by reading the first few lines, but alsoengage the students in reading aloud. If they are notcomfortable reading in front of the whole class, dividethem into pairs or small groups and have them read toeach other. Ask, What does the sound of the poem tell youabout the meaning of the poem?
Getting the Message, pp. 64–67. After students havefinished this lesson, discuss different ways a poet canbuild the theme or message. Using one particular poem asan example, see how many techniques that support thepoem’s overall meaning students can identify.
Purpose Questions and Line Numbers, pp. 68–69. Be sureto explain to students that purpose questions are not meantto be answered. They are meant to help them read in amore focused way when they are taking the GED test. Ifthey read the poem with the purpose question in mind,they should be able to better prepare to answer the itemsbased on the poem.
Poetry Starters, pp. 70–71. You may want to try groupcomposing as a way to warm up the class to write poetry.Either as a whole class or in small groups, share ideas and create a poem. Then have students try this process on their own.• Reading resource—Poetry Starter, p. 121
GED Review, pp. 72–73. Remind students to read thepoems in the review with the purpose question in mind.You may want to have the class read the first purposequestion and poem in the review aloud, to get started.
Extension Activities
Individual Have your students find their own“favorite poem.” Ask each student to bring acopy of the poem to class, along with a fewsentences about why it is important to them.
You may also want to allow song or rap lyrics.
Group In a binder, collect your students’favorite poems, along with their commentsabout the poems’ significance in their lives.Have students read their favorite poems out
loud to the class, and invite the reactions of other students.Discuss how the same poem can mean something verydifferent to different people.
Online Have students go on LiteracyLink to the Pre-GED section and click Language Arts:Reading: Poetry. Ask students to visit theFavorite Poem Project. If students click on the
link to The Videos, they can watch people from the projecttalk about the poems’ significance to them as well as hearthem read their favorite poems.
PROGRAM 9 LESSON PLAN
Teacher’s GuideP–28
D r a m aL A N G UAGE A RT S , R E A D I N G
1 0
WORKBOOK OVERVIEW
Program Segmentswith approximate time codes
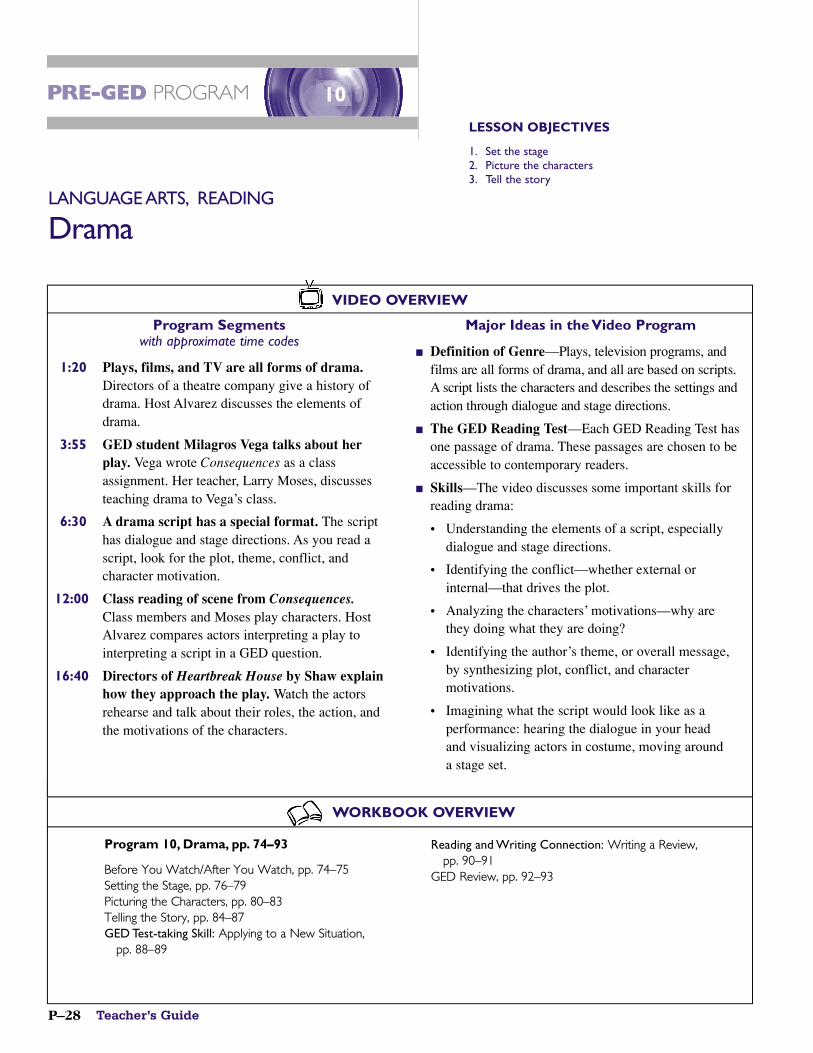
1:20 Plays, films, and TV are all forms of drama.Directors of a theatre company give a history ofdrama. Host Alvarez discusses the elements ofdrama.
3:55 GED student Milagros Vega talks about herplay. Vega wrote Consequences as a classassignment. Her teacher, Larry Moses, discussesteaching drama to Vega’s class.
6:30 A drama script has a special format. The scripthas dialogue and stage directions. As you read ascript, look for the plot, theme, conflict, andcharacter motivation.
12:00 Class reading of scene from Consequences.Class members and Moses play characters. HostAlvarez compares actors interpreting a play tointerpreting a script in a GED question.
16:40 Directors of Heartbreak House by Shaw explainhow they approach the play. Watch the actorsrehearse and talk about their roles, the action, andthe motivations of the characters.
Major Ideas in the Video Program
■ Definition of Genre—Plays, television programs, andfilms are all forms of drama, and all are based on scripts.A script lists the characters and describes the settings andaction through dialogue and stage directions.
■ The GED Reading Test—Each GED Reading Test hasone passage of drama. These passages are chosen to beaccessible to contemporary readers.
■ Skills—The video discusses some important skills forreading drama:
• Understanding the elements of a script, especially dialogue and stage directions.
• Identifying the conflict—whether external or internal—that drives the plot.
• Analyzing the characters’ motivations—why are they doing what they are doing?
• Identifying the author’s theme, or overall message, by synthesizing plot, conflict, and character motivations.
• Imagining what the script would look like as a performance: hearing the dialogue in your head and visualizing actors in costume, moving around a stage set.
VIDEO OVERVIEW
P R E - G E D P RO G R A MLESSON OBJECTIVES
1. Set the stage2. Picture the characters3. Tell the story
Program 10, Drama, pp. 74–93
Before You Watch/After You Watch, pp. 74–75Setting the Stage, pp. 76–79Picturing the Characters, pp. 80–83Telling the Story, pp. 84–87GED Test-taking Skill: Applying to a New Situation,
pp. 88–89
Reading and Writing Connection: Writing a Review, pp. 90–91
GED Review, pp. 92–93
PROGRAM 10 Drama P–29
BeforeYou Watch, pp. 74–75
Preview Lesson Goals on page 74.
Go over Think About the Topic and Prepare toWatch the Video. Encourage students to read and answerthe questions to help them think about the topic of theprogram before they watch it.
Have students read Preview the Questions on page 75 and go over the Terms in the right-hand column.
Show Program 10
After You Watch, p. 75
Have students read the Think About theProgram questions on page 75 and jot downsome thoughts. Discuss the questions with
the students.
Read the Make the Connection prompt to the students. You can use this as a discussion prompt or as a writingassignment.
Lesson Notes
Setting the Stage, pp. 76–79. To introduce this lesson, get a variety of plays from the library. Bring them to class, and pass them around so that students can see thescript of a whole play. Ask them to pick out the featuresdescribed in the video, and ask for their reactions to seeing a whole script.
Picturing the Characters, pp. 80–83. This lesson is bestconducted as a class discussion, including oral readings ofthe scenes. After reading the scenes, ask students whatthey think these characters are like—how they look andtalk. Ask, How would you play out the action in thesescenes if you were acting on stage?
Telling the Story, pp. 84–87. After students have finishedDrama Practices 5 and 6, ask them to define internal andexternal conflict and to give examples from their ownlives. Note that external conflicts are often more obvious.Ask, How does internal conflict reveal itself in real life? In a play?
Applying to a New Situation, pp. 88–89. Be sure to referstudents to the sample passage on page 77 to help themgain more context for answering the question on page 88.Note how Grace’s clothing is described in the stagedirections on page 77. No wonder she whispers as sheconfesses that she has taken off her shoes!
Writing a Review, pp. 90–91. Ask the class to namemovies, plays or TV shows that they have seen recentlythat they felt strongly about—good or bad. Get somediscussion going about a movie, play, or TV show thatmost of the class has seen. Then point out that they arealready generating ideas for their reviews.
GED Review, pp. 92–93. Once again, remind students toread the selection with the purpose question in mind. Havethe class read the first selection aloud, along with thepurpose question, before they try the questions. Have themtry the second selection and questions on their own.
Extension Activities
Individual Ask students to write a scene inwhich two characters are involved in a familyconflict, as in Milagros Vega’s play. Have theminclude dialogue and stage directions.
Group Arrange a class outing to a live play.If this is not possible, show a video or DVD of a theatrical production that shows actorsworking on a stage. For example, your library
may have the Lincoln Center/PBS Great Performancesproduction of Our Town with Spalding Gray and PenelopeAnn Miller (1989). Discuss the differences between astage play and a film.
Online Have students go on LiteracyLink to the Pre-GED section and click Language Arts:Reading: Drama. At this site, students canexplore information about Shakespeare and
the play Romeo and Juliet. Ask students if they would bemore likely to go to a live theatre version of a Shakespeareplay or to a film version, and why.
PROGRAM 10 LESSON PLAN
Teacher’s GuideP–30
P re-GED Social Studies Ove rv i ewThe GED Social Studies Test
The GED Social Studies Test consists of■ Fifty multiple-choice questions in 75 minutes■ Twenty questions, based on text alone; thirty questions based on graphics or a combination
of text and graphics■ Content in the areas of
■ U.S. History■ World History■ Government and Civics■ Economics■ Geography
■ Questions based on the thinking skills of:■ Comprehension■ Application■ Analysis■ Evaluation
LiteracyLink® Pre-GED Social Studies
Adult education learners who are reading at the 6th to 8th grade reading level are most appropriatelyplaced at the Pre-GED level.
Once students have developed a foundation in the social studies content-area knowledge and skills needed to work at the GED level, they can move on to GED Connection: Social Studies and Science.
LiteracyLink® Pre-GED Social Studies materials consist of:
■ Five video programsProgram 11 Themes in U.S. HistoryProgram 12 Themes in World HistoryProgram 13 EconomicsProgram 14 Civics and GovernmentProgram 15 Geography
■ One workbook with corresponding video lessons; each lesson has the following components:Before You Watch/After You Watch video activitiesThree Social Studies Skills sectionsThinking Skills section Graphic Skills sectionGED Practice
■ Online Pre-GED enrichment links at www.pbs.org/literacy
■ Five lesson plans on pages P-32 to P-41 of this guide.
SOCIAL STUDIES Overview P–31
Building Social Studies Content Area Knowledge
In addition to using LiteracyLink® video programs and workbooks, you may wish to use the following resources to help Pre-GED learners build their social studies background knowledge:
■ Use the maps and timelines in the Pre-GED Social Studies Resources (pages 142–144) when you are covering different events to help students get a context of time and place.
■ Develop a classroom lending library of paperback biographies, historical fiction, and nonfiction books about topics in history and geography. (Use this as an opportunity to encourage your students to get library cards for themselves and their families.)
■ Encourage students to watch history or current events programming on PBS and The History Channel.
■ Bring in current newsmagazines such as Time and Newsweek and develop “Story of the Week” activities.
■ Have students bring in the daily paper and have regular discussions on topics related togovernment and economics that affect students’ lives.
Teaching Pre-GED Social Studies Thinking Skills■ Encourage learners to answer GED-type questions by “thinking out loud” and have them
provide support for their answers.■ Use graphic organizers (i.e. Venn diagrams) for thinking skills. If you don’t have any
graphic organizers, you can find lots of sources for graphic organizers on the Internet. Just do a search for “graphic organizers.”
■ Devise higher-order thinking activities based on social studies content. Below are some possible approaches.■ Comprehension: Have students restate a sentence or two in their own words and
summarize a paragraph or an article.■ Application: After you have read an article, discuss: Given what you’ve read,
how would you expect y to act in z situation?■ Analysis: Based on social studies material, ask: What caused x? What was the result
of y? In this commentary, editorial, or review—underline the facts; circle the opinions. Which of the following conclusions are based on this article?
■ Evaluation: Based on social studies material, ask: Which of the following are supported by the information in the article? Graphic? What does the writer believe about “x”? How does that influence what he wrote?
Developing Pre-GED Social Studies Graphic Skills■ Have students make timelines about events in their lives, in the world, and in history.■ Use periodicals such as USA Today and Time magazine for their richness of graphics—
charts, graphs, photos, and diagrams. ■ Have learners write captions for photographs and titles for graphs. This will help the
learner to understand the main idea of a graphic.■ Collect data in the class and have learners graph the data. ■ Discuss best purposes for each type of graph (i.e. circle graph for 100%; bar graphs
for comparisons; and line graphs for trends).
Teacher’s GuideP–32
Themes in U. S . H i s t o rySOCIAL STUDIES
1 1
WORKBOOK OVERVIEW
Program Segmentswith approximate time codes
1:30 Early America was home to many nativesocieties. When Europeans arrived, they broughtdiseases. Their goal of acquiring land and wealthconflicted with the interests of native peoples.
5:05 Jamestown was the first permanent Europeansettlement. Archeological digs have revealed thatthese colonists were militaristic but alsoindustrious.
8:35 A new nation formed in the Revolutionaryperiod. It expanded quickly with the LouisianaPurchase. As white settlers took over the land,native people were uprooted, such as in the Trail of Tears.
15:00 Slavery, the basis of Southern agriculturallabor, divided the nation. The Union won theCivil War with more soldiers and more money.
19:30 The United States has always been a nation ofimmigrants. Waves of immigration from Europeand Asia provided labor for growing industry.
Major Ideas in the Video Program
■ Themes—Major themes in U.S. history include themixing of many cultures, the ideals of individual rights andfreedoms, and the ever-changing nature of everyday life.
■ “New World”—By 1500, Europeans were exploringand colonizing America. They sought gold and othersources of wealth. Colonists were helped by NativeAmericans yet took over their lands and resources.
■ American Revolution—The colonists’ resentmentagainst laws and taxes forced on them by the Britishgovernment led to war.
■ Manifest Destiny—The new nation expanded rapidly,displacing native tribes regardless of previous treaties.The country thought it was destined by God to rule thecontinent.
■ Slavery—Conflicts over economic power and slavery,an integral part of the South’s economy, led to the CivilWar in 1861.
■ Immigration—Immigrant groups provided labor forenormous economic expansion.
■ 20th century—A period of rapid industrial growth,social change, and urbanization with profound impacton daily life.
VIDEO OVERVIEW
P R E - G E D P RO G R A MLESSON OBJECTIVES
1. Understand the birth of the United States and its territorial growth
2. Learn how the nation survived a civil war and grew through immigration
3. Analyze the effects of wars and social movements on the nation’s development
Program 11,Themes in U.S. History,pp. 18–37
Before You Watch/After You Watch, pp. 18–19A New Nation, pp. 20–23A Nation of Immigrants, pp. 24–27A Nation of Change, pp. 28–31Thinking Skill: Comprehend Social Studies Materials,
pp. 32–33
Graphic Skill: Understand Charts and Timelines, pp. 34–35
GED Review, pp. 36–37Social Studies Resources• U.S. History Timeline, p. 143
PROGRAM 11 Themes in U.S. History P–33
BeforeYou Watch, pp. 18–19
Preview Lesson Goals on page 18.
Go over Think About the Topic and Prepare toWatch the Video. Encourage students to read and answerthe questions to help them think about the topic of theprogram before they watch it.
Have students read Preview the Questions on page 18 andgo over the Terms in the right-hand column on page 19.
Show Program 11
After You Watch, p. 19
Have students read the Think About theProgram questions on page 19 and jot downsome thoughts. Discuss the questions with
the students.
Read the Make the Connection prompt to the students. You can use this as a discussion prompt or as a writingassignment.
Lesson Notes
A New Nation, pp. 20–23. An important aspect of thissection is that students must move back and forth betweengraphics and text in order to find information. As yourclass works through this section, help students see how thegraphics and text are related. Discuss the information inthe graphics, and make sure students are accurately“reading” visual information.
A Nation of Immigrants, pp. 24–27. After students havefinished this section, ask about their family histories ofimmigration—why did their families come to America?How many immigrant groups and how many waves ofimmigration are represented by the different “generations”of Americans in your class?
A Nation of Change, pp. 28–31. After students completePractice 5 on page 29, discuss their answers to make surethey are reading the chart correctly. Also make surestudents understand that the answer to question 6 is notgiven in the material; they must infer it.
Comprehend Social Studies Materials, pp. 32–33.Summarizing is a challenging skill. After your class hasfinished this section, give students extra practice insummarizing paragraphs. A good practice technique is toread a paragraph twice—skim first, then read carefully—and then write a summary without looking at the original.
Understand Charts and Timelines, pp. 34–35. Make surethat students are familiar with the organization of chartsand timelines. Point out that it is important to read titles,headings, and labels. Graphics can be misread when thereader does not know what information is being shown. • Social Studies Resource—U.S. History Timeline, p. 143
GED Review, pp. 36–37. Have students complete the firstpassage and check their work. Then discuss the questionsas a class before they begin the second passage. Make surestudents understand that sometimes they must use both thegraphic and the text to answer a question.
Extension Activities
Individual Ask students to conduct oral history interviews with family members orother people they know to learn more aboutdifferent people’s experiences immigrating to
America. Have students write paragraphs or short essaysbased on what they learned in their interviews.
Group As a class, prepare for and shareinformation from students’ oral historyinterviews. The class might decide on a groupof themes or questions that they all want to
explore in their interviews, so that their results will bemore comparable. See if you can create comparison chartsor other visual displays of information from the interviews.
Online Have students go on LiteracyLink tothe Pre-GED section and click Social Studies:Themes in U.S. History. Invite students to readabout the Ellis Island Oral History Project and
to go to the main Ellis Island page. Scattered throughoutthe Ellis Island site are portrait icons where voices fromthe oral history project can be heard.
PROGRAM 11 LESSON PLAN
Teacher’s GuideP–34
Themes in World HistorySOCIAL STUDIES
1 2
WORKBOOK OVERVIEW
Program Segmentswith approximate time codes
1:20 Ancient civilizations began in Mesopotamia,Egypt, and the Indus River Valley. Settled areasin ancient China were also located around rivers.Early civilizations developed irrigation and roadsand trade routes arose.
6:45 Great military leaders formed the empires of the classical world. Alexander the Great and Julius Caesar ruled enormous realms.
10:00 The classical empires gave way to new nation-states. Gunpowder changed the balance of power.Rulers with wealth could form strong armies.
13:35 During the Renaissance, interest in education, the arts, and science flourished. The new printing press was key to the spread of knowledge.
17:25 The Industrial Revolution impacted manyaspects of daily life and work. Agricultural lifegave way to urbanization and mass production.
21:00 The 20th century brought worldwide conflictsand changes.
Major Ideas in the Video Program
■ Early Civilizations—Civilizations arose in rivervalleys in Mesopotamia, Egypt, India, and China, where people could grow a reliable food supply.People worked together to solve irrigation and flooding problems.
■ The Classical World—The ancient Greek and Roman empires are the sources for many of our western intellectual traditions, political systems, and arts and sciences.
■ Renaissance—Another great flowering of intellectualand artistic activity, associated with artists such asMichelangelo and da Vinci, began in Europe in the 1300s.
■ Political Revolutions—The availability of printedmaterial and new ideas about human rights led todemocratic revolutions.
■ Industrial Revolution—Manufacturing technologystimulated economic and social changes. People leftrural areas and crowded into cities to work in the newindustries. The middle class gained importance.
■ 20th century—These 100 years brought technology,political changes, mass communication, a focus onenergy, and scientific advancement.
VIDEO OVERVIEW
P R E - G E D P RO G R A MLESSON OBJECTIVES
1. Understand how civilizations and empires developed2. Trace events that helped lead to the rise of nations3. Analyze how developments in industry, transportation,
and communication changed the world
Program 12,World History, pp. 38–57
Before You Watch/After You Watch, pp. 38–39Civilizations to Empires, pp. 40–43The Rise of Modern Nations, pp. 44–47The Emergence of the Modern World, pp. 48–51Thinking Skill: Applying Social Studies Information,
pp. 52–53
Graphic Skill: Interpret Maps, pp. 54–55GED Review, pp. 56–57Social Studies Resources• World Map, p. 142• World History Timeline, p. 144
PROGRAM 12 Themes in World History P–35
BeforeYou Watch, pp. 38–39
Preview Lesson Goals on page 38.
Go over Think About the Topic and Prepare toWatch the Video. Encourage students to read and answerthe questions to help them think about the topic of theprogram before they watch it.
Have students read Preview the Questions on page 38 andgo over the Terms in the right-hand column on page 39.
Show Program 12
After You Watch, p. 39
Have students read the Think About theProgram questions on page 39 and jot downsome thoughts. Discuss the questions with
the students.
Read the Make the Connection prompt to the students. You can use this as a discussion prompt or as a writingassignment.
Lesson Notes
Civilizations to Empires, pp. 40–43. To introduce thislesson, explain to students that specific factors andconditions are needed in order to support a settledpopulation. See if students can imagine what a group ofpeople might need in order to establish a settlement.
The Rise of Modern Nations, pp. 44–47. After studentshave completed Practice 3 on page 45, be sure to checktheir answers to Part B, which asks students to compareconcepts and terms from European and Japanesefeudalism. Be sure students are drawing parallels correctly,based on their reading of the diagram on page 44.
The Emergence of the Modern World, pp. 48–51. Afterstudents complete this section, help them review theconcepts of imperialism and globalization. Compare andcontrast imperialism and globalization. What worldwidechanges enabled each of them? Who were the winners andlosers as imperialism rose, then fell? • Social Studies Resource—World History Ti m e l i n e , p. 144
Applying Social Studies Information, pp. 52–53. You canintroduce the skill of application by explaining that peopleuse application skills every day. Show students how theyapply knowledge when grocery shopping or choosing abus route. (For example, a common principle that shoppersapply is that large quantities are usually cheaper to buythan small quantities.)
Interpret Maps, pp. 54–55. Make sure that students arefamiliar with the way that information is conveyed on amap. Also stress the importance of reading titles andlegends. Students should not assume that they know whatinformation the map conveys just from glancing at theoverall image—they must read the accompanying text.• Social Studies Resource—World Map, p. 142
GED Review, pp. 56–57. Have students complete the firstpassage and check their work. Then discuss the questionstogether as a class before they begin the second passage.After they have finished the review, discuss questions 7and 8 in particular, reinforcing your earlier instruction onreading maps and applying the information.
Extension Activities
Individual Post a large world map in yourclassroom. Ask students to find and readseveral articles about current events fromaround the world. Have them place pushpins
in the locations featured in their stories.
Group Choose an area of the world that isfrequently featured in current news, such asthe Middle East. Trace that area through themain periods of history outlined in this lesson.
For example, you might ask, What early civilizations werein this area? and, What happened in this area during theperiod of imperialism?
Online Have students go on LiteracyLink tothe Pre-GED section and click Social Studies:Themes in World History. To expand theirunderstanding of world history, this link will
allow students to visit the Hyperhistory website. Therethey can find timelines, events, and maps of many regions.
PROGRAM 12 LESSON PLAN
Teacher’s GuideP–36
E c o n o m i c sSOCIAL STUDIES
1 3
WORKBOOK OVERVIEW
Program Segmentswith approximate time codes
1:35 Economics is the study of how people makechoices in the face of scarcity. Economists study how people weigh the costs and benefits of their options.
4:30 The market system is made up of sellers andbuyers. Prices are set through interactions ofbuyers and sellers. Competition may lower prices.
11:05 Our personal decisions and actions affect theeconomy as a whole. When we save money, usecredit cards, spend, and invest, we contribute tooverall economic activity.
13:30 Labor unions have significantly affected theAmerican economy. Labor unions have theirroots in the Industrial Revolution. Unions allowworkers to negotiate pay and working conditionscollectively.
18:20 Government plays an important role in oureconomy. The government tracks many economicstatistics and adjusts the money supply in order tocontrol inflation.
Major Ideas in the Video Program
■ Economics—Economics involves choices. People weigh costs and benefits to make choices about earning, spending, and saving.
■ Opportunity Cost—An opportunity cost is not beingable to have one thing because you chose to haveanother. Resources are scarce.
■ Market Economy—This is a system in whichindividuals can choose what they buy and sell. A market economy is driven by supply and demand.
■ Competition—Competition occurs when producers vie for consumers or consumers vie for a product.Competition generally leads to the best price for a good or service.
■ Consumer Economics—Consumers earn interest if they save money and pay interest if they buy on credit.
■ Labor Unions—Unions are organizations of workersthat bargain with employers over working conditionsand wages. Unions began because of terrible conditionsin early factories.
■ Government—The U.S. government passes labor andenvironmental laws, regulates businesses, and sets fiscaland monetary policies to slow or speed up the economy.
VIDEO OVERVIEW
P R E - G E D P RO G R A MLESSON OBJECTIVES
1. Learn how people make economic choices aboutusing scarce resources
2. Understand your role as a producer and consumer in the economy
3. Understand the government’s role in the economy
Program 13, Economics, pp. 58–77
Before You Watch/After You Watch, pp. 58–59Basic Concepts in Economics, pp. 60–63Your Role in the Economy, pp. 64–67The Government’s Role in the Economy, pp. 68–71Thinking Skill: Analyze Social Studies Information,
pp. 72–73
Graphic Skill: Understand Graphs, pp. 74–75GED Review, pp. 76–77
PROGRAM 13 Economics P–37
BeforeYou Watch, pp. 58–59
Preview Lesson Goals on page 58.
Go over Think About the Topic and Prepare toWatch the Video. Encourage students to read and answerthe questions to help them think about the topic of theprogram before they watch it.
Have students read Preview the Questions on page 58 andgo over the Terms in the right-hand column on page 59.
Show Program 13
After You Watch, p. 59
Have students read the Think About theProgram questions on page 59 and jot downsome thoughts. Discuss the questions with
the students.
Read the Make the Connection prompt to the students. You can use this as a discussion prompt or as a writingassignment.
Lesson Notes
Basic Concepts in Economics, pp. 60–63. As youintroduce this lesson, remind students that economics isnot an exact science with predictable rules. Ask, Why arepeople’s economic behaviors hard to predict? Reinforcethis point when you discuss opportunity cost.
Your Role in the Economy, pp. 64–67. In Practice 3, Part A, students may need help identifying the producerroles associated with services such as day care andshoveling snow, since material goods are not produced.Even working as a high school counselor is a producerrole, since services are provided to people who need them, and the counselor is paid for her work.
The Government’s Role in the Economy, pp. 68–71. After students complete this section, discuss the economic statistics on pages 70 and 71. Ask how each of these statistics measures something related—directly or indirectly—to our own lives and those of our families,neighbors, cities, etc. See how many examples the classcan think of.
Analyze Social Studies Information, pp. 72–73. Explainthat many issues in economics involve cause-and-effectrelationships. Discuss the causes and effects of an issuethat has had a significant economic impact in your area, a plant shutdown for example. Make a list of reasons forthe shutdown, then list the effects.
Understand Graphs, pp. 74–75. Help your studentsunderstand that different types of graphs are used todemonstrate different things. Have students practicecreating simple graphs based on facts about the classso they can see that you would use a circle graph to showthe age breakdown of the students, but you would use aline graph to plot students’ improvement.
GED Review, pp. 76–77. Have students complete the firstpassage and check their work. Then discuss the questionstogether as a class before they begin the second passage. If necessary, review the differences between a commandeconomy and a market economy. Remind students thatthere is no such thing as a pure market economy;governments are always involved to some extent.
Extension Activities
Individual Ask students to keep a log of their economic activities for a day, asconsumers and producers. They should keeptrack of all decisions that involve allocation
of resources—money, time, materials, space, etc.
Group As a class, prepare a format for thestudents to individually log their economicactivities. Brainstorm categories and examplesof the types of activities students should keep
track of. After the logs come in, create graphs to compareand display the data that the students have brought in.
Online Have students go on LiteracyLink tothe Pre-GED section and click Social Studies:Economics. For a real-life exercise in economicdecision-making, students can try out a case
study about a couple who wants to puchase a home.
PROGRAM 13 LESSON PLAN
Teacher’s GuideP–38
Civics and Gove r n m e n tSOCIAL STUDIES
1 4
WORKBOOK OVERVIEW
Program Segmentswith approximate time codes
1:50 The U.S. government is based on theConstitution. Early in our history, the originalArticles of Confederation were replaced by theConstitution. We have a federalist governmentwith legislative, executive, and judicial branches.
8:15 The Bill of Rights was added to theConstitution in order to ensure individualrights. The Bill of Rights lists the rights andfreedoms we are given as citizens of this country.
11:45 Brown v. Board of Education was a milestonein civil rights. The courts have had a major rolein desegregating schools and establishing votingrights for African-Americans. Because of theamendment process, the Constitution evolvesalong with our nation.
15:25 Citizenship brings rights and responsibilities.Citizens shouldn’t take their rights to vote andparticipate in the political process for granted.Immigrants go through an arduous process tobecome citizens.
Major Ideas in the Video Program
■ U.S. Constitution—The Constitution balances politicalpower between the states and the federal government. Italso provides checks and balances among the threebranches of the federal government:
• Legislative—The two houses of Congress make laws. The Senate approves treaties, and the House of Representatives levies taxes.
• Executive—The president heads the executive branch, provides policy leadership, appoints federal judges, and can veto bills passed by Congress.
• Judicial—The federal courts enforce the nation’slaws. The Supreme Court may rule that a law is unconstitutional.
■ Bill of Rights—The first 10 amendments to theConstitution establish fundamental freedoms for all U.S. citizens.
■ Juries—Citizens have the right to a trial by jury ifaccused of a crime. Juries must evaluate the evidenceand decide guilt.
■ Amending the Constitution—The process of changingthe Constitution is not easy. Wide national consensus isneeded for a change.
VIDEO OVERVIEW
P R E - G E D P RO G R A MLESSON OBJECTIVES
1. Learn about the structure of government and thesystem of checks and balances
2. Understand the rights and responsibilities of citizens3. Understand how political parties, special interest
groups, and voters influence public policy
Program 14, Civics and Government,pp. 78–97
Before You Watch/After You Watch, pp. 78–79The Structure of Government, pp. 80–83The Rights and Responsibilities of Citizens,
pp. 84–87Politics, pp. 88–91
Thinking Skill: Analyze Social Studies Information,pp. 92–93
Graphic Skill: Understand Editorial Cartoons, pp. 94–95
GED Review, pp. 96–97
PROGRAM 14 Civics and Government P–39
BeforeYou Watch, pp. 78–79
Preview Lesson Goals on page 78.
Go over Think About the Topic and Prepare toWatch the Video. Encourage students to read and answerthe questions to help them think about the topic of theprogram before they watch it.
Have students read Preview the Questions on page 78 andgo over the Terms in the right-hand column on page 79.
Show Program 14
After You Watch, p. 79
Have students read the Think About theProgram questions on page 79 and jot downsome thoughts. Discuss the questions with
the students.
Read the Make the Connection prompt to the students. You can use this as a discussion prompt or as a writingassignment.
Lesson Notes
The Structure of Government, pp. 80–83. To reinforce theinformation in the chart on page 81, talk about a currentissue in the news. Ask, What is the role of each branch inrelation to this current issue? What else could each branchd o ? Explain that the system of checks and balances isfundamental to the actions our government chooses to take.
The Rights and Responsibilities of Citizens, pp. 84–87.After students have read this section, ask them to talkabout how their first-hand experiences with thegovernment and legal system compare with what theyhave read.
Politics, pp. 88–91. Many people think that the role of“special interest groups” in politics is bad. However, mostpeople also belong to or support an organization or a goalthat could be labeled as a “special interest.” Ask, Are anyof your political interests promoted by particular groups?Do you belong to this group? Should these groups’political influence be limited?
Analyze Social Studies Information, pp. 92–93. Remindstudents that a fact is something that can be verified insome way—you can look it up, you can count it, etc. An“opinion” might be a smart guess, a hypothesis, a belief,or a position. The assertion on page 93, that making voterregistration easier will improve voter turnout, could bedescribed as a hypothesis. Ask students how they wouldtest this hypothesis. What facts could emerge from testingthe hypothesis?
Understand Editorial Cartoons, pp. 94–95. To helpstudents learn to interpret editorial cartoons, have them try to explain what is going on in the picture. Explain that cartoonists have specific messages they are trying toget across, but these messages may not be directly stated.Students should look for exaggeration, symbols, and other features of the picture for clues to the message.
GED Review, pp. 96–97. Questions 3–5 involve applicationskills. After students have completed the review, discussthese questions. Students should understand how applicationquestions ask them to extend a principle or concept fromone situation to another situation.
Extension Activities
Individual Ask your students to write about their views on voting and citizenship,particularly in response to the views expressedin the video program. Do they vote? Why or
why not? Do they believe that U.S.-born citizens takecitizenship for granted?
Group As a class, research the process ofbecoming a U.S. citizen. What does animmigrant have to do, learn, and/or prove inorder to become a citizen? Who is eligible,
who is not eligible, and why? What advice would yourclass give to someone who wanted to become a citizen?
Online Have students go on LiteracyLink tothe Pre-GED section and click Social Studies:Civics and Government. Ask your students tovisit the linked website and see how well they
do on the questions asked on the U.S. citizenship test.
PROGRAM 14 LESSON PLAN
Teacher’s GuideP–40
G e o g r ap hySOCIAL STUDIES
1 5
WORKBOOK OVERVIEW
Program Segmentswith approximate time codes
1:45 Geography is the study of the relationshipsbetween people and places. Geography borrowsideas and information from many other fields; it’san “integrative” science. The idea of place is“location plus meaning”—a place is more thanjust a physical point.
6:00 Geographers study how people both adapt toand change the landscape. Phoenix grew into amajor city only after air conditioning becamecommon. People are working to restore theFlorida Everglades to their natural balance.
13:20 Geographic Information Systems are a high-tech extension of traditional maps. GIS systems use computers to store and analyze geographic data.
19:30 All locations in the world can be identified bylatitude and longitude. The Global PositioningSystem reports locations in reference to a networkof satellites. The Degree Confluence Projectdocuments intersections of longitude and latitude lines.
Major Ideas in the Video Program
■ Geography—Geography is an integrative scienceconcerned with the nature of the earth and humanhabitation of the earth.
■ Geography and Identity—People identify stronglywith places they feel connected to.
■ Human Activity—People adapt to their physicalenvironment, but they also try to make their lives easier by changing it.
■ Environmental Impact—Human activity has resultsthat we can’t always predict. Air and water quality andecosystems can be damaged. Humans are harmed if theearth is harmed.
■ Technology—Geographers use tools such asGeographic Information Systems (GIS), a computerizedmapping system, and the Global Positioning System(GPS) of satellites to find and record data.
■ Maps—The two basic types of maps are topographicmaps, which show an area’s surface features, andthematic maps, which can display any informationrelated to geography, such as historic migration routes.
■ Latitude and Longitude—The basic grid system formapping positions on the earth.
VIDEO OVERVIEW
P R E - G E D P RO G R A MLESSON OBJECTIVES
1. Learn how places are shown on maps2. Locate and describe major world regions3. Learn how people interact with their environment
Program 15, Geography, pp. 98–117
Before You Watch/After You Watch, pp. 98–99The World in Maps, pp. 100–103World Regions, pp. 104–107People and the Environment, pp. 108–111Thinking Skill: Evaluate Social Studies Information,
pp. 112–113
Graphic Skill: Interpret Maps, pp. 114–115GED Review, pp. 116–117
PROGRAM 15 Geography P–41
BeforeYou Watch, pp. 98–99
Preview Lesson Goals on page 98.
Go over Think About the Topic and Prepare toWatch the Video. Encourage students to read and answerthe questions to help them think about the topic of theprogram before they watch it.
Have students read Preview the Questions on page 98 andgo over the Terms in the right-hand column on page 99.
Show Program 15
After You Watch, p. 99
Have students read the Think About theProgram questions on page 99 and jot downsome thoughts. Discuss the questions with
the students.
Read the Make the Connection prompt to the students. You can use this as a discussion prompt or as a writingassignment.
Lesson Notes
The World in Maps, pp. 100–103. To introduce this lesson,ask students to imagine how they would draw a map oftheir neighborhood. How would they keep the scale of themap accurate? This was the same challenge mapmakersfaced when they invented latitude and longitude.
World Regions, pp. 104–107. To introduce thehemispheres, use a globe as a tool. Explain that ahemisphere is half of a sphere, or half of the globe. Have students name countries that they have heard about or that they are connected to, and identify whathemisphere they are in.
People and the Environment, pp. 108–111. After studentshave completed this section, ask them to name ways inwhich people have changed the physical features of yourlocal area, as well as ways in which people have adapted toliving there. Also ask them how natural resources in yourarea have been exploited for economic, social, or culturalreasons. See how many examples of each you can list.
Evaluate Social Studies Information, pp. 11 2 – 113. In the context of the GED Social Studies Test, evaluationquestions ask students to identify the status of informationor judgements—whether a statement is factual, whether it issupported by given information, whether it can be justifiedaccording to given criteria. These are difficult questions.Discuss the examples on these pages with your students.
Interpret Maps, pp. 114–115. Remind students that whilesome maps show navigation and physical location, othersare used to display various types of information. The mapson these pages provide a good contrast along these lines.One map displays population growth, while the othersfocus on location and physical features.
GED Review, pp. 116–117. After students have completedthe review, remind them of the story in the video programabout the man who figured out the source of a Londoncholera epidemic. Ask, How does that story compare withquestion 5 about the spread of sleeping sickness? If youwere a medical geographer, what else would you want tofind out in order to understand the spread of sleepingsickness?
Extension Activities
Individual Ask students to create two differenttypes of maps of their neighborhoods—oneemphasizing physical features, and anotherthat displays a specific type of data, such as
residential versus commercial areas. Each map shouldhave all necessary elements.
Group As a class, collect maps of your town or city. Compare them to see how maps for different purposes are designed.
Online Have students go on LiteracyLink tothe Pre-GED section and click Social Studies:G e o g r a p h y. Your students will be linked to theMapquest site. They should enter their home
address. Ask them to compare the driving directions for a familiar route to the route selected by the web site’smapping program. How would they explain any diff e r e n c e s ?How might these differences relate to geographers’ i d e a sabout “place”?
PROGRAM 15 LESSON PLAN
Teacher’s GuideP–42
P re-GED Science Ove rv i ewThe GED Science Test
The GED Science Test consists of: ■ Fifty multiple-choice questions in 80 minutes■ Twenty-five questions based on text alone; twenty-five questions based on graphics or a
combination of text and graphics■ Content in the areas of:
■ Life Science■ Earth and Space Science■ Chemistry■ Physics
■ Questions based on the thinking skills of:■ Comprehension■ Application■ Analysis■ Evaluation
■ Many questions are based on general themes described in the National Science EducationStandards (NSES):■ Science as Inquiry■ Science and Technology■ Science in Personal and Social Perspectives■ History and Nature of Science■ Unifying Concepts and Processes
LiteracyLink® Pre-GED Science
Adult education learners who are reading at the 6th–8th grade level are most appropriately placed at thepre-GED level. Once students have developed a foundation in the science content-area knowledge andskills needed to work at the GED level, they can move on to GED Connection: Science.
■ Four video programs:Program 16 Life ScienceProgram 17 Earth and Space ScienceProgram 18 ChemistryProgram 19 Physics
■ One workbook with corresponding video lessons; each lesson has the following components:Before You Watch/After You Watch activitiesThree Science Skills sectionsThinking Skills section Graphic Skills sectionGED Practice
■ Online pre-GED enrichment links at www.pbs.org/literacy
■ Four lesson plans on pages P-44 to P-51 of this guide
SCIENCE Overview P–43
Building Scientific Knowledge
In addition to using the LiteracyLink® video programs and workbook, you may wish to use the following resources to help pre-GED learners build their science background knowledge:
■ Use the tables, charts, and diagrams in the Pre-GED Science Resources (pages 122–127) when discussing topics such as DNA, the scientific method, or the periodic table of elements.
■ Encourage students to watch scientific or health programs on PBS, The Learning Channel, and The Discovery Channel.
■ If students have access to the Internet, have them investigate NASA’s web site athttp://www.NASA.gov.
■ Bring in current newsmagazines such as Time and Newsweek and discuss science-related topics.■ Some newspapers have daily or weekly health columns. Have regular discussions on topics that
might affect students’ lives.
Teaching Thinking Skills with Text and Graphics■ Help students learn how to effectively read diagrams, graphs, and charts. Emphasize the
importance of reading titles, keys, and labels. Make sure that they know how to follow the cause-effect cycle in a diagram.
■ Devise higher-order thinking activities based on science content. Below are some possible approaches.■ Comprehension: Have students restate a sentence or two in their own words or
summarize a paragraph or an article. ■ Application: Bring in articles about results in studies of nutrition or the effects of
different types of medication. Discuss how this new information might be used to address real-life issues.
■ Analysis: Science content is replete with situations for analysis. Have students focus on cause-effect relationships. Have them brainstorm a cause-effect relationship for each of the content areas: life science, earth and space science, chemistry, and physics.
■ Evaluation: Based on science material, have students judge the accuracy of scientific information or methods used.
Introducing the Scientific Method
Familiarize students with the steps in the scientific method. For more detailed information, refer students to Science Resources on page 126 in the Pre-GED Science Connection workbook.
Step 1. Identify a problemStep 2. Collect informationStep 3. Form a hypothesis based on the information gatheredStep 4. Test the hypothesisStep 5. Draw conclusions based on the data that was collected
Teacher’s GuideP–44
L i fe ScienceS C I E N C E
1 6
WORKBOOK OVERVIEW
Program Segmentswith approximate time codes
1:45 All organisms are made up of cells. BiochemistMaria Ghirardi explains cell structure and howorganisms receive energy through photosynthesis.
6:05 The organisms in an ecosystem are dependent on one another. An ecosystem is a complexcommunity much like a large city in which people depend on each other for services.
9:00 DNA is the molecule that contains geneticinformation. Scientists explain DNA and thesignificance of the Human Genome Project.
15:50 Farmers use genetics to improve livestock lines. A farm manager explains how farmers breeddesirable characteristics in domestic animals.
18:40 Evolution theory helps to explain the fossilrecord. A paleontologist shows how evolutiontheory helps to explain the history of life onEarth.
20:50 Ecosystems are fragile. Pollution can disturb the sensitive relationships in an ecosystem.
Major Ideas in the Video Program
■ Cells—All organisms are made up of the cell, the basic unit of life. Plant and animal cells havedifferences in structure.
■ Ecosystems—There are complex relationships anddependencies among the organisms in an ecosystem.
■ Photosynthesis—An ecosystem receives its energyfrom the sun through photosynthesis. The cells of green plants capture energy from sunlight and turn it into food for other organisms.
■ Genetics—Our understanding of DNA, the buildingblock of life, allows us to develop treatments for genetic conditions.
■ Evolution—Fossils provide evidence for evolution, the change in organisms over time.
■ Ecology—Human activity can have a great impact on ecosystems. For example, pesticides and otherpollutants can enter the food web and start a destructive chain reaction in an ecosystem.
VIDEO OVERVIEW
P R E - G E D P RO G R A MLESSON OBJECTIVES
1. Understand cell structures and functions2. Learn how the human body works as a system3. Analyze the impact of people on the environment
Program 16, Life Science, pp. 18–37
Before You Watch/After You Watch, pp. 18–19Cells—The Building Blocks of Life, pp. 20–23Human Body Systems, pp. 24–27Ecosystems and the Environment, pp. 28–31GED Thinking Skill: Comprehend Science Materials,
pp. 32–33
GED Graphic Skill: Understand Diagrams, pp. 34–35
GED Review: Life Science, pp. 36–37Science Resources, pp. 122–127
PROGRAM 16 Life Science P–45
BeforeYou Watch, p. 18
Preview Lesson Goals on page 18.
Go over Think About the Topic and Prepare toWatch the Video. Encourage students to read and answerthe questions to help them think about the topic of theprogram before they watch it.
Have students read Preview the Questions on page 19 andgo over the Terms in the right-hand column.
Show Program 16
After You Watch, p. 19
Have students read the Think About theProgram questions on page 19 and jot downsome thoughts. Discuss questions and responses
with the students.
Read the Make the Connection prompt to the students. You can use this as a discussion prompt or as a writingassignment.
Lesson Notes
Cells—The Building Blocks of Life, pp. 20–23. Askstudents to compare a cell to a factory. Ask students todetermine which parts of a factory are most like the partsof a cell. Example: The nucleus is like the main officewhere decisions are made.
Human Body Systems, pp. 24–27. After students havecompleted this section, say, Asthma is a condition thatprimarily affects the respiratory system. Based on yourwork in this section, what other body systems might alsobe affected? Discuss student responses.
Ecosystems and the Environment, pp. 28–31. Present thissituation: A mining operation threatens several species oftrees and plants. What arguments could you use toconvince a friend that preserving plant life may be moreimportant than the mining operation? Discuss.
Comprehend Science Materials, pp. 32–33. Explain that ina science passage, facts are often used to support or“prove” the main idea. Have students refer to the passageat the top of page 33. Ask, What facts does the author useto support the main idea in choice 1?
Understand Diagrams, pp. 34–35. Explain that someprocess diagrams have many arrows. To interpret them, it may help to work backwards. Choose a place wheremany arrows end, then follow the arrows backwardsthrough the diagram. Have students try this using the food web diagram on page 34. Have students find as many different backward chains as they can, working from the seagull to the sun.
GED Review: Life Science, pp. 36–37. Go over the basicstructure of items 1 and 2. Explain that many GED scienceitems will have a reading passage and a diagram. Point outthat this same information will often be used to answerseveral questions. Explain that it may be necessary to goback to the diagram and passage several times to answerthe questions.
Extension Activities
Individual Now that students have seen howcharts and diagrams can be used to supportscientific ideas, have them use facts to supporttheir own ideas. Have each student study the
table on page 31 and think of one conclusion that he or shecan support using the facts from the table. Invite severalstudents to share their ideas with the class.
G roup Have students meet in small groups todiscuss their immediate environment and theire ffect on it. Students can create a small posterof ideas for taking care of their own ecosystem.
Online Have students go on LiteracyLink to the Pre-GED section and click Science:Life Science. Have students explore theinteractive demonstrations and cell art gallery.
PROGRAM 16 LESSON PLAN
Teacher’s GuideP–46
E a rth and Space ScienceS C I E N C E
1 7
WORKBOOK OVERVIEW
Program Segmentswith approximate time codes
1:35 Earthquakes are caused by movements of theearth’s plates. Scientists Patterson and Ellisexplain plate tectonics.
9:35 Scientific theory may explain the origin of theearth. A teacher shows how the earth’s origin andits relationship to the sun explain why the earth isinhabitable.
11:30 Cycles provide clues as to how earth systemswork. A teacher explains the rock cycle.
14:00 Life on earth depends on fresh water. WintfredSmith, a biologist, explains the water cycle.
17:35 The tracking of weather systems helps uspredict the weather. Scientist Kenny Priddyexplains meteorology, the science of weather andhow forecasts are made.
21:30 Some sources of energy are renewable.Scientists explain that solar energy and windpower are sources of renewable energy.
Major Ideas in the Video Program
■ Plate Tectonics—The earth’s crust is divided into rigid plates. Plate movement may cause earthquakes and volcanoes.
■ Changing Planet—Our earth is constantly changing. It developed an atmosphere and other conditions thatcould support life because of its distance from the sun.
■ Rock Cycle—Rocks form and reform as they gothrough the rock cycle. The rock cycle helps usdetermine the history of a rock and its place in theearth’s history.
■ Water Cycle—Life depends on fresh water.Water goes through a cycle as it moves through theenvironment, replacing our fresh water supplies.
■ Weather—Weather is caused by the movement of large air masses over land and water.
■ Energy Resources—Nonrenewable energy sources are extracted and used up, but renewable energysources, such as wind and solar power, exist in an endless supply.
VIDEO OVERVIEW
P R E - G E D P RO G R A MLESSON OBJECTIVES
1. Learn about the different ways that Earth changes2. Think about how people use Earth’s resources3. Understand Earth’s place in the solar system
Program 17, Earth and Space Science,pp. 38–57
Before You Watch/After You Watch, pp. 38–39The Changing Earth, pp. 40–43People and the Environment, pp. 44–47The Solar System and the Universe, pp. 48–51
GED Thinking Skill: Apply Science Information, pp. 52–53
GED Graphic Skill: Understand Graphs, pp. 54–55GED Review: Earth and Space Science, pp. 56–57Science Resources, pp. 122–127
PROGRAM 17 Earth and Space Science P–47
BeforeYou Watch, p. 38
Preview Lesson Goals on page 38.
Go over Think About the Topic and Prepare toWatch the Video. Encourage students to read and answerthe questions to help them think about the topic of theprogram before they watch it.
Have students read Preview the Questions on page 39 and go over the Terms in the right-hand column.
Show Program 17
After You Watch, p. 39
Have students read the Think About theProgram questions on page 39 and jot downsome thoughts. Discuss questions and
responses with the students.
Read the Make the Connection prompt to the students. You can use this as a discussion prompt or as a writingassignment.
Lesson Notes
The Changing Earth, pp. 40–43. After students havecompleted this section, ask, Why is it difficult to predictthe weather more than a few days in advance? Emphasizethat the conditions at a front change quickly.
People and the Environment, pp. 44–47. Have studentsreview the graph on page 44 and ask, What can we do toencourage people to use renewable sources of energy?Have students brainstorm a list of suggestions that couldbe used to promote using renewable sources.
The Solar System and the Universe, pp. 48–51. Havestudents write a one-paragraph response to the followingquestion: How can understanding more about planets,stars, and galaxies help us on Earth? Discuss students’responses.
Apply Science Information, pp. 52–53. Present these facts:A solar panel converts solar energy to electricity. Solarpanels are very expensive. If you make more electricitythan you need for your home, you can sell it to the powercompany. Ask, What factors would you consider indeciding whether to install a solar panel on your roof?
Understand Graphs, pp. 54–55. Emphasize the importanceof reading the title and labels on a graph. The title andlabels help you understand what the graph is about.Discuss whether you can answer the following questionbased on the graph on page 54: What magnitude ofearthquake during 2002 did the most damage? Since thegraph does not include damage figures, there is not enoughinformation to answer this question.
GED Review: Earth and Space Science, pp. 56–57. Many GED science items are based solely on a graph ordiagram. Encourage students to read titles and labels firstto understand what the graphic is about, and then answerthe questions.
Extension Activities
Individual Assign students to watch atelevision weather report and pay closeattention to the weather maps used. Discuss:How are fronts and weather systems shown
on maps? What other weather tools did the newspersonuse to justify his or her forecast?
Group For more practice in using graphics,have each student choose a graphic from the section and write one test question. Have students present their questions to
each other in small groups.
Online Have students go on LiteracyLink to the Pre-GED section and click Science:E a rth and Space Science. Have students readand explore an introduction to plate tectonics.
PROGRAM 17 LESSON PLAN
Teacher’s GuideP–48
C h e m i s t ryS C I E N C E
1 8
WORKBOOK OVERVIEW
Program Segmentswith approximate time codes
1:15 People in many professions use chemistry.An artist explains the chemical makeup andproperties of glass and the effects of heat.
4:30 Substances are combined in mixtures andcompounds. A chemistry teacher explains the meaning of atoms, elements, mixtures,and compounds.
10:05 The properties of substances can be changedby a chemical reaction. A teacher demonstrates a chemical reaction using sugar and sulfuric acid,and author Harold McGee demonstrates achemical reaction in the kitchen.
15:50 The periodic table organizes elements byatomic number and properties. Chemistryprofessors explain reactive and non-reactiveelements from the periodic table.
21:15 Chemistry has many practical applications.A chemist helps us understand the properties of wood. In another application, chemistry is used in the cleanup of polluted groundwater.
Major Ideas in the Video Program
■ Matter—Chemistry is the study of the composition and properties of matter. Matter takes up space and has mass. Its three states are solid, liquid, and gas.
■ Mixture and Compounds—When two substancescombine without changing their composition, the result is a mixture. When substances combinechemically, the result is a compound.
■ Atoms—All matter is made up of atoms.
■ Chemical Reaction—A chemical reaction occurs when elements combine, break down, or rearrangechemically. Cooks use chemical reactions to prepare food.
■ Periodic Table—A chart that organizes elements by their atomic numbers and properties.
■ Practical Uses—Chemists analyze matter to understand the substances around us. This knowledge is used to improve the quality of our lives.
VIDEO OVERVIEW
P R E - G E D P RO G R A MLESSON OBJECTIVES
1. Understand the nature and states of matter2. Define and identify elements, mixtures, and
compounds3. Recognize different types of chemical reactions
Program 18, Chemistry, pp. 58–77
Before You Watch/After You Watch, pp. 58–59Matter: What Everything Is Made Of, pp. 60–63Elements, Compounds, and Mixtures, pp. 64–67Chemical Reactions, pp. 68–71GED Thinking Skill: Analyze Science Information,
pp. 72–73
GED Graphic Skill: Understand Charts and Tables,pp. 74–75
GED Review: Chemistry, pp. 76–77Science Resources, pp. 122–127
PROGRAM 18 Chemistry P–49
BeforeYou Watch, p. 58
Preview Lesson Goals on page 58.
Go over Think About the Topic and Prepare toWatch the Video. Encourage students to read and answerthe questions to help them think about the topic of theprogram before they watch it.
Have students read Preview the Questions on page 59 andgo over the Terms in the right-hand column.
Show Program 18
After You Watch, p. 59
Have students read the Think About theProgram questions on page 59 and jot downsome thoughts. Discuss questions and
responses with the students.
Read the Make the Connection prompt to the students. You can use this as a discussion prompt or as a writingassignment.
Lesson Notes
Matter: What Everything Is Made Of, pp. 60–63. Havestudents compare and contrast the properties of salt andwhite flour. If possible, bring a small portion of salt andflour for students to examine.
Elements, Compounds, and Mixtures, pp. 64–67. Explainthat concrete is made from lime, water, sand, and gravel.Ask, Is concrete a compound or a mixture? (mixture) Howdo you know? (The ingredients can be separated again.)
Chemical Reactions, pp. 68–71. Ask, Which of theseexamples is a chemical reaction? (a) a silver spoontarnishes because it is exposed to sulfur in the air or (b)an iron rod becomes magnetized from contact with amagnet? Discuss students’ reasoning. The first is correctbecause a new substance is produced—tarnish.
Analyze Science Information, pp. 72–73. Discuss: Supposeyou put oil, vinegar, and spices in a container to makesalad dressing. You shake the bottle to mix the ingredientsthoroughly. The next day, you see that the ingredients haveseparated. The spices are on the bottom, the oil is in themiddle, and the vinegar is floating on top. What can youconclude from this result? Discuss students’ responses.
Understand Charts and Tables, pp. 74–75. Have studentsreview the table on page 69. Ask, What kind of reaction is produced when you strike a match? (exothermic) Have students explain how they used the table to answerthe question.
GED Review: Chemistry, pp. 76–77. Point out that the tablefor questions 4 and 5 contains a great deal of information.Suggest that students preview the questions before they spendtoo much time reading each box on the table.
Extension Activities
Individual To help students gain a greaterappreciation for the practical uses ofchemistry, have them think of ten productsthey use in their homes that were developed
through chemistry. (Some possible answers: hair products,medicines, plastics, and cleaning products) Have studentsshare ideas with the class.
Group Have students work in small groups to identify properties of various liquidsubstances. (Examples: soda pop, shampoo,motor oil) Groups can present properties to
the class and have the class guess which substance thegroup has described.
Online Have students go on LiteracyLink to the Pre-GED section and click Science:C h e m i s t ry. Have students explore theinteractive tutorial Carbon is 4 Ever.
PROGRAM 18 LESSON PLAN
Teacher’s GuideP–50
P hy s i c sS C I E N C E
1 9
WORKBOOK OVERVIEW
Program Segmentswith approximate time codes
1:30 Motion is explained by Newton’s laws.A physics teacher describes energy as it applies to a roller coaster.
7:10 Newton’s laws of motion are applied in space flight. Rocket scientists discuss thrust, drag, gravity, and velocity.
10:00 Waves carry energy. Physics teacher/performerLynda Williams explains sound waves, frequency,pitch, and cycles.
13:40 Physics is applied in the field of acoustics. A technician and sound designer discuss acoustic considerations in setting up a show.
18:10 Electricity is produced by a moving magneticfield. Engineer Janet Lumpp explains therelationship between electricity and magnetism.
22:10 A magnetic field can produce images. MRItechnology allows doctors to see image “slices” of tissues inside the human body.
Major Ideas in the Video Program
■ Conservation of Energy—The law of conservation ofenergy says that energy is neither created nor destroyed;instead, it is converted from one form to another.
■ Potential and Kinetic Energy—Potential energy is the energy of position; kinetic energy is the energy of motion.
■ Newton’s Laws of Motion—(1) Objects maintain their state of rest or motion unless acted upon by anoutside force. (2) When a force acts upon an object, the object accelerates in the direction of the force. (3) Every action has an equal and opposite reaction.
■ Sound—Sound is a wave. Waves have crests andtroughs. Wavelength is the distance between identicalpoints on successive waves.
■ Electromagnetism—Electricity and magnetism arerelated. The electromagnetic spectrum consists of waves of varying lengths, from radio waves to visiblelight to gamma rays.
VIDEO OVERVIEW
P R E - G E D P RO G R A MLESSON OBJECTIVES
1. Learn the relationships among motion,work, and energy
2. Understand different types of waves3. Know what magnetism and electricity are
and how they interact
Program 19, Physics, pp. 78–97
Before You Watch/After You Watch, pp. 78–79Motion, Work, and Energy, pp. 80–83Waves, pp. 84–87Magnetism and Electricity, pp. 88–91GED Thinking Skill: Evaluate Science Information,
pp. 92–93
GED Graphic Skill: Understand Diagrams, pp. 94–95
GED Review: Physics, pp. 96–97Science Resources, pp. 122–127
PROGRAM 19 Physics P–51
BeforeYou Watch, p. 78
Preview Lesson Goals on page 78.
Go over Think About the Topic and Prepare toWatch the Video. Encourage students to read and answerthe questions to help them think about the topic of theprogram before they watch it.
Have students read Preview the Questions on page 79 andgo over the Terms in the right-hand column.
Show Program 19
After You Watch, p. 79
Have students read the Think About theProgram questions on page 79 and jot downsome thoughts. Discuss questions and responses
with the students.
Read the Make the Connection prompt to the students. You can use this as a discussion prompt or as a writingassignment.
Lesson Notes
Motion, Work, and Energy, pp. 80–83. Have students write a paragraph explaining how a child on a swingdemonstrates both potential and kinetic energy.Discuss: Why does the swing slow down? What forces act on the swing?
Waves, pp. 84–87. Ask, Using what you have learnedabout sound waves and how they travel, what causes anecho? Follow-up question: Why don’t we hear echoes allthe time? Answer: To hear an echo, the sound must bounceoff a smooth object at least 75 meters away. Other soundsmust be absorbed. Snow is a good insulator.
Magnetism and Electricity, pp. 88–91. Refer to thedrawing of a circuit on page 90. Review that the light bulbis a resistor. Ask, Why does the light bulb light glow?Answer: As electrons are forced through the resistor, itheats up (energy conservation) and glows.
Evaluate Science Information, pp. 92–93. Scientists must carefully build an argument of facts to support a conclusion. Caution students against jumping toconclusions. Discuss: In elementary school, taller children know more math. Can you conclude that being taller causes a child to be good at math?
Understand Diagrams, pp. 94–95. Have each studentcreate a diagram of an imaginary fender bender(automobile accident). Students should use arrows to showthe forces at work. Diagrams should show where the carswere before impact, at the point of impact, and after theaccident. Display each diagram and see whether otherstudents can reconstruct the event from the diagram.
GED Review: Physics, pp. 96–97. If students encounterunfamiliar vocabulary, encourage them to use the contextof the passage and questions to discover the meaning.
Extension Activities
Individual Bring a flashlight to class and take it apart, showing its individual pieces.Have students write a description of how a flashlight works using their knowledge
of electrical circuits.
Group Have students refer to the table on page 81 of Newton’s Laws of Motion.Working in small groups, have them discuss how the three laws might apply to a
passenger riding in a car.
Online Have students go on LiteracyLink to the Pre-GED section and click Science:Physics t o explore the world of physics.
PROGRAM 19 LESSON PLAN
Teacher’s GuideP–52
P re-GED Mathematics Ove rv i ewThe GED Mathematics Test
The GED Mathematics Test consists of: ■ Fifty questions in 90 minutes■ Forty multiple-choice questions; ten alternate-format questions (eight standard grids and two
coordinate grids to be filled in)■ Fifty percent of the questions are based on graphics■ Two parts to the test: Part I allows the use of a scientific calculator; Part II does not■ Content in the areas of:
■ Number Operations and Number Sense■ Data Analysis, Statistics, and Probability■ Algebra, Functions, and Patterns■ Measurement and Geometry
■ Questions based on the following cognitive areas:■ Procedural■ Conceptual■ Application/Modeling/Problem Solving
LiteracyLink® Pre-GED Mathematics
Adult education learners who are reading at the 6th – 8th grade level are most appropriately placed at thepre-GED level. Once students have developed a foundation in the math and problem-solving skills neededto work at the GED level, they can move on to GED Connection: Mathematics.
■ Seven video programs:Program 20 Number SenseProgram 21 Problem SolvingProgram 22 DecimalsProgram 23 FractionsProgram 24 Ratio, Proportion, and PercentProgram 25 MeasurementProgram 26 Data Analysis
■ One workbook with corresponding video lessons; each lesson has the following components:Before You Watch/After You Watch activitiesThree Mathematics Skills sectionsProblem-Solving Skills section Math Connection sectionGED Practice
■ Online pre-GED enrichment links at www.pbs.org/literacy
■ Seven lesson plans on pages P-54 to P-67 of this guide.
MATHEMATICS Overview P–53
Developing Computation and Estimation Skills
In addition to using the LiteracyLink® video programs and workbook lessons, you may wish to use thefollowing resources to help pre-GED learners build their math skills:
■ Use the Math Skills Practice (pages 160–187) in the Pre-GED Mathematics Connectionworkbook to provide additional skill practice.
■ Encourage students to watch for uses of data analysis and percents on local news programs.■ Bring in current newsmagazines such as Time and Newsweek and discuss some of the graphs:
their titles, labels, and keys. Prompt students to draw reasonable conclusions about the data that can be supported by the graph.
■ The sports section in newspapers provides a wealth of numbers and statistics. Have studentsestimate current standings and statistics.
Teaching Problem Solving
Help students learn how to effectively approach and solve problems. Familiarize them with the 5-Step Strategy to Problem Solving.
Step 1. Understand the questionStep 2. Find the facts you need to answer the questionStep 3. Choose the correct operation(s)Step 4. Solve the problemStep 5. Check to make sure the answer is reasonable
Training to Use the Calculator and Grids
Familiarize students with the Casio fx-260 scientific calculator. The Casio fx-260 will be distributed to students before Part I of the GED Mathematics Test and collected before Part II of the test. Students’ anxiety about the calculator can be greatly reduced if students are familiar with the look of the Casio fx-260 and have a chance to practice entering and solving problems using the calculator.
■ In addition to multiple-choice questions, the GED Mathematics Test now uses alternate-formatquestions. Alternate-format questions test students’ ability to generate answers without choosingfrom a list of options.
■ For standard grid questions, students solve the question, write the answer in the top row of thegrid, and then fill in the corresponding bubbles in the grid. Stress that students must fill in thebubbles, or their answer will not be scored. Whole numbers, decimals, and fractions can be filled in on the standard grid.
■ Coordinate grid questions test students’ ability to plot points on the coordinate grid. Stress tostudents that they should only plot one point (two coordinates) on each of the coordinate grids.
Part I of the test features eight standard grid questions and one coordinate grid question; Part II of the test features two standard grid questions and one coordinate grid question.
Teacher’s GuideP–54
Number SenseM AT H E M AT I C S
2 0
WORKBOOK OVERVIEW
Program Segmentswith approximate time codes
4:00 You use number sense when you shop. Peopletalk about how they make buying decisions.
5:00 Numbers are a kind of language. ProfessorKeith Devlin explains what numbers are and how they came to be.
9:40 Numbers are not used only for calculations.Tap dancers talk about how numbers are used in dance.
11:00 A number line can help you understand thevalues of numbers. Host Kim Leigh Smith and Professor Zalman Usiskin explain the values of numbers using a number line.
16:45 Estimation is a powerful tool for solvingproblems. Smith and others explain that anestimate is all that is needed to solve manyproblems.
20:50 Your approach to a problem may be differentthan someone else’s approach. People learn andthink in different ways. Make sure you understandwhat is being asked; then use the techniques thatare best for you.
Major Ideas in the Video Program
■ Number Sense—Number sense is a feeling fornumbers. We all have some number sense and can build on what we know to develop more.
■ The Purpose of Numbers—Numbers can be used tocount, compare, and measure. We also use numbers to combine quantities.
■ Operations—The four basic operations are addition,subtraction, multiplication, and division. Most problems can be solved with some combination of these operations.
■ Math as Language—Math is a language with terms and symbols. To learn math, you must spend timelearning the meaning of the terms and symbols.
■ Estimation—Many problems in life do not require an exact answer and can be solved by estimation. Many multiple-choice math problems, like those on the GED Test, can also be solved by estimation.
VIDEO OVERVIEW
P R E - G E D P RO G R A MLESSON OBJECTIVES
1. Understand place value2. Compare and order numbers3. Use number lines and number patterns
Program 20, Number Sense, pp. 20–39
Before You Watch/After You Watch, pp. 20–21Number Sense, pp. 22–25Number Relationships, pp. 26–29Number Patterns, pp. 30–33GED Problem Solving: Understand Math Problems,
pp. 34–35
GED Math Connection: Explore Calculator Basics,pp. 36–37
GED Math Review, pp. 38–39Extra Practice• Place Value, p. 160• Comparing and Ordering, p. 161• Number Patterns, p. 162• Calculator Basics, p. 163
PROGRAM 20 Number Sense P–55
BeforeYou Watch, p. 20
Preview Lesson Goals on page 20.
Go over Think About the Topic and Prepare toWatch the Video. Encourage students to read and answerthe questions to help them think about the topic of theprogram before they watch it.
Have students read Preview the Questions on page 21 andgo over the Terms in the right-hand column.
Show Program 20
After You Watch, p. 21
Have students read the Think About theProgram questions on page 21 and jot downtheir answers. Discuss the questions and their
answers with the students.
Read the Make the Connection prompt to the students. You can use this as a discussion prompt or as a writingassignment.
Lesson Notes
Number Sense, pp. 22–25. Encourage students to sharetheir feelings about math. Some may believe that being“bad” at math runs in their family. Assure students that ifthey build on what they already know, learn in small steps,and practice daily, they can succeed.
Number Relationships, pp. 26–29. Some students maycompare and order numbers without using the rules in the lesson. Instead, they use their number sense. Ask,What tells you that one number is greater than another?What are you thinking when you compare numbers? • Extra practice—Place Value, p. 160• Extra practice—Comparing and Ordering, p. 161
Number Patterns, pp. 30–33. Have students create numberpatterns of their own based on the models on pages 30–31.Invite a student to put a pattern on the board, and then askthe class to find the rule behind the pattern. • Extra practice—Number Patterns, p. 162
Understand Math Problems, pp. 34–35. Discuss example 3on page 34. Point out that some choices can be eliminatedright away. Since the question asks for the tips for threeweeks, the total must be more than she earned in any oneweek, which eliminates options (1) and (2).
Explore Calculator Basics, pp. 36–37. At first the number of keys and functions on a scientific calculatormay seem overwhelming. Allow students to practicesimple calculations of their own making for a few minutesbefore beginning formal instruction on the calculator.• Extra practice—Calculator Basics, p. 163
GED Math Review, pp. 38–39. Having five answer choices can slow students down and cause them to doubttheir own thinking. Encourage them to answer the questionfirst and then look for their answer among the choices. If they are confident of their answer, they should go on to the next question.
Extension Activities
Individual Point out that there is often morethan one approach to a problem. Have studentswrite a description of how they solved question11 on page 39. Then have students compare
and discuss different methods with the entire class.
Group Have students work in small groups to create life situations in which patterns could play a part. Explore questions 11–13 on page 31 for examples. Have them write
several word problems based on their ideas.
Online Have students go on LiteracyLink to the Pre-GED section and click Mathematics: Number Sense. Have studentsexplore the site which explains how to
memorize the multiplication tables through recognition of patterns.
PROGRAM 20 LESSON PLAN
Teacher’s GuideP–56
P roblem SolvingM AT H E M AT I C S
2 1
WORKBOOK OVERVIEW
Program Segmentswith approximate time codes
2:10 Problem solving is a process with five steps.Professor Zalman Usiskin explains that Step One is “understanding the question you are tryingto answer.”
8:45 Step Two is gathering the information youneed. Credit managers explain how to solveproblems about car loans and interest.
12:09 In Step Three, you must set up the problemusing correct operations. Teachers explain howto translate words into mathematical expressions.
16:00 Do the operations in Step Four. Decide whetherto use a calculator, mental math, or pencil andpaper. Examples for each are shown.
18:50 Sometimes the order in which you do theoperations matters. Professor Keith Devlin andothers explain the rules of the order of operations.
23:42 In Step Five, check your answer. Ask, “Does my answer make sense?” Host Kim Leigh Smithreviews the five steps of problem solving.
Major Ideas in the Video Program
■ The Problem-Solving Process—The five-step processcan help you break down a problem into manageablesteps. The steps are:
• Understand the question.
• Find the facts you need.
• Set up the problem with correct operations.
• Do the calculations.
• Make sure your answer is reasonable.
■ How to Set Up a Problem—Once you know thecorrect operations to use, you can write a mathematicalexpression to solve the problem.
■ The Order of Operations—When you calculate thevalue of an expression, you must perform operations in a certain order.
■ The Role of Number Sense in Problem-Solving—Always ask whether your answer seems reasonable.Think: Is this number approximately the right size?
VIDEO OVERVIEW
P R E - G E D P RO G R A MLESSON OBJECTIVES
1. Add and subtract whole numbers2. Multiply and divide whole numbers3. Estimate amounts
Program 21, Problem Solving, pp. 40–59
Before You Watch/After You Watch, pp. 40–41Adding and Subtracting, pp. 42–45Multiplying and Dividing, pp. 46–49Estimation, pp. 50–53GED Problem Solving: Decide Which Operation to
Use, pp. 54–55
GED Math Connection: Calculator Operations and Grid Basics, pp. 56–57
GED Math Review, pp. 58–59Extra Practice• Adding and Subtracting Whole Numbers, p. 164• Multiplying and Dividing Whole Numbers, p. 165 • Estimating, p. 166• Calculator Operations and Grid Basics, p. 167
PROGRAM 21 Problem Solving P–57
BeforeYou Watch, p. 40
Preview Lesson Goals on page 40.
Go over Think About the Topic and Prepare toWatch the Video. Encourage students to read and answerthe questions to help them think about the topic of theprogram before they watch it.
Have students read Preview the Questions on page 41 andgo over the Terms in the right-hand column.
Show Program 21
After You Watch, p. 41
Have students read the Think About theProgram questions on page 41 and jot downtheir answers. Discuss the questions and their
answers with the students.
Read the Make the Connection prompt to the students. You can use this as a discussion prompt or as a writingassignment.
Lesson Notes
Adding and Subtracting, pp. 42–45. Most mental math strategies involve breaking a problem into parts and then putting it back together to find the answer.Ask, How would you solve these problems mentally: 57 + 25 and 92 – 46? Discuss strategies.• Extra practice—Adding and Subtracting
Whole Numbers, p. 164
Multiplying and Dividing, pp. 46–49. Ask, How do yourecognize when you should multiply to solve a problem?To divide? Discuss students’ ideas and strategies. • Extra practice—Multiplying and Dividing
Whole Numbers, p. 165
Estimation, pp. 50–53. Ask, Which method of estimationproduced estimates that were closest to the exact answers?Discuss students’ responses. Point out that students shouldchoose a method based on the situation and how close anestimate they need. • Extra practice—Estimating, p. 166
Decide Which Operation to Use, pp. 54–55. Review theexample at the bottom of page 54. Point out that there is often more than one way to solve a problem. Havestudents suggest another way to solve this problem. One way: 785 – 300 – 340. Point out that this method gives the same answer as 785 – (300 + 340).
Calculator Operations and Grid Basics, pp. 56–57. Ask, Calculators give an exact answer and grid problemsrequire an exact answer, so why is it important to estimatean answer to these problems? Discuss the importance ofusing estimation to make sure an answer makes sense.• Extra practice—Calculator Operations and Grid Basics,
p. 167
GED Math Review, pp. 58–59. Help students improve their understanding of mathematical expressions by havingthem explain the steps for each setup in questions 4 and 9.Example: If the setup reads 35 – (4 + 9), a student mightsay: first add 4 and 9; then subtract the sum from 35.
Extension Activities
Individual Have students write about a timewhen they have used estimation during thepast week. Students may find that they oftenuse estimation without realizing it.
Group Bring several newspapers to class.Have students work in small groups to clip out an advertisement and write four wordproblems based on the information in the ad.
Have groups exchange problems and solve.
Online Have students go on LiteracyLink tothe Pre-GED section and click Mathematics:Problem Solving. This link allows students towork on their rounding and estimating skills.
PROGRAM 21 LESSON PLAN
Teacher’s GuideP–58
D e c i m a l sM AT H E M AT I C S
2 2
WORKBOOK OVERVIEW
Program Segmentswith approximate time codes
1:30 Use what you know about money tounderstand tenths and hundredths. Teachersexplain the meaning of decimals using dimes and pennies.
7:35 Decimals, fractions, and percents can all beused to show parts of a whole. Teachers explainthe relationships among these fractional systems.
10:20 We use decimals in daily life. People show how decimals are used at the gas pump and at the bank.
13:45 On a number line, a decimal falls between two whole numbers. Teachers show how toround decimals.
16:00 When adding or subtracting, you must add like place-value columns. Teachers explain therules of adding and subtracting decimals and work several examples.
19:00 Keep track of the decimal position in theanswer when you multiply or divide. Teachersshow how to multiply and divide decimals andhow to place the decimal point in the answer.
Major Ideas in the Video Program
■ Decimals as Fractions—Decimals are one way torepresent parts of a whole. For example, we write partsof a dollar as cents, or hundredths of a dollar, usingdecimals. You can also write part of a whole as afraction or percent. Fractions, decimals, and percentsare related.
■ Place Value—In a decimal number, the position of the digit indicates its value. Moving to the right of the decimal point, each position is ten times smallerthan the position on the left.
■ Comparing—To compare decimal numbers, comparethe place-value columns, working from left to right.
■ Adding and Subtracting—Before you add and subtractdecimal numbers, you must line up the decimal pointsin the numbers.
■ Multiplying and Dividing—Determine the placementof the decimal point in the answer after you finishmultiplying. Position the decimal point in the answerbefore you divide.
VIDEO OVERVIEW
P R E - G E D P RO G R A MLESSON OBJECTIVES
1. Explore decimal place values2. Add and subtract decimals3. Multiply and divide decimals
Program 22, Decimals, pp. 60–79
Before You Watch/After You Watch, pp. 60–61Decimal Place Values, pp. 62–65Adding and Subtracting Decimals, pp. 66–69Multiplying and Dividing Decimals, pp. 70–73GED Problem Solving: Does the Answer
Make Sense?, pp. 74–75
GED Math Connection: Decimals on the Calculator and Grid, pp. 76–77
GED Math Review, pp. 78–79Extra Practice• Rounding and Comparing Decimals, p. 168• Adding and Subtracting Decimals, p. 169• Multiplying and Dividing Decimals, p. 170• Decimal Calculator Operations and Grids, p. 171
PROGRAM 22 Decimals P–59
BeforeYou Watch, p. 60
Preview Lesson Goals on page 60.
Go over Think About the Topic and Prepare toWatch the Video. Encourage students to read and answerthe questions to help them think about the topic of theprogram before they watch it.
Have students read Preview the Questions on page 61 and go over the Terms in the right-hand column.
Show Program 22
After You Watch, p. 61
Have students read the Think About theProgram questions on page 61 and jot downtheir answers. Discuss the questions and their
answers with the students.
Read the Make the Connection prompt to the students. You can use this as a discussion prompt or as a writingassignment.
Lesson Notes
Decimal Place Values, pp. 62–65. Discuss: When does the zero in a decimal number make a difference in the size of the number? How is this different than the use of zeros in whole numbers? • Extra practice—Rounding and Comparing
Decimals, p. 168
Adding and Subtracting Decimals, pp. 66–69. Afterstudents have completed this section, have them evaluatetheir own mistakes. Ask, What kind of mistakes do youmake most often? What strategies can you use to preventthese mistakes? • Extra practice—Adding and Subtracting Decimals,
p. 169
Multiplying and Dividing Decimals, pp. 70–73. Providestudents with “completed” problems, but include answerswithout the decimal point. Have students correctly placedecimal points in the answers.• Extra practice—Multiplying and Dividing Decimals,
p. 170
Does the Answer Make Sense?, pp. 74–75. Demonstratethat putting the decimal point in the wrong place greatlychanges the value of a number. Emphasize that estimatingwith whole numbers is a good way to guard against thiskind of error.
Decimals on the Calculator and Grid, pp. 76–77. Have students practice these calculations on a calculator:2.5 4 2 and 2.5 4 3. Ask, Which answer is greater?(Answer: 1.25) Remind students that decimal remaindersoften have many digits, but the decimal with the greatestnumber of digits is not necessarily the largest number.• Extra practice—Decimal Calculator Operations and
Grids, p. 171
GED Math Review, pp. 78–79. Discuss the importance ofthinking through the problem before using a calculator inPart I of the GED Math Review. The calculator will nothelp students save time if they work the problem with thewrong numbers or wrong operations.
Extension Activities
Individual Have students choose one wordproblem from the GED Math Review (pp. 78–79)and write a description of their approach to theproblem. Have them include the sequence of
steps they would follow to solve the problem.
Group In small groups, have students createsimple restaurant menus. Have them write five decimal word problems based on theirmenus. Then have groups trade menus and
solve each other’s problems.
Online Have students go on LiteracyLink tothe Pre-GED section and click Mathematics:Decimals. Have students review decimalprocedures and practice calculations.
PROGRAM 22 LESSON PLAN
Teacher’s GuideP–60
F r a c t i o n sM AT H E M AT I C S
2 3
WORKBOOK OVERVIEW
Program Segmentswith approximate time codes
1:35 Fractions are often used in measurements.Cooking students practice using fractions in recipes, and math students use fractions with a ruler.
6:00 Fractions name the points between wholenumbers on a number line. GED teachers use number lines to show fractions.
8:30 Fractions have many practical applications.Musicians demonstrate how they use fractions to keep time.
10:40 To add or subtract fractions, the denominatorsmust be the same. Teachers show how to findand use common denominators.
13:00 People in many occupations must add andsubtract fractions. The manager of a stableshows how she uses fractions to figure out correct vitamin dosages for horses.
15:45 Multiplying and dividing fractions is a simple process. Students and workers on the job demonstrate how they multiply and divide fractions.
Major Ideas in the Video Program
■ The Meaning of Fractions—Fractions are numbersthat represent values between whole numbers. A fraction compares a number of parts to a whole.
■ Parts of a Fraction—The top number is thenumerator; the bottom number is the denominator.Think of a fraction as a division problem. Thenumerator is divided by the denominator.
■ Adding and Subtracting—Fractions must have acommon denominator before you add or subtract.
■ Multiplying and Dividing—Fractions do not need acommon denominator before you multiply or divide.When possible, use canceling to make your work easier.
■ Simplifying Fractions Using Prime Factoring—To simplify fractions, factor the numerator and thedenominator using prime numbers and cancel likefactors. Then find the product of the remaining terms.
VIDEO OVERVIEW
P R E - G E D P RO G R A MLESSON OBJECTIVES
1. Simplify and compare fractions2. Add and subtract fractions3. Multiply and divide fractions
Program 23, Fractions, pp. 80–99
Before You Watch/After You Watch, pp. 80–81Fraction Basics, pp. 82–85Adding and Subtracting Unlike Fractions, pp. 86–89Multiplying and Dividing Fractions, pp. 90–93GED Problem Solving: The Information You
Need, pp. 94–95
GED Math Connection: Fractions on the Calculator and Grid, pp. 96–97
GED Math Review, pp. 98–99Extra Practice• Fraction Basics, p. 172• Adding and Subtracting Fractions, p. 173• Multiplying and Dividing Fractions, p. 174• Fraction Calculator Operations and Grids, p. 175
PROGRAM 23 Fractions P–61
BeforeYou Watch, p. 80
Preview Lesson Goals on page 80.
Go over Think About the Topic and Prepare toWatch the Video. Encourage students to read and answerthe questions to help them think about the topic of theprogram before they watch it.
Have students read Preview the Questions on page 81 andgo over the Terms in the right-hand column.
Show Program 23
After You Watch, p 81
Have students read the Think About theProgram questions on page 81 and jot downtheir answers. Discuss the questions and their
answers with the students.
Read the Make the Connection prompt to the students. You can use this as a discussion prompt or as a writingassignment.
Lesson Notes
Fraction Basics, pp. 82–85. Ask, Which fraction is easierto understand: or ? Discuss responses. Point out thatsimplifying fractions makes it easier to communicate andvisualize quantities. • Extra practice—Fraction Basics, p. 172
Adding and Subtracting Unlike Fractions, pp. 86–89. A denominator is the label for a fraction. To better helpstudents understand this concept, write problems such as + as 3 fourths + 2 thirds.
•Extra practice—Adding and Subtracting Fractions, p. 173
Multiplying and Dividing Fractions, pp. 90–93. True or false: When you multiply a number by a fraction, the answer will be less than the number. Discuss. (Note: This statement is false if you are multiplying by an improper fraction.) • Extra practice—Multiplying and Dividing Fractions,
p. 174
The Information You Need, pp. 94–95. Encourage studentsto work backwards from the question when a problemseems complicated. Have them read the question first, then figure out what facts they will need to answer thequestion. Finally, find the facts and solve.
Fractions on the Calculator and Grid, pp. 96–97. The fraction keys on a calculator can help students save valuable time during the GED Math Test. Encouragethem to spend a few minutes each day using the fractionkeys until they are proficient. In addition to the extrapractice listed below, they can rework problems on pages 87, 89, 91, and 93 on the calculator.• Extra practice—Fraction Calculator Operations and
Grids, p. 175
GED Math Review, pp. 98–99. Encourage students to useestimation to eliminate obviously wrong choices. One wayis to have them round mixed fractions to the nearest wholenumber to estimate an answer.
Extension Activities
Individual Now that students have completedthis section, have them write a summary of the main ideas they need to remember aboutfractions to do well on the GED Math Test.
Encourage students to include strategies for how they willremember the material.
G roup In small groups, have students worktogether to figure out what fraction of a 24-hourday each group member spends in diff e r e n tactivities. Have group members compare how
they spend their time by comparing fractions.
Online Have students go on LiteracyLink tothe Pre-GED section and click Mathematics:Fractions. At this website students can enterproblems and see them worked out step-by-step.
PROGRAM 23 LESSON PLAN
37
2 45 6
34
23
Teacher’s GuideP–62
R a t i o, P ro p o rt i o n , and Pe rc e n tM AT H E M AT I C S
2 4
WORKBOOK OVERVIEW
Program Segmentswith approximate time codes
2:20 A ratio is a fraction. Teachers explain how ratios compare quantities using examples fromeveryday life.
4:50 Unit rates can help you find the best buy.Math teachers show how to use unit rates when shopping.
6:00 Ratio and percent have many practical uses.An urban planner shows how he uses ratio infinding the size of a building. A financial advisorshows how percent is used in financing decisions.
18:00 You can set up a proportion to find a missingvalue when two ratios are equal. A math teacherexplains how to set up and solve proportionproblems using cross products.
22:00 Proportion has many practical applications.A ship’s captain shows how proportion is used toread navigational maps. Artists and filmmakersshow how proportion is used to create specialeffects.
Major Ideas in the Video Program
■ Ratios—A ratio compares two numbers using division. Ratios can be written as fractions and follow many of the same rules.
■ Unit Rates—A unit rate compares a number to 1. Weoften use unit rates to find the best buy. Most grocerystores display the unit rate for products. For example, a shelf label may state the price per ounce for juice.
■ Percents—A percent is a ratio that compares a part to a whole as though the whole is always the number 100.
■ Benchmarks—Use number sense when solving percent problems. Use your understanding of fractionsand decimals.
■ Proportions—A proportion sets up equal ratios. When one number is unknown, you can solve for itusing cross products.
■ Practical Applications—Percents are used in finding sale prices. Proportions are used in map scales and in art.
VIDEO OVERVIEW
P R E - G E D P RO G R A MLESSON OBJECTIVES
1. Use ratios and rates2. Set up and solve proportions3. Solve percent problems
Program 24, Ratio, Proportion, and Percent,pp. 100–119
Before You Watch/After You Watch, pp. 100–101Ratios and Rates, pp. 102–105Proportions, pp. 106–109Percents, pp. 110–113GED Problem Solving: Using Proportions to
Solve Problems, pp. 114–115
GED Math Connection: Percents on the Calculator and Grid, pp. 116–117
GED Math Review, pp. 118–119Extra Practice• Ratios and Rates, p. 176• Proportions, p. 177• Percents, p. 178• Proportions and Percents with Calculators
and Grids, p. 179
PROGRAM 24 Ratio, Proportion and Percent P–63
BeforeYou Watch, p. 100
Preview Lesson Goals on page 100.
Go over Think About the Topic and Prepare toWatch the Video. Encourage students to read and answerthe questions to help them think about the topic of theprogram before they watch it.
Have students read Preview the Questions on page 101and go over the Terms in the right-hand column.
Show Program 24
After You Watch, p. 101
Have students read the Think About theProgram questions on page 101 and jot downtheir answers. Discuss the questions and their
answers with the students.
Read the Make the Connection prompt to the students. You can use this as a discussion prompt or as a writingassignment.
Lesson Notes
Ratios and Rates, pp. 102–105. Discussion questions: How do unit rates help you to save money? Do you useunit rates when you shop? Why or why not? Does it evermake sense to buy a brand with a higher unit rate? Have students explain their thinking.• Extra practice—Ratios and Rates, p. 176
Proportions, pp. 106–109. To explore patterns inproportions, have students make a table showing the cost of 1 to 10 items for an item with a unit rate of $1.25. • Extra practice—Proportions, p. 177
Percents, pp. 110–113. Demonstrate how a percent relates to parts of a whole by drawing a line. Write 0 at the beginning and 100 at the end. Ask students to imaginethat the value of the entire line is $500. What amountwould be written at 10%, 25%, 50%, 80%, etc.? Discuss:How are percents related to proportions? • Extra practice—Percents, p. 178
Using Proportions to Solve Problems, pp. 114–115. To see how a proportion setup relates to the originalproportion, have students write a proportion and then write the steps for solving it.
For example, = . Steps: Multiply 4 and 200 and
divide by 3. Write the setup: .
Percents on the Calculator and Grid, pp. 116–117. Stress the importance of writing and labeling theproportion before using a calculator. A calculator gives the answer quickly, but it does not tell you what theanswer represents. • Extra practice—Proportions and Percents with
Calculators and Grids, p. 179
GED Math Review, pp. 118–119. Remind students thattheir knowledge of fractions and estimation can help them answer percent problems. Discuss question 1. How does it help to know that 25% equals one-fourth?
Extension Activities
Individual Have students figure out whatpercent of their total household income goes to these four categories: housing, food,clothing, and transportation. Students may
want to compare their findings. Note that percents make it possible to compare data without revealing actualincome or expenses.
Group In small groups, have studentscompare and contrast these sales promotions:“Buy three, get one free” or “Buy now, get25% off.” Ask, Which is the most motivating
to the customer? Which is the better deal?
Online Have students go on LiteracyLink tothe Pre-GED section and click Mathematics:Percents. Have students explore the percentinstruction and practice problems.
PROGRAM 24 LESSON PLAN
34
2 0 0x
4 32 0 03
Teacher’s GuideP–64
M e a s u re m e n tM AT H E M AT I C S
2 5
WORKBOOK OVERVIEW
Program Segmentswith approximate time codes
0:50 There are many ways to measure.Professor Zalman Usiskin and host Kim LeighSmith discuss units of measure. A carpenterdemonstrates how to measure length with a tape measure.
4:20 Some jobs use special measurements. A graphic designer shows how he measures type in picas and points.
5:30 Measurements can be converted into largerand smaller units. A cooking instructor showshow to use conversions to make smaller portionsof recipes. An architect explains how she usesconversions on the job.
12:40 Many jobs require an understanding ofperimeter, area, and volume. An architect and a landscaper show how they use these three measures in their work.
19:20 The metric system is another way to measurelength, weight, and volume. Professor Usiskinintroduces the units of the metric system andexplains how the system works.
Major Ideas in the Video Program
■ Units of Measure—The units of measure for time,distance, size, and weight help us understand therelative size of things.
■ U.S. Customary System—This is the system preferred by most Americans. It includes inches, feet, miles, pounds, cups, quarts, and so on. The equivalencies of customary units are irregular,so more memorization is required.
■ The Metric System—The metric system is based on the powers of ten. It uses the basic units of meters,grams, and liters for length, weight, and capacity.By adding prefixes to the basic unit, you can createsmaller and larger units.
■ Perimeter, Area, and Volume—Perimeter measures the linear distance around a figure, area measures the surface inside a figure, and volume measures the space inside a three-dimensional object.
VIDEO OVERVIEW
P R E - G E D P RO G R A MLESSON OBJECTIVES
1. Use standard and metric measurements2. Work with perimeter, area, and volume3. Find perimeter and area of irregular shapes
Program 25, Measurement, pp. 120–139
Before You Watch/After You Watch, pp. 120–121Measurement Units, pp. 122–125Measurement Operations, pp. 126–129Perimeter, Area, and Volume, pp. 130–133GED Problem Solving: Draw a Picture, pp. 134–135
GED Math Connection: Formulas Page, pp. 136–137
GED Math Review, pp. 138–139Extra Practice• Standard and Metric Measurement, p. 180• Perimeter, Area, and Volume, p. 181• Irregular Shapes, p. 182• GED Formulas, p. 183
PROGRAM 25 Measurement P–65
BeforeYou Watch, p. 120
Preview Lesson Goals on page 120.
Go over Think About the Topic and Prepare toWatch the Video. Encourage students to read and answerthe questions to help them think about the topic of theprogram before they watch it.
Have students read Preview the Questions on page 121and go over the Terms in the right-hand column.
Show Program 25
After You Watch, p. 121
Have students read the Think About theProgram questions on page 121 and jot downtheir answers. Discuss the questions and their
answers with the students.
Read the Make the Connection prompt to the students. You can use this as a discussion prompt or as a writingassignment.
Lesson Notes
Measurement Units, pp. 122–125. Have students choosethree measurement units that they are less familiar withand think of their own personal benchmark for each. • Extra practice—Standard and Metric Measurement,
p. 180
Measurement Operations, pp. 126–129. Have students add 35 and 18. Then have them add 3 ft. 5 in. and 1 ft. 8 in. Ask, How are these problems similar? How are they different? Point out that regrouping is needed in both problems, but the equivalencies are different: 10 ones = 1 ten and 12 inches = 1 foot.
P e r i m e t e r, A rea, and Vo l u m e , pp. 130–133. Bring rulers toclass and have students measure and find the perimeter,surface area, and volume of a common object. Watch forstudents who have trouble interpreting the marks on the ruler.• Extra practice—Perimeter, Area, and Volume, p. 181• Extra practice—Irregular Shapes, p. 182
Draw a Picture, pp. 134–135. Have students draw aregular or irregular figure and label it with measurements.Then have them describe the figure to another student who must make as accurate a sketch as possible from the description.
Formulas Page, pp. 136–137. Have students write theirown formulas based on common life situations. Example:A phone company charges $5 per month plus 7 cents perminute for long distance calls. Have students write aformula to find C, the total monthly cost of long distanceservice. Answer: C = $5 + $0.07m, where m = the numberof minutes of long distance calls. • Extra practice—GED Formulas, p. 183
GED Math Review, pp. 138–139. Review question 2.Discuss how to find the value of a variable within theformula. Students can usually solve these problemswithout formal instruction in algebra. Point out that they can use guess and check to see which answer choice works.
Extension Activities
Individual Have students make flash cards out of index cards to help them memorize the common measurement equivalenciespresented on pages 122 and 124.
Group If possible, bring a floor plan of a house to show students. Then have themwork together to create their own floor planfor a one-story house. Have them label all
measurements and calculate the area in square feet foreach room.
Online Have students go on LiteracyLink tothe Pre-GED section and click Mathematics:Measurement. Have students explore thiswebsite dedicated to helping students make
the transition from the U.S. customary system to themetric system.
PROGRAM 25 LESSON PLAN
Teacher’s GuideP–66
Data A n a ly s i sM AT H E M AT I C S
2 6
WORKBOOK OVERVIEW
Program Segmentswith approximate time codes
1:40 Tables and charts are used to organizeinformation. A dietician shows a calorie intake chart. A stock analyst uses a chart to track an investment.
5:30 Graphs make data easier to understand. Anartist shows how data can be made into a graph.
7:30 Bar and column graphs compare data.Professor Zalman Usiskin discusses graphs in newspapers and magazines.
10:25 Circle or pie graphs compare parts to a whole. Teachers demonstrate how to read and understand circle graphs.
13:50 Line graphs show change over time. They help investors follow changes in the stock marketand see trends in stock prices. Later, an investorexplains how data can be misleading.
19:50 An average can be used to represent data. Host Kim Leigh Smith shows how to find themean, median, and mode of data.
Major Ideas in the Video Program
■ Data—Data are pieces of related information that can be arranged in tables, charts, and graphs.
■ Tables and Charts—Tables and most charts arrangedata in columns and rows. The columns and rows arelabeled to make it easy to find specific data.
■ Graphs—Bar or column graphs make it easy tocompare data values by comparing the lengths of bars.Line graphs show trends or changes over time. Circlegraphs compare parts to a whole.
■ Misleading Graphs—By leaving out numbers, graphscan be drawn so that the reader is given the wrongimpression. Members of the public must be on guard to spot misleading information.
■ Averages—An average is a measure of centraltendency. It gives you an idea of what value is normalfor the set of data. Mean, median, and mode are threetypes of measures of central tendency.
VIDEO OVERVIEW
P R E - G E D P RO G R A MLESSON OBJECTIVES
1. Use tables2. Read and interpret graphs3. Explore probability
Program 26, Data Analysis, pp. 140–159
Before You Watch/After You Watch, pp. 140–141Tables, Charts, and Graphs, pp. 142–145Line and Circle Graphs, pp. 146–149Special Topics in Data Analysis, pp. 150–153GED Problem Solving: The Problem-Solving
Method, pp. 154–155
GED Math Connection: Data Analysis on theCalculator and Grid, pp. 156–157
GED Math Review, pp. 158–159Extra Practice• Tables, p. 184• Graphs, p. 185• Probability, p. 186• Data Work with the Calculator and Grids, p. 187
PROGRAM 26 Data Analysis P–67
BeforeYou Watch, p. 140
Preview Lesson Goals on page 140.
Go over Think About the Topic and Prepare toWatch the Video. Encourage students to read and answerthe questions to help them think about the topic of theprogram before they watch it.
Have students read Preview the Questions on page 141and go over the Terms in the right-hand column.
Show Program 26
After You Watch, p. 141
Have students read the Think About theProgram questions on page 141 and jot downtheir answers. Discuss the questions and their
answers with the students.
Read the Make the Connection prompt to the students. You can use this as a discussion prompt or as a writingassignment.
Lesson Notes
Tables, Charts, and Graphs, pp. 142–145. Point out that data can be used to make either tables or graphs. Ask, When is a table more useful than a graph? When is a graph more useful? Discuss students’ responses. • Extra practice—Tables, p. 184
Line and Circle Graphs, pp. 146–149. Have students work in small groups to think of graphs and titles thatcould be used to show sports statistics. For example, a bar graph could compare batting averages of a team’splayers, a line graph could show a player’s batting average from month to month, and a circle graph couldbreak down a batter’s “at bats.”• Extra practice—Graphs, p. 185
Special Topics in Data Analysis, pp. 150–153. Havestudents take turns rolling a pair of dice. Continue for 100 trials. Record the results on the board. Have studentswork together to make sense of the data. Ask, If I roll a 7 this time, am I less likely to roll a 7 on the next roll? • Extra practice—Probability, p. 186
The Problem-Solving Method, pp. 154–155. Present this situation: A student complains that following the five problem-solving steps will slow him down. Whatwould you tell him? Why are all five steps important to doing well on a test? Discuss student responses.
Data Analysis on the Calculator and Grid, pp. 156–157.Emphasize that estimating is a good way to check workwhen using a calculator. Ask, What is the best way toestimate the mean, or arithmetic average? Discussresponses. • Extra practice—Data Work with the Calculator
and Grids, p. 187
GED Math Review, pp. 158–159. Choose a problem that students may have difficulty with, and have thestudents apply the five steps of the problem-solvingmethod on page 154.
Extension Activities
Individual Present this situation: A student hasfive test scores: 92, 76, 80, 80, and 96. Ask,Should the teacher base the student’s grade onthe mean, median, or mode of his test scores?
Which best represents the student’s ability? Have studentswrite a paragraph to justify their thinking.
Group In pairs, have students flip a coin 30 times and write down the results, eitherheads or tails. Have each group find thechance of flipping heads from their results.
Then combine the results for all groups and find thechance of flipping heads. Discuss the experiment. Students should observe that as more trials are added, the results are closer to 50%.
Online Have students go on LiteracyLink tothe Pre-GED section and click Mathematics:Data Analysis. Have students explore makingtheir own graphs.