+ All Categories
Home > Documents > PDF Created with deskPDF PDF Writer - Trial :: ... · PDF fileA report submitted in partial...

PDF Created with deskPDF PDF Writer - Trial :: ... · PDF fileA report submitted in partial...

Date post: 27-Mar-2018
Category:
Upload: vuongcong
View: 226 times
Download: 5 times
Share this document with a friend
24
SOLAR HOME AUTOMATION SYSTEM (ELECTRO-MECHANICAL PART) MOHD RADZI BIN MOHD RASOL A report submitted in partial fulfilment of the requirements for the award of the degree of Diploma of Mechanical Engineering Faculty of Mechanical Engineering UNIVERSITI MALAYSIA PAHANG NOVEMBER 2008 PDF Created with deskPDF PDF Writer - Trial :: http://www.docudesk.com
Transcript

SOLAR HOME AUTOMATION SYSTEM (ELECTRO-MECHANICAL PART)

MOHD RADZI BIN MOHD RASOL

A report submitted in partial fulfilment of the requirements for the award of the degree of

Diploma of Mechanical Engineering

Faculty of Mechanical Engineering UNIVERSITI MALAYSIA PAHANG

NOVEMBER 2008

PDF Created with deskPDF PDF Writer - Trial :: http://www.docudesk.com

iv

ACKNOWLEDGEMENTS

I am grateful and would like to express my sincere gratitude to my supervisor

En Shahmi B Junoh @ yacob for his ideas, invaluable guidance, continueous

encouragement and constant support in making this project possible. He has always

impressed me with his outstanding professional conduct, his strong conviction for

engineering, and his belief that a Diploma program is only a start of a life-long

learning experience. I appreciate his consistent support from the first day I applied to

graduate program to these concluding moments. I am truly grateful for his progressive

vision about my training in engineerin, his tolerance of my naïve mistakes, and his

commitment to my future career. I also would like to express very special thanks to

my partner project Mohd Ridzuan B Ramli for their suggestions and co-operation

throughout the study. I also sincerely thanks for the time spent proofreading and

correcting my many mistakes.

My sincere thanks go to all my labmates and members of the staff of the

Mechanical Engineering Department, UMP, who helped me in many ways and made

my stay at UMP pleasant and unforgettable.

I acknowledge my sincere indebtedness and gratitude to my parents for their

love, dream and sacrifice throughout my life. I cannot find the appropriate words that

could properly describe my appreciation for their devotion, support and faith in my

ability to attain my goals. Special thanks should be given to my committee members. I

would like to acknowledge their comments and suggestions, which was crucial for the

successful completion of this study.

PDF Created with deskPDF PDF Writer - Trial :: http://www.docudesk.com

v

ABSTRACT

This project is mainly concerned on development of solar home automation

system for electro-mechanical part and integration. The main objective in this project

is to give an experience and knowledge for student to make the project and activity

successfully. The specific objective of to design the mechanical and electronic part of

solar home automation system. This project as model to an application for a real

house .This project involve the process of designing the circuit ,mechanical part

,functionality and the manufacturing costs for people using. The material using is

solar panel, Perspex, electric components such as diode , battery, lamp, led and switch

on/off. In this project have 3 main process .The first process is fabricate the electrical

part, the second one process is fabricate the mechanical part and the last one is

integrated electrical part and mechanical part. The electrical part need to make a

circuit . To generate the electric by solar energy. Mechanical part to make model

house. Lastly, two part need to integrate. The results can also significantly reduce the

cost and time to market, and improve product reliability and customer confidence.

PDF Created with deskPDF PDF Writer - Trial :: http://www.docudesk.com

vi

ABSTRAK

Project ini membangunkan Sistem Rumah Solar Automatik untuk bahagian elektro-

mekanikal dan integrasi. Objektif utama projek ini ialah memberi pengalaman dan

pengatahuan kepada pelajar membuat projek dengan jayanya. Manakala ,objektif

spesifik pula ialah meraka bahagian mekanikal dan elektronik Sistem Rumah Solar

Automatik . Projek ini sebagai contoh atau model kepada rumah yang sebenar. Projek

ini disertai dengan proses mereka litar elektrik , bahagian mekanikal , fungsi , dan kos

pembuatan untuk digunakan oleh orang. Bahan yang digunakan Panel Solar , Perspex

, komponen elektronik seperti diod ,bateri ,lampu dan suis on /off. Terdapat 3 proses

utama dalam projek ini. Proses pertama ialah membuat bahagian elektrik iaitu

membuat litar elektik. Proses yang kedua pula membuat bahagian mekanikal dan

proses terakhir pula ialah mengabungkan kedua-kedua bahagian tadi. Keputusan dari

projek tadi bermakna mengurangkan kos dan masa untuk dipasarkan dan kebolehan

produk dan keyakinan pelanggan.

PDF Created with deskPDF PDF Writer - Trial :: http://www.docudesk.com

vii

TABLE OF CONTENTS

Page

SUPERVISOR’S DECLARATION ii

STUDENT’S DECLARATION iii

ACKNOWLEDGEMENTS iv

ABSTRACT v

ABSTRAK vi

TABLE OF CONTENTS vii

LIST OF TABLES xi

LIST OF FIGURES xiii

LIST OF SYMBOLS

xx

LIST OF ABBREVIATIONS xxiv

CHAPTER 1 INTRODUCTION

1.1 Project sypnosis 1

1.2 Project background 2

1.3 Project Objecktive 3

1.4 Problem Statement 4

1.5 Project scope 4

CHAPTER 2 LITERATURE REVIEW

2.1 Introduction 5

2.2 Basic Component 6

PDF Created with deskPDF PDF Writer - Trial :: http://www.docudesk.com

viii

2.3 Method joining of welding process 9 2.3 Method joining of welding process 9 2.4 Thread fastener 14

CHAPTER 3 DURABILITY ASSESSMENT METHODS

CHAPTER 4 RESULTS AND DISCUSSION

4.1 Introduction 26

4.2 Design 27

4.3 Drawing 27

4.4 Sketching and Drawing Selection 28

4.5 Result 31

4.6 DESIGNS IN SOLID WORK 32

4.7 Design in Dxp Portel Software 33

4.8 Design Specification 34

4.9 Material 34

4.10 Functional performance 36

4.11 Step by Step process 36 4.12 Project Testing 40

4.13 Costing the Product 43

CHAPTER 5 CONCLUSION AND RECOMMENDATIONS

5.1 Introduction 44

5.2 Project problem 44

5.3 Recomendation 45 5.4 Future Work 45

5.5 Conclusion 45

3.1 Project flow Chart 15

3.2 Project Gantt Chart 23

PDF Created with deskPDF PDF Writer - Trial :: http://www.docudesk.com

ix

REFERENCES 46

APPENDICES

A Solar panel holderSolid Work 47

B Orthographic view 48

C Circuit drawing 49

D Whole Picture Project 50

LIST OF FIGURE

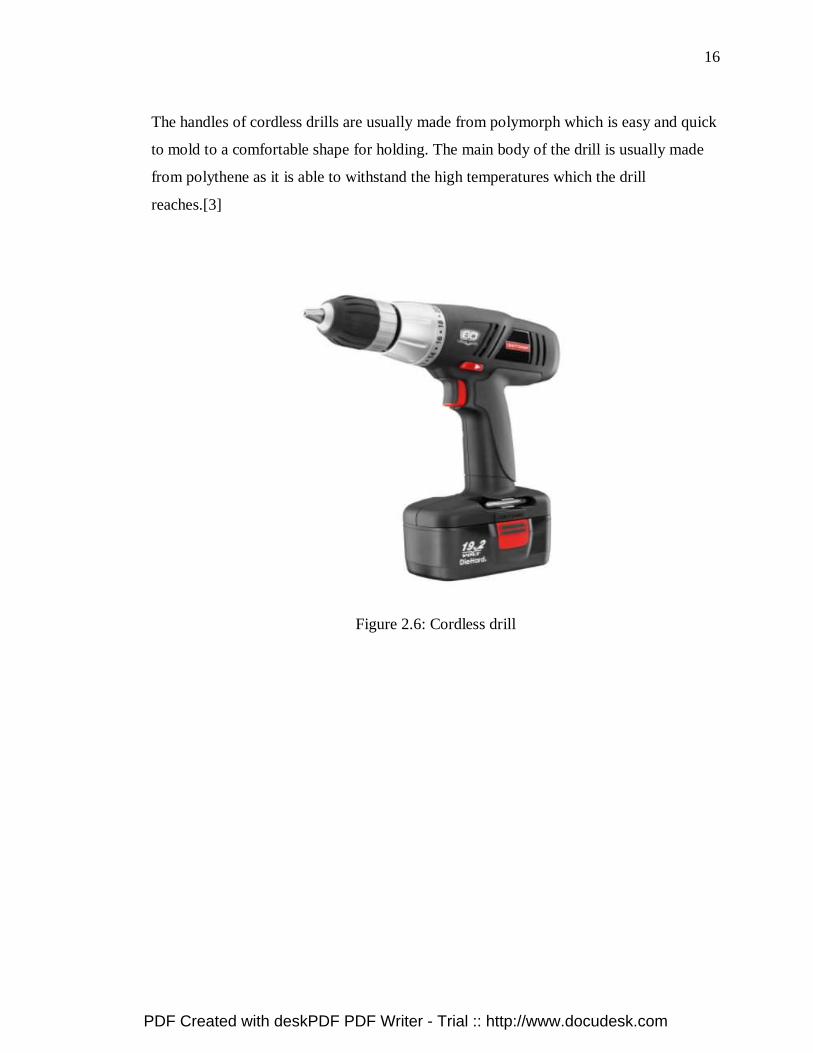
Figure No. Page 2.1 Solar Panel 6 2.2 Gas metal arc welding (GMAW) 9 2.3 MIG welding Process 11 2.4 Bolt and nut 12 2.5 Hand drill 14 2.6 Cordless drill 16 2.7 Drill Press 18 3.1 Flow chart project 20 3.2 Gant chart project 23 4.1 Design 1 28 4.2 Design 2 29 4.3 Design 3 30 4.4 Solid work for Solar Panel Holder 32 4.5 Circuit for automatic system 33 4.6 Voltage test for solar mechanical 36

4.7 Current test for solar panel 36

4.8 Solder electrical part 37

4.9 The work done 37

4.10 The raw material was cutting using bendsaw 38

4.11 welding the work piece 38

4.12 Project done picture 39 4.13 The roof not close and lamp not bright . 40

4.14 During the roof close the lamp brighter. 41

4.15 During the roof open. 42

4.16 When the roof closes. 42

PDF Created with deskPDF PDF Writer - Trial :: http://www.docudesk.com

x

LIST OF TABLE

Table No. Page

4.1 Table of material solar panel 34

4.2 Table of material for electrical part 35

4.3 Costing used for the solar panel holder 43

4.4 Costing used for the electrical part 43

LIST OF SYMBOLS AND ABBREVIATIONS

GMAW Gas metal arc welding

NiCd Nickel-cadmium

PV photovoltaic

V Voltage

PDF Created with deskPDF PDF Writer - Trial :: http://www.docudesk.com

CHAPTER 1

INTRODUCTION

1.1 PROJECT SYNOPSIS

1.1.1 General Project Synopsis

The purpose of this project to Development of Home Solar Automation System,

in this project we must know two basic engineering it is mechanical engineering and

electric engineering. In this project ,the machine tools are mostly use to do to the metal

cutting ,grinding and drilling . Welding also important to join inseperably every

component of the product .This product also must know the basic of electrical. This

project help consumer reduce their bill rate. As we known, the source our energy home

is too expensive because of limited source. That why we must to find a new source easy

to get and can renewable. This Project has 3 main part process development. There are

mechanical process , where are we need made solar panel holder. The second process is

electrical process ,in this process we need make a circuit for home electrical system.The

last process is integration the two part , mechanical and electrical parts.

PDF Created with deskPDF PDF Writer - Trial :: http://www.docudesk.com

2

1.1.2 Specific Project Synopsis

My project is to development of solar home automation (electro-mechanical

part). This solar home automation is a model actual house. The house size is 50cm x

40cm x 25cm. This house using 24V solar panel .To know solar panel it function the

bulb and led were install in the house and has a switch to on /off .The house can stand

load 10 kg .Although the solar panel and the holder it weight not more then 5kg but the

stability of house is important. The holder solar panel made from L shape steel. This

holder was fix with house roof because when install the solar panel it’s not slip down. In

the circuit, rechargeable battery 24 V was using for save energy from solar panel and

using when the night.

1.2 PROJECT BACKGROUND

At this moment, this product was available at market. home automation is all

about transforming our existing home to an automated home to suite our living style,

bring comfort and safety and the most important creating a peace of mind knowing that

our house is secure while we are home or away and family and loved ones are safe and

sound.

Using solar powered system, with minimal cost , we can transform our proposed

home automation system fully automated , save energy and high utility bills.

PDF Created with deskPDF PDF Writer - Trial :: http://www.docudesk.com

3

1.3 PROJECT OBJECTIVES

1.3.1 General Objective

Diploma final year project objective is to practice the knowledge and skill

of the student that have been gathered before in solving problem using academic

research, to born an engineer that have enough knowledge and skill. This project

also important to train and increase the student capability to get knowledge,

research, data gathering, analysis making and then solve a problem by research

or scientific research.

1.3.2 Specific Project Objective.

The objectives of this project are:

I ) To design the mechanical part of solar home automation system.

II ) To fabricate the mechanical part of the system.

PDF Created with deskPDF PDF Writer - Trial :: http://www.docudesk.com

4

1.4 PROBLEM STATEMENT

This project is about how to reduce the costing for source at home. This project to

shown solar energy is the best solution to solve high utility bills problem because

solar energy can get at anyway .Solar energy source can get from the sun .Sun can

sunrise every day at anyway in this world .This project are the first house using

automation system in house .The example is when someone enter the house the lamp

in house automatic will in immediately.

1.5 PROJECT SCOPE

The scopes for this project are:

I) Design of structure with given specification

II) Sketching and designing: sketching and designing using Solid Work software

and DXP Portel Software.

Fabrication: fabricate and produce the holder for solar panel and electrical

system circuit.

IV ) Made integration with home.

V ) Test the project .

PDF Created with deskPDF PDF Writer - Trial :: http://www.docudesk.com

CHAPTER 2

LITERATURE REVIEW

2.1 INTRODUCTION

Solar energy is one of source can renewable. This energy can get to free. The

world today , the energy undeniable will vanish forever such as fossil ,coal and other.

This energy will empty so the method we can used wisely is using solar energy.

Solar energy very clean ,easy to get and no pollution occur. In this project , how

solar can energy can use as source for house .

PDF Created with deskPDF PDF Writer - Trial :: http://www.docudesk.com

6

2.2 BASIC COMPONENT

I ) Solar panel has two type :

• Solar photovoltaic modules use solar cells to convert light from the sun

into electricity.

• Solar thermal collectors use the sun's energy to heat water or another

fluid such as oil or antifreeze

II ) Solar panel Holder : Made from L shape steel. That shape in rectangular fit

with size of solar panel.

III) Electric component : the electric component were using in this project is

Zenith diode , Battery ,switch on/off and bulb.

2.2 HISTORY OF SOLAR ENERGY

Figure 2.1: Solar panel

Ancient Greeks and Romans saw great benefit in what we now refer to as passive solar

design—the use of architecture to make use of the sun’s capacity to light and heat indoor

PDF Created with deskPDF PDF Writer - Trial :: http://www.docudesk.com

7

spaces. The Greek philosopher Socrates wrote, “In houses that look toward the south,

the sun penetrates the portico in winter.” Romans advanced the art by covering south

facing building openings with glass or mica to hold in the heat of the winter sun.

Through calculated use of the sun’s energy, Greeks and Romans offset the need to burn

wood that was often in short supply.

Auguste Mouchout, inventor of the first active solar motor, questioned the widespread

belief that the fossil fuels powering the Industrial Revolution in the 19th century would

never run out. “Eventually industry will no longer find in Europe the resources to satisfy

its prodigious expansion. Coal will undoubtedly be used up. What will industry do

then?” Mouchout asked prophetically.

In 1861, Mouchout developed a steam engine powered entirely by the sun. But its high

costs coupled with the falling price of English coal doomed his invention to become a

footnote in energy history.

Nevertheless, solar energy continued to intrigue and attract European scientists

through the 19th century. Scientists developed large cone-shaped collectors that could

boil ammonia to perform work like locomotion and refrigeration. France and England

briefly hoped that solar energy could power their growing operations in the sunny

colonies of Africa and East Asia.

In the United States, Swedish-born John Ericsson led efforts to harness solar

power. He designed the “parabolic trough collector,” a technology which functions more

than a hundred years later on the same basic design. Ericsson is best known for having

conceived the USS Monitor, the armored ship integral to the U.S. Civil War.

Solar power could boast few major gains through the first half of the 20th

century, though interest in a solar-powered civilization never completely disappeared. In

fact, Albert Einstein was awarded the 1921 Nobel Prize in physics for his research on

the photoelectric effect—a phenomenon central to the generation of electricity through

solar cells.

PDF Created with deskPDF PDF Writer - Trial :: http://www.docudesk.com

8

Some 50 years prior, William Grylls Adams had discovered that when light was

shined upon selenium, the material shed electrons, thereby creating electricity.

In 1953, Bell Laboratories (now AT&T labs) scientists Gerald Pearson, Daryl

Chapin and Calvin Fuller developed the first silicon solar cell capable of generating a

measurable electric current. The New York Times reported the discovery as “the

beginning of a new era, leading eventually to the realization of harnessing the almost

limitless energy of the sun for the uses of civilization.”

In 1956, solar photovoltaic (PV) cells were far from economically practical.

Electricity from solar cells ran about $300 per watt. (For comparison, current market

rates for a watt of solar PV hover around $5.) The “Space Race” of the 1950s and 60s

gave modest opportunity for progress in solar, as satellites and crafts used solar paneling

for electricity.

It was not until October 17, 1973 that solar leapt to prominence in energy

research. The Arab Oil Embargo demonstrated the degree to which the Western

economy depended upon a cheap and reliable flow of oil. As oil prices nearly doubled

over night, leaders became desperate to find a means of reducing this dependence. In

addition to increasing automobile fuel economy standards and diversifying energy

sources, the U.S. government invested heavily in the solar electric cell that Bell

Laboratories had produced with such promise in 1953.

The hope in the 1970s was that through massive investment in subsidies and

research, solar photovoltaic costs could drop precipitously and eventually become

competitive with fossil fuels.[3]

PDF Created with deskPDF PDF Writer - Trial :: http://www.docudesk.com

9

2.3 METHOD JOINING OF WELDING PROCESS

2.3.1 Basic Theory of Metal Inert Gas (MIG) Welding

Figure 2.2: Gas metal arc welding (GMAW)

Gas metal arc welding (GMAW), sometimes referred to by its subtypes metal

inert gas (MIG) welding or metal active gas (MAG) welding, is a semi-automatic or

automatic arc welding process in which a continuous and consumable wire electrode and

a shielding gas are fed through a welding gun. A constant voltage, direct current power

source is most commonly used with GMAW, but constant current systems, as well as

alternating current, can be used. There are four primary methods of metal transfer in

GMAW, called globular, short-circuiting, spray, and pulsed-spray, each of which has

distinct properties and corresponding advantages and limitations.

Originally developed for welding aluminum and other non-ferrous materials in

the 1940s, GMAW was soon applied to steels because it allowed for lower welding time

compared to other welding processes. The cost of inert gas limited its use in steels until

several years later, when the use of semi-inert gases such as carbon dioxide became

common. Further developments during the 1950s and 1960s gave the process more

versatility and as a result, it became a highly used industrial process. Today, GMAW is

PDF Created with deskPDF PDF Writer - Trial :: http://www.docudesk.com

10

the most common industrial welding process, preferred for its versatility, speed and the

relative ease of adapting the process to robotic automation. The automobile industry in

particular uses GMAW welding almost exclusively. Unlike welding processes that do

not employ a shielding gas, such as shielded metal arc welding, it is rarely used outdoors

or in other areas of air volatility. A related process, flux cored arc welding, often does

not utilize a shielding gas, instead employing a hollow electrode wire that is filled with

flux on the inside.

2.3.2 The Advantages of MIG Welding

• High productivity, because based on this machine the consumer no need to

stop their work to change rods or chip and brush the weld frequently.

• Easy to learn and makes great –looking welds.

• Can weld stainless steel ,mild steel

• This welding process also can be weld in all position.

2.3.3 The Disadvantages of MIG Welding

• Costs money of consumable ,such as tips and nozzle

• Is not worth a dang on paint , rust ,or dirty surfaces

• Not good for thick steel , because it does not get proper penetration.

PDF Created with deskPDF PDF Writer - Trial :: http://www.docudesk.com

11

2.3.4 Operation of MIG Welding

Figure 2.3: MIG welding Process

The basic technique for GMAW is quite simple, since the electrode is fed

automatically through the torch. By contrast, in gas tungsten arc welding, the welder

must handle a welding torch in one hand and a separate filler wire in the other, and in

shielded metal arc welding, the operator must frequently chip off slag and change

welding electrodes. GMAW requires only that the operator guide the welding gun with

proper position and orientation along the area being welded. Keeping a consistent

contact tip-to-work distance (the stickout distance) is important, because a long stickout

distance can cause the electrode to overheat and will also waste shielding gas. Stickout

distance varies for different GMAW weld processes and applications. For short-circuit

transfer, the stickout is generally 1/4 inch to 1/2 inch, for spray transfer the stickout is

generally 1/2 inch. The position of the end of the contact tip to the gas nozzle are related

to the stickout distance and also varies with transfer type and application. The

orientation of the gun is also important—it should be held so as to bisect the angle

between the workpieces; that is, at 45 degrees for a fillet weld and 90 degrees for

welding a flat surface. The travel angle or lead angle is the angle of the torch with

respect to the direction of travel, and it should generally remain approximately vertical.

PDF Created with deskPDF PDF Writer - Trial :: http://www.docudesk.com

12

However, the desirable angle changes somewhat depending on the type of shielding gas

used—with pure inert gases, the bottom of the torch is out often slightly in front of the

upper section, while the opposite is true when the welding atmosphere is carbon

dioxide.[1]

2.4 Threaded Fastener

Bolts screw and nuts are among the most commonly used threaded fasteners.

Numerous standards and specifications (including thread dimensions, dimensional

tolerances, strength and the quality of the material used to make these fasteners) are

described. Bolts and screw may be secured with nuts, or they may be self tapping is

particularly effective and economical in plastic products where fastening does not

required a tapped hole or nut. If the joint is to be subjected to vibration (such as an

aircraft, engines, and machinery) several especially designed nuts and lock washers are

available. They increase the frictional resistance in tensional direction and so inhibit any

vibration of the fasteners.[1]

Figure 2.4: bolt and nut

PDF Created with deskPDF PDF Writer - Trial :: http://www.docudesk.com

13

2.5 Drill Machine

A drill (from Dutch Drillen) is a tool with a rotating drill bit used for drilling

holes in various materials. Drills are commonly used in woodworking, metalworking,

and construction and DIY.

The drill bit is gripped by a chuck at one end of the drill, and is pressed against the target

material and rotated. The tip of the drill bit does the work of cutting into the target

material, either slicing off thin shavings (twist drills or auger bits), grinding off small

particles (oil drilling), or crushing and removing pieces of the work piece (SDS masonry

drill).

2.5.1 History

The earliest drills were bow drills which date back to the ancient Harappans

and Egyptians. The drill press as a machine tool evolved from the bow drill and is

many centuries old. It was powered by various power sources over the centuries, such as

human effort, water wheels, and windmills, often with the use of belts. With the

coming of the electric motor in the late 19th century, there was a great rush to power

machine tools with such motors, and drills were among them. The invention of the first

electric drill is credited to Mr. Arthur James Arnot and William Blanch Brain, in 1889,

at Melbourne, Australia. Wilhelm Fein invented the portable electric drill in 1895, at

Stuttgart, Germany. In 1917, Black & Decker patented a trigger-like switch mounted

on a pistol-grip handle.

PDF Created with deskPDF PDF Writer - Trial :: http://www.docudesk.com

14

2.5.2 Types

There are many types of drills: some powered manually, others using electricity

or compressed air as the motive power, and a minority driven by an internal combustion

engine (for example, earth drilling augers). Drills with a percussive action (such as

hammer drills, jackhammers or pneumatic drills) are usually used in hard materials such

as masonry (brick, concrete and stone) or rock. Drilling rigs are used to bore holes in the

earth to obtain water or oil. An oil well, water well, or holes for geothermal heating are

created with large drill rigs up to a hundred feet high. Some types of hand-held drills are

also used to drive screws. Some small appliances may be drill-powered, such as small

pumps, grinders, etc. [3]

a) Hand Tool

A variety of hand-powered drills have been employed over the centuries. Here are a

few, starting with approximately the oldest:

• Bow drill

• Brace and bit

• Gimlet

• Breast drill, also known as "eggbeater" drill

• Push drill, a tool using a spiral ratchet mechanism

• Pin chuck, a small hand-held jewellers drill

Figure 2.5: Hand drill

PDF Created with deskPDF PDF Writer - Trial :: http://www.docudesk.com

15

b) Cordless drill

A cordless drill is a type of electric drill which uses rechargeable batteries.

These drills are available with similar features to an AC mains-powered drill. They are

available in the hammer drill configuration and most also have a clutch setting which

allows them to be used for driving screws. Also available now are Right Angle Drills,

which allow a worker to drive screws in a tight space. These are currently less useful

than the corded version however, as one of the main functions is drilling holes through

joist and studs to run electrical and plumbing. While recent battery innovation allows

significantly more drilling, the large diameter holes required (typically 1/2"-1" or larger)

drain current cordless drills quickly.

For continuous use, a worker will have one or more spare battery packs charging

while drilling, so that he or she can quickly swap them, instead of having to wait an hour

or more for recharging, although there are now Rapid Charge Batteries that can charge

in 10-15 minutes.

Early cordless drills started with interchangeable 7.2 V battery packs, and over

the year’s available battery voltages have increased, with 18 V drills being most

common, and 24V drills are available. This allows these tools to produce as much torque

as some mains-powered drills. The drawback of most current models is the use of

nickel-cadmium (NiCd) batteries, which have limited life, self-discharging and

eventually internally short circuiting due to dendrite growth. This severely limits battery

life, and poses a hazardous materials disposal problem. A lot of drill manufacturers,

including DeWalt, Ryobi, and RIDGID, are now using lithium ion batteries. The main

advantages are very short charging time, longer life, and lighter battery weights. Instead

of charging a tool for an hour to get 20 minutes of use, 20 minutes of charge can run the

tool for an hour. Lithium-ion batteries also have a constant discharge rate. The power

output remains constant until the battery is depleted, something that nickel-cadmium

batteries also lack, and which makes the tool much more versatile. Lithium-ion batteries

also hold a charge for a significantly longer time than nickel-cadmium batteries, about

two years if not used, vs. 1 to 4 months for a nickel-cadmium battery.

PDF Created with deskPDF PDF Writer - Trial :: http://www.docudesk.com

16

The handles of cordless drills are usually made from polymorph which is easy and quick

to mold to a comfortable shape for holding. The main body of the drill is usually made

from polythene as it is able to withstand the high temperatures which the drill

reaches.[3]

Figure 2.6: Cordless drill

PDF Created with deskPDF PDF Writer - Trial :: http://www.docudesk.com


Recommended