“Dry It, You’ll Like It…Dehydrating Made Easy” Compiled by Debbie Kent peaceofpreparedness.com “So why dehydrate? There are many reasons: It’s a quick and easy way to preserve food; It saves money to buy on sale and dry; Dried food takes up much less space than fresh or canned food; It is a great way to add variety to your family’s long term food storage When you dehydrate foods you are able to maximize the shelf life, It is a great way to use the zucchini that is taking over your backyard and all the other yummy fruits and vegetables during the winter months. It saves so much time when you cook with dehydrated foods. Another Great Reason? The Prophets have asked us to. President Ezra Taft Benson has urged each of us to be productive and to store what we produce: ―Can or bottle fruit and vegetables from your gardens and orchards. Learn how to preserve food through drying and possibly freezing. Make your storage a part of your budget…We urge you to do this prayerfully and do it now.‖ Prepare for the Days of Tribulation, Ensign,November 1980. Dehydrating Food People have been drying food for thousands of years. In the beginning the sun and air were used to dry out their grain and fruits for the long winter months when no fresh fruits and vegetables were available. Dehydrating removes moisture from food so bacteria, yeasts & molds can’t grow and spoil food. It also slows down action of enzymes but doesn’t inactivate them. Optimum temperature for drying food is 140°F. If higher temps are used food cooks instead of drying. Today, there are still methods of dehydrating that use the air and sun to dry food. But now you can also use your oven (if you can set it at 140°), or else the fastest and best method to dry food which is an electric food dehydrator. You can buy dehydrators: at department stores, mail-order, thrift stores, garage sales and the internet.
Transcript
“Dry It, You’ll Like It…Dehydrating Made Easy” Compiled by Debbie Kent peaceofpreparedness.com
“So why dehydrate? There are many reasons:
It’s a quick and easy way to preserve food; It saves money to buy on sale and dry; Dried food takes up much less space than fresh or canned food; It is a great way to add variety to your family’s long term food storage When you dehydrate foods you are able to maximize the shelf life, It is a great way to use the zucchini that is taking over your backyard and all the other yummy fruits and
vegetables during the winter months. It saves so much time when you cook with dehydrated foods.
Another Great Reason? The Prophets have asked us to. President Ezra Taft Benson has urged each of us to be productive and to store what we produce:
―Can or bottle fruit and vegetables from your gardens and orchards. Learn how to preserve food
through drying and possibly freezing. Make your storage a part of your budget…We urge you to do
this prayerfully and do it now.‖ Prepare for the Days of Tribulation, Ensign,November 1980.
Dehydrating Food People have been drying food for thousands of years. In the beginning the
sun and air were used to dry out their grain and fruits for the long winter
months when no fresh fruits and vegetables were available. Dehydrating
removes moisture from food so bacteria, yeasts & molds can’t grow and
spoil food. It also slows down action of enzymes but doesn’t inactivate
them. Optimum temperature for drying food is 140°F. If higher temps are
used food cooks instead of drying.
Today, there are still methods of dehydrating that use the air and sun to dry food. But
now you can also use your oven (if you can set it at 140°), or else the fastest and best
method to dry food which is an electric food dehydrator. You can buy dehydrators: at
department stores, mail-order, thrift stores, garage sales and the internet.
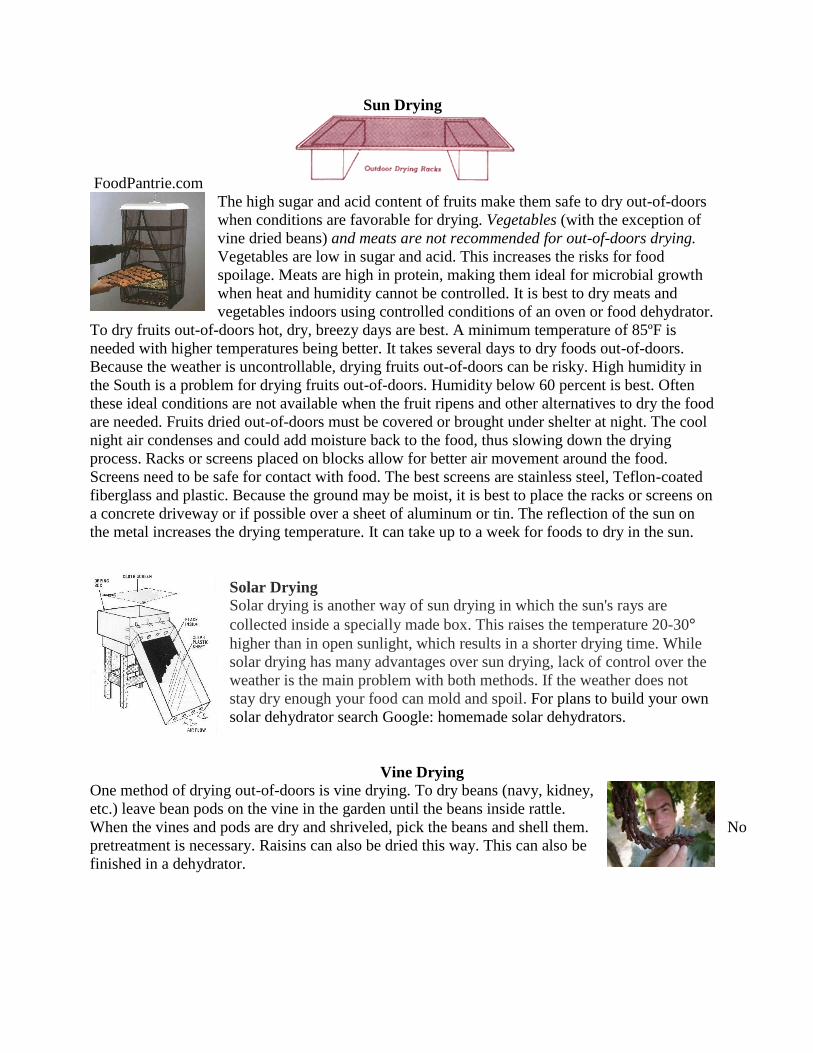
Sun Drying
FoodPantrie.com
The high sugar and acid content of fruits make them safe to dry out-of-doors
when conditions are favorable for drying. Vegetables (with the exception of
vine dried beans) and meats are not recommended for out-of-doors drying.
Vegetables are low in sugar and acid. This increases the risks for food
spoilage. Meats are high in protein, making them ideal for microbial growth
when heat and humidity cannot be controlled. It is best to dry meats and
vegetables indoors using controlled conditions of an oven or food dehydrator.
To dry fruits out-of-doors hot, dry, breezy days are best. A minimum temperature of 85ºF is
needed with higher temperatures being better. It takes several days to dry foods out-of-doors.
Because the weather is uncontrollable, drying fruits out-of-doors can be risky. High humidity in
the South is a problem for drying fruits out-of-doors. Humidity below 60 percent is best. Often
these ideal conditions are not available when the fruit ripens and other alternatives to dry the food
are needed. Fruits dried out-of-doors must be covered or brought under shelter at night. The cool
night air condenses and could add moisture back to the food, thus slowing down the drying
process. Racks or screens placed on blocks allow for better air movement around the food.
Screens need to be safe for contact with food. The best screens are stainless steel, Teflon-coated
fiberglass and plastic. Because the ground may be moist, it is best to place the racks or screens on
a concrete driveway or if possible over a sheet of aluminum or tin. The reflection of the sun on
the metal increases the drying temperature. It can take up to a week for foods to dry in the sun.
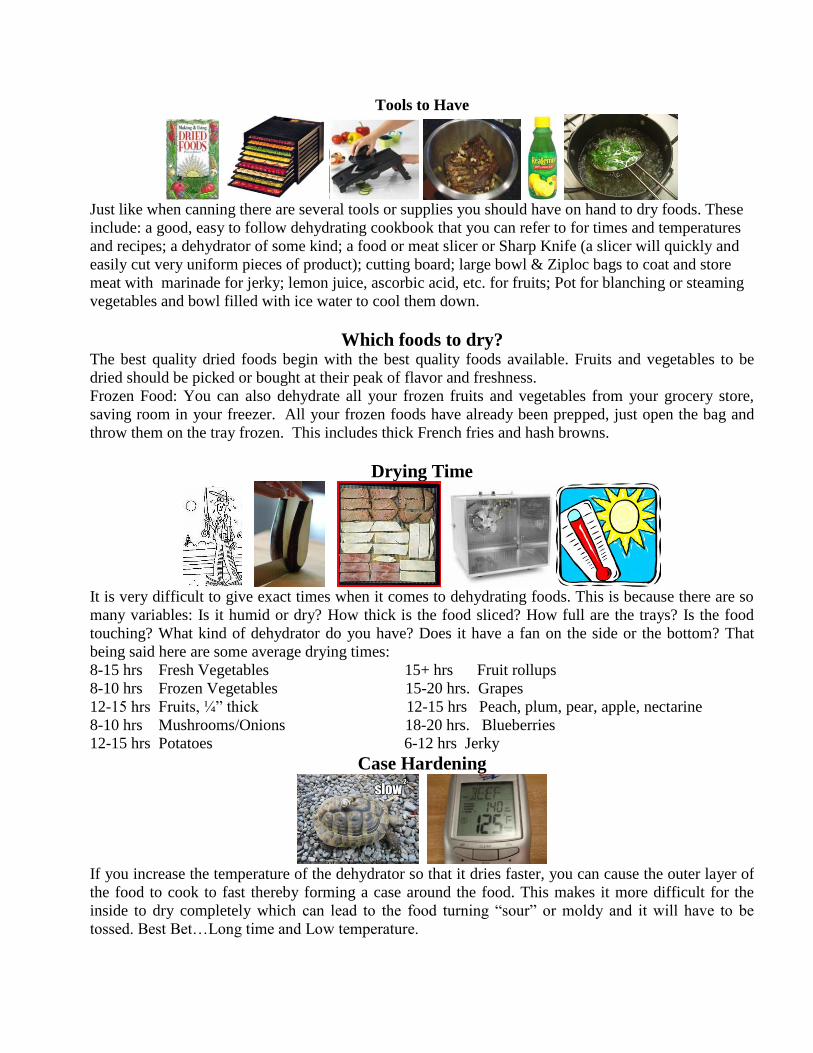
Solar Drying
Solar drying is another way of sun drying in which the sun's rays are
collected inside a specially made box. This raises the temperature 20-30°
higher than in open sunlight, which results in a shorter drying time. While
solar drying has many advantages over sun drying, lack of control over the
weather is the main problem with both methods. If the weather does not
stay dry enough your food can mold and spoil. For plans to build your own
solar dehydrator search Google: homemade solar dehydrators.
Vine Drying
One method of drying out-of-doors is vine drying. To dry beans (navy, kidney,
etc.) leave bean pods on the vine in the garden until the beans inside rattle.
When the vines and pods are dry and shriveled, pick the beans and shell them. No
pretreatment is necessary. Raisins can also be dried this way. This can also be
finished in a dehydrator.
Oven Drying Oven drying would seem the most practical way to experiment with dehydration. It
requires little initial investment, protects foods from insects and dust, and does not
depend on the weather. Continual use of an oven for drying is not recommended
because ovens are less energy efficient than dehydrators, and energy costs tend to be
high in addition, it takes about twice as long to dry foods this way compared to an
electric dehydrator. Drawbacks: Temperature must be below 140°, it is difficult to
maintain this low drying temperature in the oven, and foods are more susceptible to
scorching at the end of the drying period. Oven-dried foods usually are darker, more
brittle and less flavorful than foods dried by a dehydrator. Oven drying
Temperature needs to go down to 140ºF, use oven thermometer to monitor this.
Leave oven door propped oven 2-6 inches
Best if you place a fan outside oven door
Trays should be 3-4‖ shorter front to back and side to side of oven with 2-3‖ between racks.
Electric Dehydrators By Ronco By Excalibur
This is a small electrical appliance for drying foods indoors. A food dehydrator has an electric element
for heat and a fan and vents for air circulation. Dehydrators are efficiently designed to dry foods fast.
Food dehydrators are available from discount department stores, mail-order catalogs, the small
appliance section of a department store, natural food stores and seed or garden supply catalogs. Costs
vary depending on features. Some models are expandable and additional trays can be purchased later,
including ones for fruit leather. Twelve square feet of drying space dries about a half bushel of produce.
Features to Look For Is it safe? Look for the UL seal of approval and a one-year guarantee.
How big is it? Will it fit on your counter?
How many trays does it have? Are they sturdy, made of open mesh and easy to clean?
An enclosed thermostat from 85ºF to 160ºF.
Does it have a side or bottom mounted fan or blower? Side fans are more efficient.
An easy to read dial for regulating temperature.
A timer. Often the completed drying time may occur during the night and a timer could turn the
dehydrator off and prevent scorching.
Double wall construction of metal or high grade plastic. An unlined wood dehydrator is not
recommended, because it is a fire hazard and is difficult to clean.
How noisy is it?
Types of Electric Dehydrators Horizontal vs. Vertical
There are two basic designs for electric dehydrators. One has horizontal air flow and the other has
vertical air flow. In the units with horizontal air flow, the heating element and fan are located on the
side of the unit. The major advantages of horizontal flow are: it reduces flavor mixture so several
different foods can be dried at one time; all trays receive equal heat penetration; and juices or liquids do
not drip down into the heating element. Vertical air flow dehydrators have the heating element and fan
located at the base. If different foods are dried, flavors can mix and liquids can drip into the heating
element.
Dehydrating Made Easy
The following section contains rules, tips and instructions for dehydrating in general:
Dry food as soon as possible after picking to maximize nutrients.
Thin, uniform, slices dry fastest and most evenly.
Place food in single layer, not touching any other pieces.
Follow directions and drying times given in recipes.
Turn over half-way through drying process.
Check food, it dries much faster at the end of drying period.
Dehydrate foods that process for the same amount of time and temperature together.
Clean Environment
Keeping your area and hands clean produces safer dried products. Wearing gloves cuts down on the
spread of bacteria, especially when handling meat. There are natural oils and moistures in your hands
which will contaminate your foods by reintroducing moisture. The whole idea to dehydrating foods is
to maintain a good quality food with a long shelf life. Wearing protective gloves helps you obtain these
goals.
Tools to Have
Just like when canning there are several tools or supplies you should have on hand to dry foods. These
include: a good, easy to follow dehydrating cookbook that you can refer to for times and temperatures
and recipes; a dehydrator of some kind; a food or meat slicer or Sharp Knife (a slicer will quickly and
easily cut very uniform pieces of product); cutting board; large bowl & Ziploc bags to coat and store
meat with marinade for jerky; lemon juice, ascorbic acid, etc. for fruits; Pot for blanching or steaming
vegetables and bowl filled with ice water to cool them down.
Which foods to dry? The best quality dried foods begin with the best quality foods available. Fruits and vegetables to be
dried should be picked or bought at their peak of flavor and freshness.
Frozen Food: You can also dehydrate all your frozen fruits and vegetables from your grocery store,
saving room in your freezer. All your frozen foods have already been prepped, just open the bag and
throw them on the tray frozen. This includes thick French fries and hash browns.
Drying Time
It is very difficult to give exact times when it comes to dehydrating foods. This is because there are so
many variables: Is it humid or dry? How thick is the food sliced? How full are the trays? Is the food
touching? What kind of dehydrator do you have? Does it have a fan on the side or the bottom? That
If you increase the temperature of the dehydrator so that it dries faster, you can cause the outer layer of
the food to cook to fast thereby forming a case around the food. This makes it more difficult for the
inside to dry completely which can lead to the food turning ―sour‖ or moldy and it will have to be
tossed. Best Bet…Long time and Low temperature.
Packaging Dried Foods
Dried foods are susceptible to insect contamination and moisture re-absorption and must be properly
packaged and stored immediately. First, cool completely. Warm food causes sweating which could
provide enough moisture for mold to grow. Pack foods into clean, dry insect-proof containers as tightly
as possible without crushing. If you are going to use you dried foods within a month or two, you can
just put them into Ziplocs or Tupperware type containers. IF you are packaging for Long Term Storage
then see Storing Dried Food Section.
Store dried foods in clean, dry home canning jars (using Food Saver Canning Jar attachment);
plastic freezer containers with tight-fitting lids; or in plastic freezer bags.
Vacuum packaging using Food Saver or Seal-a-Meal is also a good option.
Pack foods in amounts that can be used all at once. Each time a package is re-opened, the food
is exposed to air and moisture that can lower the quality of the food and result in spoilage.
Storing Dried Foods
The taste and quality of all stored food is affected by HALT: humidity; air; light and temperature. The
drier; less oxygen; darker and cooler it is the longer the food will look and taste good. Food quality is
affected by most by heat. For instance: if the food is stored at a constant temperature 60° = it will store
for 20 years; if stored at 95° it will last 2.5 years. Cooler is much better. If you are going to store things
in the Mylar or food saver bags you will need to put them in buckets with gamma lids to keep the
rodents and light out. SEE BELOW for more information on storage times. Oxygen packs are small oxygen absorbing packages that can be placed into your vacuum sealed bags,
buckets, or cans of dehydrated foods. The purpose of an oxygen pack is to absorb any residual oxygen
that might be present in your bag or can, allowing your food to store much longer.
What O2 packets size to use? 100 cc per one gallon vacuum bag or glass jar. (available at HoneyvilleGrain.com)
Drying Fruit
Dried fruits are the oldest, the most familiar, and the most popular of dried foods. They also are the
simplest to dry and the simplest to use. Raisins, apples, banana chips, apricots and plums are favorites.
For dried fruit mixtures, they are best if they are prepared, dried and packaged separately, the combined
just before eating. (Making & Using Dried Foods)
Preparing the Fruits – wash fruit and core, if needed
Fruits can be halved or sliced and some left whole
Apples can be cored and sliced - wedges, rings
Bananas can be sliced
If fruit dried whole, ―check‖ or crack the skin to speed drying – cranberries – place in boiling
then cold water to ―check‖
Oranges, Lemons and Limes can be sliced and placed right on the trays.
Pre-treating the Fruit (Excalibur Dehydration Guide)
Pre-treating prevents fruits from turning brown. There are several different ways to pre-treat... Some
fruits benefit from blanching. Blotting off any excess moisture with paper towels before placing the
food in the dehydrator is the final important step. Excess moisture on foods will prolong the drying
cycle.
Ascorbic Acid: Is simply a form of Vitamin C and is found in all citrus fruits. You can buy it
under the name Ascorbic Acid in drug or health food stores in crystal, powder or table form.
Soak the prepared fruit in a solution of 2 T. of power to 1 quart of water for 2 minutes.
Fruit Juice Dip: Citrus Juices, such as: pineapple, lemon or lime may be used as a
natural anti-oxidant. Bottled lemon juice or pineapple juice can be sprayed directly
on the items instead of soaking them in a bowl. Soaking food takes away important vitamins
and minerals. To soak: stir 1 cup of juice into 1 quart of lukewarm water and soak fruit for
10 minutes. (Note: fruit juice is only 1/6th
as effective as pure ascorbic acid and may add
taste to your food.)
Honey Dip: Honey dips are used quite frequently on fruits to be dried. The honey will
make fruit considerable sweeter and will add calories as well. Dissolve 1 c of sugar in 3
cups of hot water. Allow mixture to cool until lukewarm, and then add 1 cup honey. Dip
fruits in small batches, remove with a slotted spoon and drain thoroughly before
dehydrating.
Pectin: Pectin (Fruit Fresh) is another way to preserve the fresh fruit flavor, color and
texture of your fruit. It does not add taste or color. Combine 3 T. with 8 cups of water, dip
fruits and drain. For fruit leather add 1 t. to 2 cups pureed fruit.
Blanching Fruit
Some fruits have a better texture when dehydrated if blanched first. These include: apricots,
blueberries, cranberries, gooseberries, currants, grapes (raisins), peaches and plums (prunes). Most
just have to be dipped in boiling water for 30 seconds then cooled in ice water and drained.
Drying Fruits
Fruits can be dried in sun or in dehydrator at 115° (most). See chart for times.
How to Tell if Fruit is Done
Let food cool 5-10 minutes before testing.
Cut several cooled pieces in half…should be no visible moisture and should not be able to
squeeze any moisture from fruit
Not be sticky or tacky, should spring back when squeezed together.
If piece folded in half, shouldn’t stick to itself.
Peaches, pears, apples and plums should remain pliable but others such as berries and rhubarb
should be crisp. Banana chips can be either.
After Fruit is Done
Cool fruit 30-60 minutes before packaging…don’t pack too soon or moisture buildup could
occur…don’t wait too long or could pick up moisture
Conditioning Fruits
The moisture content of home dried fruit should be about 20 percent. When the fruit is taken from the
dehydrator, the remaining moisture may not be distributed equally among the pieces because of their
size or their location in the dehydrator. Conditioning is the process used to equalize the moisture. It
reduces the risk of mold growth.
To condition the fruit, take the dried fruit that has cooled and pack it loosely in plastic or glass jars.
Seal the containers and let them stand for 7 to 10 days. The excess moisture in some pieces will be
absorbed by the drier pieces. Shake the jars daily to separate the pieces and check the moisture
condensation. If condensation develops in the jar, return the fruit to the dehydrator for more drying.
Pack cooled food loosely in plastic or glass jars, seal and let stand for 7-10 days
Shake jars daily to separate pieces and check for moisture condensation
If condensation, return to dehydrator for more drying…unless has started to mold, then dispose
of.
After conditioning, package and store the fruit as described above.
Drying Vegetables
To retain the best flavor and nutrition in dried vegetables, pick or buy the crispest, freshest and
most flavorful vegetables you can. More care must be taken in pre-treating and drying vegetables
because they are low-acid and therefore more susceptible to spoilage than most fruits. Strong
smelling foods should not be dehydrated in the same batch as other foods. Try putting your
dehydrator outside on a hot dry day when doing your garlic and onions to avoid the spreading of
strong unwanted scents through your home.
Preparing Vegetables
To preparing the vegetables you will need to: Wash, core, trim and peel according to directions
and then slice or chop if needed into uniform sizes. Remember that the food will shrink
dramatically when drying, if cut too small it can fall through the racks. Most vegetables need to
be pre-treated in one of the following ways to stop the enzyme process from turn the vegetables
and unappetizing black color.
Pre-Treating Vegetables
Pre-treating is necessary for most vegetables (not: peppers, Collard Greens, Spinach,
Mushrooms, onions or garlic) to keep them from turning dark, brown, black or rotting during
storage. This process includes water or steam blanching.
Water blanching: Fill a large pan over half-full with water. Bring the water to a boil and stir the
food directly into the boiling water. Start counting time as soon as water returns to boil. If takes
more than 1 minute to return to boil, are putting in too many vegetables at a time. Blanch for
about 3 minutes. Remove food into ice water for a few minutes to cool, drain and blot with a
towel to remove excess water before drying.
Steam blanching: Using an old fashioned, pan-type steam, fill the bottom with 2 inches of water
and bring to a boil. Add vegetables no more than 2 inches deep above boiling water. Cover and
steam according to directions given for each vegetable. Remove to bowl of ice water for few
minutes, then drain and blot dry, before putting in dehydrator.
Drying Vegetables
Dehydrator temperatures should not go above 120°. See chart for more details.
Dry vegetables until brittle or ―crisp‖ (Root vegetables, squash and pumpkin will be
tough and leathery but still pliable.
Check dried vegetables for moisture once or twice a week for the couple of weeks.
Fruit and Vegetable Leathers
Fruit leathers are homemade fruit rolls made from ripe or slightly over ripe: apples, apricots,
In Conclusion This year our Theme is ―The Peace of Preparedness‖ and we have and will continue to cover
many aspects of preparedness for both cooking with our Food Storage and being prepared in
other areas in our quest to be ―Be Prepared in All Things‖. Some of you are just starting on this
path while others are getting close to the top of the trail. No matter where you are you must
watch for the signs along the way. Some of these signs tell you which way to go, some are
reminders to stay on the path, some them warn you of
dangers ahead and some encourage you to keep going
when the terrain is difficult. Such is real life. We are all on this
path of earth life. We have parents, leaders and Prophets
to show us the way to go. Sometimes when we get
busy with the distraction in life they have to say, ―Hey, you
are going the wrong way, come back to the path!‖Sometimes
they give us warnings both in word and in scripture of
dangers that lie ahead and how we can prepared for them.
Always, they encourage us and remind us that we CAN DO
IT and that we are not alone. I hope that these classes do all
these things too. For that is my goal: to remind you where
you are going, what you need to get there and encourage you
all along the way. As the storms continue to brew around us, we can be at peace knowing we
have done all we can both spiritually and temporally to be prepared. I love the Lord, I am so
grateful to be here on earth at this time as we prepare for the Second Coming of our Savior. I
hope that through these classes I can in some small way help you to be better prepared for the
days of want that lie ahead.
Brigham Young said, “A great many have taken this counsel, and they are prepared...
Who is deserving of praise? The persons who take care of themselves,
or the ones who always trust in the great mercies of the Lord to take care of them?
It is just as consistent to expect that the Lord will supply us with fruit when we do not plant the
trees; or that, when we do not plow and sow and are saved the labor of harvesting, we should cry to
the Lord to save us from want, as to ask Him to save us from the consequences of our own folly,
disobedience and waste..."The Lord has said, 'Gather and save the produce I put within your reach, and prepare against a day of want.” - (Journal of Discourses, vol. 12, p. 244
I hope that this class and the canning class have gotten you excited about different and easy ways
to ―Put Up the Harvest‖ and by doing so: add nutrition and variety to your family’s food storage
and gain the blessings of gathering and saving the produce He puts within your reach.
RECIPES
Fruit Leathers Leathers from Fresh Fruit
Select ripe or slightly overripe fruit. Wash fresh fruit or berries in cool water. Remove peel,
seeds and stem. Cut fruit into chunks. Use 2 cups of fruit for each 13" x 15" inch fruit leather.
Purée fruit until smooth. Add 2 t. of lemon juice, 1/8 t. ascorbic acid or 1 t. fruit fresh for each 2
cups light colored fruit to prevent darkening.
Optional: To sweeten, add corn syrup, honey or sugar. Corn syrup or honey is best for longer
storage because it prevents crystals. Sugar is fine for immediate use or short storage. Use ¼ to ½
cup sugar, corn syrup or honey for each 2 cups of fruit. Saccharin-based sweeteners could also be
used to reduce tartness without adding calories. Aspartame sweeteners may lose sweetness
during drying.
Leathers from Canned or Frozen Fruit Home reserved or store-bought canned or frozen fruit can be used.
Drain fruit, save liquid.
Use 1 pint of fruit for each 13" X 15" leather.
Purée fruit until smooth. If thick, add liquid.
Add 2 teaspoons of lemon juice or 1/8 teaspoon ascorbic acid (375 mg) for each 2 cups of
light colored fruit to prevent darkening.
Applesauce can be dried alone or added to any fresh fruit purée as an extender. It
decreases tartness and makes the leather smoother and more pliable.
Fruit Leather: Spices, Flavors and Garnishes
To add interest to your fruit leathers, spices, flavorings or garnishes can be added.
Spices to Try — Allspice, cinnamon, cloves, coriander, ginger, mace, mint, nutmeg or pumpkin
pie spice. Use sparingly, start with 1/8 teaspoon for each 2 cups of purée.