9
Task 1
| Date post: | 10-Feb-2017 |
| Category: |
Automotive |
| Upload: | stacey-johnson |
| View: | 74 times |
| Download: | 0 times |

Task 1
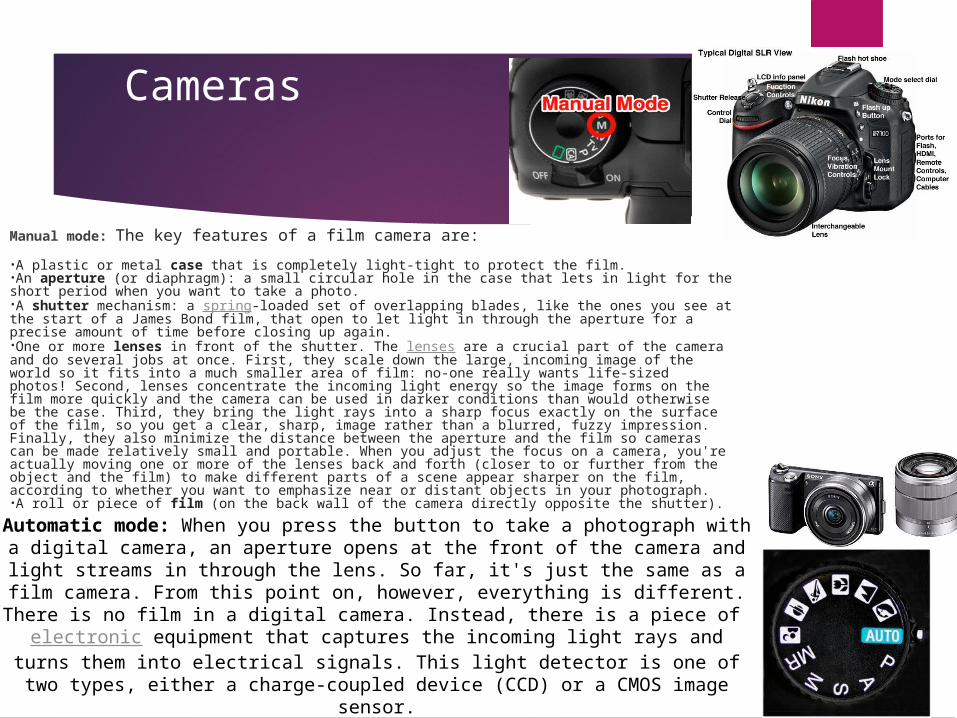
Cameras
Manual mode: The key features of a film camera are: •A plastic or metal case that is completely light-tight to protect the film.•An aperture (or diaphragm): a small circular hole in the case that lets in light for the short period when you want to take a photo.•A shutter mechanism: a spring-loaded set of overlapping blades, like the ones you see at the start of a James Bond film, that open to let light in through the aperture for a precise amount of time before closing up again.•One or more lenses in front of the shutter. The lenses are a crucial part of the camera and do several jobs at once. First, they scale down the large, incoming image of the world so it fits into a much smaller area of film: no-one really wants life-sized photos! Second, lenses concentrate the incoming light energy so the image forms on the film more quickly and the camera can be used in darker conditions than would otherwise be the case. Third, they bring the light rays into a sharp focus exactly on the surface of the film, so you get a clear, sharp, image rather than a blurred, fuzzy impression. Finally, they also minimize the distance between the aperture and the film so cameras can be made relatively small and portable. When you adjust the focus on a camera, you're actually moving one or more of the lenses back and forth (closer to or further from the object and the film) to make different parts of a scene appear sharper on the film, according to whether you want to emphasize near or distant objects in your photograph.•A roll or piece of film (on the back wall of the camera directly opposite the shutter).
Automatic mode: When you press the button to take a photograph with a digital camera, an aperture opens at the front of the camera and light streams in through the lens. So far, it's just the same as a film camera. From this point
on, however, everything is different. There is no film in a digital camera. Instead, there is a piece of electronic equipment that captures the incoming
light rays and turns them into electrical signals. This light detector is one of two types, either a charge-coupled device (CCD) or a CMOS image sensor.
Capturing Images
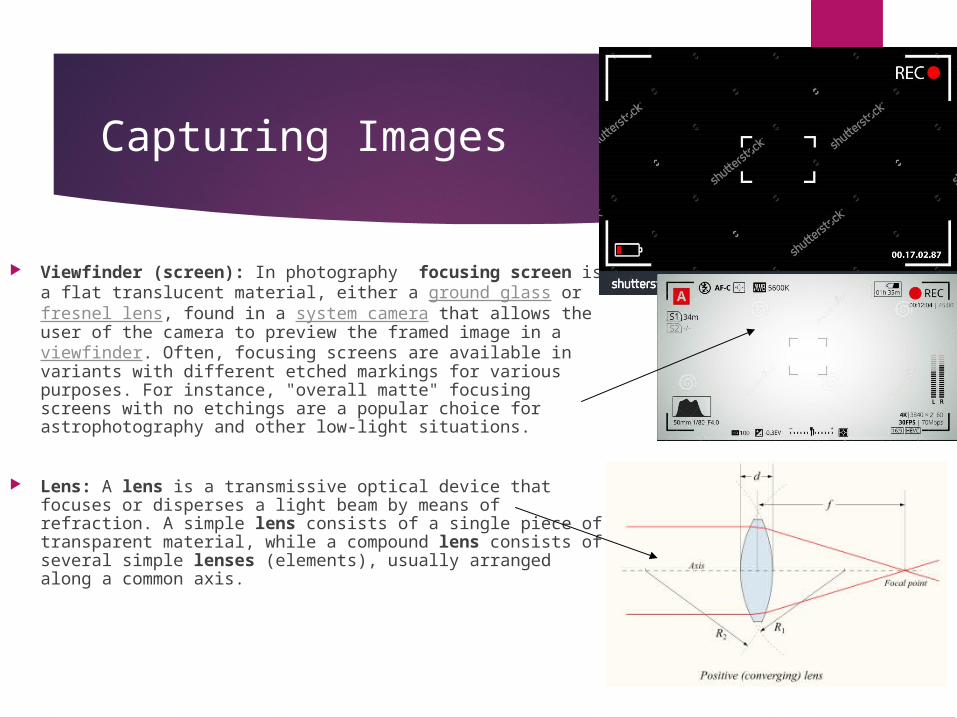
Viewfinder (screen): In photography focusing screen is a flat translucent material, either a ground glass or fresnel lens, found in a system camera that allows the user of the camera to preview the framed image in a viewfinder. Often, focusing screens are available in variants with different etched markings for various purposes. For instance, "overall matte" focusing screens with no etchings are a popular choice for astrophotography and other low-light situations.
Lens: A lens is a transmissive optical device that focuses or disperses a light beam by means of refraction. A simple lens consists of a single piece of transparent material, while a compound lens consists of several simple lenses (elements), usually arranged along a common axis.
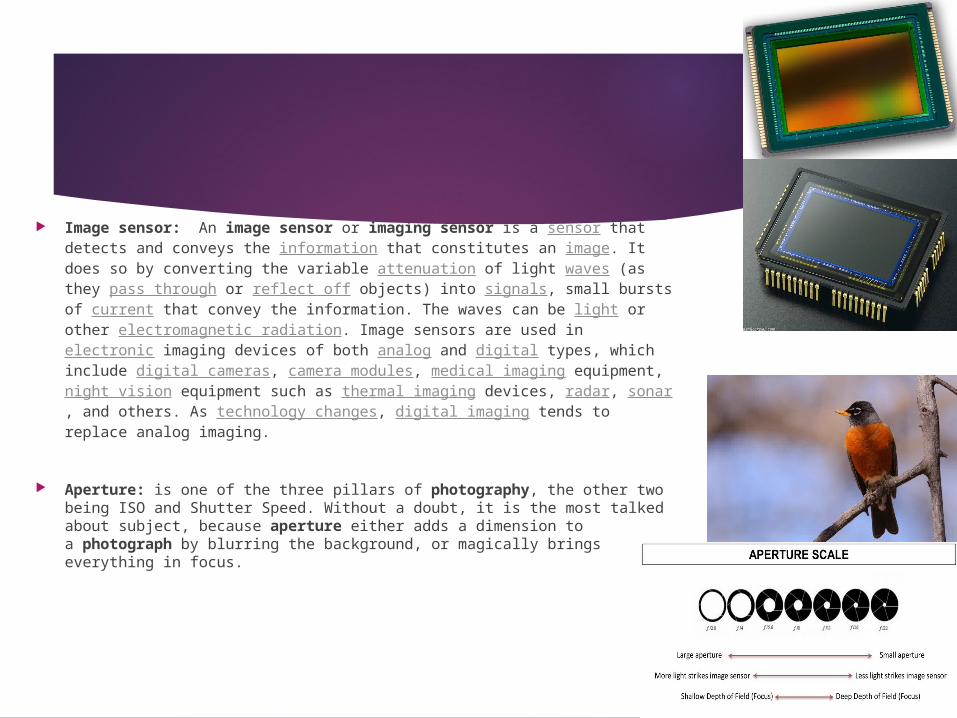
Image sensor: An image sensor or imaging sensor is a sensor that detects and conveys the information that constitutes an image. It does so by converting the variable attenuation of light waves (as they pass through or reflect off objects) into signals, small bursts of current that convey the information. The waves can be light or other electromagnetic radiation. Image sensors are used in electronic imaging devices of both analog and digital types, which include digital cameras, camera modules, medical imaging equipment, night vision equipment such as thermal imaging devices, radar, sonar, and others. As technology changes, digital imaging tends to replace analog imaging.
Aperture: is one of the three pillars of photography, the other two being ISO and Shutter Speed. Without a doubt, it is the most talked about subject, because aperture either adds a dimension to a photograph by blurring the background, or magically brings everything in focus.
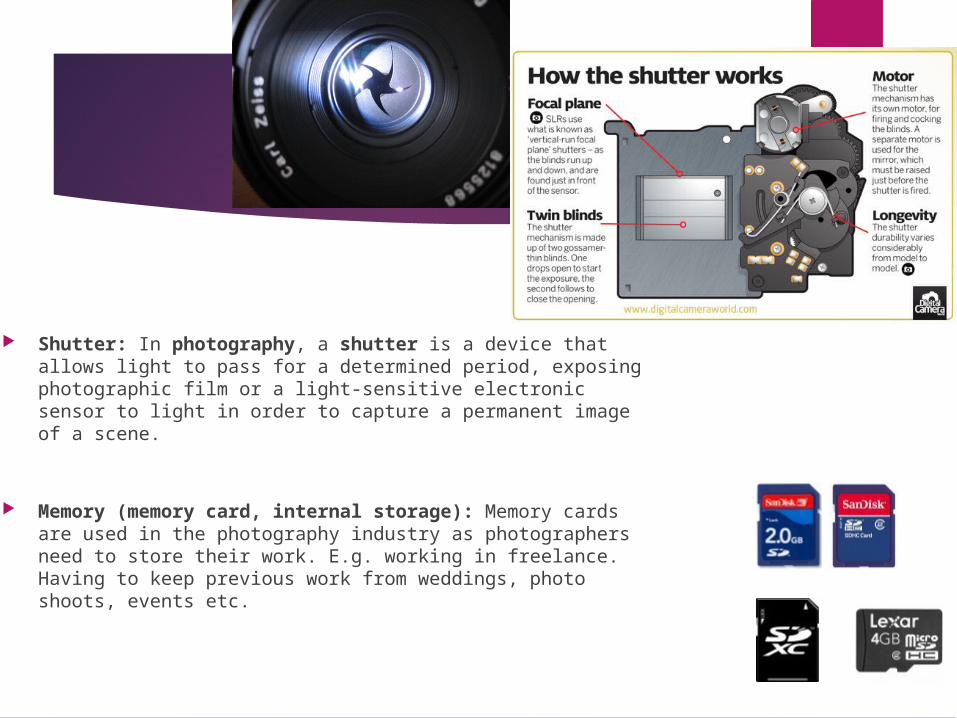
Shutter: In photography, a shutter is a device that allows light to pass for a determined period, exposing photographic film or a light-sensitive electronic sensor to light in order to capture a permanent image of a scene.
Memory (memory card, internal storage): Memory cards are used in the photography industry as photographers need to store their work. E.g. working in freelance. Having to keep previous work from weddings, photo shoots, events etc.
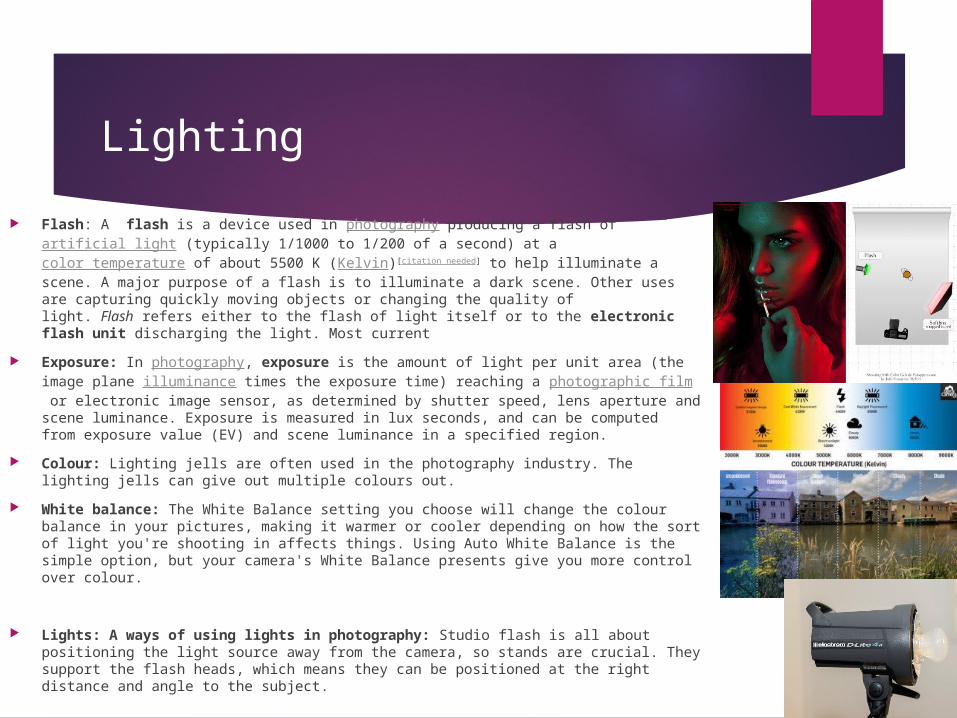
Lighting Flash: A flash is a device used in photography producing a flash of artificial light
(typically 1/1000 to 1/200 of a second) at a color temperature of about 5500 K (Kelvin)[citation needed] to help illuminate a scene. A major purpose of a flash is to illuminate a dark scene. Other uses are capturing quickly moving objects or changing the quality of light. Flash refers either to the flash of light itself or to the electronic flash unit discharging the light. Most current
Exposure: In photography, exposure is the amount of light per unit area (the image plane illuminance times the exposure time) reaching a photographic film or electronic image sensor, as determined by shutter speed, lens aperture and scene luminance. Exposure is measured in lux seconds, and can be computed from exposure value (EV) and scene luminance in a specified region.
Colour: Lighting jells are often used in the photography industry. The lighting jells can give out multiple colours out.
White balance: The White Balance setting you choose will change the colour balance in your pictures, making it warmer or cooler depending on how the sort of light you're shooting in affects things. Using Auto White Balance is the simple option, but your camera's White Balance presents give you more control over colour.
Lights: A ways of using lights in photography: Studio flash is all about positioning the light source away from the camera, so stands are crucial. They support the flash heads, which means they can be positioned at the right distance and angle to the subject.
Support
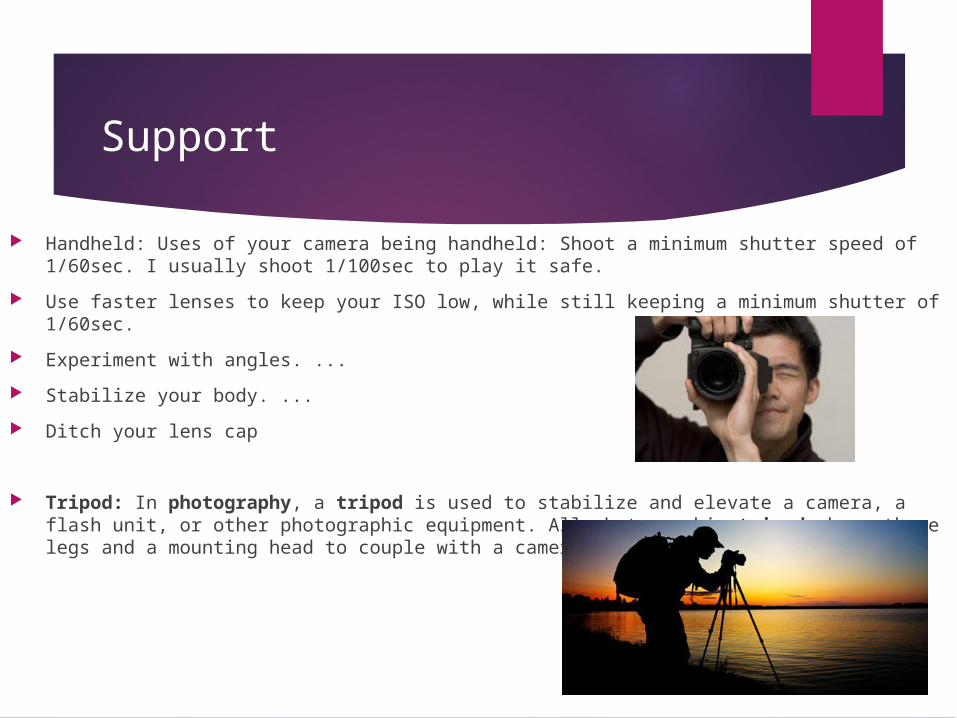
Handheld: Uses of your camera being handheld: Shoot a minimum shutter speed of 1/60sec. I usually shoot 1/100sec to play it safe.
Use faster lenses to keep your ISO low, while still keeping a minimum shutter of 1/60sec. Experiment with angles. ... Stabilize your body. ... Ditch your lens cap
Tripod: In photography, a tripod is used to stabilize and elevate a camera, a flash unit, or other photographic equipment. All photographic tripod shave three legs and a mounting head to couple with a camera.
File StorageAdvantages Disadvantages• When shooting in a format like JPEG image
information is compressed and lost. Because no information is compressed with RAW you’re able to produce higher quality images, as well as correct problem images that would be unrecoverable if shot in the JPEG format.
• Levels of brightness are the number of steps from black to white in an image. The more you have, the smoother the transitions of tones. Smooth is good.
• The most attractive bit about filming in RAW is the sheer amount of information that is retained in your video. The details that normally disappear in the shadows and highlights of DSLR footage is completely retained. No longer do you have to sacrifice quality in one area for another.
• Almost every DSLR shoots in an 8 bit colour space with 4-2-0 sampling. This means that there are only a certain number of colours to choose from, with only a specific portion of those said colours being sampled. This is where RAW comes in. RAW video typically has a colour space between 10bits and 16bits and a sampling of 4-2-2 or 4-4-4-4; which is useful information, but that’s not what RAW file format really means. I’m not going to go into details, but it effectively means that you can capture a huge range of colours and information, and expose your footage in post. You technically have the flexibility to change the way your footage behaves after you film it. It’s much like shooting photographs in RAW. You retain a wide range of information and use that to achieve the best results possible. It’s truly amazing what you can do when you get to colour grading.
• The most attractive bit about filming in RAW is the sheer amount of information that is retained in your video. The details that normally disappear in the shadows and highlights of DSLR footage is completely retained. No longer do you have to sacrifice quality in one area for another.
• Almost every DSLR shoots in an 8 bit color space with 4-2-0 sampling. This means that there are only a certain number of colors to choose from, with only a specific portion of those said colors being sampled. This is where RAW comes in. RAW video typically has a color space between 10bits and 16bits and a sampling of 4-2-2 or 4-4-4-4; which is useful information, but that’s not what RAW file format really means. I’m not going to go into details, but it effectively means that you can capture a huge range of colours and information, and expose your footage in post. You technically have the flexibility to change the way your footage behaves after you film it. It’s much like shooting photographs in RAW. You retain a wide range of information and use that to achieve the best results possible. It’s truly amazing what you can do when you get to colour grading.
Raw

Size
One of the primary differences between looking at a scene in person and looking at a photograph of it is that in person you have numerous cues as to the size of objects. A cow, a car, or a pumpkin somewhere in the scene helps shape your sense of scale. When you compose a photograph, though, you eliminate many of these clues, leaving viewers to wonder about the size of objects; subjects that appear only inches tall may in reality be enormous, and vice versa. The more unusual or obscure the subject, the less able we are to judge its true size without help.


