45
Pinout User Manual Version 1.0(Draft) Zesty Systems Inc. 2016.7.27
Pinout User Manual Version 1.0(Draft)
Zesty Systems Inc. 2016.7.27
PINOUT MANUAL
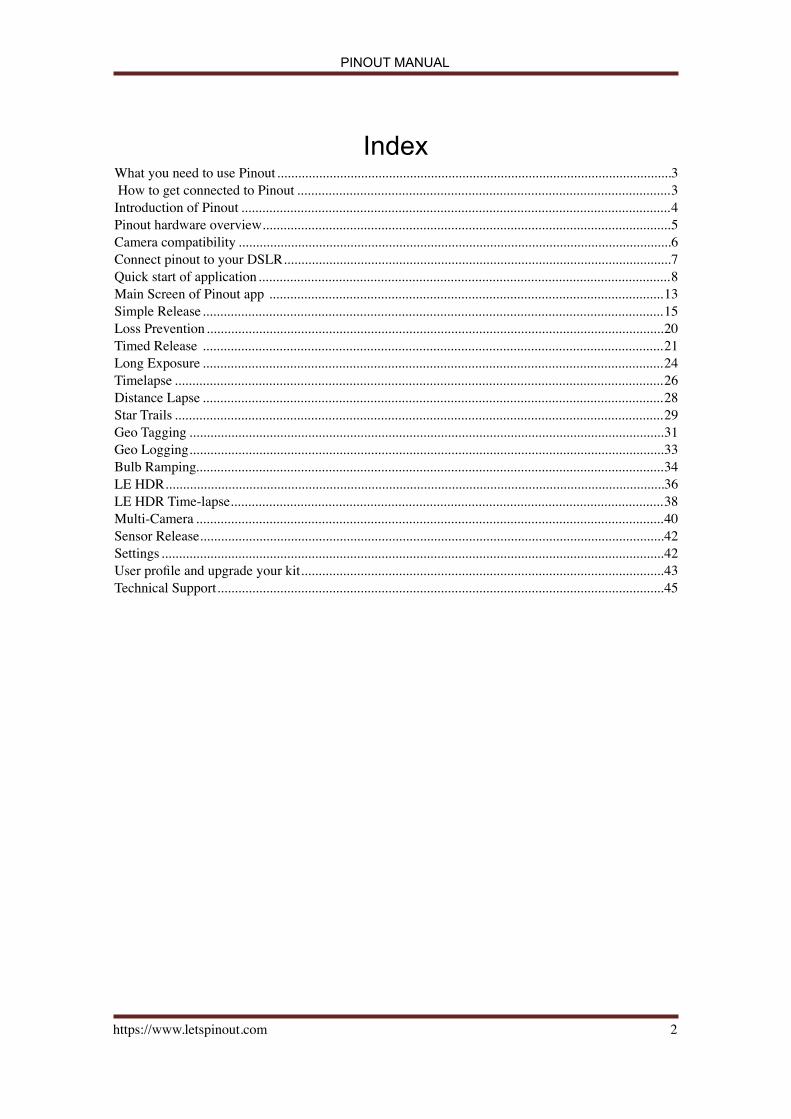
Index What you need to use Pinout 3................................................................................................................. How to get connected to Pinout 3...........................................................................................................Introduction of Pinout 4...........................................................................................................................Pinout hardware overview 5.....................................................................................................................Camera compatibility 6............................................................................................................................Connect pinout to your DSLR 7...............................................................................................................Quick start of application 8......................................................................................................................Main Screen of Pinout app 13.................................................................................................................Simple Release 15....................................................................................................................................Loss Prevention 20...................................................................................................................................Timed Release 21....................................................................................................................................Long Exposure 24....................................................................................................................................Timelapse 26............................................................................................................................................Distance Lapse 28....................................................................................................................................Star Trails 29............................................................................................................................................Geo Tagging 31........................................................................................................................................Geo Logging 33........................................................................................................................................Bulb Ramping 34......................................................................................................................................LE HDR 36...............................................................................................................................................LE HDR Time-lapse 38............................................................................................................................Multi-Camera 40......................................................................................................................................Sensor Release 42.....................................................................................................................................Settings 42................................................................................................................................................User profile and upgrade your kit 43........................................................................................................Technical Support 45................................................................................................................................
https://www.letspinout.com � 2
PINOUT MANUAL
What you need to use Pinout To use pinout with your DSLR you will need 1. Pinout app
A) Smartphone: your smartphone must have BLE capability to use pinout B) iOS device: iPhone 4s/5/5s/6/6s or later, iPad2 / iPad mini, Apple watch,iOS 9.0 or
later C) Android device: OS4.4、5.0、6.0 or later (BLE is required)
2. Pinout device 3. Your DSLR
How to get connected to Pinout 1. Download pinout app to your smartphone (put link here) 2. Attach pinout to your DSLR 3. Make sure BLE is available on your smartphone
https://www.letspinout.com � 3

PINOUT MANUAL
Introduction of Pinout Pinout is a small device that plugs to your DSLR camera; it uses Bluetooth LE technology and a dedicated app on your smartphone to give you remote access and much more to the camera. The main functions of pinout are as follows ◇ Simple release ◇ Long exposure ◇ Timed release ◇ Time lapse ◇ Distance lapse ◇ Star trail ◇ Geo tagging ◇ Geo logging ◇ Bulb ramping ◇ LE HDR ◇ LE HDR time lapse ◇ Loss prevention ◇ Multi-camera control
https://www.letspinout.com � 4

PINOUT MANUAL
Pinout hardware overview Pinout does not require batteries and uses a very tiny portion of camera’s charge. It seamlessly blends in with camera. No cable, does not use hot shoe, and no need to take it off before stowing away camera in camera bag.
https://www.letspinout.com � 5
TYPE-B
TYPE-A LED indicatorAfter connecting with camera, the red LED goes on and off.
10-pins connectorConnect to remote-control interface
LED indicatorAfter connecting with camera, the red LED goes on and off.
10-pins connectorConnect to remote-control interface

PINOUT MANUAL
Camera compatibility Pinout includes type A and type B. Please confirm your digital camera models before purchase
Type DSLR Models
Type A Nikon D5, D500, D4, D4s, D3, D3S, D3X, D2X, D2XS, D2HS, D2H, D800, D800E, D810, D810A, D700, D300, D300S, D200 and Fujifilm S5 Pro
Type B Nikon Df, D750, D610, D600, D90, D7200, D7100, D7000, D5500, D5300, D5200, D5100, D5000, D3300, D3200, D3100, COOLPIX A, COOLPIX P7800, COOLPIX P7700
https://www.letspinout.com � 6

PINOUT MANUAL
Connect pinout to your DSLR Connect to remote-control interface of the camera
Connect pinout to your DSLR by easily friction fit the port (please don’t screw otherwise the interface or pinout maybe damaged).
! TYPE-A
! TYPE-B
https://www.letspinout.com � 7
PINOUT MANUAL
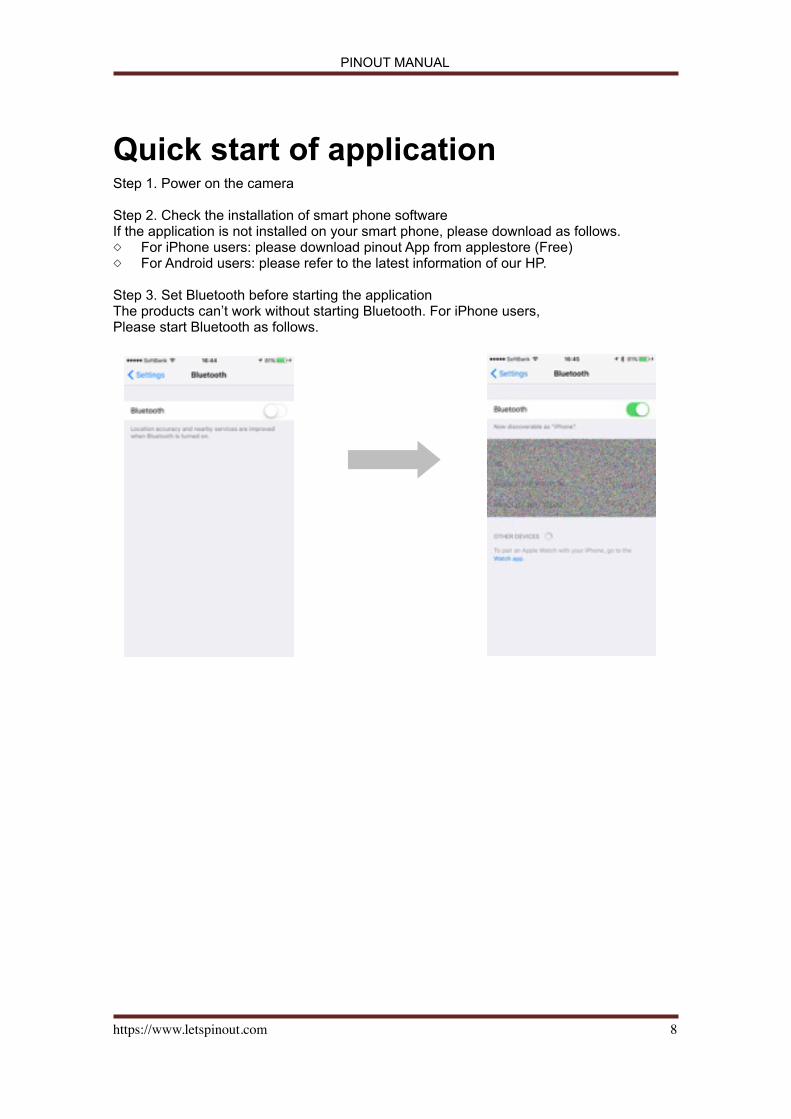
Quick start of application Step 1. Power on the camera
Step 2. Check the installation of smart phone software If the application is not installed on your smart phone, please download as follows. ◇ For iPhone users: please download pinout App from applestore (Free) ◇ For Android users: please refer to the latest information of our HP.
Step 3. Set Bluetooth before starting the application The products can’t work without starting Bluetooth. For iPhone users, Please start Bluetooth as follows.
https://www.letspinout.com � 8

PINOUT MANUAL
Step 4. Start pinout app Start pinout application. If it is the first time your start pinout app, you will see following.
! The registration page of pinout app
Step 5 user registration and pinout kit setting or login If you are a new user please choose new user and register as following. Or login.
! Register a new user
https://www.letspinout.com � 9

PINOUT MANUAL
After you registered as a new user you need to choose the kit you purchased.
! Choose the pinout kit you purchased
If you purchased a pro kit or a full kit, you need to tear off the seal and scan the QR code printed on the warranty card or input the passcode manually. When the scan is finished, your registration is done and you are ready to use Pinout.
! QR code scan to register to a pro or full kit user
https://www.letspinout.com � 10

PINOUT MANUAL
Step 6. Connect pinout to your DSLR Tap the camera icon on top-right screen, pinout app will start to search DSLRs and give out a list, tap the right DSLR to connect to pinout app.
! Tap top-right camera icon
! Discover the DSLR nearby
https://www.letspinout.com � 11

PINOUT MANUAL
! Connect the right DSLR to pinout app
Step 7. Shooting Click back to the main screen, and press the red S button to start shooting.
https://www.letspinout.com � 12

PINOUT MANUAL
Main Screen of Pinout app
https://www.letspinout.com � 13
Shutter button
Focus button
Camera list
Geo Logging status
info
Shooting setting Volume settingControl button
Geo Tagging status
Volume Button setting status
Phone Shake setting status
Focus
Pausing
Exposure
Feature List
Connection Status

PINOUT MANUAL
Feature list: tap to get the feature listConnection status: the camera icon turns to white when connection between smartphone and pinout is established, otherwise the color is grayShutter button: tap to start shootingFocus button: tap to start focus, focus is only effective when your camera is set to autofocus mode.Camera list: tap to get camera list and connect to camerasGeo logging status: when geo logging feature is on this status icon turns on, tap to get location informationGeo tagging status: when geo tagging feature is on this status icon turns onVolume button setting status: this status icon turns on when set using volume level to shoot picturesPhone shake setting status: this status icon turns on when set using phone shake to shoot picturesFocus: this status icon turns on when press focus buttonPausing: this status icon turns on during pausingExposure: this status icon turns on during exposureInfo: tap to get more info or helpControl button: tap to get back to the shooting screenVolume setting: tap to setting using volume level to shoot picturesShooting setting: tap to setting the way to shooting pictures (phone shake or volume button)NOTICE:1. Pinout supports exposure time control from 0.01s to 99hours 59minutes 59.99 seconds,
only exposure time can be controlled by pinout, the actual exposure value can only be set on the camera.
2. When you set your camera to auto focus, the exposure time you set by pinout app maybe not work properly. (It depends on the time cost on auto focus) we suggest you to use pinout under manual focus mode.
https://www.letspinout.com � 14

PINOUT MANUAL
Simple Release Pinout has no wires, and is easily controlled via an app on your smartphone. You can snap a picture with the volume control button, a simple click using the app, shaking your phone, or even by simply saying “CHEEESE” with voice volume control mode. Remote release is a popular tool used by serious photographers both outside and inside for shooting wildlife, scenery, and studio shoots. One reason is because when you manually press the shutter on your camera, even the steadiest of us send a small vibration to the camera body leading to blurry pictures. With Pinout, you can capture that crisp, beautiful shot of sunset you always wanted.
Camera setting : simple release works in all camera modes, acts as a trigger. The shutter speed control is only effective when your camera is under bulb mode. Taking photos by volume level, phone shake, volume button are effective in all camera modes except bulb mode.
!
The way of using simple release is as follows.
Step1. Tap the left-top icon to get the feature menu
! Tap to get feature menu
https://www.letspinout.com � 15

PINOUT MANUAL
Step2. Choose simple release from the feature menu
! Choose simple release from the feature menu
Step3. Tap the focus to adjust the focus or press the red shutter button to take a photo. (When your camera is set to bulb mode, long press the shutter button can control the exposure time)
!
https://www.letspinout.com � 16

PINOUT MANUAL
It is possible to take with shake or volume down button, or volume level setting Take with volume button or phone shake(it doesn’t work under bulb mode)
Step1. Tap the toolbox icon on the simple release screen.
! Step2. Use the sliding button to choose take with volume button, take with phone shake or both
!
https://www.letspinout.com � 17

PINOUT MANUAL
Step3. Tap the double circle button to get back to the main screen.
!
Step 4. Take photos by press the volume down button or phone shake.
Take with volume level setting. Step1. Tap the microphone icon in the middle of the bottom menu
!
https://www.letspinout.com � 18

PINOUT MANUAL
Step2. Set up the volume level you want to shoot.
! Step3. Take photos by voice, when the voice level exceeds the level you set, shooting will be taken place automatically.
https://www.letspinout.com � 19

PINOUT MANUAL
Loss Prevention Expensive cameras are an easy target for theft. With Pinout, you can set your smartphone to alert you when your camera goes 20 or 30 meters (up to 98 feet) away from your phone, with your camera on or off. No more leaving your camera somewhere and forgetting it behind. You can even track the point where your camera went out of range if it does get lost or stolen. The way of using loss prevention is as following Step1 choose loss prevention from the feature menu
! Choose loss prevention
Step 2. Tap the name of the pinout you want to check, then the current location or the location of the link broken detected will be shown on the map.
! Location of the lost pinout
https://www.letspinout.com � 20

PINOUT MANUAL
Loss prevention mode can be set from the setting menu From the features menu, please choose settings.
! Setting loss prevention mode
Set up the loss prevention mode from the setting page. Sensitive: you will receive an alert if the distance between pinout and your smartphone exceeds 3-5 meters, or the BLE link is broken. Default: you will receive an alert if the BLE link between pinout and your smartphone is broken. Disabled: disable the loss prevention function.
Timed Release Pinout provides you a simple interface to setup the timer to shoot the photos. Camera setting: this feature only works when your camera is under blub mode.
Step1. Choose timed release from the feature menu.
https://www.letspinout.com � 21
PINOUT MANUAL
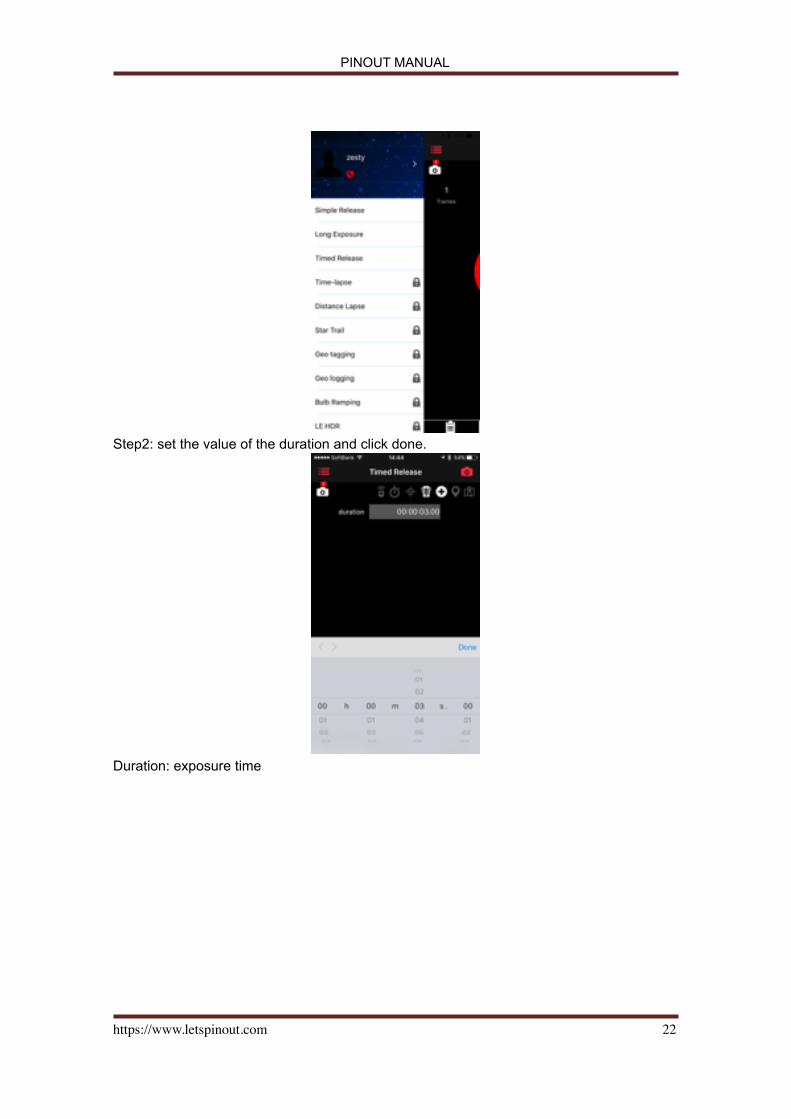
! Step2: set the value of the duration and click done.
! Duration: exposure time
https://www.letspinout.com � 22

PINOUT MANUAL
Step3. Tap the double circle button to get back to the shooting screen. Press the red S button to start shooting.
!
https://www.letspinout.com � 23

PINOUT MANUAL
Long Exposure With pinout, you can focus on the objects or you want to shoot. Single click the app to start the shoot, and double click to stop.
Camera setting: this feature only works when your camera is under blub mode.
Step1: Choose long exposure from the feature menu.
! Step2: Press the red S shutter button to start long exposure.
!
https://www.letspinout.com � 24

PINOUT MANUAL
Step3. Double click the stop button to stop the shooting.
!
https://www.letspinout.com � 25

PINOUT MANUAL
Timelapse A series of pictures are captured at a particular interval and played back to yield what looks like a video. This feature is perfect for capturing subtle changes to scenery or objects over a period of time. Time-lapse allows you to cut through the noise and observe things from a different perspective by manipulating the flow of time. With Pinout, you can easily set the interval, number of frames to shoot, and exposure on the app. With the premium function, you can set exposure of each frame individually as well. Once you press start, Pinout receives the command and starts the time-lapse, allowing you to watch videos, surf, or even turn off your smartphone. Camera setting: pinout works as a trigger, the exposure time you set on the camera must be smaller than the interval
Step1. Choose time-lapse from the feature menu Step2. Set the parameters (interval, number of exposure, start) and click done
Frames: number of shooting Interval: the amount of time you would like between exposures. Start: time to start shooting
https://www.letspinout.com � 26

PINOUT MANUAL
Step3: Press the double circle button to get back to the shooting screen.
Step4. Press the red S shutter button to start shooting time lapse.
https://www.letspinout.com � 27

PINOUT MANUAL
Distance Lapse you can also perform distance-lapse with Pinout which allows you to take a series of pictures with interval of a particular distance, instead of time. For example, you can strap your Pinout-attached camera to your car’s roof and drive around your neighborhood to capture scenery that changes with distance.
Camera setting: pinout works as a trigger
Step1. Choose distance lapse from the menu Step2: Set the distance to trigger the shutter
! Step3. Click the double circle icon to get back to the shooting screen. Step4. Click the red S shutter button to start distance lapse shooting
https://www.letspinout.com � 28

PINOUT MANUAL
Star Trails Pinout provides you a simple interface to setup all the necessary parameters (interval, exposure, duration, start and end time) to shoot startrails. The way of using startrails functions is as following.
Camera setting: this feature only works when your camera is under blub mode.
Step1. Choose star trails from the menu Step2. Set up the parameters (interval, number of exposure, start,)
!
Frames: number of shooting Duration: exposure time Gap: pausing time Start: start time of shooting
Step3. Click the double circle icon to get back to the shooting screen.
https://www.letspinout.com � 29

PINOUT MANUAL
Step4. Click the red S shutter button to start shooting star trails.
!
https://www.letspinout.com � 30

PINOUT MANUAL
Geo Tagging With the GPS feature, you can automatically geo-tag your photos by recording GPS position data of each picture you take into EXIF information, as you shoot. Moreover, on the easy-to-use map interface on the dedicated app, you can set your location to the place you’re taking a picture of. For example, you can take pictures of Mt. Fuji from hundreds of kilometers away and set your location to Mt. Fuji so that all of your pictures are automatically tagged with what’s actually in the picture. Automatically Geo Tagging saves a lot of time in the long run and also makes it easy to share location of the shoot when you share photos on social media. Step1. Choose geo tagging from the feature menu Step2. Drag the “send GPS to your camera” to green to real time tag the location information to your photos
! There are advanced features of geo tagging as following 1. Modify the current location manually and tag it to the pictures automatically
To use this feature, just simply move the red pin on the map to the location you want to locate. The blue round indicates your current location, the red pin indicates the new location you want to tag to your pictures. You can tap the red left bottom icon to relocate the pin to the current location.
https://www.letspinout.com � 31

PINOUT MANUAL
!
2. Fix the location If you want to move with your smartphone but want to tag the fixed location information to the pictures, you can simply tap the right-bottom icon to tick Fix Location from the menu.
!
In the map above, pinout will tag the red pin location to your pictures, the blue round indicates your actual location. From the map, you can choose different views. Standard: map view Satellite: satellite view Hybrid: satellite with map view
https://www.letspinout.com � 32
PINOUT MANUAL
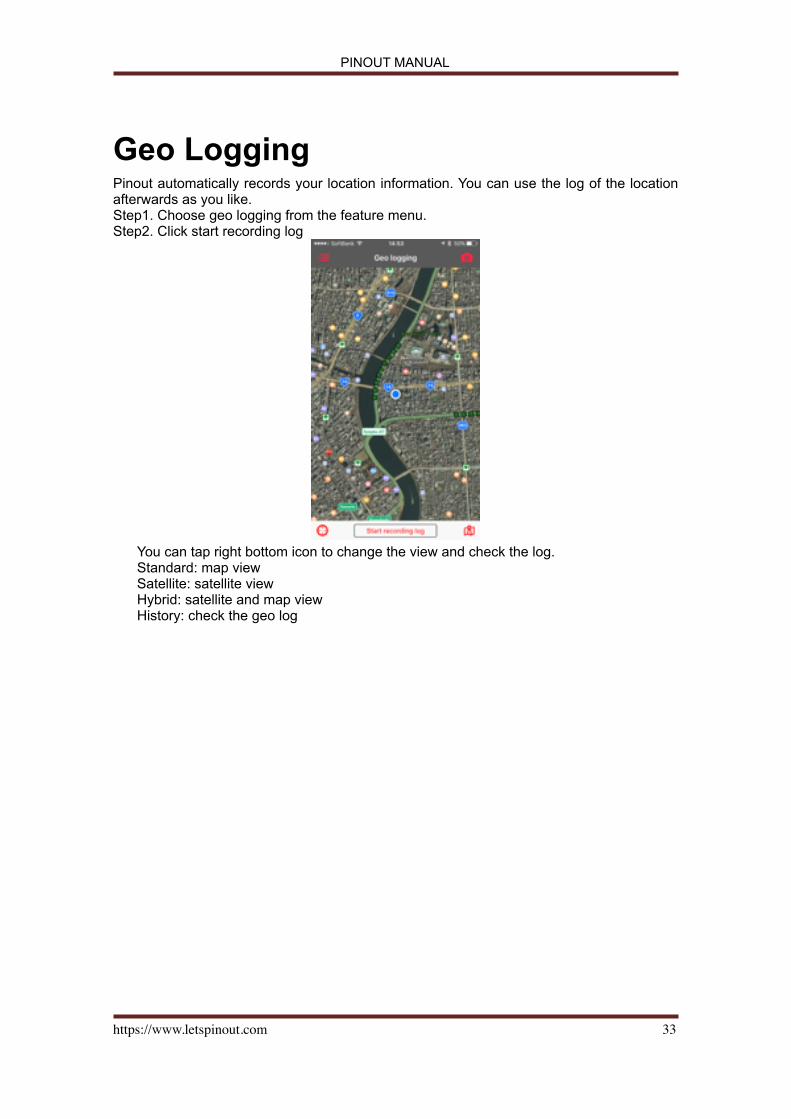
Geo Logging Pinout automatically records your location information. You can use the log of the location afterwards as you like. Step1. Choose geo logging from the feature menu. Step2. Click start recording log
! You can tap right bottom icon to change the view and check the log. Standard: map view Satellite: satellite view Hybrid: satellite and map view History: check the geo log
https://www.letspinout.com � 33

PINOUT MANUAL
Bulb Ramping Bulb Ramping allows you to take a time-lapse of scenes with changing exposure levels and adjusts for the light variation gradually to drastically reduce the flickering effect. Pinout provides you an interface to setup the change of the exposure levels, number of shooting and all other necessary parameters.
Camera setting: this feature only works when your camera is under bulb mode.
The way of using bulb ramping is as following Step1. Choose bulb ramping from features menu Step2. Input the necessary parameters (start of exposure, end of exposure, interval, number of exposures, start)
Frames: number of shooting Start of exposure: starting value of the exposure time End of exposure: end value of the exposure time Gap: pausing time Start: start time of the shooting Step3: Click the double circle button to get back to the shooting screen.
https://www.letspinout.com � 34

PINOUT MANUAL
Step4. Click the red S shutter button to start bulb ramping
https://www.letspinout.com � 35
PINOUT MANUAL
LE HDR LE HDR allows you to take serials photos at different exposure levels then mashed them together by software. By merging all the photos, HDR can avoid blown-out highlights, flat shadows Use Pinout app, you can easily setup middle exposure, EV step and number of exposures that are necessary to shoot LE HDR.
Camera setting: this feature only works when your camera is under bulb mode. The gap is fixed, 1 second.
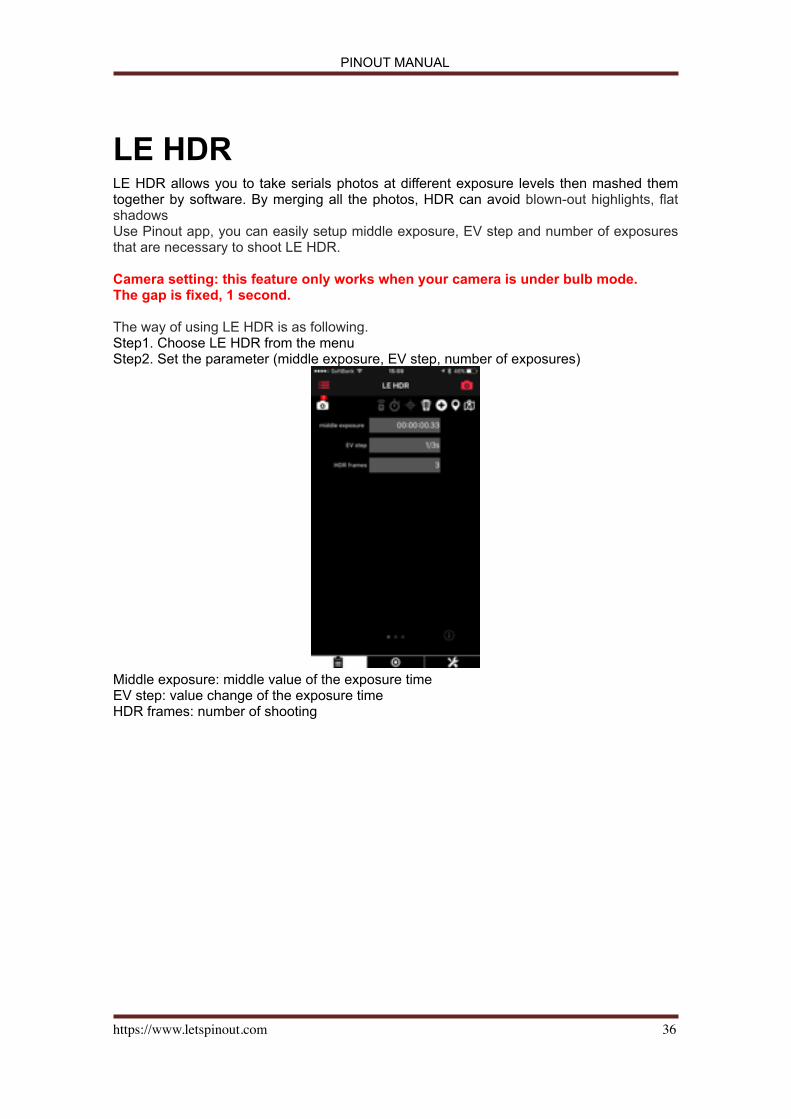
The way of using LE HDR is as following. Step1. Choose LE HDR from the menu Step2. Set the parameter (middle exposure, EV step, number of exposures)
! Middle exposure: middle value of the exposure time EV step: value change of the exposure time HDR frames: number of shooting
https://www.letspinout.com � 36

PINOUT MANUAL
Step3. Click the double circle button to get back to the shooting screen. Step4. Click red S shutter button to start LE HDR
!
https://www.letspinout.com � 37

PINOUT MANUAL
LE HDR Time-lapse LE HDR Timelapse is to take series of HDR photos which allows you to edit them to a perfect video afterwards. Camera setting: this feature only works when your camera is under bulb mode. The way of using LE HDR timelapse is as following. Step1: Choose LE HDR Timelapse from the menu Step2: Set the parameter (middle exposure, EV step, timelapse interval, number of exposures, start)
! Middle exposure: middle value of the exposure time EV step: value change of the exposure time Interval: the amount of time you would like between exposures. HDR set: number of the HDR timelapse set Start: starting time of the shooting The number of shooting in one HDR set is 3.
https://www.letspinout.com � 38

PINOUT MANUAL
Step3: Click the double circle button to get back to the shooting screen Step4. Click red S shutter button to start LE HDR timelapse
!
https://www.letspinout.com � 39

PINOUT MANUAL
Multi-Camera Pinout app can control up to 10 cameras simultaneously, so by setting up cameras at different angles you never miss the perfect angle for that perfect moment. Great for photographing sports! The way of using multi-camera function is as following. Step1. Tap the right-top camera icon
Step2: To click find cameras to discover cameras or the camera discovery is taken place automatically
Step3. Tick the cameras you want to connect, the status of the connection will be shown under the name of pinout. Step4. Get back to the main screen to choose the functions you want to use, and start multi-camera shooting.
https://www.letspinout.com � 40

PINOUT MANUAL
https://www.letspinout.com � 41

PINOUT MANUAL
Sensor Release DSLR cameras have few sensors built-in but smartphones come packed with sensors such as motion sensor, vibration sensor, face detection sensor, along with camera and microphone. Pinout can use your smartphone's sensors to enhance DSLRs’ capabilities. For instance, by using motion sensor any changes in your smartphone’s position triggers the shutter on your Pinout-connected camera so you can snap a picture at the moment your phone moves(refer to the simple release to find how to use this function.) other sensor based functions will be implemented and released gradually.
Settings Pinout app also provides a setting function to let you set up some parameters in advance. You can find settings function from the function menu.
https://www.letspinout.com � 42

PINOUT MANUAL
User profile and upgrade your kit User information (name, photo, phone number)can be updated when you click on the user name.
The status of your kit is shown in the profile, you can upgrade your kit by tapping on the kit status.
https://www.letspinout.com � 43
Tap here
Tap here

PINOUT MANUAL
Step1 After you tap on the current kit name, you will get the screen below
If you choose “upgrade to Pro kit” or “upgrade to Full kit”, you will get a popup message to ask you to sign in itunes store to purchase the kit.
If you choose “input passcode”, you need to tear off the seal and scan the QR code printed on the warranty card or input the passcode manually.
https://www.letspinout.com � 44

PINOUT MANUAL
Technical Support Please send emails to following email address if you have any questions [email protected]
https://www.letspinout.com � 45
Input Passcode manually
Or scan QR Code here


