46
Release 7.2.0 LA February 2006 Point-of-Sale Administrator Guide Store 360

Point-of-SaleAdministrator Guide
Store360
Release 7.2.0 LA February 2006
Confidential
©2005 360Commerce. All rights reserved. 360Commerce and third-party specifications are subject to change without notice. Although every precaution has been taken in the prepara-tion of this paper, 360Commerce assumes no responsibility for errors or omissions, and no warranty or fitness is implied. 360Commerce shall have neither liability nor responsibility to any person or entity with respect to any loss or damages arising from the use of the informa-tion contained in this paper. Trademarks: 360Commerce (both word and logo), 360Store, 360Enterprise, Unleashed, Warm-Start Optimization. All terms mentioned in this paper that may be trademarks or service marks have been appropriately capitalized or otherwise desig-nated.
This document and the information it contains are the property of 360Commerce, Inc. This document contains confidential and proprietary information that is not to be disclosed to other parties. The information in this document may not be used by other parties except in accordance with a written agreement signed by an officer of 360Commerce, Inc.
11400 Burnet Road, Suite 5200, Austin, Texas 78758 (512) 491-2600 • (800) 897-8663 • (512) 491-0078 (fax)
www.360Commerce.com

TABLE OF CONTENTSPreface ix
Chapter 1: InstallationInstallation Requirements 1-1
Supported Software for Clients (Registers) 1-1Supported Software for Store Servers 1-2Basic Computer Specifications 1-2Peripheral Devices for Clients 1-3Supported Hardware for Clients 1-3Supported Hardware for Store Servers 1-3
Installing with the Install Script 1-4Determining Server Tier 1-4Installing the Database 1-5Installing JMS 1-5Installing JavaPOS 1-6Installing Point-of-Sale on Machines 1-6Populating the Database 1-8Integrated Environment Steps 1-8Updating Device Configuration 1-8
Results of a Point-of-Sale Installation 1-9Running Point-of-Sale 1-9Changing the JRE 1-10
Installing the Alternative JRE 1-10Installing Point-of-Sale 1-11Replacing Security Files in the Alternative JRE 1-11Configuring Point-of-Sale for the IBM JRE 1-11
Creating a Custom Installation 1-12
Chapter 2: ConfigurationModifying Parameters 2-1
Understanding Parameter XML Tags 2-2Parameter File Hierarchy 2-3Modifying Parameters in Parameter XML Files 2-4Modifying Parameters Through Point-of-Sale 2-4
Defining Security with Roles 2-6Modifying a Role 2-6Adding a Role 2-7Secured Features 2-9
Reason Codes 2-10Modifying Reason Codes 2-10
Configuring Transaction ID Lengths 2-12Understanding Transaction IDs 2-12Changing Transaction ID Lengths 2-13
Configuring RMI Time-outs 2-13Setting the RMI Time-out for the JVM Under Linux 2-14
T a b l e o f C o n t e n t s iii

Setting the RMI Time-out for All Manager and Technician Calls 2-14Setting the RMI Time-out for a Specific Technician 2-14
Configuring Third-party Tender Authorization 2-15Enabling the Financial Network Technician 2-15Setting the Merchant Number 2-16
System Settings 2-16Adding or Changing Language Bundles 2-16
Naming Convention for Language Bundles 2-16Creating a New Language Bundle 2-17Configuring the System to Use a New Language Bundle 2-17
Configuring Logging 2-17
Chapter 3: TroubleshootingViewing the Electronic Journal 3-1Resetting Totals 3-3Managing the Transaction Queue 3-3
Deleting an Entry 3-4Clearing the Queue 3-4
i v P o i n t - o f - S a l e A d m i n i s t r a t o r G u i d e

LIST OF FIGURESFigure 2-1 Parameter Groups and Parameter List Screens 2-5Figure 2-2 Set Access Screen 2-6Figure 2-3 Add Role Screen 2-7Figure 2-4 Set Access Screen 2-7Figure 2-5 Reason Code Group Screen 2-10Figure 2-6 Reason Code List Screen 2-11Figure 2-7 Edit Reason Code Screen 2-12Figure 3-1 Find Transaction Screen 3-2Figure 3-2 Journal Display Screen 3-2Figure 3-3 Del Queue Conf Screen 3-4
L i s t o f F i g u r e s v

v i P o i n t - o f - S a l e A d m i n i s t r a t o r G u i d e

LIST OF TABLESTable P-1 Text Conventions xTable 1-1 Supported Software for Clients 1-1Table 1-2 Supported Software for Store Servers 1-2Table 1-3 Hardware Minimum Recommendations 1-2Table 1-4 Supported Hardware for Clients 1-3Table 1-5 Supported Hardware for Store Servers 1-3Table 1-6 Server Tier Logical Components 1-4Table 1-7 Point-of-Sale Install Script Information 1-7Table 1-8 360Store Subdirectories 1-9Table 1-9 360Store\pos Subdirectories 1-9Table 2-1 Standard Parameter Properties 2-3Table 2-2 Parameter XML Files, In Precedence Order 2-3Table 2-3 Sample Parameter Values and Results 2-4Table 2-4 Point-of-Sale Security Access Points 2-9Table 2-5 Sample Bundle Names 2-16
L i s t o f T a b l e s vii

v i i i P o i n t - o f - S a l e A d m i n i s t r a t o r G u i d e

PREFACE
Audience
The audience for this document is administrators and developers who install and configure the 360Store® Point-of-Sale application.
Goals
An administrator or developer who reads this document will be able to:
• Install Point-of-Sale• Configure Point-of-Sale
Feedback
Please e-mail feedback about this document to [email protected].
Trademarks
The following trademarks may be found in 360Commerce® documentation:
• 360Commerce, 360Store and 360Enterprise are registered trademarks of 360Commerce Inc.• Unleashed is a trademark of 360Commerce Inc.• BEETLE is a registered trademark of Wincor Nixdorf International GmbH.• Dell is a trademark of Dell Computer Corporation.• IBM, WebSphere and SurePOS are registered trademarks or trademarks of International Business
Machines Corporation in the United States, other countries, or both.• Windows are registered trademarks or trademarks of Microsoft Corporation.• Java is a trademark of Sun Microsystems Inc.• Linux is a registered trademark of Linus Torvalds.
All other trademarks mentioned herein are the properties of their respective owners.
P r e f a c e ix

x
Text Conventions
The following table shows the text conventions used in this document.
Table P-1 Text ConventionsSample DescriptionItalic text This is used for emphasis. It calls attention to crucial information and important
terms defined in the text, for example, quantity on hand is .... Bold text This is used for text (in an application window or on a keyboard) that is acted
upon by the user, for example, Click Next.Courier Text This is used for code, including file and directory names, paths, syntax, and
commands, for example, /opt/jboss-3.2.1/server/default/lib.<Italics and angle brackets>
This is used for text that needs to be supplied by the user, for example, Set the parameter AccessViaIniFilePath = /opt/accessvia/program/<AccessVia ini file name>.. If it is within a code sample, the text is in Courier font.
P o i n t - o f - S a l e A d m i n i s t r a t o r G u i d e

C H A P T E R 1
INSTALLATIONThis chapter provides information about the installation procedures for 360Store Point-of-Sale. 360Commerce provides an installation script for Point-of-Sale, but customer installations typically develop custom procedures which build on the existing scripts. Use procedures in this chapter to install a demonstration or initial register system and as a source of information for modifying installations.
Installation RequirementsThis section defines supported products for client and server systems in the Point-of-Sale system. Other products may work with the system, but have not been tested; not all permutations of these products have been tested. Consult the release notes provided with the software for details.
Supported Software for Clients (Registers)The following table lists software products in the required categories which have been tested for this release in at least one configuration.
Table 1-1 Supported Software for ClientsRequired Item Supported ProductsOperating System Windows Embedded for Point of
Service (WEPOS)IRES V2 (SUSE Linux Enterprise Server 9)
Java Runtime Environment Java 2 Platform, Enterprise Edition (J2EE), Version 1.4.2
I n s t a l l a t i o n 1- 1

1-2
Supported Software for Store Servers
Basic Computer SpecificationsSpecific hardware requirements for the machines running Point-of-Sale depend on several variables including the number of users and other applications running on the same machine. However, the following can be used as general guidelines:
*Tested on Linux only
Table 1-2 Supported Software for Store ServersRequired Item Supported ProductsOperating System IRES V 2 (SUSE Linux Enterprise
Server 9)Windows 2003 Server
Java Runtime Environment Java 2 Platform, Enterprise Edition (J2EE), Version 1.4.2
Database DB2 v.8.2MySQL 4.1.14
Messaging JBoss JMS 4.0.2Websphere MQ Series 5.3 FP 11
Table 1-3 Hardware Minimum RecommendationsMachine CPU Speed RAM Hard DriveStore Server Pentium III 500 MHz 256MB 10GBDatabase Server Pentium III 500 MHz 256MB 10GBStore Server, Database Server and Back Office on the same machine
Pentium III 500 MHz 512MB 10GB
Client (Register) minimum
Pentium II 266MHz 128 MB with hard drive256MB without hard drive*
2GB
Client recommended
Pentium III 400 MHz 256MB 2GB
P o i n t - o f - S a l e A d m i n i s t r a t o r G u i d e

Peripheral Devices for ClientsJavaPOS is the industry standard for Java compatibility for retail-oriented devices. A committee of prominent retail vendors and end users maintains the standard. Some of the more common devices used with point-of-sale applications include bar code scanners, cash drawers, printers, keyboards, magnetic stripe readers (MSR), wedge keyboards, hard totals, and magnetic ink check readers (MICR). Any JavaPOS-compliant peripheral devices should work with Point-of-Sale; some may require software modifications to work properly.
Supported Hardware for ClientsThe following items were tested for Point-of-Sale release 7.1. Other products may work with the system, but have not been tested; not all permutations of these products have been tested. Consult the release notes provided with the software for details. Mice are not supported for Point-of-Sale. A touch screen may be used, but a keyboard is required for some functions. Both tested configurations included touch screens.
Supported Hardware for Store Servers
Table 1-4 Supported Hardware for ClientsCategory Supported ItemsRegister IBM SurePOS™ 741
Wincor Nixdorf BEETLE /SPIN pads Ingenico EN-TOUCH 1000Pole display IBM 25L5510 (2x20)Scanner Symbol LS 1004, RS232Printer/MICR 4610 Model 4 - USB
Epson TMH 6000Cash Drawer IBM
WincorKeyboard IBM A/N with MSR
Wincor A/N with MSR
Table 1-5 Supported Hardware for Store ServersCategory Supported ItemsHardware Dell 2650
Dell 2850CPU Intel I2x2.8 GHz
Intel 4x2.8 GHz
I n s t a l l a t i o n 1- 3

1-4
Installing with the Install ScriptTo establish an initial Point-of-Sale installation or to create a demonstration system, use the Point-of-Sale installation script as described in this section. Note that the installation script is not appropriate for all installations:
• 360Commerce expects implementation teams to develop custom procedures for actual register installations, which may or may not be based on the script described here. See “Creating a Custom Installation” on page 1-12 for guidelines.
• If you intend to use a different JRE than the Sun JRE installed by the Point-of-Sale installation script (for example, if the Sun JRE is not supported by your hardware), see “Changing the JRE” on page 1-10 before performing the procedures described in this section.
Determining Server TierMachines and logical components of the Point-of-Sale application are defined in the following table:
When you run the installation script, it asks you to specify a Server Tier Type. The available types are:
• Stand-alone/Collapsed—Choose this option to run the Point-of-Sale on one machine without client-server components. This configuration runs in one JVM. It is typically used for development and demos, but not for production systems.
• N-Tier Client—Choose this when installing the client component.• N-Tier Store Server—Choose this when installing the store server component.
Note: Choose both N-Tier Client and N-Tier Store Server to install both components on the same machine.
• N-Tier Database Server—Choose this when installing the database server component.
Table 1-6 Server Tier Logical ComponentsMachine DescriptionStore Server The machine that runs the server component of Point-of-Sale. There is at
least one store server for each store. This component runs as a service. This machine may also house the Back Office Server and other 360Store components such as the 360Store database and Unleashed Point-of-Sale.
Point-of-Sale Clients The machines that execute the Point-of-Sale transactions; they are typically cash registers.
Database Server The machine that houses the 360Store database. This machine may or may not be the same as the store server.
JMS Server The machine that houses the JMS server software.
P o i n t - o f - S a l e A d m i n i s t r a t o r G u i d e

Installing the Database360Store products such as Point-of-Sale and Back Office use the 360Store database. One 360Store database is typically installed in each store. Data stored in the 360Store database includes employee names, logon information, transaction data, and the inventory database. The database can be located on the store server or on a separate machine acting as the database server. The database must be installed before Point-of-Sale can be installed. To complete the installation script, you must know the database location:
• If you install Point-of-Sale on the same machine as the database, the script asks for the database directory location.
• If you install Point-of-Sale on a different machine from the database, the script asks for the hostname or IP address and RMI port number of the machine running the database.
The Point-of-Sale installation process installs scripts to build the tables and insert a minimal data set. Steps for running these scripts are included later in the process.
Installing JMS JMS queues may be used by Point-of-Sale for distribution of Ejournal and POSlog data to other systems. The JMS API provides a standardized means for sending messages between applications and application components. If you are installing the server component so that a new instance of JBossMQ runs on the store server, the installation script performs the installation. If you are using an existing instance of a JBossMQ queue, a JBoss queue on another machine, or another type of JMS queue, install it before running the Point-of-Sale installation scripts. You must define information about the queue manually in appropriate configuration scripts.Additional information about JBoss is available at http://www.jboss.org.Most of the work of installing JMS is performed by the installer itself, but you need to set up the class part with application server .jar files and set the location of the corporate server.
To install JMS on the server:
1. Edit the posenv.bat file by removing rem from rem call jboss.bat. This enables setting up the classpath for JBoss.
2. Check jboss.bat to make certain it points to the store server where JBoss is installed.3. Edit the pos/bin/comm.properties file by adding the following lines:
a. comm.jms.topicConnectionFactory.name.centraloffice=ConnectionFactory b. comm.jms.queueConnectionFactory.name.centraloffice=ConnectionFactory
4. Remove any other copies of the comm.properties file from the pos/config directory.5. Check pos/config/centraloffice.jndi.properties to make certain the Central Office server
name is set correctly.6. Edit the jndi/config/backoffice.jndi.properties file by setting values for the store server host
and port number in the following property:
I n s t a l l a t i o n 1- 5

1-6
java.naming.provider.url=jnp://<store_server_host_name>:<store_server_port_number>
Example:java.naming.provider.url=jnp://eqa4:1099
To install JMS on the client:
1. Edit the posenv.bat file by removing rem from rem call jboss.bat. This enables setting up the classpath for JBoss.
2. Check jboss.bat to make certain it points to the store server where JBoss is installed.3. Remove the comm.properties file the pos/config directory.
Installing JavaPOSInstall an appropriate version of JavaPOS on each register; refer to the hardware vendor’s documentation for instructions.
Installing Point-of-Sale on MachinesIf a previous version of Point-of-Sale is installed on a machine, uninstall it by deleting the installation directory (the default directory is c:\360store) or choose a different installation directory from the default.Run the installation script one time for each machine in the Server Tier and once for each register:
• The Collapsed and Single-Tier implementations require running the script one time. • The 2-Tier implementation requires installation on the store server and each register. • The 3-Tier implementation requires installation on the store server, database server and each register.
The installation script performs the following steps. Not all steps apply for client, server, or database installations.
• Installs Foundation, Retail Domain and Point-of-Sale jar files.• Installs database build scripts and start-up files.• Installs a Java runtime environment (JRE). • Defines Server Tier in conduit script that starts Point-of-Sale for the given machine.• Defines hostnames or IP addresses and port numbers for the Store Server and/or database server.• Defines device availability.• Defines application properties for Store ID and Register Number.
P o i n t - o f - S a l e A d m i n i s t r a t o r G u i d e

The installation script asks some or all of the following questions. (Some questions do not apply to all Server Tier types.)
Table 1-7 Point-of-Sale Install Script InformationItem Default DescriptionInstallation Location c:\360store The directory into which Point-of-Sale files are
to be copied. This install location should be the same for all 360Store products, since they share resources. Files specific to Point-of-Sale are copied to a /pos subdirectory of the directory specified here.
Server Tier Type <none> Choose from Stand-alone, N-Tier Client, N-Tier Store Server or N-Tier Data Server.
Store Server Details port # - 1300 The hostname or IP address and port number of the Store Server, when not the current machine.
Store ID 04241 The store ID.Database Type MySQL Choose the type of database.Database on Store Server? Yes Define whether the database is located on the
Store Server or on a separate, dedicated database server.
Database Location c:\Program Files\<databasename>
The directory location where the database is installed, when the database is on the current machine.
Database Hostname <none> The hostname or IP address of the database server, when not the current machine.
Database Configuration JDBC Driver, URL, Jar
Database hostname.
360Store Database Port Number
1200 The port number of the port open on the database server.
Server Journal Options <none> Choose the appropriate server journal options.POSlog Options Do not export Choose the export options for the POSlog and/
or define a JMS queue hostname or IP address.Log Options Verbose Choose Verbose to get all log messages and
Standard to log fewer messages.Register Number 129 The register number for a client install.Install Set/Devices No platform or
devicesFor a client install on a register, specify the platform. For a client install with devices, specify which devices are installed.
Client Journal Options Local file Specify the E-journal options.Tender Authorization Options
Simulated Indicate if the Tender Authorizer is simulated or ISD. Demo installations should use the Simulated option.
I n s t a l l a t i o n 1- 7

1-8
Populating the DatabaseThe 360Store database needs to be built with tables, fields, and initialized data. If a database is not shared with 360Store Back Office and is being built from scratch, run one of the following scripts to build the tables and insert a minimal data set:
• For Windows, run C:\360store\pos\bin\dbbuild.bat.• For Linux, run /pos/bin/dbbuild.sh.
Integrated Environment StepsFor information about integrating the Point-of-Sale environment, see 360Store Back Office Administor Guide.
Updating Device Configuration1. Update the 360common/360Tools/automatedTesting/Tools/jpos/res/jpos.xml file to reflect the
devices being used on the machine. <JposEntries> <JposEntry logicalName="defaultScanner"> <creation factoryClass="com.extendyourstore.jpos.CrsJposServiceInstanceFactory" serviceClass="com.extendyourstore.jpos.Scanner.POSsim"/> <vendor name="360Commerce" url="http://www.360Commerce.com"/> <jpos category="Scanner" version="1.5"/> <product description="POSsim Scanner" name="360 Commerce EYS Scanner"
url="http://www.360Commerce.com"/> <prop name="host" value="localhost"/> <prop name="debug" value="true"/> </JposEntry> ...</JposEntries>
2. After the install script is run, update 360common/360Tools/automatedTesting/Tools/jpos/res/jpos.properties to point to the JavaPOS location.
Tender Authorization Details
Host name - www.isdwhq.comHost port - 15713Merchant number - 0001
For the ISD Tender Authorizer, provide details.
User Interface Option Swing Choose from Swing (a standard swing interface) or Image (custom images for buttons and other graphics are provided).
Table 1-7 Point-of-Sale Install Script InformationItem Default Description
P o i n t - o f - S a l e A d m i n i s t r a t o r G u i d e

Results of a Point-of-Sale InstallationThe default root directory for 360Store applications on Windows is c:\360Store. The default root directory for 360Store applications on Linux is /opt/360store. In either operating system, the subdirectories listed in the following table are created:
Important subdirectories of the \pos directory on Windows and Linux include:
Running Point-of-SaleYou run the Point-of-Sale system by executing batch files or shell scripts, found in your installation’s bin directory, to launch various components.
Note: For each command, a Windows batch file (such as dbstart.bat) and equivalent Linux shell script (dbstart.sh) exist; the procedure shows only the Windows version.
1. Start the 360Store database, if needed:dbstart.bat
Regardless of where the database is located, start the service before starting the Point-of-Sale application. If the database was recently built, the database server may already be running. If it is not running, you can start the database using the software supplied with it, or with the dbstart.bat command.
Table 1-8 360Store SubdirectoriesName Contents360common Files shared by multiple 360Store applications including Foundation or
360Platform, Domain, and 3rd party jar filesdatabases Resources for various database typesjre Contains the Java runtime environmentpos Point-of-Sale filesbackoffice Back Office files (if the 360Store Back Office product is installed)unleashed Unleashed files (if the 360Store Unleashed product is installed)
Table 1-9 360Store\pos SubdirectoriesName Contentsbin Startup batch files and shell scriptslib Point-of-Sale application and resource jar fileslib\locales Text bundles for localization3rdparty Third party source files used by Point-of-Sale onlyconfig XML configuration files, .properties files, and .dat fileslogs Log files (additional log files are in the bin directory)UninstallerData Files for uninstalling Point-of-Sale
I n s t a l l a t i o n 1- 9

1-1
2. If you are not running a collapsed implementation, start the store server:StoreServerConduit.bat
When the message TierManager Started appears, the server has started. The server component does not have a user interface. Collapsed implementations do not need to launch a separate store server.
3. Start the registers.For each of the Point-of-Sale registers, execute the conduit script that starts the Point-of-Sale client component. For collapsed implementations, the command is:CollapsedConduitFF.bat
For 2-Tier or 3-Tier implementations, the command is:ClientConduit.bat
4. Verify the installation on each register by logging on to Point-of-Sale with the default username (pos) and password (pos). If the login is successful and the status bar indicates the database is online, the installation is complete.
Changing the JREBy default, the Point-of-Sale installation script installs the Sun Java Runtime Environment (JRE). You may want or need to use a different JRE if:
• You are using the WebSphere Application Server, which requires the IBM JRE.• You are using hardware with a chipset that requires the IBM JRE, such as a Wincor Nixdorf register.
Although this section assumes that you are changing from the Sun JRE to the IBM JRE, you can use these instructions to change to any JRE.
Installing the Alternative JREInstall the JRE that you want to use instead of the default Sun JRE.Complete the following steps if required:
• If you are using the IBM JRE on Windows, you must get the JRE by downloading IBM’s Web Services development kit (wsdk). The kit is located at http://www-106.ibm.com/developerworks/webservices/wsdk/. The wsdk 5.1 download contains the Java Development Kit (JDK) 1.4.2, which contains the JRE. Install the wsdk, then install the JDK.
• If you are using WebSphere MQ, install the MQ Series client jars. Download them from http://www-3.ibm.com/software/integration/support/supportpacs/individual/ma88.html and then copy the installed jars to the lib directory of your JRE installation (for example, c:\wsdk_v51\appserver\lib\).
0 P o i n t - o f - S a l e A d m i n i s t r a t o r G u i d e

Installing Point-of-SaleInstall Point-of-Sale as described in “Installing with the Install Script” on page 1-4, then return to this section.
Replacing Security Files in the Alternative JREUse the security and policy files from the Point-of-Sale installation with your alternative JRE. Copy the java.security and java.policy files from the <install directory>\jre\lib\security directory to the corresponding directory in your alternative JRE, such as c:\wsdk_v51\appserver\java\jre\lib\security.
Configuring Point-of-Sale for the IBM JREEdit the posenv.bat file to reflect the new JRE location:
1. Change the JRE_HOME variable to point to the new IBM JRE. For example,SET JRE_HOME=C:\wsdk_v51\appserver\java\jre
2. If you are using WebSphere MQ, add the wsdk jars to the CLASSPATH environment variable just before the file writes out to the log file. See the following example.set CLASSPATH==%CLASSPATH%;c:\wsdk_v51\appserver\lib\com.ibm.mq.jarset CLASSPATH==%CLASSPATH%;c:\wsdk_v51\appserver\lib\com.ibm.mq.pcf.jarset CLASSPATH==%CLASSPATH%;c:\wsdk_v51\appserver\lib\com.ibm.mqjms.jarset CLASSPATH==%CLASSPATH%;c:\wsdk_v51\appserver\lib\naming.jarset CLASSPATH==%CLASSPATH%;c:\wsdk_v51\appserver\lib\jndi.jarset CLASSPATH==%CLASSPATH%;c:\wsdk_v51\appserver\lib\namingclient.jarset CLASSPATH==%CLASSPATH%;c:\wsdk_v51\appserver\lib\namingserver.jarset CLASSPATH==%CLASSPATH%;c:\wsdk_v51\appserver\lib\messaging.jarset CLASSPATH==%CLASSPATH%;c:\wsdk_v51\appserver\lib\messagingClient.jarset CLASSPATH==%CLASSPATH%;c:\wsdk_v51\appserver\lib\ecutils.jarset CLASSPATH==%CLASSPATH%;c:\wsdk_v51\appserver\properties
Note: This example assumes that you copied the MQ Client jars over to your IBM JRE.
I n s t a l l a t i o n 1- 11

1-1
Creating a Custom InstallationA custom installation of Point-of-Sale can use one of several approaches:
• Install Point-of-Sale using the install script on a reference machine, and copy the resulting installation to other machines.- With this method, you can change the configuration settings of the installation as described in
Chapter 2, “Configuration,” until the installation works as desired, then propagate those configurations to other machines.
- You can copy just the installation directory to a new machine, or if the hardware is sufficiently similar, you can copy the entire hard drive image to an machine. Copying the entire hard drive retains the JavaPOS installation as well as any other customizations.
- You must change the WorkstationID value for the target machines to a unique number. This value can be found in <installdirectory>\pos\config\application.properties.
• Create a custom installation script which allows for various hardware options but specifies the software choices your company has chosen.
Note: By default, installation of a register requires certain IBM Install Set parameters to have specific values:
• Hard Total must be Off.• Ingenico must be On.
2 P o i n t - o f - S a l e A d m i n i s t r a t o r G u i d e

C H A P T E R 2
CONFIGURATIONThis chapter covers options for configuring Point-of-Sale normally carried out by an administrator before the system goes into general use. It covers the following topics:
• “Modifying Parameters”• “Defining Security with Roles”• “Reason Codes”• “Configuring Transaction ID Lengths”• “Configuring RMI Time-outs”• “Configuring Third-party Tender Authorization”• “System Settings”• “Adding or Changing Language Bundles”• “Configuring Logging “
Modifying ParametersPoint-of-Sale includes many configurable parameters; these parameters are used to control flow, set minimums and maximums for data, and to allow flexibility without recompiling code. Most parameters can be modified through the Point-of-Sale user interface. This section describes those parameters, which are stored in XML files.
Note: The Point-of-Sale system can also be configured through system settings and reason codes. System settings are values, set in the database, that control application behavior in a manner similar to parameters. For more information, see “System Settings” on page 2-16. Reason codes enable administrators to configure lists of options that are offered to the application’s users; see “Reason Codes” on page 2-10.
The XML parameters are stored in a set of related parameter XML files, and editing those files is another way to change parameters. Parameters not visible in the Point-of-Sale interface can be modified in the XML files. For parameters that establish company policies, you can create files for corporate and store-level defaults; see “Parameter File Hierarchy” on page 2-3.
C o n f i g u r a t i o n 2- 1

2-2
Each parameter belongs to one and only one group, and there is a security role for each group, so parameter access can be restricted to particular groups if desired. See “Defining Security with Roles” on page 2-6.Your choice of how to change a parameter matters: if you change a parameter with the Point-of-Sale interface, the value of that parameter is not loaded on other registers. You can address this by copying parameter XML files from one register to another, or by making parameter changes in Back Office or Central Office and then distributing the parameters to registers.
Understanding Parameter XML TagsParameters XML files store parameters in <GROUP> tags that contain <PARAMETER> tags; the <PARAMETER> tags contain properties that describe the parameter. The following example shows the parameter that determines the maximum traveler’s check value that the system accepts:
<GROUP name="Tender" hidden="N">
...other parameters omitted here...
<PARAMETER name="MaximumTravelersCheckAmount"
type="CURRENCY"
final="N"
hidden="N">
<VALIDATOR class="FloatRangeValidator"
package="com.extendyourstore.foundation.manager.parameter">
<PROPERTY propname="minimum" propvalue="0.00" />
<PROPERTY propname="maximum" propvalue="99999.99" />
</VALIDATOR>
<VALUE value="1000.00"/>
</PARAMETER>
...other parameters omitted...
</GROUP>
P o i n t - o f - S a l e A d m i n i s t r a t o r G u i d e

This example shows some standard properties:
Parameter File HierarchyThe Point-of-Sale application gets its parameter values from an interrelated set of XML files. These files can each contain values for the same parameters; a set of precedence rules determines which parameters actually take effect.
Note: The application.xml file contains all of the parameters and thus represents the default value set. The other files contain subsets of parameters.
The following table shows the parameter XML files in the order in which they are consulted by the Point-of-Sale application. Normally, the last value wins; if a parameter is specified in each of the files, the value in workstation.xml is used.
The final property, when set to Y in a parameter definition, reverses the precedence order for that parameter, so that store.xml parameters with final=Y beat workstation.xml parameters, and corporate.xml parameters beat store.xml—but only for the parameters that specify final=Y.
Table 2-1 Standard Parameter PropertiesProperty Descriptiontype The type of parameter value.final Can be Y or N; if Y, it reverses the normal file precedence for the parameter. See the next
section, “Parameter File Hierarchy,” for more information.hidden If Y, the parameter does not appear in the Point-of-Sale interface.validator A structure that defines valid values for the parameter. In the example, the tags define a range
of floating-point currency values, from 0.00 to 99999.99.value The actual value of the parameter specified in this file. Whether this value becomes the actual
value or not depends on the values set in other files, as described in the next section, “Parameter File Hierarchy.”
Table 2-2 Parameter XML Files, In Precedence OrderParameter File Location Notesapplication.xml c:\360store\pos\config Contains default values for all parameterscorporate.xml c:\360store\pos\config\corporate Stores values distributed by Central Officestore.xml c:\360store\pos\config\store Stores values distributed by Back Officeworkstation.xml c:\360store\pos\config\register Contains values set through the Point-of-Sale
interface
C o n f i g u r a t i o n 2- 3
2-4
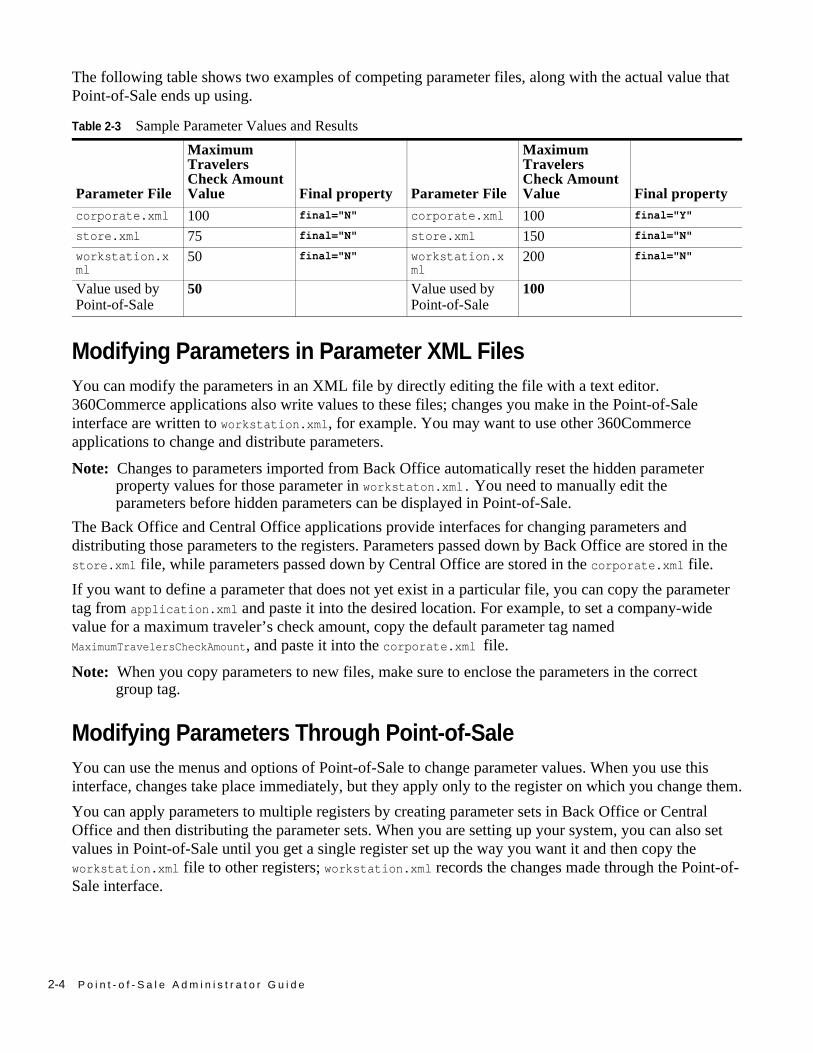
The following table shows two examples of competing parameter files, along with the actual value that Point-of-Sale ends up using.
Modifying Parameters in Parameter XML FilesYou can modify the parameters in an XML file by directly editing the file with a text editor. 360Commerce applications also write values to these files; changes you make in the Point-of-Sale interface are written to workstation.xml, for example. You may want to use other 360Commerce applications to change and distribute parameters.
Note: Changes to parameters imported from Back Office automatically reset the hidden parameter property values for those parameter in workstaton.xml. You need to manually edit the parameters before hidden parameters can be displayed in Point-of-Sale.
The Back Office and Central Office applications provide interfaces for changing parameters and distributing those parameters to the registers. Parameters passed down by Back Office are stored in the store.xml file, while parameters passed down by Central Office are stored in the corporate.xml file. If you want to define a parameter that does not yet exist in a particular file, you can copy the parameter tag from application.xml and paste it into the desired location. For example, to set a company-wide value for a maximum traveler’s check amount, copy the default parameter tag named MaximumTravelersCheckAmount, and paste it into the corporate.xml file.
Note: When you copy parameters to new files, make sure to enclose the parameters in the correct group tag.
Modifying Parameters Through Point-of-SaleYou can use the menus and options of Point-of-Sale to change parameter values. When you use this interface, changes take place immediately, but they apply only to the register on which you change them.You can apply parameters to multiple registers by creating parameter sets in Back Office or Central Office and then distributing the parameter sets. When you are setting up your system, you can also set values in Point-of-Sale until you get a single register set up the way you want it and then copy the workstation.xml file to other registers; workstation.xml records the changes made through the Point-of-Sale interface.
Table 2-3 Sample Parameter Values and Results
Parameter File
Maximum Travelers Check Amount Value Final property Parameter File
Maximum Travelers Check Amount Value Final property
corporate.xml 100 final="N" corporate.xml 100 final="Y"
store.xml 75 final="N" store.xml 150 final="N"
workstation.xml
50 final="N" workstation.xml
200 final="N"
Value used by Point-of-Sale
50 Value used by Point-of-Sale
100
P o i n t - o f - S a l e A d m i n i s t r a t o r G u i d e

Within Point-of-Sale, there is no indication of the source of the value of a parameter. The value you see displayed on screen could come from a variety of XML files. See “Parameter File Hierarchy” on page 2-3 for more information.
To use the Point-of-Sale application to change a parameter:
1. From the Main Options screen, choose F4/Administration.2. When prompted, enter your username and password.3. From the Admin. Options screen, choose F4/Security.4. From the Security Options screen, choose F4/Parameters.
The Parameter Groups screen appears.5. Choose a parameter group, then choose Enter/Next. If you have permission to edit that group, the
Parameter List screen appears. Figure 2-1 Parameter Groups and Parameter List Screens
Choose a parameter to edit and choose Next. The Edit Parameter Screen appears.6. Depending on the parameter chosen, change the necessary information, then choose Enter/Next.7. To return to the Security Options screen, choose Esc/Undo.
C o n f i g u r a t i o n 2- 5

2-6
Defining Security with RolesIn Point-of-Sale, you specify users’ access to the application by assigning a role to each user. Each role contains a list of the security access points of the application, specifying which access points that role is allowed to use. You can create as many roles as you need. Roles are typically named for job titles; by creating a manager role and a clerk role, for example, you define two classes of employees with different access to the Point-of-Sale functions. All clerks, however, would have the same access rights.The procedures in this section describe how to modify existing roles or add new ones. For a list of security access points, see “Secured Features” on page 2-9. To find out how to add an employee login to the system and assign roles to the employee, see “Employee” on page 3-2.
Note: The security model used by Point-of-Sale is different from the model used by J2EE applications like Central Office or Back Office.
Modifying a RoleTo modify a role:
1. From the Main Options screen, choose F4/Administration, F4/Security, F3/Roles, and F2/Find.2. Select a role name from the list and choose Enter/Next.
The Edit Role screen appears with the selected role displayed.3. Choose Enter/Next to display the Set Access screen for the selected role. 4. To edit the role, scroll through the list of functions. While a function is selected, choose F2/Yes/No
to toggle the access for that function.Figure 2-2 Set Access Screen
5. When you are finished, choose F3/Done to save the settings.
P o i n t - o f - S a l e A d m i n i s t r a t o r G u i d e

Adding a RoleTo add a role:
1. From the Main Options screen, choose F4/Administration, F4/Security, F3/Roles, and F3/Add.The Add Role screen appears.
2. From the Main Options screen, choose F4/Administration, F4/Security, F3/Roles, and F3/Add.The Add Role screen appears.
Figure 2-3 Add Role Screen
3. Enter the new role name and choose Enter/Next.4. The Set Access screen appears. Initially, access for all functions is set to No.
Figure 2-4 Set Access Screen
C o n f i g u r a t i o n 2- 7
2-8
5. Select the function(s) that need to be enabled/disabled for the role and choose F2/Yes/No to toggle to between Yes and No.
6. Continue selecting all functions that need to be changed. When finished, choose F3/Done to save the settings.
7. Choose Esc/Undo or F12/Cancel to return to the Security Options screen.
P o i n t - o f - S a l e A d m i n i s t r a t o r G u i d e

Secured FeaturesThe following table lists all of the functions within Point-of-Sale for which security access points exist. When a user attempts to use a function protected by one of these security access points, the system checks whether the user’s role allows that function.Table 2-4 Point-of-Sale Security Access Points• Accept Invalid DL
Format• Administration• Approve Soft
Decline of a Check• Back Office• Bank Deposit• Call Referral Accept
for check, credit, or gift card
• Cancel Special Order
• Cancel Transaction• Close Register• Close Till• Corporate Level
Parameter Access• Customer – Add/
Find• Customer Delete• Daily Operations• Department Level
Parameter• Discount Rule• Discount Rule End• Electronic Journal
• E-Mail• Employee - Add/
Find• Employee Clock In/
Out • End of Day• Inventory• Item Maintenance• Item/Transaction
Discounts• Item/Transaction
Gift Registry• Item/Transaction
Sales Associate• Item/Transaction
Tax Modifications• Job Queue• Kit Maintenance• Layaway Delete• Modify Layaway
Fees• Modify Markdowns• No Sale• Open Register• Open Till• Orders
• Override Declined Check
• Override Declined Credit
• Override Restocking Fee
• Override Tender Limits
• Parameters Add/Modify
• Preferred Customer Discount
• POS• Price Change• Price Override• Price Promotion• Queue Management• Reason Codes Add/
Modify• Receiving• Register Level
Parameter• Register Reports • Reprint Receipt• Reset Hard Totals• Return
• Role - Add/Find• Schedule Jobs• Service Alert• Start of Day• Store Level
Parameter• Store Operations• Till Pay-in• Till Pay-out• Till Pickup/Loan• Till Reconcile• Transfer• Void• Web Store
C o n f i g u r a t i o n 2- 9

2-1
Reason CodesReason codes are items offered to the end user as choices in lists, for example, the set of possible reasons for a price override. These choices normally vary for each corporation, and they must be configured to suit your local requirements and policies. The system comes with a predetermined set of reason code groups; within each group, you can add, remove, and modify the list of codes, all from within the Point-of-Sale interface. For a complete list of available reason code groups, contact 360Commerce for a copy of Reason Codes Functional Requirements.
Modifying Reason CodesTo modify reason codes:
1. From the Main Options screen, choose F4/Administration, F4/Security, and F5/Reason Codes.2. From the Reason Code Store screen, choose the local store number and press Enter/Next. The
Reason Code Group screen appears.Figure 2-5 Reason Code Group Screen
3. From the Reason Code Groups screen, select the group you want to view or edit. The Reason Code List screen appears.
0 P o i n t - o f - S a l e A d m i n i s t r a t o r G u i d e

Figure 2-6 Reason Code List Screen
4. Select one of the following:• To delete a code, select it, then choose F5/Delete.• To change the position of a code in the list, select it, then choose F6/Move Up or F7/Move
Down.• To add a code, choose F4/Add. The Add Reason Code screen appears. Enter a name and
database ID, then choose Enter/Next.• To change the name or database ID of a code, select the code in the list and choose F3/Edit.
The system displays the Edit Reason Code screen. Edit the values shown, then choose Enter/Next.
5. Press F2/Make Default to save your changes and make the selected settings the new default.6. Choose Enter/Next. The changes are saved, and the system displays the Reason Code Group
screen.
C o n f i g u r a t i o n 2- 11

2-1
Figure 2-7 Edit Reason Code Screen
Configuring Transaction ID LengthsYou can change the lengths of some of the most common data values associated with transactions. These changes affect every aspect of the software and should not be undertaken lightly. Changes should only be performed before Point-of-Sale is installed. Changes to these settings can require substantial testing to establish that no problems result from the change.
Understanding Transaction IDsA transaction ID is a composite key made from the store number, register number, and sequence number. When combined, these attributes create a unique number for each transaction. Transaction IDs can also include an eight-digit date to ensure that they are unique—for example, if you restart your sequence numbers on a daily basis, the date value prevents transaction ID repetition.Key points about the transaction ID and related properties:
• You can change the length of the store, register, and sequence numbers which contribute to the Transaction ID. You cannot directly configure the length of the transaction ID itself.
• System-generated unique Layaway numbers, Special Order numbers, and Web Order numbers are not affected by changes to the transaction ID rules.
• A maximum of 20 digits of transaction ID can be printed on receipts using the Point-of-Sale current barcode format.
• If the value of a store, register, or sequence number has fewer than the specified number of digits, Point-of-Sale uses leading zeroes to pad the number to the required number of digits; a four-digit sequence number whose value is 22 shows up within the transaction ID as 0022.
2 P o i n t - o f - S a l e A d m i n i s t r a t o r G u i d e

• Dates can be used in transaction IDs to help ensure unique IDs. If they are used, they are expressed as an 8-digit number; this is set by the TransactionIDBarcodeDateFormat property in the domain.properties file. The only valid values for this property are no value and yyyyMMdd. The date format does not vary from one locale to another.
• You can set the transaction sequence start number in the database.• When you enter a transaction ID manually, the trailing date is optional.
Changing Transaction ID LengthsTo change ID lengths, edit the values in the Transaction ID section of the \360store\domain\config\domain.properties file in your source code control system. See “Understanding Transaction IDs” on page 2-12 for more information on what these properties mean.
# Transaction ID
TransactionIDStoreIDLength=5
TransactionIDWorkstationIDLength=3
TransactionIDSequenceNumberLength=4
#TransactionIDBarcodeDateFormat=yyyyMMdd
TransactionIDBarcodeDateFormat=
TransactionIDSequenceNumberSkipZero=false
TransactionIDSequenceNumberMaximum=9999
Configuring RMI Time-outsYou can configure remote method invocation (RMI) time-outs at two levels:
• The JVM level (Linux installs only)• The level of managers and technicians
If you are performing a Linux installation, configure the JVM as described in “Setting the RMI Time-out for the JVM Under Linux,” below. If you determine that RMI connections are timing out, you can use one of the other procedures in this section, “Setting the RMI Time-out for All Manager and Technician Calls” on page 2-14 or “Setting the RMI Time-out for a Specific Technician” on page 2-14.
C o n f i g u r a t i o n 2- 13

2-1
Setting the RMI Time-out for the JVM Under Linux360Commerce has found it useful to change the RMI time-out for the JVM under Linux. To do this, change the command that launches the JVM, adding the JVM flag -Dsun.rmi.transport.connectionTimeout=<X> where <X> represents the time-out period in milliseconds.This tells the JVM to time out socket connections used by RMI after X milliseconds of inactivity. Linux quickly notifies the JVM when a socket connection cannot be established. Linux is slow, however, to notify the JVM when an open socket connection has been broken (around 15 minutes). By setting the connection time-out low, you can cause the sockets to disconnect quickly after each RMI call, thereby requiring a connect for each subsequent RMI call.
Setting the RMI Time-out for All Manager and Technician CallsYou can change the RMI time-out values for connections and reads in the \360store\pos\bin\comm.properties file. The value for the following properties apply to all manager and technician calls, unless overridden by a communication scheme for a specific call.
• comm.connectTimeout - Specifies how long to wait for a socket connection to succeed. The value is in milliseconds.
• comm.readTimeout - Specifies how long to wait before a read times out. The value is in milliseconds. This property causes the read to time out even if the socket is alive and well and transmitting data.
Setting the RMI Time-out for a Specific TechnicianTo set the time-out for a specific technician:
1. Edit the \360store\pos\bin\comm.properties file and the conduit script as follows: a. Add a new communication scheme to the \360store\pos\bin\comm.properties file. The
following lines provide an example:
comm.rmi_longread.readTimeout=120000
comm.rmi_longread.connectTimeout=1000
These lines establish a new communication scheme called rmi_longread with a read time-out of 120 seconds and a connect time-out of one second (since the values are in milliseconds). b. Add the following property to the appropriate technician definition in the conduit script:
<PROPERTY propname="commScheme" propvalue="rmi_longread"/>
This sets the communication time-outs for all managers that connect to this technician. A manager who is sending a valet to this technician times out if the valet fails to complete within 120 seconds. It only attempts to connect to the technician for 1 second before giving up.
4 P o i n t - o f - S a l e A d m i n i s t r a t o r G u i d e

Configuring Third-party Tender AuthorizationInitially, the Point-of-Sale system simulates tender authorization. You can connect Point-of-Sale to a third-party tender authorization service to verify tenders. Setting up this connection requires two configuration steps:
• “Enabling the Financial Network Technician”• “Setting the Merchant Number”
Enabling the Financial Network TechnicianIn your conduit script, locate a technician tag with the name “FinancialNetworkTechnician” and replace it with the tag shown in the following code sample.
<TECHNICIAN name="FinancialNetworkTechnician"
class="ISDTechnician"
package="com.extendyourstore.domain.manager.tenderauth.isd"
export="Y">
<PROPERTY
propname="hostName"
propvalue="<enter a URL here>"
/>
<PROPERTY
propname="hostPort"
propvalue="<enter a port number here>"
proptype="INTEGER"
/>
<PROPERTY
propname="reversalFile"
propvalue="testRev.ser"
/>
<PROPERTY
propname="logFile"
propvalue="isd.log"
/>
</TECHNICIAN>
C o n f i g u r a t i o n 2- 15
2-1
Setting the Merchant NumberSet the Merchant Number parameter to the appropriate value for the authorization service you are using. Merchant Number is an XML parameter in the Tender Authorization group. See “Modifying Parameters” on page 2-1.
System SettingsSystem settings are values set in the 360Store database. Changes to these settings must be made in the database by a database administrator or an application developer.System settings can have significant effects on the Point-of-Sale system; do not make changes unless you are confident that you understand the effects. For a description of all available system settings, refer to the Parameter Names and Values Addendum.
Adding or Changing Language BundlesPoint-of-Sale supports additional languages when the appropriate strings are provided, bundled in a .jar file. The procedures in this section describe how to create new bundles and make them available to the application.
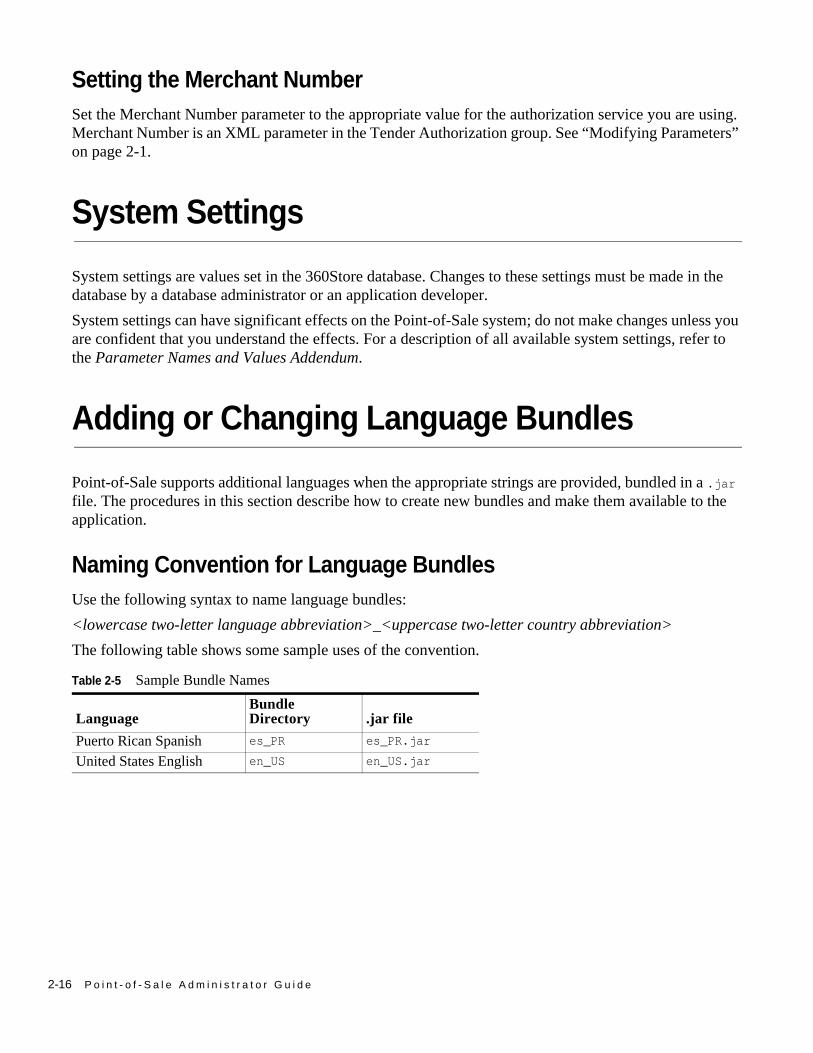
Naming Convention for Language BundlesUse the following syntax to name language bundles:<lowercase two-letter language abbreviation>_<uppercase two-letter country abbreviation>The following table shows some sample uses of the convention.
Table 2-5 Sample Bundle Names
LanguageBundle Directory .jar file
Puerto Rican Spanish es_PR es_PR.jar
United States English en_US en_US.jar
6 P o i n t - o f - S a l e A d m i n i s t r a t o r G u i d e

Creating a New Language BundleTo create a new language bundle:
1. Create a new source code directory in \360store\pos\locales for the language bundle, starting with a copy of the en_US directory.
2. Replace the English text in the properties files and help files in your new directory with translated text.
3. Generate a .jar file using the naming convention described in the preceding section.
Configuring the System to Use a New Language BundleTo add a new language and change the default language:
1. Store the new .jar file in \360store\pos\lib\locales.2. Change the locale parameter to match the new locale in the ClientConduit.xml,
StoreServerConduit.xml, and CollapsedConduitFF.xml files. These files are located in \360store\pos\config\conduit.
<?xml version='1.0' ?>
<!DOCTYPE DISPATCHER SYSTEM "classpath://com/extendyourstore/foundation/tour/dtd/dispatch.dtd">
<DISPATCHER name="STANDALONE">
<LOCALE language="es" country="PR"/>
<APPLICATION name="APPLICATION"
3. Edit the \360store\pos\config\application.properties file. a. If you want the new locale to be the default locale, replace the value of the default_locale
property with your new locale name. b. Add your new locale name to the list in the supported_locales property.default_locale=es_PR
supported_locales=en_US,es_PR,fr_CA
4. If the standard installation script is not used, then include the new .jar in the classpath ahead of pos360.jar.
Configuring LoggingPoint-of-Sale logging uses the Log4J tool. Configure Log4J by editing \360store\pos\config\log4j.xml. See the Apache documentation for Log4J at http://logging.apache.org/log4j for more information; a how-to can be found at http://wiki.apache.org/logging-log4j/Log4jXmlFormat.
C o n f i g u r a t i o n 2- 17

2-1
8 P o i n t - o f - S a l e A d m i n i s t r a t o r G u i d e
C H A P T E R 3
TROUBLESHOOTINGThis chapter describes Point-of-Sale functions used by administrators to maintain and troubleshoot the system. It includes the following sections:
• “Viewing the Electronic Journal”• “Resetting Totals”• “Managing the Transaction Queue”
Viewing the Electronic JournalUse the electronic journal to view register transactions. Registers produce clean receipts which do not include corrections made during a transaction. The electronic journal provides the ability to view every action performed by a cashier during the transaction. This can be used to audit the transactions.Electronic journal data can be sent to the corporate office as part of the Store Close process. The range of transactions you can view in the Point-of-Sale interface may be limited to the current day, depending on the frequency with which your company sends data out.
T r o u b l e s h o o t i n g 3- 1

3-2
To view the electronic journal:
1. From the Admin Options screen, choose F2/E.Journal. The Find Transaction screen opens.Figure 3-1 Find Transaction Screen
• To search by Transaction ID, date, time, cashier ID, or Sales Associate ID, enter the search criteria and choose Enter/Next.
• To search for all transactions for the current business day, choose Enter/Next without entering any data in the search criteria fields.
2. If there is a single match, the transaction journal appears in the window. If there are multiple matches, the navigation buttons (Previous, Next, First, and Last) are enabled. Using these buttons, locate the desired transaction.
Figure 3-2 Journal Display Screen
P o i n t - o f - S a l e A d m i n i s t r a t o r G u i d e

3. View or print the transaction detail.• Choose F2/Previous, F3/Next, F4/First, F5/Last to view the journal.• Choose F7/Print to print the journal entry.
4. When you are finished, choose F6/Done to exit. The Admin Options screen opens.
Resetting TotalsNote: Typical register installations have hard totals turned off. If they are turned on, resetting totals
clears the financial information stored in hard totals. You should use the Reset Totals button only in the case of equipment failure or data corruption. This option is typically used only by administrators, sometimes operating remotely, to return a problem register to operation. In such a circumstance, you may also need to clear the transaction queue as described in “Managing the Transaction Queue” on page 3-3.
Use the Reset Totals feature to clear the financial information stored in hard totals, which contains summary financial information that is available to the local register. The hard totals are kept for each till, register, and store. If there is no active till for the register or if the register is not open, the Reset Totals button is disabled.
To access Reset Totals:
1. From the Main Options screen, choose F4/Administration.2. From the Admin Options screen, choose F3/Reset Totals.
The system prompts you to verify that you want to reset the hard totals.• Choose No to continue with no action.• Choose Yes to reset the totals. The Reset Totals screen appears; when the totals are reset, the
system displays the Admin Options screen. A receipt prints with the hard totals that existed before they were cleared.
Managing the Transaction QueueNote: You must run either BuildFF.bat or BuildFF.sh prior to offline queue management. The transaction queue holds transactions until they are sent to the server. If the register is offline, all transactions are queued until the register is back online and the transactions can be sent to the server. Use the Queue Options screen to manage the queue when the server has returned to online status.
Note: Any transactions that are deleted before they are sent to the server are lost and cannot be recalled. When you are operating offline, you may want to avoid deleting transactions.
T r o u b l e s h o o t i n g 3- 3

3-4
Deleting an EntryTo delete the first entry in the queue:
1. From the Main Options screen, choose F4/Administration. From the Admin Options screen, choose F5/Queue.The Queue Options screen appears.
2. Choose F2/Delete Entry.3. The Delete Confirmation screen appears.
• Choose Yes to delete the first entry in the queue. A confirmation message appears. Choose Enter to continue.
• Choose No to return to the Queue Options screen.
Clearing the QueueNote: During development, you may need to delete the queue and/or reset totals (as described in
“Resetting Totals” on page 3-3) to clear corrupt data. During production, deleting a queue generally requires manual entry of deleted transactions.
To clear all transactions in the queue:
1. From the Main Options screen, choose F4/Administration. From the Admin Options screen, choose F5/Queue.The Queue Options screen appears.
2. Choose F3/Clear Queue from the Queue Options screen.Figure 3-3 Del Queue Conf Screen
3. The system prompts you to verify that you want to delete all transactions in the queue.
P o i n t - o f - S a l e A d m i n i s t r a t o r G u i d e

• If you select Yes, all transactions in the queue are deleted and a confirmation message appears. Choose Enter/Next to continue.
• If you select No, the system displays the Queue Options screen.
T r o u b l e s h o o t i n g 3- 5

3-6
P o i n t - o f - S a l e A d m i n i s t r a t o r G u i d e


