18
HR.OSU.EDU 1590 N. High Street, Suite 300 | Columbus, OH 43201 | 614-292-1050 Position Mapping Tool Job Aid August, 2019 Revised October, 2019 Career Roadmap

HR.OSU.EDU
1590 N. High Street, Suite 300 | Columbus, OH 43201 | 614-292-1050
Position Mapping Tool Job Aid August, 2019
Revised October, 2019
Career Roadmap
2
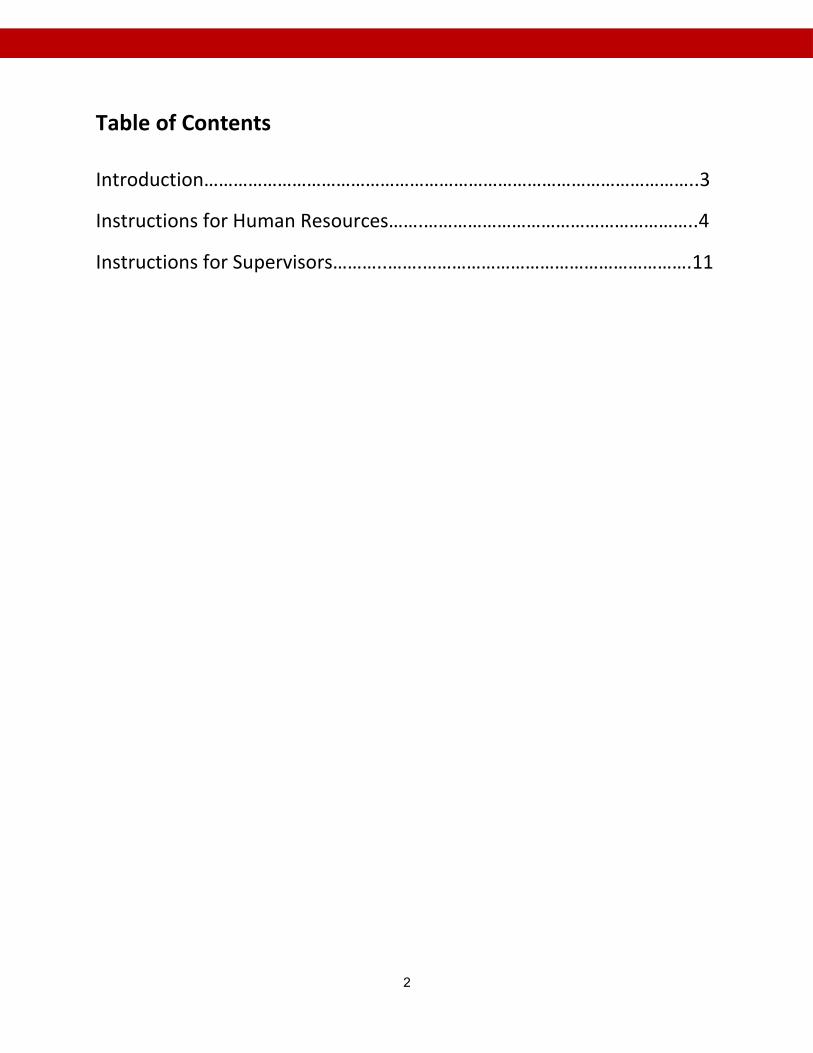
Table of Contents Introduction………………………………………………………………………………………..3
Instructions for Human Resources…….………………………………………………..4
Instructions for Supervisors………..…….……………………………………………….11
3
Introduction The Position Mapping tool is a web-based application that HR and managers will use to validate the initial mapping to Career Roadmap job titles for the positions in your respective units. The preferred web browser is Chrome as other browsers. The tool is accessed at https://apps.hr.osu.edu/CareerRoadmap/. Login with your university credentials (lastname.#, employee ID or Medical Center ID). Duo is not required for this application. The preferred web browsers are Chrome or Firefox. Security roles – there are two security roles available.
• The Manager role is automatically granted when an individual has one or more positions directly reporting to their own position. Managers have view only access.
• The Human Resources Professional role is automatically granted to individuals who have been recognized as performing in an HR function.
Requests to add a security role for an individual may be submitted to [email protected].
Be sure to click on the Logout button in the menu bar when you have concluded your work.
4
Instructions for Human Resources
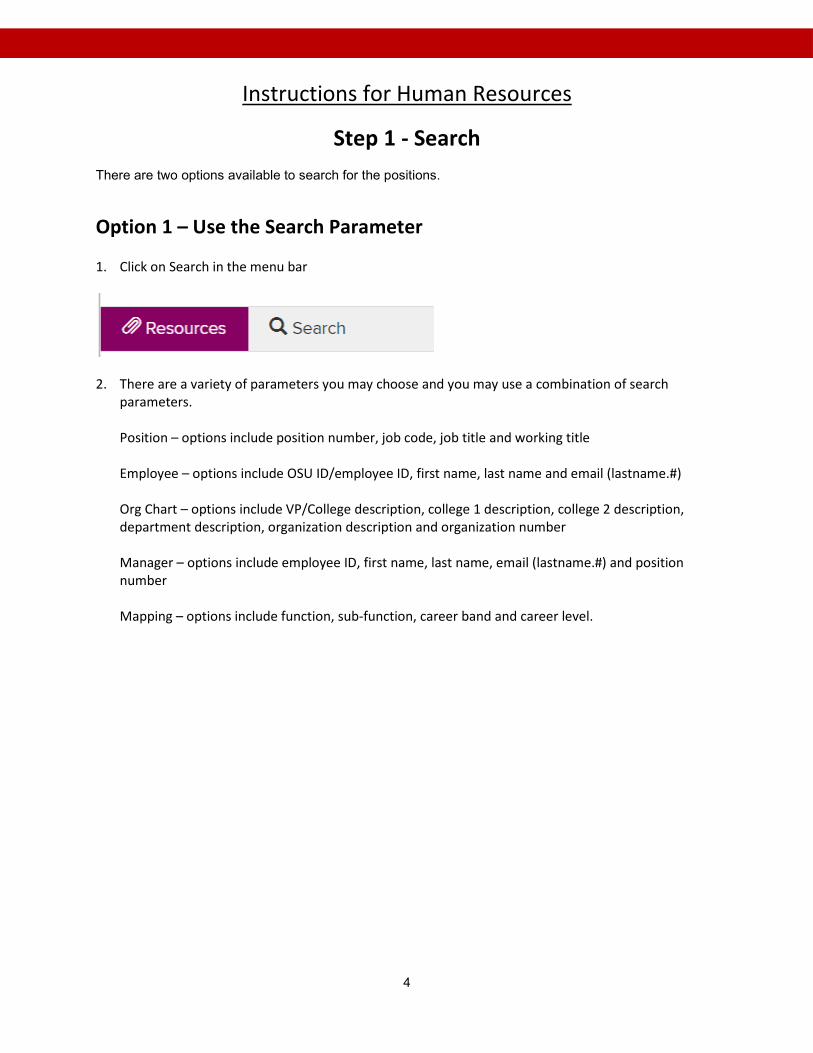
Step 1 - Search There are two options available to search for the positions.
Option 1 – Use the Search Parameter
1. Click on Search in the menu bar
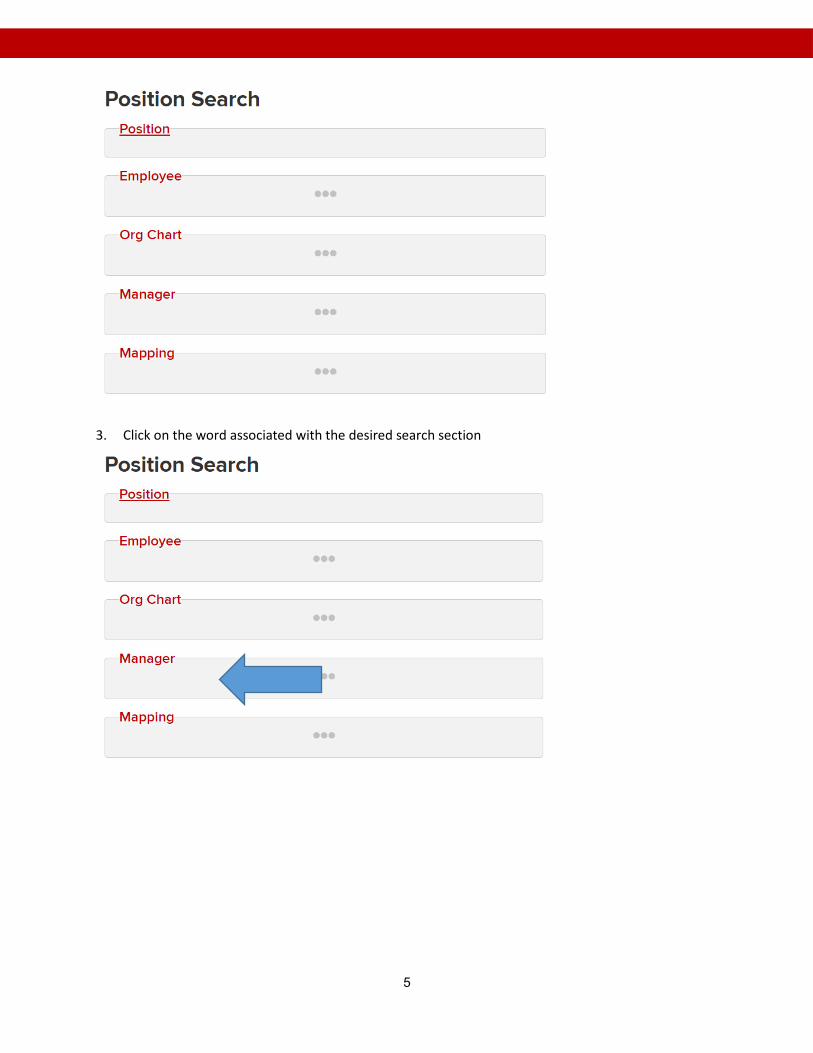
2. There are a variety of parameters you may choose and you may use a combination of search
parameters.
Position – options include position number, job code, job title and working title Employee – options include OSU ID/employee ID, first name, last name and email (lastname.#) Org Chart – options include VP/College description, college 1 description, college 2 description, department description, organization description and organization number Manager – options include employee ID, first name, last name, email (lastname.#) and position number Mapping – options include function, sub-function, career band and career level.
5
3. Click on the word associated with the desired search section
6
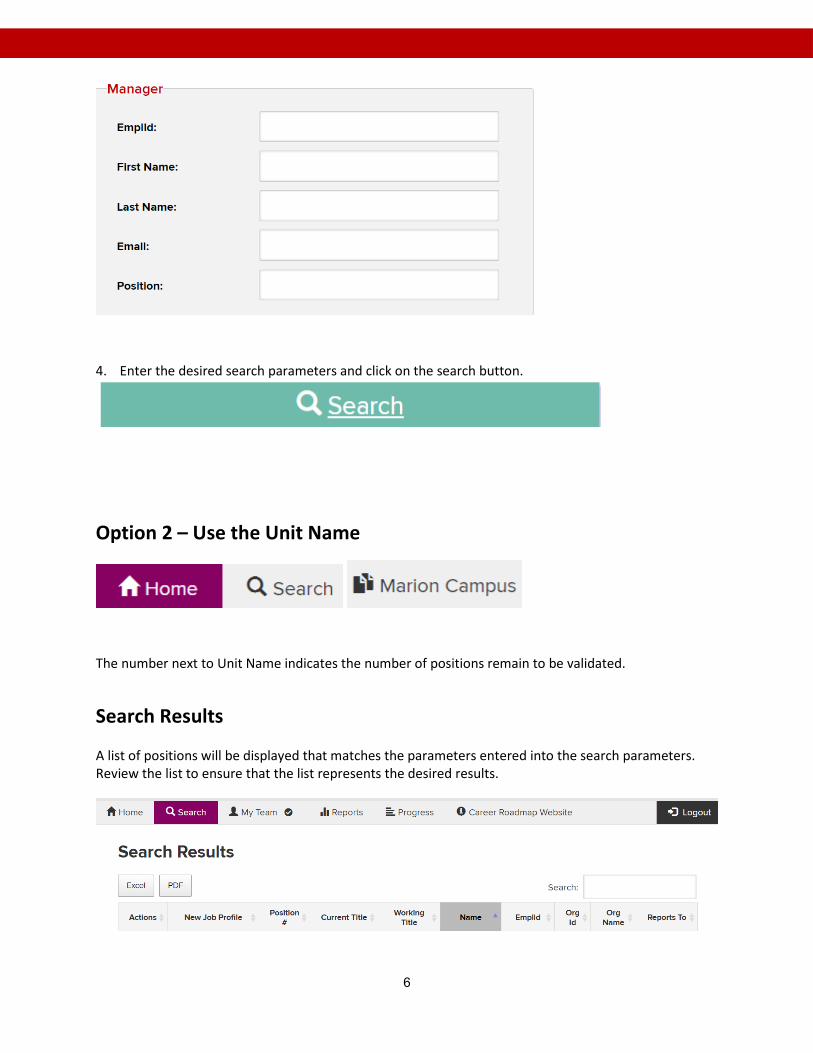
4. Enter the desired search parameters and click on the search button.
Option 2 – Use the Unit Name
The number next to Unit Name indicates the number of positions remain to be validated.
Search Results A list of positions will be displayed that matches the parameters entered into the search parameters. Review the list to ensure that the list represents the desired results.
7
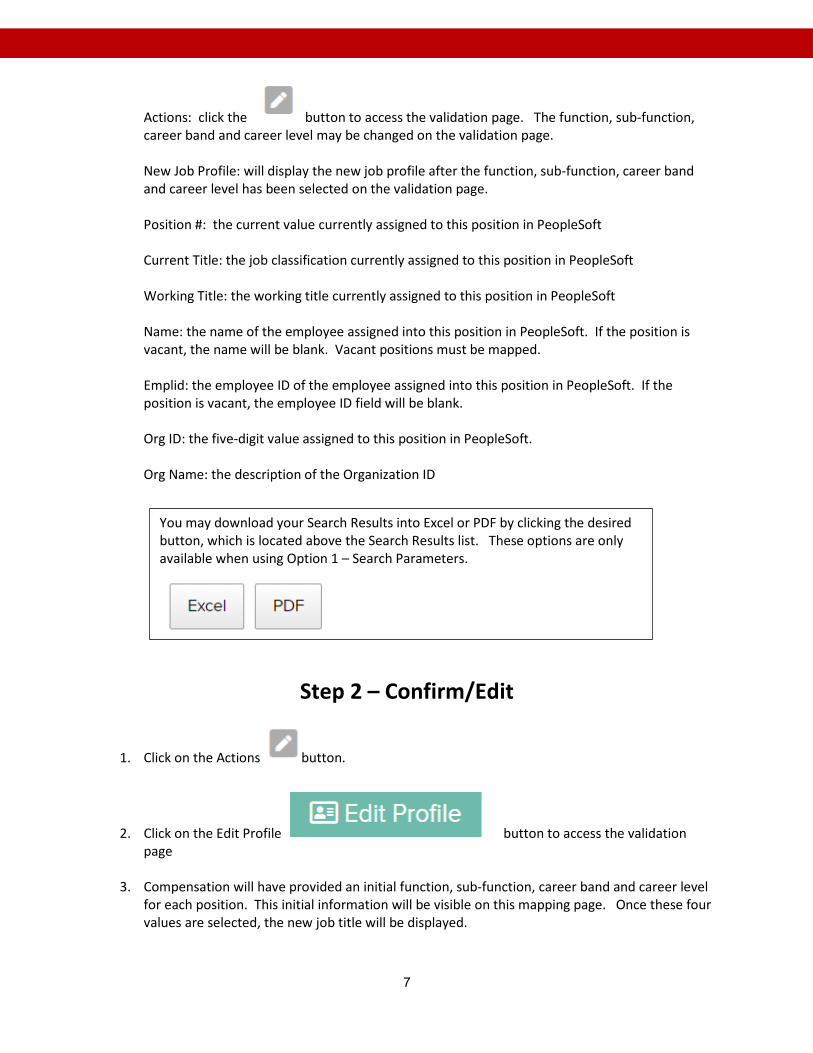
Actions: click the button to access the validation page. The function, sub-function, career band and career level may be changed on the validation page. New Job Profile: will display the new job profile after the function, sub-function, career band and career level has been selected on the validation page.
Position #: the current value currently assigned to this position in PeopleSoft
Current Title: the job classification currently assigned to this position in PeopleSoft Working Title: the working title currently assigned to this position in PeopleSoft
Name: the name of the employee assigned into this position in PeopleSoft. If the position is vacant, the name will be blank. Vacant positions must be mapped. Emplid: the employee ID of the employee assigned into this position in PeopleSoft. If the position is vacant, the employee ID field will be blank.
Org ID: the five-digit value assigned to this position in PeopleSoft. Org Name: the description of the Organization ID
Step 2 – Confirm/Edit
1. Click on the Actions button.
2. Click on the Edit Profile button to access the validation page
3. Compensation will have provided an initial function, sub-function, career band and career level for each position. This initial information will be visible on this mapping page. Once these four values are selected, the new job title will be displayed.
You may download your Search Results into Excel or PDF by clicking the desired button, which is located above the Search Results list. These options are only available when using Option 1 – Search Parameters.
8
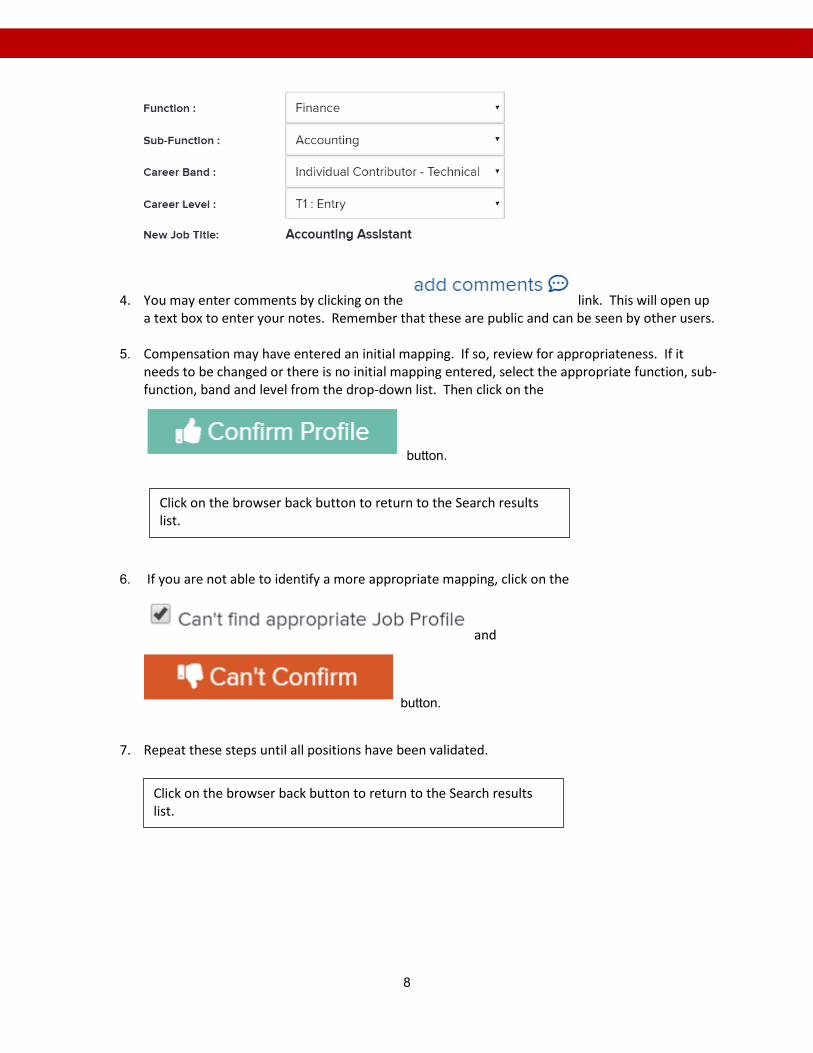
4. You may enter comments by clicking on the link. This will open up a text box to enter your notes. Remember that these are public and can be seen by other users.
5. Compensation may have entered an initial mapping. If so, review for appropriateness. If it
needs to be changed or there is no initial mapping entered, select the appropriate function, sub-function, band and level from the drop-down list. Then click on the
button.
6. If you are not able to identify a more appropriate mapping, click on the
and
button.
7. Repeat these steps until all positions have been validated.
Click on the browser back button to return to the Search results list.
Click on the browser back button to return to the Search results list.
9
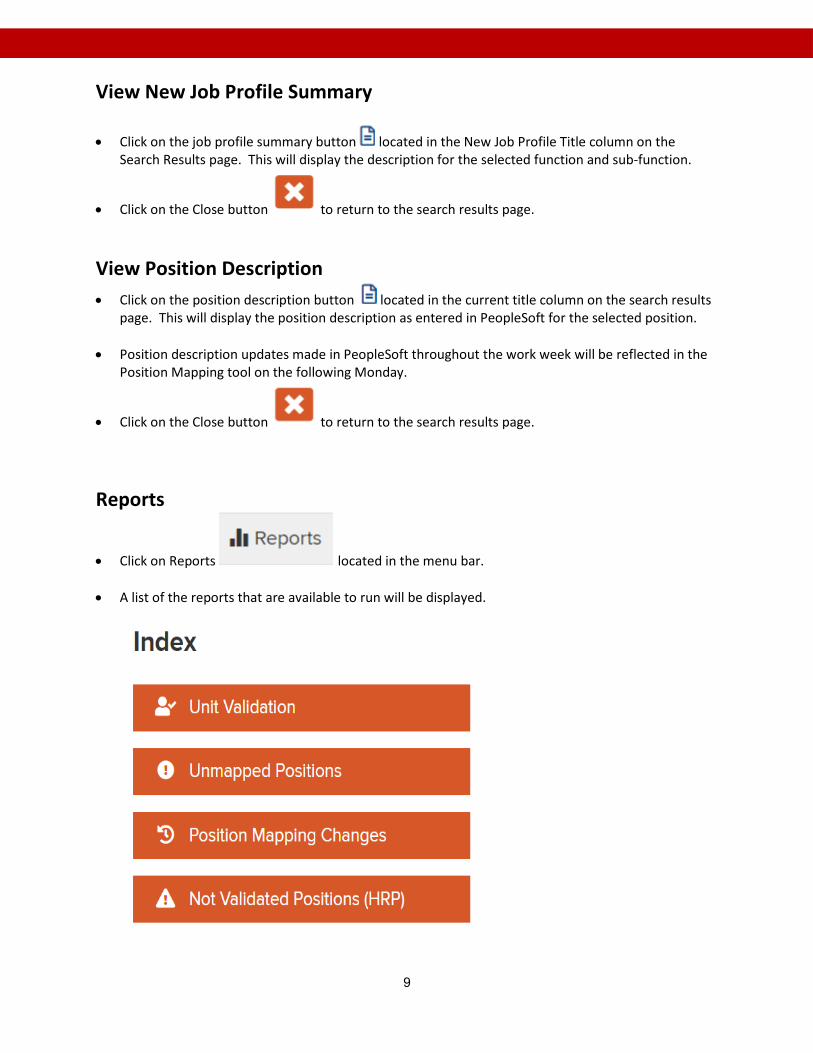
View New Job Profile Summary
• Click on the job profile summary button located in the New Job Profile Title column on the Search Results page. This will display the description for the selected function and sub-function.
• Click on the Close button to return to the search results page. View Position Description • Click on the position description button located in the current title column on the search results
page. This will display the position description as entered in PeopleSoft for the selected position.
• Position description updates made in PeopleSoft throughout the work week will be reflected in the Position Mapping tool on the following Monday.
• Click on the Close button to return to the search results page.
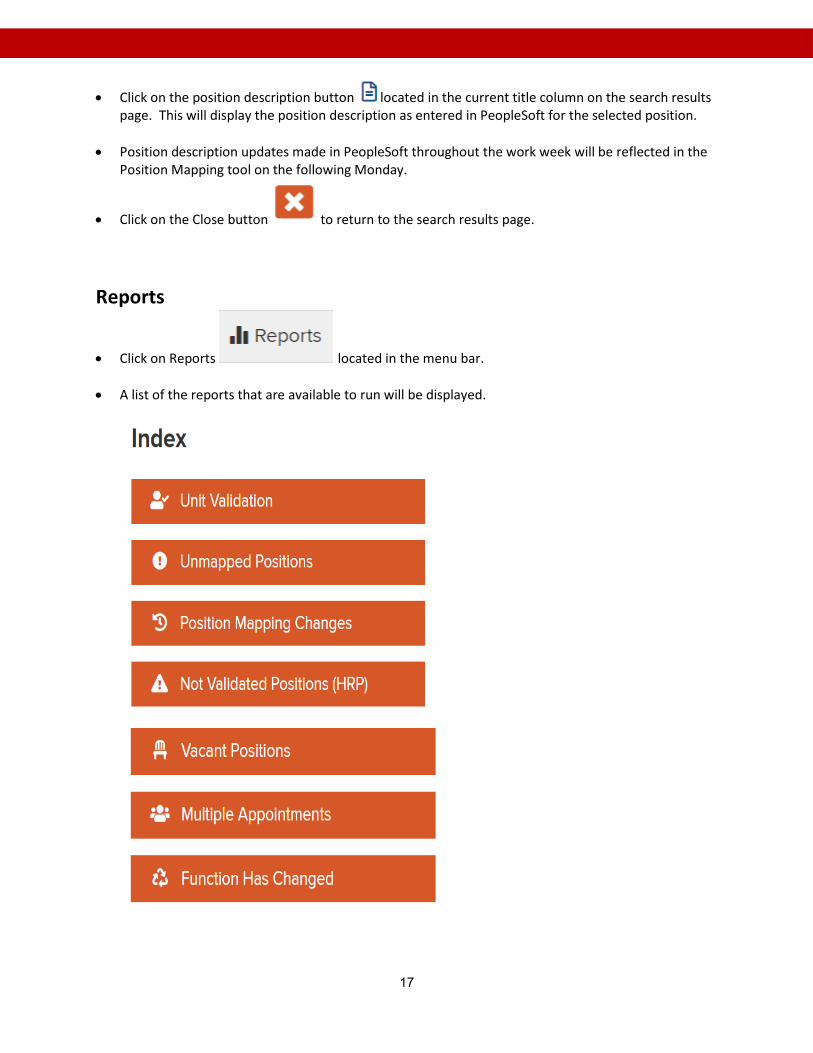
Reports
• Click on Reports located in the menu bar. • A list of the reports that are available to run will be displayed.
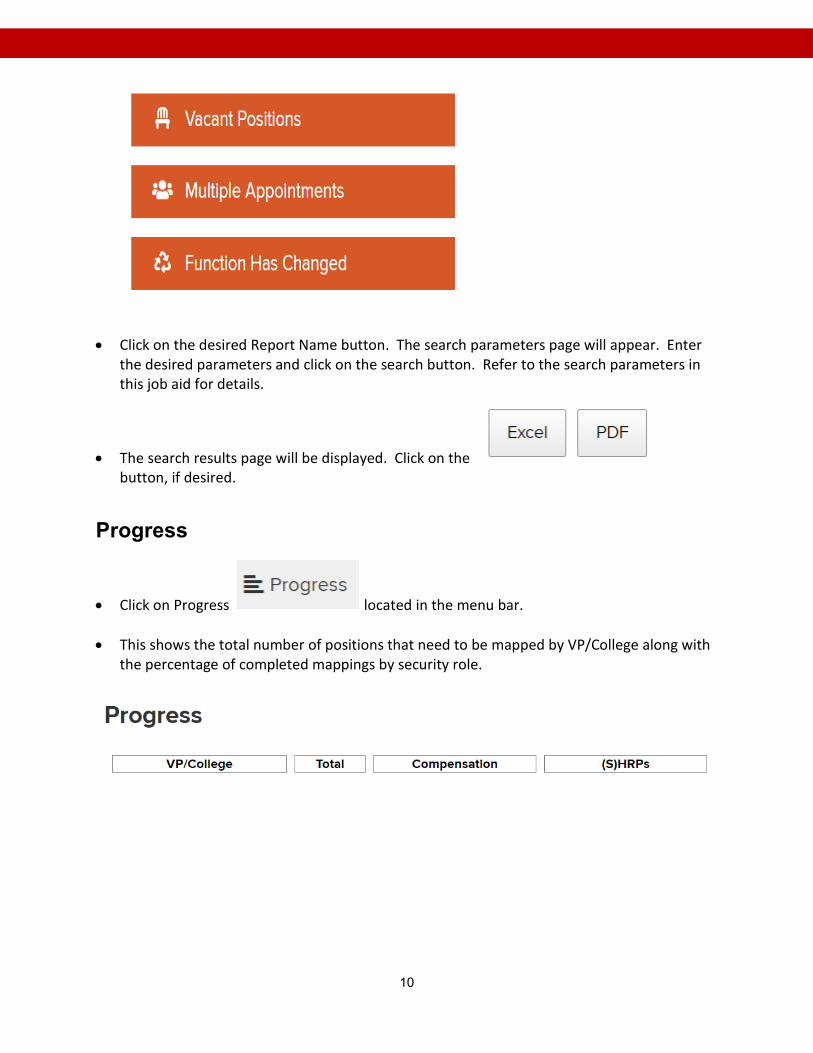
10
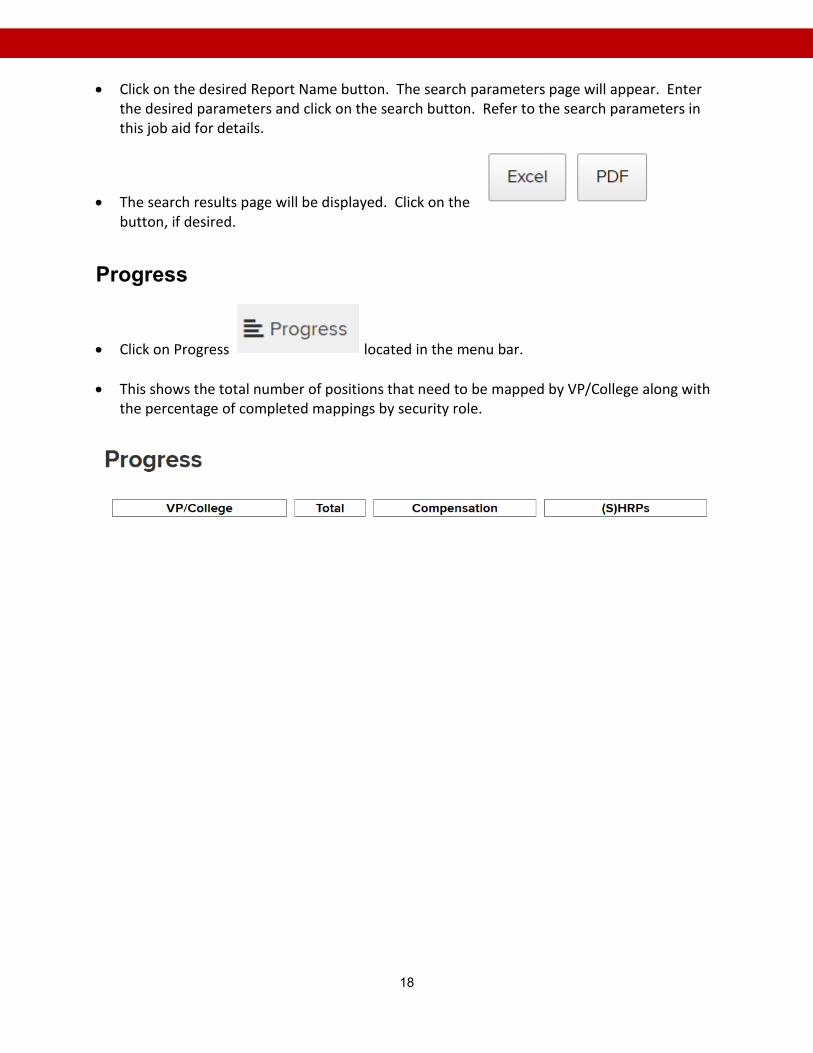
• Click on the desired Report Name button. The search parameters page will appear. Enter the desired parameters and click on the search button. Refer to the search parameters in this job aid for details.
• The search results page will be displayed. Click on the button, if desired.
Progress
• Click on Progress located in the menu bar. • This shows the total number of positions that need to be mapped by VP/College along with
the percentage of completed mappings by security role.
11
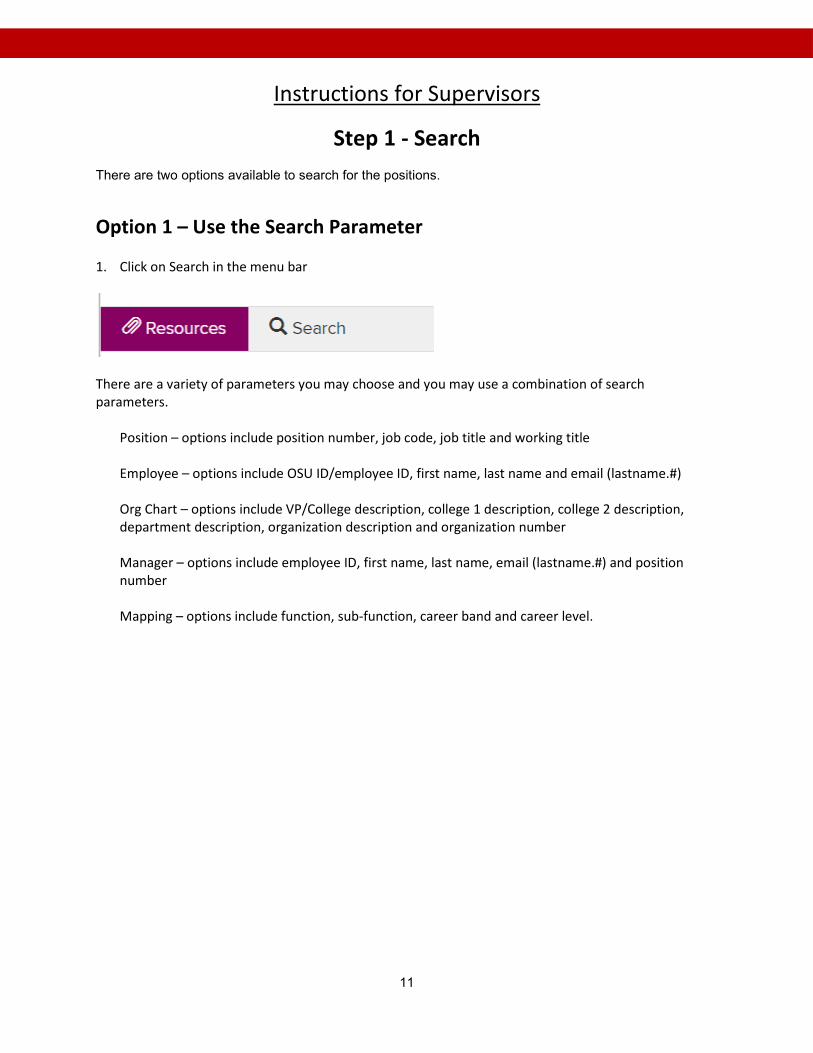
Instructions for Supervisors
Step 1 - Search There are two options available to search for the positions.
Option 1 – Use the Search Parameter
1. Click on Search in the menu bar
There are a variety of parameters you may choose and you may use a combination of search parameters.
Position – options include position number, job code, job title and working title Employee – options include OSU ID/employee ID, first name, last name and email (lastname.#) Org Chart – options include VP/College description, college 1 description, college 2 description, department description, organization description and organization number Manager – options include employee ID, first name, last name, email (lastname.#) and position number Mapping – options include function, sub-function, career band and career level.

12
5. Click on the word associated with the desired search section
13
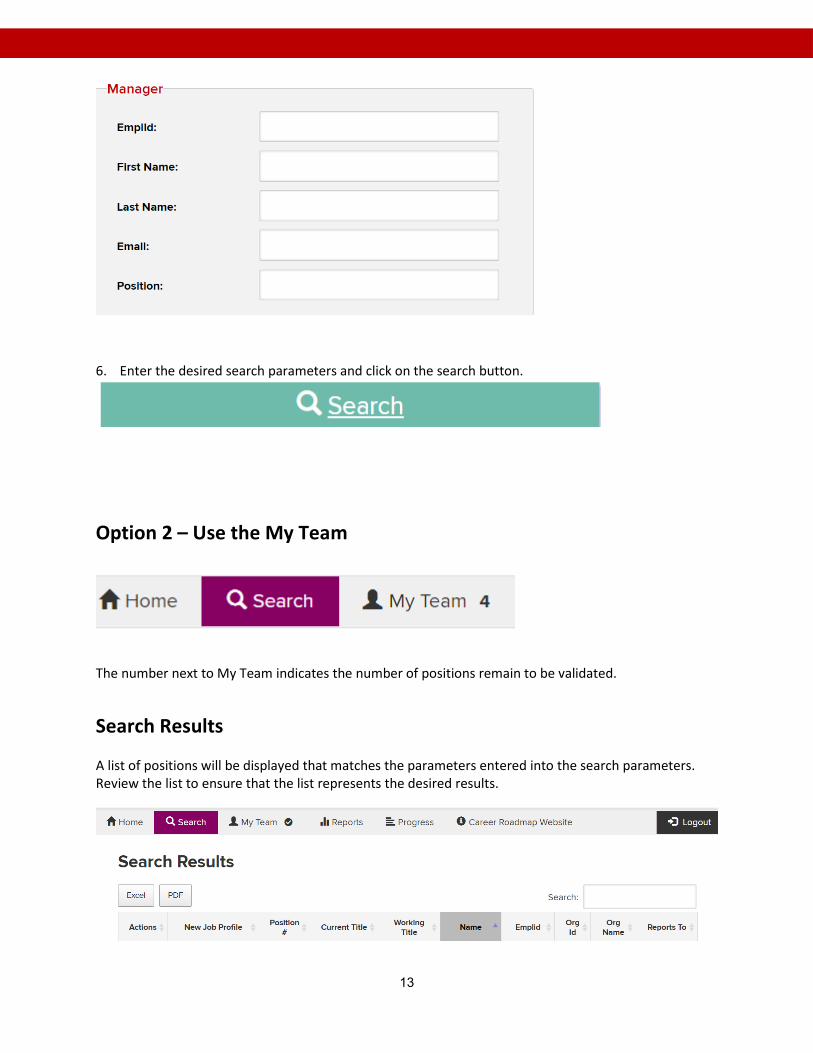
6. Enter the desired search parameters and click on the search button.
Option 2 – Use the My Team
The number next to My Team indicates the number of positions remain to be validated.
Search Results A list of positions will be displayed that matches the parameters entered into the search parameters. Review the list to ensure that the list represents the desired results.
14
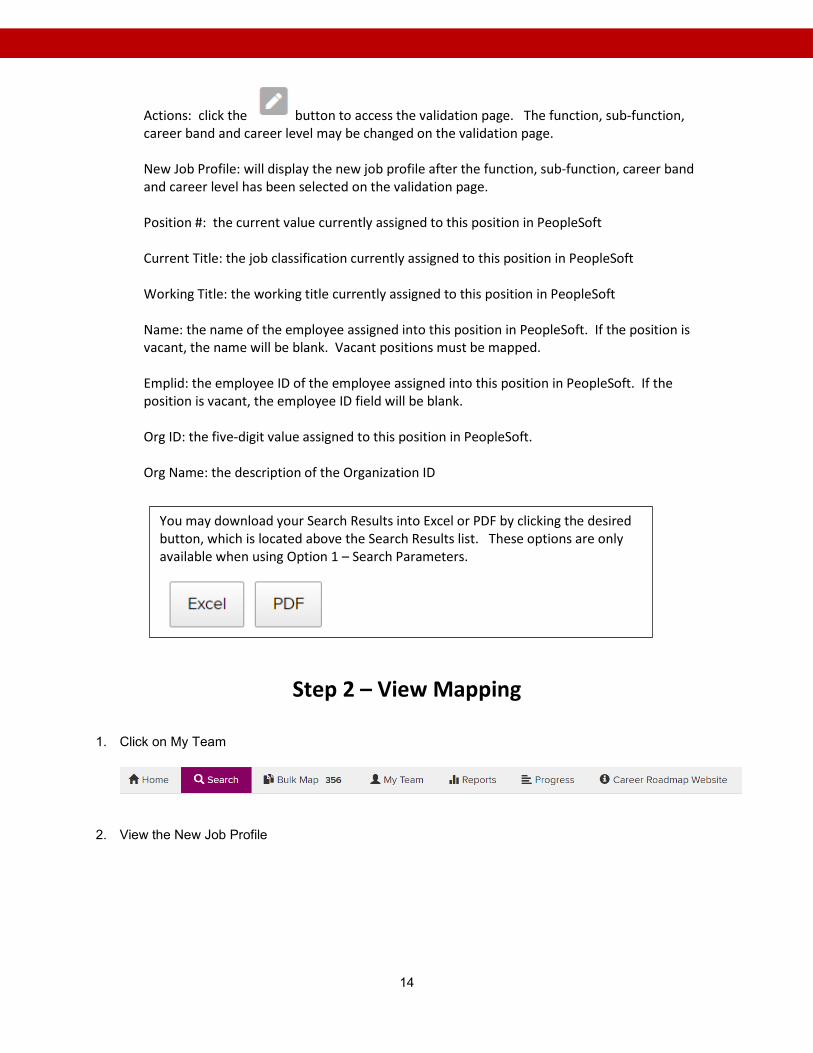
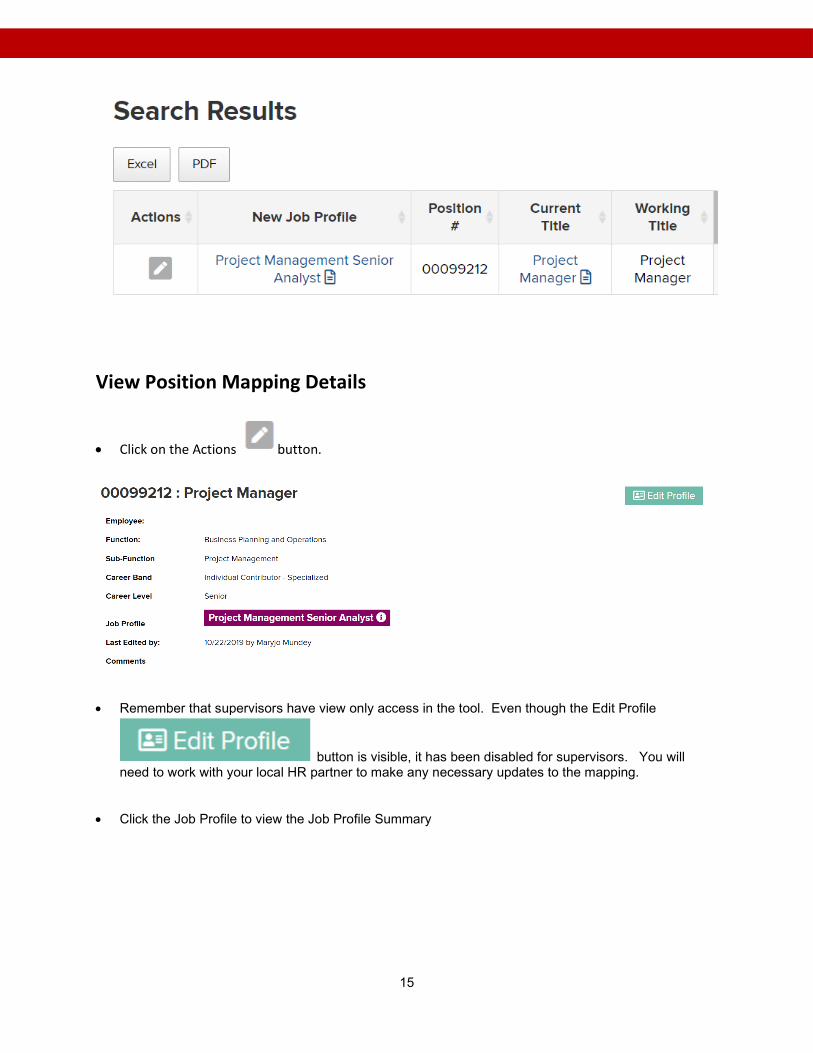
Actions: click the button to access the validation page. The function, sub-function, career band and career level may be changed on the validation page. New Job Profile: will display the new job profile after the function, sub-function, career band and career level has been selected on the validation page.
Position #: the current value currently assigned to this position in PeopleSoft
Current Title: the job classification currently assigned to this position in PeopleSoft Working Title: the working title currently assigned to this position in PeopleSoft
Name: the name of the employee assigned into this position in PeopleSoft. If the position is vacant, the name will be blank. Vacant positions must be mapped. Emplid: the employee ID of the employee assigned into this position in PeopleSoft. If the position is vacant, the employee ID field will be blank.
Org ID: the five-digit value assigned to this position in PeopleSoft. Org Name: the description of the Organization ID
Step 2 – View Mapping 1. Click on My Team
2. View the New Job Profile
You may download your Search Results into Excel or PDF by clicking the desired button, which is located above the Search Results list. These options are only available when using Option 1 – Search Parameters.
15
View Position Mapping Details
• Click on the Actions button.
• Remember that supervisors have view only access in the tool. Even though the Edit Profile
button is visible, it has been disabled for supervisors. You will need to work with your local HR partner to make any necessary updates to the mapping.
• Click the Job Profile to view the Job Profile Summary
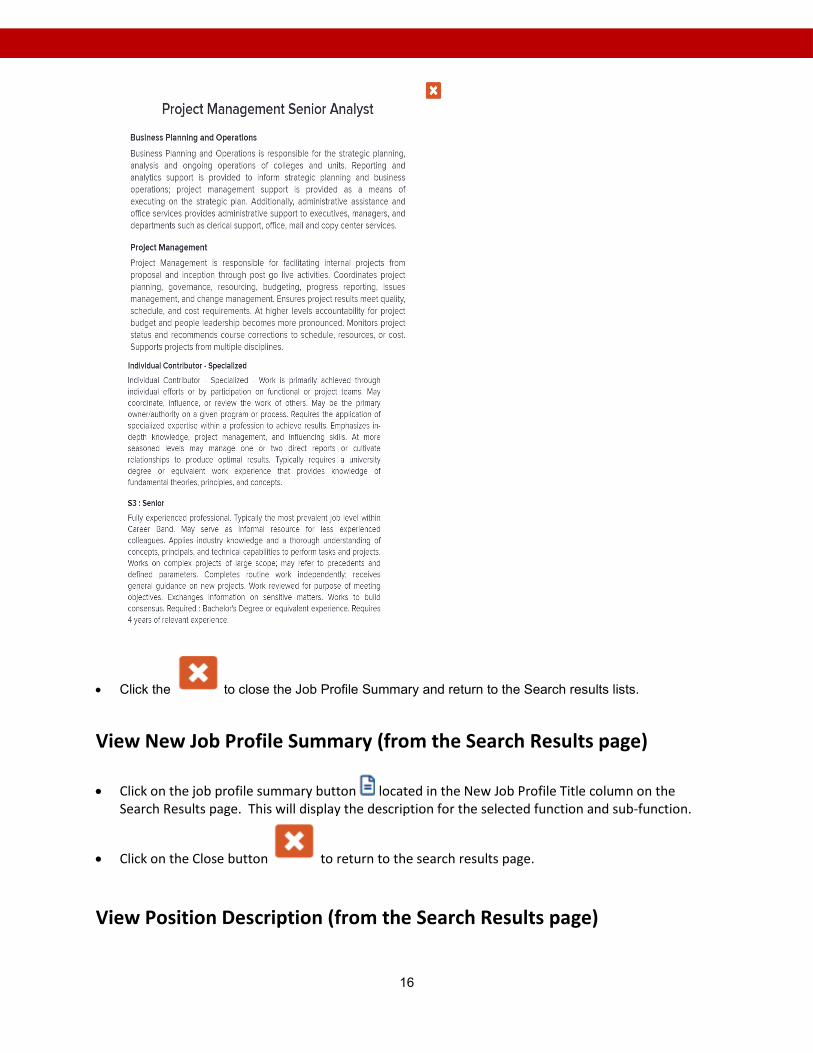
16
• Click the to close the Job Profile Summary and return to the Search results lists.
View New Job Profile Summary (from the Search Results page)
• Click on the job profile summary button located in the New Job Profile Title column on the Search Results page. This will display the description for the selected function and sub-function.
• Click on the Close button to return to the search results page. View Position Description (from the Search Results page)
17
• Click on the position description button located in the current title column on the search results page. This will display the position description as entered in PeopleSoft for the selected position.
• Position description updates made in PeopleSoft throughout the work week will be reflected in the Position Mapping tool on the following Monday.
• Click on the Close button to return to the search results page.
Reports
• Click on Reports located in the menu bar. • A list of the reports that are available to run will be displayed.
18
• Click on the desired Report Name button. The search parameters page will appear. Enter the desired parameters and click on the search button. Refer to the search parameters in this job aid for details.
• The search results page will be displayed. Click on the button, if desired.
Progress
• Click on Progress located in the menu bar. • This shows the total number of positions that need to be mapped by VP/College along with
the percentage of completed mappings by security role.


