20
Level 1 Diploma in Plastering © 2013 City and Guilds of London Institute. All rights reserved. presentation Application: broad screed method Unit 124: Applying floating coats to wall
| Date post: | 18-Feb-2017 |
| Category: |
Education |
| Upload: | robbie-blake |
| View: | 480 times |
| Download: | 0 times |

Level 1 Diploma in Plastering
© 2013 City and Guilds of London Institute. All rights reserved.
PowerPoint
presentation
Application: broad screed method
Unit 124: Applying floating coats to wall

Level 1 Diploma in Plastering
© 2013 City and Guilds of London Institute. All rights reserved.
Assessment criteria
1.4 describe the importance of correct technique and
procedure when using tools
1.5 describe different types of floating coats
2.4 use methods to apply floating coats
2.5 use correct techniques when applying floating coats

Level 1 Diploma in Plastering
© 2013 City and Guilds of London Institute. All rights reserved.
Application
• When floating, it is important to prepare the work
area, tools and equipment before starting work
• This will make it easier for you and will ensure
that the wall is applied in an even manner to
create a flat and even surface

Level 1 Diploma in Plastering
© 2013 City and Guilds of London Institute. All rights reserved.
Place the mixed plaster on
a pre- wetted spot board
• If the spot board is too
wet, the plaster will slide
off
• If it’s not wet, the plaster
will start to dry out
Application

Level 1 Diploma in Plastering
© 2013 City and Guilds of London Institute. All rights reserved.
Application
Tip: It is a good idea to wash all the mixing
equipment so that you are ready to mix the next
batch!
Water can be poured ready to mix.

Level 1 Diploma in Plastering
© 2013 City and Guilds of London Institute. All rights reserved.
Application
When floating, it is good practice to work heel to toe
of the trowel.
Right to left for right-handed plasterers
Left to right for left-handed plasterers
This means that you are always working towards
your last application.

Level 1 Diploma in Plastering
© 2013 City and Guilds of London Institute. All rights reserved.
Application
Each trowelful should overlap the last one
slightly and an even amount of pressure should
be used
Try to build up the thickness required in short
strokes

Level 1 Diploma in Plastering
© 2013 City and Guilds of London Institute. All rights reserved.
Application
• Start in the top corner of the wall and work down the wall angle
• Ruling from the angle outwards approx. 200mm
• Check with spirit level and fill out where needed

Level 1 Diploma in Plastering
© 2013 City and Guilds of London Institute. All rights reserved.
Application
• Now fill out the
opposite angle
• Ruling out from the
angle approx. 200mm
• Check with spirit level
Level 1 Diploma in Plastering
© 2013 City and Guilds of London Institute. All rights reserved.
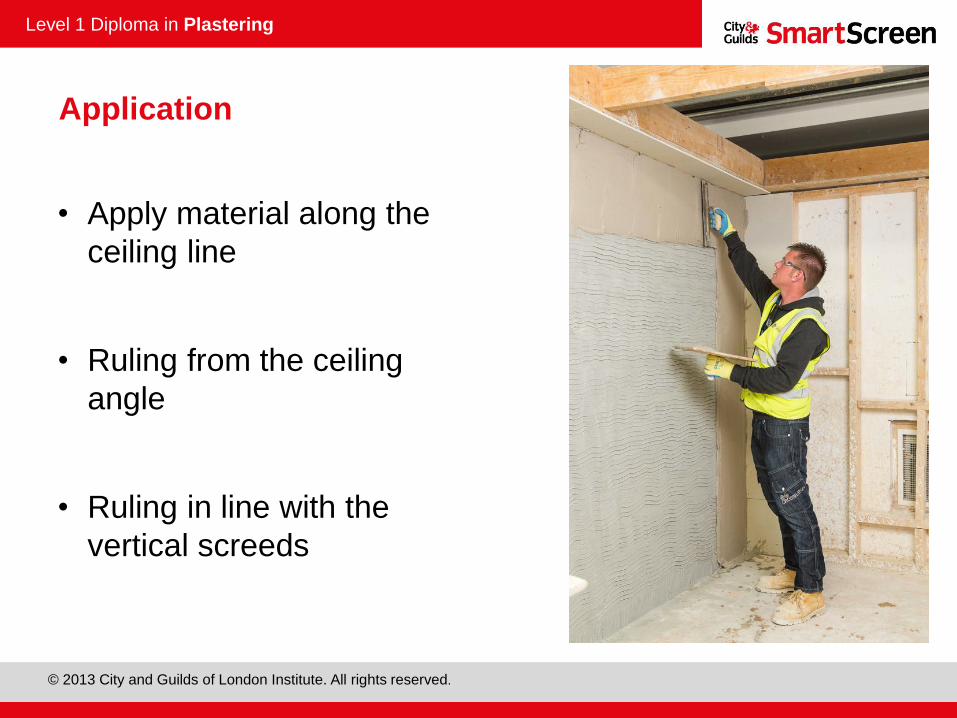
Application
• Apply material along the
ceiling line
• Ruling from the ceiling
angle
• Ruling in line with the
vertical screeds

Level 1 Diploma in Plastering
© 2013 City and Guilds of London Institute. All rights reserved.
Application
Apply a final band along the
skirting line approx. 150mm
high.
Now all of the angles
should be straight!!!
Note: Plastering material
should not go down to the
floor!!
Level 1 Diploma in Plastering
© 2013 City and Guilds of London Institute. All rights reserved.
Application
The screeds should be left for a short period of
time before being rubbed up and the hollows
filled.
A key can be applied to the bands.
www.youtube.com/watch?v=Mx5SY5ElL9M

Level 1 Diploma in Plastering
© 2013 City and Guilds of London Institute. All rights reserved.
Application
The middle section can now be filled in ruling off all the
screeds.
The area should be ruled in every direction, taking off
the excess and filling in the hollows.
www.youtube.com/watch?v=GodQJRnhtT0
www.youtube.com/watch?v=7wz0Q9vK-ME

Level 1 Diploma in Plastering
© 2013 City and Guilds of London Institute. All rights reserved.
Application
Once the material starts to
set (‘pull in’), the wall can be
flattened and the hollows filled
in.
Use a float to rub the wall up.
www.youtube.com/watch?v=e-jZYJBwBq4

Level 1 Diploma in Plastering
© 2013 City and Guilds of London Institute. All rights reserved.
Application
The wall can now be
given an appropriate key.
Use a devil float and
give a ‘figure of eight’
key

Level 1 Diploma in Plastering
© 2013 City and Guilds of London Institute. All rights reserved.
Application
Overall, the floating coat should be approximately
between 8mm and 12mm thick.
British Standard for internal plastering states that
no more of a 3mm deviation in a 1.8m rule is
allowed.

Level 1 Diploma in Plastering
© 2013 City and Guilds of London Institute. All rights reserved.
Did you know?
Cracks can appear on the surface (shrinkage).
This is caused by the suction in the background and
the plaster drying out.
The background joints can appear through the
surface (grinning).
This is caused by the plaster being too thinly applied
or variations in suction.

Level 1 Diploma in Plastering
© 2013 City and Guilds of London Institute. All rights reserved.
Patching a chase
Plastering after
electricians mainly
consists of filling chases
left from fitting wires to
walls.
The plaster should be
removed back to a solid
area before being filled
with bonding coat plaster
and ruled in flush with the
existing plaster.

Level 1 Diploma in Plastering
© 2013 City and Guilds of London Institute. All rights reserved.
Patching a chase
Once the plaster has set, it should be cut back
so that when the finish is applied, it will blend
in with the existing one and not leave a ridge.

Level 1 Diploma in Plastering
© 2013 City and Guilds of London Institute. All rights reserved.
Any questions?


