11
Preliminary steps before starting the experiment: 1) Click the Launch button to start the experiment. 2) Click OK to create a new session

Preliminary steps before starting the experiment:
1) Click the Launch button to start the experiment.
2) Click OK to create a new session

3) Click the Screen Sharing option and click connect to establish the session
4) Click the VNC viewer button on the taskbar of the Windows 7 host that opens
soon after and enter 10.1.200.44 as the ip address of the VNC server. Click
connect to establish the session
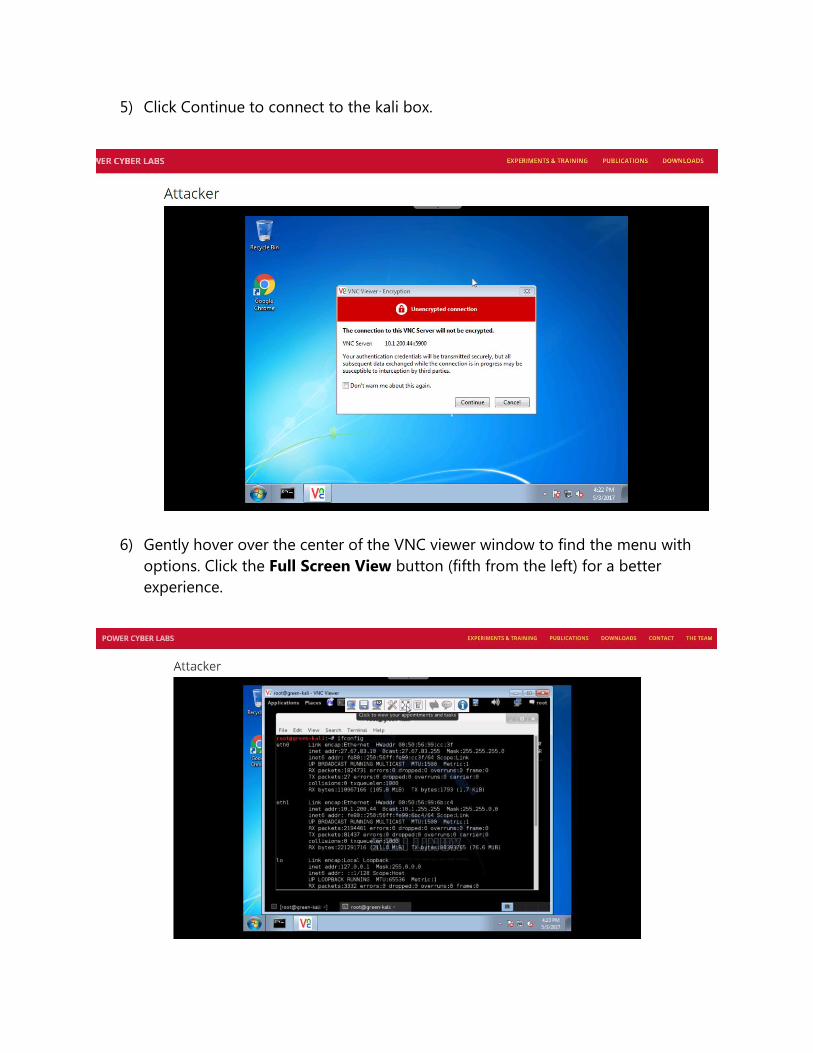
5) Click Continue to connect to the kali box.
6) Gently hover over the center of the VNC viewer window to find the menu with
options. Click the Full Screen View button (fifth from the left) for a better
experience.

7) This is how a full screen Kali box looks like.
Actual Experiment:
Vulnerability Assessment with OpenVAS
Learning Outcomes
Understand the importance of discovering system vulnerabilities using detailed
scans.
Analyze the severity of their impacts and potential solutions to patch critical
vulnerabilities.
Starting OpenVAS
To start OpenVAS, open the terminal and type “openvas-start”. In case you see any
“error” while it’s startup, try “openvas-stop” and then start the OpenVAS again.
Login and Starting a Scan
Open a web browser and navigate to “https://127.0.0.1:9392/login/login.html”

We have placed a bookmark on the browser's toolbar with a link to this page.
The login credentials are as follows:
username: root
password: root
To start a scan, enter an IP address in the Quick Start field and click “Start Scan”


You should then see a new scan appear in progress in the list of tasks.

To view the report of the scan, go to Scan Management → Reports
Then, click on the date of the scan to view its details.
This can be done even if the scan is not complete yet.

From this screen you can investigate the different results from the scan.

Tasks:
1. Once you get familiar with the procedure to scan a particular host, please try to
scan other hosts that you had identified earlier in each of the corporate, control
and substation networks.
2. Take some time to look through the various types of results from each scan to
understand the type of vulnerabilities hosts have and how those could potentially
affect the overall system availability/reliability.
3. With the scan results obtained from the first two labs and any other information
you might have collected from the SCADA system, try to come up with one or
two possible attacks as a penetration tester (Do not need to implement it).
=========================================================
===========
Internet access from your kali box:
Some of you complained that the Kali does not have access to the internet. Have asked
your classmate Jacob Drahos to set up one proxy server for all the Kalis. Please check
following notes from him to use the web proxy.
Configure Iceweasel (Firefox) for the Kali as follows:
- Open Iceweasel
- Go to connection settings
- Edit -> Preferences -> Advanced Tab -> Network Tab (within advanced tab) -> Settings
- Enter proxy settings for the workaround keyhole
- 27.67.83.253:3128
- Use for all protocols (see attached image)
- Save settings and exit (Enter works if it is cut-off due to screen resolution)
You should now be able to browse the web with Iceweasel.
If you want command-line tools to be able to access the internet, you will
have to set the http_proxy and https_proxy environment variables:
export http_proxy="http://27.67.83.253:3128"
export https_proxy="$http_proxy"

Now command-line tools (in that shell session) will work through the proxy, for example curl or wget. This might
not be particularly useful for now, but if you need to do it, you know how.


