19
PRO Getting Started Visit www.HowToNoNo.com for Videos, Tips & Tricks
PROGetting Started
Visit www.HowToNoNo.com for Videos, Tips & Tricks
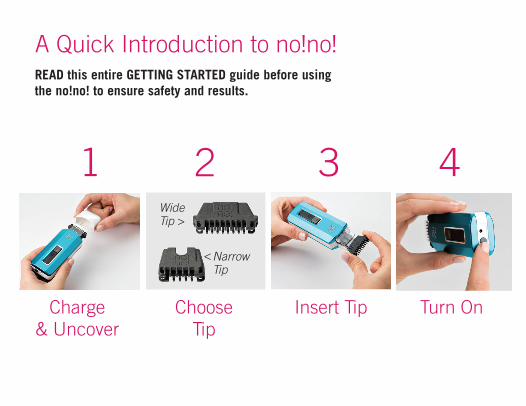
2Wide Tip >
<Narrow Tip
A Quick Introduction to no!no!READ this entire GETTING STARTED guide before using the no!no! to ensure safety and results.
1 3 4
Charge& Uncover
Turn OnInsert TipChooseTip
How
to no!no!
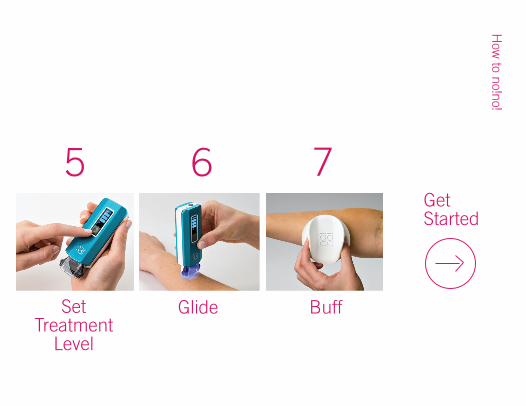
5 6 7
Set Treatment
Level
Glide Buff
Get Started
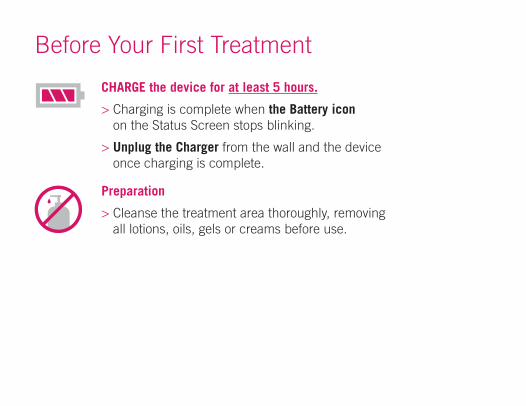
Before Your First Treatment
CHARGE the device for at least 5 hours.
> Charging is complete when the Battery iconon the Status Screen stops blinking.
> Unplug the Charger from the wall and the deviceonce charging is complete.
Preparation
> Cleanse the treatment area thoroughly, removingall lotions, oils, gels or creams before use.

Select Your Thermicon Tip
Wide Tip
> Use the Wide Tip to treatlarge areas like the arms,legs, chest and back.
Narrow Tip
> Use the Narrow Tip for smallsensitive areas like the face,neck, underarms and bikini line.
How
to no!no!
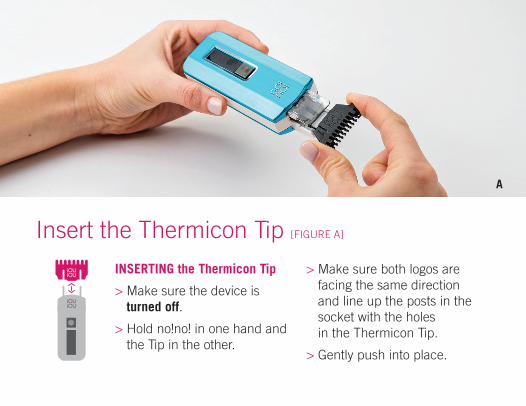
Insert the Thermicon Tip [FIGURE A]
A
INSERTING the Thermicon Tip
> Make sure the device isturned off.
> Hold no!no! in one hand andthe Tip in the other.
> Make sure both logos arefacing the same directionand line up the posts in thesocket with the holesin the Thermicon Tip.
> Gently push into place.
Notes:REMOVING the Thermicon Tip
> Grasp the Tip by both sides.
> Gently pull the Tip out of the socket.
When to REPLACE the Thermicon Tip
> If the light turns red.
> If it is no longer working efficiently.
> If the wire is damaged in any way.
> If the Thermicon Tip Icon is blinkingand no more bars appear on theStatus Screen.
> Make sure the Thermicon Tip isplaced properly into the socketbefore treatment.
> Never use a Thermicon Tip ifthe wire is bent or torn.
How
to no!no!
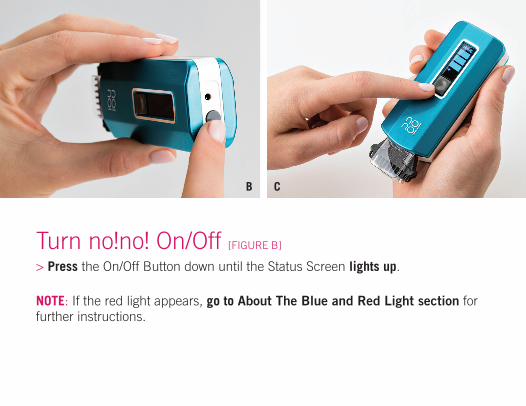
Turn no!no! On/Off [FIGURE B]
> Press the On/Off Button down until the Status Screen lights up.
NOTE: If the red light appears, go to About The Blue and Red Light section for further instructions.
B C
LOW
MED
IUM
HIG
H
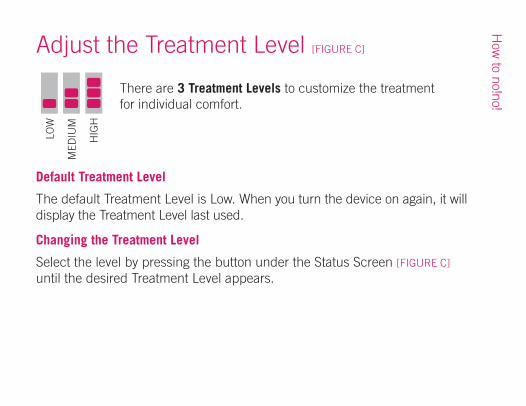
Adjust the Treatment Level [FIGURE C]
There are 3 Treatment Levels to customize the treatment for individual comfort.
Default Treatment Level
The default Treatment Level is Low. When you turn the device on again, it will display the Treatment Level last used.
Changing the Treatment Level
Select the level by pressing the button under the Status Screen [FIGURE C] until the desired Treatment Level appears.
How
to no!no!
> Test a small section of your skin with the Low Treatment Levelwhen starting to treat a new area for the first time.
> Adjust the level after that, and if you can tolerate it, raise theTreatment Level to the highest level for optimal results.
Getting Comfortable with Treatment Levels
How
to no!no!
> Should any discomfort appear at any time STOP immediately,lower the Treatment Level and try again or move to a new area.
> When treating facial hair, please see the Treating Facial Hair section.
Important Notes about Treatment Levels:
D
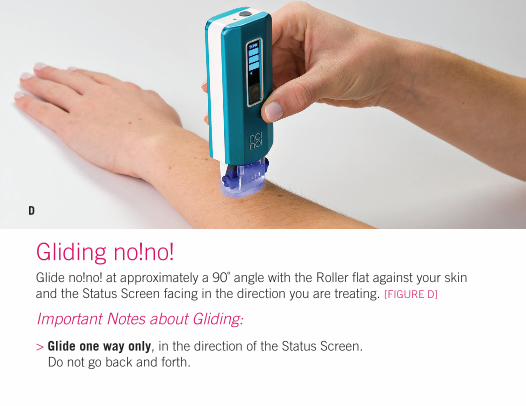
Gliding no!no!Glide no!no! at approximately a 90˚ angle with the Roller flat against your skin and the Status Screen facing in the direction you are treating. [FIGURE D]
> Glide one way only, in the direction of the Status Screen.Do not go back and forth.
Important Notes about Gliding:

How
to no!no!> It is best to glide towards your body against the grain of the hair growth.
However, if it is more comfortable you may glide in other directions, butalways in the direction of the Status Screen.
> Use a STEADY, SMOOTH and EVEN motion. If you move too slowly, the devicewill not activate; if you move too fast, you will not achieve optimal results.
> When gliding at the proper speed the blue light will be steady. A blinkingor flickering blue light indicates that you may be moving too slowly. Onceyour movement has been adjusted, the blue light will remain steady.
> Do not press down too hard on your skin.
> You may need to go over an area more than once; 4-6 passes may beenough. If the skin is not uncomfortably warm, you may continue. If thereis still hair left after buffing and your skin is too warm, wait a few minutesto return to the area. Try to remove all of the hair.
> Buff after each treatment to remove treated hair left behind.
NOTE: Do not be alarmed when the number of bars change on the Status Screen. When you first start to glide, the Status Screen will automatically switch from the Treatment Level display to the Thermicon Tip status display. Check the icon to determine what information is being displayed.
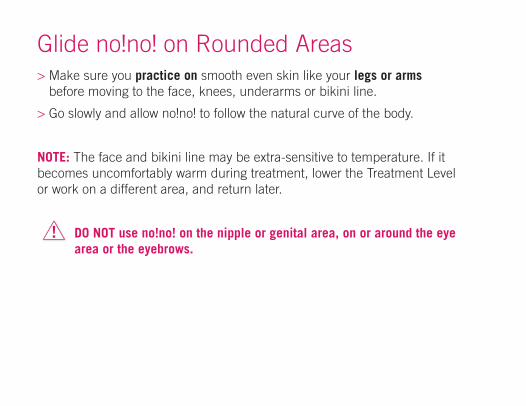
Glide no!no! on Rounded Areas> Make sure you practice on smooth even skin like your legs or arms
before moving to the face, knees, underarms or bikini line.
> Go slowly and allow no!no! to follow the natural curve of the body.
NOTE: The face and bikini line may be extra-sensitive to temperature. If it becomes uncomfortably warm during treatment, lower the Treatment Level or work on a different area, and return later.
DO NOT use no!no! on the nipple or genital area, on or around the eye area or the eyebrows.
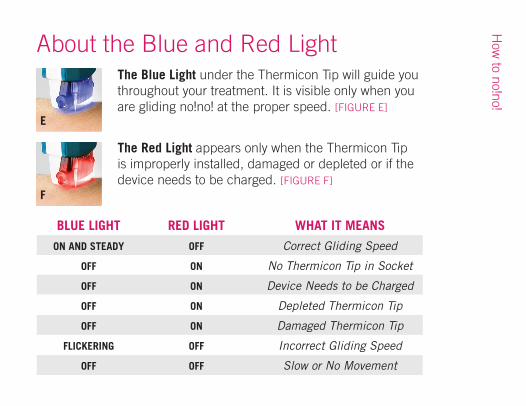
About the Blue and Red Light The Blue Light under the Thermicon Tip will guide you throughout your treatment. It is visible only when you are gliding no!no! at the proper speed. [FIGURE E]
The Red Light appears only when the Thermicon Tip is improperly installed, damaged or depleted or if the device needs to be charged. [FIGURE F]
How
to no!no!
E
F
BLUE LIGHT RED LIGHT WHAT IT MEANS
ON AND STEADY OFF Correct Gliding Speed
OFF ON No Thermicon Tip in Socket
OFF ON Device Needs to be Charged
OFF ON Depleted Thermicon Tip
OFF ON Damaged Thermicon Tip
FLICKERING OFF Incorrect Gliding Speed
OFF OFF Slow or No Movement
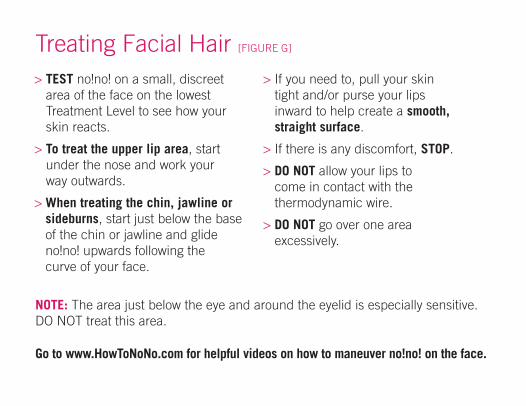
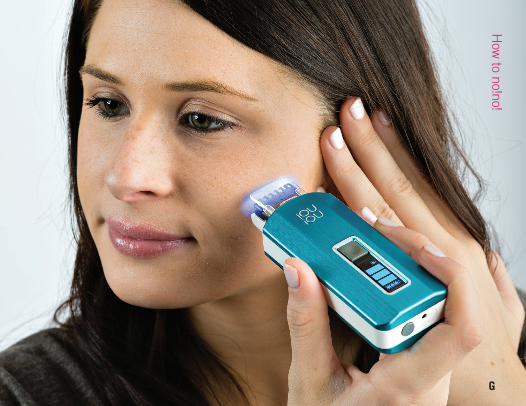
Treating Facial Hair [FIGURE G]
> TEST no!no! on a small, discreetarea of the face on the lowestTreatment Level to see how yourskin reacts.
> To treat the upper lip area, startunder the nose and work yourway outwards.
> When treating the chin, jawline orsideburns, start just below the baseof the chin or jawline and glideno!no! upwards following thecurve of your face.
> If you need to, pull your skintight and/or purse your lipsinward to help create a smooth,straight surface.
> If there is any discomfort, STOP.
> DO NOT allow your lips tocome in contact with thethermodynamic wire.
> DO NOT go over one areaexcessively.
Go to www.HowToNoNo.com for helpful videos on how to maneuver no!no! on the face.
NOTE: The area just below the eye and around the eyelid is especially sensitive. DO NOT treat this area.
How
to no!no!
G
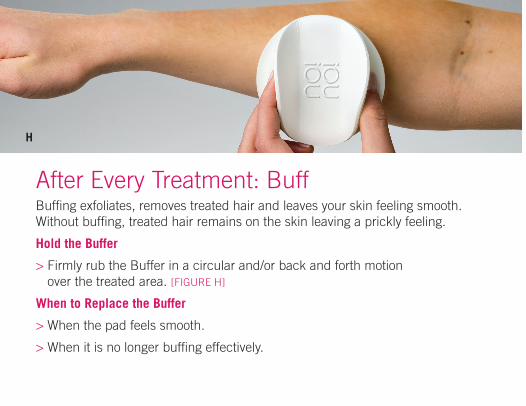
After Every Treatment: Buff Buffing exfoliates, removes treated hair and leaves your skin feeling smooth. Without buffing, treated hair remains on the skin leaving a prickly feeling.
Hold the Buffer
> Firmly rub the Buffer in a circular and/or back and forth motionover the treated area. [FIGURE H]
When to Replace the Buffer
> When the pad feels smooth.
> When it is no longer buffing effectively.
H
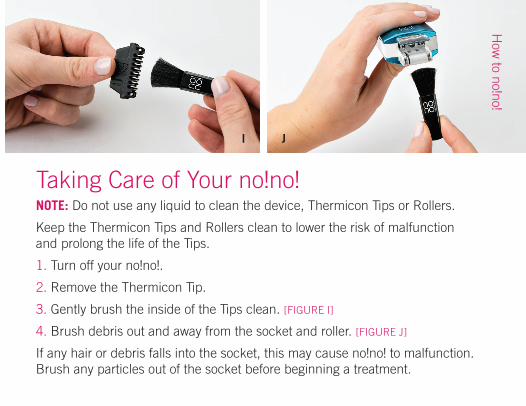
Taking Care of Your no!no!NOTE: Do not use any liquid to clean the device, Thermicon Tips or Rollers.
Keep the Thermicon Tips and Rollers clean to lower the risk of malfunction and prolong the life of the Tips.
1. Turn off your no!no!.
2. Remove the Thermicon Tip.
3. Gently brush the inside of the Tips clean. [FIGURE I]
4. Brush debris out and away from the socket and roller. [FIGURE J]
If any hair or debris falls into the socket, this may cause no!no! to malfunction. Brush any particles out of the socket before beginning a treatment.
I J
How
to no!no!


![Skaffold - storage.googleapis.com · [getting-started getting-started] Hello world! [getting-started getting-started] Hello world! [getting-started getting-started] Hello world! 5.](https://static.documents.pub/doc/80x56/5ec939f2a76a033f091c5ac7/skaffold-getting-started-getting-started-hello-world-getting-started-getting-started.jpg)


