Connect2Go 14845-6 Yonge St, Suite 310 Aurora, ON Canada L4G 6H8 T: (+1) 647-503-3406 www.connect2go.com Page 1 Pro and Customer Account Setup The following document outlines how to set up new Pro and new Customer accounts. Before you can set up any customers you must have an active Pro Account. While the Connect2Go Portal is compatible with all browsers, for users with PCs it is highly encouraged that a standard compliant browser such as Firefox, Chrome or Safari for Windows is used. Step 1: Set-up a Pro Account 1. Go to the Connect2Go home page www.connect2go.com . 2. Move the cursor over Become A Dealer located in the menu bar at the top of the screen. 3. Click Sign Up. The Connect2GoPro Program description and Information and Pro Account Request Form should appear. 4. Request a Pro Account by filling out the form. In the message box type the message “Requesting a new Pro Account”. 5. Click Submit. 6. Once the request is reviewed by Dealer Relations, you will receive an email with your Pro ID, login credentials and a link to the Pro Account Enrollment No-Obligation Form. This form must be signed and sent back to Dealer Relations before your account is fully active. 7. Review, sign, and return the Pro Account Enrollment Form by fax (905-918-0569) or scan the form and email to [email protected]. 8. Once received, you will receive an email indicating your account is fully active. Now you are able to login and set up a Customer Account. Step 2: Customize Your Pro Account From your Pro account, click on the settings tab to view your options.
Transcript
Connect2Go 14845-6 Yonge St, Suite 310 Aurora, ON Canada L4G 6H8 T: (+1) 647-503-3406 www.connect2go.com Page 1
Pro and Customer Account Setup
The following document outlines how to set up new Pro and new Customer accounts. Before you can set up any customers you must have an active Pro Account.
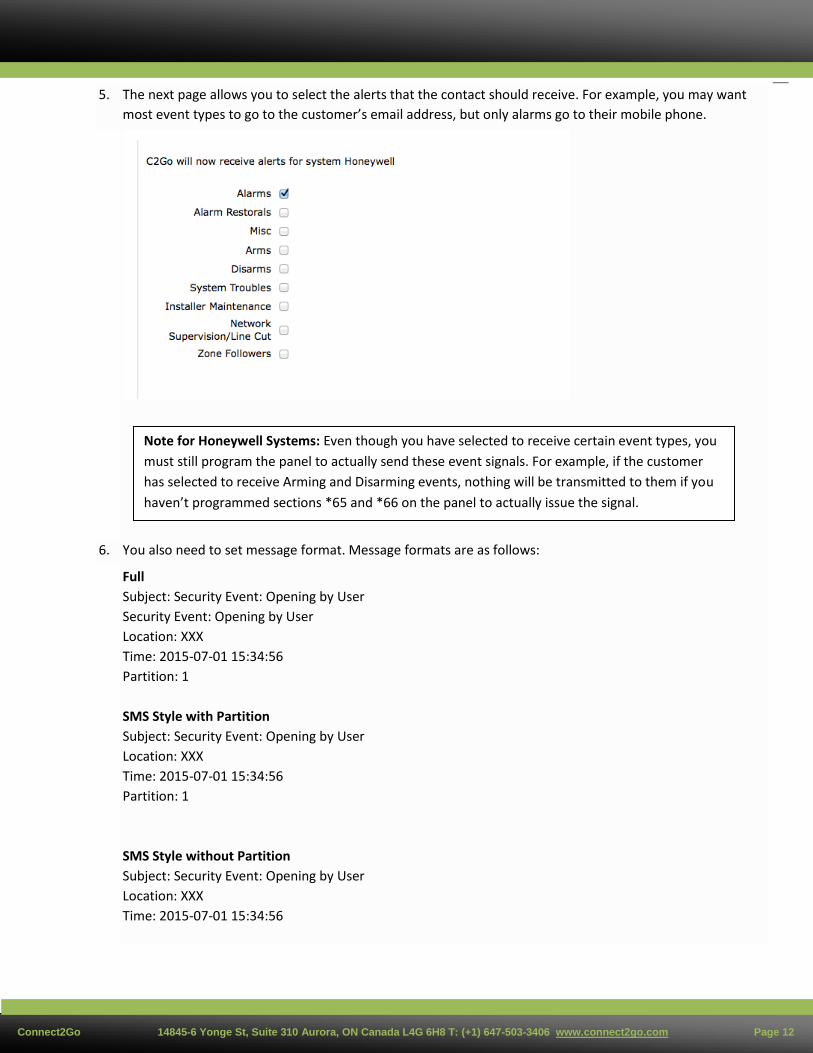
While the Connect2Go Portal is compatible with all browsers, for users with PCs it is highly encouraged that a standard compliant browser such as Firefox, Chrome or Safari for Windows is used.
Step 1: Set-up a Pro Account
1. Go to the Connect2Go home page www.connect2go.com.
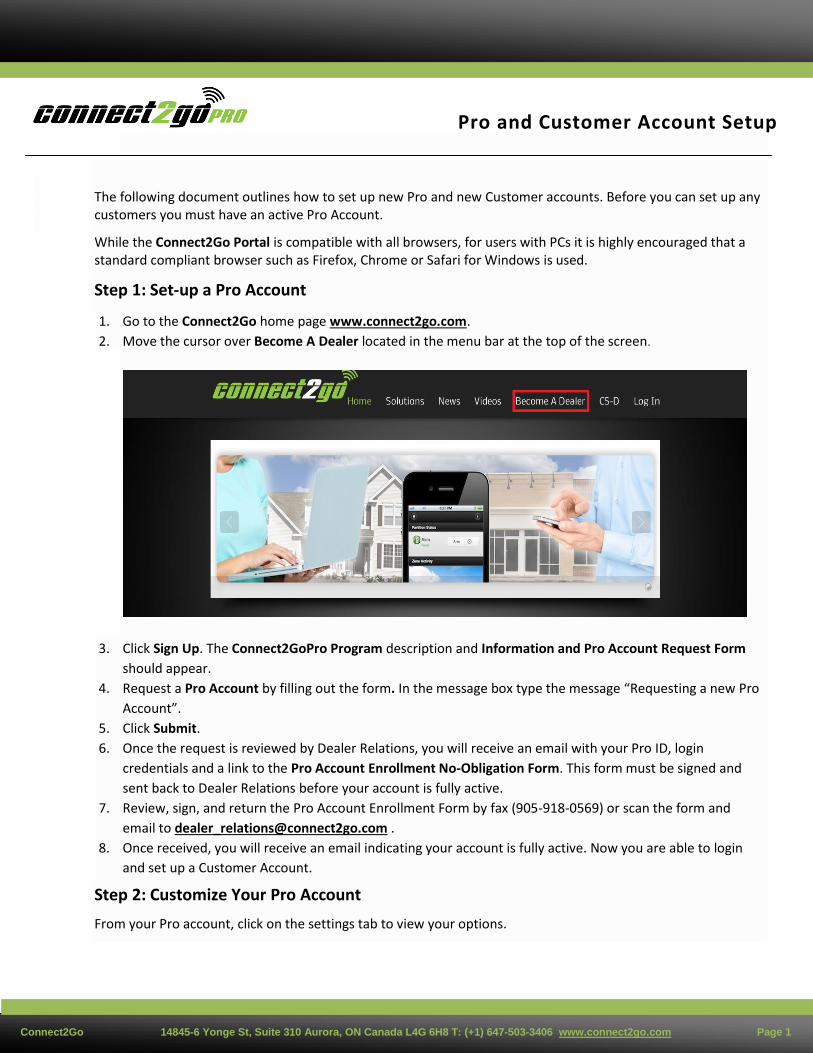
2. Move the cursor over Become A Dealer located in the menu bar at the top of the screen.
3. Click Sign Up. The Connect2GoPro Program description and Information and Pro Account Request Form
should appear.
4. Request a Pro Account by filling out the form. In the message box type the message “Requesting a new Pro
Account”.
5. Click Submit.
6. Once the request is reviewed by Dealer Relations, you will receive an email with your Pro ID, login
credentials and a link to the Pro Account Enrollment No-Obligation Form. This form must be signed and
sent back to Dealer Relations before your account is fully active.
7. Review, sign, and return the Pro Account Enrollment Form by fax (905-918-0569) or scan the form and
Connect2Go 14845-6 Yonge St, Suite 310 Aurora, ON Canada L4G 6H8 T: (+1) 647-503-3406 www.connect2go.com Page 2
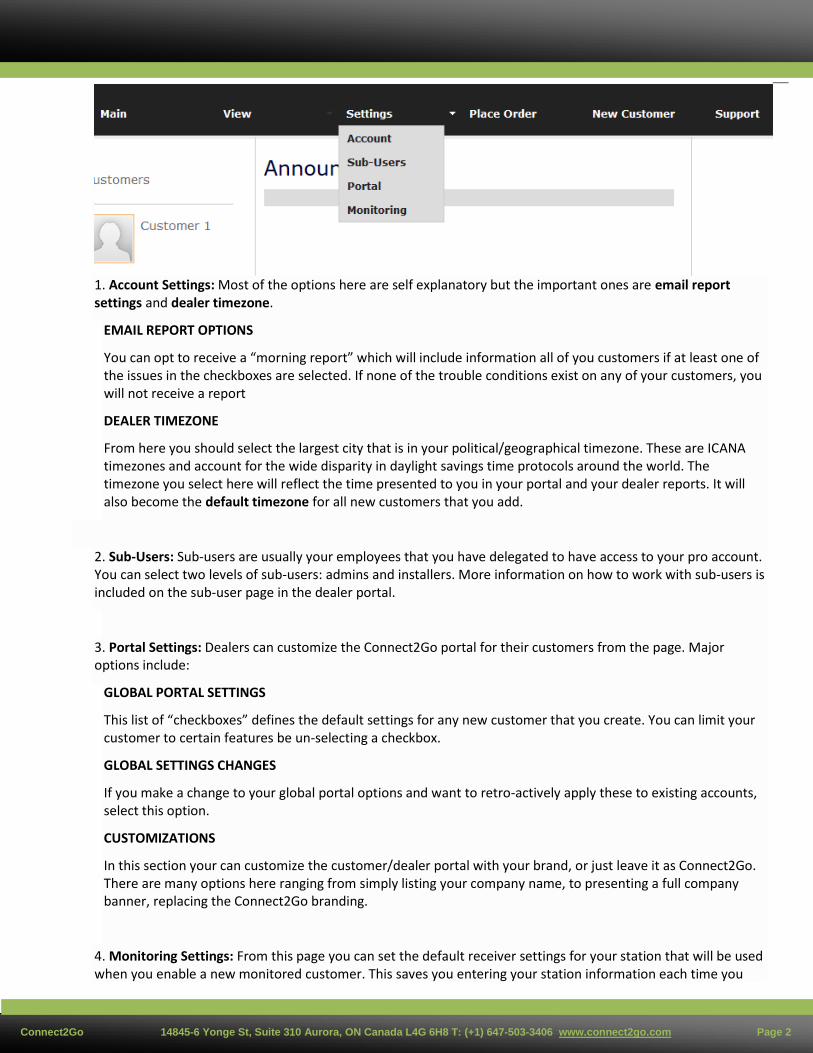
1. Account Settings: Most of the options here are self explanatory but the important ones are email report settings and dealer timezone.
EMAIL REPORT OPTIONS
You can opt to receive a “morning report” which will include information all of you customers if at least one of the issues in the checkboxes are selected. If none of the trouble conditions exist on any of your customers, you will not receive a report
DEALER TIMEZONE
From here you should select the largest city that is in your political/geographical timezone. These are ICANA timezones and account for the wide disparity in daylight savings time protocols around the world. The timezone you select here will reflect the time presented to you in your portal and your dealer reports. It will also become the default timezone for all new customers that you add.
2. Sub-Users: Sub-users are usually your employees that you have delegated to have access to your pro account. You can select two levels of sub-users: admins and installers. More information on how to work with sub-users is included on the sub-user page in the dealer portal.
3. Portal Settings: Dealers can customize the Connect2Go portal for their customers from the page. Major options include:
GLOBAL PORTAL SETTINGS
This list of “checkboxes” defines the default settings for any new customer that you create. You can limit your customer to certain features be un-selecting a checkbox.
GLOBAL SETTINGS CHANGES
If you make a change to your global portal options and want to retro-actively apply these to existing accounts, select this option.
CUSTOMIZATIONS
In this section your can customize the customer/dealer portal with your brand, or just leave it as Connect2Go. There are many options here ranging from simply listing your company name, to presenting a full company banner, replacing the Connect2Go branding.
4. Monitoring Settings: From this page you can set the default receiver settings for your station that will be used when you enable a new monitored customer. This saves you entering your station information each time you
Connect2Go 14845-6 Yonge St, Suite 310 Aurora, ON Canada L4G 6H8 T: (+1) 647-503-3406 www.connect2go.com Page 3
enable monitoring. Optionally you can globally change all of your existing customer’s receiver settings at once. This is useful if your station tells you to move your customers to a different set of receivers.
Step 2: Login and Create a New Customer Account
1. Go to the Connect2Go home page www.connect2go.com.
2. To login to your Connect2Go Pro Account move the cursor over Log In in the menu bar at the top of the
screen.
3. Click Pro Log In and enter your credentials that were emailed to you in Step 1.
4. Once logged in, you will be taken to the Connect2GoPro Main Screen. Click the New Customer link in the
top menu bar and enter the Customer’s email address as requested. The email address will be the Customer
Username.
5. Click Submit Information.
6. Complete the Customer detail as directed on the website and Click Next. The following message should
appear:
Your Customer's Account Has Been Successfully Created.
They have been sent an e-mail with log-in information to the Connect2Go Portal
7. Verify that the Customer Information is correct. If it is, click Finish.
Connect2Go 14845-6 Yonge St, Suite 310 Aurora, ON Canada L4G 6H8 T: (+1) 647-503-3406 www.connect2go.com Page 4
8. Return to the Main Screen by clicking on the Main link in the top left hand corner. Your new customer will
show up in the left hand column of the screen. As you add more customers they will be displayed in
alphabetical order by last name as shown below:
9. Once the customer’s account is created, the customer will automatically receive an email with login
credentials and instructions on how to login using the email address you entered during account creation. If
they do not receive this email, advise them to check their “SPAM” or “Junk” folders.
As shown in the screen capture on the following page:
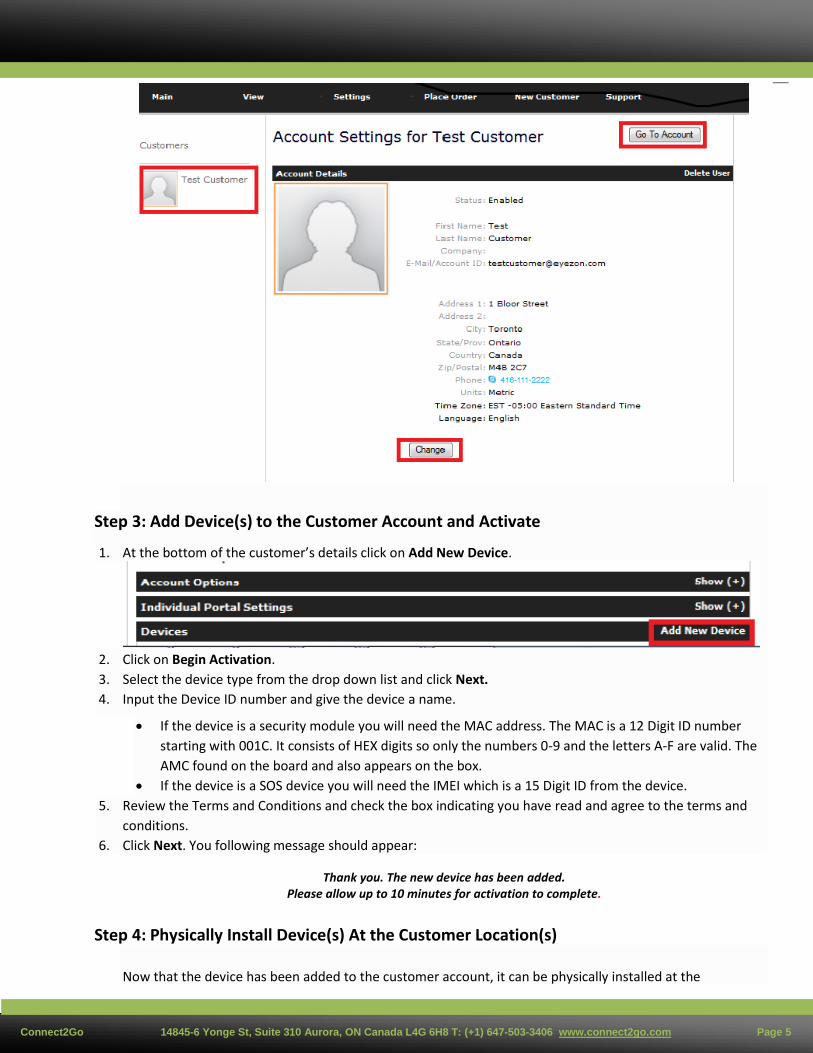
To access the customer’s account detail and settings click on the Customer Icon in the left-hand column on the screen and the customer’s details will appear in the right hand panel.
To change customer details, click the Change button and make the appropriate changes and then click Save. The detail will be updated immediately.
To change Account Settings, Click Go To Account located in the top right-hand corner of the screen.
Connect2Go 14845-6 Yonge St, Suite 310 Aurora, ON Canada L4G 6H8 T: (+1) 647-503-3406 www.connect2go.com Page 5
Step 3: Add Device(s) to the Customer Account and Activate
1. At the bottom of the customer’s details click on Add New Device.
2. Click on Begin Activation.
3. Select the device type from the drop down list and click Next.
4. Input the Device ID number and give the device a name.
If the device is a security module you will need the MAC address. The MAC is a 12 Digit ID number
starting with 001C. It consists of HEX digits so only the numbers 0-9 and the letters A-F are valid. The
AMC found on the board and also appears on the box.
If the device is a SOS device you will need the IMEI which is a 15 Digit ID from the device.
5. Review the Terms and Conditions and check the box indicating you have read and agree to the terms and
conditions.
6. Click Next. You following message should appear:
Thank you. The new device has been added. Please allow up to 10 minutes for activation to complete.
Step 4: Physically Install Device(s) At the Customer Location(s)
Now that the device has been added to the customer account, it can be physically installed at the
Connect2Go 14845-6 Yonge St, Suite 310 Aurora, ON Canada L4G 6H8 T: (+1) 647-503-3406 www.connect2go.com Page 6
customer’s location. For hardware hook-up of a security module follow the instructions that came with the
module. For Honeywell installs it is critical that you follow the Honeywell Installation Guide accessed at:
Step 5: Install the Connect2Go App on the Customer’s Mobile Device
The Connect2Go Mobile app is available for Android and iOS devices. Verision 10+ of iOS is required. If your
customer does not have a supported device, proceed to Step 6 and install the Mobile Portal instead. The Mobile
Portal provides most of the same functionality as the Connect2Go app.
Android and iOS Customers
Go to either the Google Play Store or the Apple App Store and search for Connect2Go. The Connect2Go Mobile
app will appear and you install it like any other app.
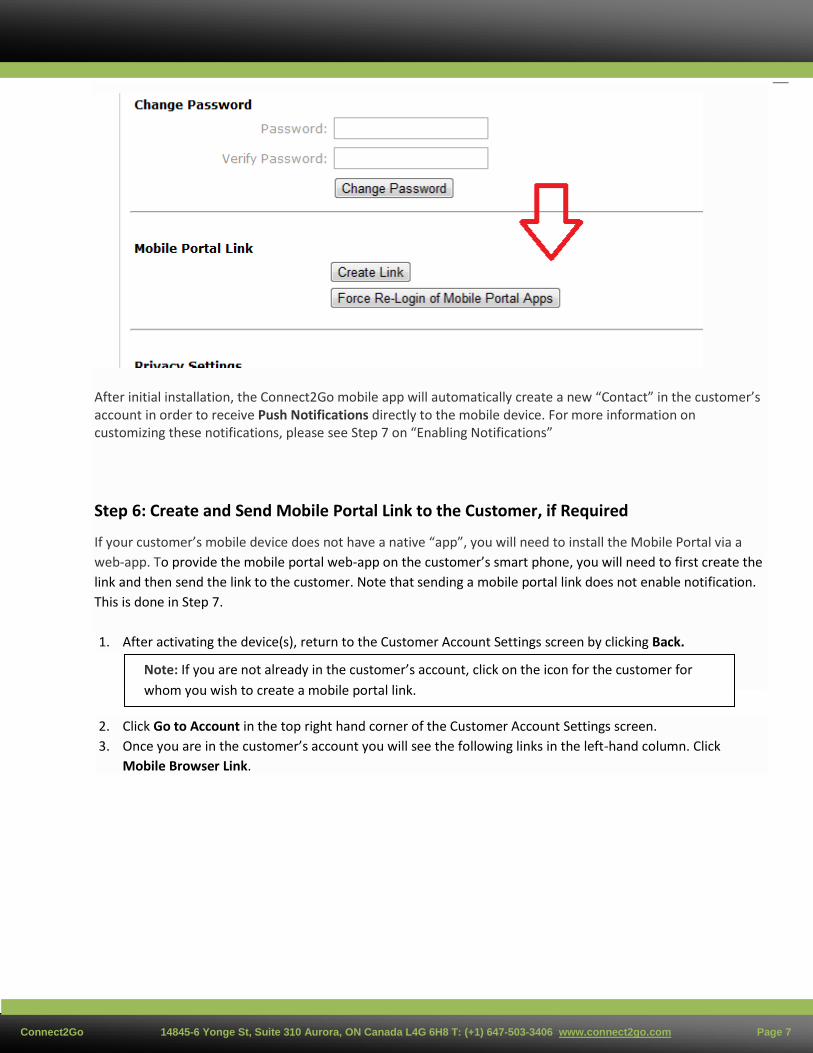
Once installed, open the app and you will be prompted for the customer login credentials (do not use your Pro login credentials). The username and password are the same username and password sent to the customer when you created their account. Once logged in, the app stores a unique session key and discards the username and password. Your customer will not have to log-in again until the session key is destroyed. This feature allows the user to disable access to their account remotely in the event the mobile device is lost. You can destroy the session key and force all app users to re-login from the customer account page. See below.
Connect2Go 14845-6 Yonge St, Suite 310 Aurora, ON Canada L4G 6H8 T: (+1) 647-503-3406 www.connect2go.com Page 7
After initial installation, the Connect2Go mobile app will automatically create a new “Contact” in the customer’s account in order to receive Push Notifications directly to the mobile device. For more information on customizing these notifications, please see Step 7 on “Enabling Notifications”
Step 6: Create and Send Mobile Portal Link to the Customer, if Required
If your customer’s mobile device does not have a native “app”, you will need to install the Mobile Portal via a
web-app. To provide the mobile portal web-app on the customer’s smart phone, you will need to first create the
link and then send the link to the customer. Note that sending a mobile portal link does not enable notification.
This is done in Step 7.
1. After activating the device(s), return to the Customer Account Settings screen by clicking Back.
2. Click Go to Account in the top right hand corner of the Customer Account Settings screen.
3. Once you are in the customer’s account you will see the following links in the left-hand column. Click
Mobile Browser Link.
Note: If you are not already in the customer’s account, click on the icon for the customer for
whom you wish to create a mobile portal link.
Connect2Go 14845-6 Yonge St, Suite 310 Aurora, ON Canada L4G 6H8 T: (+1) 647-503-3406 www.connect2go.com Page 8
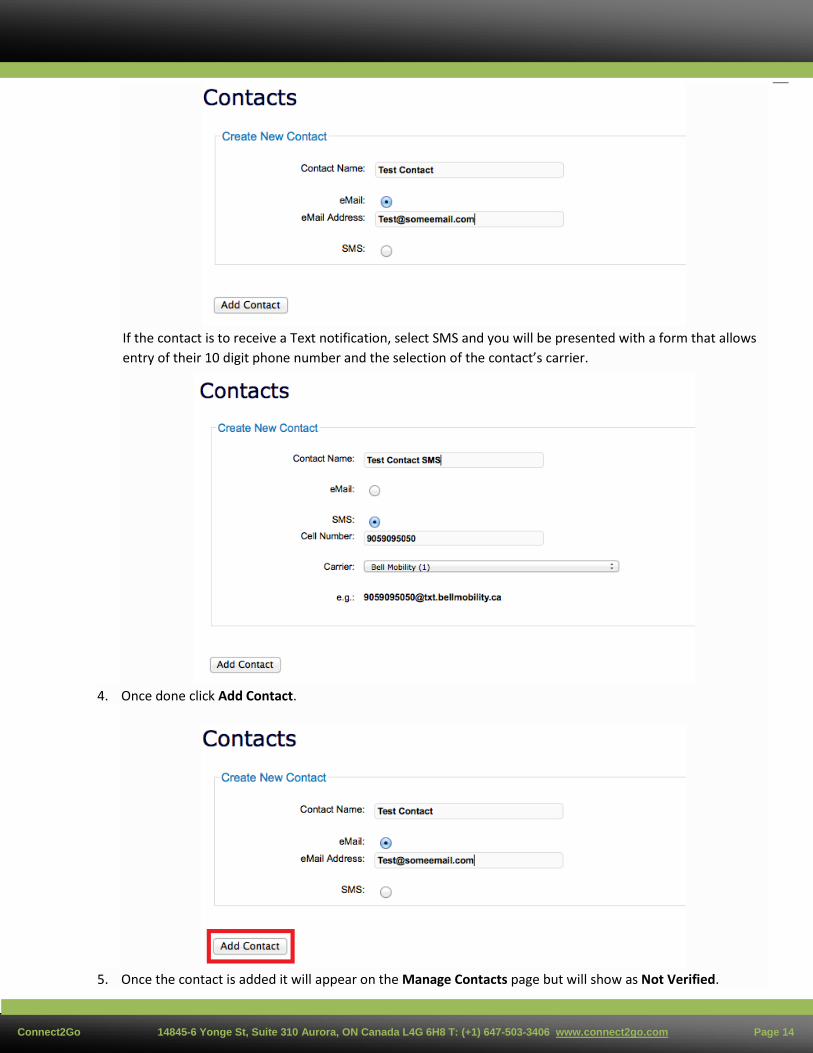
4. Once expanded, the option Generate Mobile Portal Link will appear in the right-hand panel. Click Create
New Link.
5. Click Finished.
6. If the customer wishes to use their default account address, simply click Email Link. If the customer wishes
to use an alternative address enter the address and then click Email Link.
7. Click Finished.
8. Once received, the customer should open the email on their phone and click on the link to get the mobile
portal to open in their browser. The mobile portal should look like this:
Note: Only one link can be active at a time. If the customer wants someone else to have mobile
access to his/ her account, the customer should forward the current link to them (e.g. everyone
must share the current active link).
Connect2Go 14845-6 Yonge St, Suite 310 Aurora, ON Canada L4G 6H8 T: (+1) 647-503-3406 www.connect2go.com Page 9
9. To get the Mobile Portal Link to appear as an icon like any other App on the customer’s phone, the
customer needs to bookmark the mobile portal to the home screen. The process to create a bookmark for
IPhone and Android is outlined on the following pages. For other device types, follow the appropriate
procedure to add an icon to the home screen as per the device manufacturer.
iPhone Customers
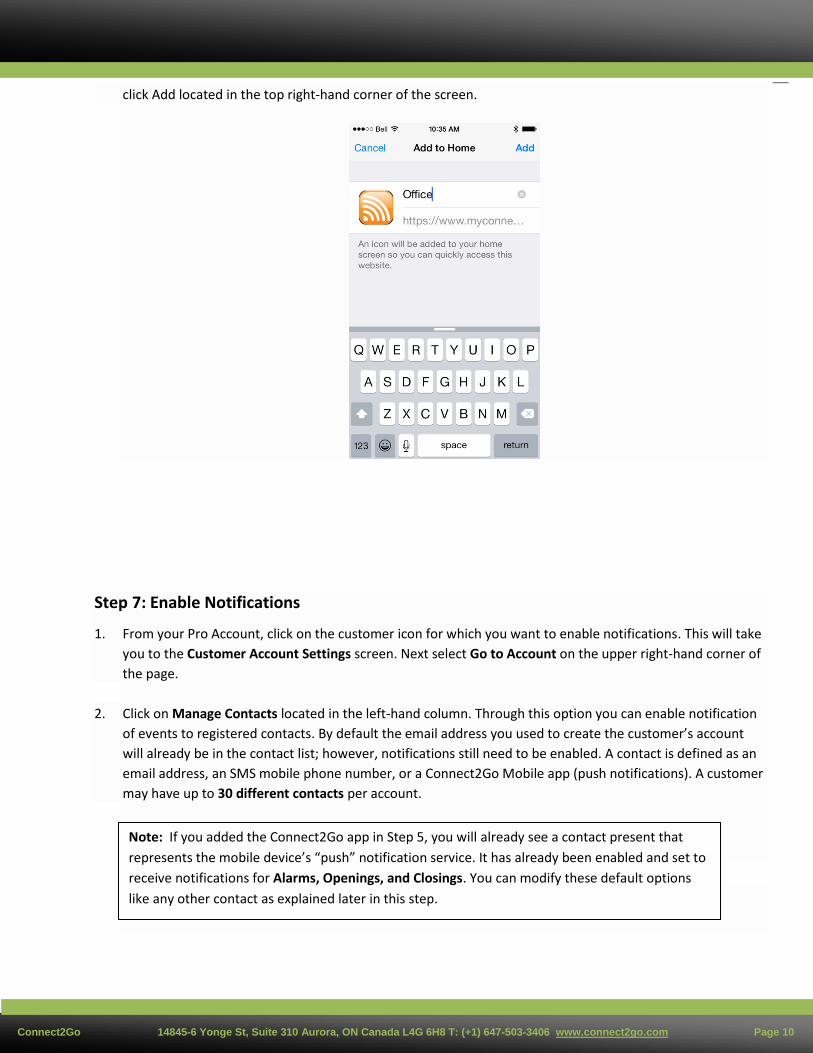
1. Click the Share button located in the middle at the bottom of the screen as shown in the left-hand image. Then click Add to Home Screen located in the middle of the next screen as shown in the right-hand image.
2. The Add to Home screen should appear and the bookmark can be renamed. Once the bookmark is named,


![m+ · 3+ $>% 6h8@B!]`Bn $5>D9BA:F9E% I I nBL`BKc`BL!h4* @Zg]b]Zm^l Zk^ pZkg^] maZm ma^r lahne] ghm _nkgbla Zgr iZkmb\neZkl maZm Zk^ _Zel^ hk lniik^ll Zgr](https://static.documents.pub/doc/80x56/5ae5fe517f8b9a29048cf519/m-6h8bbn-5d9baf9e-i-i-nblbkcblh4-zgbzml-zk-pzkg-mazm-mar.jpg)


