16
USER GUIDE Revision 02 ®
| Date post: | 17-Mar-2016 |
| Category: |
Documents |
| Upload: | rss-rewired |
| View: | 213 times |
| Download: | 0 times |
USER GUIDE
Revision 02
®

Pro-Bot® User Guide Revision 02
1
Please Read All Instructions Carefully Before Using
Contents
1. Battery precautions ............................................................. 2
2. Care & maintenance of Pro-Bot® ...................................... 2
3. Battery requirements ........................................................... 3
4. Installing batteries in Pro-Bot® .......................................... 3
5. Know your Pro-Bot® ......................................................... 4
6. Basic movements – your first program ............................... 5
7. Editing your program ......................................................... 6
8. Repeat loops ....................................................................... 7
9. Different step lengths and angles ........................................ 7
10. Using the pen mechanism ................................................. 8
11. Procedures – what is a procedure? .................................... 9
12. Procedures – using procedures ....................................... 10
13. Procedures – defining and editing ................................... 10
14. Menu system ................................................................... 11
15. Special commands menu ................................................. 12
16. Using sensors .................................................................. 13
17. Examples using sensors .................................................. 14
18. Connecting to a PC......................................................... 15
19. Support & Warranty ....................................................... 15

Pro-Bot® User Guide Revision 02
2
1. Battery precautions
Only batteries of the same or equivalent type as recommended are to be used.
Do not mix different types of battery or new and used batteries
Replace batteries when function becomes impaired
Remove exhausted batteries from your Pro-Bot®
Batteries are to be inserted with correct polarity
Do not short-circuit the battery terminals
Always dispose of old batteries safely
Do not mix rechargeable and non-rechargeable batteries
Rechargeable batteries are to be removed from your Pro-Bot® before charging
Rechargeable batteries are only to be charged by an adult
Do not attempt to recharge non-rechargeable batteries
2. Care & maintenance of Pro-Bot®
Remove batteries from Pro-Bot when not in use for a long period of time
Wipe the Pro-Bot gently with a clean damp cloth
Keep the Pro-Bot away from direct sunlight and heat
Do not allow the Pro-Bot to come into contact with water or other liquids. If painting or gluing on the additional shells, ensure the shells are dry before clipping to your Pro-Bot®
Please retain the information in this User Guide for future reference.
In the event of an electrostatic discharge, your Pro-Bot may malfunction or lose memory. In this case, insert a paper-clip or similar into the reset hole to reset it.

Pro-Bot® User Guide Revision 02
3
3. Battery requirements
3 of 1.5V AA Alkaline batteries (not included)
Rechargeable batteries can also be used. NiMH (Nickel Metal Hydride) is recommended
Do not mix rechargeable and non-rechargeable batteries
Use a C2032 battery (supplied) for back-up. This will need changing approximately once per year
There is an audible and visible warning on the Pro-Bot display when a battery needs changing
4. Installing batteries in Pro-Bot®
Ensure the power slide switch is set to “OFF”
Use a small coin to loosen screw on battery compartment
Insert three new batteries with „+‟ and „-‟ signs as shown in the pictures below. You must ensure correct polarity
Ensure all three batteries are of same type
Close the battery compartment door and tighten the screw
Dispose of exhausted batteries in designated collection areas following the laws of your country

Pro-Bot® User Guide Revision 02
4
Use a cross head screwdriver to remove backup battery cover
Remove an exhausted battery by moving spring clip sideways
Insert the battery with the +ve sign uppermost
Close the cover and tighten the screw
5. Know your Pro-Bot®
LCD Panel
Arrow keys
Light Sensor
Menu key Scroll keys
Front touch sensor
Pen holder Numeric keypad
K‟Nex mounting hole
Rear touch sensor
Main battery cover
Main drive wheels Trailer fitment positions
USB Connection
Backup battery cover
Sound On/Off switch
Power On/Off switch
Speaker
Sound sensor

Pro-Bot® User Guide Revision 02
5
6. Basic movements – your first program
In a programming language, such as Logo, a program is a sequence of commands that are executed in the order specified. With the Pro-Bot, like the multi-award winning Bee-Bot®, a simple program can be developed using only the four arrow keys. Surprisingly complex and extended sequences can be created without requiring any other keys.
Without using the numeric keypad, a or will travel one
step (25 cm); the and commands will rotate 90º. To see these commands in action, simply press the arrow keys you want in the order you want them to be executed. For instance, to draw a square with 25 cm sides, simply press:
You will notice that when you press the arrow keys, the short form of the equivalent Logo command will be displayed in the LCD screen on the right of the Pro-Bot. Each separate command will go onto a different line. The „Square‟ program we have written will look like this:

Pro-Bot® User Guide Revision 02
6
When you have finished typing in your program, press the
key to start the Pro-Bot on its way.
TIP: If you want to stop the Pro-Bot when it is going, press the key again.
Now you‟ve written your first program, that wasn‟t so hard was it?
7. Editing your program
One of the great strengths of the Pro-Bot is its ability to edit the programs using the on-board display. Use the scroll keys above the display to move the cursor up and down the list of commands.
To delete a command, press the key. To insert a command in between two commands, move the cursor onto the command you want to insert after, then type the new command.
TIP: To insert in front of your first command, you will have to move the cursor right to the top of the display (above the first command)
When you start using more complex command sequences you
will find that simply pressing will only delete the last key pressed on each line. To delete a whole line that comprises
many characters, or even the whole program, hold the key down for 3 seconds. The Pro-Bot will show a dialog box on the display where you can choose whether to clear just the main program, any of the individual procedures, or the complete program. Pro-Bot will request additional confirmation before clearing the whole program.
Pro-Bot® User Guide Revision 02
7
8. Repeat loops
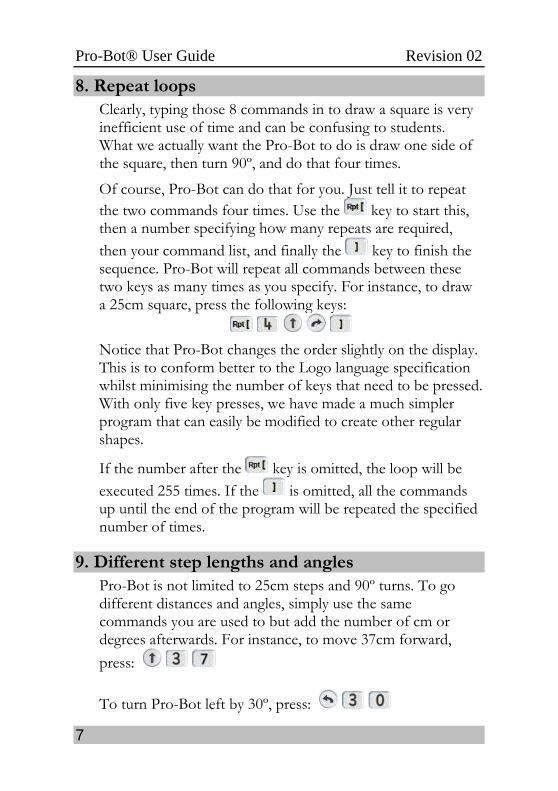
Clearly, typing those 8 commands in to draw a square is very inefficient use of time and can be confusing to students. What we actually want the Pro-Bot to do is draw one side of the square, then turn 90º, and do that four times.
Of course, Pro-Bot can do that for you. Just tell it to repeat
the two commands four times. Use the key to start this, then a number specifying how many repeats are required,
then your command list, and finally the key to finish the sequence. Pro-Bot will repeat all commands between these two keys as many times as you specify. For instance, to draw a 25cm square, press the following keys:
Notice that Pro-Bot changes the order slightly on the display. This is to conform better to the Logo language specification whilst minimising the number of keys that need to be pressed. With only five key presses, we have made a much simpler program that can easily be modified to create other regular shapes.
If the number after the key is omitted, the loop will be
executed 255 times. If the is omitted, all the commands up until the end of the program will be repeated the specified number of times.
9. Different step lengths and angles
Pro-Bot is not limited to 25cm steps and 90º turns. To go different distances and angles, simply use the same commands you are used to but add the number of cm or degrees afterwards. For instance, to move 37cm forward,
press:
To turn Pro-Bot left by 30º, press:

Pro-Bot® User Guide Revision 02
8
Using the number keys and the repeat loops, we can make Pro-Bot trace out more complex polygons, using the same program structure as before, but with changed numbers. For instance:
Triangle:
Pentagon:
Hexagon:
Octagon:
TIP: To work out how many degrees to turn, divide 360 by the number of sides in the polygon. So a nine sided nonagon would need to turn by 360/9 = 40º at each step.
10. Using the pen mechanism
With the pen mechanism, you can bring these shapes to life. Insert a standard dry wipe marker into the pen receptor, then twist the levers clockwise to place the pen under slight pressure onto the writing surface. Ensure the surface below is capable of taking a dry wipe pen without damage.
When you have finished drawing, twist the levers anti-clockwise to lift the pen off the surface. There is no need to take the pen out every time.
TIP: It is easiest to fit the pen in correctly when the mechanism is in the “Up” position. Twist the levers anti-clockwise and ensure that the top of the mechanism is proud of Pro-Bot’s top surface.

Pro-Bot® User Guide Revision 02
9
11. Procedures – what is a procedure?
Logo is a “procedural language”. This means that the main program can call other “secondary programs” (procedures) that each perform a specific function. For instance, one procedure could trace out a leaf, another could trace out a petal and a third could draw a stem.
The main program could use all these three procedures to draw a complete flower. Pro-Bot, of course, can do exactly this. In fact different groups of students could write the different procedures and the main program, then put them all together and see how well it works!
Pro-Bot has several different types of procedure. They are numbered from 1 to 39. Procedure numbers 1 to 32 are fully definable by you, but numbers 33 to 40 are reserved for special functions. Also, the main program itself is just another procedure – number 0. The other special procedures are also shown differently in the display and are:
33: Run when the front touch sensor is triggered [FRONT]
34: Run when the rear touch sensor is triggered [REAR]
35: Run when the light sensor goes from light to dark [DARK]
36: Run when the light sensor goes from dark to light [LIGHT]
37: Run when the sound sensor is triggered [SOUND]
38: Draws a hexagon (not changeable) [HEXGN]
39: Draws a diamond (not changeable) [DIAMND]
40: Draws eight diamonds by using procedure 39 [FLOWER] eight times (not changeable)

Pro-Bot® User Guide Revision 02
10
12. Procedures – using procedures
To use an existing procedure in your program, press the key followed by the number of the procedure you want to run. For example, to run the hexagon procedure, you would
use:
13. Procedures – defining and editing
To create a new procedure, press the key then scroll
down to the <New Proc> menu entry and press again. You are then presented with a list of procedures from Proc1 to Proc32 and the sensor procedures. Scroll down to the
number you want to use then press again to select it.
The top line of the display changes to the number of the procedure chosen, for example “Proc 3”. You can then enter commands as normal. When you have finished entering
commands for the procedure, press the key again.
To edit a procedure you have already written, press and
scroll down to the <Edt Proc> menu entry and press again. Scroll down to the number of the procedure you want
to edit, then press . Edit the commands in the list as
normal and press once more to complete the procedure editing.
Pro-Bot allows you to run any procedure from within any other procedure, even ones that haven‟t any commands in yet. If you run procedures that call each other, you may get
into an endless loop. Don‟t worry, just press the key to stop the program running.

Pro-Bot® User Guide Revision 02
11
14. Menu system
Using the menu key gives you access to a number of other functions within Pro-Bot. Special commands can be added to your program, different configuration options can be selected and procedures can be managed.
The Menu system is entered by pressing the key above the display. You are then given a list of menu selections. The first in the list is always <Back>, which allows you to go back one level. Use the up and down scroll keys to move the
highlight to the menu item you want to select, then press again to select that item. The Menu system is structured as follows:
Back Goes back one level
New Proc o <Select> Edit procedure with empty program
Edt Proc o <Select> Edit procedure with existing program
Config o Units
Cm Units are in Cm
Pro-Bot Units are in Pro-Bot lengths o End of Cmd
Beep on/off Enable beep after commands
Pause on/off Enable pause after commands
Sensors o Sensors on/off Enable all sensors
Clear o Clr Main Clears Main procedure only o Clr Proc Clears specified procedure o Clr All Clears the whole program

Pro-Bot® User Guide Revision 02
12
15. Special commands menu
There is a short-cut way of getting to the special commands
section. From the normal editing window, press and hold for 1½ seconds. This will get you directly to the special commands section of the menu system and allow you to quickly enter the command you want. For example, to insert the command Lights On at the current location, press and
hold , move the highlight to the <Lights On> menu item,
then press again.
The Special Commands (eg. Light On and Light Off) will form part of the program sequence. When these commands are run, the headlights will be switched on or off as required (Note: if these commands are used, the flashing after each command setting will be inverted. So if the lights are on, then they will flash to off briefly then back on again after each command)
The Special Command “Sound nn” will play the sound defined by the number when the command is run. (Note: this will play regardless of the setting of “Beep after command” and will be played instead of the normal Beep for this command)
The Special Commands Pen Up (Pu) and Pen Down (Pd) will not cause any action on the Pro-Bot. However, these are valid commands that will be downloaded from the Probotix™ PC simulator and are capable of being uploaded and inserted on the Pro-Bot although they have no effect.
Pro-Bot® User Guide Revision 02
13
16. Using sensors
Pro-Bot has four built-in sensors that can be used to control your program. Before you can use sensors in your program, you must enable them by selecting sensors from the Menu system.
The front and rear touch sensors will run procedures 33 and 34 when Pro-Bot hits an obstacle in front of it or behind it. These sensors are quite sensitive and only a small force is required to activate them.
The light sensor, mounted on the front of Pro-Bot, is sensitive to changes in the light level in the room. When the light level goes from light to dark, procedure 35 will be run. When the light level goes from dark to light, procedure 36 will be run. The threshold for the light-to-dark transition is about 50 Lux. From dark-to-light the transition is about 350 Lux. You could, for example, make Pro-Bot pass through a tunnel (Example 1). When it gets into the tunnel the light sensor will notice that it is dark and so will run procedure 35. If you had programmed procedure 35 to switch the headlights on and 36 to switch the headlights off, then the headlights will turn on as Pro-Bot enters the tunnel, and switch off again when it exits the tunnel.
The sound sensor, mounted underneath, is sensitive to short sharp sounds such as a hand clap or snapping fingers. However, it is only enabled during periods of inactivity of Pro-Bot so that the sounds of the motors do not accidentally trigger the sensor. When the sound is detected over approximately 35dB, procedure 37 is run.

Pro-Bot® User Guide Revision 02
14
17. Examples using sensors
Example 1: Turning lights on when going through a tunnel
Press followed by New Procedure
Select Procedure 35 „Light to Dark‟ [35 DARK]
Hold down the button for 3 seconds to access the special commands menu.
Select „Light On‟
Press again
Select procedure 36 „Dark to Light‟ [36 LIGHT]
Again, hold down the button for 3 seconds to access the special commands
Select „Light Off‟
Press to return to the main screen
At the main screen, program Pro-Bot to move forward by
pressing the forward arrow several times
Press to activate Pro-Bot Example 2: Reversing when front touch sensor is pressed
Press followed by New Procedure
Select Procedure 33 „Front touch sensor‟ [33 FRONT]
Press the backwards arrow key to program Pro-Bot to reverse
Press the left arrow key to insert a turn (by doing this Pro-Bot will continue reversing and turning until there are no obstacles in front of it)
Press to return to the main screen
Press the forward key and enter a large number such as 300 (This will ensure that Pro-Bot hits an object in the room before the program ends)
Press to activate Pro-Bot

Pro-Bot® User Guide Revision 02
15
18. Connecting to a PC
Only use the special USB cable provided with your copy of Probotix software (available separately) to connect Pro-Bot to the PC. Follow the instructions with Probotix to install the PC software.
The upload/download process is managed completely from the PC and all that needs to be done on the Pro-Bot is to ensure that it is switched on.
19. Support & Warranty
This product is provided with a one-year warranty for problems found during normal usage. Mistreating the Pro-Bot® or opening the unit will invalidate this warranty.
All out of warranty repairs will be subject to a replacement fee.
Please visit www.pro-bot.co.uk for hints and tips, and latest product information.
Email [email protected] for technical support.
TTS Group Ltd Nunn Brook Road Huthwaite Nottinghamshire, UK NG17 2HU Freephone: 0800 318686 Freefax: 0800 137525


