Page 1
1
PROCEDURES TO PARK NPO INVOICES/VOUCHERS
Go to webpage: https://apps.cmich.edu/invoiceparking/
Suggestion: save as a favorite
If you experience any problems accessing the web page, try another browser.
Enter your global id and password
Click on Logon
All data must be entered in uppercase
Page 2
2
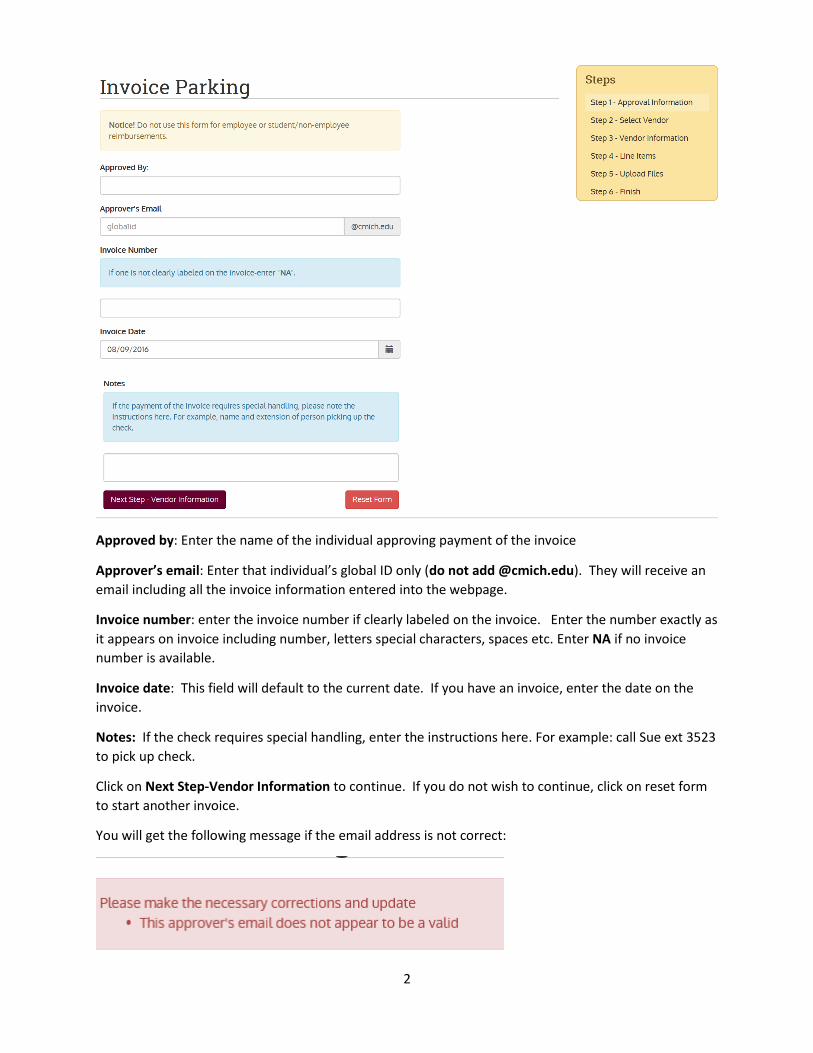
Approved by: Enter the name of the individual approving payment of the invoice
Approver’s email: Enter that individual’s global ID only (do not add @cmich.edu). They will receive an
email including all the invoice information entered into the webpage.
Invoice number: enter the invoice number if clearly labeled on the invoice. Enter the number exactly as
it appears on invoice including number, letters special characters, spaces etc. Enter NA if no invoice
number is available.
Invoice date: This field will default to the current date. If you have an invoice, enter the date on the
invoice.
Notes: If the check requires special handling, enter the instructions here. For example: call Sue ext 3523
to pick up check.
Click on Next Step-Vendor Information to continue. If you do not wish to continue, click on reset form
to start another invoice.
You will get the following message if the email address is not correct:
Page 3
3
_____________________________________________________________________________________
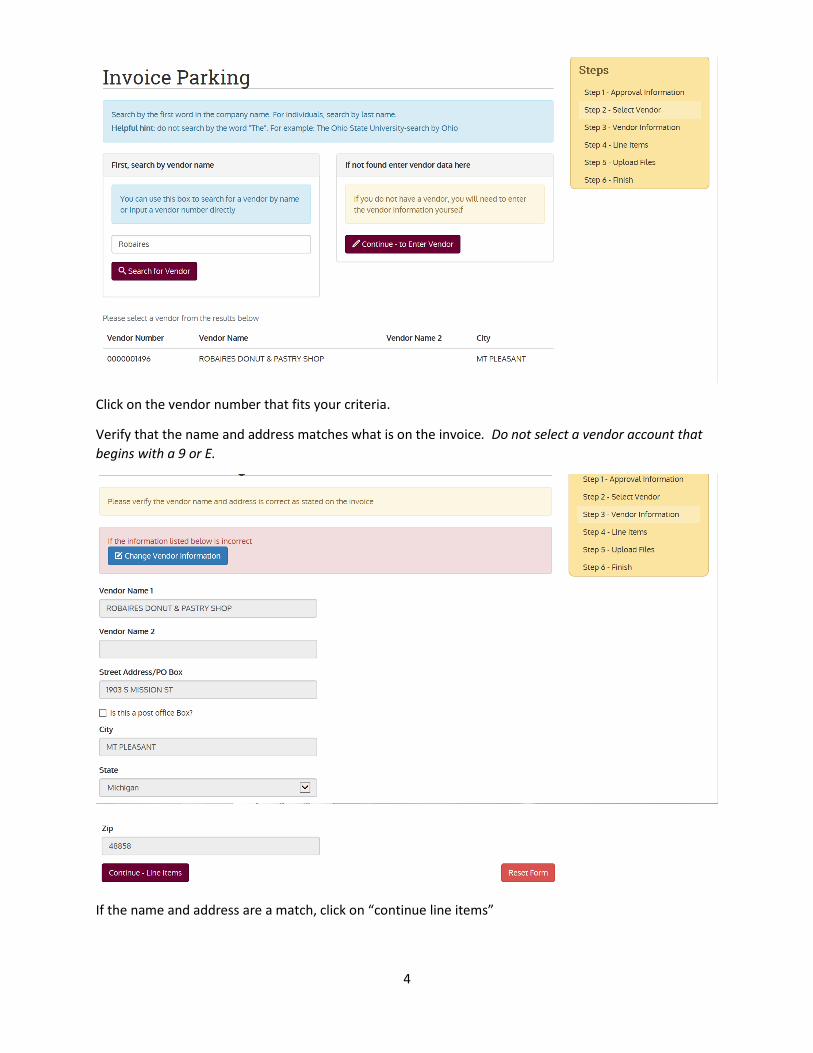
Enter the vendor account number if you know it. If not, you can search for the vendor account by name.
Enter the first name of the company or the last name of the individual. For example:
Then click on
Page 4
4
Click on the vendor number that fits your criteria.
Verify that the name and address matches what is on the invoice. Do not select a vendor account that
begins with a 9 or E.
If the name and address are a match, click on “continue line items”
Page 5
5
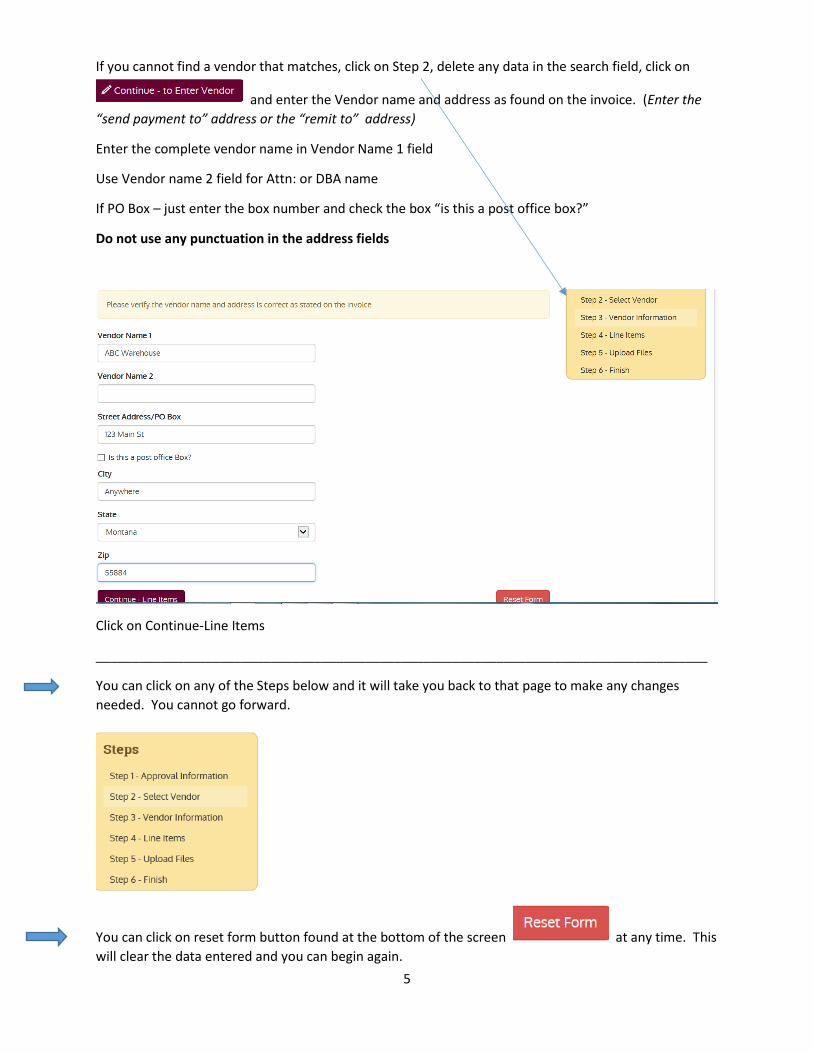
If you cannot find a vendor that matches, click on Step 2, delete any data in the search field, click on
and enter the Vendor name and address as found on the invoice. (Enter the
“send payment to” address or the “remit to” address)
Enter the complete vendor name in Vendor Name 1 field
Use Vendor name 2 field for Attn: or DBA name
If PO Box – just enter the box number and check the box “is this a post office box?”
Do not use any punctuation in the address fields
Click on Continue-Line Items
____________________________________________________________________________________
You can click on any of the Steps below and it will take you back to that page to make any changes
needed. You cannot go forward.
You can click on reset form button found at the bottom of the screen at any time. This
will clear the data entered and you can begin again.
Page 6
6
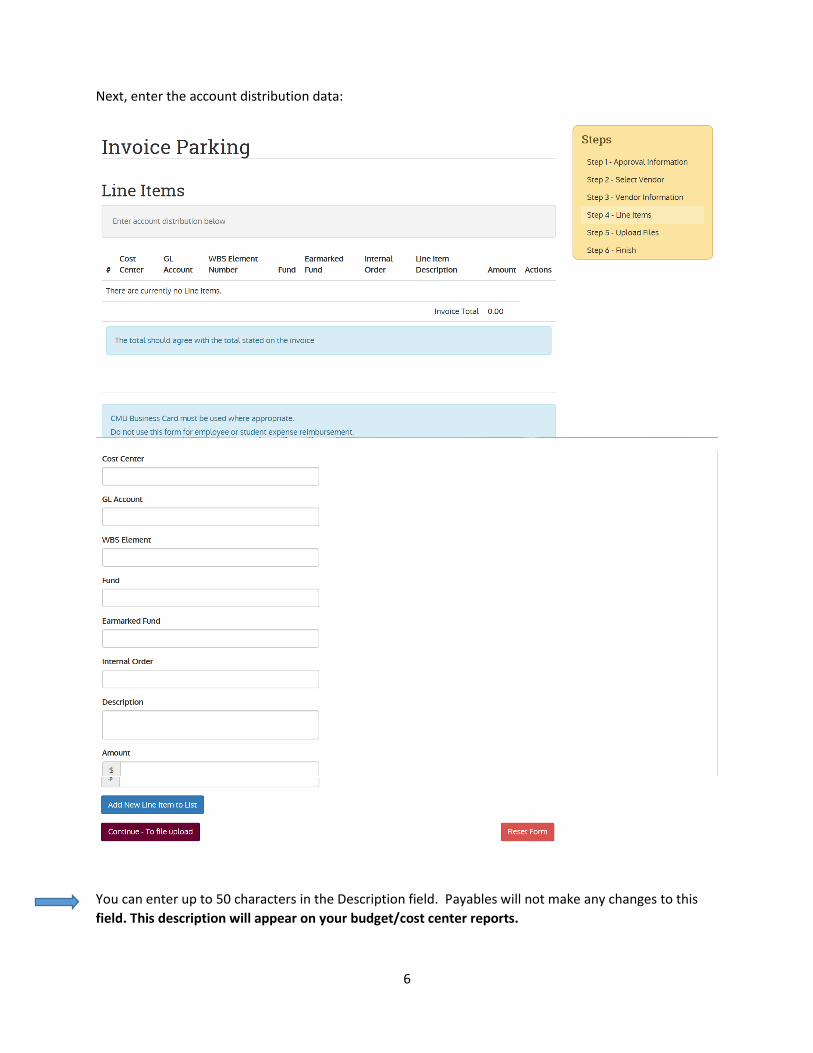
Next, enter the account distribution data:
You can enter up to 50 characters in the Description field. Payables will not make any changes to this
field. This description will appear on your budget/cost center reports.
Page 7
7
Here you will enter the cost center, GL account, WBS, Fund number, IO number, a description and an
amount for the invoice. You must enter a description.
Click on add new line to list. The data entered will move to the section at the top of the page
If you are allocating fund to multiple accounts, continue entering the data and click:
The total of the Line items must match the total of the invoice. This amount that will be paid
to the vendor.
______________________________________________
Page 8
8
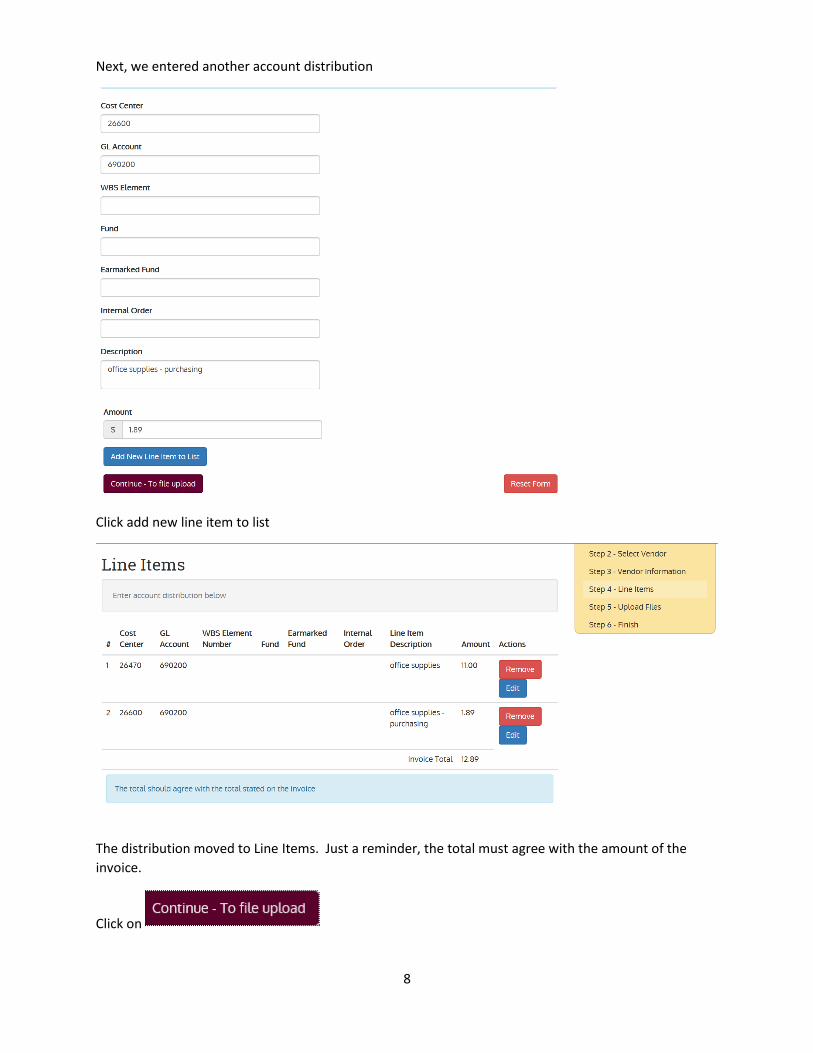
Next, we entered another account distribution
Click add new line item to list
The distribution moved to Line Items. Just a reminder, the total must agree with the amount of the
invoice.
Click on
Page 9
9
If you would like to edit a field, click on edit, make the necessary changes and click on apply changes.
In this example, we changed the amount for office supplies to $11.00
Page 10
10
Note: If the account distribution is not valid in SAP, the line will not be added to the Line Items section
and a message will appear at the top of the screen that the number is invalid.
_____________________________________________________________________________________
Here you must attach at least one document to support the request for payment. An approval
signature is required on the invoice or document supporting the amount to be paid. Attachments will
include but are not limited to the invoice, excel spreadsheet, letter, application, Independent contractor
agreements, Speaker/Presenter/Performer/Athletic Official Agreement, google maps etc.
You would also attached W9 and ACH/direct deposit forms if required. W9 are required from all
vendors that do not have an existing account in SAP.
Documents should be attached to the web application in the following order:
Invoice/Voucher
Any supporting documents such as contracts, commitment letters, speaker/official agreements
etc.
W9/W8BEN
ACH (DIRECT DEPOSIT)/PNC (CREDIT CARD) ENROLLMENT FORM
Page 11
11
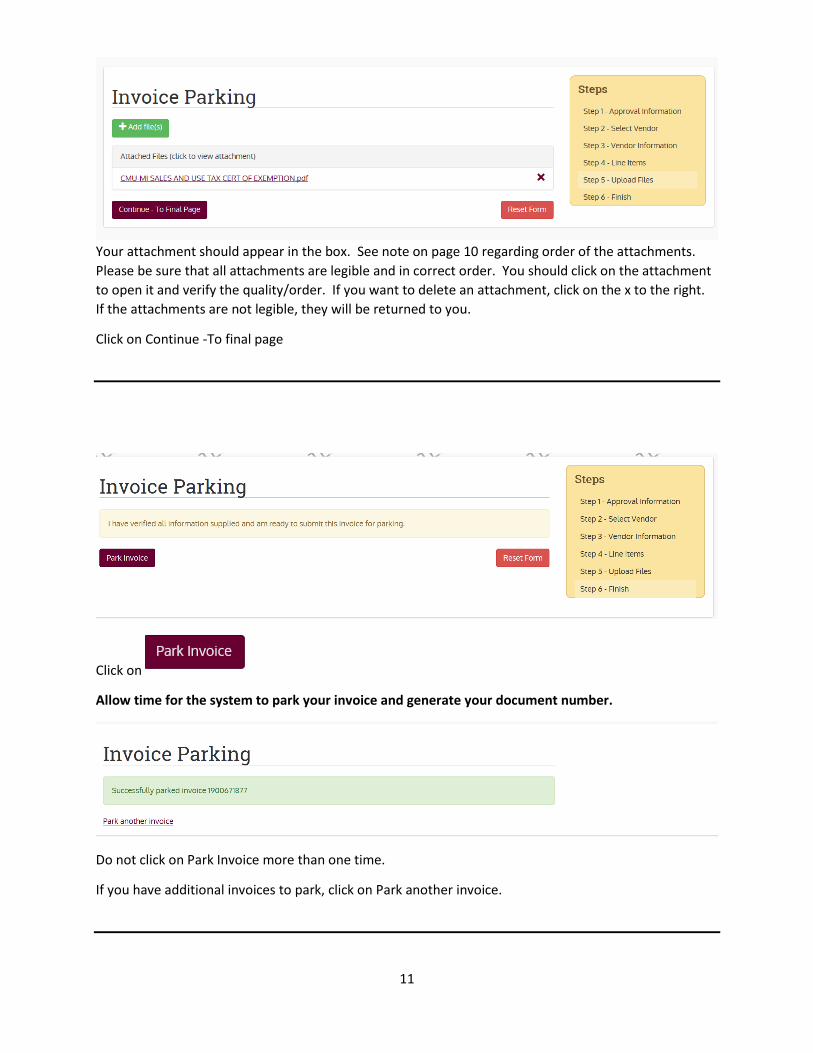
Your attachment should appear in the box. See note on page 10 regarding order of the attachments.
Please be sure that all attachments are legible and in correct order. You should click on the attachment
to open it and verify the quality/order. If you want to delete an attachment, click on the x to the right.
If the attachments are not legible, they will be returned to you.
Click on Continue -To final page
Click on
Allow time for the system to park your invoice and generate your document number.
Do not click on Park Invoice more than one time.
If you have additional invoices to park, click on Park another invoice.
Page 12
12
If you receive the following error after clicking , call Deb Hayes ext 7372 or Linda
Kaliszewski ext 3351 immediately.
Page 13
13
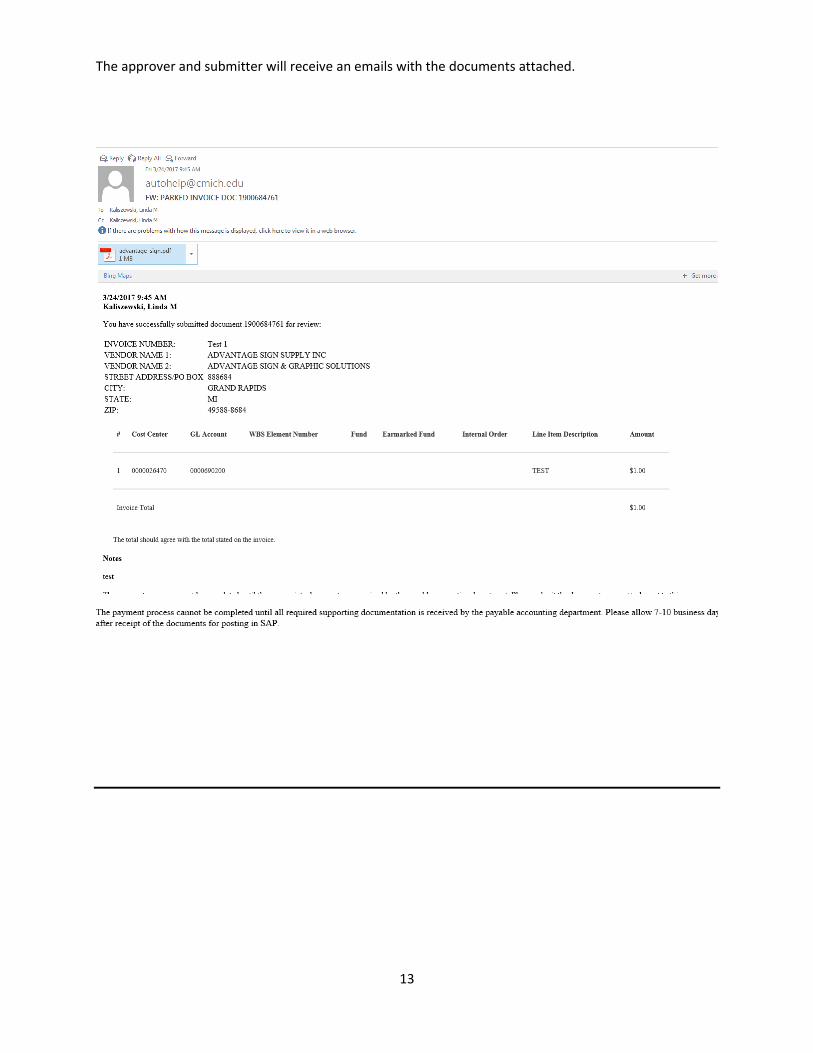
The approver and submitter will receive an emails with the documents attached.
Page 14
14
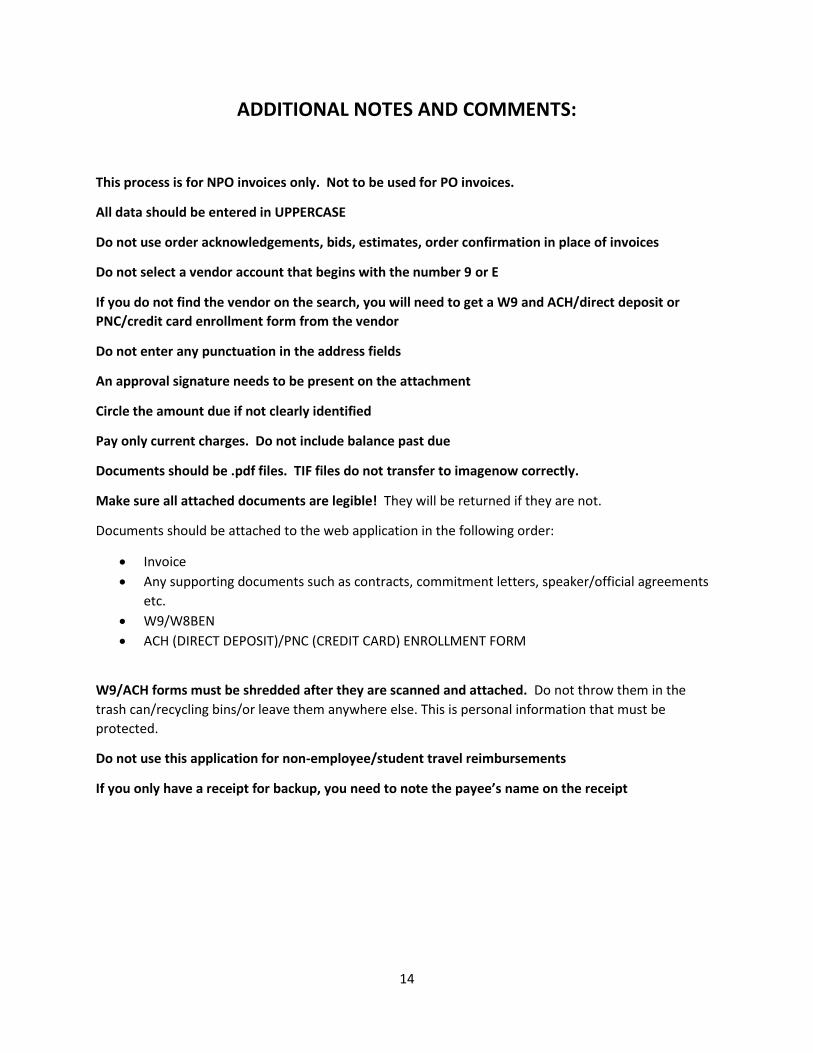
ADDITIONAL NOTES AND COMMENTS:
This process is for NPO invoices only. Not to be used for PO invoices.
All data should be entered in UPPERCASE
Do not use order acknowledgements, bids, estimates, order confirmation in place of invoices
Do not select a vendor account that begins with the number 9 or E
If you do not find the vendor on the search, you will need to get a W9 and ACH/direct deposit or
PNC/credit card enrollment form from the vendor
Do not enter any punctuation in the address fields
An approval signature needs to be present on the attachment
Circle the amount due if not clearly identified
Pay only current charges. Do not include balance past due
Documents should be .pdf files. TIF files do not transfer to imagenow correctly.
Make sure all attached documents are legible! They will be returned if they are not.
Documents should be attached to the web application in the following order:
Invoice
Any supporting documents such as contracts, commitment letters, speaker/official agreements
etc.
W9/W8BEN
ACH (DIRECT DEPOSIT)/PNC (CREDIT CARD) ENROLLMENT FORM
W9/ACH forms must be shredded after they are scanned and attached. Do not throw them in the
trash can/recycling bins/or leave them anywhere else. This is personal information that must be
protected.
Do not use this application for non-employee/student travel reimbursements
If you only have a receipt for backup, you need to note the payee’s name on the receipt